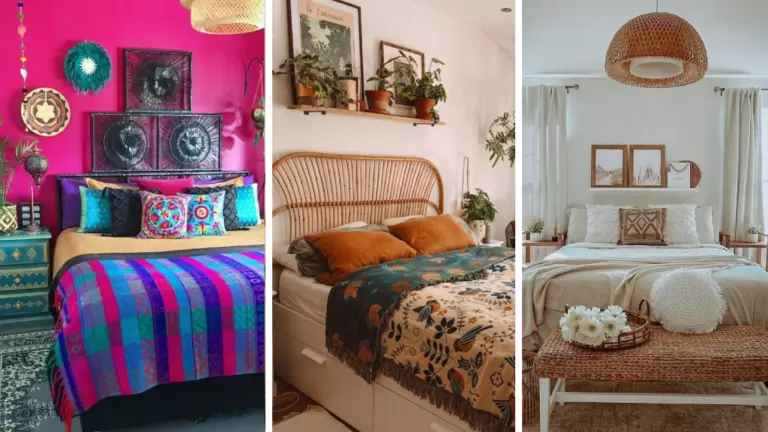
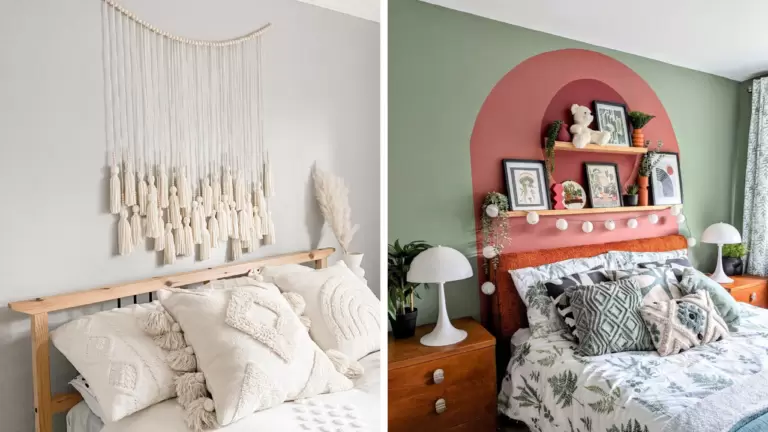
45 Creative DIY Headboard Ideas

This post may contain affiliate links: full affiliate disclosure.
Building a custom headboard is one of the fastest ways to change the entire look of a bedroom without a full renovation. These projects range from simple fabric wraps to modern wood designs that fit any budget or skill level.
Soft and Upholstered DIY Headboard Ideas
1. Simple Rectangular Upholstered Headboard
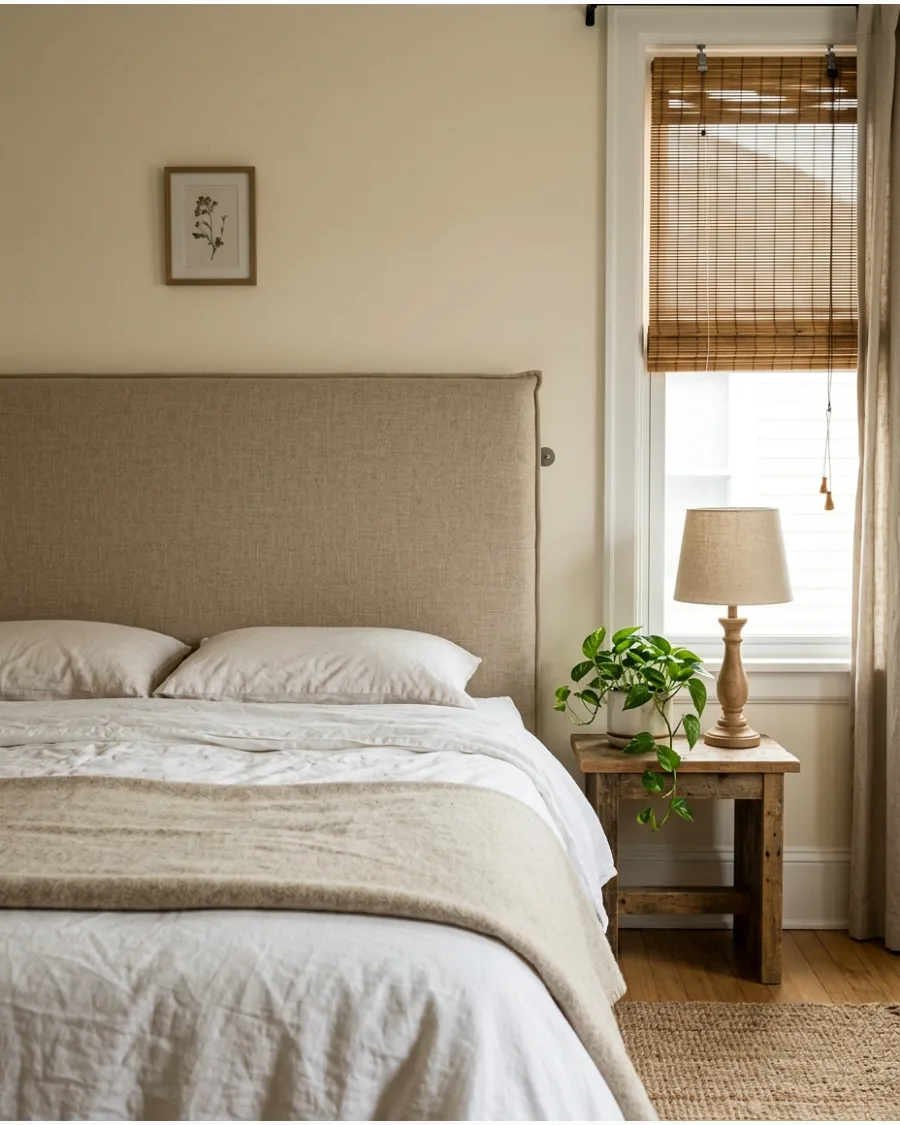
Build a sturdy base using a plywood panel topped with high-density foam and batting. Wrap the entire piece in a neutral linen or textured weave to create a classic look that fits any decor style.
Staple the fabric tightly to the back of the board, starting from the center of each side to prevent bunching. A solid neutral fabric hides minor assembly mistakes better than a pattern.
- $50-$100 budget
- 3-hour project
- Use a heavy-duty staple gun and spray adhesive
Most people skip this: Iron the fabric thoroughly before stapling to avoid permanent wrinkles.
2. Curved Upholstered Headboard
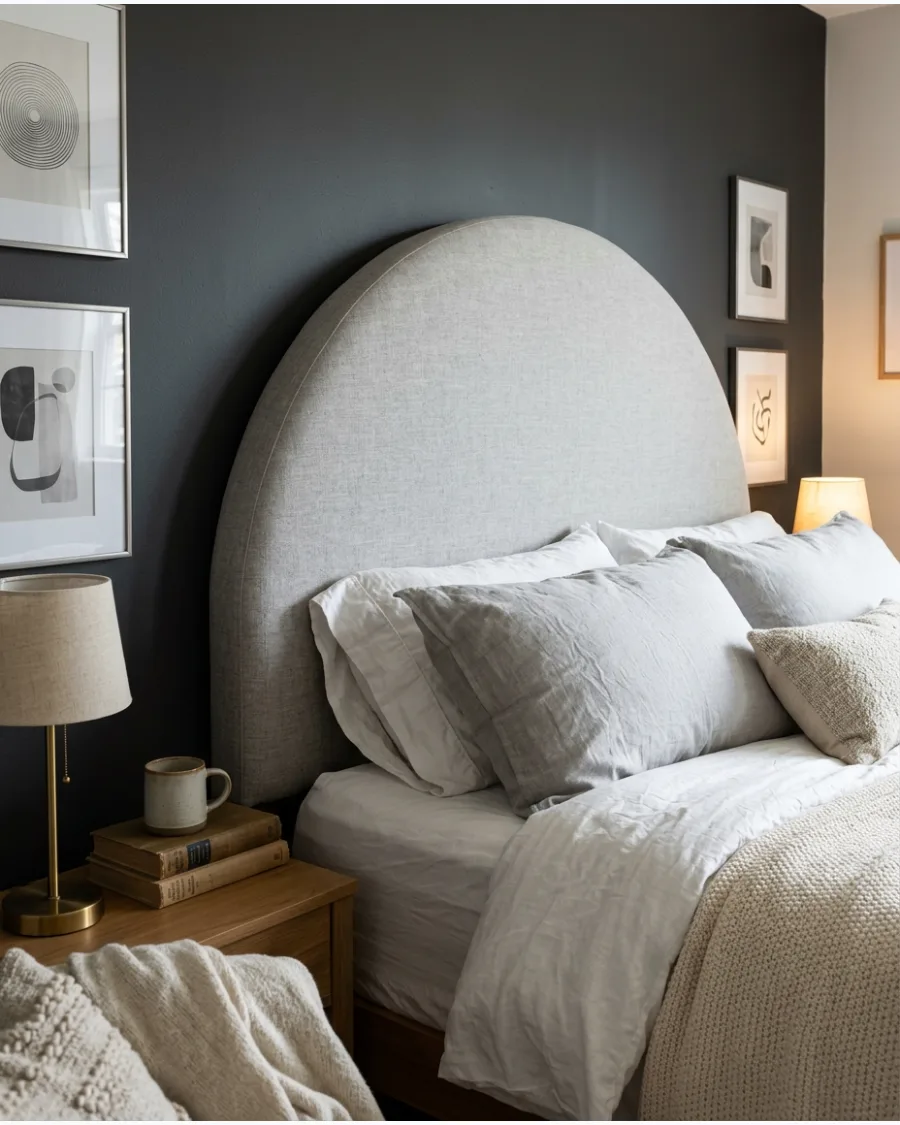
Use a jigsaw to cut a wide arch or soft curve into a plywood sheet before adding padding. This sculptural shape breaks up the sharp angles commonly found in bedroom furniture.
Pull the fabric in small increments around the curves to ensure a smooth, pucker-free edge. This design adds a high-end custom feel without requiring advanced sewing skills.
- $70-$120 budget
- Requires a jigsaw
- Best for king or queen-sized beds
Quick win: Use a flexible measuring tape or a string to trace a perfect arc before cutting.
3. Vertical Channel-Tufted Headboard
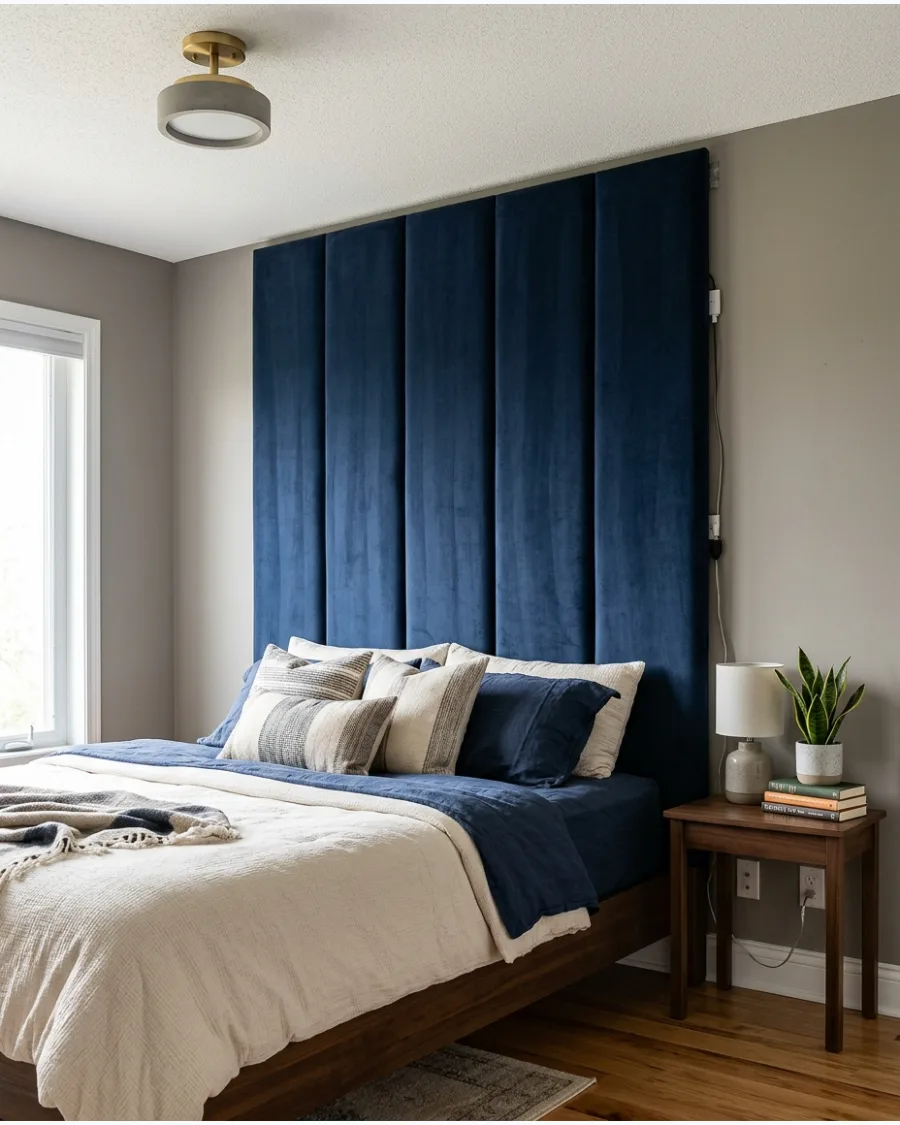
Construct several narrow vertical panels and wrap each one individually in foam and fabric. Mounting these panels side by side creates a sophisticated hotel look that adds height to the room.
Secure the panels to the wall using French cleats for a flush and professional-looking installation. This method is easier than traditional tufting because it avoids complex button placement.
- $100-$150 budget
- Intermediate difficulty
- Requires French cleats for mounting
Best shortcut: Use 1×4 pine boards as the base for each channel to keep them uniform and lightweight.
4. Upholstered Panel Grid
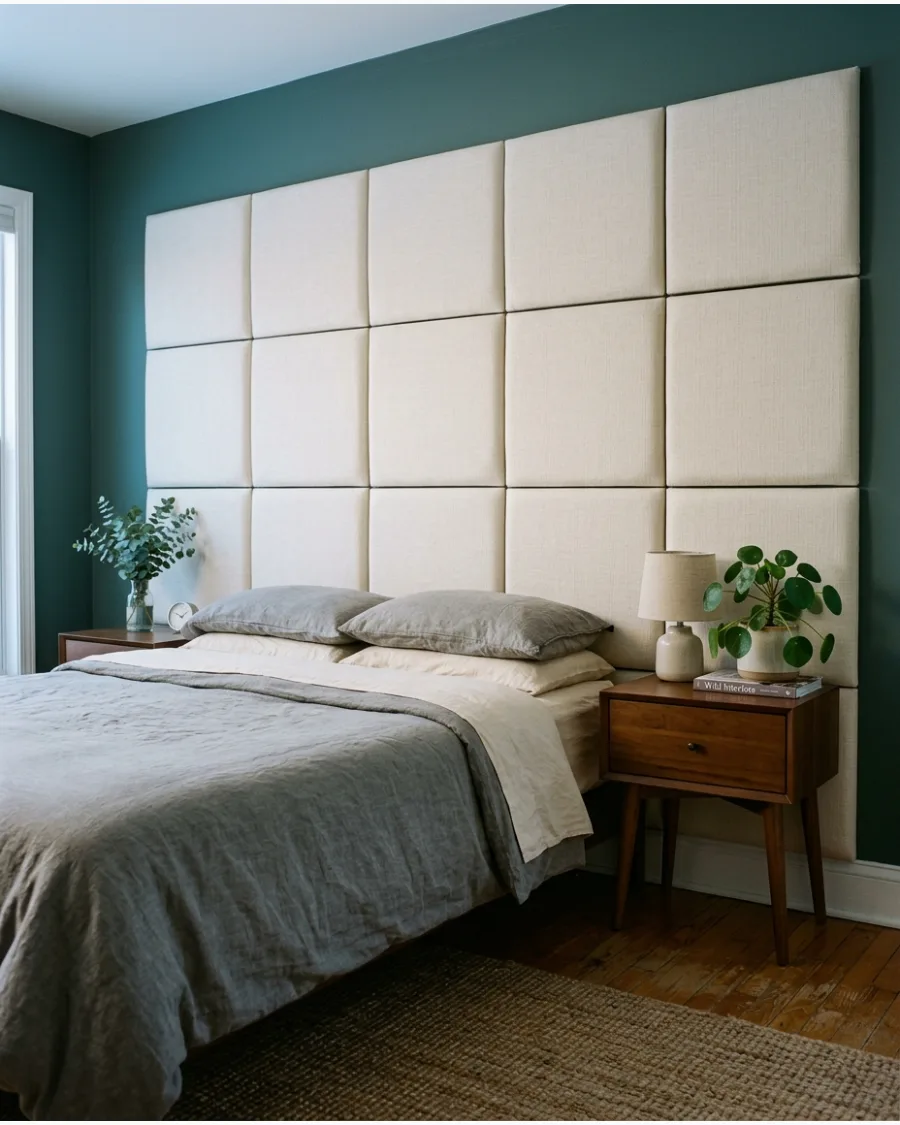
Wrap identical plywood squares in batting and fabric to build a large-scale grid behind the bed. Extending the grid wider than the mattress makes the entire wall feel like a deliberate design feature.
Layout the grid on the floor first to verify the spacing before attaching anything to the wall. Using thin foam keeps the panels from looking too bulky in a small room.
- $80-$130 budget
- 4-5 hour project
- Best for large primary bedrooms
Most people skip this: Use a laser level to ensure the grid stays perfectly straight across the entire wall.
5. DIY Velvet Headboard
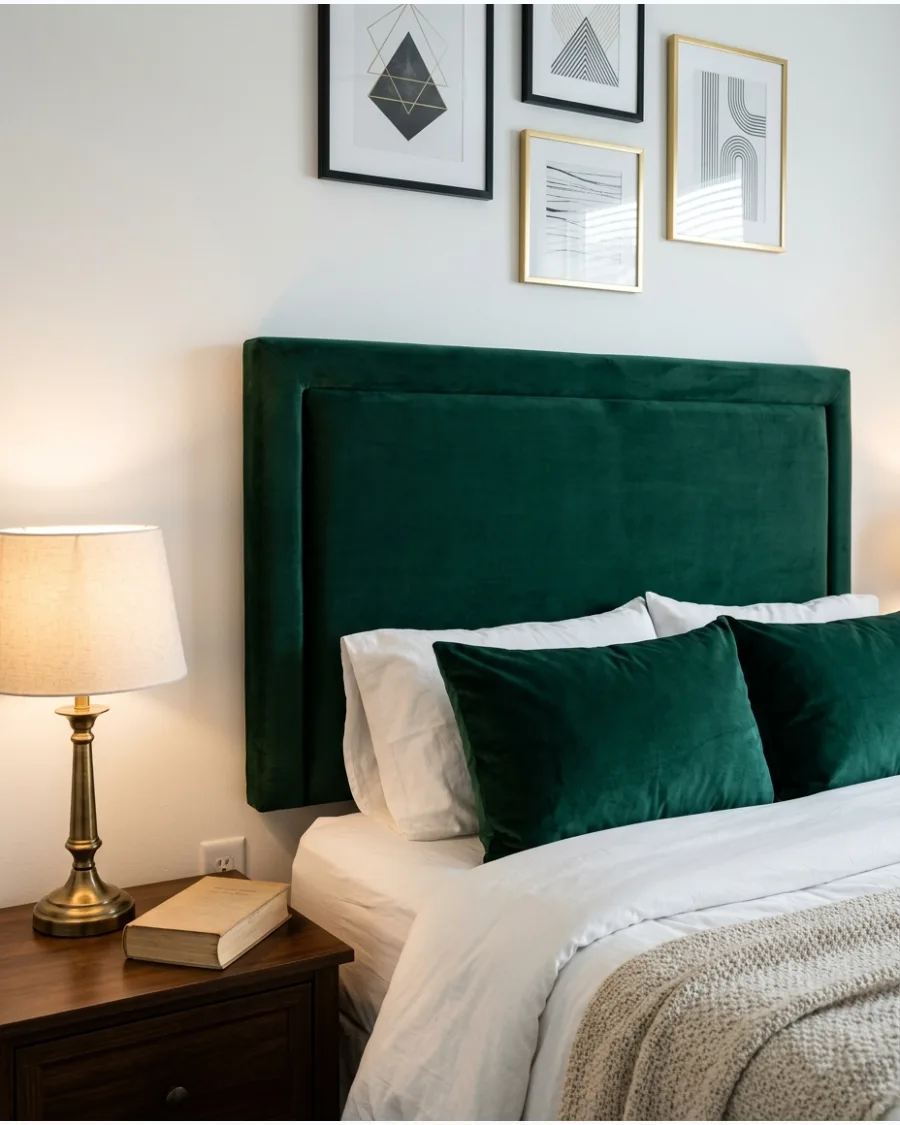
Select a rich velvet in a deep tone like forest green or navy to act as the room's focal point. The fabric's natural sheen provides enough visual interest that a simple rectangular shape is all you need.
Brush the velvet pile in one direction before stapling to ensure the color looks consistent across the surface. Velvet is surprisingly durable and hides small punctures well.
- $60-$110 budget
- Easy DIY
- Use 100% polyester velvet for easier cleaning
Quick win: Use a garment steamer to remove any fold lines from the velvet once the headboard is mounted.
6. Bouclé Headboard
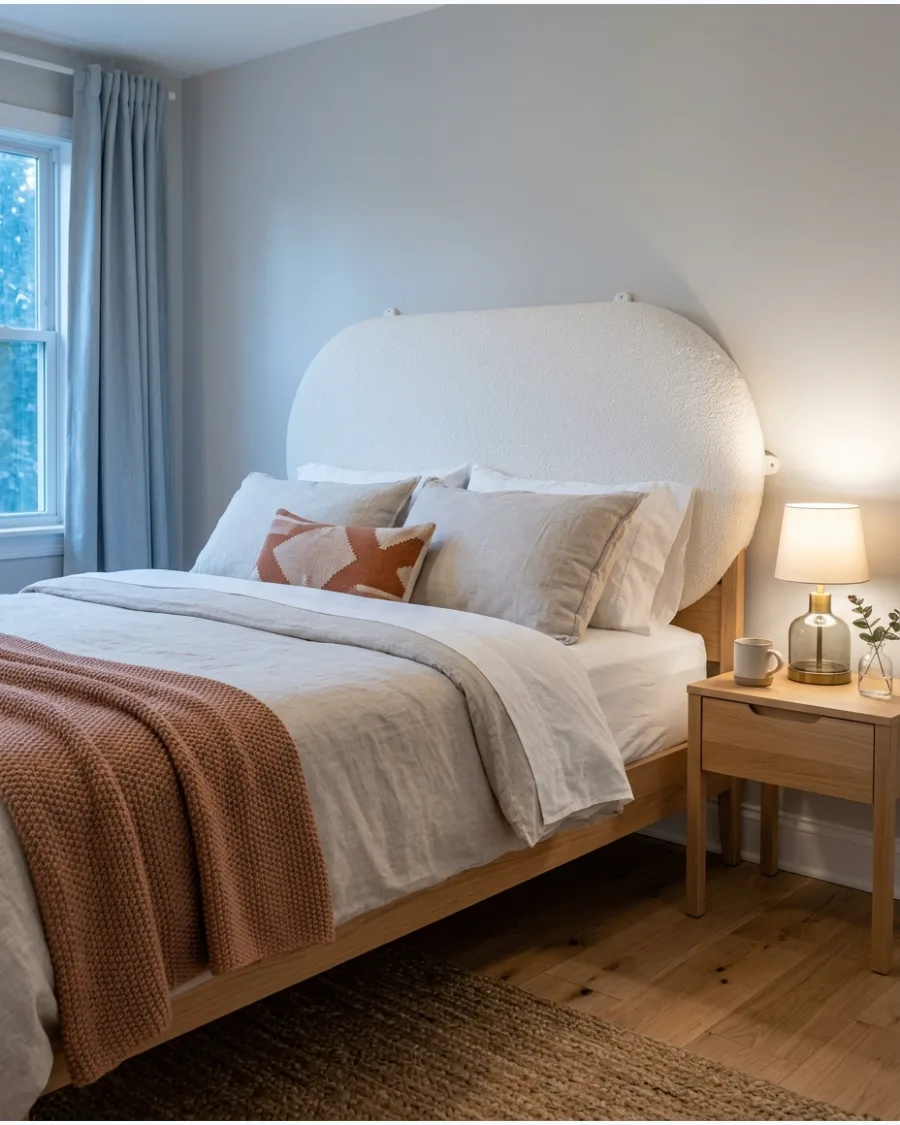
Create a curved or organic shape and wrap it in cream-colored bouclé for a trendy, cozy look. The nubby texture of the fabric adds depth to a monochromatic bedroom without feeling cluttered.
Choose a high-loft batting layer to emphasize the soft, rounded appearance of the bouclé. This fabric is excellent for hiding slightly uneven cuts in the underlying wood.
- $75-$125 budget
- 3-hour project
- Best for modern or Scandinavian styles
Best shortcut: Use spray adhesive to bond the bouclé to the foam before stapling to prevent the fabric from shifting.
7. Removable Linen Slipcover Headboard
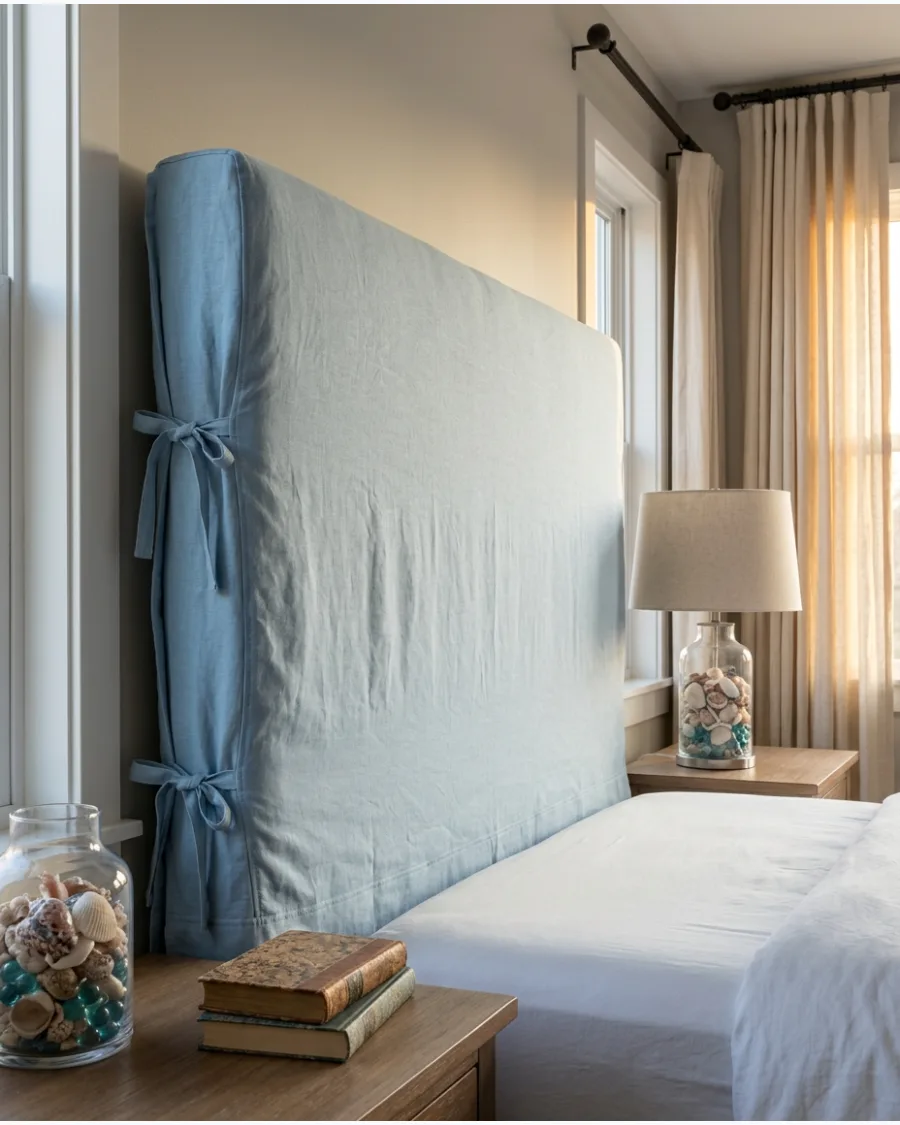
Build a basic padded frame and sew a simple pillowcase style cover out of linen. This design is perfect for those who want the ability to wash their headboard or change colors seasonally.
Include a hidden zipper or a tie-back closure at the bottom to keep the fabric taut. Linen provides a relaxed, breathable feel that works well in coastal or farmhouse rooms.
- $40-$80 budget
- Requires basic sewing skills
- Machine washable
Most people skip this: Pre-wash the linen fabric before sewing to prevent the slipcover from shrinking later.
8. Patchwork Fabric Headboard
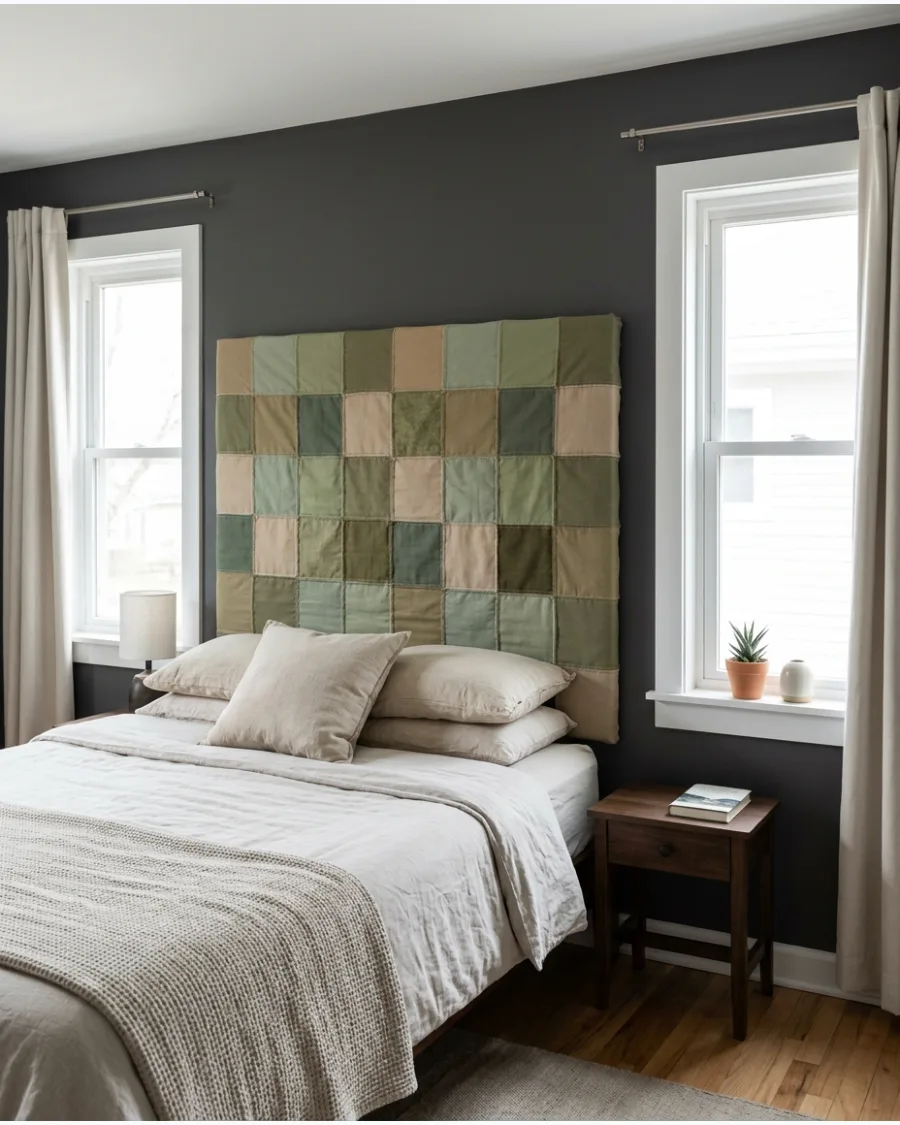
Join small upholstered squares covered in different but coordinating fabrics to create a custom mosaic.
This is a great way to use up fabric scraps while adding a unique, handmade touch to the bedroom. Stick to a limited color palette of three or four shades to keep the pattern from feeling overwhelming. Ensure each square has the same thickness of foam for a level surface.
- Under $50 if using scraps
- Time-intensive project
- Best for guest or kids' rooms
Quick win: Use a piece of pegboard as the backing to make mounting the individual squares easier.
9. Hanging Cushion Headboard
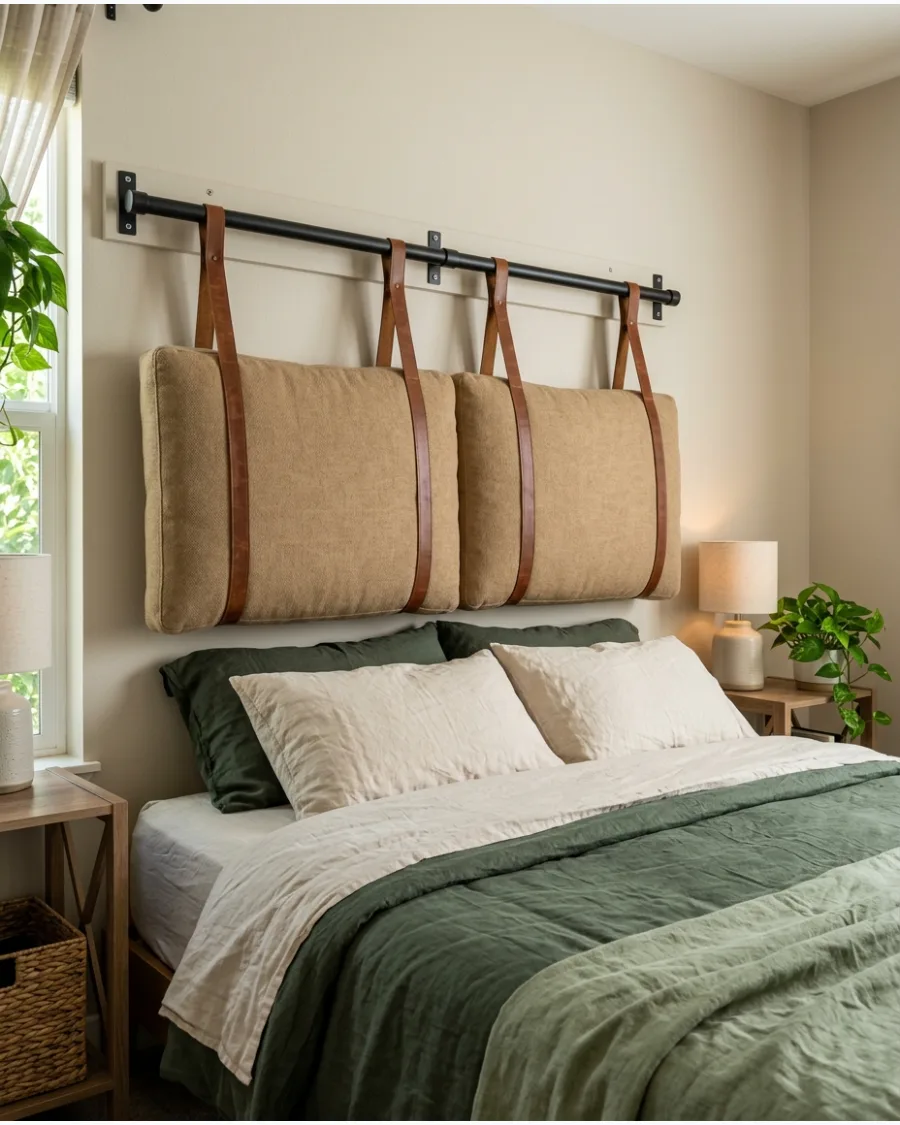
Mount a sturdy wood or metal rod to the wall and hang two large, firm cushions from it using fabric or leather straps. This setup provides excellent back support for reading and can be easily adjusted for height.
Use heavy-duty wall anchors to ensure the rod can handle the weight of the cushions and people leaning against them. It offers a casual, modern look that is very easy to maintain.
- $60-$100 budget
- No-drill option for the cushions
- Rod requires wall mounting
Best shortcut: Use high-quality floor pillows instead of sewing custom cushions to save time.
10. Scalloped Fabric Headboard
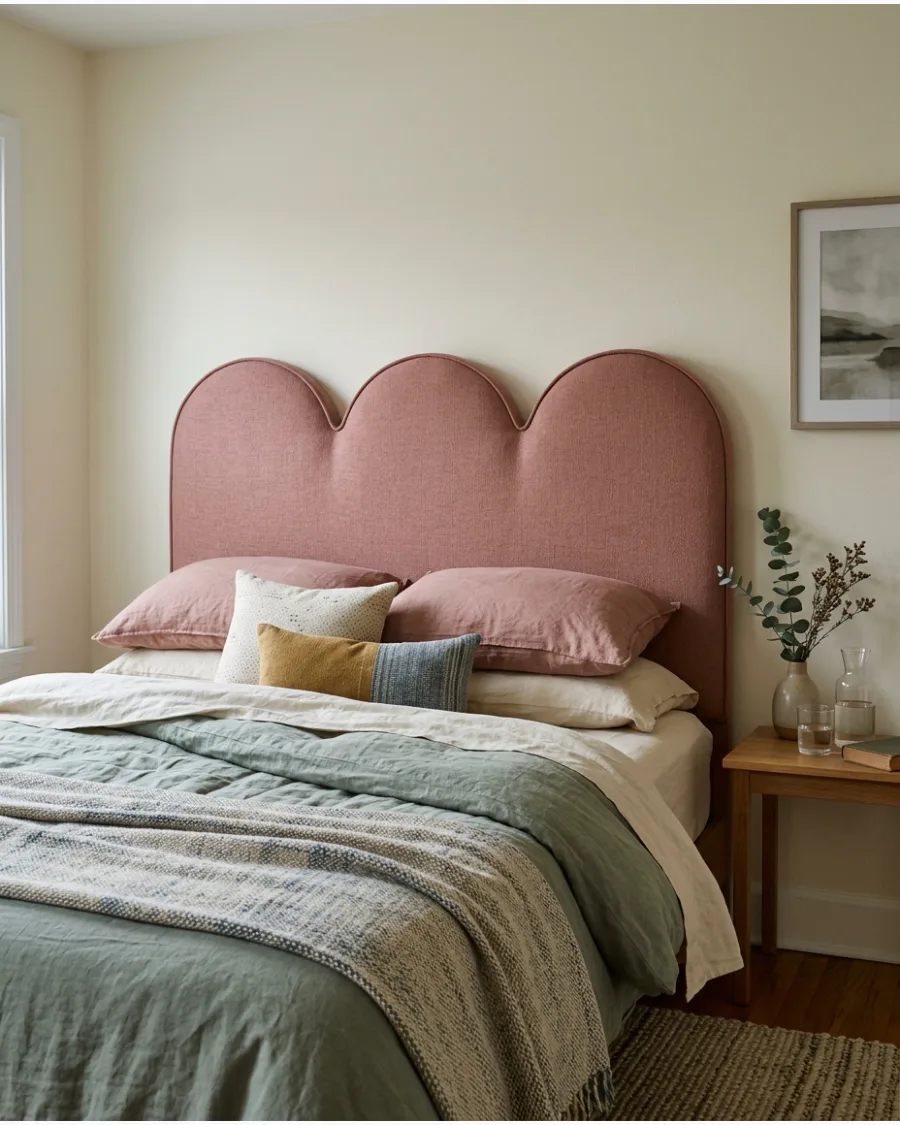
Cut a series of half-circles into a plywood sheet to create a whimsical scalloped edge along the top. This design adds a playful architectural element to a child's room or a creative primary suite.
Notch the fabric at the valleys of the scallops to allow it to lay flat against the curved wood. Use a single solid color to keep the focus on the interesting silhouette.
- $70-$120 budget
- Requires a jigsaw
- Best for whimsical or feminine decor
Most people skip this: Sand the edges of the plywood scallops thoroughly so the wood doesn't snag the fabric during assembly.
Modern Wood DIY Headboard Ideas
11. Vertical Wood Slat Headboard
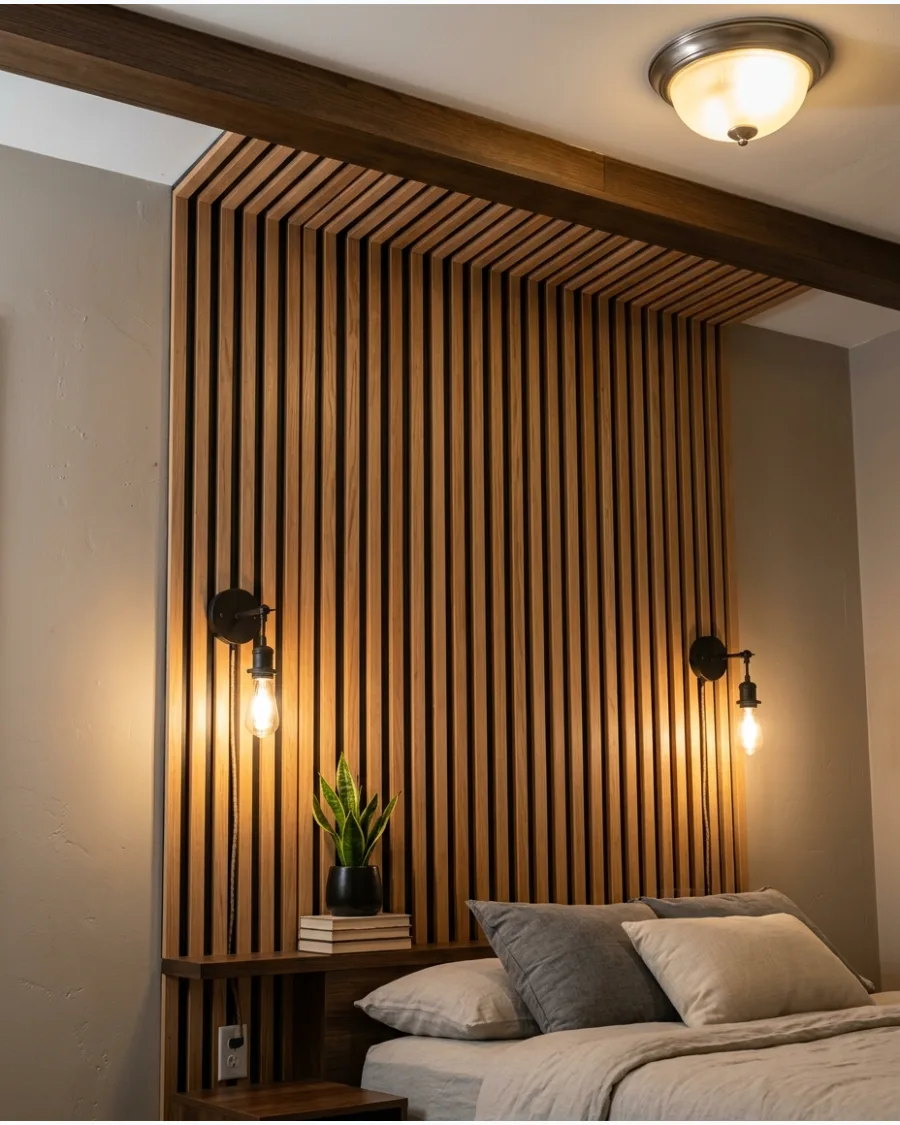
Attach thin, evenly spaced wood strips to a dark-painted plywood backing for a contemporary look. The vertical lines draw the eye upward, making the ceiling feel higher than it actually is.
Use a spacer block between each slat during installation to maintain perfectly even gaps. Light woods like pine or oak provide a warm, natural contrast to white bedding.
- $80-$150 budget
- 4-hour project
- Best for mid-century modern styles
Quick win: Apply a clear matte polyurethane to the slats before mounting them to protect the wood without adding shine.
12. Horizontal Wood Slat Headboard
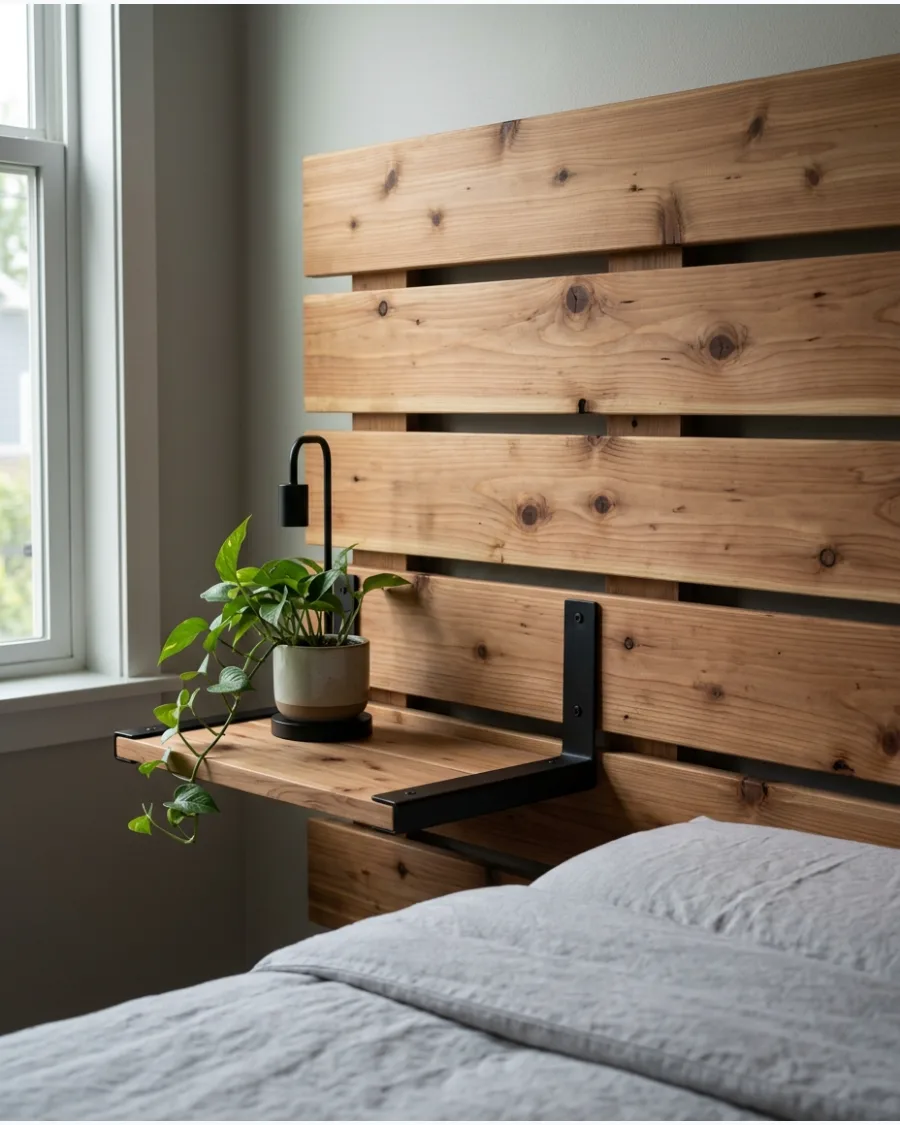
Run long wooden boards horizontally across the wall to visually widen the sleeping area. Extending the boards behind the nightstands creates a built-in look that feels very custom and high-end.
Fasten the boards directly to wall studs to ensure the headboard is secure and won't rattle. This style works particularly well in minimalist or industrial-themed rooms.
- $100-$200 budget
- Intermediate assembly
- Requires a stud finder
Best shortcut: Use tongue and groove planks to make alignment easier and hide the mounting screws.
13. Arched Plywood Headboard
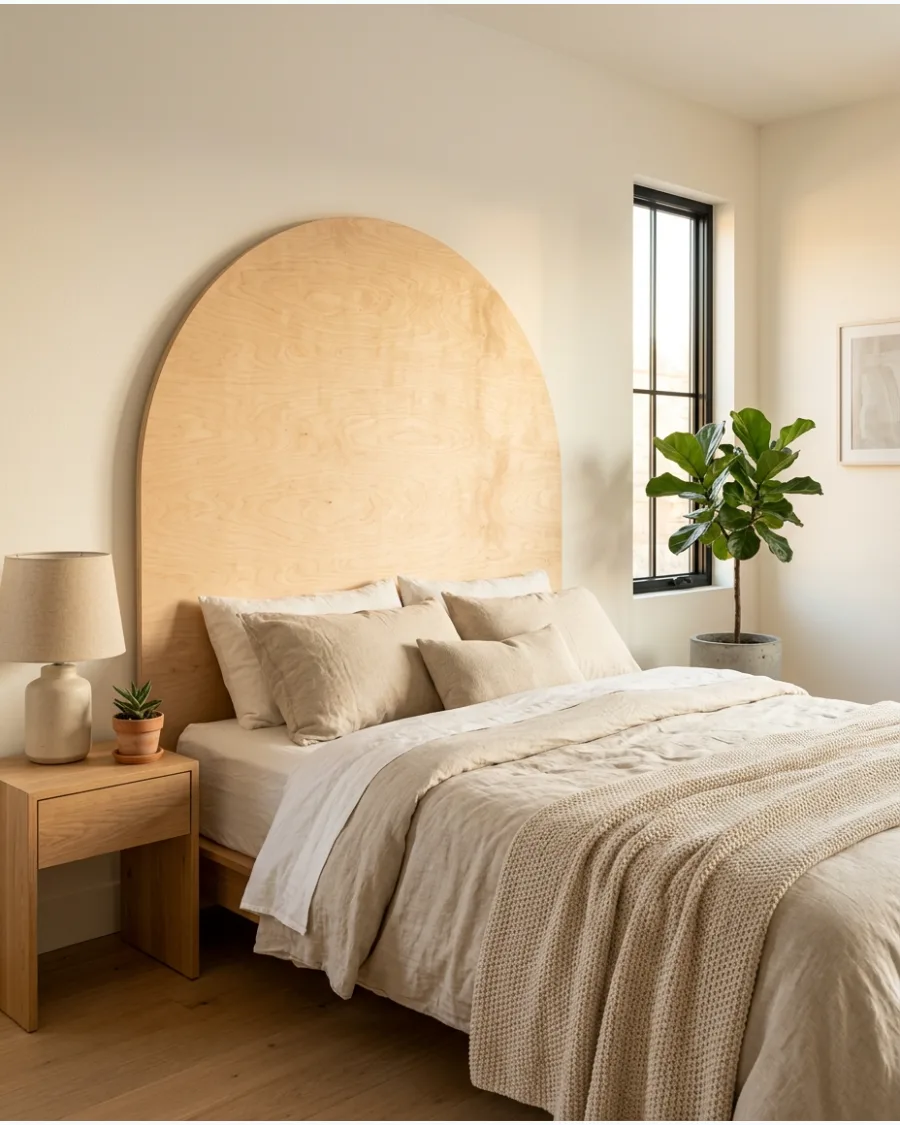
Cut a single large arch from a high-quality sheet of birch or maple plywood for a clean, Scandinavian-inspired look. The simple shape highlights the beauty of the natural wood grain without needing extra ornamentation.
Edge-band the cut sides of the plywood to hide the layered core and give it a solid-wood appearance. It is a budget-friendly way to achieve a high-design look with minimal materials.
- $40-$70 budget
- 2-hour project
- Minimalist aesthetic
Most people skip this: Use 3/4-inch plywood rather than thinner sheets to prevent the headboard from warping over time.
14. Fluted Dowel Headboard
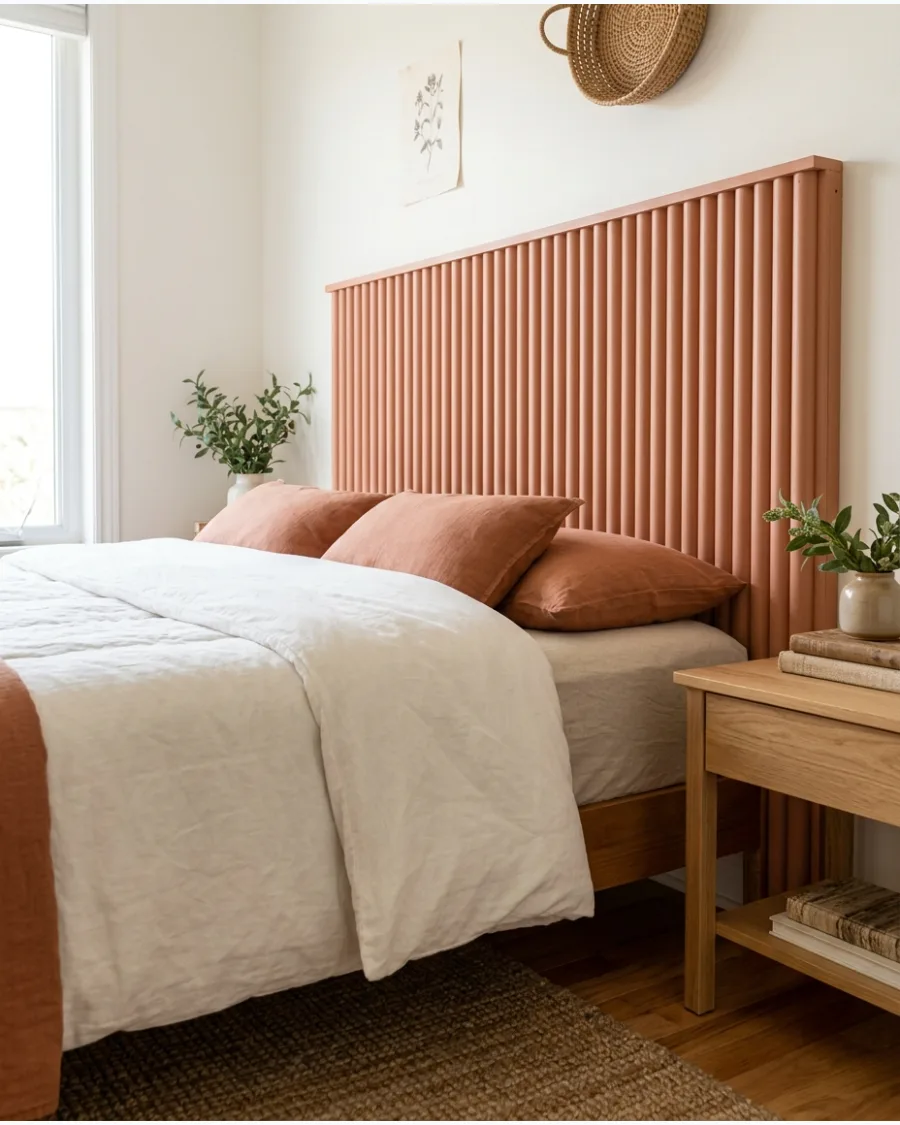
Glue half-round dowels vertically across a flat board to create a trendy fluted texture. This design adds significant visual interest and a tactile quality that standard flat headboards lack.
Use a miter box to ensure every dowel is cut to the exact same length for a flush top edge. The repeating shadows created by the dowels add depth to the wall.
- $90-$160 budget
- Time-intensive gluing
- Very trendy texture
Quick win: Use a wood filler to close any small gaps between the dowels at the top before painting or staining.
15. Reclaimed Plank Headboard
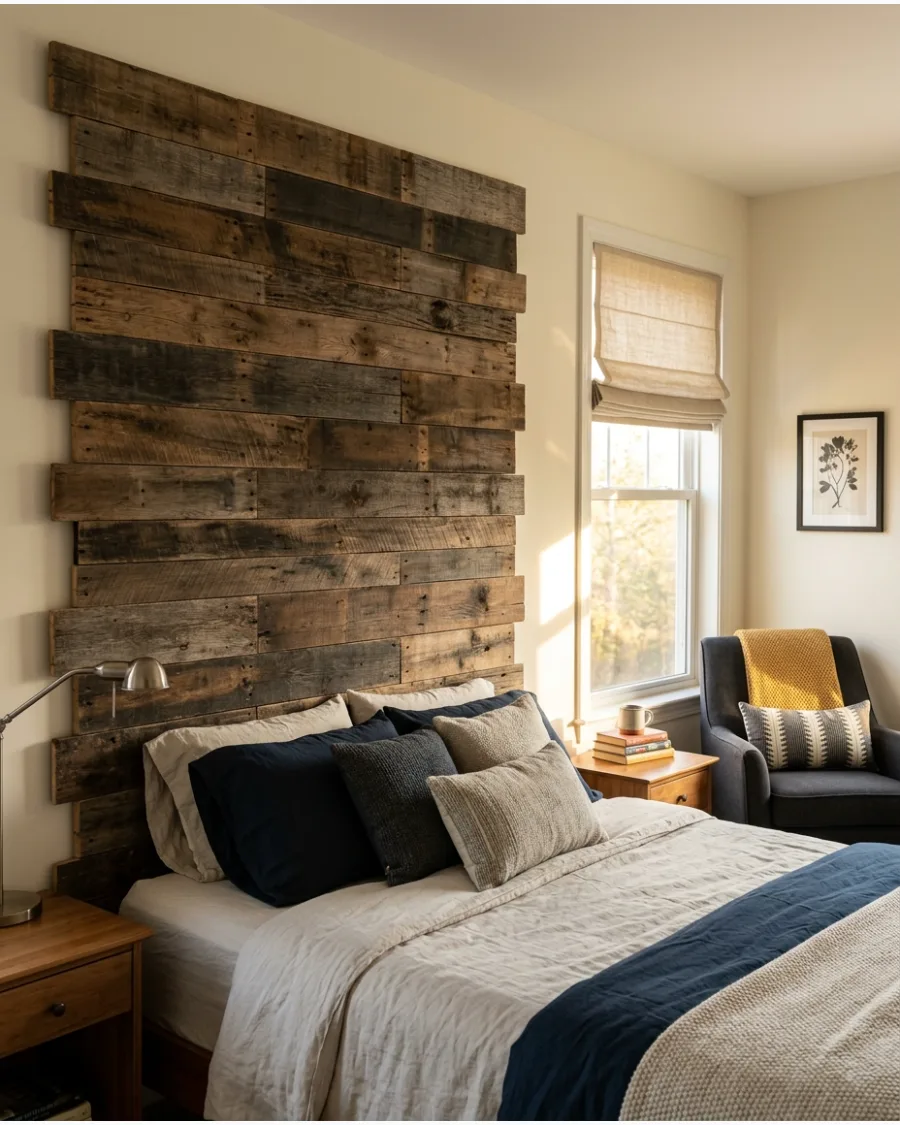
Assemble weathered boards of varying widths and lengths into a rustic, staggered pattern. The natural imperfections and color variations in reclaimed wood provide instant character that new lumber can't replicate.
Sand the boards with a high-grit sandpaper to remove splinters while keeping the original saw marks and patina. This project is often very affordable if you can source wood from old pallets or barns.
- $20-$60 budget
- Great for upcycling
- Best for farmhouse or rustic styles
Best shortcut: Look for reclaimed wood wall planks that come pre-sanded and finished to save hours of prep work.
16. Herringbone Wood Headboard
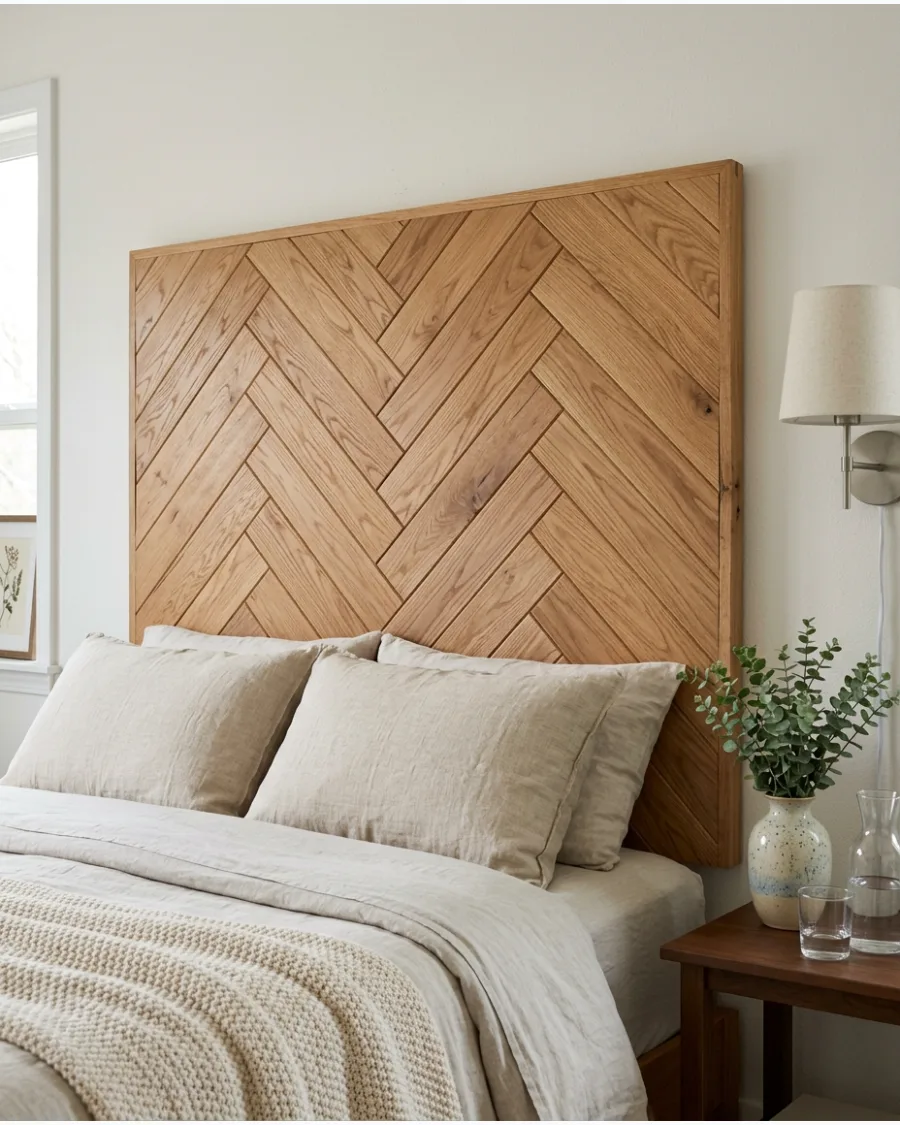
Arrange short wood pieces in a repeating herringbone pattern over a plywood base to create a high-end focal point. A natural stain emphasizes the pattern without introducing too many competing colors.
Apply a matte clear coat to the wood to protect it without losing the raw, natural look of the grain.
- Materials cost roughly $60 to $100 depending on wood species.
- Secure the pattern with wood glue and a pin nailer from the back.
- Mix different wood stains for a more rustic, varied appearance.
Quick win: Use a speed square to ensure every 45-degree angle is perfect so the pattern doesn't drift.
17. Framed Wood Slat Headboard
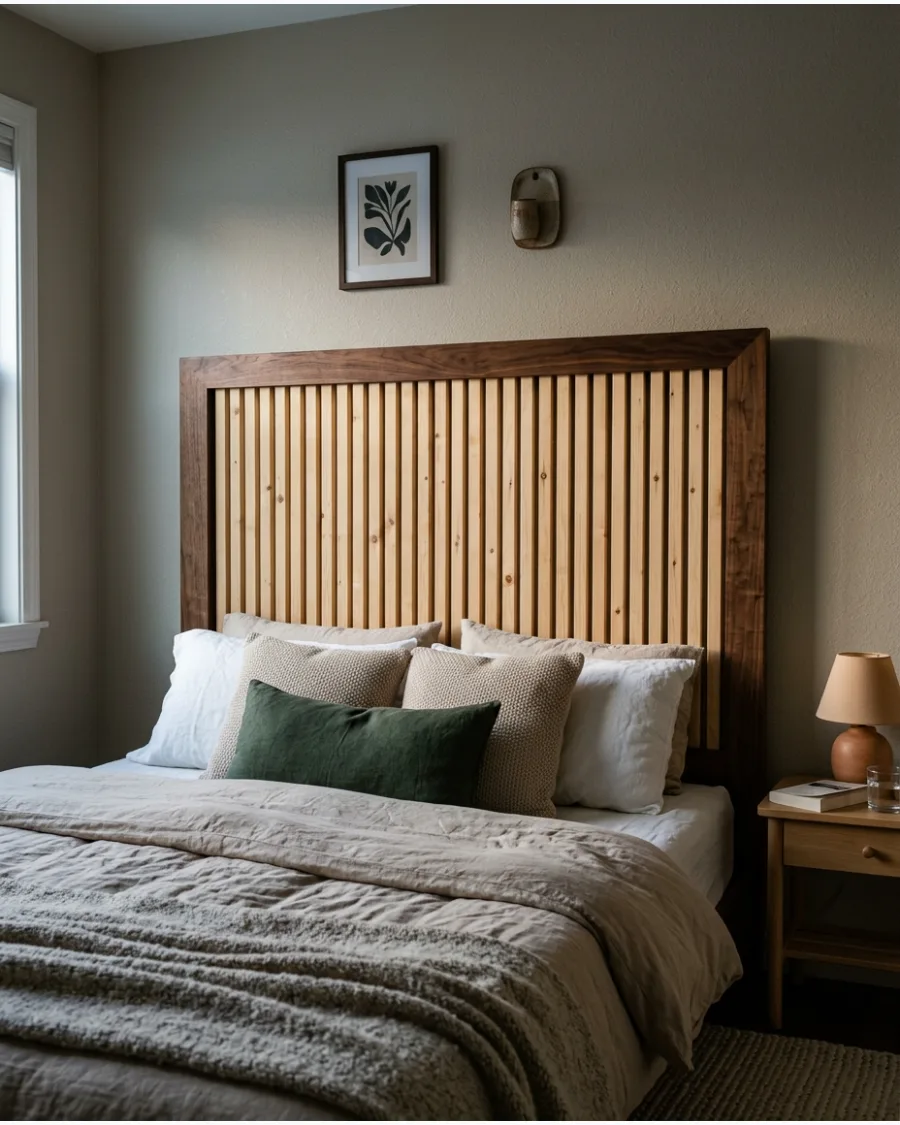
Surround a group of vertical or horizontal timber strips with a wider wooden frame for a polished look. The border gives the DIY construction a more complete, furniture-like appearance.
Glue the slats to the backing board before adding the frame to ensure everything stays perfectly aligned.
- Complete this project in one weekend including drying time.
- Mount directly to the wall studs to prevent the heavy frame from leaning.
- Paint the backing board black to make the wood slats pop visually.
Best shortcut: Use pre-cut furring strips from the lumber yard to save time on ripping boards.
18. Live-Edge Wood Headboard
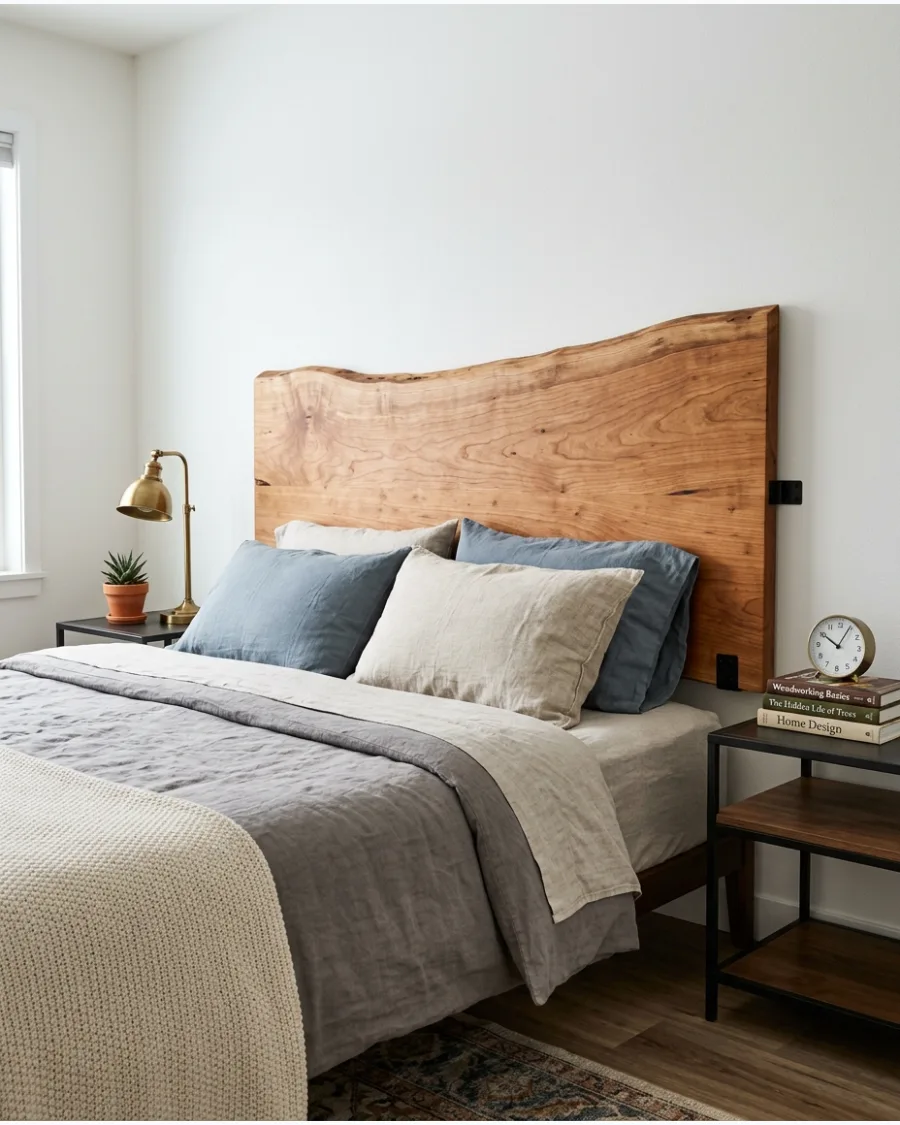
Use a wide live-edge slab or several coordinated boards with naturally uneven upper edges for an organic feel. Keep the remaining bedroom furniture simple so the organic wood shape remains prominent.
Mount the slab to the wall studs using heavy-duty French cleats to keep the wood flush and secure.
- Budget $150 to $300 for a quality kiln-dried wood slab.
- Sand the live edge thoroughly to remove loose bark and sharp splinters.
- Use a butterfly joint to stabilize any natural cracks in the wood.
Most people skip this: Seal the back of the slab as well as the front to prevent the wood from warping over time.
19. Painted Shiplap Headboard
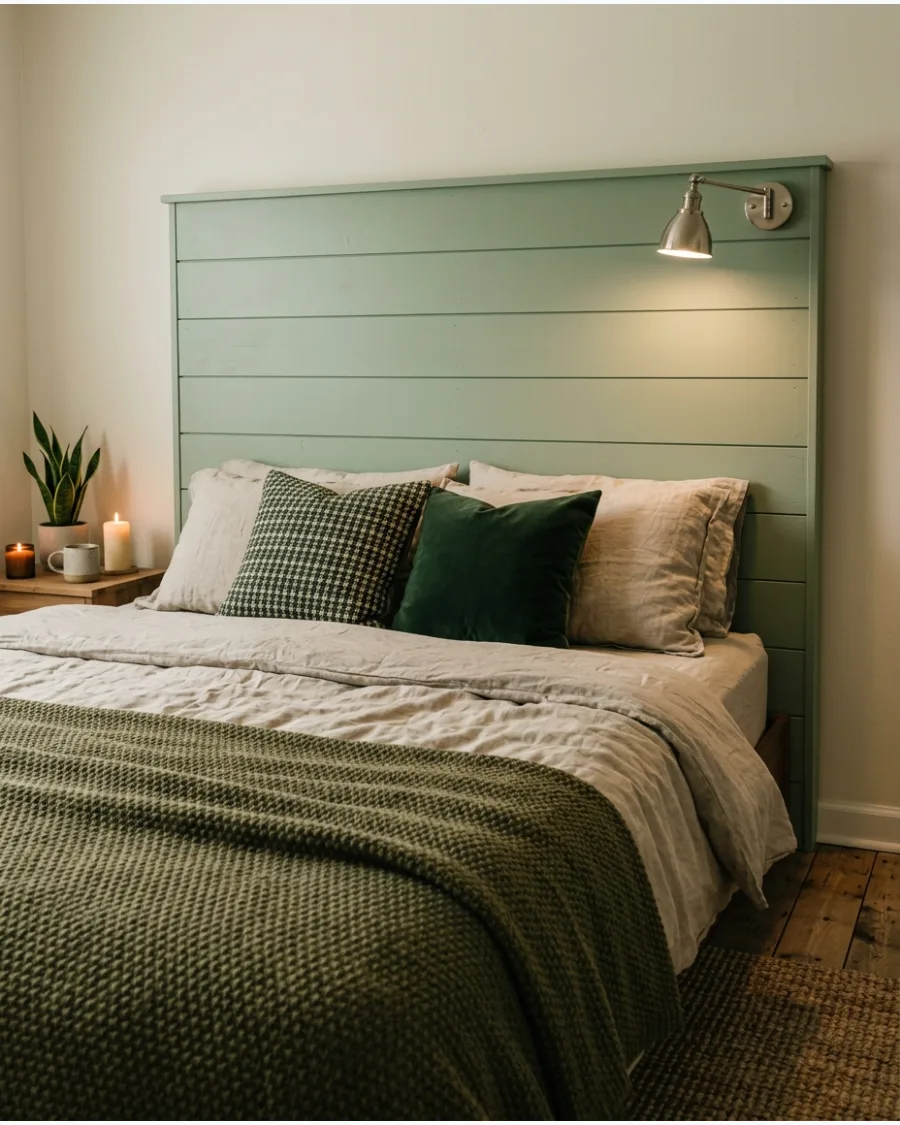
Join horizontal tongue-and-groove or shiplap-style boards and paint them in a warm neutral or muted color. This provides subtle texture without the heavier appearance of dark reclaimed wood.
Use a nickel or a spacer between each board to keep the gaps consistent across the entire width.
- Inexpensive project using pine shiplap or MDF strips.
- Attach to a plywood frame if you want the headboard to be movable.
- Add a thin trim piece on the top edge for a finished, dust-free cap.
Quick win: Paint the tongue of each board before assembly so raw wood doesn't show when the boards expand.
20. Wall-to-Wall Wood Panel Headboard
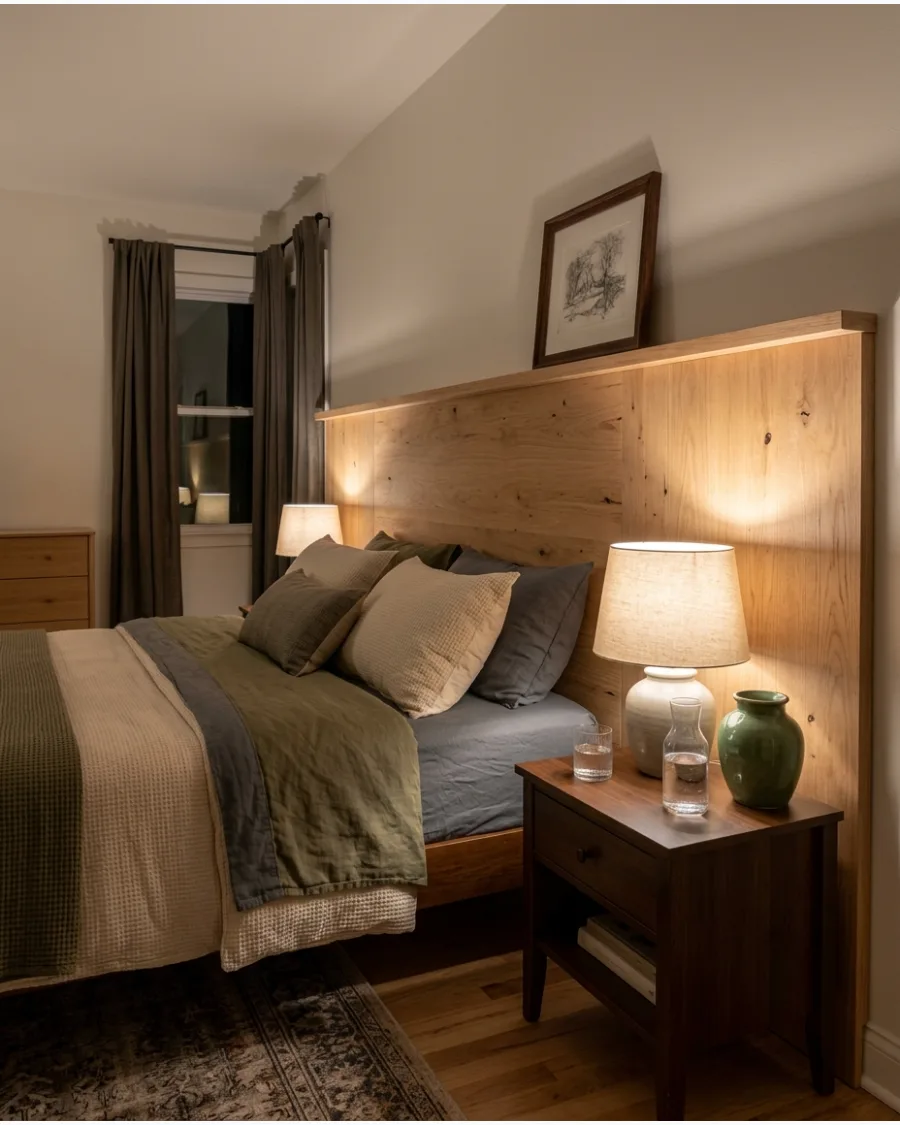
Install a low wooden panel that runs behind the bed and both bedside tables to ground the room. Add a narrow upper ledge to display small artwork while keeping heavier objects away from the sleeping area.
Install a cord-management channel behind the panel to hide lamp wires and keep the top ledge clutter-free.
- Requires basic carpentry skills and a circular saw for long cuts.
- Anchor the ledge every 16 inches for maximum weight capacity.
- Stain the wood to match your flooring for a built-in architectural look.
Best shortcut: Use edge-banding on the top shelf to make inexpensive plywood look like solid timber.
Woven and Natural DIY Headboard Ideas
21. Framed Cane Headboard
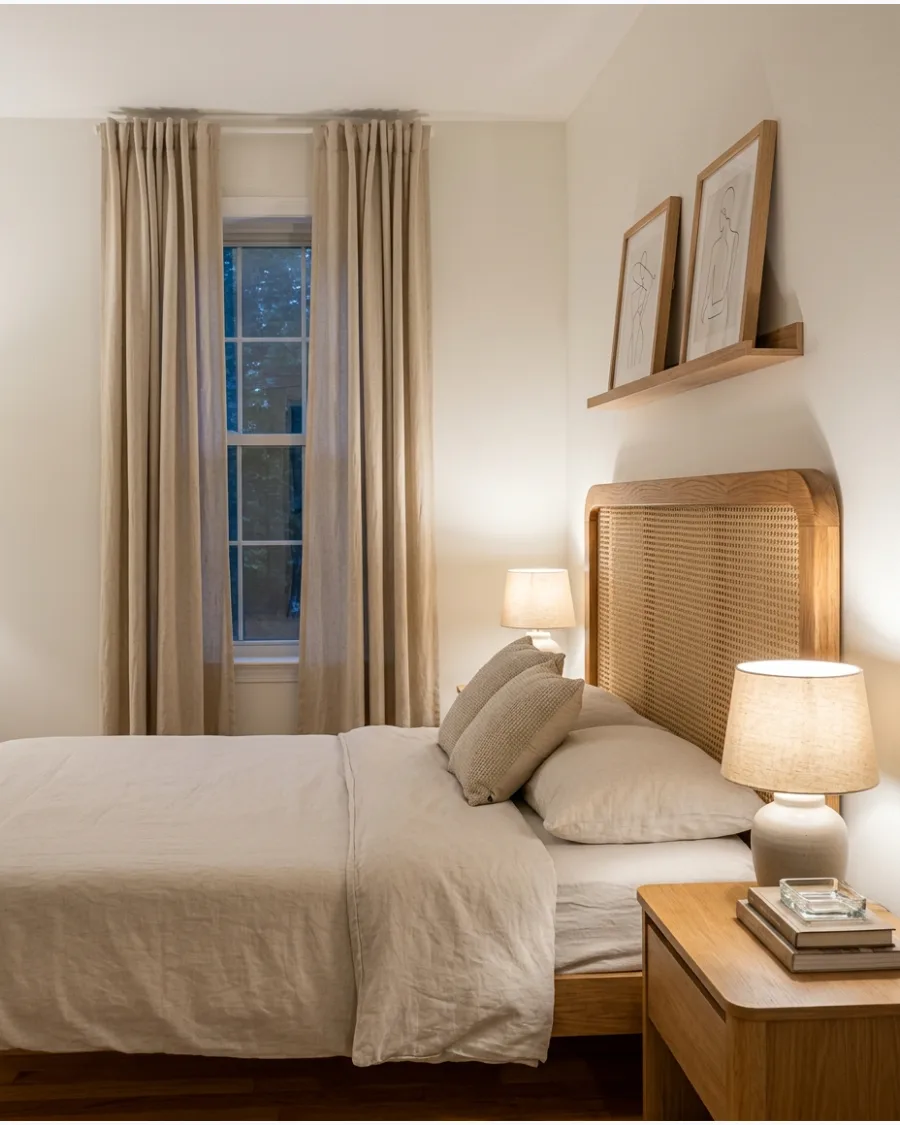
Build a simple timber frame and stretch cane webbing securely across the center for a classic look. The open weave adds natural texture without making the bedroom feel visually heavy.
Soak the cane webbing in warm water for thirty minutes before stapling it so it shrinks and tightens as it dries.
- Cane webbing is sold by the linear foot in various widths.
- Use a heavy-duty staple gun to attach the webbing to the back of the frame.
- Cover the staples with a thin wood trim for a professional finish.
Most people skip this: Sand the frame before attaching the cane to avoid damaging the delicate weave.
22. Woven Upholstery-Webbing Headboard
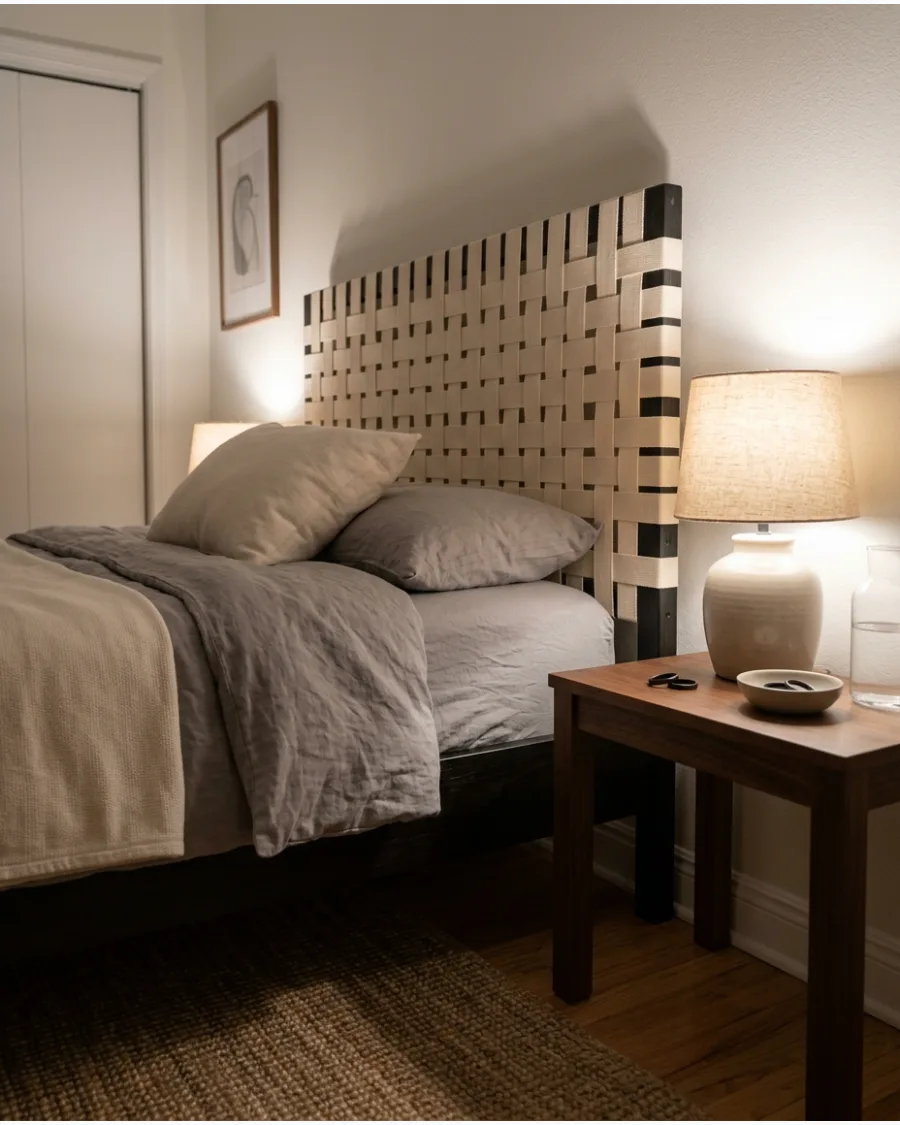
Weave wide cotton or jute upholstery straps across a wooden frame for a modern, tactile finish. Alternating the strips over and under each other creates a strong graphic pattern with a handmade finish.
Pull the straps as tight as possible during the weaving process to prevent the center from sagging over time.
- Budget-friendly using bulk rolls of jute or cotton webbing.
- Space the vertical straps evenly before starting the horizontal weave.
- Mix two different colors of webbing for a bold checkerboard effect.
Quick win: Use an upholstery stretching tool to get the straps tighter than you can with your hands alone.
23. Rattan Screen Headboard
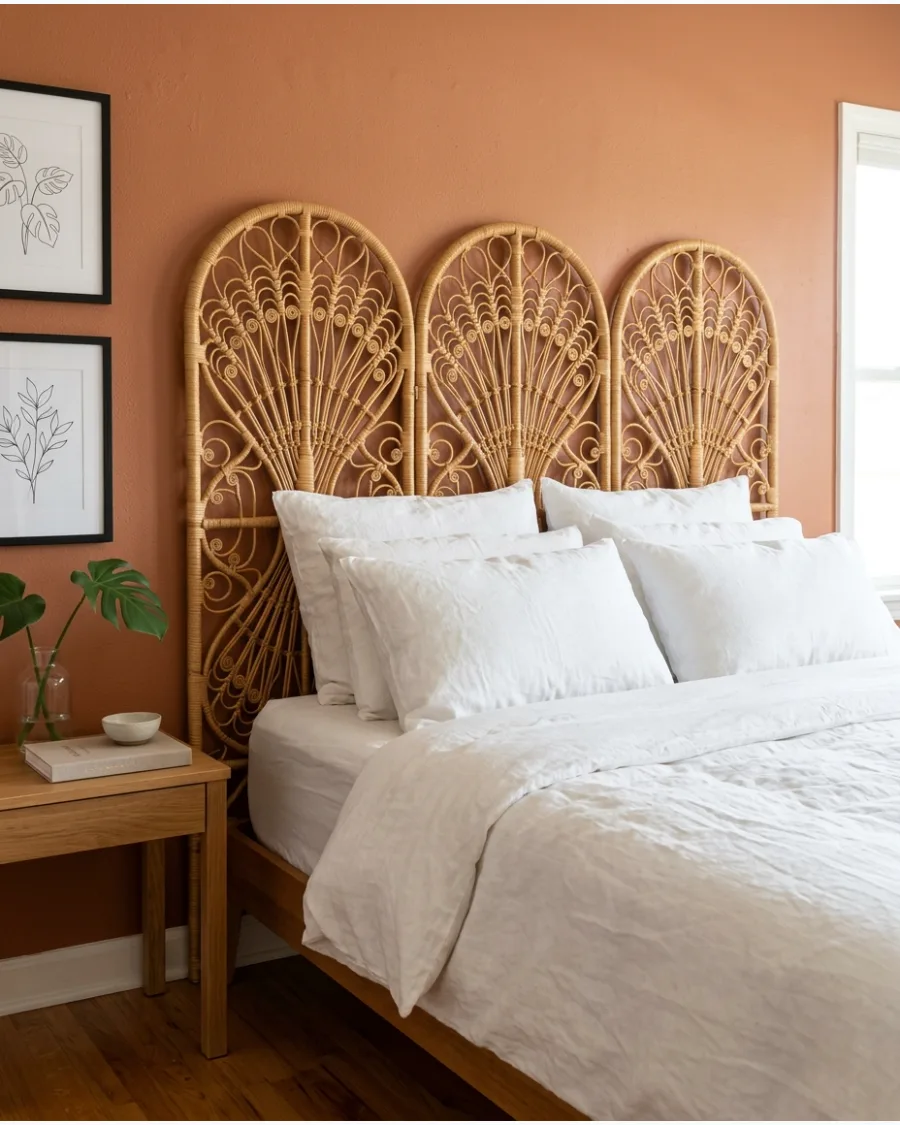
Place a lightweight rattan room divider securely behind the bed and fasten it to prevent movement. The folding sections add height and work well in relaxed, natural bedrooms.
Attach rubber bumpers to the back of the screen to prevent it from scratching the wall or rattling at night.
- No-build solution that requires zero power tools.
- Secure the screen to the wall using small L-brackets or zip ties.
- Choose a three-panel screen for queen beds or a four-panel for kings.
Best shortcut: Paint the rattan a bold color like black or emerald to modernize the vintage look.
24. Bamboo Pole Headboard
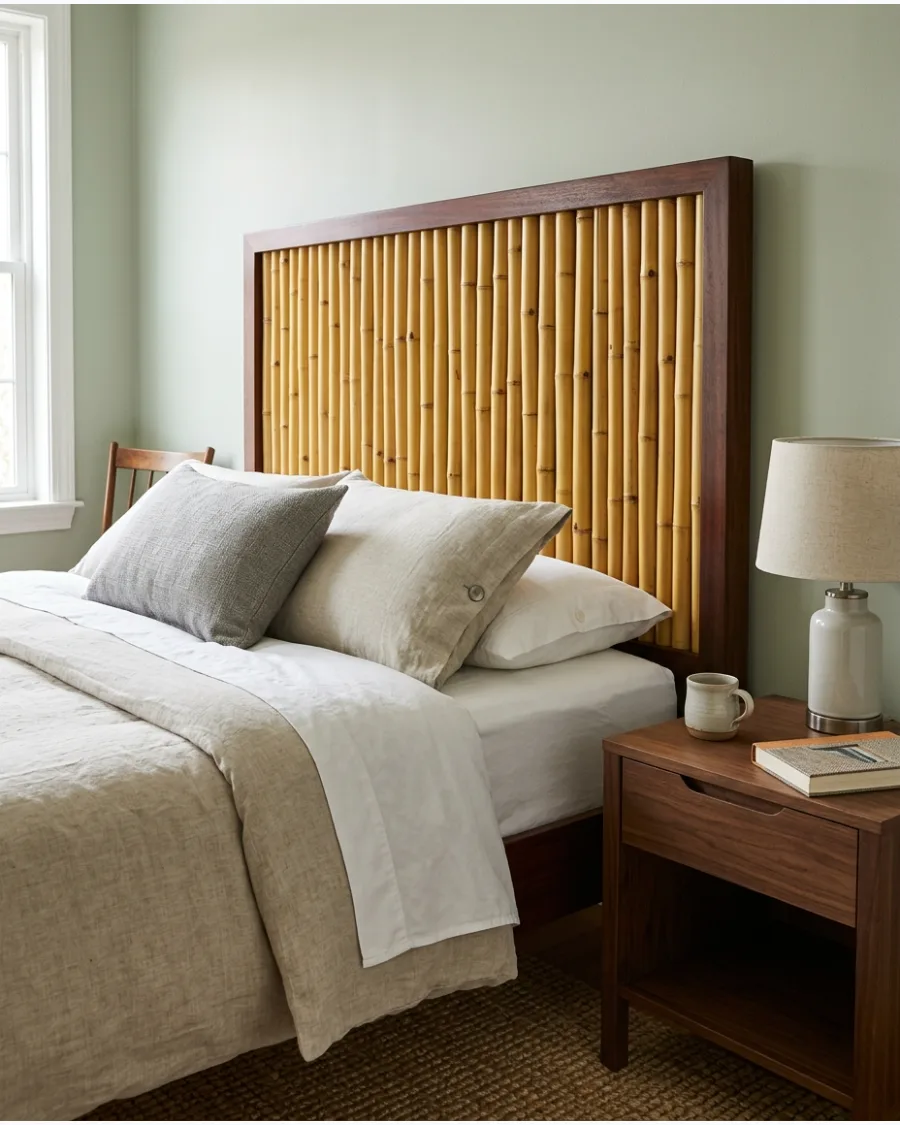
Arrange smooth bamboo poles vertically inside a timber frame for a spa-like atmosphere. Varying the pole widths slightly can create a more organic appearance.
Use a small amount of wood glue at the top and bottom of each pole to stop them from spinning in the frame.
- Bamboo is a sustainable material that is naturally moisture-resistant.
- Cut poles with a fine-tooth saw to prevent splintering the fibers.
- Apply a clear gloss finish to make the bamboo glow under bedside lighting.
Most people skip this: Pre-drill the frame if you plan to screw into the bamboo to prevent the poles from splitting.
25. Woven Rope Headboard
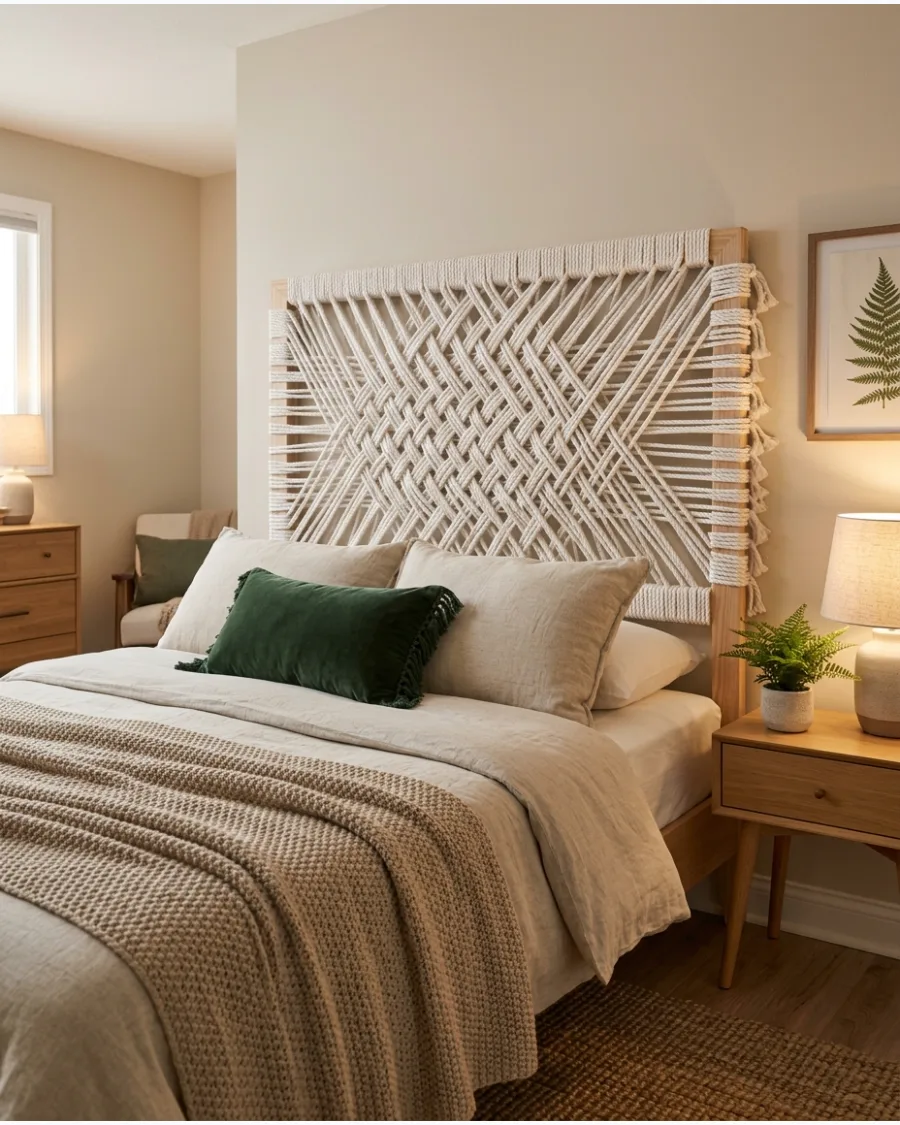
Wrap and weave cotton rope across a wooden frame to create a textural pattern. Natural cream rope produces a subtle result, while colored cord creates a more playful accent.
Drill holes along the inner frame edges to feed the rope through for a cleaner, more professional finish.
- Use 1/4-inch or 1/2-inch cotton rope for the best visual impact.
- Seal the rope ends with a small flame or tape to prevent fraying during weaving.
- Tension the rope as you go to ensure the pattern stays uniform.
Quick win: Use a macrame knot at the transition points to add extra decorative detail.
26. Basket-Weave Wood Headboard
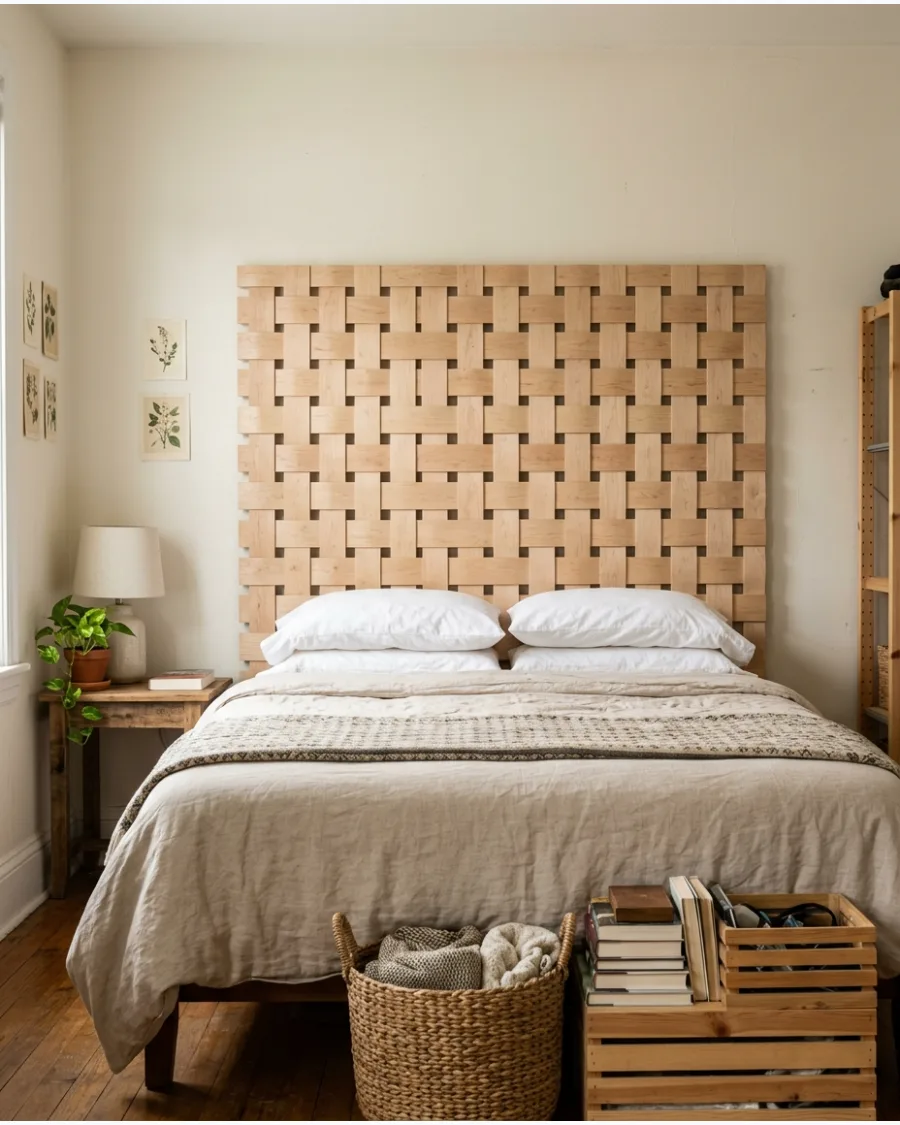
Arrange thin wooden strips in an oversized basket-weave pattern over a solid backing. Use similar wood tones to emphasize the dimensional texture rather than strong color contrast.
Sand the edges of the thin wood strips thoroughly to prevent snagging your pillows or bedding on the weave.
- Use wood veneer strips or thin lath for a flexible weave.
- Finish with a spray-on polyurethane to reach into all the small crevices.
- Mount to a dark-painted plywood base to add depth to the woven gaps.
Best shortcut: Use a spacer block to keep the weaving tight and straight across the entire board.
Painted and Wall-Mounted Headboard Ideas
27. Painted Arch Headboard
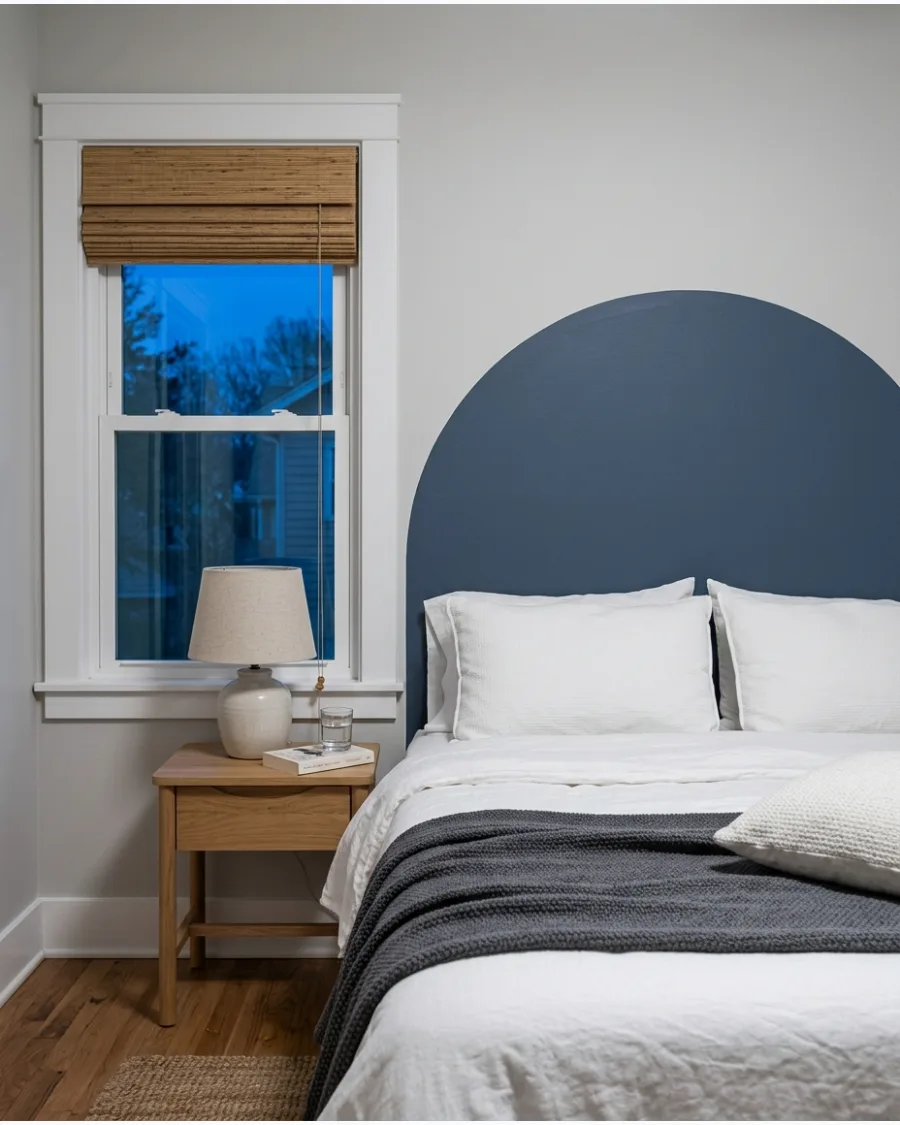
Paint a large arch directly behind the bed to imitate the outline of a traditional headboard. Use a contrasting shade or a deeper version of the existing wall color.
Use a pencil tied to a string as a compass to trace the perfect arch shape before you start painting.
- Costs less than $20 for a sample-sized can of paint.
- Ideal for small bedrooms where a physical headboard would take up too much space.
- Use a high-quality angled brush for the curved edges to get a sharp line.
Most people skip this: Paint the arch slightly wider than your bed frame so it frames the pillows perfectly.
28. Painted Rectangular Headboard
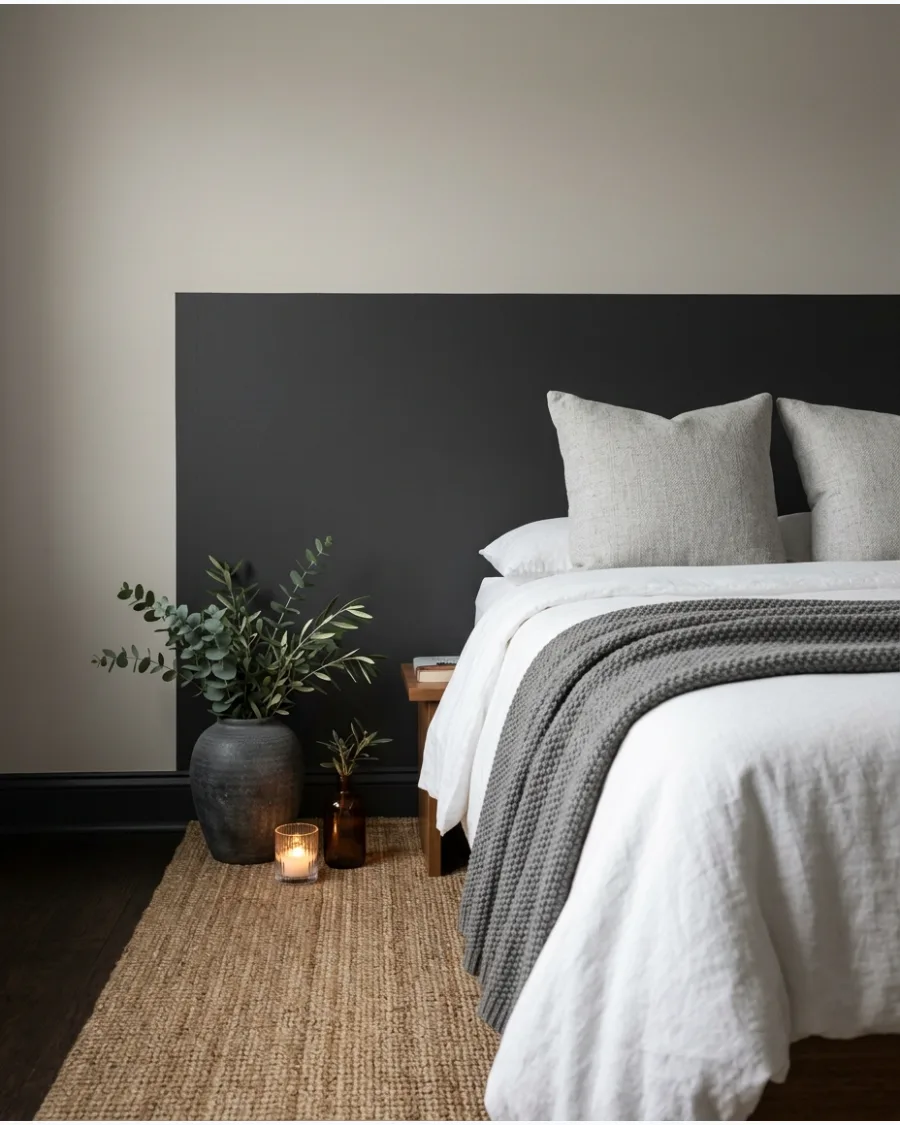
Create a wide painted block that extends slightly beyond the bed for a minimalist look. A crisp rectangle offers a simple headboard effect without taking up any floor space.
Apply painter's tape and seal the edges with the base wall color first to get perfectly sharp lines.
- Takes about two hours to complete from taping to final coat.
- Choose a washable paint finish to make it easy to wipe away marks.
- Align the top of the rectangle with the height of your windows for visual balance.
Quick win: Use a laser level to ensure your tape lines are perfectly horizontal across the entire wall.
29. Color-Drenched Headboard Zone
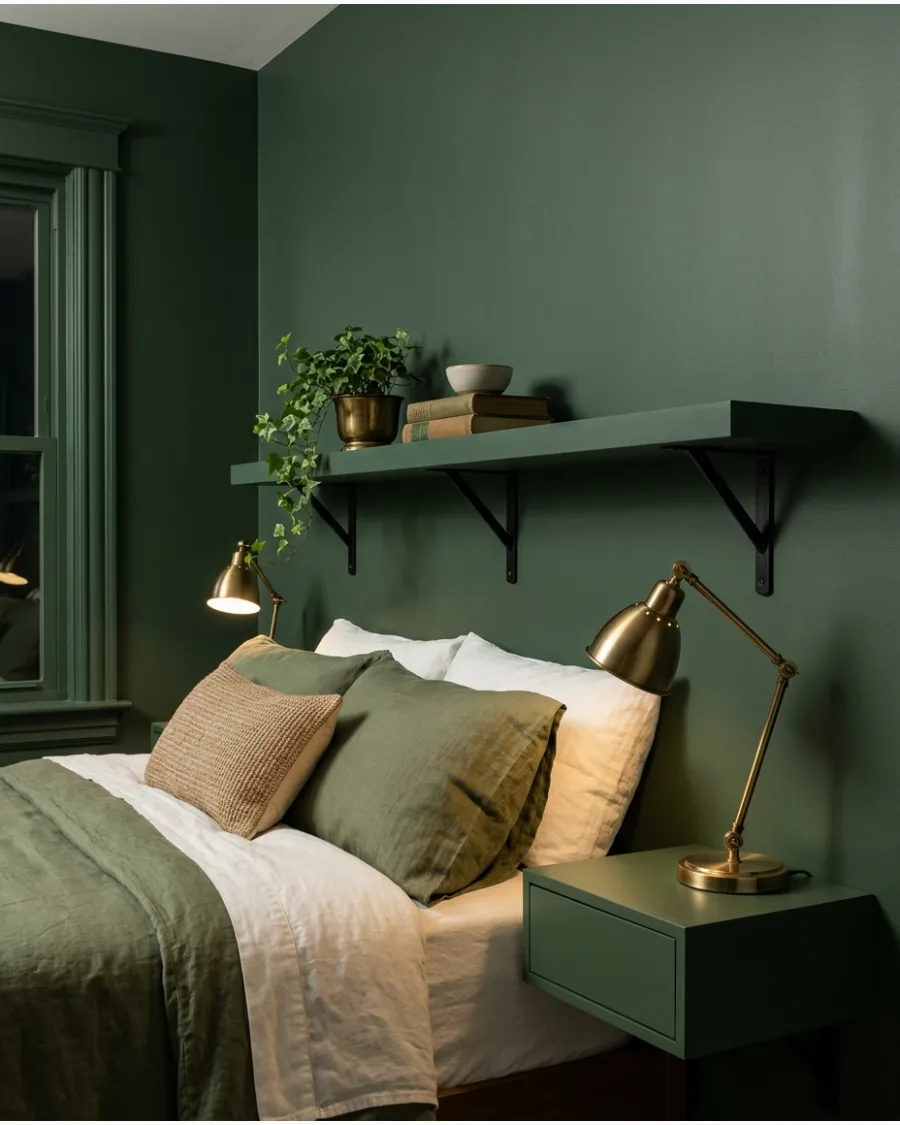
Paint the wall behind the bed, the trim, and nearby shelves in the same rich color. This creates an immersive sleeping zone and makes separate pieces feel intentionally connected.
Choose a flat or eggshell finish for the paint to prevent the large block of color from creating a distracting glare.
- Works best with moody colors like navy, forest green, or charcoal.
- Paint everything from the floor to the ceiling for the most dramatic effect.
- Use a primer if you are painting over light walls with a dark, saturated color.
Best shortcut: Paint the outlet covers and switch plates in the same color to make them disappear into the wall.
30. Wallpaper Panel Headboard
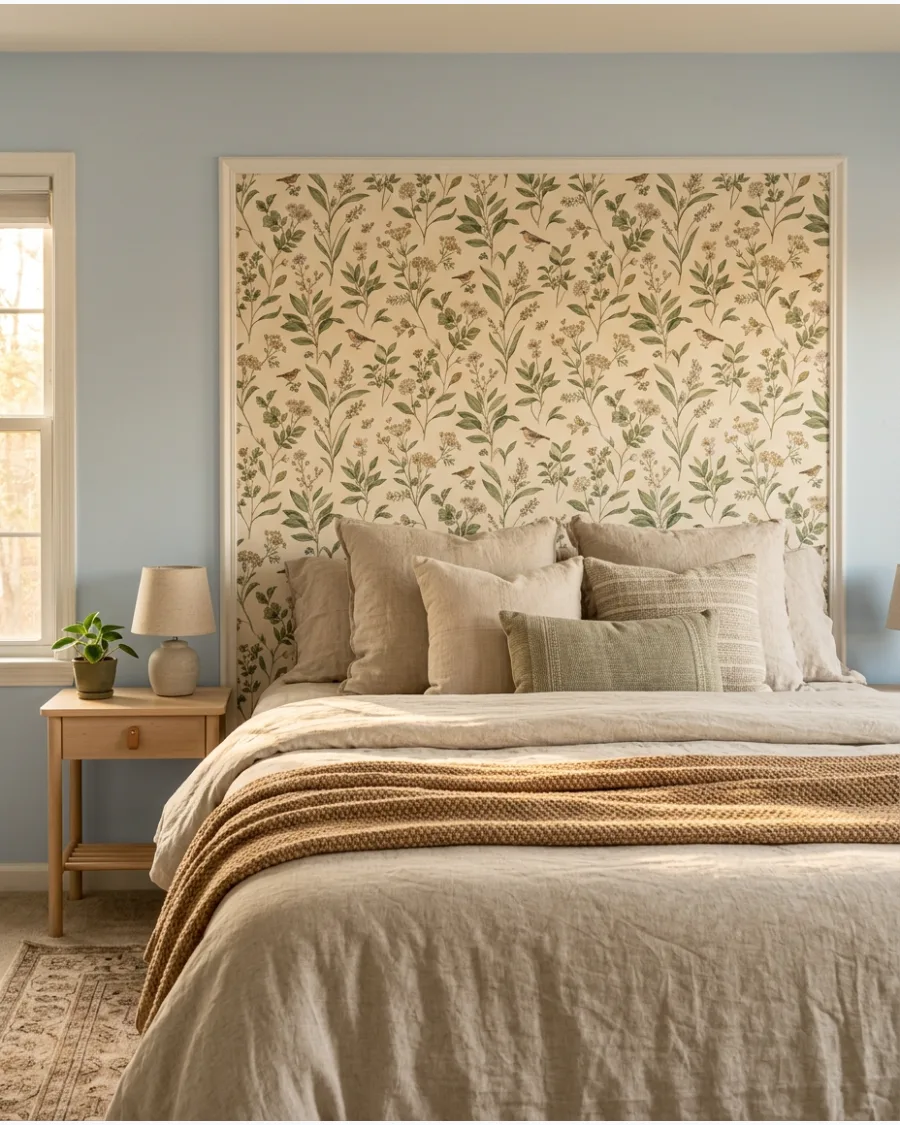
Apply wallpaper inside a large rectangular or arched outline behind the bed for instant pattern. Finish the outside edges with slim molding to make the wallpaper resemble a framed decorative panel.
Measure the center of your bed carefully so the pattern in the wallpaper is perfectly symmetrical behind the pillows.
- Use peel-and-stick wallpaper for a renter-friendly DIY option.
- Cut the molding at 45-degree angles for a professional, mitered corner look.
- Pick a large-scale pattern to make the small panel feel like a grand piece of art.
Most people skip this: Use a wallpaper smoothing tool to remove every air bubble before the adhesive sets.
31. Framed Wall-Mural Headboard
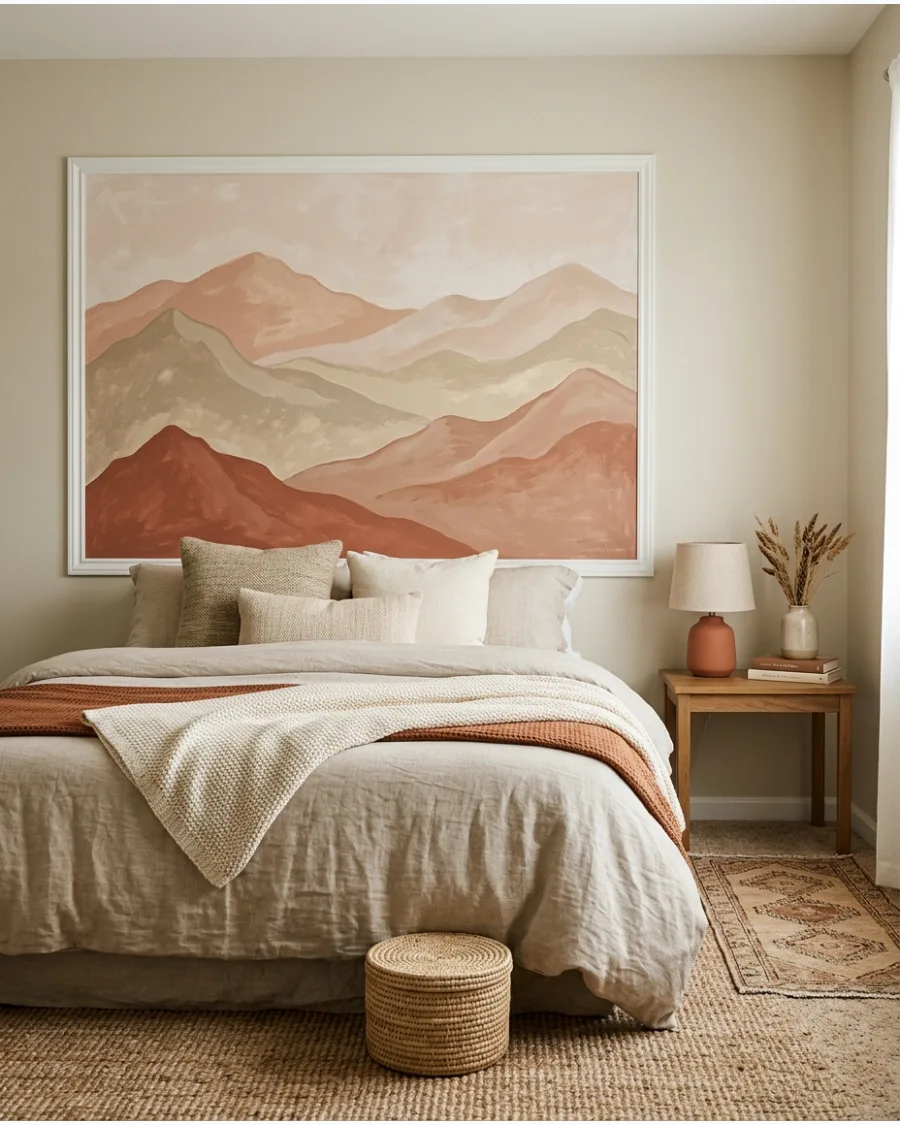
Painting a landscape or abstract design directly on the wall creates a focal point without taking up floor space. Surround the art with thin wooden molding to give it a finished, gallery-style look.
Measure the height of your pillows and shams before starting to ensure the best parts of the mural stay visible. Expert opinion: Keeping the mural slightly wider than the bed frame makes the whole room feel more expansive.
- Low budget for paint and molding
- Install molding after the paint is fully dry
- Use painters tape to create crisp edges for the frame
Quick win: Use a sponge instead of a brush for the mural to create soft, blended edges that look professional.
32. Board-and-Batten Headboard Wall
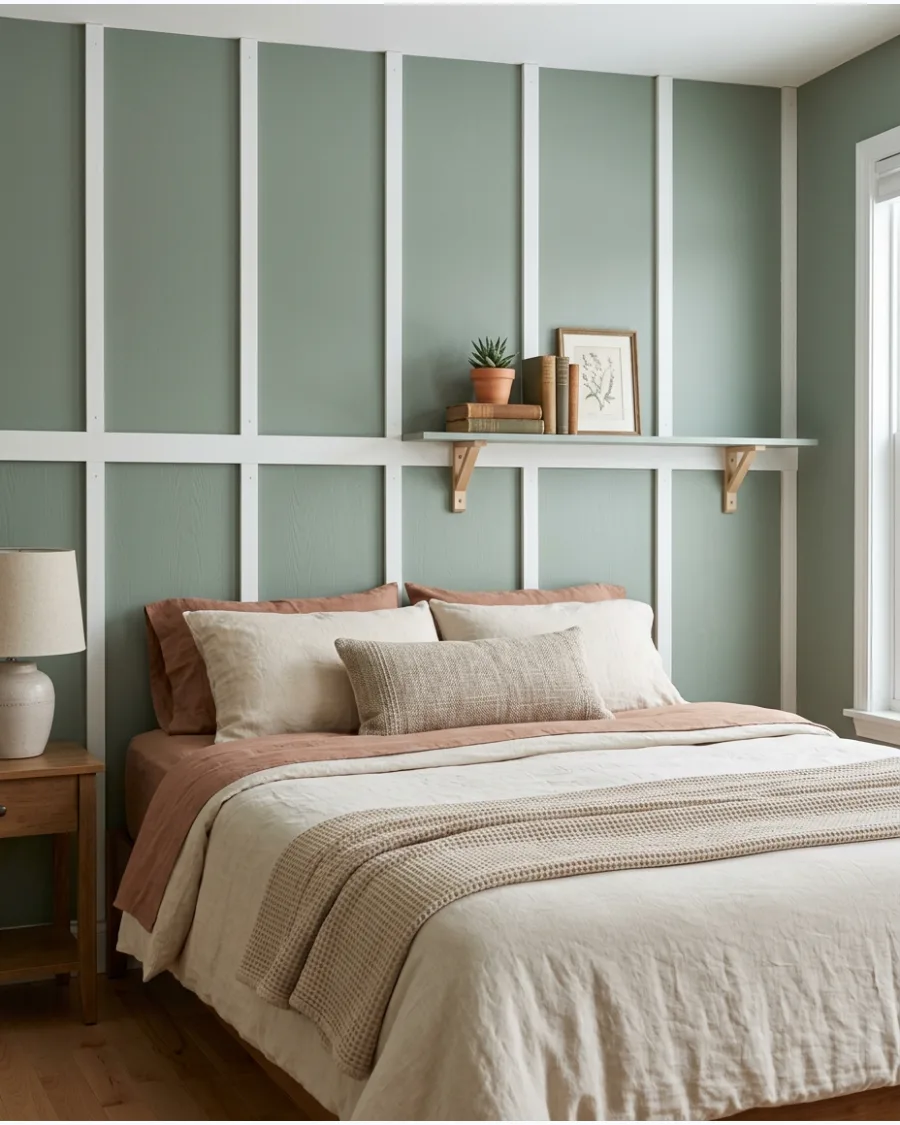
Vertical battens add architectural interest and a sense of height to a standard bedroom. Finish the top with a flat rail to create a small ledge for leaning thin art prints.
Secure every vertical strip into a wall stud or use heavy-duty construction adhesive to prevent the boards from warping over time. Expert opinion: Painting the battens and the wall the same satin finish makes the installation look like expensive custom millwork.
- Moderate weekend project
- Use a level for every vertical strip
- Paint the boards before nailing them up to save time
Best shortcut: Use a spacer block of wood to ensure the distance between every batten is perfectly identical without measuring every time.
33. Picture-Frame Molding Headboard
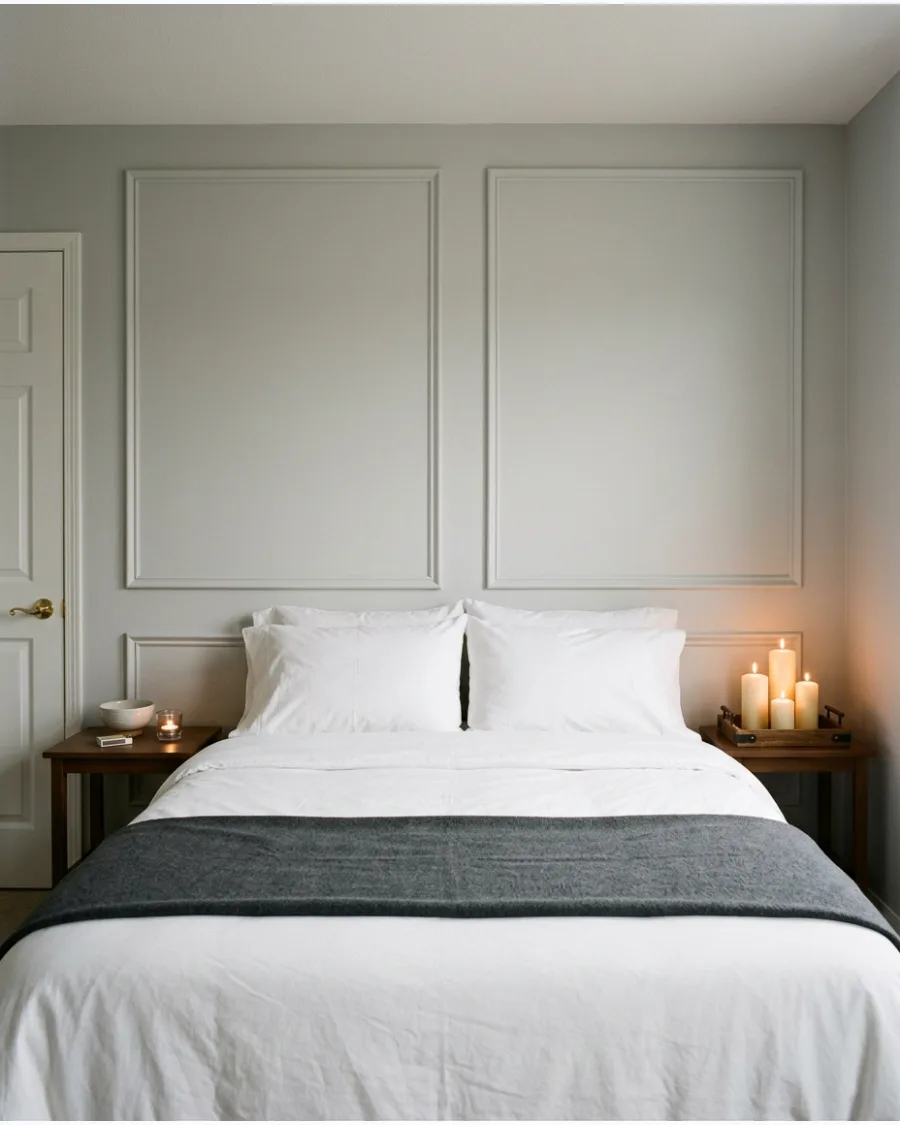
Decorative molding rectangles offer a classic look that works well in traditional or transitional spaces. Matching the trim color to the wall creates a sophisticated texture that doesn't overwhelm the room.
Use a laser level to ensure the boxes are perfectly centered and level behind the bed frame. Expert opinion: Double-stacked molding boxes, one inside the other, add a high-end custom feel for just a few extra dollars.
- Budget-friendly trim project
- Mitre the corners at 45 degrees for a tight fit
- Fill nail holes with wood filler before the final paint coat
Most people skip this: Sanding the joints of the molding after gluing them makes the corners look seamless under paint.
34. Limewash Headboard Block
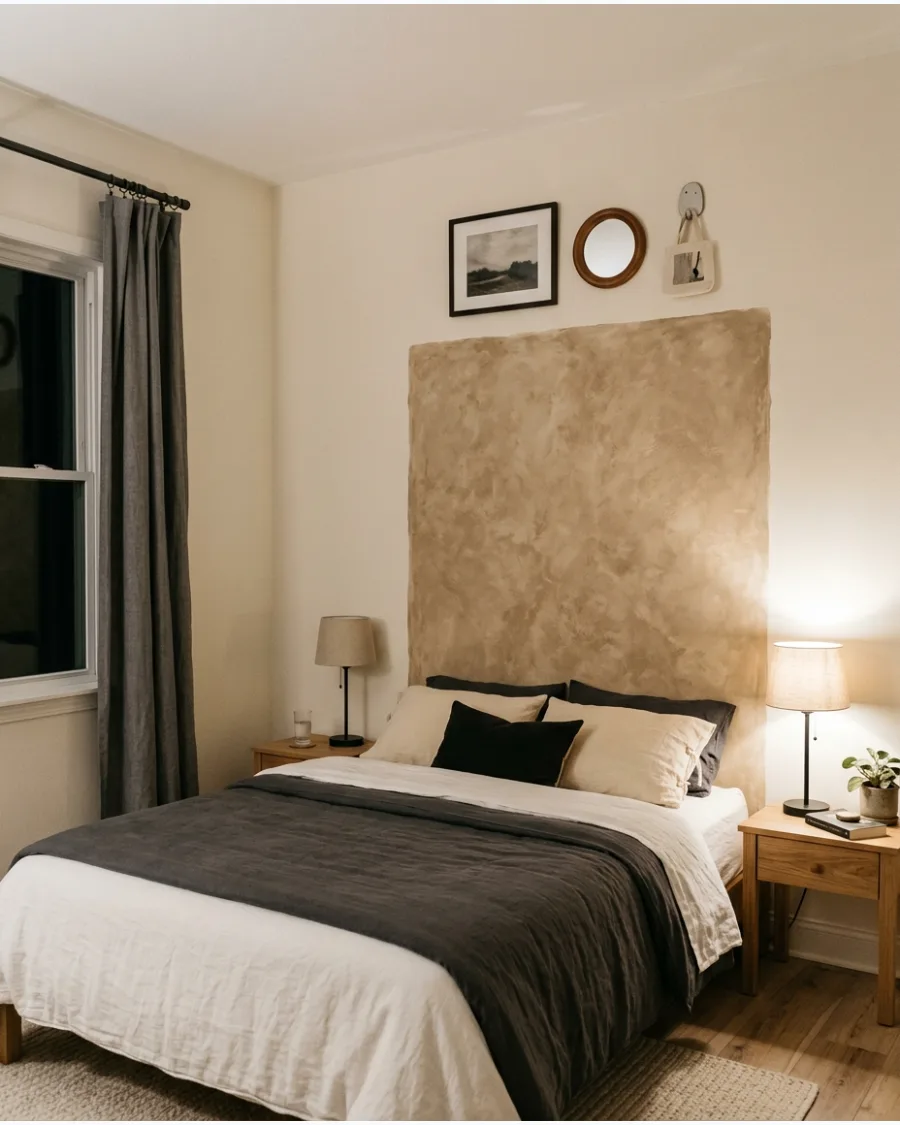
Limewash paint provides a chalky, suede-like texture that adds instant character to a flat wall. Applying it in a specific rectangular block creates the visual weight of a headboard without any bulk.
Apply the paint in random, overlapping X strokes to build the mottled texture that makes limewash unique. Expert opinion: A darker shade of limewash than the surrounding wall creates a cozy, recessed feel that anchors the bed.
- Low cost for specialty paint
- Requires a masonry brush for application
- Works best on porous or primed surfaces
Quick win: Keep a spray bottle of water nearby to dampen the wall slightly if the limewash is drying too fast to blend.
35. Stenciled Headboard Design
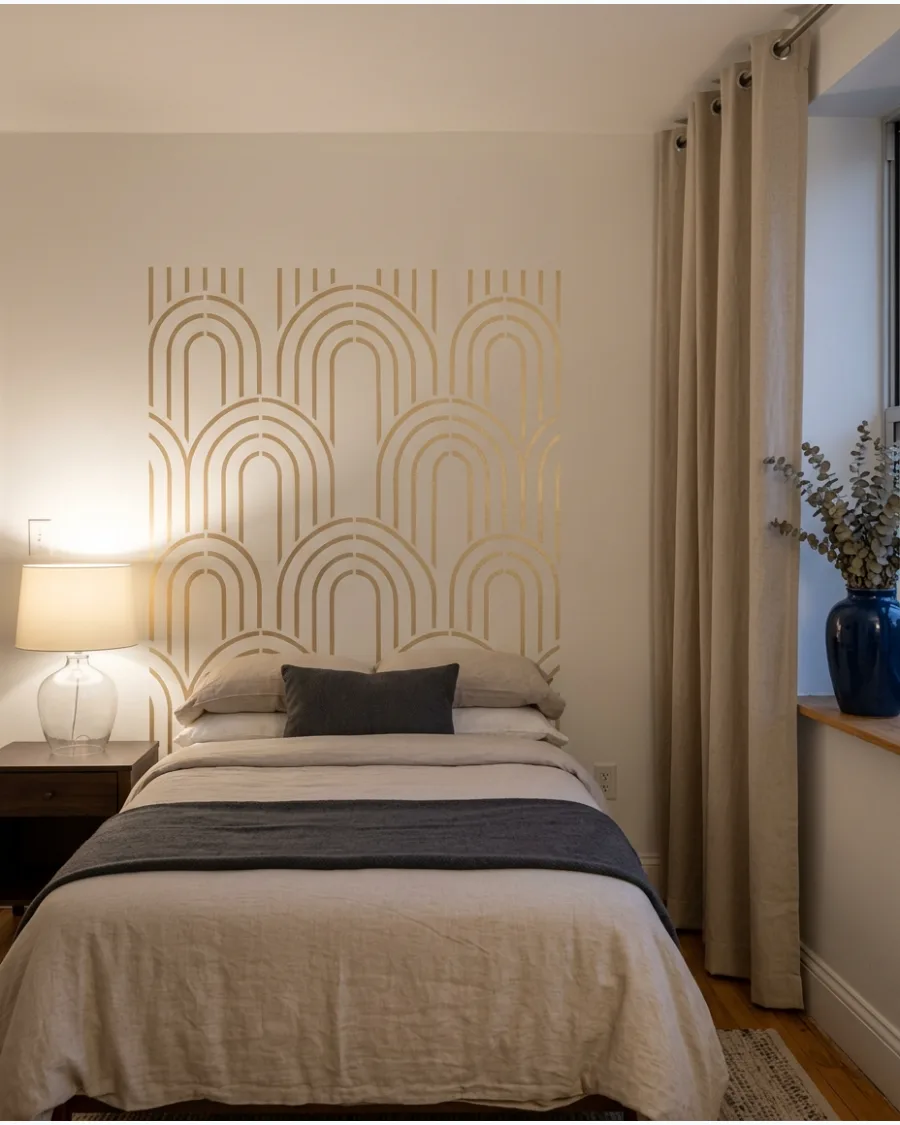
Stenciling allows for intricate patterns like arches or florals without the cost of high-end wallpaper. This method is ideal for adding a custom pattern to a specific zone behind the pillows.
Use a dense foam roller and very little paint to prevent the design from bleeding under the stencil edges. Expert opinion: Choosing a stencil color only one or two shades different from the wall keeps the pattern from feeling too busy in a sleeping space.
- Inexpensive DIY
- Use repositionable spray adhesive on the back of the stencil
- Clean the stencil every few rows to avoid paint buildup
Best shortcut: Start the stencil in the center of the bed and work outward so the pattern is perfectly symmetrical.
Budget-Friendly and Renter-Friendly Headboards
36. Fabric-Wrapped Foam Board Headboard
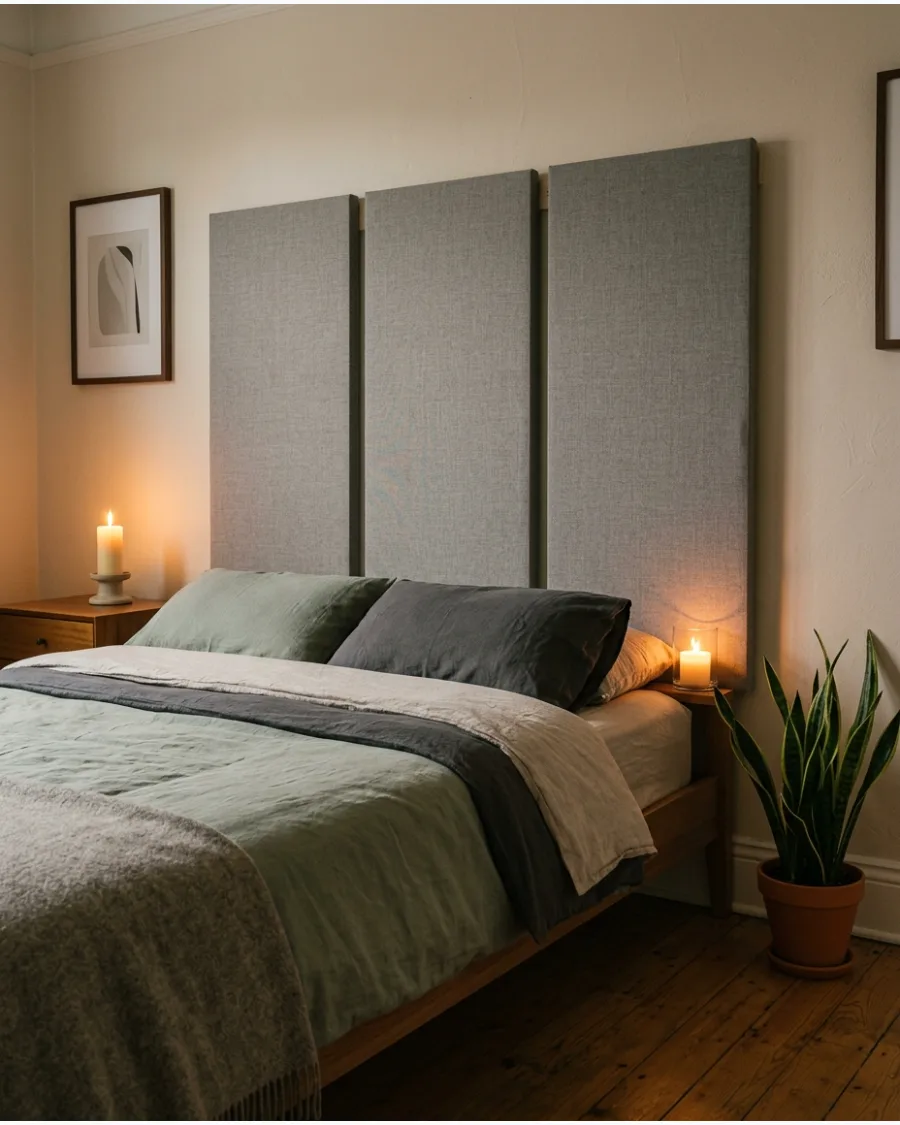
Lightweight foam insulation boards are easy to cut and wrap in your favorite textile for a soft, upholstered look. Because they weigh very little, they stay secure with simple hook-and-loop fasteners.
Pull the fabric tight across the front and staple it into the back of the foam, using wide duct tape to reinforce the staples if needed. Expert opinion: Using three or four separate vertical panels makes the project easier to handle and adds a modern, segmented look.
- Low cost and very lightweight
- Mount with heavy-duty Command strips
- Swap the fabric easily when you want a new look
Most people skip this: Adding a layer of thin quilt batting under the fabric gives the panels a high-end, cushioned appearance.
37. Curtain Headboard
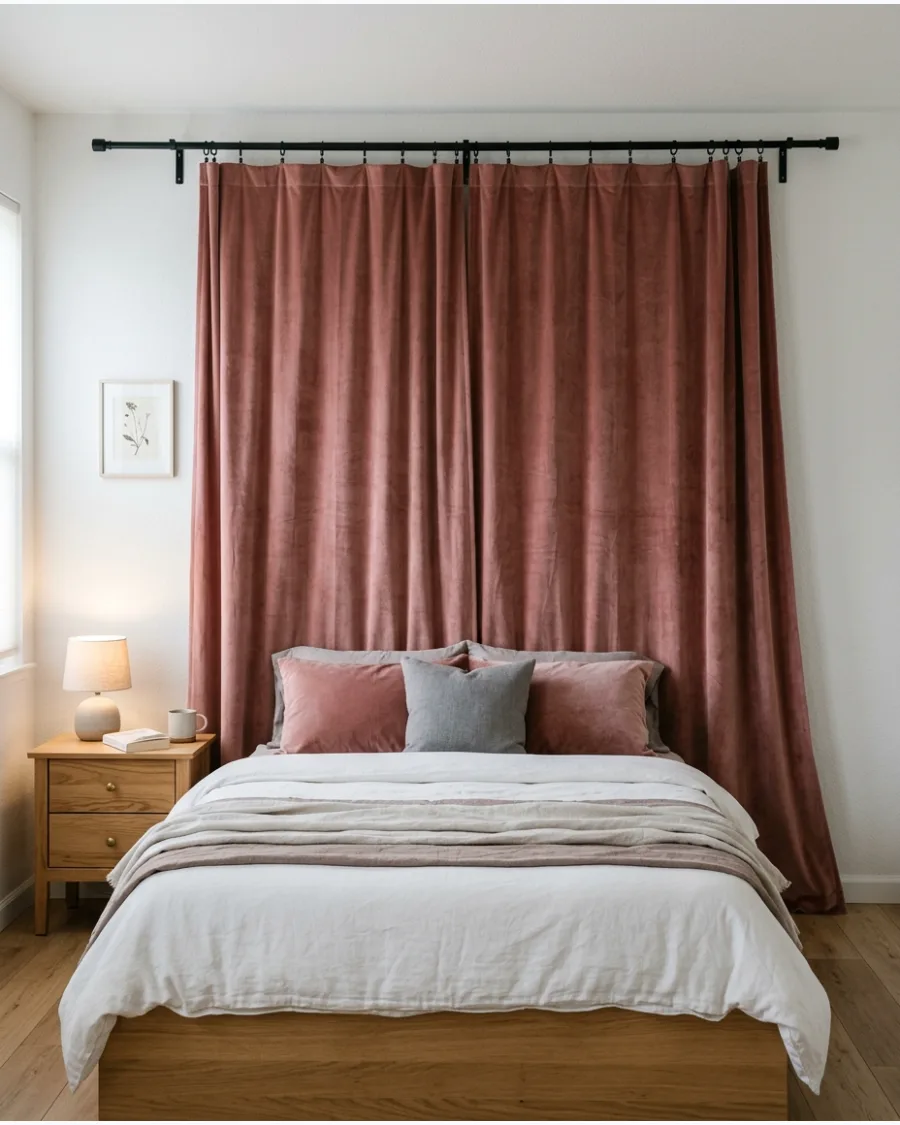
Hanging curtains behind a bed adds height and softens the acoustics of a bedroom. This setup works perfectly for covering unattractive walls or windows that aren't centered.
Choose a curtain rod that is at least 12 inches wider than your bed to create a sense of luxury and scale. Expert opinion: Velvet or heavy linen fabrics provide the best drape and make the backdrop look like a permanent architectural feature.
- Fast installation
- Use blackout liners for a heavier feel
- Washable and easy to change seasonally
Quick win: Use twice as many curtain panels as you think you need to get a full, gathered look that hides the wall completely.
38. Folding Screen Headboard
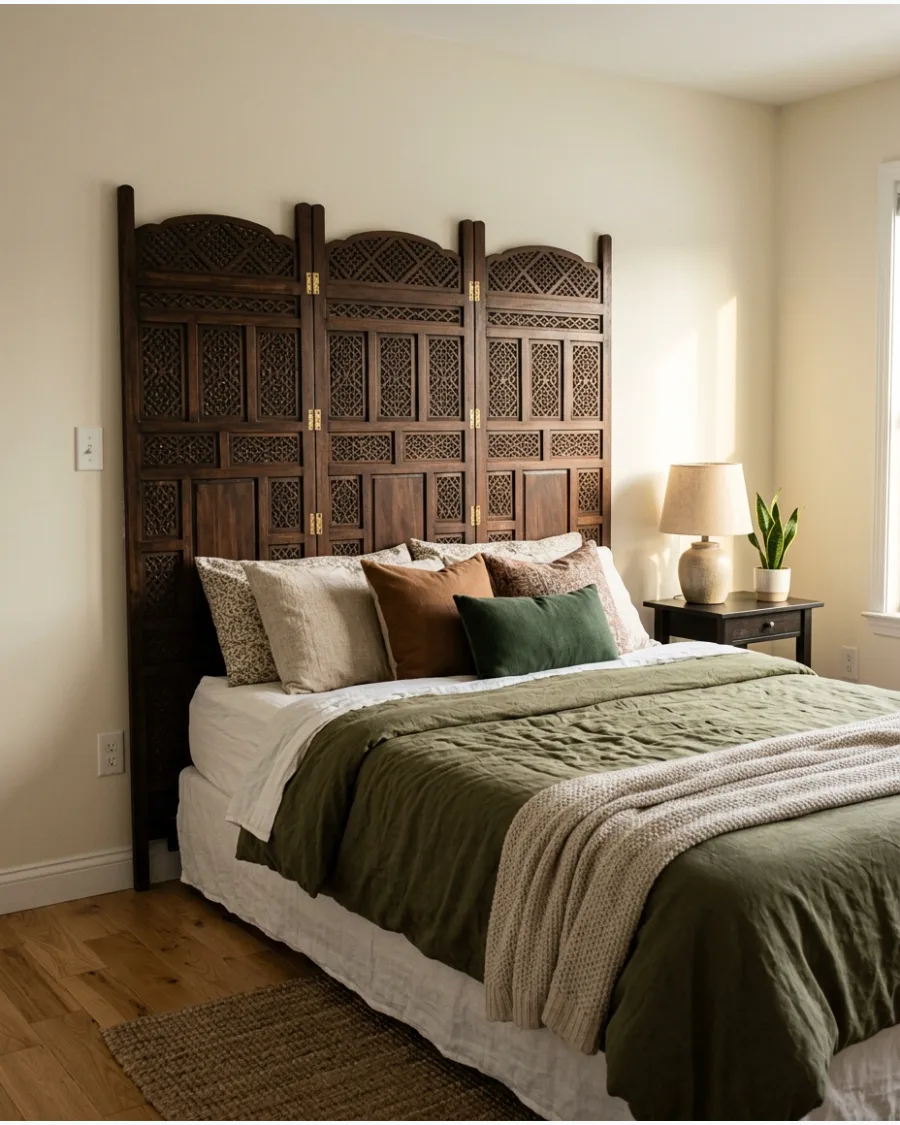
A decorative folding screen provides instant style and height with zero construction required. It acts as a large-scale art piece that anchors the bed in the room.
Anchor the screen to the wall with small L brackets or clear zip ties to ensure it stays upright and safe. Expert opinion: A screen with open fretwork or woven textures adds visual interest without making the room feel smaller.
- No-build solution
- Portable for renters
- Can be painted to match any room
Best shortcut: If the screen is too short, mount a 1×2 wood cleat to the wall and rest the screen on top of it to gain a few inches of height.
39. Repurposed Door Headboard
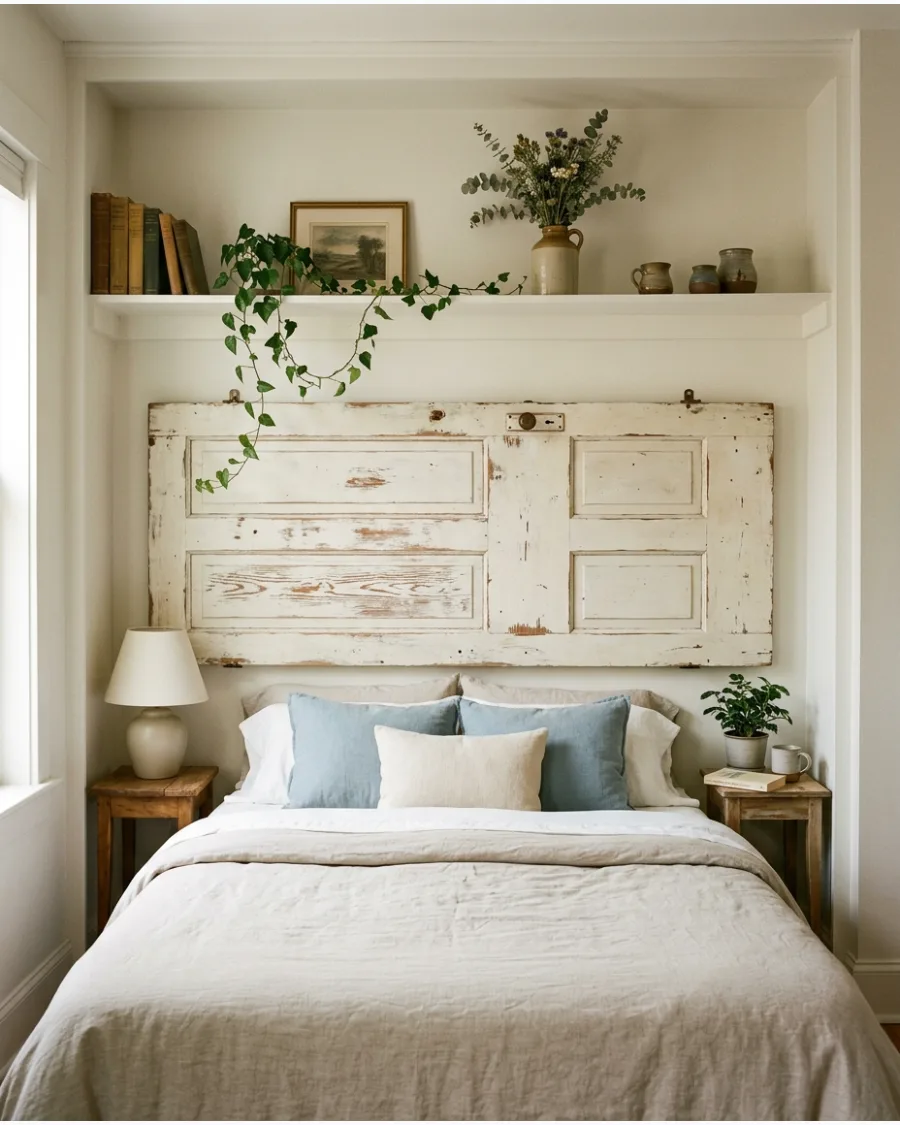
An old paneled door turned on its side creates a sturdy and unique headboard with built-in character. The recessed panels provide a natural frame for the bed.
Sand the surface thoroughly and apply a clear sealer to prevent any old paint from flaking off. Expert opinion: Solid wood doors are quite heavy, so mounting them directly to the wall studs is much safer than attaching them to a bed frame.
- Sourced from salvage yards
- Use heavy-duty French cleats for mounting
- Fits a king or queen bed perfectly
Most people skip this: Remove the old doorknob but leave the hole or fill it with a decorative metal plate for an authentic vintage look.
40. Repurposed Shutter Headboard
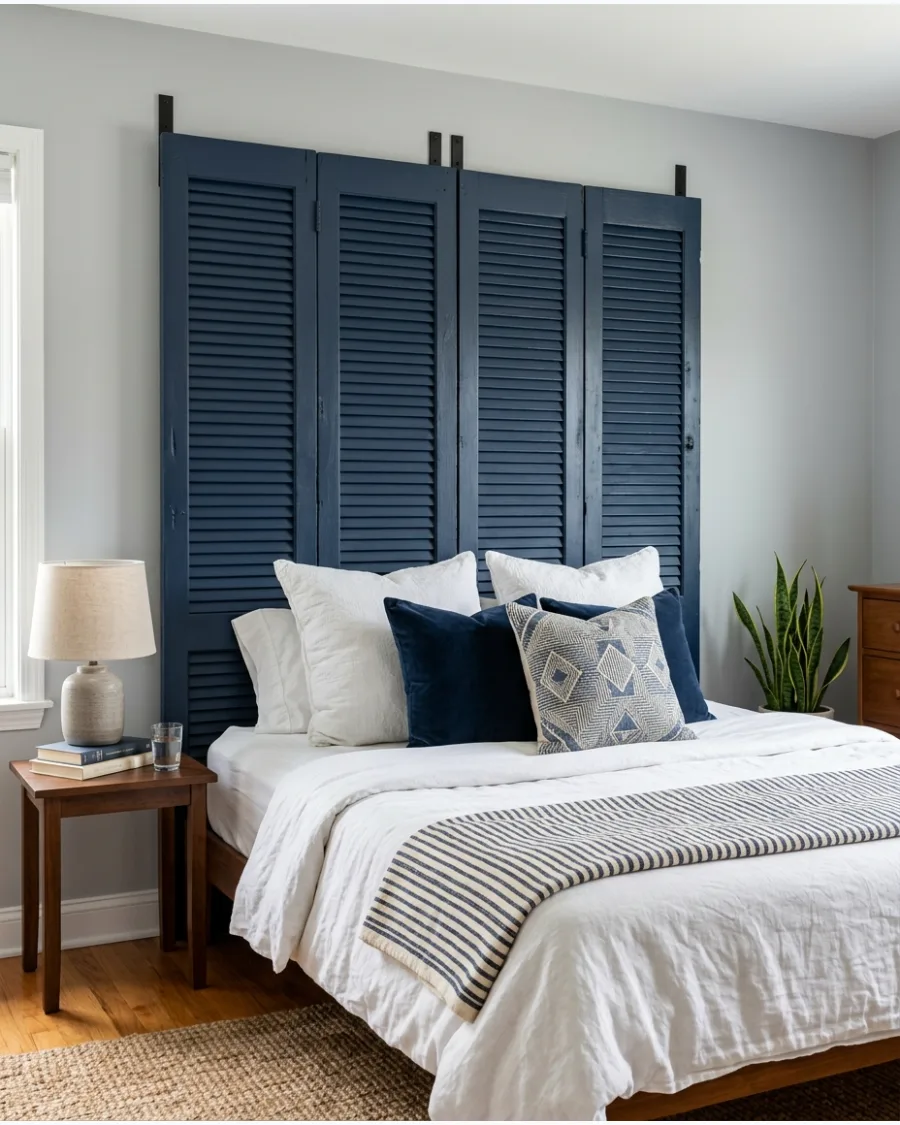
Grouping several shutters together creates a textured, cottage-style headboard that feels airy and light. The horizontal slats add a linear element that draws the eye across the room.
Join the shutters together on the back using flat metal mending plates to create one solid, stable unit. Expert opinion: Painting shutters a bold, dark color makes the traditional louvers look modern and high-contrast.
- Great for adding texture
- Can be found at thrift stores
- Easy to customize with paint
Quick win: Use a duster or a vacuum brush attachment regularly, as the slats on shutters tend to collect dust quickly.
41. Peel-and-Stick Headboard Panels
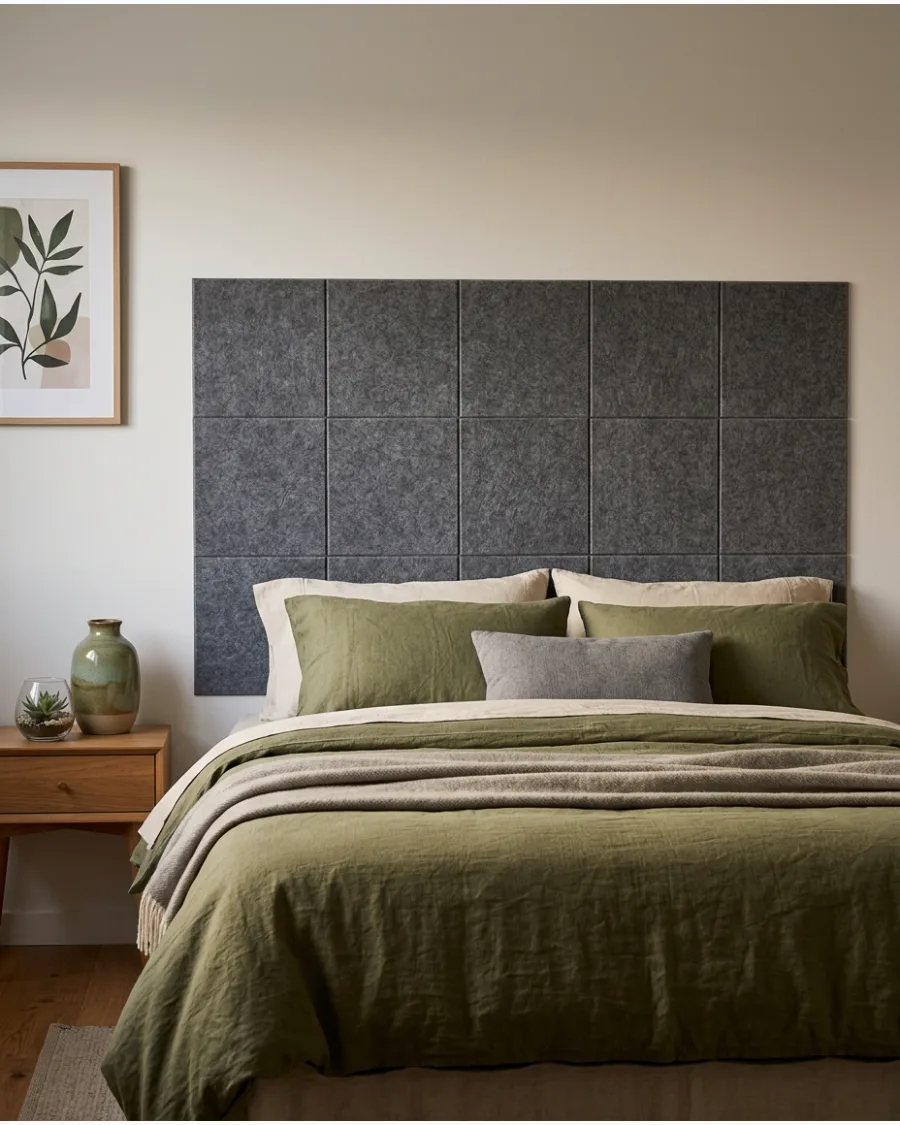
Self-adhesive panels made of felt, wood, or faux leather offer a mess-free way to build a custom headboard in minutes. These are perfect for renters because they can often be removed without damaging the paint.
Map out your design on the wall using a pencil and a level before peeling off the adhesive backing. Expert opinion: Mixing two different colors of felt panels in a checkerboard or random pattern creates a playful, custom look.
- No tools required
- Sound-dampening properties
- Removable for most surfaces
Best shortcut: If your wall has a heavy texture, add a few dots of removable mounting putty to the corners for extra grip.
Functional DIY Headboard Ideas
42. Headboard With a Display Shelf
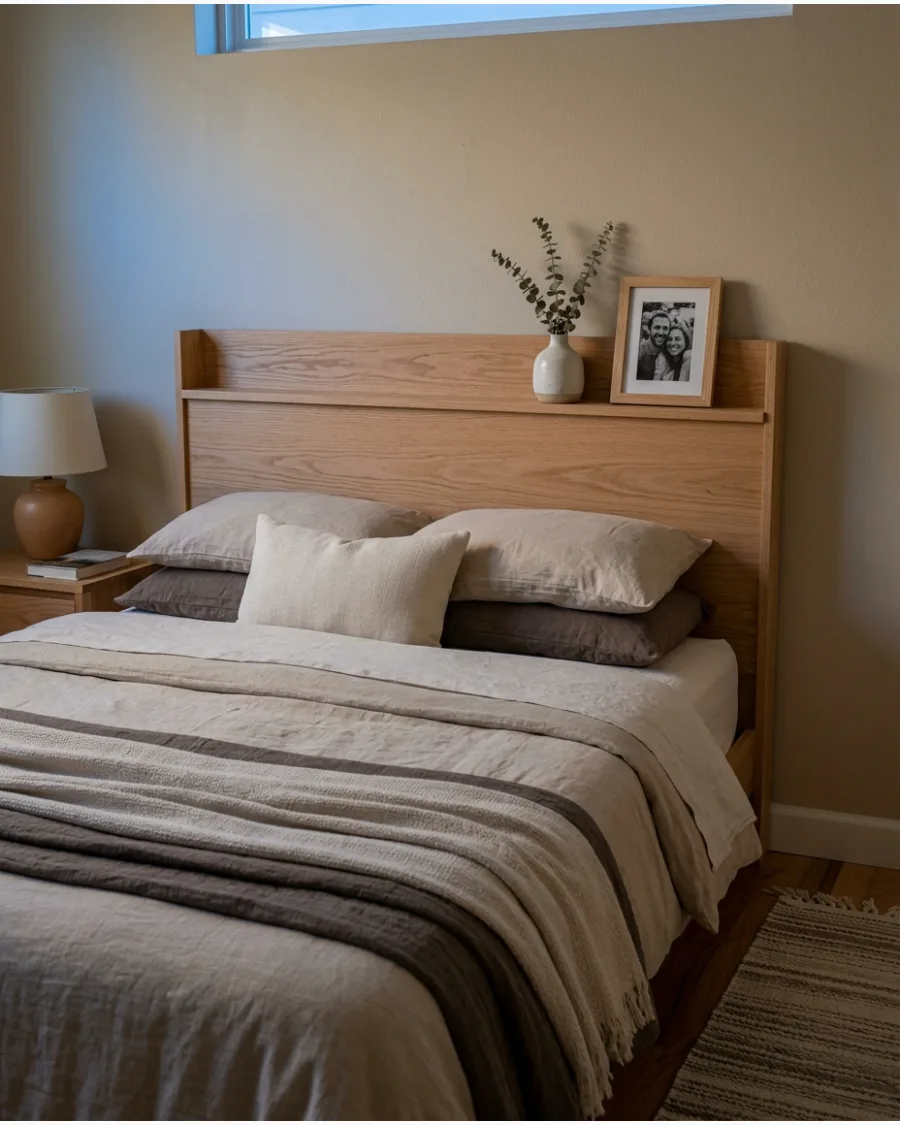
Integrating a shelf into your headboard provides a place for small items without needing a bulky nightstand. It keeps the wall above your head functional and decorative.
Build the shelf at least 12 inches above your pillows to avoid accidentally bumping your head when sitting up. Expert opinion: A shelf with a small lip or edge keeps frames and clocks from sliding off during the night.
- Adds storage
- Requires basic woodworking
- Use sturdy wall anchors
Most people skip this: Line the top of the shelf with a thin strip of felt to prevent items from rattling or scratching the wood.
43. Headboard With Integrated Bedside Tables
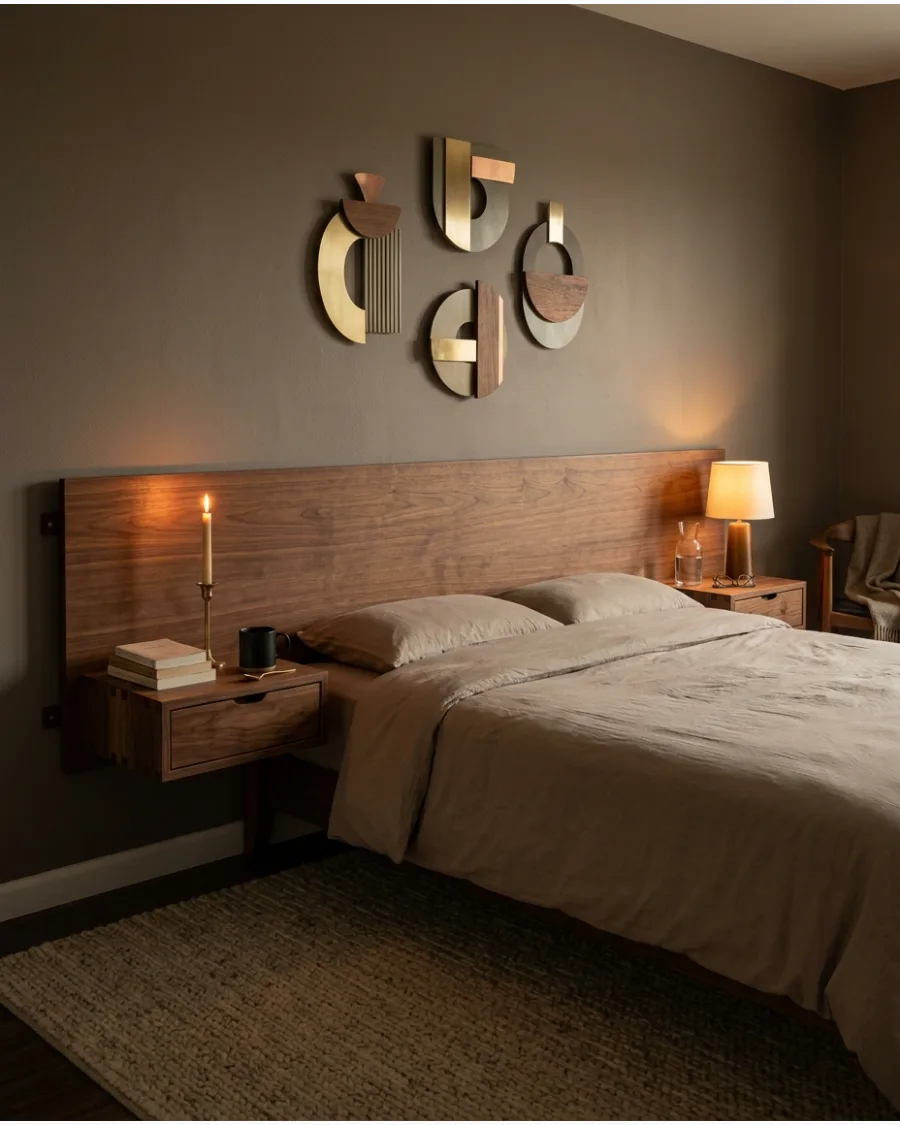
A wide headboard that spans the width of the bed and the nightstands creates a high-end, custom-built look. Attaching floating boxes or shelves directly to the headboard keeps the floor clear for easy cleaning.
Reinforce the floating tables with internal wood blocks to ensure they can support the weight of a lamp and books. Expert opinion: This design is the best way to make a small bedroom feel organized and intentionally designed.
- Saves floor space
- Best for modern styles
- Requires careful measuring
Quick win: Drill a small hole in the back of the floating tables to hide phone charging cables for a clutter-free look.
44. Headboard With Reading Lights
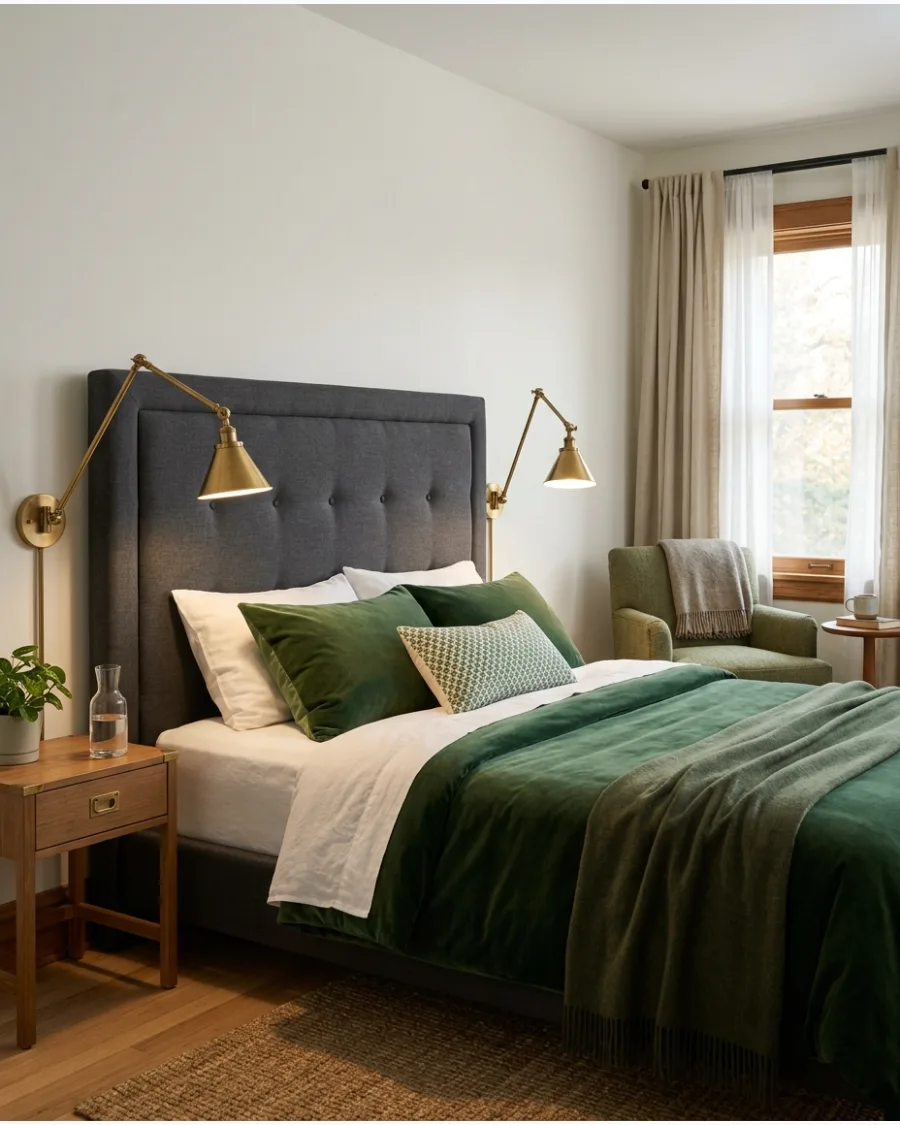
Mounting lights directly to your headboard frees up space on your nightstand and puts the light exactly where you need it. Sconces with adjustable arms are the most practical for reading in bed.
Position the lights so the bottom of the shade is roughly at shoulder height when you are sitting up. Expert opinion: Plug-in sconces are easier for DIYers because they don't require opening the wall for electrical boxes.
- Improves bedroom lighting
- Use cord covers for a clean look
- Ideal for shared beds
Best shortcut: Use cord covers that match your wall or headboard color to make the wiring practically invisible.
45. Storage Headboard With Sliding Panels
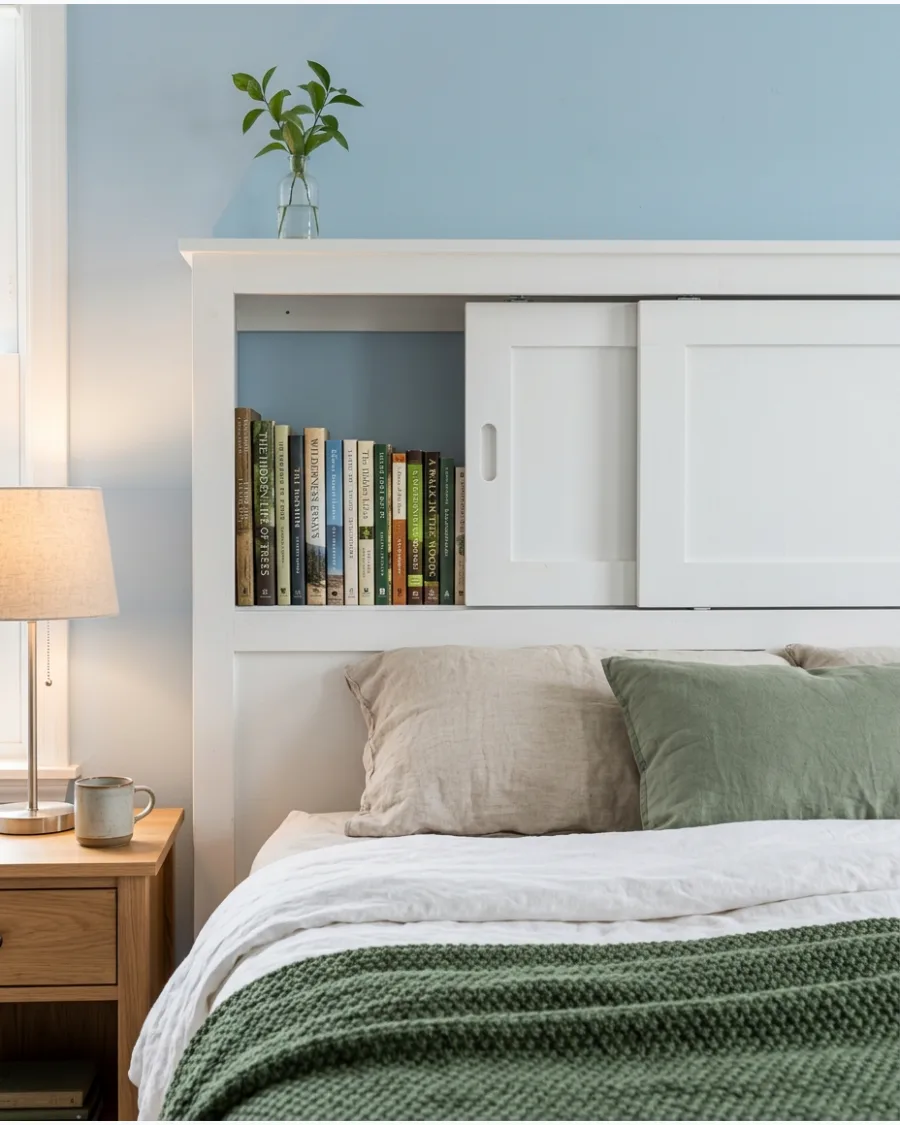
A deep headboard frame can hide a surprising amount of storage for extra pillows, blankets, or books. Sliding panels on the front keep the look clean while providing easy access to the items inside.
Use plastic or metal sliding tracks to ensure the panels glide smoothly without sticking. Expert opinion: This is a great solution for rooms without enough space for a traditional dresser or large closet.
- High storage capacity
- Intermediate DIY project
- Replaces need for extra furniture
Most people skip this: Adding a small strip of weatherstripping to the inside of the sliding panels prevents them from banging loudly when closed.
Frequently Asked Questions
How do I attach a DIY headboard to the wall without damaging it?
Use a French cleat for a secure, professional mount, or try heavy-duty Command strips for lightweight designs if you're a renter. For a completely damage-free option, a 'leaning' headboard secured by the bed frame's weight works beautifully.
What is the cheapest material for a DIY headboard?
Plywood is a budget-friendly staple, but you can also repurpose old shutters or use fabric-wrapped insulation foam boards for a custom look. These materials are incredibly affordable and easy to find at most local home improvement stores.
How much wider than the bed should a headboard be?
Aim for a headboard that is about 2 to 4 inches wider than your mattress on each side to ensure a balanced, high-end look. For example, a standard Queen headboard should be roughly 62 to 64 inches wide to account for bedding and blankets.
Can I make a headboard without power tools?
Absolutely! You can create a stunning upholstered headboard using just a manual staple gun or use peel-and-stick wood planks for a rustic, tool-free accent. These methods allow you to achieve a professional finish without needing a single power drill.
What fabric is best for an upholstered headboard?
Durable, easy-to-clean fabrics like polyester-linen blends, performance velvet, or faux leather are ideal for long-lasting style. These materials resist wear and can be easily spot-cleaned, making them perfect for a piece you'll lean against every night.