55 Shared Bedroom Ideas for Kids in Small Spaces

This post may contain affiliate links: full affiliate disclosure.
Sharing a room doesn't have to feel crowded or chaotic. Smart layouts and vertical storage can turn even the smallest bedroom into a functional, organized space for multiple children.
SPACE-SAVING SHARED BEDROOM LAYOUTS
1. Classic Twin Bunk Beds
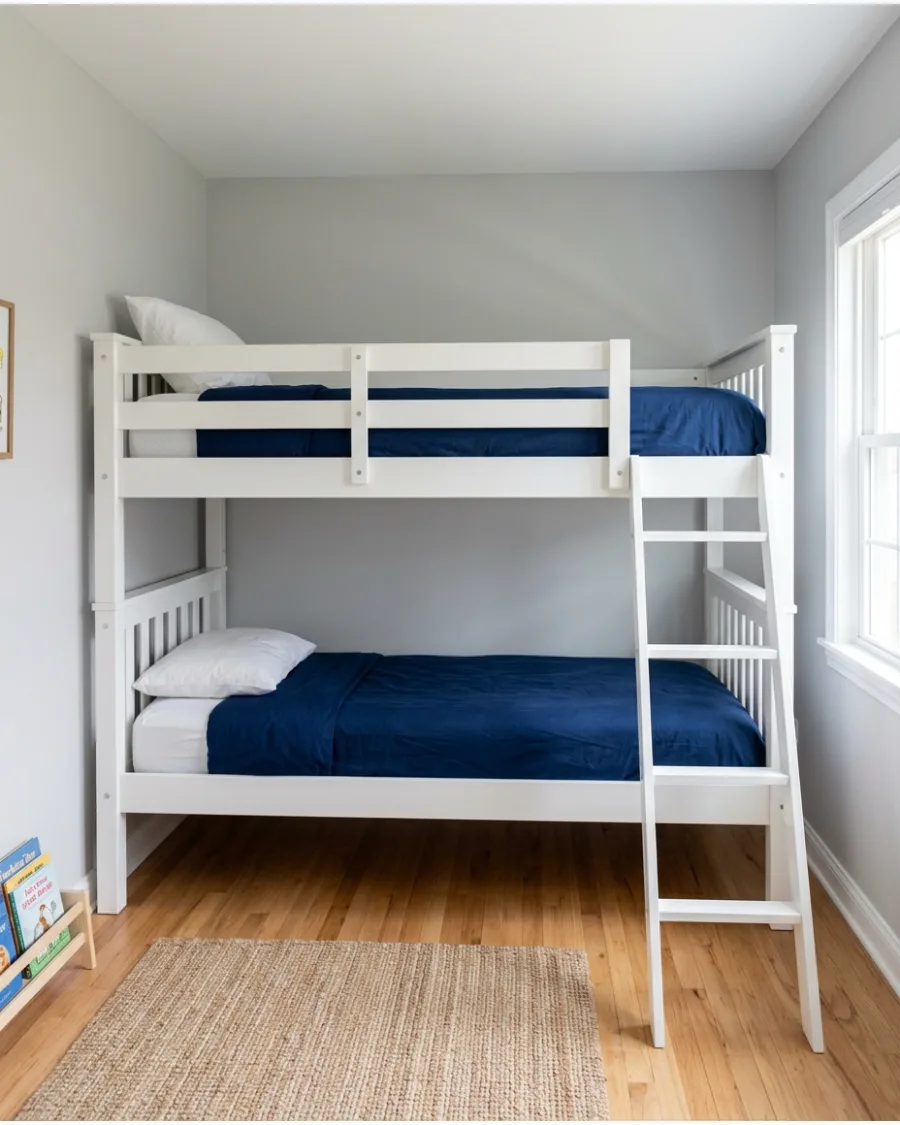
Stacking sleeping areas is the fastest way to save floor space in a tiny room. Use a white or light-colored frame to keep the furniture from feeling like it is closing in on the space.
Choose a bunk bed with a sturdy, vertical ladder to keep the footprint as small as possible. A solid wood frame lasts longer than flimsy metal and feels more stable for growing kids.
- $300-$600 budget and 2 hours for assembly
- Secure the frame to wall studs for safety
- Solid wood frames reduce creaking and noise
Quick win: Use high-quality bunkie boards instead of bulky box springs to maximize headroom for the child on the bottom bunk.
2. Built-In Bunk Bed Wall
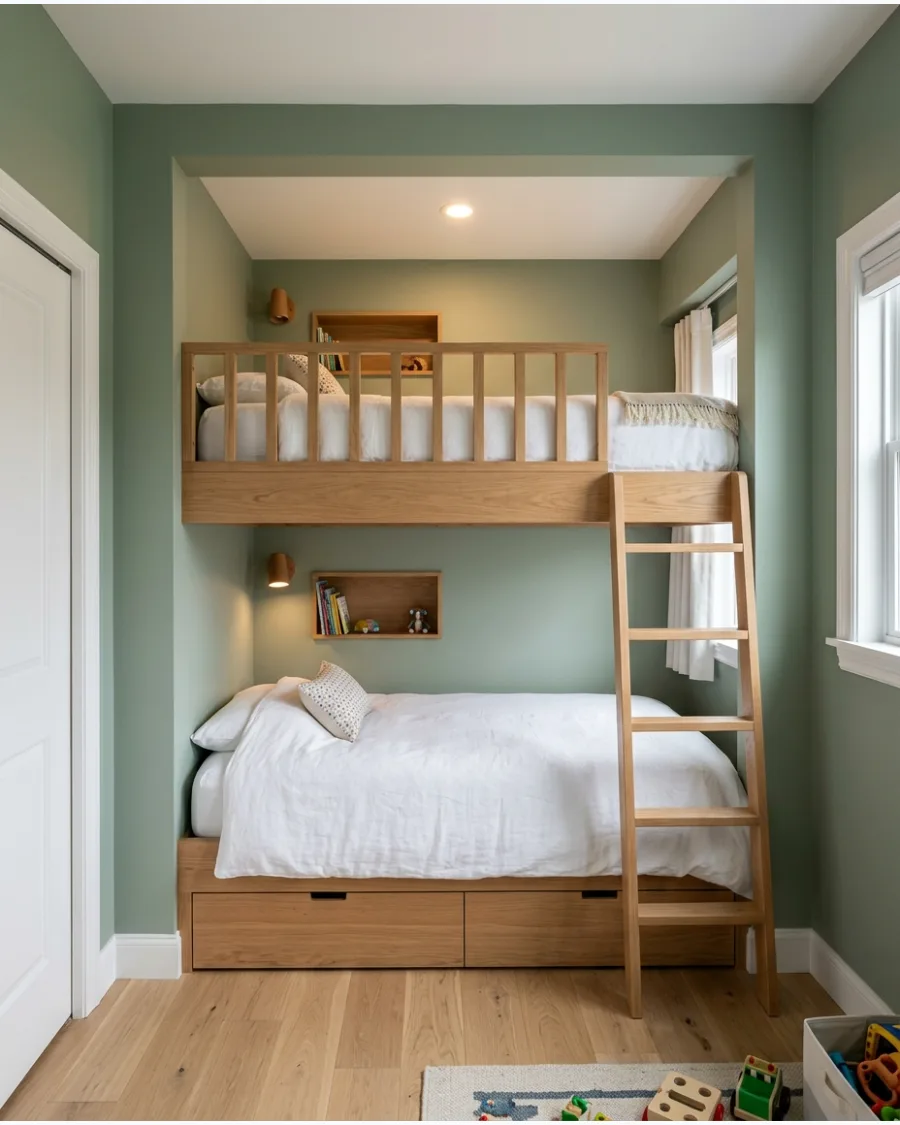
Custom built-ins turn a single wall into a sleeping and storage hub. This design eliminates awkward gaps where dust and lost toys tend to gather.
Install individual reading lights inside each bunk niche to give every child a sense of personal space. Integrated drawers under the bottom bunk act as a built-in dresser to save even more floor area.
- $1,500+ budget and 3-5 days for construction
- Hire a professional carpenter for a seamless look
- Great for permanent home layouts and high ceilings
Best shortcut: Use paint-to-match trim around the bunk opening to make the unit look like part of the original architecture.
3. L-Shaped Bunk Beds
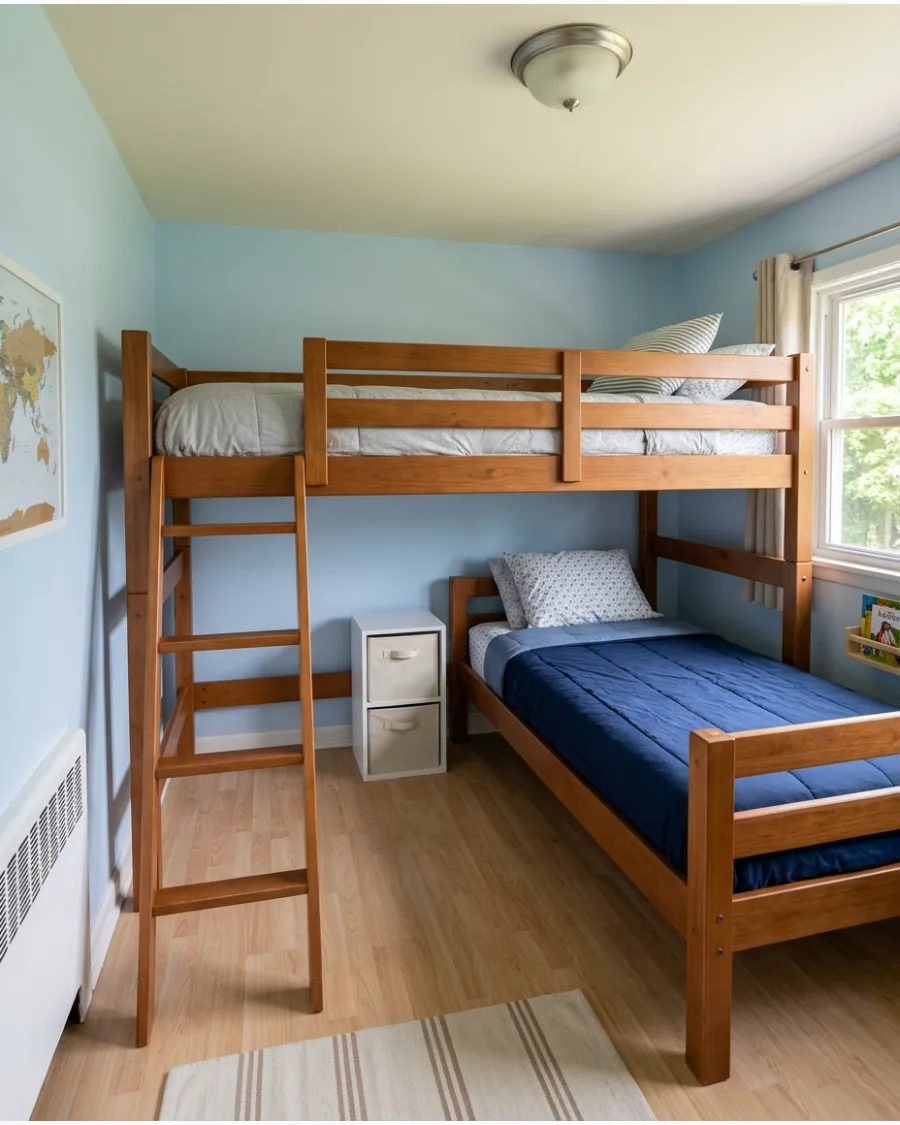
Set the beds perpendicular to each other to open up the center of the room. This layout makes the bottom bunk feel less enclosed and dark than a standard stack.
Place a small desk or a storage chest in the empty corner created by the L-shape. It is a smart way to utilize a corner that usually goes to waste in a small bedroom.
- $400-$800 budget and 3 hours for assembly
- Requires clear corner space away from doors
- Maximizes under-bed floor space for activities
Most people skip this: Measure the door swing carefully before choosing an L-shaped layout to ensure the bottom bed doesn't block the entrance.
4. Offset Bunk Beds
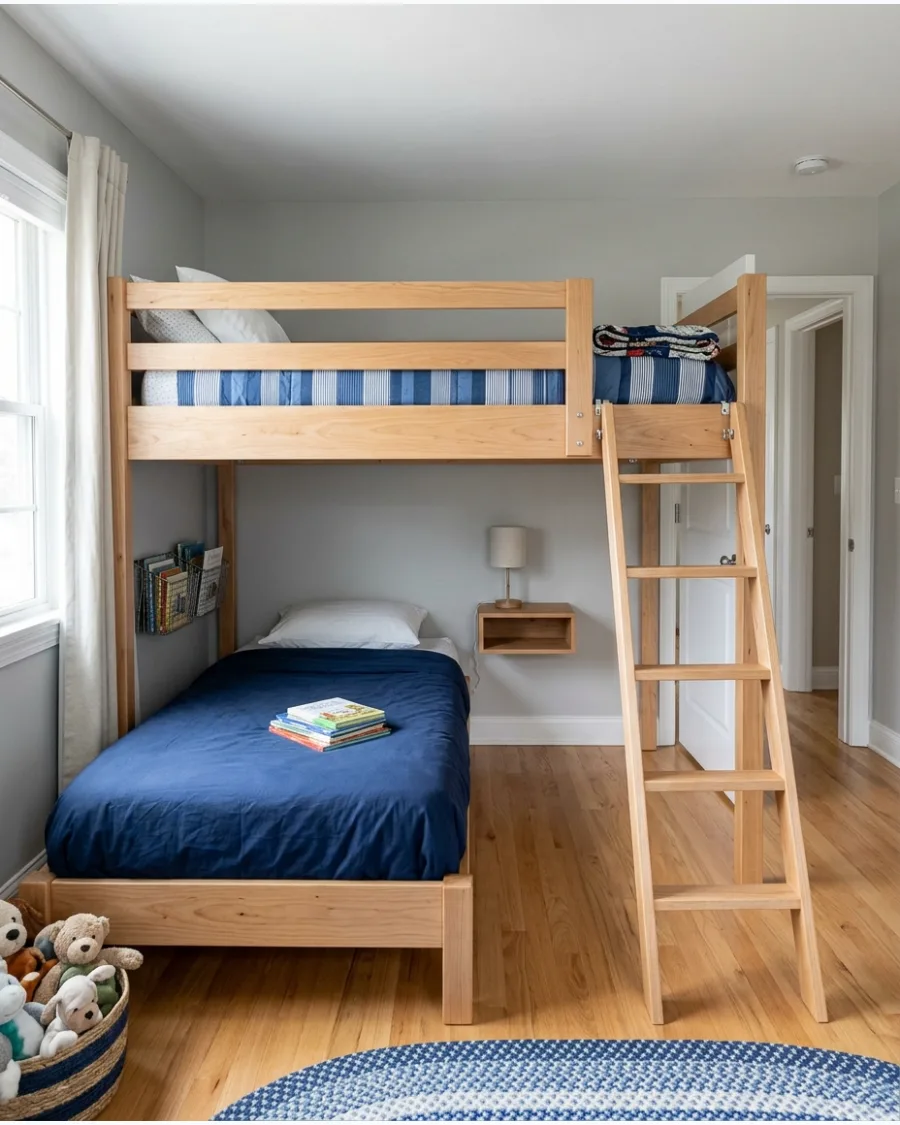
Shift the top bunk so it does not completely overlap the bottom one. This staggered look provides extra room for a built-in shelf or more headroom for a taller child on the bottom.
Use the extra wall space next to the bottom bunk for a floating nightstand or a wall-mounted book basket. This configuration feels less claustrophobic for the child sleeping below.
- $500-$900 budget and 3 hours for assembly
- Check weight capacity for the cantilevered section
- Ideal for medium-length walls in narrow rooms
Quick win: Use the offset space for a tall floor lamp to brighten the dark corner often created by standard bunks.
5. Low Bunk Beds
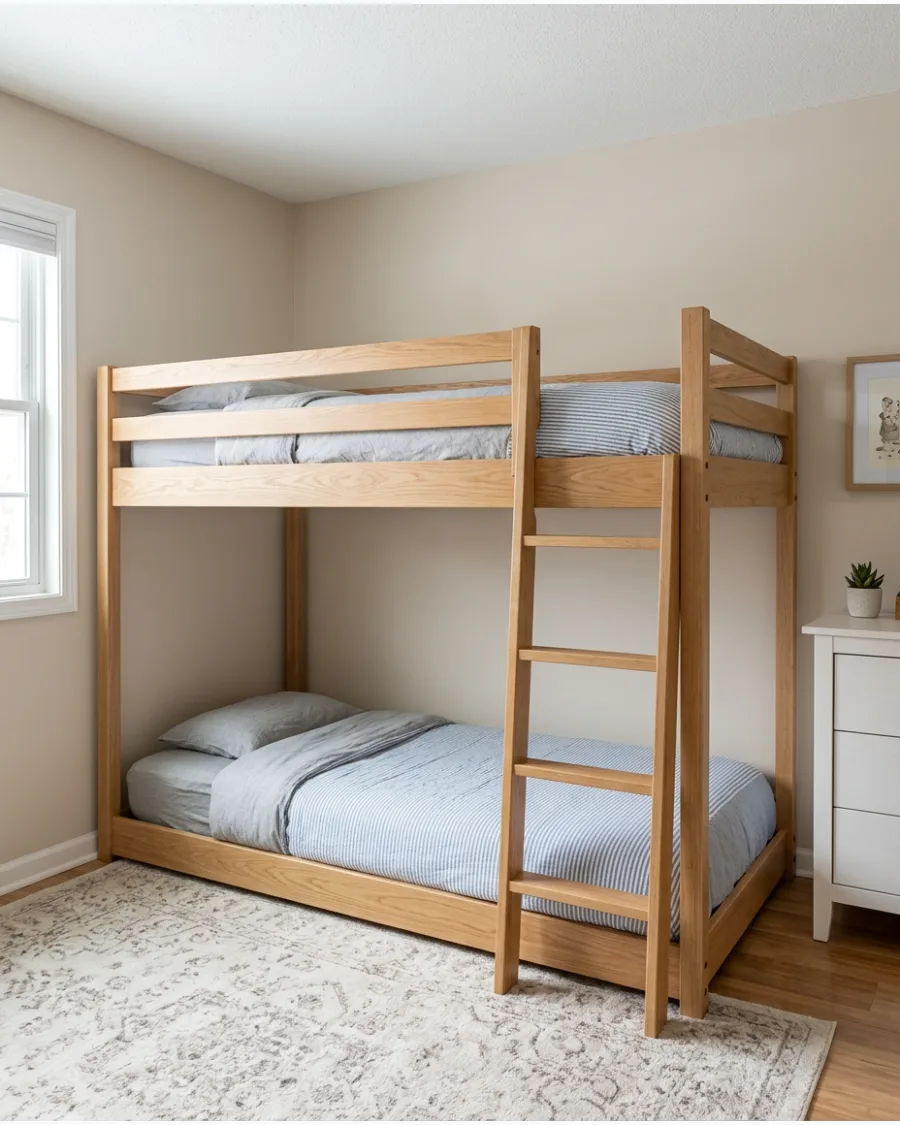
These beds sit closer to the ground than traditional bunks. They are safer for younger children and work perfectly in rooms with standard or low ceilings.
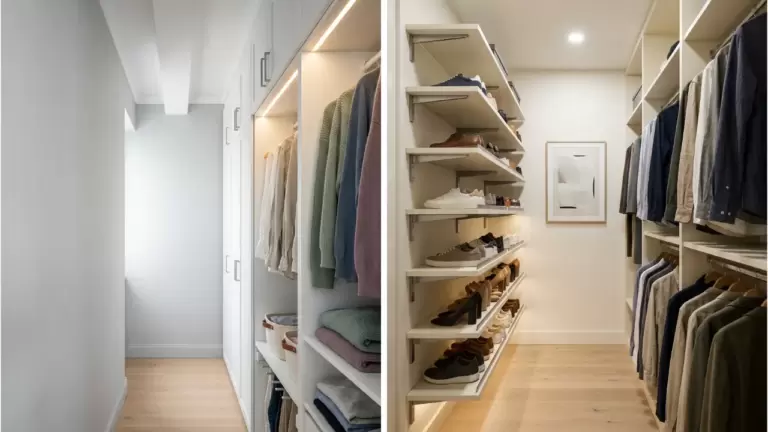
Pick a model where the bottom mattress rests directly on the floor to maximize the vertical gap between sleepers. This prevents the top bunk from feeling too close to the ceiling for comfort.
- $250-$500 budget and 2 hours for assembly
- Best for 8-foot ceilings to prevent head bumps
- Safer for toddlers transitioning to big-kid beds
Best shortcut: Look for 'junior' bunk beds, which are often shorter in length and height for very tight spaces.
6. Corner Twin Bed Layout
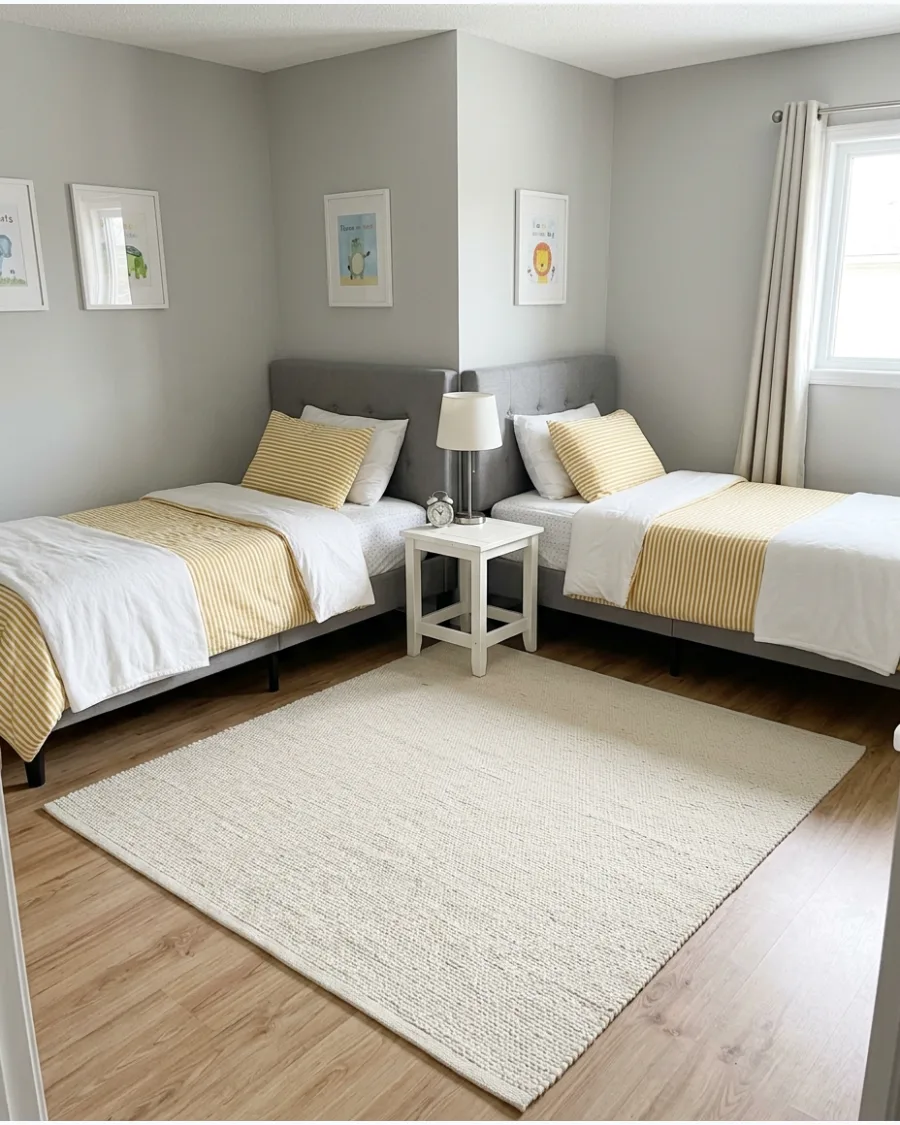
Line two twin beds along adjoining walls so they meet in a corner. This leaves the entire middle of the room open for a rug and playtime.
Connect the two beds with a square corner table that can hold a shared lamp and alarm clock. It creates a cozy nook feeling that makes a shared room feel more like a suite.
- $200-$400 budget and 1 hour for setup
- Uses two walls and keeps the center floor open
- Great for square rooms with centered doors
Most people skip this: Use beds without footboards to keep the room looking open and prevent the layout from feeling like a fence.
7. Parallel Twin Beds
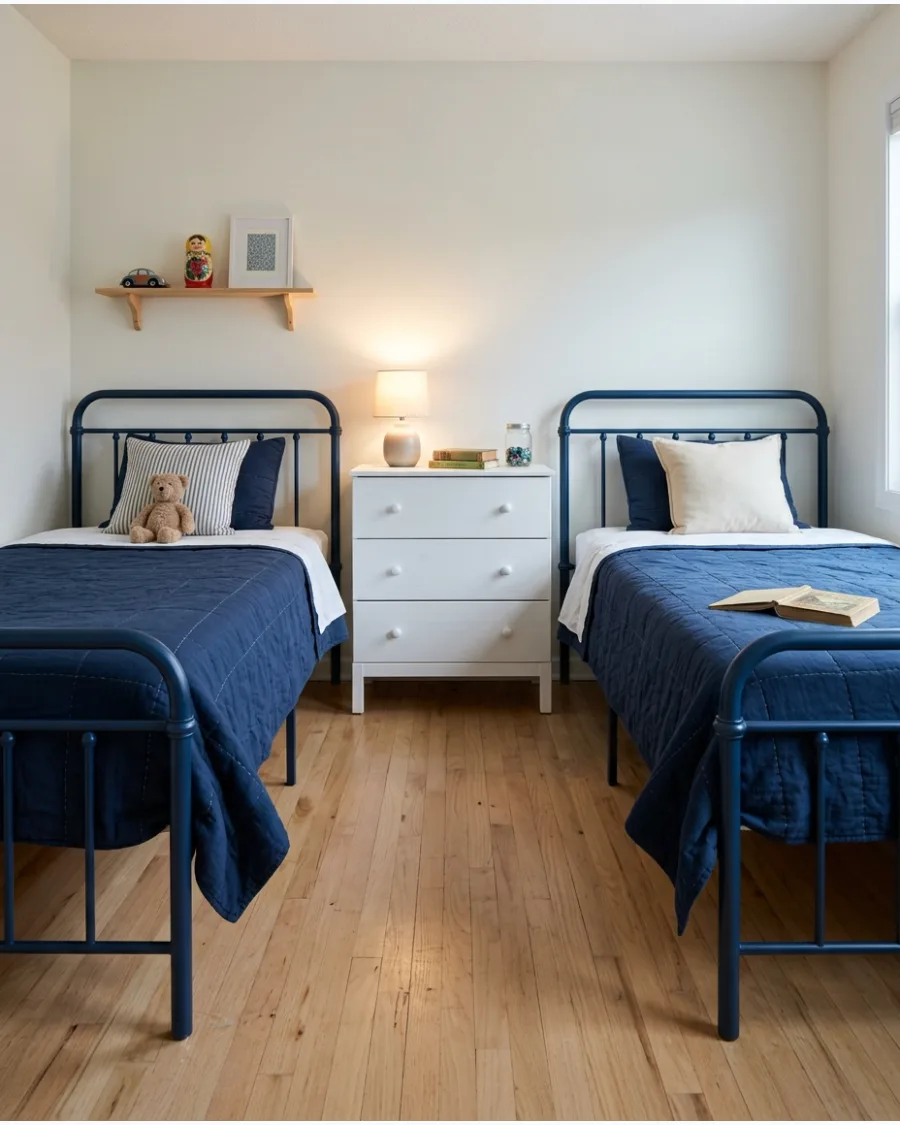
Standard side-by-side placement works best for symmetrical rooms.
It provides each child with their own clear side of the room for a sense of ownership. Place a single tall dresser between the beds to act as both a shared nightstand and clothing storage. Matching bedding ties the room together so it looks intentional rather than cluttered.
- $300-$700 budget and 1 hour for setup
- Requires a wide wall without windows or doors
- Best for older children who want their own space
Quick win: Use a large shared rug that fits under both beds to anchor the space and make the room feel wider.
8. Head-to-Head Twin Beds
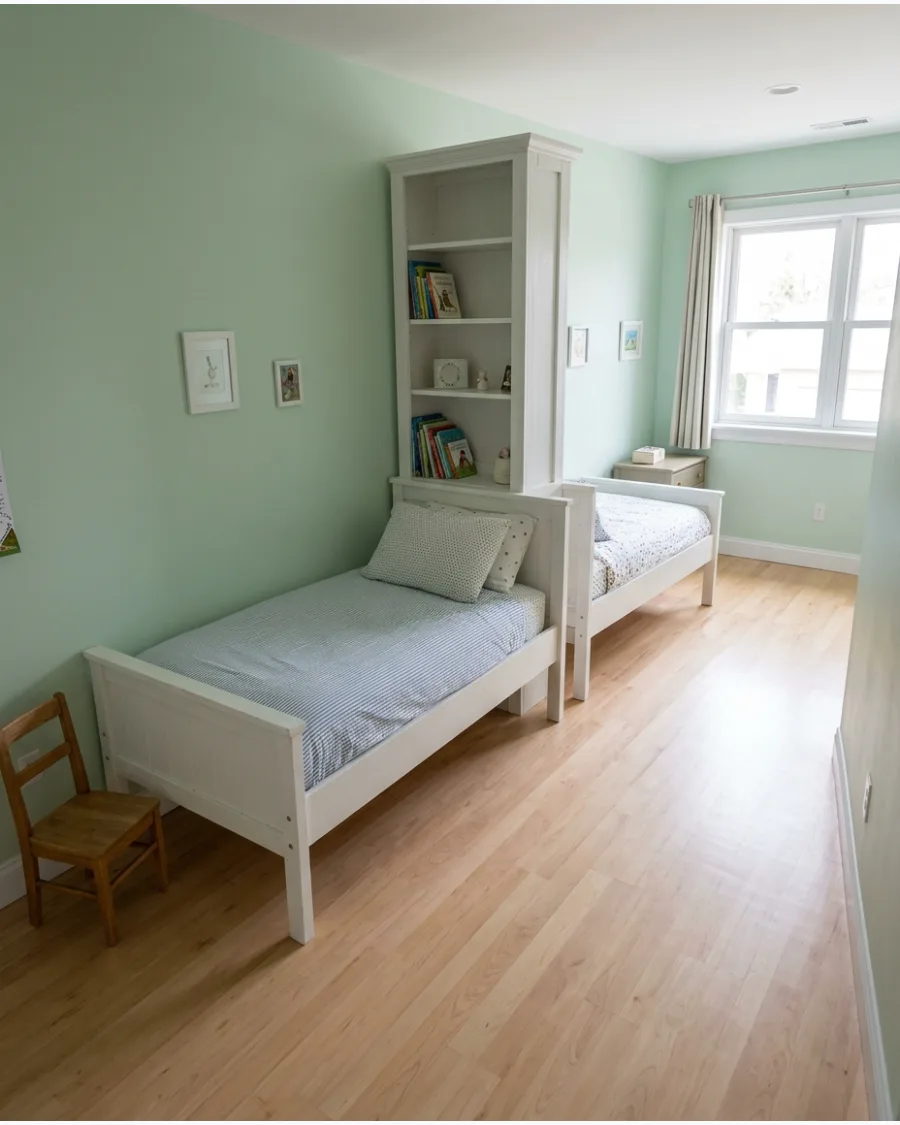
Arrange beds end-to-end along one long wall. This is the best solution for narrow, railroad-style bedrooms where side-by-side beds won't fit.
Install a tall bookshelf between the two headboards to provide a physical privacy barrier. It gives each child a sense of their own room within the shared space.
- $200-$500 budget and 1 hour for setup
- Fits very narrow rooms where bunks are too tall
- Creates distinct zones for each child
Best shortcut: Use wall-mounted sconces above each bed to save space on the shared shelving unit.
Small Shared Kids Bedroom Ideas
9. Linear Foot-to-Foot Bed Layout
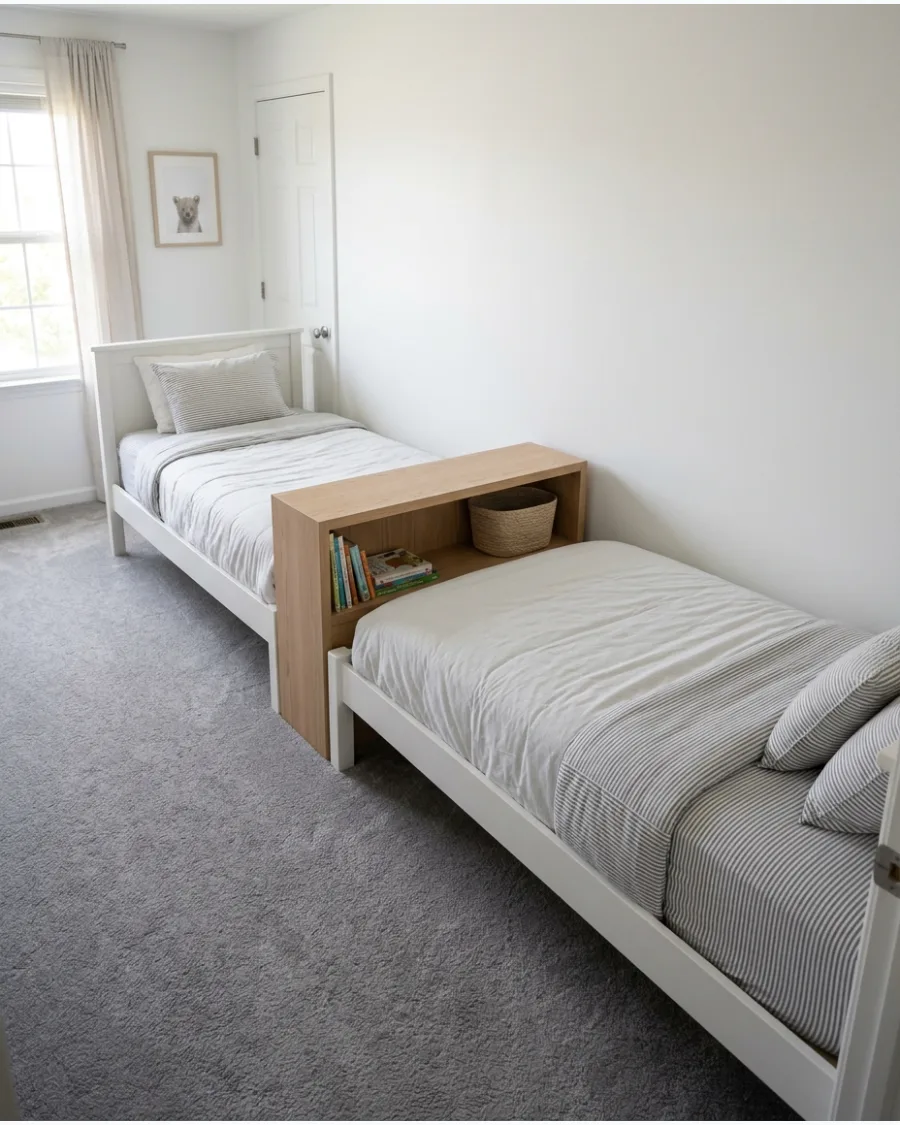
Aligning two twin beds along a single long wall maximizes central floor space for play and movement. This configuration creates a streamlined look that makes narrow rooms feel significantly wider than traditional side-by-side placement.
Place a low, narrow bookshelf or a storage cubby between the feet of the beds to serve as a shared nightstand and a clear boundary. It is often more practical than bunk beds for rooms with low ceilings or for children who are not yet ready for climbing.
- Sourcing: Measure the total wall length to ensure two standard 75-inch twin frames plus a 12-inch divider will fit the available span.
- Setup: Position the frames flush against the wall and use rubber furniture cups under the legs to prevent the beds from shifting out of alignment.
- Adaptation: Use contrasting bedding colors for each sleeper to define personal territory without breaking the visual flow of the linear arrangement.
Most people skip this: Bolting the central divider or a long shared headboard directly to the wall prevents pillows from slipping into the gaps between the furniture.
SPACE-SAVING SHARED BEDROOM LAYOUTS
10. Daybed With a Trundle
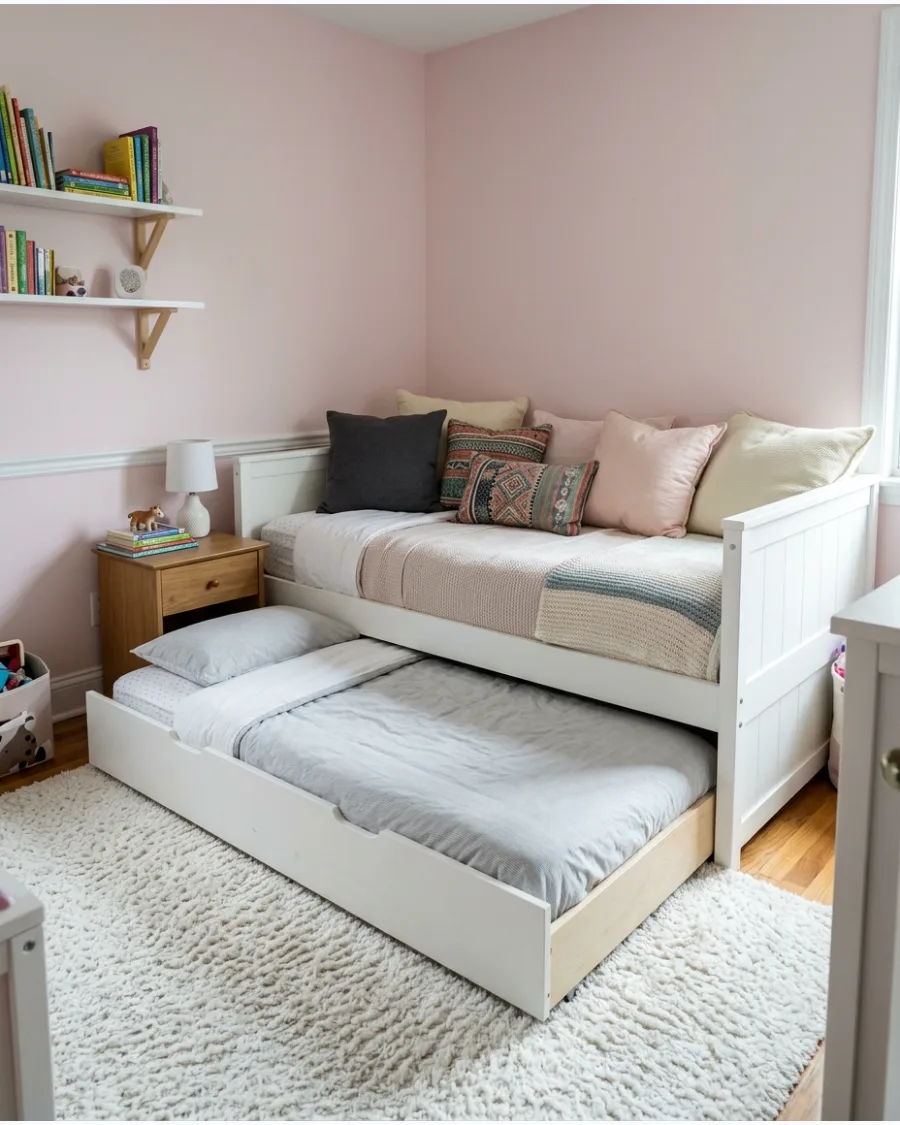
A daybed looks like a sofa during the day and hides a second mattress underneath. This is the ultimate space-saver for rooms that need to double as a playroom or office.
Choose a trundle with pop-up legs if you want the second bed to sit at the same height as the main one. It keeps the floor clear for activities until bedtime.
- $350-$600 budget and 2 hours for assembly
- Hidden bed stays out of sight during the day
- Dual-purpose furniture is ideal for tiny rooms
Quick win: Use a zippered bedding set on the trundle mattress to make it much easier to tuck away every morning.
11. Loft Bed With a Second Bed Below
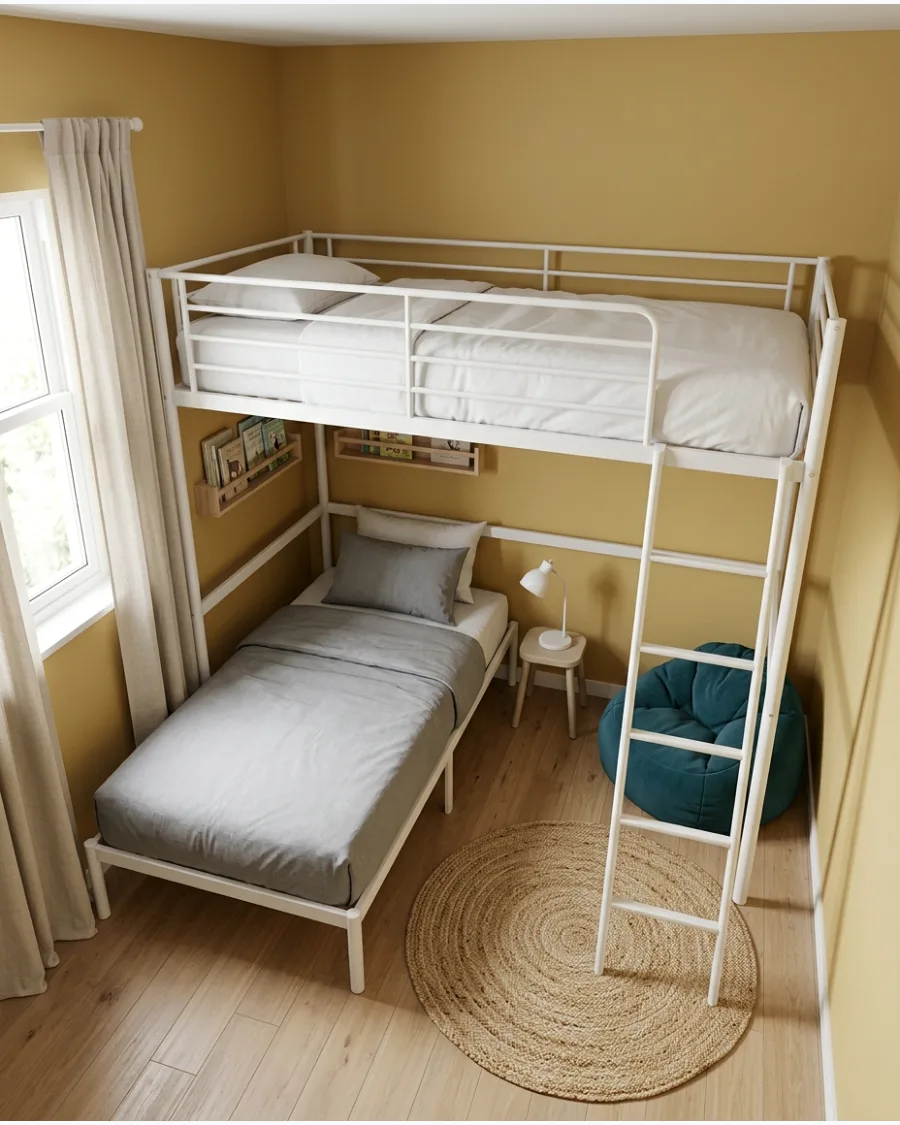
Use vertical space by lofting one bed and placing the second bed underneath at a 90-degree angle. This creates a cozy cave for the bottom sleeper while freeing up floor space for a desk or chair.
Position the bottom bed perpendicular to the top bunk to leave room for a small rug or bean bag in the corner. Lofting beds is the most effective way to gain square footage in a tiny room without moving any walls.
- Budget $400 to $800 for a quality metal or wood loft frame.
- Assemble the frame against two corner walls for maximum stability.
- Choose a model with a built-in ladder to save even more floor space.
Quick win: Use a clip-on lamp for the top bunk so the child doesn't have to climb down in the dark.
12. Raised Platform Bedroom
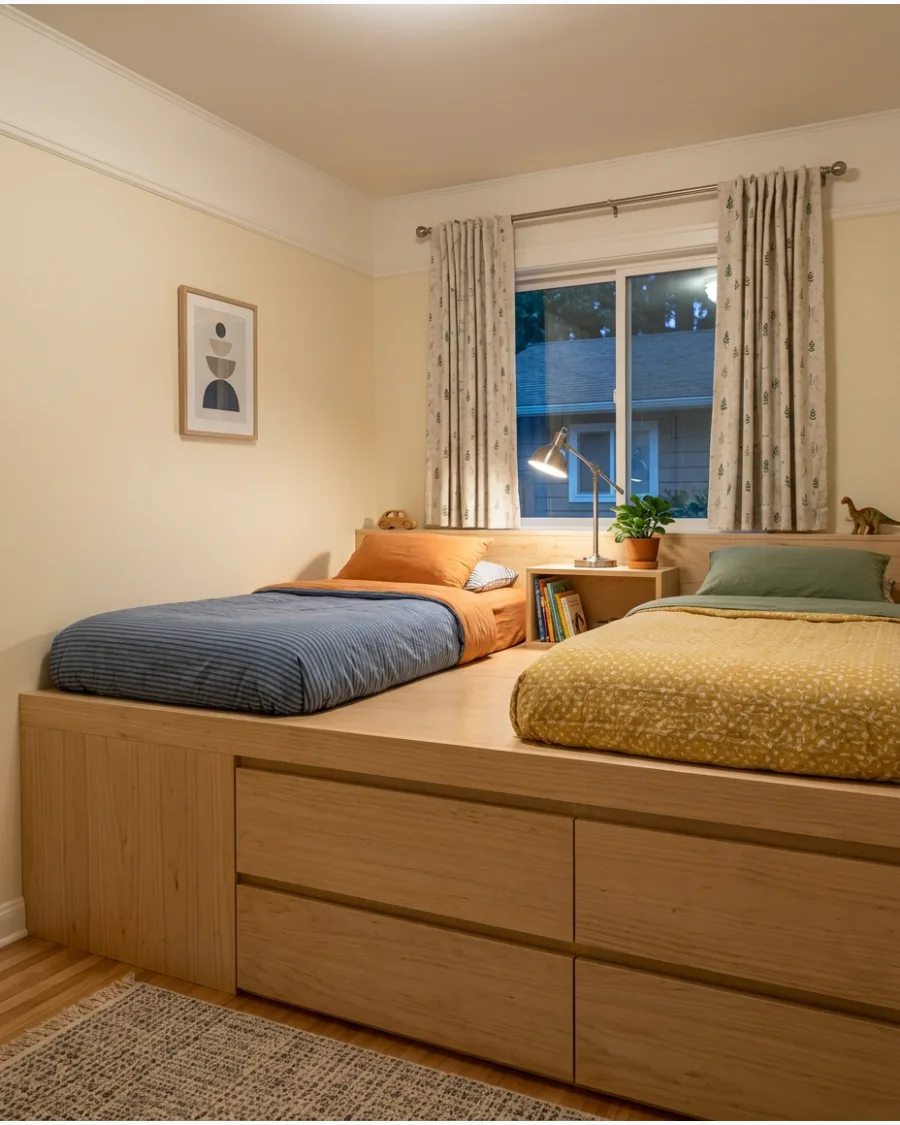
Build a custom wooden platform that elevates the mattresses and creates massive storage space underneath. This design eliminates the need for bulky dressers that take up valuable floor space.
Install deep pullout drawers into the side of the platform to hold seasonal clothing or sports gear. Platforms work best in rooms with high ceilings to prevent a cramped feeling at the top.
- Costs $1,000 or more for custom professional carpentry.
- Requires a room with at least 9-foot ceilings for comfortable clearance.
- Incorporate a small set of steps with anti-slip tread for safety.
Most people skip this: Add a layer of carpet or a soft rug on top of the platform to keep the sleeping area warm and quiet.
13. Alcove-Style Sleeping Nooks
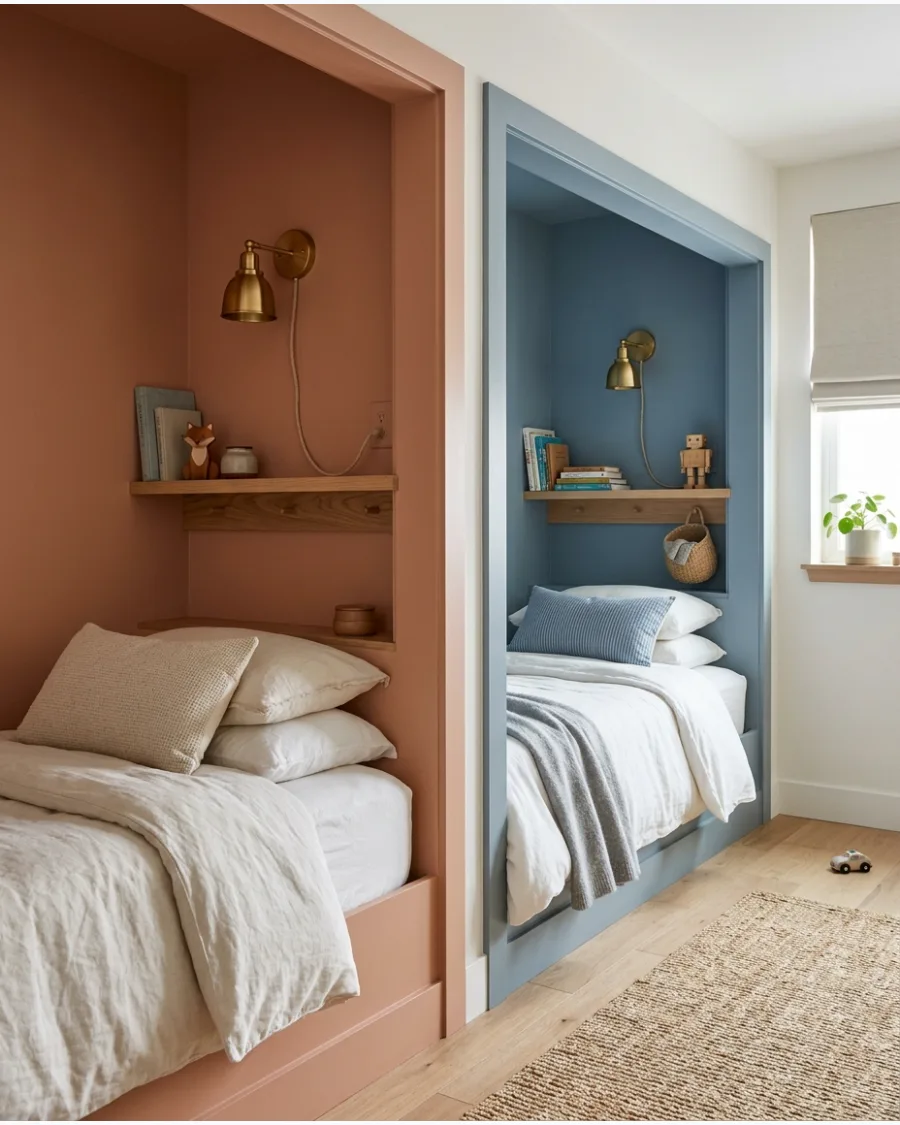
Frame out two individual sleeping nooks with drywall or plywood to give each child a sense of privacy. Each nook should have its own shelving and light to create a personal sanctuary within the shared room.
Paint the interior of each nook a different color to help children feel ownership over their specific space. These enclosures also help block out light if one child stays up later than the other.
- Budget $500 to $1,200 for framing, drywall, and paint materials.
- Plan for 2 to 3 days of construction time including drying and sanding.
- Install individual light switches inside each nook for independent control.
Quick win: Hang a small curtain across the opening for total privacy and a cozy fort vibe.
14. Bunk Beds Across the Window Wall
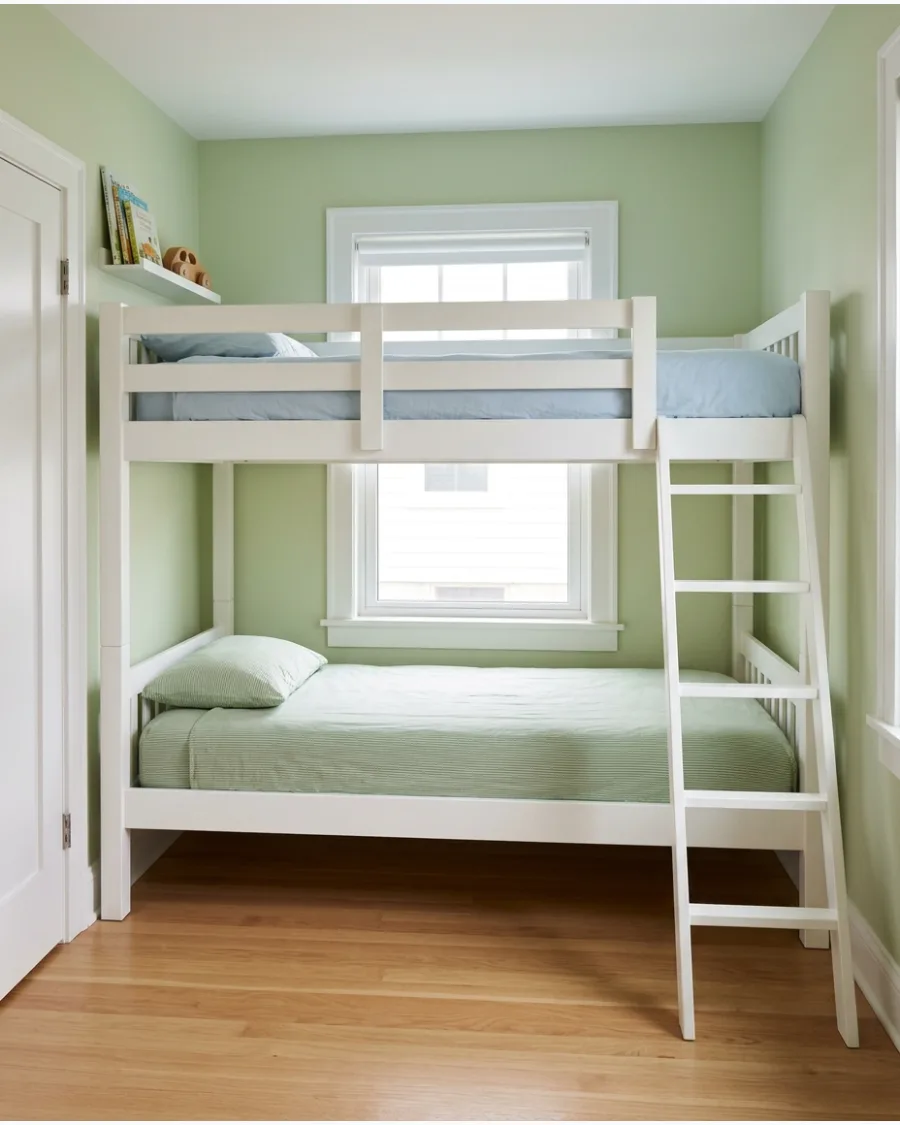
Build bunk beds around a central window to utilize a wall that is often left empty. This layout provides natural light for both sleepers and keeps the rest of the room open for play.
Use a low-profile window shade that sits inside the frame so it doesn't get caught in the bedding. Framing a window this way makes the room feel much larger by drawing the eye toward the light.
- Budget $600 to $1,000 for materials or a semi-custom frame.
- Measure the window frame carefully to ensure the bed doesn't block the glass.
- Ensure the top bunk railing is high enough to be safe near the window.
Most people skip this: Check local fire codes to ensure the window remains a safe secondary exit point.
15. Built-In Beds Under a Sloped Ceiling
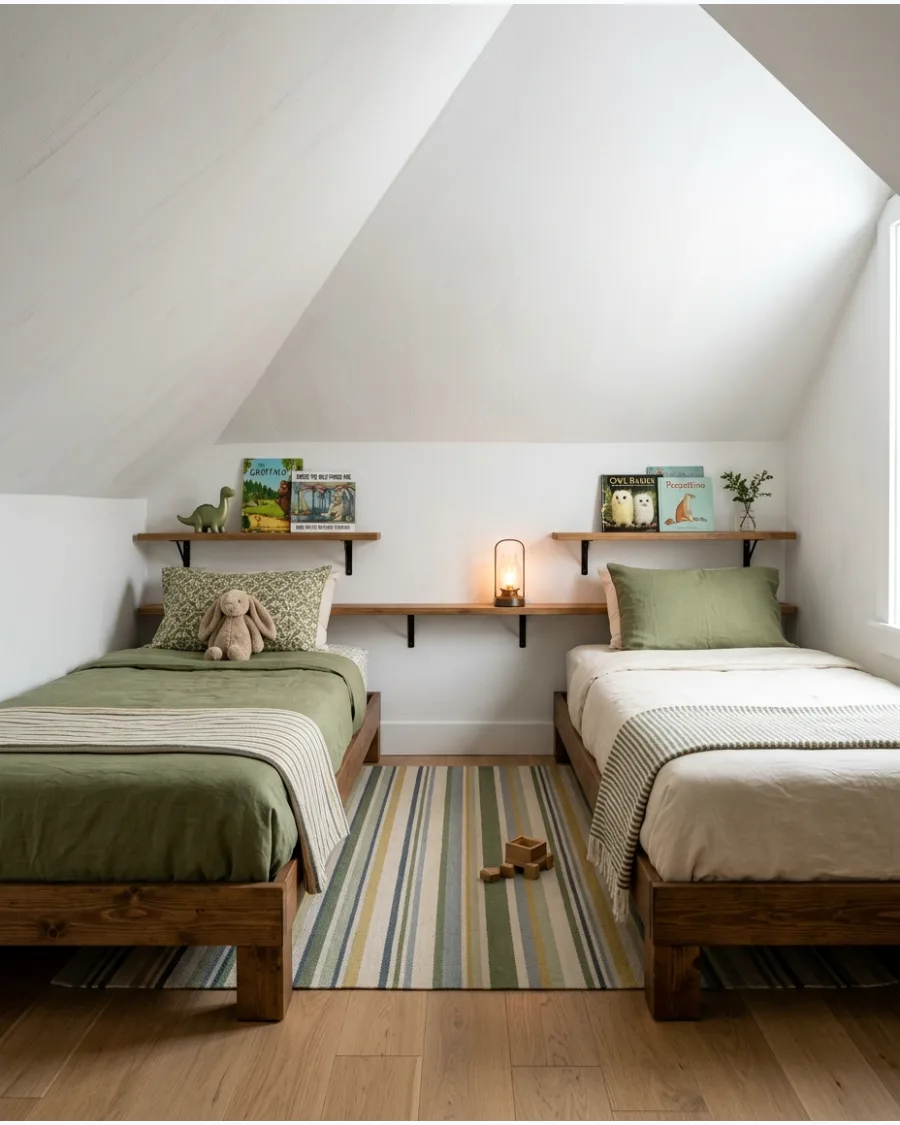
Take advantage of awkward attic spaces by tucking low beds directly under the eaves. This uses the shortest part of the room for sleeping and leaves the taller areas for standing and walking.
Mount thin ledges on the wall for books since there may not be room for traditional nightstands. Sloped ceilings naturally create a cozy, den-like atmosphere that kids love.
- Budget $200 to $500 for low-profile frames and wall ledges.
- Easy weekend project that requires only basic assembly.
- Use mattresses that are 8 inches thick or less to maximize head clearance.
Best shortcut: Use battery-powered puck lights on the sloped ceiling so you don't have to run new electrical wires.
16. Foldaway Wall Beds
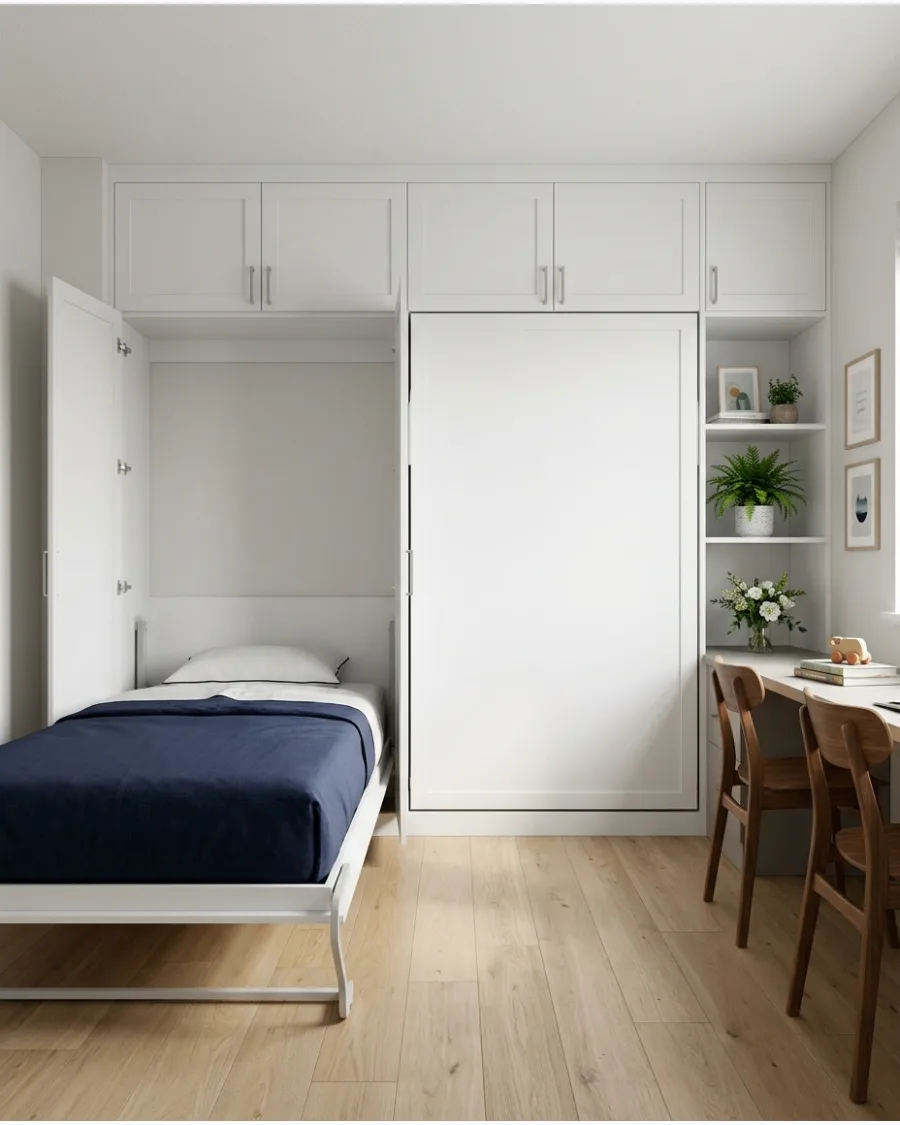
Install Murphy beds that fold up against the wall during the day to clear the floor for activities. This is the ultimate solution for a room that serves as both a bedroom and a playroom.
Choose a model with built-in shelving on the outside so the wall looks finished even when the beds are up. Modern wall beds are balanced with springs, making them easy enough for older children to operate safely.
- Costs $1,200 to $2,500 for a dual Murphy bed system.
- Requires 4 to 6 hours for assembly and secure wall anchoring.
- Must be anchored directly into wall studs for safety.
Quick win: Use elastic mattress straps to keep the bedding and pillows in place when the bed is folded up.
17. Matching Beds With a Shared Headboard
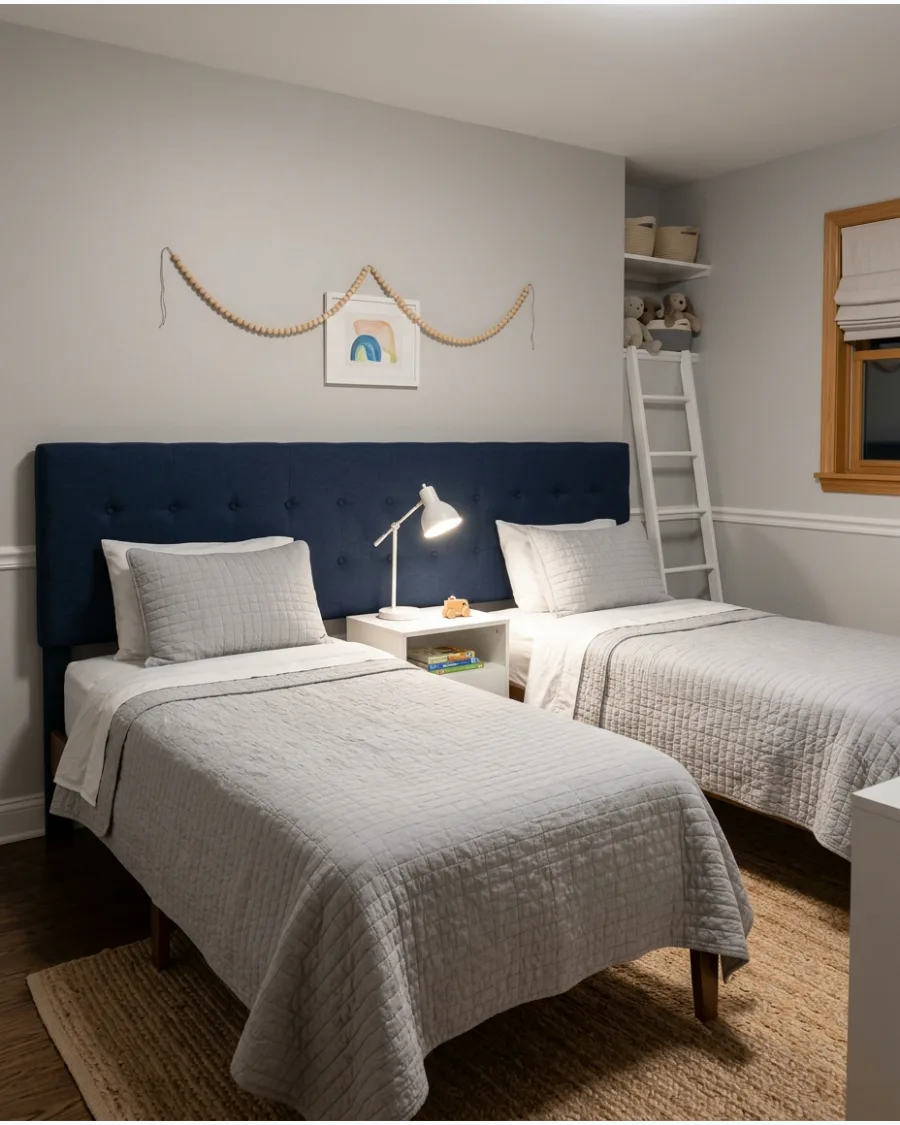
Place two twin beds side-by-side and connect them with one extra-wide headboard. This creates a unified look that makes a small room feel organized rather than cluttered.
Select a neutral fabric or wood finish for the headboard to allow for different bedding styles as the kids grow. A single long headboard also prevents small toys from falling behind the beds.
- Budget $300 to $700 depending on material and size.
- Can be DIYed with plywood, foam, and fabric in a few hours.
- Center the headboard on the main wall to create a balanced focal point.
Most people skip this: Bolt the headboard to the wall instead of the bed frames to prevent it from wobbling or banging.
SMART STORAGE IDEAS FOR TWO CHILDREN
18. Underbed Storage Drawers
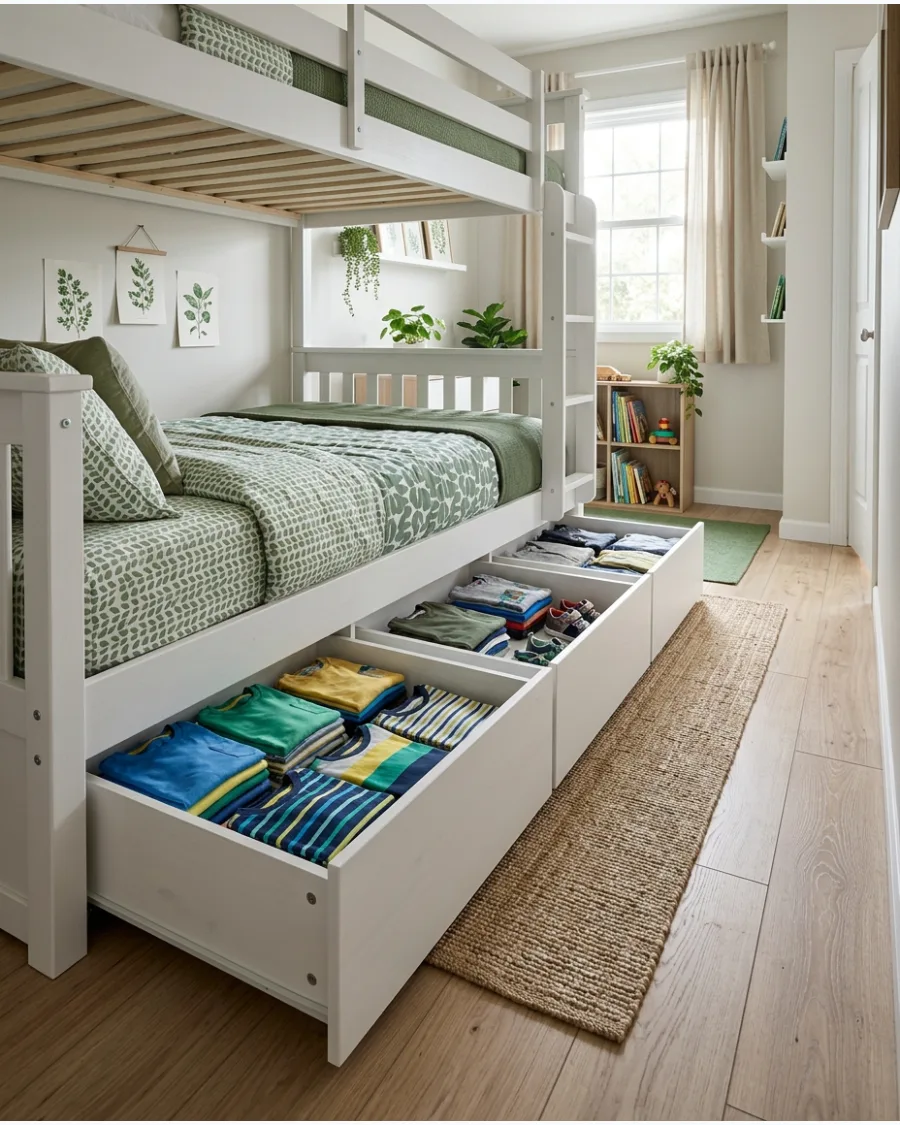
Maximize the dead space under the bed by choosing frames with integrated drawers. This provides a specific spot for each child to store their own clothes or toys without needing a second dresser.
Assign a specific number of drawers to each child to prevent arguments over storage space. Clear plastic bins can also work under standard frames if you prefer a more budget-friendly option.
- Budget $300 to $600 per bed for integrated storage frames.
- No extra assembly required if buying beds with built-in drawers.
- Label the drawers with each child's name to keep organization simple.
Best shortcut: Use drawer dividers to keep socks and small items from getting lost in deep underbed compartments.
19. Storage Built Into Bunk Stairs
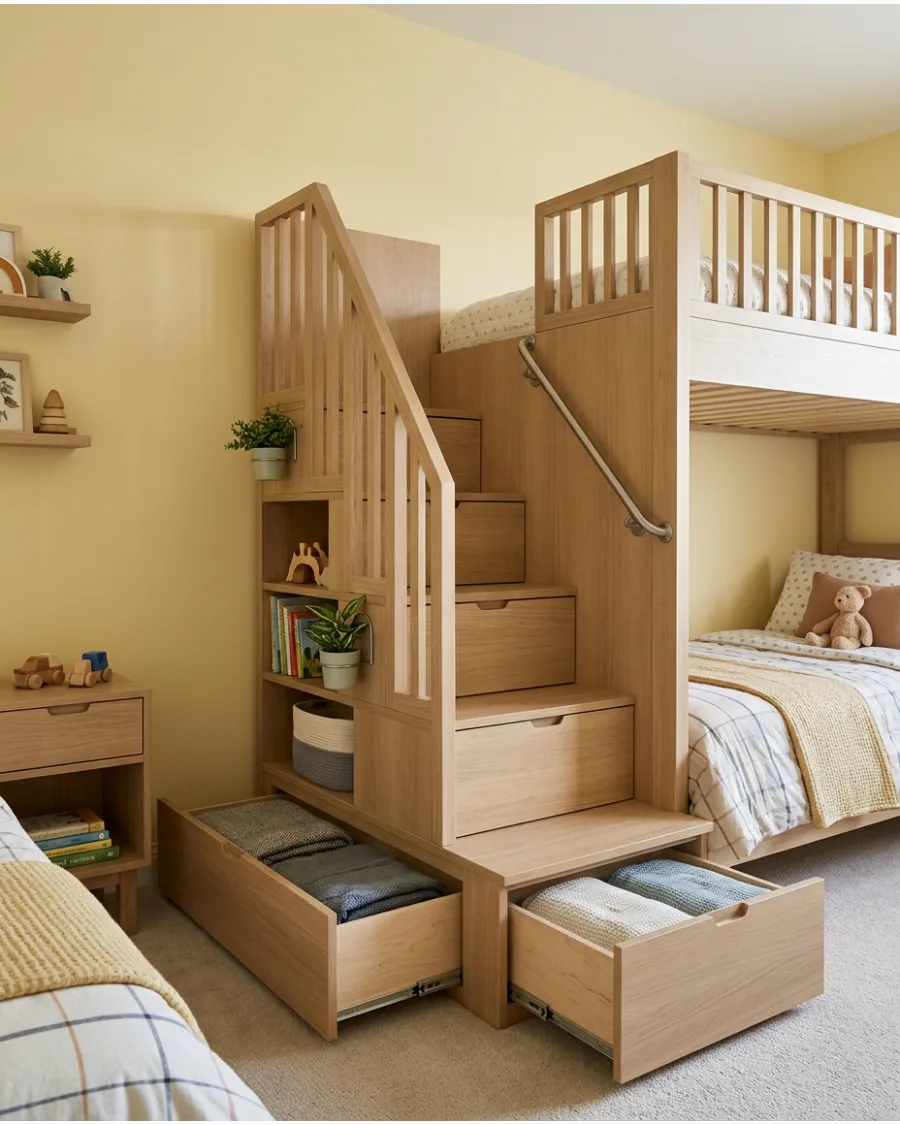
Replace a traditional vertical ladder with a staircase that features built-in drawers. These steps are safer for younger children to climb and provide hidden storage for bulky items like blankets or board games.
Ensure the drawer pulls are recessed or flush to prevent any tripping hazards on the stairs. This design turns a necessary structural element into a hard-working storage unit.
- Budget $800 to $1,500 for a full bunk set with storage stairs.
- Requires significant assembly time compared to standard ladders.
- Ideal for rooms where a traditional ladder feels too steep or unsafe.
Quick win: Store heavy items like books in the bottom steps to keep the center of gravity low and stable.
20. Individual Bedside Niches
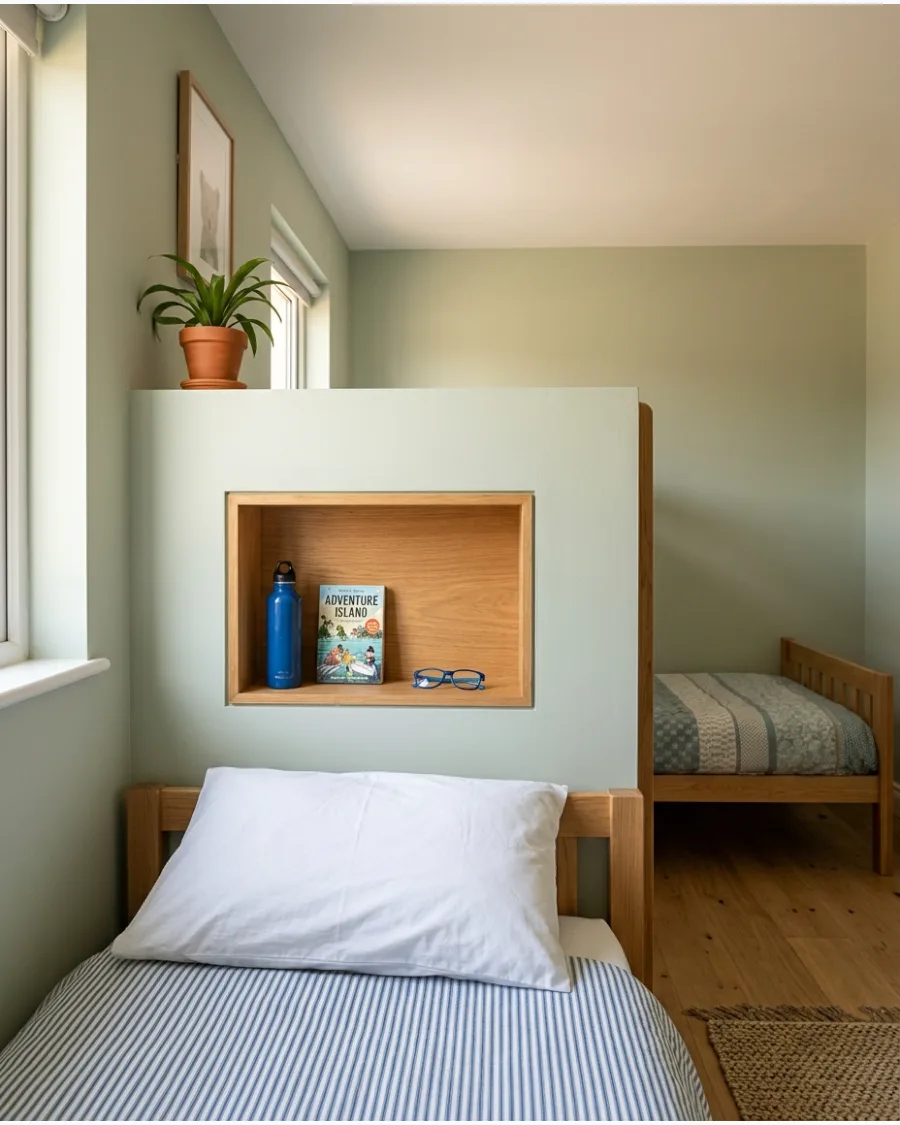
Cut small niches into the wall or build shallow shelving units next to each bed to serve as tiny nightstands. These niches hold essentials like water bottles and books without taking up any floor space.
Install a USB charging port inside each niche so kids can keep their devices powered up overnight. This gives each child a private zone for their most important items.
- Budget $50 to $150 for DIY materials and paint.
- Requires cutting into drywall and patching the surrounding area.
- Best installed between existing wall studs to avoid structural issues.
Most people skip this: Paint the back of the niche a dark color to make the items inside look organized and intentional.
21. Floor-to-Ceiling Wardrobe
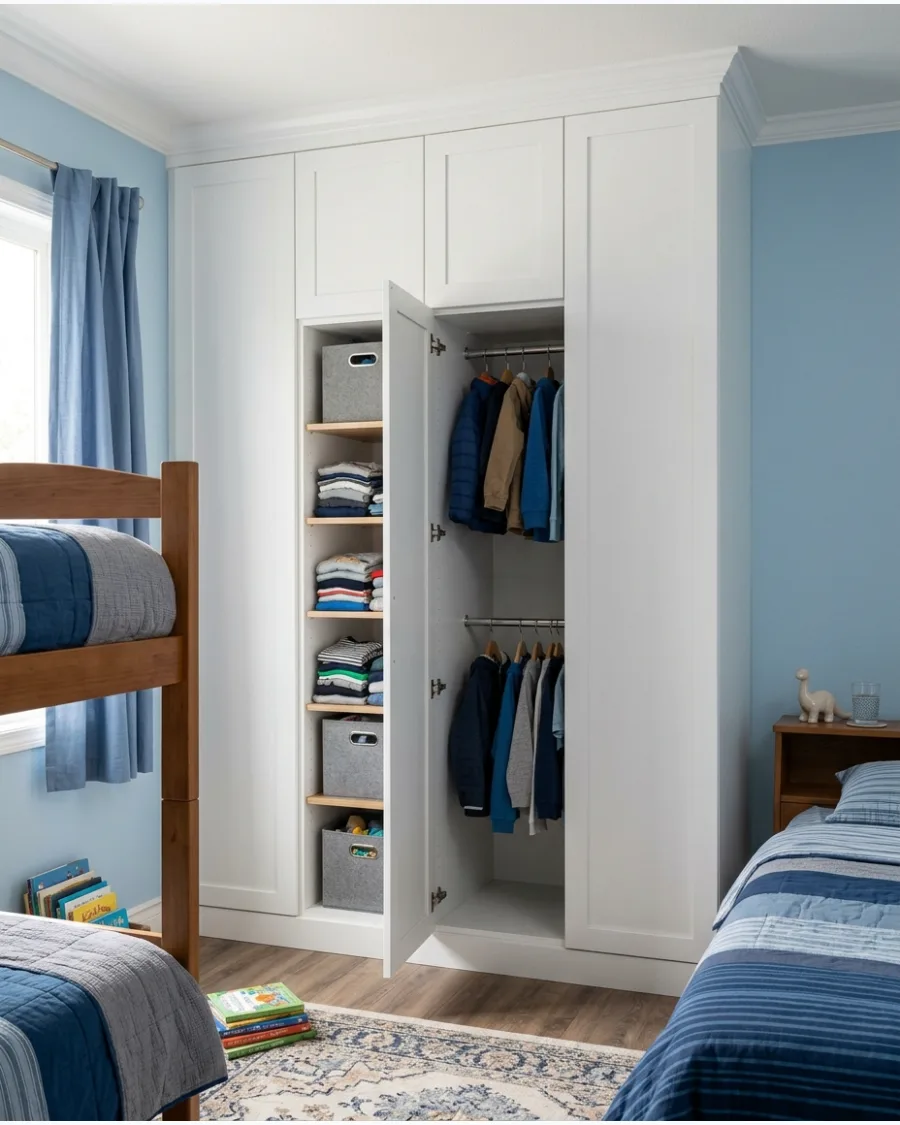
One tall wardrobe maximizes vertical space more efficiently than multiple short dressers. Divide the interior evenly so both children receive their own shelves, drawers, and hanging section.
Invest in a unit with adjustable interior components to adapt as the children grow taller and their clothing sizes change. High units prevent wasted space above the furniture and keep the room looking streamlined.
- Budget $400 to $1,200 for a quality unit.
- Secure the wardrobe to wall studs with heavy-duty brackets for safety.
- Choose floor-to-ceiling heights to eliminate dust-collecting tops.
Quick win: Use the highest shelves for out-of-season clothes and lower ones for daily outfits.
22. Shared Dresser With Labeled Drawers
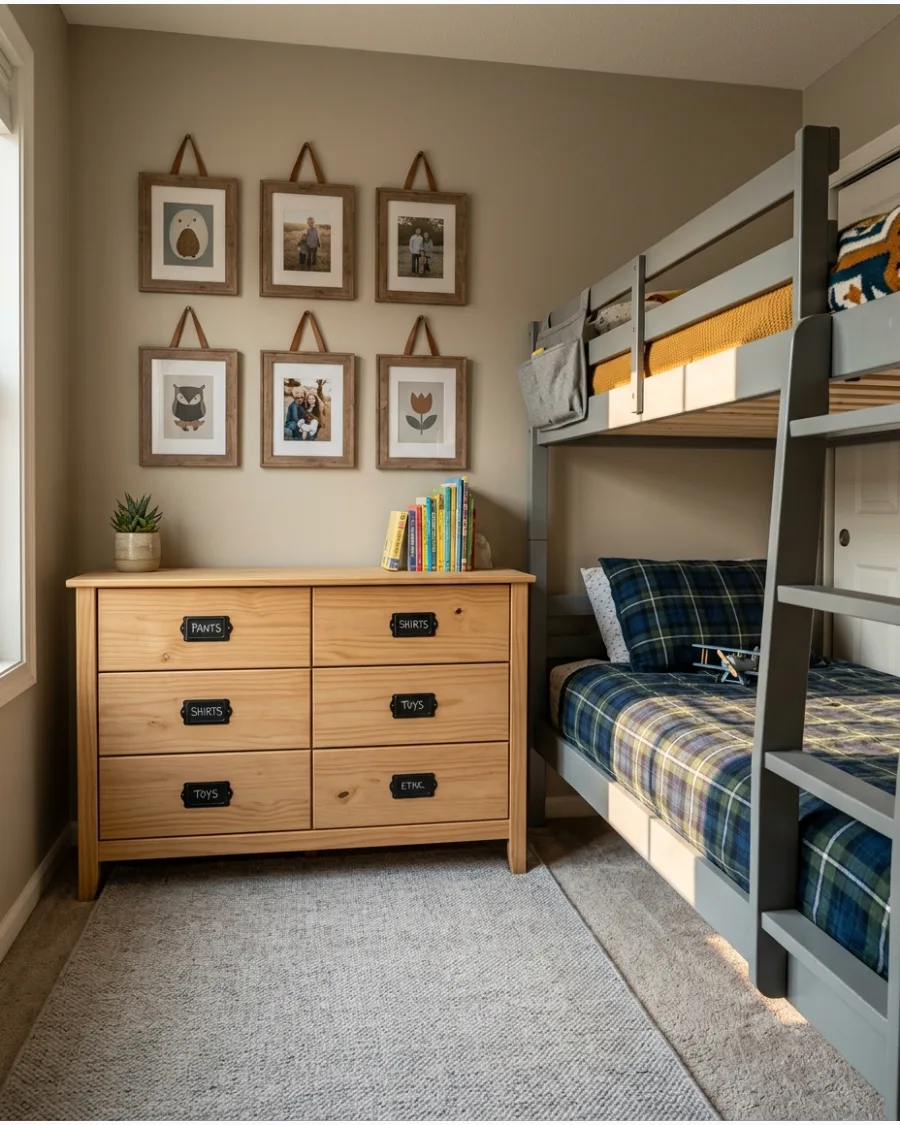
Using one compact dresser instead of two saves significant floor space for play.
Assign specific drawers to each child using labels, different knobs, or small colored markers to prevent confusion. Assign the bottom drawers to the younger child so they can reach their own clothes without help. This builds independence while keeping the shared room organized.
- Budget $150 to $500 for a sturdy dresser.
- Arrange clothes by type with socks and underwear in top drawers.
- Swap standard knobs for unique shapes to identify each child's section.
Best shortcut: Use drawer dividers to prevent clothes from getting mixed up in the middle.
23. Wall-Mounted Book Ledges
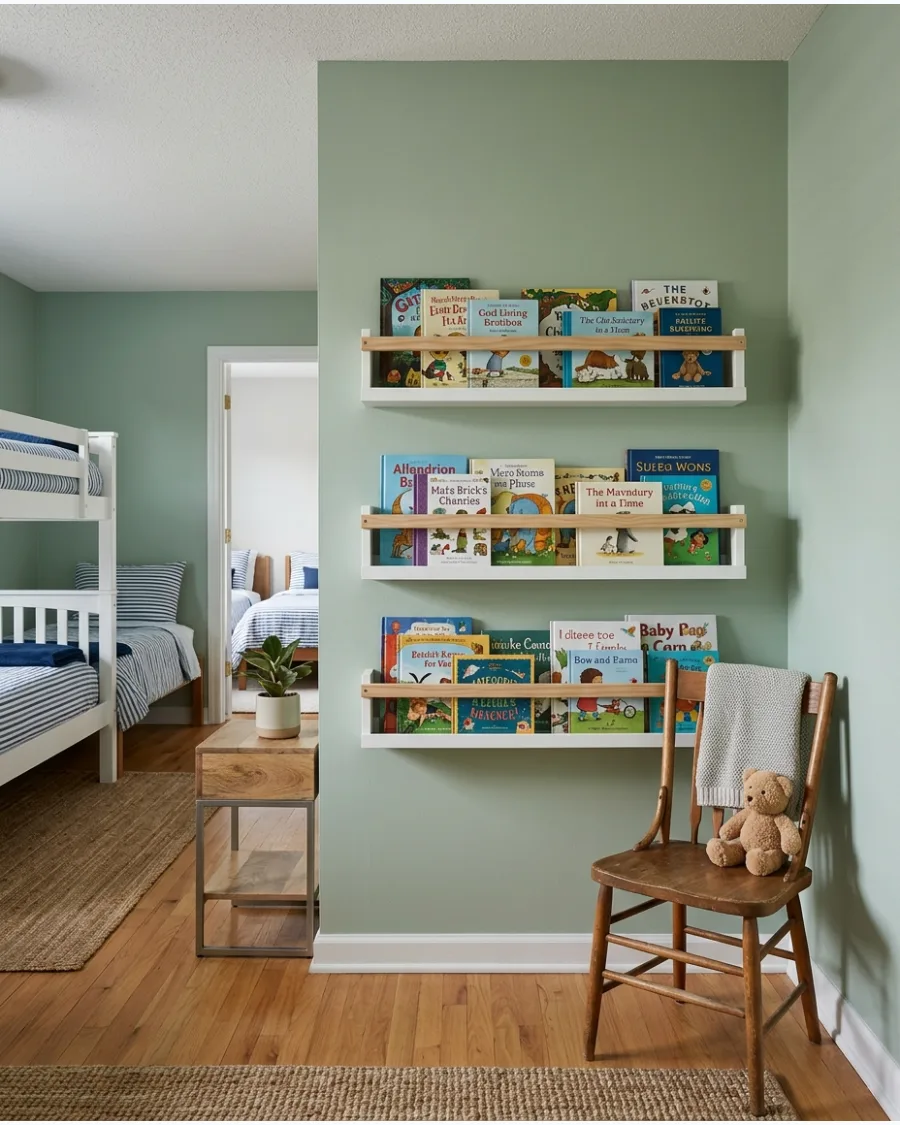
Install narrow book ledges above beds or desks to keep stories within reach. They provide visible storage without taking up any floor space and turn book covers into wall art.
Install the lowest ledge about 18 inches off the floor so kids can reach books from a sitting position. This keeps the floor clear for walking paths and larger toys.
- Budget $20 to $60 for a set of ledges.
- Use a level and wall anchors for a straight and secure fit.
- Line up multiple ledges to create a full library wall effect.
Most people skip this: Rotate the books every few weeks to keep the selection fresh and engaging.
24. Overhead Storage Cabinets
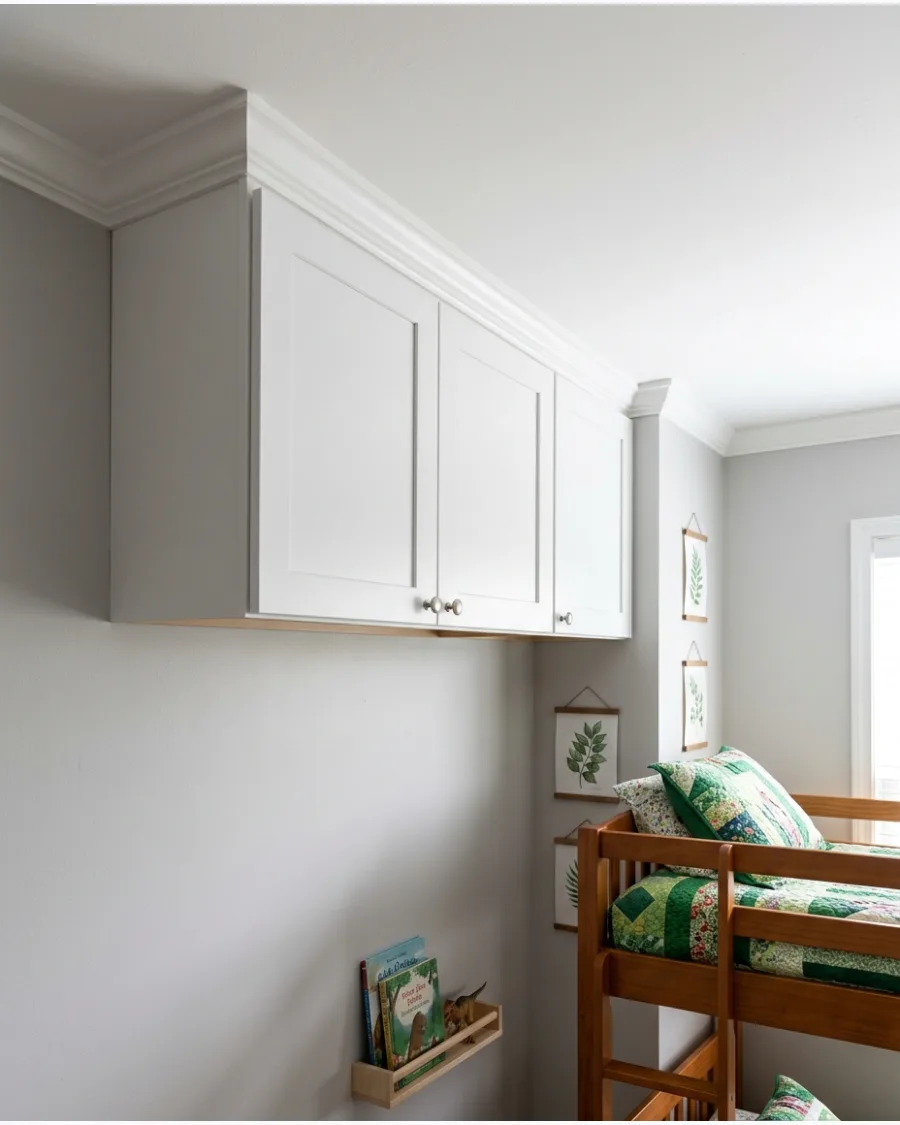
Add closed cabinets near the ceiling for items that are not needed every day. Keeping occasional-use belongings overhead leaves the lower part of the room easier for children to navigate.
Select cabinets with doors to hide visual clutter and keep the room looking tidy from below. This utilizes the dead space that usually sits empty above the door or bed.
- Budget $100 to $300 for wall-mounted units.
- Mount into wall studs to support the weight of heavy storage.
- Keep a sturdy step stool nearby for safe adult access.
Quick win: Store bulky winter coats or extra blankets in these upper zones during summer.
25. Storage Bench Between the Beds
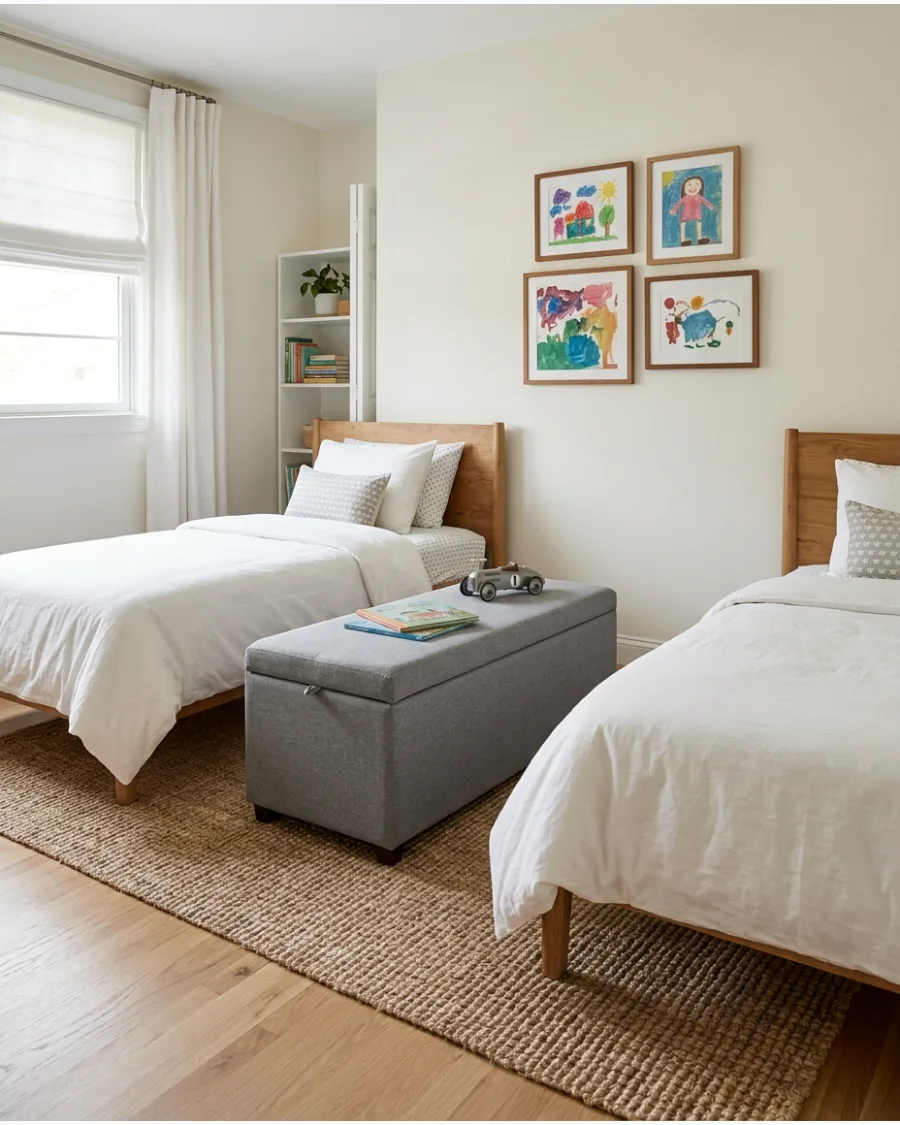
Place a small storage bench between two beds to act as both seating and a toy chest. It provides a shared landing spot for blankets or stuffed animals.
Choose a bench with a flat top so it can double as a shared nightstand for water bottles or alarm clocks. It maximizes the utility of the narrow gap between mattresses.
- Budget $80 to $200 for an upholstered bench.
- Measure the gap between beds carefully before purchasing the bench.
- Use a soft-close hinge to protect small fingers from slamming lids.
Best shortcut: Add a tray on top of the bench to create a stable surface for drinks.
26. Rolling Bins Under the Beds
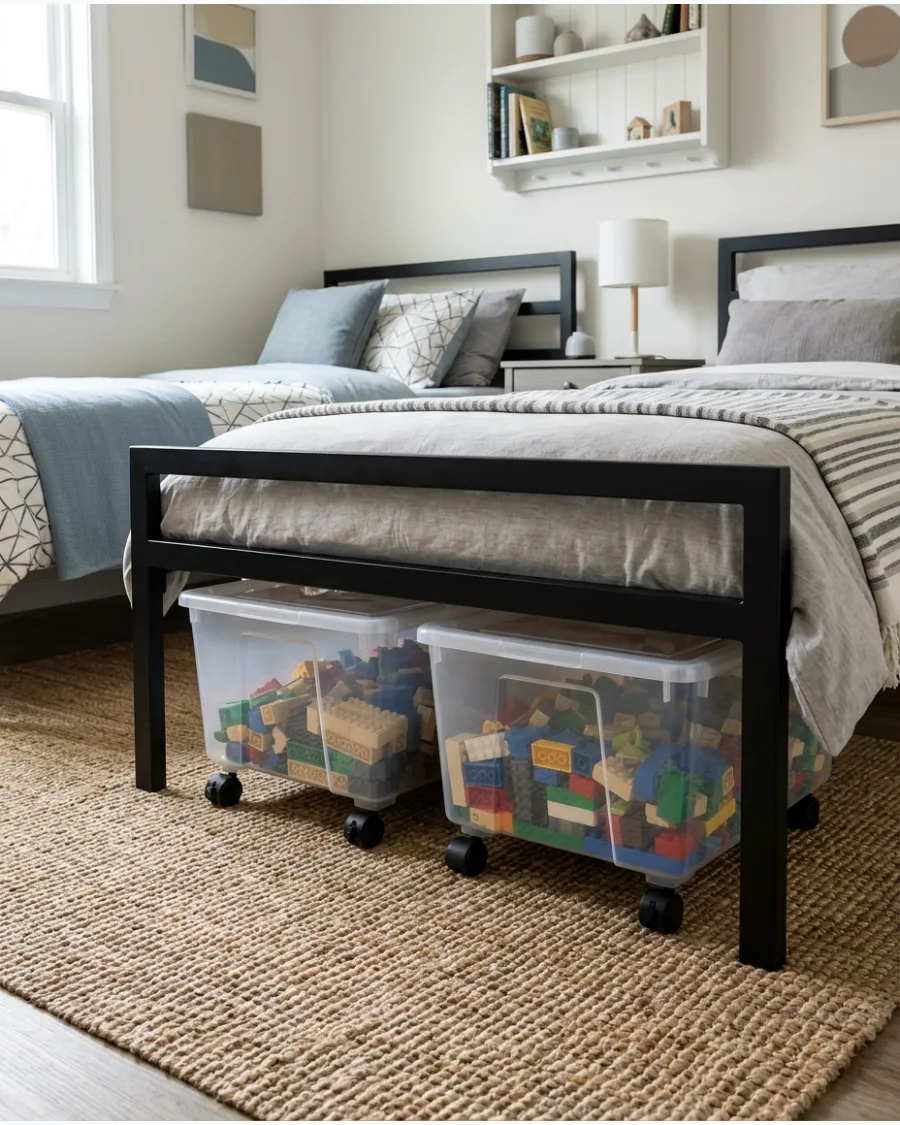
Use lightweight rolling bins that children can pull out easily for quick cleanup.
Transparent fronts or simple labels help everyone find and return items without dumping the whole bin. Opt for bins with lids to keep dust off items stored close to the floor. This turns the dark space under the bed into a highly functional storage zone.
- Budget $30 to $70 for a set of rolling bins.
- Check the clearance height of the bed frame before buying.
- Use bins with sturdy handles for easy pulling on carpeted floors.
Quick win: Label the top of the lids so kids know exactly what is inside without pulling the bin out.
27. Color-Coded Storage Baskets
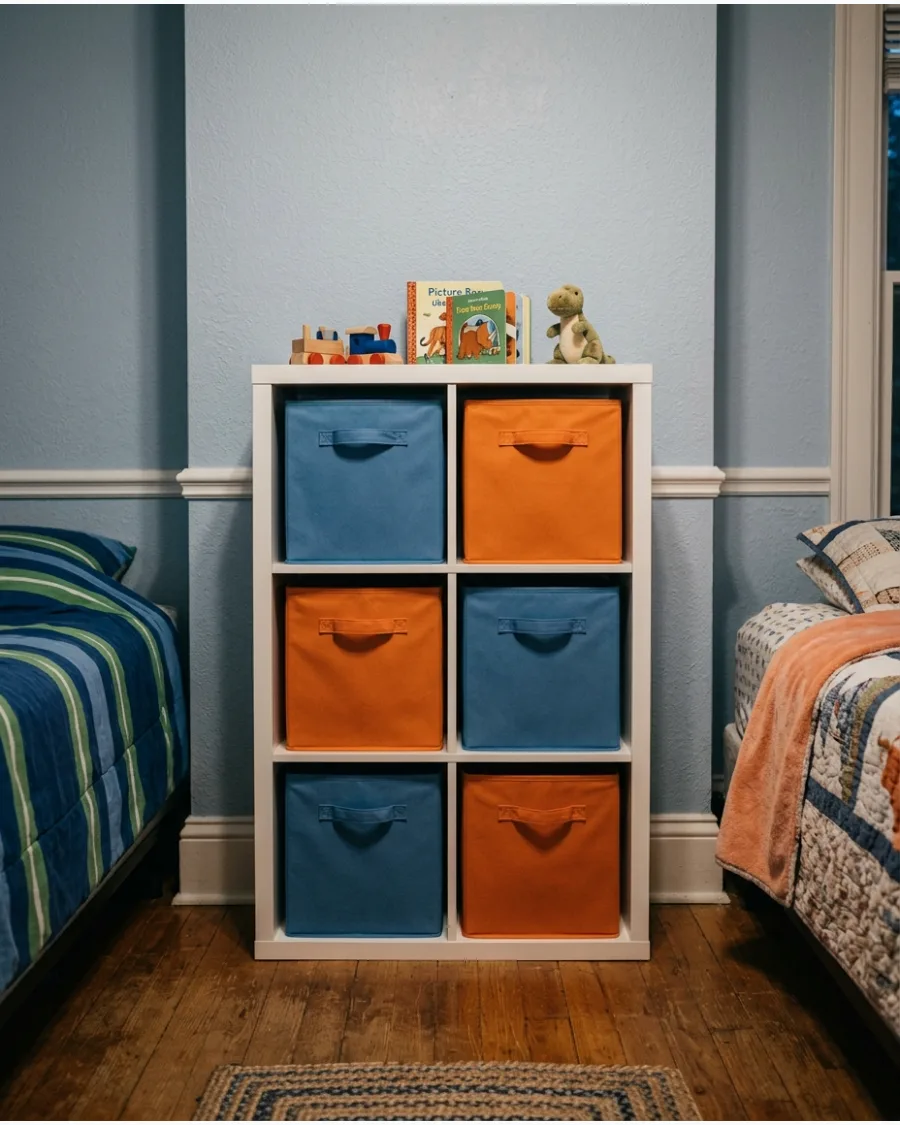
Assign each child a specific storage color and use matching baskets throughout the room. The system adds personality while making shared organization easier for young children to understand.
Stick to two distinct colors to maintain a cohesive look while providing clear boundaries. It eliminates daily arguments over whose toys belong in which bin.
- Budget $40 to $100 for a full set of baskets.
- Buy extra baskets in the same colors to replace worn ones later.
- Use matching colors for laundry hampers to keep the system consistent.
Most people skip this: Use the same colors for towels and toothbrushes to carry the system into the bathroom.
28. Hanging Bedside Organizers
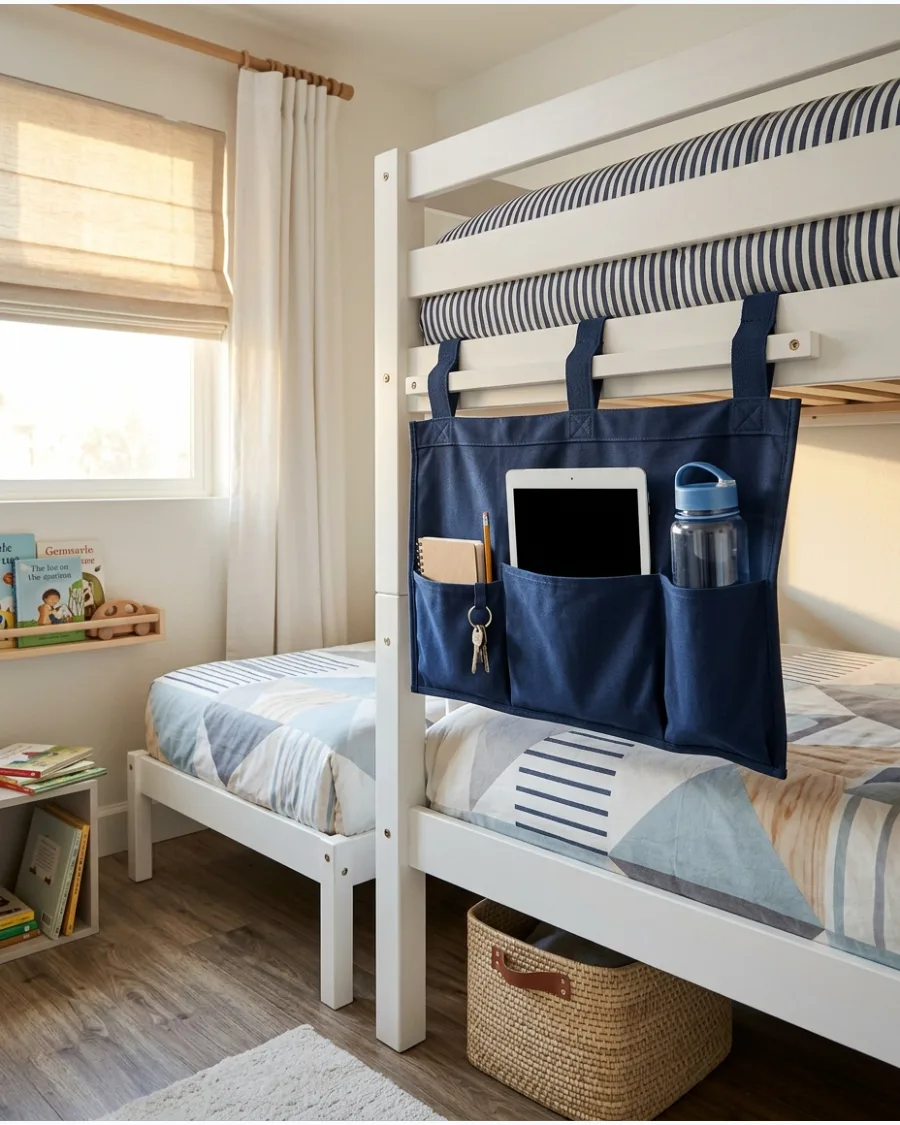
Attach fabric organizers to the sides of bunk beds or bed frames for easy access to essentials. They are perfect for books, small toys, and headphones when there is no room for a nightstand.
Secure the straps tightly so the organizer does not sag when filled with heavy tablets or books. It gives each child a private spot for their bedtime items.
- Budget $15 to $30 per organizer.
- Slide the stabilizer flap under the mattress for a more secure hold.
- Choose a machine-washable fabric for easy cleaning.
Best shortcut: Use the smaller pockets for a flashlight or reading glasses.
29. Peg Rail Storage Wall
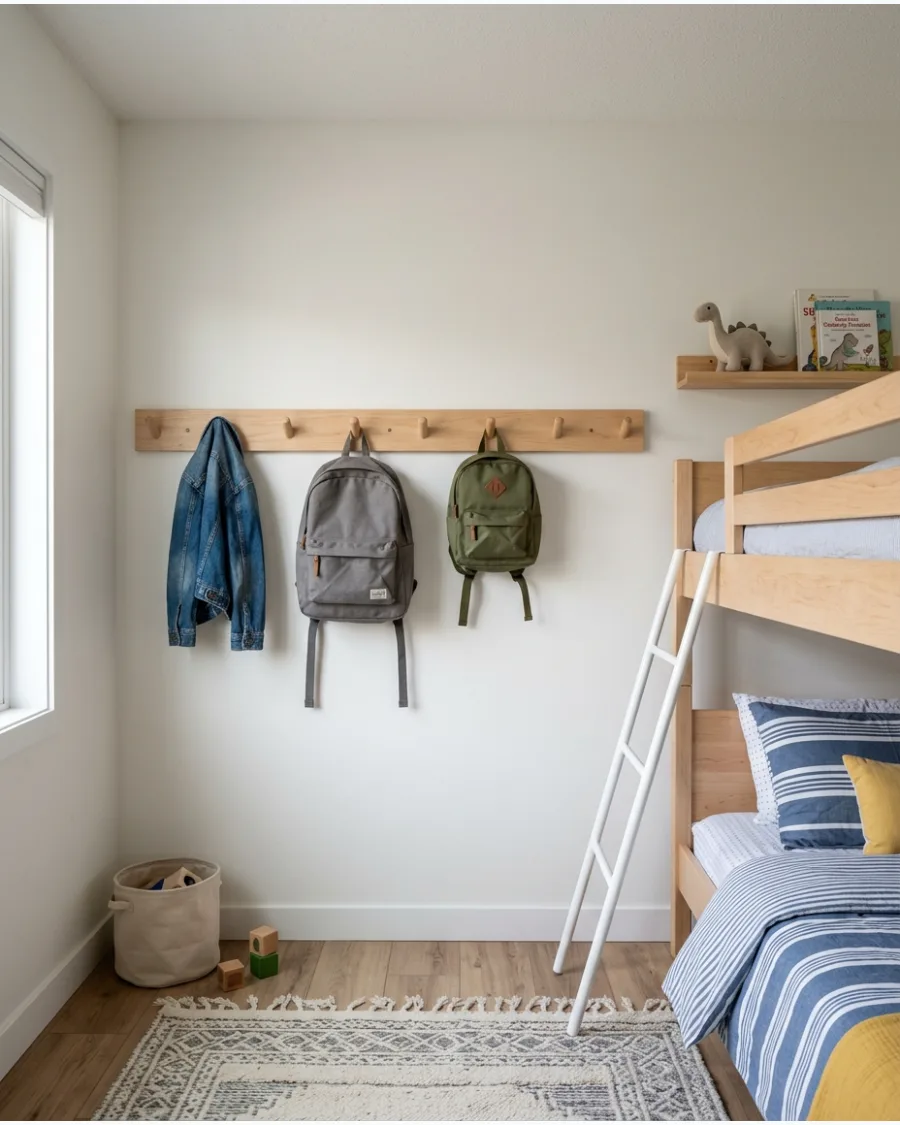
Install a long peg rail to hold backpacks, robes, hats, and dress-up clothes. This keeps the floor clear of the typical pile that forms after school.
Space the pegs at least six inches apart to prevent items from overlapping and looking messy. It creates an organized drop zone that takes up very little depth in the room.
- Budget $25 to $60 for a solid wood rail.
- Mount the rail at a height the children can reach comfortably.
- Use sturdy wooden pegs that will not snap under the weight of heavy bags.
Quick win: Hang small mesh bags on the pegs to hold loose items like socks or hair ties.
30. Built-In Window Seat Storage
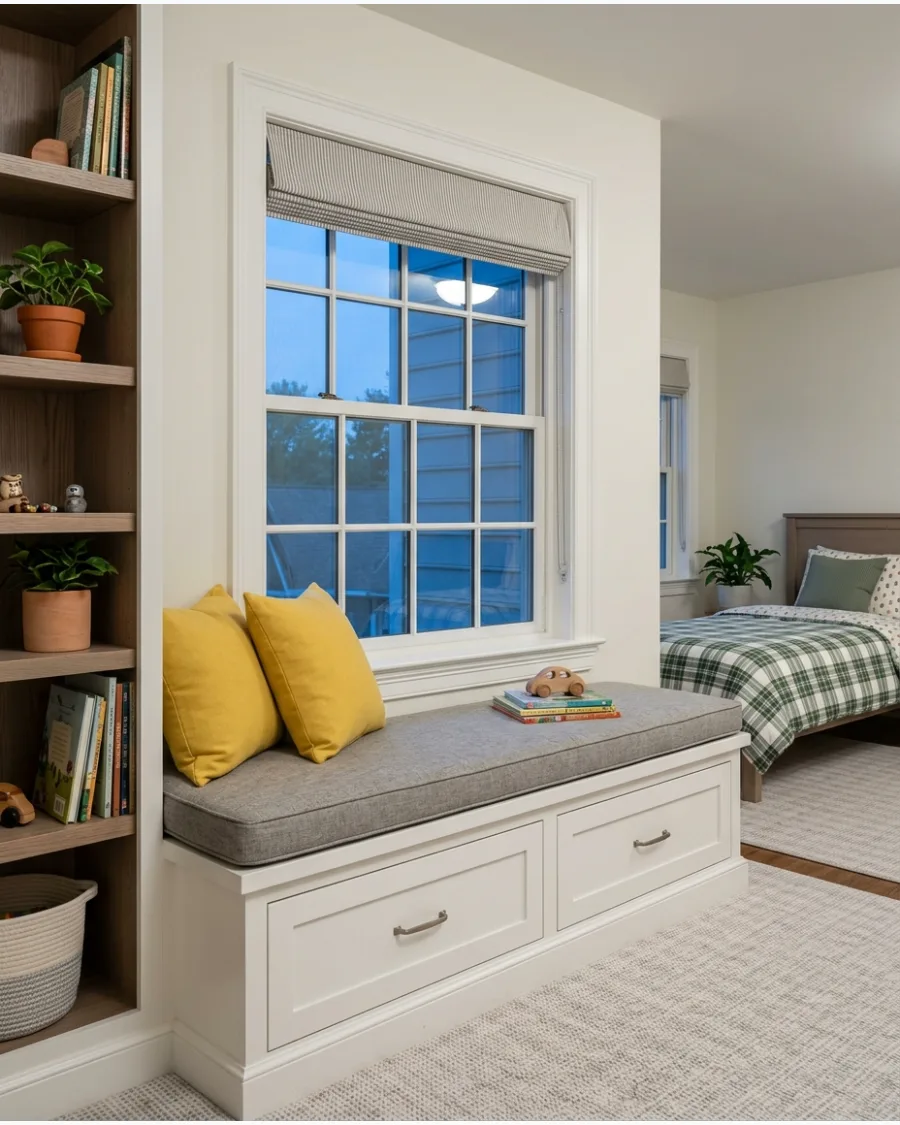
Turn the space beneath a bedroom window into a seat with drawers or lift-up storage. Add cushions to create a shared reading nook that also hides away bulky items.
Add a thick foam cushion to make the seat comfortable enough for long reading sessions. This utilizes a space that is often left empty or blocked by furniture.
- Budget $200 to $800 for custom or semi-custom units.
- Use high-quality drawer slides for smooth daily operation.
- Coordinate the cushion fabric with the room's existing bedding.
Most people skip this: Use the drawers for heavy items like board games or sports equipment.
31. Corner Shelving Unit
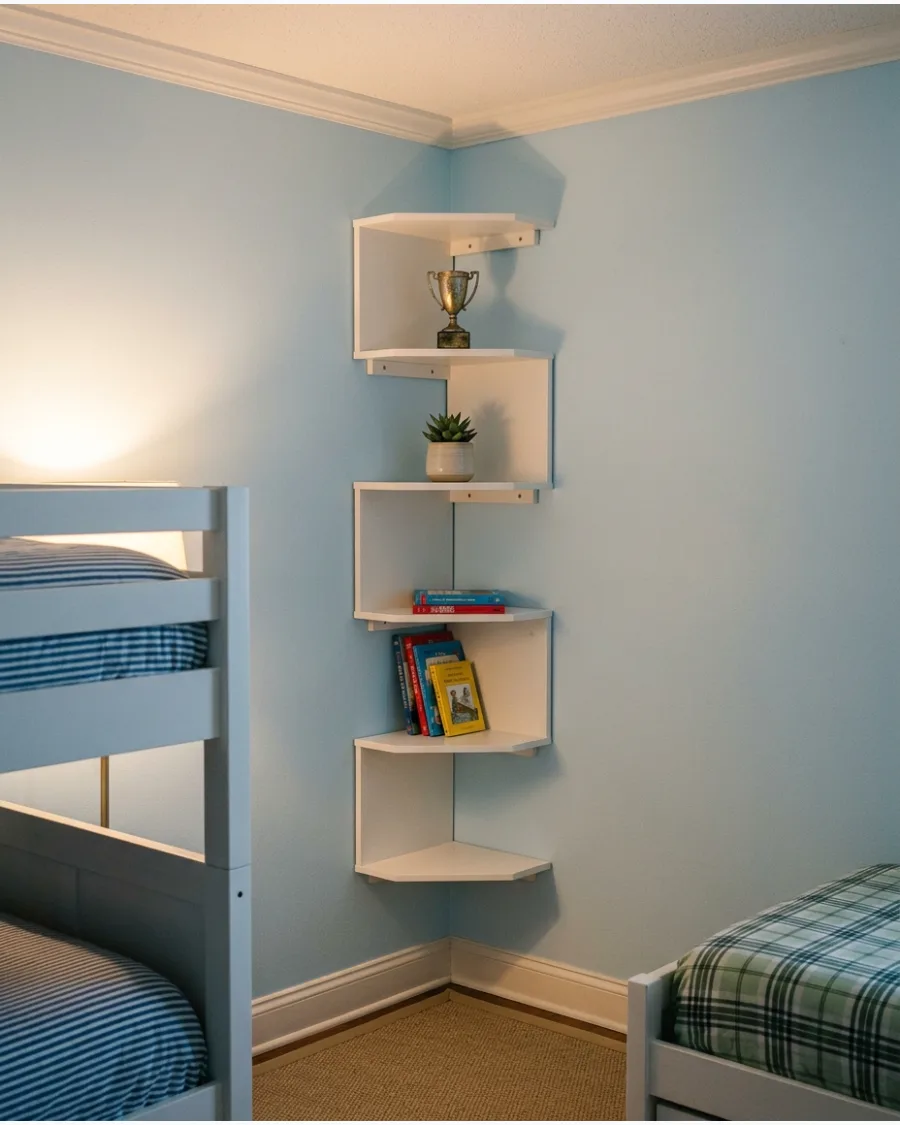
Vertical space is the best friend of a small shared room. Corner units turn dead space into a functional display for trophies or favorite books.
Mount the unit high enough to clear floor space for a laundry hamper or a small toy bin underneath. Keeping frequently used items at each child's eye level prevents them from climbing the shelves to reach their things.
- Budget: $30 to $60 depending on material; 45-minute installation.
- Secure the unit directly to wall studs to prevent tipping or pulling.
- Choose a model with rounded edges to prevent bumps in tight walkways.
Quick win: Use the bottom shelf for heavy books and the top for fragile decor to keep the unit stable.
32. Storage Headboards
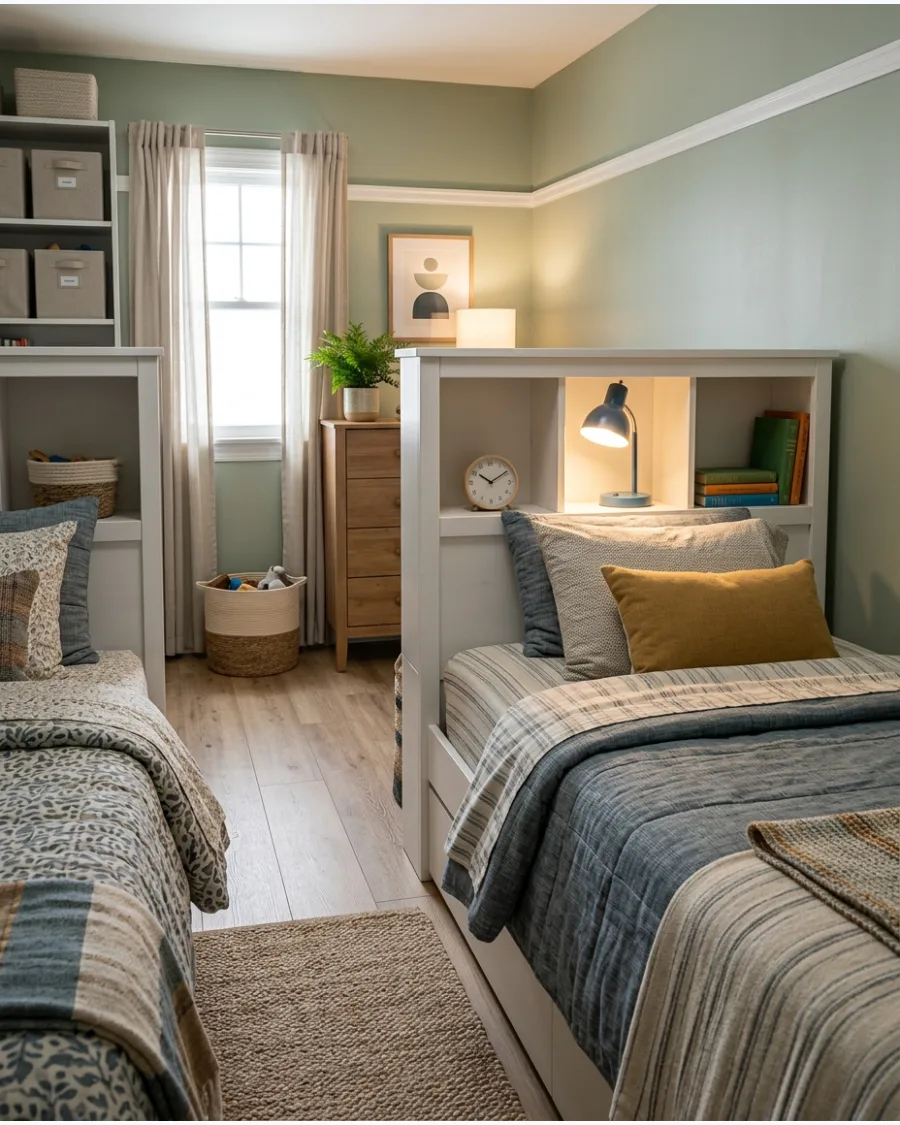
Traditional nightstands take up valuable floor area that kids need for playing. A storage headboard keeps water bottles, reading lamps, and books within reach without the extra furniture footprint.
Measure the bed width carefully to ensure the headboard doesn't block access to the closet or the main bedroom door. This setup works best when beds are pushed against opposite walls to maximize the center floor space.
- Budget: $100 to $200 per bed; 1-hour assembly time.
- Look for units with built-in cord holes to keep charging cables organized and hidden.
- Opt for a slim profile to save depth in narrow rooms where every inch counts.
Best shortcut: Use adhesive cable clips on the back of the headboard to keep lamp cords from tangling.
33. Door-Back Organization
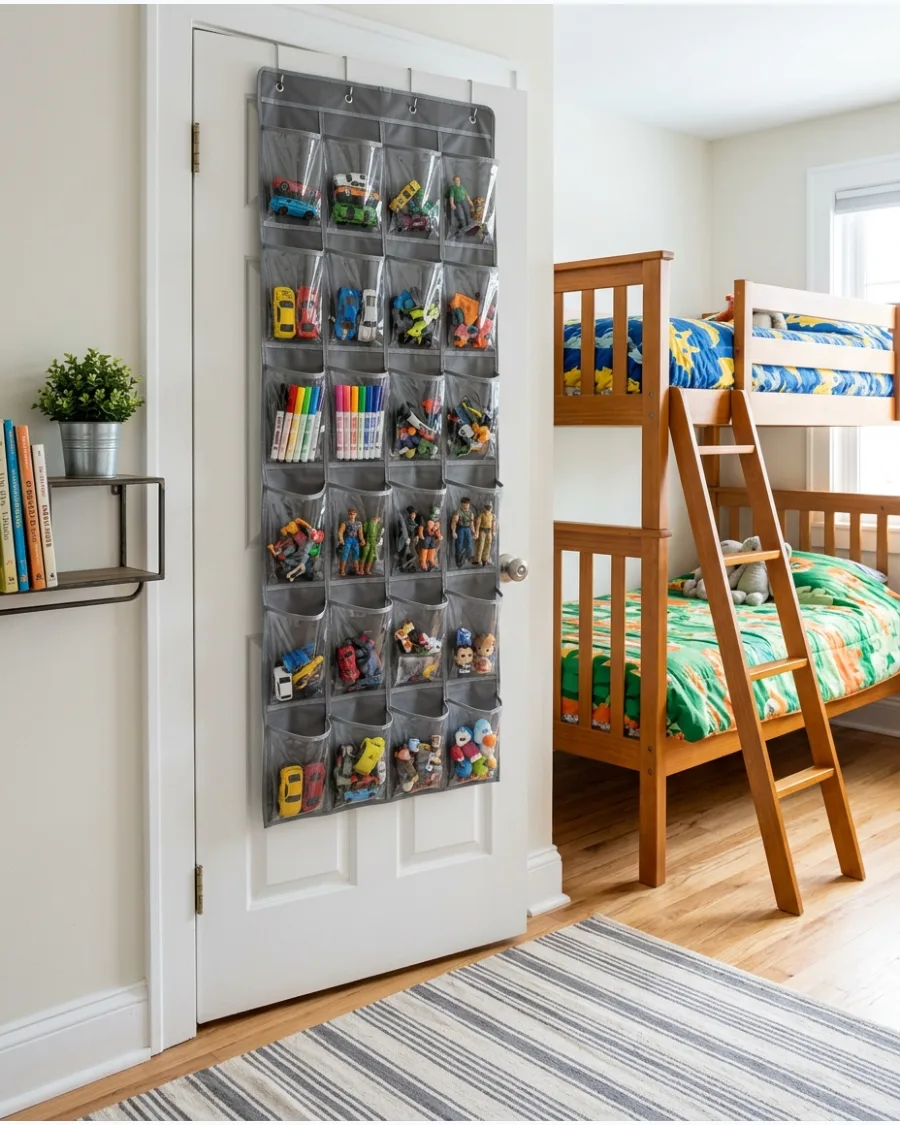
The back of a door is prime real estate that often goes to waste in a cramped room. Clear pocket organizers allow kids to see their small toys or art supplies without dumping out a whole bin.
Use heavy-duty over-the-door hooks to prevent the organizer from sagging or sliding when the door opens. It keeps the floor clear and makes cleanup a five-minute task for even young children.
- Budget: $15 to $25; 5-minute setup time.
- Label pockets with stickers or small cards so kids know exactly where items go.
- Felt pads on the back of the metal hooks protect the door finish from scratches.
Most people skip this: Tighten the hooks with a small piece of foam tape to stop the organizer from banging against the door.
34. Shared Closet With Two Zones
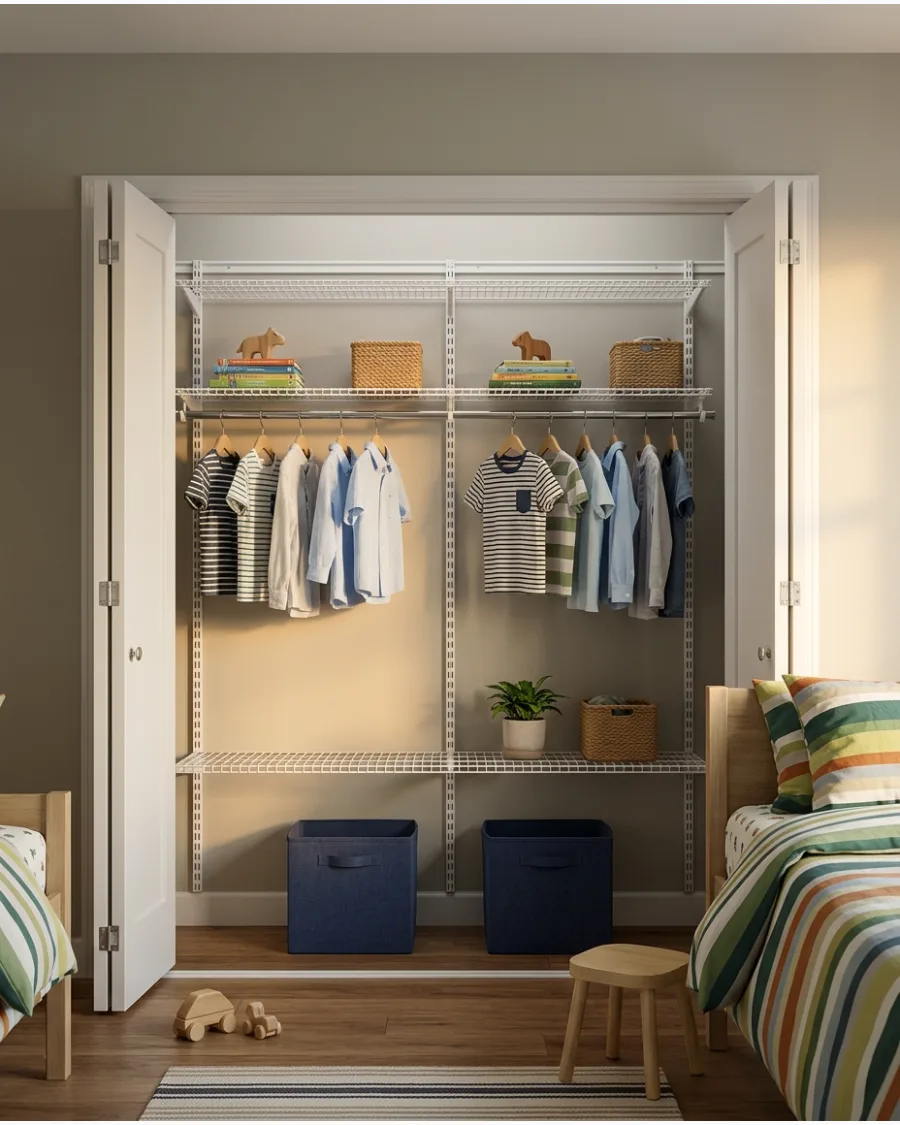
A single closet can work for two if the layout is strictly divided. Vertical dividers or separate hanging rods ensure each child knows exactly where their belongings live.
Place a double-hang rod on one side to maximize space for smaller shirts and pants. Symmetry helps reduce morning arguments over whose clothes are whose while keeping the space tidy.
- Budget: $50 to $150; 2 to 3 hours for installation.
- Use different colored hangers for each child to keep clothes separated at a glance.
- Store out-of-season clothes on the highest shelf in labeled bins to save rod space.
Quick win: Install the lower rod at a height where the child can reach their own clothes to encourage independence.
STUDY, PLAY, AND ACTIVITY AREAS
35. Long Shared Homework Desk
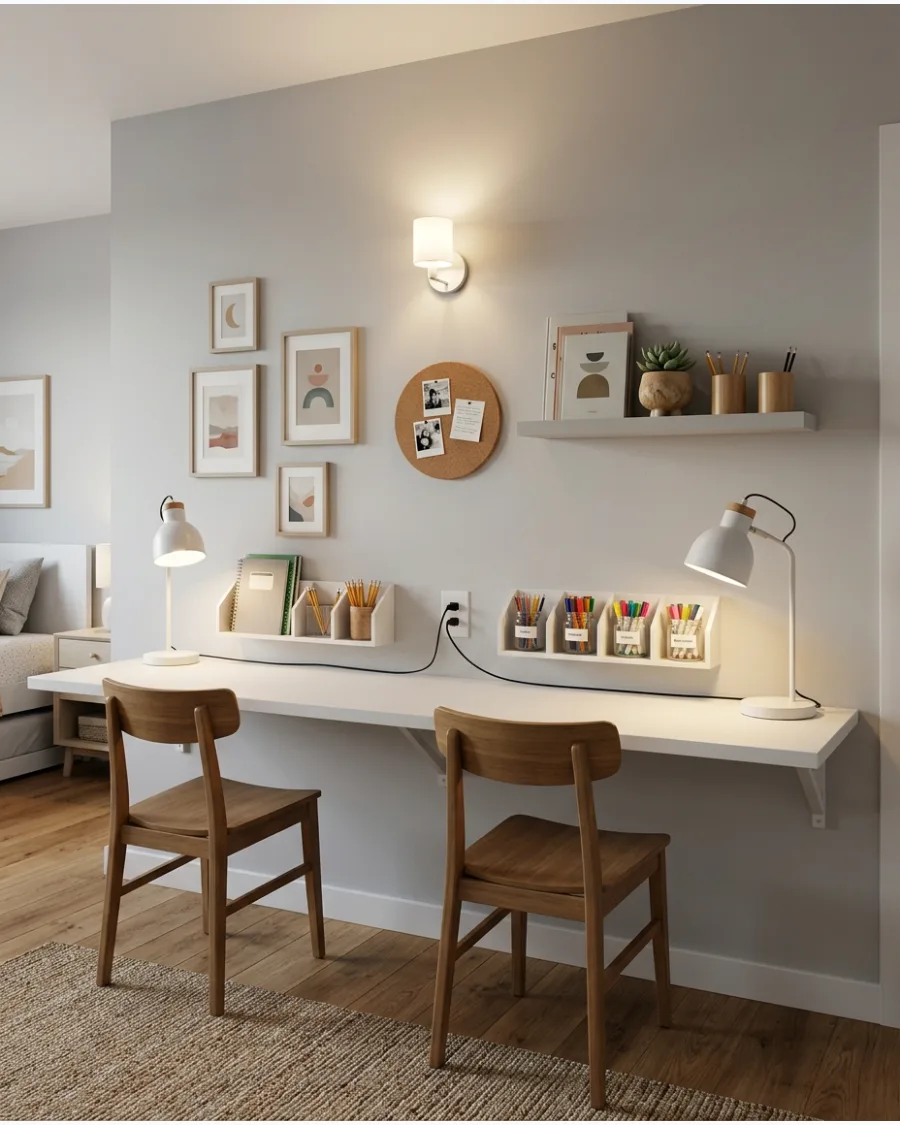
A single long surface provides more workspace than two tiny separate desks in a small room. Using a wall-mounted countertop keeps the area underneath open for legroom or rolling storage carts.
Install a central drawer unit or a vertical divider to create a clear boundary between the two workspaces. It creates a dedicated zone for focus while maintaining a sleek and uncluttered look.
- Budget: $150 to $300; 3-hour assembly and mounting time.
- Use heavy-duty L-brackets every 24 inches for maximum weight support and safety.
- Add a power strip under the desk for easy cord management for tablets or laptops.
Best shortcut: Use a kitchen countertop from a hardware store for a durable and cost-effective long desk surface.
36. Two Compact Floating Desks
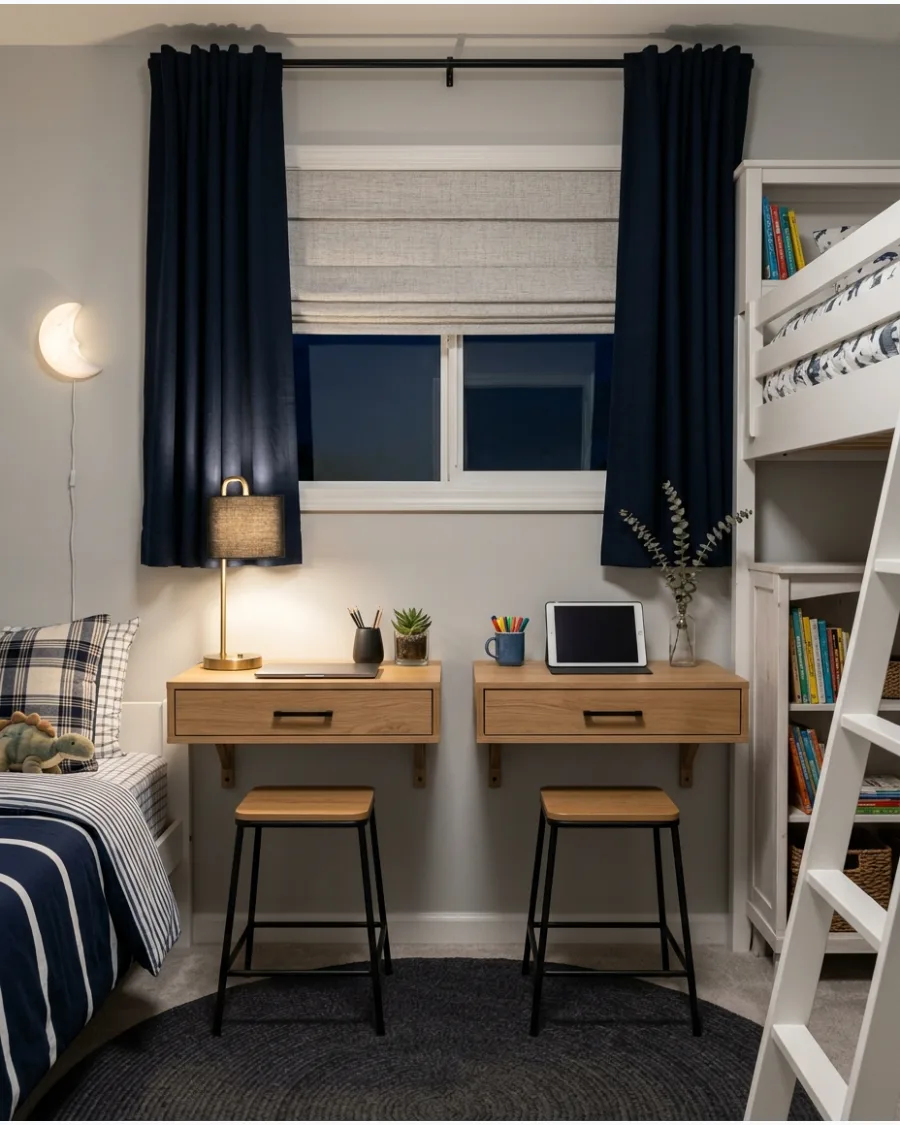
Floating desks are ideal for rooms with awkward layouts where a long shared desk will not fit. By removing the legs, the room feels larger and cleaning the floor becomes much easier.
Position the desks near windows to provide natural light for reading and art projects. This allows each child to have a private corner even in a shared environment.
- Budget: $80 to $150 per desk; 1-hour installation.
- Mount at a height that matches the child's current chair for ergonomic comfort.
- Ensure the wall anchors are rated for at least 50 pounds to handle leaning weight.
Most people skip this: Check for wall studs before buying to ensure the desk can be mounted securely without wobbling.
37. Desk Under the Loft Bed
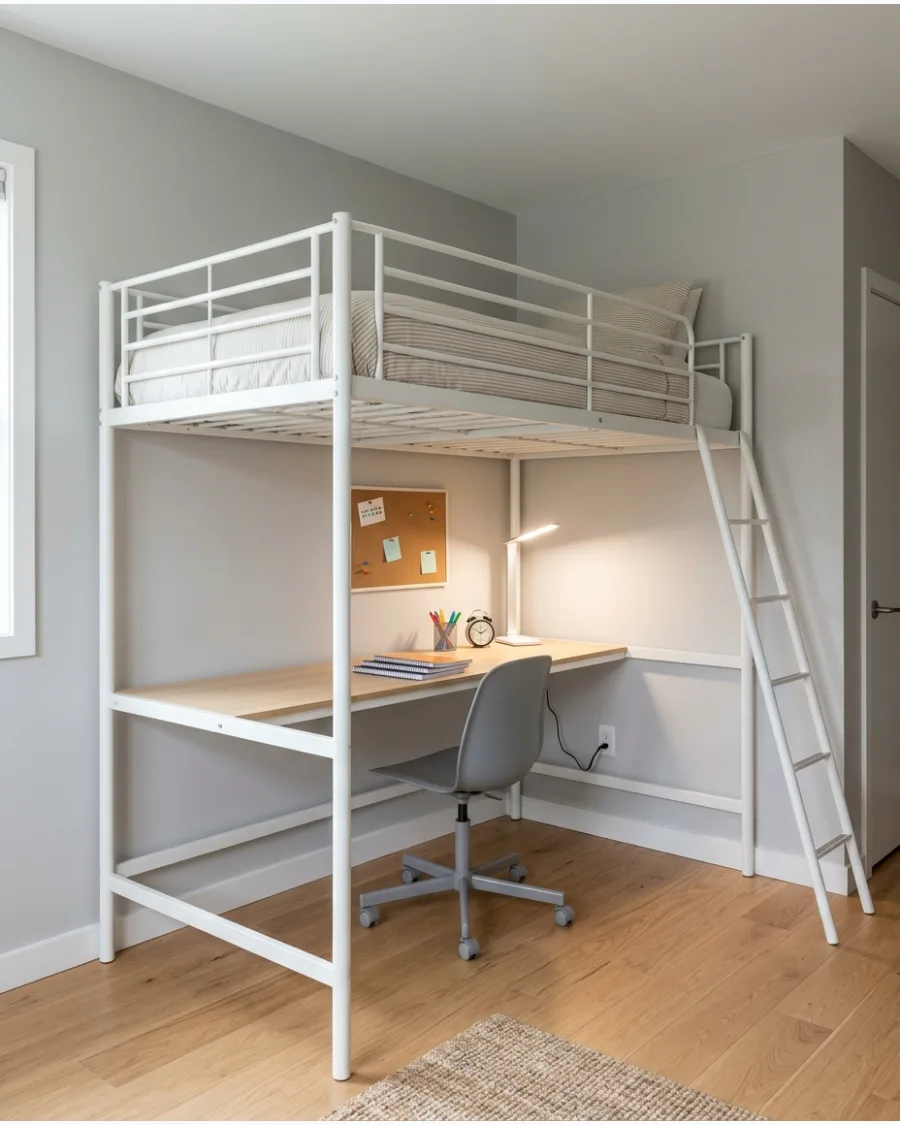
A loft bed creates an entire second floor of usable space in a small bedroom. The area underneath is the perfect size for a full workstation or a cozy study nook.
Add a bright LED strip or a desk lamp under the bed frame to prevent the workspace from feeling dark. This layout leaves the rest of the floor free for the second child's bed and play space.
- Budget: $300 to $600; 4-hour assembly time.
- Choose a loft bed with a built-in ladder to save even more floor space.
- Use a swivel chair that can tuck fully under the desk when not in use.
Quick win: Hang a small curtain across the desk area to create a private office feel for the child while they study.
38. Fold-Down Wall Desk
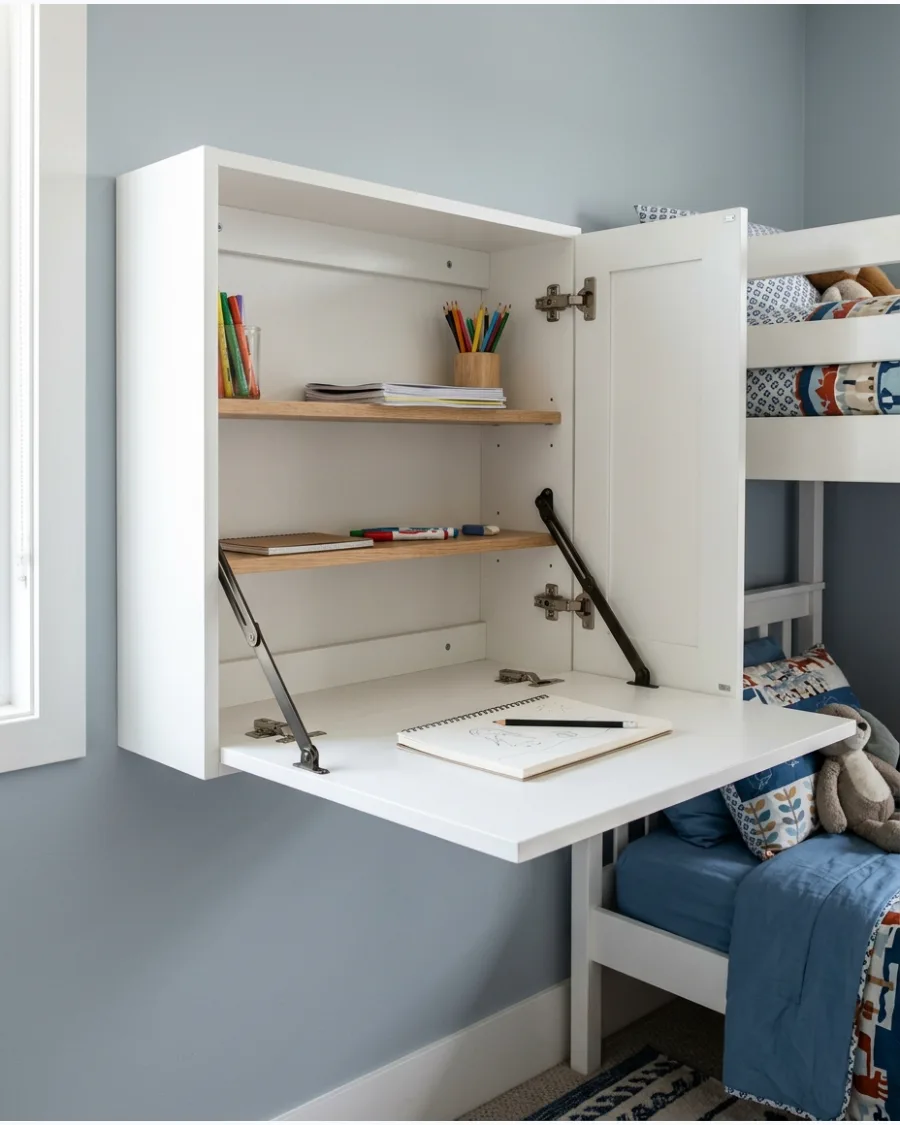
When floor space is at a premium, a desk that disappears is the ultimate solution. These units stay flush against the wall until they are needed for homework or creative crafts.
Mount the desk at a height that works with existing chairs to avoid buying specialized furniture. It keeps the center of the room open for active playtime during the day.
- Budget: $70 to $120; 1-hour installation time.
- Select a model with magnetic latches to keep the desk securely closed when not in use.
- Place it away from the door swing path to ensure safety and easy access.
Best shortcut: Look for a murphy desk with built-in storage cubbies for paper and supplies to keep the surface clear.
39. Shared Activity Table
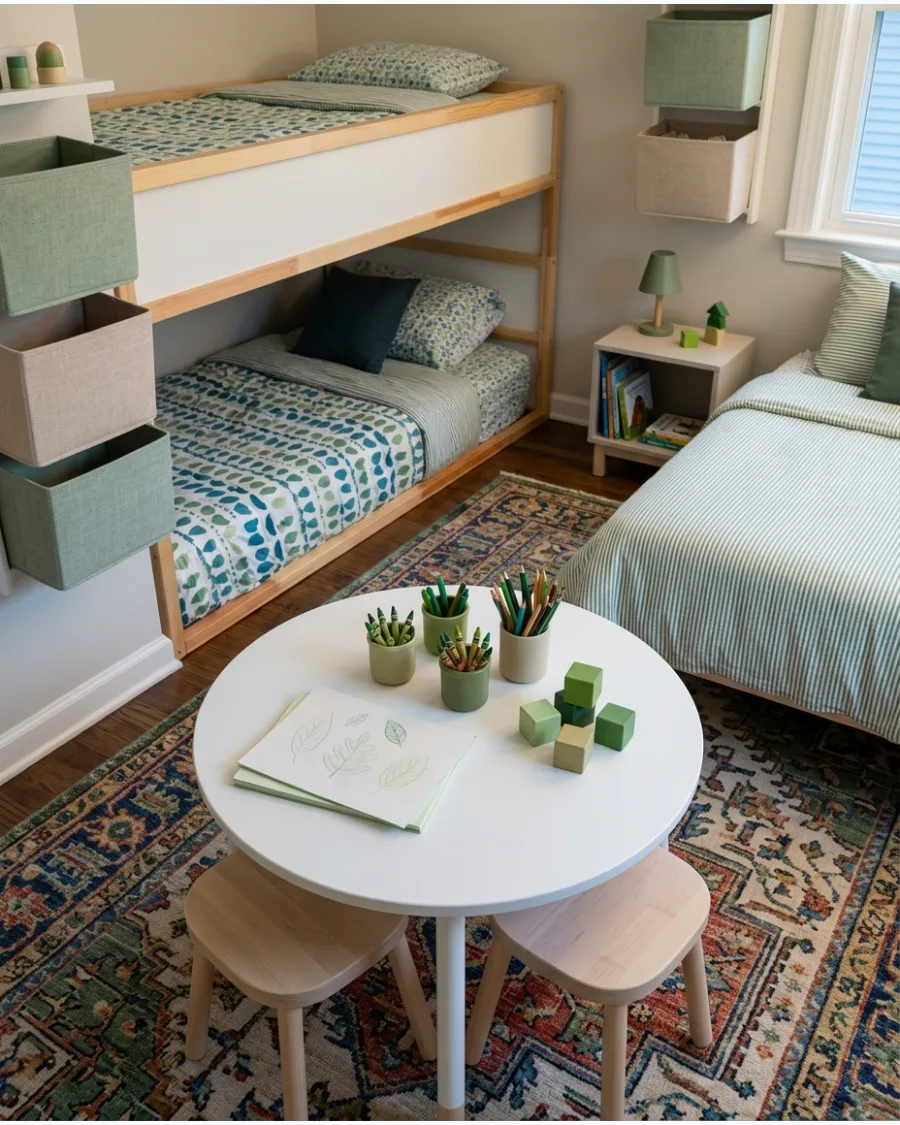
A central table provides a neutral ground for siblings to work on puzzles or build toys together. Selecting a table with a smooth, easy-clean surface makes it perfect for messy art projects or snacks.
Choose stools or chairs that can be pushed entirely under the table to keep walkways clear. A round table often fits better in tight corners than one with sharp rectangular edges.
- Budget: $60 to $150; 30-minute assembly.
- Use a clear plastic mat underneath the table to protect the rug from spills.
- Store art supplies in a rolling cart nearby for quick access and easy cleanup.
Most people skip this: A table with a lipped edge prevents crayons and small toy pieces from rolling onto the floor.
40. Reading Corner Between the Beds
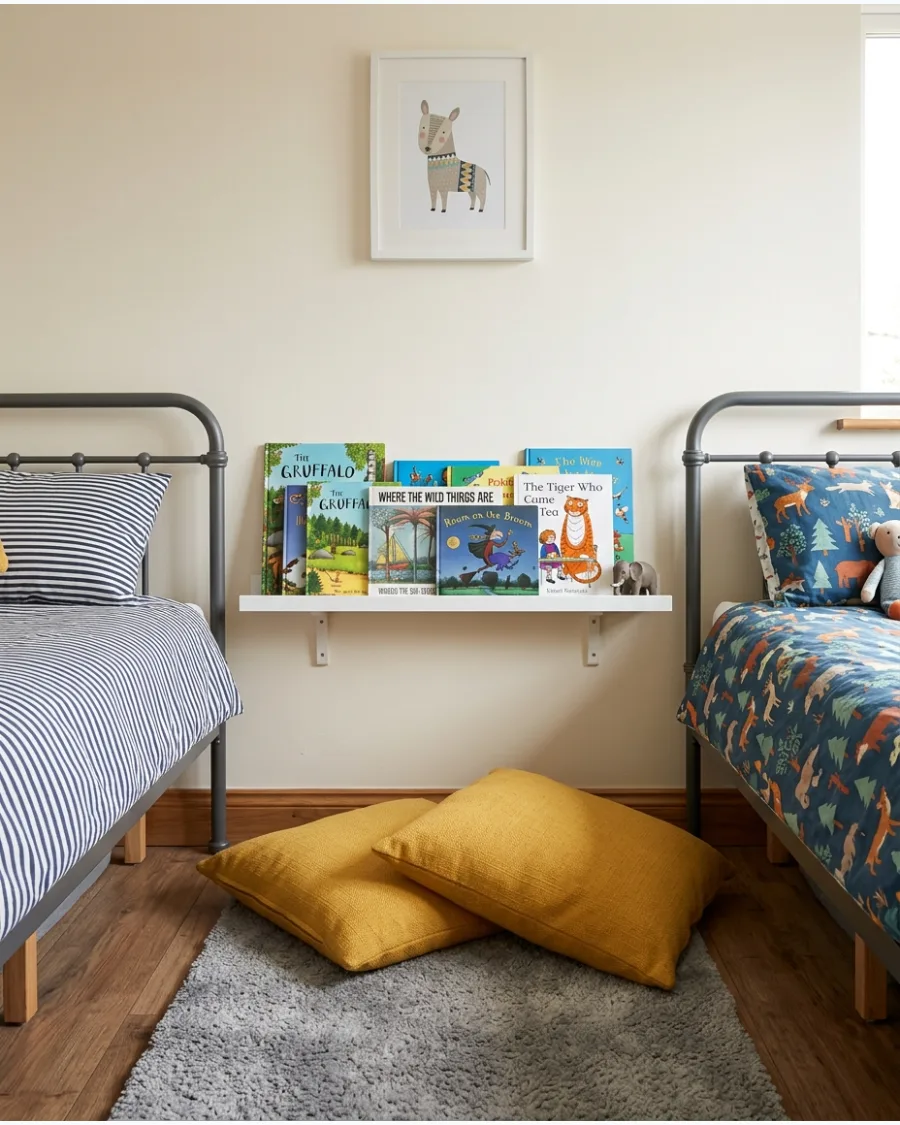
The space between two beds is often wasted, but it can easily become a cozy retreat.
Floor cushions and a soft rug create a comfortable spot for kids to wind down before sleep.
Install low wall-mounted shelves so books are within reach for a child sitting on the floor. This shared zone encourages quiet time and keeps books off the beds.
- Budget: $40 to $100; 20-minute setup time.
- Use a non-slip rug pad to keep the reading area from shifting on hard floors.
- Choose washable cushion covers for easy maintenance and longevity.
Quick win: Add a small battery-operated clip light to the bookshelf so kids can read without turning on the main overhead light.
41. Play Zone Under a Raised Bed
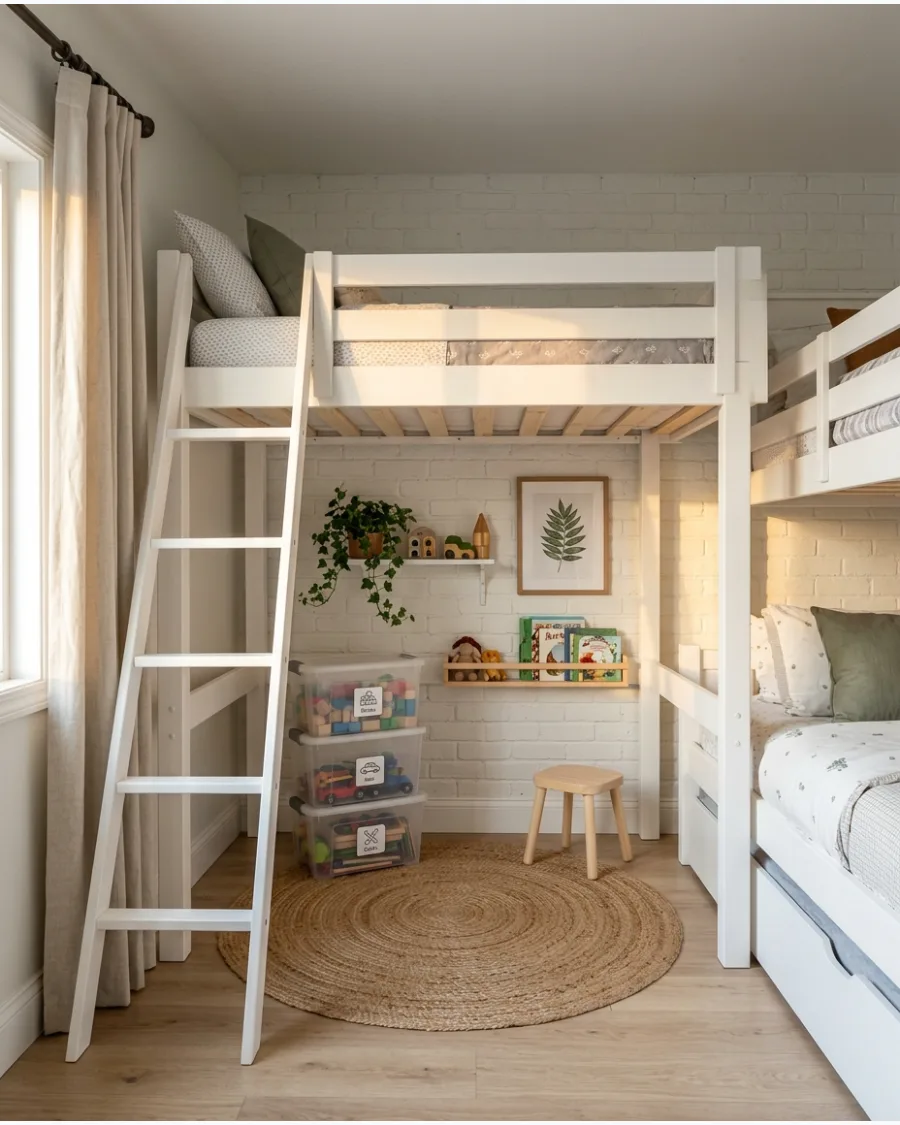
Use the area underneath a loft bed as a compact play zone. Add a washable rug, toy baskets, and a curtain that can make the space feel like a small den.
Tuck clear bins against the back wall to keep toys organized but visible for easy cleanup. This setup keeps the floor clear for walking while giving children a private spot for imagination.
- Sourcing: $50-$150 for accessories
- Setup: Measure height to ensure sitting clearance
- Adaptation: Use a tension rod for a no-drill curtain
Best shortcut: Use battery-operated puck lights to brighten the dark space under the bed.
42. Window Homework Nook
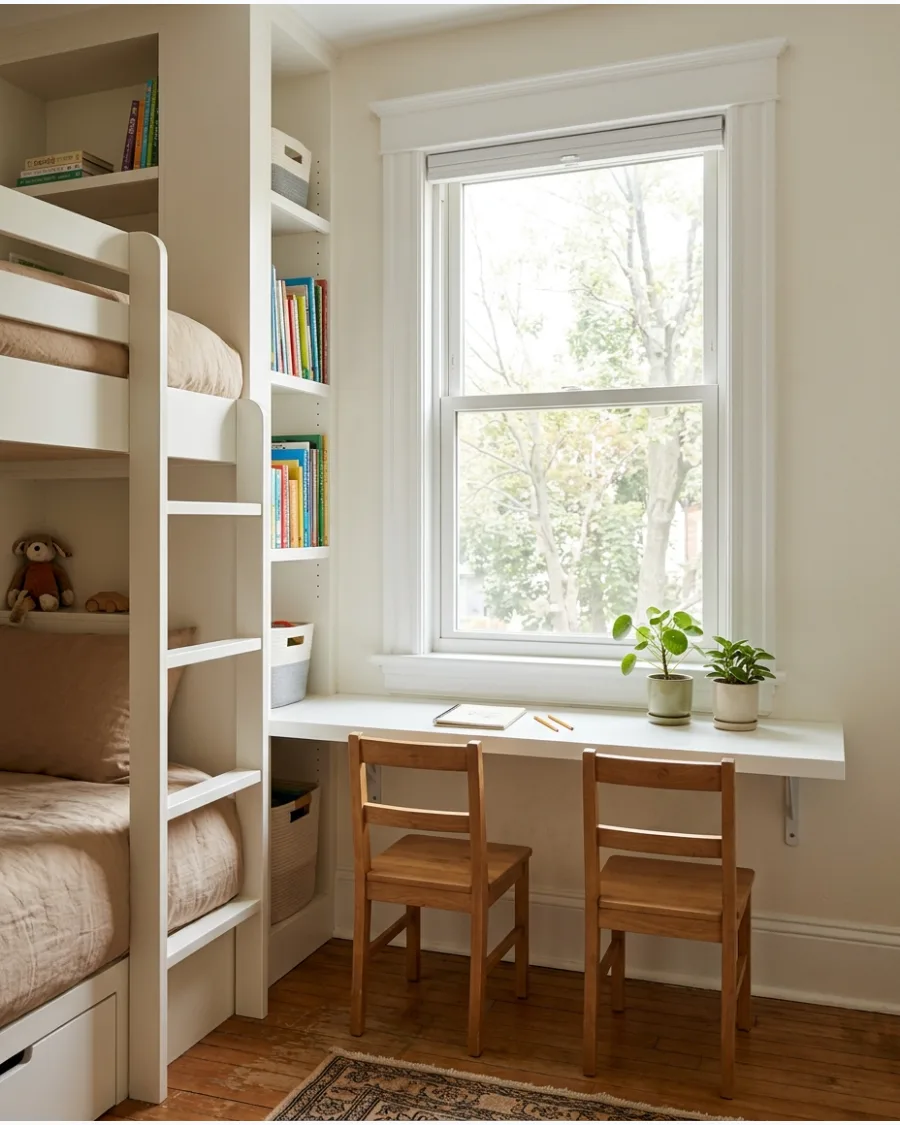
Position a narrow shared desk beneath the window to take advantage of natural light. Keep the desktop shallow so it does not block movement through the room.
Install a wall-mounted power strip just above the desk surface to prevent tangled cords on the floor. Natural light helps with focus and makes the study area feel larger than it actually is.
- Sourcing: Local hardware store for brackets and wood
- Setup: Level the desk height with the window sill
- Adaptation: Use a folding desk if space is extremely tight
Quick win: Add a sheer roller shade to reduce glare on computer screens without losing the light.
PRIVACY AND PERSONAL SPACE IDEAS
43. Bunk Bed Curtains
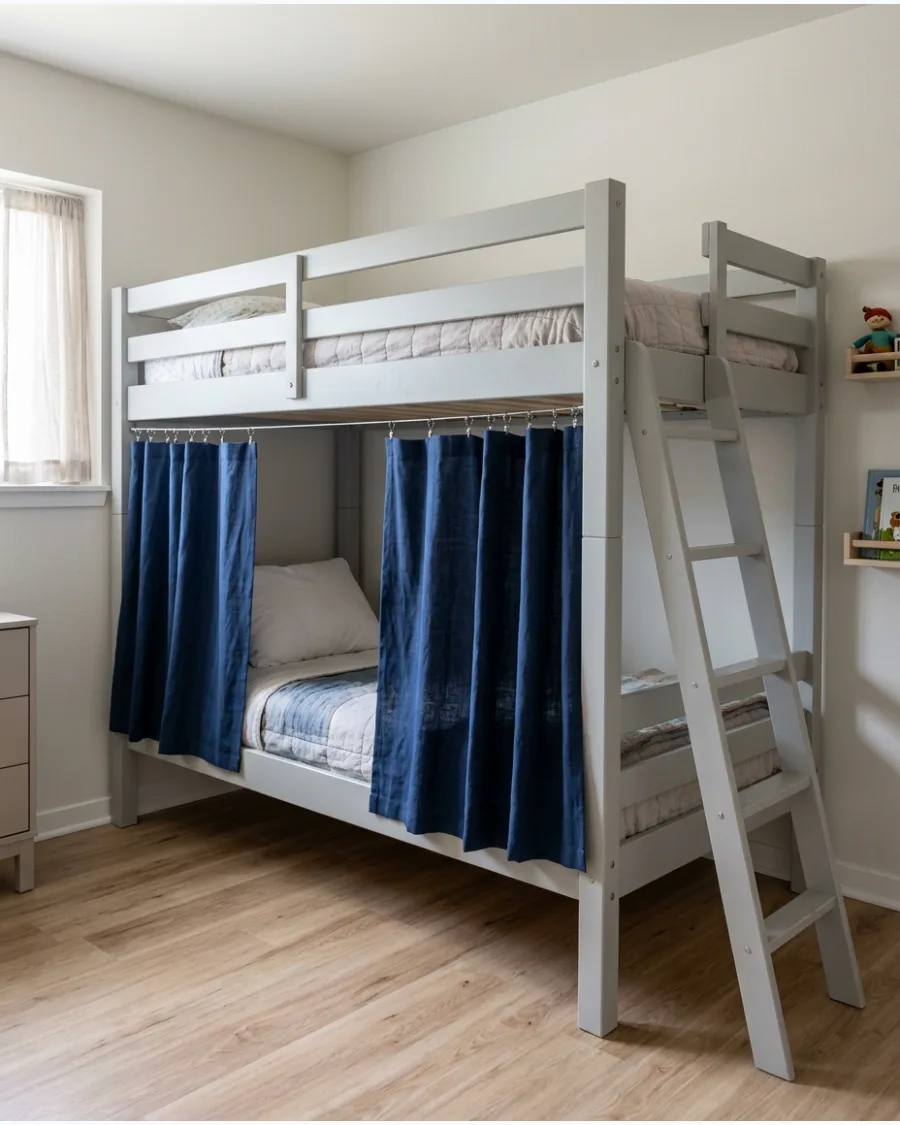
Add individual curtains to bunk openings so each child can enjoy a little privacy. Select breathable fabric that coordinates with the room without making the bunks feel enclosed or dark.
Attach the fabric to the bed frame using a simple wire rod or heavy-duty hook-and-loop strips. This creates a cozy room-within-a-room feel for shared sleeping quarters.
- Sourcing: $20-$40 for fabric and hardware
- Setup: Ensure fabric is hemmed 1 inch above the floor
- Adaptation: Use mesh or lace for better airflow in warm climates
Most people skip this: Use flame-retardant fabric for any textiles used near sleeping areas or electronics.
44. Open Shelf Room Divider
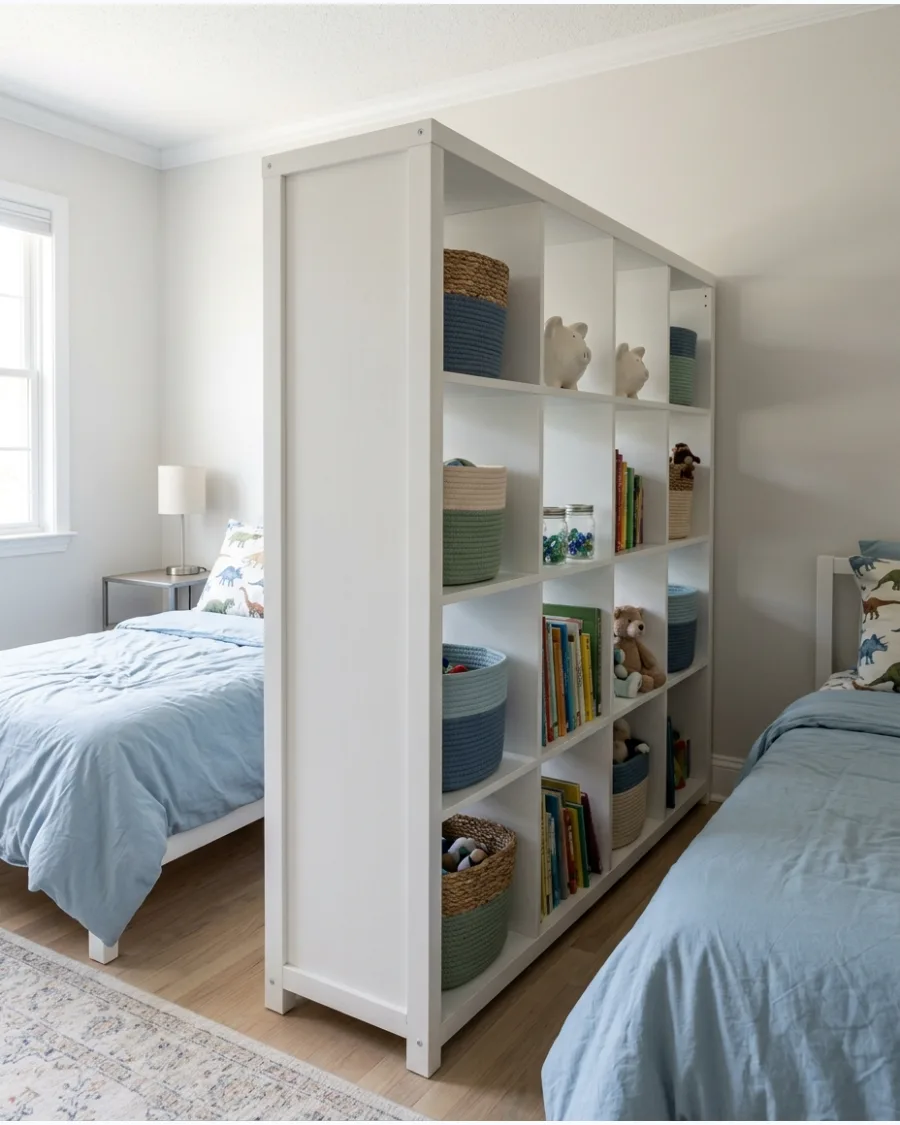
Use an open bookcase between two beds to define separate sleeping areas. The open design provides storage while allowing light to travel through the room.
Secure the bookcase to both the wall and floor to prevent any tipping in a high-energy kids room. It acts as a shared nightstand that serves both children simultaneously.
- Sourcing: $60-$120 at big-box retailers
- Setup: Leave 2 feet of walking space around the unit
- Adaptation: Use a low 2×2 shelf for a less imposing look
Quick win: Fill the middle cubbies with books and the bottom ones with heavy toys to lower the center of gravity.
45. Ceiling-Mounted Curtain Divider
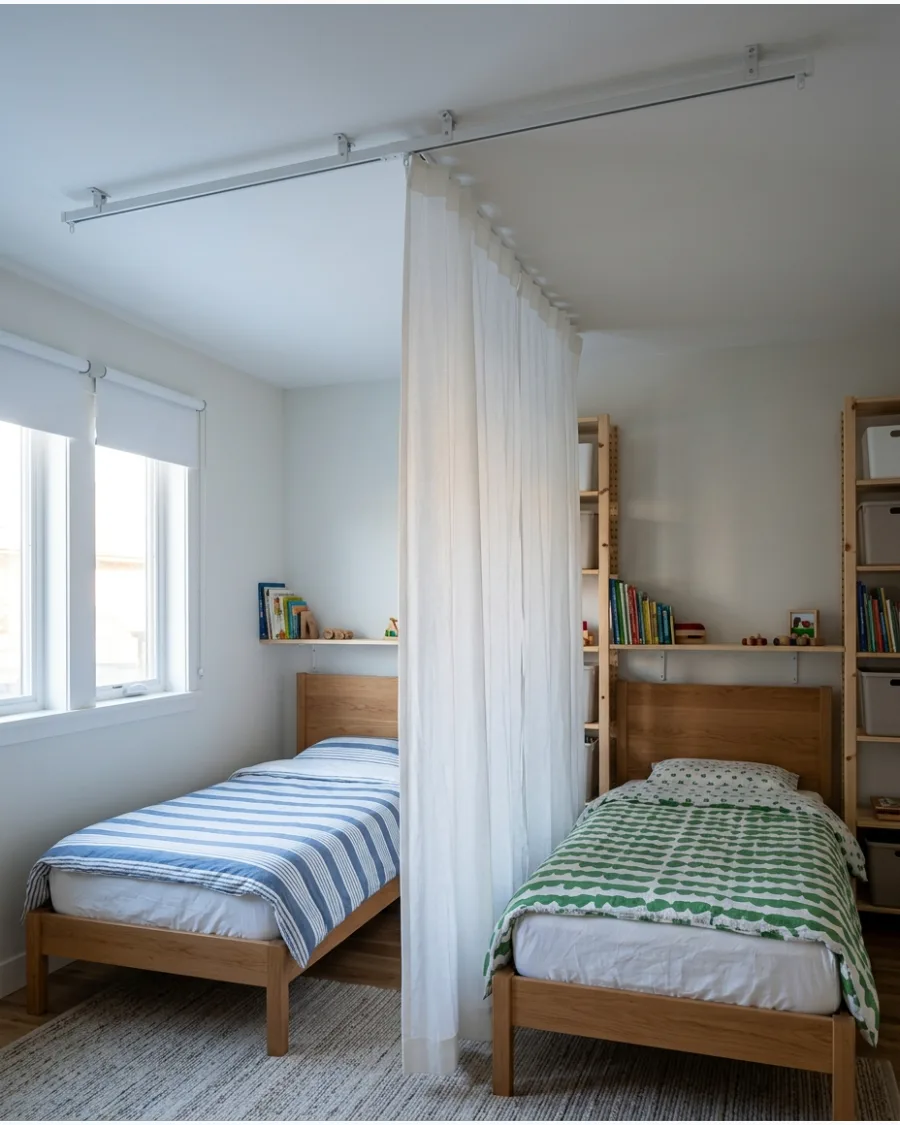
Hang a curtain between two beds that can be opened during the day and closed when privacy is needed. A lightweight neutral fabric will prevent the small room from feeling divided permanently.
Install a ceiling track instead of a rod for a seamless look and smoother operation. This is the fastest way to give siblings their own territory without building walls.
- Sourcing: $30 for track kits
- Setup: Drill into ceiling joists for a secure hold
- Adaptation: Use a beaded curtain for a fun look that doesn't block air
Best shortcut: Use clip rings so you can easily swap or wash the curtains without taking down the track.
46. Two-Tone Wall Zones
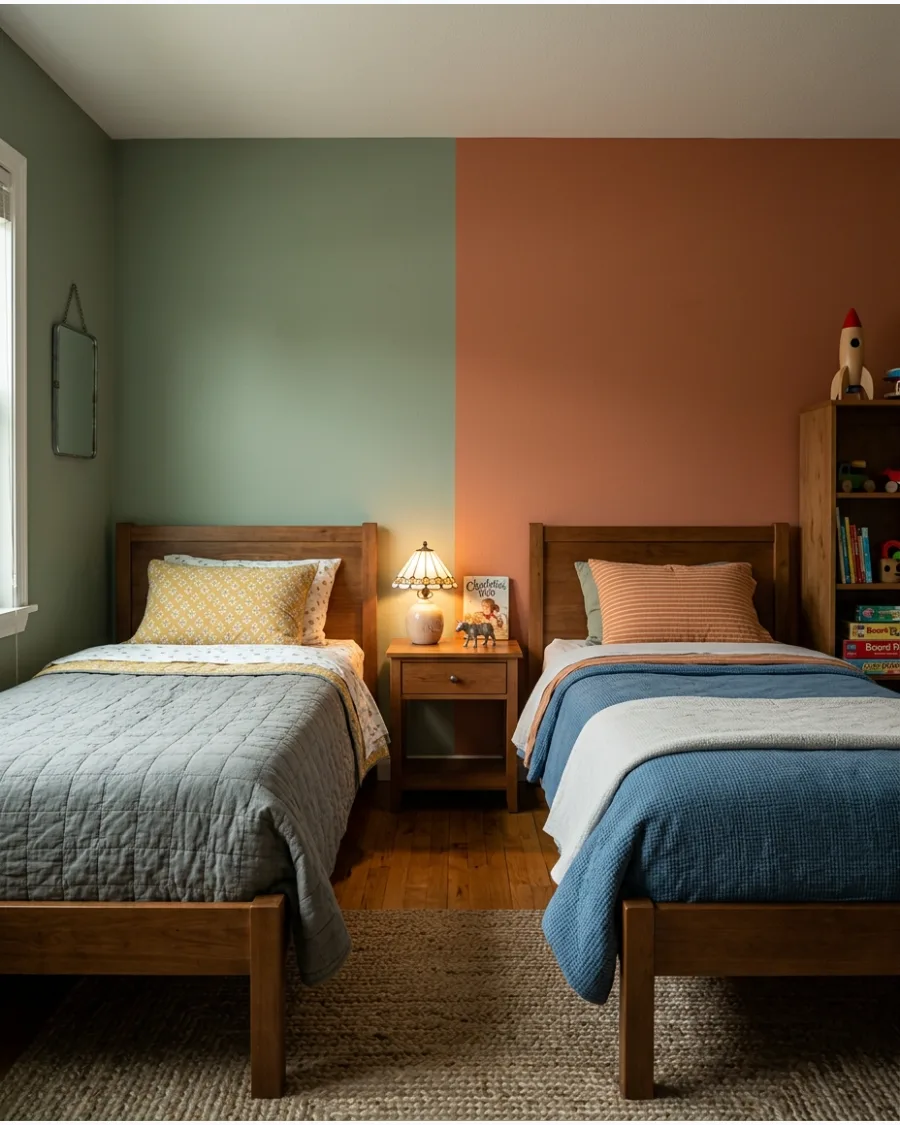
Paint the wall behind each bed in a different but coordinating color.
The two zones can express individual personalities without requiring extra furniture. Use a vertical line of painter's tape to create a crisp, clean border between the two colors. Visual cues like paint help children feel ownership over their specific side of the room.
- Sourcing: $20-$40 for two sample-size paint cans
- Setup: Paint 2-3 feet beyond the width of the bed frame
- Adaptation: Use peel-and-stick wallpaper panels if you cannot paint
Most people skip this: Carry the wall color onto the baseboards in that specific zone for a more custom, professional look.
47. Separate Bedside Lighting
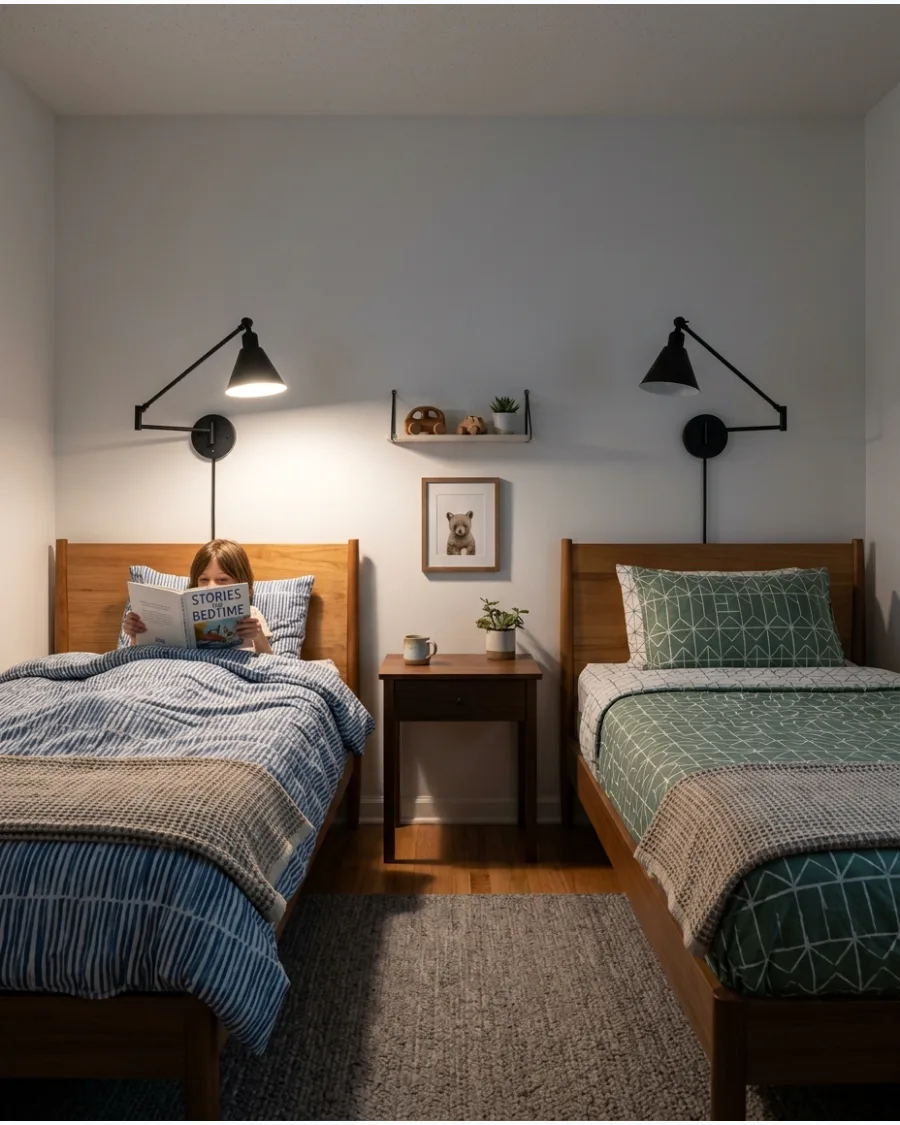
Give each child an individual wall light or reading lamp. Separate controls allow one child to read while the other settles down to sleep.
Mount swing-arm lamps to the wall to save space on small or shared nightstands. This setup prevents bedtime arguments by letting each child control their own environment.
- Sourcing: $25-$50 per lamp
- Setup: Position the switch within easy reach of a lying-down child
- Adaptation: Use clip-on book lights for a budget-friendly alternative
Quick win: Use warm LED bulbs to help children's eyes adjust for sleep better than cool blue-toned bulbs.
48. Personalized Headboard Areas
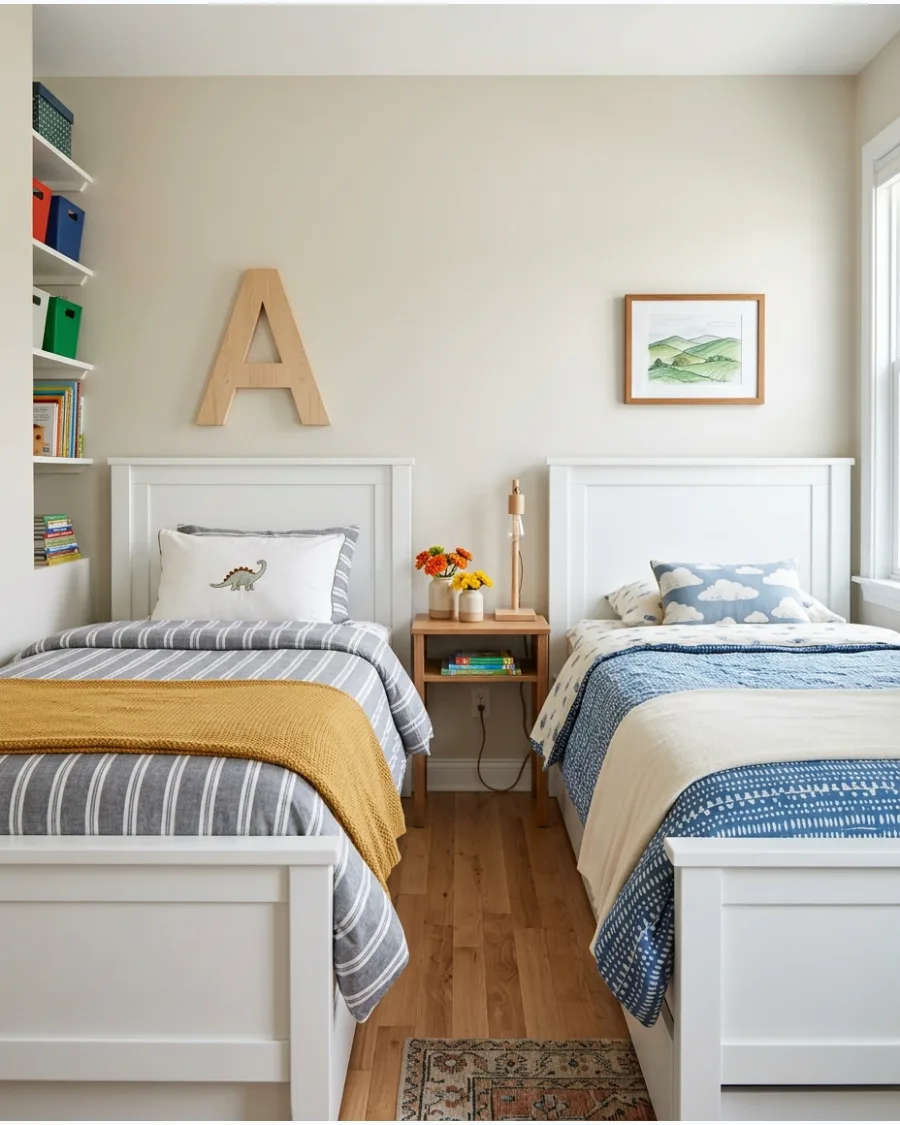
Decorate each headboard with a name sign, initial, favorite artwork, or small pinboard. Keep the bed frames consistent so the overall room still feels coordinated.
Hang a small framed corkboard above each bed for rotating school photos and drawings. Personal touches help kids feel special in a space where they have to share almost everything else.
- Sourcing: Craft stores or DIY items
- Setup: Use Command strips to avoid damaging the walls
- Adaptation: Use vinyl wall decals for a flat, space-saving decoration
Best shortcut: Limit the personal zone to the width of the headboard to keep the room from looking cluttered.
DECORATING IDEAS FOR A 2026-READY ROOM
49. Neutral Base With Personal Accent Colors
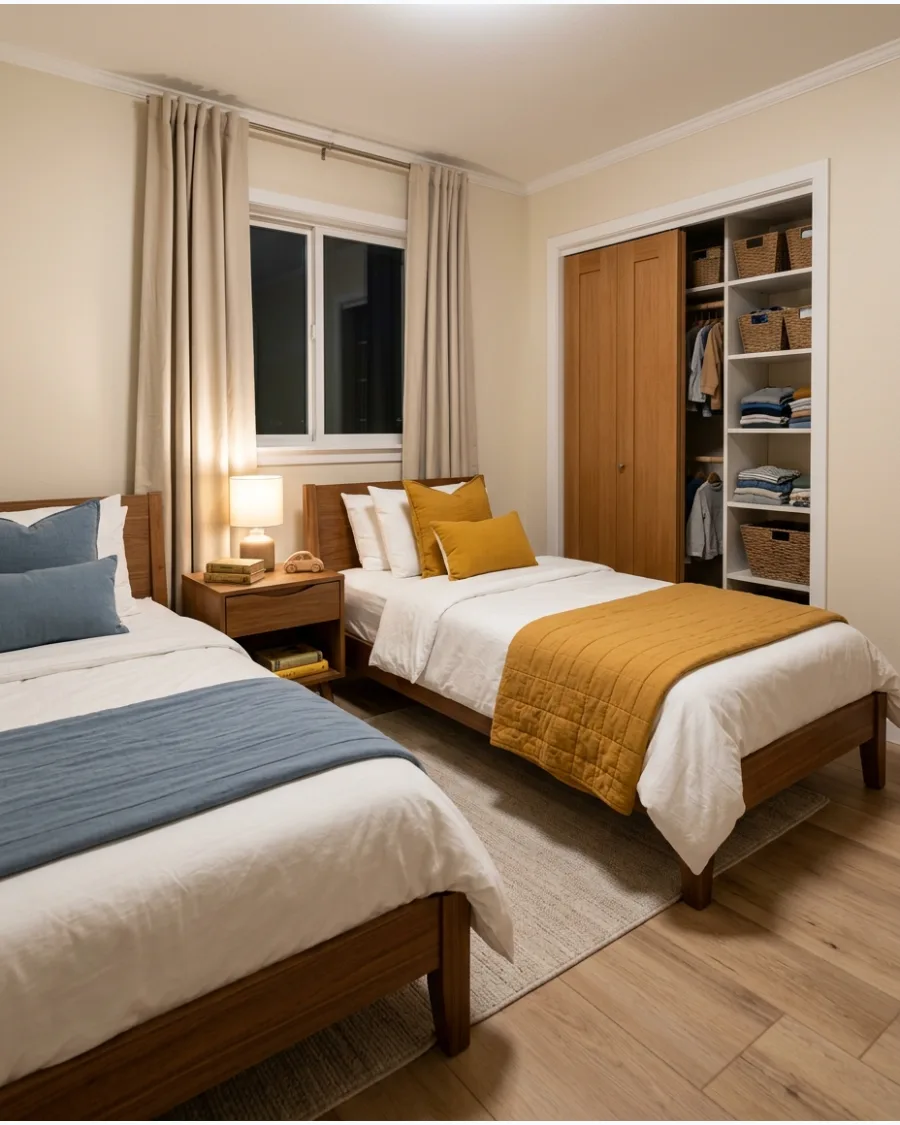
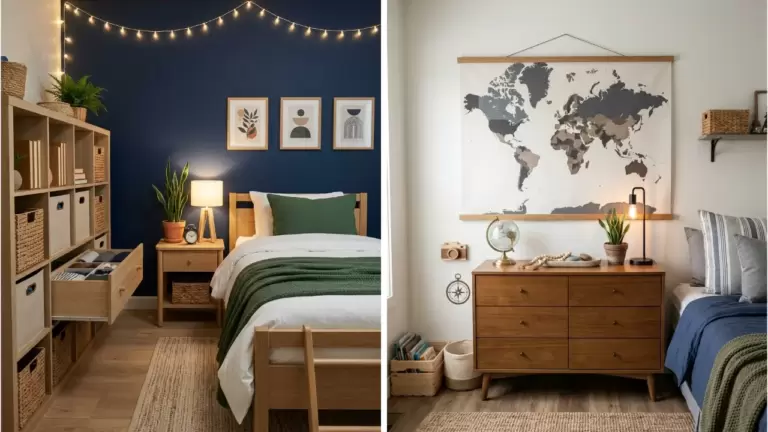
Begin with warm white, soft beige, or light greige walls and let each child select an accent color. Use those colors in bedding, artwork, and storage accessories.
Stick to a maximum of two accent colors per child to keep the room from feeling visually chaotic. A neutral foundation makes it easy to update the room as the children grow and their tastes change.
- Sourcing: High-quality neutral paint
- Setup: Buy matching neutral frames for all artwork
- Adaptation: Use neutral rugs and curtains to keep big-ticket items timeless
Most people skip this: Match the white in the bedding to the white on the trim for a cohesive, high-end look.
50. Coordinated but Different Bedding
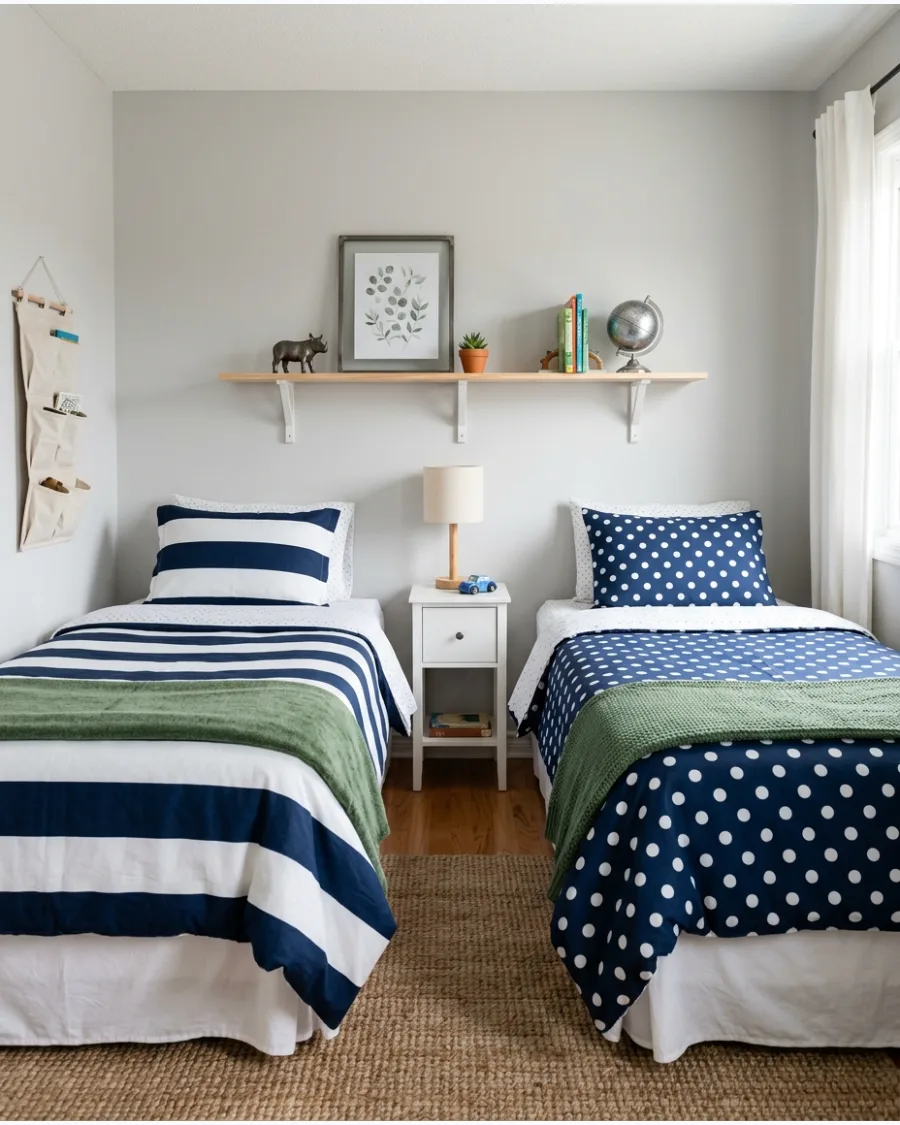
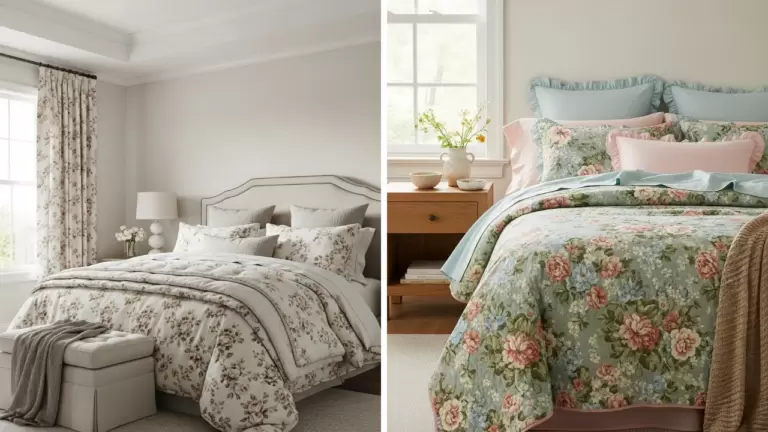
Choose bedding with related colors instead of using completely matching sets.
One bed might feature stripes while the other uses a small floral, geometric, or nature-inspired print. Ensure both sets of bedding share at least one common thread, like the same background color or fabric texture. This approach acknowledges individual style while maintaining a designed look for the shared space.
- Sourcing: Department stores or online bedding shops
- Setup: Layer with matching solid-colored throw blankets
- Adaptation: Buy reversible duvets to change the look instantly
Quick win: Use identical pillowcases but different duvet covers to bridge the gap between two different styles.
51. Sage Green and Natural Wood Palette
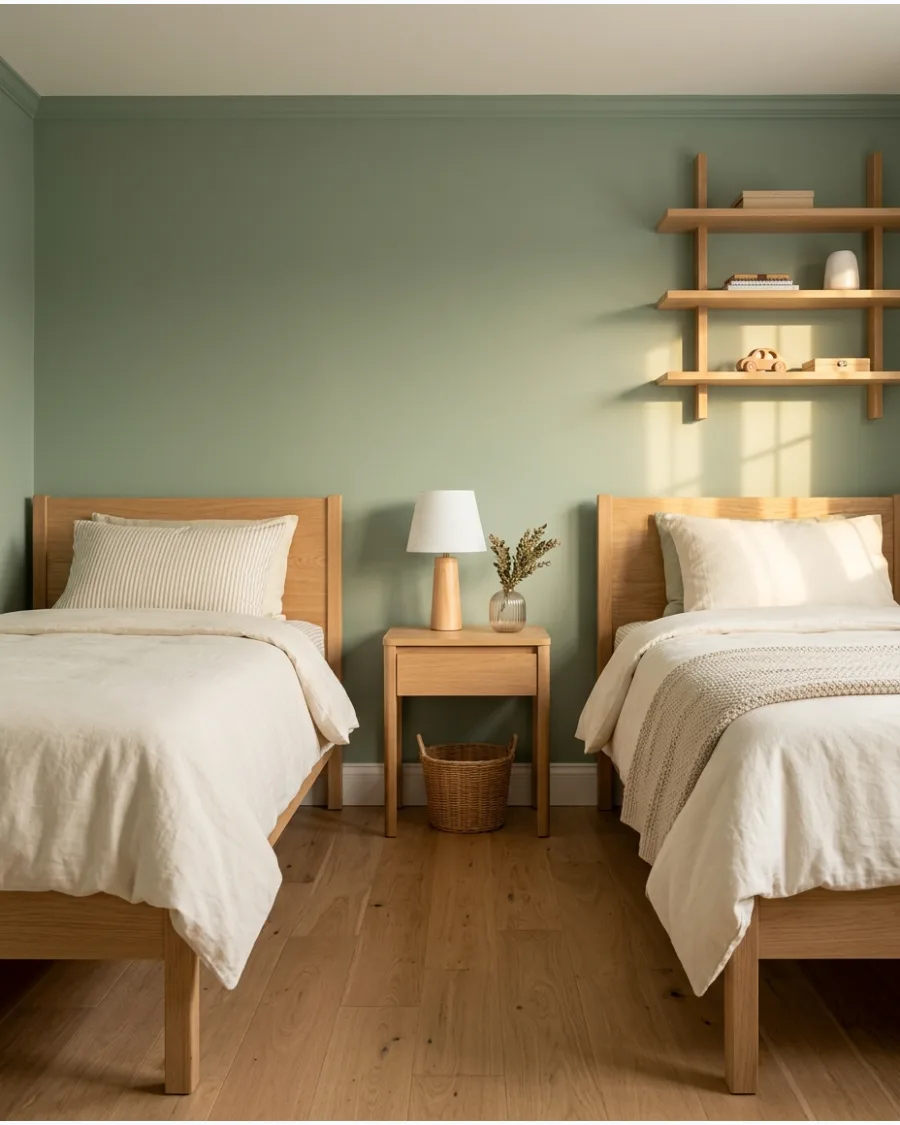
Muted sage walls create a restful backdrop that does not feel too juvenile for older children. Pair this with light-colored wood frames and cream-colored linens to keep the room feeling airy.
Stick to a two-tone color scheme to prevent a small room from looking cluttered or chaotic. Natural wood tones bring a warmth that painted furniture often lacks.
- Budget $50 to $200 for paint and basic decorative accents.
- Position the beds against the sage wall to anchor the room and define the sleeping zone.
- Swap sage for soft olive or navy if the room receives a lot of direct sunlight.
Quick win: Use matte paint on the walls to hide scuffs and reduce glare in small spaces.
52. Dusty Blue and Warm Clay Accents
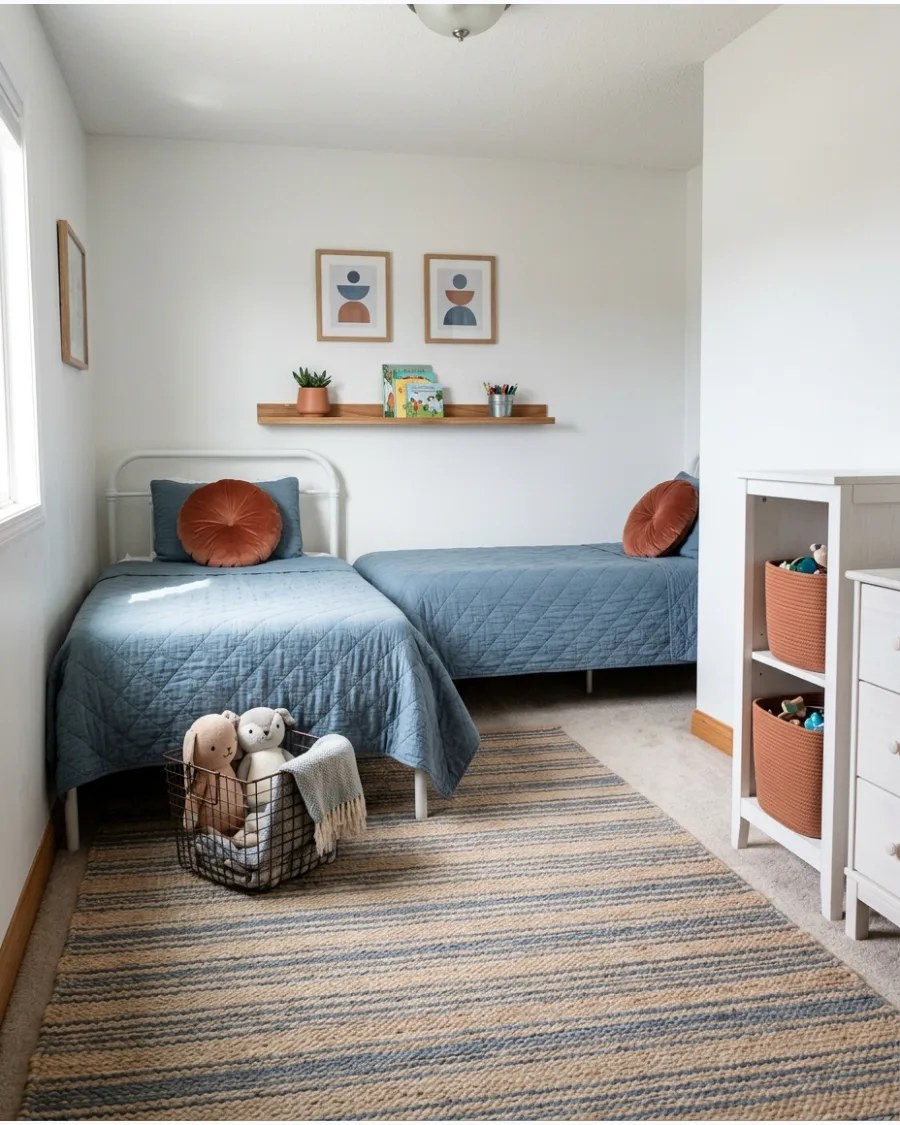
Mix cool dusty blue tones with earthy terracotta or peach accents for a balanced look. This combination provides enough contrast to define separate spaces without being visually jarring.
Incorporate these colors through throw pillows, small rugs, or wall art rather than painting every surface. Warm clay tones help ground the cool blue and make the room feel much cozier.
- Budget $40 to $120 for textiles and accent pillows.
- Layer the clay accents on top of the blue bedding for a cohesive and intentional look.
- Use deeper rust tones instead of peach for a more mature feel as children grow older.
Most people skip this: Match the clay accent color to a small piece of art on the wall to tie the whole room together.
53. Playful Wallpaper Ceiling
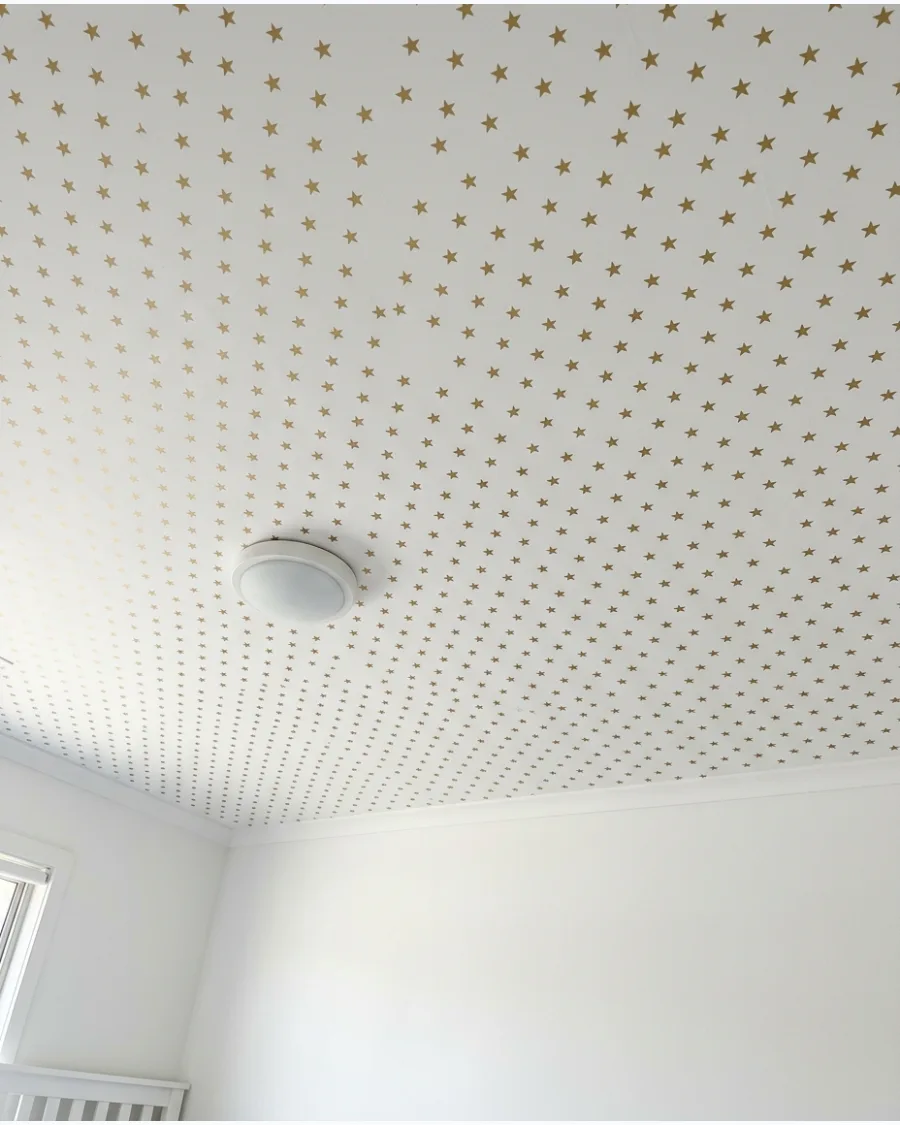
Put a fun pattern like stars or soft stripes on the ceiling to add character without taking up any wall space. This draws the eye upward, which can actually make a small room feel taller and more open.
Opt for a peel-and-stick wallpaper so you can easily update the look when the kids outgrow the design. Ceilings are the most underused surface in a room and offer a great spot for bold patterns.
- Budget $100 to $300 depending on wallpaper type and the total ceiling square footage.
- Apply the wallpaper from the center of the ceiling outward to ensure the pattern stays straight.
- Use a light-colored background on the wallpaper to keep the room from feeling closed in.
Best shortcut: Use a wallpaper smoothing tool to get rid of air bubbles for a professional finish.
54. Small Storybook Mural
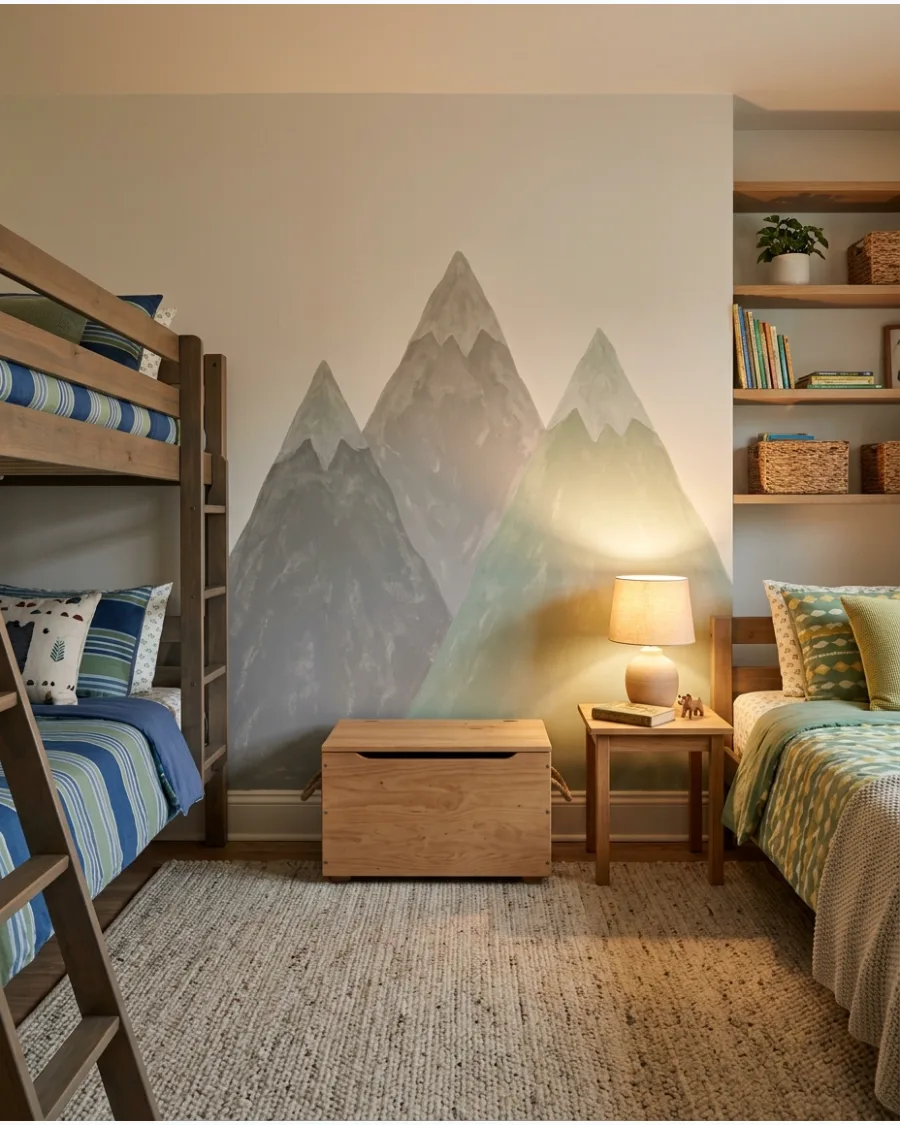
Choose one wall to feature a simple mural like rolling mountains or a quiet forest scene. Keeping the other three walls a solid, neutral color prevents the room from feeling overwhelmed by the art.
Use a large-scale mural with plenty of white space in the design to keep the room feeling light and breathable. A mural creates a sense of wonder and gives the children a shared focal point for imaginative play.
- Budget $80 to $250 for a pre-pasted mural or basic paint supplies.
- Center the mural on the largest open wall to create a clear focal point for the entire room.
- Choose a mural with a horizon line low on the wall to make the ceiling appear higher.
Quick win: Position the beds so they do not cover the best parts of the mural design.
55. Flexible Bedroom That Grows With Them
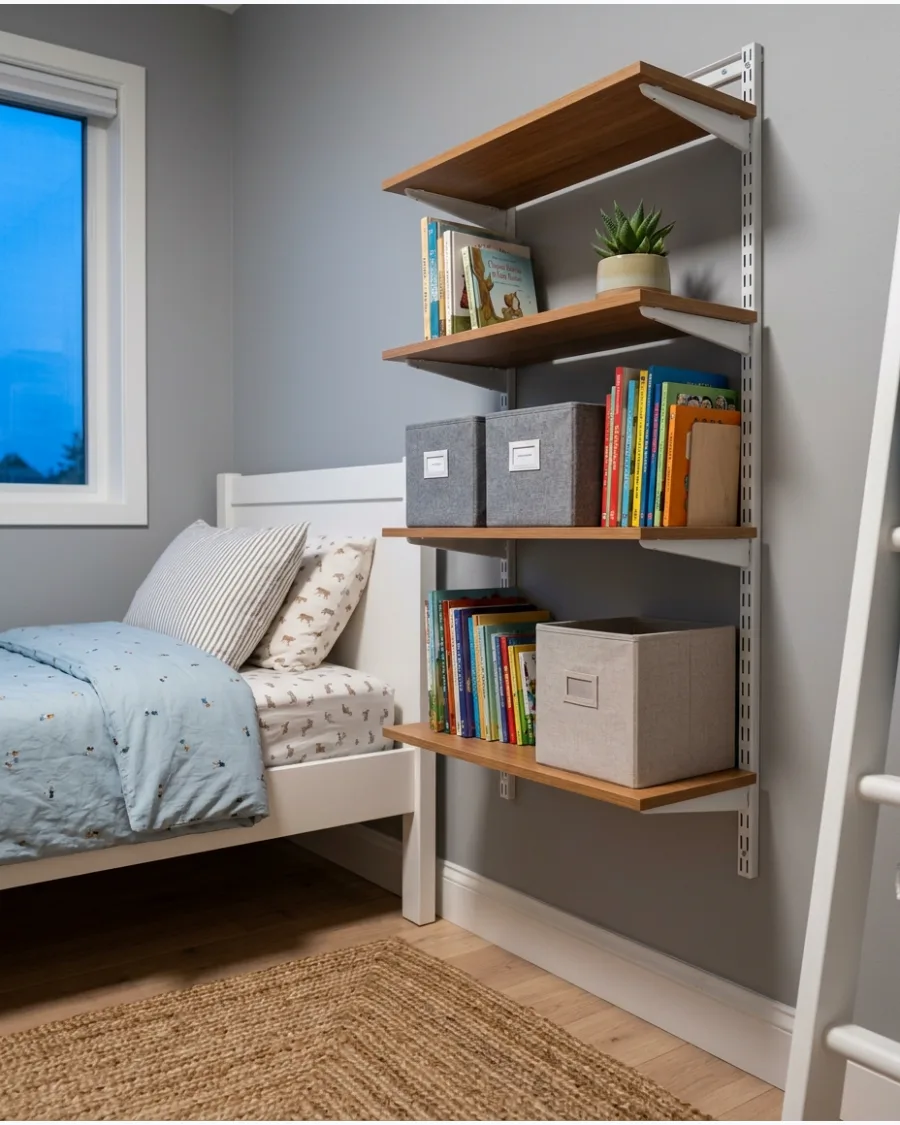
Invest in simple furniture with clean lines that can transition from toddler years to the teen years. Use adjustable wall shelving and removable bins so the storage can change as their hobbies do.
Select furniture in neutral finishes like white or natural wood to ensure it matches any future decor changes. Modular storage is much better than built-ins because you can move it around as the floor plan needs to change.
- Budget $150 to $500 for modular furniture pieces and adjustable shelving components.
- Mount shelving at a height the children can reach now but can be moved higher later.
- Add personality with removable wall decals that will not damage the paint when it is time for a change.
Most people skip this: Buy extra matching storage bins now so you have them if the manufacturer stops making that style.
Frequently Asked Questions
How do you divide a small shared room for privacy?
You can easily create individual zones by hanging ceiling-mounted curtains or placing an open bookshelf between the beds to act as a divider. Canopy beds are another stylish way to provide a sense of personal space and a private retreat for each child.
What is the best layout for two twin beds in a small room?
An L-shaped corner layout is often the best choice because it opens up the center of the room for a larger play area. If the room is narrow, placing beds parallel to each other with a shared nightstand helps maintain a balanced and functional flow.
How do you manage toy storage in a shared bedroom?
Maximize your space by using rolling under-bed bins for larger items and installing vertical wall shelving to keep the floor clear. Using labeled bins helps both children know exactly where their things go, making cleanup much faster.
Can a toddler and an older child share a small room safely?
Yes, as long as you prioritize age-appropriate furniture and ensure any bunk beds are only used by children aged six and up. Make sure all heavy furniture is anchored to the wall and keep small toys with choking hazards in elevated storage out of the toddler's reach.
How do you coordinate decor without it looking too 'matchy-matchy'?
Start with a cohesive color palette for the walls and rugs to unify the space. From there, let each child choose their own accents, such as unique throw pillows or personalized wall art, to reflect their individual personalities within the shared theme.