50 ’70s Kitchen Remodel Ideas

This post may contain affiliate links: full affiliate disclosure.
An older kitchen gives you a starting point. Look for one feature worth keeping, like walnut doors, an orange counter, or a serving hatch into the dining room.
Save the ideas that suit the room you actually have. Start with color and finishes, then compare the changes that could make cooking or sitting down easier.
This article contains affiliate links. As an Amazon Associate I earn from qualifying purchases.
Keep the character you already have
1. Keep the walnut and lighten what surrounds it
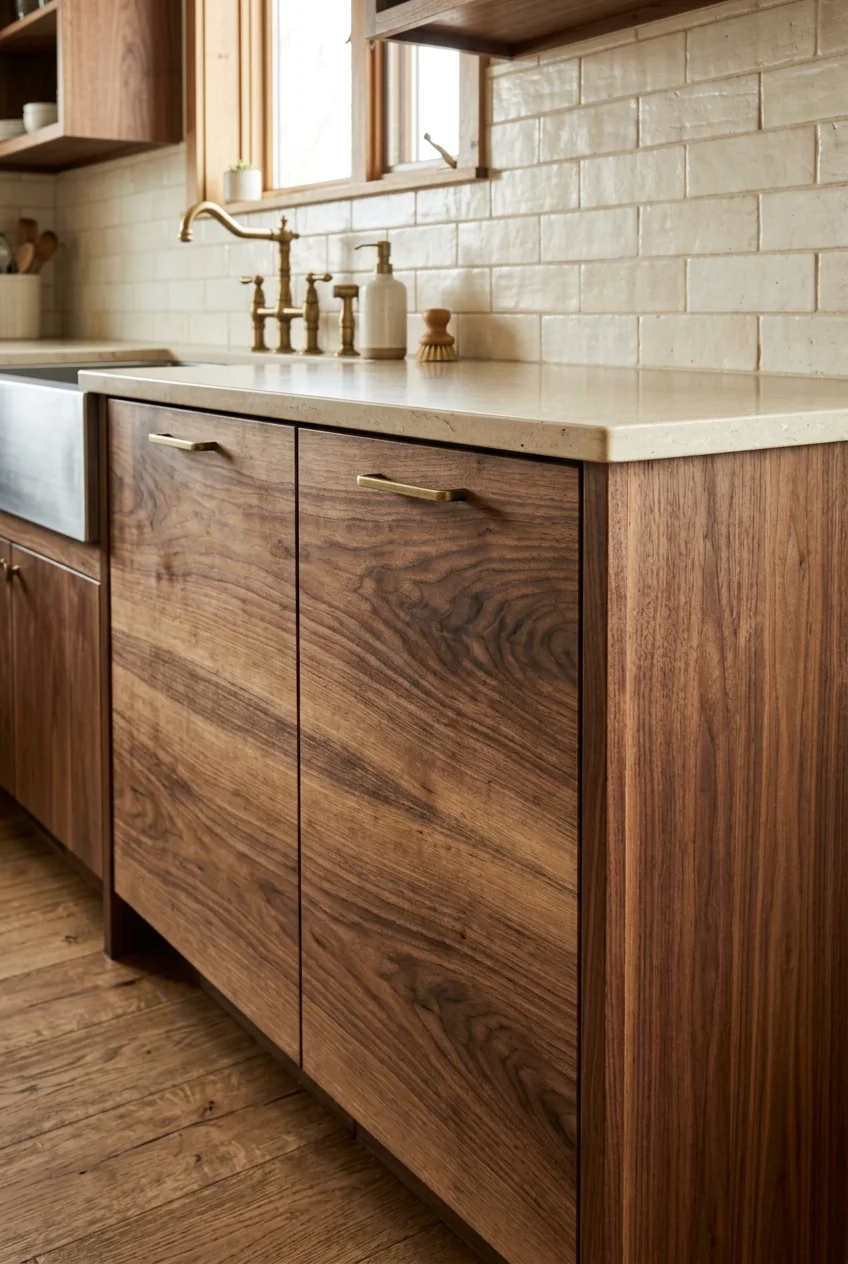
A creamy backsplash can change how a whole bank of walnut doors reads. Choose a tile with a warm base so the wood keeps its depth.
Hold the tile upright behind a sample of your counter. A bright white tile can make an existing ivory counter look yellower than you expected.
Look closely at the edge of an inconspicuous door before planning a new finish. Thin veneer deserves a gentler assessment than a solid wood edge.
2. Repaint a dark cabinet run in warm white
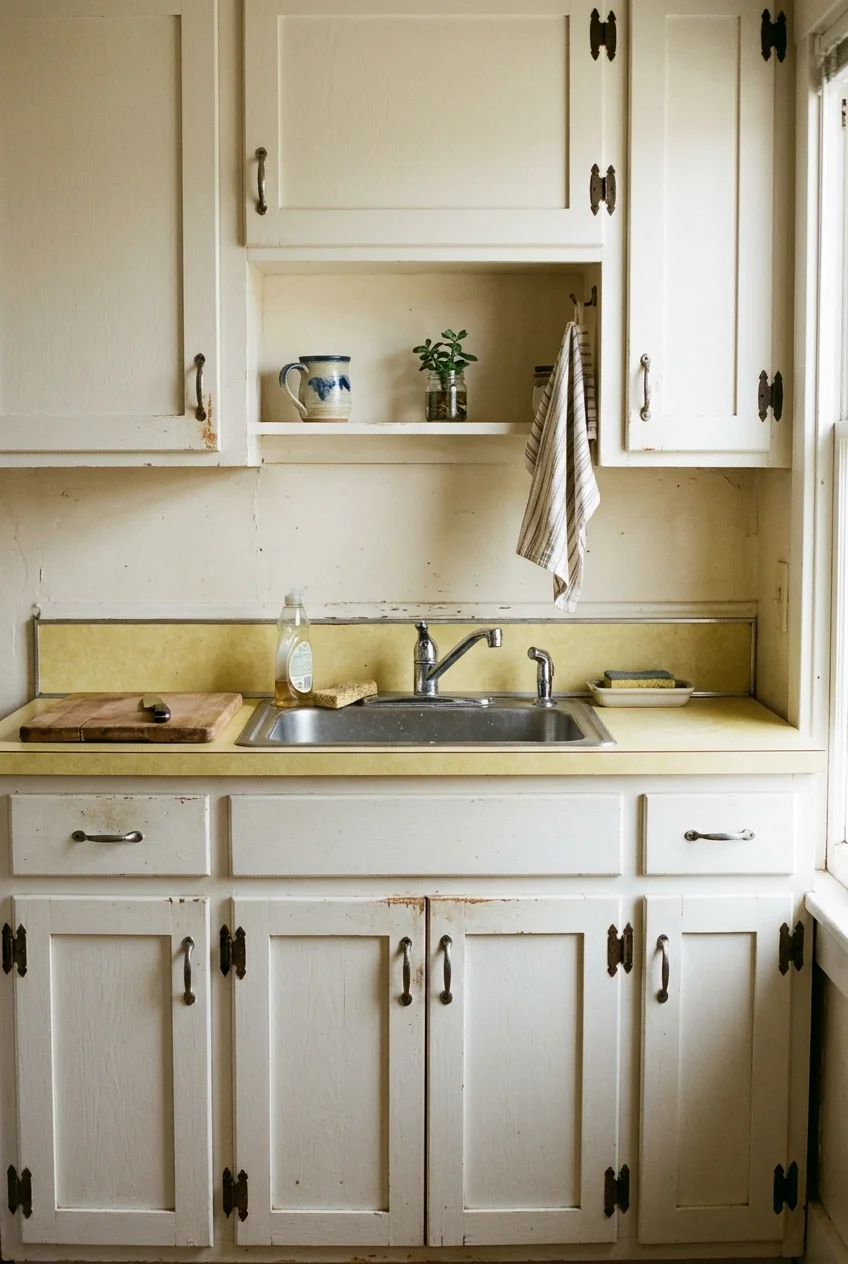
A warm white on the cabinets can give a dark ranch kitchen a lift while keeping the old laminate counter and the familiar door profile.
Choose a cabinet coating system rated for the existing surface. Glossy laminate calls for a compatible bonding primer, and greasy areas need cleaning before coating.
If the home predates 1978, read the lead-safe renovation guidance before disturbing old paint. The EPA recommends hiring a lead-safe certified contractor for this work.
Take one door through the entire finish process first. Give the coating its specified cure time, then check adhesion and see how the color looks upright.
3. Make the old orange counter the starting point
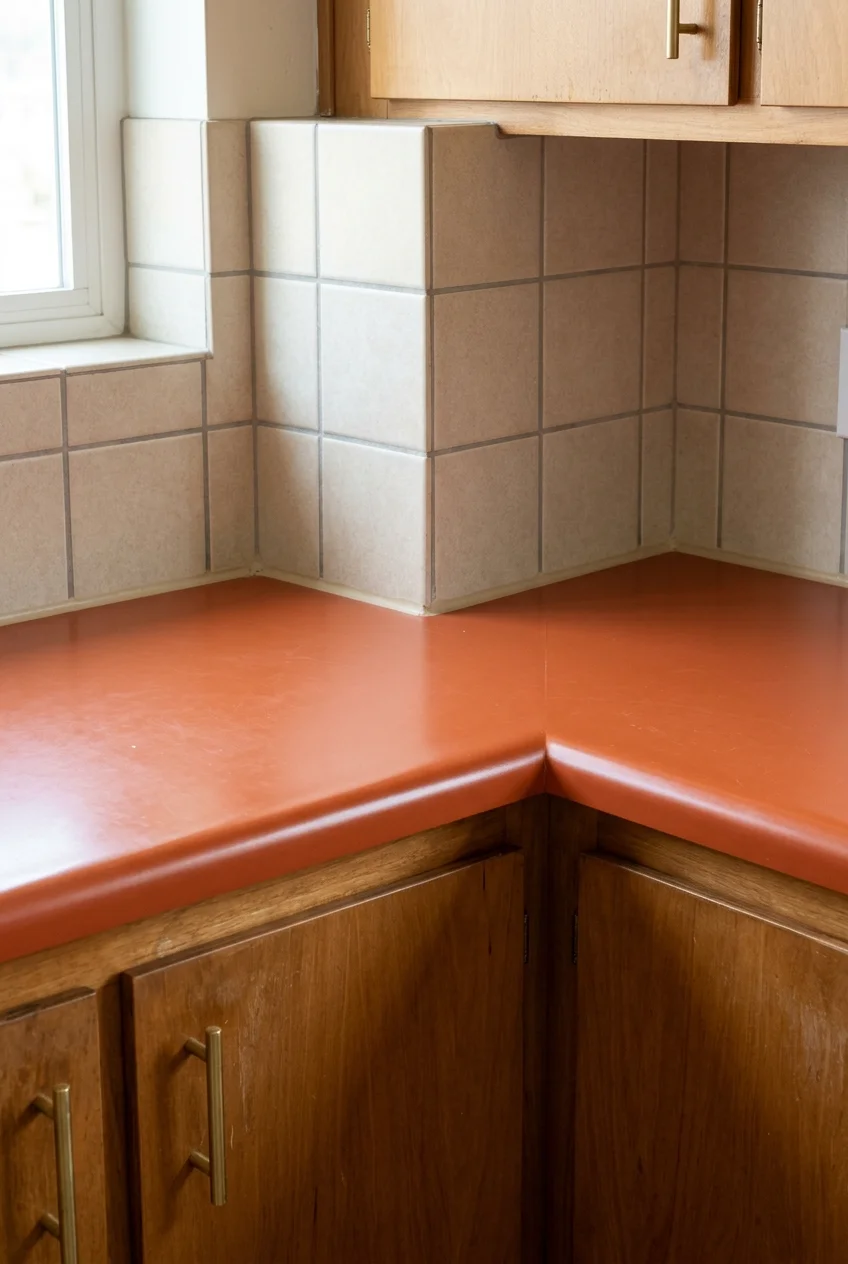
Put a soft oatmeal tile above orange laminate and keep the wood below in a quieter caramel tone. The countertop becomes the strongest color in the room.
Look at the sink cutout before planning around the old top. A clean surface with stable edges gives you more to work with than swollen substrate.
4. Match the old screw holes with warmer pulls
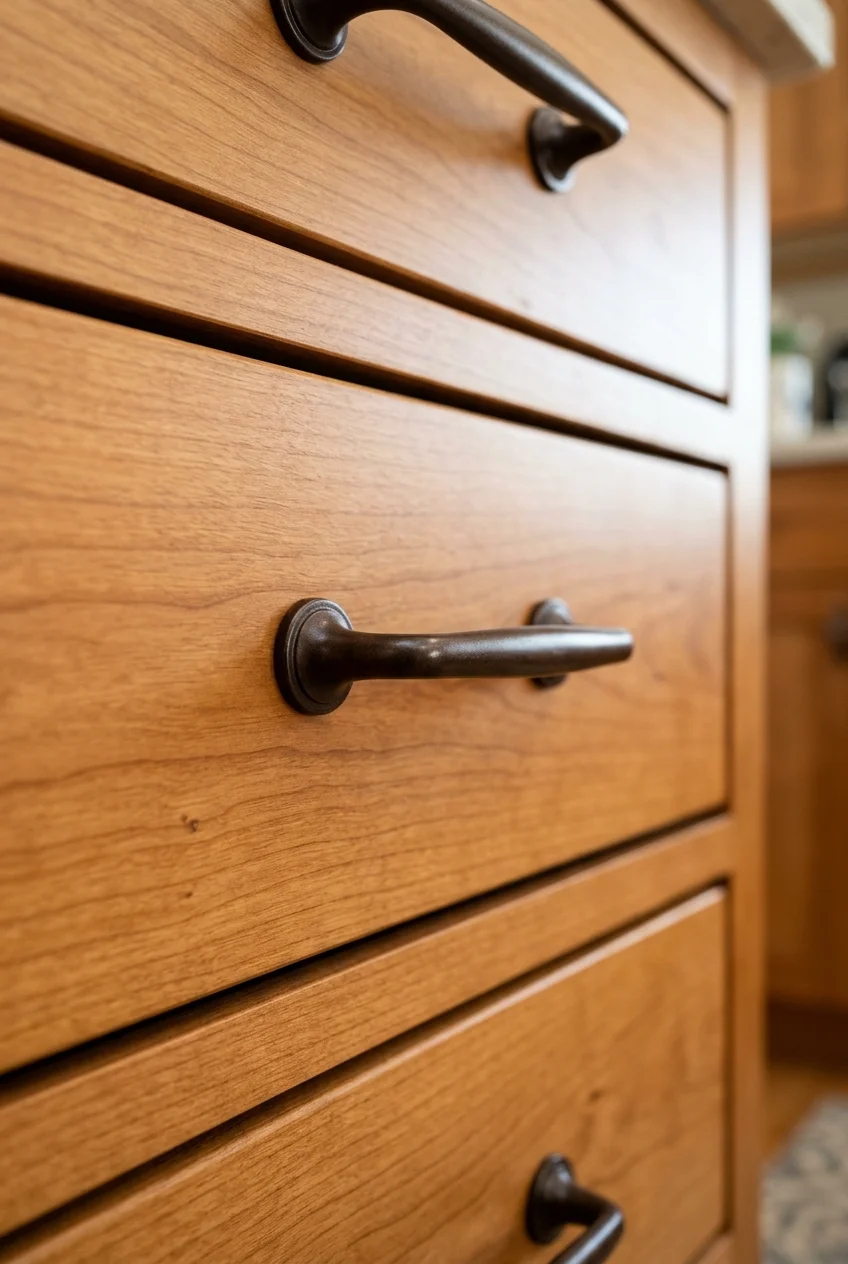
Warm chestnut pulls soften the contrast on brown cabinetry. Unscrew one existing handle and measure from the center of one screw hole to the other.
These Franklin Brass chestnut pulls fit three-inch hole spacing (paid link). Compare their base width with the old hardware marks and check screw length against your drawer thickness.
Try the deepest drawer first. Its handle needs enough room for your fingers when the drawer is loaded, and its projection can matter at a corner.
5. Keep a scalloped valance over the sink
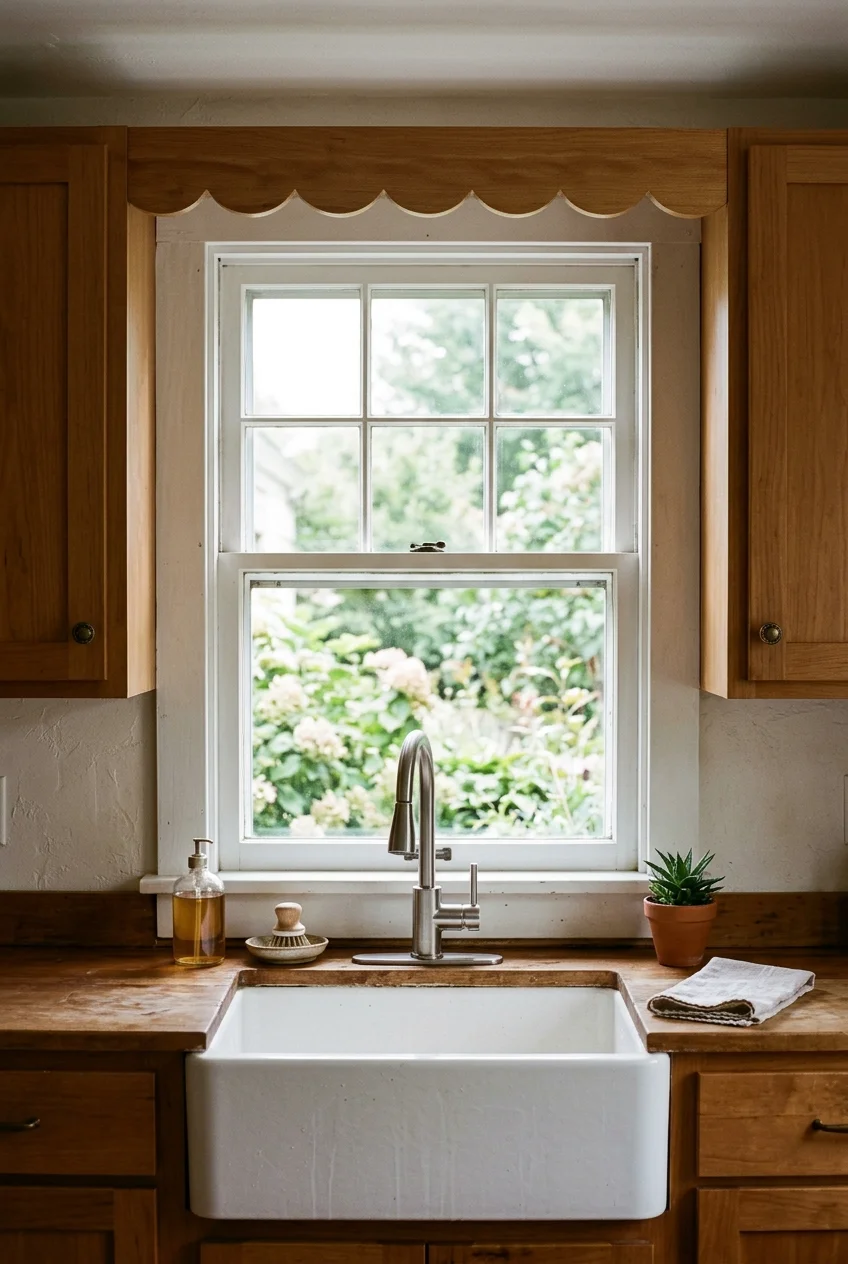
Let the wave of the old wood valance frame the window. Flat cabinet fronts and a plain window treatment give the scalloped edge room to show.
If the window has a crank, open it fully before choosing a shade. A fabric fold that lands behind the handle can make the window irritating to use.
6. Frame the kitchen in its original ceiling beams
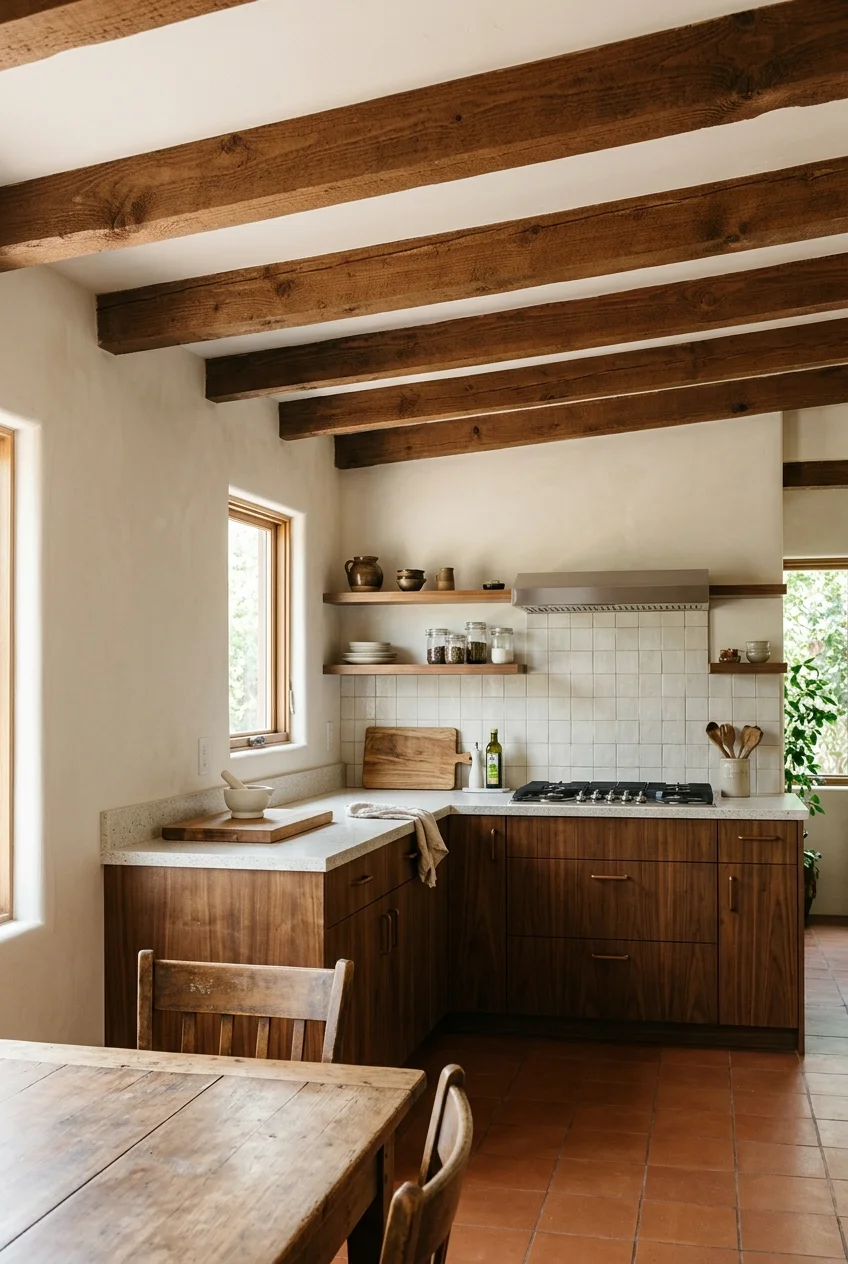
Dark ceiling beams can make a brighter kitchen feel connected to the rest of the house. Repeat their wood tone on one low piece, like a bench.
Plan ceiling lighting around the beams' shadows. Have an electrician review fixture placement and wiring options before anyone cuts into the ceiling or drills into the beams.
7. Preserve the terracotta floor and choose quieter cabinets
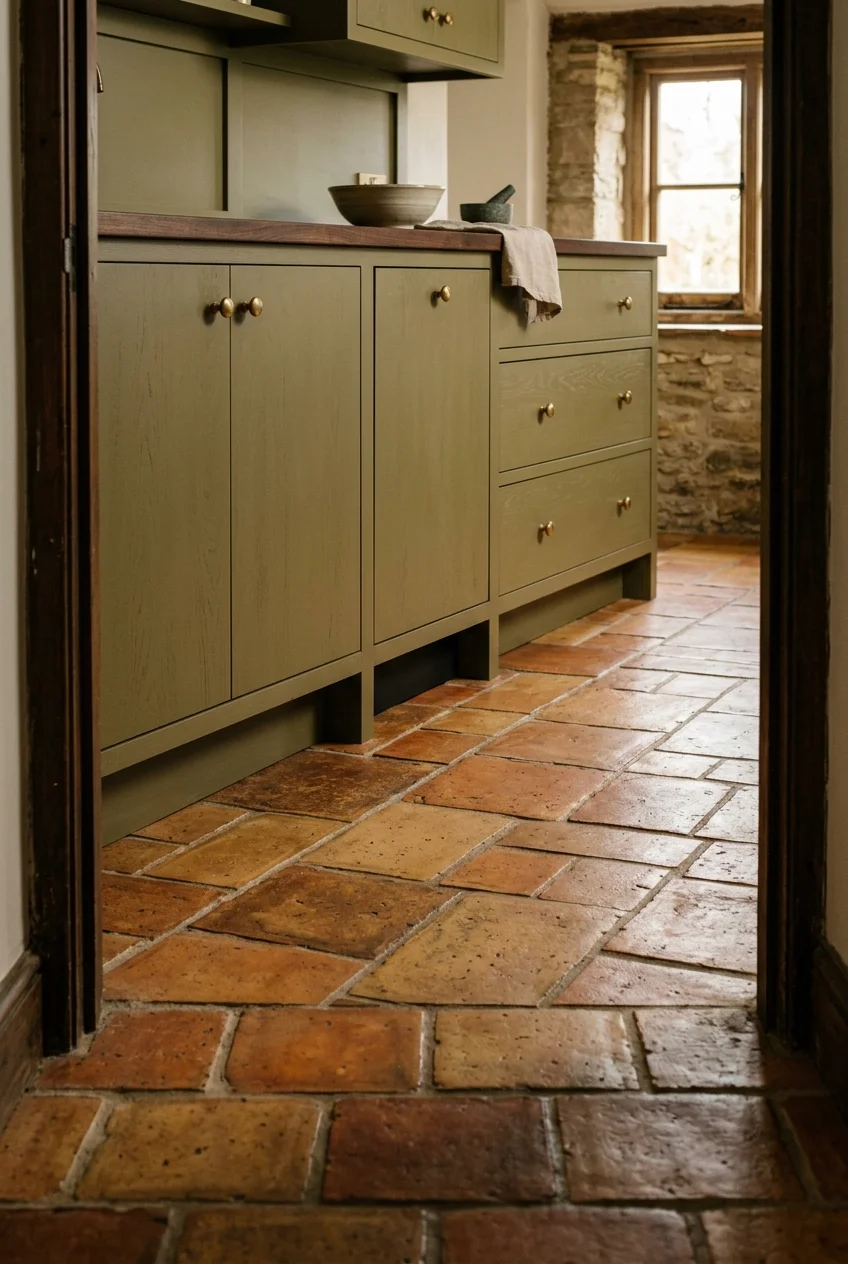
The rosy variation in old terracotta can supply all the pattern a room needs. Lay cabinet samples over several tiles so you see the floor's full range.
An olive that looks muted beside one tile may turn very yellow beside another. Check the combination where the floor runs into the next room, too.
Build a palette around one unmistakable color
8. Put avocado green below the counter
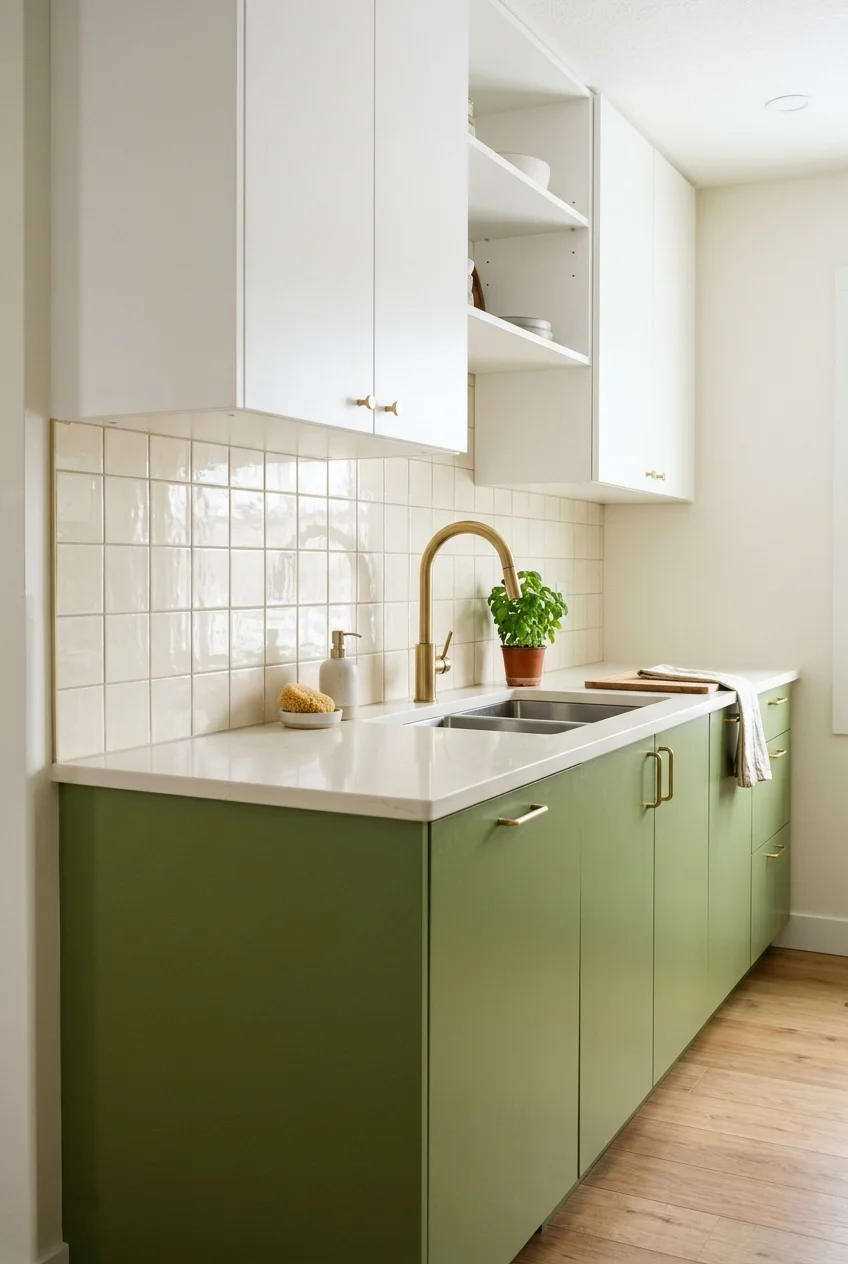
Keep avocado green on the lower doors and use ivory above the counter. The green stays visible from the next room without enclosing the whole kitchen.
Bring home a painted sample large enough to stand against a door. The green should still look deliberate under your evening lights, when you actually cook.
9. Bring back a harvest gold laminate worktop
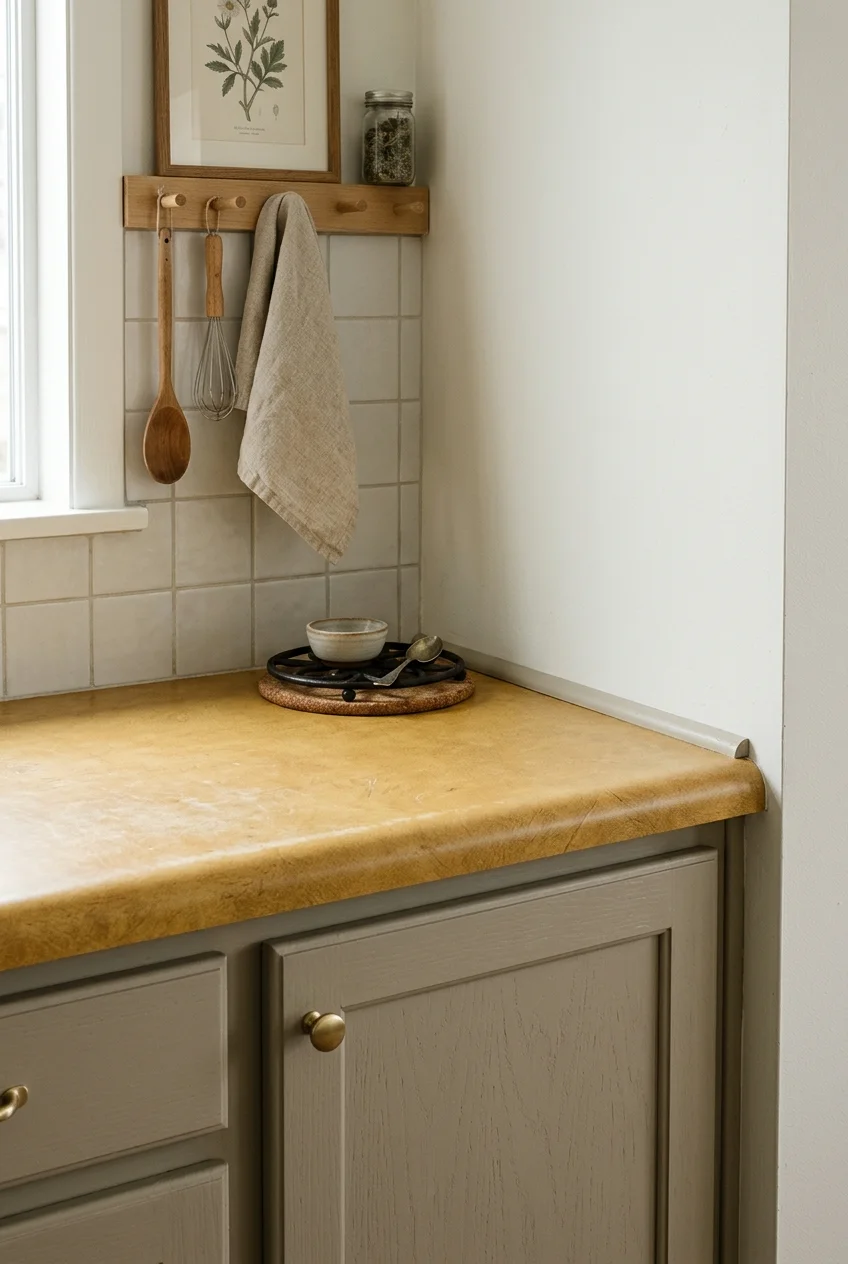
A long band of mustard yellow is particularly effective over flat putty doors. Request a sample of the edge profile as well as the gold surface.
A rounded edge suits a simple straight run. Ask the fabricator where seams will land if the counter turns a corner or wraps around a sink.
Keep a board for chopping and a trivet for hot pans by the range. Laminate can carry a strong color, but it still needs everyday protection.
10. Let one retro refrigerator carry the color
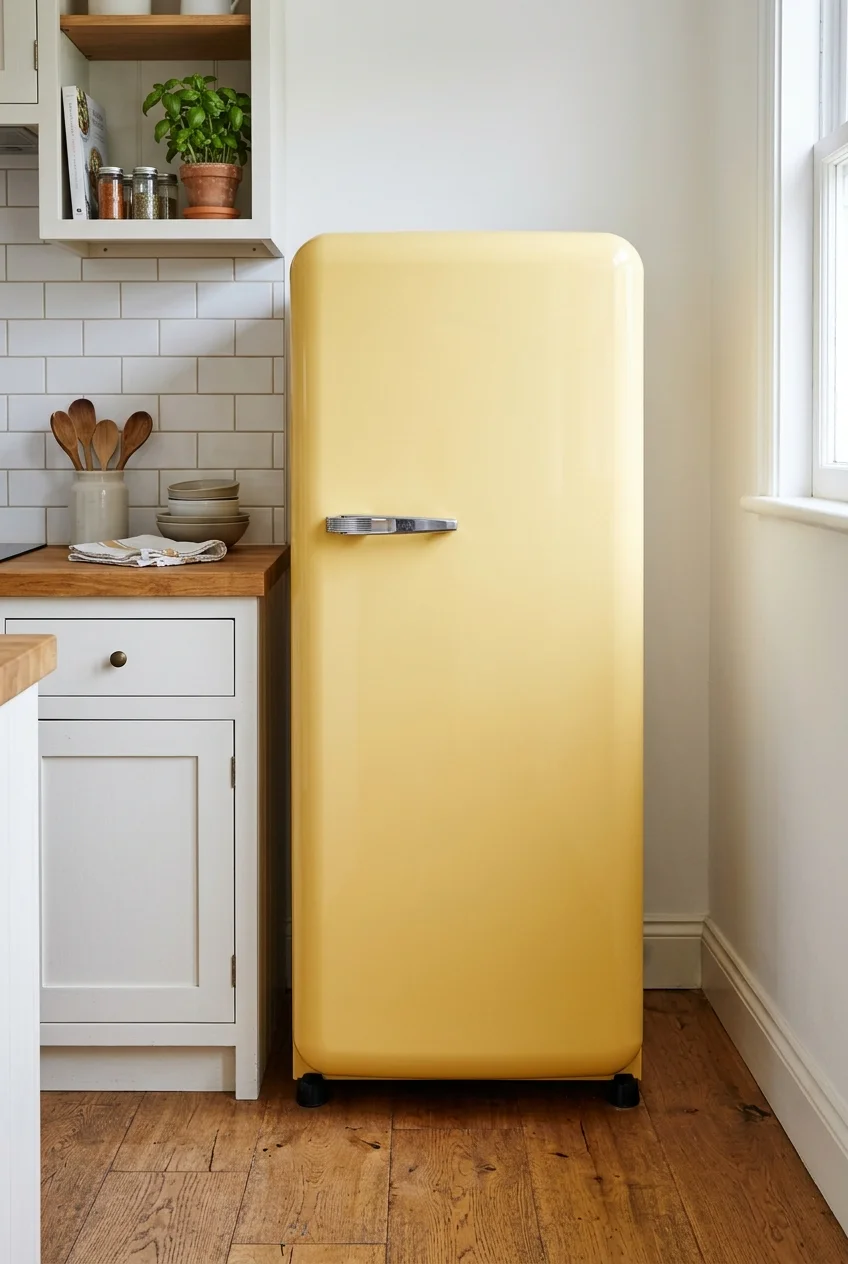
A butter-yellow refrigerator can deliver the retro look in a kitchen with plain slab doors. Keep a clear spot beside it for groceries and heavy containers.
Compare the manufacturer's installation drawing with the actual opening. The width on the product page leaves out questions that matter every time you use the refrigerator.
- Air clearance at the sides, back and top.
- Door swing next to a wall or tall cabinet.
- Space needed to remove bins and drawers.
- Overall depth with handles and connections.
11. Use paprika on the range hood
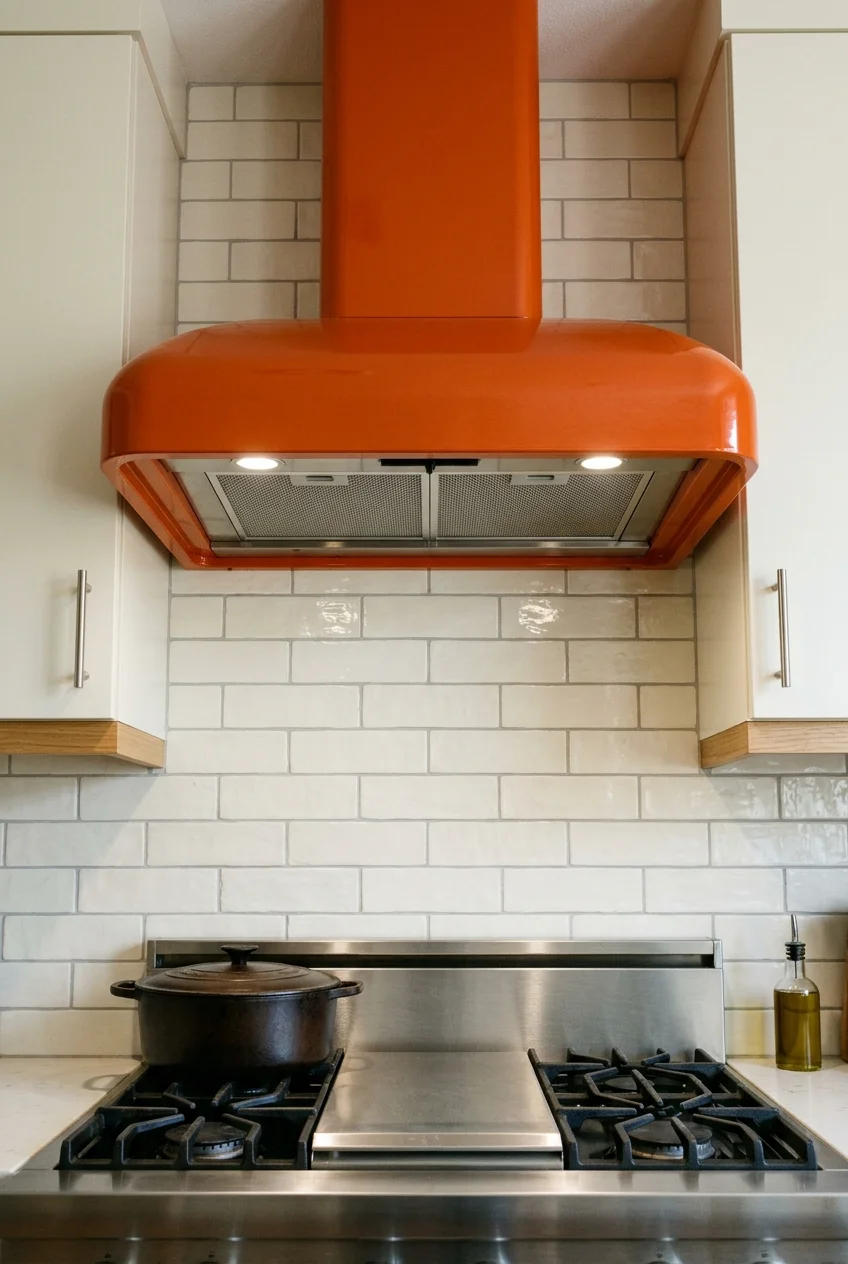
A paprika hood puts color at eye level and leaves the rest of the cooking wall easy to pair with existing counters and cabinets.
Choose the hood insert or finished appliance early. Its mounting height, vent path and clearance requirements determine the size and placement of the colored feature.
12. Edge cream cabinet doors in dark wood
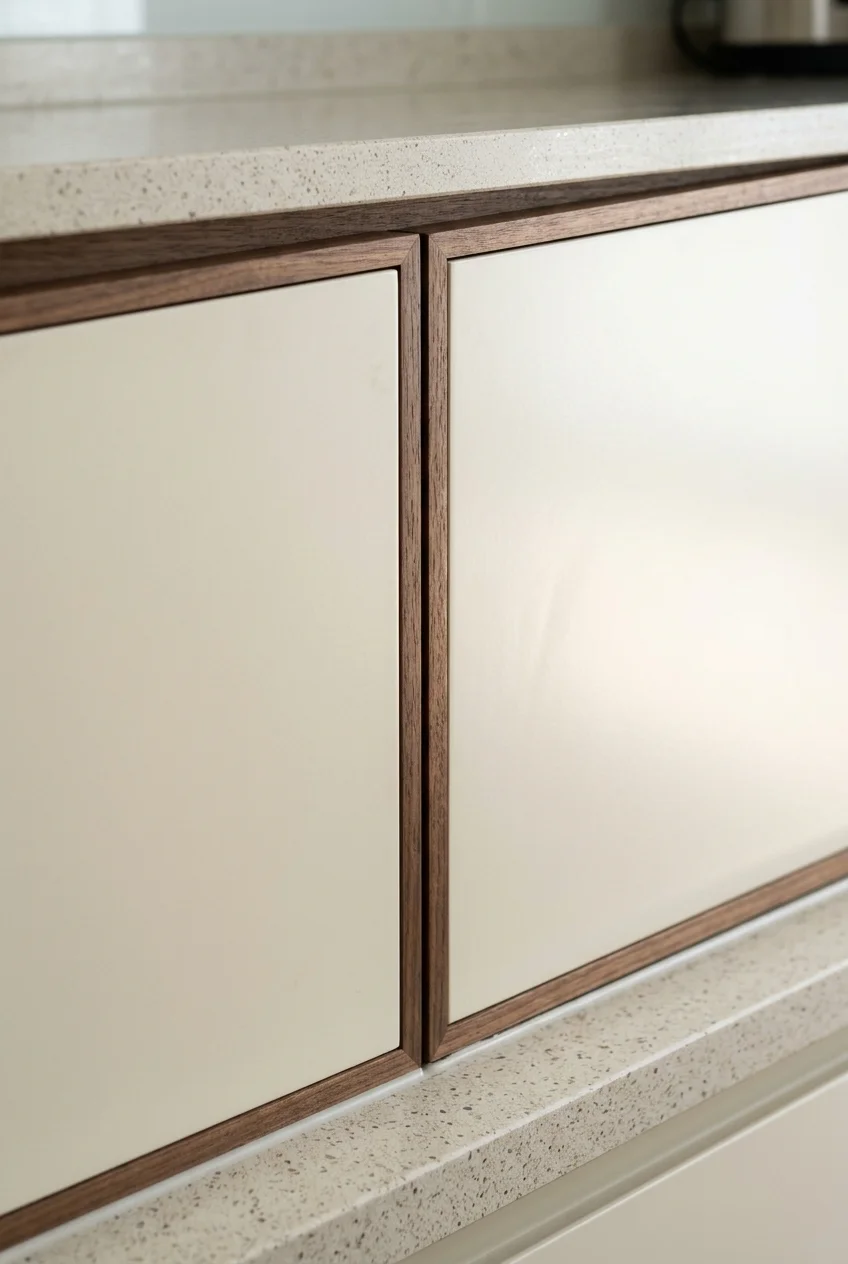
A thin walnut edge around cream slabs gives flat cabinet fronts a graphic outline. The effect depends on even reveals and works best on simple rectangular doors.
Ask for a full corner sample showing how the edging meets at the ends. That joint will be more noticeable than the finish on a small swatch.
13. Give a tall cabinet bank a tobacco glaze look
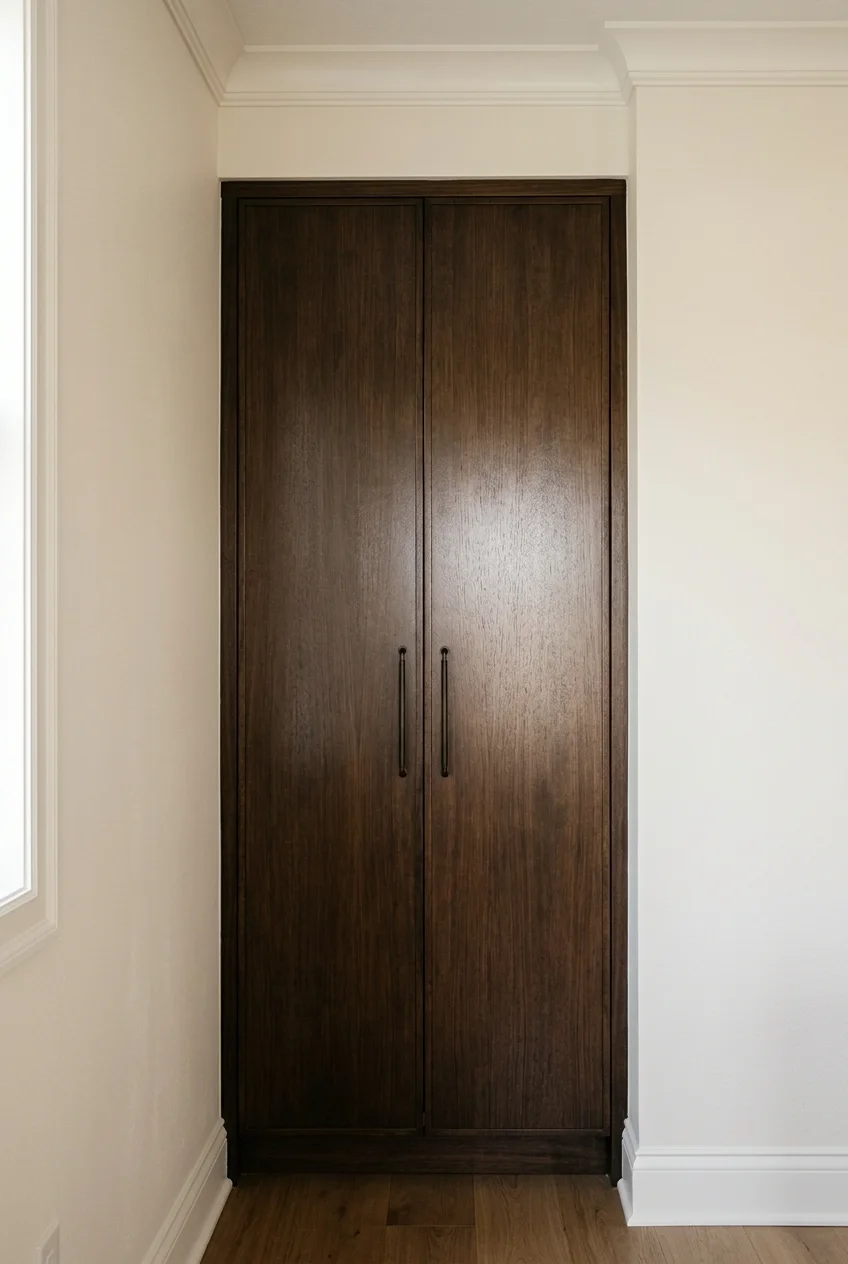
A tobacco finish looks particularly rich on a single tall pantry bank. Pale walls around it give the dark vertical surface a clear beginning and end.
Sample the finish on the species and cut you plan to use. The same stain reads differently on porous grain than on a smooth veneer.
14. Carry burnt orange onto the pantry door
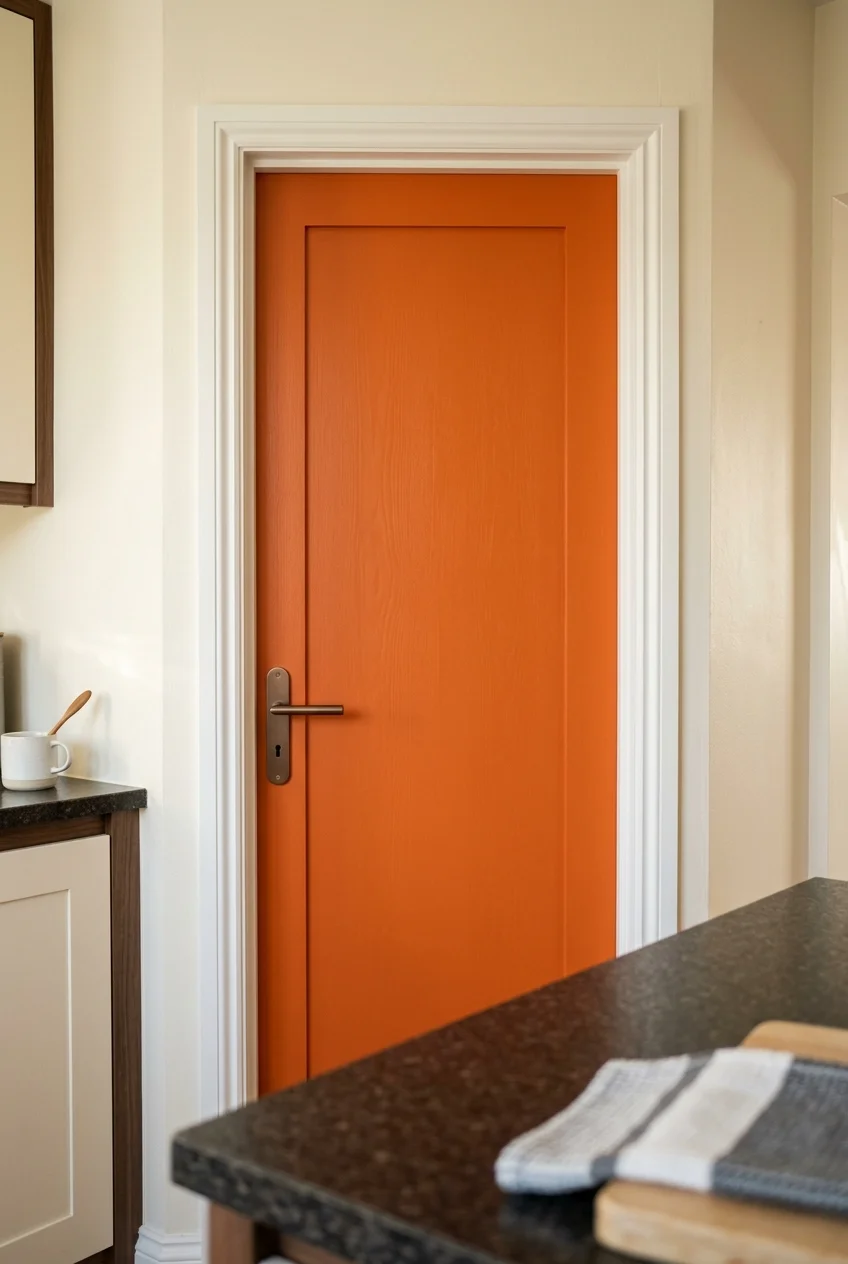
A pantry door is a useful place to put a punch of burnt orange. From the kitchen table, it reads almost like a block of artwork.
Paint a sample across the door and trim colors before choosing a sheen. A repeat of the orange in one small table accessory is usually enough.
15. Pair sky blue enamel with caramel wood
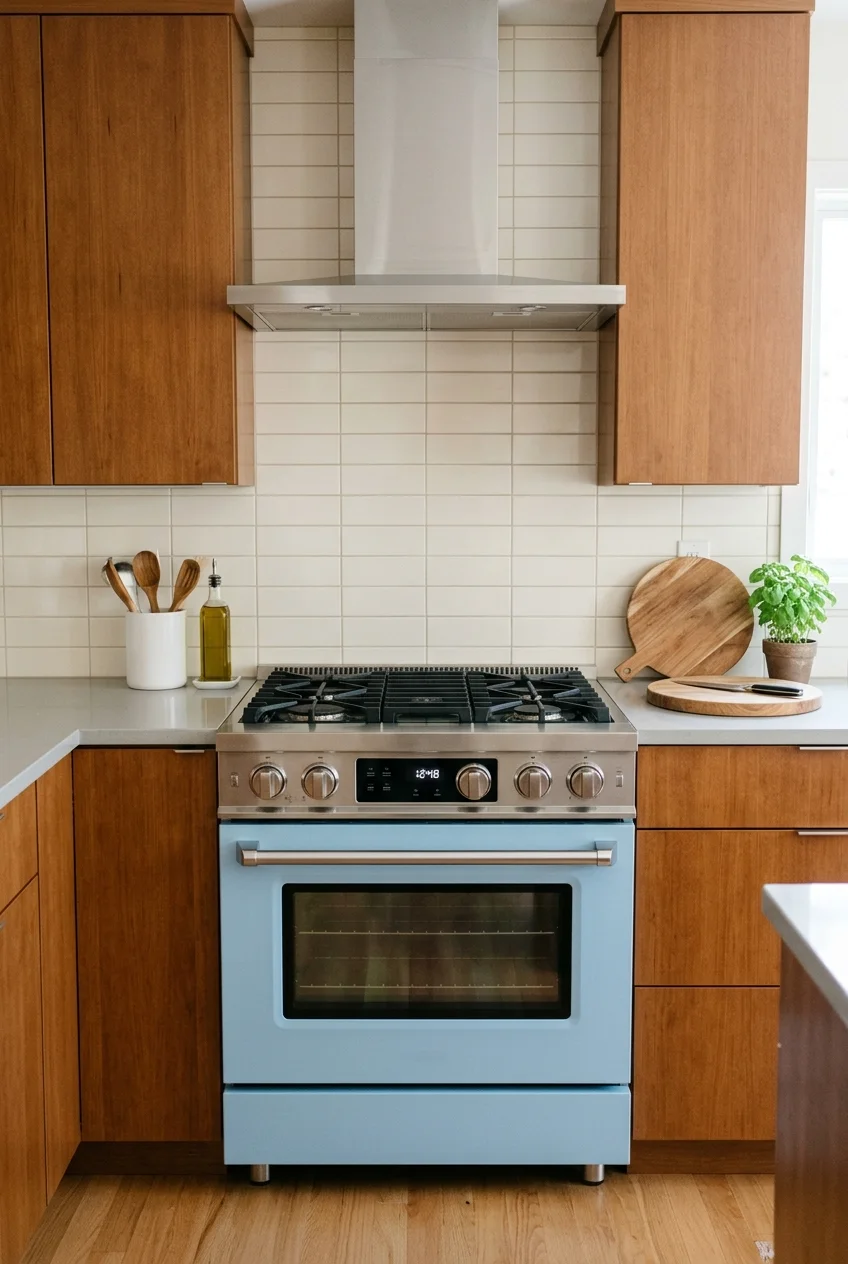
For a cooler take on the decade, set a sky blue range between caramel wood fronts. The brown grain keeps the blue from tipping into pastel sweetness.
Look at the enamel beside actual wood samples and stainless trim. A muted blue will sit differently with a pinkish wood than with a golden one.
Give tile, walls and floors a pattern of their own
16. Run a band of geometric tile behind the range
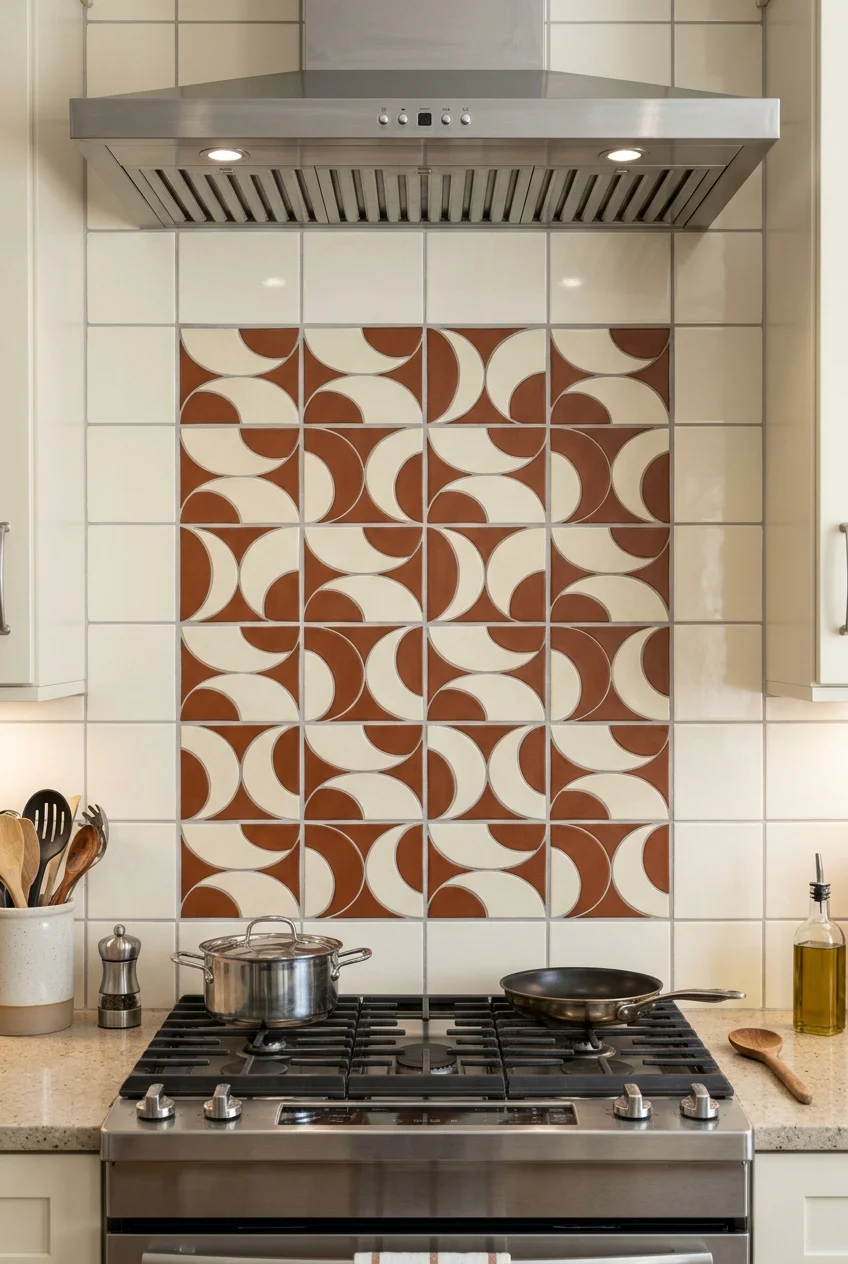
A rectangle of rust and cream arcs can read like a piece of artwork behind the range. Border it with plain tile in the same cream.
Lay out enough sample tiles to see a full repeat. Center that repeat on the range and check where partial tiles would land under the hood.
Ask the maker about use behind your cooking appliance and whether the tile needs sealing. A greasy splash zone rewards finishes you can clean without fuss.
17. Stack white finger tile above painted cabinets
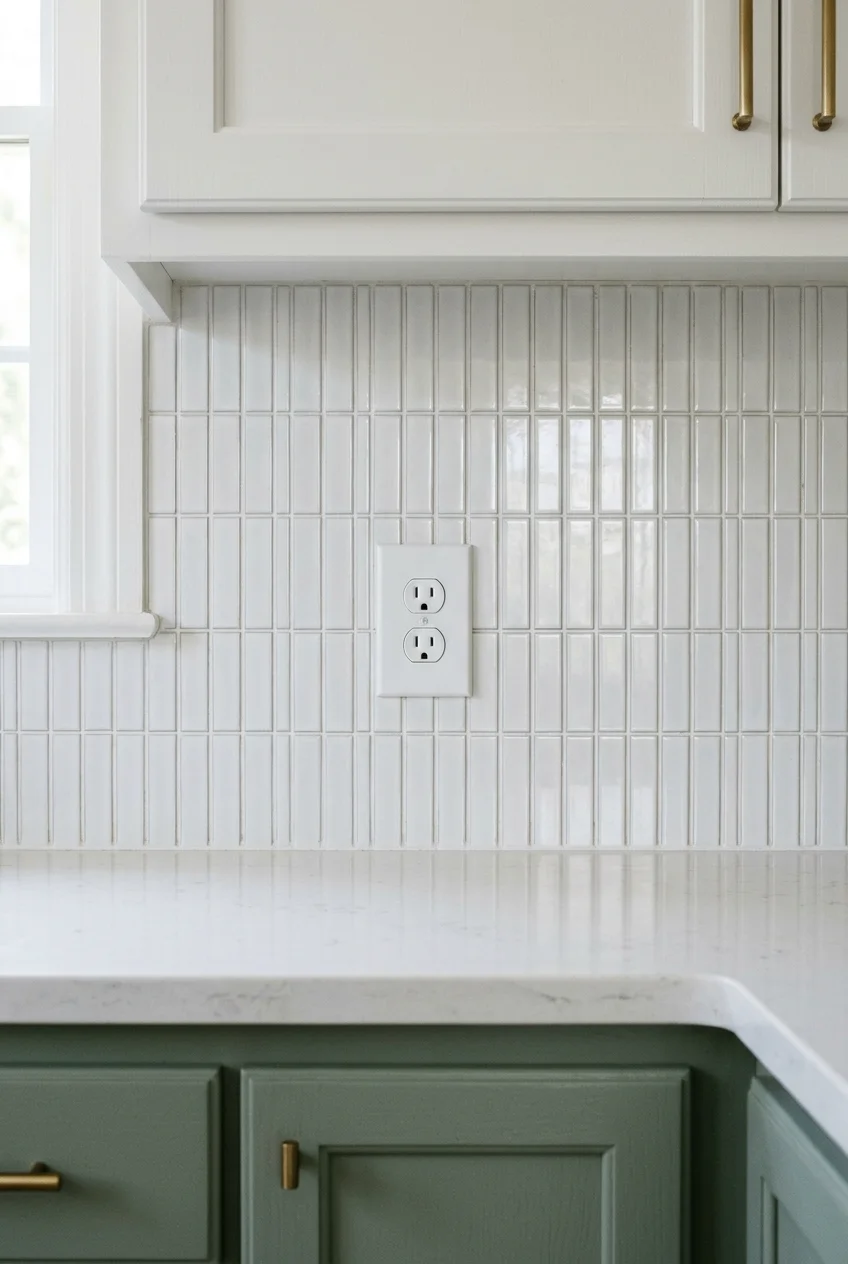
White finger tile adds a fine stripe to a kitchen with flat painted doors. A close grout color keeps the joints from overpowering the narrow tile.
Bring a mounted sample home. For more backsplash directions that work with pale uppers, compare these backsplash ideas for white kitchen cabinets against your counter sample.
18. Give the floor a tobacco and cream checkerboard
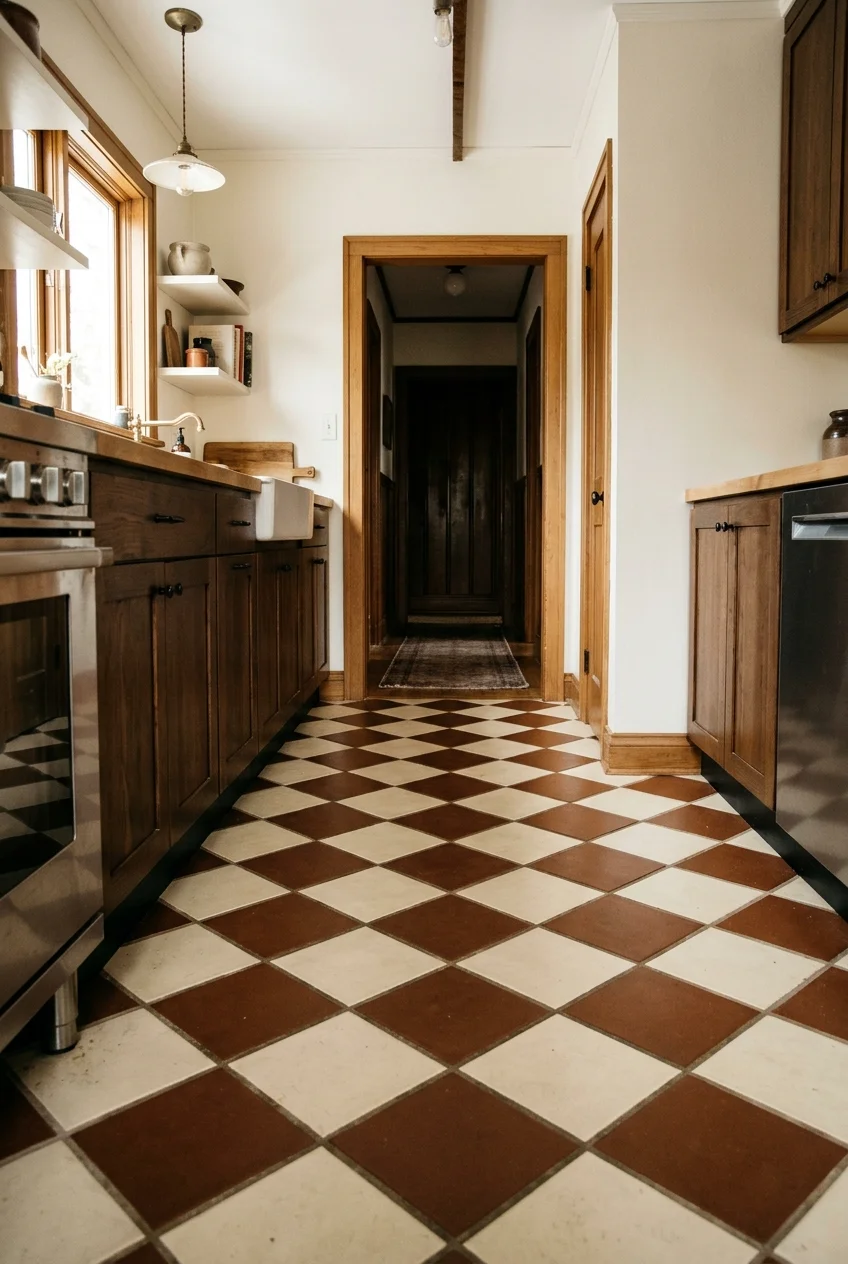
Cream and tobacco squares give a narrow kitchen a strong pattern without the sharp contrast of black and white. Keep the toe kicks a single tone.
Lay out the pattern on paper from both thresholds. Aim for balanced cut pieces at the exposed edges, especially where the kitchen opens into another room.
Discuss the height of the new assembly with the installer. Doors, thresholds and a dishwasher that must slide out all depend on the finished floor level.
Watch for Before disturbing suspect flooring, have a trained, accredited asbestos inspector sample it. Tile color and pattern cannot tell you whether the material contains asbestos.
19. Choose cork to soften a hard-edged kitchen
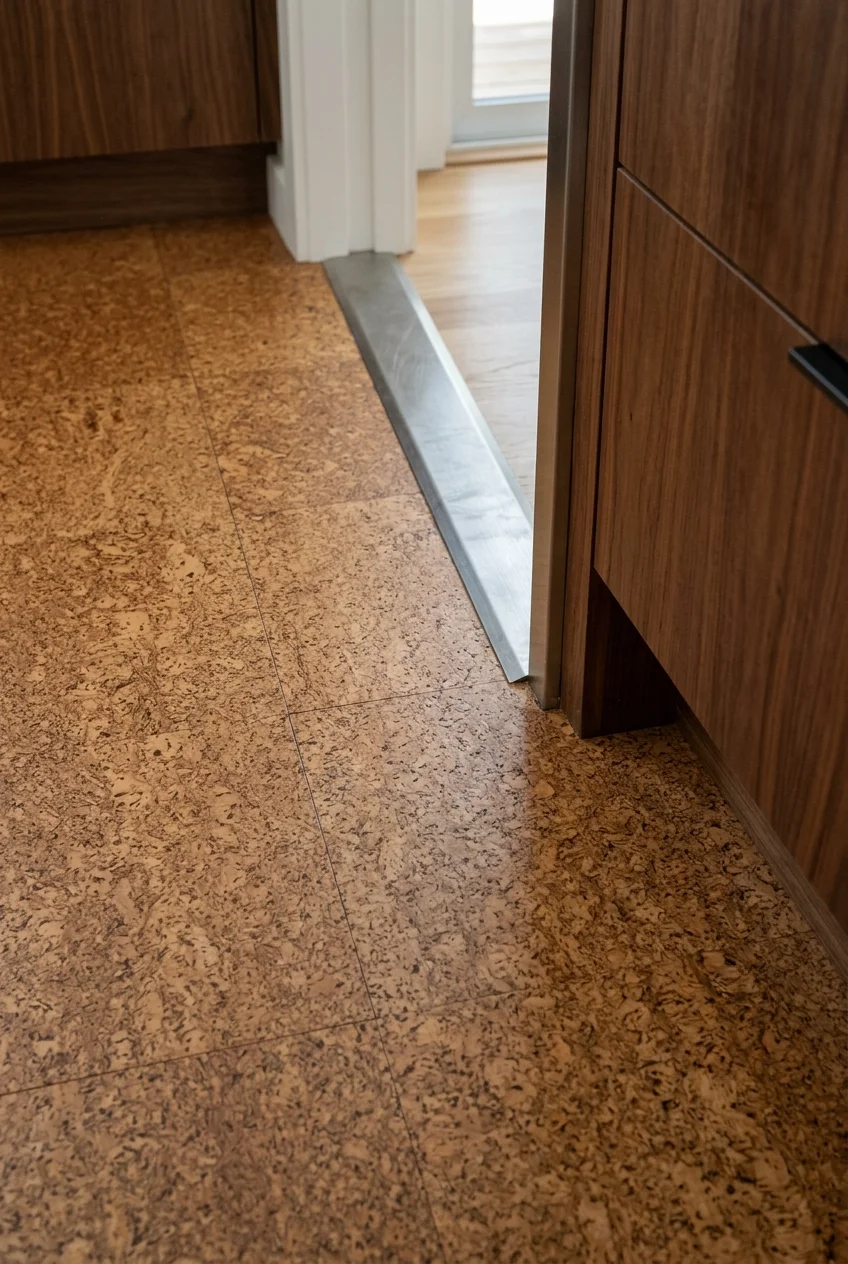
Cork gives plain cabinet fronts a soft backdrop with smaller flecks than terrazzo. A medium cork tone works well where the kitchen meets an existing wood floor.
Choose a product the manufacturer approves for kitchens and follow its instructions for finishing, spill cleanup and floor protection. Ask how individual damaged tiles can be addressed.
20. Tuck terrazzo into the breakfast end
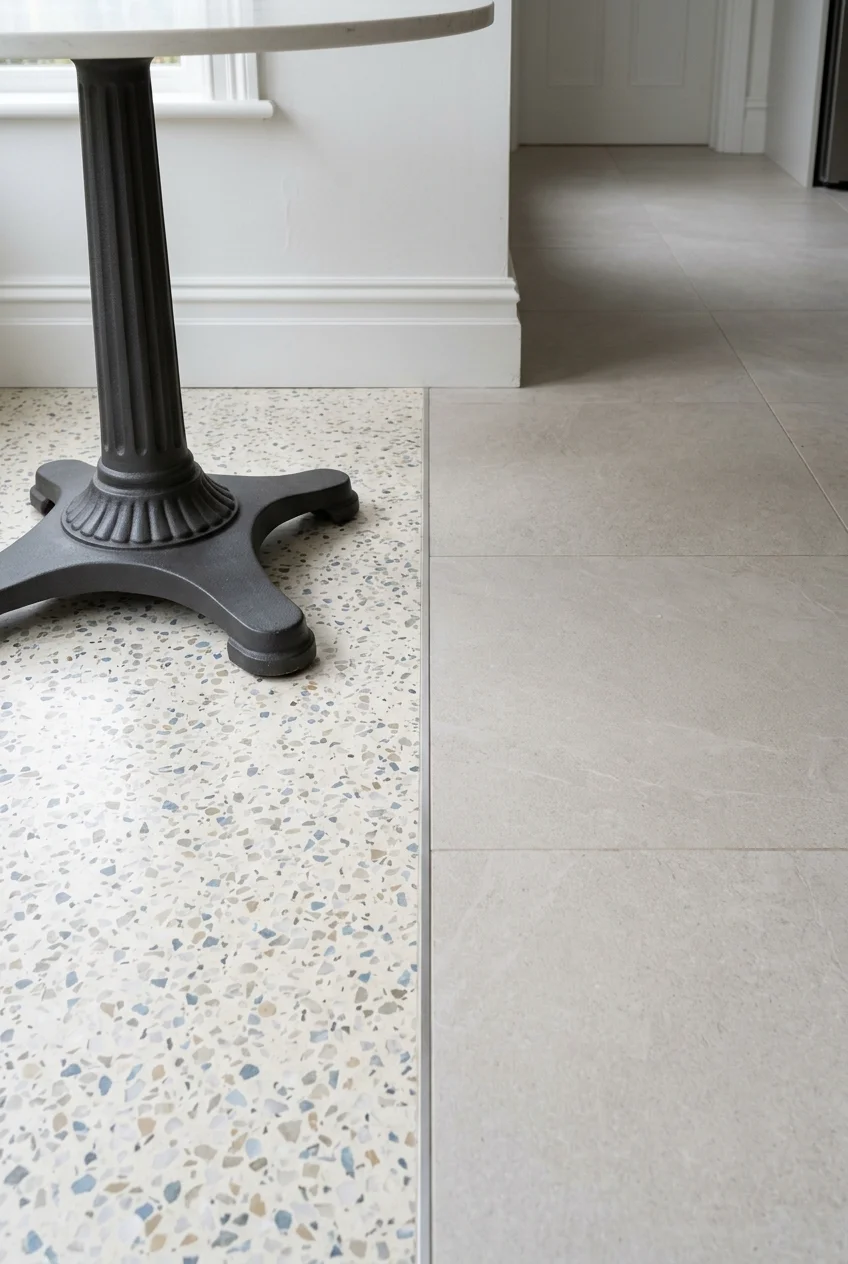
A cream terrazzo look can define a breakfast area inside an open kitchen. Choose aggregate colors that appear somewhere nearby, like brown cabinet grain or rust upholstery.
Use a natural break for the joint between floors, such as the line of a cased opening. A transition through the middle of a walkway looks arbitrary.
21. Put oversized floral wallpaper in the dining nook
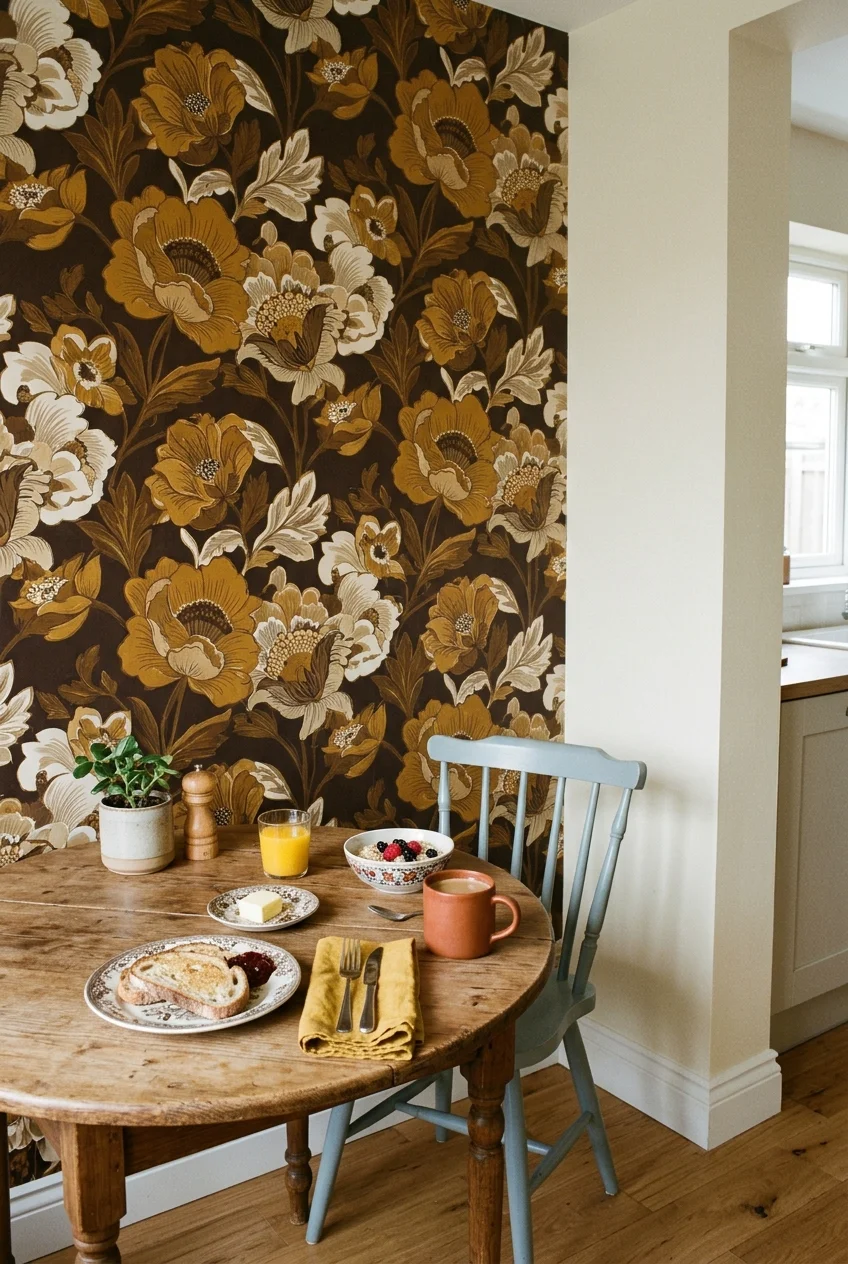
Oversize flowers make a breakfast corner feel separate from the stove and sink. Take one color from the print for the seat cushions or a shade.
Check where a full flower will land against the chair backs. A motif hidden almost entirely by furniture changes the scale the wall seems to have.
22. Wrap a doorway with paneled wood
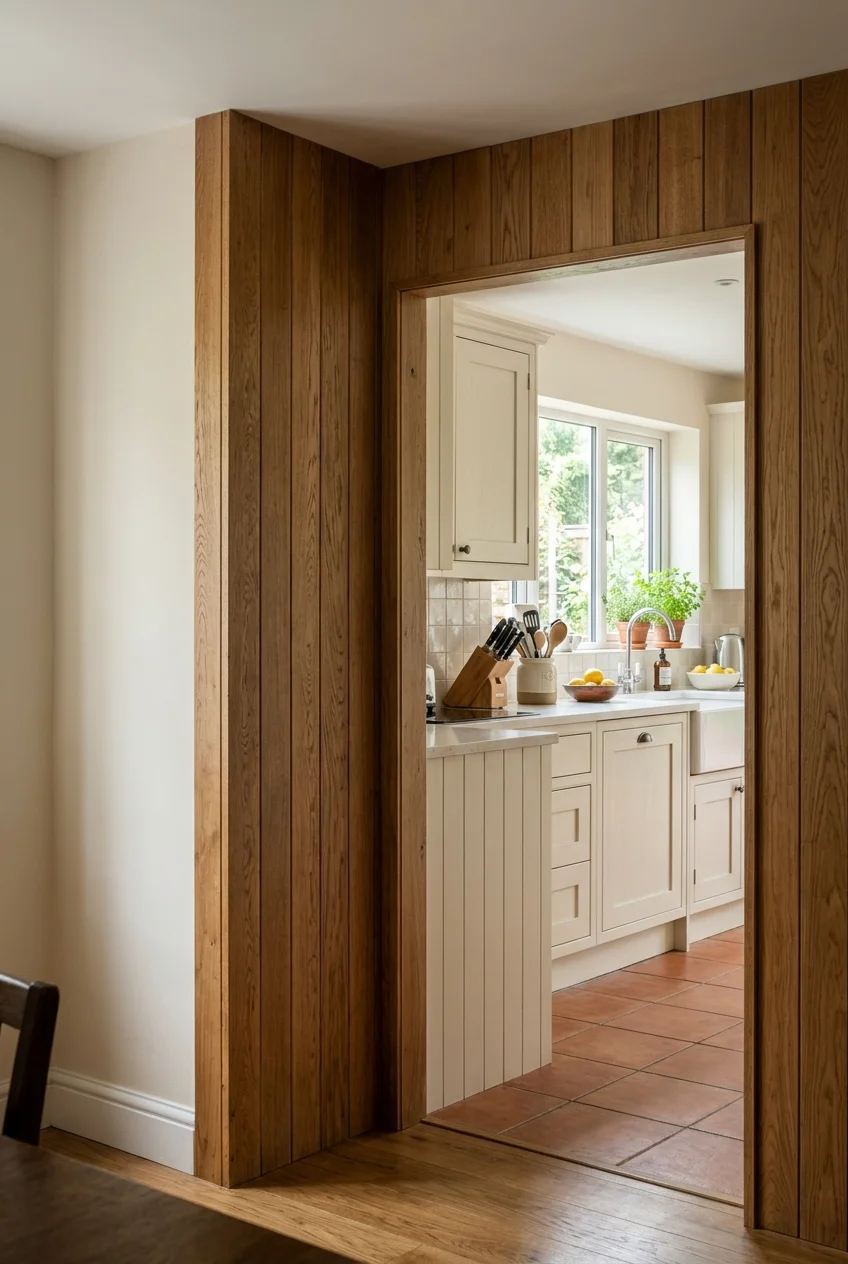
Vertical paneling on a doorway return gives the room a warm edge without covering every wall. Carry the grain in one direction across the visible faces.
Ask for a sample corner where the paneling meets painted trim. A simple, clean return makes the small area of wood look like part of the house.
23. Lay a counter in square tile with a finished edge
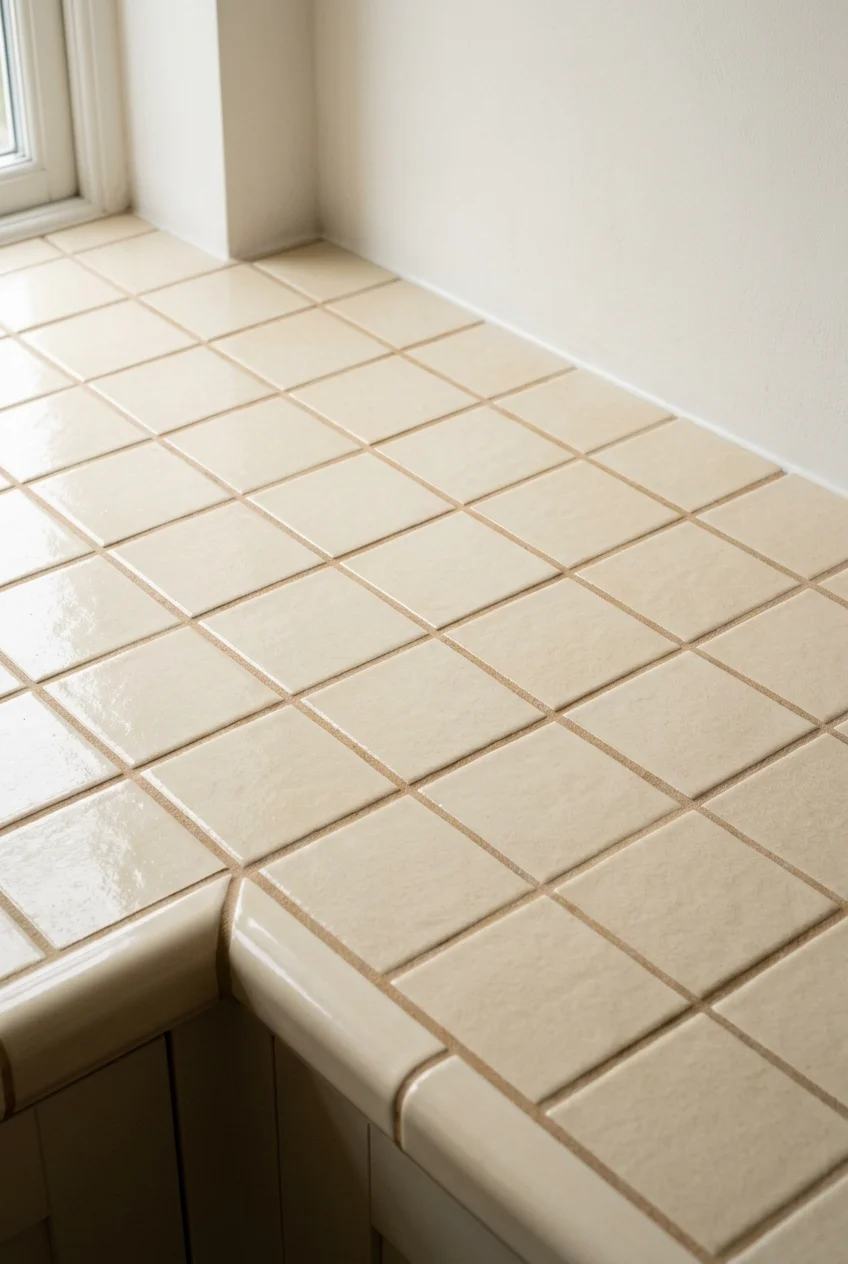
Square tile gives the countertop a visible grid and a kitchen a distinctly period surface. Choose tile and edge trim intended for the application before finalizing the layout.
Grout lines can catch crumbs and interrupt tasks like rolling pastry. Set aside space for a large smooth board or use tile on a secondary work surface.
24. Make the backsplash a single wipeable color field
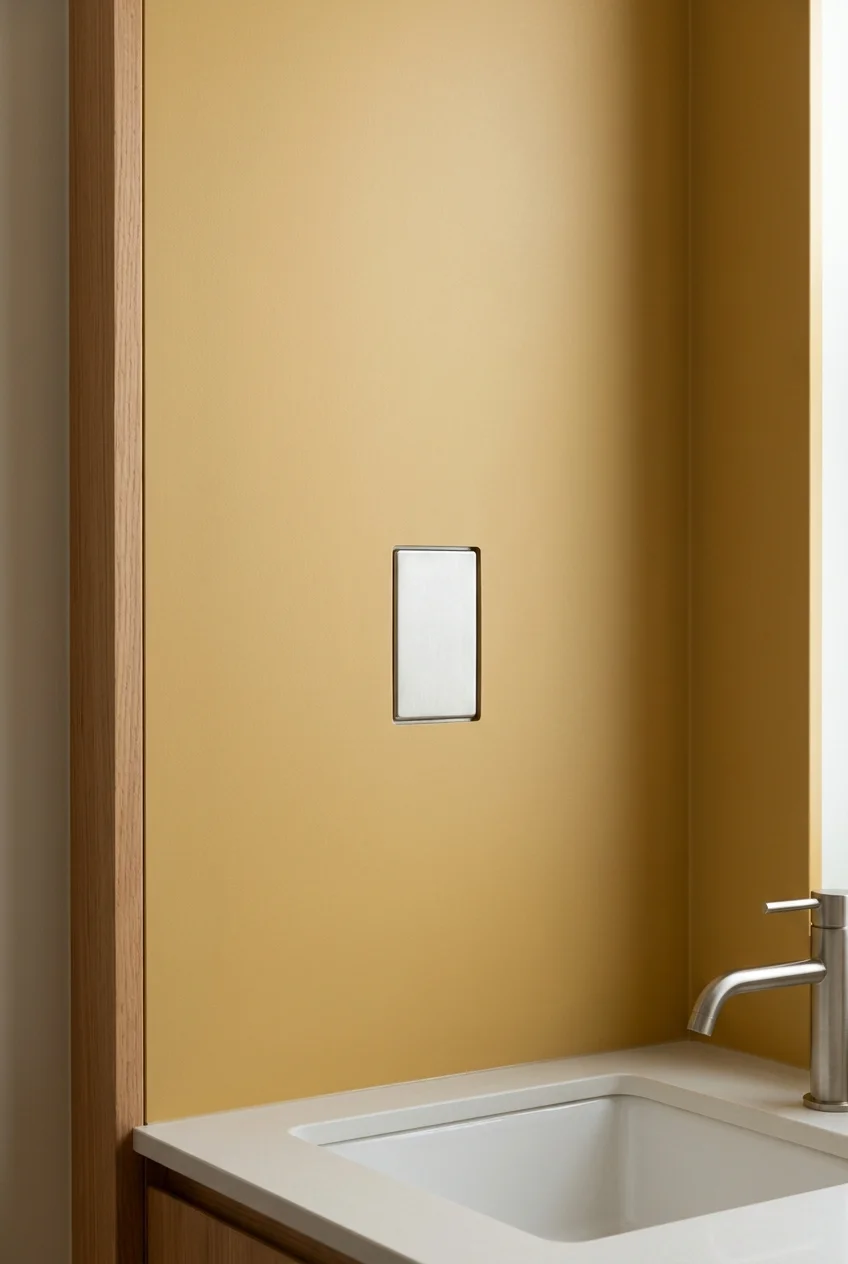
A smooth ocher panel works the way a bold wall color does, but with a surface selected for splashes. Keep its edge aligned with the cabinet end.
Use a backsplash system approved for the location. Check restrictions near heat, and coordinate joints, moisture sealing and outlet placement with the installer before ordering material.
Simplify cabinet fronts and improve what opens
25. Reface sound cabinet boxes with walnut slabs
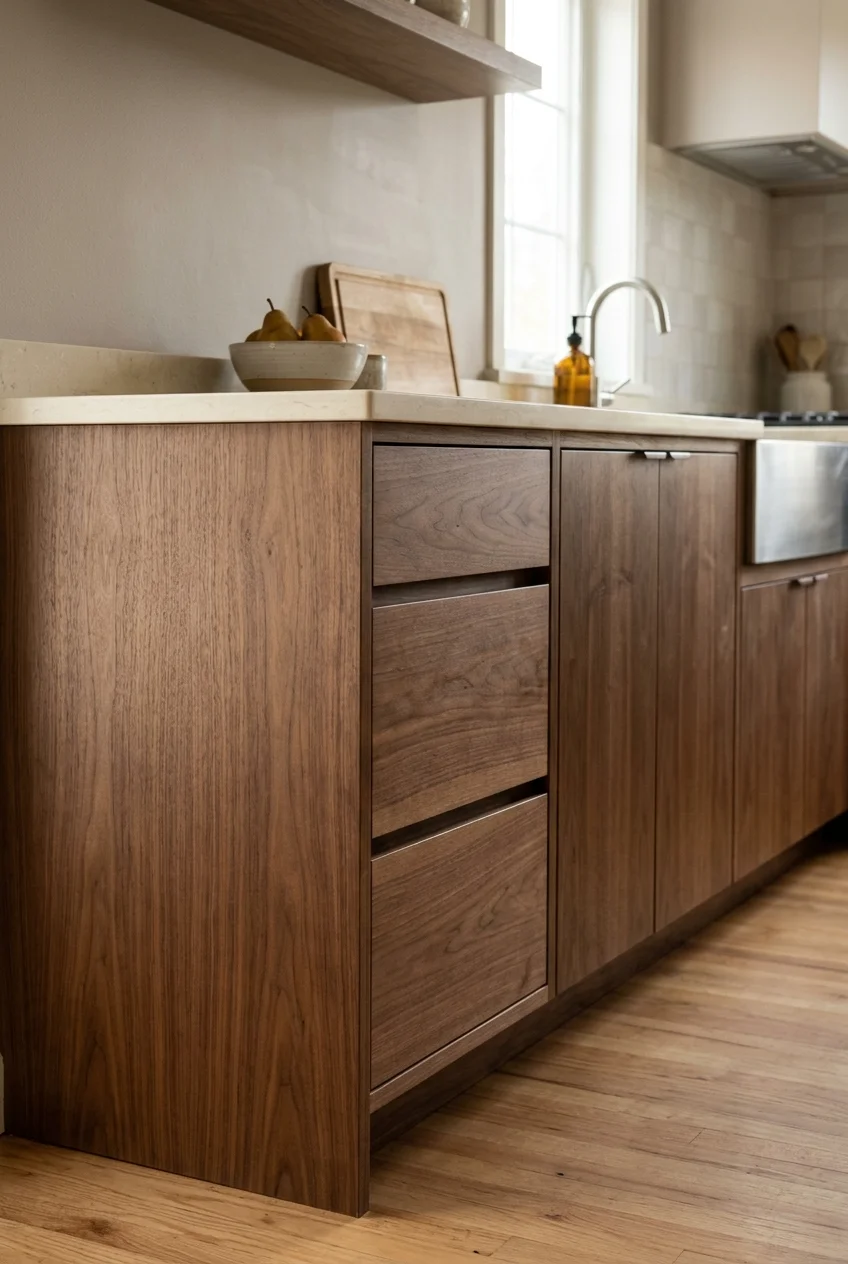
Flat walnut fronts bring the grain forward and can keep a cabinet run in its existing footprint. Refacing makes sense when you already like where things live.
Have the boxes checked for square openings, firm fastening and damage around the sink. A decorative skin over a swollen panel leaves the structural problem underneath.
Open a door and inspect how much it covers the face frame. Switching to a larger overlay changes the gaps and may require different hinges.
Before ordering, settle which parts will match the new fronts. Exposed ends, face frames and toe kicks all show, especially when viewed from the dining room.
- Confirm door overlay, hinge compatibility and opening angles.
- Approve one sample door and a visible end-panel sample.
- Check that handles clear adjacent walls and appliances.
Ask for grain matching on the most prominent door bank. A numbered run of fronts makes it easier to keep a deliberate grain sequence during installation.
26. Turn a cupboard into deep pot drawers
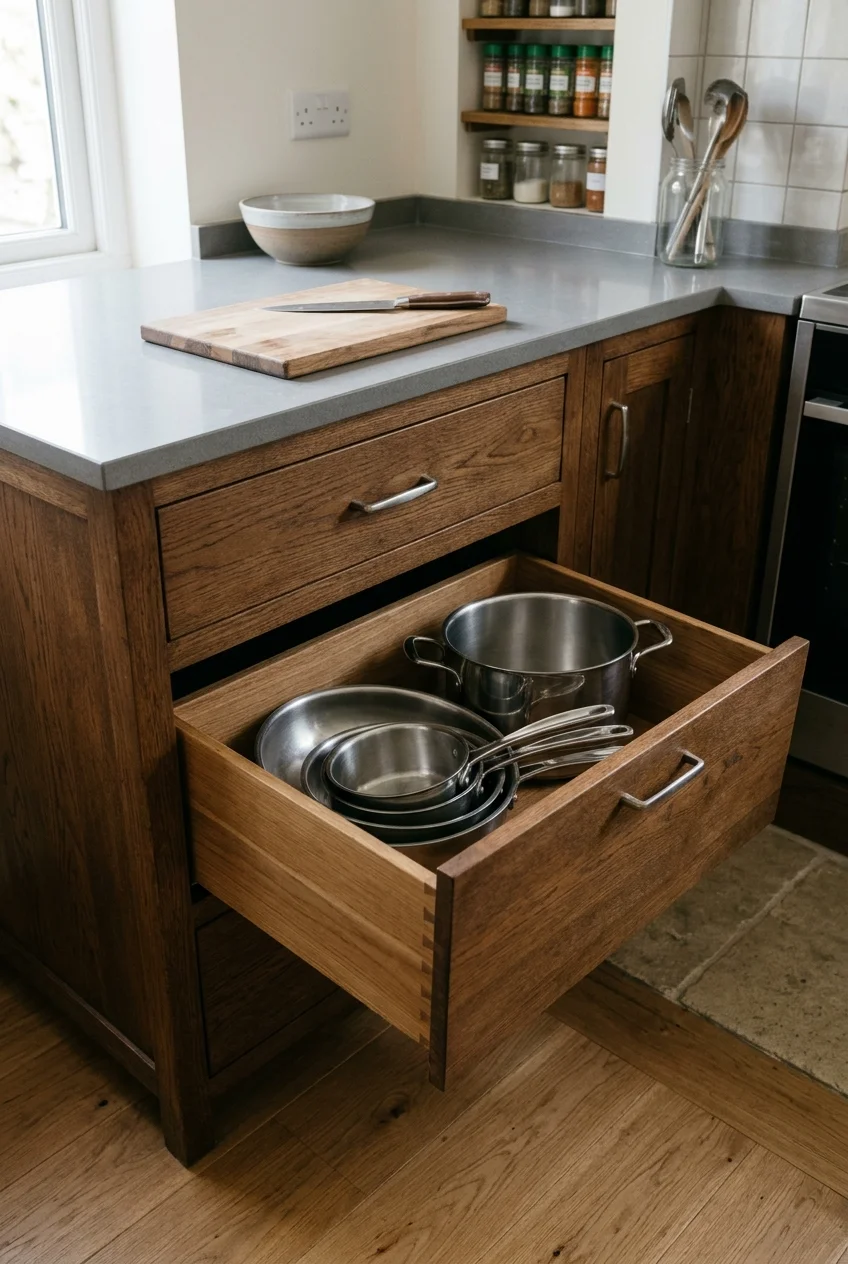
Deep drawers bring a stack of pots out into the aisle where you can reach it. Give lids their own spot so they stay upright and visible.
If you want to reuse a cabinet box, have a cabinetmaker check the face frame, opening and available depth. A fixed center stile can limit the conversion.
Measure your tallest pot with its lid on, then check usable interior height under the drawer above it. Evaluate slide capacity with a full load in mind.
Setup note Before committing to the drawer depth, check whether the open drawer and an opposing dishwasher door can share the aisle during your usual cleanup routine.
27. Add hinged reeded glass above the serving counter
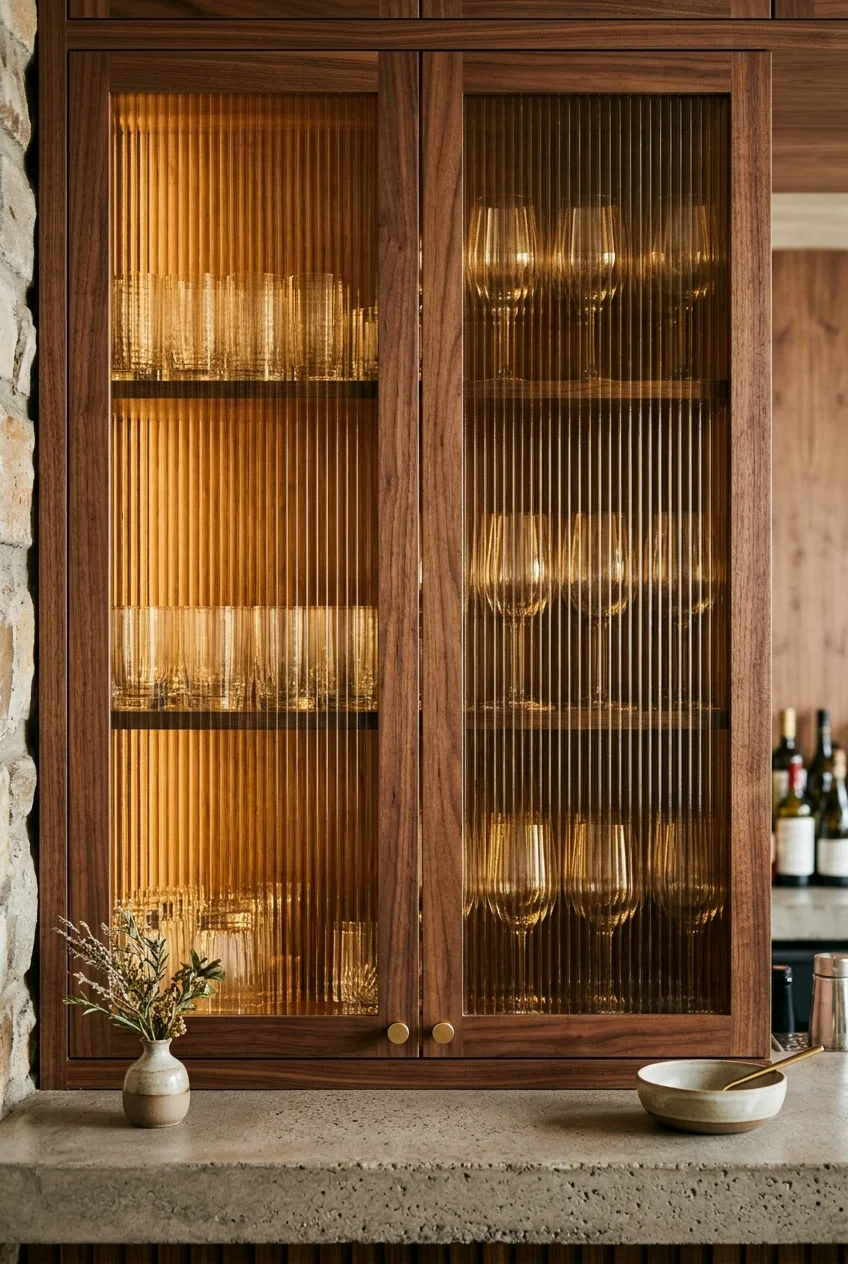
Vertical flutes let the shapes of glassware show through softly. Use reeded doors on a serving cabinet where a little visual texture adds depth to the wall.
Ask for a glass sample and hold it against the contents you plan to store. Strong backlighting makes cabinet interiors more visible, even through textured glass.
28. Fit a turntable into the blind reach of a corner
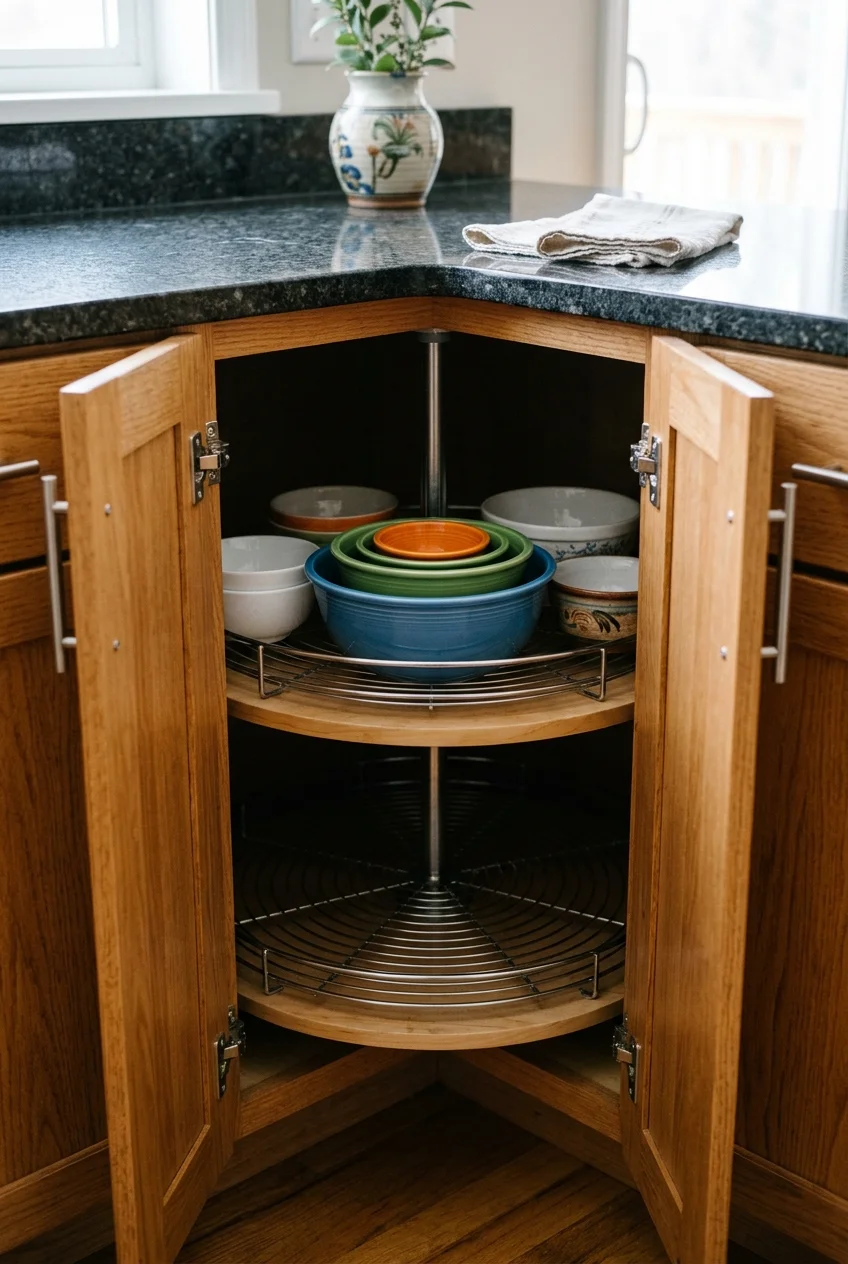
A carousel makes deep corner space easier to use for bowls or colanders. Pick items that stay inside the shelf perimeter when the shelf turns.
Start with the opening measurement and the usable interior dimensions. Check the hardware template against face frames, the door swing and the position of any plumbing.
A corner pullout can work better with rectangular items. Compare the clear opening and the weight limits of both systems before giving up an existing shelf.
29. Stand baking sheets upright in a narrow bay
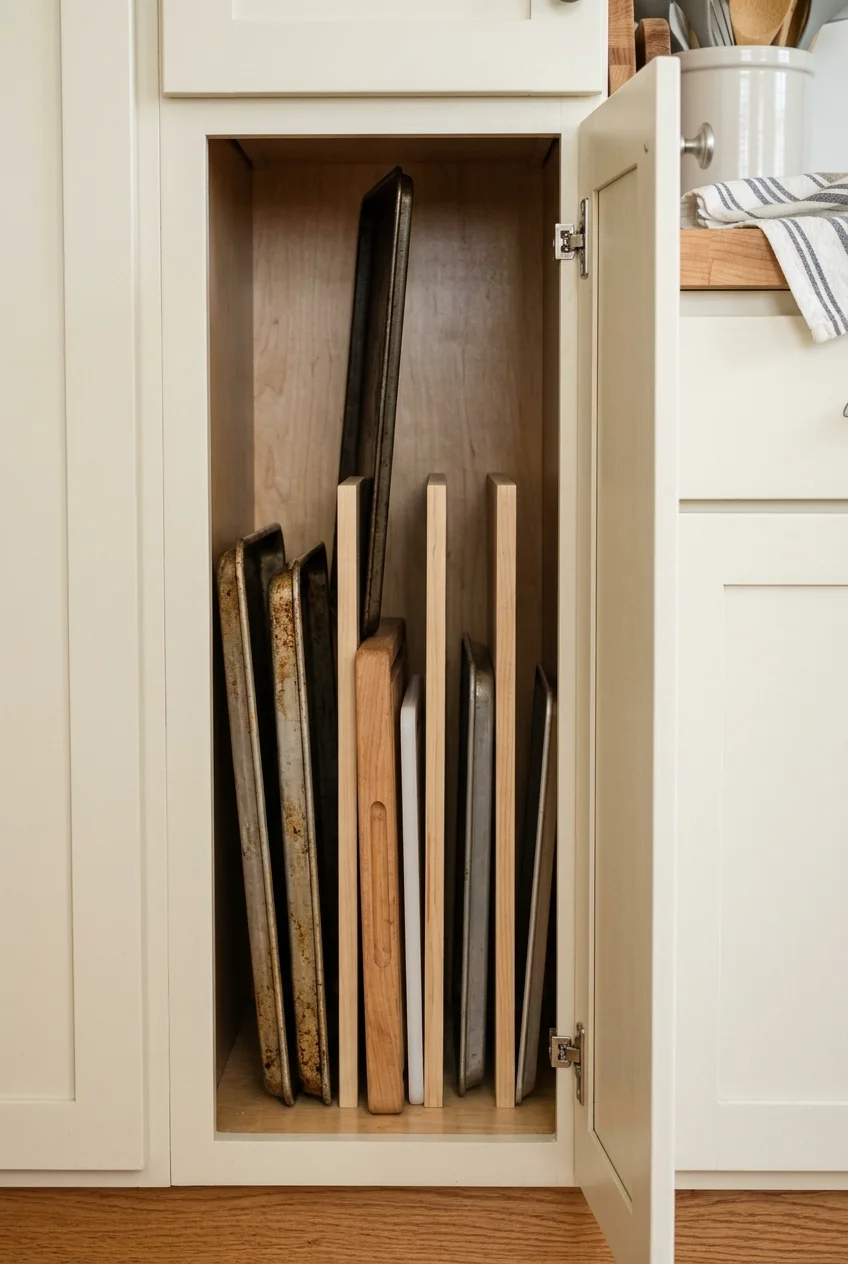
A narrow cupboard beside the oven can hold sheet pans the way a file drawer holds folders. Put the trays you reach for most at the front.
Take the largest pan along when measuring. A rim or protruding handle can catch the cabinet frame even when the pan fits inside the box itself.
30. Hide the toaster behind a pocket door
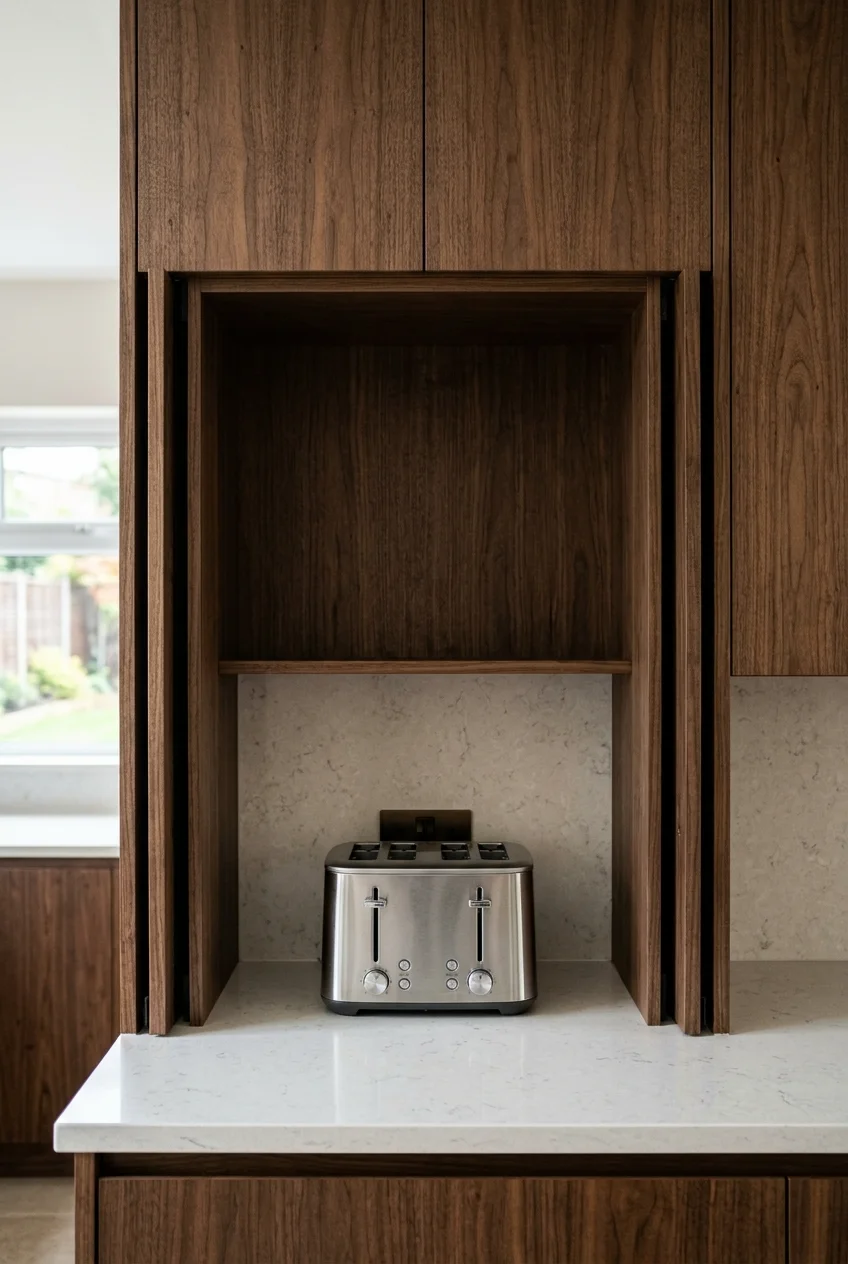
For a clear counter after breakfast, give small appliances a cabinet that sits directly on the worktop. Pocket doors clear the approach when the cabinet is open.
Find out how much space the parked doors take inside the cabinet. Include plugs and cord bends in the depth check, along with the biggest appliance.
Pull heat-producing appliances out to an open work surface before operating them, following their clearance instructions. Let them cool before putting them back and closing the doors.
31. Replace a heavy upper cabinet with one open shelf
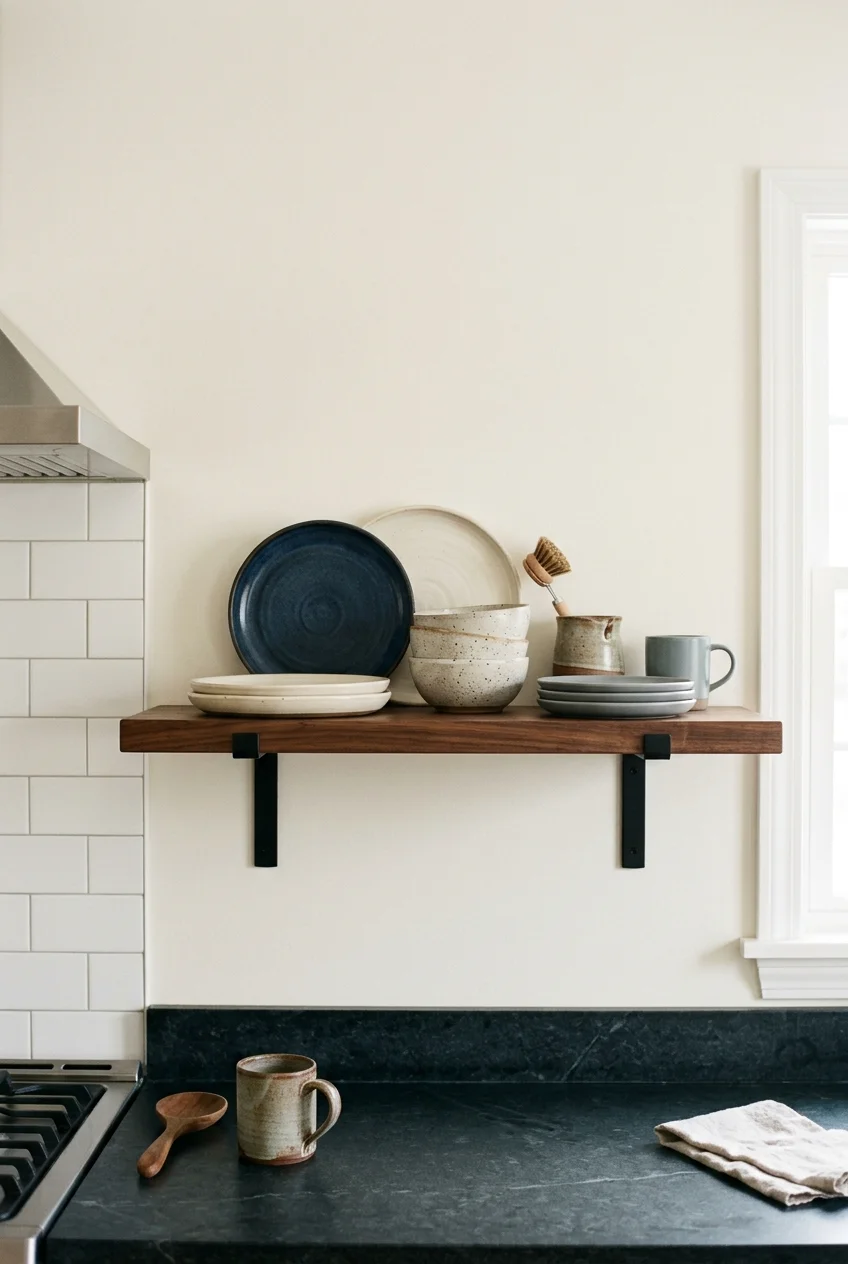
One short walnut shelf can make a side wall feel lighter while keeping daily plates handy. The effect works best when the shelf has breathing room.
Confirm the wall support and loaded shelf capacity with the installer. Keep the shelf off the main cooking wall if grease would make the dishes hard to maintain.
32. Use inset finger pulls to clear a tight corner
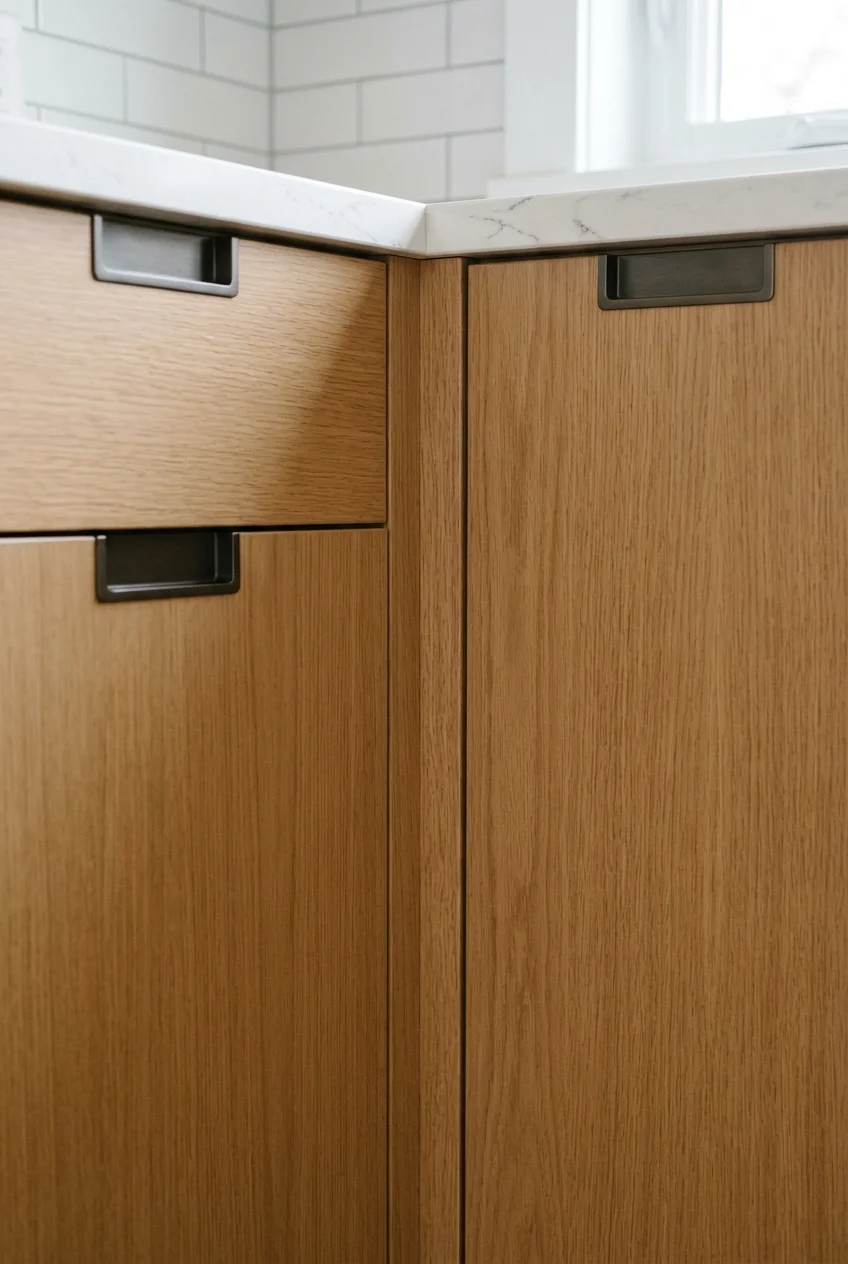
A recessed pull can spare you a protruding handle where two cabinet runs meet. Test the grip with the drawer loaded before choosing it for the whole kitchen.
Flush hardware buys only its own projection. Have the cabinet shop check the doors, drawer fronts and necessary filler when they are fully open.
33. Give the peninsula a reed-textured back
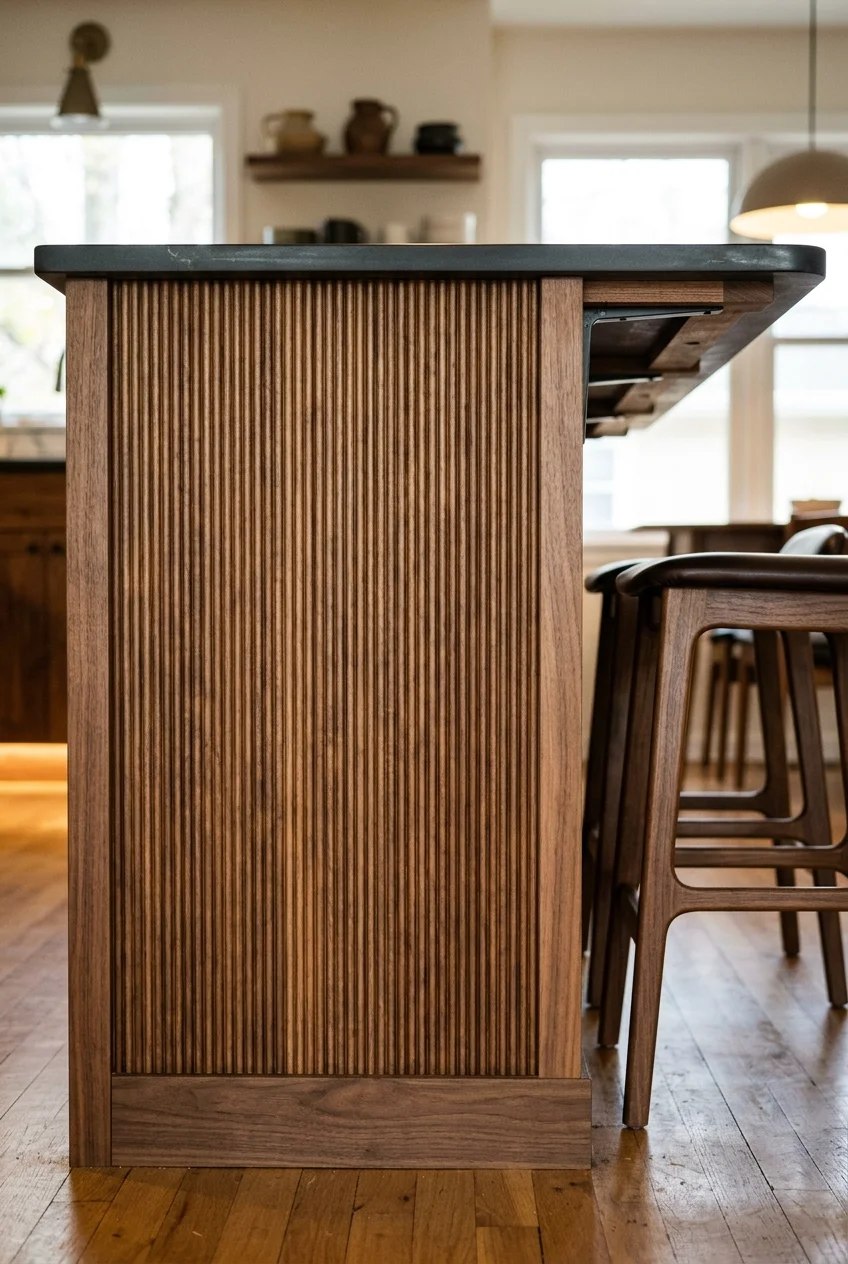
Reeding gives the dining side of a peninsula a furniture finish that looks especially good in glancing light. Smooth trim at each end helps frame the texture.
For a kick-prone seating spot, choose grooves you can clean easily and carry a smooth plinth across the bottom. Have the fabricator detail the exposed ends.
Rethink the places you cook, pass through and sit
34. Keep the galley and clear its far end
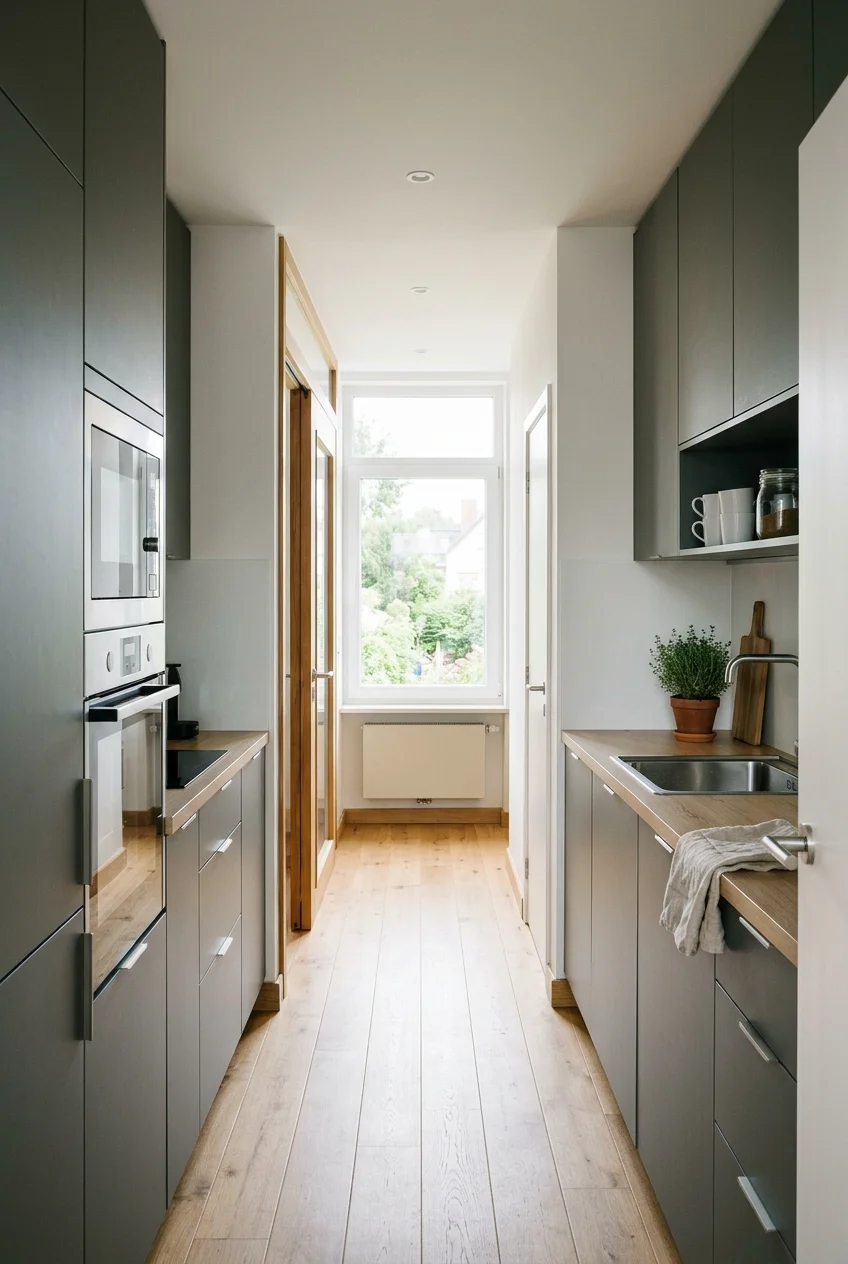
A clear view to the window can make a galley feel much longer. Group tall units close to the entrance where they won't crowd the brightest end.
Draw both runs with the refrigerator, oven and dishwasher doors open. Check how much of the aisle remains and how someone would pass with a laundry basket.
Draw the galley from both entries if it connects two rooms. Tall storage works best where an open refrigerator door leaves an alternate route through.
Keep the most useful prep space close to the sink and cooking surface. A stretch of counter on the far side of a doorway may go unused.
35. Round off the end of a short peninsula
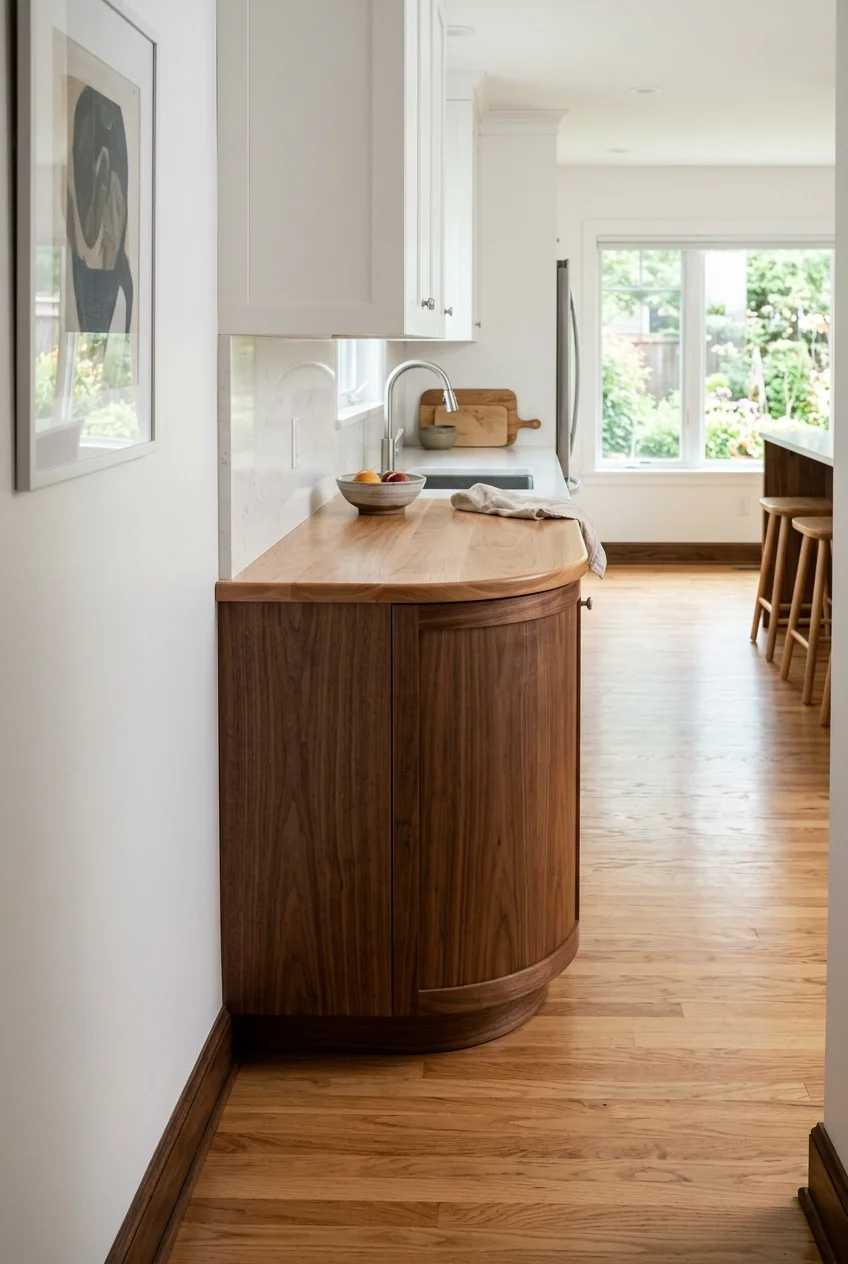
Soften the end of a peninsula that sits on the route into the kitchen. A curved cabinet end and matching counter make the turn feel less sharp.
Tape the entire footprint onto the floor first. Check the pinch point along the approach and leave enough support under any new curve or counter overhang.
36. Remove the upper cabinet bridge while keeping the peninsula
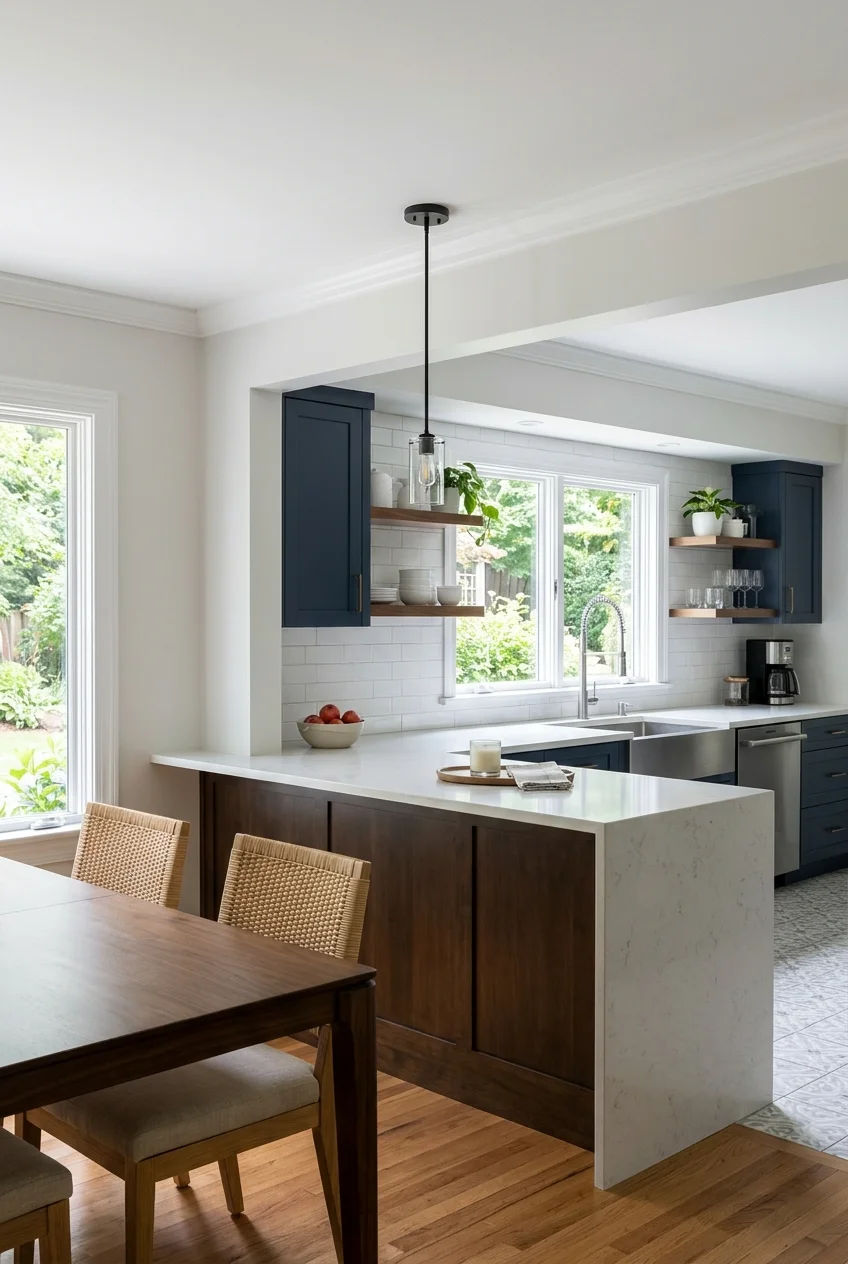
A heavy cabinet bridge can block the view across a perfectly useful peninsula. Keeping the base preserves a work surface and a landing spot for dishes.
Take stock of what the uppers hold and assign it a new home before committing. Wide dish drawers can take some of the load when designed for it.
Have the proposed removal assessed before work begins. The ceiling attachment, hidden utilities and the finish left behind all affect the shape of the finished opening.
Carry the ceiling finish across the old cabinet line and decide where the task light should land. Check the sightline from a seated position, too.
37. Give the original serving hatch a serving ledge
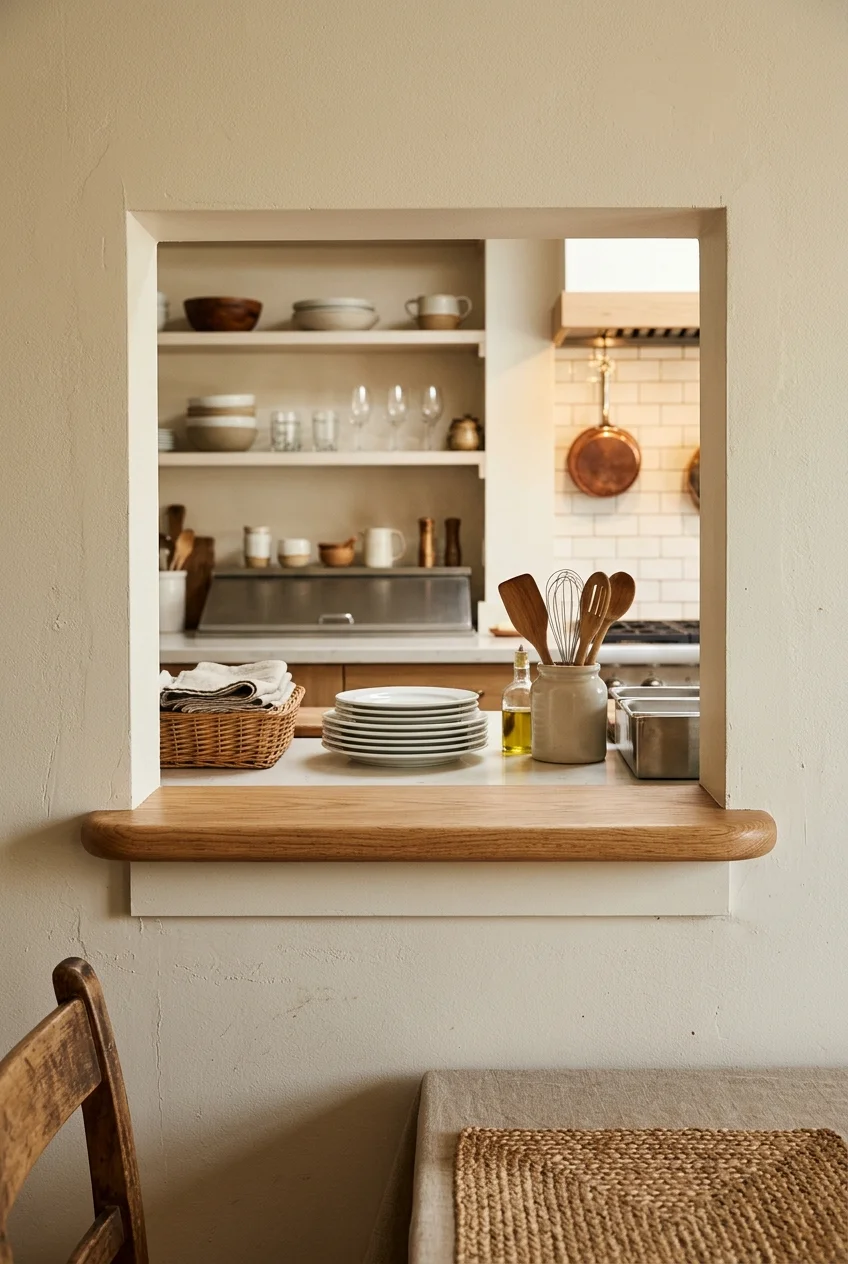
A shallow, rounded sill lets a serving hatch work like a tiny sideboard. Match its wood to the dining furniture to connect the two rooms.
Size the ledge for the plates you actually pass through. Have a professional assess support and structure before changing the opening or extending the ledge.
38. Set a slim worktable on legs in place of a built-in island
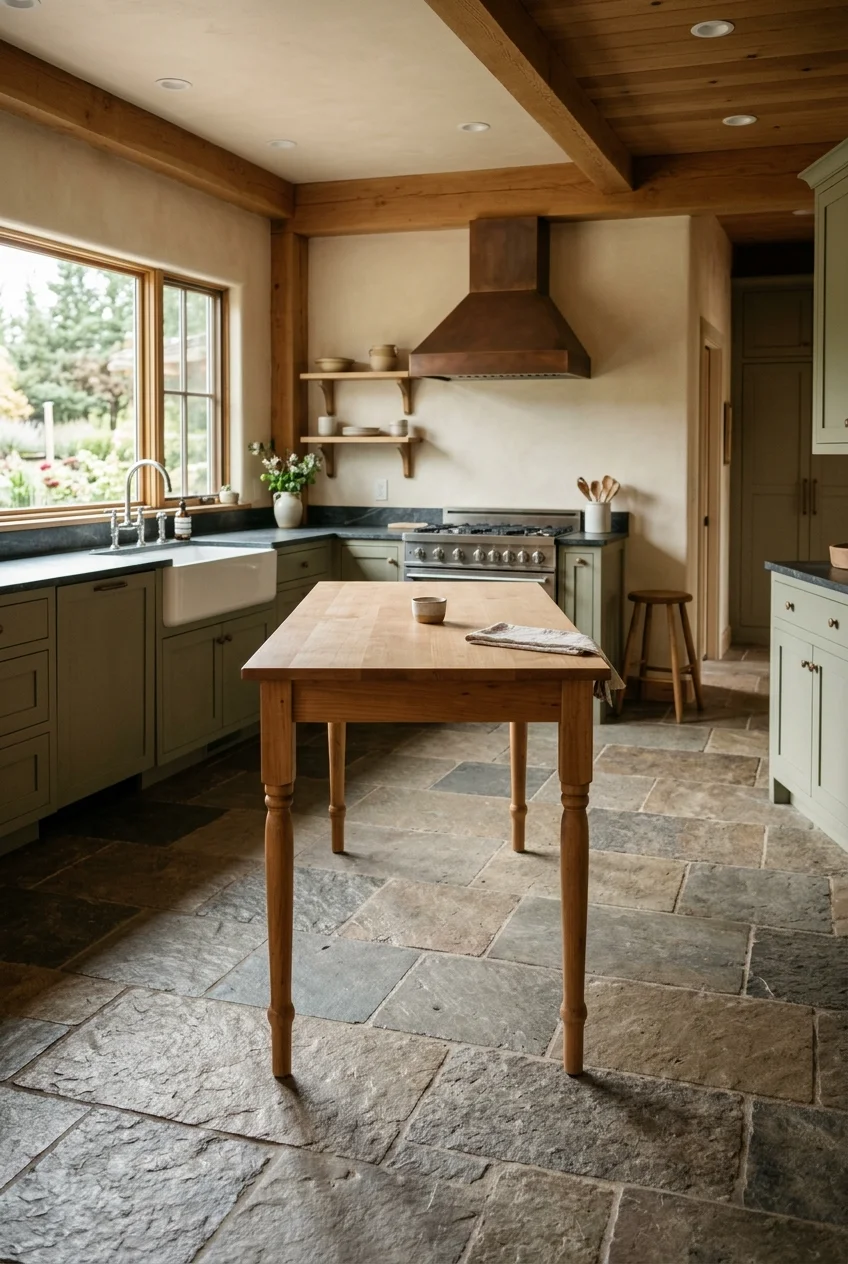
A narrow worktable on legs keeps the floor visible and gives you a place to prep. Choose a sturdy piece with a work surface made for kitchen use.
Mark its footprint and go through a normal meal cleanup. The table should leave room for open appliance doors and for a person carrying hot cookware.
Practical tip When trying sizes with a temporary table, test the corners as well as the midpoint. The tightest turn is often at the end of a cabinet run.
39. Build a curved booth around a pedestal table
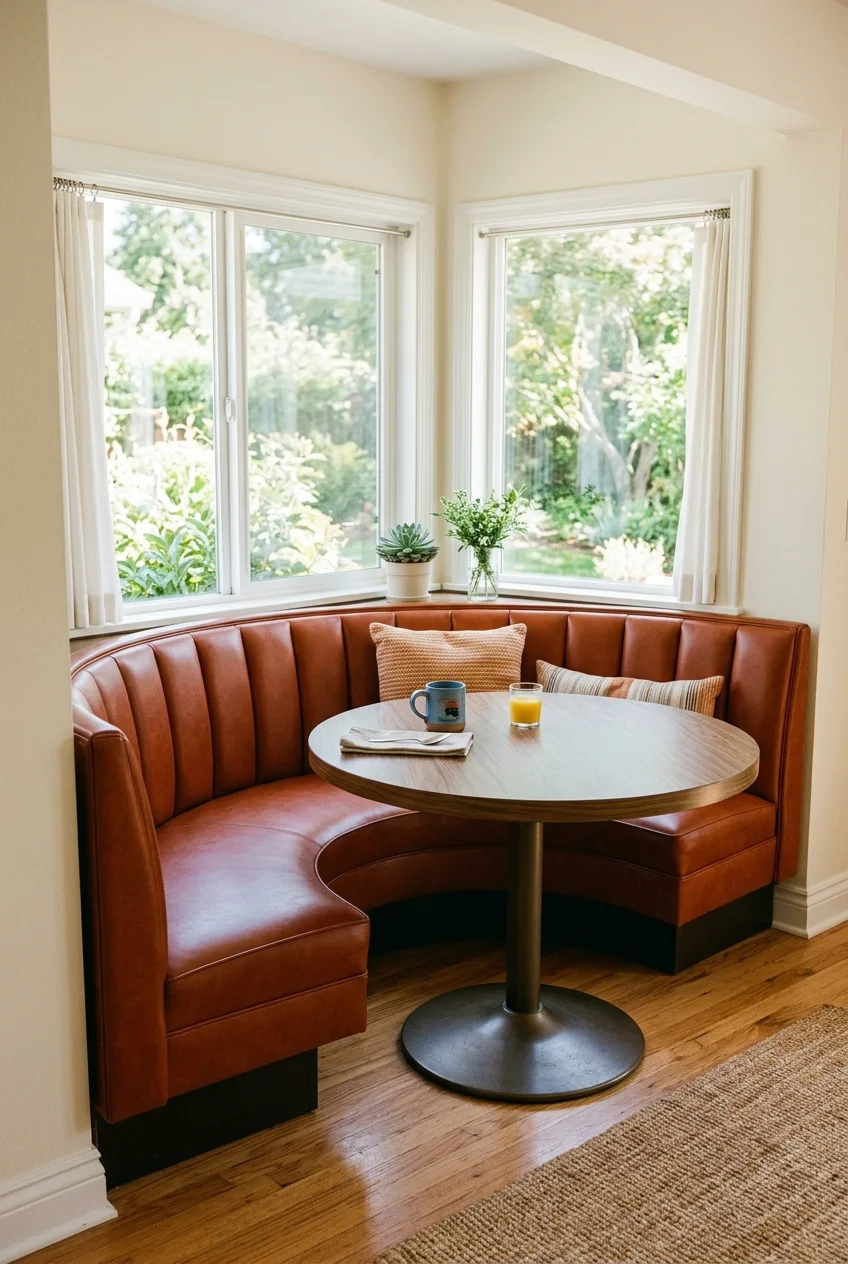
A curved booth with wipeable rust upholstery gives breakfast a diner feel. A central pedestal leaves more room for knees when people slide around the bench.
Make a full-size floor template before ordering seating. Test how someone reaches the farthest place and how far the tabletop overlaps the bench from the side.
Ask for a seat mockup with the cushion thickness included. A deeper seat can feel generous until the table edge makes it hard to slide in.
If the nook is tight, a straight bench and round table keep much of the look with simpler access. A loose chair can serve the open end.
40. Put a drop-leaf table against a blank wall
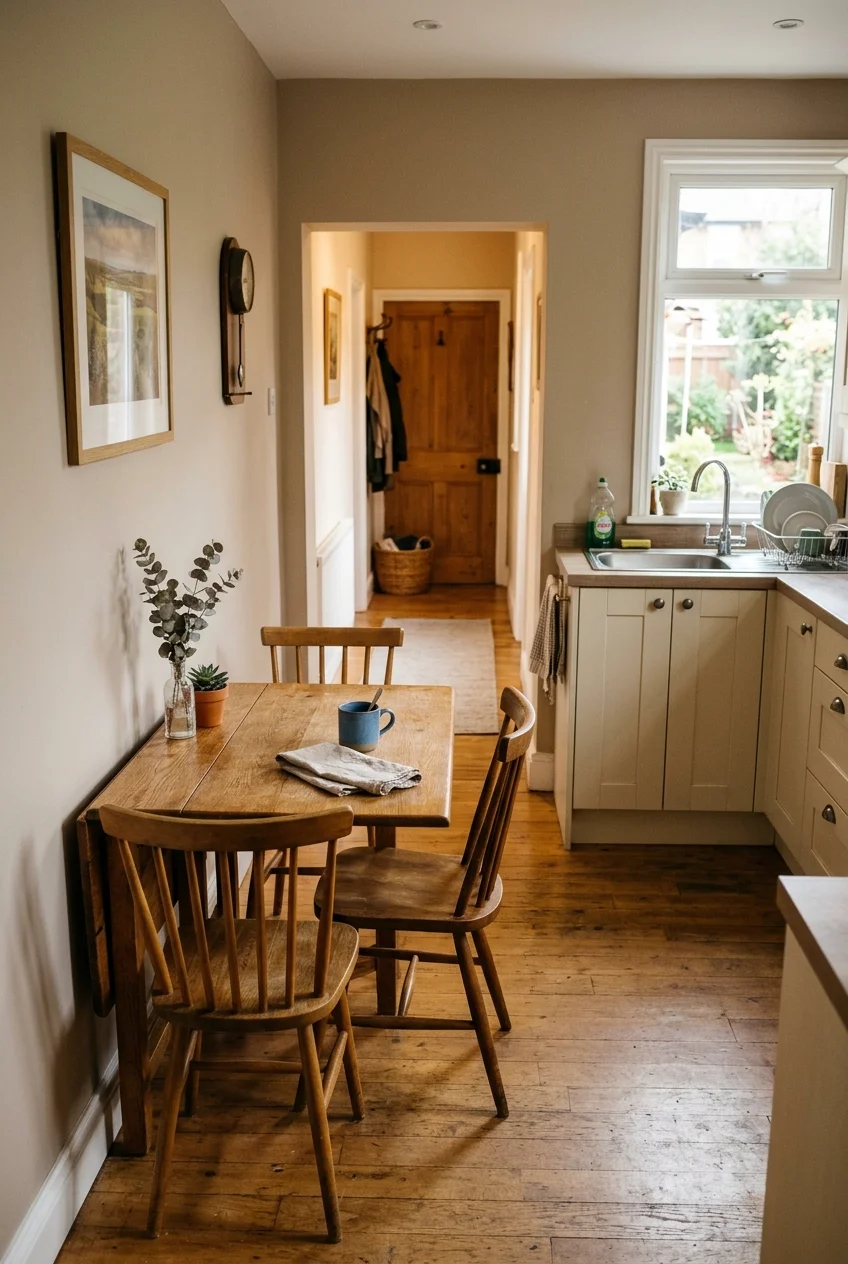
A wall-side drop-leaf table leaves floor space for weekday traffic. Pick a rounded leaf if the table's open edge sits on the way to the back door.
Allow for the legs or bracket that supports the open leaf when choosing chairs. Check chair positions with the leaf up and down before buying the table.
41. Turn a shallow recess into a coffee counter
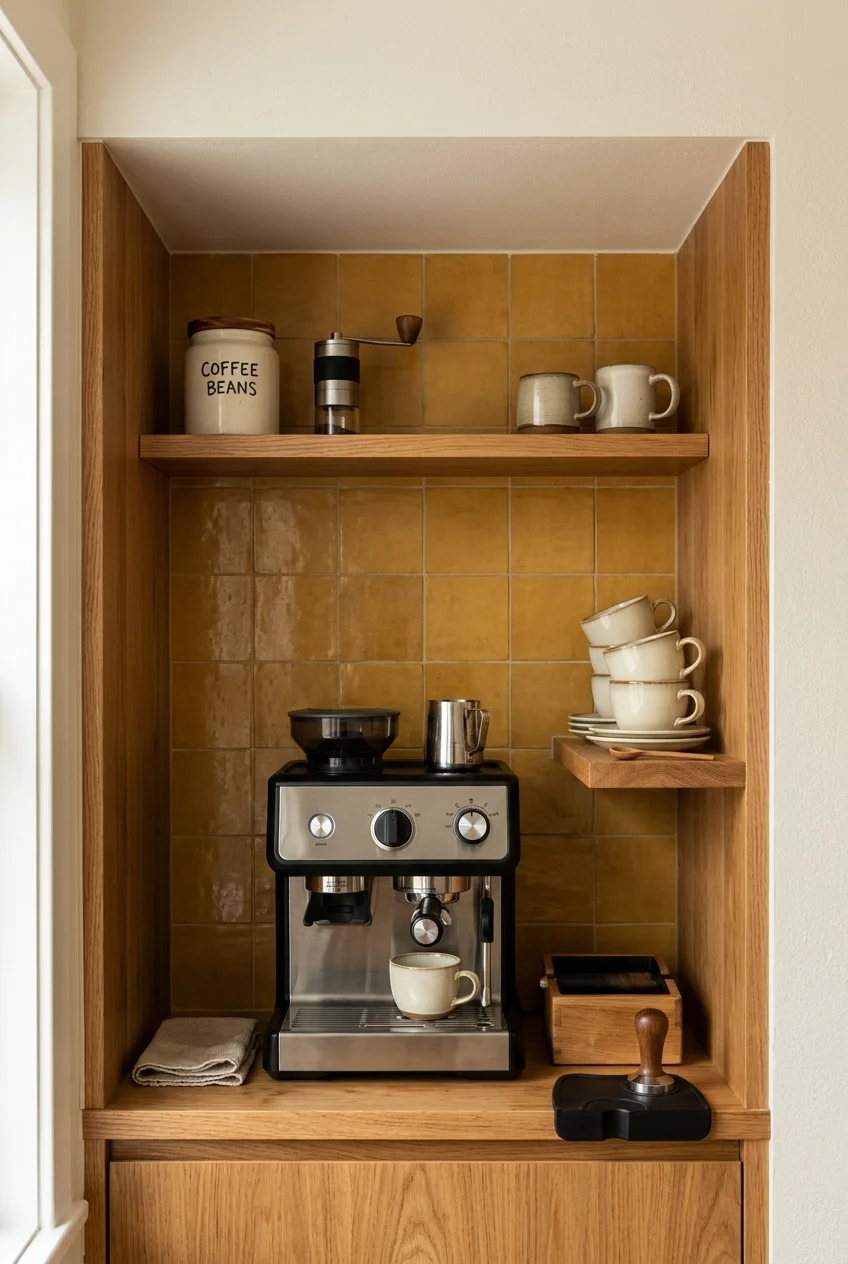
Move mugs and the coffee maker into a recess outside the main prep run. Back the nook with ocher and repeat your cabinet finish on the sides.
Measure the space with the machine's reservoir lid open. Check the manufacturer's steam and clearance instructions, and keep storage off to the side where steam won't collect.
42. Put a single deep basin in the old sink zone
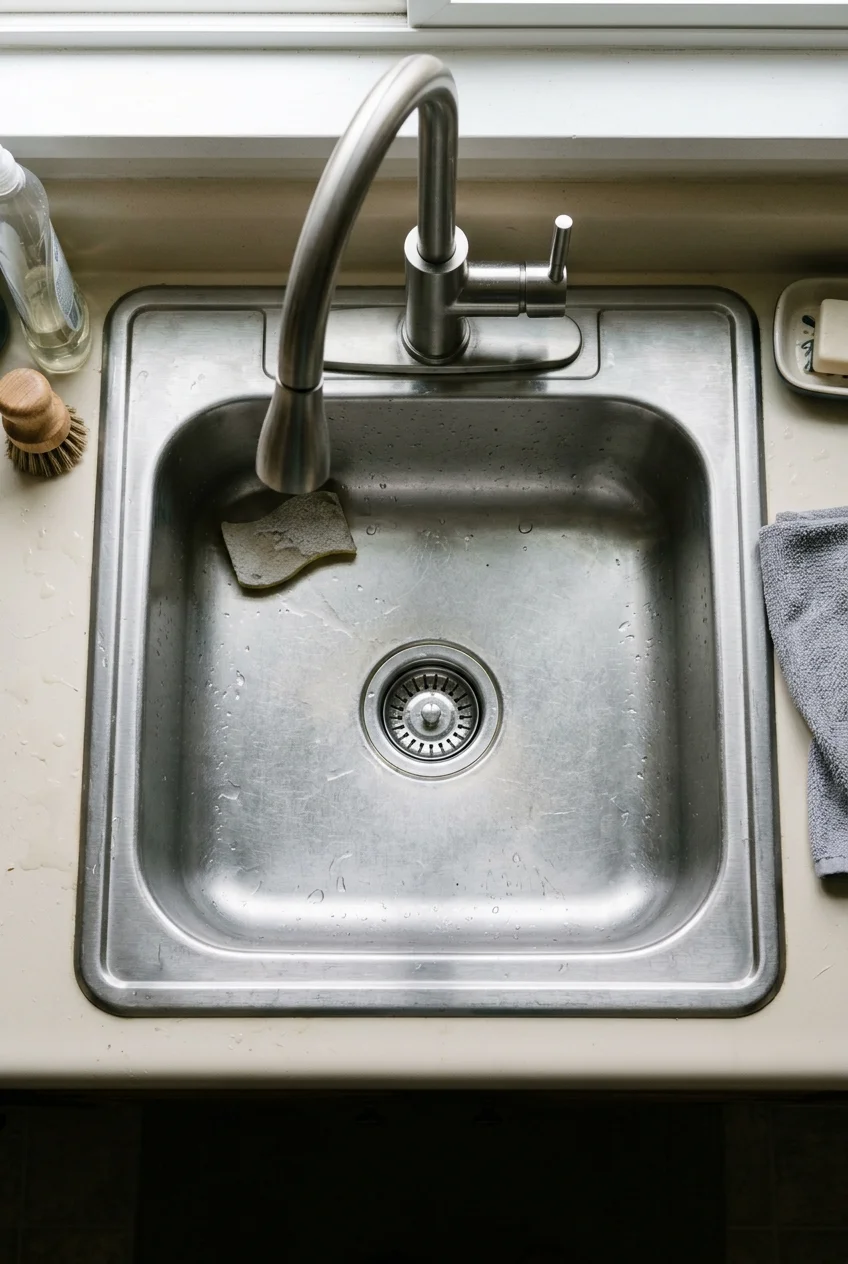
A single basin can make it easier to wash big pans in the same sink zone. Brushed stainless also works with vintage laminate and simple cabinet fronts.
Measure the cabinet interior and have the cutout checked before buying. An existing double-bowl hole may dictate which drop-in rims will actually cover the edges.
Discuss bowl depth, drain location and existing plumbing with the installer. A deeper sink can affect both the connections and the usable storage below the basin.
Finish with lighting and details that look good in use
43. Suspend opal globes over the dining end
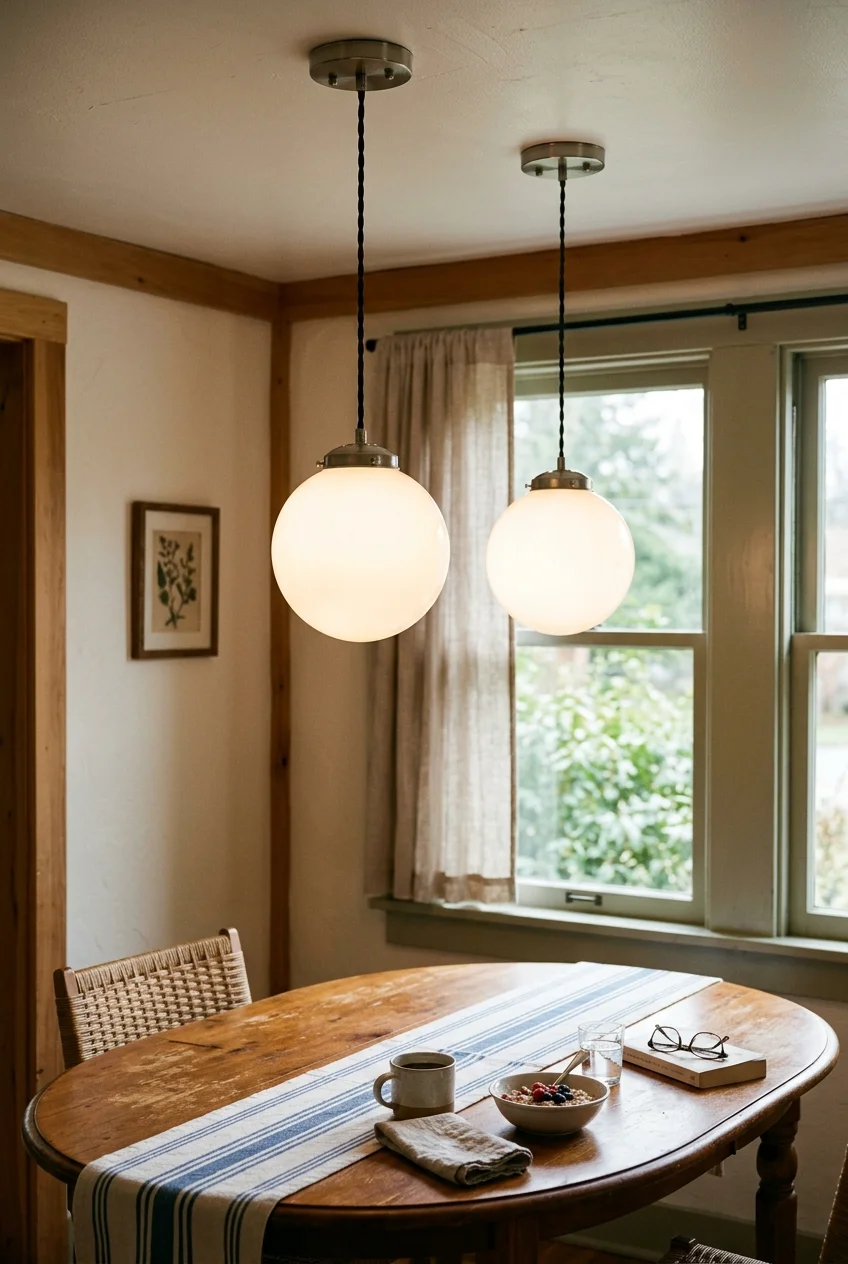
Milk-white glass gives the breakfast table a softer glow than clear bulbs. Center the globes on the furniture so the light belongs to the dining area.
Sit down before confirming pendant height. Check the view across the table and from the kitchen door, then have an electrician confirm the mounting and fixture requirements.
44. Put a low-profile disk where a fluorescent box used to hang
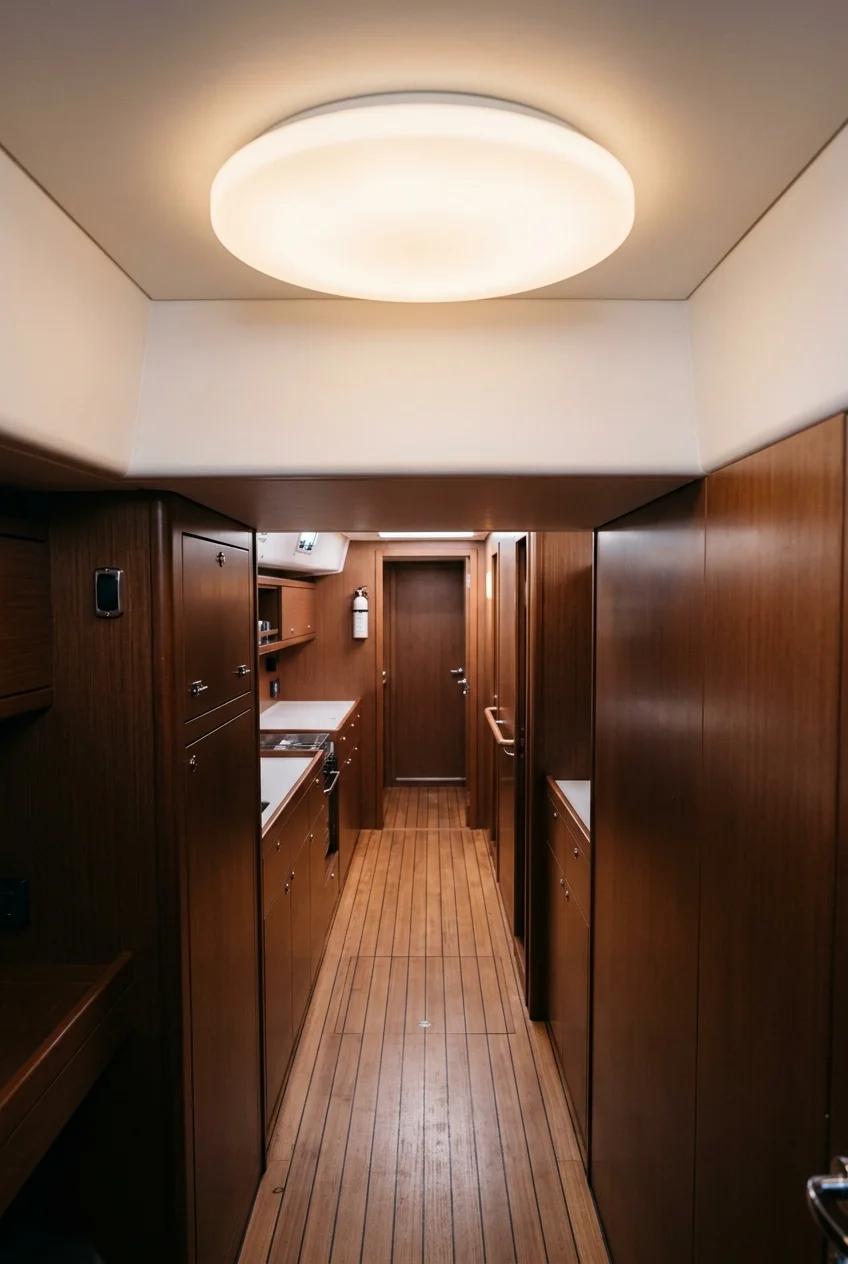
A broad flush-mount disk keeps the ceiling line calm in a low ranch kitchen. Its frosted face can soften the glare you notice from an adjacent room.
Ask an electrician to inspect the existing box and what the old fixture covered. The ceiling may need repair beyond the footprint of the new disk.
45. Wash the prep counter with concealed under-cabinet light
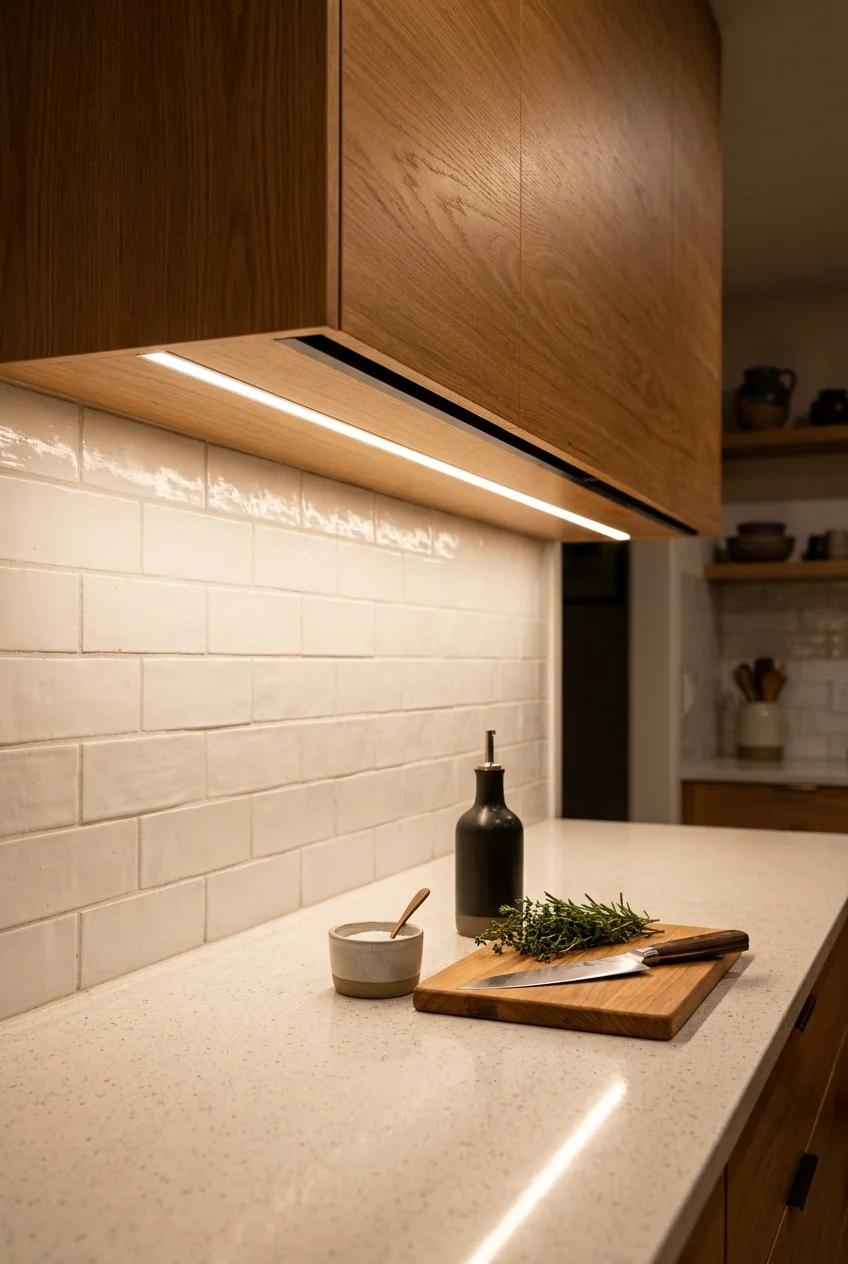
A concealed strip lets you see what you're chopping while leaving the room's retro ceiling light in place. A diffuser softens the individual points of light.
Check reflections on your counter sample before settling on placement. Have the wiring and driver location planned so the unit remains reachable for maintenance after installation.
46. Aim track heads at a patterned wall
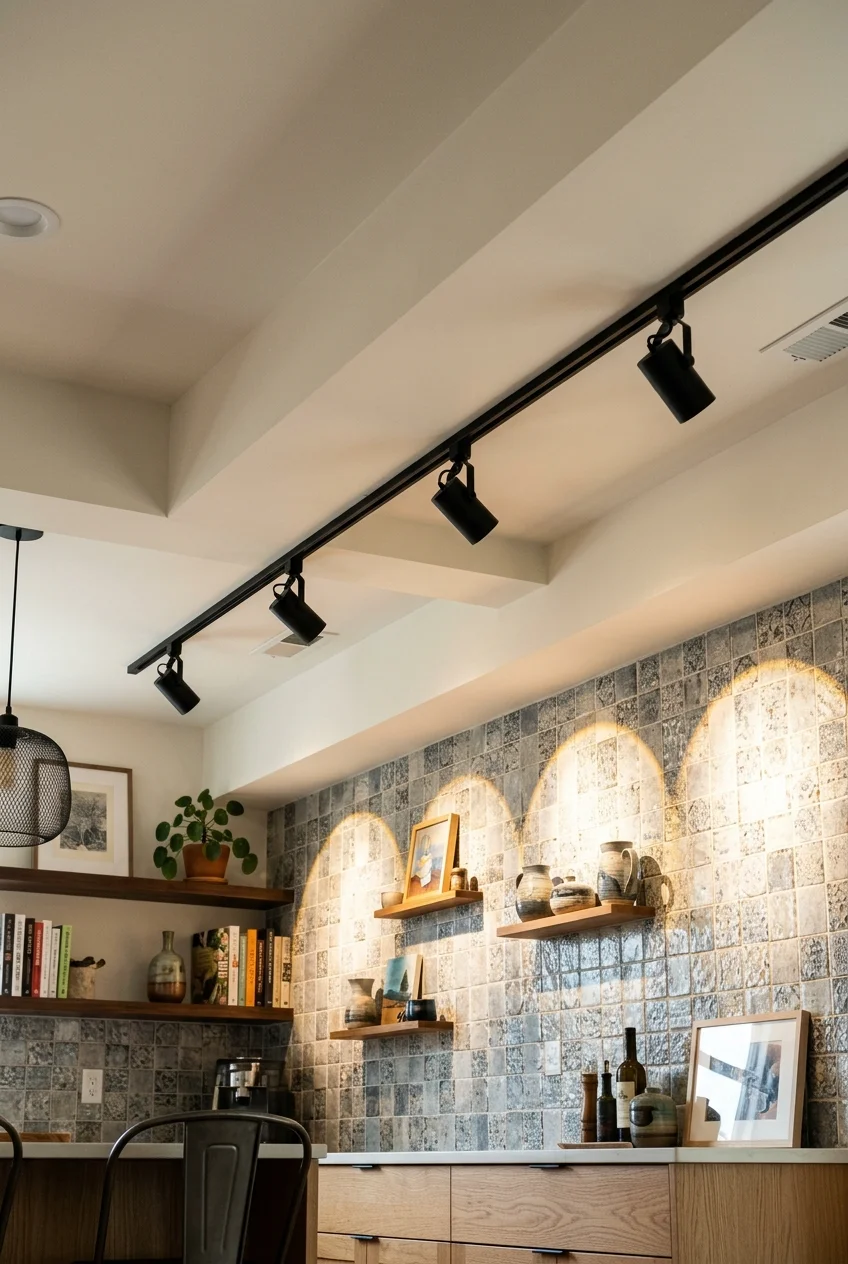
A short ceiling track can pick out a tile pattern or a serving shelf from one line. Choose discreet heads that sit close to the ceiling.
Stand at the door and sit at the table when checking aim. Light pointed at a glossy surface can bounce straight into one of those viewpoints.
47. Hang a short cafe curtain at the sink window
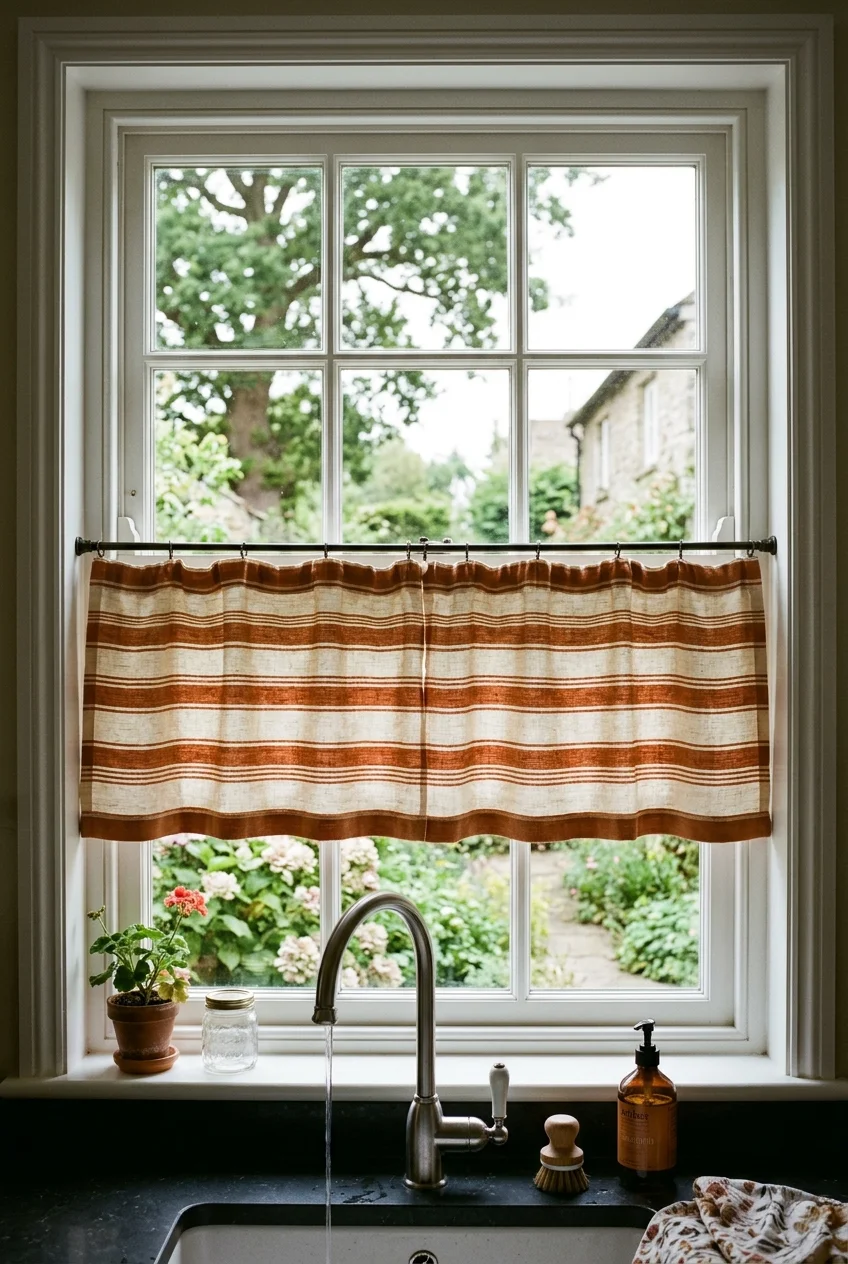
A half curtain gives the sink window color while leaving the upper glass open to daylight. A narrow rust stripe is enough beside wood cabinet fronts.
Hang the fabric where it clears the faucet and window hardware. Pick a washable textile and reserve curtains for windows away from the cooking surface.
48. Give the breakfast corner a vinyl chair with a tubular frame
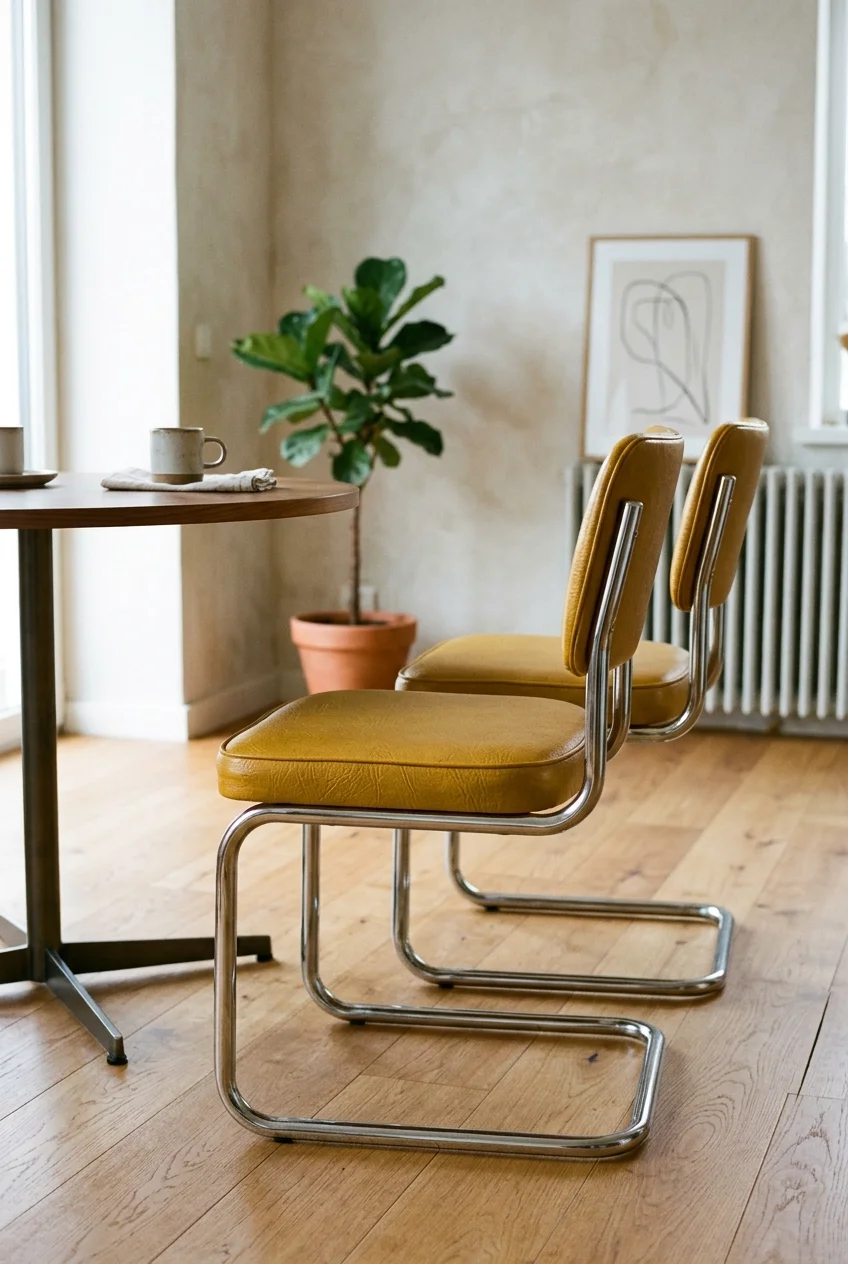
Ocher vinyl and chrome give a small breakfast table a period outline. The metal frames work especially well against a warm wood table with quiet grain.
When shopping secondhand, check the seat seams, welds and floor glides. Try the chair under your table, since wide frames can make side-by-side seating awkward.
49. Mount a utensil rail over an empty prep stretch
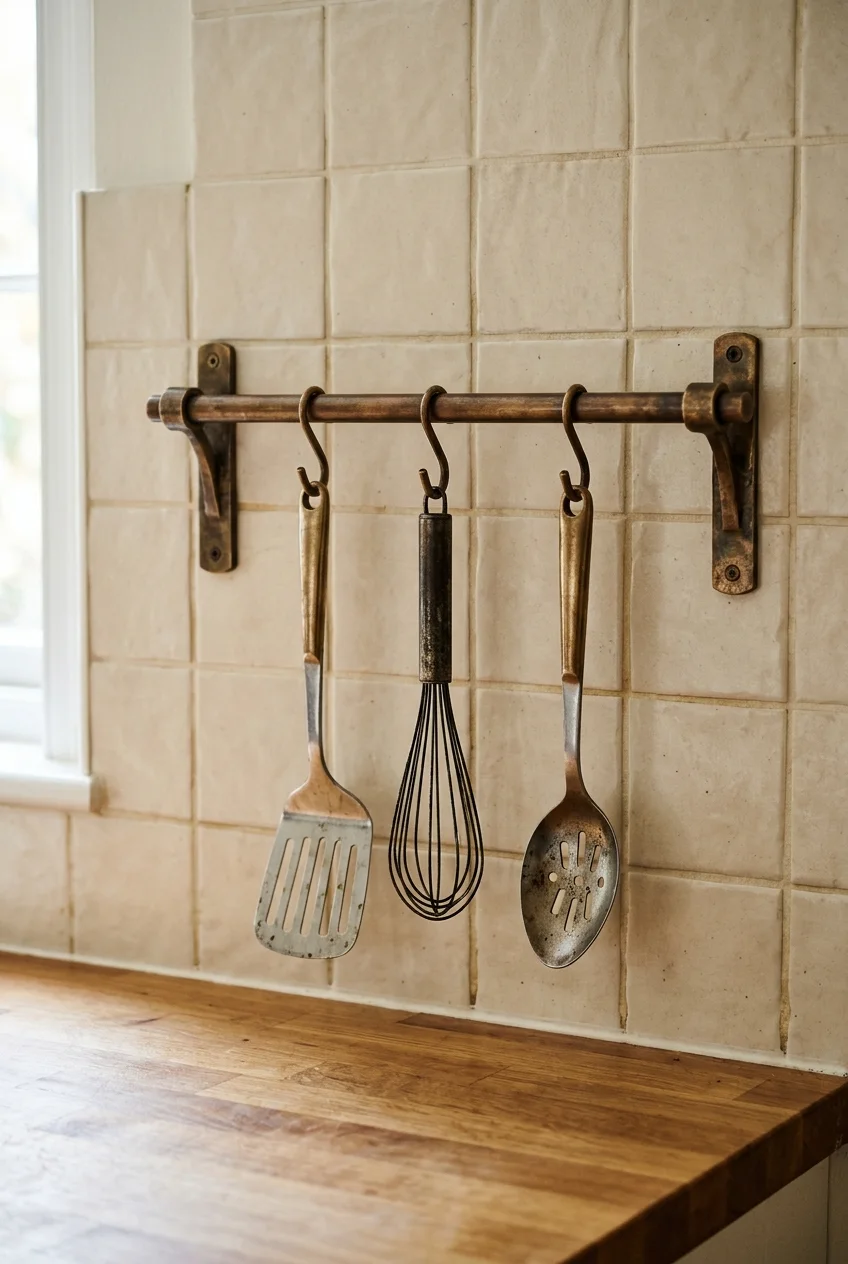
A slim bronze rail brings a little familiar kitchen hardware into view and puts utensils where you use them. Give frequently washed tools the prime spots.
Check the mounting surface and product instructions before drilling. Choose a wall away from burner heat, and keep the longest utensil high enough to clear the counter.
50. Set a retro enamel bread box where the counter ends
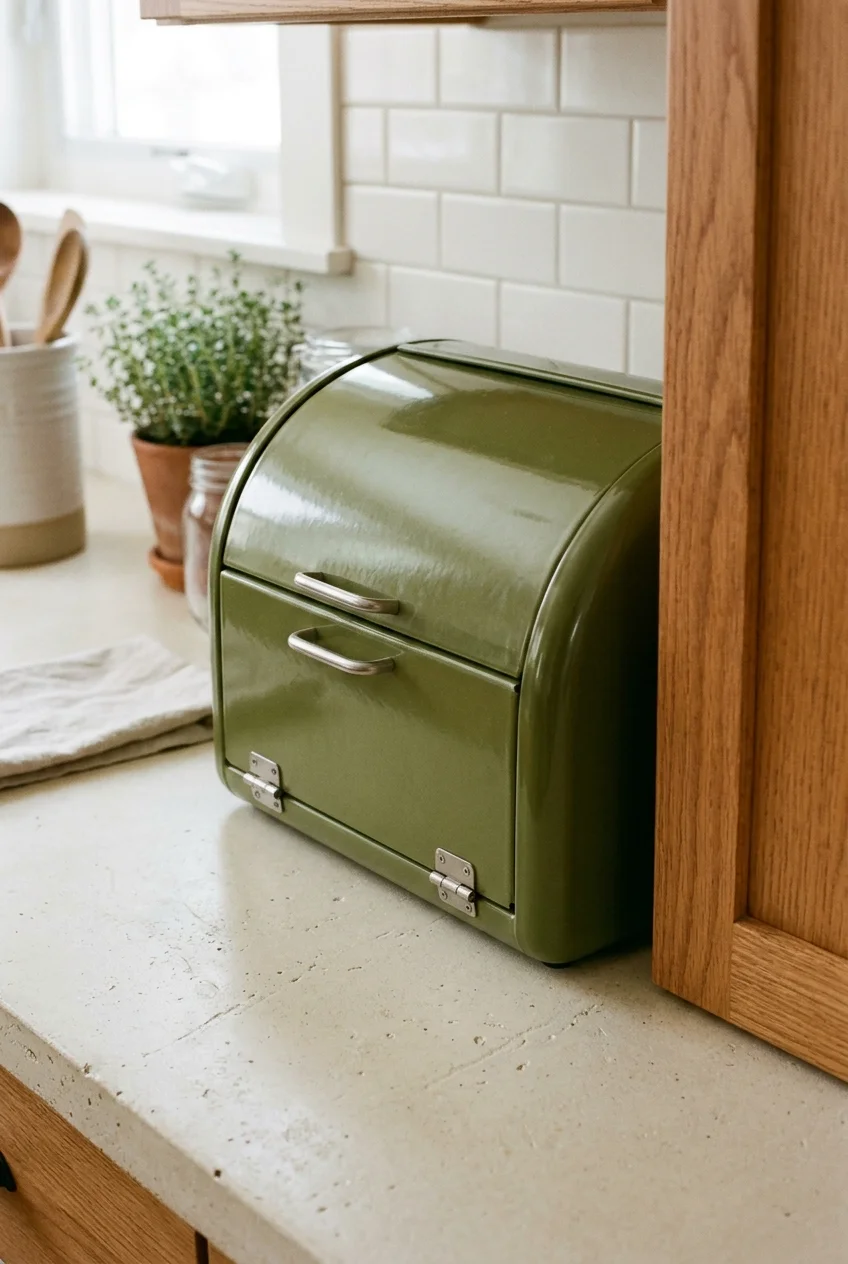
An olive enamel bread box lets a small area of counter carry the retro color. Put it at the end of the run, away from the main prep space.
Check the opening direction before choosing one. A front door needs room on the counter, while a lift-top version needs space under any cabinet above it.