50 Kitchen Faucet Ideas

This post may contain affiliate links: full affiliate disclosure.
Kitchen faucets can look nearly identical online, yet small differences in reach, handle clearance, spray control, and mounting shape change daily use considerably.
Use these ideas to compare silhouettes and finishes visually, then narrow the options by your sink size, existing holes, cabinet clearance, and cleanup habits.
Measure before choosing a favorite, and verify current specifications for the exact model. A well-scaled faucet should direct water toward the basin, not the counter.
As an Amazon Associate I earn from qualifying purchases.
Faucets That Change How the Sink Works
Begin with the motion you use most: pulling, swiveling, touching, or turning. The right operating style matters more than a feature you rarely need.
1. Choose a Pull-Down Faucet With Secure Docking
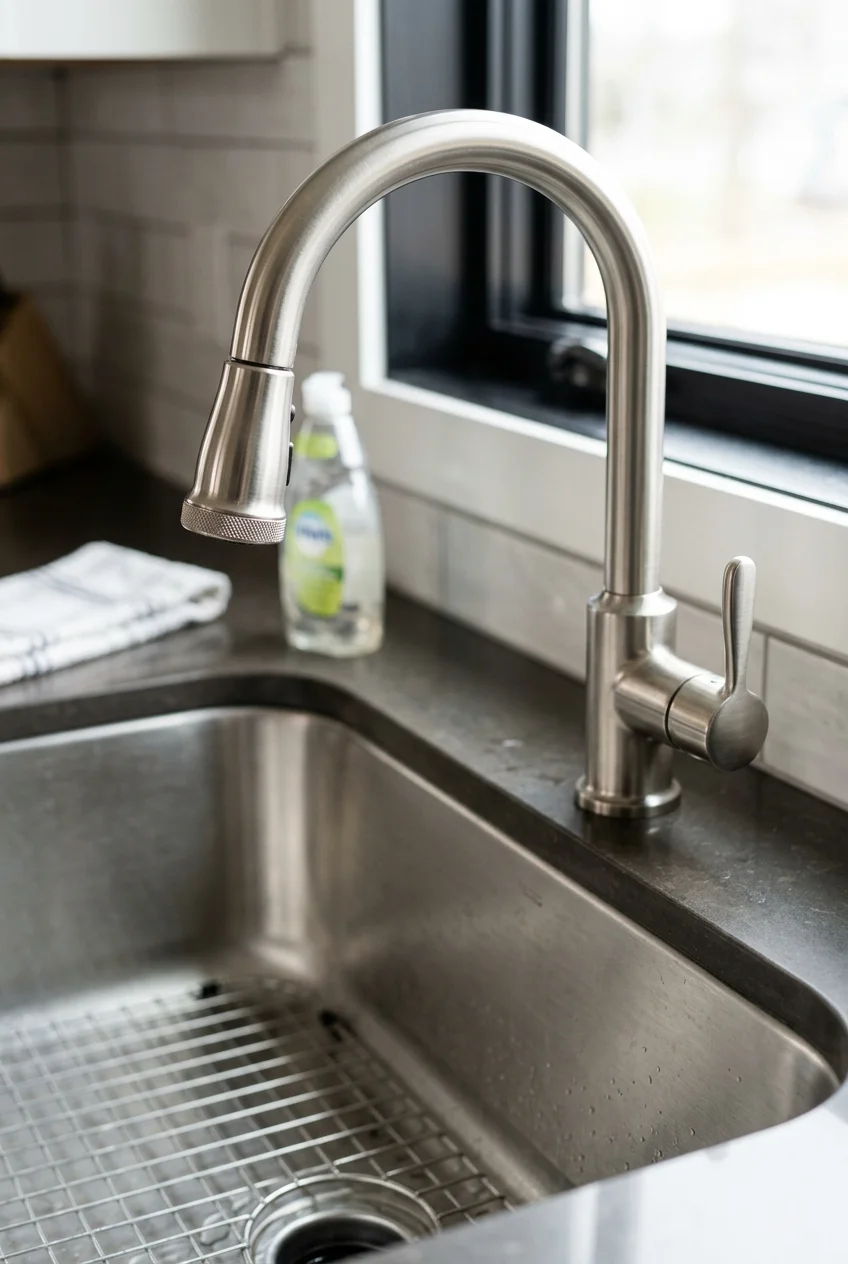
A pull-down head puts stream and spray controls directly over a deep basin. It suits rinsing sheet pans, washing produce, and clearing sink corners.
Check hose length, spout reach, and docking method together. The head should return neatly without hanging low or requiring a hard push after every use.
For a current example, compare this Delta pull-down faucet with magnetic docking (paid link). Confirm its height, reach, hole layout, and finish against your own sink before ordering.
Setup note Keep the hose route free beneath the sink; a bin, disposal, or shutoff valve can interrupt retraction even when the faucet itself works correctly.
2. Use a Low-Profile Pull-Out Under a Window
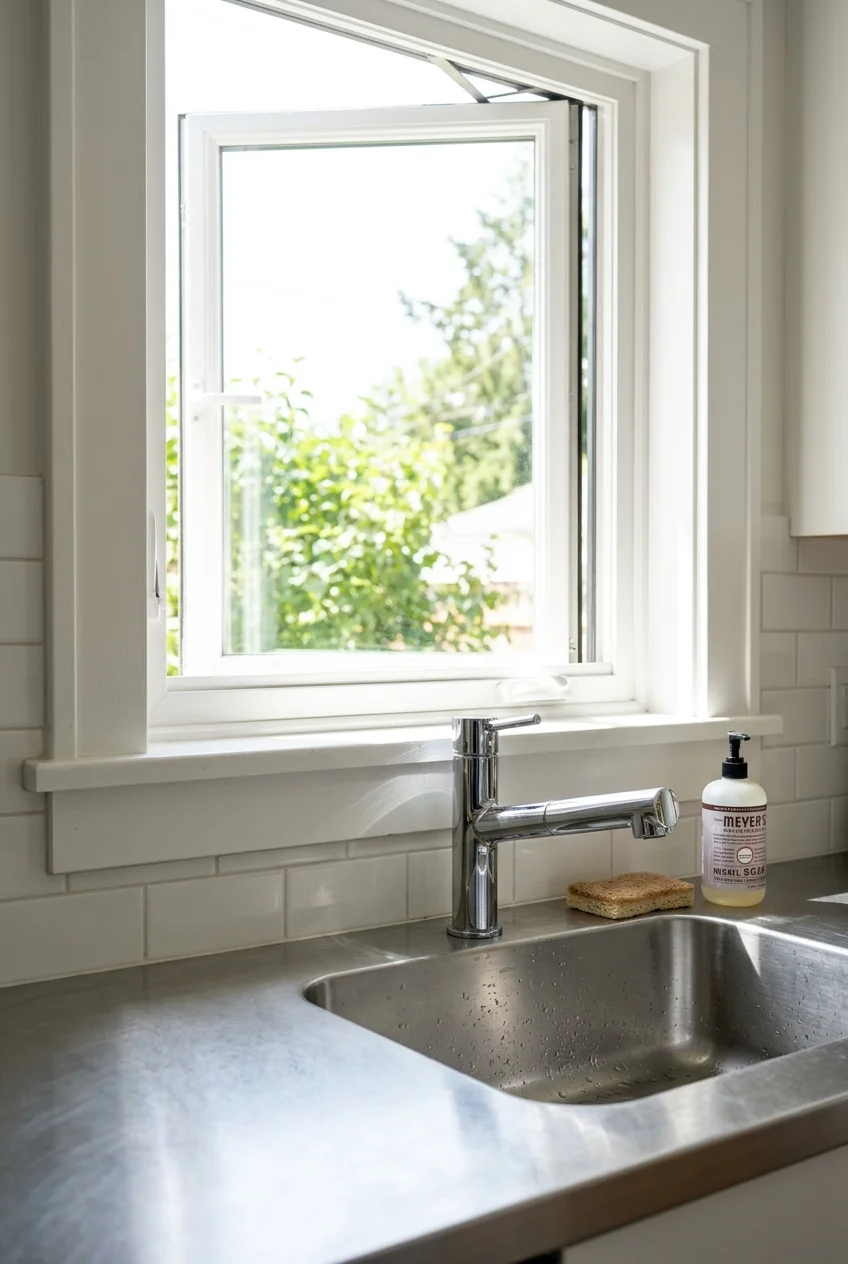
A pull-out faucet sends the spray head forward instead of downward, making it useful where a tall arch would crowd a window, shelf, or cabinet.
Measure the faucet’s full height and the space needed to grip the wand. Leave enough room behind the handle so it never strikes the backsplash.
Because the wand is usually larger than a pull-down head, hold a similarly sized object before buying. Confirm that the grip feels comfortable for every regular user.
3. Keep a Fixed Spout and Add a Side Sprayer
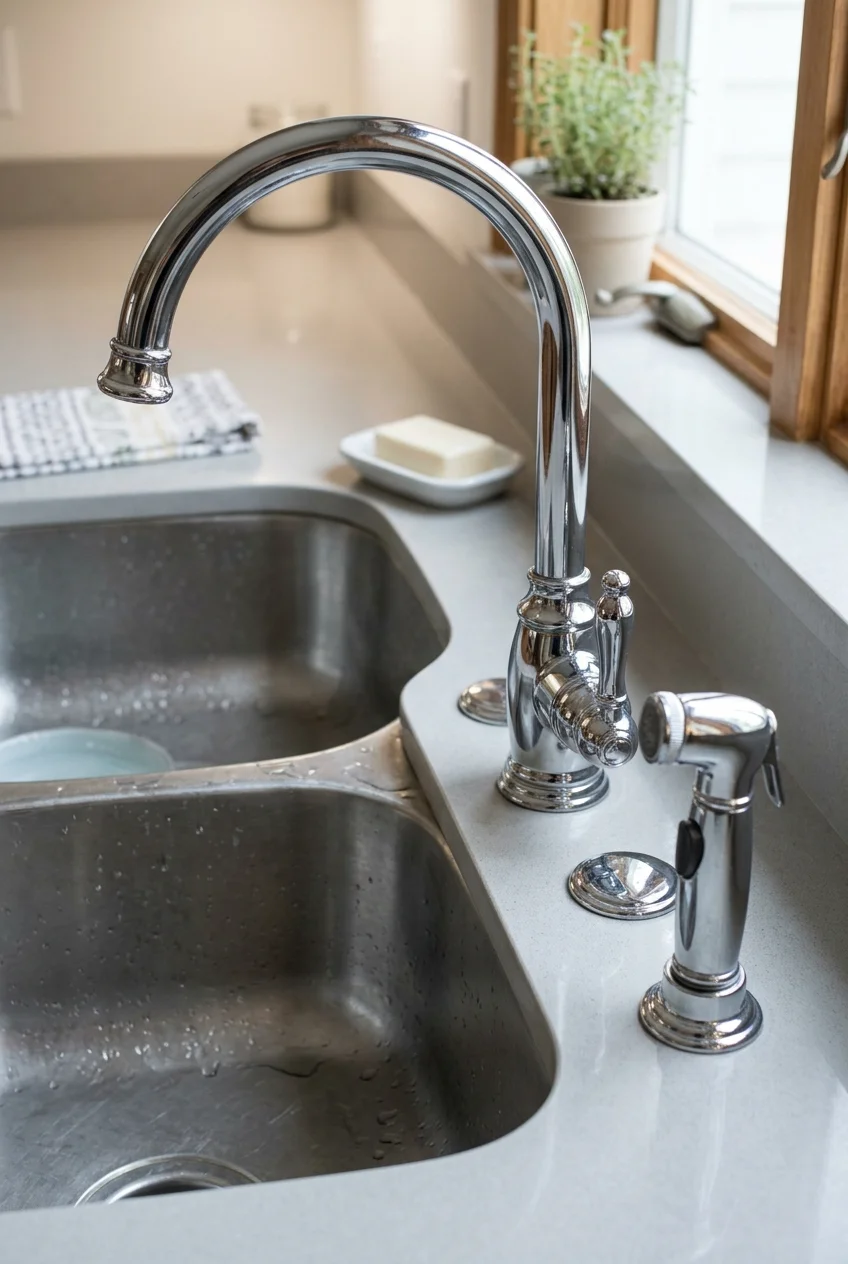
A fixed spout with a separate side sprayer preserves a traditional outline while adding reach for rinsing corners, large cookware, or an adjacent draining board.
This arrangement needs another sink or countertop hole and clear hose space below. Place the sprayer where your dominant hand can lift it without crossing the stream.
- Confirm the sink deck has an available hole.
- Check that the sprayer hose clears the disposal.
- Test whether the holder crowds a soap dispenser.
4. Make a Spring Faucet the Working Focal Point
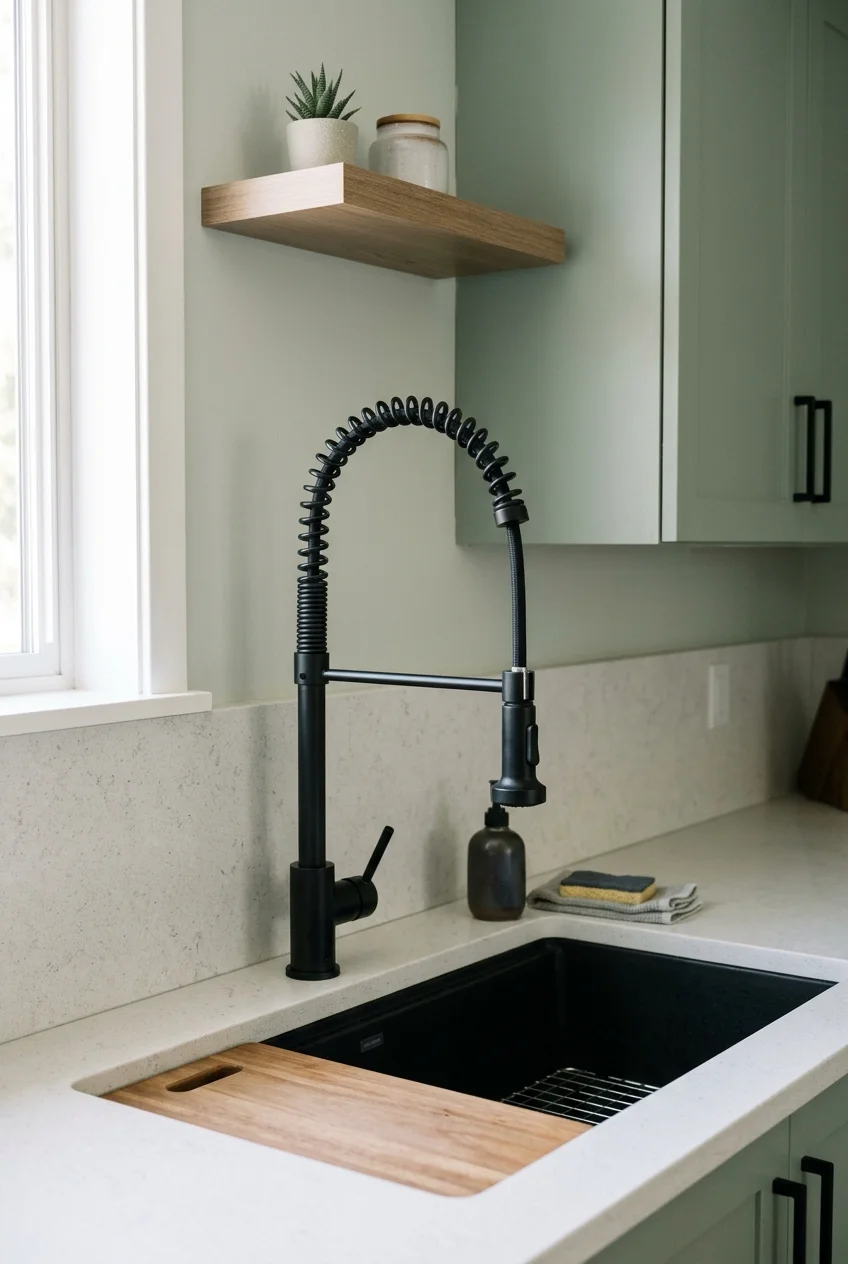
A semi-professional spring faucet creates strong vertical structure and keeps a flexible spray head within easy reach. It works best beside a generously scaled sink.
Compare overall height with nearby cabinets and pendants, then check whether the docking arm feels stable. An oversized coil can dominate a compact prep basin.
Choose a coated or easy-clean hose when exposed coils collect cooking residue nearby. Keep decorative objects away from the moving spray head and lever path.
Watch for A tall spring silhouette needs visual breathing room. Beneath a low cabinet, a compact pull-out usually looks better and leaves more usable clearance.
5. Use Touch Activation for Messy Prep
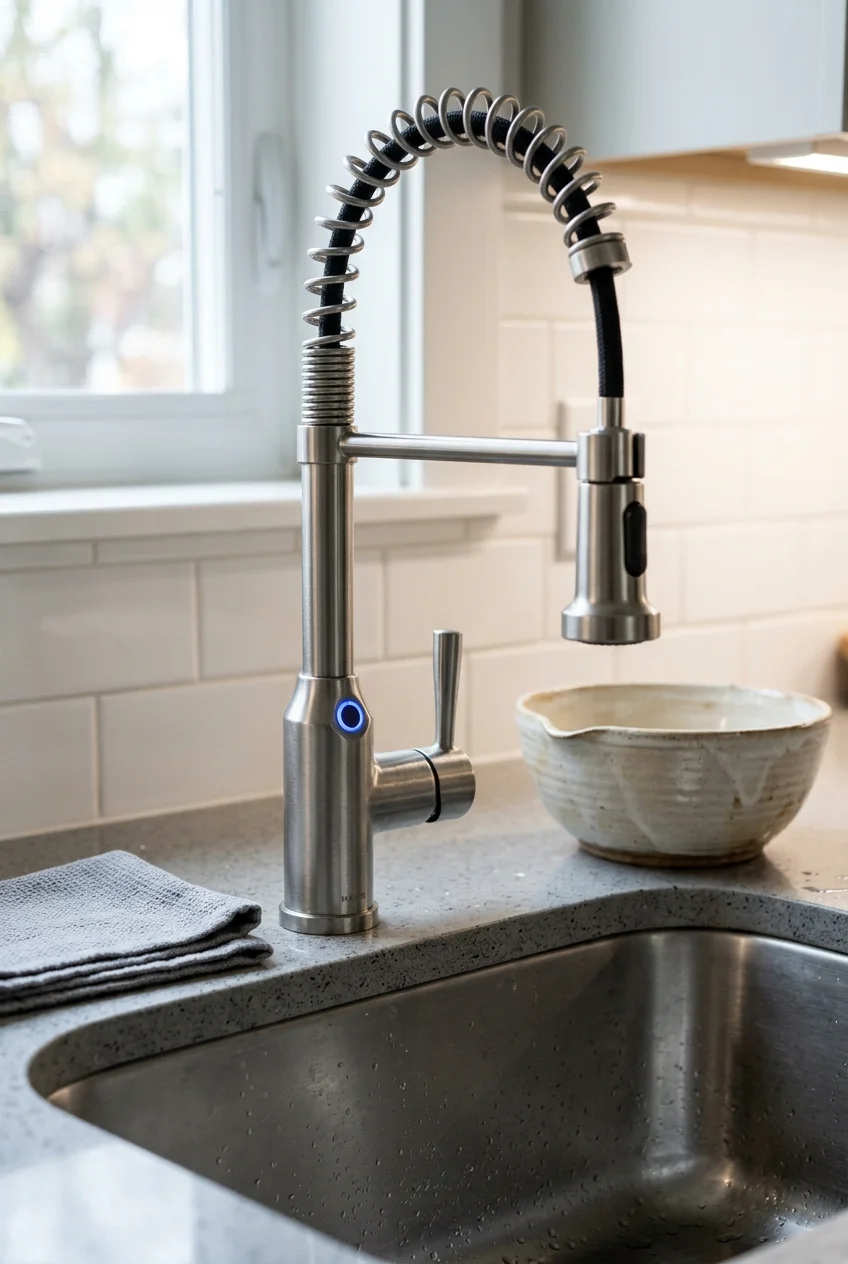
Touch-activated faucets start or stop when you tap the spout, allowing a wrist or forearm to control water while your fingers are coated with dough.
They still need a manual handle, power source, and accessible controls. Review the manufacturer’s instructions for batteries, adapters, temperature settings, and troubleshooting before committing.
One feature-rich reference is this Delta spring-spout touch faucet (paid link). Its listing describes touch control and magnetic docking; verify exact installation requirements and available space for the selected variation.
Touch activation is not identical to motion sensing. Decide whether tapping anywhere on the spout feels more predictable than aiming for a sensor zone.
6. Choose True Touchless Control for Hands-Free Starts
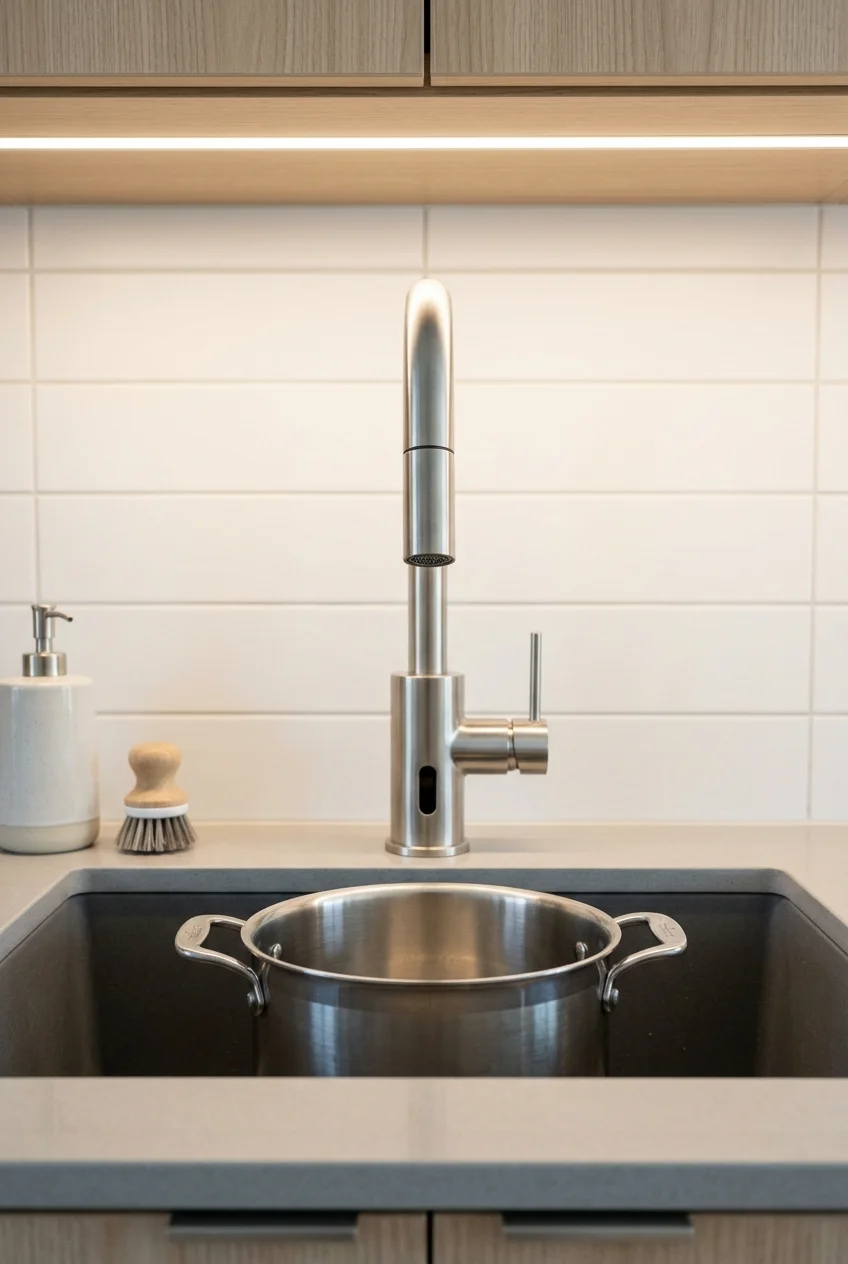
A motion-sensor faucet can begin flow without contact, which helps when handling raw ingredients or carrying a heavy pot with both hands occupied.
Sensor locations and timeout behavior vary, so read the actual model instructions. A poorly positioned zone may trigger during routine wiping or miss short containers.
- Locate the sensor before choosing a sink accessory.
- Confirm manual operation remains available during power loss.
- Plan battery or outlet access below the sink.
- Check how temperature is set between uses.
7. Place a Single Lever Where It Can Move Freely
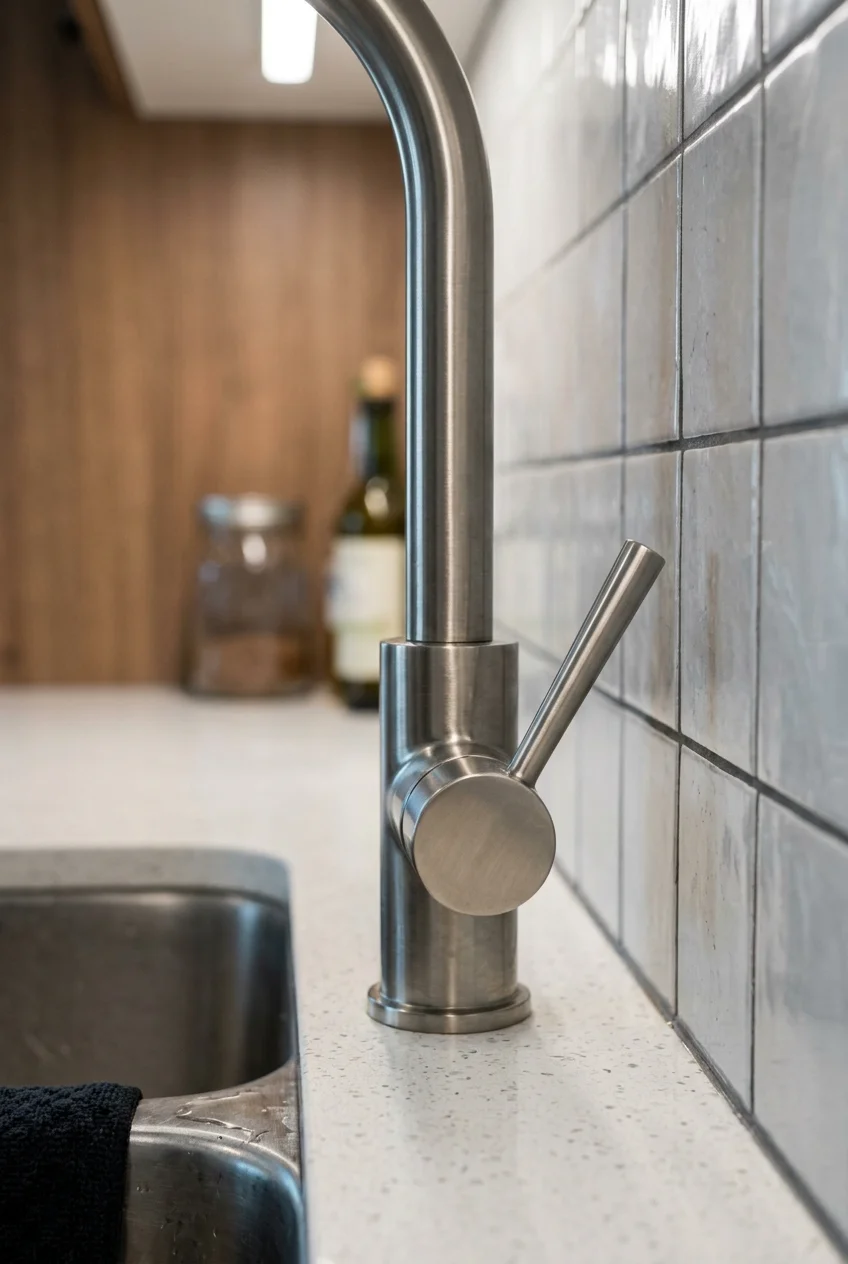
A single lever controls volume and temperature with one hand, but its travel can collide with a tight backsplash or window trim behind the faucet.
Look for forward-only handle movement when rear space is limited. Also check whether right-side placement remains comfortable for left-handed cooks and nearby walls.
Practical tip Tape a cardboard handle shape beside the planned base, then move it through its full arc before drilling a new countertop or sink hole.
8. Choose Two Handles for a Deliberate Traditional Look
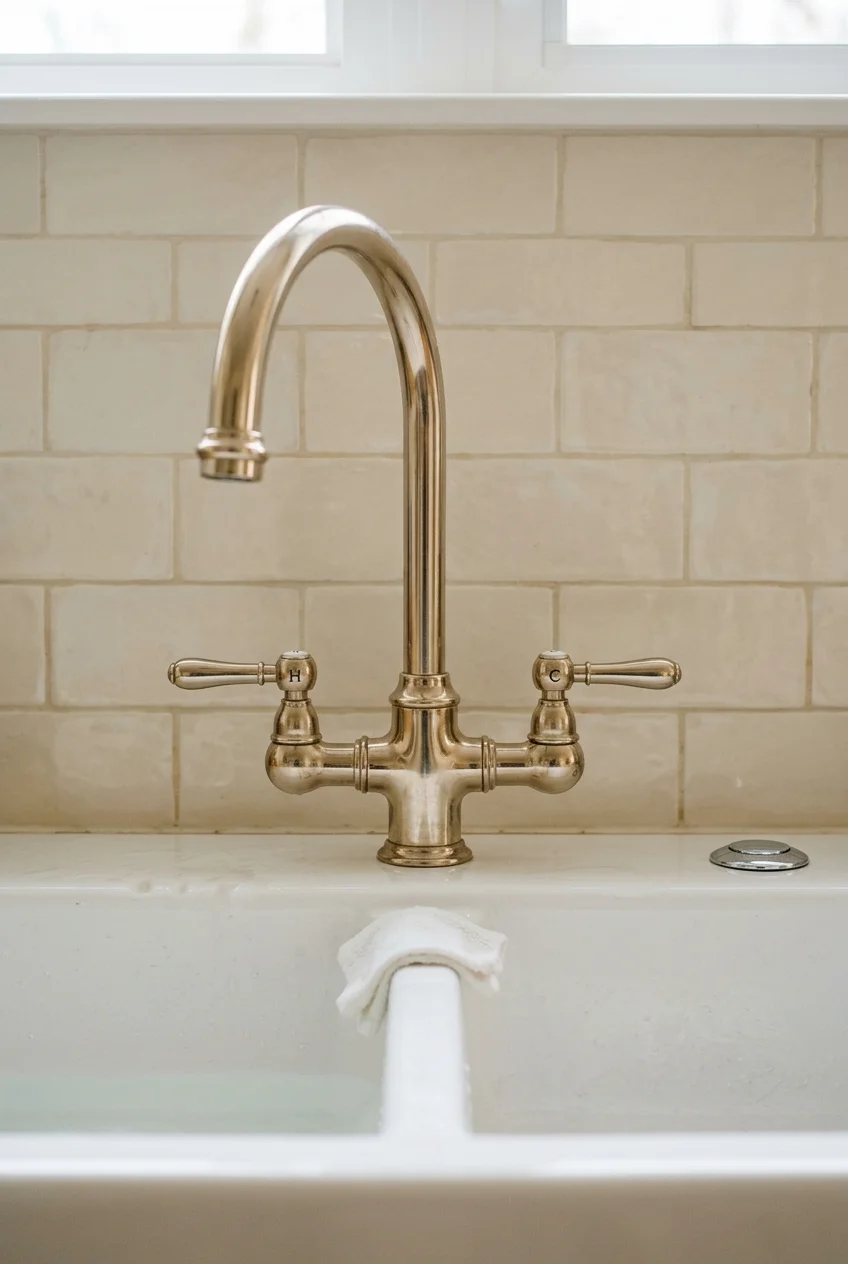
Separate hot and cold handles give a faucet visual width and allow small temperature adjustments, especially when paired with a bridge or classic central spout.
Two hands may be needed to change temperature quickly, and cleaning takes longer around additional bases. Confirm handle rotation will not meet the backsplash or window casing.
Cross handles feel formal and compact; levers are easier to push with a wrist. Choose the shape for actual grip, not only the period style.
9. Match the Swivel Range to a Double-Bowl Sink
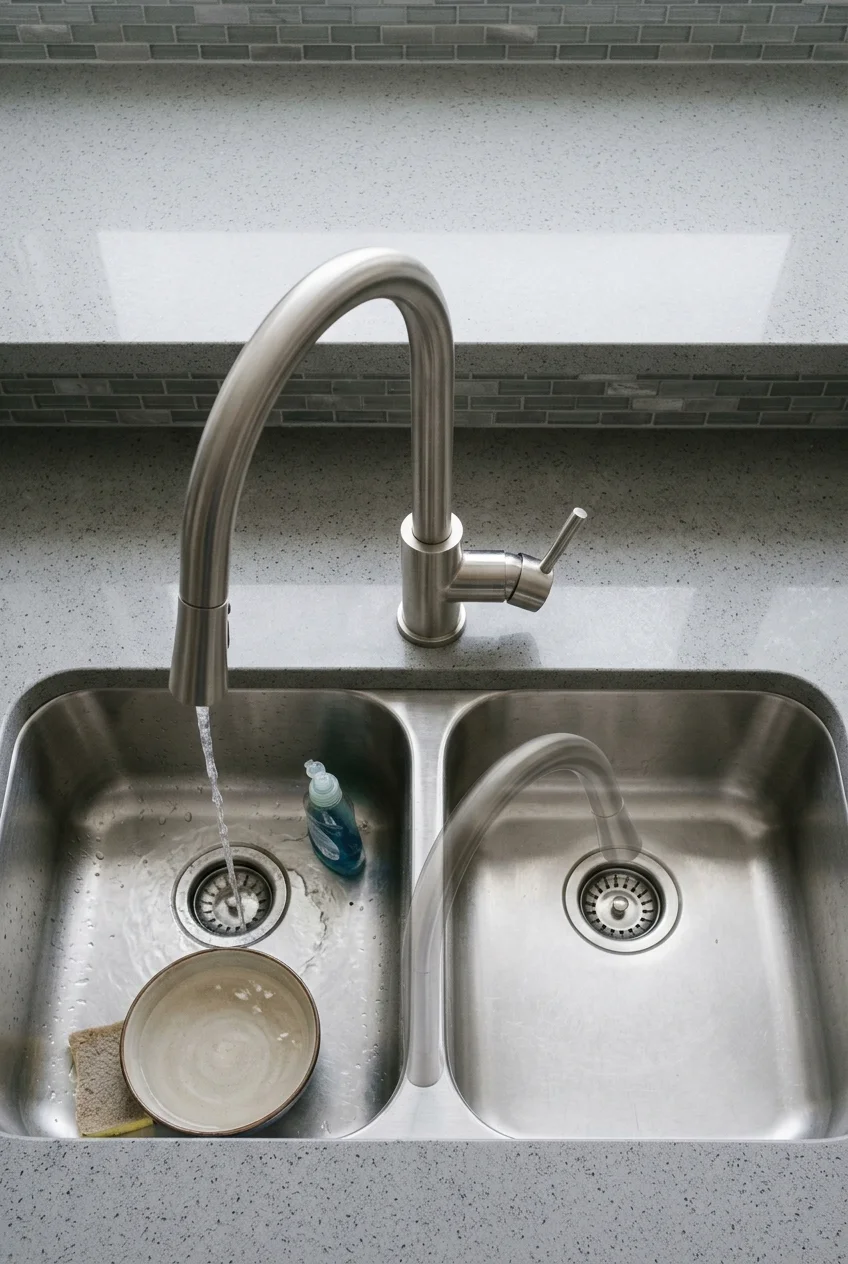
A broad swivel lets one spout serve both bowls, but unlimited rotation can send water behind the sink when children or guests turn it too far.
Check the documented swivel angle and the location of any stop. Center the outlet over each bowl while keeping the rear countertop outside the water path.
- Mark the faucet centerline on the sink deck.
- Measure from that point to each drain.
- Compare those distances with the published spout reach.
- Confirm the swivel stops inside the sink outline.
10. Select Spray Modes You Will Actually Use
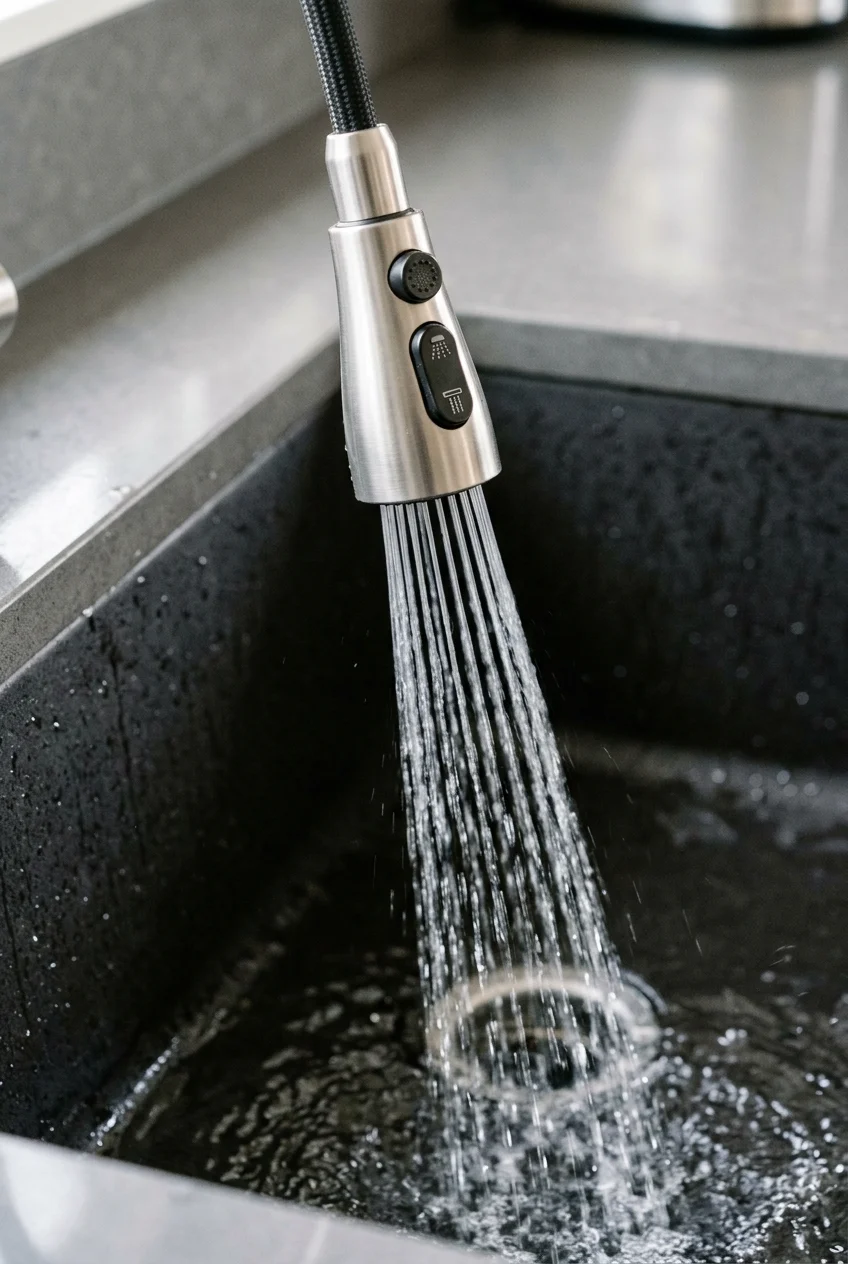
Stream fills vessels cleanly, while a broad spray rinses produce and sink walls. Extra modes only help when their buttons are easy to find and reset.
Try the switch with wet hands if a display model is available. Check whether the selected spray remains active or returns to stream after shutoff.
A concentrated cleaning spray can splash in a shallow basin. Pair stronger patterns with enough bowl depth and begin at lower volume until you understand the spread.
Silhouettes and Mounting Styles
Once the operating type is clear, compare the outline from across the room. Spout geometry and mounting position determine both character and usable clearance.
11. Use a Slim Gooseneck for Soft Height
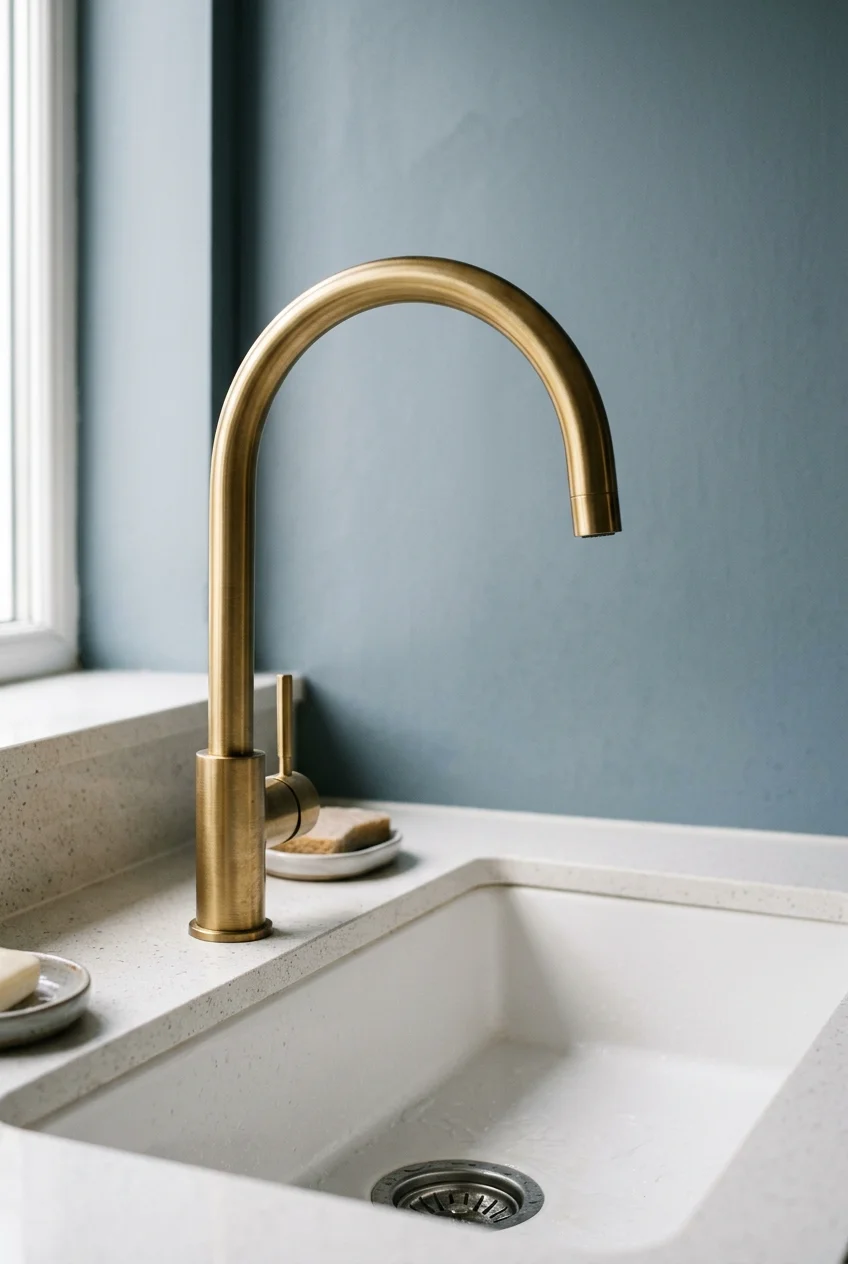
A narrow gooseneck adds generous vessel clearance without the visual weight of a spring coil. Its continuous curve works with modern, transitional, and cottage kitchens.
Balance the arch against the sink width and nearby cabinet height. A very thin neck can disappear beside an oversized farmhouse basin, while a bulky arc overwhelms prep sinks.
12. Choose a Squared U-Spout for Crisp Geometry
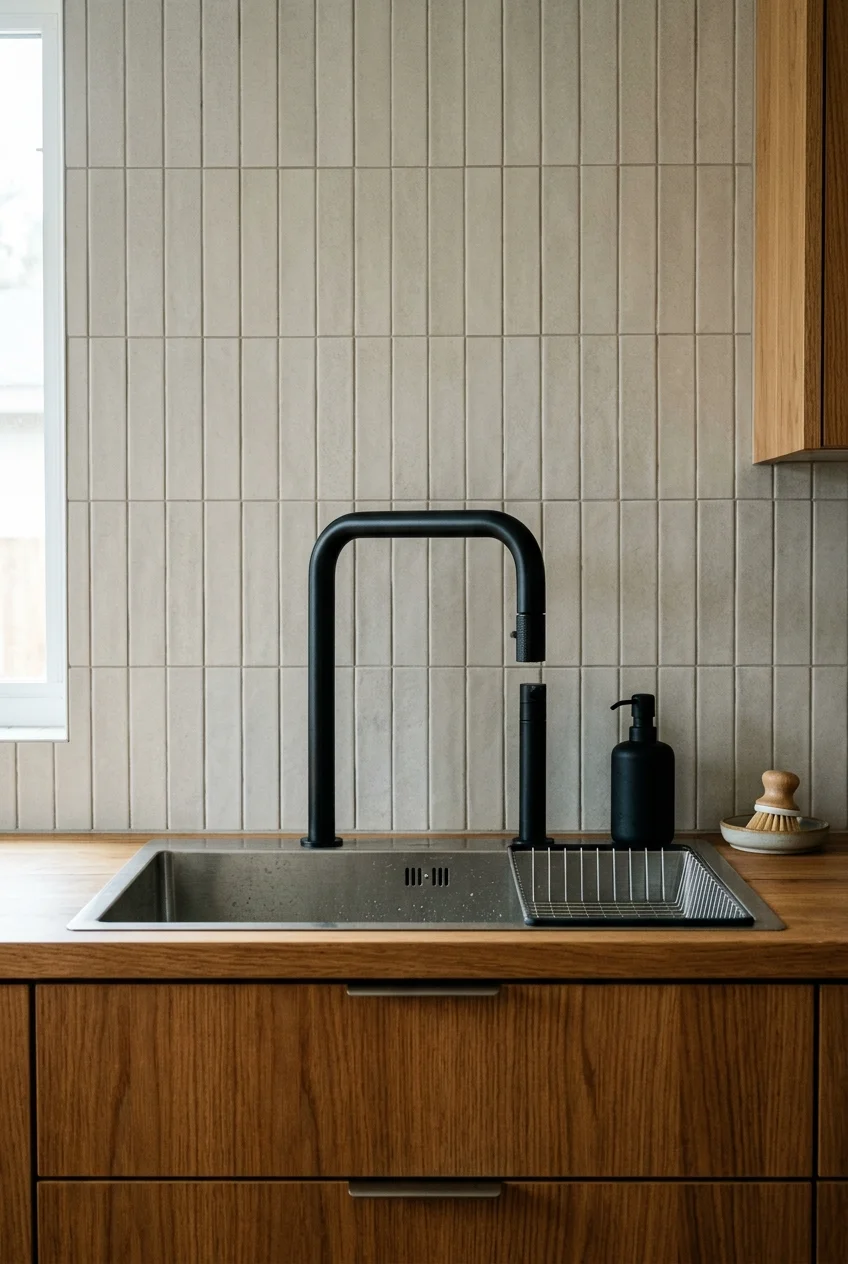
A squared U-spout repeats the right angles of slab cabinets, rectangular sinks, and stacked tile. The shape feels architectural without adding decorative detailing.
Inspect the inner corners and spray-head seam closely, because awkward joints become prominent on a spare design. Keep enough reach to clear the sink’s rear ledge.
Pair the rigid outline with one softer material, such as wood or lightly veined stone. This prevents the sink area from becoming a collection of competing rectangles.
13. Keep Sightlines Open With an L-Shaped Spout
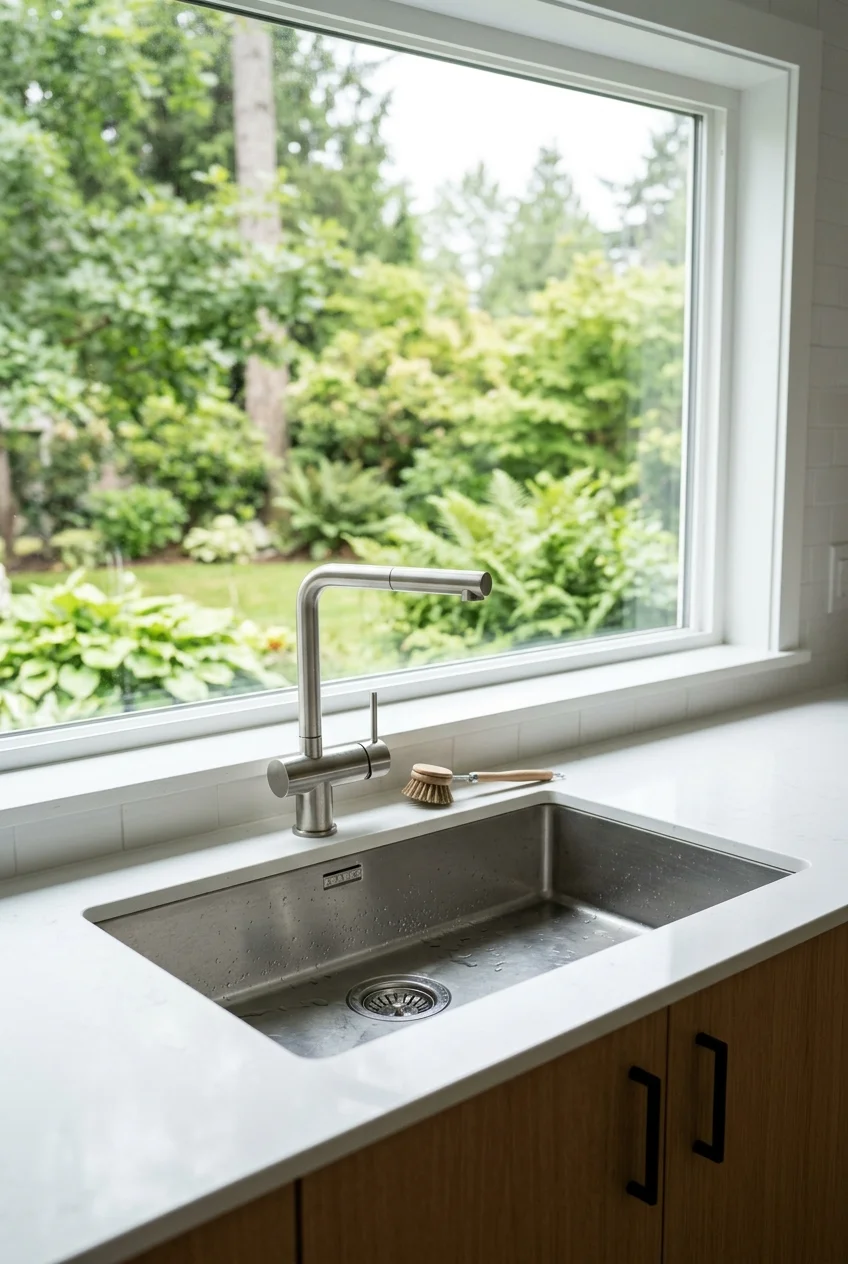
A low L-shaped spout keeps the faucet below a window view and creates a calm horizontal line. It suits shallow modern sinks and compact urban kitchens.
Low height reduces space for stockpots, so confirm the distance from outlet to basin floor. A pull-out wand can recover reach without increasing the silhouette.
Watch for Aim the outlet toward the drain rather than the front wall; a short spout paired with a wide ledge often causes counter splash.
14. Make a Bridge Faucet the Centerpiece
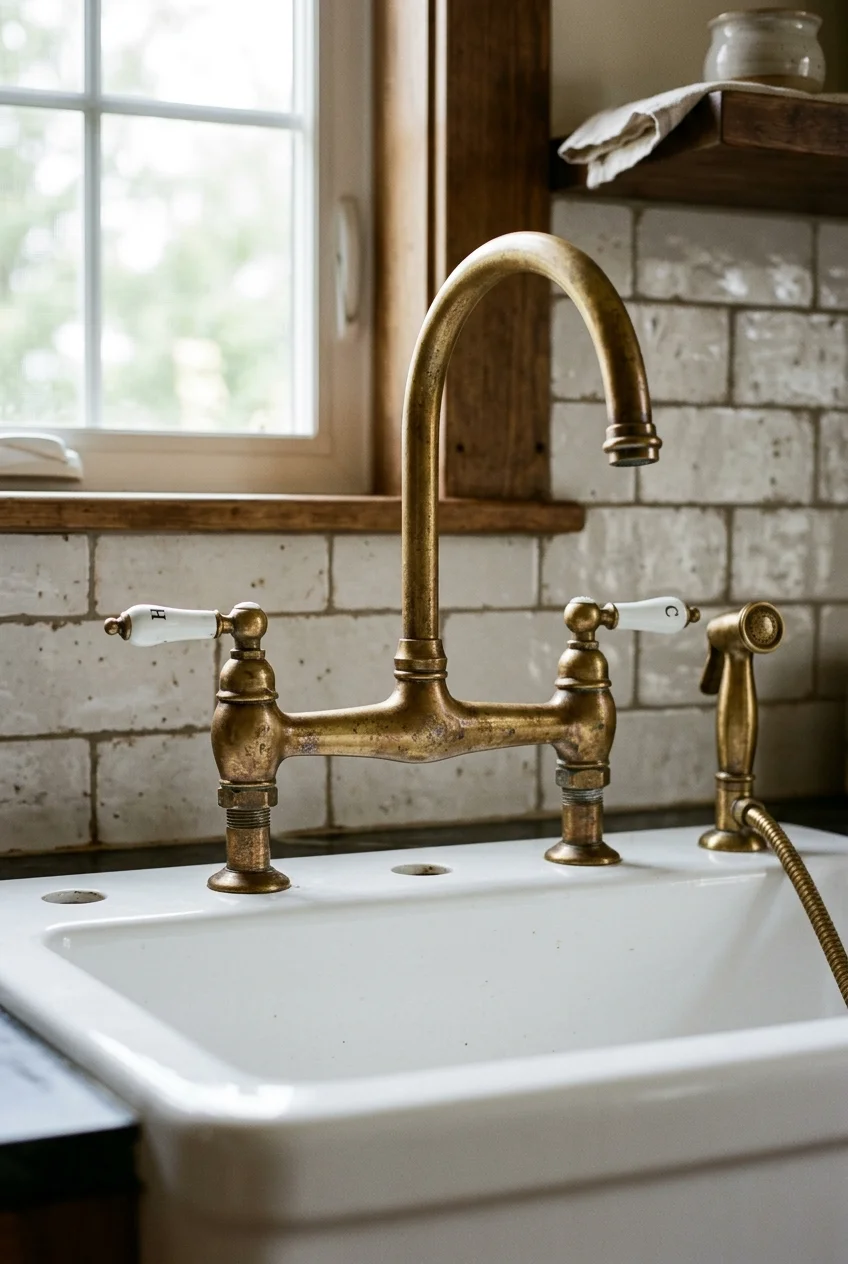
A bridge exposes the connection between separate hot and cold controls, giving the sink a strong traditional or industrial focal point without relying on color alone.
Most bridge designs need multiple accurately spaced holes. Verify center-to-center measurements, deck thickness, handle swing, and whether a side spray requires another opening.
The exposed crossbar collects splashes, so allow room to wipe behind it. Choose simple lever shapes when ornate cross handles would compete with patterned tile.
- Measure every existing hole from center to center.
- Confirm whether the spout swivels across the full sink.
- Check included supply lines and deck-thickness limits.
- Reserve a separate hole if the sprayer is essential.
15. Clear the Counter With a Wall-Mounted Faucet
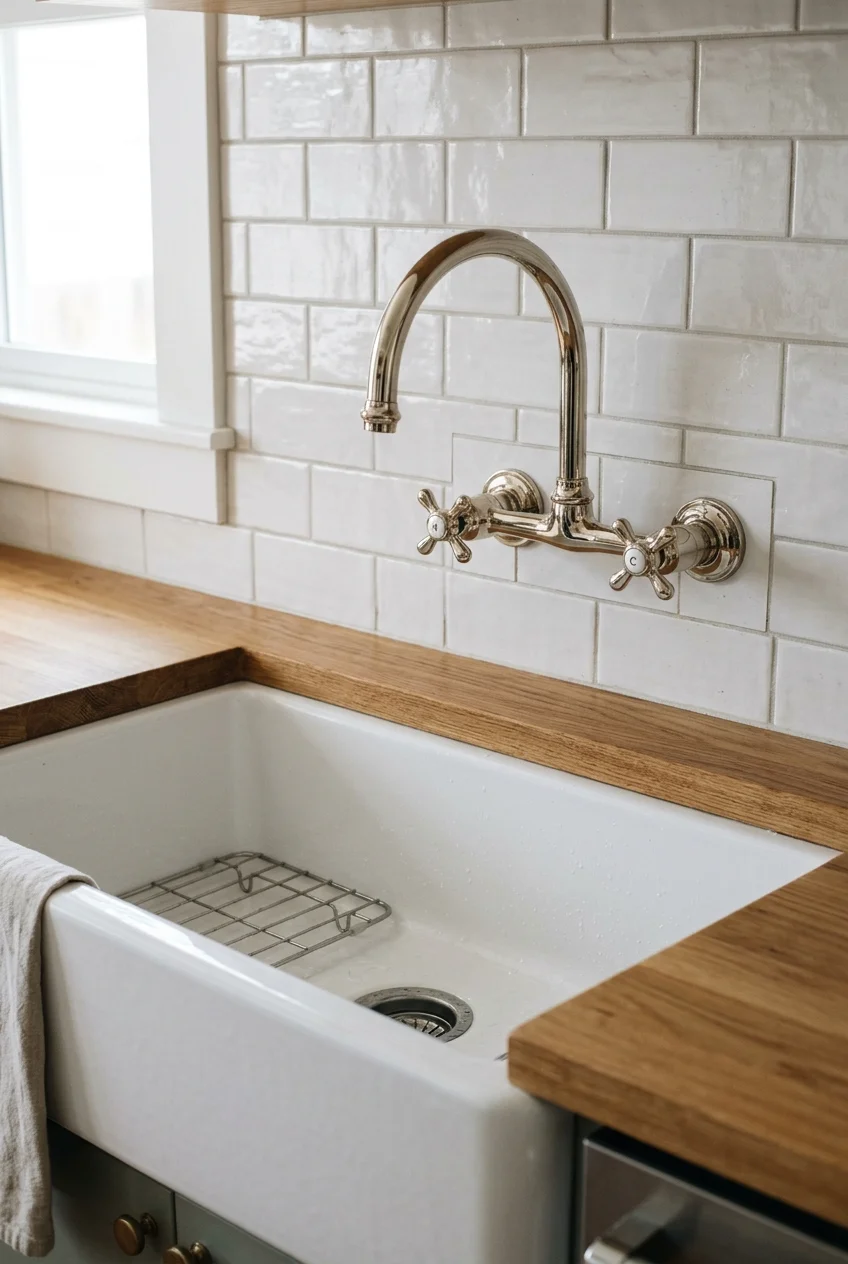
A wall-mounted faucet leaves the sink deck open and makes wiping the rear ledge easier. It also creates a tailored look with apron-front or integrated sinks.
This is a renovation choice, not a simple swap. Rough-in depth, finished wall thickness, spout reach, valve access, waterproofing, and local requirements need professional coordination.
Set the outlet far enough forward to reach the basin, yet high enough for cookware without excessive splash. Final tile placement must align cleanly around both valve openings.
Setup note Keep service access in the plan. Concealed plumbing should not become unreachable behind finished cabinetry or a wall assembly without an approved access strategy.
16. Try an Articulating Faucet for Directional Reach

A jointed articulating spout folds, extends, and pivots to direct water toward large cookware or different sink zones. Its moving geometry becomes part of the design.
Map the full folded and extended envelope before buying. Nearby shelves, pendants, windows, and tall dishes must remain outside every moving joint and outlet position.
This style has more visible connections than a simple arc. Choose a model with clear service information and use the joints gently rather than treating them as handles.
17. Add a Pot Filler Only Where It Solves a Real Task
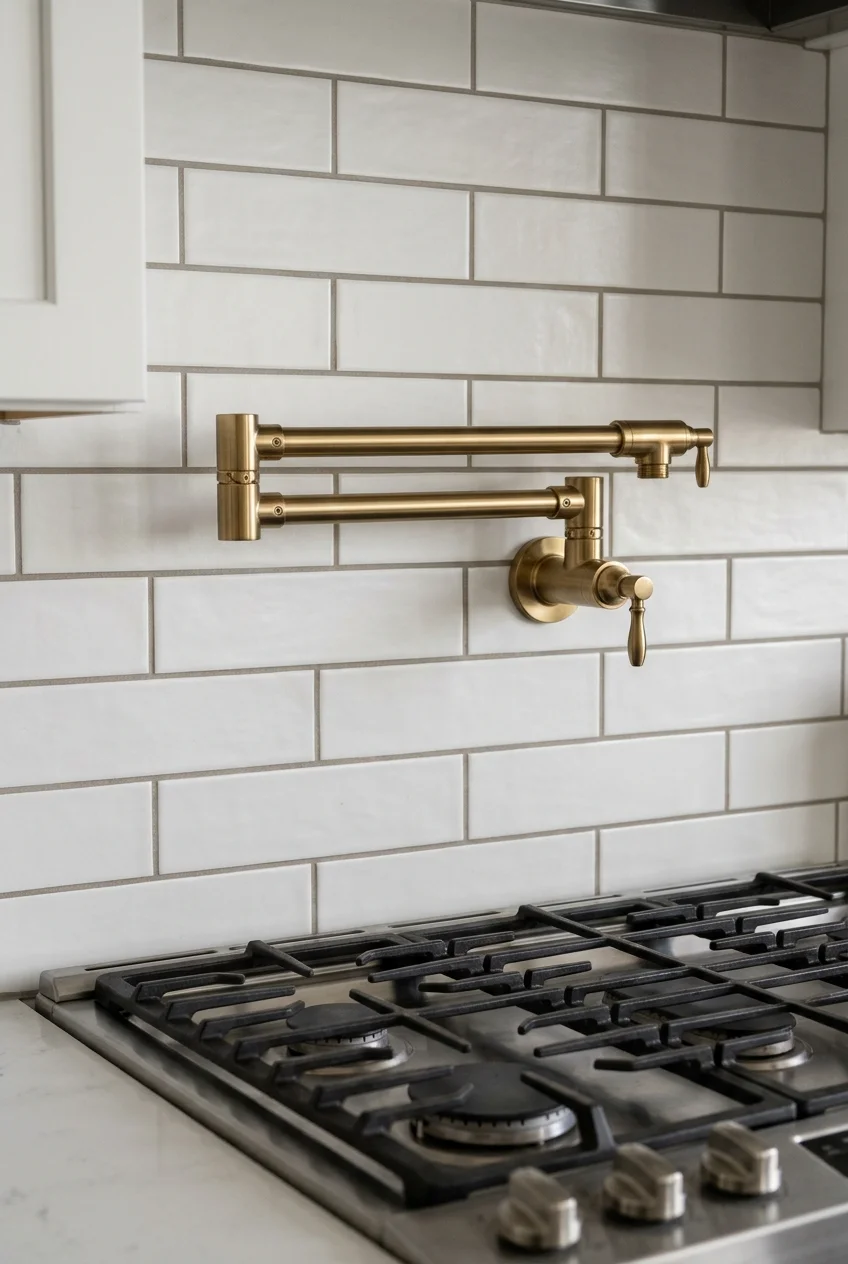
A folding pot filler can bring water to the range, reducing the need to carry an empty pot from the sink before cooking begins.
It does not remove the need to carry a full pot away. The wall needs suitable plumbing, shutoffs, heat-aware placement, structural support, and coordinated backsplash work.
Choose a folded position that clears burners, controls, tall cookware, and cabinet doors. Confirm the extended outlet reaches the intended vessels without crossing open flames.
- Set the range and hood locations first.
- Confirm the water-line and valve plan with a plumber.
- Mock up folded and extended arm positions.
- Finish the backsplash around the approved rough-in.
18. Scale Down to a Compact Prep Faucet
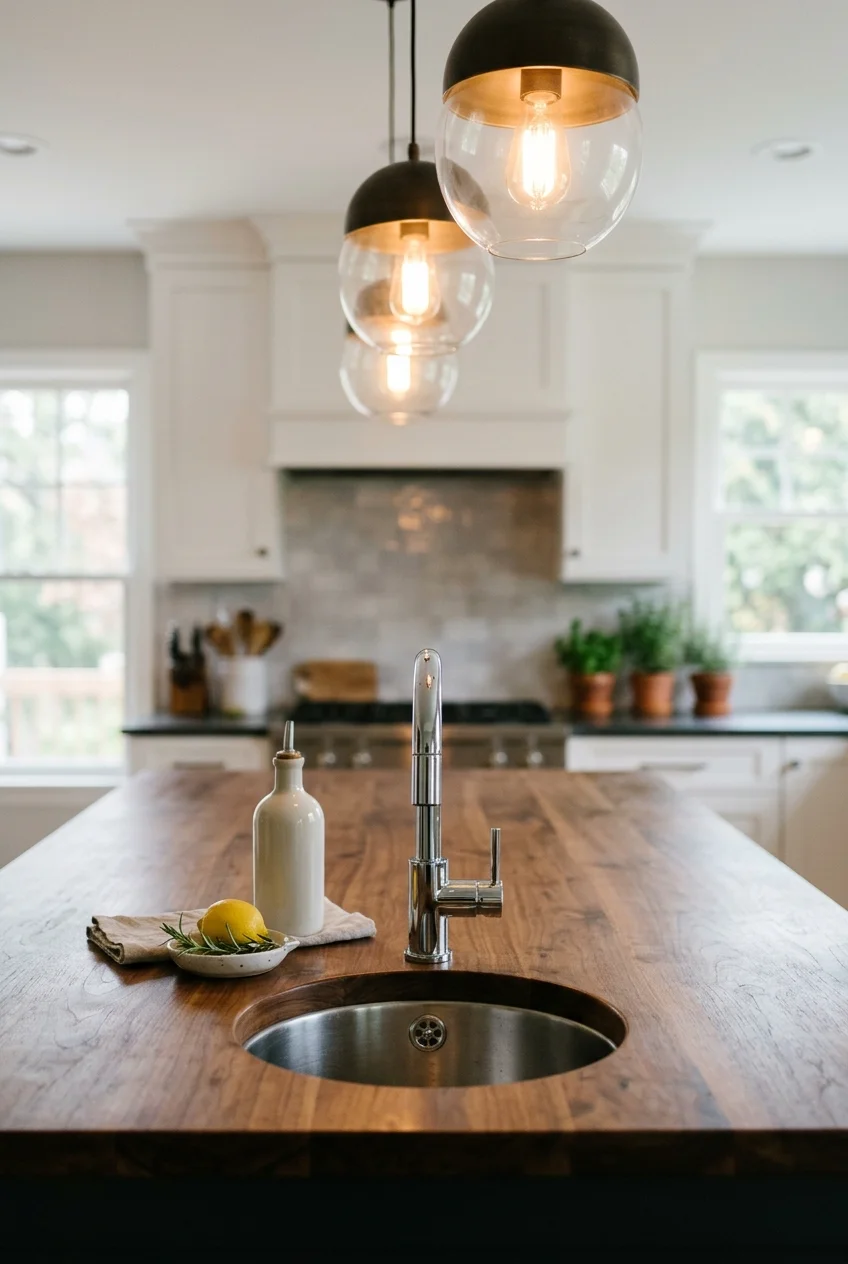
A prep faucet repeats the main faucet’s language at a smaller sink without crowding the island or beverage station. Reduced height keeps the secondary zone proportional.
Match function before finish: a small pull-down may help with produce, while a fixed spout is enough for handwashing and filling glasses.
Check that the secondary faucet does not block conversation across an island. A slim profile also leaves more visual space around platters and serving pieces.
19. Add a Dedicated Drinking-Water Tap
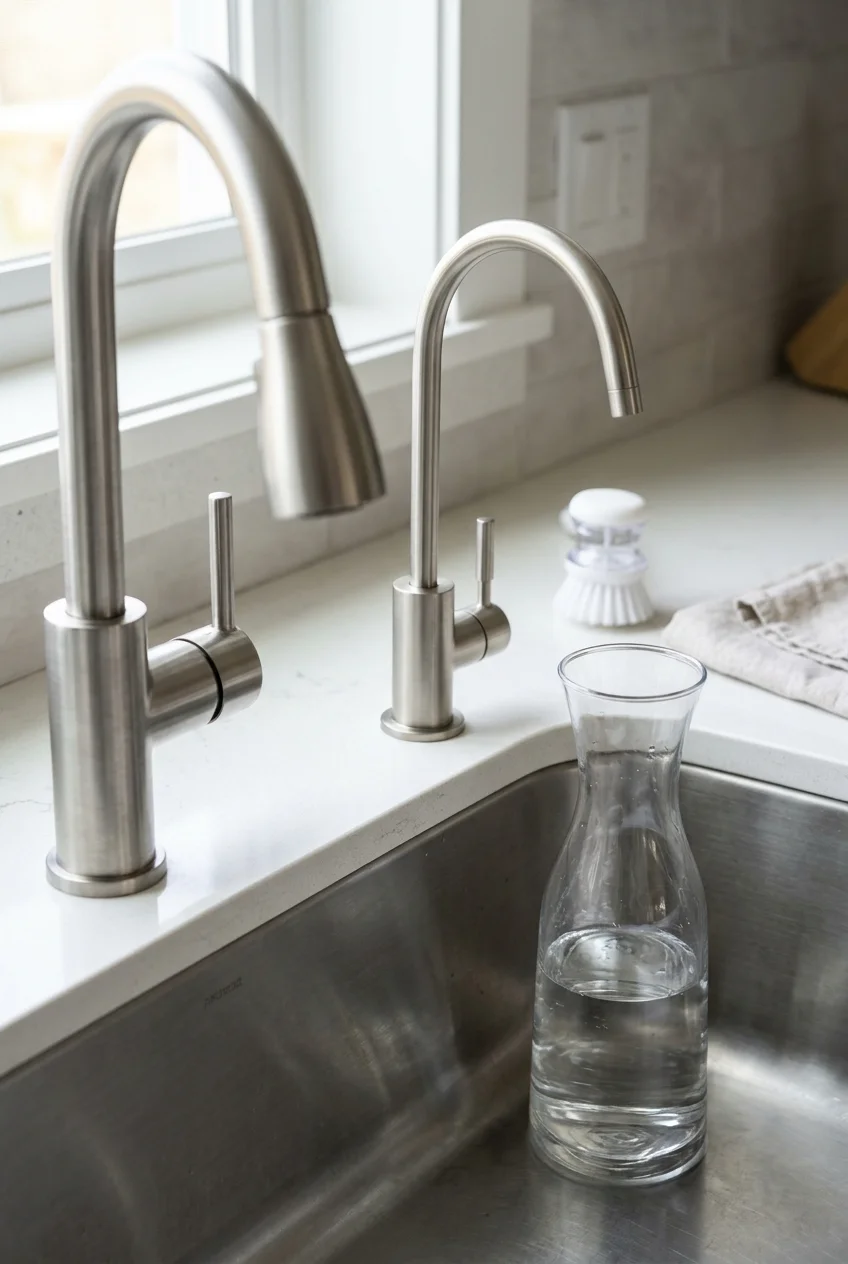
A small beverage faucet separates filtered drinking water from the main cleanup fixture. Its narrow scale suits a sink corner or a nearby coffee and tea station.
Verify the filtration system, replacement schedule, compatible tubing, pressure requirements, and certification independently. The decorative tap alone does not establish water-treatment performance.
Place the outlet where bottles fit below it without blocking the main faucet. A coordinated finish keeps the secondary fixture intentional rather than improvised.
20. Combine Filtered and Regular Water in One Faucet
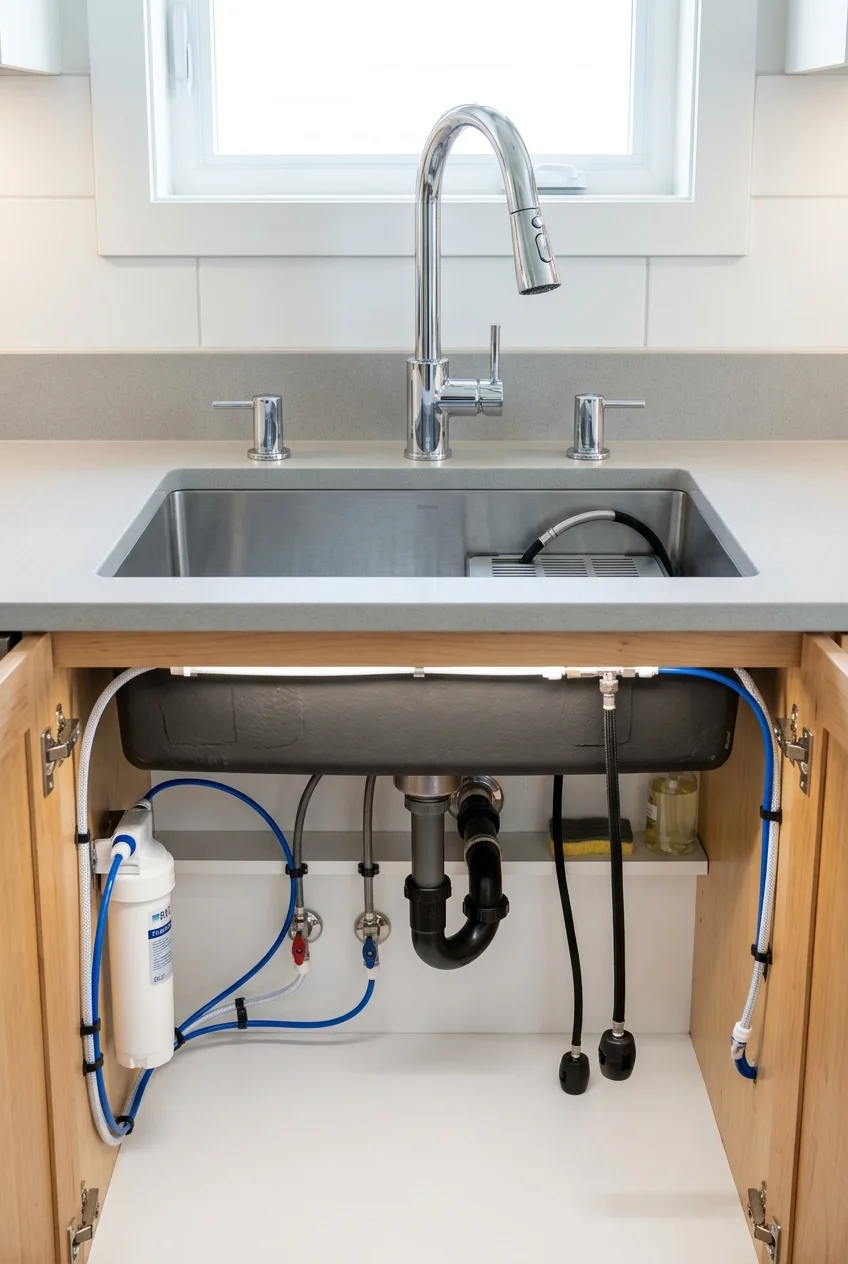
An integrated filtration faucet keeps the sink deck simpler by delivering regular and treated water through one body with separate controls or internal channels.
Read the exact system diagram before specifying cabinetry. Filters, tanks, tubing, electrical components, and replacement access can occupy more under-sink space than the faucet suggests.
Confirm the two water paths remain distinct and identify which control operates each outlet. Replacement cartridges should be readily available for the expected ownership period.
Practical tip Photograph the installed filter label and replacement date inside the cabinet, where the information stays accessible without adding clutter around the sink.
Finishes and Color Pairings
Finish changes the faucet’s visual weight and maintenance needs. Compare samples beside the sink, countertop, backsplash, and hardware under the kitchen’s actual lighting.
21. Use Bright Chrome for a Crisp Reflective Accent
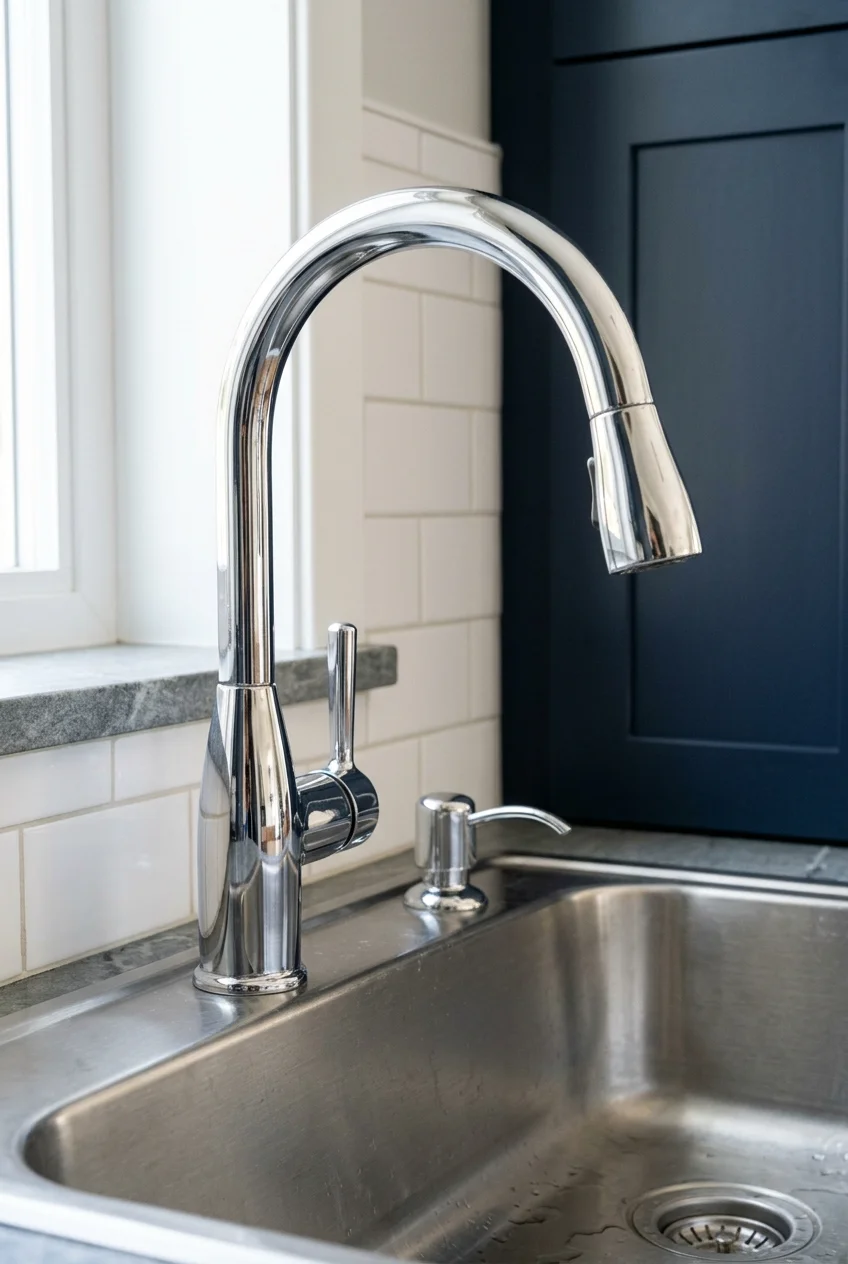
Polished chrome reflects surrounding colors and creates a bright punctuation mark at the sink. Its familiar finish works especially well with white tile and stainless appliances.
Water spots show quickly on a mirror-like surface, so choose chrome when regular wiping feels realistic. Repeat the shine once nearby rather than coating every metal detail.
22. Choose Brushed Nickel for Softer Reflection
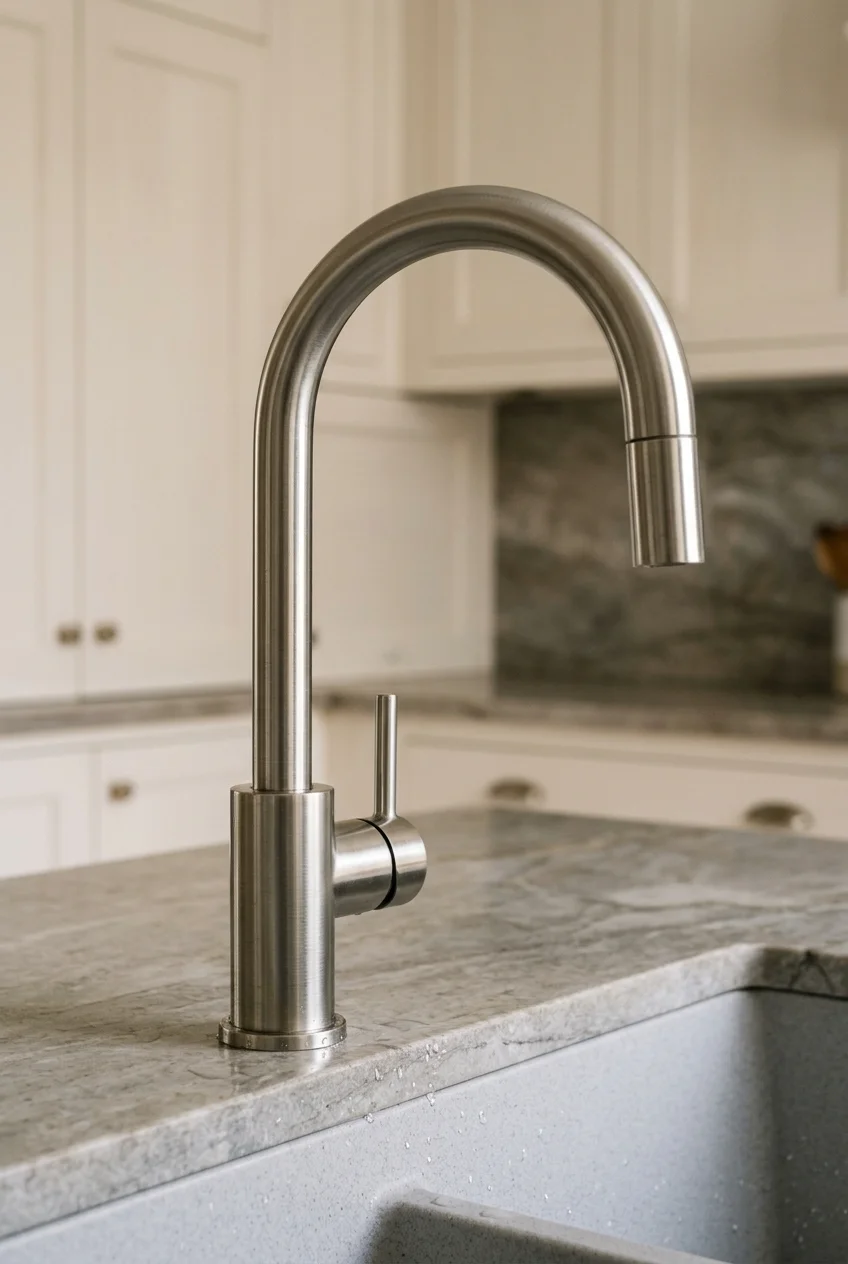
Brushed nickel diffuses glare and introduces a slightly warm silver tone. The directional grain makes fingerprints less prominent than they appear on highly polished metal.
Compare samples carefully because “brushed nickel” varies by manufacturer. Pairing different brands can reveal pink, gray, or yellow undertones once they sit together.
23. Let Polished Nickel Warm a Traditional Kitchen
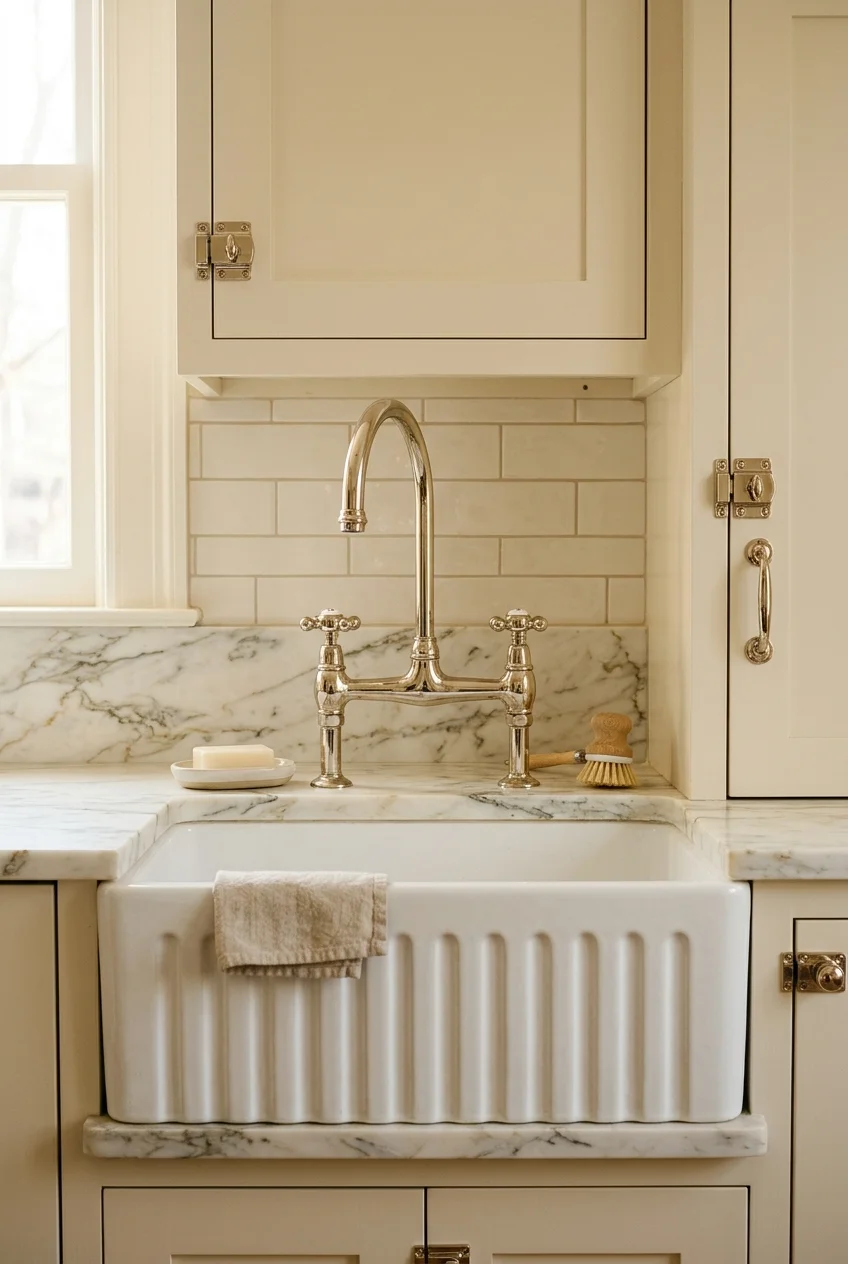
Polished nickel has a bright surface with a warmer cast than typical chrome. It complements creamy paint, marble veining, and traditional cabinet profiles without looking dark.
The surface still shows fingerprints and water marks. Use a soft cloth and the manufacturer’s approved cleaner, avoiding abrasives that can dull a reflective finish.
Keep chrome appliances elsewhere if needed; the metals can coexist when their shapes and placement feel deliberate. Repeating polished nickel on two small hardware details creates continuity.
24. Blend a Stainless Finish Into the Sink
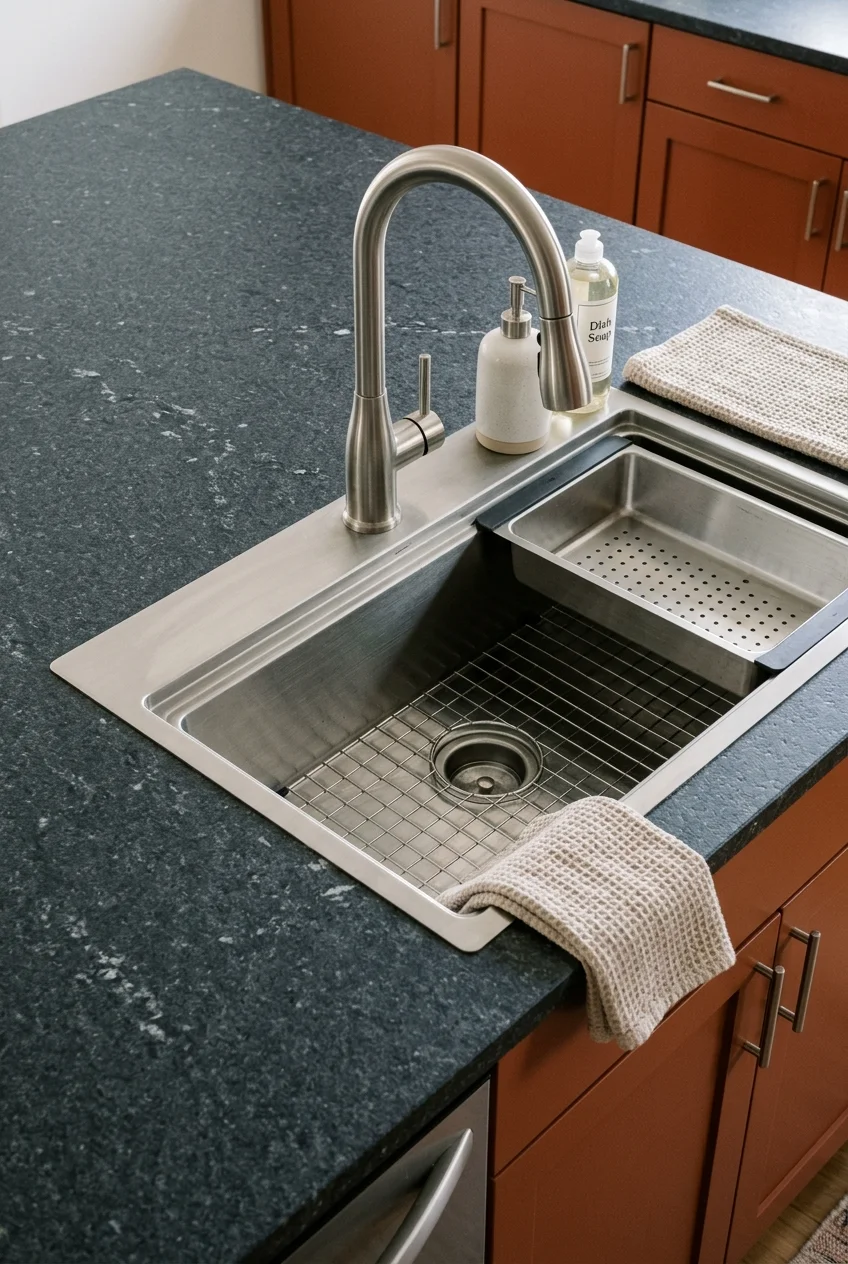
A stainless-look faucet beside a stainless sink creates one quiet working zone, allowing tile, cabinetry, or stone to carry more of the room’s color.
Exact matches are difficult because steel grain and reflectivity vary. Aim for compatible undertones and sheen rather than expecting the faucet and sink to appear identical.
Practical tip View both finishes vertically and horizontally; directional brushing catches light differently on the curved faucet, flat sink rim, and appliance doors.
25. Use Matte Black to Draw a Clean Outline
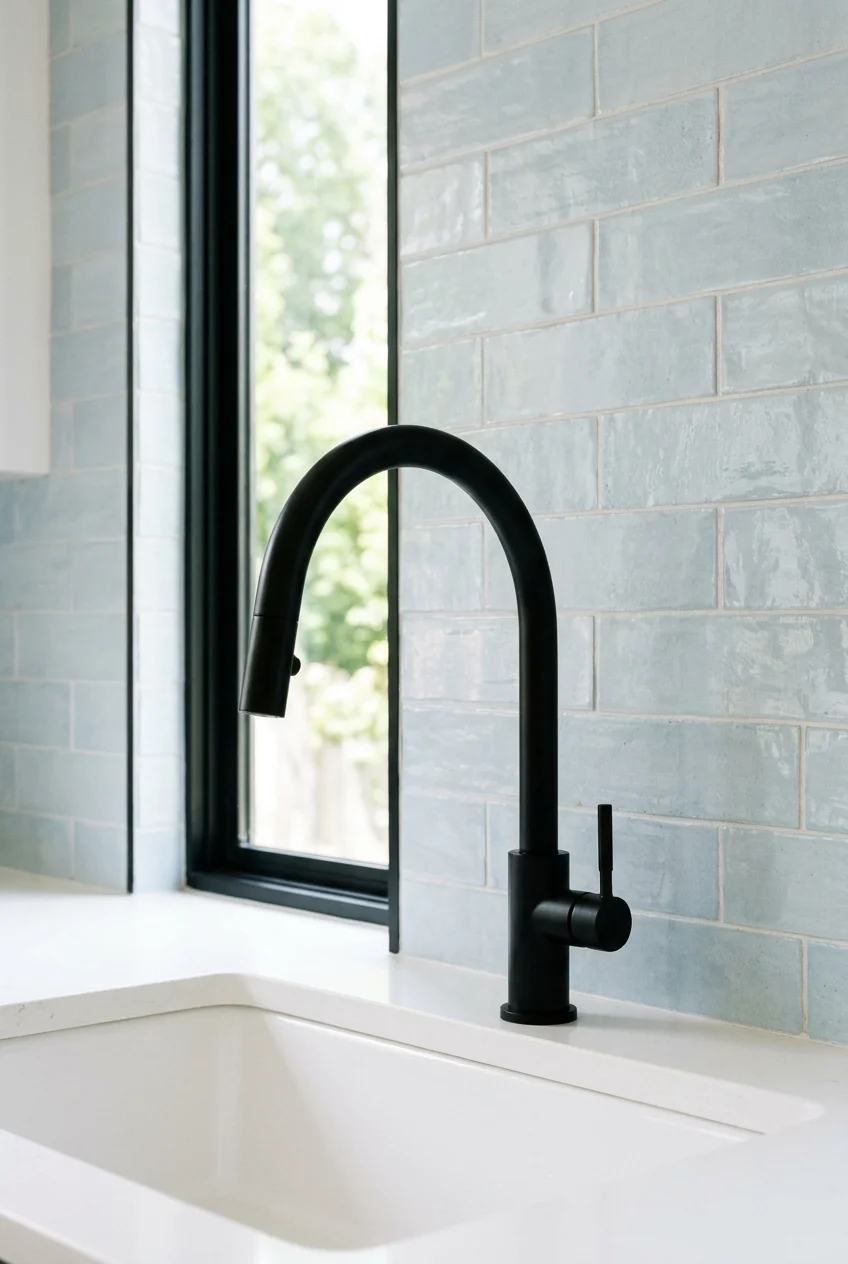
Matte black makes the faucet silhouette easy to read against pale stone or tile. It can connect black window frames, lighting, or cabinet pulls across the room.
Mineral residue may look chalky on a dark finish, especially with hard water. Check approved cleaning methods and avoid scouring pads that polish isolated patches.
Give the outline space by limiting nearby black accessories. One dark faucet, a slim frame, and restrained hardware usually read more clearly than a crowded themed sink area.
26. Bring Warmth With an Aged Brass Finish
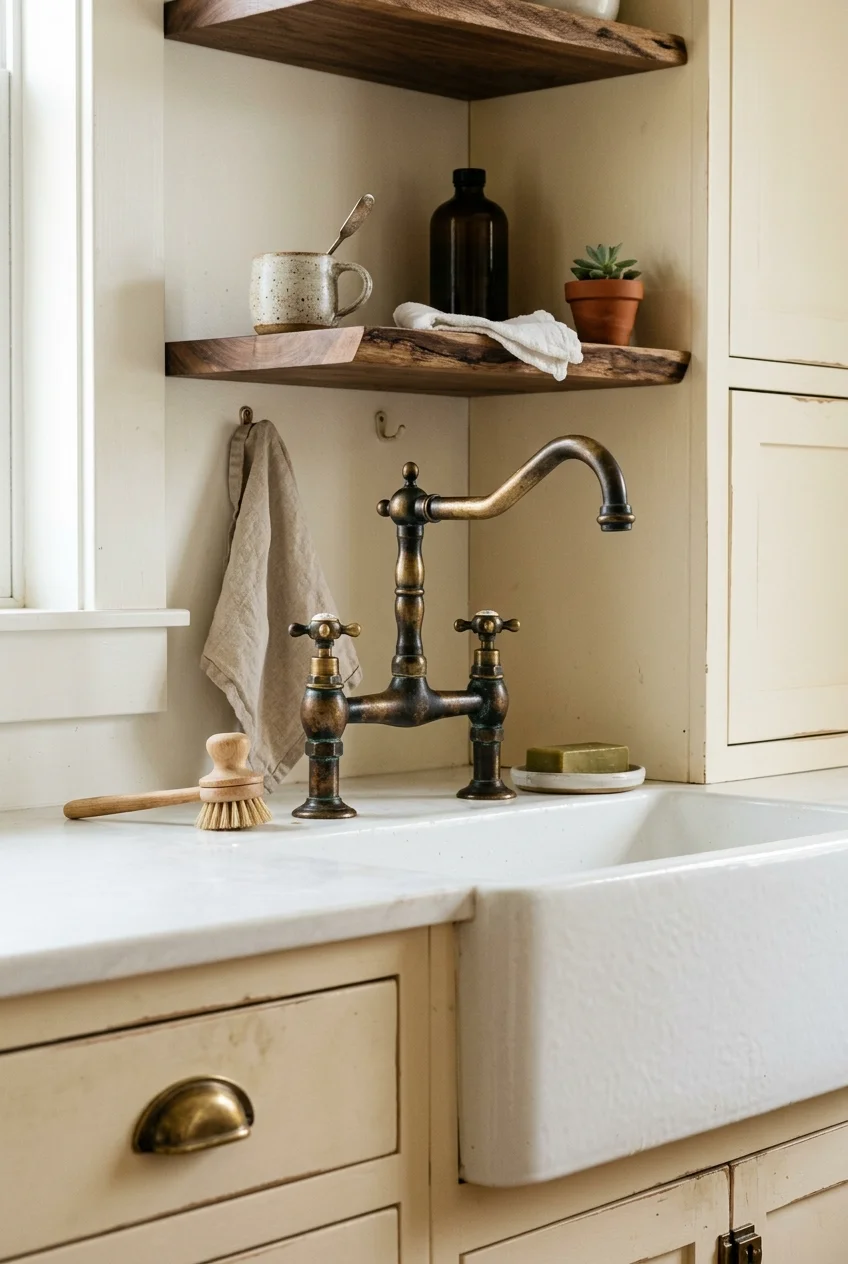
Aged brass softens white kitchens and complements wood, cream paint, and warm stone. Its darker recesses also make traditional bridge details easier to see.
Determine whether the finish is sealed, plated, or intended to change. Care instructions differ, and an aging finish should not be scrubbed like stainless steel.
Use brass near the sink as a concentrated accent. Matching every knob exactly can flatten the room, while compatible warm metals create a collected appearance.
27. Choose Satin Brass for a Quieter Gold Note
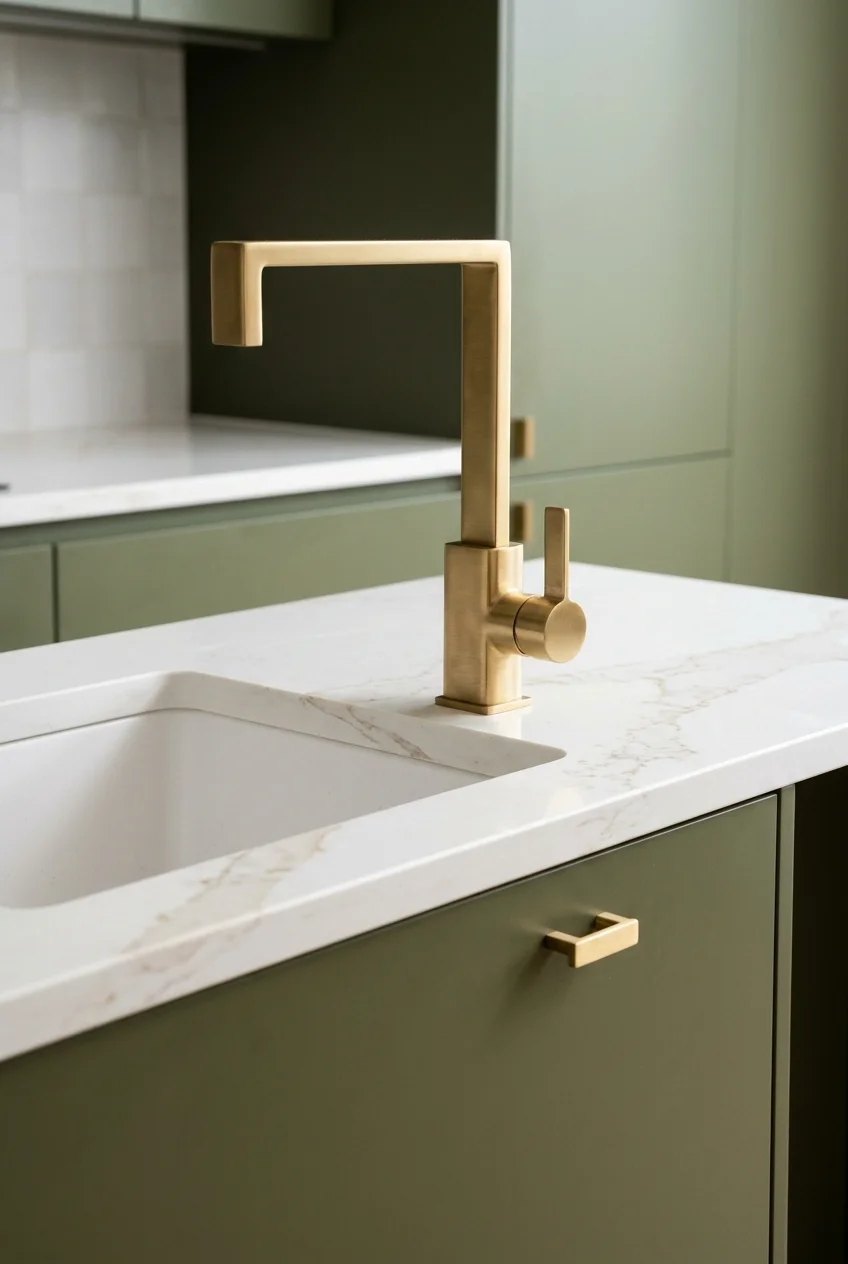
Satin brass brings warm color without the sharp reflections of polished gold. Its restrained sheen works with contemporary slab fronts as easily as transitional cabinetry.
Place a sample beside countertop veining and wood stain before deciding. Greenish, orange, or pale brass tones can pull unexpected colors from neighboring materials.
28. Ground a Traditional Sink With Dark Bronze
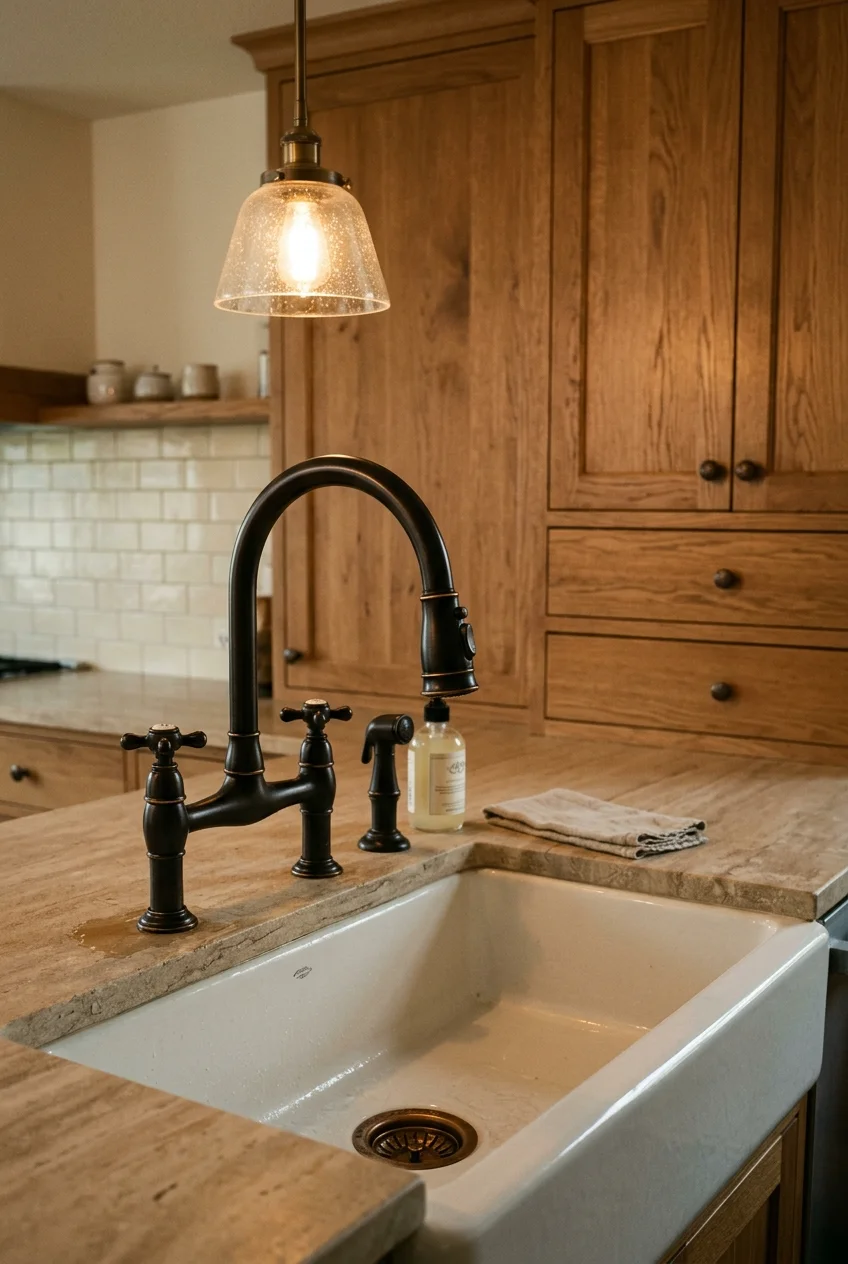
Oil-rubbed bronze gives a substantial dark anchor to cream cabinets, warm stone, and traditional sink shapes. Highlighted edges can emphasize curves without mirror-like shine.
Finish names cover many brown and black variations. Compare the actual sample with lighting and hardware, then follow model-specific cleaning guidance to protect the surface.
29. Treat Copper as a Finish That May Change
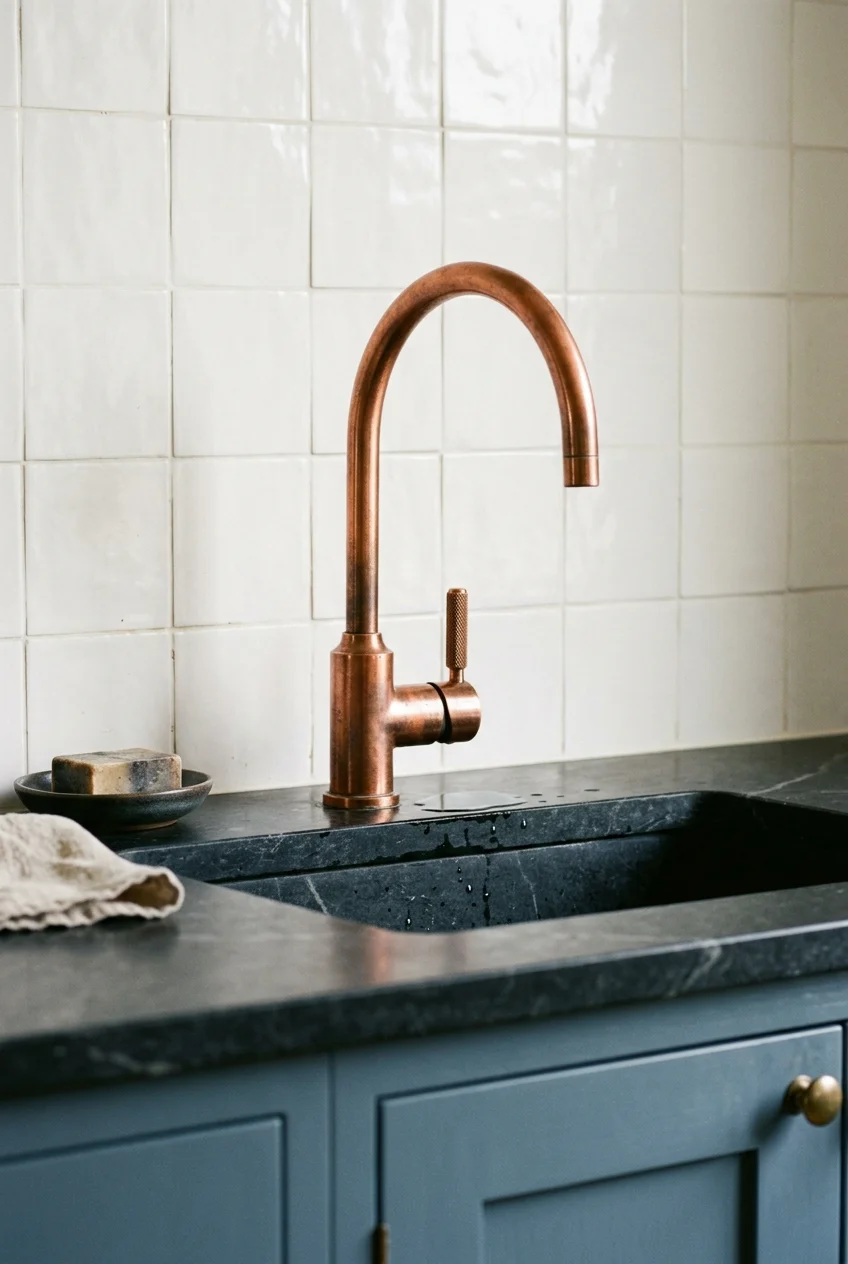
Copper introduces a warm reddish metal that can develop visible variation over time, depending on whether the surface is living, waxed, lacquered, or plated.
Ask how the manufacturer expects it to age before pairing it with a copper sink. Two changing surfaces may develop differently rather than remaining a perfect match.
A copper faucet stands out best against quiet materials such as soapstone, warm white tile, or simple painted cabinetry. Keep strong orange woods slightly separated.
30. Use a White Faucet for a Tonal Sink Area
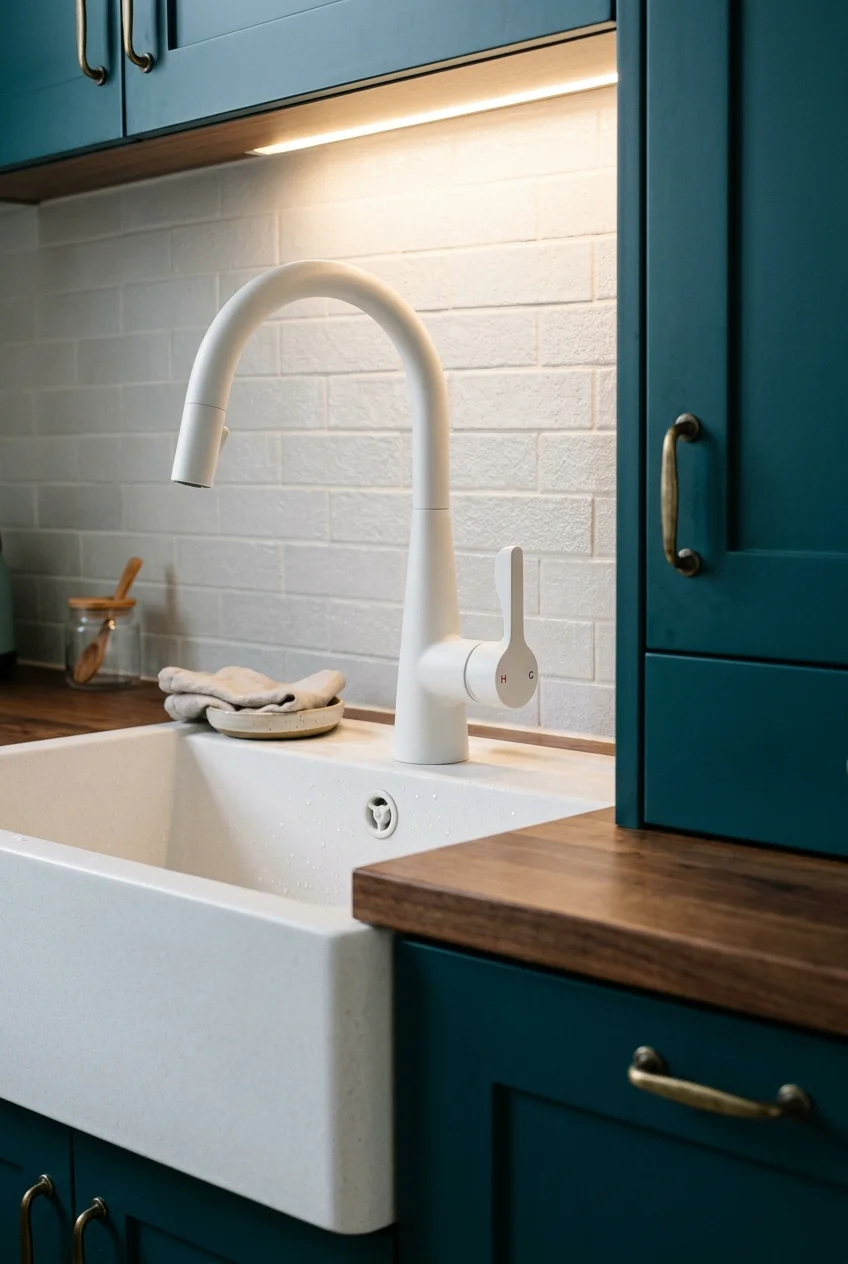
A white faucet can recede into a pale backsplash or coordinate with a white composite sink, keeping attention on cabinetry, artwork, or a dramatic countertop.
Compare whites in person; cool appliance white can clash with creamy stone. Check how the coating handles staining, scratching, heat, and approved cleaning products.
Watch for Keep a slight value difference between faucet and background so the controls remain easy to locate in dim evening light.
31. Introduce Color With a Coated Faucet
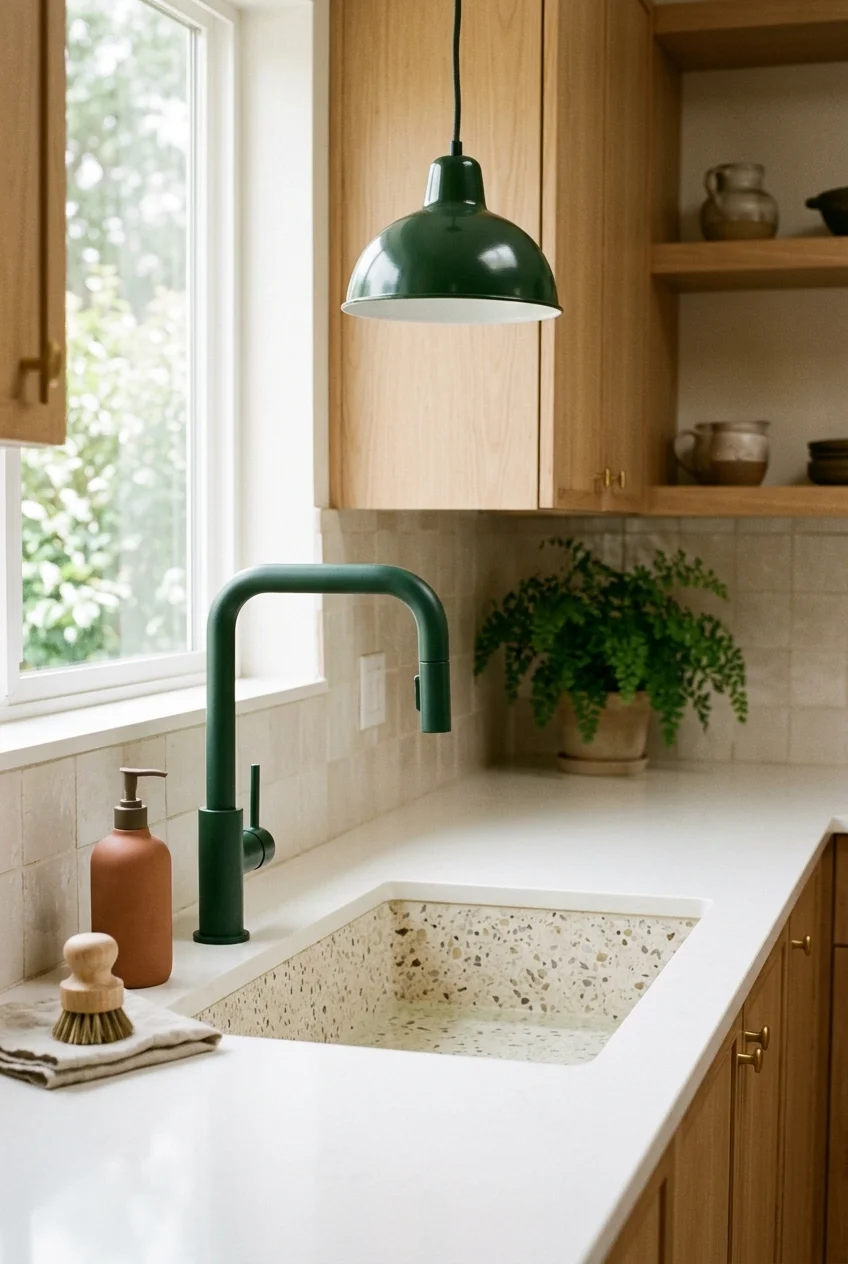
A colored faucet can echo cabinetry or tile without adding another decorative object. Deep blue, green, or muted red works best when the shape remains simple.
Confirm the finish warranty and approved care, because chips expose the underlying material more obviously than wear on a metallic surface. Avoid placing sharp tools nearby.
Repeat the hue once in a small, durable element such as a painted stool or enamel light. An exact room-wide match can feel more commercial than intentional.
32. Try a Two-Tone Faucet for Controlled Contrast
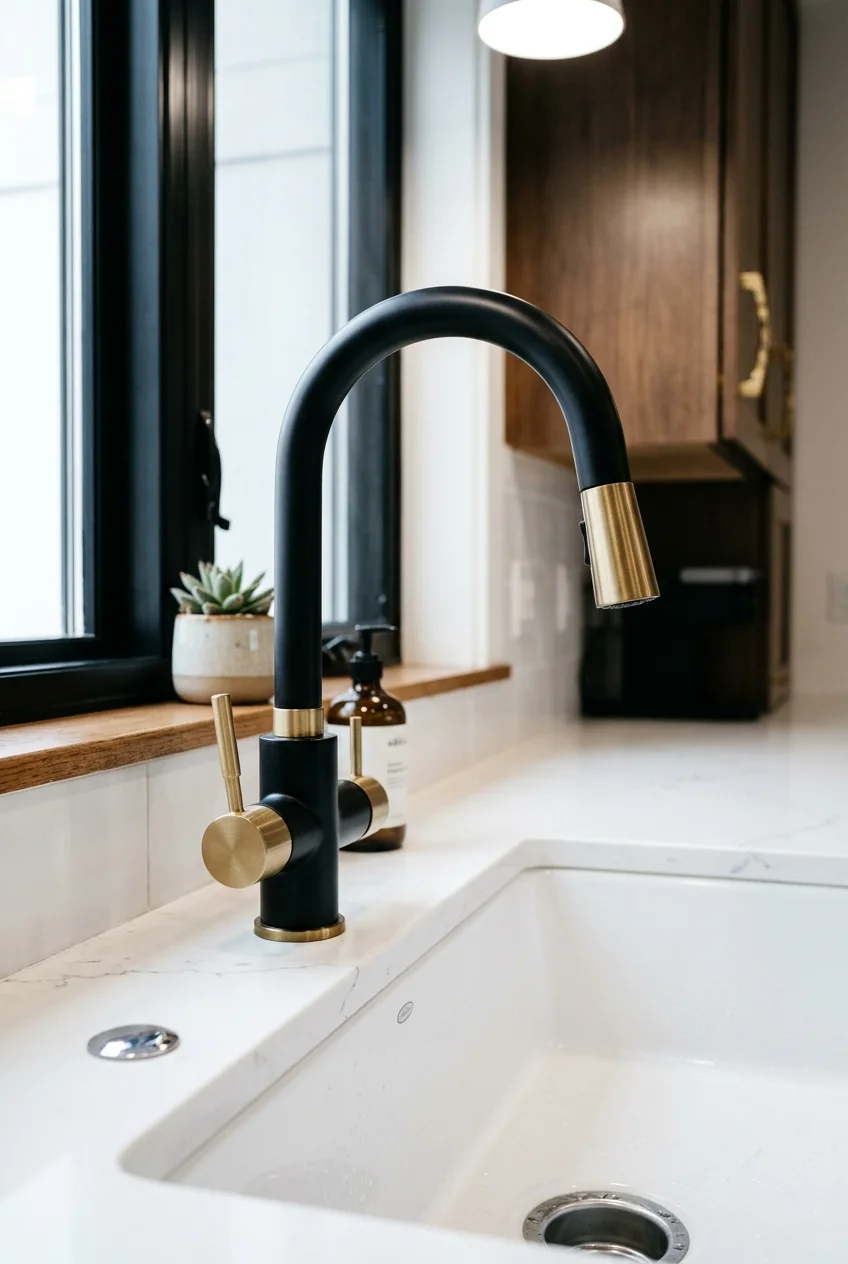
A two-tone faucet can connect black framing with warm cabinet hardware in one compact element. The contrast also clarifies handles, joints, or the spray head.
Choose a design where the finish change follows real components instead of appearing randomly striped. Repeat each metal once elsewhere to make the combination feel deliberate.
Inspect replacement-part finishes before buying. A future spray head or handle should remain available in the same combination, especially on a prominent centerpiece faucet.
33. Mix Metals by Assigning Each One a Job
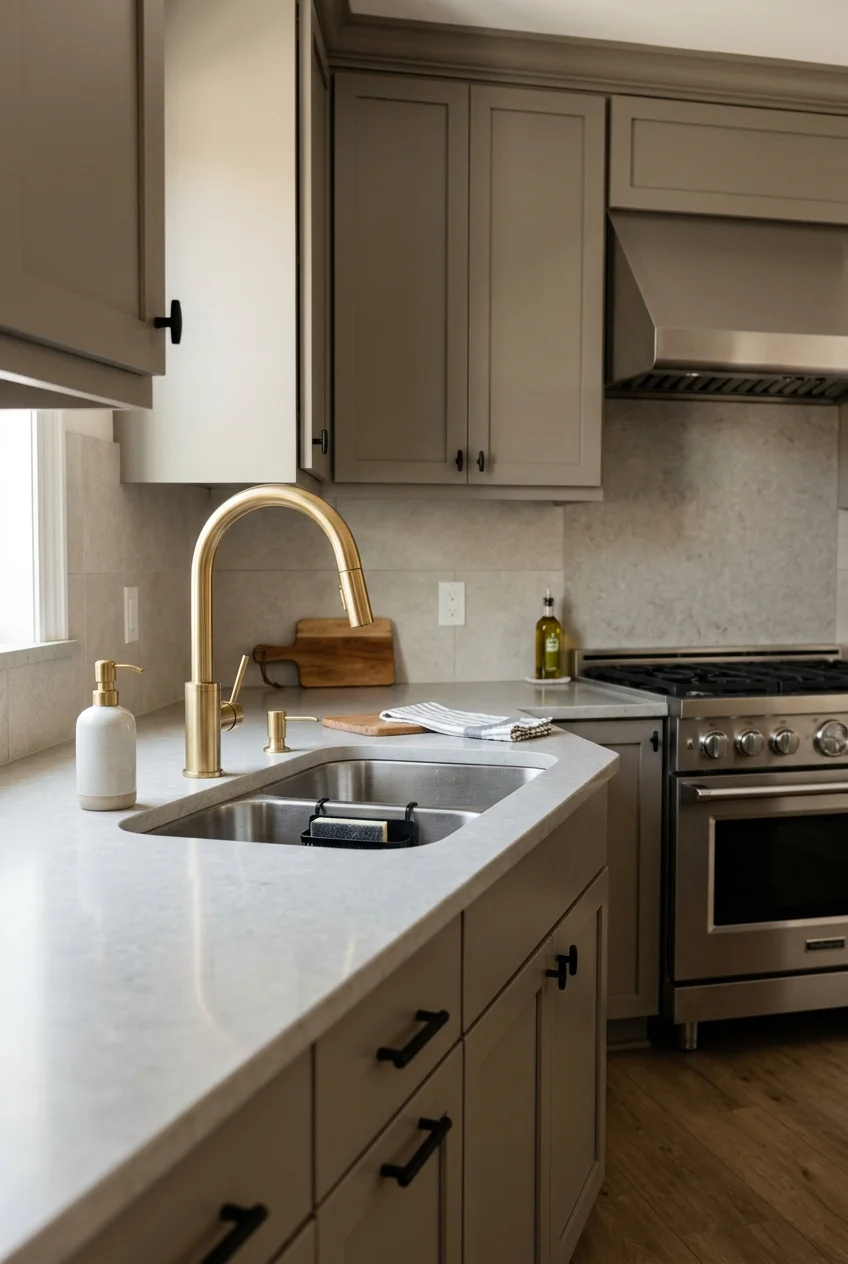
Mixed metals look coherent when one finish leads and another appears in smaller supporting details. Let the faucet anchor the sink zone while hardware repeats elsewhere.
Separate similar reflective metals that almost match, or vary their shape deliberately. A warm brass faucet beside large stainless appliances works because their roles are visually distinct.
- Use one dominant finish at the sink.
- Repeat the secondary metal at least once nearby.
- Keep undertones compatible with stone and paint.
- Avoid collecting every available finish in one view.
34. Coordinate Hardware by Undertone, Not Exact Match
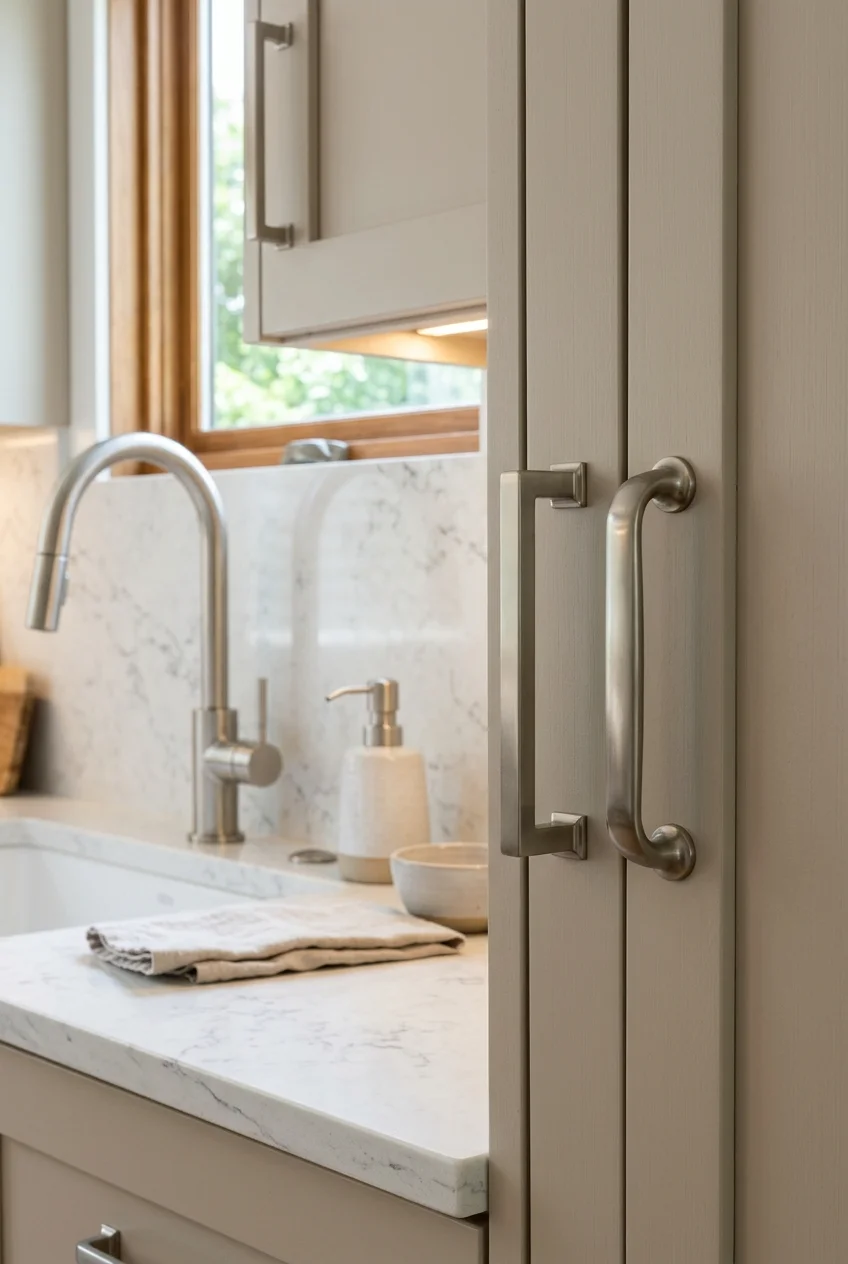
Cabinet hardware does not need the faucet’s exact finish name. Similar warmth and sheen can connect pieces made by different manufacturers without an overly matched showroom effect.
Place samples on the actual cabinet door beside the faucet sample. Evaluate them under daylight and evening lighting before ordering the full hardware quantity.
35. Create Contrast Between Faucet and Sink
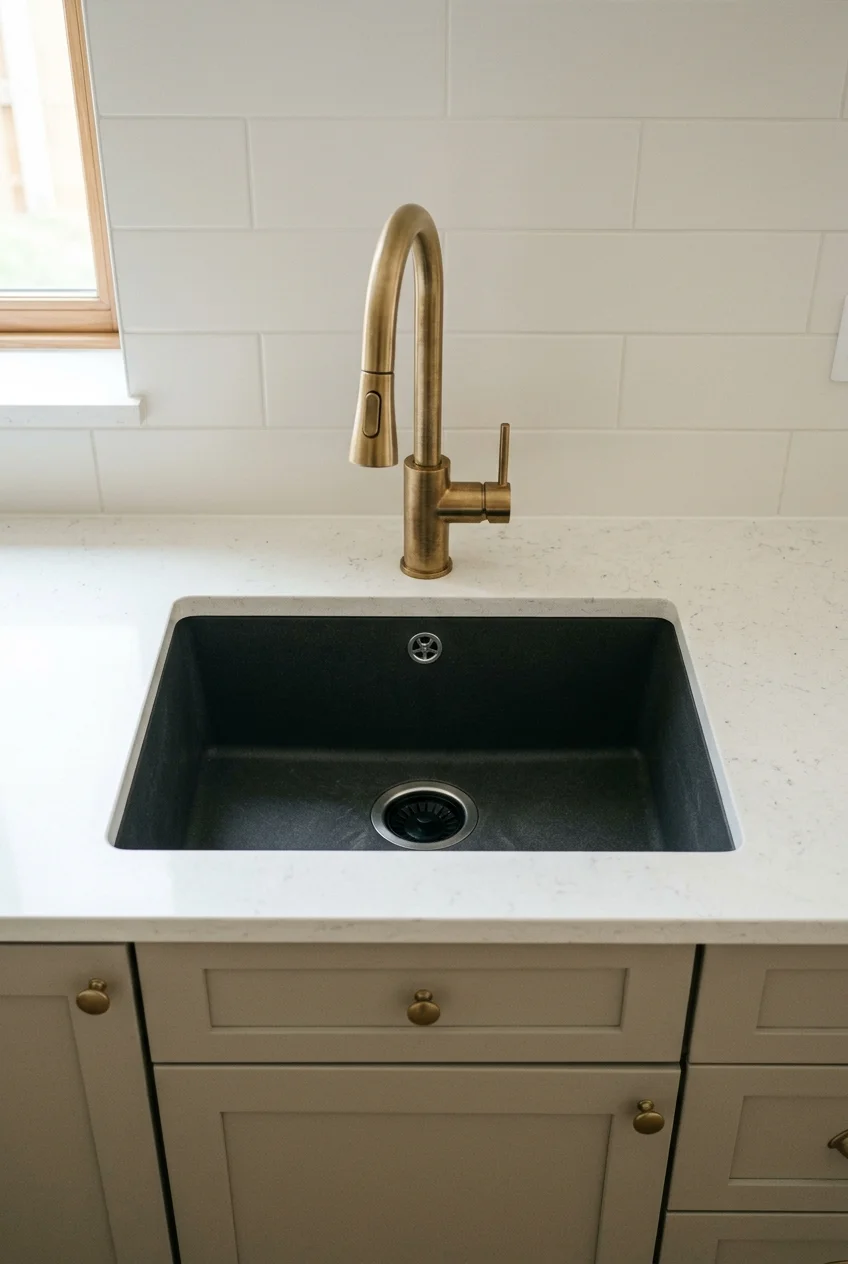
A contrasting faucet makes both fixtures easier to read: brass over black composite, black over white fireclay, or chrome above a colored enamel sink.
Keep proportions linked even when colors differ. The spout should still reach the useful basin area, and its visual weight should suit the sink’s width and depth.
Use the countertop as the bridge between strong colors. A quieter surface prevents the faucet, sink, tile, and cabinetry from competing simultaneously.
Pair the Faucet With the Sink and Room
The faucet and sink operate as one system. Review basin depth, ledges, bowl divisions, nearby windows, and room sightlines before choosing a beautiful isolated fixture.
36. Pair a Bridge Faucet With an Apron-Front Sink
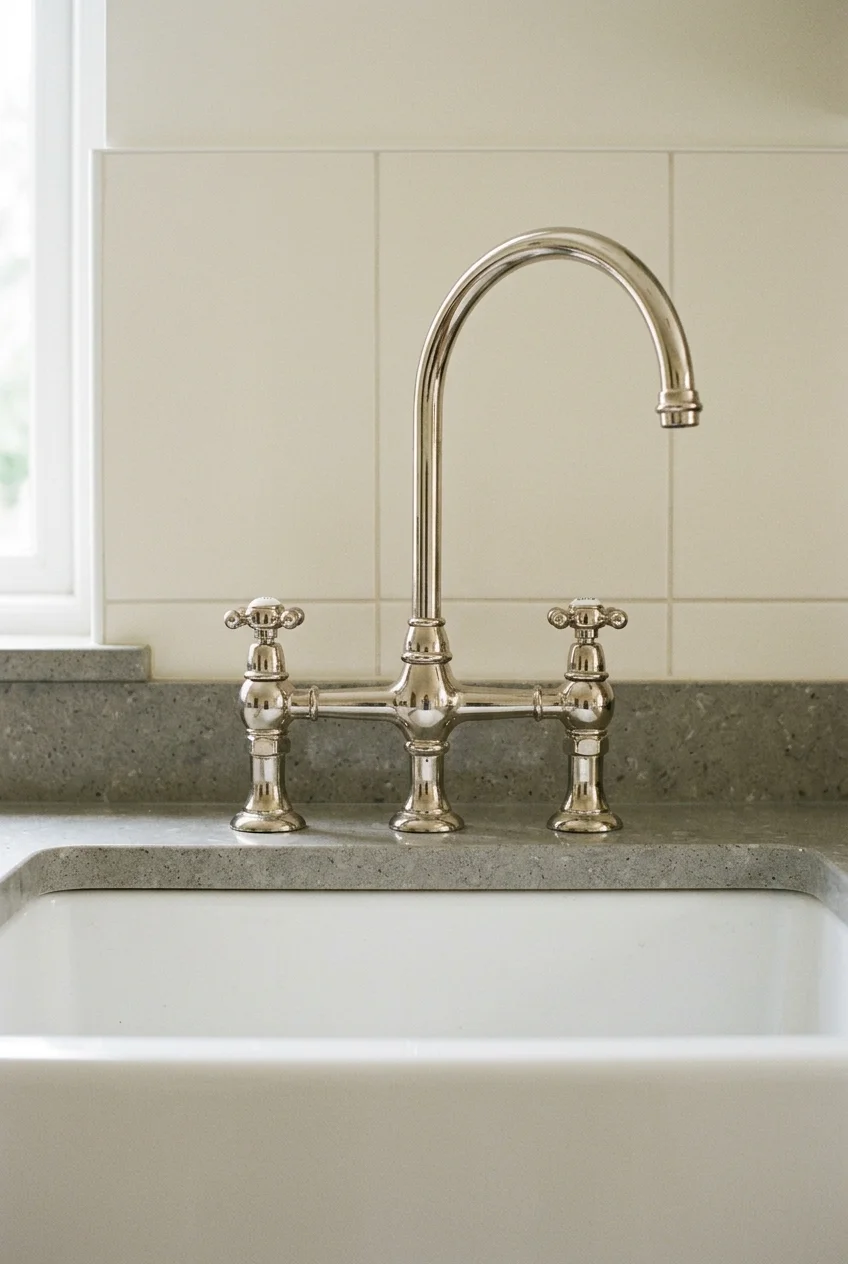
A bridge faucet balances the visual width of an apron-front sink and reinforces its traditional construction. The exposed connection looks especially clear against simple backsplash tile.
Check that the sink deck or countertop has enough flat space for every valve body. The spout must project beyond the broad rear rim into the basin.
Keep the side spray optional rather than automatic. If the main spout swivels widely and the sink is modest, another deck fitting may only crowd cleaning space.
37. Use a Pull-Down With a Deep Undermount Sink
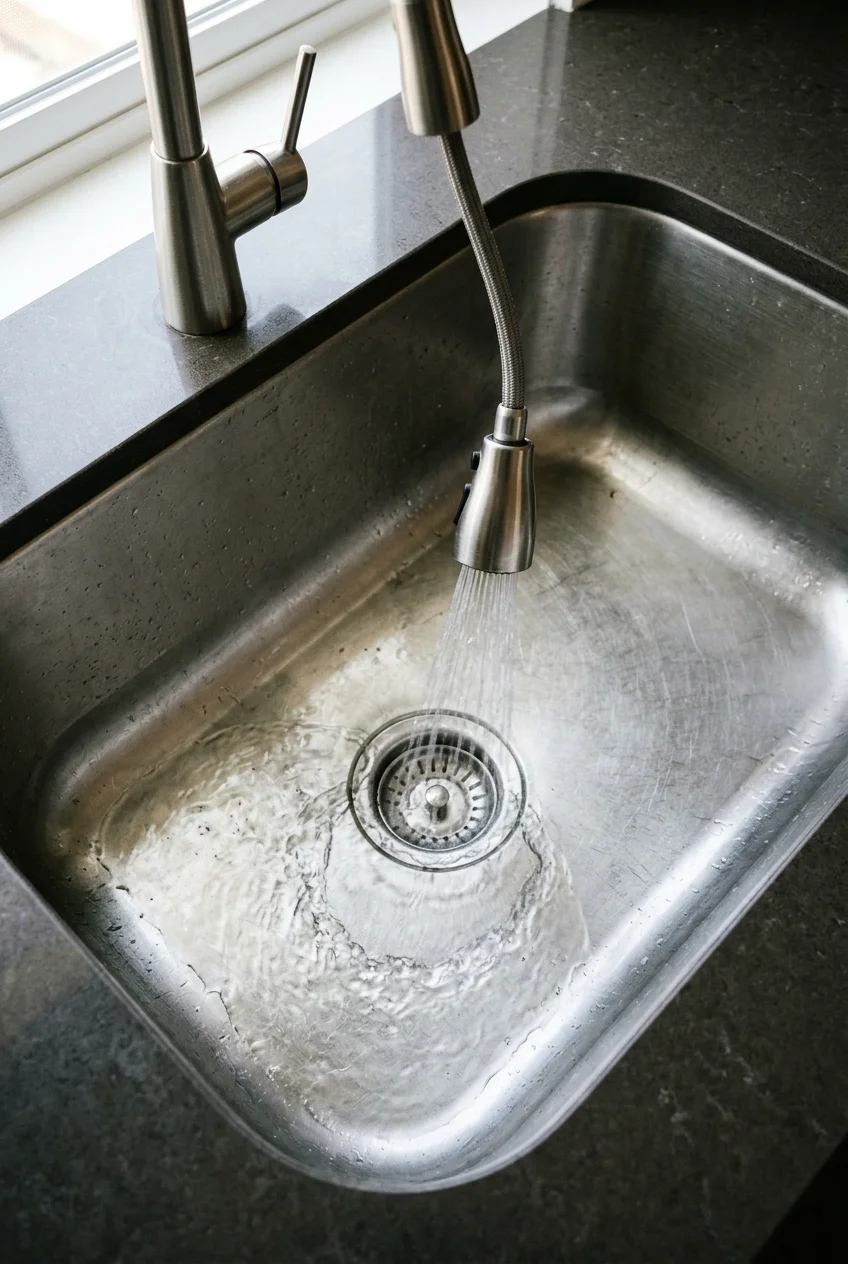
A pull-down spray head works naturally with a deep undermount basin because the wand travels toward the work and the rim does not interrupt sweeping motions.
High water velocity can still splash from the basin floor. Match the spray spread, outlet height, and sink depth rather than assuming deeper always solves splash.
Center the stream near the drain and keep the head low while rinsing. Rounded internal sink corners are easier to sweep clean than sharply squared corners.
38. Aim for Full Coverage on a Workstation Sink
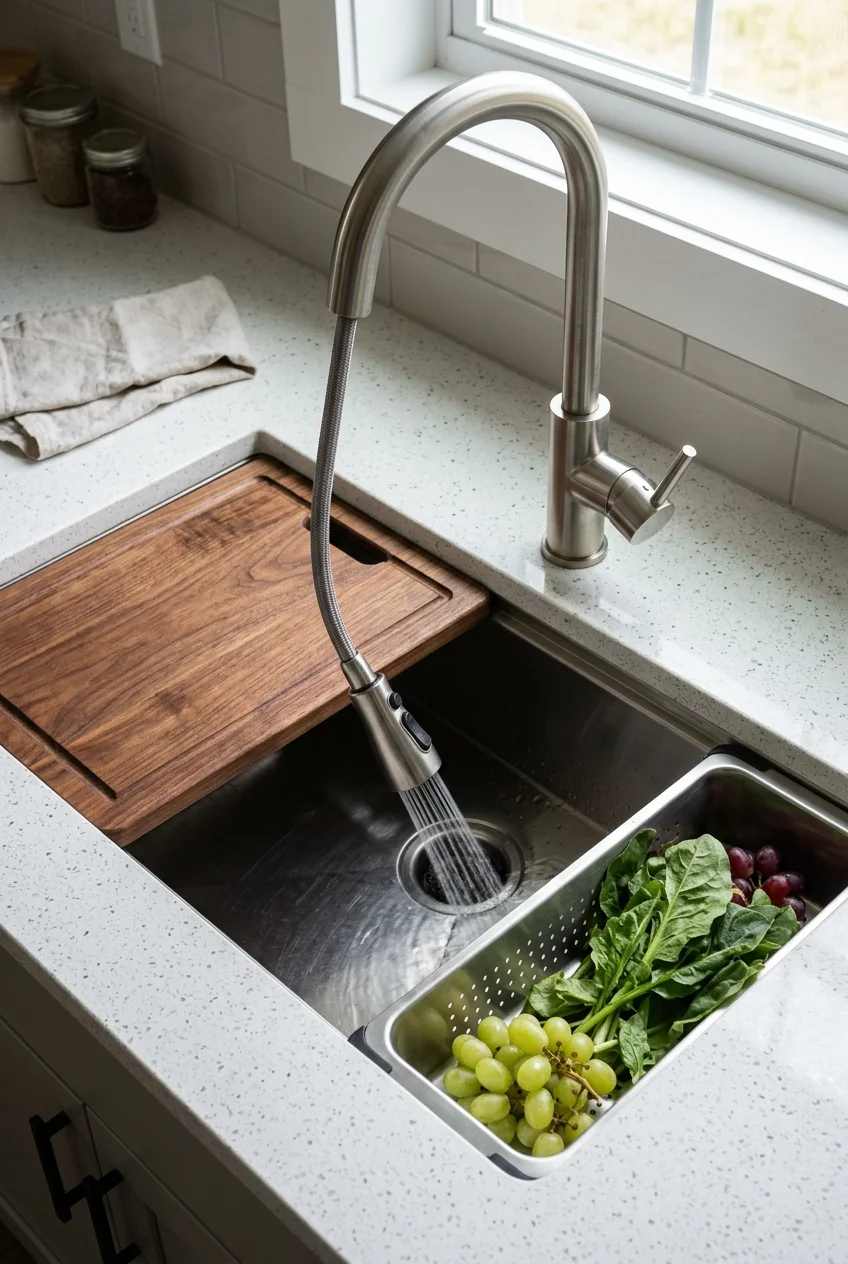
Workstation sinks add ledges, cutting boards, colanders, and drying racks, so faucet reach must serve both the open basin and accessories positioned above it.
A pull-down or articulating head can rinse around inserts without moving them repeatedly. Confirm the hose reaches the far corners while retracting freely below.
- Map the outlet over the open basin.
- Test reach to both rear corners.
- Keep spray controls usable above accessories.
- Protect the hose path from stored cutting boards.
39. Center a Swivel Faucet Between Two Bowls
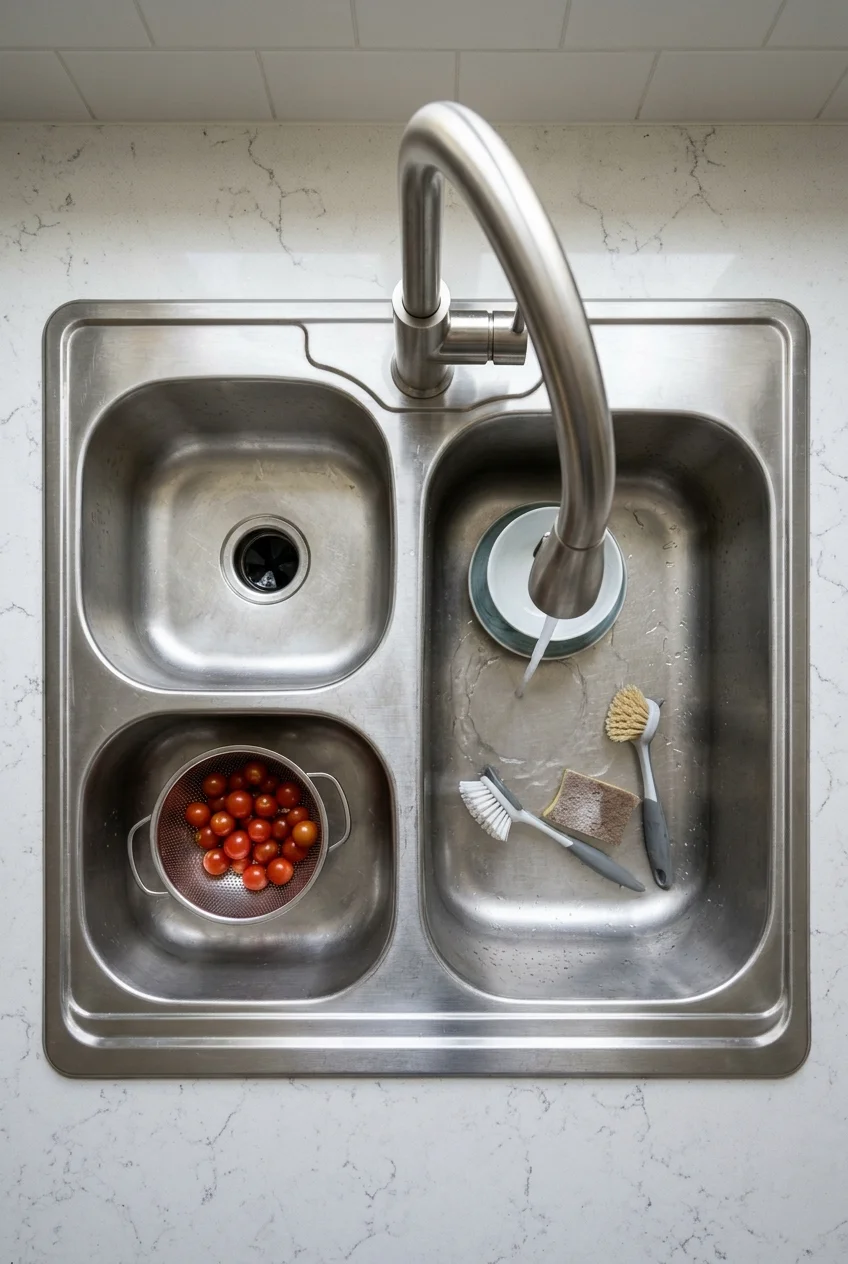
For a divided sink, place the faucet where its arc reaches both bowl centers without forcing the spray hose across a raised divider at an awkward angle.
An offset drain does not always require an offset faucet. Use the bowl geometry, usual dish-loading side, and spout rotation to choose the mounting center.
If one bowl is smaller, favor the larger cleanup side slightly while preserving usable reach to the prep bowl. A cardboard plan view makes the tradeoff visible.
40. Scale an Island Faucet for Open-Room Views
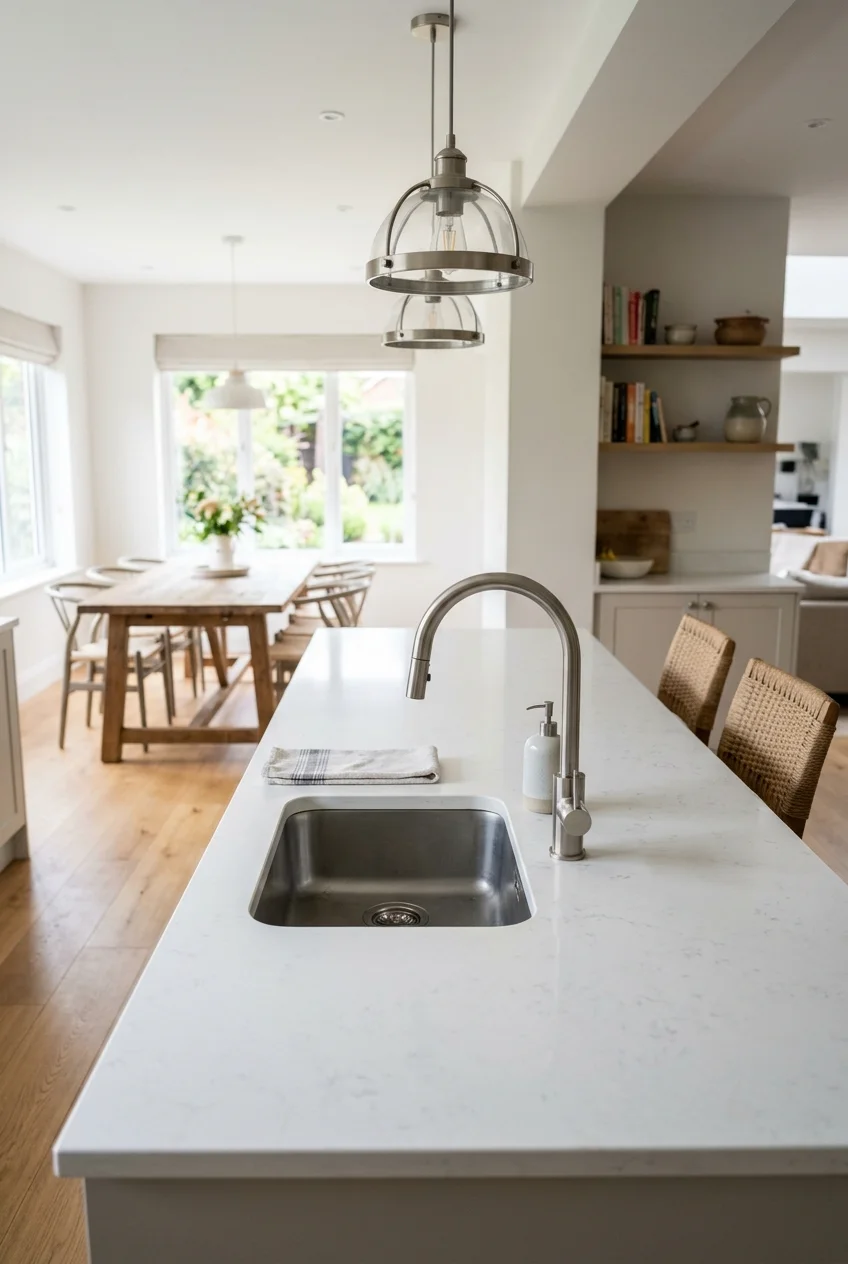
An island faucet is visible from several rooms, so its height and back view matter as much as the front. Choose clean connections and a proportionate arch.
Sit at nearby seating and check whether the faucet blocks faces, pendants, or windows. A very tall spring coil may become the room’s unintended centerpiece.
If the island sits in a tight room, review these narrow kitchen island ideas before adding plumbing. The sink, dishwasher, seating, and walkways must work together, not as separate decisions.
Keep the rear lever and fasteners visually tidy because guests may see them. An escutcheon should cover only necessary holes, not become a broad decorative plate.
41. Protect Window Clearance With the Right Height
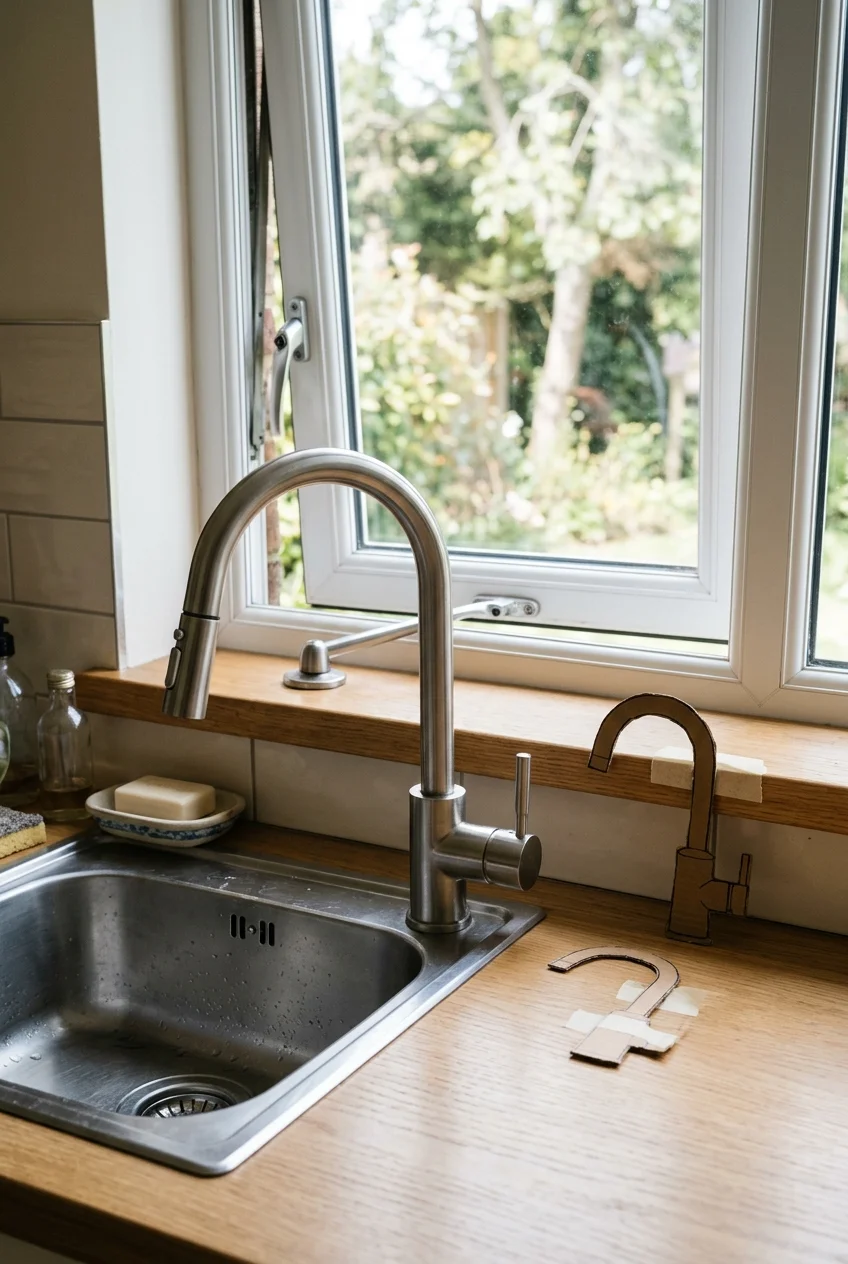
A faucet under a window must clear the sash, crank, sill, and any inward movement. Measure the complete operating envelope, not only the closed window opening.
If clearance is tight, choose a low pull-out, an offset placement, or a model designed to fold down. Verify every moving part before drilling the deck.
Practical tip Build a full-height cardboard profile and tape it at the proposed faucet center; then open, clean, and lock the window as you normally would.
42. Check Handle Travel Against the Backsplash
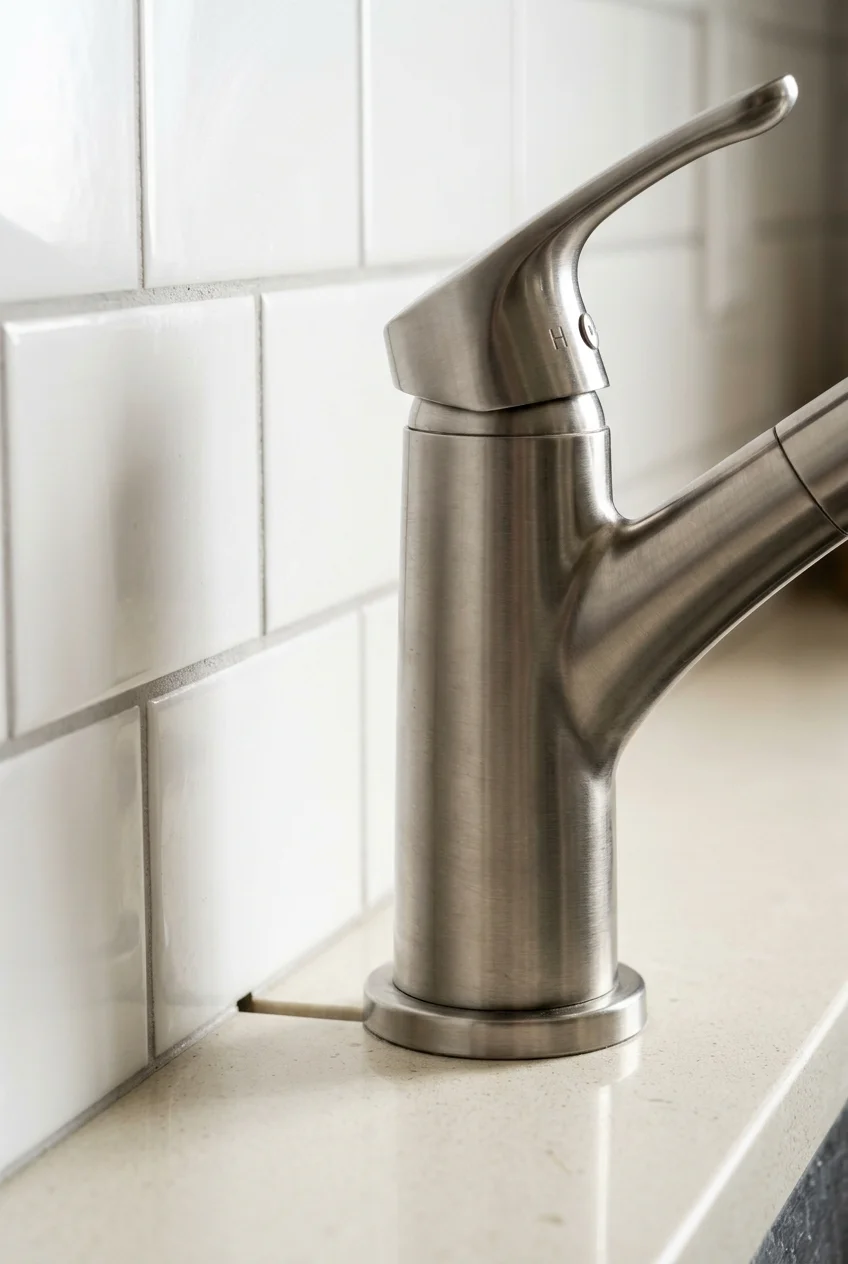
A beautiful handle becomes frustrating when it strikes tile before reaching full hot or cold. Tight rear clearances deserve the same attention as spout height.
Forward-only levers, top controls, or side placement can solve the conflict. Confirm the exact handle arc in the manufacturer drawing rather than relying on product photographs.
Leave enough space to clean around the base and replace cartridges later. A faucet squeezed against a backsplash may also complicate the mounting nut below.
43. Choose a Compact Faucet for a Small Kitchen
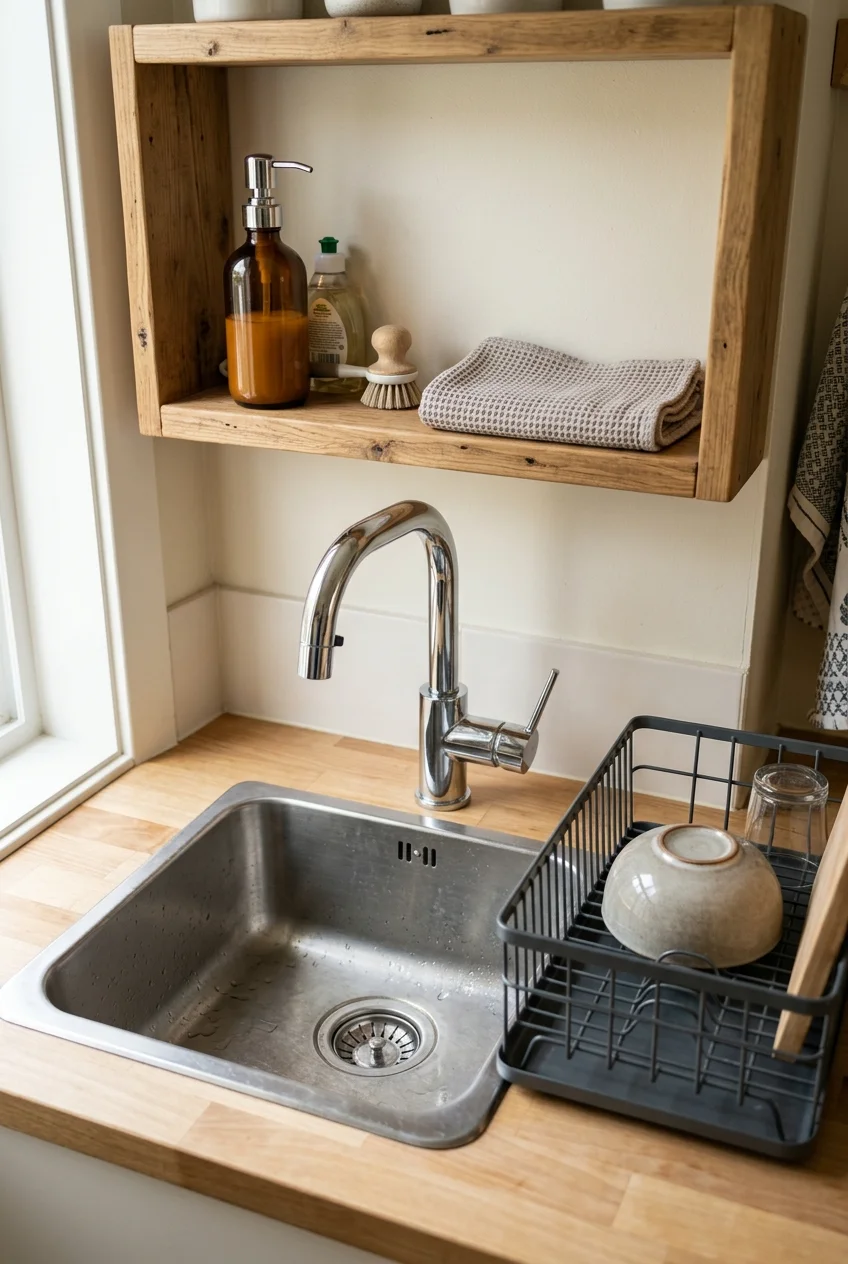
In a small kitchen, a modest faucet leaves more visual space around the sink and reduces collisions with shelves, dish racks, and open cabinet doors.
Compact should not mean short reach. Match the outlet to the drain and select a pull-out wand when horizontal flexibility matters more than a tall arch.
Keep the surrounding counter functional with only daily items. For more ways to free nearby cabinet space, explore under-kitchen-sink organization ideas that work around pipes and hoses without crowding them.
44. Favor Lever Controls for Easier Operation
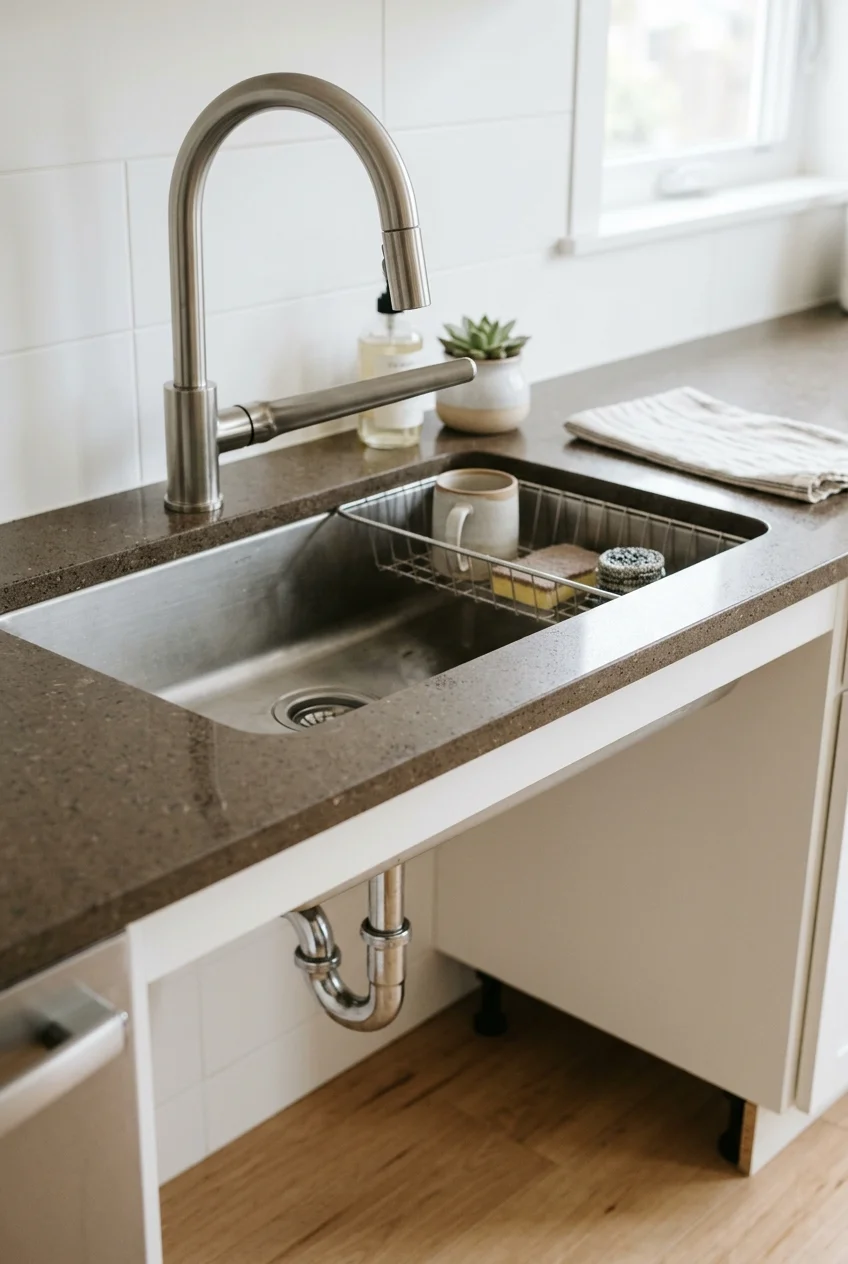
A long lever can be pushed with a wrist or forearm and usually requires less gripping than a small cross handle. That can help many households.
Accessible use depends on more than handle shape, including reach, force, approach, sink height, and surrounding clearance. Avoid claiming universal accessibility from one feature.
Try the control from seated and standing positions when possible. The hottest setting should remain understandable, and the lever should not disappear behind the spout.
45. Give a Prep Sink Its Own Smaller Faucet
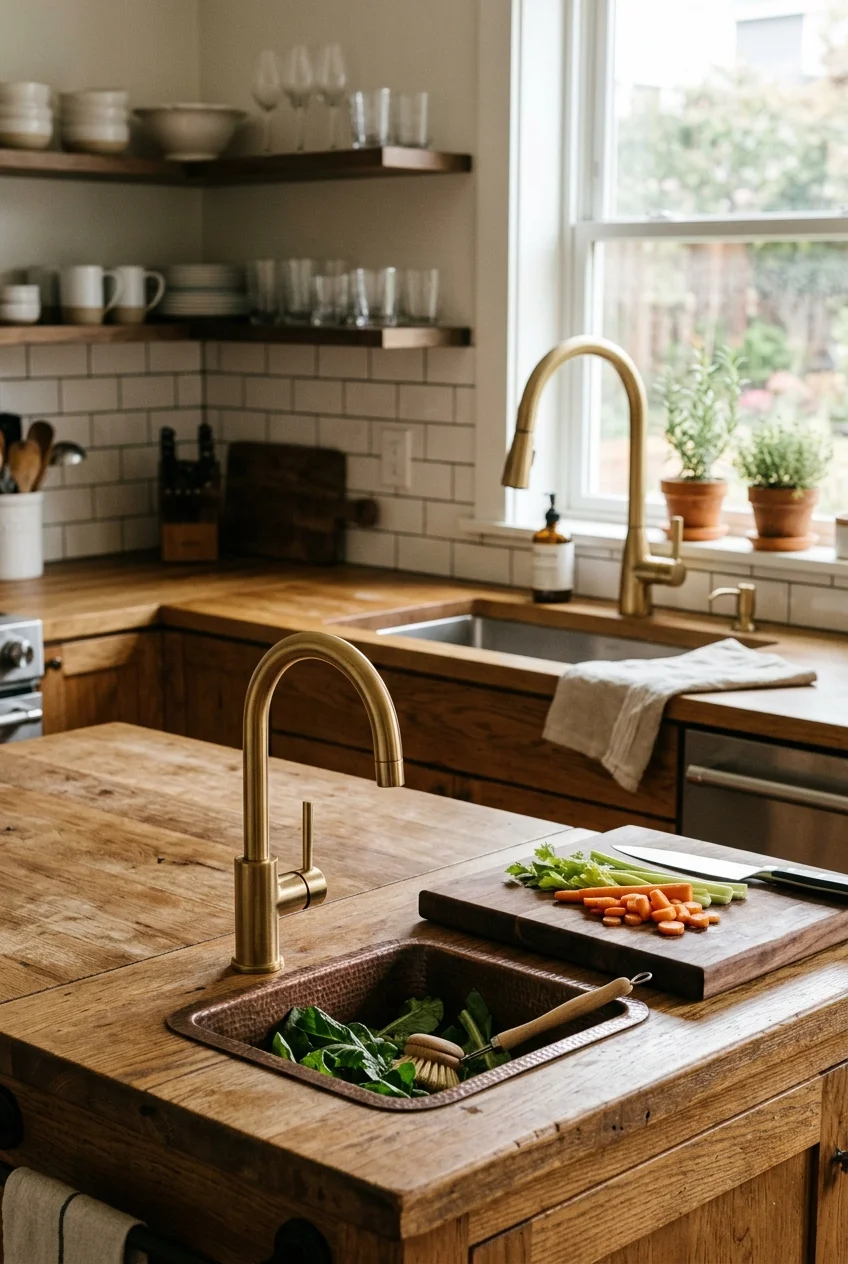
A secondary prep sink works best with a faucet sized for rinsing produce, filling a saucepan, or serving drinks without competing with the main cleanup zone.
Coordinate the silhouettes rather than buying identical sizes. A compact version can share the main faucet’s finish and curve while respecting the smaller basin.
Plan supply lines, drain, and storage before placing the sink in an island. The faucet should not occupy the only uninterrupted area available for chopping.
Retrofit and Buying Checks
Finish the shortlist with installation facts. Existing holes, deck thickness, supply access, hose clearance, certifications, and replacement parts can decide between otherwise similar options.
46. Cover Extra Holes With a Purposeful Deck Plate
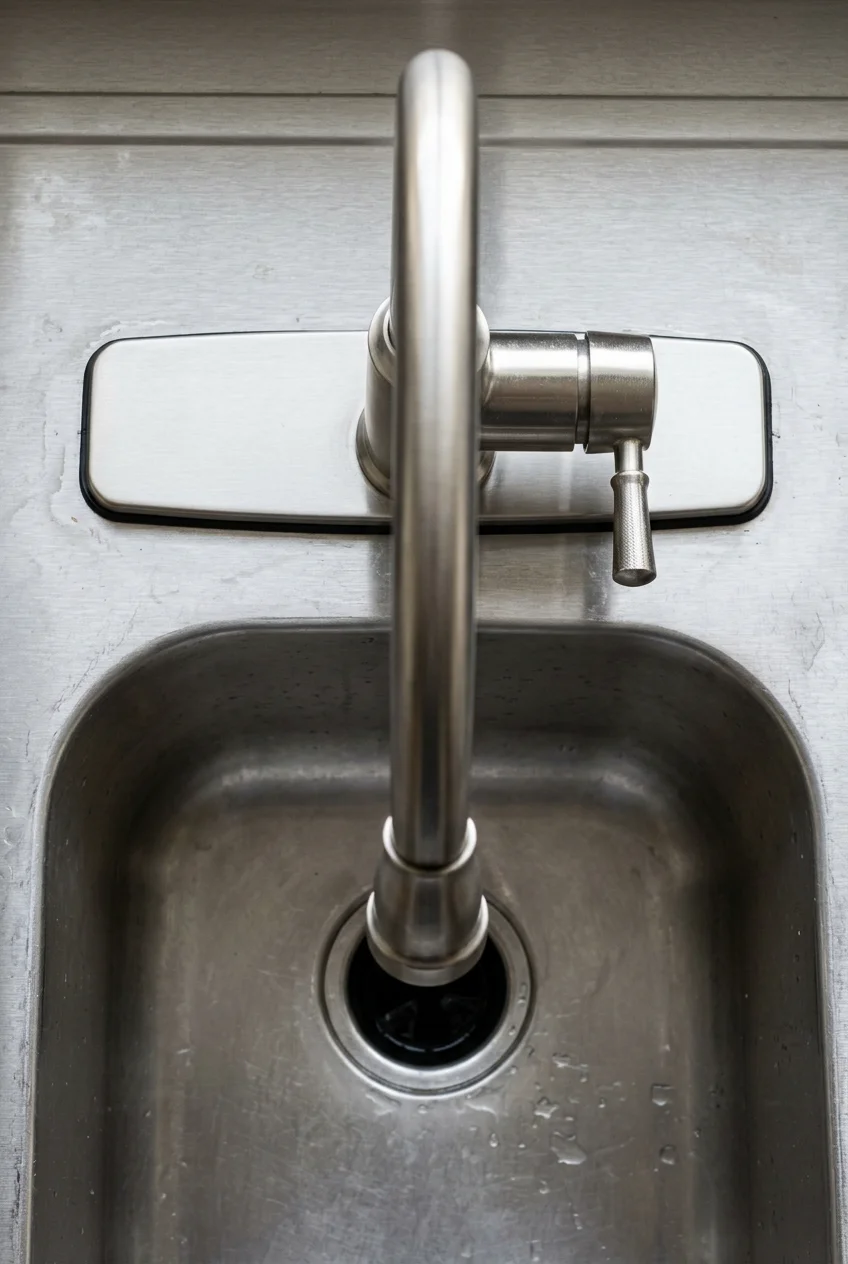
A one-hole faucet can often replace a three-hole configuration when a compatible deck plate covers the unused openings. This avoids changing an otherwise sound sink.
Use only a plate approved for the model and wide enough for the actual spacing. The gasket must sit on a flat, clean surface without bridging a raised rim.
A plate changes the visual weight and creates another cleaning edge. If new counters are planned, drilling only the required hole usually looks more integrated.
- Measure the outer edges of all existing holes.
- Confirm the plate dimensions in the specification sheet.
- Inspect the deck for flatness and damage.
- Check access for the central mounting hardware below.
47. Use a Four-Hole Layout Without Crowding It
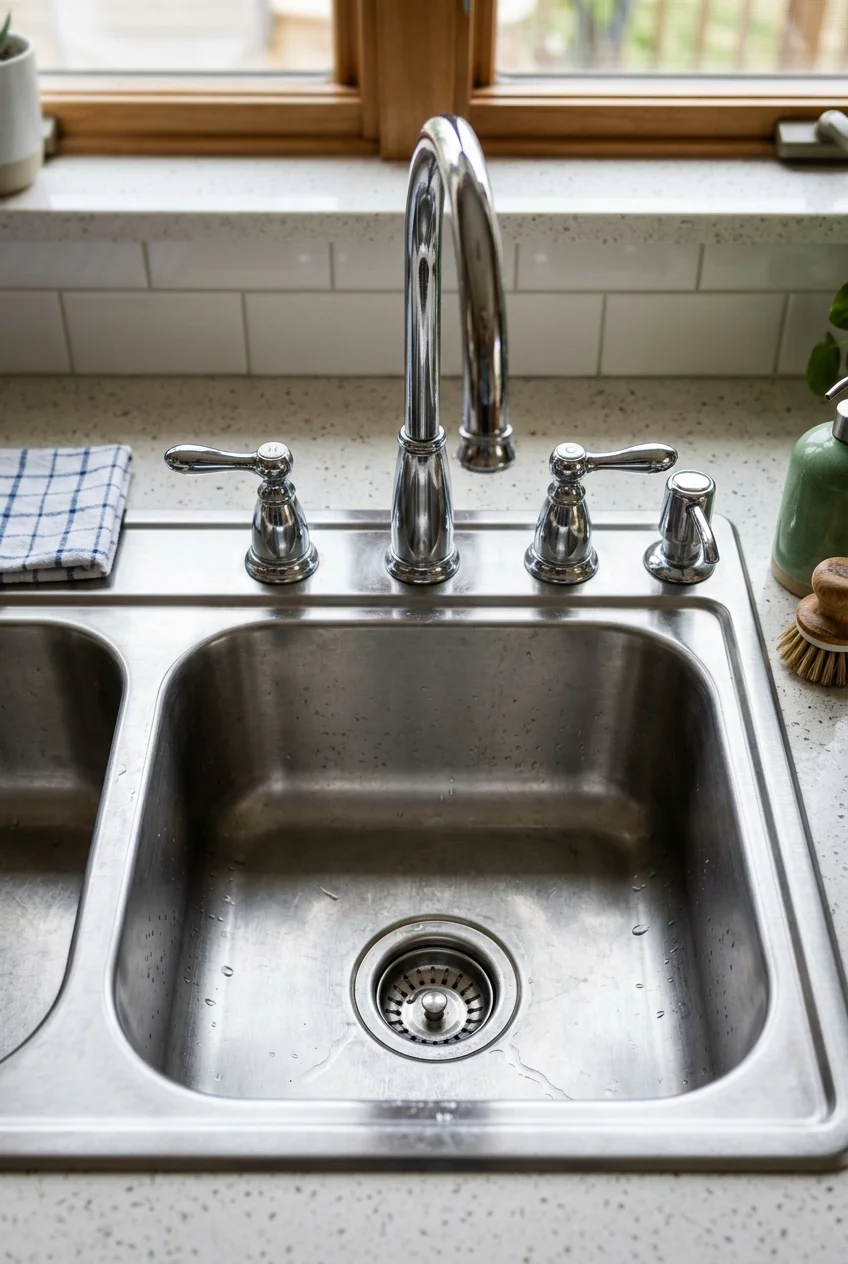
A traditional four-hole sink can support separate hot and cold handles, a central spout, and a side sprayer without adapters or concealed cover plates.
Keep each component useful and reachable. If the sprayer no longer serves your routine, a compatible soap dispenser may use the opening more effectively.
Confirm the hole spacing, component base diameters, and below-deck connections before mixing pieces. A decorative cap should be an intentional last option, not a surprise.
48. Orient the Handle Before Tightening the Base
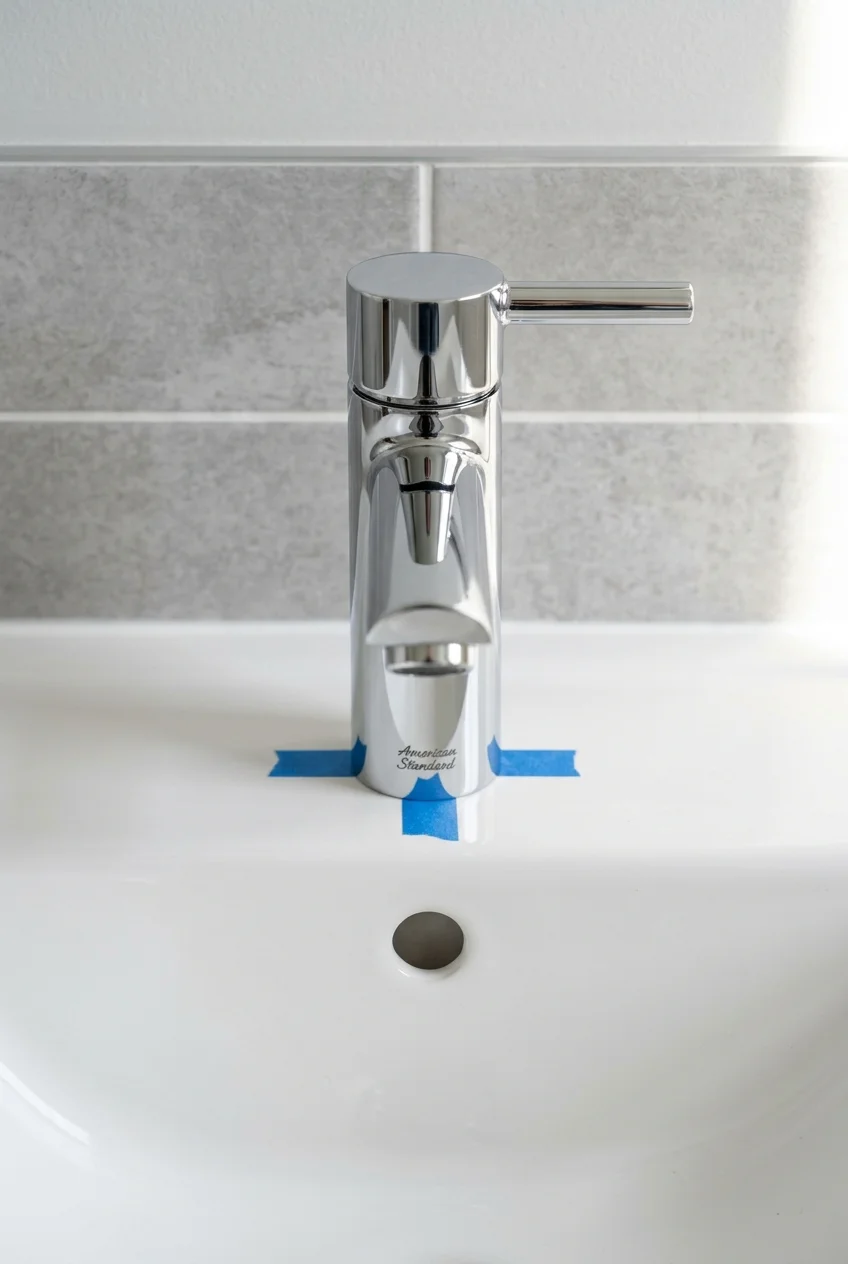
Many single-handle faucets allow some rotational orientation during installation. A slight adjustment can improve reach, backsplash clearance, and visibility of the temperature direction.
Do not assume any model can be turned freely; supply lines, logos, sensor zones, and internal stops may require a specific position. Follow its installation drawing.
Before final tightening, operate the handle through its full range and swivel the spout. Check that neither movement loosens the base or contacts adjacent surfaces.
Setup note Have one person hold the faucet aligned above while another tightens below; this prevents the body from rotating off center during the final turn.
49. Reserve a Clear Path for the Pull-Down Hose
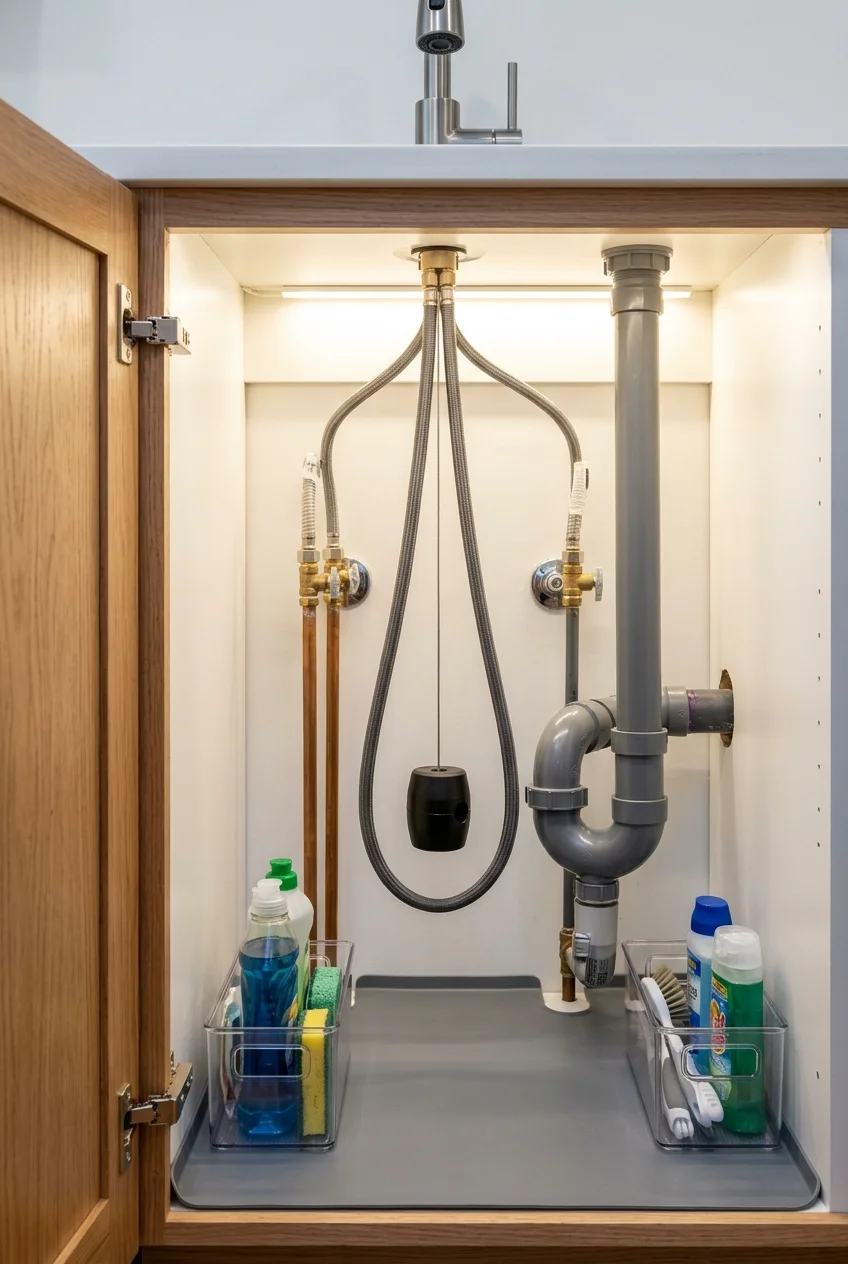
A pull-down hose needs a straight, unobstructed drop beneath the faucet. The counterweight must travel without catching supply valves, filter tubing, shelves, or cleaning bottles.
Operate the hose while watching below before organizing the cabinet. Move storage around the mechanism instead of tying the hose aside or removing its weight.
Use adjustable organizers from these under-kitchen-sink organization ideas only after marking the hose path. Keep leak-detection mats and shutoff valves visible, reachable, and separate from moving parts.
- Pull the spray head to maximum reach.
- Watch the weight rise and fall several times.
- Secure unrelated tubing away from the moving path.
- Leave shutoff valves accessible for emergencies.
50. Verify Certification, Parts, and Service Before Style
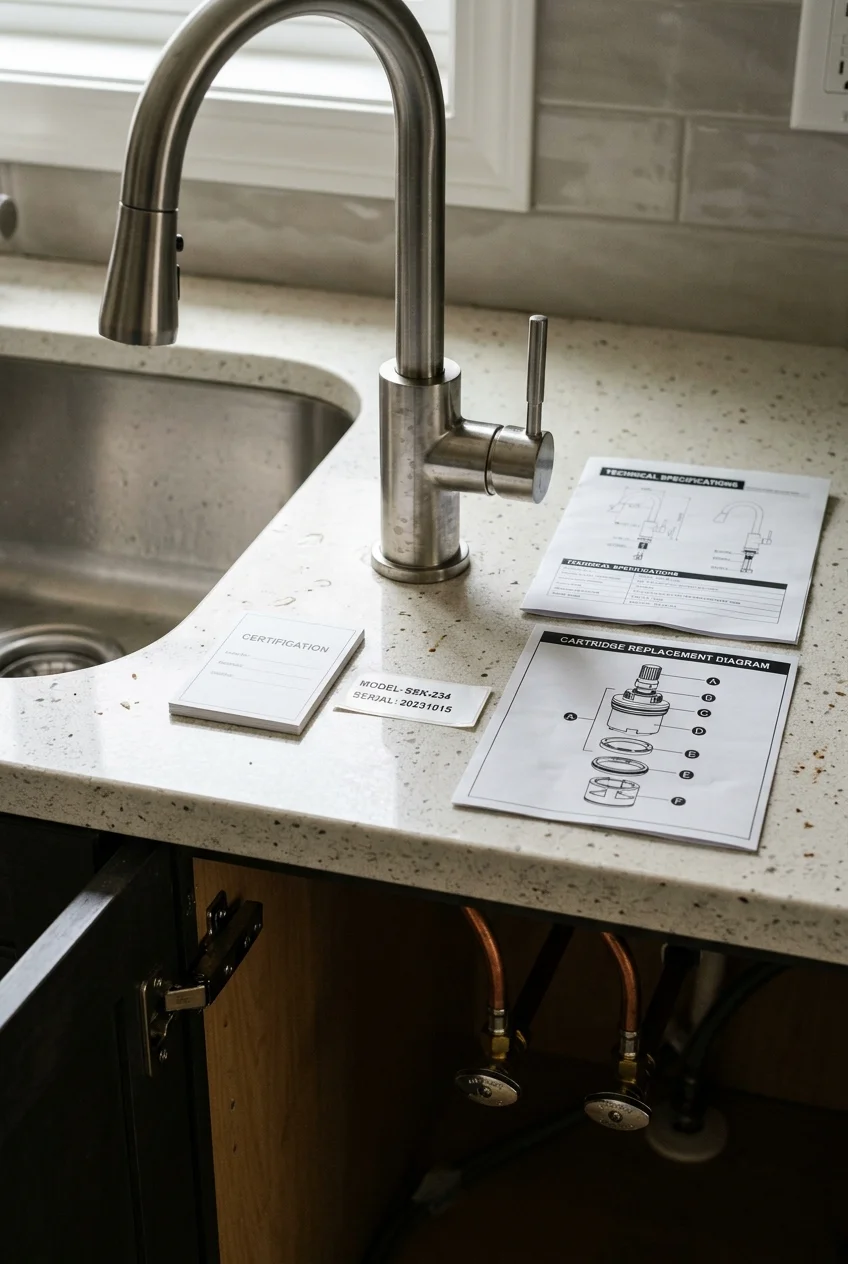
Kitchen faucets deliver water for drinking and cooking, so choose products carrying applicable lead-free and drinking-water certifications from recognized third-party bodies for the U.S. market.
The EPA requires covered kitchen faucets introduced into U.S. commerce for potable use to be certified lead-free. NSF listings can help confirm specific models independently.
Also check cartridge numbers, hose assemblies, aerators, finish warranty, and support channels. A replaceable wear part can matter more over time than an extra spray pattern.
Save the model number, specification sheet, receipt, and finish name together. Photograph labels before they disappear behind cabinetry, then note the shutoff locations.
Buying check Treat missing specifications as unknown, not reassuring. Ask the manufacturer or choose a better-documented faucet when certification, dimensions, or replacement parts cannot be confirmed.
Frequently Asked Questions
How do I know whether a kitchen faucet will fit my sink?
Count and measure the existing holes, then compare faucet height, spout reach, base diameter, handle travel, deck-thickness limits, supply connections, and under-sink mounting access.
For a new sink, select both fixtures together. Confirm the outlet lands inside the basin, moving parts clear nearby surfaces, and accessories have dedicated openings.
Should the kitchen faucet match the cabinet hardware?
It can, but an exact match is unnecessary. Compatible undertones and sheen create continuity, while repeating the faucet finish once nearby makes intentional mixed metals easier to read.
Is a pull-down or pull-out faucet better?
Pull-down heads suit deep sinks and direct water downward; pull-out wands offer horizontal reach with a lower profile. Choose according to clearance, grip, and basin geometry.
Compare hose length, docking, spray controls, and the cabinet path below. Either type becomes frustrating when its hose catches storage or its outlet misses the drain area.
What faucet finish is easiest to keep looking clean?
Brushed and spot-resistant finishes often disguise fingerprints better than mirror-polished metal, while dark finishes can reveal pale mineral residue. Local water and cleaning habits matter.
Follow the manufacturer’s care directions for the exact finish. Gentle wiping is safer than abrasives, acidic cleaners, or improvised polishes that may alter the surface unevenly.