60 Christmas Tree Tinsel Ideas

This post may contain affiliate links: full affiliate disclosure.
Adding tinsel to a Christmas tree brings a unique sparkle that modern ornaments cannot replicate on their own. This classic decorating technique transforms a standard tree into a shimmering centerpiece using simple, light-reflecting strands.
Master the art of layering tinsel to create a festive look that feels both timeless and professional.
Classic and Vintage Christmas Tree Tinsel
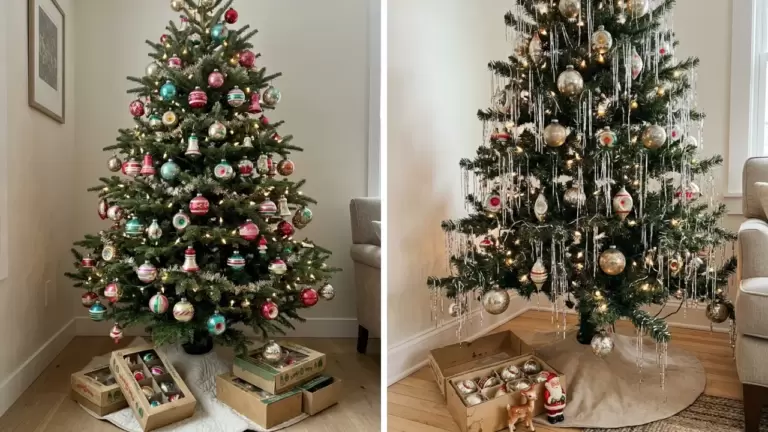
1. Classic Silver Tinsel Christmas Tree
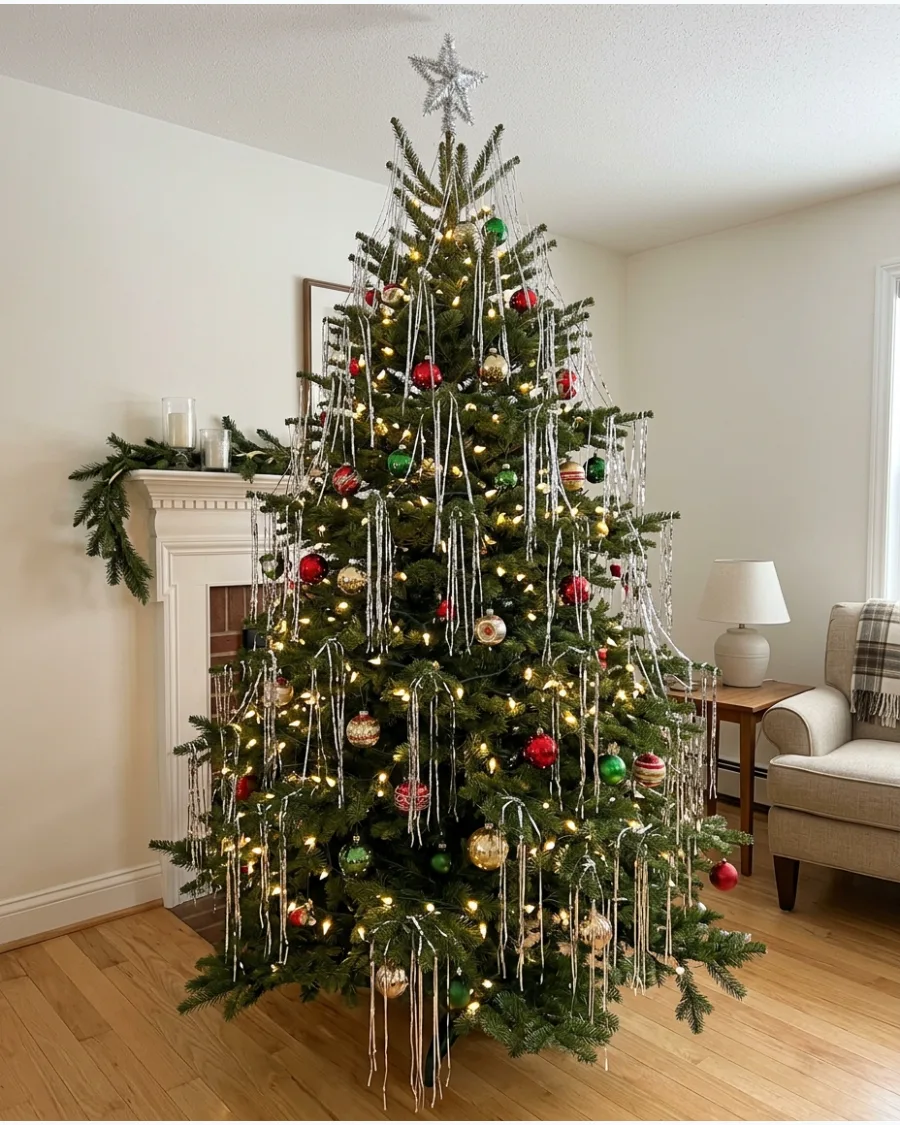
Drape individual silver tinsel strands vertically over a traditional green tree to create a shimmering icicle effect. This method catches the light from every angle and adds a sense of height to the room.
Wait until the lights and ornaments are perfectly placed before adding the tinsel as the final layer.
- Silver tinsel packs are an affordable way to add high impact.
- Place strands one by one rather than in clumps for a clean look.
- This style works best on dense trees like Fraser or Balsam firs.
Most people skip this: Pinch the top of each strand to the branch needle to prevent it from sliding off during the season.
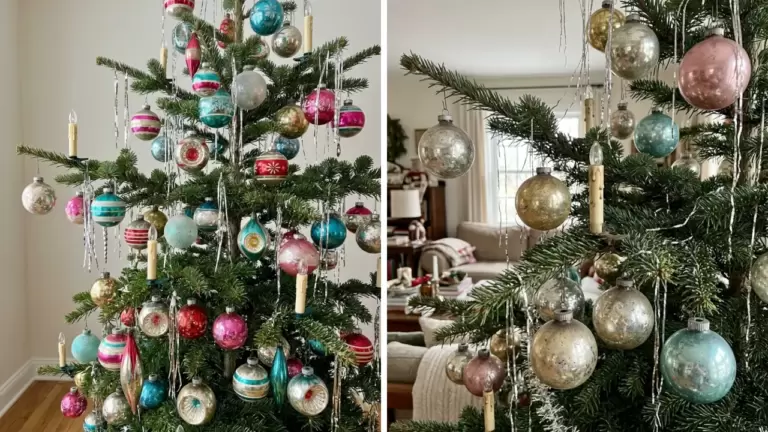
2. Vintage Lametta Christmas Tree
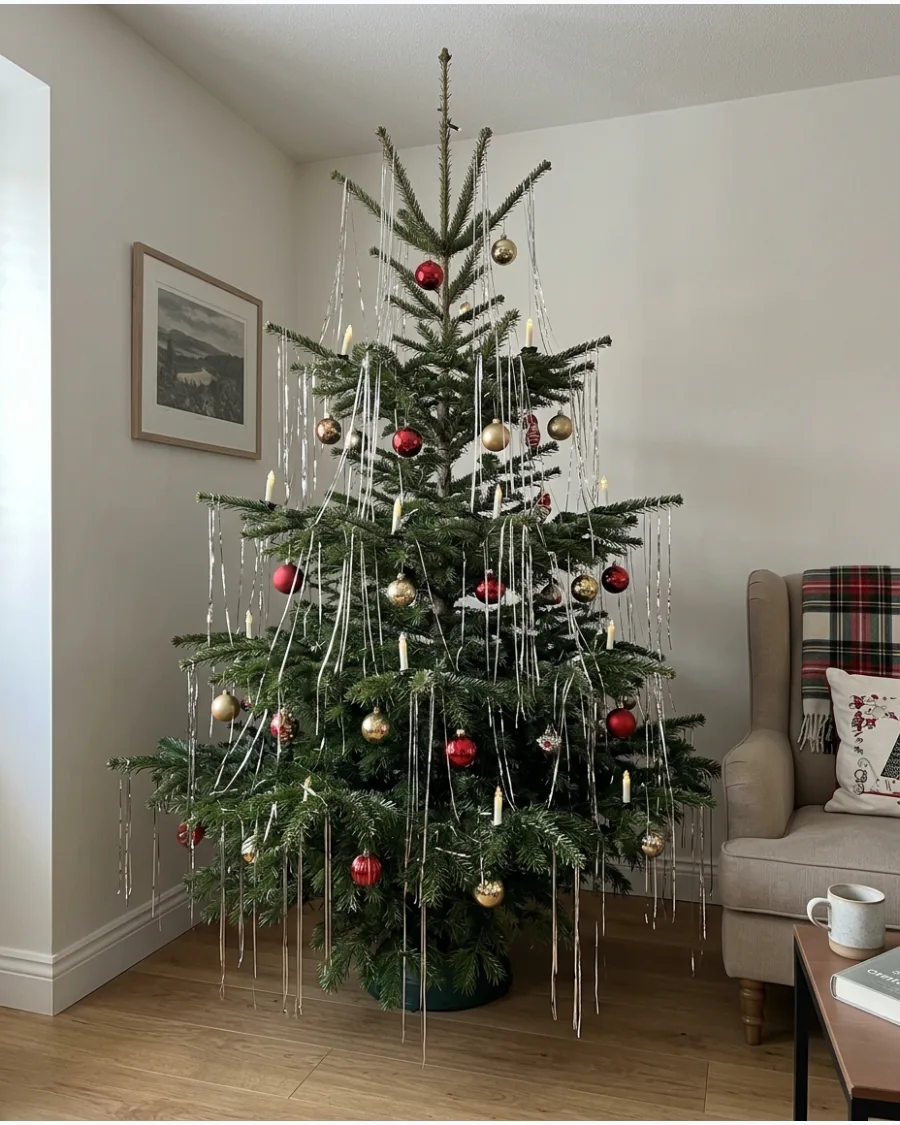
Use fine lametta strands placed individually over branch tips to recreate a sophisticated European aesthetic. This technique allows the tree's natural shape to show through while adding delicate movement.
Focus on the outer two inches of each branch to keep the center of the tree from looking cluttered.
- Look for real metal lametta for a heavier, more authentic drape.
- Apply strands to every third branch for a subtle, elegant shimmer.
- Store the strands by wrapping them around cardstock to reuse them next year.
Quick win: Use a pair of tweezers to place the finest strands if your fingers feel too clumsy for the delicate work.
3. 1950s Tinsel Christmas Tree
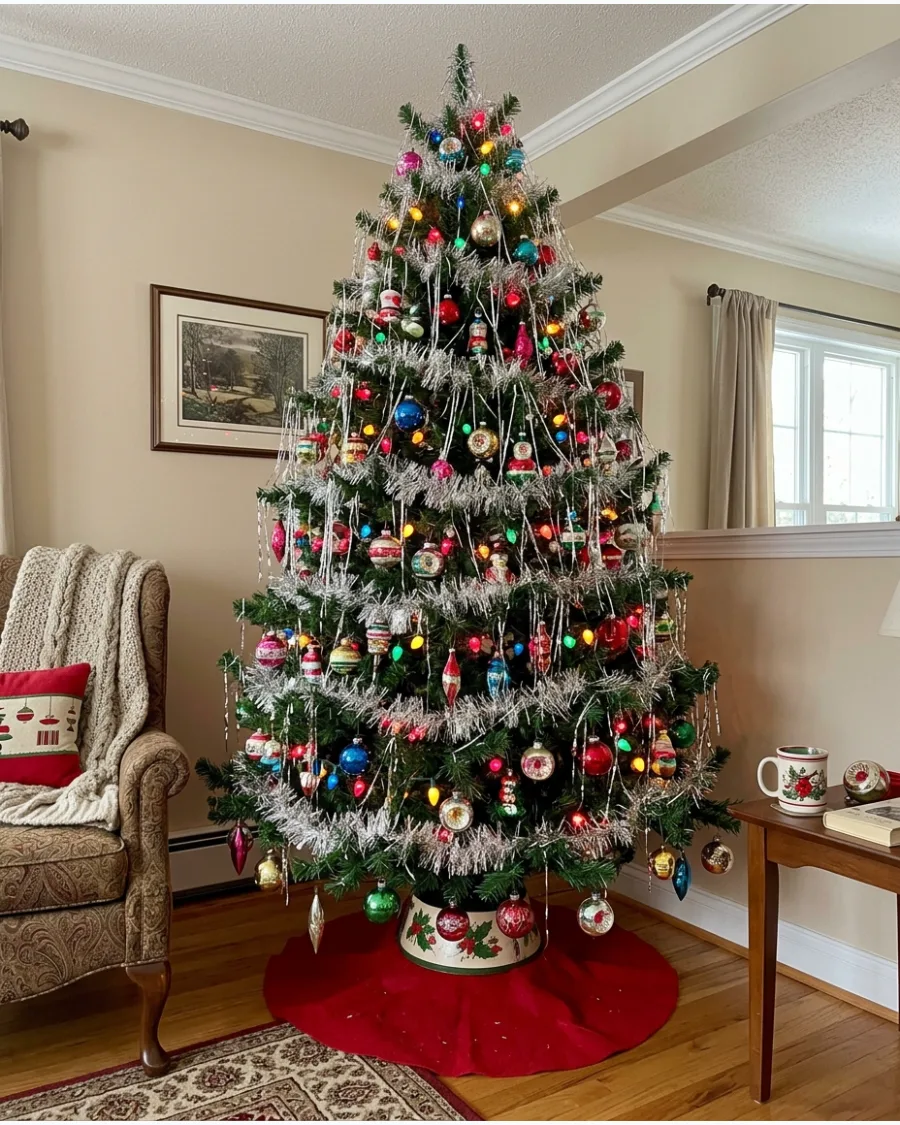
Style a green tree with abundant silver tinsel and multicolored lights to achieve a nostalgic mid-century vibe. Mismatched glass ornaments add to the charm of this cheerful family-friendly look.
Cluster the tinsel more heavily toward the bottom of the tree to mimic a snow-heavy appearance.
- Combine tinsel with vintage glass finial toppers for height.
- Use larger C7 or C9 bulbs to match the authentic mid-century scale.
- Mix in classic plastic candy canes to add extra pops of color.
Best shortcut: Squint at the tree from across the room to find any dark spots that need more tinsel to reflect the light.
4. 1960s Retro Tinsel Christmas Tree
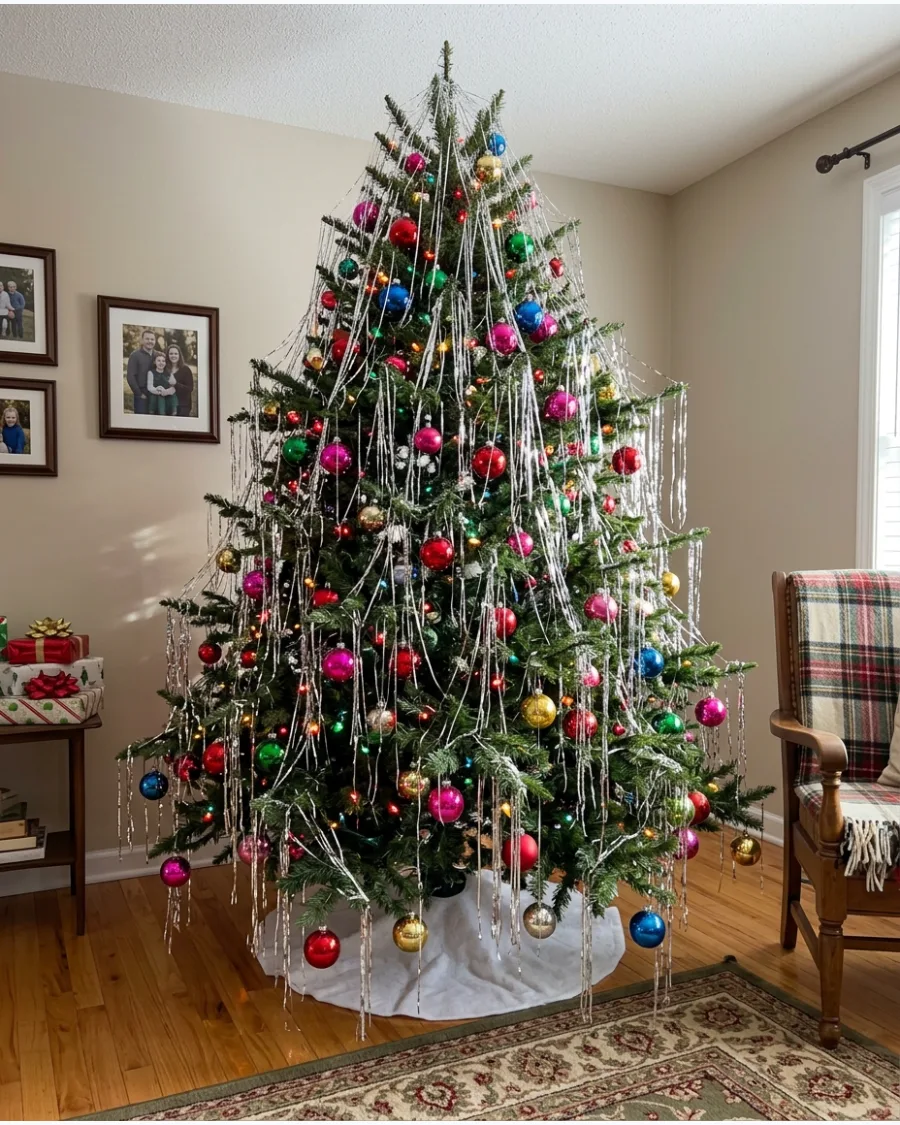
Cover the tree generously with long silver tinsel and bright, shiny round ornaments in various colors. This creates a playful, high-shine effect that defined the glamorous holiday decor of the 1960s.
Layer the tinsel deep into the branches to create a sense of depth and extra sparkle.
- Choose 18-inch tinsel strands for better vertical coverage on tall trees.
- Match the look with a tinsel garland at the base for a cohesive theme.
- Use high-gloss ornaments to maximize the reflection between the strands.
Quick win: If the tinsel strands are too long for your tree height, trim the bottom with sharp scissors once the tree is fully decorated.
5. Old-Fashioned Tinsel and Glass Ornament Tree
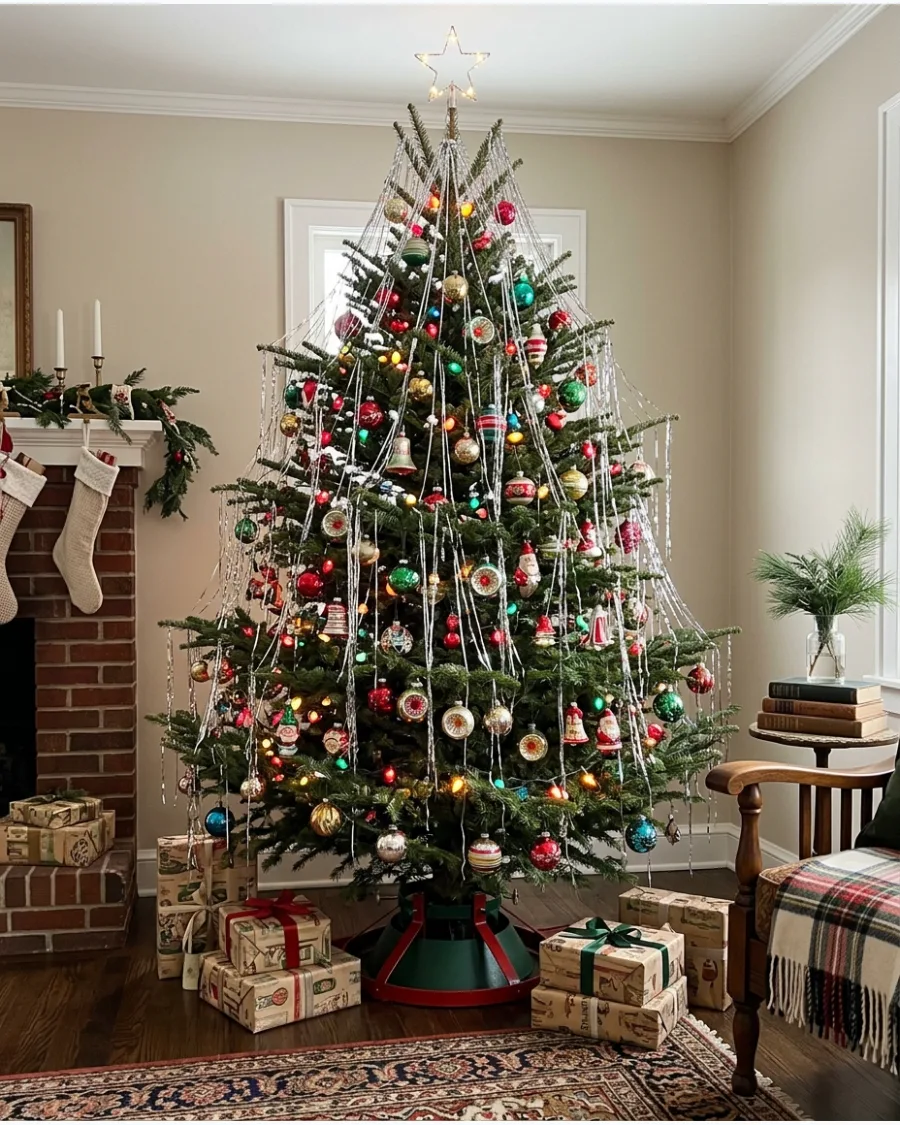
Combine cascading silver tinsel with reflector ornaments and traditional bells for a classic holiday feel. This balance ensures the ornaments remain the stars while the tinsel provides a glowing backdrop.
Hang the largest ornaments first, then drape the tinsel around them so the glass remains visible.
- Use reflector ornaments to bounce light directly into the tinsel strands.
- Keep tinsel strands thin to avoid hiding the intricate ornament details.
- Opt for warm-toned incandescent lights to give the silver a golden glow.
Most people skip this: Clean your glass ornaments with a microfiber cloth before hanging so they shine clearly through the tinsel layers.
6. Victorian-Inspired Gold Tinsel Christmas Tree
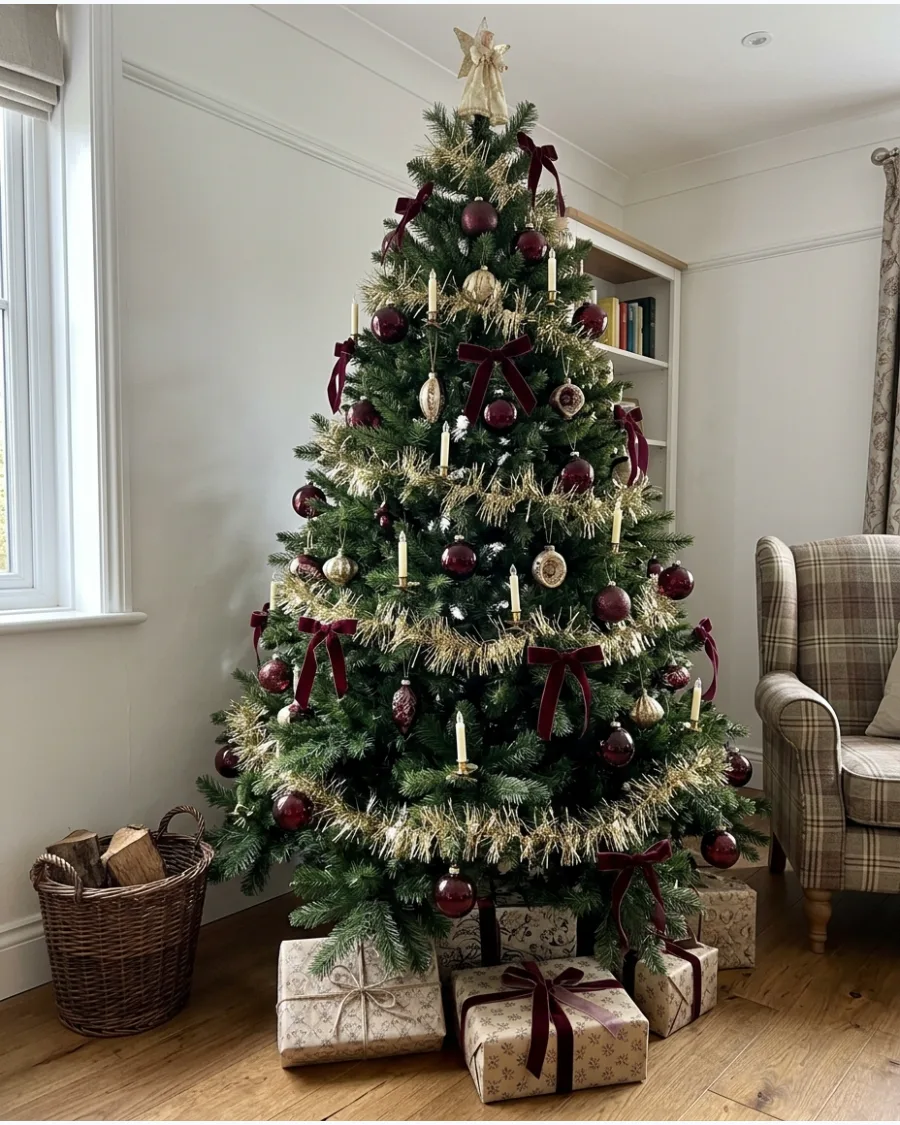
Decorate with fine gold lametta and burgundy velvet ribbons for a sophisticated, historic feel. This look works best with warm lighting and antique-inspired accents like miniature candles.
Use only a few strands of gold tinsel per branch to maintain a delicate, airy appearance.
- Pair with clip-on candle lights for historical Victorian accuracy.
- Use real brass or gold-colored metal tinsel for a premium finish.
- Add dried orange slices or cinnamon sticks for a natural touch.
Best shortcut: Drape gold tinsel over the tops of velvet ribbons to tie the different textures together into a unified design.
7. Nostalgic Family Christmas Tree With Tinsel
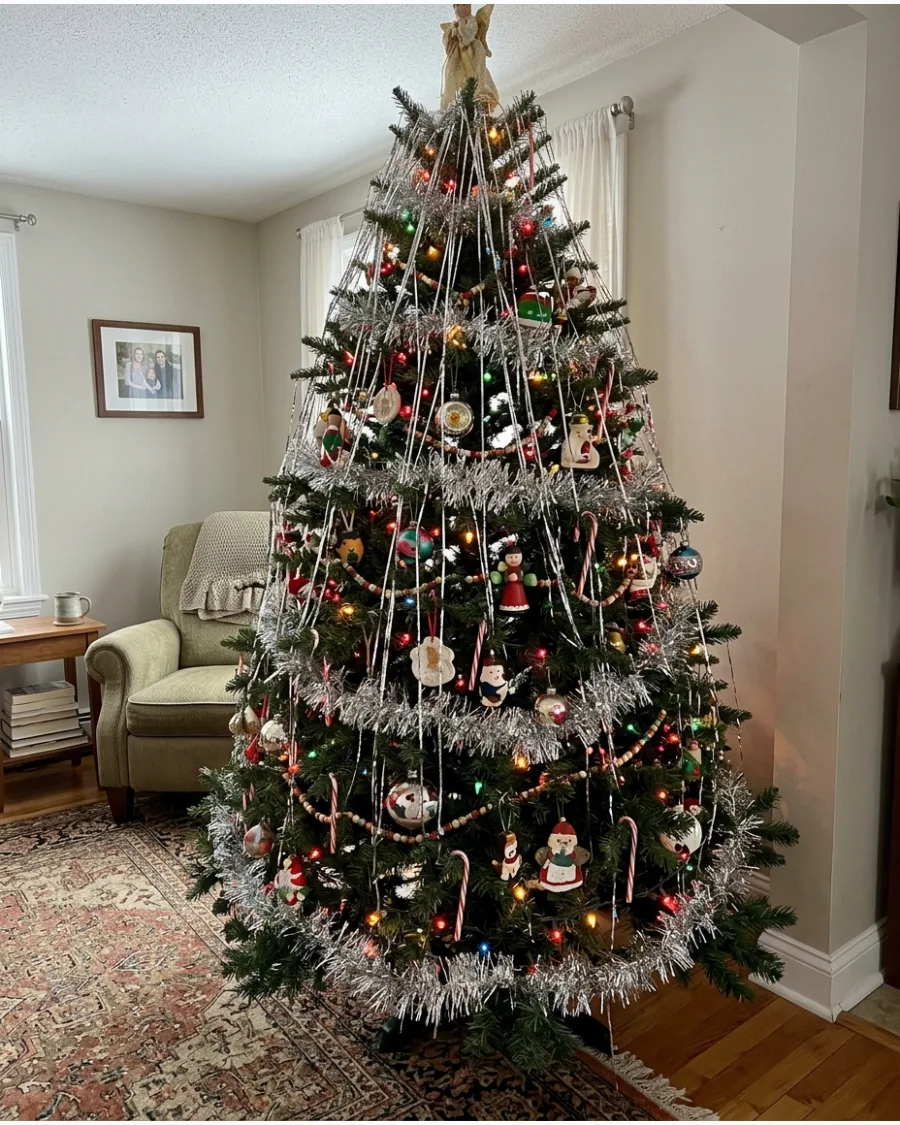
Mix silver tinsel with handmade decorations and sentimental ornaments for a cozy, collected look. This style prioritizes memories and warmth over a perfect designer aesthetic.
Encourage everyone in the house to add a handful of tinsel to make the decorating process a shared tradition.
- This look is perfect for trees with varied ornament sizes and shapes.
- Use multicolored lights to highlight the different textures of the ornaments.
- Drape a small amount of tinsel over the tree topper for a finished look.
Quick win: Save the empty tinsel boxes to store small, fragile handmade ornaments safely at the end of the season.
8. Retro Multicolor Tinsel Christmas Tree
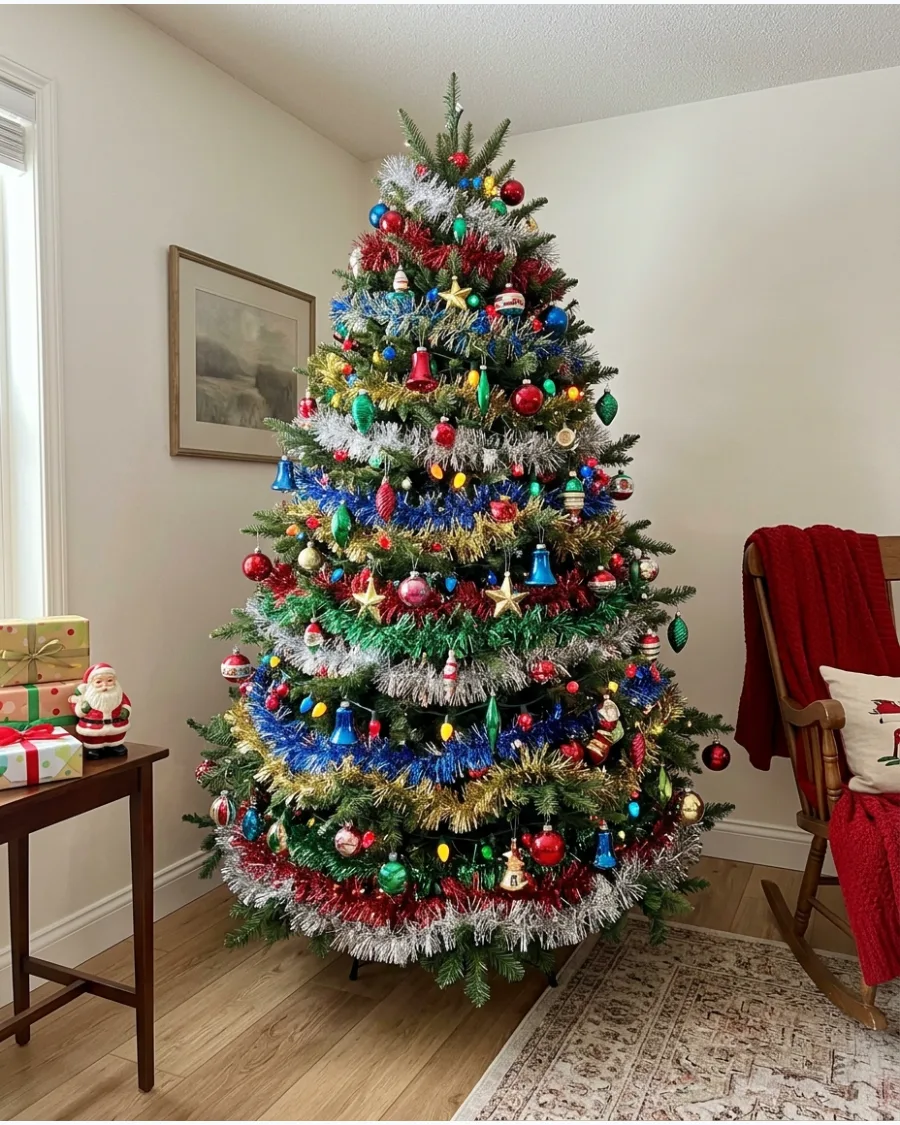
Combine several metallic tinsel colors like red, blue, and gold for a joyful maximalist tree. This approach brings a high-energy, festive feel to any room and is great for modern spaces.
Group similar colors of tinsel together in small clusters to create a subtle striped or patterned effect.
- Mix at least three different metallic colors for the best visual impact.
- Pair with solid-colored ornaments to avoid creating too much visual chaos.
- This colorful style is an excellent choice for kids' rooms or playrooms.
Most people skip this: Use a white artificial tree to make the multicolor tinsel strands pop even more than they do on green.
9. Vintage Silver Tinsel With Red Ornaments
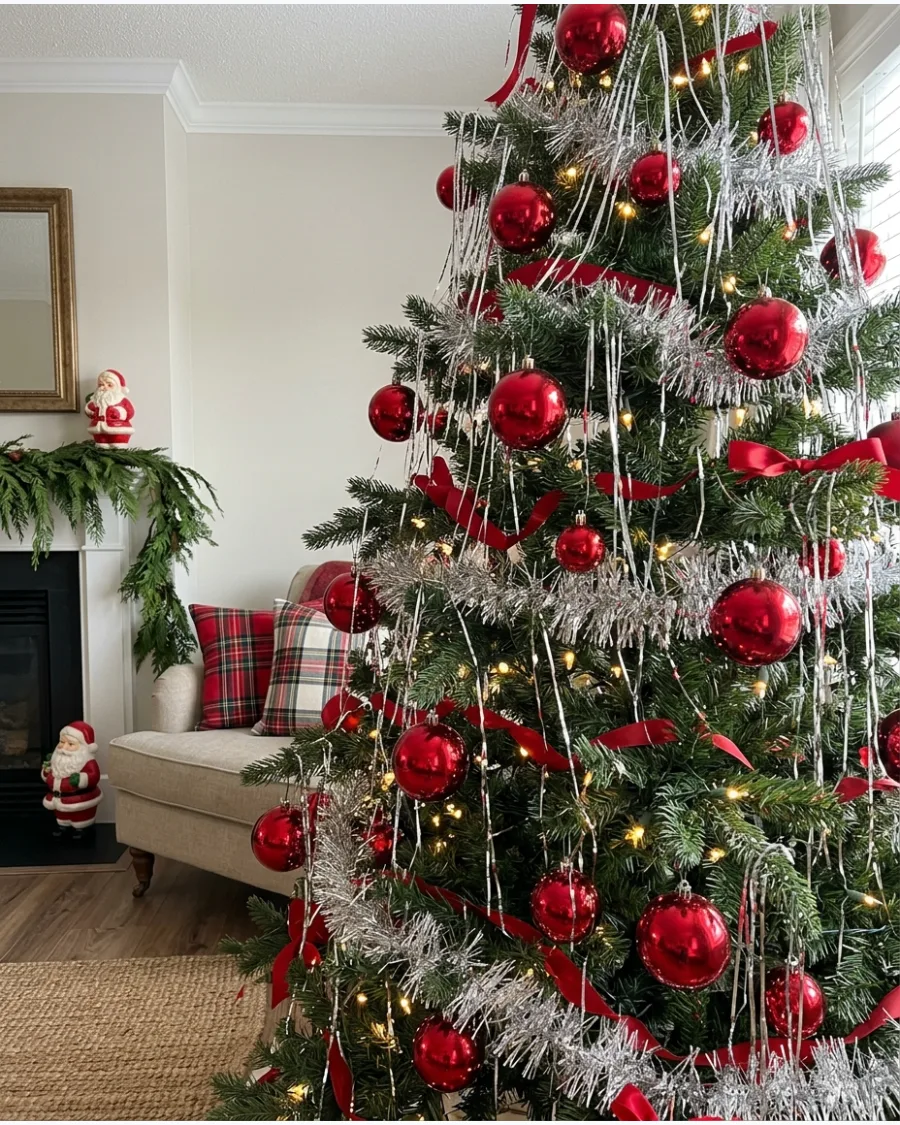
Use silver icicle tinsel as a shimmering background for classic glossy red ornaments. This simple two-tone palette is timeless and looks high-end with very little effort.
Space the red ornaments evenly before adding the tinsel to ensure the color is balanced across the tree.
- Use different finishes of red, like matte and shiny, to add interest.
- Add a simple red tree skirt to ground the design and repeat the color.
- Stick to cool white lights to enhance the icy shimmer of the silver.
Best shortcut: Buy your tinsel in bulk for this look, as it benefits from a dense and lush application behind the ornaments.
10. Heavily Tinselled Vintage Christmas Tree
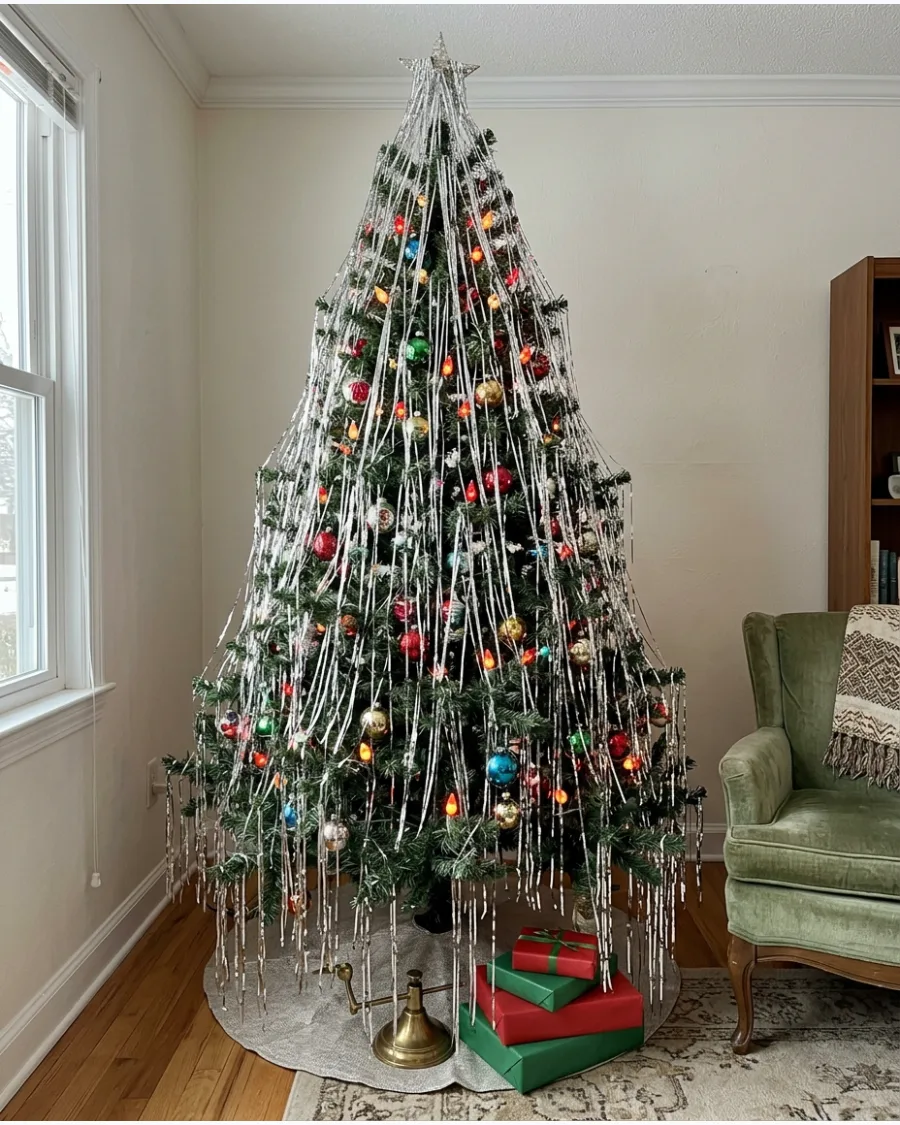
Cover branches with generous amounts of loose silver tinsel until the tree nearly disappears under the sparkle. This bold choice creates a magical, frozen look that feels very nostalgic.
Apply the tinsel in layers, starting from the inner branches and moving outward for maximum volume.
- This style requires at least 10-15 packs of tinsel for a standard 7-foot tree.
- Keep the floor area clear for easy tinsel cleanup during the application.
- Use a heavy-duty tree stand to support the weight of a heavily decorated tree.
Quick win: Use a handheld vacuum with a hose attachment to quickly pick up stray tinsel from the floor without tangling the brush roll.
Silver and White Tinsel Christmas Trees
11. Elegant Silver Tinsel Christmas Tree
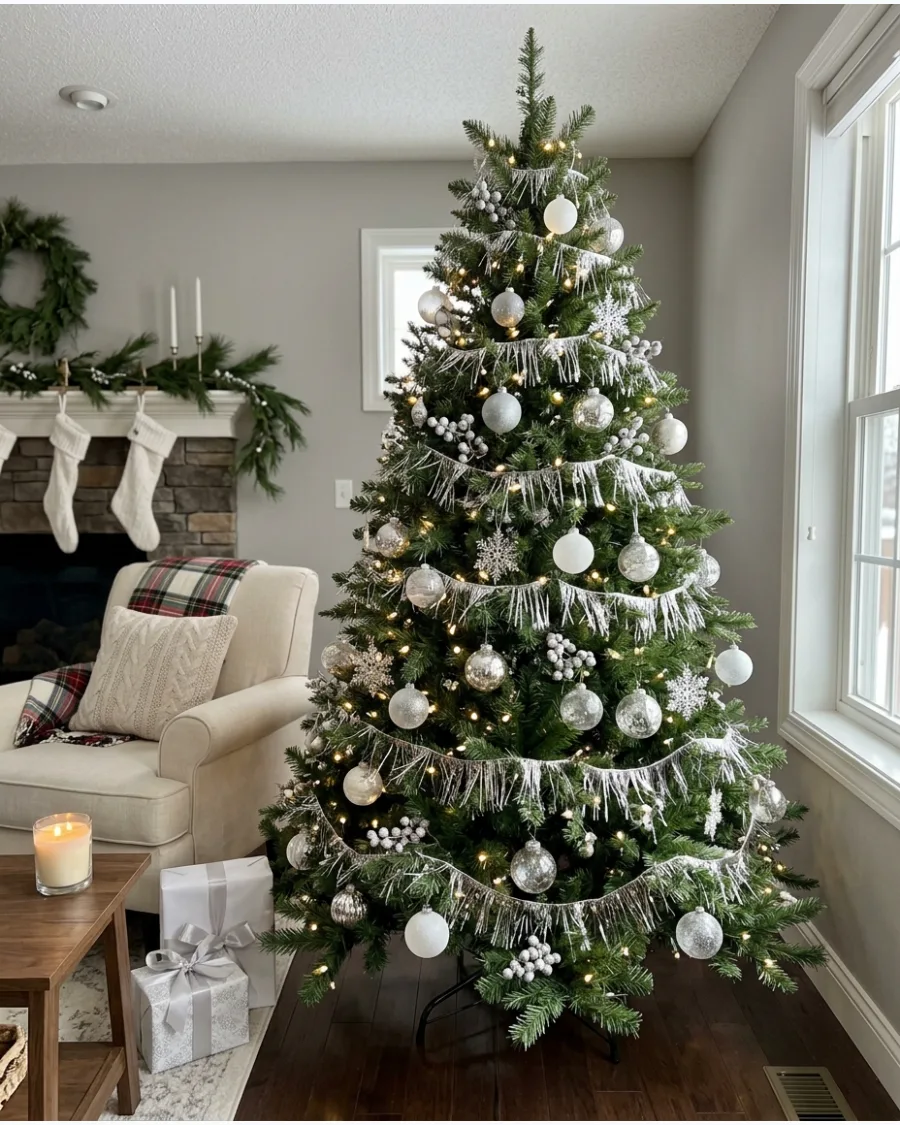
Combine fine silver tinsel with a palette of white and clear glass ornaments on a natural green tree. This setup uses soft white lights to create a polished look where the metallic strands catch the glow without hiding the ornaments.
Space the strands about two inches apart to ensure the green needles and glass ornaments still peek through the metallic layers. It creates a sophisticated shimmer that feels intentional and high-end.
- Standard silver tinsel costs under ten dollars per pack.
- Hang strands one by one rather than in clumps to avoid tangles.
- Swap white ornaments for navy blue to create a moodier winter look.
Quick win: Use a pair of tweezers to place tinsel on the very inner branches for extra depth.
12. Silver Icicle Tinsel Christmas Tree
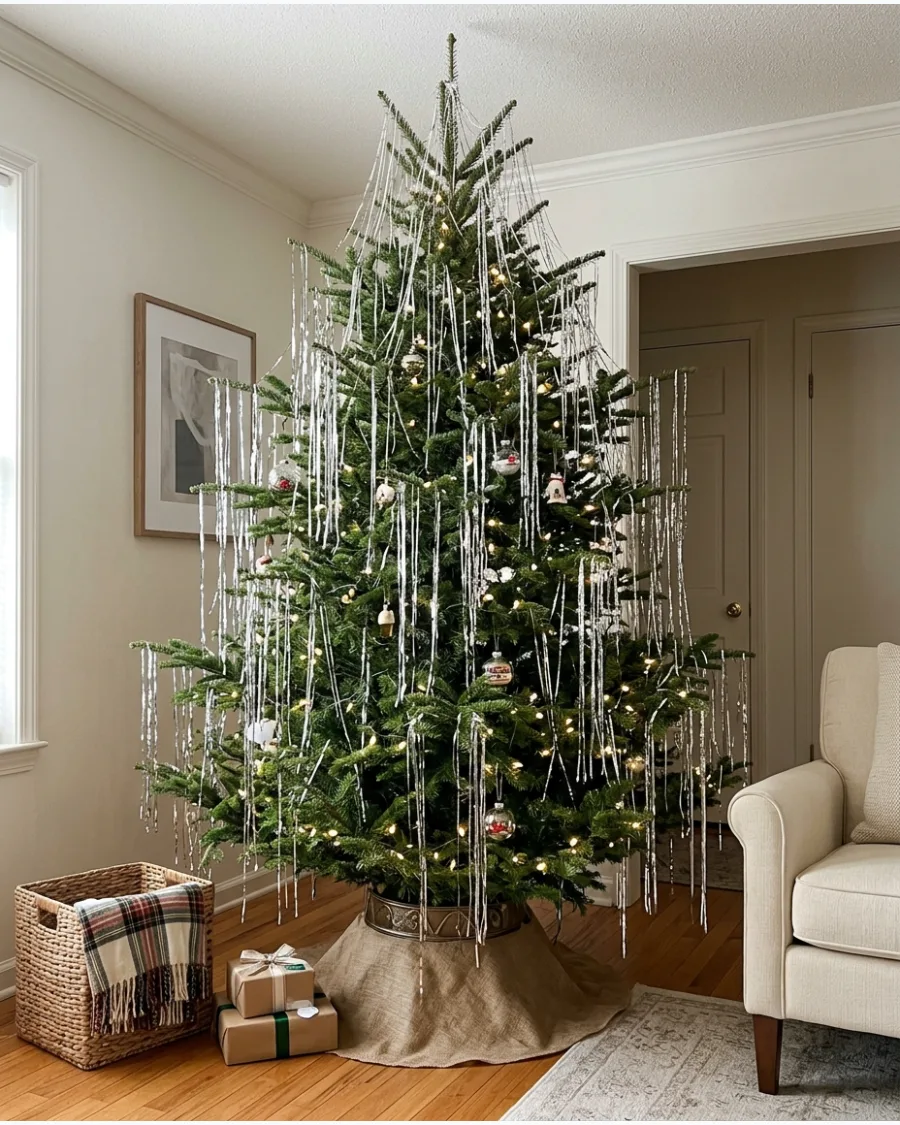
Hang extra-long silver tinsel vertically from the outer branches to mimic the look of falling icicles. This technique leaves plenty of green visible between the strands so the tree stays airy and dimensional.
Apply the longest tinsel strands only to the very tips of the sturdiest branches so they hang perfectly straight without snagging on lower limbs. It gives the tree a verticality that makes standard ceilings feel taller.
- Look for eighteen-inch tinsel packs for the best icicle effect.
- Focus on the outer two inches of each branch to maximize the hang.
- Use this on slim or pencil trees to emphasize their height.
Most people skip this: Static electricity makes tinsel stick to your hands; rub a dryer sheet on your fingers before starting.
13. Silver and White Christmas Tree With Tinsel
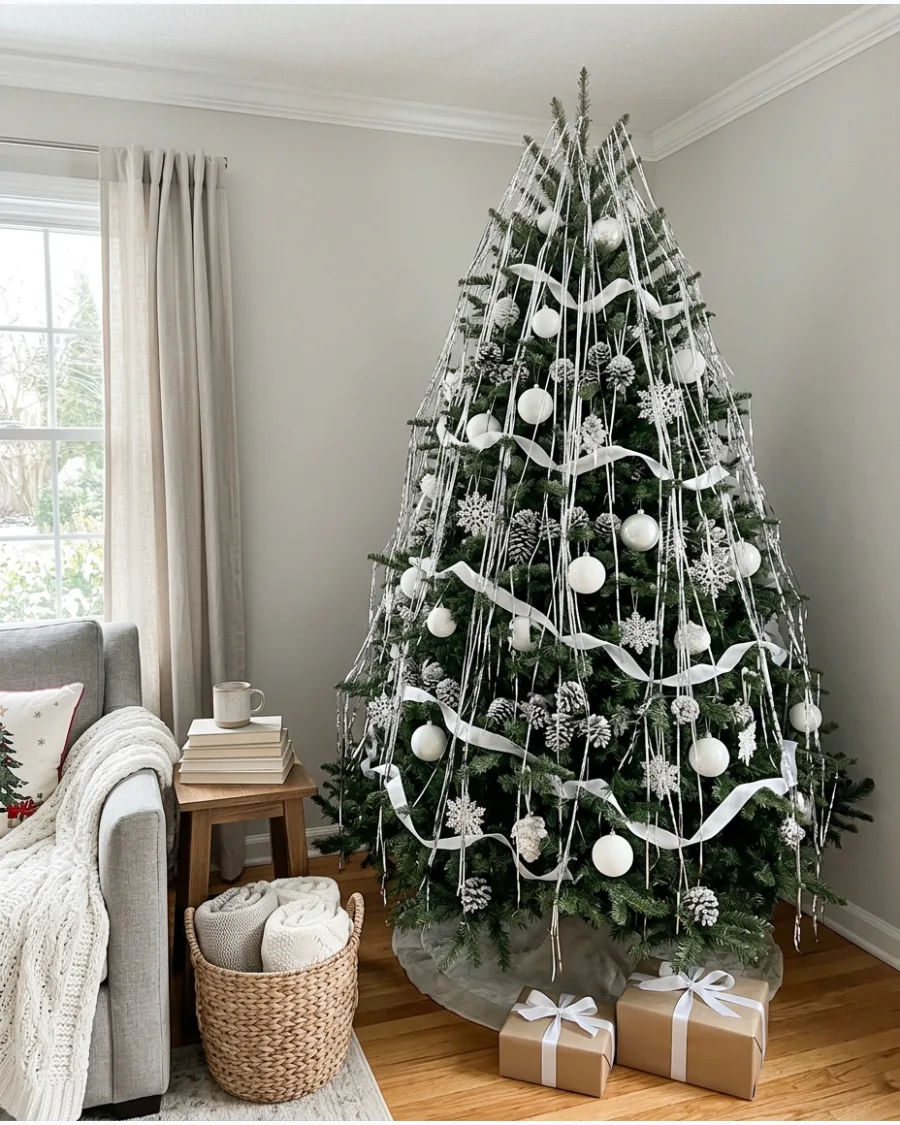
Pair silver tinsel with white ornaments, snowflakes, and frosted decorations for a monochromatic winter theme. The limited color palette emphasizes the reflective quality of the metallic strands against the flat white surfaces.
Tuck white silk ribbons deep into the branches before hanging the tinsel to create a layered backdrop that makes the silver strands pop. This combination works best on trees with high-density branches.
- Budget for three to four packs of tinsel for a seven-foot tree.
- Layer the white ornaments first, then add tinsel as the final step.
- Add silver glittered pinecones to bridge the gap between white and metallic.
Best shortcut: Use cool-toned LED lights to make the silver and white appear crisp rather than yellow.
14. Snowy Flocked Tree With Silver Tinsel
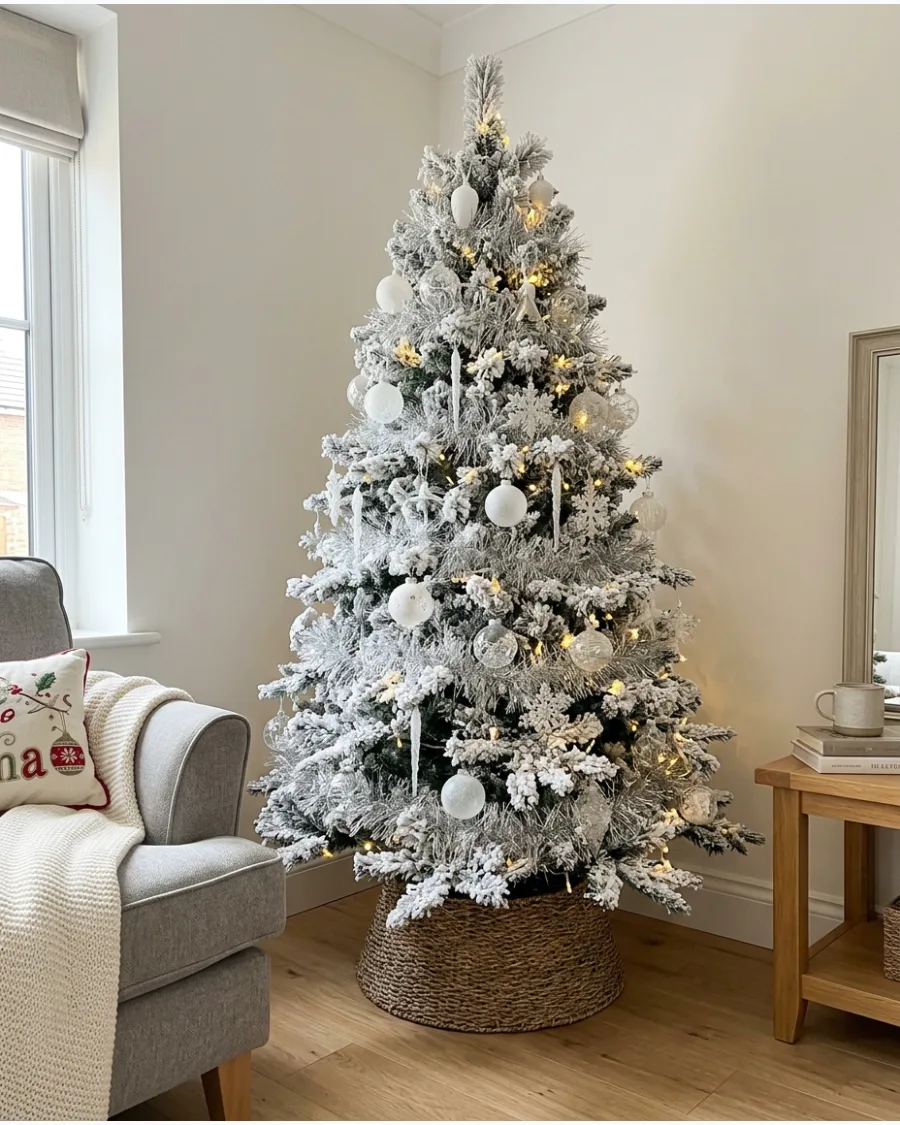
Add delicate silver tinsel to a flocked Christmas tree so it blends with the artificial snow while providing extra shimmer. The tinsel catches the light that the matte flocking usually absorbs.
Choose tinsel with a matte or brushed finish to complement the soft texture of the artificial snow without creating harsh glares. This creates a soft, ethereal look that feels very cohesive.
- Apply tinsel sparingly to avoid covering the beautiful flocking texture.
- Drape strands over the snowy 'clumps' for a natural frozen look.
- Works perfectly for coastal or modern farmhouse holiday styles.
Quick win: Use a handheld steamer near the tinsel (not on it) to help the strands hang flatter against the flocking.
15. Silver Tinsel and Crystal Ornament Tree
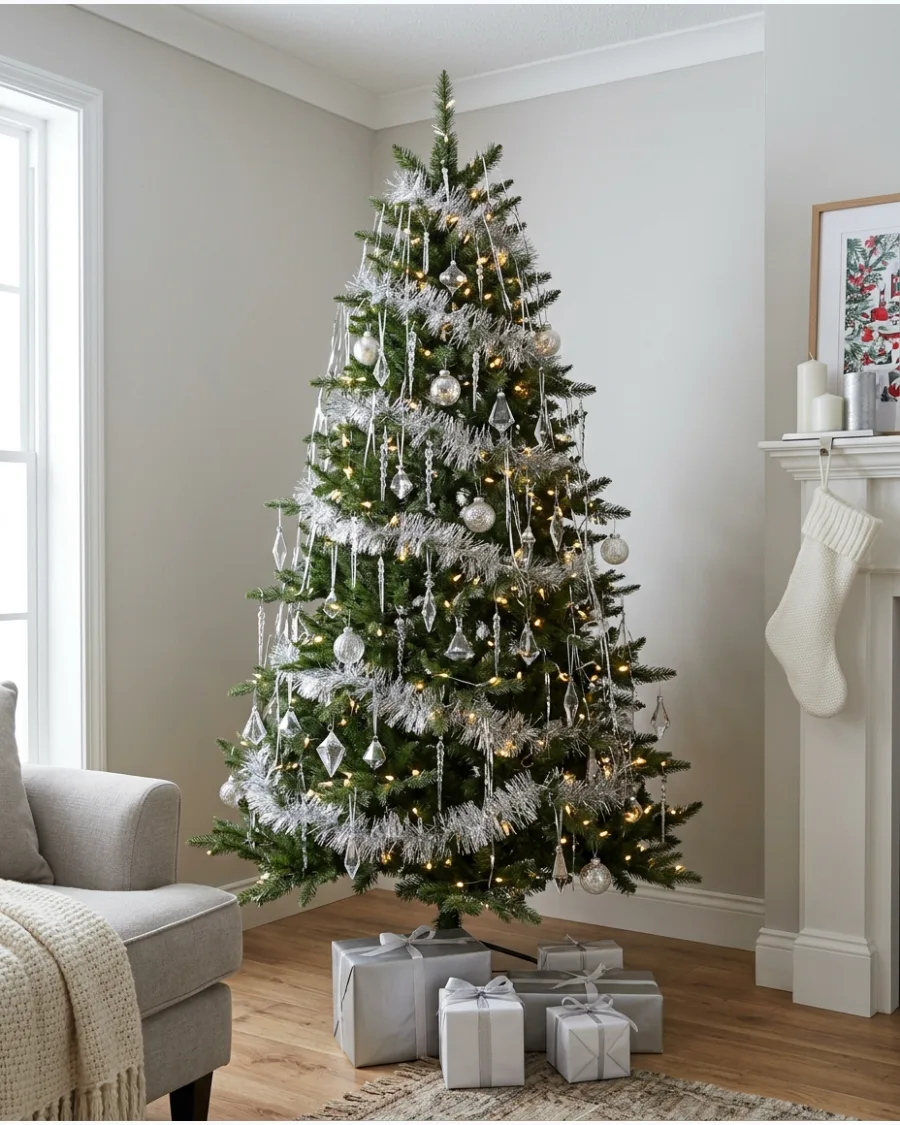
Combine individual silver strands with clear acrylic or glass ornaments that resemble crystals and icicles. White lights reflecting through both materials create an especially luminous tree once the sun goes down.
Hang crystal icicles at different depths within the tree so the tinsel reflects light through the facets from multiple angles. This turns the tree into a light fixture for the room.
- Crystal ornaments are heavier, so place them on thicker branches.
- Position lights directly behind the crystals for maximum sparkle.
- Use clear fishing line to hang crystals if the included hooks are too bulky.
Most people skip this: Clean your crystal ornaments with a microfiber cloth before hanging to remove fingerprints that dull the glow.
16. Silver Tinsel and Disco Ball Christmas Tree
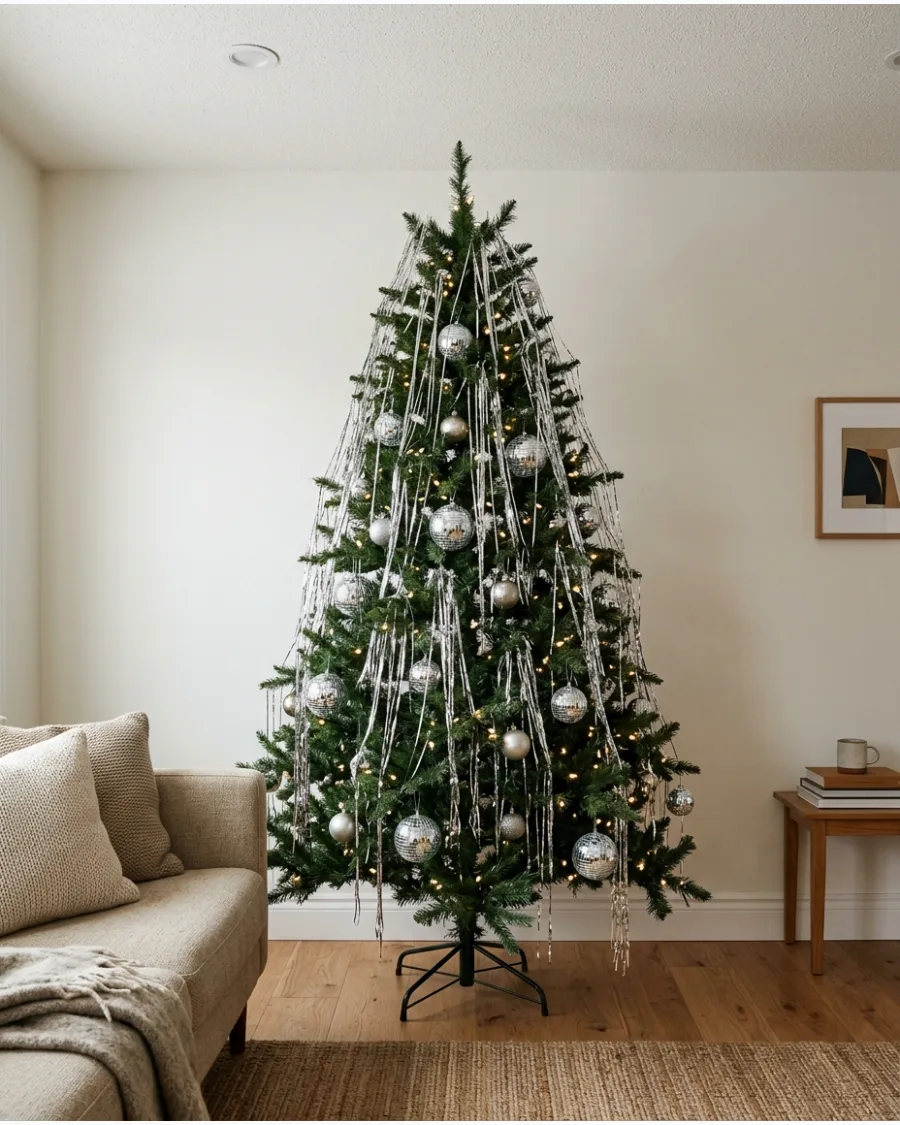
Mix cascading silver tinsel with small mirrored disco-ball ornaments for a high-energy, festive look. Keep the rest of the decorations minimal so the reflected light and metallic texture remain the main focus.
Position several small disco ball ornaments near the center of the tree to bounce light outward through the curtain of tinsel. It creates a dynamic light show on the walls of the living room.
- Buy disco balls in varying sizes from one to four inches for variety.
- Use a revolving tree stand to make the light reflections move around the room.
- Great for New Year's Eve parties or modern apartment setups.
Best shortcut: Use a small spotlight at the base of the tree aimed upward to hit the disco balls and tinsel simultaneously.
17. Minimal Silver Tinsel Christmas Tree
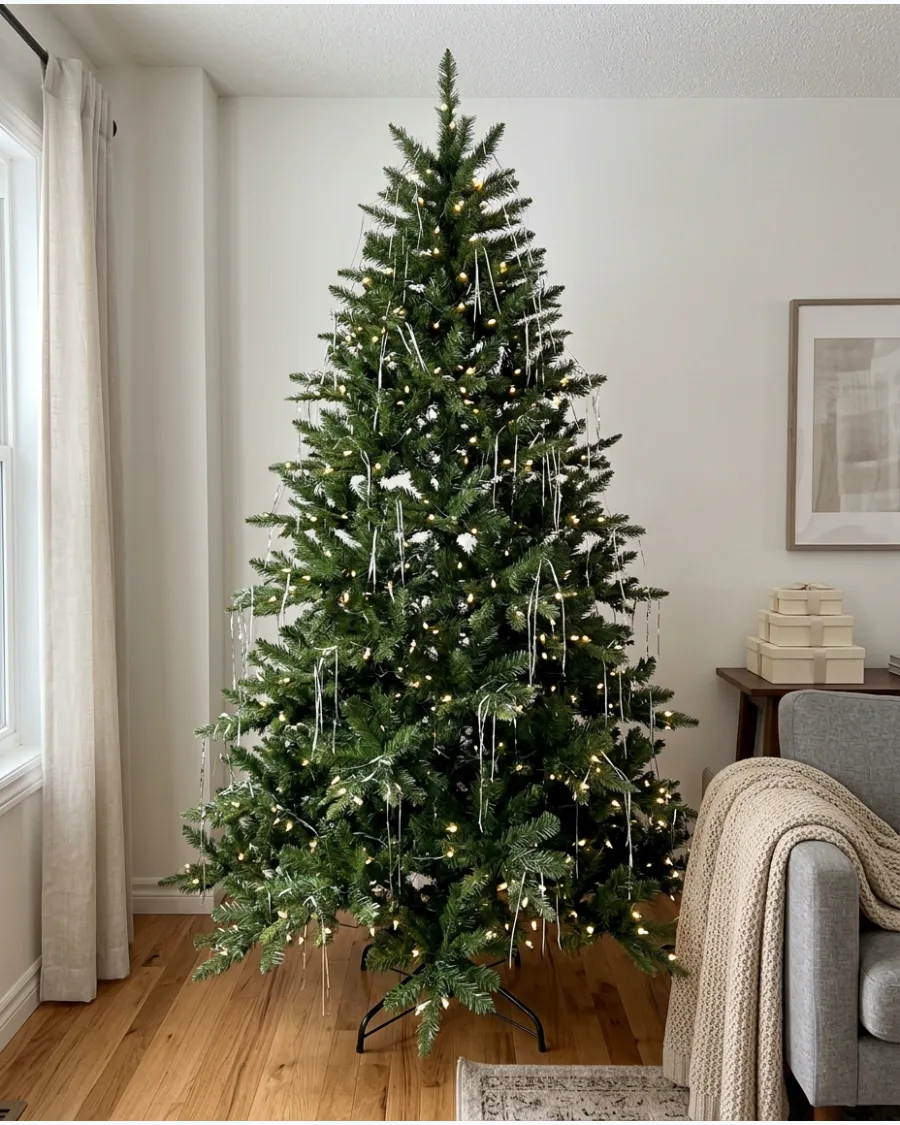
Decorate a simple green tree using only white lights and small amounts of silver lametta for a restrained look. This approach avoids the cluttered feel of traditional tinsel applications.
Apply just three to five strands of tinsel per branch tip to keep the look modern and prevent the tree from looking cluttered. It highlights the natural shape of the tree while adding a touch of holiday spirit.
- Takes less than thirty minutes to decorate a full-sized tree.
- Concentrate the tinsel in the middle third of the tree for visual balance.
- Perfect for small spaces where a heavily decorated tree would feel overwhelming.
Quick win: Use a spray bottle of water to lightly mist the tree before applying tinsel to help the strands stay exactly where you place them.
18. Silver Tinsel Waterfall Christmas Tree
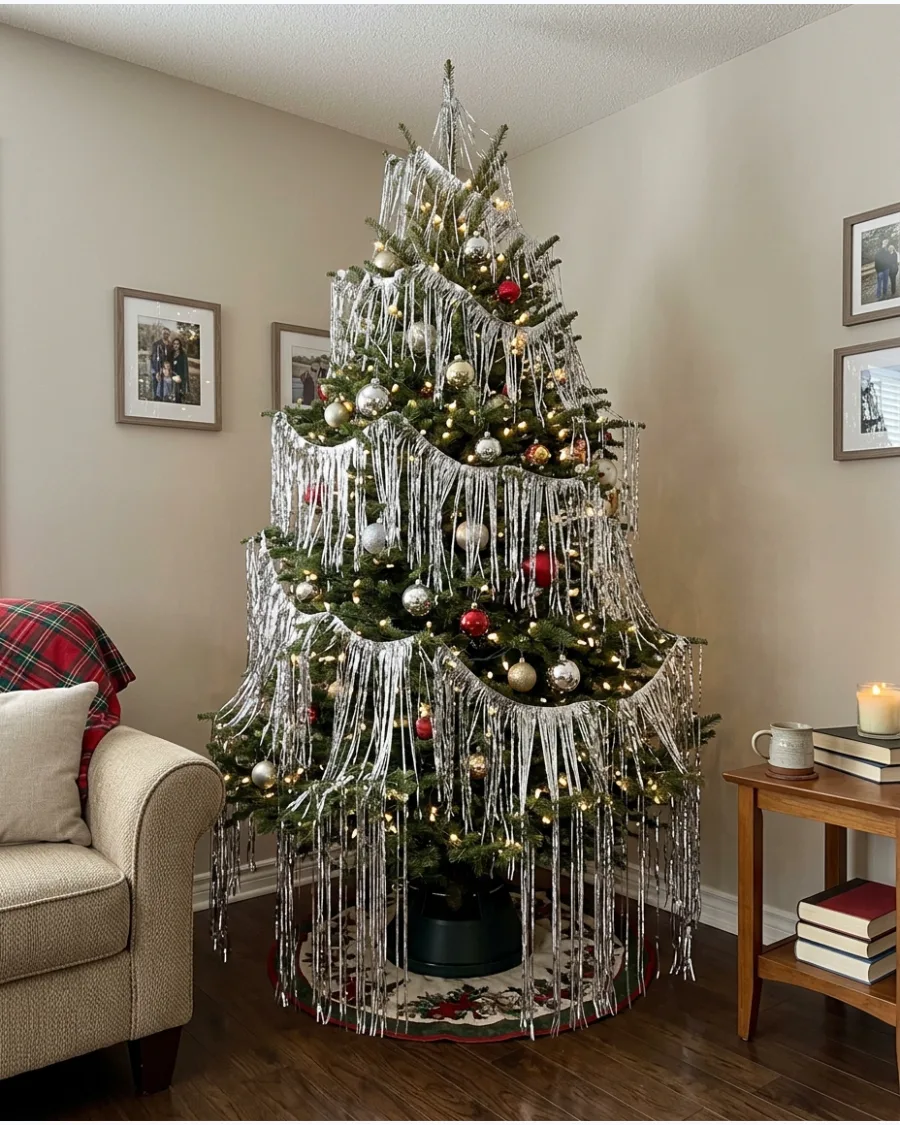
Start with shorter tinsel strands near the top and gradually use longer strands toward the lower branches to create a cascading effect. This makes the tinsel feel like a design choice rather than a random addition.
Trim the tinsel strands with sharp scissors as you move down the tree to ensure the transition from short to long looks smooth and intentional. This technique gives the tree a beautiful, flowing silhouette.
- Buy one pack of standard tinsel and one pack of extra-long tinsel.
- Work in horizontal layers around the tree to keep the lengths consistent.
- Use this method on artificial trees with perfectly symmetrical branches.
Most people skip this: Stand back every five minutes to check the 'flow' of the waterfall and adjust any strands that look too short.
Gold and Warm Metallic Tinsel Trees
19. Gold Tinsel Christmas Tree
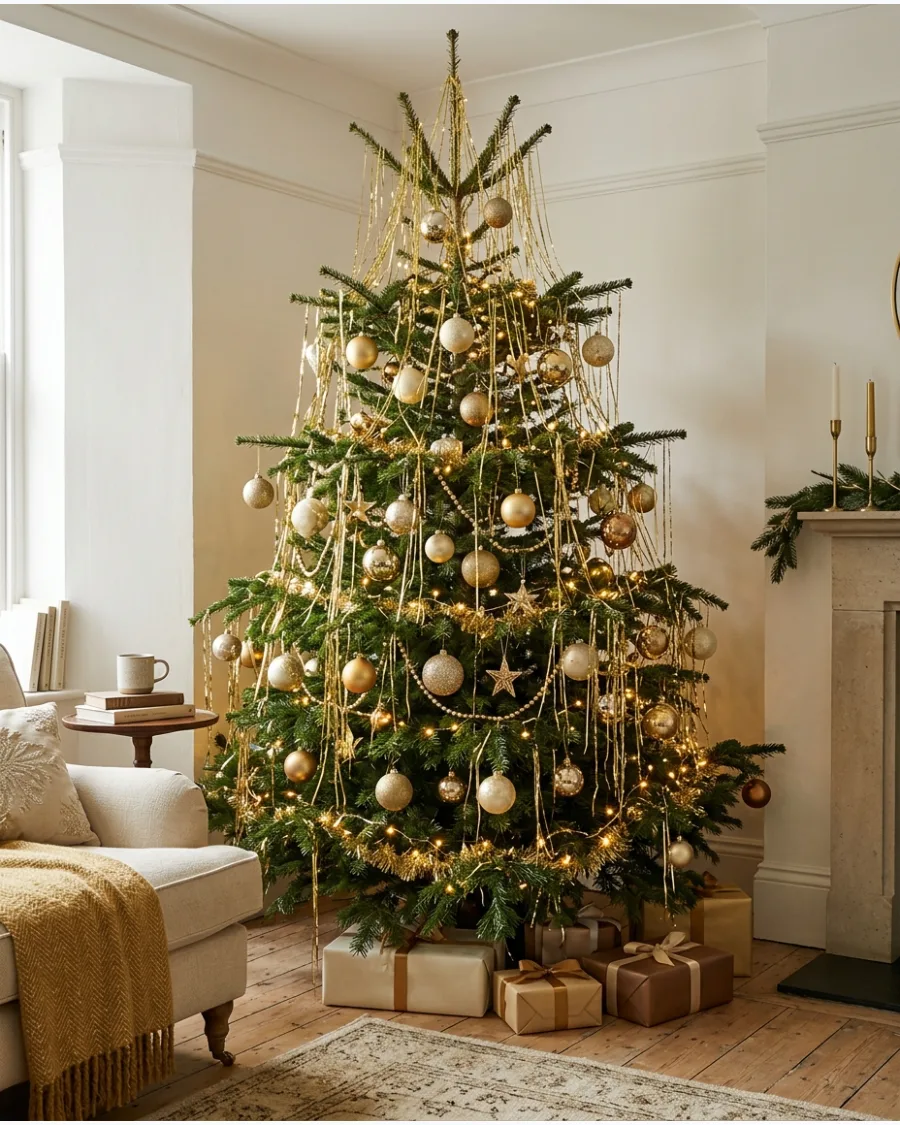
Drape fine gold tinsel throughout a traditional green tree and pair it with warm white lights for a classic glow. Adding gold, cream, and champagne ornaments creates a rich, monochromatic metallic look.
Layer different shades of gold ornaments like champagne and matte bronze to give the tree depth underneath the shimmering gold tinsel. The warm tones make the living room feel cozy and inviting.
- Gold tinsel works best with warm-toned (2700K) LED lights.
- Mix matte and shiny gold ornaments to prevent the tree from looking flat.
- Pairs beautifully with wood floors and warm leather furniture.
Best shortcut: Use gold wire ornament hooks so they disappear into the gold tinsel backdrop.
20. Gold Tinsel and Red Christmas Tree
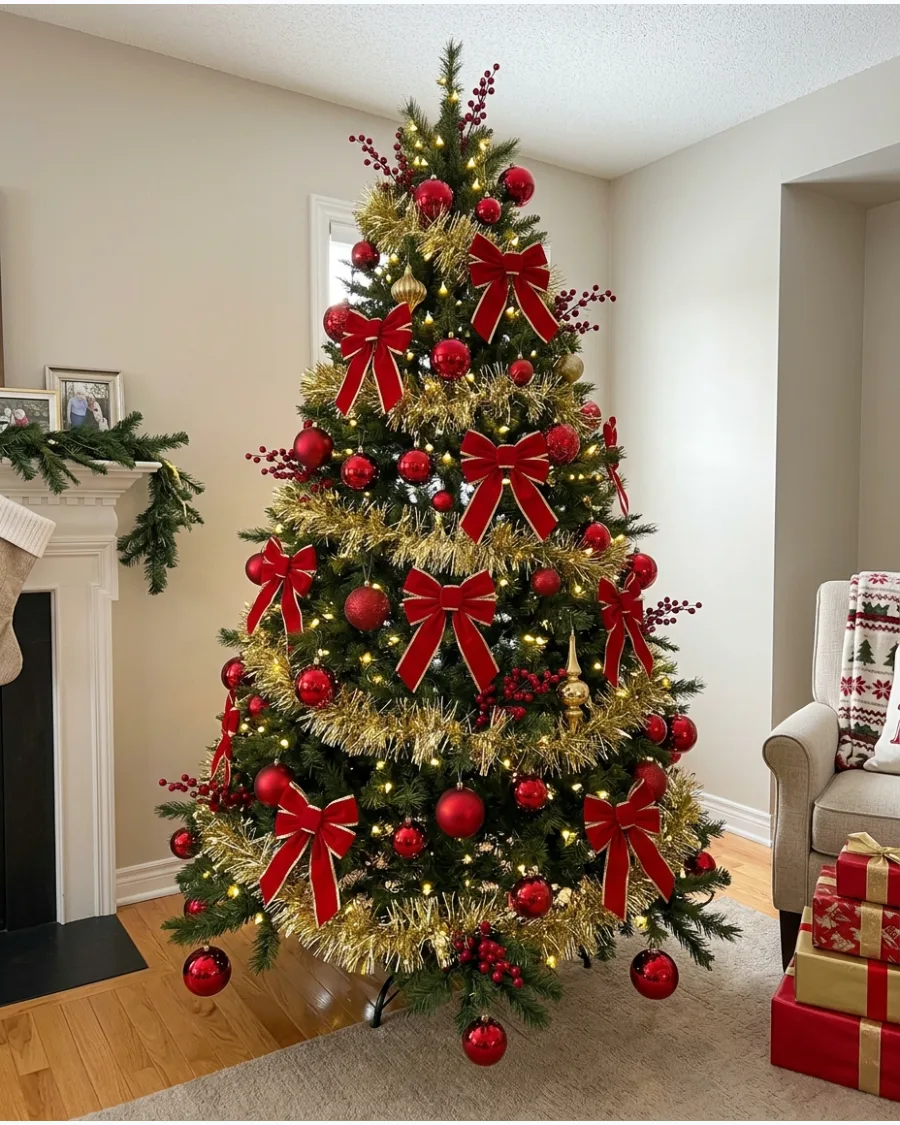
Combine gold tinsel with glossy red ornaments and red velvet bows for a traditional, luxurious palette. The red provides a bold anchor for the light, airy gold strands.
Place large red velvet bows at the base of the branches to provide a heavy, dark contrast to the light, airy gold tinsel strands. This look is timeless and works in almost any residential setting.
- Use deep burgundy red for a more sophisticated, mature look.
- Space the red ornaments evenly before adding the gold tinsel.
- Add a gold star topper to tie the metallic theme together at the peak.
Quick win: Spritz the red velvet bows with a little hairspray to help them hold their shape against the weight of the tinsel.
21. Champagne Gold Tinsel Christmas Tree
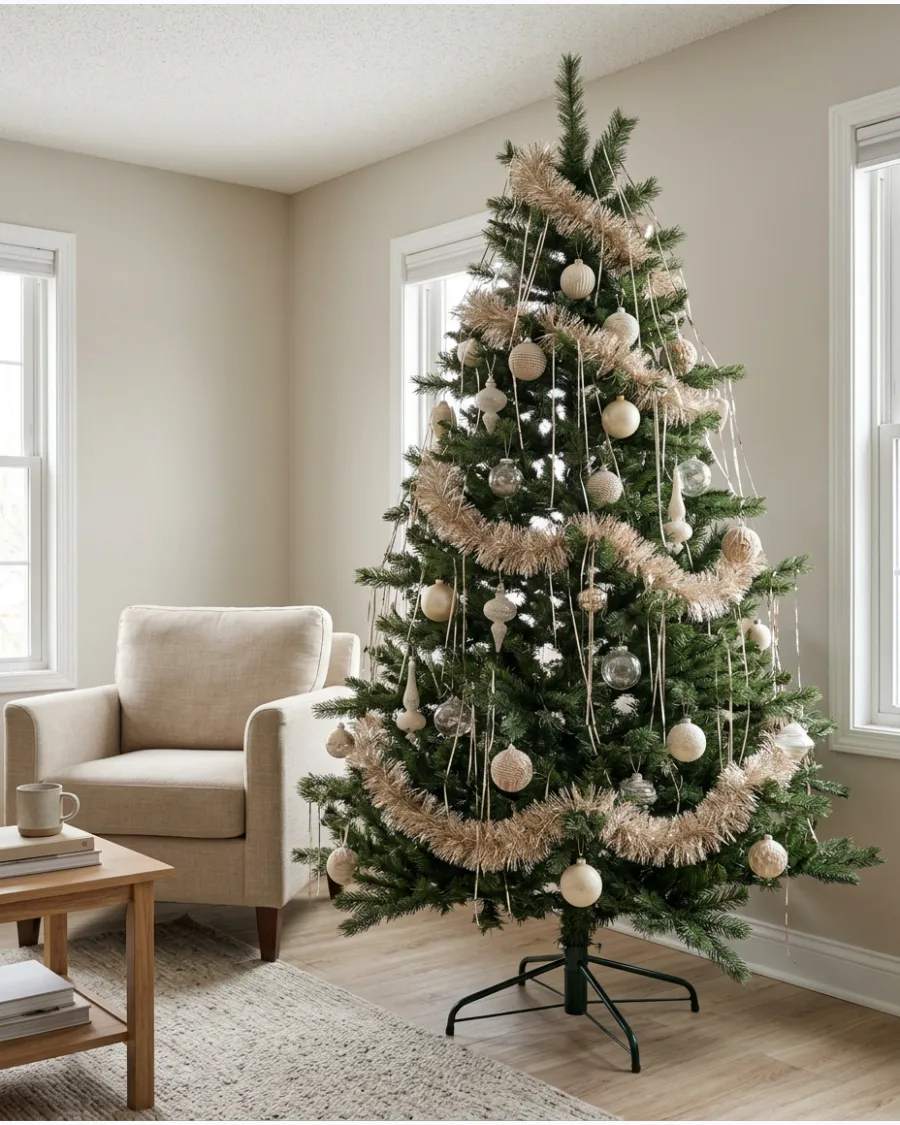
Champagne tinsel offers a softer, more sophisticated look than traditional bright yellow gold. This muted metallic pairs perfectly with ivory, beige, and clear glass ornaments for a high-end feel.
Hang champagne tinsel in clusters near the lights to create a soft, diffused glow that brightens the neutral ornaments. This approach keeps the tree looking curated and modern rather than overly flashy.
- Sourcing: Look for 'champagne' or 'pale gold' lametta packs.
- Setup: Place clear glass ornaments deep in the branches to catch the tinsel's reflection.
- Adaptation: Use this on a white flocked tree for an ultra-clean, monochromatic look.
Quick win: Mix in a few strands of silver tinsel to add extra dimension without losing the champagne warmth.
22. Gold Lametta and Velvet Ribbon Tree
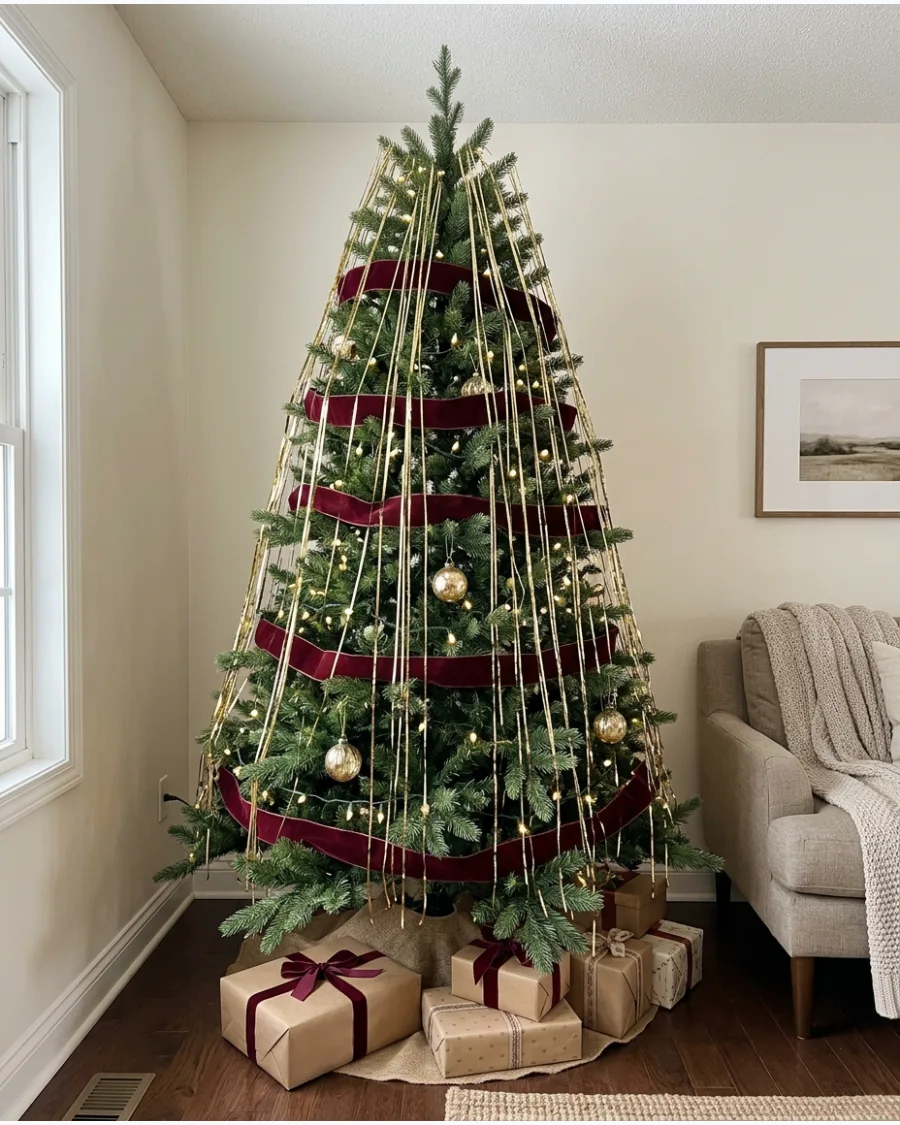
The contrast between shiny metallic strands and matte fabric creates a rich, textured appearance. Deep burgundy or forest green velvet ribbons provide a heavy, luxurious base that anchors the light tinsel.
Drape thick velvet ribbon vertically down the tree before adding individual gold lametta strands on top of the loops. The tinsel will catch the light while the velvet absorbs it, adding depth to the greenery.
- Sourcing: Buy 2-inch wide velvet ribbon on spools for the best visual impact.
- Setup: Secure the ribbon at the top of the tree and let it cascade naturally before adding tinsel.
- Adaptation: Use brown or navy velvet for a more masculine or moody holiday palette.
Most people skip this: Iron the velvet ribbon before hanging to ensure it drapes smoothly without unsightly fold lines.
23. Rose Gold Tinsel Christmas Tree
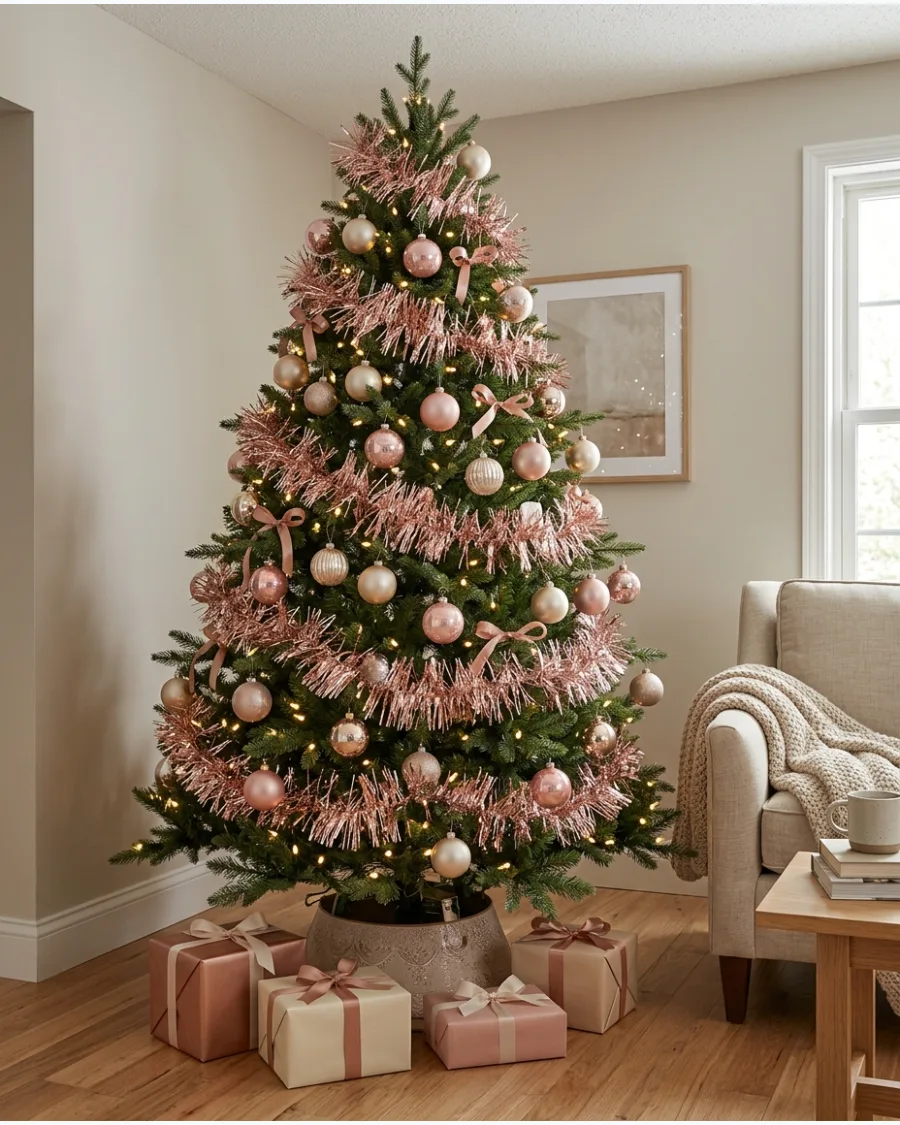
Rose gold provides a trendy, warm alternative to traditional metals that feels both feminine and festive. Pairing it with blush ornaments and champagne baubles creates a cohesive, warm-toned display.
Intersperse matte blush baubles with shiny rose gold tinsel to keep the tree from looking like a solid block of metal. Using warm white lights instead of cool ones will enhance the pinkish-gold tones of the tinsel.
- Sourcing: Search for 'rose gold icicle tinsel' for the finest strands.
- Setup: Layer the tinsel more heavily toward the bottom of the tree to create a weighted look.
- Adaptation: Add copper accents to lean into a more industrial or earthy rose gold theme.
Best shortcut: Use copper-wired fairy lights to blend seamlessly into the rose gold tinsel strands.
24. Copper Tinsel Christmas Tree

Copper tinsel has an earthy, warm glow that feels more grounded than bright gold or silver. It works beautifully with brown, amber, and bronze ornaments for a sophisticated autumnal-to-winter transition.
Pair copper tinsel with unpainted wooden bead garlands to ground the metallic shine with natural textures. The result is a cozy, glowy tree that feels warm even when the lights are off.
- Sourcing: Copper lametta is often available in 'antique' or 'burnished' finishes.
- Setup: Focus copper tinsel on the outer two inches of the branches for maximum light reflection.
- Adaptation: Add cream-colored ornaments to brighten the overall look if the copper feels too dark.
Quick win: Use ornaments with a mercury glass finish to mimic the mottled, rustic look of aged copper.
25. Gold and Silver Mixed Tinsel Christmas Tree
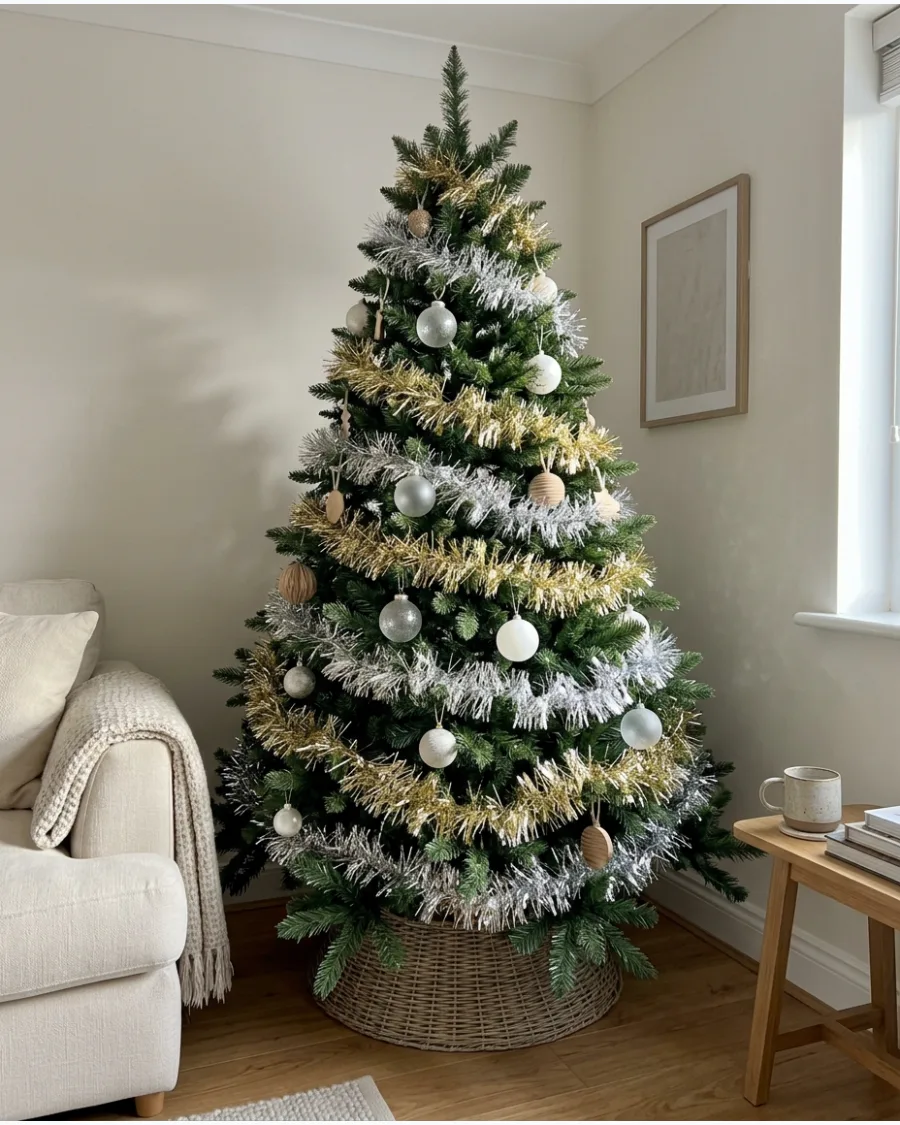
Mixing metals is a great way to add visual interest and break away from a rigid color scheme. By layering both gold and silver, the tree gains a multi-dimensional sparkle that works with almost any ornament style.
Apply gold and silver tinsel in alternating small batches to ensure the mixed metal look is evenly distributed across the tree. Keep the ornaments neutral, like white or clear glass, to let the metal mix take center stage.
- Sourcing: Purchase equal amounts of gold and silver lametta packs.
- Setup: Mix the strands together in your hand before applying to the tree for a more blended look.
- Adaptation: Use this technique to bridge the gap between silver tinsel and gold-toned warm white lights.
Most people skip this: Use a mix of shiny silver and matte gold tinsel to add even more texture to the metallic layer.
26. Brass and Antique Gold Tinsel Tree
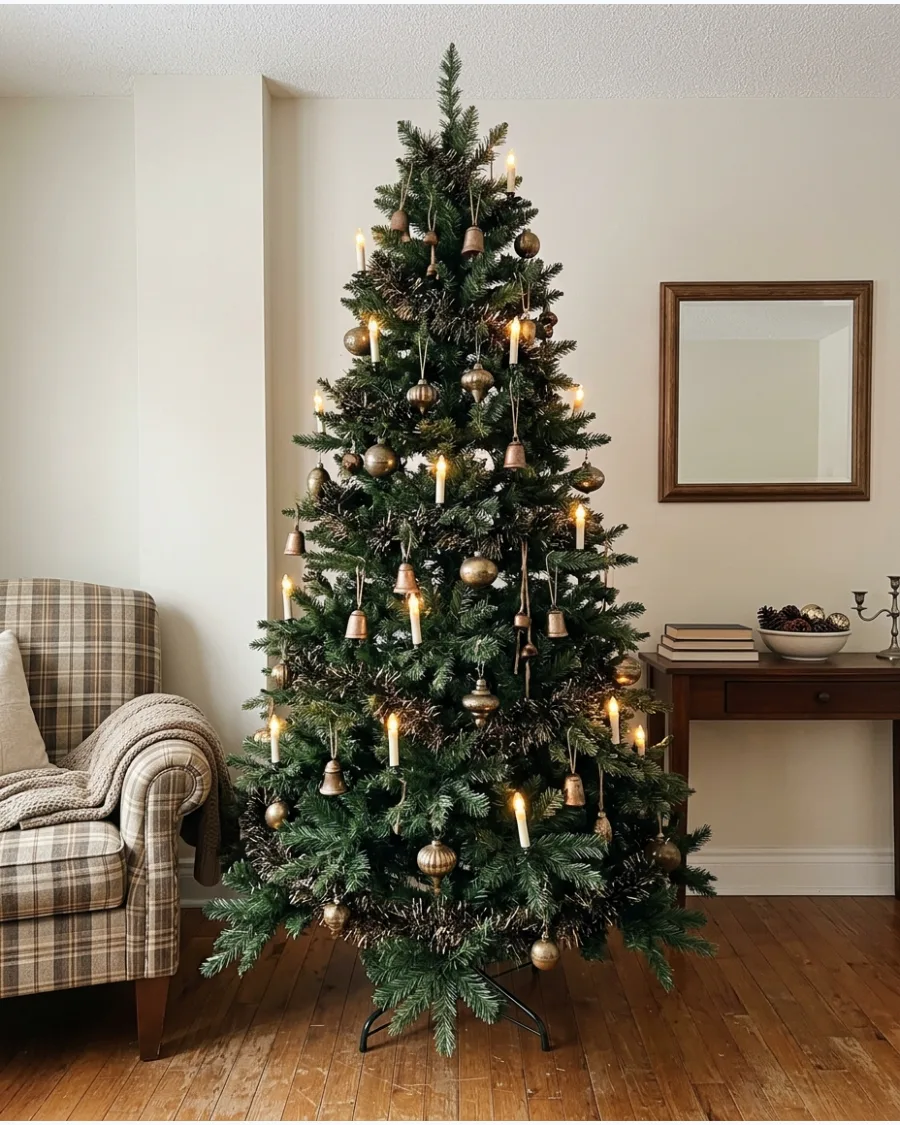
Antique gold has a deeper, more bronze-like quality that feels heritage-inspired and classic. This style looks best when paired with aged brass bells and traditional candle-style LED lights.
Clip battery-operated candle lights to the branch tips to highlight the deeper, muted tones of antique gold tinsel. It creates a quiet, elegant shimmer rather than a bright, distracting glare.
- Sourcing: Look for tinsel labeled 'antique gold,' 'old gold,' or 'bronze.'
- Setup: Drape tinsel loosely so it moves slightly with the air in the room.
- Adaptation: Pair with dried orange slices and cinnamon sticks for a Victorian-inspired aesthetic.
Best shortcut: Use brass ornament hooks instead of green plastic ones to match the antique metal theme.
Colorful Christmas Tree Tinsel
27. Red Tinsel Christmas Tree
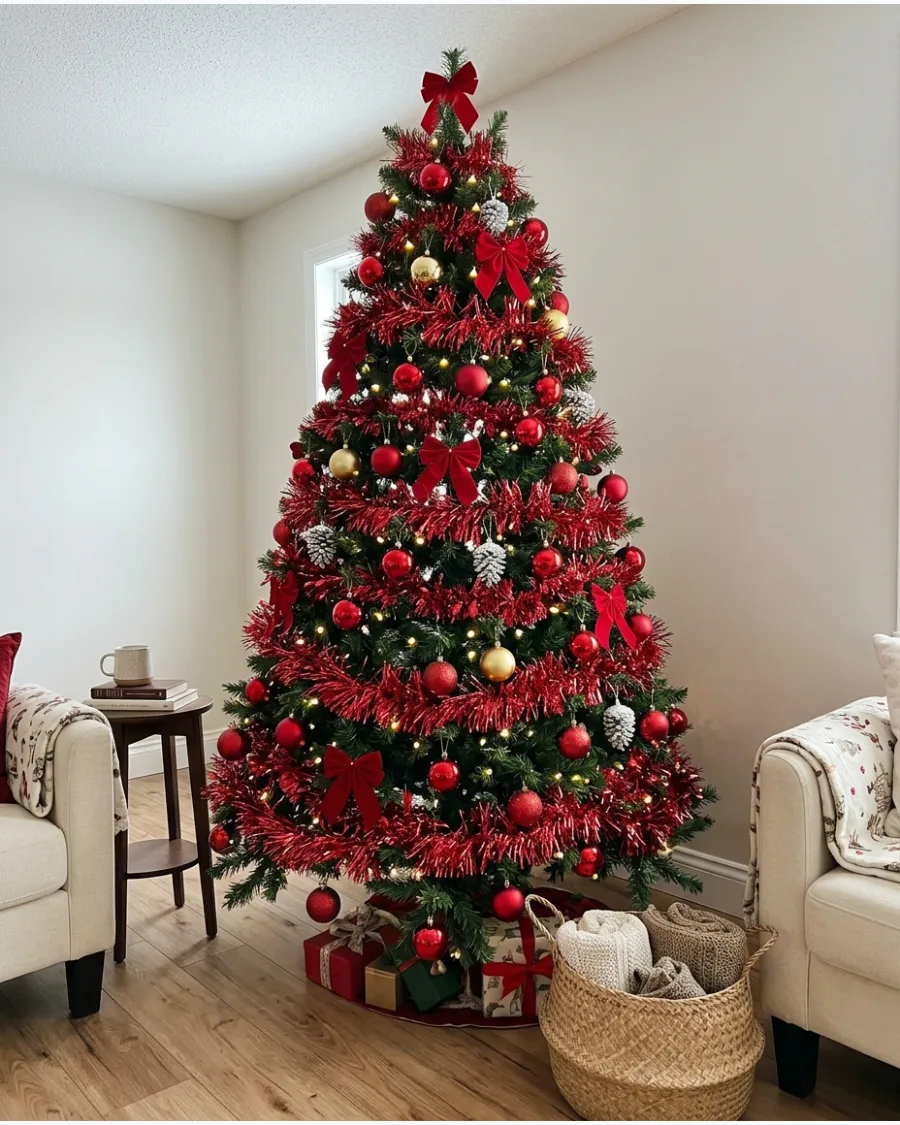
Red tinsel on a green tree is a bold, high-contrast choice that feels intensely festive. To keep it from looking flat, mix in varying shades of red and a few white or gold accents for relief.
Mix red tinsel with white snowflake ornaments to provide a crisp visual break from the saturated red color palette. The white elements will act as a canvas for the red tinsel to pop against.
- Sourcing: Ensure the red tinsel is 'colorfast' so it doesn't bleed onto light-colored ornaments.
- Setup: Place red lights behind the red tinsel for a glowing, monochromatic effect.
- Adaptation: Use this on a black tree for a modern, dramatic 'goth-mas' look.
Quick win: Use red tinsel specifically on the middle section of the tree to create a candy-cane stripe effect.
28. Green Tinsel Christmas Tree
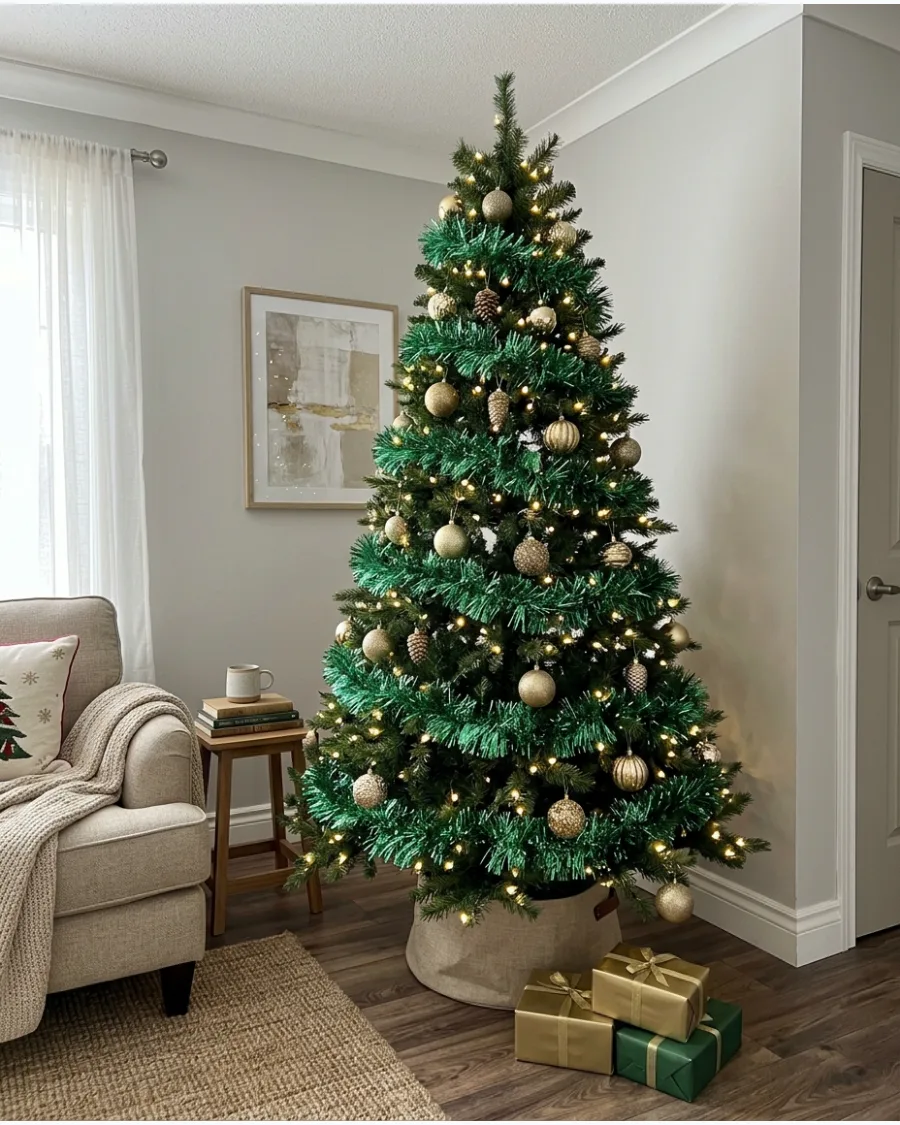
Layering green tinsel over green branches is a subtle way to add shimmer without changing the tree's natural look. The metallic strands catch the light and add a wet, dewy appearance to the needles.
Tuck emerald tinsel deep into the inner branches to add unexpected depth and shimmer that reflects the interior lights. Gold ornaments provide the perfect contrast to make the green-on-green layers stand out.
- Sourcing: Look for emerald or forest green tinsel to match your tree's needle color.
- Setup: Apply tinsel in the gaps between branches to fill out the tree's silhouette.
- Adaptation: Use light lime green tinsel on a dark tree for a bright, modern pop.
Most people skip this: Use green tinsel to hide any 'holes' in a real tree where branches might be sparse.
29. Pink Tinsel Christmas Tree
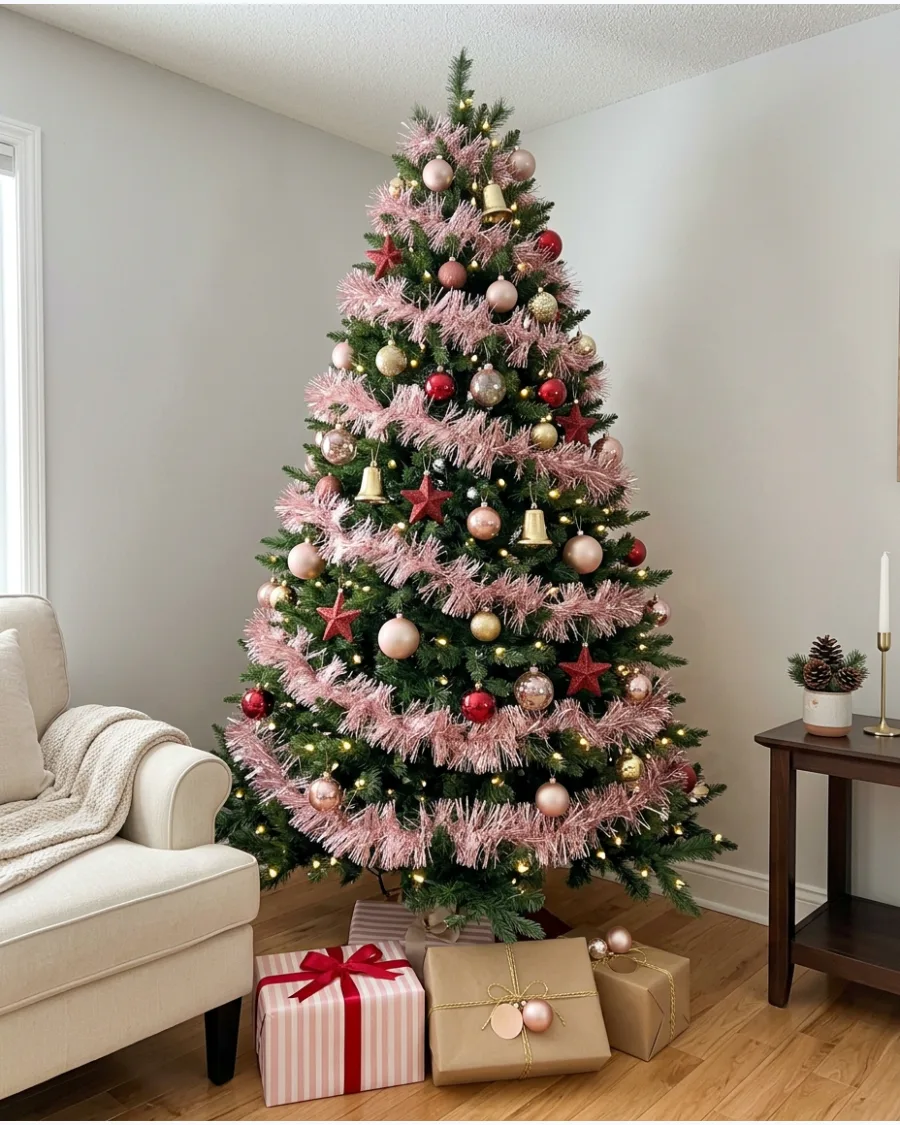
Pink tinsel is playful and works well with a variety of tree colors, from traditional green to modern white. It pairs beautifully with blush, red, and gold ornaments for a romantic or whimsical vibe.
Drape pink tinsel strands loosely over the very tips of the branches to maintain a light, airy feeling. This prevents the pink from overwhelming the other decorations on the tree.
- Sourcing: Soft pastel pink or 'blush' tinsel offers a more sophisticated look than neon pink.
- Setup: Hang tinsel after all ornaments and ribbons are in place as the final layer.
- Adaptation: Use this on a white tree with gold lights for a 'shabby chic' holiday style.
Best shortcut: Use pink tinsel only on the top half of the tree for a subtle 'dip-dyed' appearance.
30. Hot Pink and Red Tinsel Christmas Tree
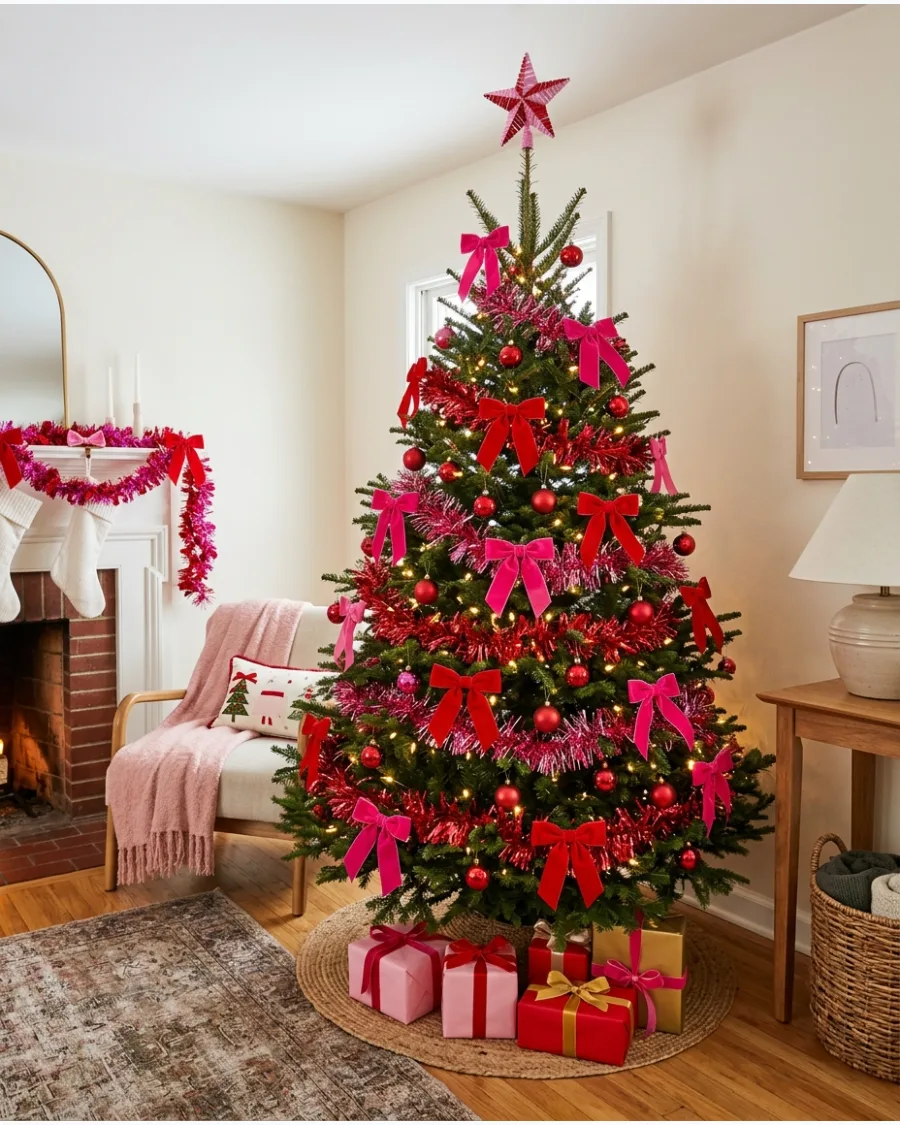
Combining hot pink and red creates a high-energy, vibrant palette that feels modern and bold. This maximalist approach works best with glossy red ornaments and soft velvet bows to balance the shimmer.
Layer hot pink tinsel specifically around glossy red ornaments to create a vibrant, high-contrast look that pops against the green needles. Warm lights help soften these bright colors so they don't feel jarring.
- Sourcing: Buy separate packs of hot pink and red lametta to control the color ratio.
- Setup: Use a 2-to-1 ratio of red to pink to keep the tree feeling grounded in traditional colors.
- Adaptation: Add orange or purple ornaments for a full multi-color 'boho' Christmas theme.
Quick win: Use matte red ornaments to let the hot pink tinsel be the main source of shine.
31. Blue Tinsel Christmas Tree
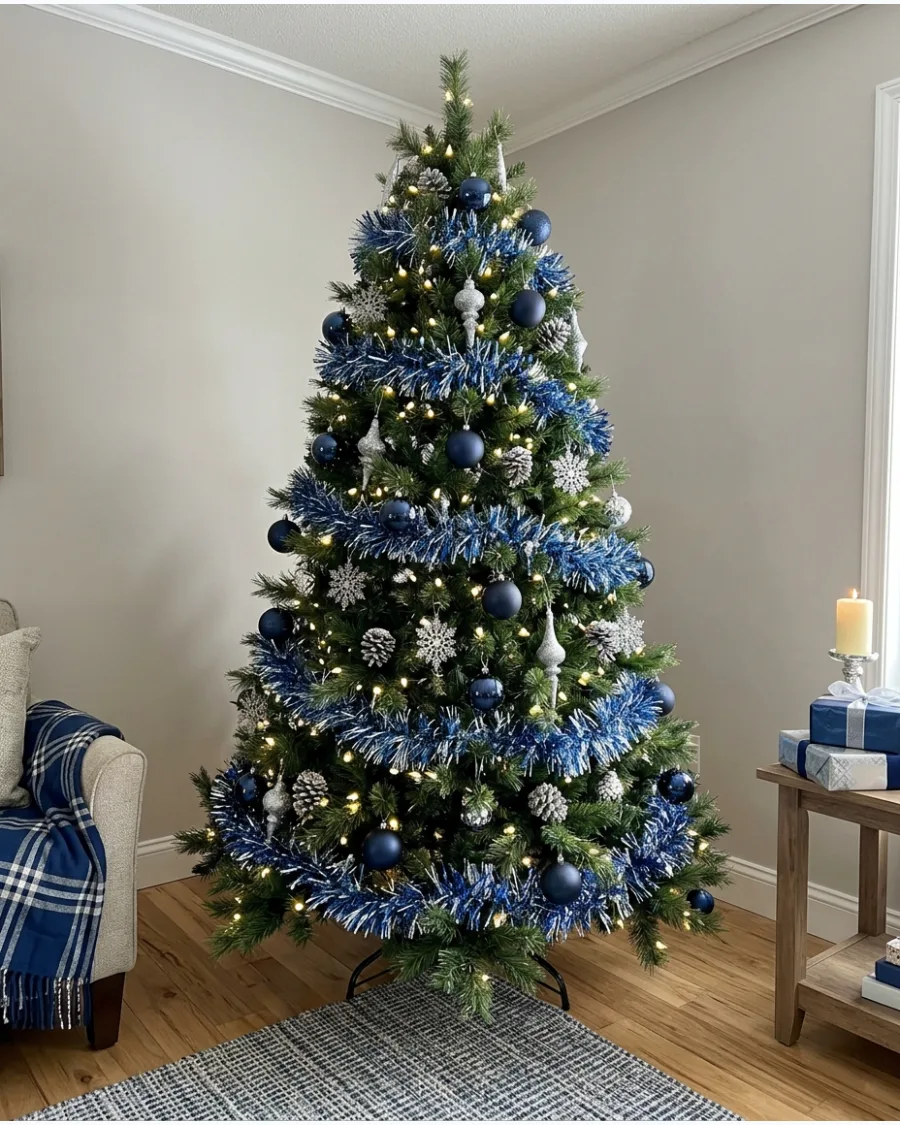
Mixing metallic blue tinsel with navy ornaments creates a sophisticated winter look. This cool-toned palette works best on a green or flocked tree with white lights.
Layer the blue strands over silver ornaments to add depth and catch the light from different angles.
- Buy tinsel in bulk to ensure full coverage on larger trees.
- Place navy ornaments deep in the branches to create a sense of depth.
- Use cool white LED lights to enhance the icy blue tones.
Most people skip this: Use silver wire to hang blue ornaments so the hardware disappears into the tinsel.
32. Turquoise Tinsel Christmas Tree
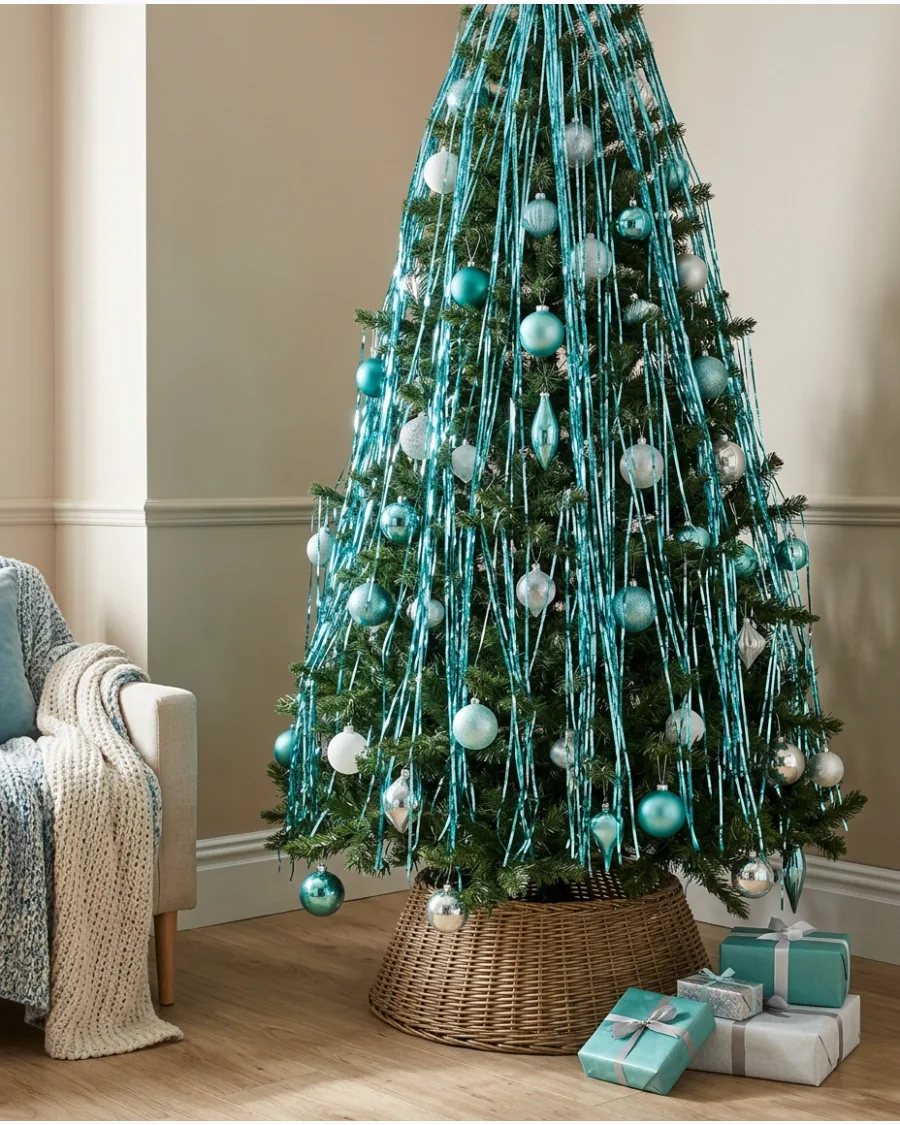
Turquoise tinsel brings a bright, modern energy to a standard green tree. Pair it with teal and aqua ornaments to maintain a monochromatic theme.
Keep ornament shapes simple to let the vibrant turquoise color stand out as the main feature.
- Source tinsel in varying shades of aqua for a textured look.
- Hang ornaments first and apply tinsel as the final layer.
- Mix in white ornaments to keep the bright color from feeling heavy.
Quick win: Tuck a few white ornaments near the trunk to make the turquoise tinsel appear brighter.
33. Purple Tinsel Christmas Tree
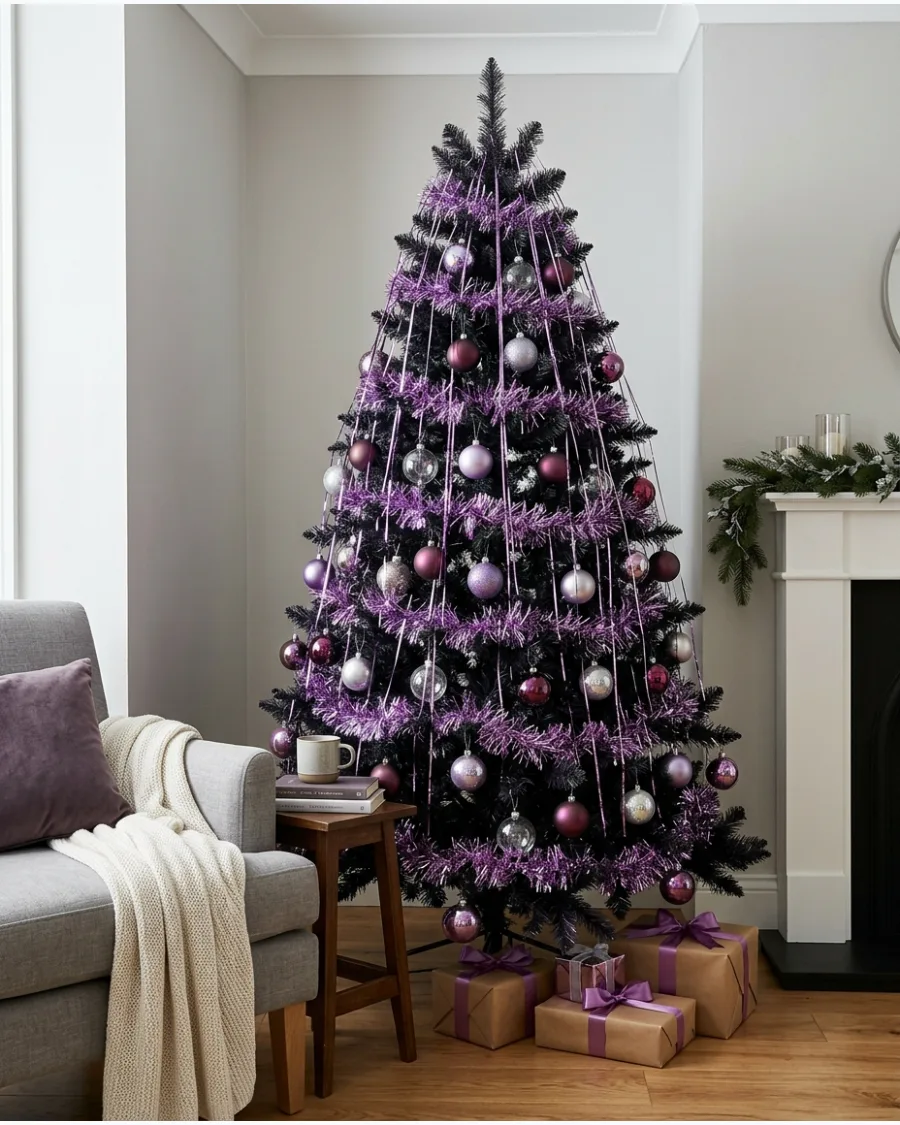
Jewel tones like purple create a moody and luxurious holiday vibe. Metallic purple tinsel looks best when paired with plum, lavender, and clear glass accents.
Drape the tinsel heavily on the bottom branches to ground the dark color and create a balanced visual weight.
- Budget for extra tinsel to achieve a dense, saturated purple look.
- Apply tinsel in small clusters rather than individual strands for impact.
- Use a dark green tree base to make the purple strands pop.
Best shortcut: Use clear glass ornaments to reflect the purple color without adding more visual clutter.
34. Emerald and Gold Tinsel Christmas Tree
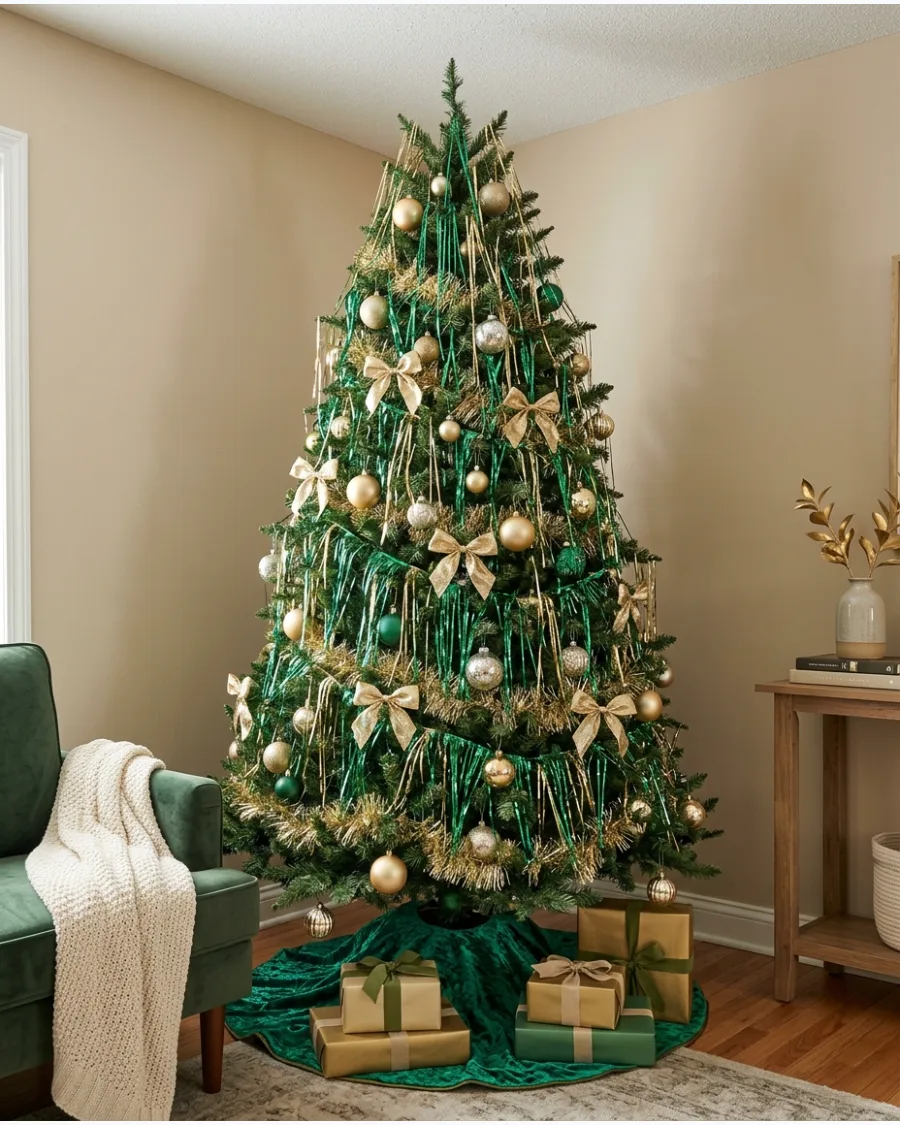
Tonal emerald tinsel blends into green branches for a subtle texture while gold ornaments provide the necessary sparkle. This combination feels high-end and traditional without being predictable.
Intersperse gold ribbons between the emerald strands to highlight the contrast between the matte needles and shiny tinsel.
- Match the tinsel shade to the tree needle color for a seamless look.
- Concentrate gold ornaments in the middle of the tree for a glowing core.
- Use warm yellow lights to complement the gold and emerald tones.
Quick win: Use emerald tinsel to hide any gaps or thin spots in a natural tree.
35. Red and Green Tinsel Christmas Tree
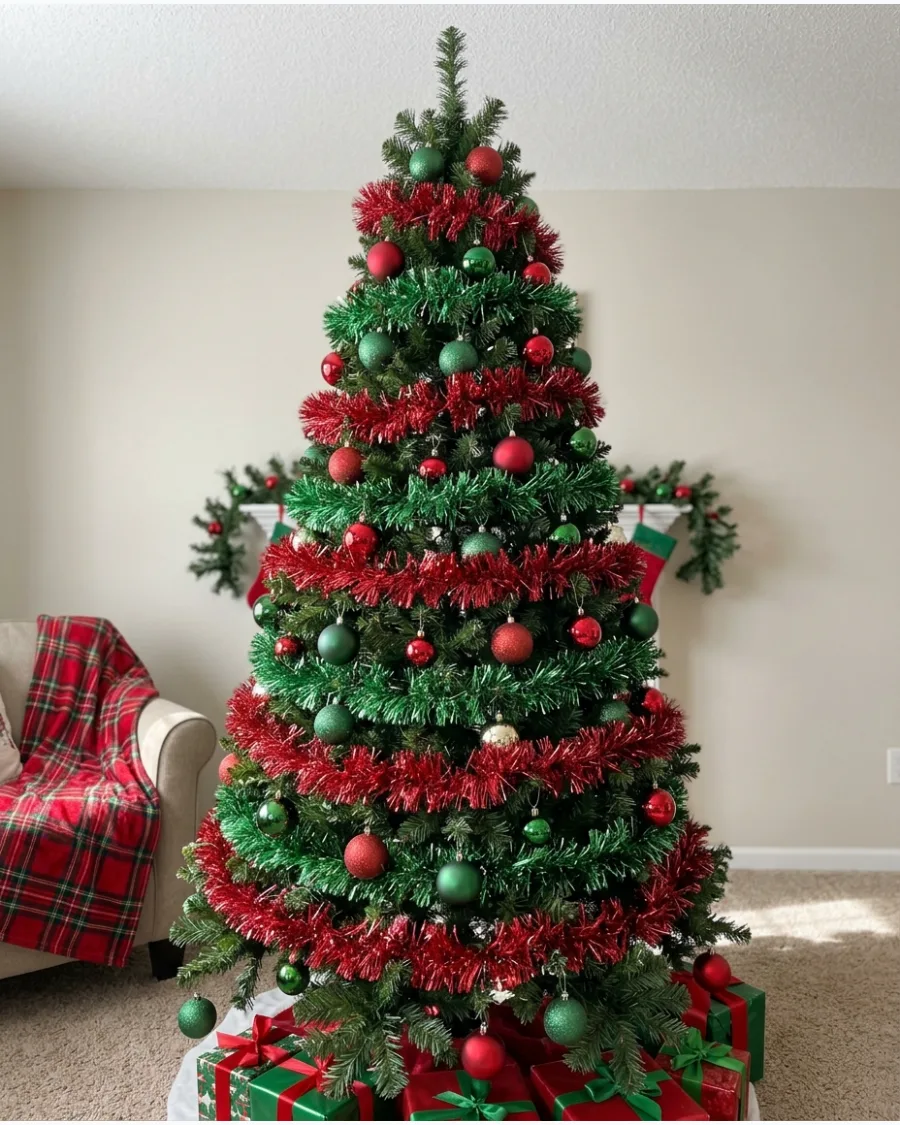
Alternating red and green tinsel is a classic move that reinforces a traditional holiday theme. This look works best when other colors like silver or gold are kept to a minimum.
Apply the colors in alternating vertical sections to give the tree a striped, candy-cane-inspired appearance.
- Buy red and green tinsel in equal amounts for a balanced look.
- Alternate tinsel colors branch by branch to distribute color evenly.
- Stick to a simple white light string to keep the colors clear.
Most people skip this: Grouping three strands of each color together makes the stripes more visible from across the room.
36. Rainbow Tinsel Christmas Tree
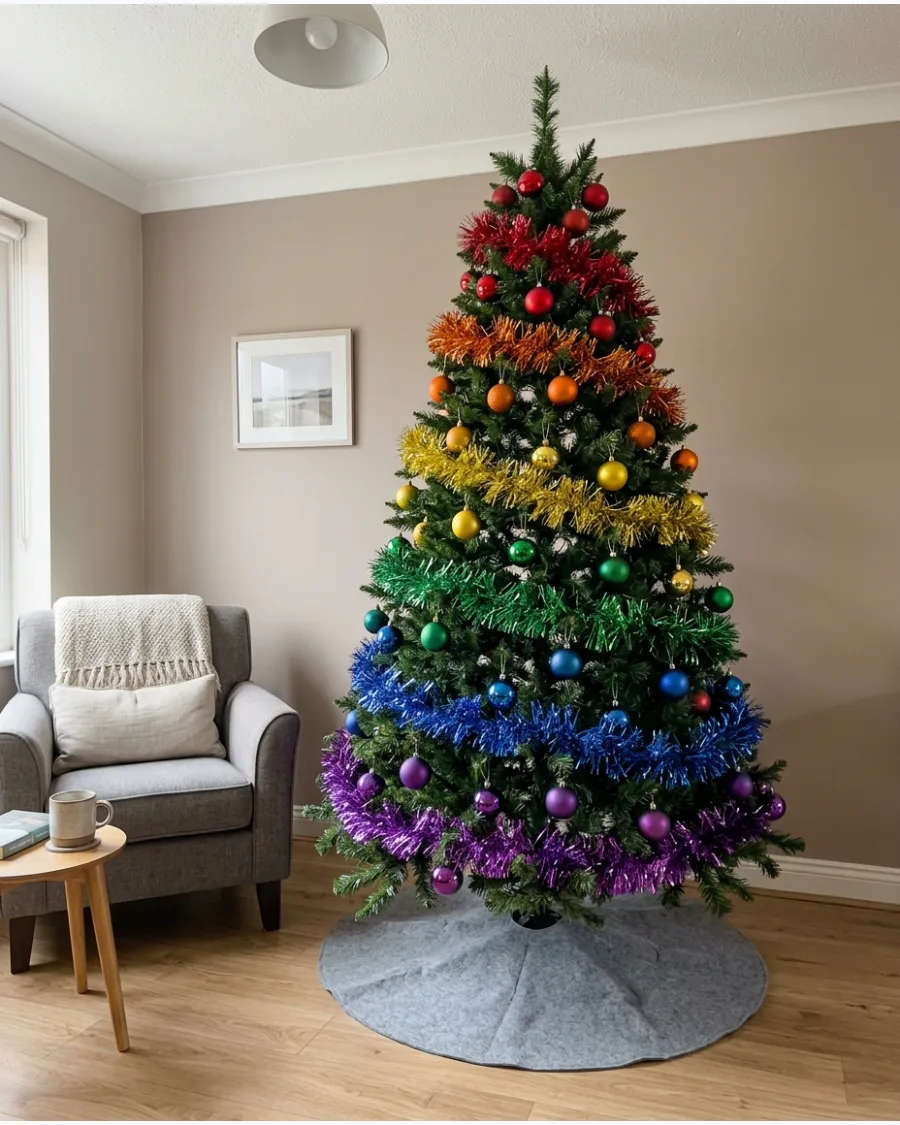
A rainbow tree is a playful choice for family spaces or playrooms. Use different tinsel colors in horizontal bands from the top to the bottom of the tree.
Match ornament colors to the tinsel band in that specific section to create a cohesive gradient effect.
- Organize tinsel by color spectrum before starting application.
- Use simple round ball ornaments to avoid distracting from the rainbow.
- Keep the tree topper neutral to let the color bands remain the focus.
Best shortcut: Buy a multi-pack of tinsel colors to ensure you have enough variety for the full gradient.
37. Pastel Tinsel Christmas Tree
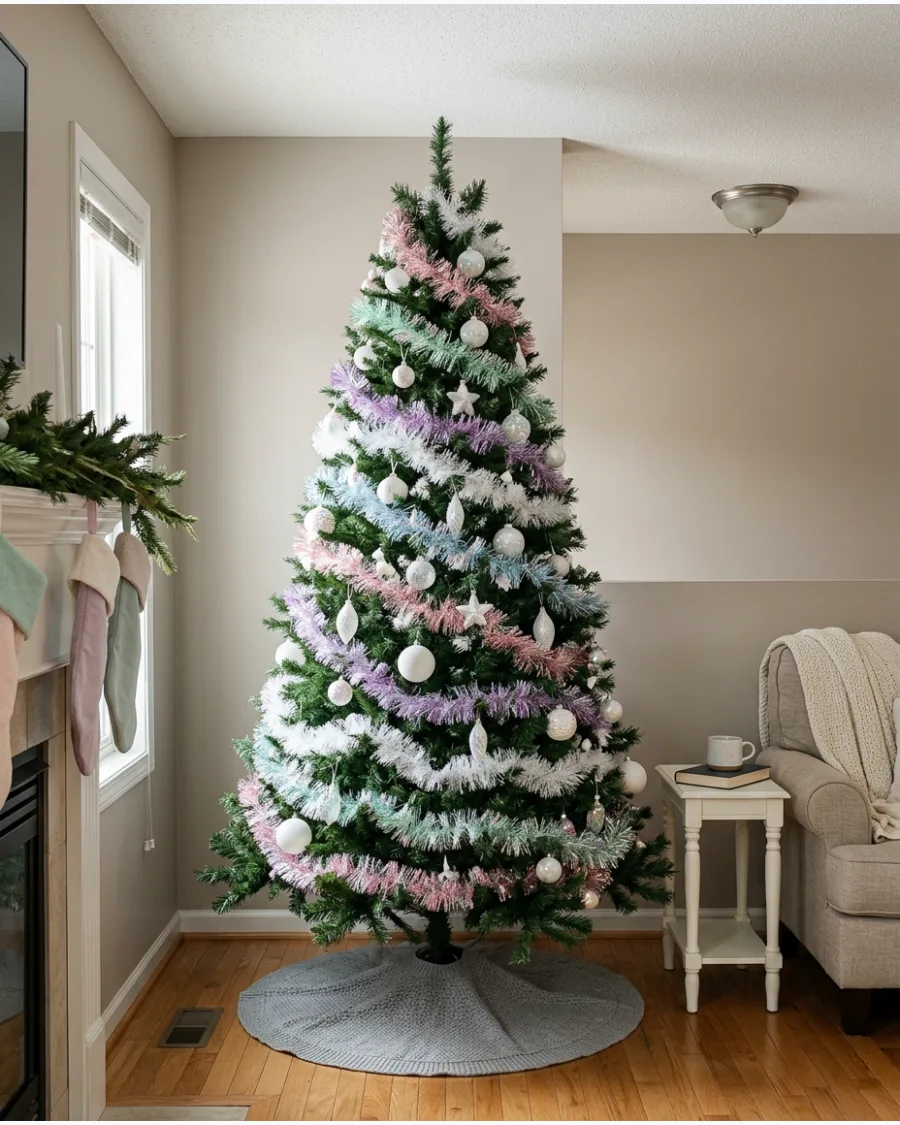
Soft shades like pink, mint, and lavender create a gentle, whimsical holiday look. These colors pop beautifully against a white or flocked tree, but they also work on light green pine.
Use iridescent ornaments to bridge the gap between different pastel tinsel colors without overwhelming the design.
- Mix pink, mint, and lavender tinsel for a soft, varied palette.
- Drape strands loosely to maintain a light and airy aesthetic.
- Add iridescent glass ornaments to catch the soft pastel reflections.
Quick win: Use white lights with a silver wire to keep the pastel palette looking clean and airy.
38. Iridescent Tinsel Christmas Tree
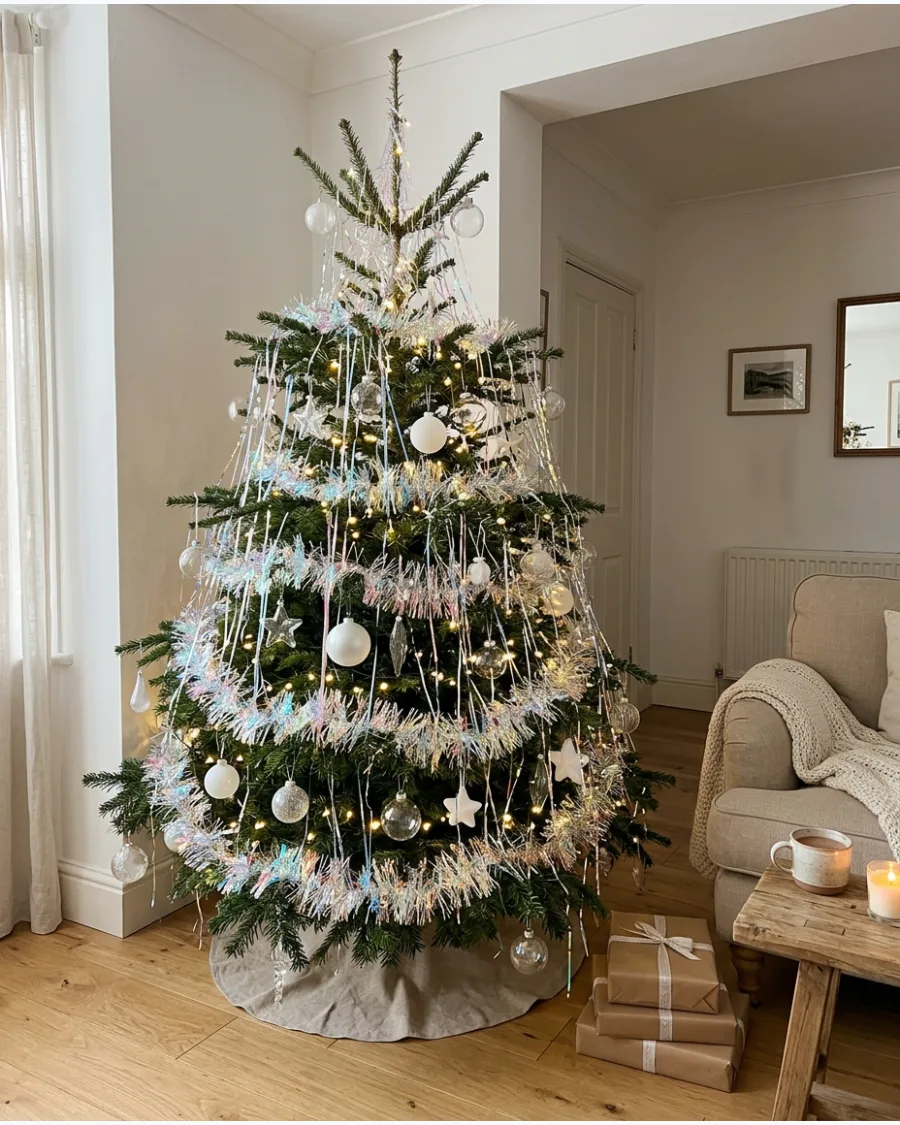
Iridescent tinsel changes color based on the light, offering a magical and modern feel. It looks best when paired with clear or white ornaments that do not compete with the shifting hues.
Place lights deep inside the branches to make the iridescent strands glow from within.
- Choose color-shifting tinsel for the most dynamic visual effect.
- Use clear or white glass baubles to maintain a clean look.
- Avoid heavy opaque ornaments that might block the light reflection.
Most people skip this: Iridescent tinsel looks best under warm white lights, which pull out the gold and pink tones.
Modern Christmas Tree Tinsel Styles
39. Modern Green Christmas Tree With Sparse Tinsel
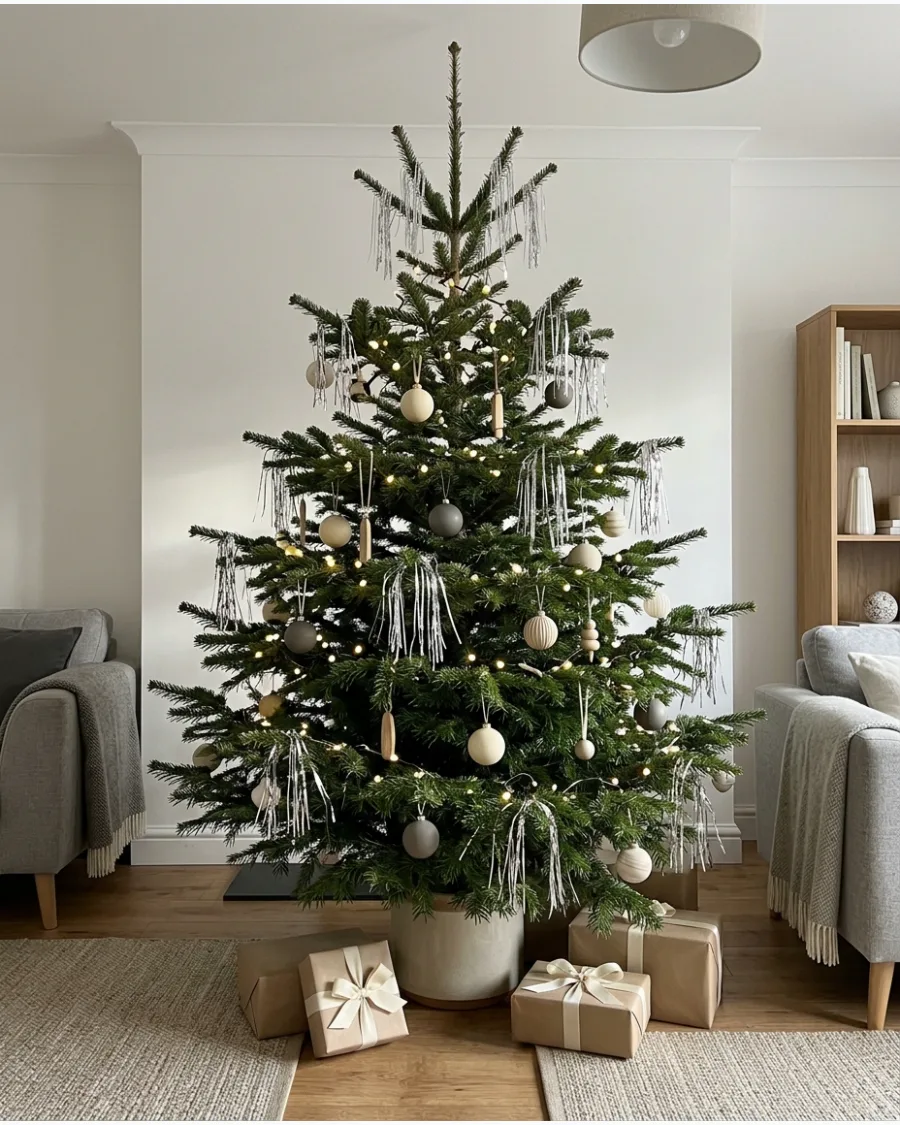
A modern approach involves using tinsel sparingly rather than covering the whole tree. Select specific branches to highlight with small clusters of silver strands for a minimalist look.
Focus on the outer tips of the branches to create a subtle dripping effect that doesn't hide the natural shape of the tree.
- Purchase high-quality lametta strands for a clean, straight hang.
- Apply tinsel to branch tips only to maintain a minimalist feel.
- Swap silver for gold tinsel if the room has many warm wood tones.
Quick win: Use tweezers to apply tinsel strands one by one for a perfectly intentional, non-clumpy look.
40. Modern Tinsel Tree With Dark Ornaments
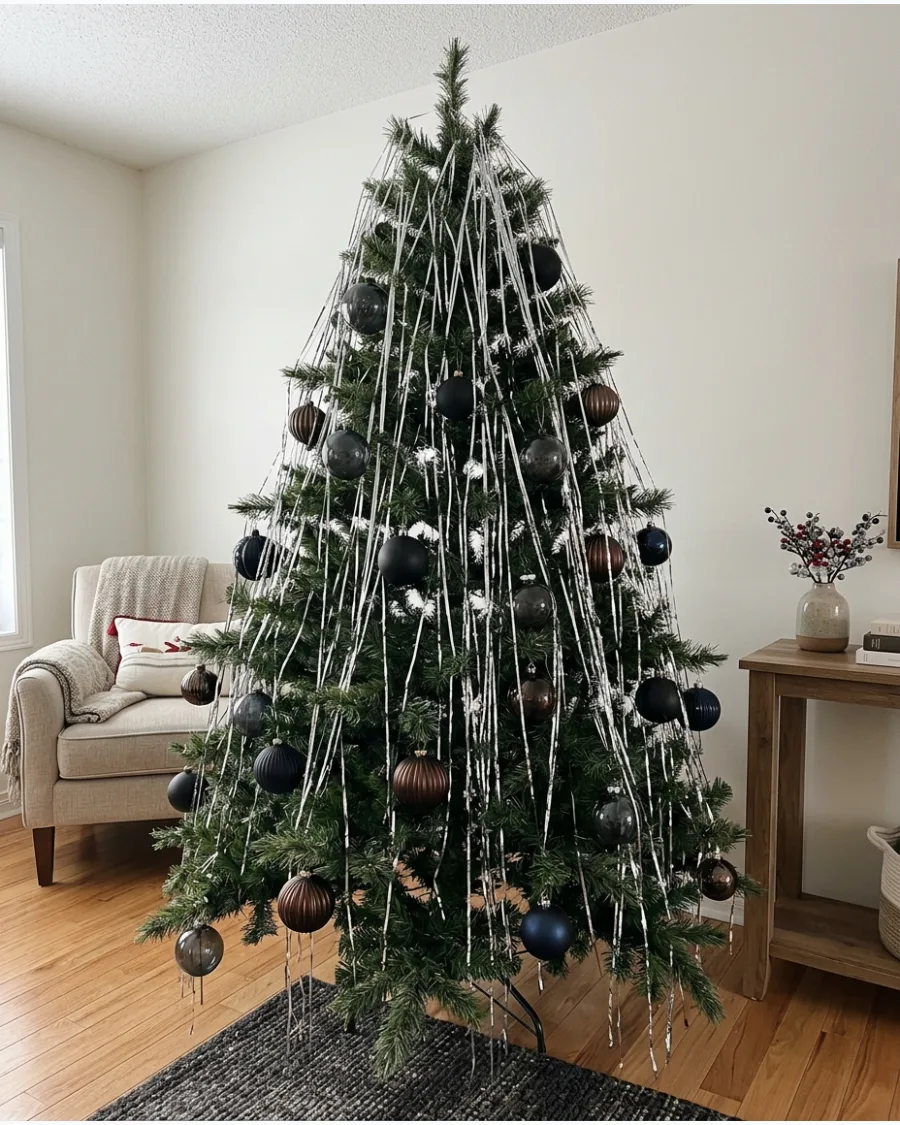
Pairing bright silver tinsel with dark ornaments like black or navy creates a dramatic, high-contrast aesthetic. The reflective tinsel makes the dark ornaments pop instead of letting them disappear into the shadows.
Group the dark ornaments in the middle of the tree and drape tinsel over them to catch the light.
- Contrast silver tinsel with matte black or charcoal ornaments.
- Use navy or deep indigo accents for a slightly softer contrast.
- Opt for matte finish ornaments to let the tinsel be the only shiny element.
Best shortcut: Use silver tinsel only on the branches that hold dark ornaments to maximize the contrast.
41. Minimalist Tinsel and Lights Christmas Tree
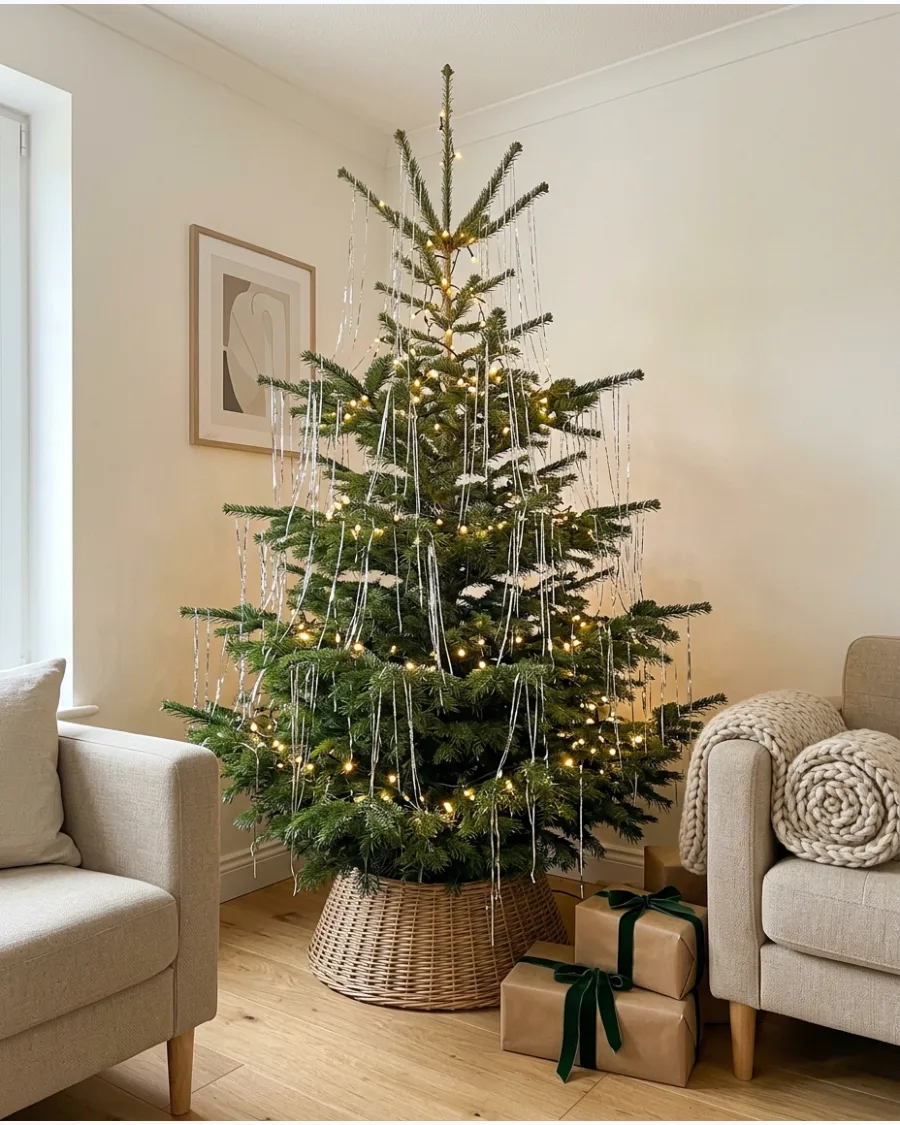
This look focuses on the glow of the tree rather than a collection of items. By skipping traditional ornaments, the metallic strands can catch the light without competition.
Drape tinsel in small clusters only where the light hits the branches to maximize the shimmer.
- Budget-friendly using only one or two packs of tinsel.
- Takes about 30 minutes to style a standard six-foot tree.
- Ideal for small apartments where a heavy tree feels overwhelming.
Most people skip this: use warm-toned LED lights to prevent silver tinsel from looking too cold or industrial.
42. Scandinavian Christmas Tree With Tinsel
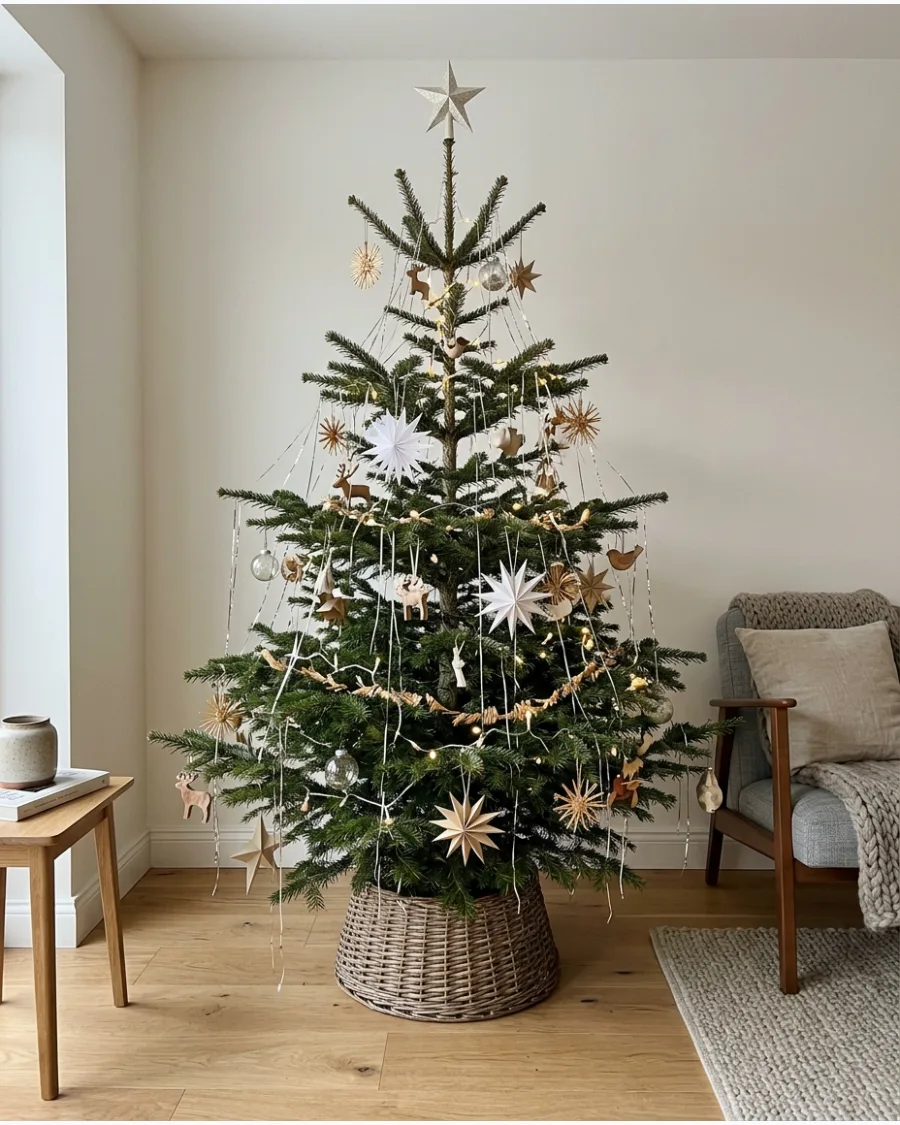
Scandinavian style relies on natural materials and a calm color palette. Adding a small amount of silver tinsel provides a festive touch that mimics winter frost.
Hang individual strands of tinsel vertically from the tips of branches to mimic frozen icicles.
- Sourced from craft stores or natural wood suppliers.
- Place ornaments first and add tinsel last to avoid tangles.
- Switch to matte white tinsel for an even more muted look.
Quick win: use real pine or fir trees to provide the organic texture needed for this style.
43. Neutral Christmas Tree With Silver Tinsel

Neutral decor can sometimes feel flat in a festive setting. Silver tinsel adds a necessary layer of reflection that brings beige and taupe ornaments to life.
Layer silver tinsel over cream-colored ornaments to add depth to a monochromatic color palette.
- Use champagne or mercury glass ornaments for the best color match.
- Distribute tinsel evenly to ensure every side of the tree has sparkle.
- Works well in rooms with grey or off-white walls.
Best shortcut: choose tinsel with a very fine width to keep the neutral look sophisticated instead of bulky.
44. Brown Christmas Tree With Silver Tinsel
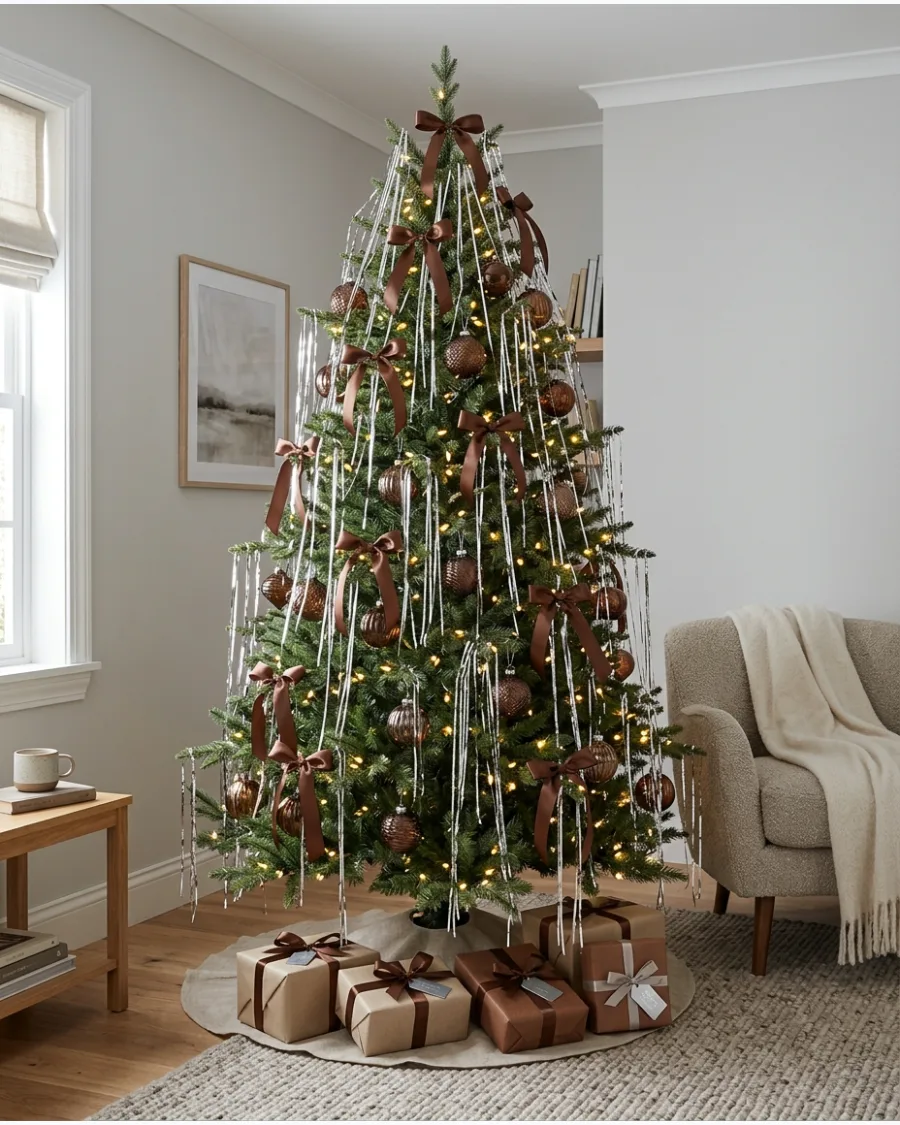
The contrast between earthy brown and cool silver creates a high-end look. This palette feels grounded yet celebratory.
Use wide chocolate-brown velvet ribbon as a base before draping thin silver tinsel over the branch ends.
- Sourced from fabric stores or high-end holiday collections.
- Secure the ribbon with floral wire before adding the tinsel.
- Add copper ornaments to bridge the gap between brown and silver.
Most people skip this: use matte brown ornaments to make the shiny silver tinsel pop even more.
45. Black and Silver Tinsel Christmas Tree
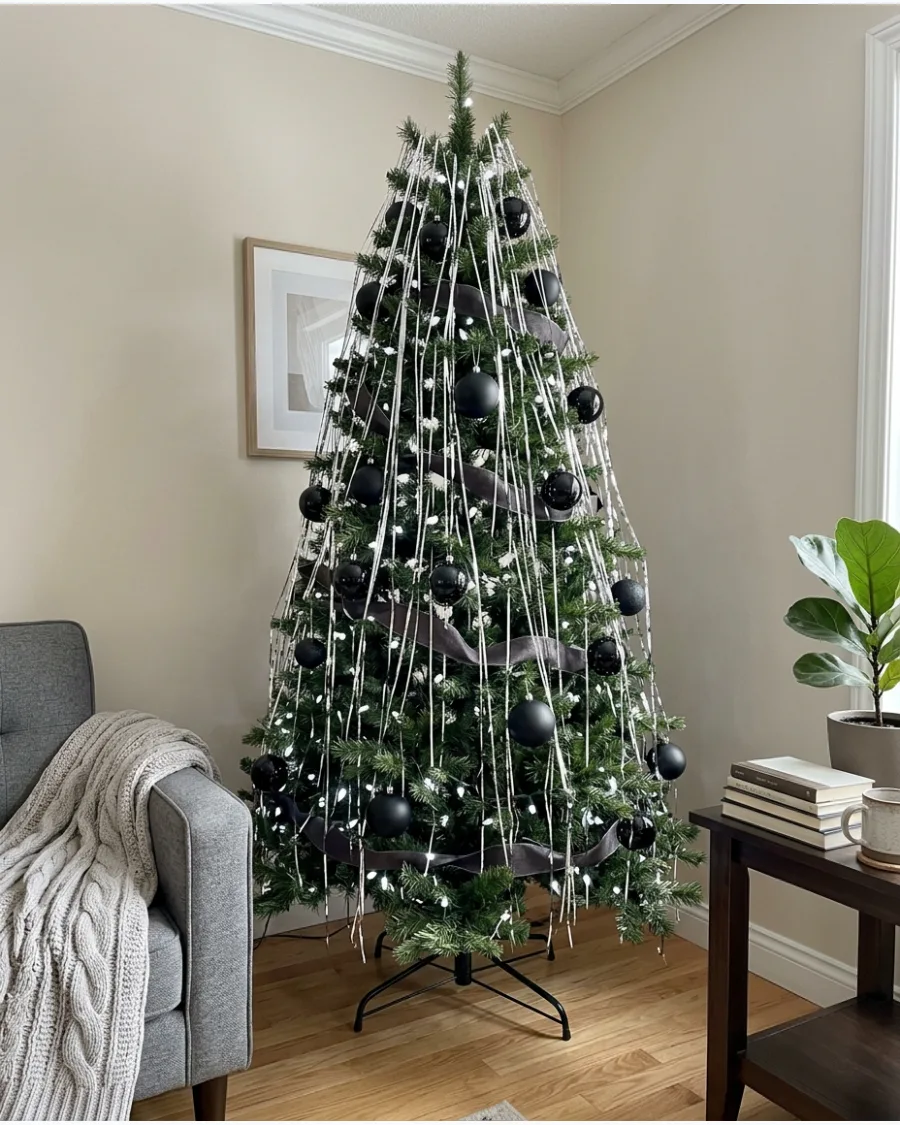
A black and silver theme is bold and fits perfectly in modern homes. The silver strands act as a highlight against the dark ornaments.
Space black ornaments evenly across the tree so the silver tinsel creates a bright outline around the dark shapes.
- Available at specialty holiday retailers or online.
- Use cool white lights to maintain the crisp, high-contrast look.
- Mix matte and shiny black ornaments for visual variety.
Quick win: use a black tree collar to ground the look and hide the messy base of the stand.
46. Black and Gold Tinsel Christmas Tree
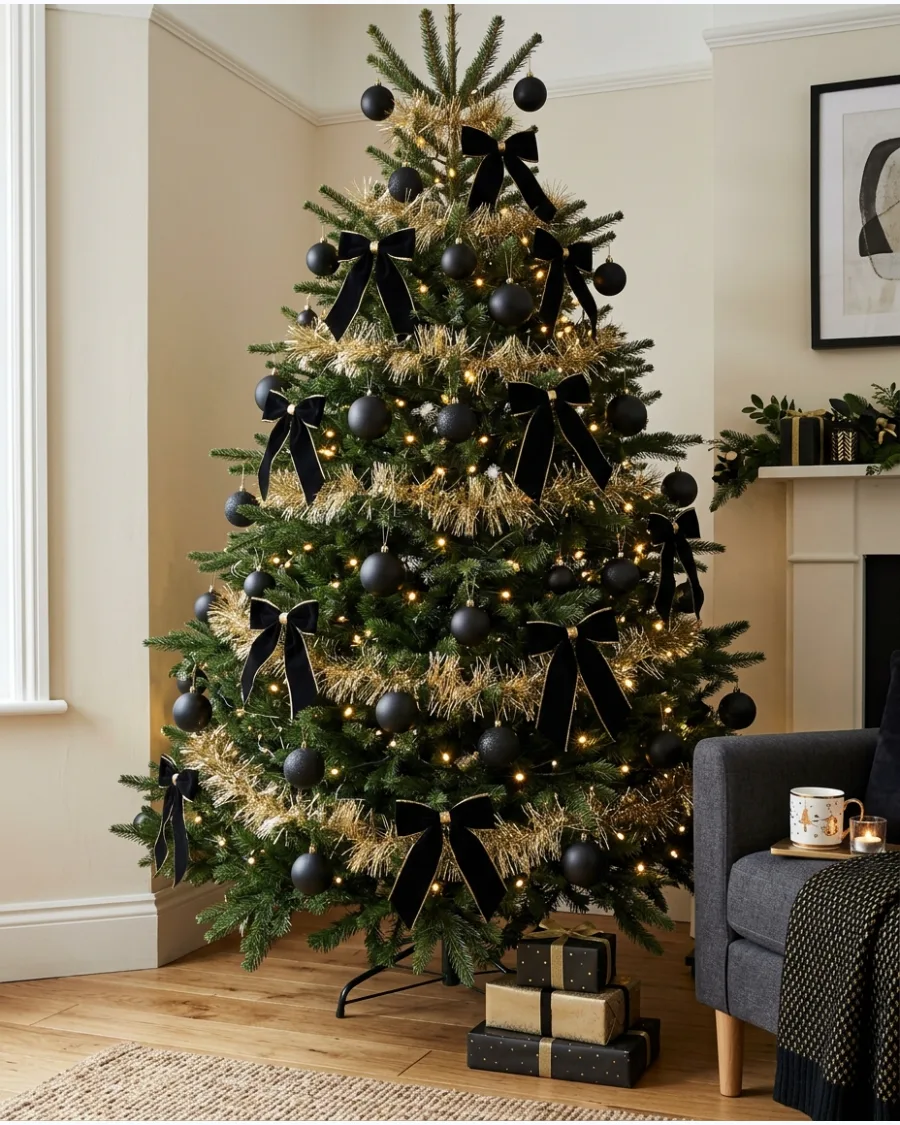
Gold tinsel adds warmth to a black color scheme, making it feel more traditional. This combination works best with soft, yellow-toned lighting.
Tuck gold tinsel behind black velvet bows to create a hidden glow when the tree lights are on.
- Pick gold tinsel with a metallic finish rather than a holographic one.
- Tie bows directly onto branches to keep them from sliding.
- Great for formal living rooms or evening holiday parties.
Best shortcut: use gold tinsel that comes in pre-cut lengths to save time during application.
47. White Christmas Tree With Silver Tinsel
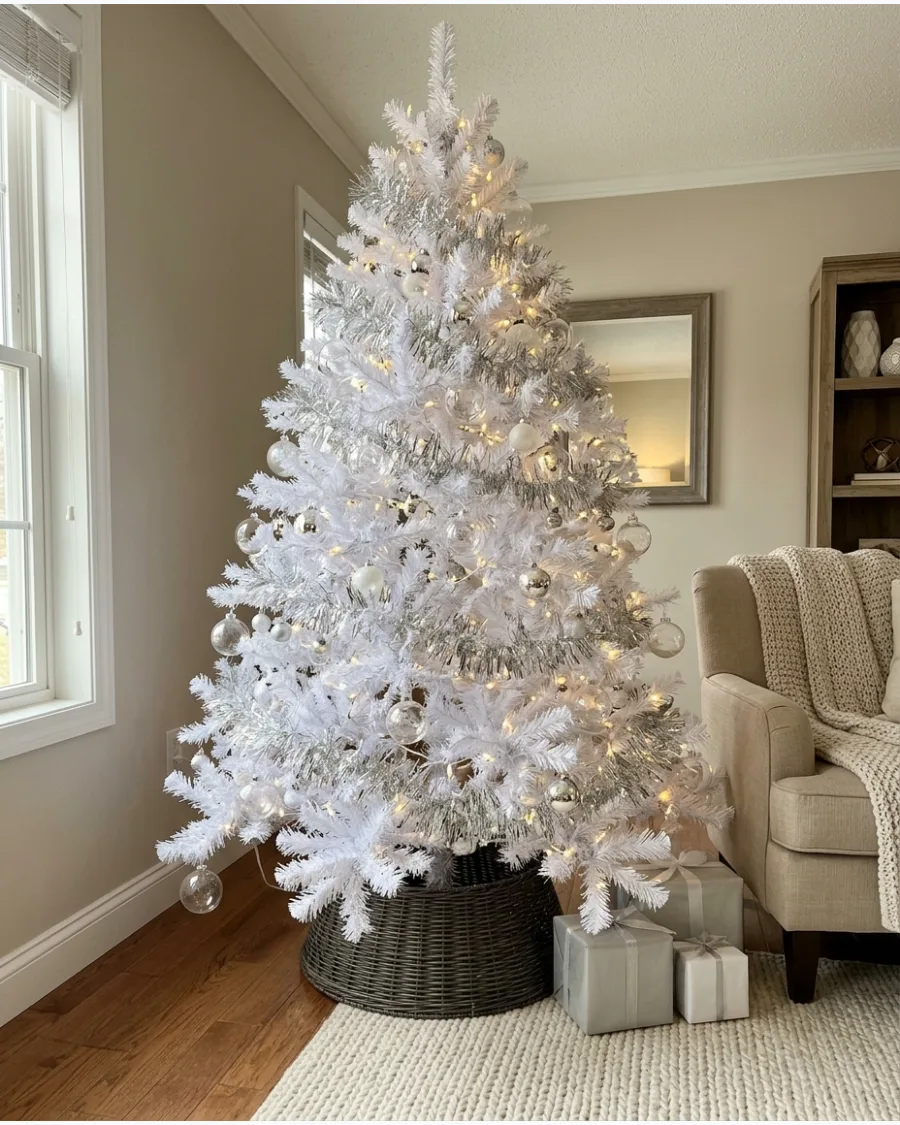
On a white tree, silver tinsel blends in for a subtle, shimmering effect. It creates a cohesive look that feels like a snowy forest.
Apply silver tinsel heavily to the middle of the white branches to create a metallic core that reflects light outward.
- Standard artificial white trees work best for this look.
- Use clear glass or acrylic ornaments to keep the tree looking light.
- Works as a great secondary tree for a bedroom or office.
Most people skip this: check the color of your tinsel against your white tree in daylight to ensure the whites don't clash.
48. White Christmas Tree With Colored Tinsel
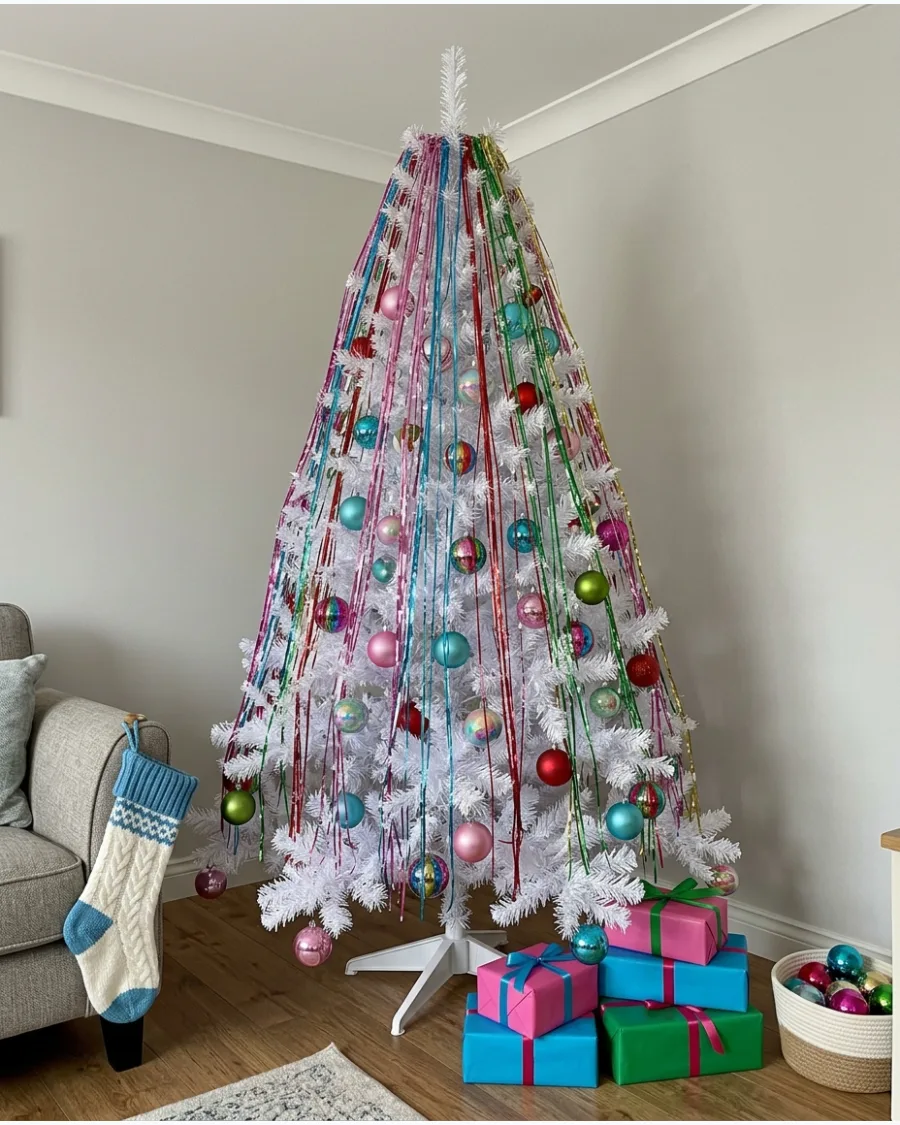
A white tree acts as a blank canvas for vibrant colors. Using colored tinsel makes the tree the focal point of the room.
Stick to one bold tinsel color on a white tree to keep the look intentional rather than cluttered.
- Choose tinsel in jewel tones or bright pastels for maximum impact.
- Apply tinsel in vertical sections for a modern striped effect.
- Match the tree topper to the tinsel color for a finished look.
Quick win: use tinsel to cover any gaps in an older or cheaper artificial white tree.
Christmas Tree Tinsel Decorating Techniques
49. Straight Hanging Tinsel Christmas Tree
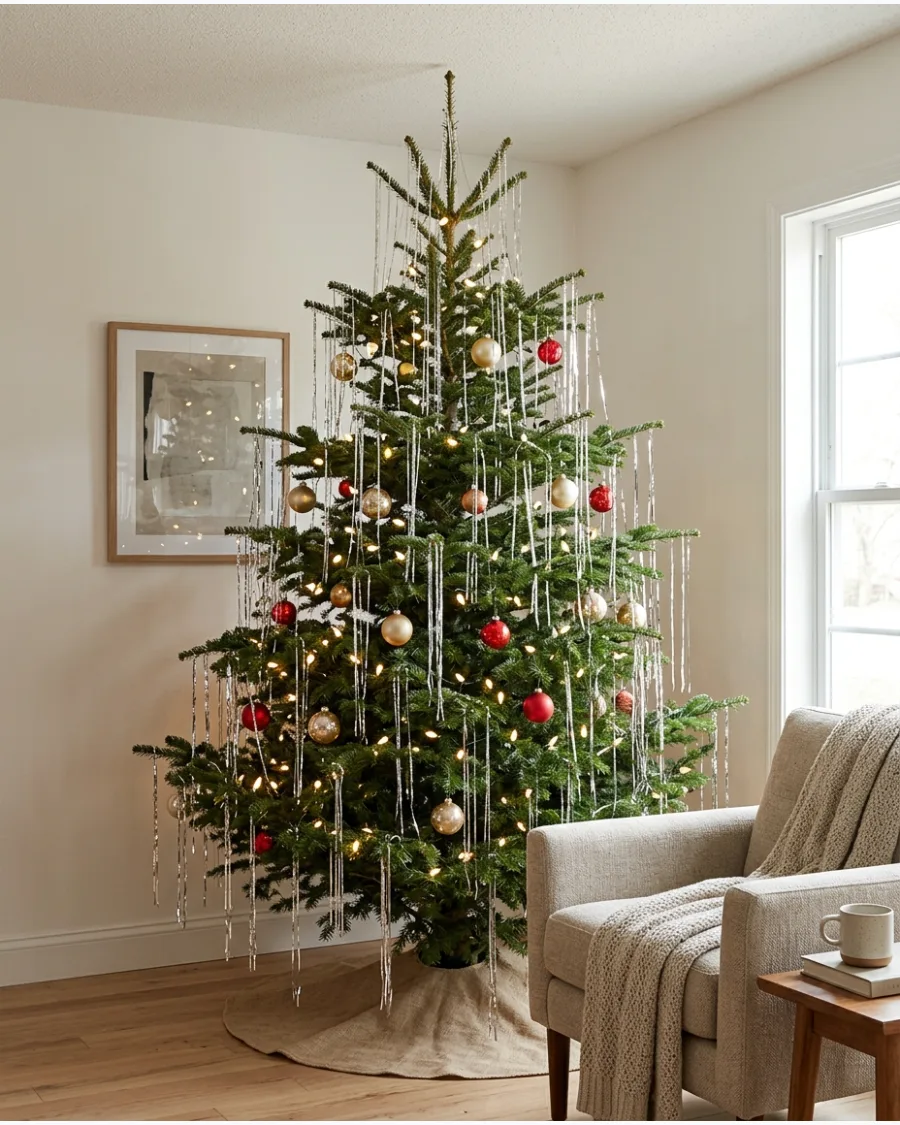
This method requires patience but results in a very tidy, classic appearance.
It mimics the look of real icicles hanging from the branches. Place each tinsel strand one by one on the very tip of the branch to ensure they hang perfectly vertical without tangling.
- Best for trees with sturdy, horizontal branches like Noble Firs.
- Plan for at least two hours of decorating time for a full-sized tree.
- Store strands flat after the holidays to reuse them next year.
Best shortcut: use a pair of tweezers to place strands in hard-to-reach areas near the top of the tree.
50. Sparse Tinsel Christmas Tree
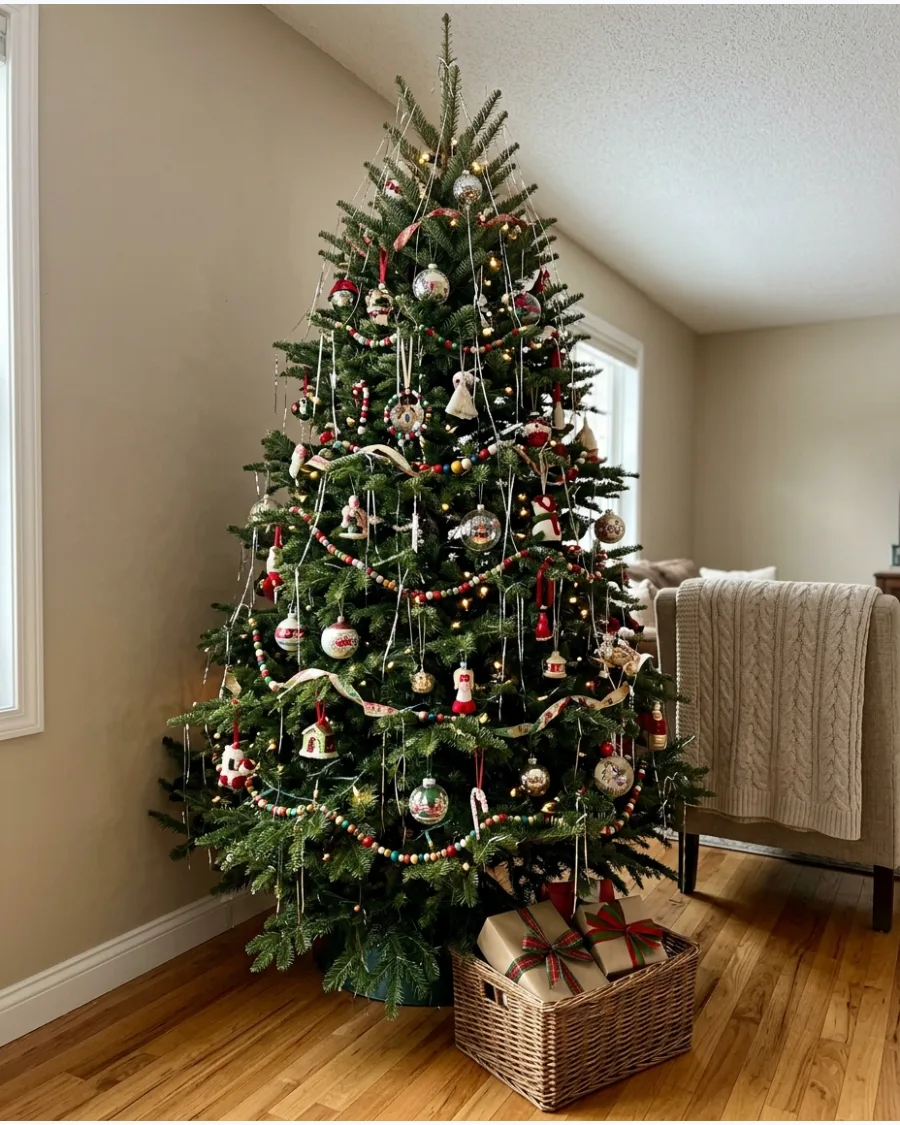
Less is more when you want the tree's natural beauty to shine through. This technique adds just a hint of sparkle.
Limit yourself to three or four strands per branch to let the natural texture of the needles show through.
- Works best on high-quality artificial trees or lush real trees.
- Spread the strands out so they don't clump together in the middle.
- Ideal for those who prefer a more organic, less 'decorated' look.
Most people skip this: step back frequently to ensure the tinsel is distributed evenly across the entire tree.
51. Full Tinsel-Covered Christmas Tree
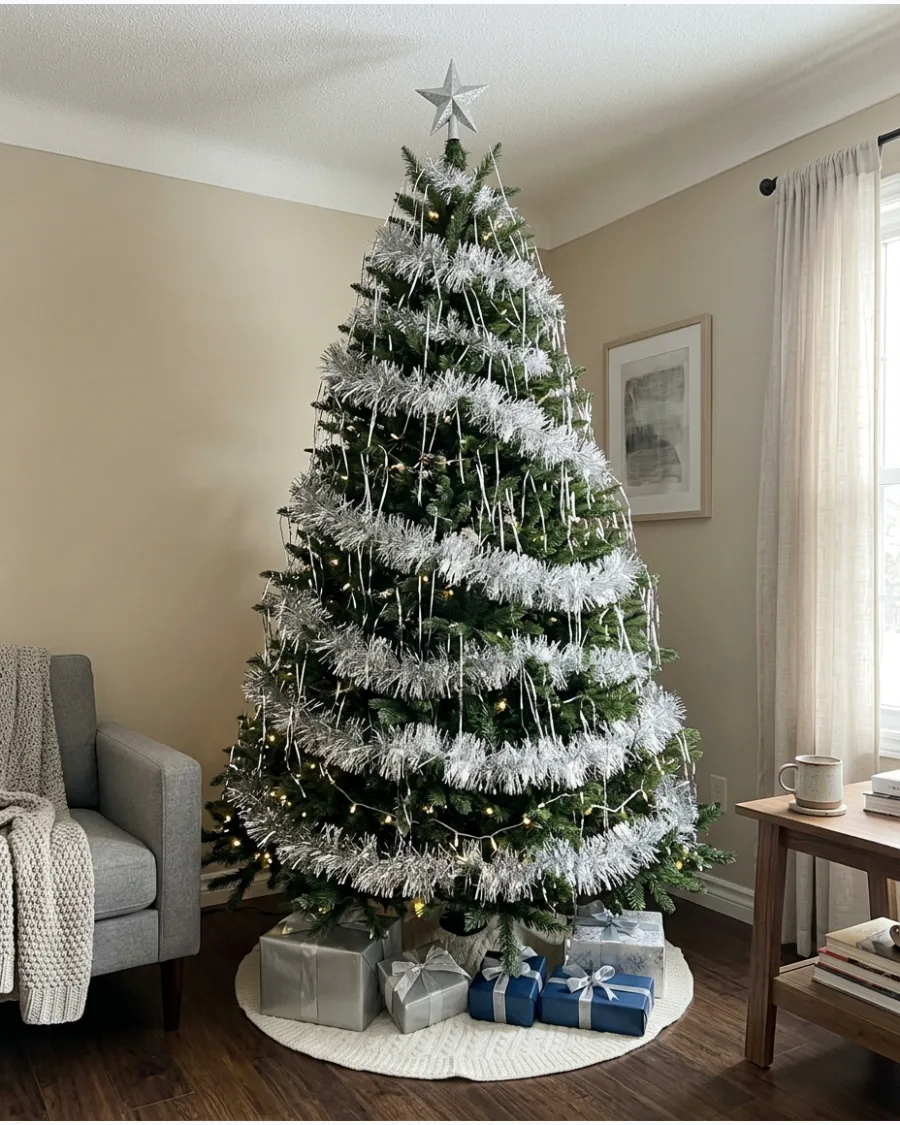
Apply loose tinsel generously across nearly every visible branch for maximum shine. Spread the strands evenly from top to bottom so the finished tree looks lush instead of patchy. This method works best when you want the tree to look like a solid pillar of light.
- Buy bulk packs of lametta early in the season to ensure you have enough for heavy coverage.
- Start applying strands from the bottom branches and work upward to create a natural layered effect.
- Switch to gold tinsel for a warmer glow in rooms with yellow-toned lighting or wood furniture.
Most people skip this: Shake the tinsel pack before opening to separate the strands for easier application.
52. Tinsel Only on Branch Tips
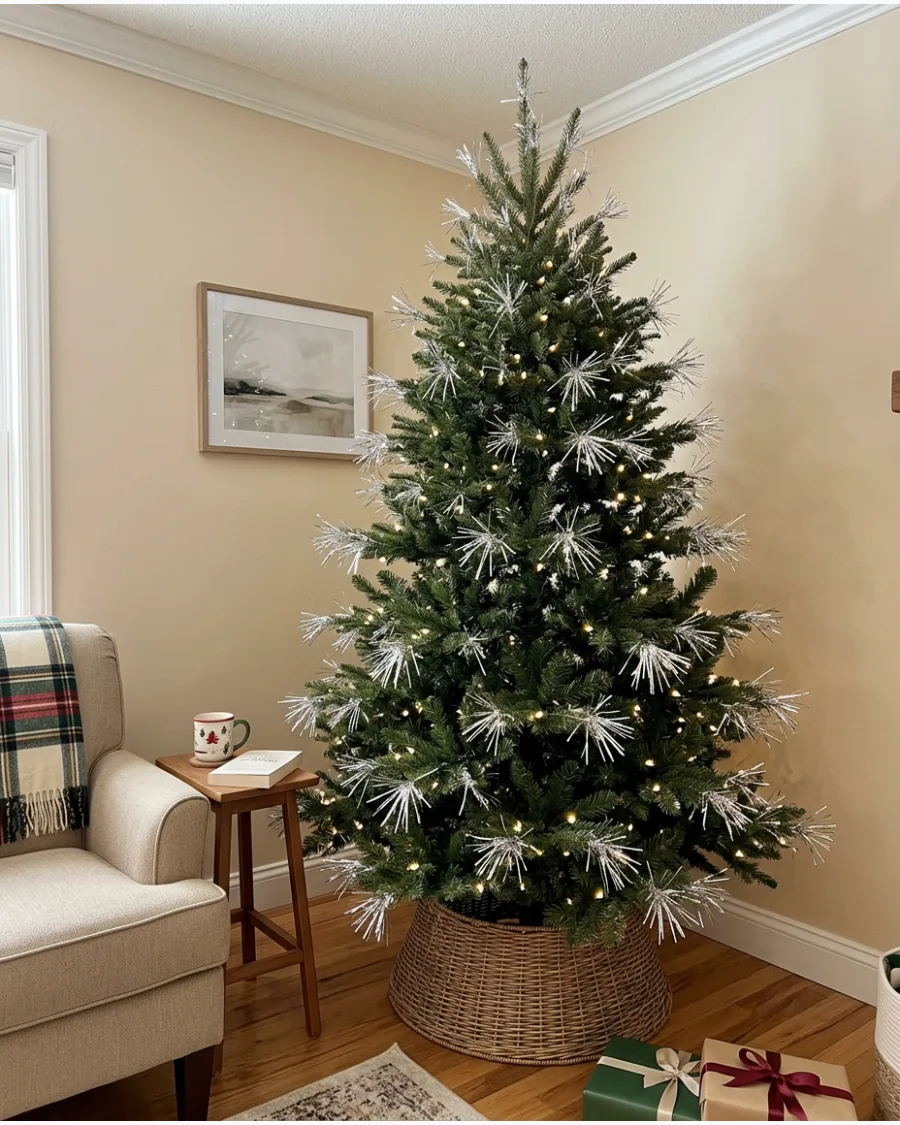
Place small groups of metallic strands exclusively on the outer ends of branches. This makes the edges of the Christmas tree sparkle while keeping the center darker and more dimensional. It is a great way to highlight a tree with a beautiful natural shape.
- One or two packs of tinsel is usually enough for this minimalist, targeted approach.
- Use a very light touch to avoid weighing down the delicate outer needles of the tree.
- Try this method on real trees like Fraser firs to show off the distinct branch structure.
Quick win: Use tweezers if you have trouble grabbing just a few strands at a time for precise placement.
53. Tinsel Garland Wrapped Christmas Tree
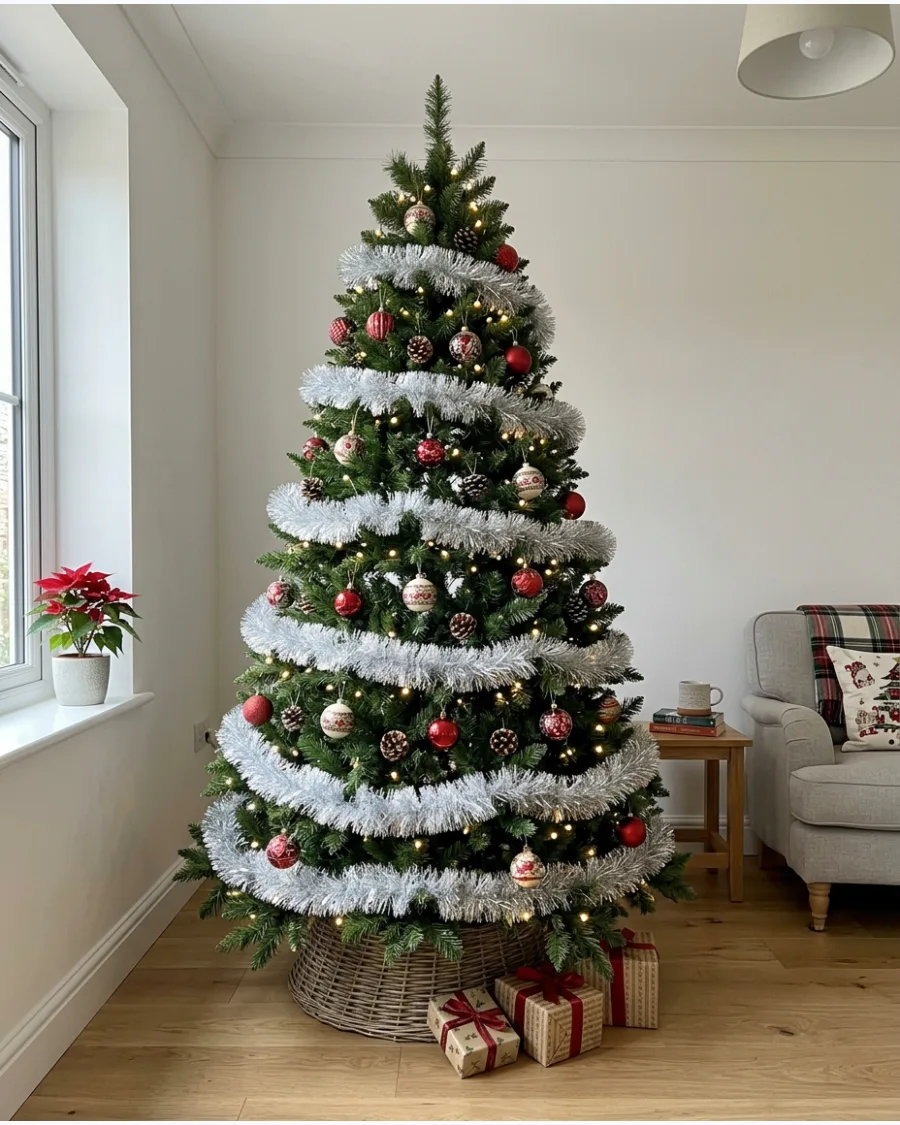
Use fluffy rope-style tinsel garland instead of individual strands and loosely spiral it around the tree. Leave generous space between each row so ornaments and branches remain visible. This adds instant bulk and shimmer without the mess of loose strands.
- Measure the height and width of your tree to ensure you buy enough total feet of garland.
- Tuck the garland slightly into the branches rather than letting it sit on the outer surface.
- Choose a thinner garland for smaller trees to keep the proportions looking balanced and intentional.
Best shortcut: Hook the garland onto sturdy inner branches so it does not slide down the tree over time.
54. Vertical Tinsel Garland Christmas Tree
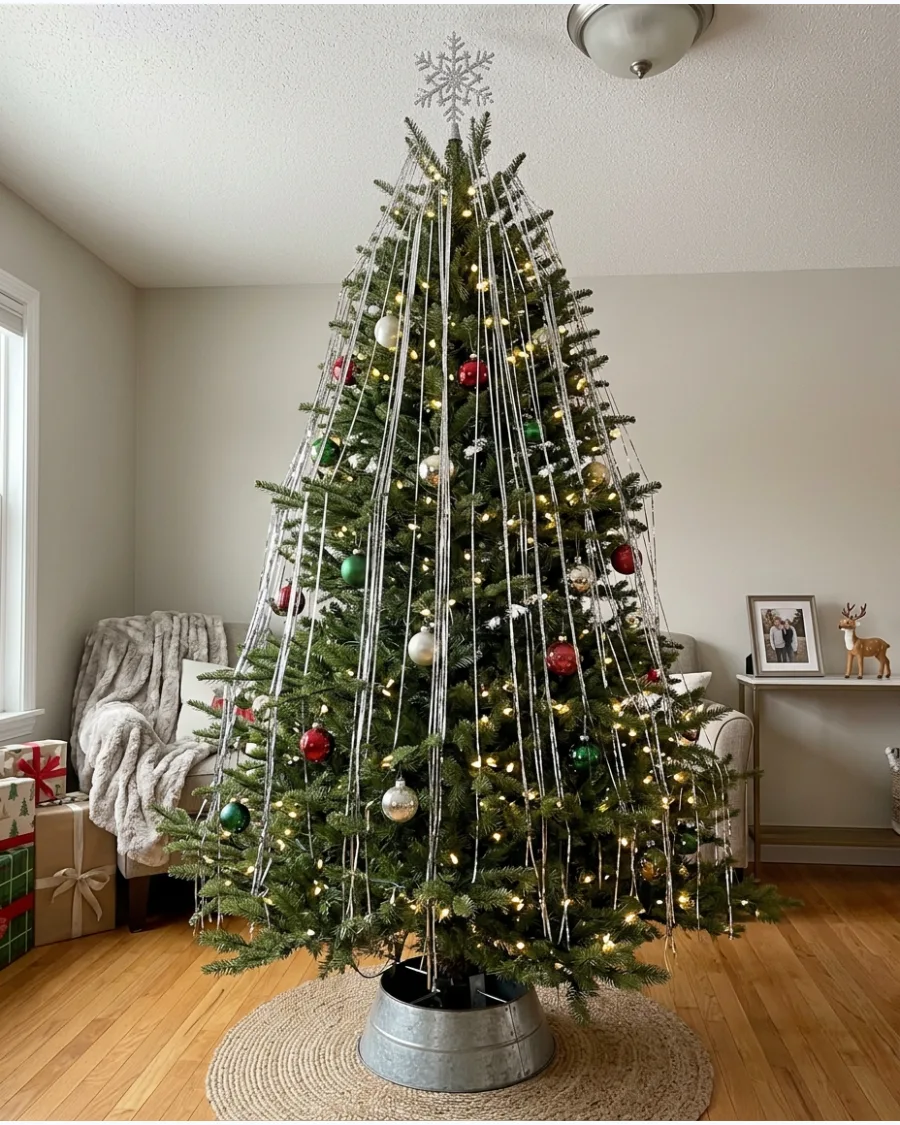
Run several long pieces of tinsel garland vertically from near the tree topper toward the bottom branches. This creates strong vertical lines and provides an alternative to the traditional horizontal garland spiral. It can make a shorter tree appear much taller.
- Budget for about six to eight long garland strands depending on the width of your tree.
- Secure the top of each garland piece near the tree topper using a small piece of floral wire.
- Drape the garland over a white artificial tree for a seamless and high-contrast holiday look.
Most people skip this: Use a heavy ornament at the bottom of each vertical garland to help it hang perfectly straight.
55. Tinsel and Ribbon Layered Christmas Tree
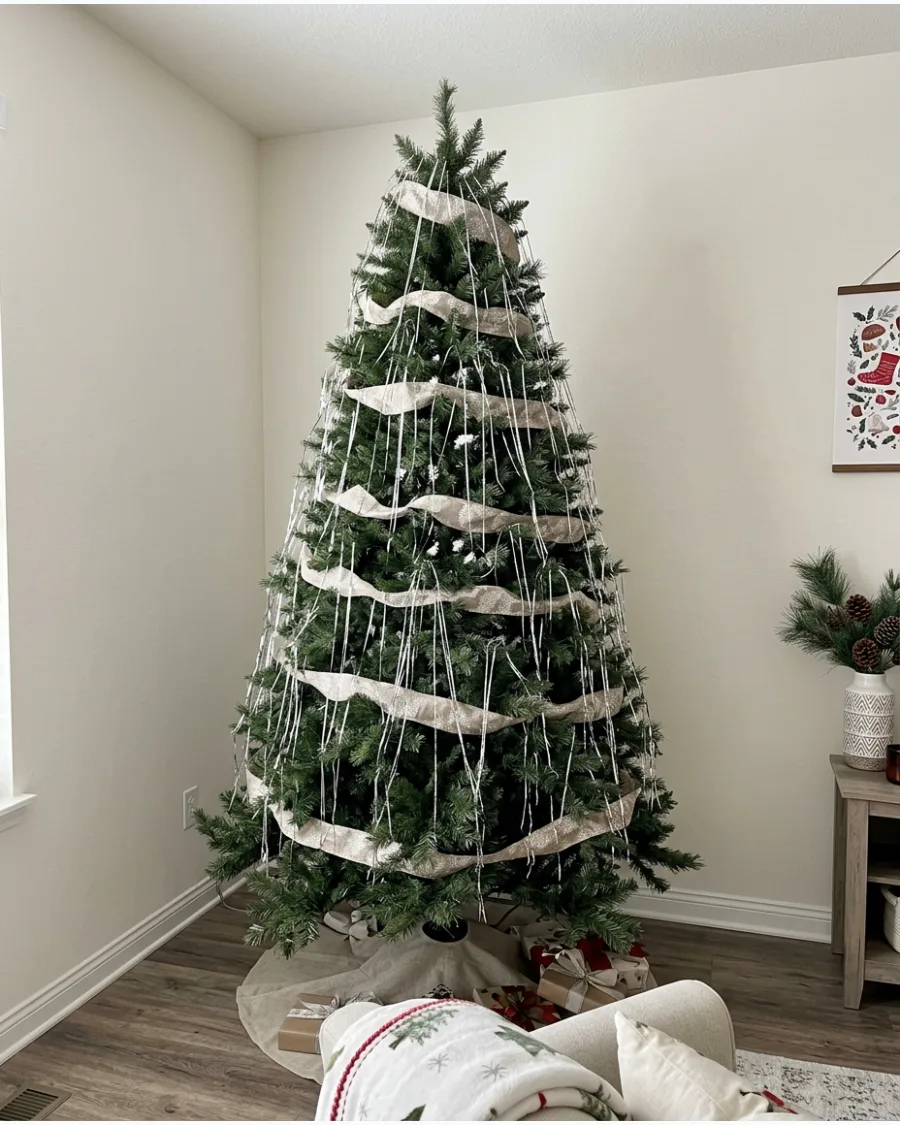
Decorate first with wide ribbon and then add individual tinsel strands over the outer branches. Combining soft fabric with reflective tinsel creates more texture and prevents the metallic decoration from dominating the entire tree. The ribbon acts as a solid base for the sparkle.
- Look for wired ribbon because it holds its shape better under the weight of the tinsel.
- Layer the tinsel only where the ribbon hits the light for a focused and sophisticated sparkle.
- Swap velvet for burlap ribbon to create a more grounded and textured appearance on a green tree.
Quick win: Use the same color tinsel as the ribbon for a sophisticated and monochromatic look.
56. Tinsel and Fairy Light Christmas Tree
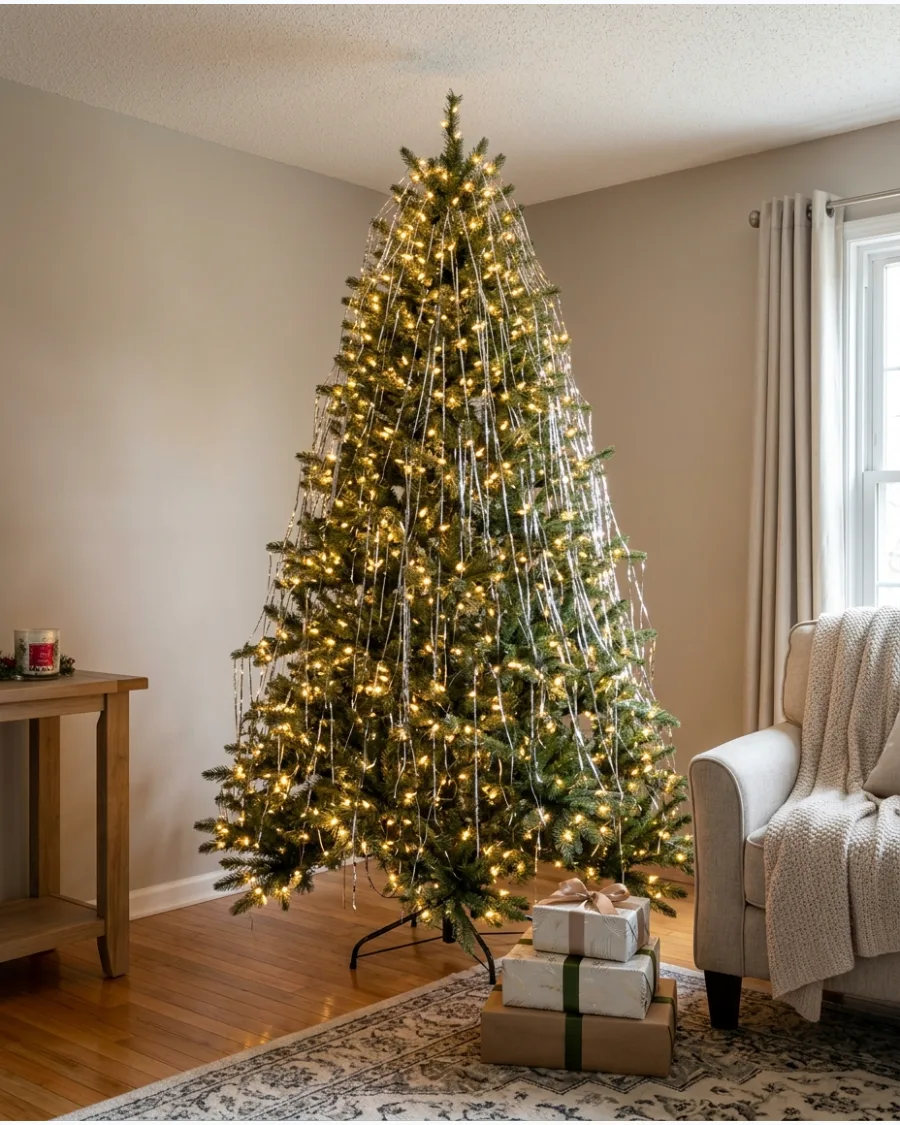
Use dense warm fairy lights beneath a lighter layer of tinsel. Position the metallic strands where they can catch and reflect nearby lights, producing significantly more sparkle without needing additional ornaments. The tiny bulbs act as miniature spotlights for the tinsel.
- Use LED fairy lights to keep the tree cool and safe for the metallic tinsel strands.
- Drape tinsel strands in clusters of three or four directly over the glowing light bulbs.
- Use copper-wire fairy lights so the wiring blends into the tree branches more effectively.
Best shortcut: Test the light placement with the room lights off before you start adding the tinsel.
Statement and Specialty Tinsel Christmas Trees
57. Silver Aluminum-Style Christmas Tree
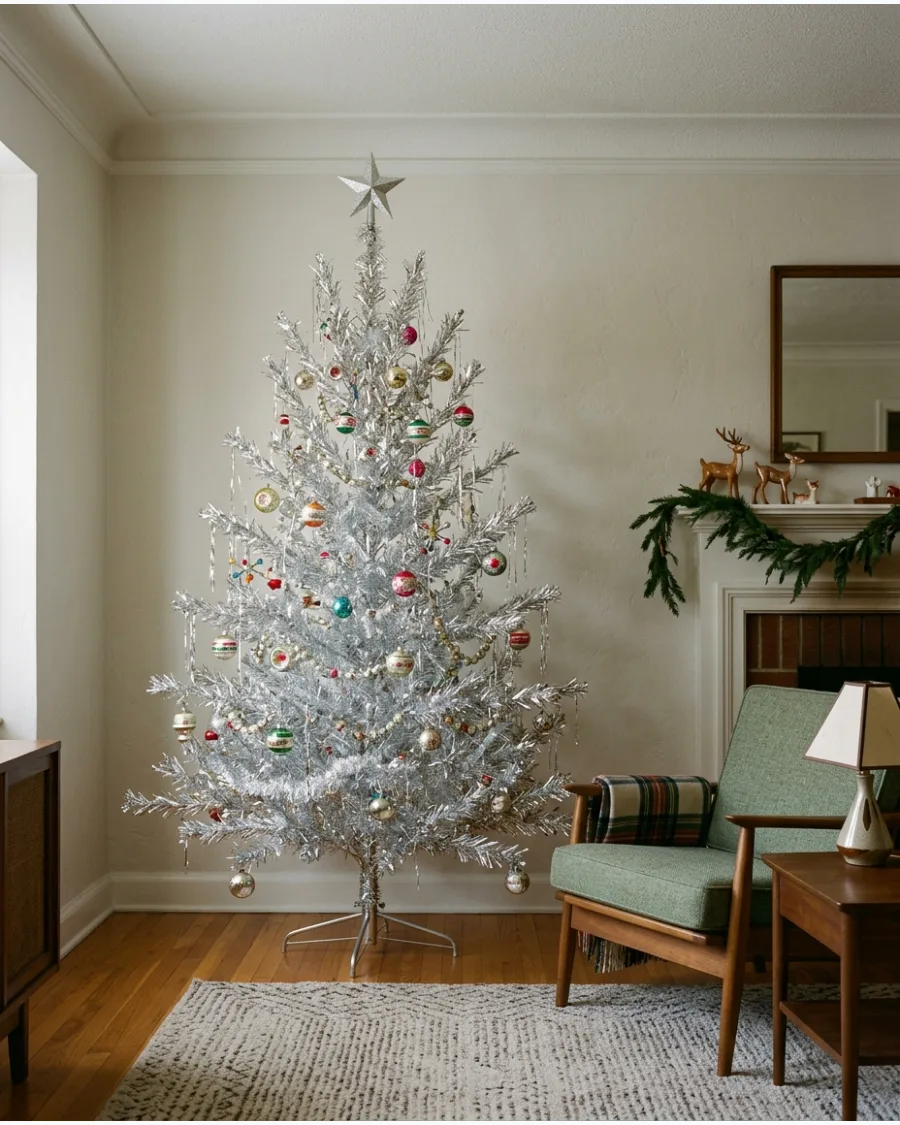
Create a mid-century-inspired display using a metallic silver artificial tree or aluminum-style tree. Decorate minimally with vintage ornaments so the reflective branches themselves remain the main attraction. This style thrives on a less-is-more philosophy.
- These trees are an investment but can last for decades with proper storage and care.
- Skip the heavy string lights and use a color wheel floor lamp for an authentic retro vibe.
- Use only lightweight plastic or glass ornaments to avoid bending the delicate metallic branches.
Most people skip this: Clean the metallic branches with a soft microfiber cloth to keep them shiny and dust-free.
58. Tabletop Tinsel Christmas Tree
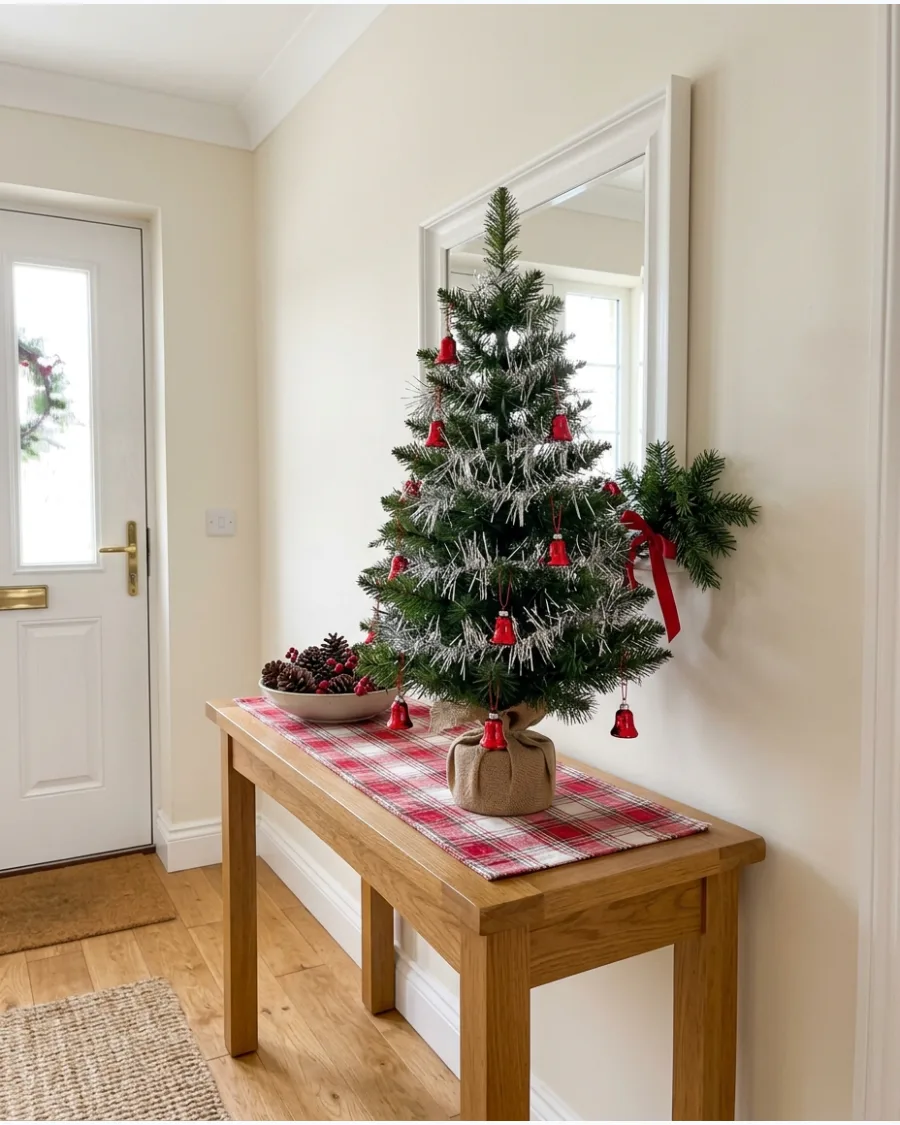
Decorate a small tabletop tree with shorter tinsel strands scaled to its size. Use miniature ornaments and tiny lights to create a complete tinsel Christmas tree for a console, bedroom, or kitchen. Scaling down the decorations keeps the look intentional.
- Search for miniature tinsel or cut standard-sized strands in half for a better fit.
- Place the tree on a sturdy tray to catch any falling tinsel strands and keep the surface clean.
- Use a battery-operated light string to avoid messy power cords on your tabletop or counter.
Quick win: Use a decorative pot or a small basket to hide the tree base and add extra height.
59. Tinsel Christmas Tree With Oversized Bows
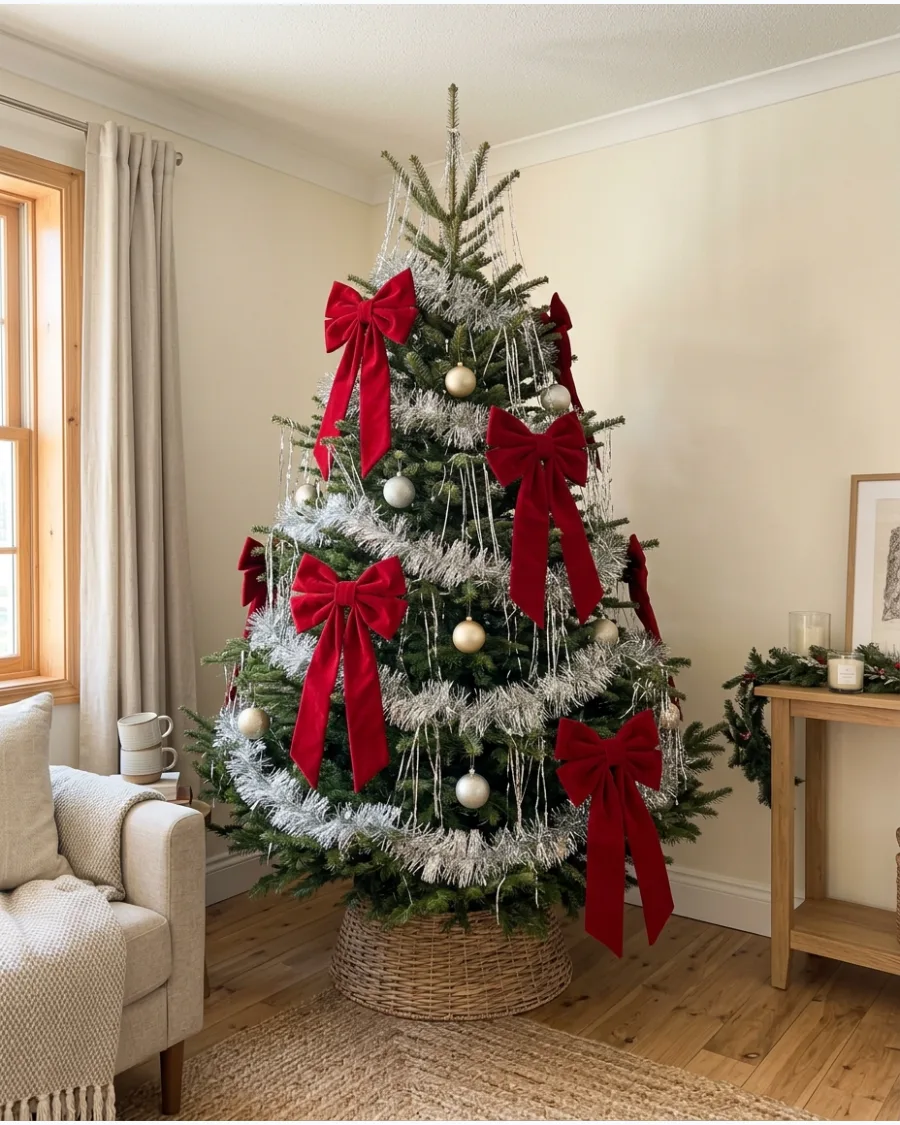
Combine shimmering tinsel with several large velvet or satin bows placed around the tree. Keep the ornament selection limited so the contrast between soft oversized ribbon and fine metallic strands becomes the main feature. The bows act as visual anchors.
- Buy pre-made bows or use four-inch wide ribbon to tie your own for a custom look.
- Space the bows evenly in a zigzag pattern from the top of the tree down to the bottom.
- Match the bow color to your room's existing pillows or curtains for a cohesive design.
Best shortcut: Use pipe cleaners to attach the bows securely to the inner branches of the tree.
60. Maximalist Tinsel Christmas Tree
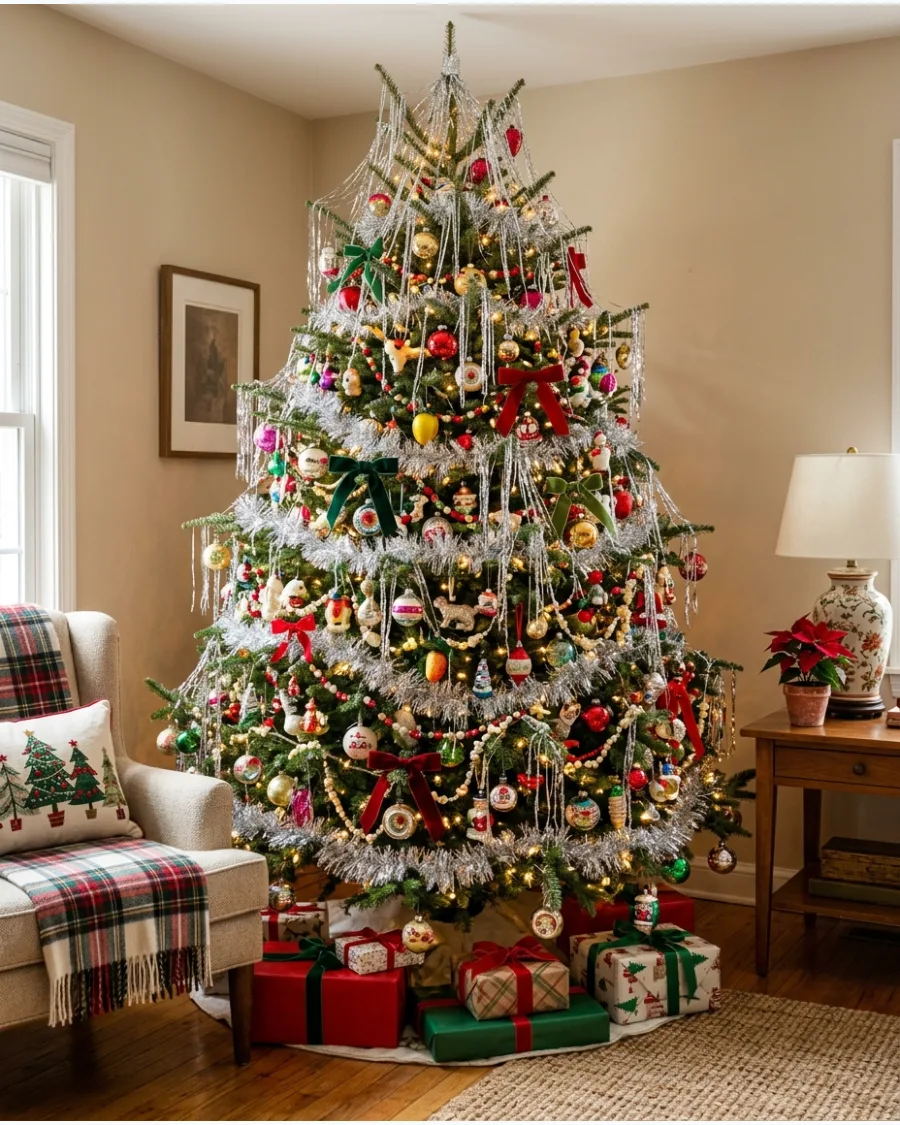
Layer abundant silver or colored tinsel with bows, glass ornaments, and novelty decorations. Distribute the different decorations throughout the entire tree so the maximalist look feels full and joyful rather than concentrated in random areas. This approach celebrates a more-is-more aesthetic.
- Collect ornaments throughout the year to build a diverse and interesting collection for layering.
- Start with the largest ornaments deep in the branches and save the tinsel for the final layer.
- Use tinsel in multiple colors like gold and silver together to create extra visual depth.
Quick win: Take a photo of the tree to find holes or empty spots that need more tinsel or ornaments.
Frequently Asked Questions
How do you put tinsel on a Christmas tree so it looks professional?
To achieve a professional look, hang small groups of two or three strands individually from the very tips of the branches rather than tossing them on in clumps. This precise technique creates a beautiful, shimmering icicle effect that catches the light perfectly.
What is the difference between lametta and tinsel garland?
Lametta consists of thin, individual icicle-like strands designed to be hung separately for a delicate dripping effect. Tinsel garland is a thick, rope-like decoration that is typically wrapped around the tree to provide bold volume and texture.
Should I put tinsel on before or after the ornaments?
You should always apply tinsel as the very last step after all your ornaments are securely in place. This layering order ensures the strands hang freely to provide depth and prevents them from getting tangled or crushed by heavier decorations.
How do you make tinsel look modern instead of retro?
For a modern aesthetic, choose a monochromatic color scheme like all-silver or all-gold and apply the strands very sparsely. This minimalist approach highlights the tree's natural shape while adding a sophisticated, high-end glow to your holiday decor.
Is tinsel safe for households with cats or dogs?
Traditional tinsel is a significant safety risk because pets may ingest the strands, leading to dangerous intestinal blockages. If you have furry friends, it is best to use safer alternatives like wide tinsel ribbon or metallic ornaments to get that festive shine.