60 Spooky Halloween Lighting Ideas

This post may contain affiliate links: full affiliate disclosure.
Lighting transforms a standard yard into a spooky destination without the need for expensive props. Focus on color layering and hidden light sources to create a professional look that keeps messy wires out of sight.
Outdoor Halloween Lights Ideas
1. Orange and Purple Porch Lights
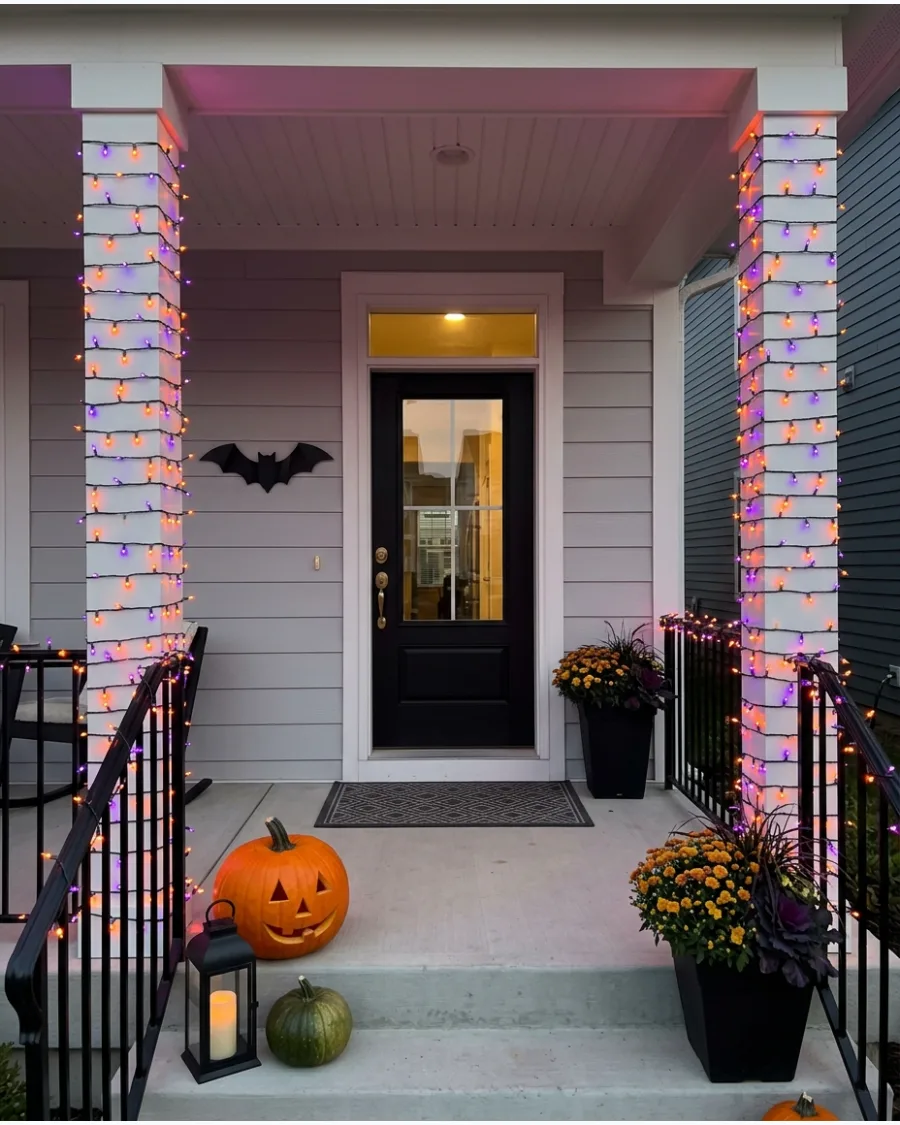
Wrapping porch posts and railings in contrasting colors creates a vibrant, high-energy entrance. Avoid a cluttered look by keeping the lines tight and uniform across every vertical surface.
Secure the strands with clear outdoor clips instead of staples to protect the wood and keep wires perfectly straight. This simple color swap sets a festive tone for the entire house.
- Purchase LED strands for lower energy use and brighter colors
- Use clear plastic clips for hidden fastening on trim
- Works for small apartment balconies or large wraparound porches
Quick win: Use a plug-in timer so the lights pop on right at dusk every night without manual effort.
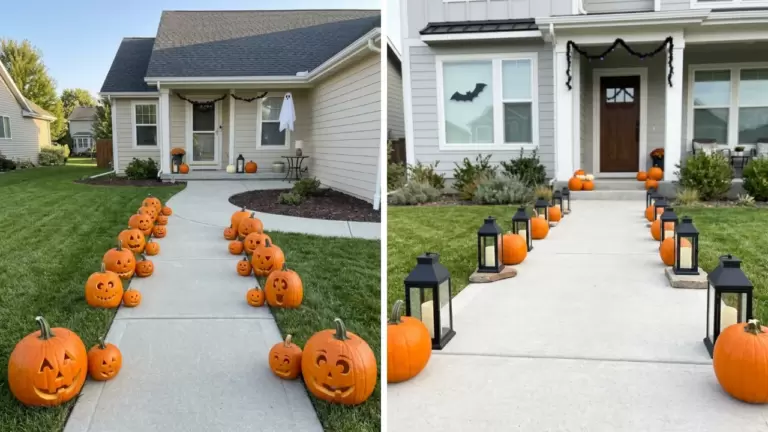
2. Glowing Pumpkin Pathway
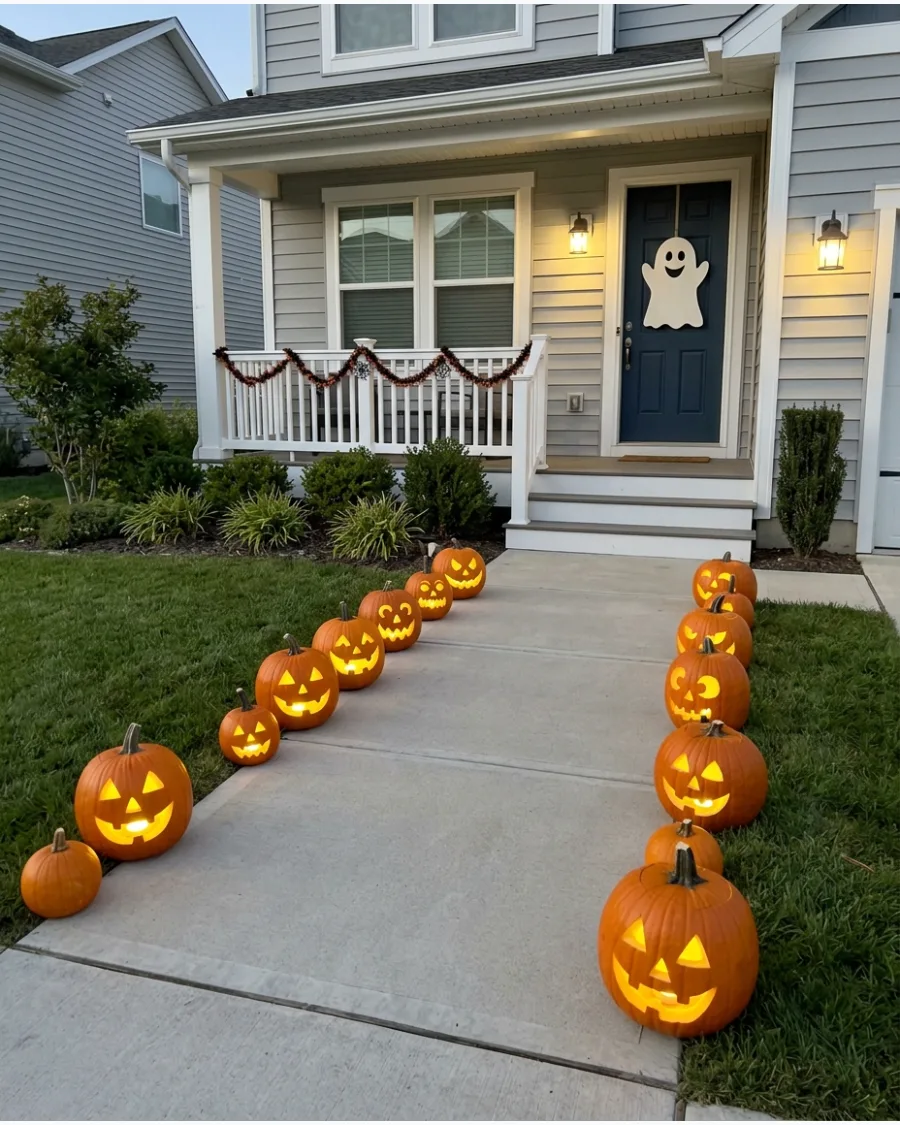
Real candles in pumpkins are a fire hazard and blow out easily in the wind.
Switch to battery-powered LED puck lights to ensure a steady, bright glow all night long. Mix different pumpkin sizes and carved expressions to add variety and depth to the walkway. This method provides a safe and reliable path for trick-or-treaters to follow.
- Use plastic or resin pumpkins for a reusable display
- Space them 2 feet apart for even lighting along the walk
- Swap for flameless tea lights if the pumpkins are small
Best shortcut: Use remote-controlled LED lights to turn them all on with one button from inside the house.
3. Purple-Lit Haunted Porch
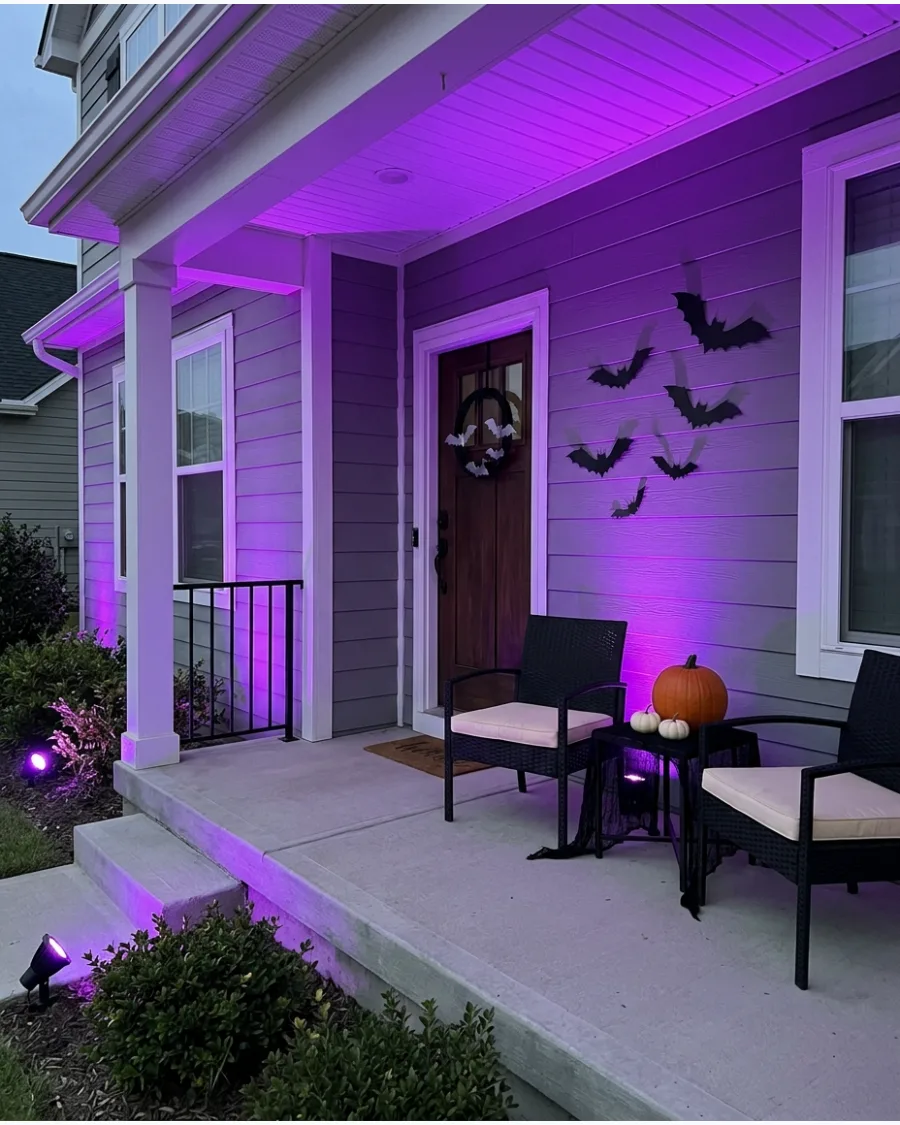
Purple spotlights create a moody, supernatural atmosphere that standard white lights cannot achieve. Position the lights at the base of the house and tilt them upward to wash the siding and ceiling in color.
Layer black cheesecloth or bat cutouts over the lit areas to create sharp, dramatic shadows against the purple glow. The high-contrast look makes the porch feel like a professional stage set.
- Buy outdoor-rated LED floodlights to withstand rain
- Place lights 3 feet from the wall for the widest beam spread
- Renters can use battery-powered uplights on the floor
Most people skip this: Clean the light lenses before setup to ensure the color stays crisp and bright throughout October.
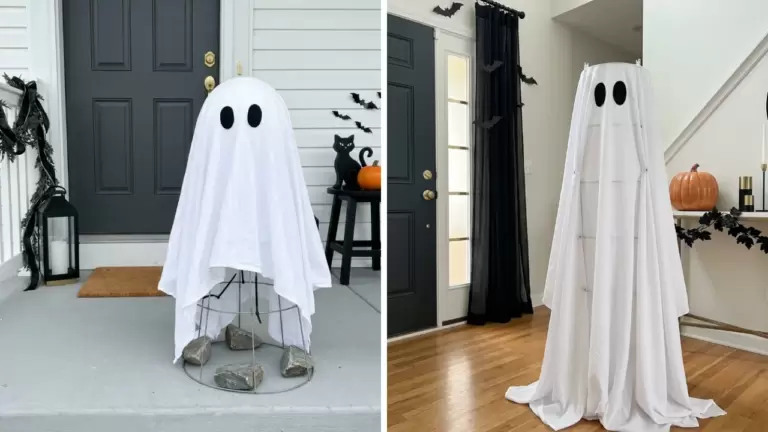
4. Lighted Ghost Yard Display
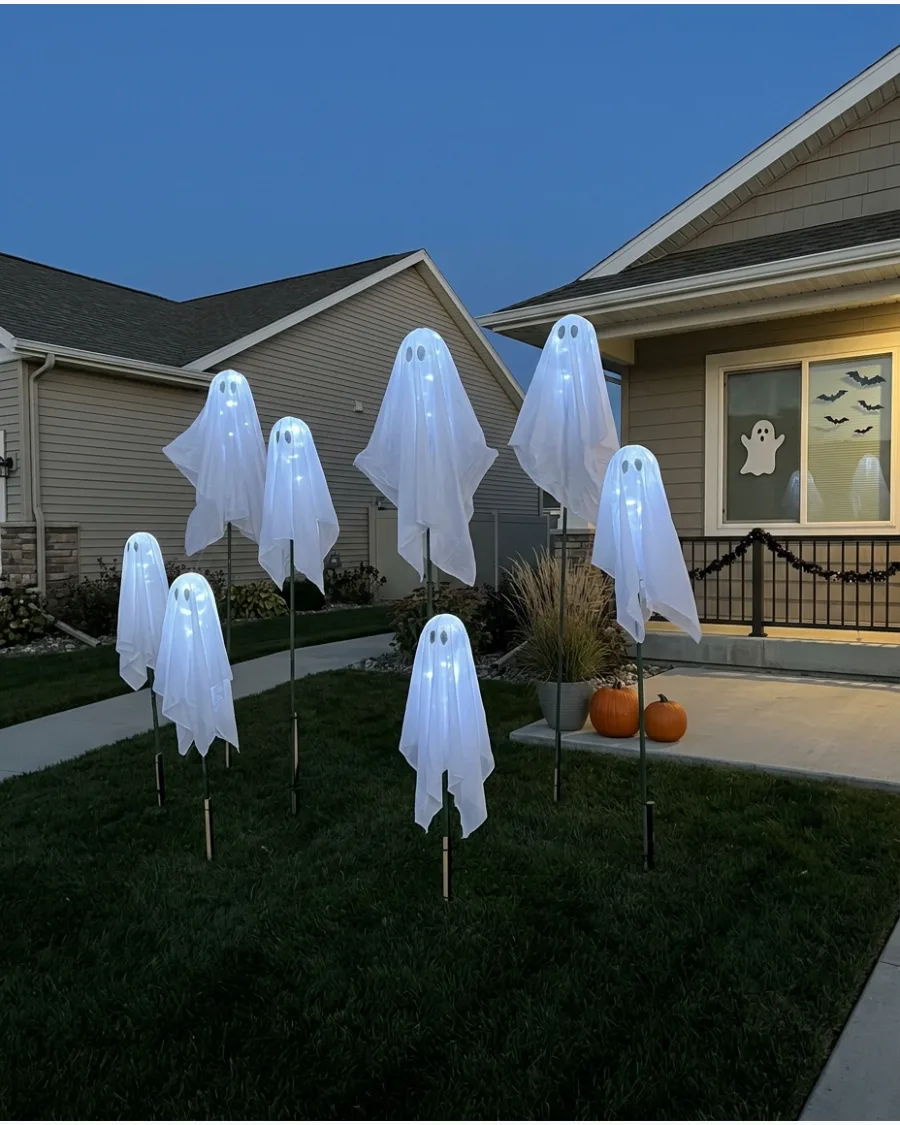
Floating ghosts add height and movement to a flat lawn. Use cool-white lights inside white fabric to give the figures an eerie, ethereal glow that stands out against the dark grass.
Drive sturdy garden stakes into the ground at varying heights to make the ghosts appear to be hovering at different levels. This creates a sense of motion that captures attention from the street.
- Use white cheesecloth or lightweight polyester fabric
- Install 3-foot and 5-foot garden stakes for height variation
- Add small black felt circles for eyes to create simple faces
Quick win: Use fishing line to tie the ghost heads to tree branches for a true floating effect that moves with the wind.
5. Orange Tree-Wrapped Lights
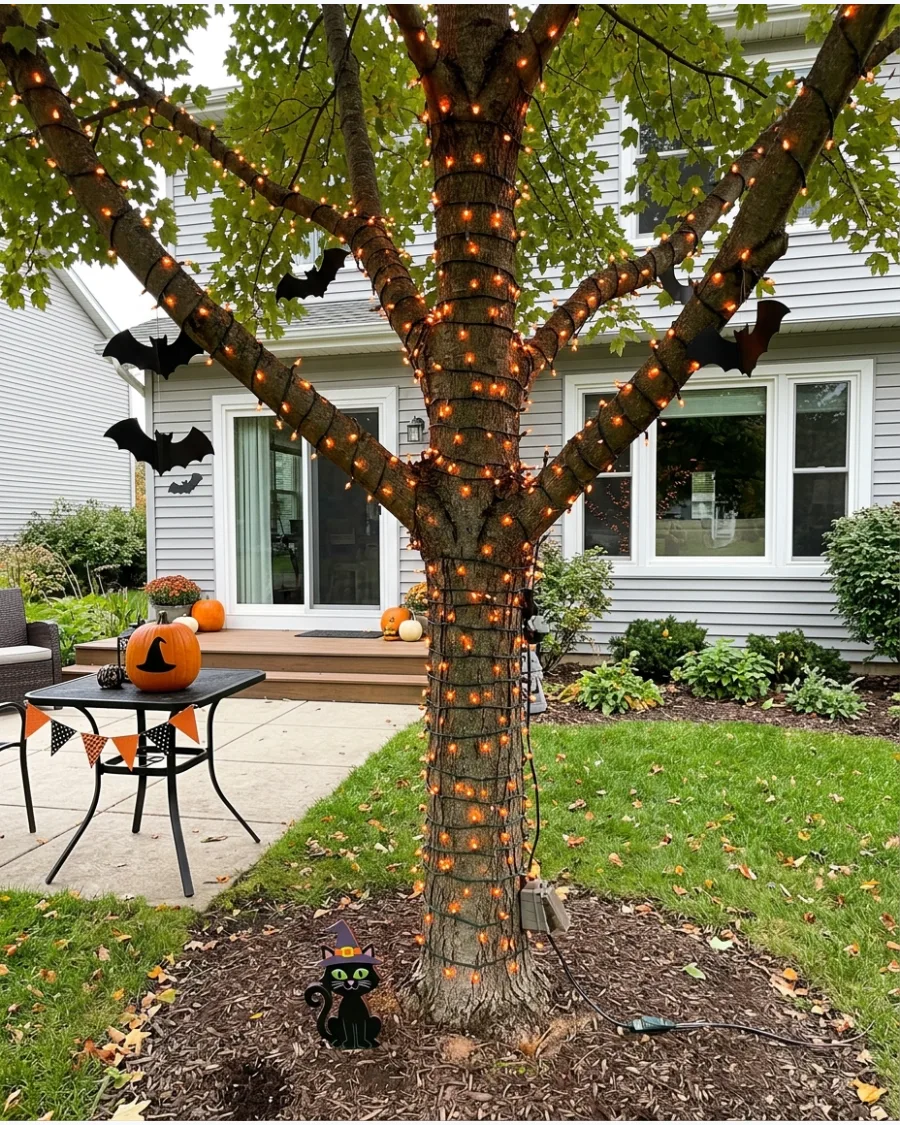
Lighting up trees extends the Halloween theme into the yard and provides extra visibility for guests. Focus on wrapping the trunk and the first few major branches to create a structured and polished look.
Hang a few black bat silhouettes from the lit branches to add a spooky focal point within the glow. The warm orange light makes the trees look like they are burning with autumn color.
- Select LED mini light strands for durability
- Use 3 strands per average tree trunk for full coverage
- Connect to a weather-proof outdoor power strip
Most people skip this: Wrap the lights from the top down so the plug ends up near the ground power source.
6. Green Witch’s Cauldron Glow
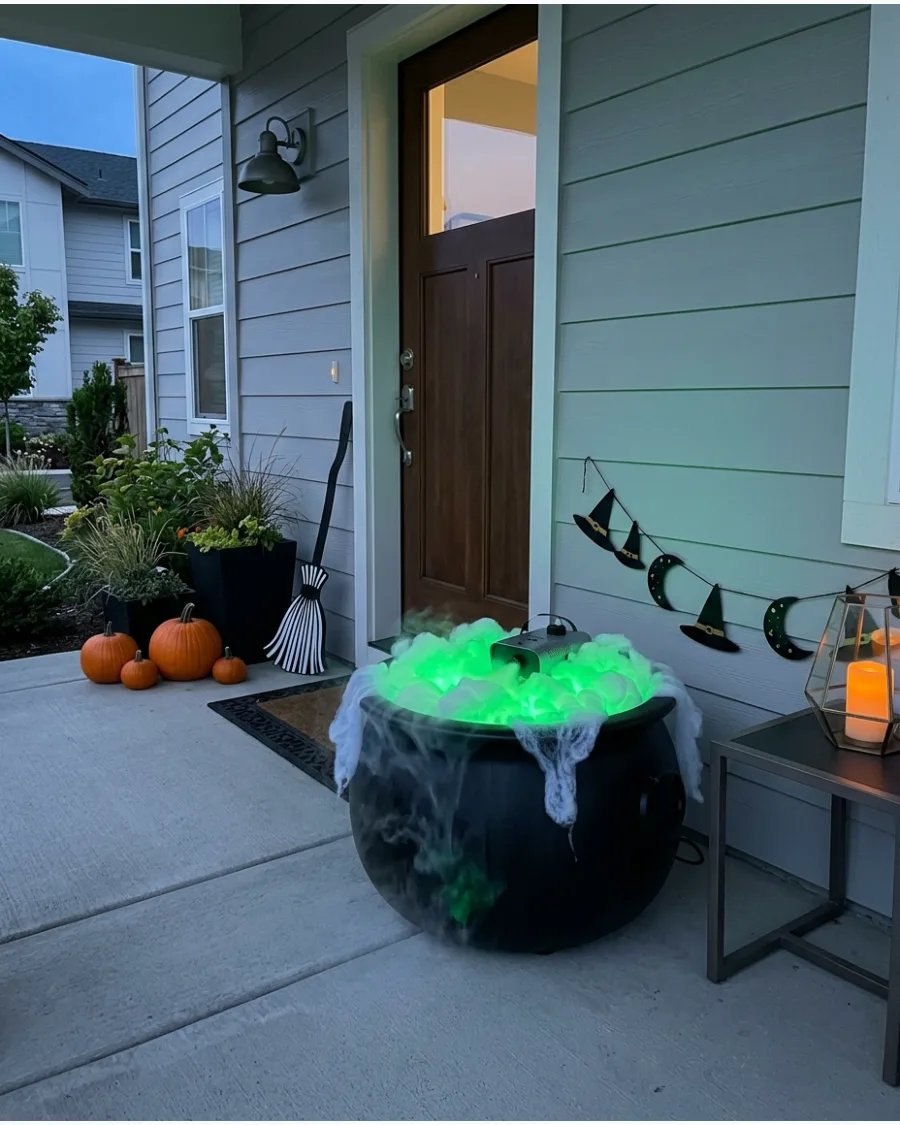
A glowing cauldron acts as a perfect centerpiece for a porch or yard scene. Use green lights and translucent poly-fill stuffing to mimic the look of a bubbling, magical potion.
Tuck a small battery-operated fog machine or dry ice inside the cauldron to add a layer of moving mist. This creates a dynamic prop that looks better as the sun goes down.
- Use a large black plastic cauldron from a party store
- Insert green battery-operated string lights for the core glow
- Use clear packing tape to secure lights to the inner rim
Best shortcut: Use a green spotlight pointed down into the cauldron if you do not want to mess with internal wiring.
7. Halloween Pathway Stake Lights
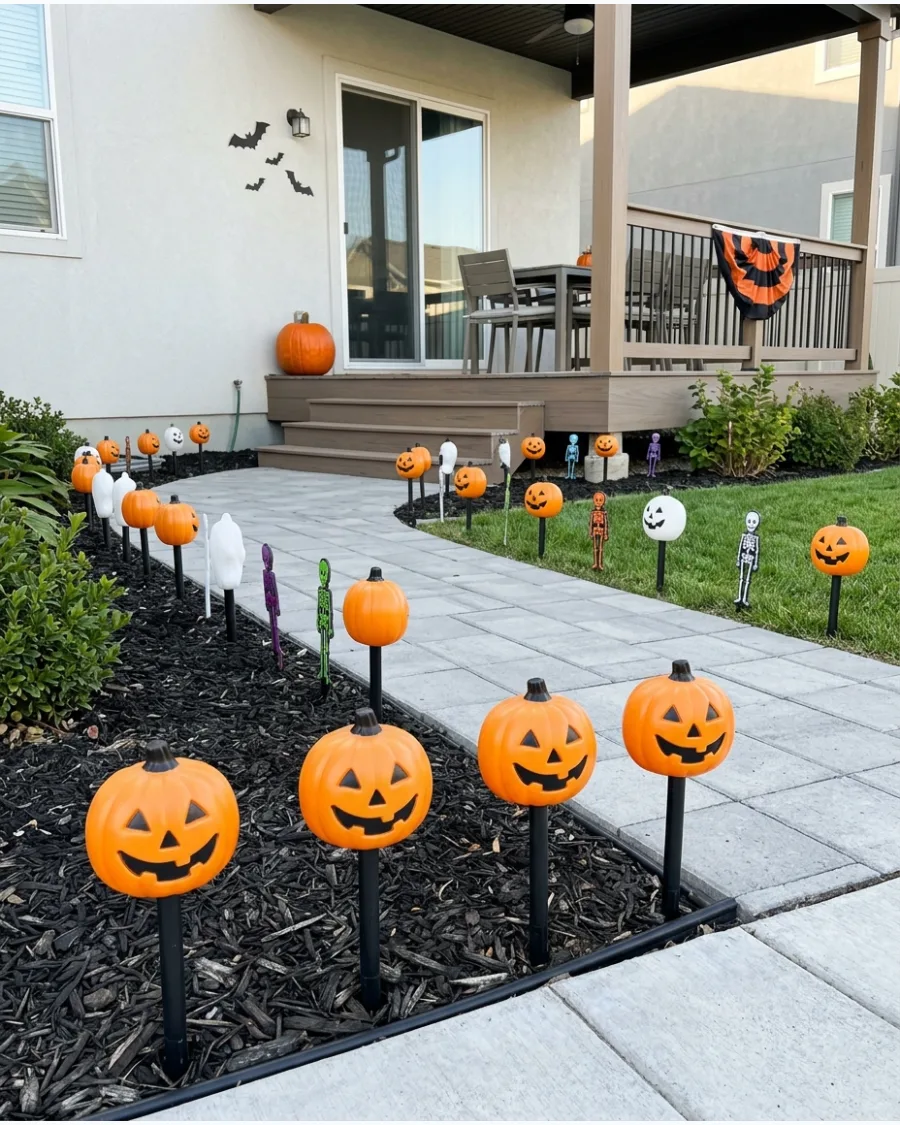
Stake lights are the easiest way to define a path while adding themed shapes to the landscape. Choose icons like skulls or pumpkins that match the rest of your outdoor decor style.
Line both sides of the driveway or front walk to ensure visitors can clearly see where they are stepping. These lights are usually solar or battery-powered, making them very low-maintenance.
- Choose solar-powered pathway stakes for easy setup
- Space them 18 inches apart for a continuous line of light
- Wipe solar panels weekly for maximum brightness
Quick win: Push the stakes all the way into the ground so they do not lean or wobble in soft soil.
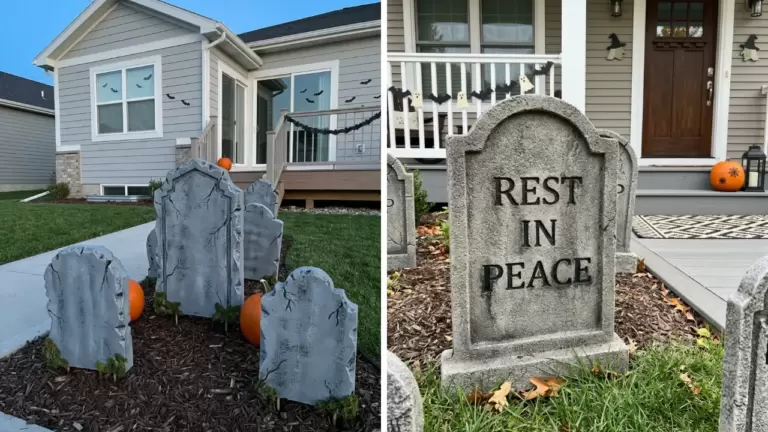
8. Glowing Cemetery Tombstones
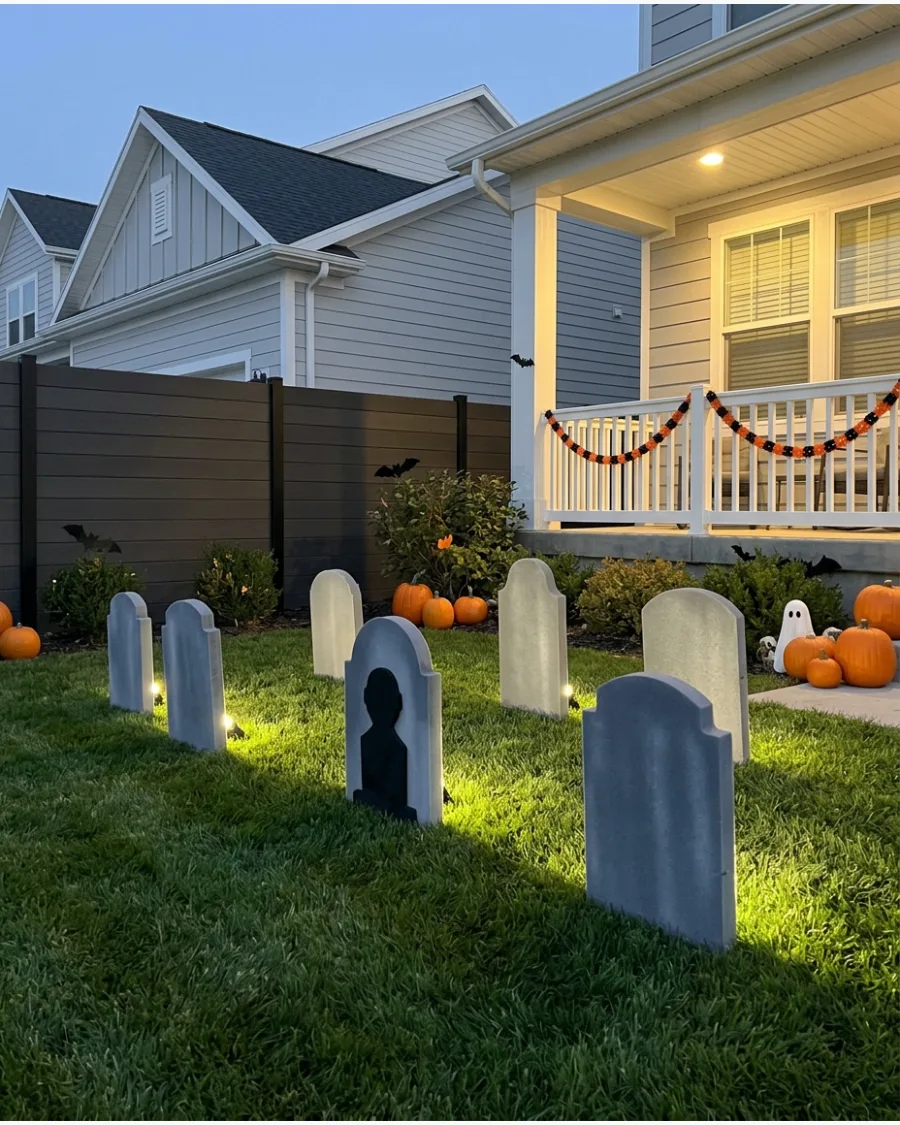
Backlighting tombstones makes them pop without washing out the details on the front. Hide small spotlights behind each stone and point them toward the ground or a nearby wall.
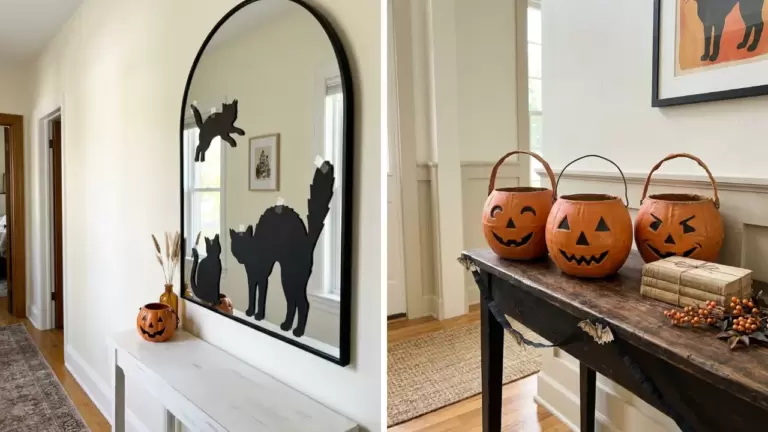
Position the lights at a very low angle to cast long, creepy shadows across the grass. This technique keeps the light source invisible to passersby, maintaining the mystery of the scene.
- Use mini LED spotlights with adjustable heads
- Apply black duct tape to hide silver light housings
- Secure tombstones with metal H-stakes to prevent tipping
Most people skip this: Angle the light slightly to the side to create more dramatic, elongated shadows.
9. Blue Moonlit Graveyard
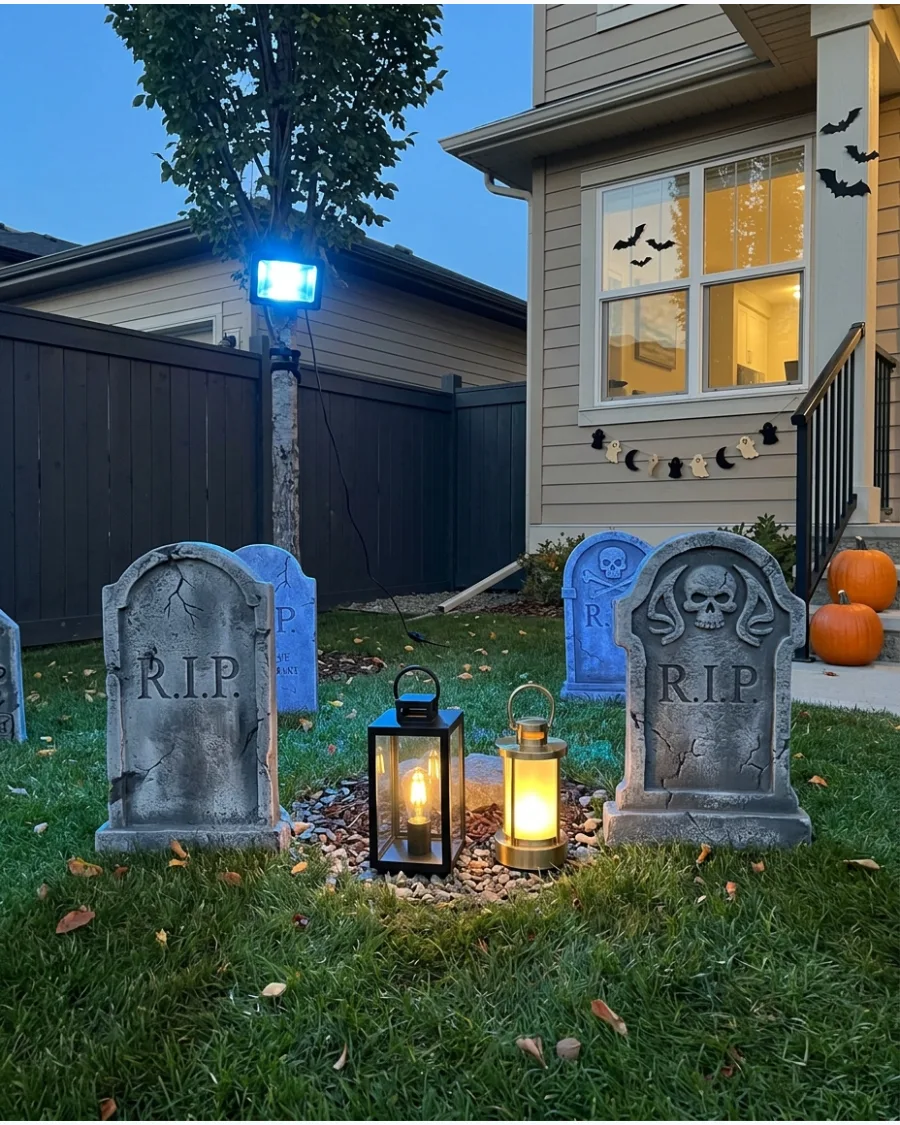
Cool blue lighting mimics the look of a full moon and provides a chilling backdrop for a graveyard display. Use wide-angle floodlights to cover the entire graveyard in a soft wash of blue.
Add a few warm-toned lanterns near the center of the display to provide a focal point and color contrast. The mix of cool and warm light creates a professional, cinematic look.
- Use blue outdoor floodlight bulbs in standard fixtures
- Choose a 100-watt equivalent LED for large yards
- Place the light 10 feet back for a soft, even wash
Best shortcut: Use a smart bulb in an existing outdoor fixture to change the color to blue instantly with an app.
10. Purple and Green Graveyard Lights
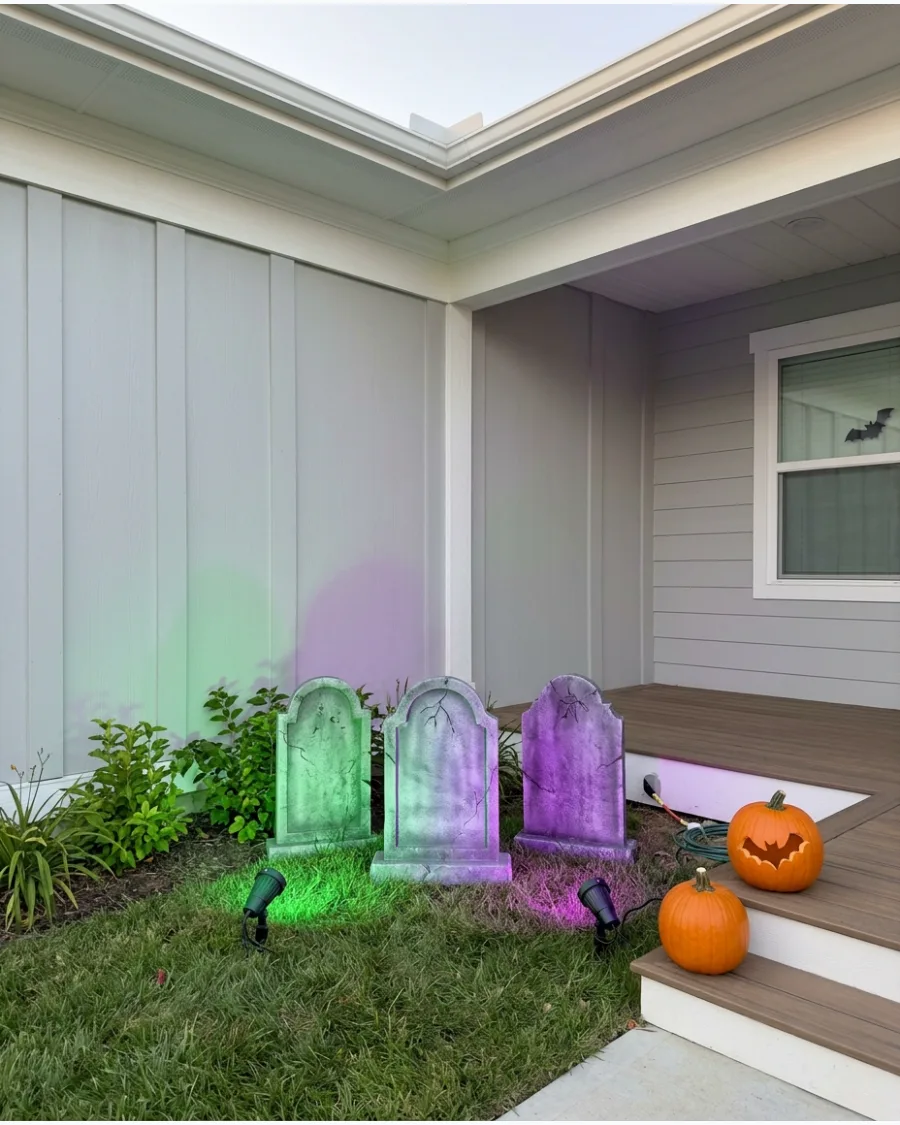
Using two different colors adds depth and a haunted vibe to the yard. Place green lights on one side and purple on the other, allowing them to meet in the middle of the display.
Cross the beams slightly in the center of the graveyard to create a third, blended color zone for a layered effect. This approach makes the scene look more complex and thoughtfully designed.
- Buy a pair of colored LED floodlights with stakes
- Use adjustable stakes for easy aiming at different angles
- Works best when projected against light-colored siding or fences
Quick win: Use a ground-level power box to keep all the plugs dry and organized during fall weather.
11. Flickering Cemetery Lanterns
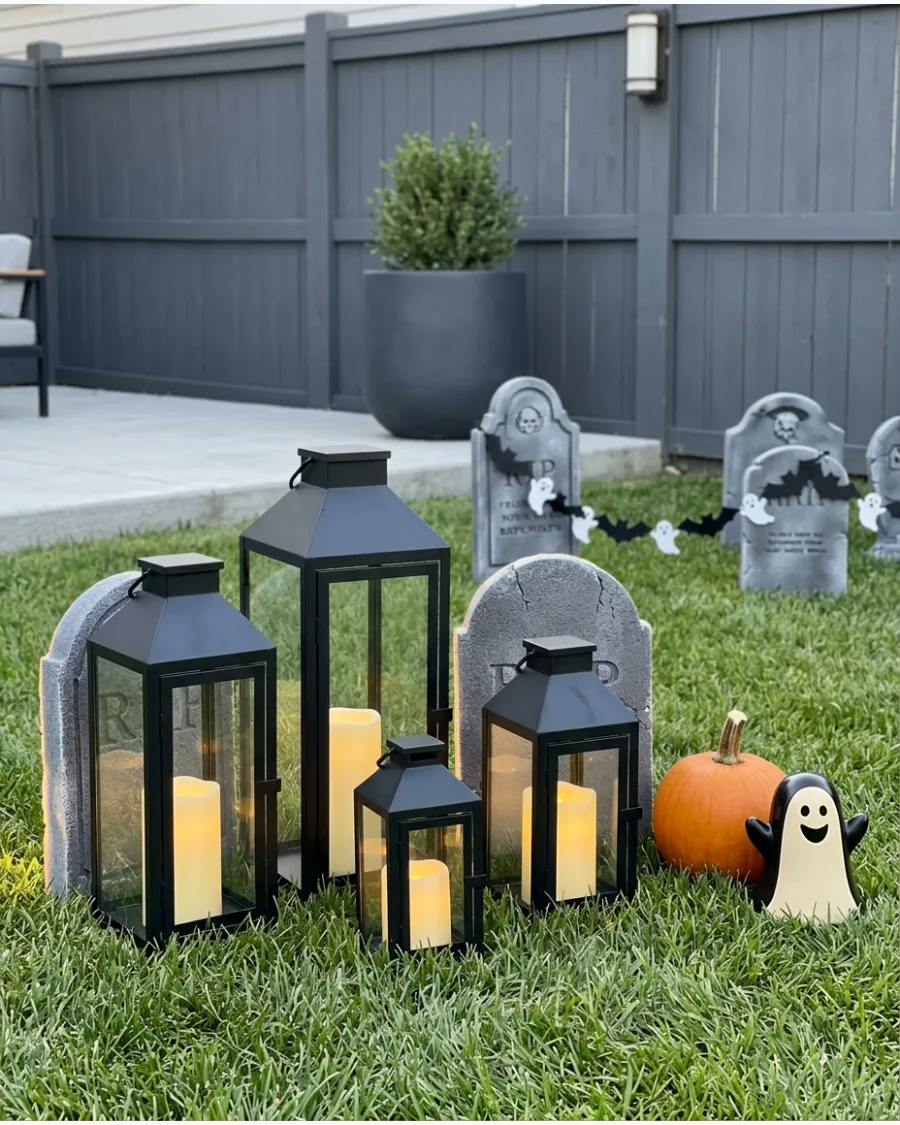
Use battery-operated flickering lanterns to add movement and mystery to a graveyard display. Mixing different heights prevents the setup from looking too flat or staged.
Tuck smaller lanterns behind tombstones to create a back-lit glow that highlights the edges of your props. Lanterns with built-in timers save you the hassle of walking through the yard every night.
- Available at most hardware stores or seasonal decor shops for $15-$30 each.
- Set the lanterns on flat ground or small pavers to keep them from tipping over in the wind.
- Switch to solar-powered flickering torches if you want a hands-off setup that charges during the day.
Quick win: Use lanterns with a frosted glass finish to hide the artificial candle and create a softer, more realistic glow.
12. Glowing Skeleton Porch Scene
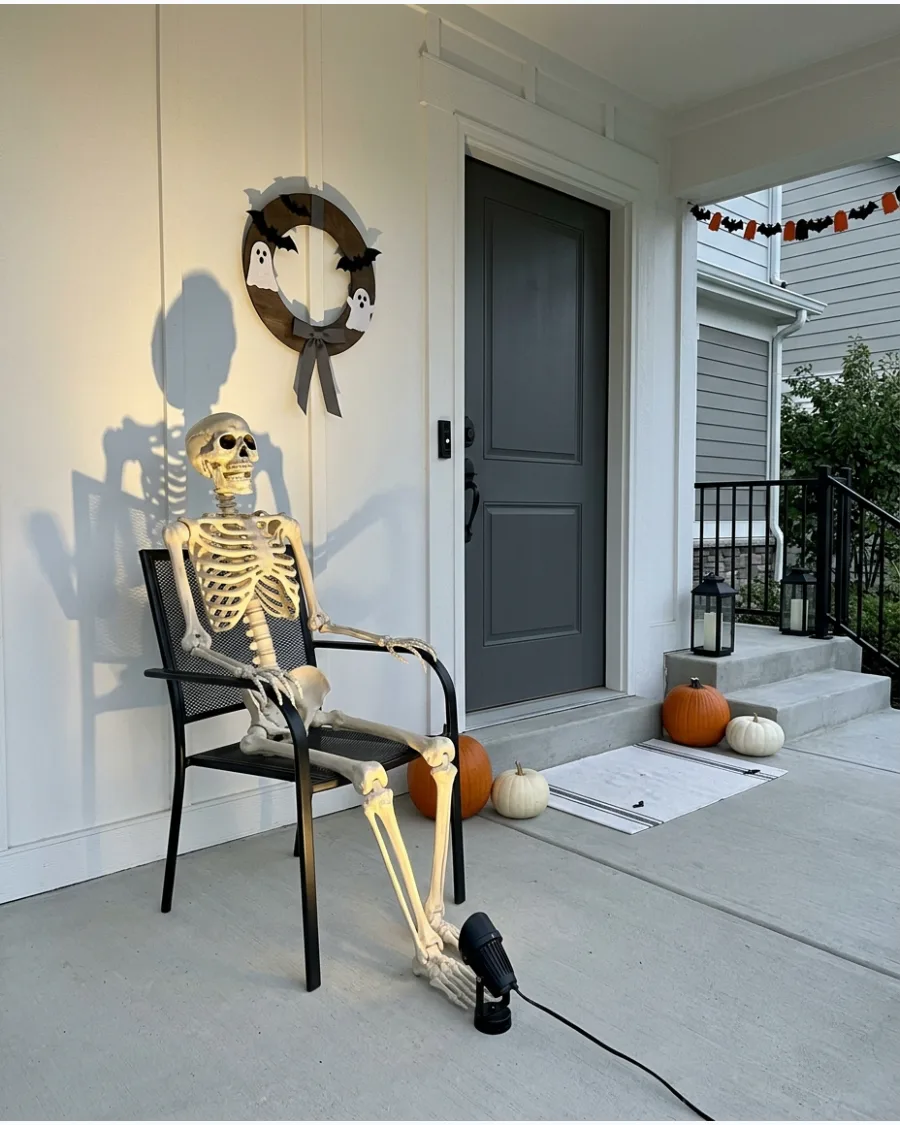
Set a plastic skeleton in a chair or against a wall and place a warm-white spotlight at its feet. Up-lighting creates long, eerie shadows on the porch ceiling and emphasizes the bone structure.
Point the light slightly away from the door to ensure the skeleton stays the focal point without blinding guests. This setup works best in dark corners where the contrast is highest.
- Basic poseable skeletons cost around $40 at big-box retailers.
- Secure the skeleton to the chair with clear zip ties so it doesn't slump over or blow away.
- Swap the white bulb for a pale blue one to give the scene a cold, ghostly atmosphere.
Most people skip this: Angle the light so the skeleton’s shadow falls onto a flat wall for a much larger, more imposing visual.
13. Lighted Skeleton Tree
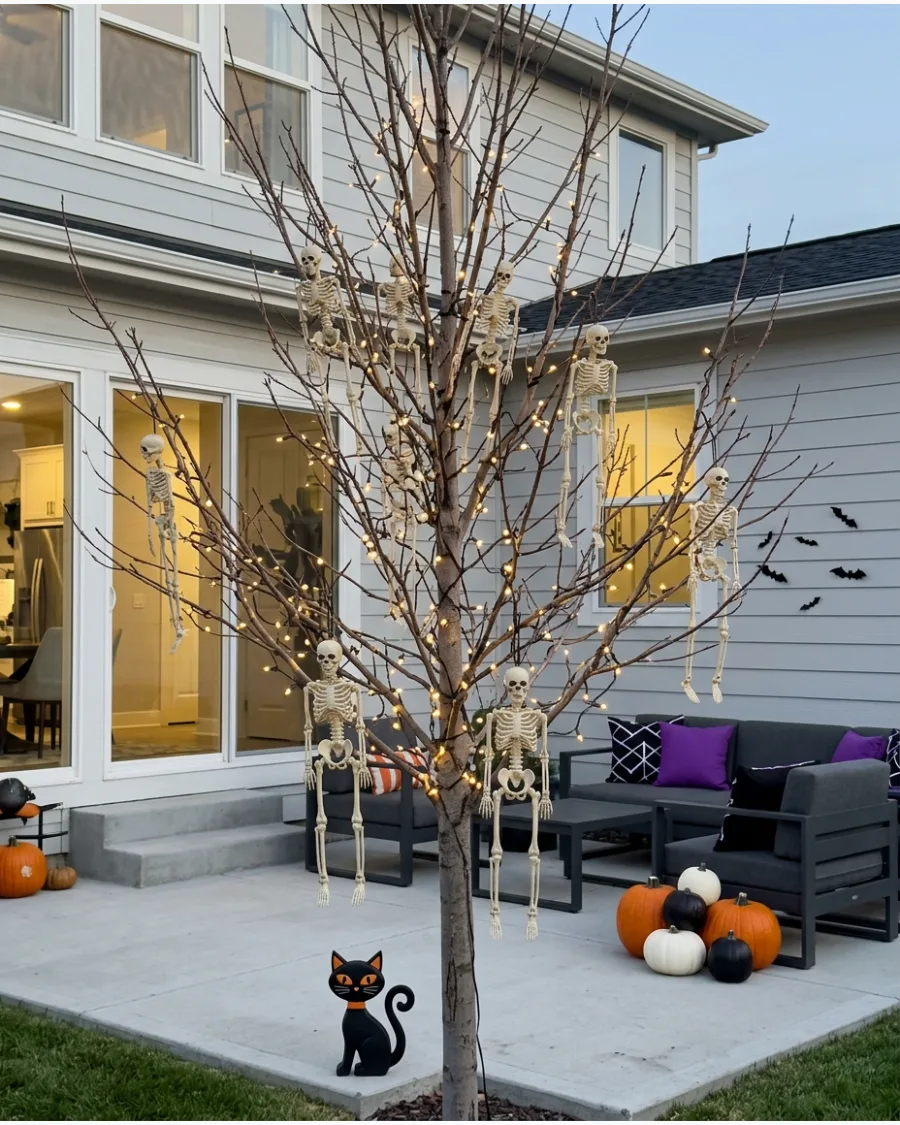
Hang small, lightweight skeletons from tree branches and wind dim string lights around the limbs.
Keeping the lights low-intensity ensures the skeletons don't disappear into a bright glare. Use black zip ties to attach the figures so they stay in place during autumn breezes. This turns a standard yard tree into a vertical haunted display.
- Mini skeletons are often sold in packs of 6 or 12 for under $20.
- Use battery-operated string lights with waterproof battery boxes if the tree is far from an outlet.
- Add a few plastic crows among the skeletons to fill in gaps in the branches.
Best shortcut: Use 'fairy lights' on a dark wire because the thin wire becomes invisible against the bark at night.
14. Floating Candle Porch Ceiling
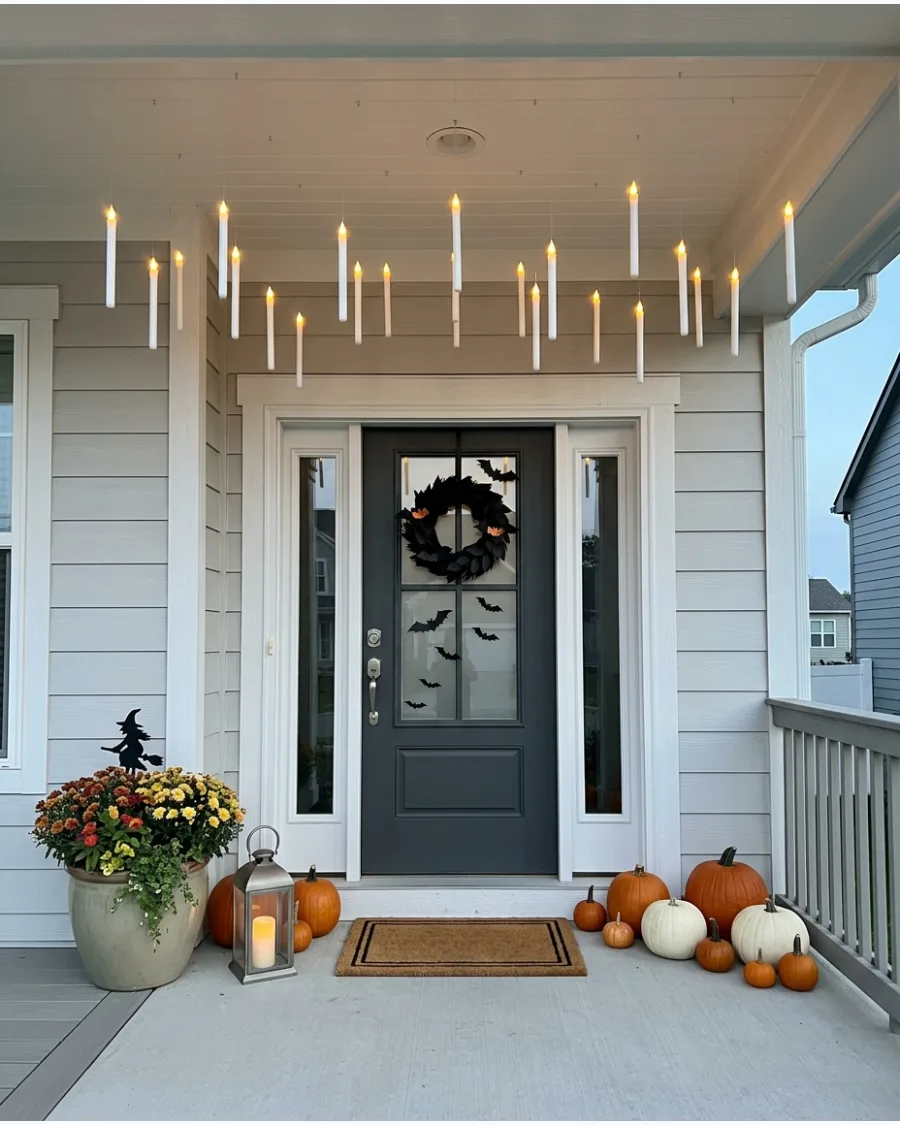
Use clear fishing line to hang battery-operated taper candles from your porch roof. Varying the heights makes the candles look like they are hovering in mid-air.
Choose candles with a remote control so you can turn them all on at once without using a ladder. This creates a magical, slightly unsettling look for anyone walking up to the door.
- Floating candle kits often include 12 to 20 candles and a remote for $25-$40.
- Use small adhesive clear hooks on the ceiling for a damage-free setup that is easy to remove.
- Hang them closer to the house wall if you live in a very windy area to prevent tangling.
Quick win: Use different lengths of fishing line to ensure no two candles are at the exact same level for a more natural look.
15. Glowing Spiderweb Wall
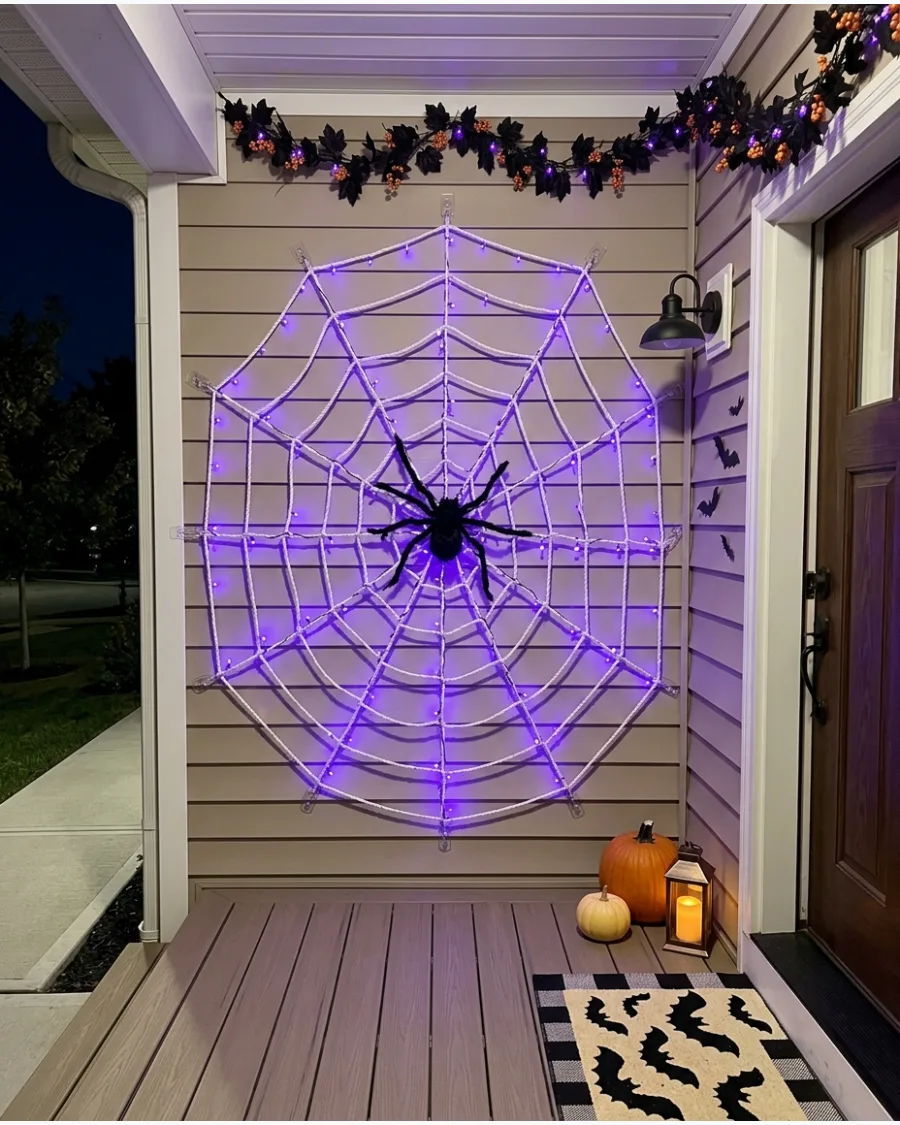
Stretch a large rope or fabric spiderweb across a flat exterior wall and weave purple or white lights through the strands. Placing a large, dark spider near the center creates a clear silhouette against the glow.
Focus the lighting on the outer edges of the web to define its shape against the house. This covers a large area with very little effort.
- Large outdoor spiderwebs and giant spiders can be found as sets for about $30.
- Use siding clips or removable outdoor hooks to avoid drilling holes into your home's exterior.
- Wrap the lights around the main support lines of the web rather than the cross-sections for better visibility.
Most people skip this: Use a purple spotlight on the ground pointed at the web to fill in any dark spots between the string lights.
16. Lighted Spiderweb Bushes
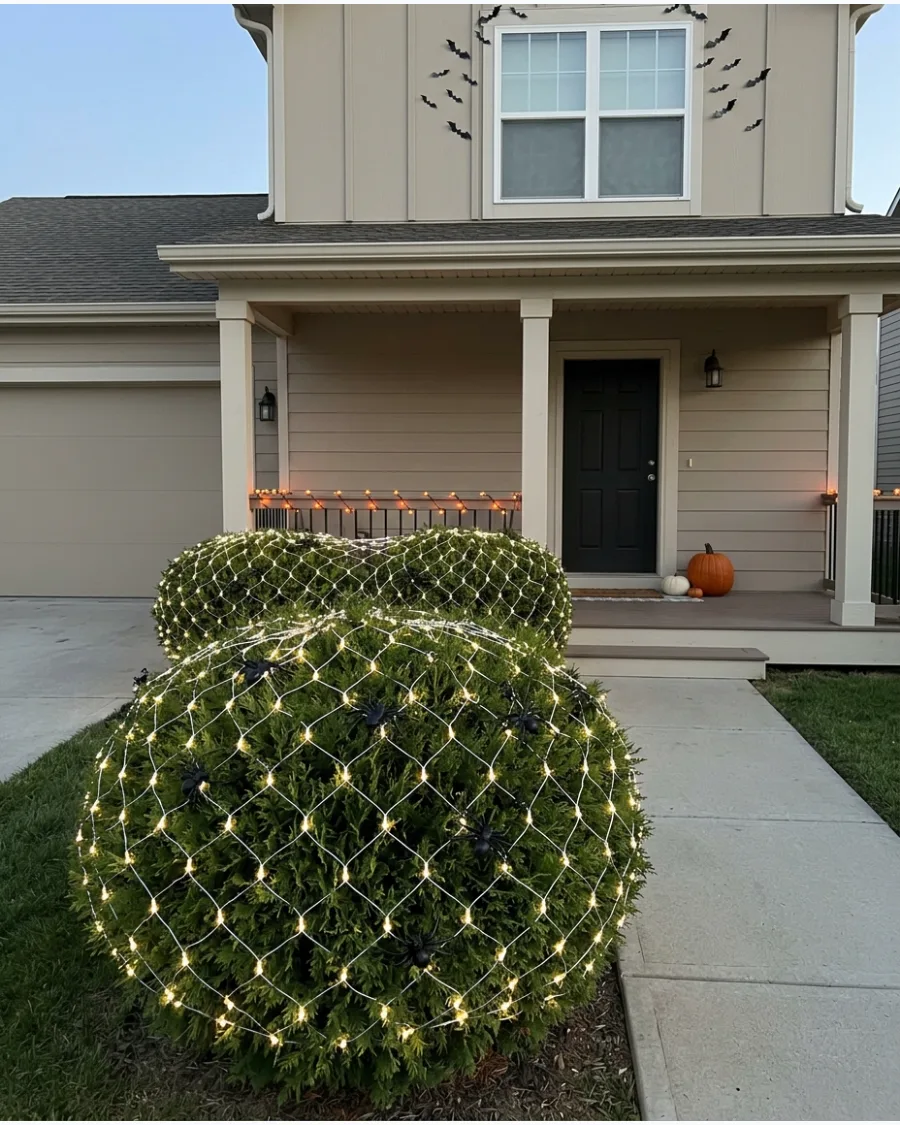
Drape white net lights over your front yard bushes for an instant glowing foundation. The grid pattern of the net perfectly mimics the structure of a massive web.
Scatter several small black plastic spiders across the lights to break up the uniform pattern. It is a fast way to light up the landscape without wrapping individual branches.
- White net lights are standard holiday items usually priced between $10 and $20 per set.
- Connect multiple nets together if you have a long hedge, but check the wattage limits on the package.
- Pull the net tight at the bottom and stake it into the mulch to keep it from shifting.
Best shortcut: Use 'cool white' LEDs instead of warm white to get a crisp, icy look that feels more like silk webbing.
17. Giant Glowing Spider Eyes
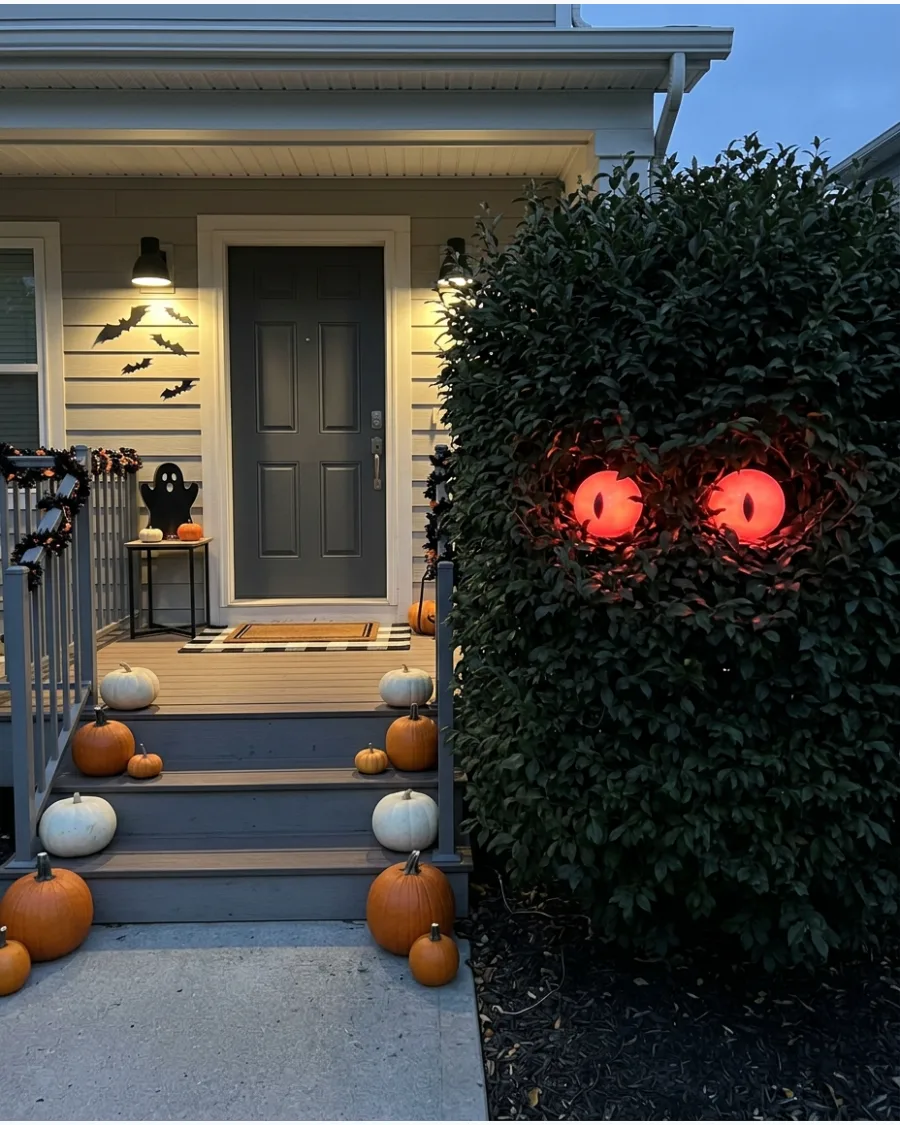
Hide two round, illuminated globes inside a dark bush or behind a porch railing to look like a pair of watching eyes. Keeping the rest of the area dark makes the eyes pop and creates a sense of something hiding.
Use red or green bulbs to give the creature a more monstrous feel. This is a subtle way to add a spooky factor without using gore.
- You can use battery-powered globe lights or even glow sticks inside plastic containers for a low-cost version.
- Mount the lights on small stakes or zip-tie them to inner branches so they stay level.
- Place the eyes at roughly waist-height to make them feel more like a large animal is lurking.
Quick win: Use a slow-fade or pulsing light setting to make it look like the creature is breathing or blinking.
18. Halloween Curtain Lights on the Porch
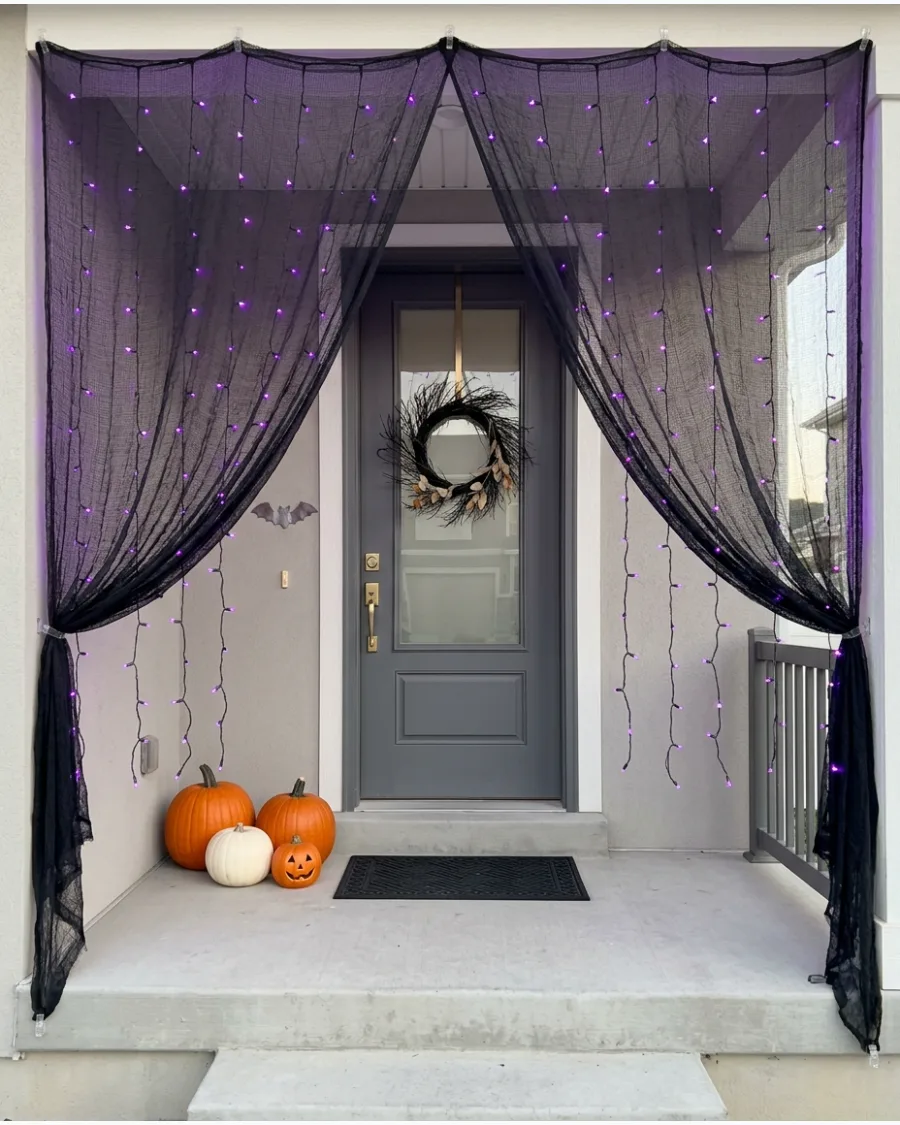
Hang purple or orange curtain lights across a porch opening and layer sheer black fabric in front of them. The fabric diffuses the light and creates a soft, foggy glow that hides the individual bulbs.
Secure the fabric at the top and bottom so it doesn't flap too much in the wind. This creates a dramatic backdrop for other decorations like pumpkins or skeletons.
- Curtain lights come in 6×6 or 10×10 foot sizes, usually costing $20-$35.
- Black creepy cloth or sheer polyester fabric is available in large rolls for under $15.
- Use a tension rod to hang the lights and fabric if you have a recessed porch area.
Most people skip this: Use a mix of purple and orange curtain lights behind the fabric for a more textured, multi-colored glow.
Halloween Lights Ideas
19. Layered Bat Silhouette Entryway
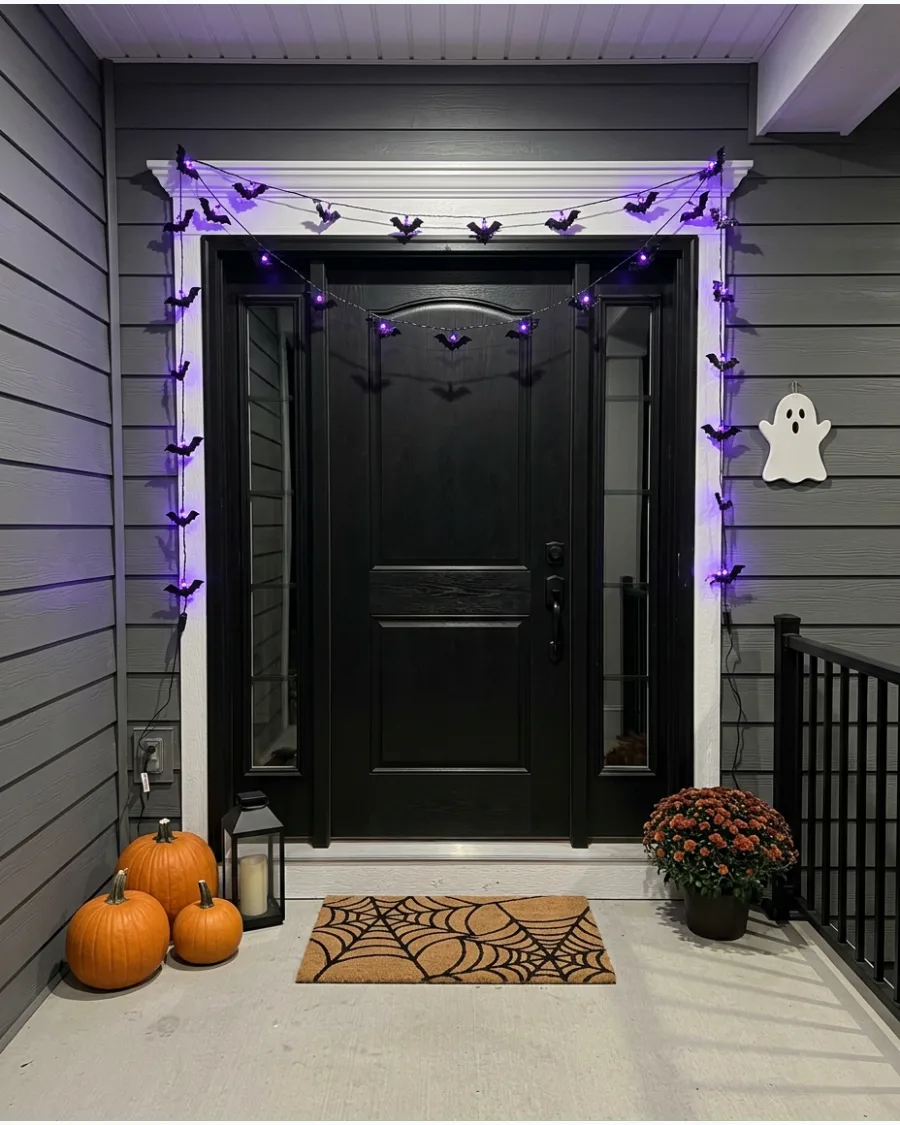
Using purple or orange bat-shaped string lights around a door frame creates an instant spooky focal point for trick-or-treaters. This setup works because the repeating shapes provide texture without requiring heavy hardware or permanent changes.
Drape three strands of lights loosely over the door molding to create a cascading effect rather than a tight, rigid line. Using LED versions ensures the lights stay cool against wooden trim or wreaths throughout the evening.
- Look for battery-operated strands with timers to save on energy and avoid messy extension cords.
- Secure the wires with clear adhesive clips every twelve inches to prevent sagging or snagging during use.
- Intertwine the bat lights with a simple grapevine garland for a more organic, dimensional look.
Most people skip this: check the spacing between bats on the wire before buying, as wider gaps often look sparse and lose the swarm effect when lit.
Outdoor Halloween Lights Ideas
20. Glowing Pumpkin Arch
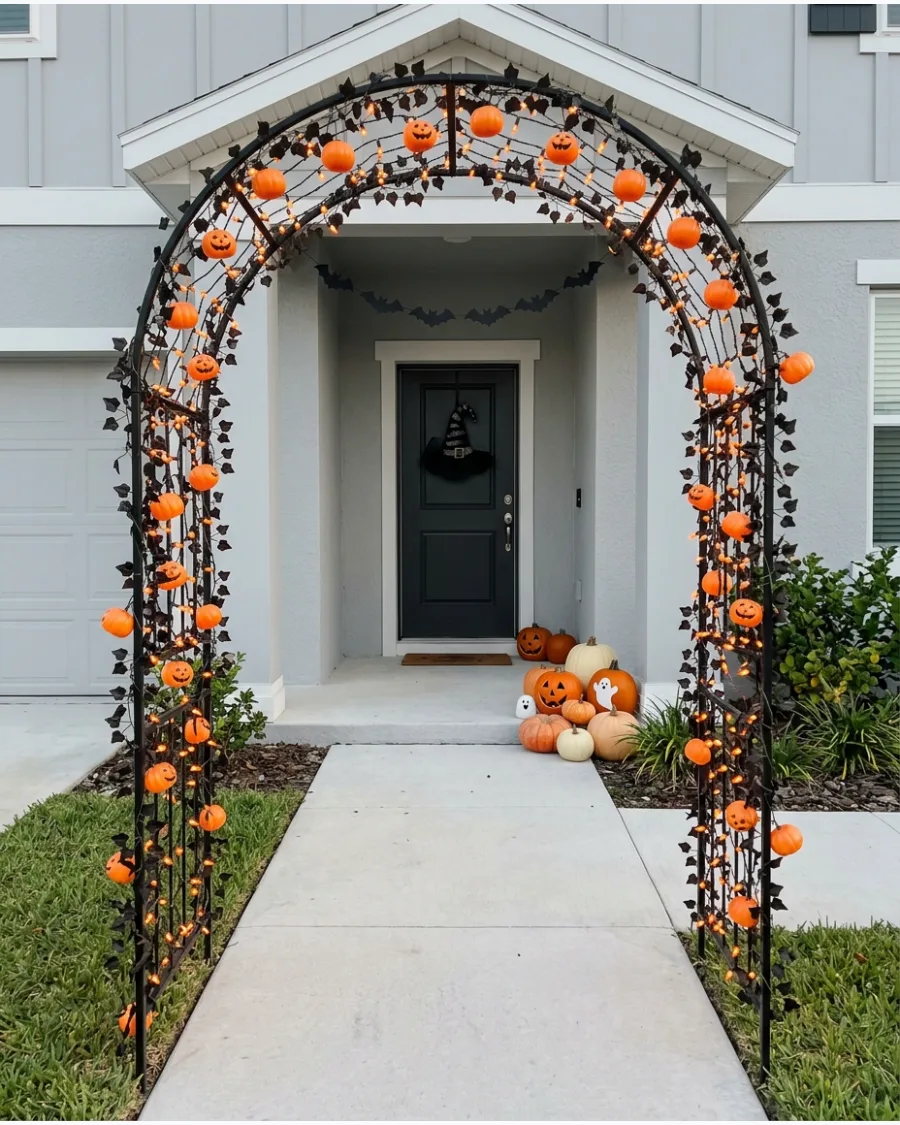
Create a walk-through entrance using a lightweight archway covered in artificial pumpkins and orange lights. Mixing in dark faux vines or fall leaves helps hide the wires and the arch frame.
Use lightweight plastic pumpkins so the structure doesn't become top-heavy or unstable. This creates a grand entrance for trick-or-treaters.
- A basic metal garden arch costs around $35, while plastic pumpkins are $1-$5 each.
- Use heavy-duty zip ties to attach the pumpkins to the arch frame so they stay secure.
- Weight the base of the arch with sandbags or stakes to prevent it from tipping in the wind.
Quick win: Carve small holes in the back of the plastic pumpkins and tuck a bulb from the string lights inside each one to make them glow.
21. Witch Hat Pathway Lights
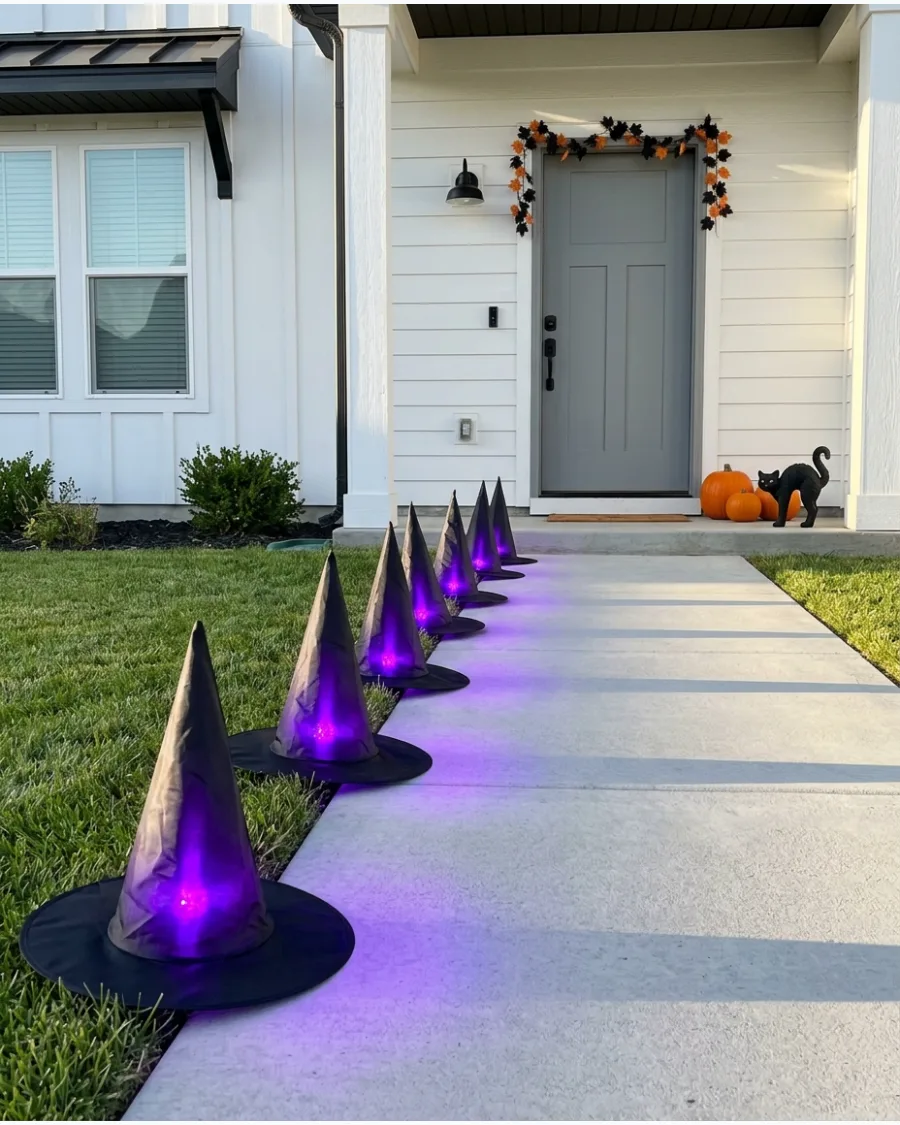
Line a front walkway with classic black witch hats to guide guests to the door. Placing a battery-operated LED puck light or a glow stick inside each hat makes the fabric shine from within.
Space the hats about two feet apart to create distinct pools of colored light on the concrete. Using purple or green lights inside the hats adds a more mystical feel than standard white bulbs.
- Standard black fabric witch hats from a costume shop.
- Set one battery-powered LED puck light under the center of each hat.
- Use heavy fishing weights or small rocks inside the brim to keep hats from blowing away in the wind.
Quick win: Use color-changing LED pucks with a remote so you can switch the pathway color from purple to green without lifting the hats.
22. Glowing Ghost Tree
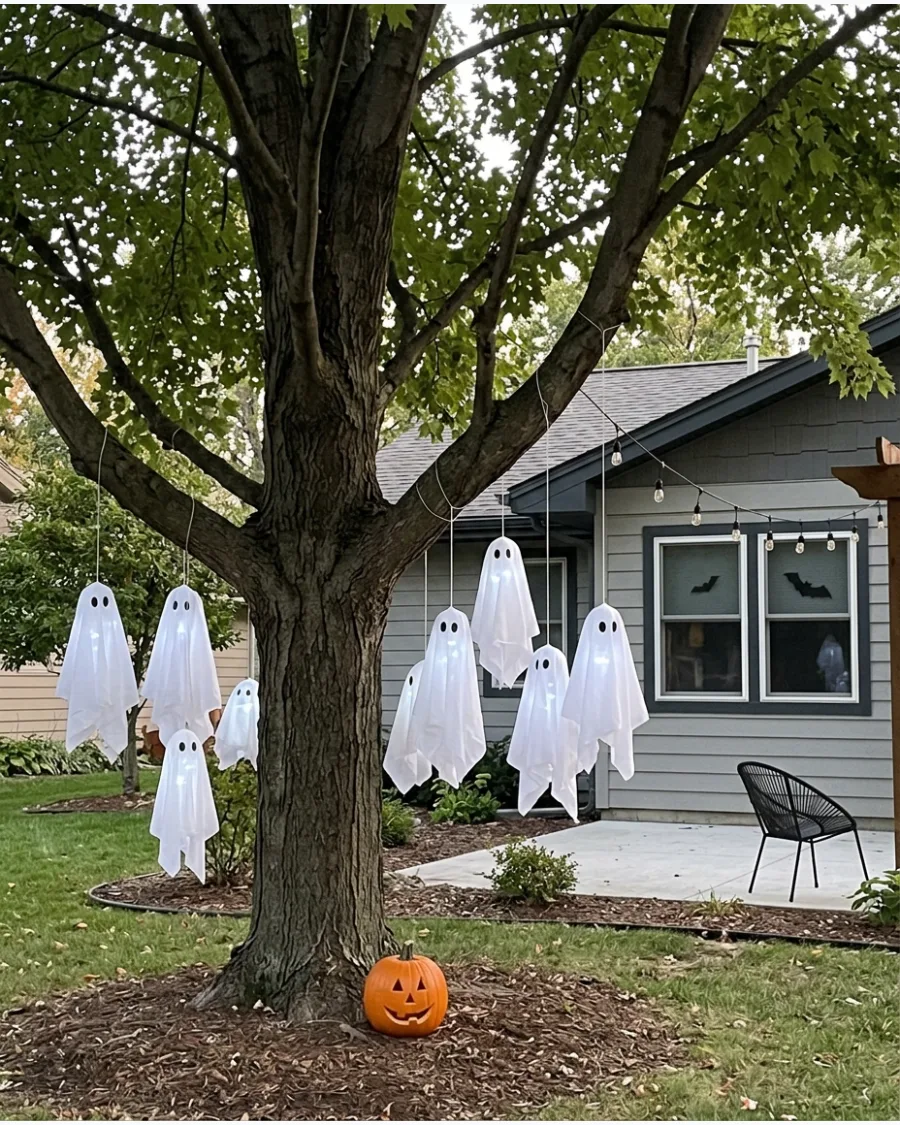
Transform a front-yard tree into a gathering of spirits by hanging fabric ghosts from the lower branches. Insert a small LED balloon light or a battery-operated bulb inside each ghost to make the white fabric glow.
Vary the hanging heights and sizes of the ghosts to make the scene look more dynamic and less uniform. Lightweight white polyester fabric works best because it catches the light without becoming too heavy for the branches.
- White polyester fabric or old white sheets cut into squares.
- Tie the fabric over a small foam ball or balloon and secure with clear fishing line.
- Hang ghosts at least 12 inches apart to prevent them from tangling in the wind.
Most people skip this: Use blue-toned LED lights inside the ghosts to give them a colder, more spectral appearance compared to warm white bulbs.
23. Haunted Forest Lighting
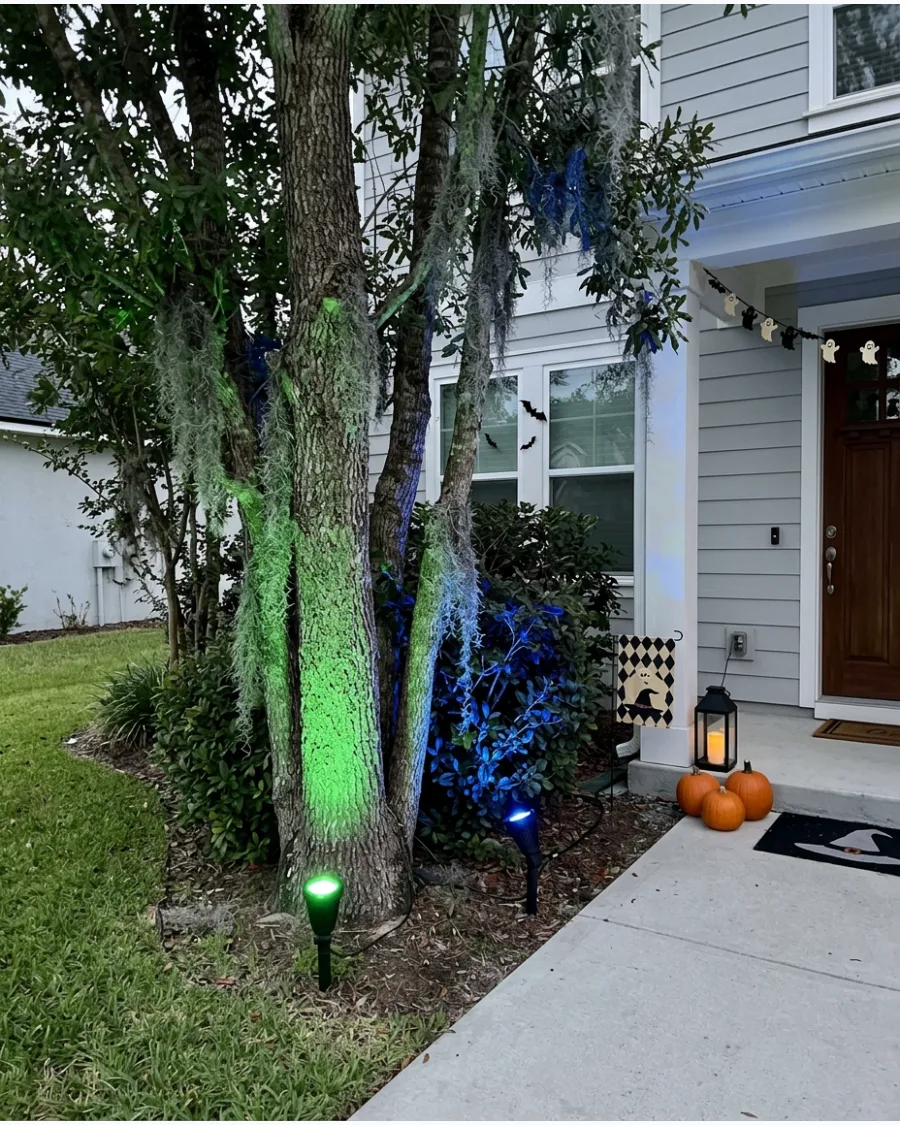
Turn a standard group of trees or shrubs into a spooky woods scene using colored spotlights. Aiming green and blue lights toward the trunks and thick branches creates deep shadows and highlights the texture of the bark.
Position the spotlights at the base of the trees and tilt them upward for a dramatic uplighting effect. Adding a few strands of gray artificial moss to the branches will help catch the light and add to the mysterious atmosphere.
- Outdoor-rated LED spotlights with adjustable heads.
- Place lights 3 to 5 feet away from the tree trunk for the best coverage.
- Add clumps of gray Spanish moss or tattered gray fabric to branches to catch the colored light.
Best shortcut: Use a single RGB outdoor floodlight that can project two colors at once to simplify your wiring and setup.
24. Red Haunted-House Windows
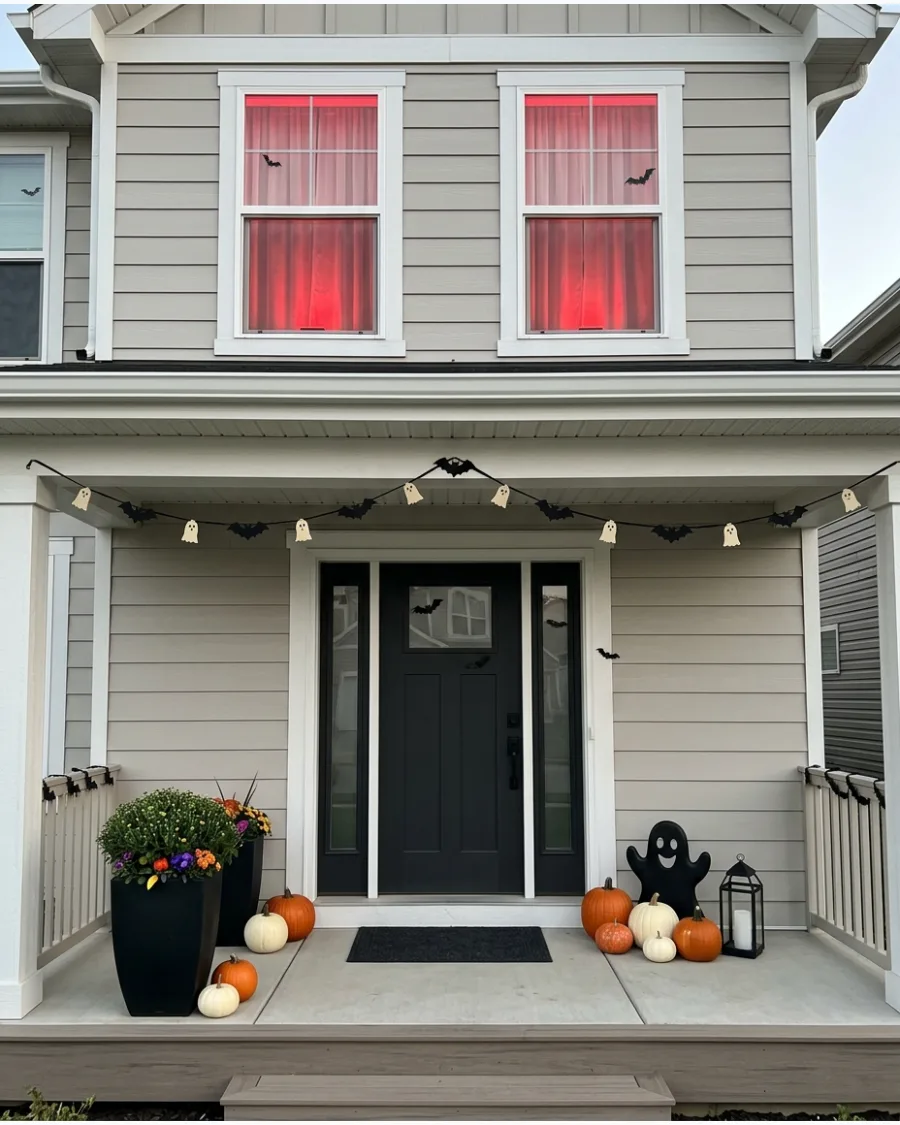
Make a home look occupied by something spooky by turning the upper windows into glowing red portals. Placing red LED floodlights or red-tinted bulbs behind sheer white curtains creates a solid, eerie glow that is visible from the street.
Ensure the curtains are closed completely to hide the light source and diffuse the glow across the entire window pane. Keeping the rest of the exterior porch lights off or very dim makes the red windows stand out much more effectively.
- Red LED floodlights or high-wattage red smart bulbs.
- Place the light on a small table or the floor about 3 feet back from the window.
- Use white sheer curtains or a thin white bedsheet to diffuse the light evenly.
Quick win: Use smart bulbs so you can set a 'flicker' or 'pulse' effect to make the red glow look like a fire or a heartbeat.
25. Giant Window Eye Lights
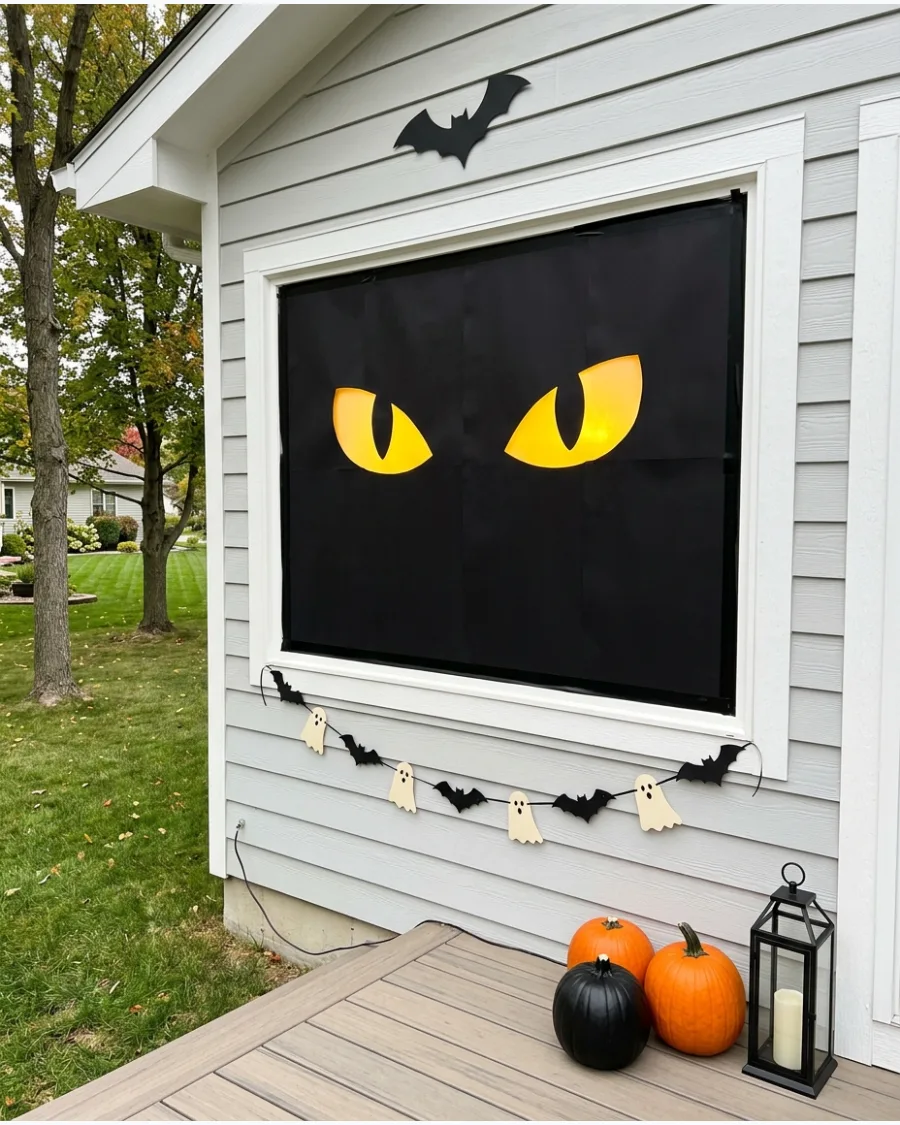
Give a house a personality by creating giant glowing eyes in a large front window. Cover the window with black poster board or heavy landscape fabric and cut out two large, almond-shaped eye holes.
Place a bright yellow or orange light source directly behind the cutouts so the eyes appear to glow from within the darkness. This setup works best on windows that face the street directly to ensure passersby get the full effect of the staring eyes.
- Black poster board, cardboard, or heavy black landscape fabric.
- Bright yellow or orange LED work lights or lanterns.
- Secure the black covering to the window frame with painter's tape to avoid damaging the trim.
Most people skip this: Tilt the eye cutouts slightly inward at the top to give the house a more 'angry' or menacing expression.
26. Glowing Garage-Door Silhouette
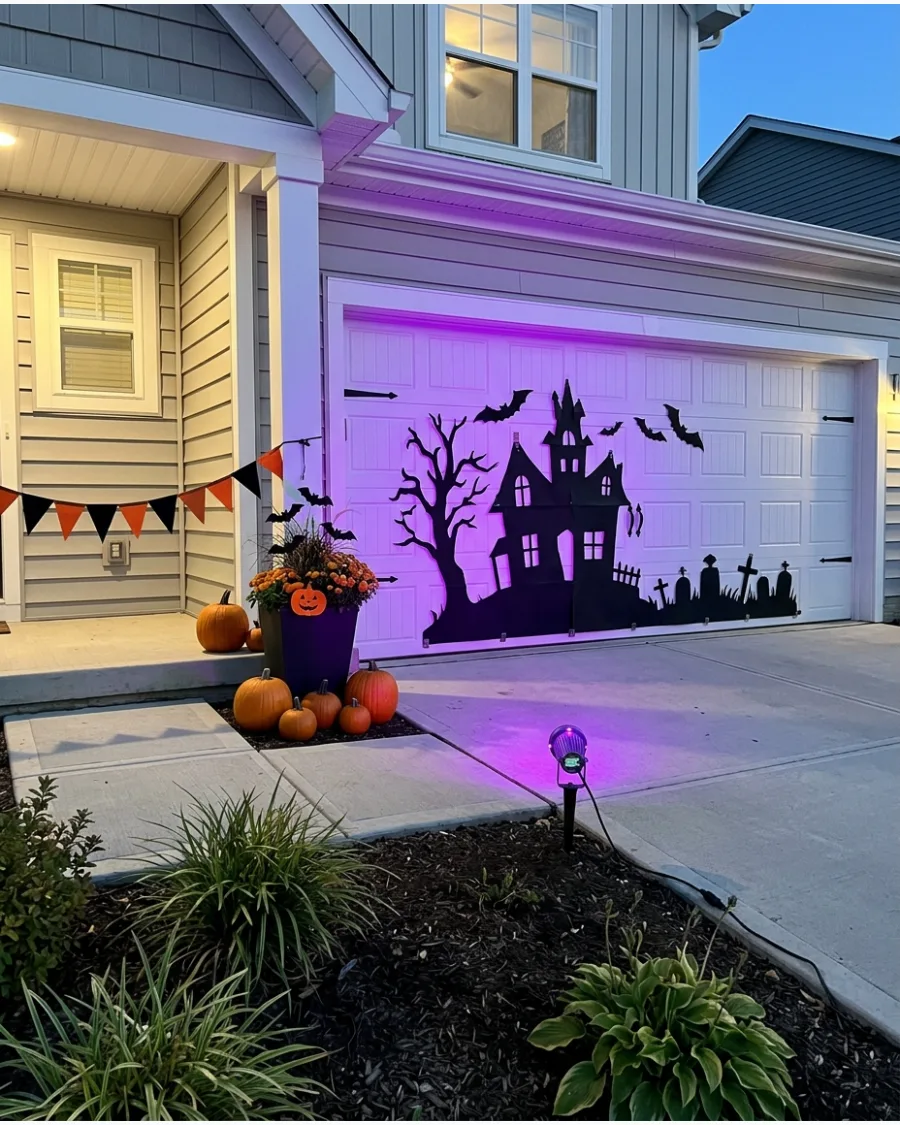
A garage door provides a massive canvas for a spooky nighttime scene. Attach a large silhouette of a haunted house, a giant spider, or a graveyard scene made from black plastic or plywood to the door.
Place an outdoor spotlight on the driveway and aim it upward at the door to cast the silhouette into sharp relief. Using a purple or green spotlight adds a thematic color wash that makes the black silhouette pop against the background.
- Black vinyl garage decals or DIY silhouettes cut from black foam board.
- Outdoor-rated LED spotlight in purple or green.
- Position the light 5 to 8 feet back from the garage door for even coverage.
Best shortcut: If you have a two-car garage, place the silhouette on one side and the light on the other to create a giant shadow on the neighboring wall.
27. Orange Roofline Halloween Lights
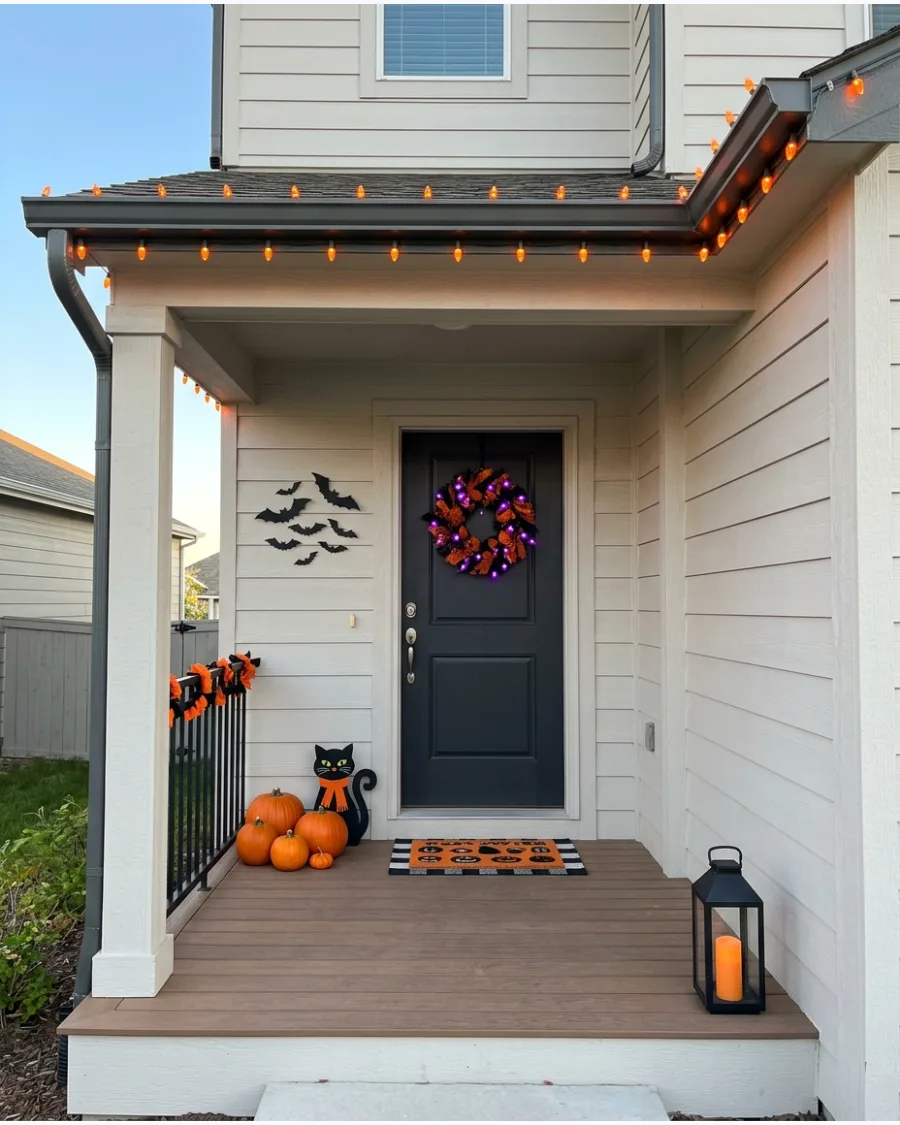
Swap standard white holiday lights for solid orange strands to define the architecture of a home. Running these lights along the porch roofline or the lower gutters creates a bright, festive border that feels intentional for the season.
Mix in a few purple-lit focal points like a porch lamp or a wreath to break up the orange and add contrast. Orange LED mini-lights provide a cleaner, more saturated color than older incandescent bulbs.
- Strands of orange LED mini-lights or C7 bulbs.
- Plastic gutter clips or shingle clips for a straight, professional line.
- Connect no more than the manufacturer-recommended number of strands to a single outlet.
Quick win: Use 'stay-lit' LED technology so that if one bulb goes out, the rest of the roofline stays bright all night.
28. Color-Changing Yard Trees
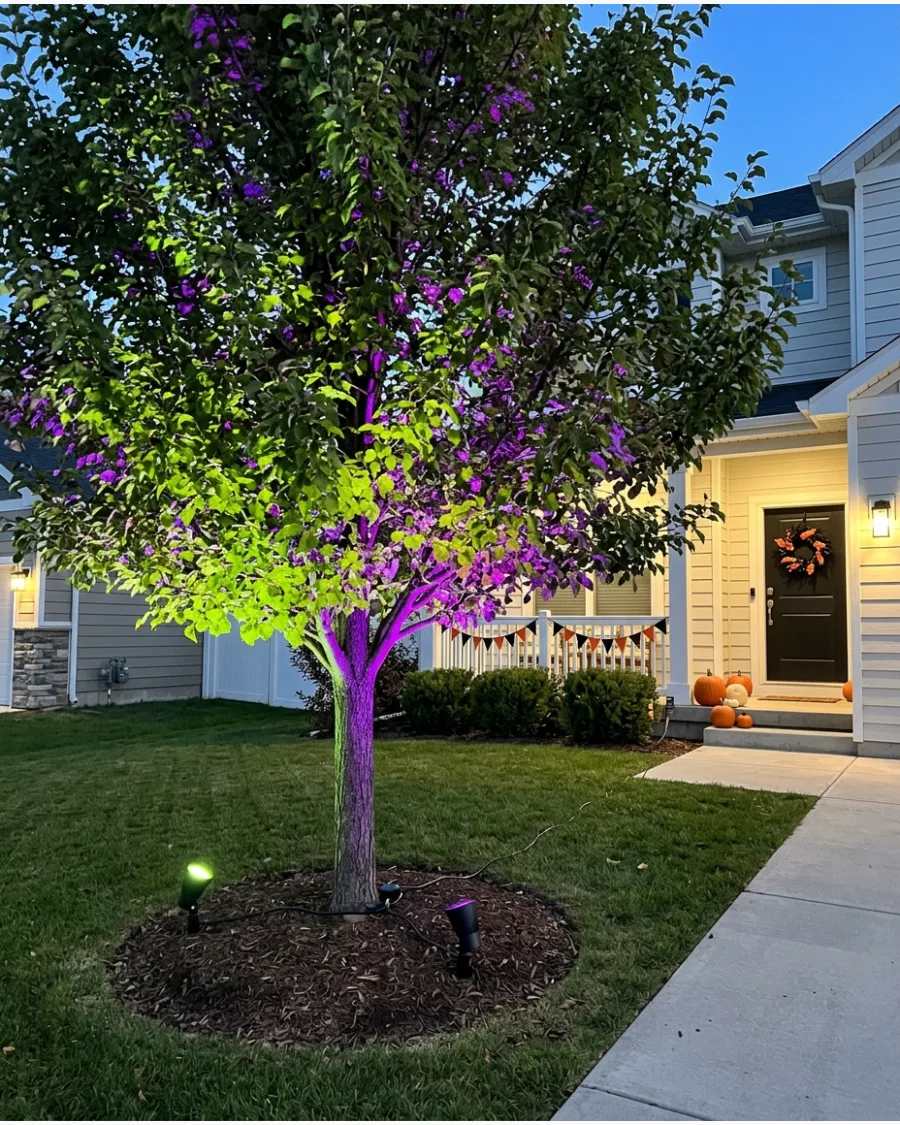
Use smart outdoor spotlights to bring life to the trees in a front yard without hanging a single string of lights. Pointing the lights upward into the canopy allows the leaves to catch and diffuse the color.
Set the lights to a slow-fading transition between Halloween colors like lime green, deep purple, and orange. This method is much faster to set up and take down than traditional wrapping and covers more visual area.
- Smart outdoor RGB spotlights with app control.
- Heavy-duty outdoor extension cords rated for wet weather.
- Hide the spotlights behind low bushes or small rocks to keep the light source invisible.
Most people skip this: Avoid fast-flashing or strobing effects, as slow color transitions feel much more high-end and atmospheric.
29. Glowing Pumpkin Patch Yard
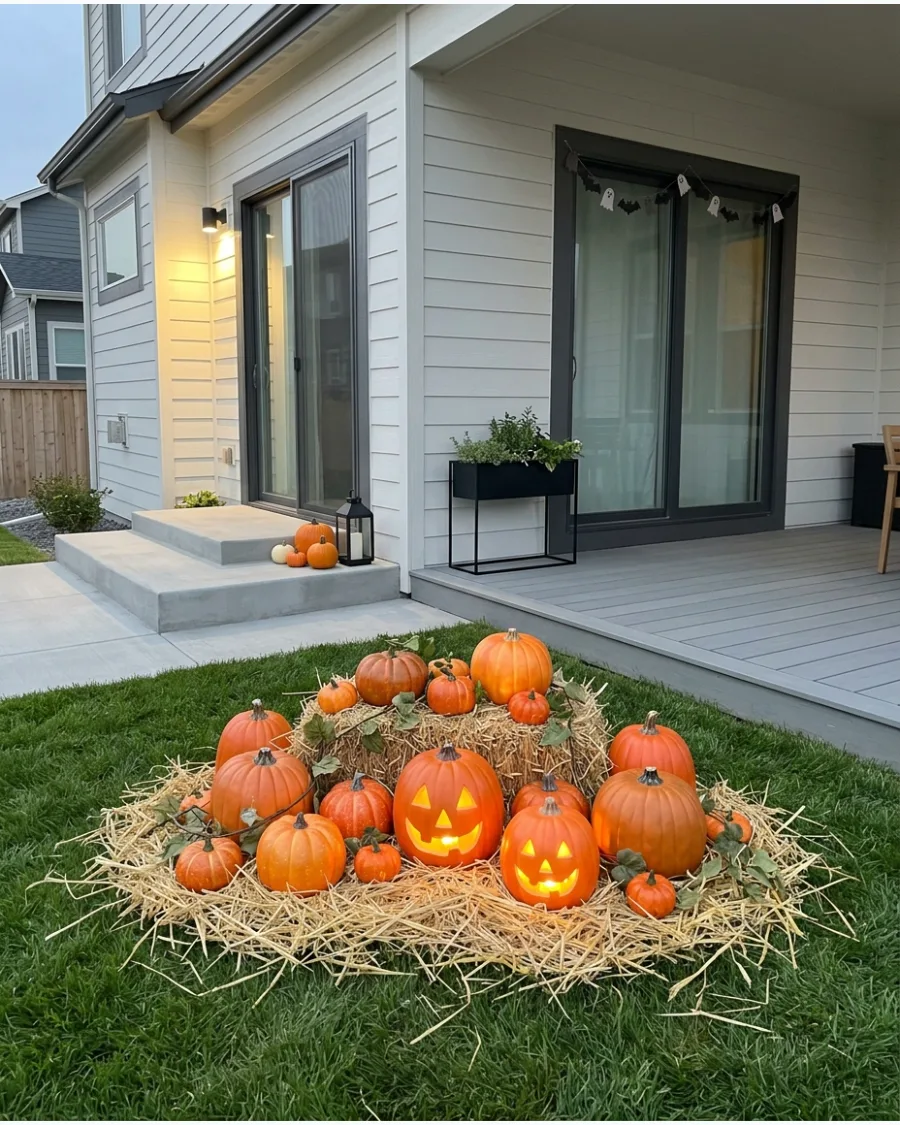
Create a mini pumpkin patch on the lawn by grouping artificial pumpkins of different sizes. Tucking small battery-powered lights inside a few of the pumpkins makes the patch look like it is glowing from within.
Scatter some loose straw and faux vines around the base of the pumpkins to ground the display and make it look realistic. This setup works well in small corner spots of the yard or near the base of a porch.
- Assorted plastic or foam pumpkins (carved or uncarved).
- Battery-operated LED tea lights or small puck lights.
- A bale of craft straw and green silk ivy or pumpkin vines.
Best shortcut: Use pumpkins with built-in timers so they automatically turn on at dusk and save your battery life through the month.
30. Complete Layered Outdoor Light Display
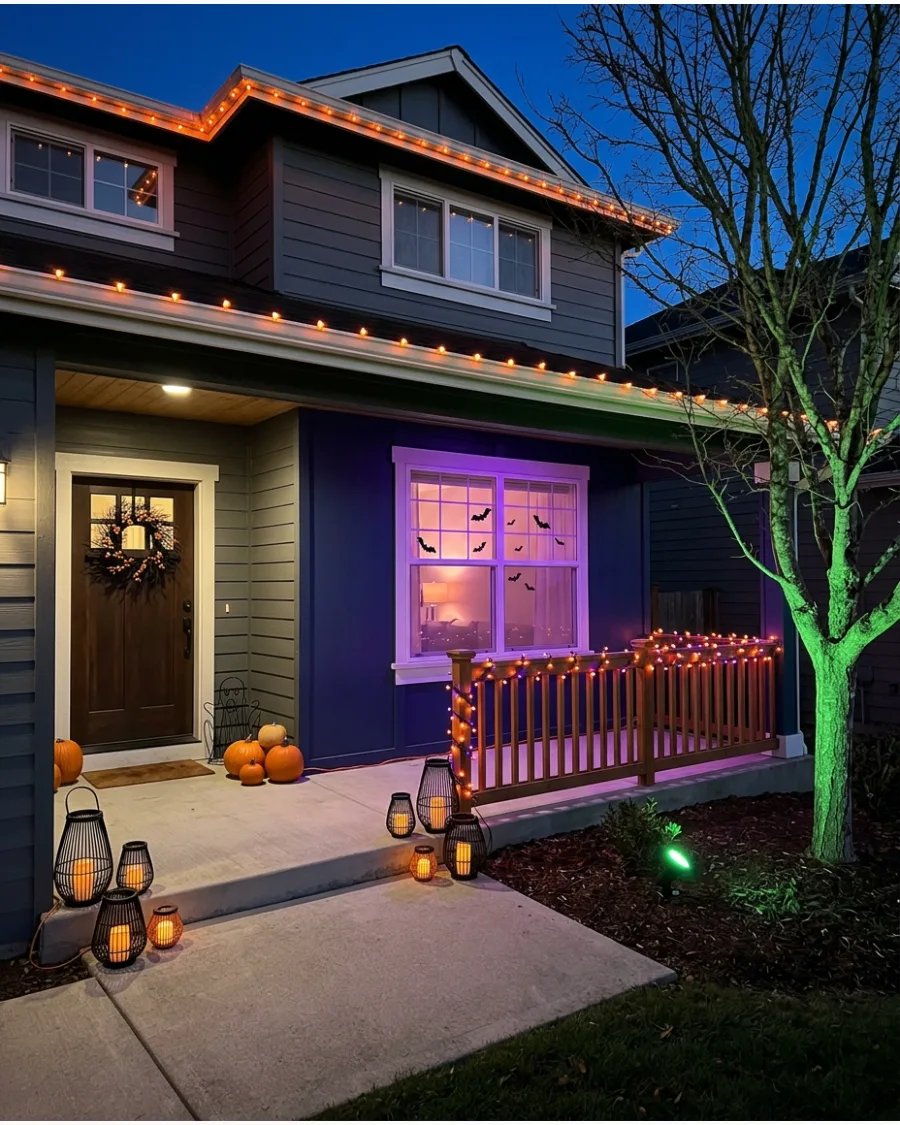
The most effective Halloween displays use layers of light to create depth rather than lighting everything at once. Combine low-level pathway lights with mid-level window glows and high-level roofline strands.
Keep some areas of the yard in complete shadow to make the illuminated features look more dramatic and mysterious. Using a consistent color palette, like orange and purple, ties all the different light sources together for a polished look.
- A mix of string lights, spotlights, and battery-operated accents.
- Outdoor power stakes or multi-outlet timers to coordinate all lights.
- Focus the brightest lights on the front door to create a clear destination for trick-or-treaters.
Quick win: Take a photo of the house at night before you start so you can identify the 'dead zones' where a small light or shadow would have the most impact.
Indoor Halloween Lights Ideas
31. Orange Mantel String Lights
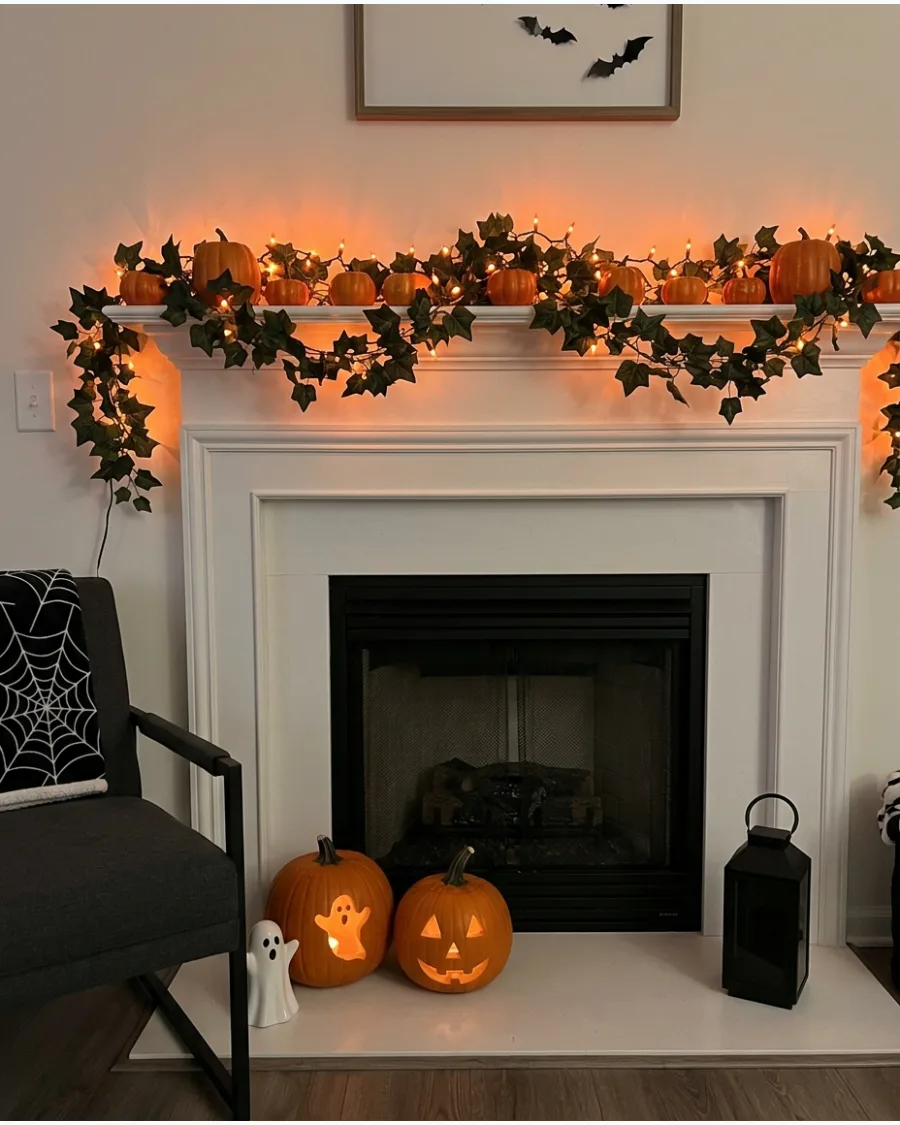
Weave orange lights through garland, miniature pumpkins, and dark foliage across the mantel. Allow a few bulbs to remain partially hidden for a softer glow.
Tucking the wire behind the foliage keeps the focus on the warm light rather than the hardware. This setup works best when you layer different textures like silk leaves and plastic gourds.
- Buy 50-count orange LED strands for a standard 5-foot mantel.
- Intertwine the lights with the garland on a flat surface before placing it on the mantel.
- Use green or brown floral wire to secure the lights to the garland for a seamless look.
Quick win: Use battery-operated lights with a timer so you do not have to reach behind the decor every night.
32. Purple Bat Mantel Lights
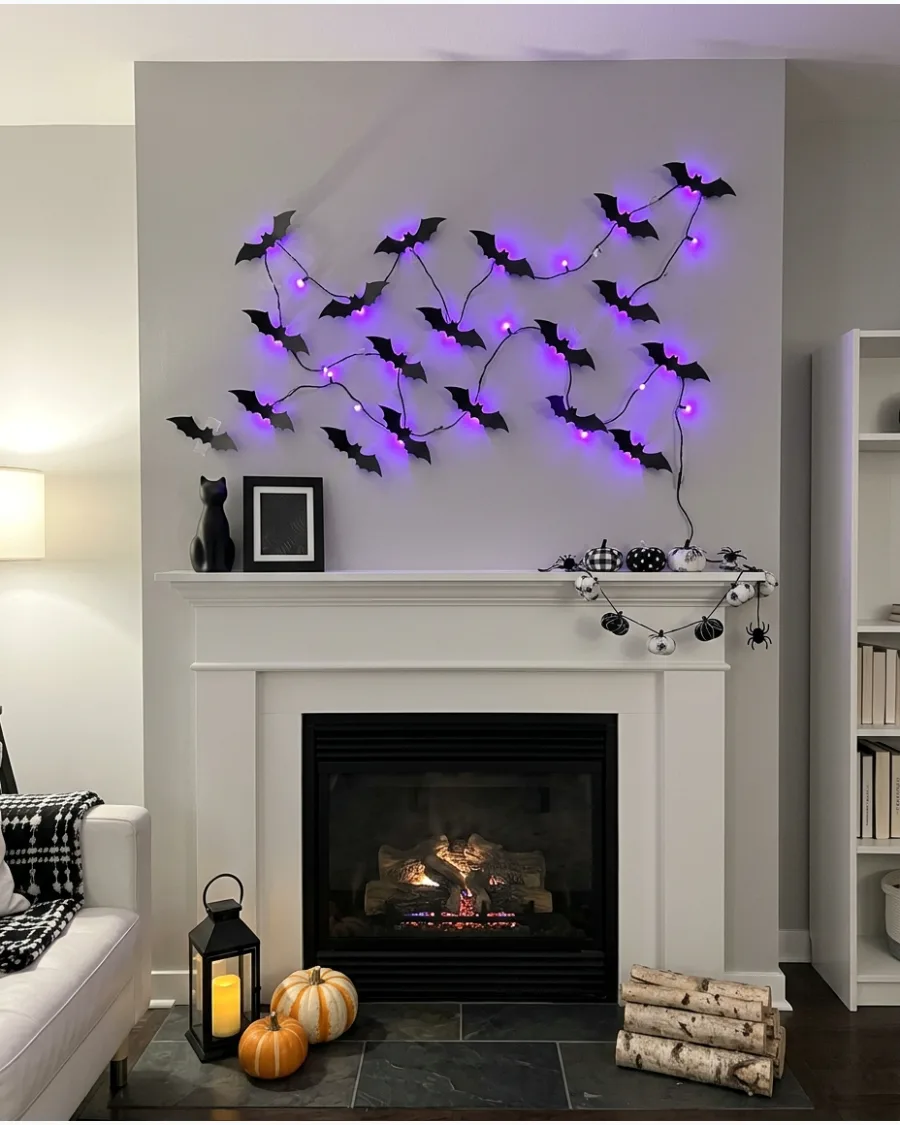
Arrange purple string lights around black paper bats above the fireplace. Fold the bat wings slightly so the lights cast small shadows on the wall.
Placing the purple bulbs directly behind the bat bodies creates a sharp silhouette effect. This adds a moody, high-contrast look to a clean white or gray room.
- Pick up purple LED lights and a pack of black cardstock for a DIY project under $20.
- Fold the bat wings at a 45-degree angle to create more interesting shadows.
- Use clear command hooks to drape the lights across the wall or mantel.
Most people skip this: Use blue painter's tape or removable putty to secure the bats so you do not damage your wall paint.
33. Floating Candle Hallway
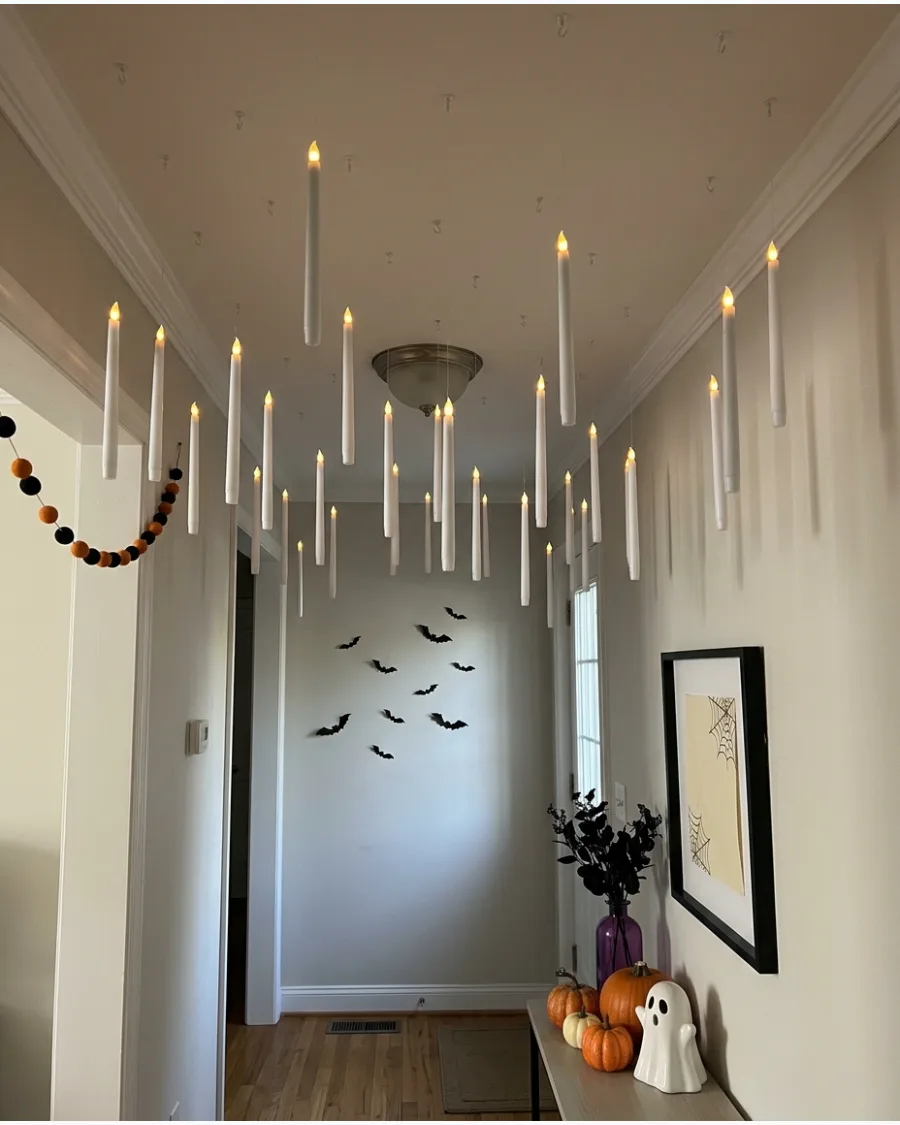
Hang battery-operated candles from the hallway ceiling at different heights. Keep the rest of the hallway lighting low so the floating effect remains visible.
Use thin fishing line to make the candles look like they are hovering in mid-air. This creates a magical, immersive experience for anyone walking through the house.
- A pack of 12 LED taper candles usually costs around $30.
- Measure different lengths of fishing line to vary the height of each candle.
- Use clear adhesive ceiling hooks that will not leave marks on your paint.
Best shortcut: Use a remote-controlled candle set so you can turn the entire hallway on or off with one click.
34. Glowing Ghost Mantel
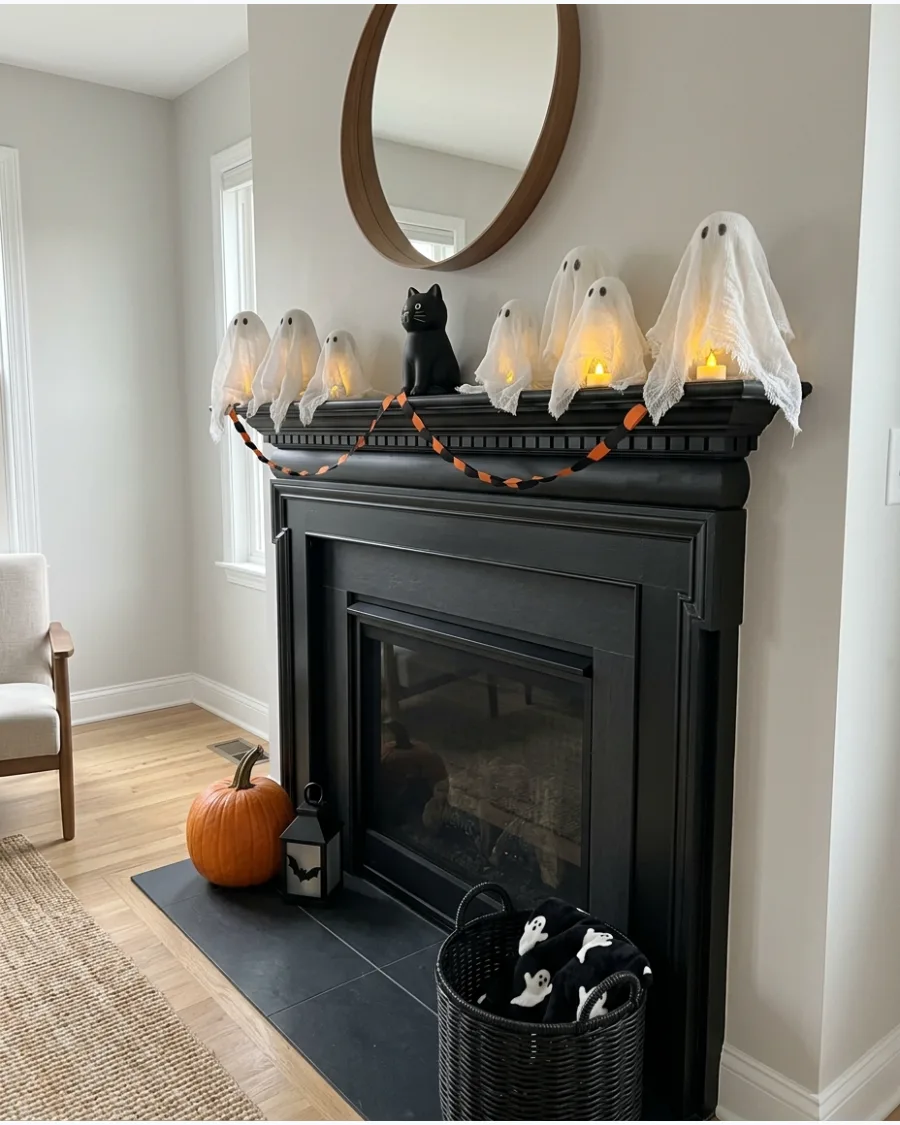
Place small cheesecloth or fabric ghosts across the mantel with battery tea lights beneath them. Use several ghost sizes to create a complete glowing group.
Stiffening the cheesecloth with fabric starch helps the ghosts hold their shape over the lights. This creates a soft, ethereal glow that is not too bright.
- Cheesecloth is available at most grocery or craft stores for a few dollars.
- Place the tea lights on a small tray or coaster to protect the mantel surface.
- Swap the white cheesecloth for gray or black fabric for a more gritty ghost look.
Quick win: Draw tiny black eyes on the cheesecloth with a marker to give each ghost a bit of personality.
35. Halloween Tree With Orange Lights
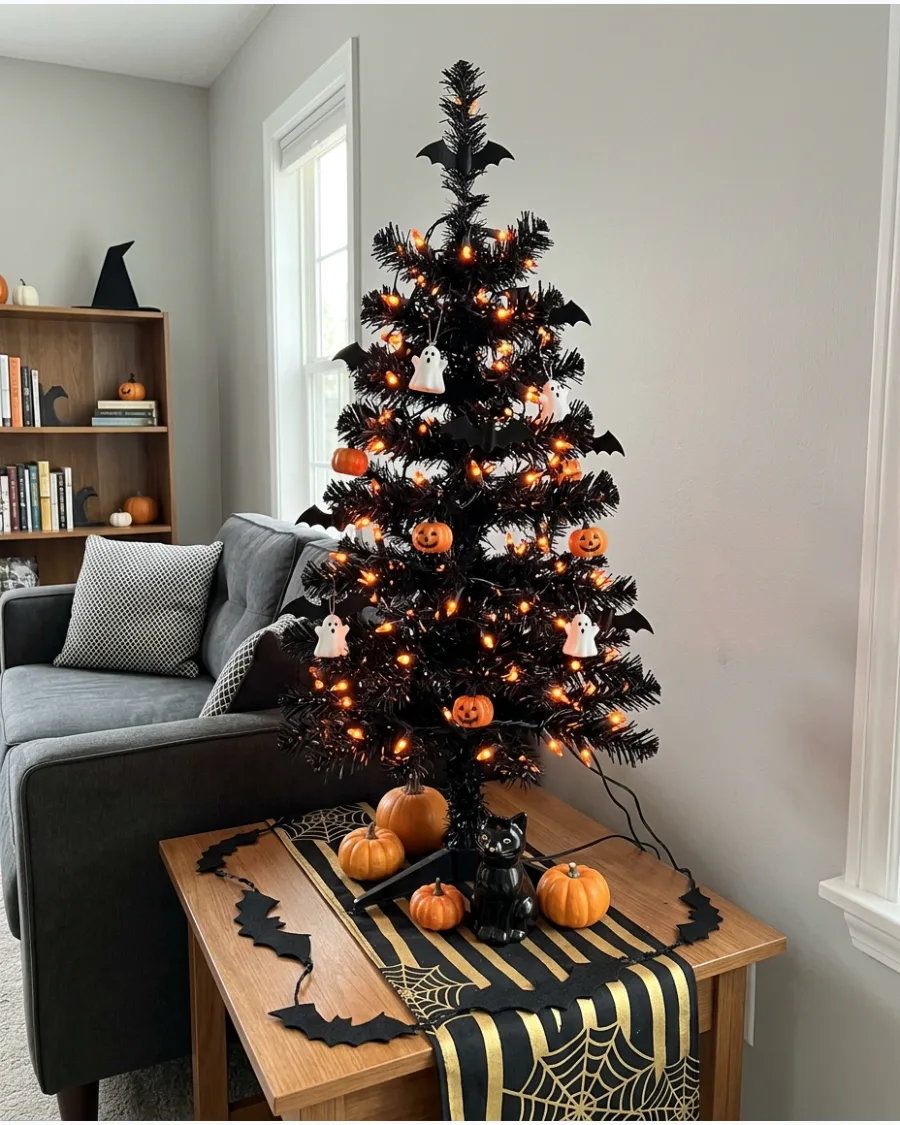
Decorate a black tabletop tree with orange lights, miniature pumpkins, bats, and ghost ornaments. Place it in the living room, entryway, or bedroom as a Halloween focal point.
Matching the light color to the ornaments creates a cohesive and professional look. A black tree makes the orange lights pop much more than a traditional green one.
- Tabletop trees are widely available in 2-foot or 3-foot sizes.
- Start wrapping the lights from the bottom and work your way up to the top.
- Use a heavy base or a decorative pot to keep the tree from tipping over.
Most people skip this: Fluff the branches thoroughly before adding lights to avoid any dead spots in the glow.
36. Purple Halloween Tree
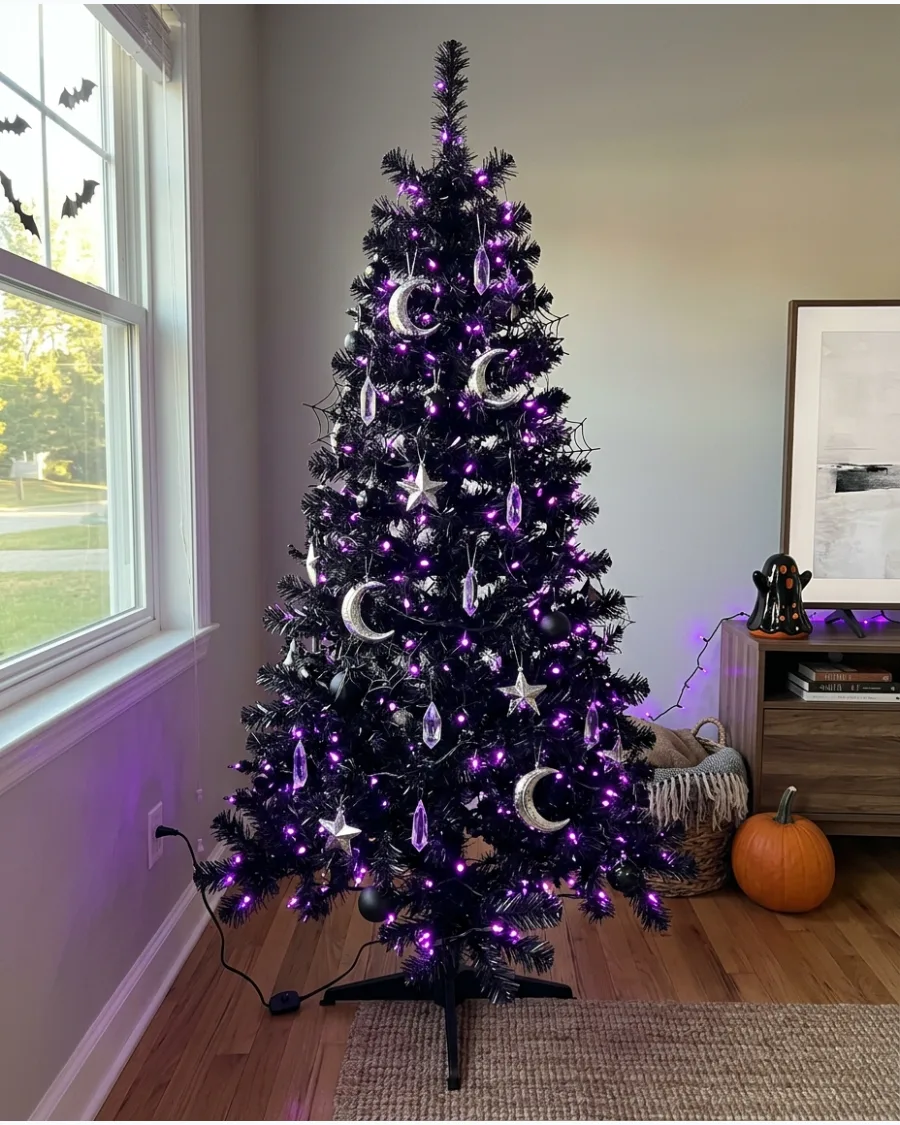
Cover a black tree with purple lights and silver or black decorations. Add crescent moons, stars, and crystal-shaped ornaments for a celestial Halloween theme.
Silver ornaments reflect the purple light and make the whole tree shimmer. This is a sophisticated alternative to the classic orange and black palette.
- Look for celestial or astrology themed ornaments at craft stores.
- Space the purple lights evenly to ensure every silver ornament is illuminated.
- Substitute clear glass ornaments if you want a more subtle, icy look.
Quick win: Use a mix of matte and shiny silver ornaments to add depth to the tree's lighting.
37. Black-and-Orange Staircase Lights
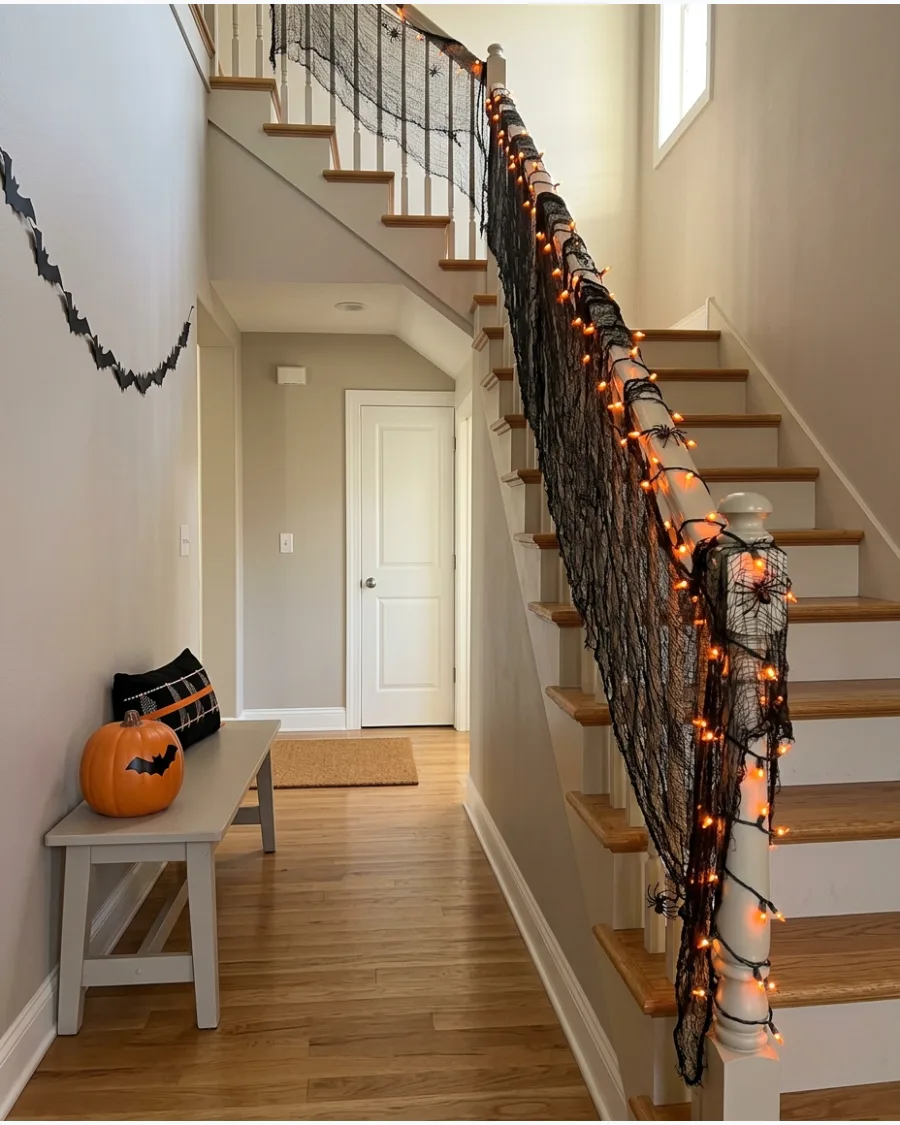
Wrap orange lights around the staircase railing and layer black gauze loosely over them. Add bats or spiders without blocking the handrail.
Draping the gauze unevenly creates a haunted texture that softens the bright LED bulbs. This keeps the stairs safe while adding a spooky vibe to a high-traffic area.
- Standard orange mini-lights and 5 yards of black gauze are needed.
- Loop the lights around the balusters first, then drape the gauze loosely over the top.
- Ensure the handrail itself remains clear of fabric for safety and grip.
Best shortcut: Use zip ties that match your railing color to secure the lights and gauze so they do not slide down the banister.
38. Glowing Staircase Lanterns
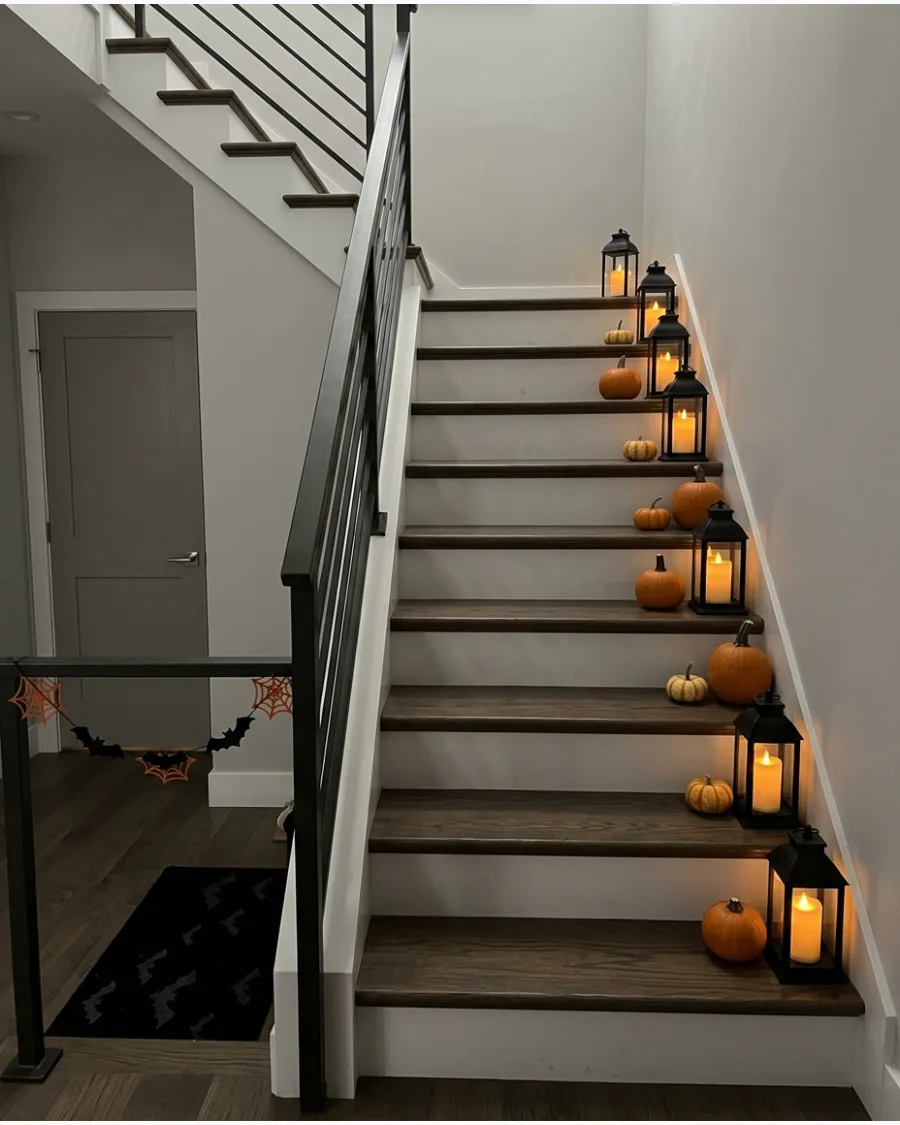
Place battery lanterns along wide staircase edges or on nearby ledges. Alternate lanterns with miniature pumpkins for a warm indoor pathway.
Using lanterns with flickering flame effects adds a realistic and eerie movement to the light. This is a great way to light up a dark staircase without using overhead fixtures.
- Metal lanterns are more durable, but plastic versions are lighter and easier to move.
- Set the internal LED candles to flicker mode for a more realistic flame look.
- Add small bunches of dried leaves around the base for extra texture.
Most people skip this: Only place lanterns on one side of the stairs to ensure there is plenty of room for people to walk safely.
39. Halloween Window Curtain Lights
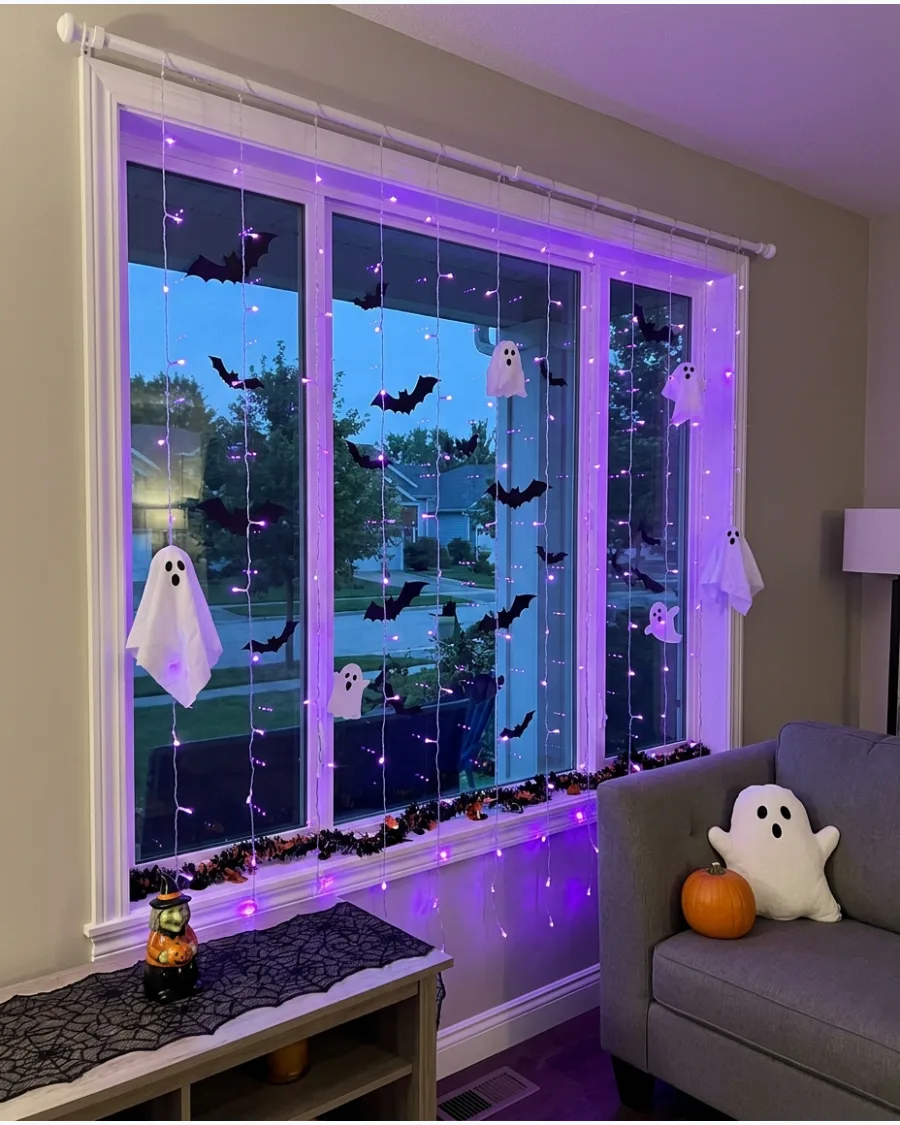
Hang orange or purple curtain lights behind a front-facing window. Add paper silhouettes of bats, ghosts, or a haunted house so the display can be seen from outdoors.
Tension rods are the easiest way to hang curtain lights without drilling into your window frame. This creates a massive block of color that defines your home's look from the street.
- Curtain lights usually come in 6.6ft by 6.6ft squares for standard windows.
- Hang the lights behind your regular sheer curtains for a diffused, glowing effect.
- Use small clips to attach silhouettes directly to the light strands.
Quick win: Choose flicker or wave settings on the lights to give the window a more dynamic, living appearance.
40. Glowing Haunted-House Window
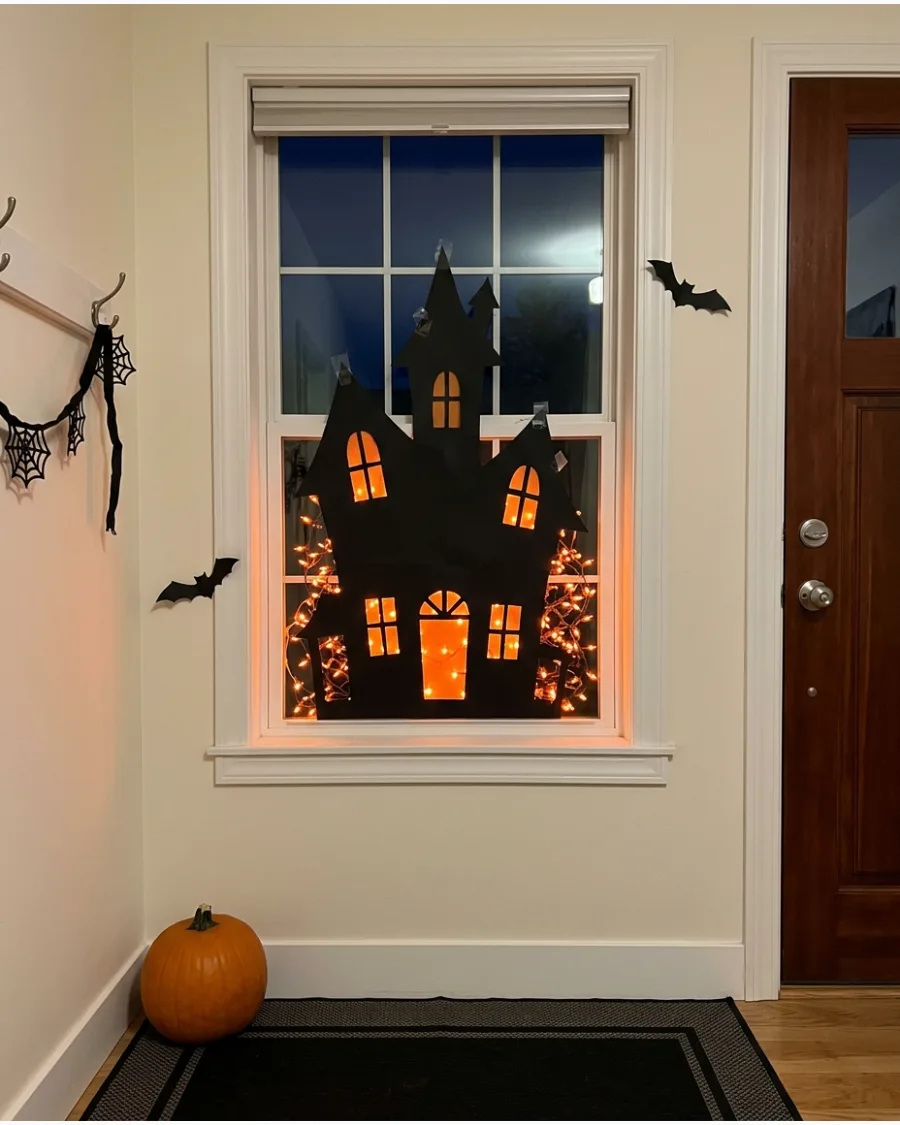
Create a black haunted-house silhouette from cardstock and place it against a window. Illuminate the background with orange lights to create glowing windows and doorways.
Backlighting the silhouette makes the black paper look like a solid shadow against a sunset sky. This provides a professional-looking display with very little technical effort.
- A single sheet of black poster board can create a house large enough for a standard window.
- Use a craft knife for clean, sharp edges on the tiny window cutouts.
- Place the orange lights in a zig-zag pattern behind the paper for even coverage.
Best shortcut: Use a black poster board for the silhouette because it is thicker and blocks more light than standard construction paper.
41. Bat-Shaped Bedroom Lights
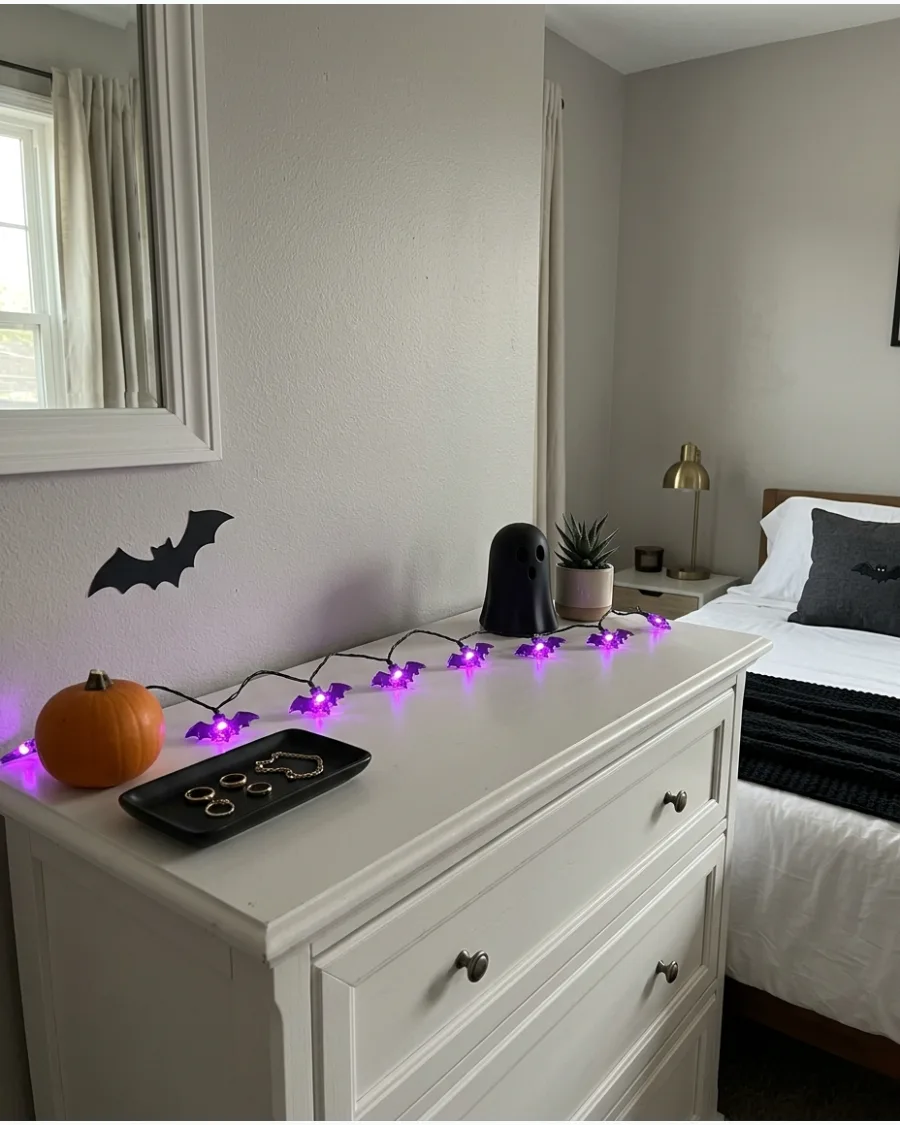
Bat-shaped string lights add a moody touch to a bedroom without requiring heavy decorations. Hang them in a simple horizontal line or a slight drape over a dresser to focus the light where it matters.
Use black bedding accents like a throw or pillow to tie the dark shapes of the bats into the rest of the room. This setup works best when the room lights are low, allowing the purple or orange glow to define the silhouettes.
- Expect to spend $15 to $25 at a craft store or online retailer.
- Secure the strand using clear adhesive clips and hide the battery pack behind a mirror or jewelry box.
- Opt for warm-white bat lights if the room has a neutral color palette and you want a softer look.
Quick win: Use black painter's tape to secure the wires behind the furniture so they don't dangle.
42. Ghost String Lights Above the Bed
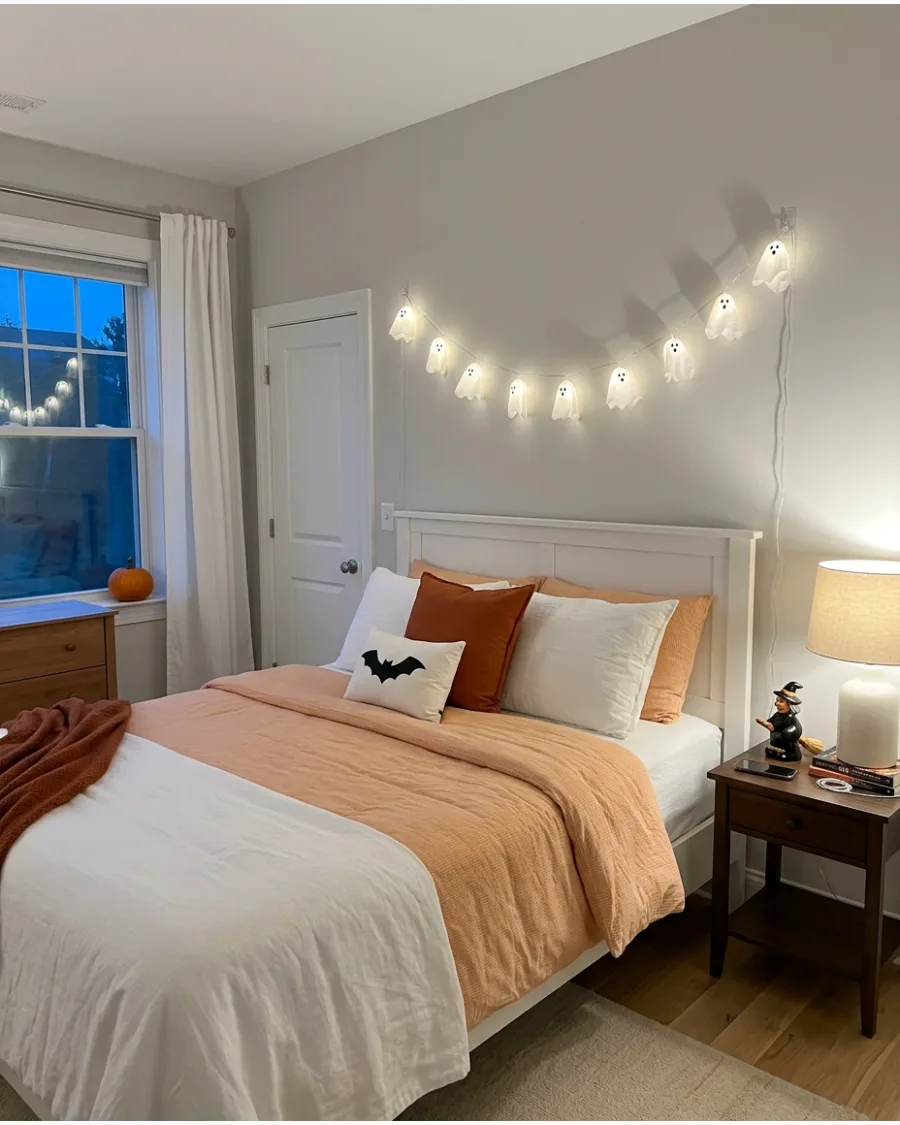
Floating ghosts create a whimsical but spooky vibe in a sleeping area.
Drape a single strand in a shallow curve above the headboard using clear removable hooks to keep the wall clean. Keep the arrangement simple by avoiding other wall decor so the glowing ghost shapes stand out as the main feature. The soft white light provides enough visibility for a nightlight while maintaining the Halloween theme.
- Budget around $20 for a 10-foot strand of fabric ghost lights.
- Space the hooks 12 inches apart to ensure an even drape that won't sag too low.
- Switch to orange lights for a more traditional Halloween feel if the room has dark-colored walls.
Most people skip this: Space the hooks evenly to ensure the drape doesn't look lopsided or messy.
43. Halloween Reading-Nook Lights
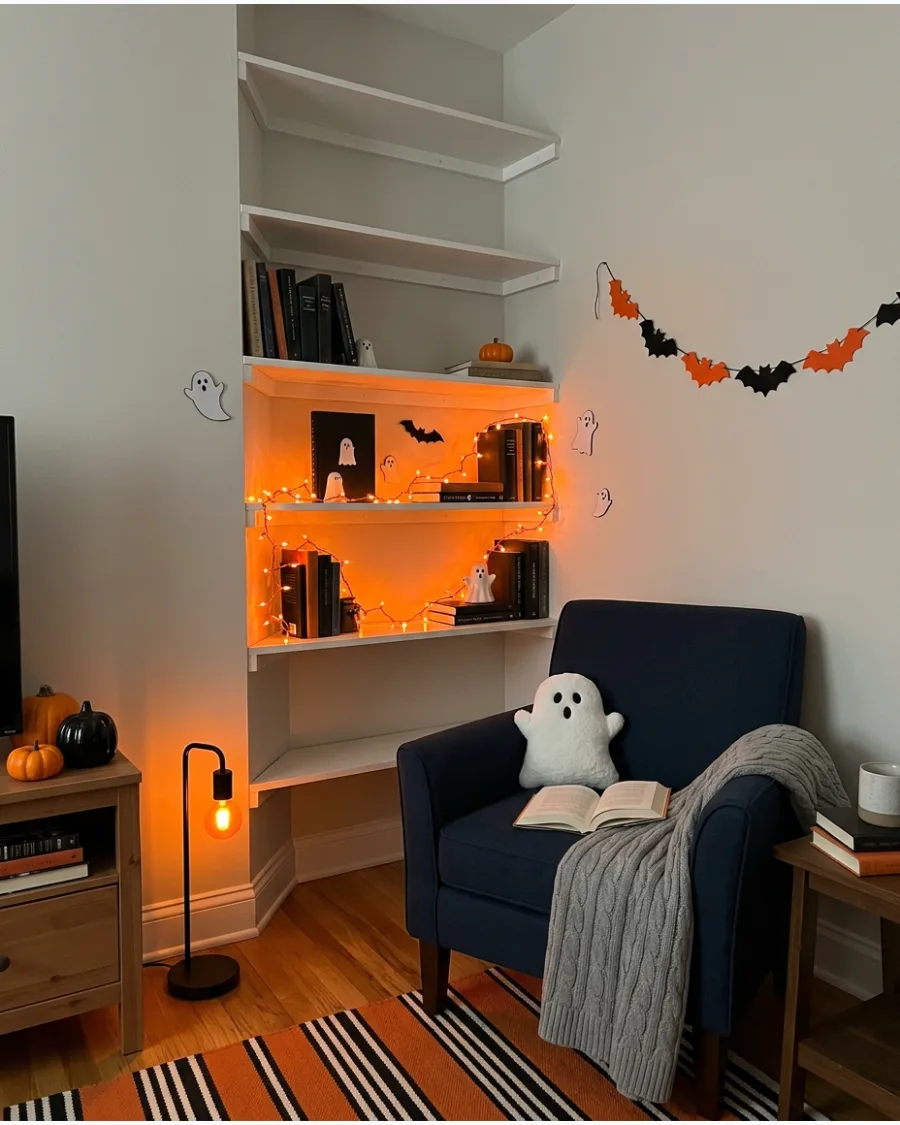
Turn a quiet corner into a seasonal retreat by weaving fairy lights through a bookshelf. Choose warm-white or orange bulbs to highlight a few dark-covered books and a small ghost-themed pillow on a nearby chair.
Focus the lights on the middle shelves to create a glow that illuminates the reading area without being too bright. This creates a cozy atmosphere that feels intentional rather than cluttered.
- Copper wire fairy lights usually cost under $12 and take 5 minutes to install.
- Wrap the lights loosely around the front edge of the shelves to avoid knocking over books.
- Use a battery-operated set to keep the reading nook free of tripping hazards like extension cords.
Best shortcut: Use battery-operated lights with a timer so the nook is always glowing when evening hits.
44. Glowing Bookshelf Bats
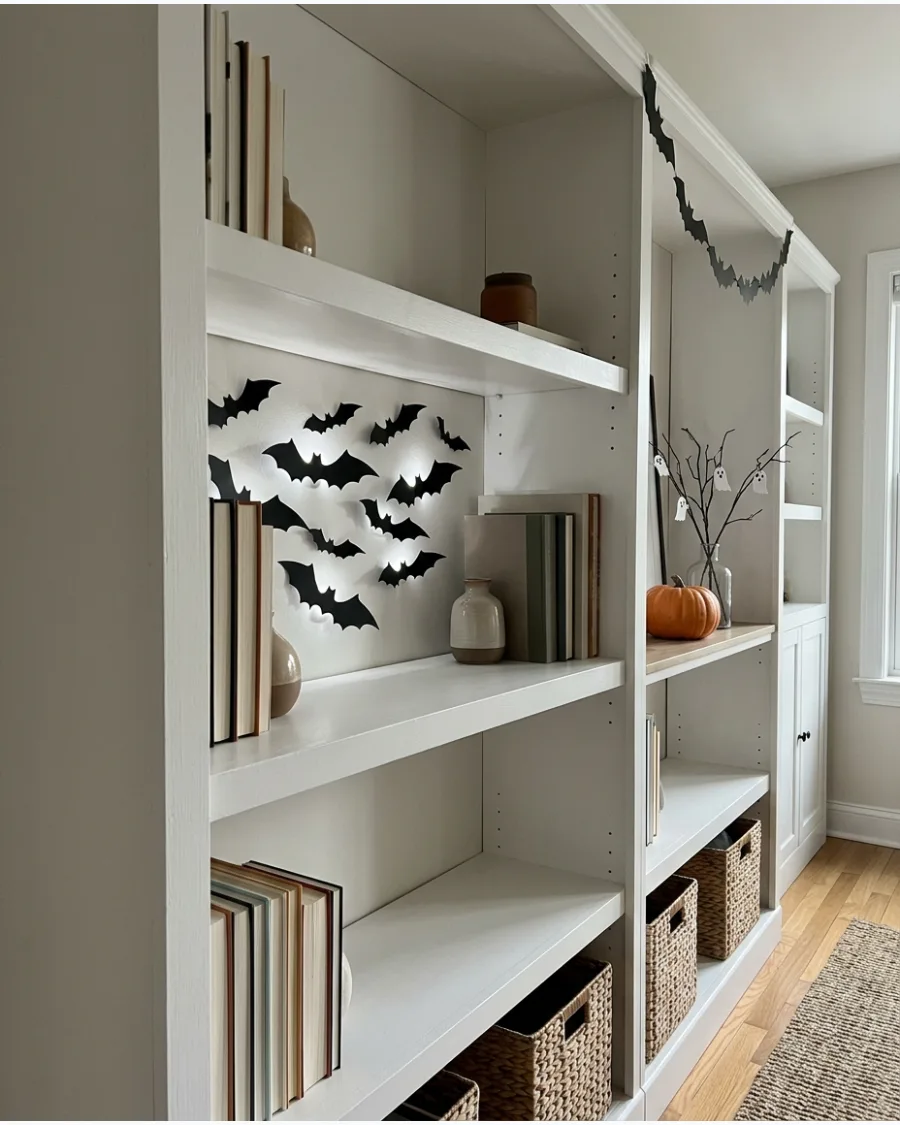
Use hidden lighting to make paper bats look like they are flying out of the shadows. Place small puck lights or short battery-operated strips behind a cluster of black cardstock bats taped to the back of a shelf.
The backlighting will cast sharp shadows and make the bat shapes pop against the shelf's interior. It is a high-impact look that takes up zero floor space.
- A set of three puck lights with a remote typically costs $20 to $30.
- Use double-sided removable tape for the bats to prevent damaging the bookshelf finish.
- Renter-friendly because the lights and bats can be removed without leaving marks.
Quick win: Fold the wings of the paper bats slightly forward to give them a 3D effect when the light hits.
45. Illuminated Apothecary Shelf
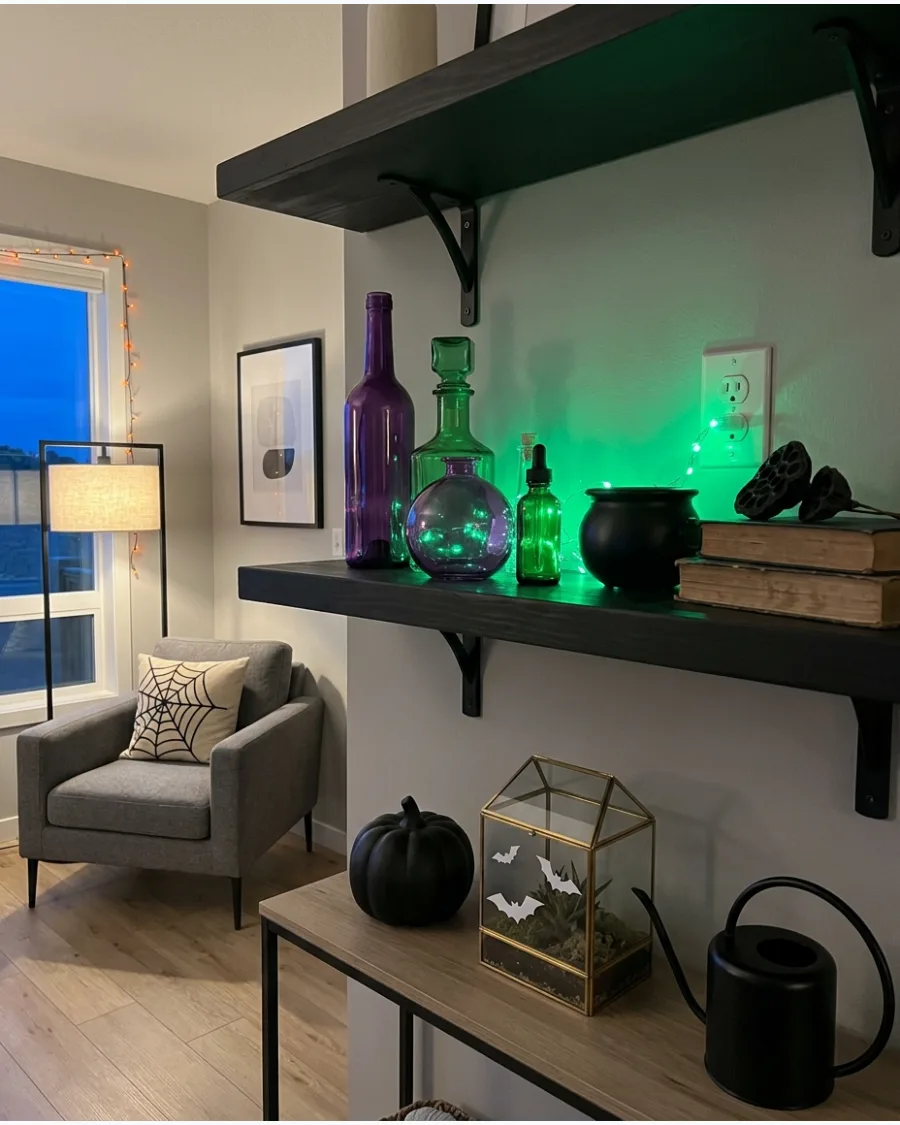
Create a spooky laboratory feel by lighting up a collection of colored glass and miniature cauldrons. Tuck purple or green string lights behind the objects to make the glass look like it is filled with magical liquids.
Group the bottles by height to ensure the light reaches every piece of the display. This turns a standard shelf into a focal point that looks professionally styled.
- Colored glass bottles can be found at thrift stores for $2 to $5 each.
- Position the light strand along the back ledge and weave it around the base of the taller bottles.
- Swap green lights for purple to change the vibe from a lab to a mystical witch's shelf.
Most people skip this: Use frosted glass bottles to diffuse the light more evenly than clear glass.
46. Glowing Potion Bottles
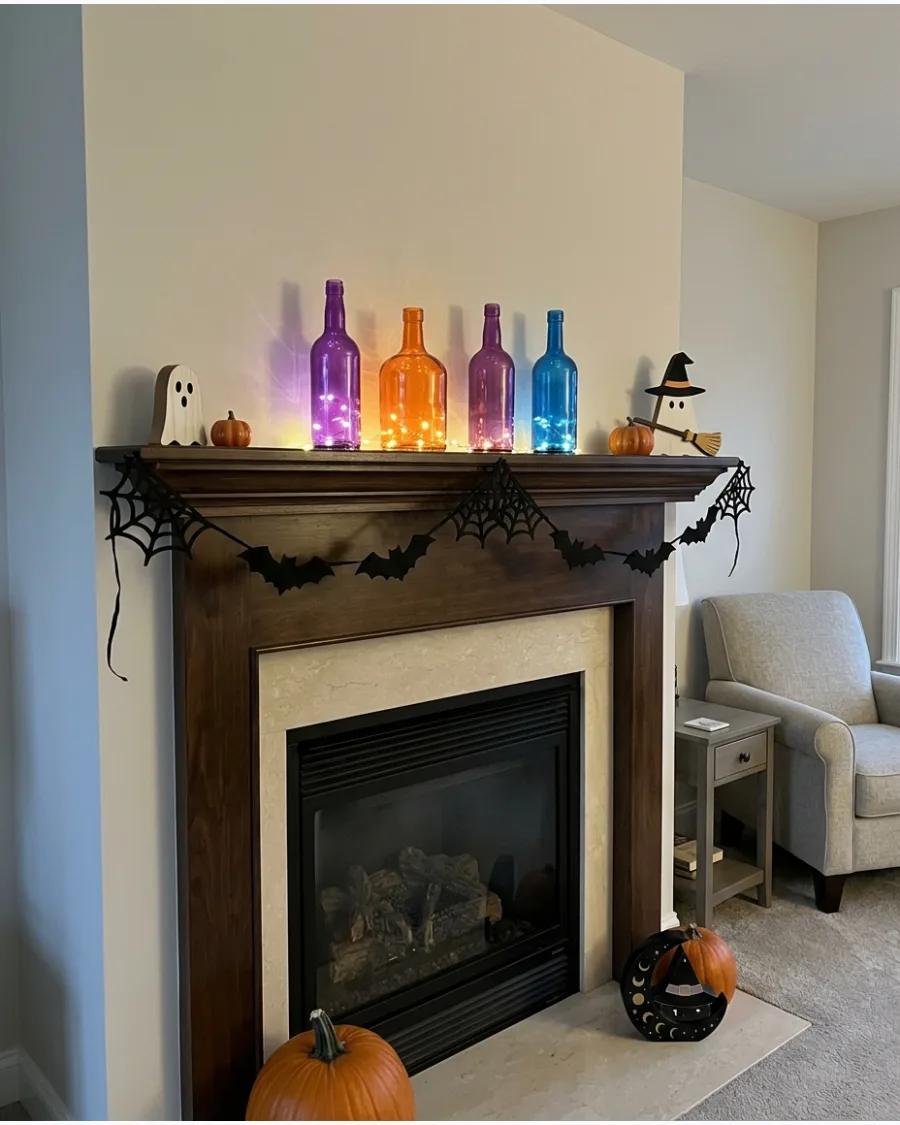
Transform ordinary glass containers into glowing potion bottles using targeted light. Place small LED tea lights or thin wire lights directly behind or underneath translucent bottles in various Halloween colors.
Mix orange, blue, and purple bottles to create a vibrant display that mimics a witch's cupboard. This technique works especially well on narrow surfaces like mantels or windowsills.
- LED tea lights are inexpensive, often sold in packs of 12 for under $15.
- Clean the bottles thoroughly before lighting to ensure there are no fingerprints or dust spots showing.
- Use this idea on a bathroom counter for a subtle, functional Halloween nightlight.
Best shortcut: Use adhesive LED 'dots' on the bottom of the bottles for a clean, cordless look.
47. Cauldron Table Centerpiece
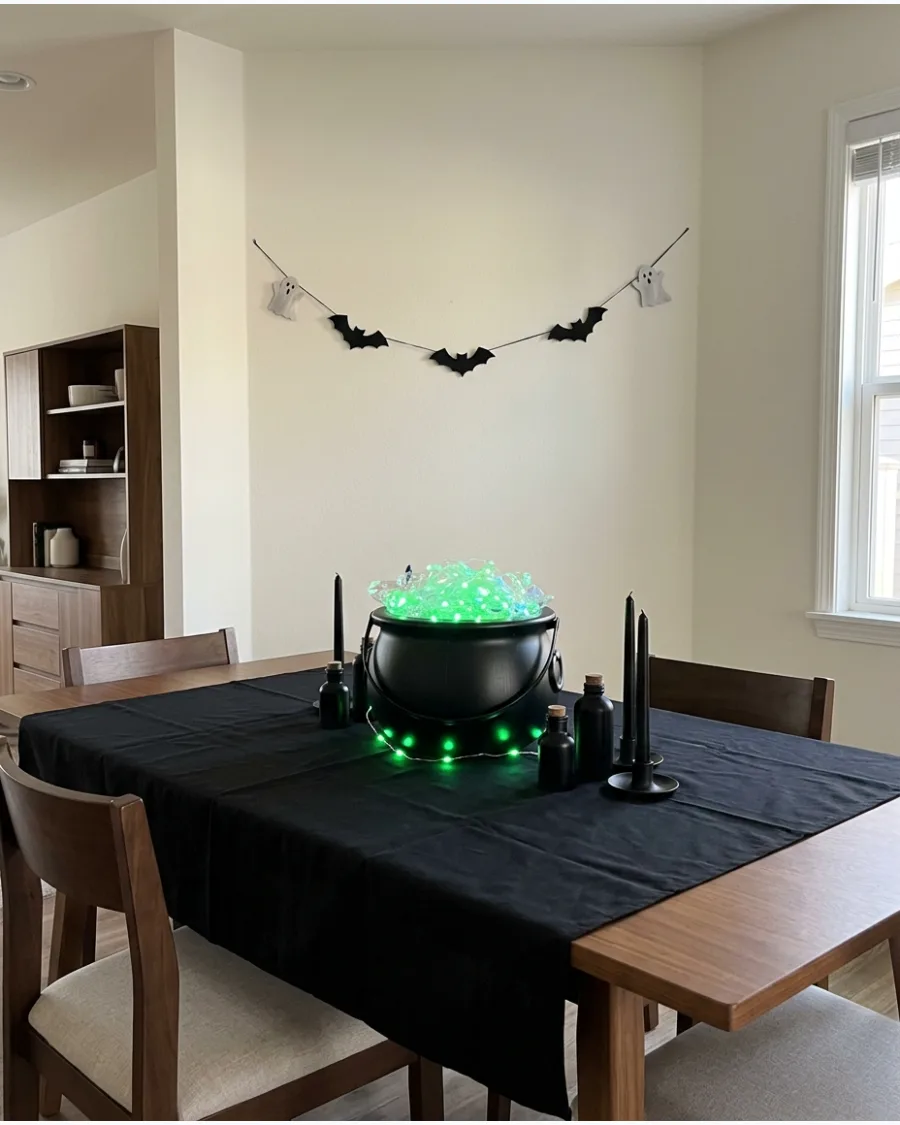
A glowing cauldron makes a perfect centerpiece for a dining or entryway table. Fill a black plastic cauldron with green lights and top it with translucent fabric or clear ornaments to simulate bubbles.
Surround the base with a few black candles or small potion bottles to ground the display on the table. The green glow creates a striking contrast against dark table linens.
- Plastic cauldrons and green string lights cost roughly $20 total.
- Stuff the bottom of the cauldron with paper or bubble wrap so you only need one light strand for the top.
- Add a small ultrasonic mister for a real 'steaming' effect if the table is near an outlet.
Quick win: Use a battery pack light so you don't have to run a cord across the dining table.
Halloween Lights Ideas
48. Enchanted Monochrome Halloween Village
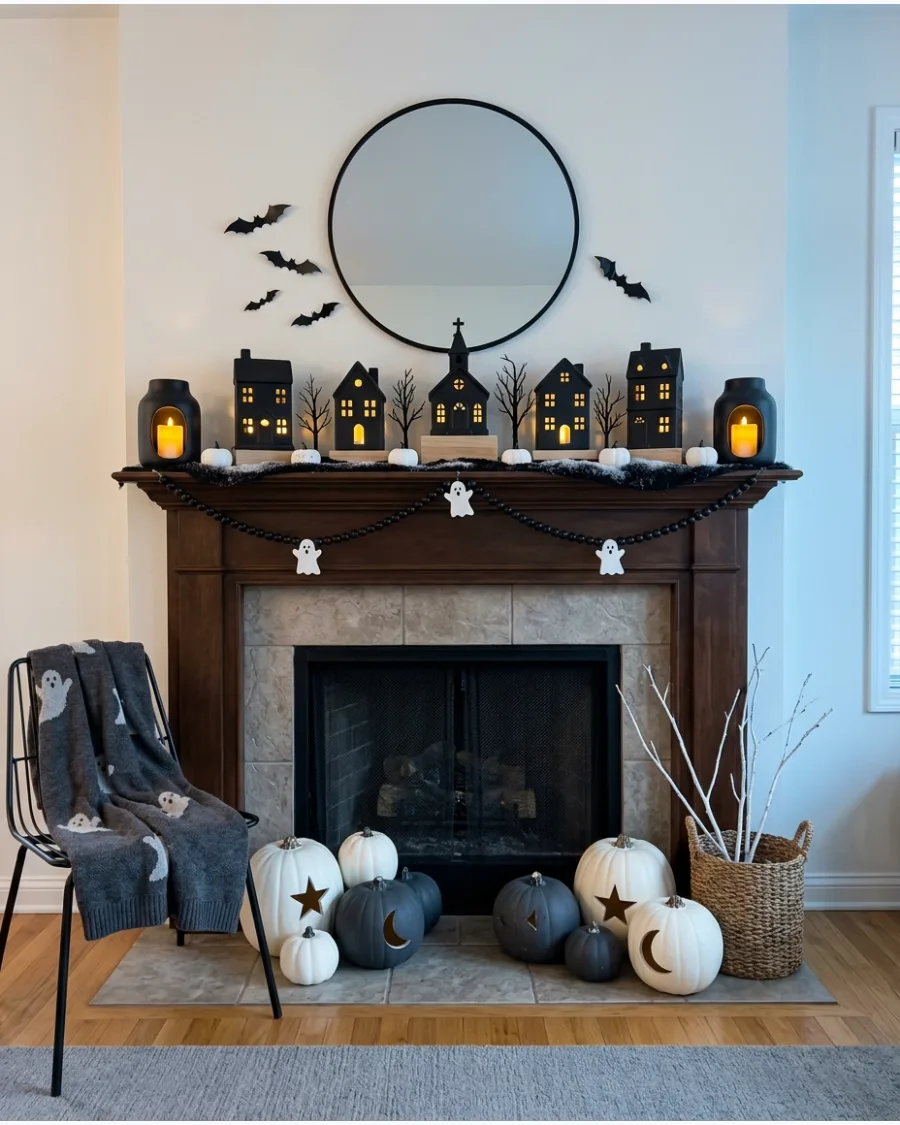
A lighted Halloween village creates a captivating miniature world that serves as a glowing focal point for a mantel or sideboard. By sticking to a strict black-and-white color palette, the collection looks cohesive and sophisticated rather than cluttered.
Arrange the buildings at varying heights using small wooden blocks hidden under a layer of faux black snow. This setup works because the contrast between the dark silhouettes and the warm internal LEDs draws the eye immediately.
Small, battery-operated tea lights are more reliable and safer than traditional plug-in bulbs for tight shelf spaces.
- Sourcing: Look for unfinished wood or ceramic houses at craft stores during late summer to paint and customize on a budget.
- Setup: Use a multi-outlet power strip with a timer to ensure the village illuminates automatically every evening at dusk.
- Adaptation: Incorporate small purple or orange fairy lights behind the houses to create a spooky sunset glow against the wall.
Quick win: Use museum wax on the bottom of each piece to prevent them from tipping over on uneven faux snow or fabric surfaces.
Indoor Halloween Lights Ideas
49. Orange Kitchen Cabinet Lights
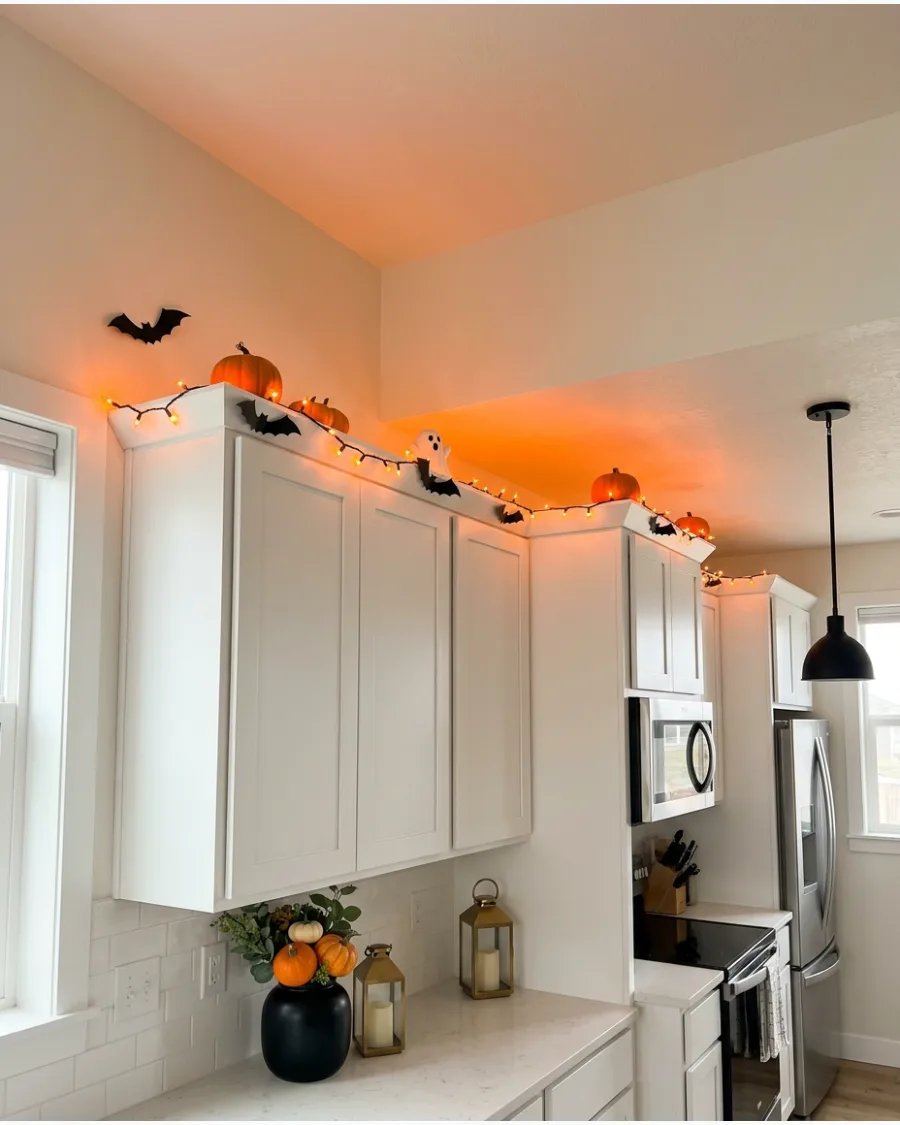
Kitchen lighting often gets overlooked, but the tops of cabinets are perfect for seasonal accents.
Run a strand of orange battery-operated lights along the ledge to create an upward glow on the ceiling. Add a few paper bats or small pumpkins to the top of the cabinets to break up the line of light. This adds holiday cheer without taking up valuable counter space.
- A 16-foot LED strip or rope light costs about $20 to $30.
- Measure the length of your cabinets before buying to ensure the light strand reaches the end.
- Perfect for small kitchens where counter space is at a premium.
Best shortcut: Use rope lights instead of string lights for a more uniform, solid line of color.
50. Halloween Kitchen Window Lights
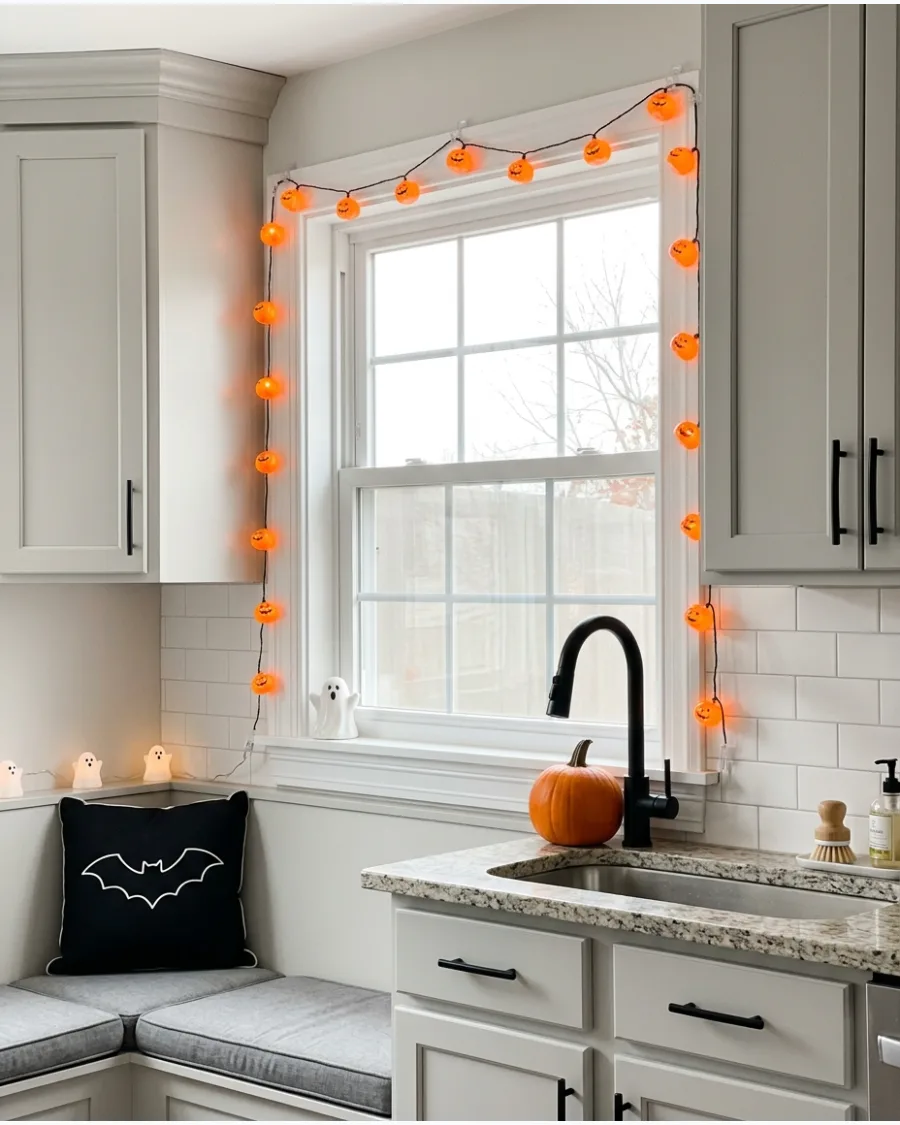
Frame your kitchen window with festive lights to make the space feel cozy while you cook. Use small pumpkin or ghost-shaped lights draped around the window casing to keep the decor out of the way of your workspace.
Keep the countertop underneath clear of extra clutter so the focus remains on the glowing window frame. This is a simple way to bring the theme into a high-traffic room.
- Window strands are typically $10 to $20 and take 10 minutes to set up.
- Use clear suction cup hooks to hold the lights in place without drilling into the window trim.
- Choose plug-in lights if you have an outlet nearby to avoid changing batteries frequently.
Quick win: Use clear suction cup hooks to attach the lights directly to the glass if the trim is too narrow.
51. Glowing Dining-Table Branches
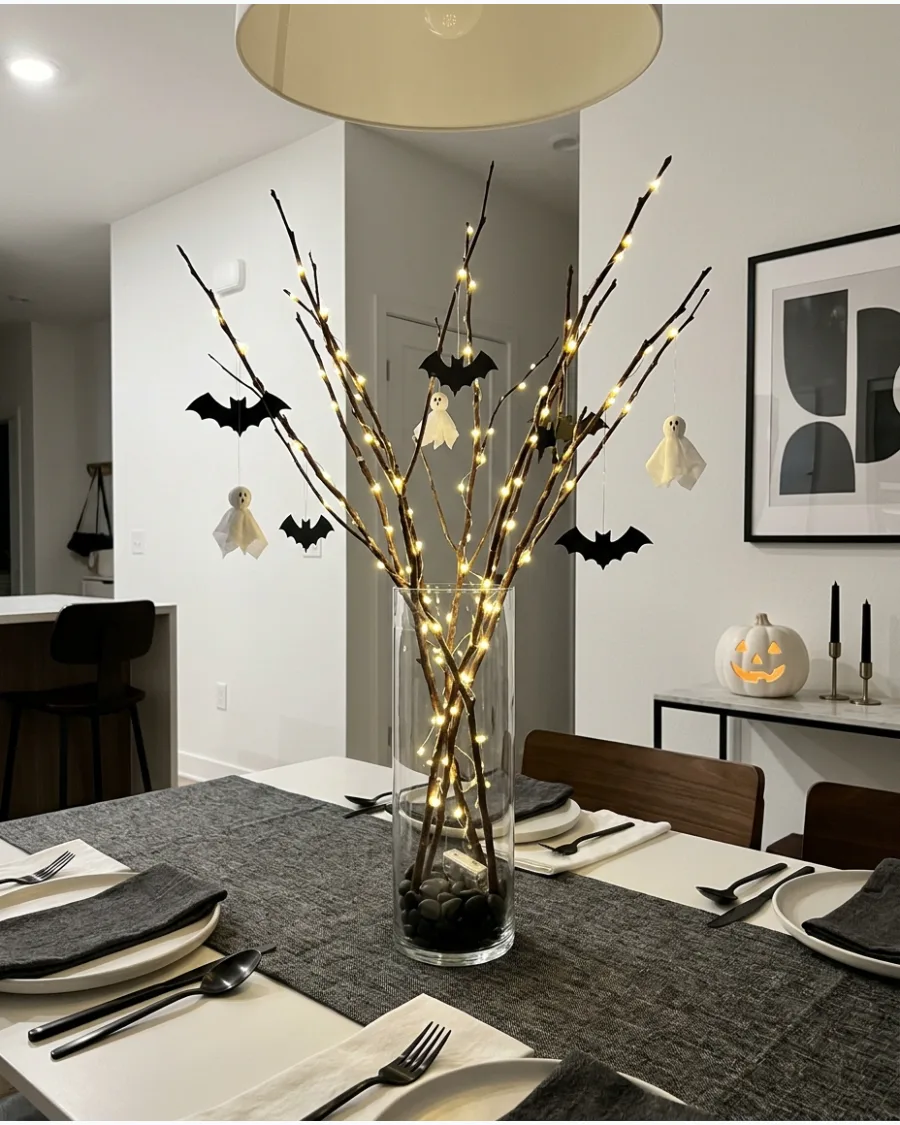
Place bare branches inside a tall vase and weave micro lights through them. Hang miniature bats, moons or ghosts from the illuminated branches.
Weaving battery-powered micro lights through the twigs hides the wires while highlighting the delicate shapes. Natural branches provide height without blocking conversation across the table.
- Use real branches from the yard or black decorative twigs from a craft store.
- Secure the battery pack at the base of the vase behind a small pumpkin to hide it.
- Swap the bats for paper spiders or tiny skeletons for a different theme.
Quick win: Use thin floral wire to secure the battery pack to the back of a branch so it stays out of sight.
52. Black Candle Dining Display
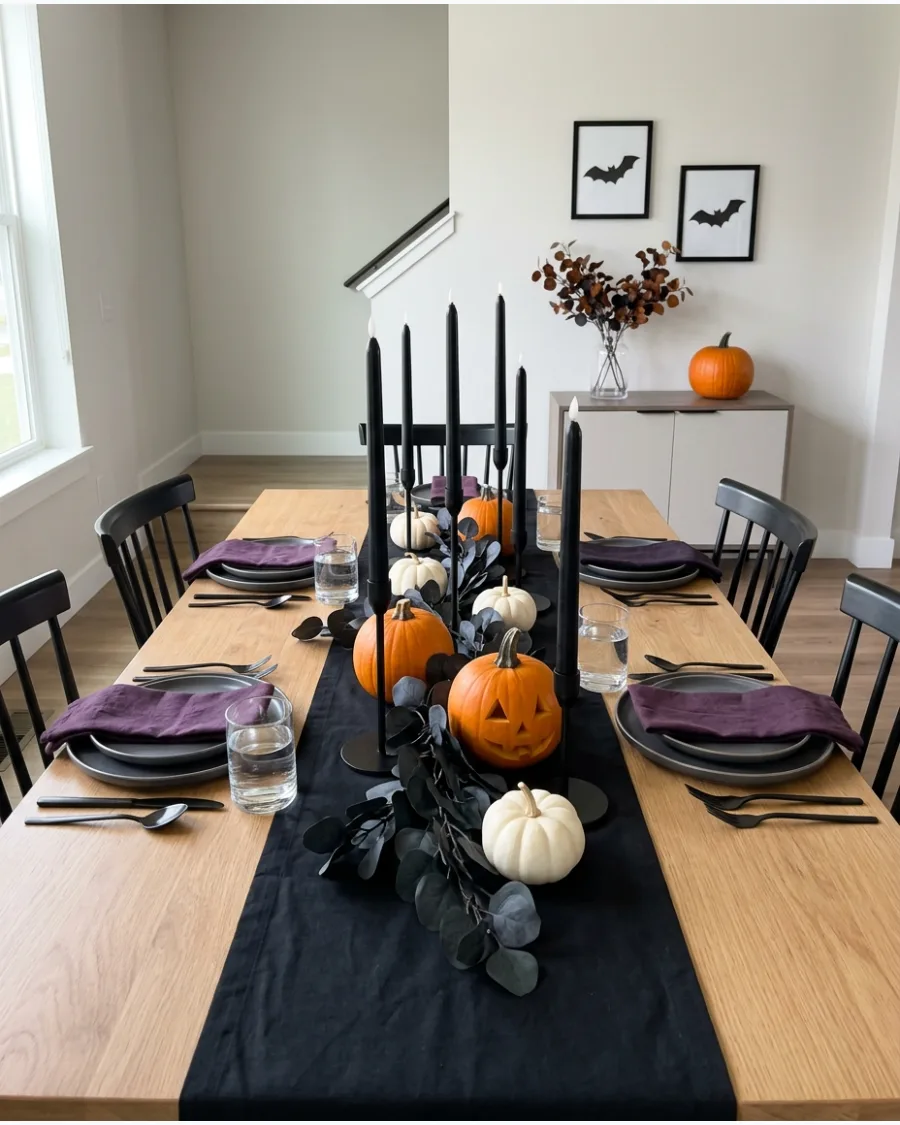
Arrange flameless black taper candles down the center of the dining table. Mix different candle heights with dark greenery and small pumpkins for a dramatic centerpiece.
Using flameless candles ensures the display stays safe near greenery and fabric runners all night long. Mixing heights creates visual movement and makes the center of the table feel more intentional.
- Look for candles with a realistic flickering flame effect for more atmosphere.
- Place the tallest candles in the center and shorter ones toward the ends of the table.
- Add a few silver or gold accents if you want a more formal look.
Most people skip this: Set the candle timers to turn on right at dusk so the table is always ready for dinner.
53. Halloween Chandelier Lights
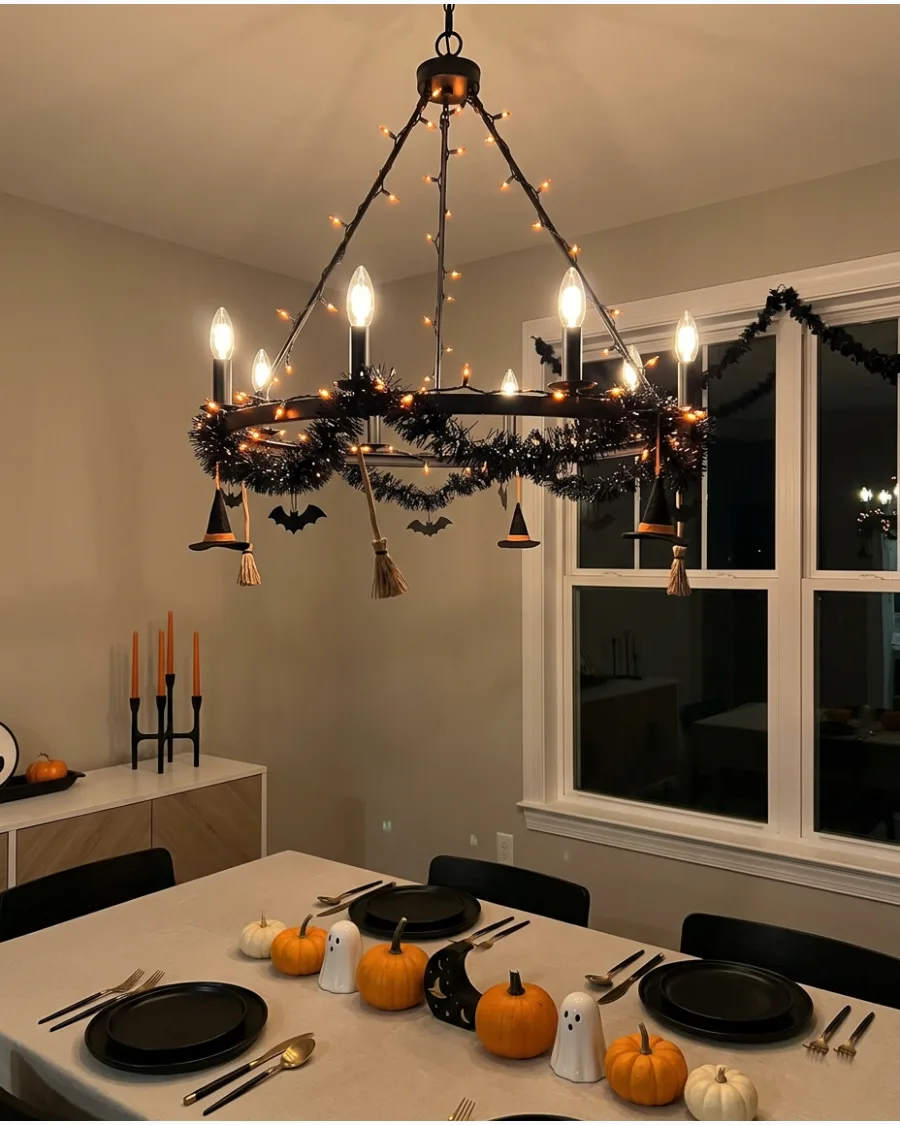
Drape lightweight orange lights and black garland around a dining-room chandelier. Add hanging bats or small witch hats while keeping decorations away from hot bulbs.
Securing the garland with small zip ties keeps the weight balanced and prevents the decor from slipping. This draws the eye upward, making the whole room feel decorated without taking up floor space.
- Use battery-operated strands to avoid having cords running down from the ceiling.
- Ensure all decorations are at least three inches away from the actual light bulbs.
- Lightweight felt shapes are best for hanging because they won't weigh down the fixture.
Best shortcut: Use clear fishing line to hang bats from the chandelier so they look like they are floating in mid-air.
54. Glowing Pumpkin Table Centerpiece
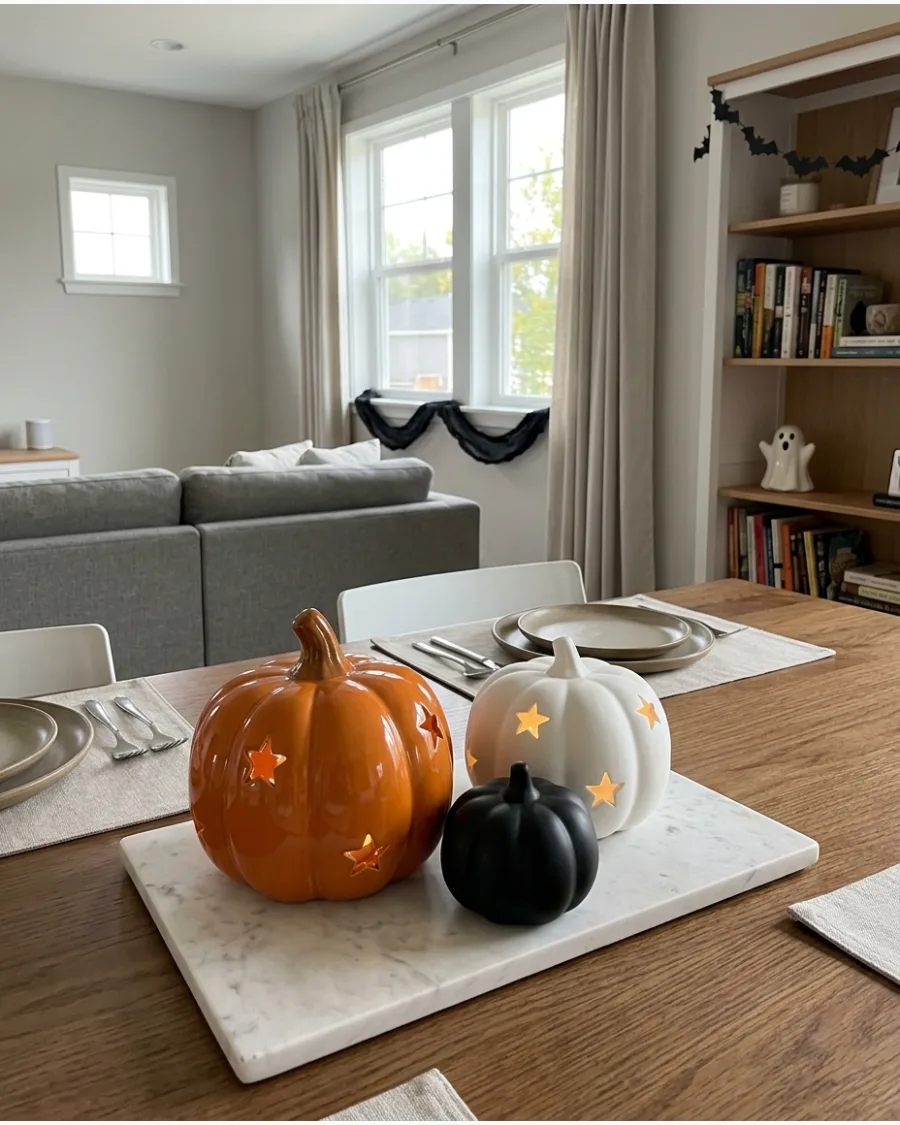
Group illuminated artificial pumpkins in different sizes across a tray or table runner. Mix orange, white and black pumpkins to create more contrast.
Combining different finishes like matte black and glossy orange adds texture to the light display. Using a tray keeps the arrangement contained so it is easy to move for mealtime.
- Pick pumpkins with pre-cut patterns like stars or dots for better light diffusion.
- Vary the sizes from mini gourds to large pumpkins for a more organic feel.
- Use a mirrored tray to double the light output from the glowing pumpkins.
Quick win: Place a few loose orange LED tea lights between the pumpkins to fill in any dark gaps.
55. Halloween Mirror Lights
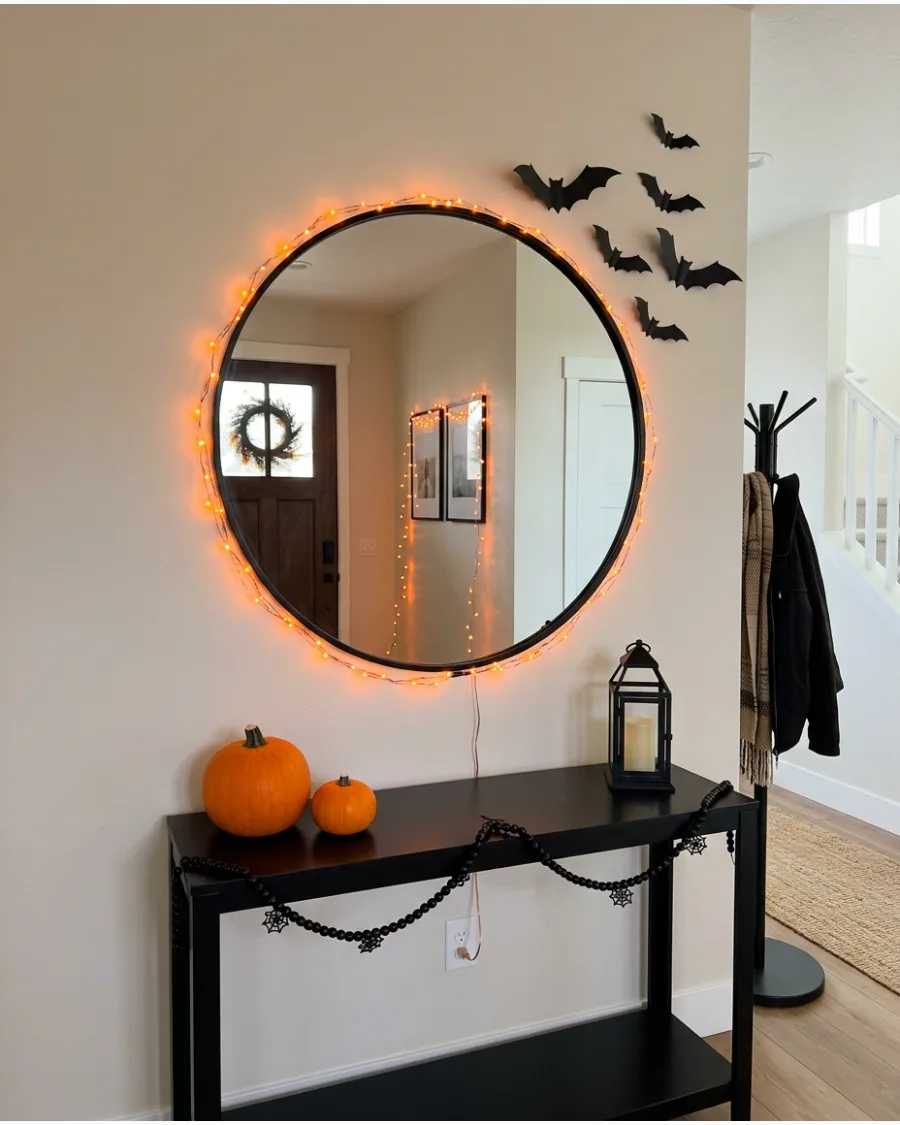
Frame an entryway or mantel mirror with warm-orange fairy lights. Arrange paper bats so they appear to fly from behind the mirror onto the wall.
Tucking the battery pack behind the mirror frame keeps the setup looking professional and wire-free. The reflection doubles the amount of light, making a small entryway feel much brighter.
- Use adhesive hooks or small bits of painter's tape to hold the wires in place.
- Choose copper wire lights because they are stiff and hold their shape around corners.
- Bend the wings of the paper bats slightly to create a 3D shadow effect.
Most people skip this: Clean the mirror thoroughly before adding lights to prevent dust from glowing under the LEDs.
56. Lighted Entryway Ghosts
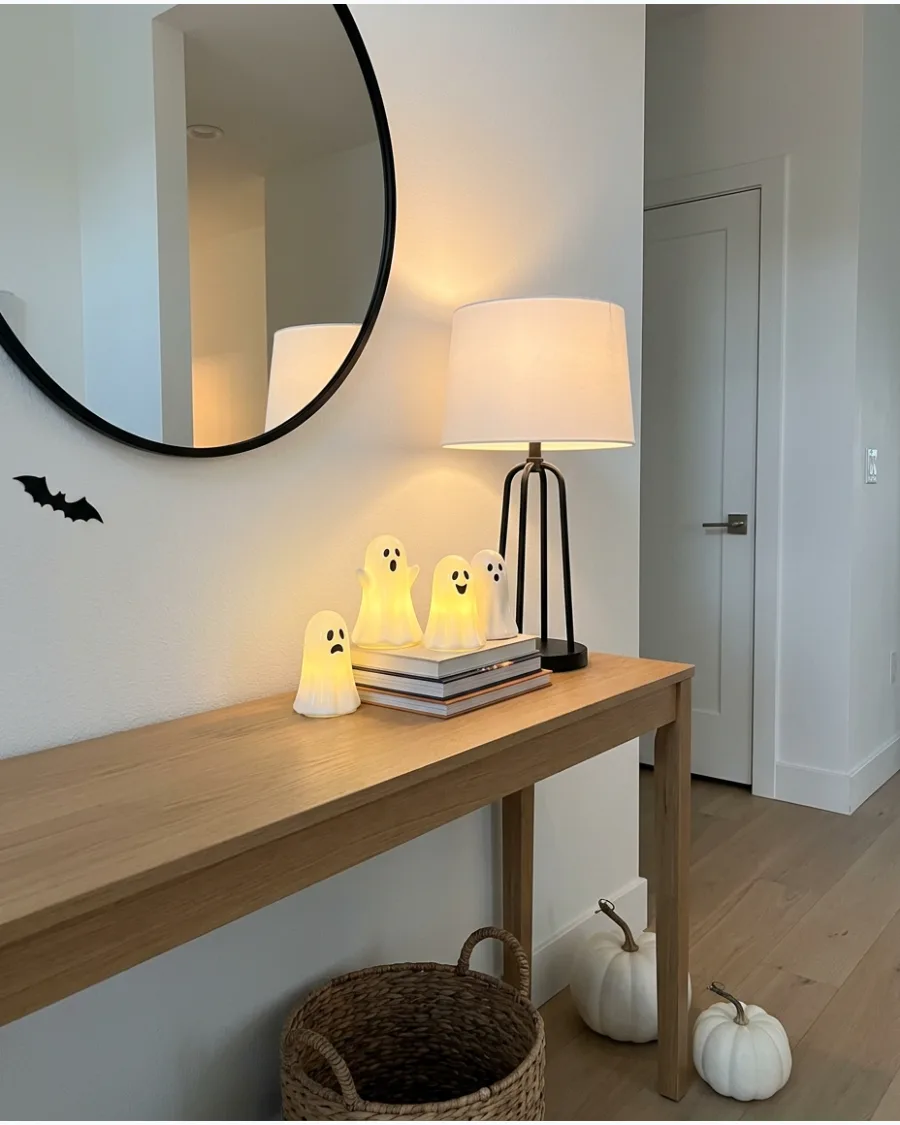
Place several glowing ghosts on an entry table beside a lamp or mirror. Keep the remaining decor neutral so the illuminated figures stand out.
Placing these figures near a lamp allows the light to bounce off their white surfaces for a softer glow. Neutral surroundings help the illuminated ghosts pop without making the entry feel cluttered.
- Group ghosts in odd numbers like three or five for a more natural arrangement.
- Mix different heights to prevent the display from looking too flat or uniform.
- Keep the table clear of daily mail or keys to let the decor be the focal point.
Best shortcut: If your ghosts aren't lighted, hide a small LED puck light behind them to create a silhouette effect.
57. Purple Bathroom Night-Light Display
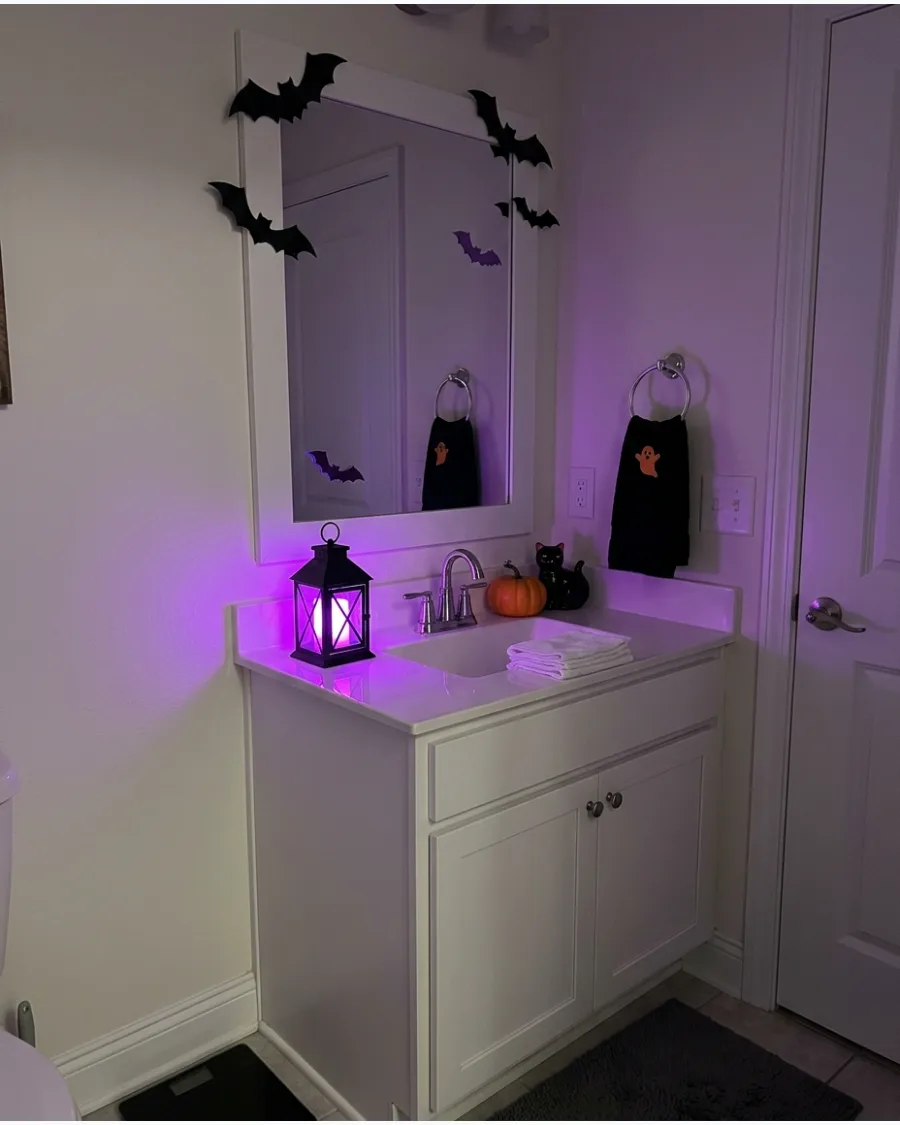
Use a soft purple night-light or battery lantern as the main Halloween accent in a small bathroom. Add a few bats around the mirror and a miniature pumpkin near the sink.
A single purple bulb provides enough light for guests to navigate without ruining the spooky mood. Small spaces benefit from one strong color choice rather than a mix of competing lights.
- Replace a standard night-light bulb with a purple LED for an instant change.
- Use battery-operated lanterns if there isn't a convenient outlet near the sink.
- Keep the purple light away from mirrors if you want to avoid too much glare.
Quick win: Purple light makes white decor items look like they are glowing, so use white towels for extra effect.
58. Glowing Fireplace Cauldron
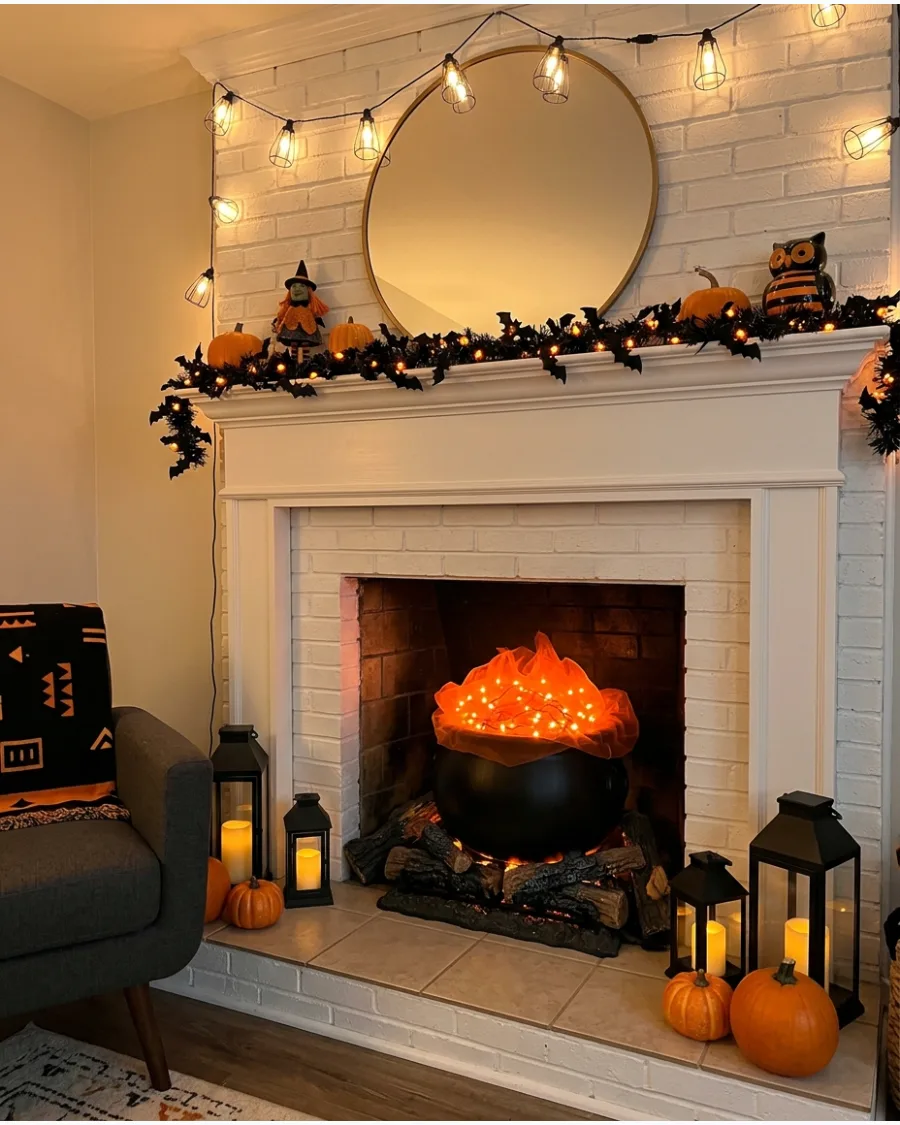
Fill an unused fireplace with a decorative cauldron, orange lights and lightweight flame-shaped fabric. Surround it with black lanterns and artificial logs.
Layering orange lights under sheer orange fabric creates the realistic look of a simmering fire without any heat. This is the perfect way to utilize a non-working fireplace during the fall season.
- Use a mix of steady and flickering orange lights for a more realistic fire effect.
- Stuff the bottom of the cauldron with newspaper so you only need lights at the top.
- Place black lanterns of different sizes on the hearth to frame the scene.
Most people skip this: Drape a few strands of lights over the edge of the cauldron to look like bubbling potion.
59. Halloween Light Jar Collection
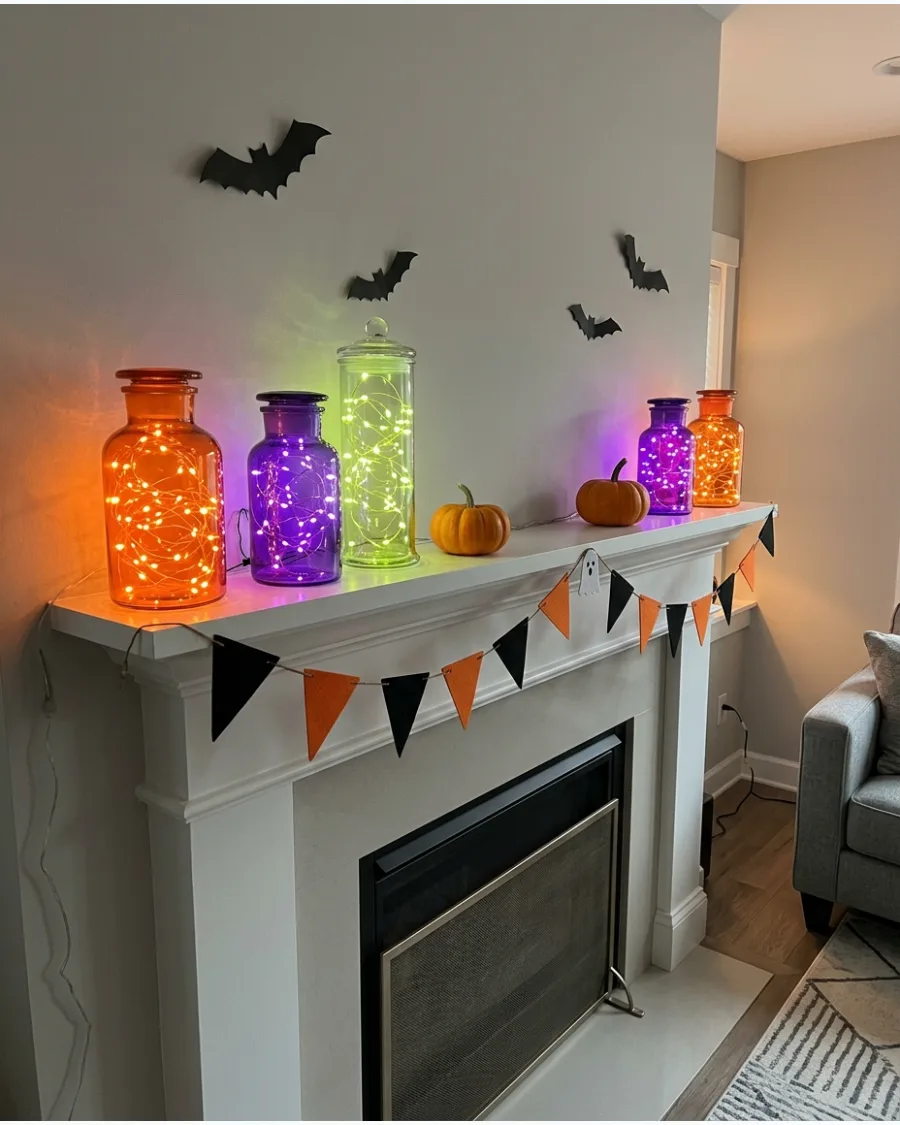
Fill clear jars with orange, purple and green micro lights. Arrange the jars on a windowsill, mantel or shelf and vary their heights for a glowing laboratory effect.
Grouping jars in odd numbers like three or five creates a more balanced and artistic look on a shelf. Varying the jar sizes mimics the look of an old-fashioned apothecary or laboratory.
- Reuse old pasta or mason jars to save money on this DIY project.
- Coil the lights tightly inside the jars to ensure the color is vibrant and dense.
- Add a few drops of food coloring and water to the jars for a swampy look.
Best shortcut: Use frosted glass jars if you want a softer, more diffused glow instead of seeing individual bulbs.
60. Whole-Room Layered Halloween Lighting
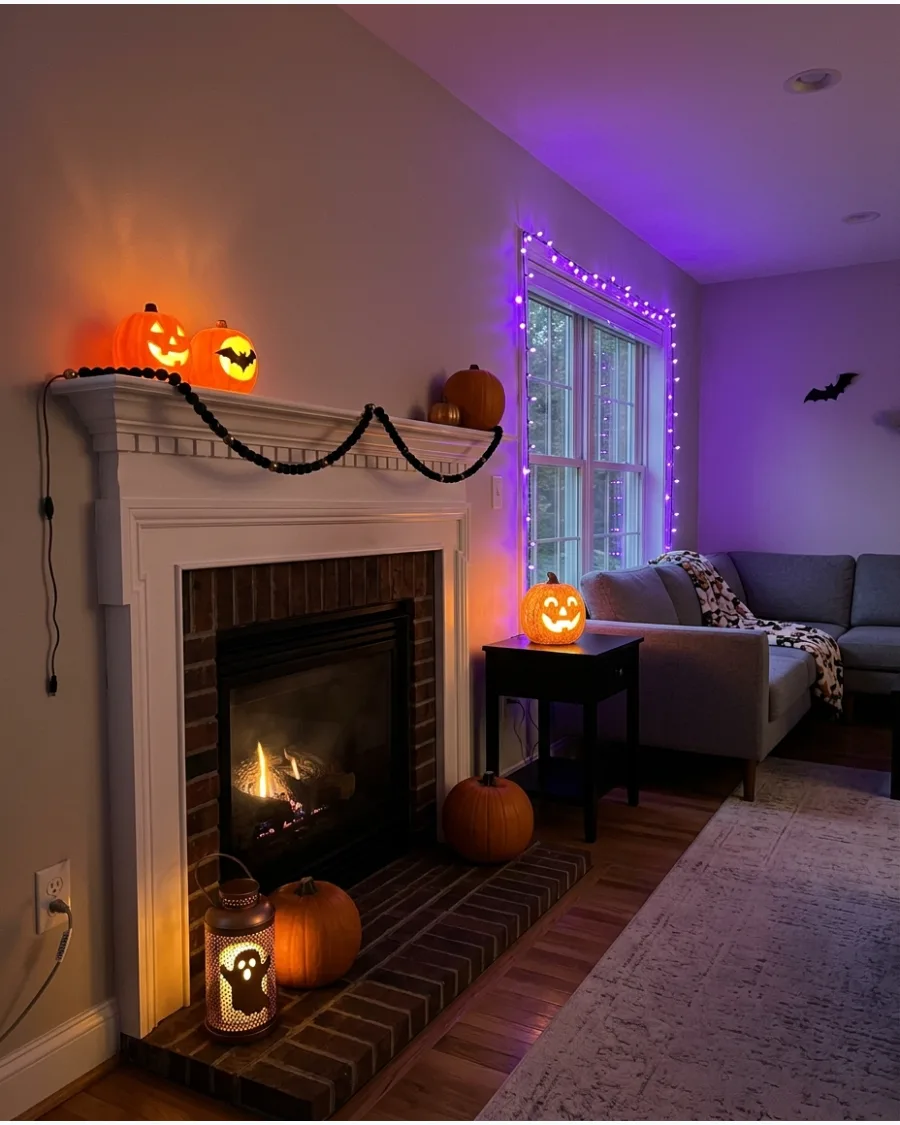
Combine a softly illuminated mantel, a glowing window and one lighted tabletop display. Use two or three related colors and leave the main ceiling light off to create a comfortable Halloween atmosphere.
Turning off the overhead lights and relying on these small sources creates a cozy, immersive environment. Layering lights at different heights—floor, table, and wall—makes the theme feel complete.
- Stick to a consistent color palette like orange and purple to keep the room cohesive.
- Spread the light sources out so every corner of the room has a soft glow.
- Use smart plugs to turn the entire room's Halloween display on with one command.
Quick win: Place a small light behind a large furniture piece to create a backlight effect that adds depth to the room.
Frequently Asked Questions
How do I hide extension cords for my outdoor Halloween lights?
To keep your yard looking tidy, use cord covers or match the cord color to your home's siding or mulch. For a simpler setup, consider switching to battery-operated LED lights to eliminate the need for long cords altogether.
What is the best color combination for a spooky atmosphere?
While orange and black are classic, a mix of deep purple and slime green creates a truly eerie, supernatural vibe. These colors provide a high-contrast glow that makes your yard look like a scene from a haunted mansion.
Are LED Halloween lights better than incandescent bulbs?
LED lights are generally superior because they are energy-efficient, stay cool to the touch, and offer much brighter colors. While incandescents have a nostalgic warm glow, LEDs last much longer and allow you to safely connect more strands together.
How can I make my window lights look good from both inside and outside?
Use double-sided window clings or silhouettes paired with interior backlighting to ensure the design pops for neighbors and guests alike. Placing your lights between the window and a sheer curtain helps diffuse the glow, creating a polished look from both perspectives.
How do I safely hang lights on brick or vinyl siding without damage?
Use specialized siding clips or plastic brick hangers that grip the surface without requiring any drilling or permanent hardware. For a temporary and damage-free solution, adhesive hooks or tension rods are also excellent choices for framing windows and entryways.