50 DIY Ghost Decorations for Halloween

This post may contain affiliate links: full affiliate disclosure.
Modern ghost decor relies on clean shapes and interesting textures rather than complicated builds. Focus on draping and scale to create a cohesive look that feels intentional throughout the home.
These projects use everyday materials to build a festive atmosphere without cluttering the space.
Easy and Budget-Friendly DIY Ghost Decorations
1. White Sheet Ghost
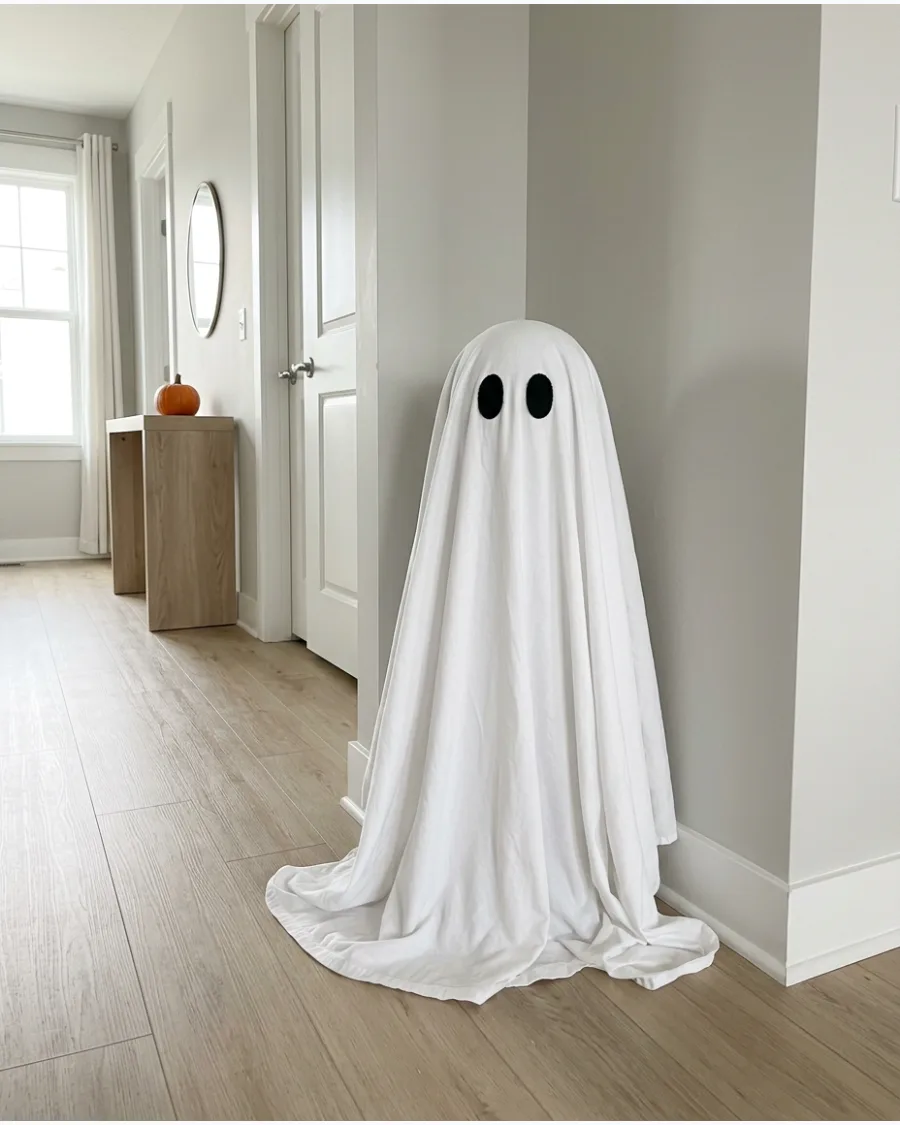
Use a high-thread-count sheet for a more opaque, high-end look that doesn't feel like a last-minute costume. Drape the fabric over a round form and let the excess pool naturally on the floor for a grounded appearance.
Secure the sheet to the top of the form with a single safety pin to keep the face from shifting out of place. A matte black felt is best for the eyes to avoid any glare from room lighting.
- White cotton bed sheet and a round foam sphere.
- Position the ghost in a corner or near an entryway table.
- Use a twin sheet for small spaces or a king-sized sheet for high ceilings.
Quick win: Use a heavy starch spray on the sheet before draping to help the folds hold their shape and stay crisp.
2. Dollar Tree Mop-Head Ghost
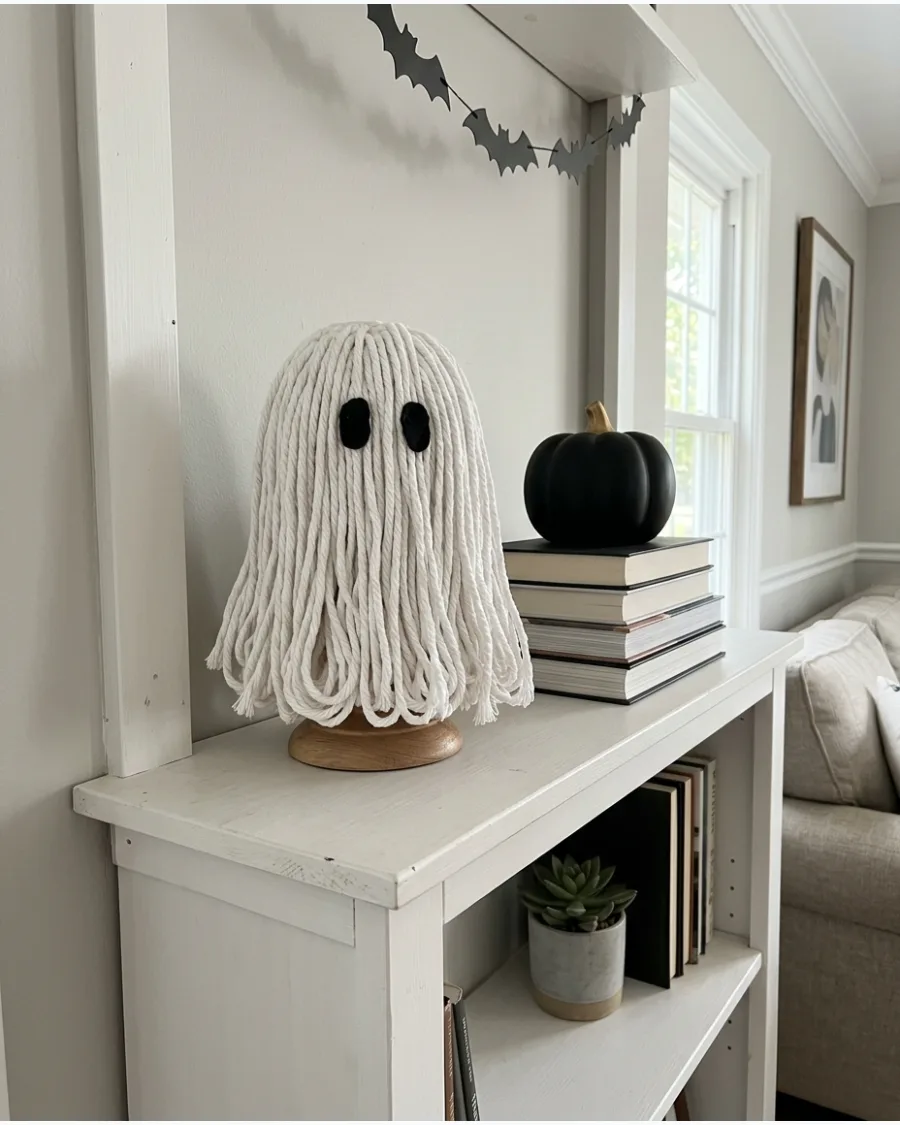
The cotton strands of a mop head provide a unique texture that mimics a high-end tassel or woven wall hanging. Mount the mop head onto a sturdy wooden dowel or a small cone to give it height and stability on a surface.
Glue the felt eyes deep into the strands so they appear to be peeking out from the texture. This smaller scale is perfect for styling tiered trays or bookshelves.
- White cotton mop head and a small wood dowel.
- Hot glue the base to a small wood disc for stability.
- Add a black ribbon bow for a more tailored look.
Most people skip this: Comb through the cotton strands with a wide-tooth comb to untangle them for a cleaner, fluffier appearance.
3. Plastic Tablecloth Ghost
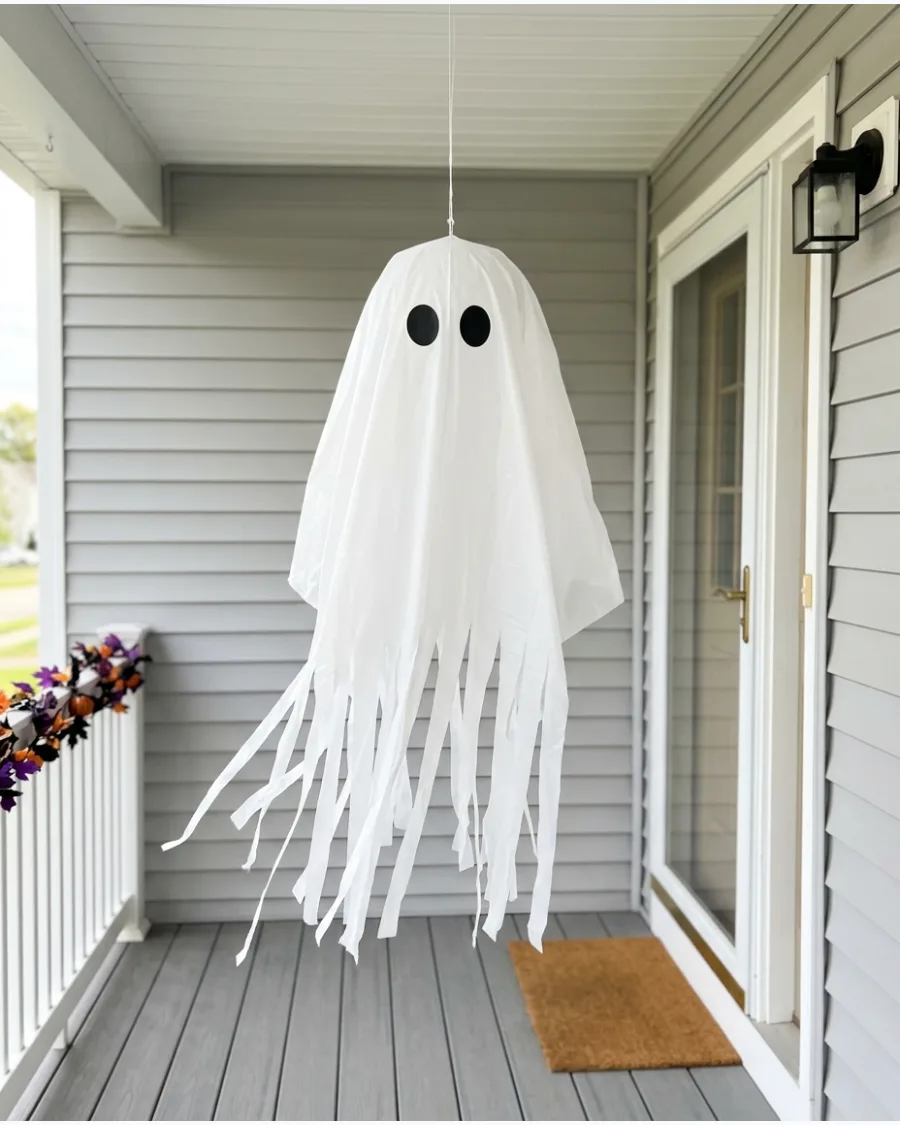
Plastic tablecloths are weather-resistant and incredibly light, making them ideal for outdoor movement.
Shred the bottom third of the plastic into thin ribbons to catch even the slightest breeze on a porch. Tie the plastic tightly around a balloon or foam ball using a clear fishing line for an invisible hanging point. The glossy finish of the plastic creates a subtle shimmer that stands out against dark exterior walls.
- White plastic tablecloth and clear fishing line.
- Hang from porch hooks or door frames to avoid blocking the path.
- Layer two tablecloths for a more opaque and durable ghost.
Best shortcut: Use black electrical tape for the eyes; it sticks perfectly to plastic and won't peel off in the rain.
4. Paper Plate Hanging Ghost
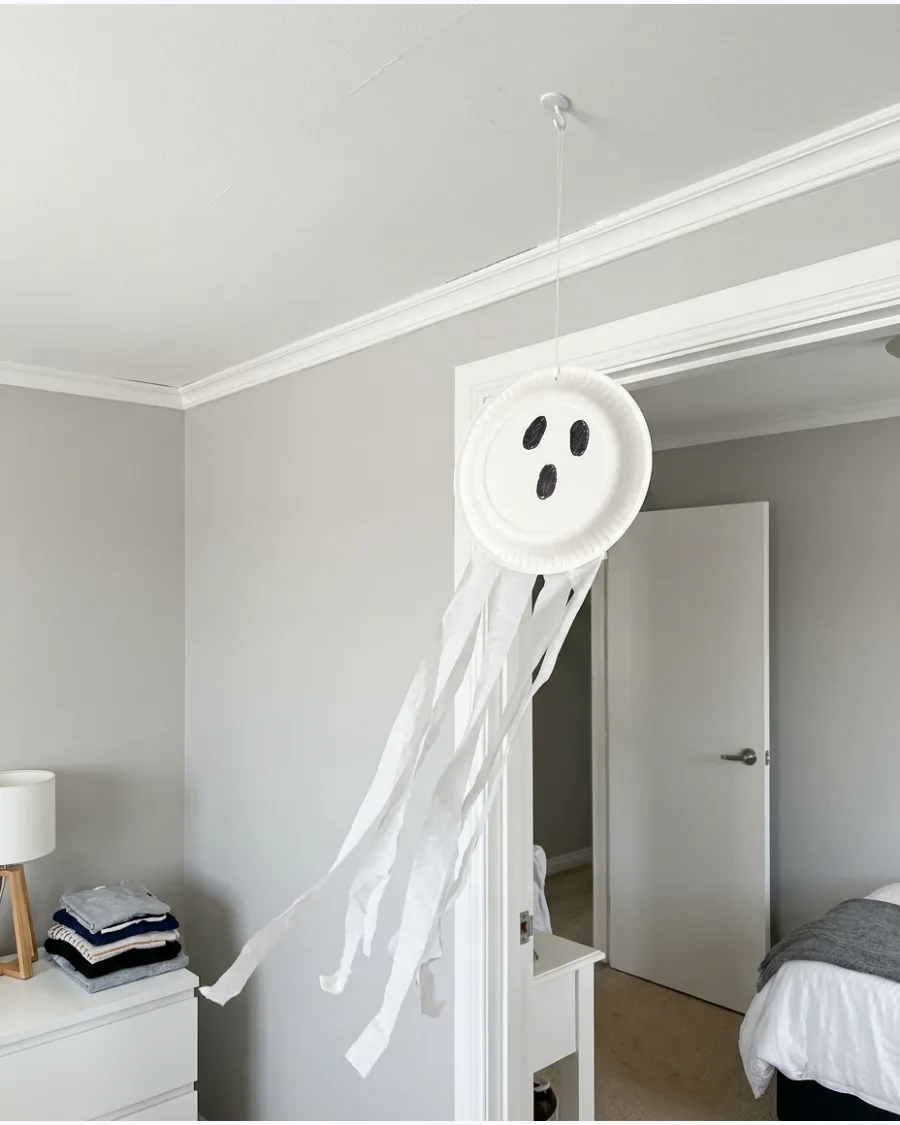
This project turns simple kitchen staples into vertical decor that fills empty wall or ceiling space. Attach long, varying lengths of white tissue paper or crepe streamers to the back of the plate to create a flowing tail.
Use a hole punch at the top of the plate to ensure the hanging string is perfectly centered and balanced. It is a fast way to decorate a large area like a playroom or a wide hallway.
- White paper plates and white crepe paper streamers.
- Tape or glue streamers to the bottom rim of the plate.
- Vary the streamer lengths to create more visual movement.
Quick win: Curl the ends of the tissue paper strips slightly with a pair of scissors to give the ghost more volume.
5. Coffee Filter Mini Ghosts
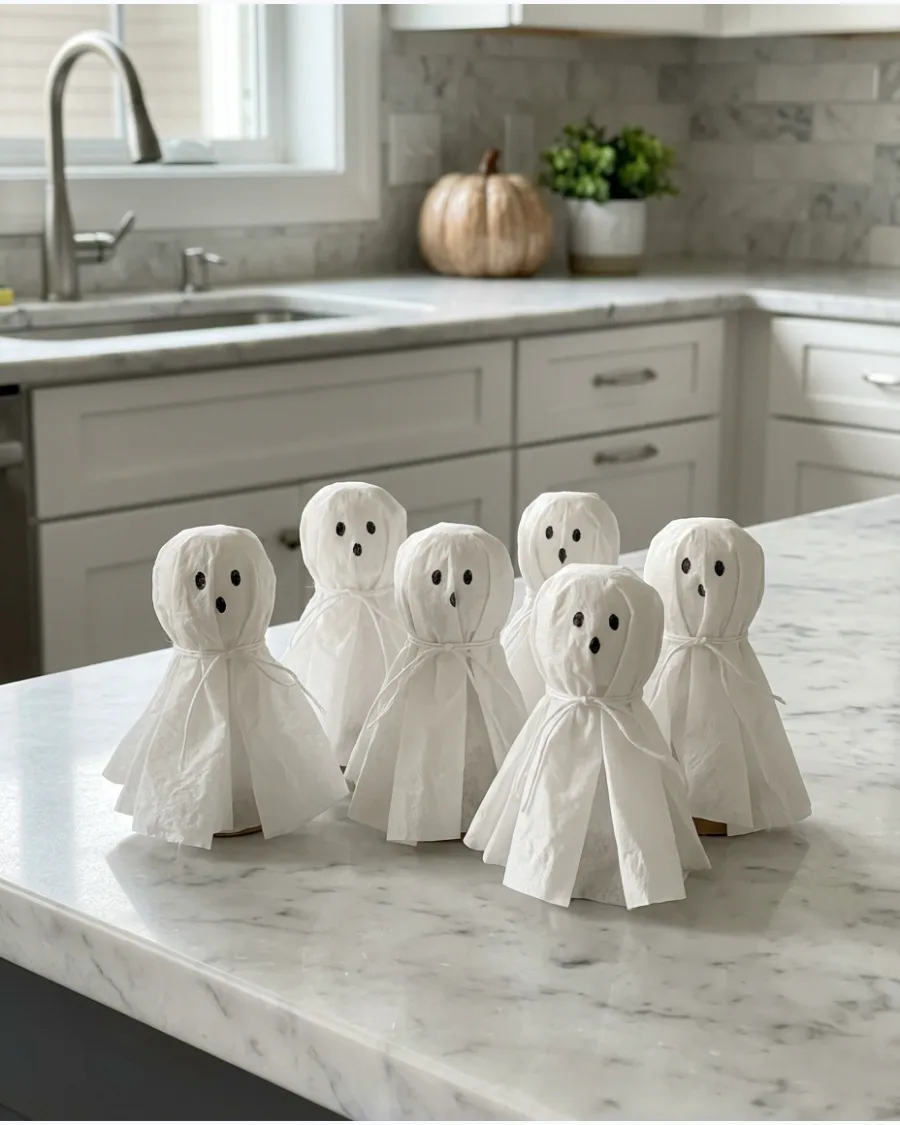
Coffee filters have a delicate, translucent quality that looks beautiful when grouped together. Wrap a filter over a small ball and cinch it with a thin white thread to define the head.
Cluster these small ghosts in a clear glass bowl or string them onto a thin cord for a subtle mantel display. The ruffled edges of the filters add a sophisticated touch to a tabletop.
- White basket-style coffee filters and small foam balls.
- Place in a decorative bowl or on a tiered tray.
- Use different sized filters to create a diverse ghost family.
Most people skip this: Use two filters per ghost to prevent the foam ball from showing through the paper.
6. Tissue Paper Ghost Garland
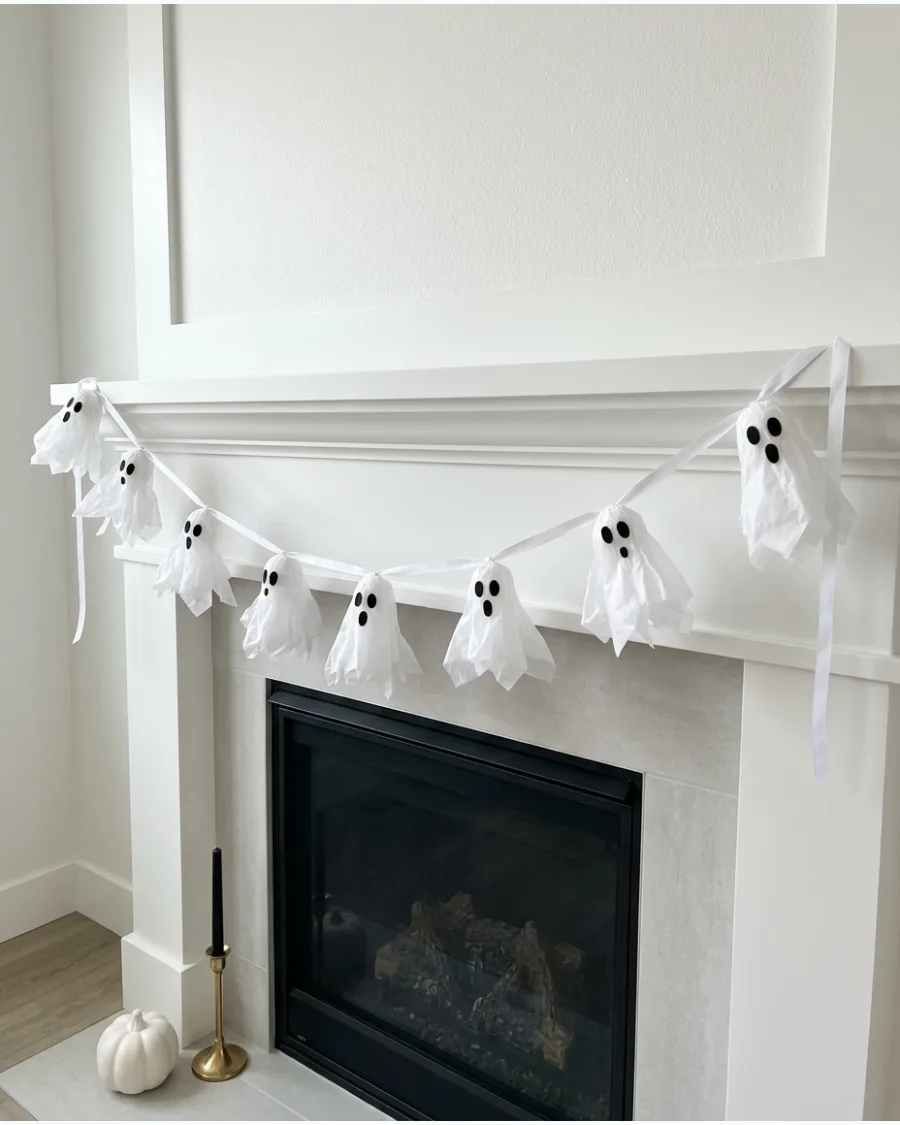
A garland is an effective way to bring a theme into a room without taking up any floor or counter space. Fold tissue paper multiple times before cutting to ensure every ghost in the chain is identical in size and shape.
Space the ghosts about four inches apart on the string to prevent them from tangling or overlapping. This works well draped across a large mirror or along a staircase railing.
- White tissue paper and white twine.
- Secure to the mantel with clear removable hooks.
- Shorten the string for windows or lengthen it for large walls.
Best shortcut: Use a glue stick instead of liquid glue to attach the eyes so the thin tissue paper doesn't wrinkle or tear.
7. White Trash-Bag Ghosts
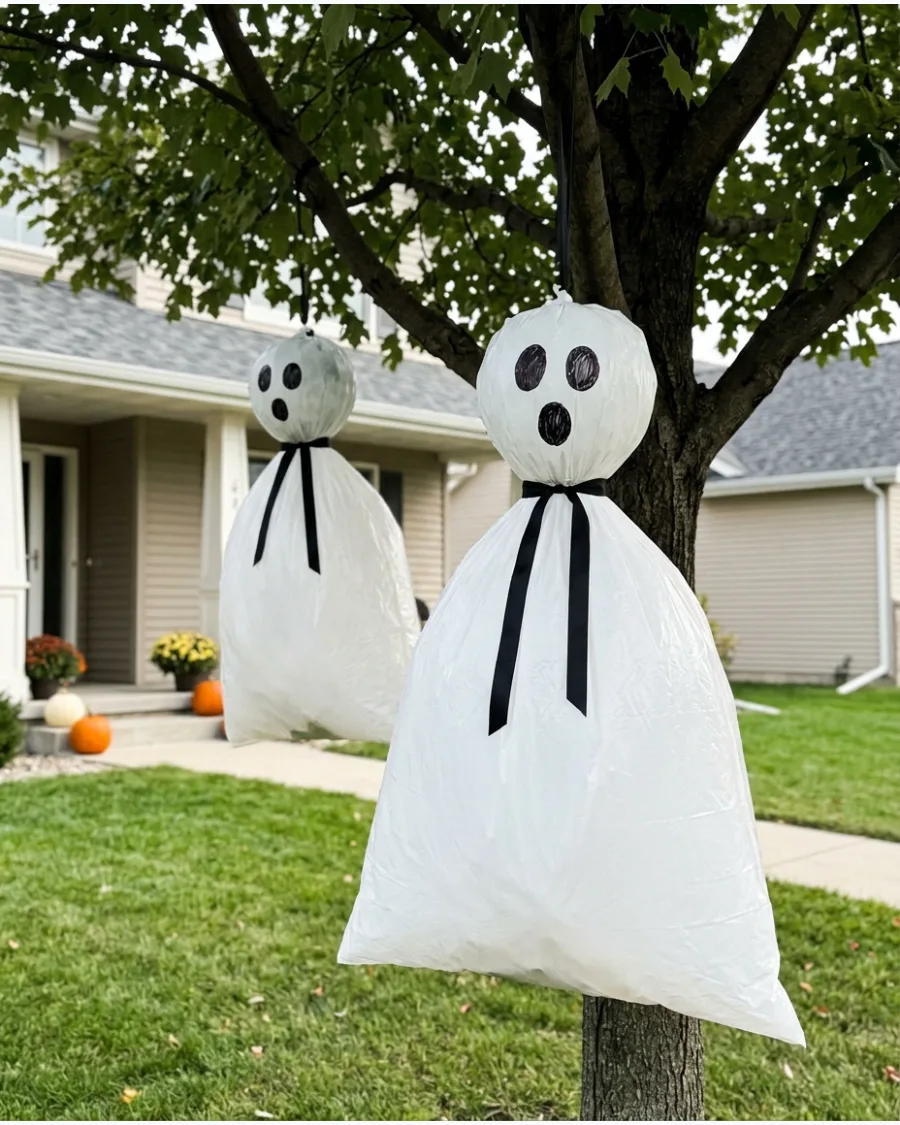
These ghosts are the most durable option for yards and exposed outdoor spaces because they handle moisture perfectly. Fill the head section with plastic grocery bags or bubble wrap to keep it lightweight and round.
Poke a few small holes in the bottom of the bag to prevent it from trapping air and blowing away like a sail. They look best when hung at varying heights from tree branches or porch eaves.
- White drawstring trash bags and plastic filler.
- Loop twine around the neck and tie to branches.
- Use oversized lawn bags for a giant ghost statement.
Quick win: Draw the faces with a broad-tip permanent marker for maximum visibility from the street.
8. Sock Ghost Decorations
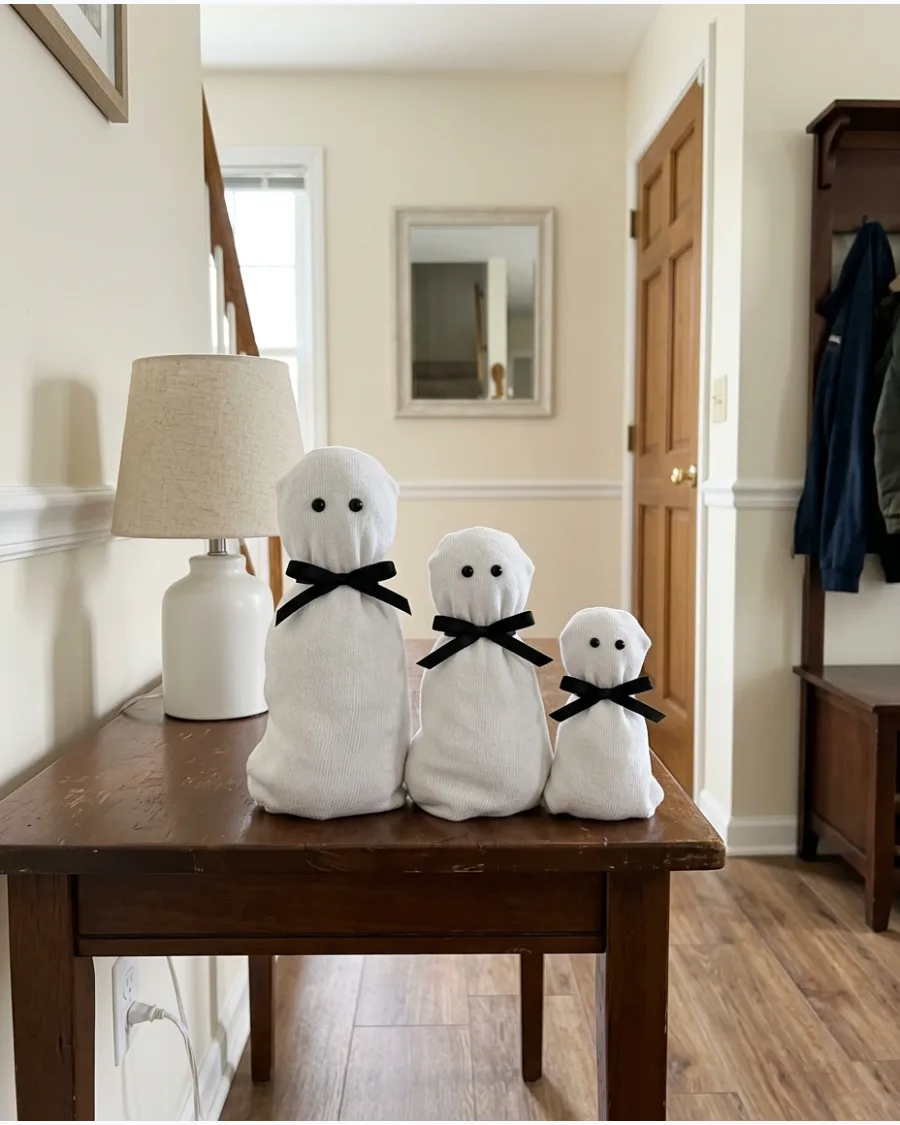
Repurposing white crew socks creates a soft, plush ghost that feels cozy and high-quality. Fill the sock with poly-fill or fabric scraps until it reaches a plump, rounded shape.
Tie a piece of black velvet ribbon around the neck to add a modern, high-contrast detail. These are sturdy enough to stand on their own when tucked into a holiday display or placed on a bedside table.
- White crew socks and polyester fiberfill.
- Arrange in groups of three for a balanced look.
- Stuff with dried beans at the bottom to help them stand upright.
Most people skip this: Turn the sock inside out before stuffing if you want a smoother, seamless texture without the ribbing.
9. Cotton-Ball Ghost Canvas
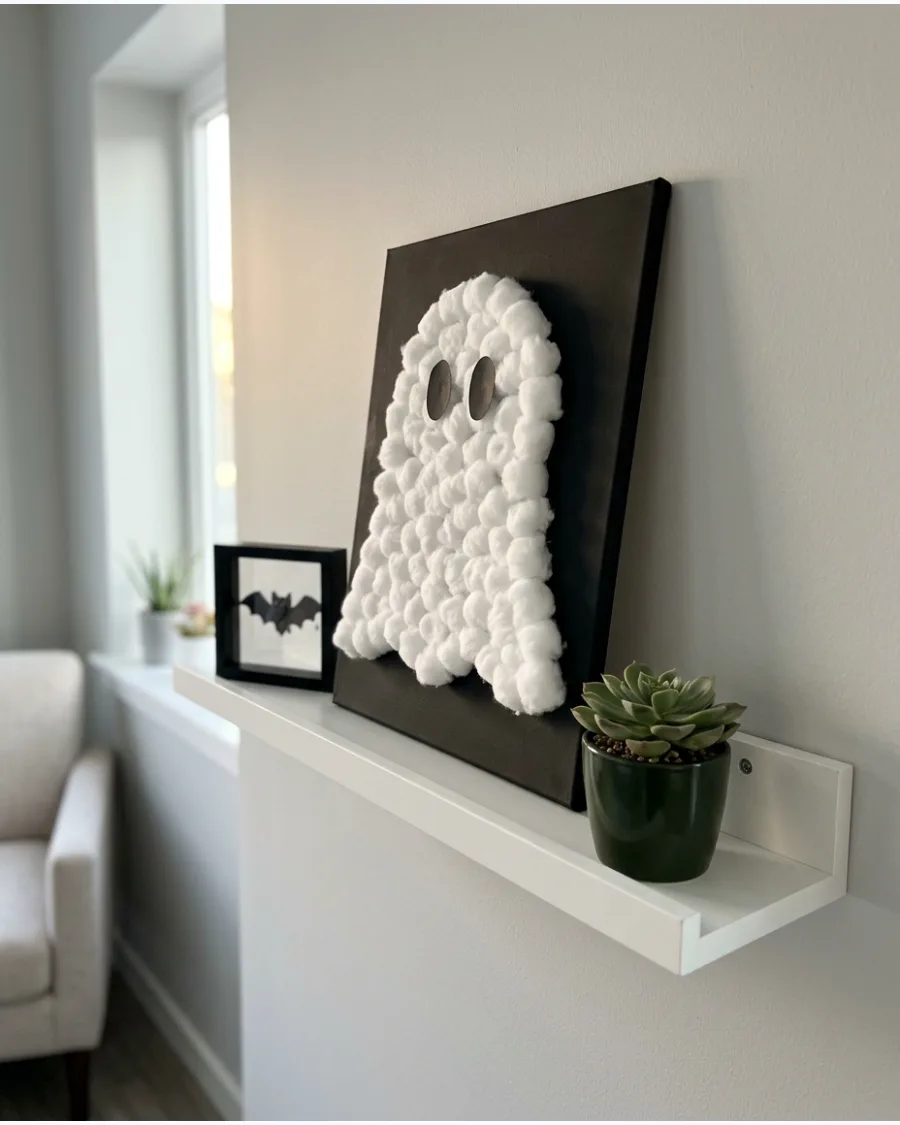
Texture is key for wall art, and the soft fluff of cotton balls creates a 3D effect that catches the light. Sketch the ghost outline lightly in pencil first to ensure the proportions are correct before gluing.
Apply the cotton balls in a tight pattern to ensure the ghost looks solid and opaque against the dark background. This is a great way to add seasonal art to a gallery wall or a floating shelf.
- Black stretched canvas and cotton balls.
- Lean on a shelf or hang with adhesive strips.
- Use a navy or charcoal canvas for a softer alternative to black.
Best shortcut: Use a spray adhesive on the canvas for a faster, more even application of the cotton balls.
10. Foam Cup Ghosts
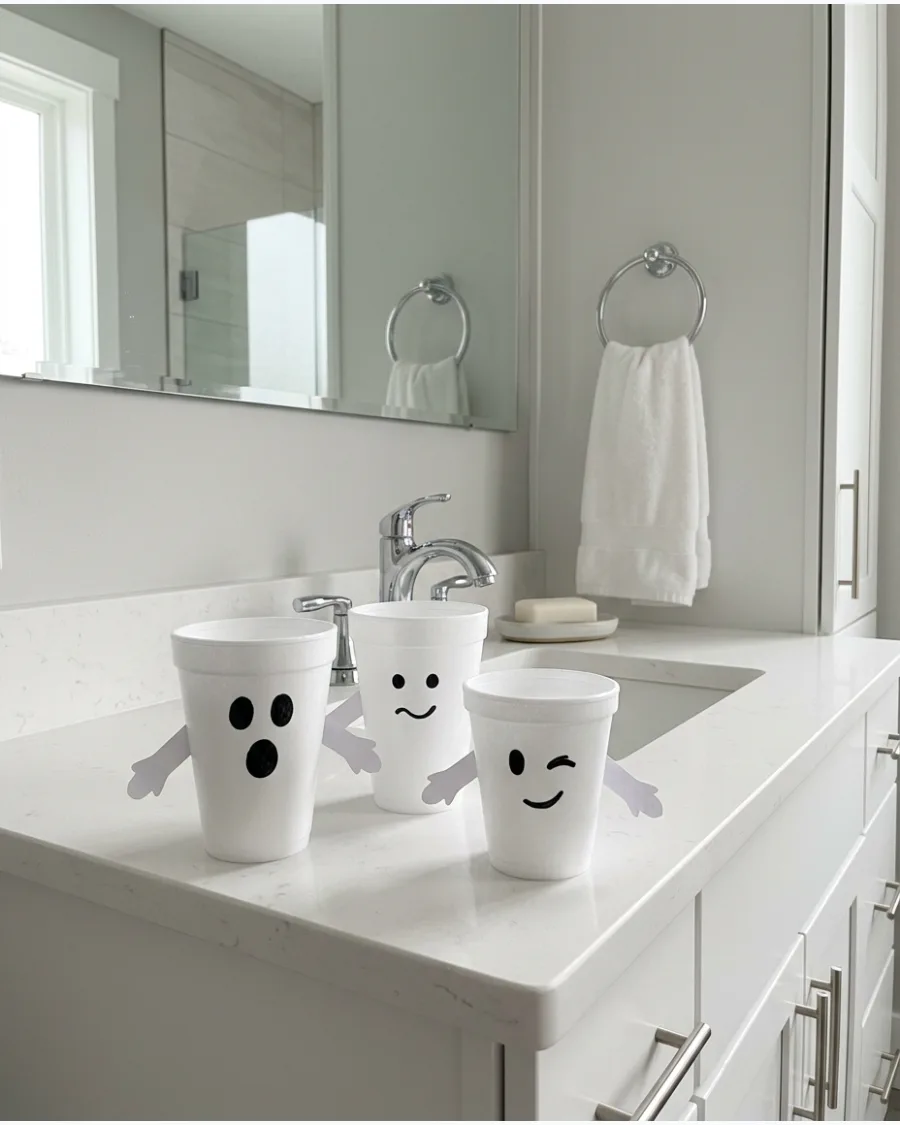
Foam cups provide a built-in structure that makes these ghosts incredibly easy to assemble and display. Turn the cups upside down so the wider base provides stability on any flat surface.
Cut small arms from white cardstock and glue them to the sides to give the ghosts a more active, playful silhouette. They are the perfect size for decorating a home office desk or a bathroom vanity.
- White foam cups and white cardstock.
- Line them up on a windowsill or shelf.
- Place a battery-operated tea light underneath for a glowing effect.
Most people skip this: Use a warm-toned marker for the eyes if you want a softer look that coordinates with gold or brass hardware.
Outdoor DIY Ghost Decorations
11. Tomato Cage Ghost
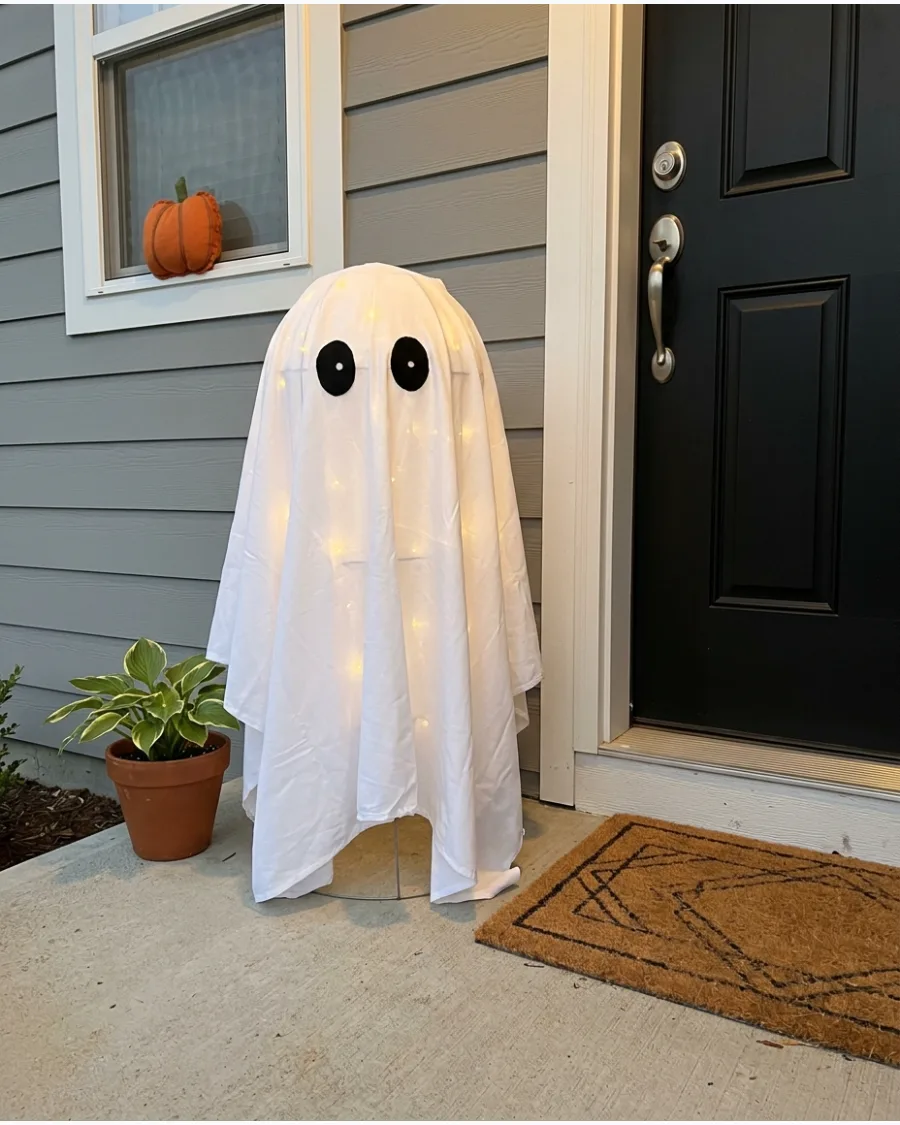
Flip a tomato cage upside down and secure the tines at the top with a rubber band to create a stable cone shape. Place a large foam ball or a stuffed balloon on the top to serve as the head before draping a white sheet over the entire frame.
Secure the fabric at the base with landscape staples to prevent the wind from blowing the ghost away. Use battery-powered fairy lights inside the cage for a soft, internal glow.
- Standard tomato cages and white sheets.
- Secure the base with heavy rocks if the ground is too hard for staples.
- Use smaller tomato cages to create smaller ghosts for front porch steps.
Quick win: Use a white pillowcase for the head section to add extra opacity so the cage wires do not show through.
12. Tomato Cage Ghost With Pool-Noodle Arms
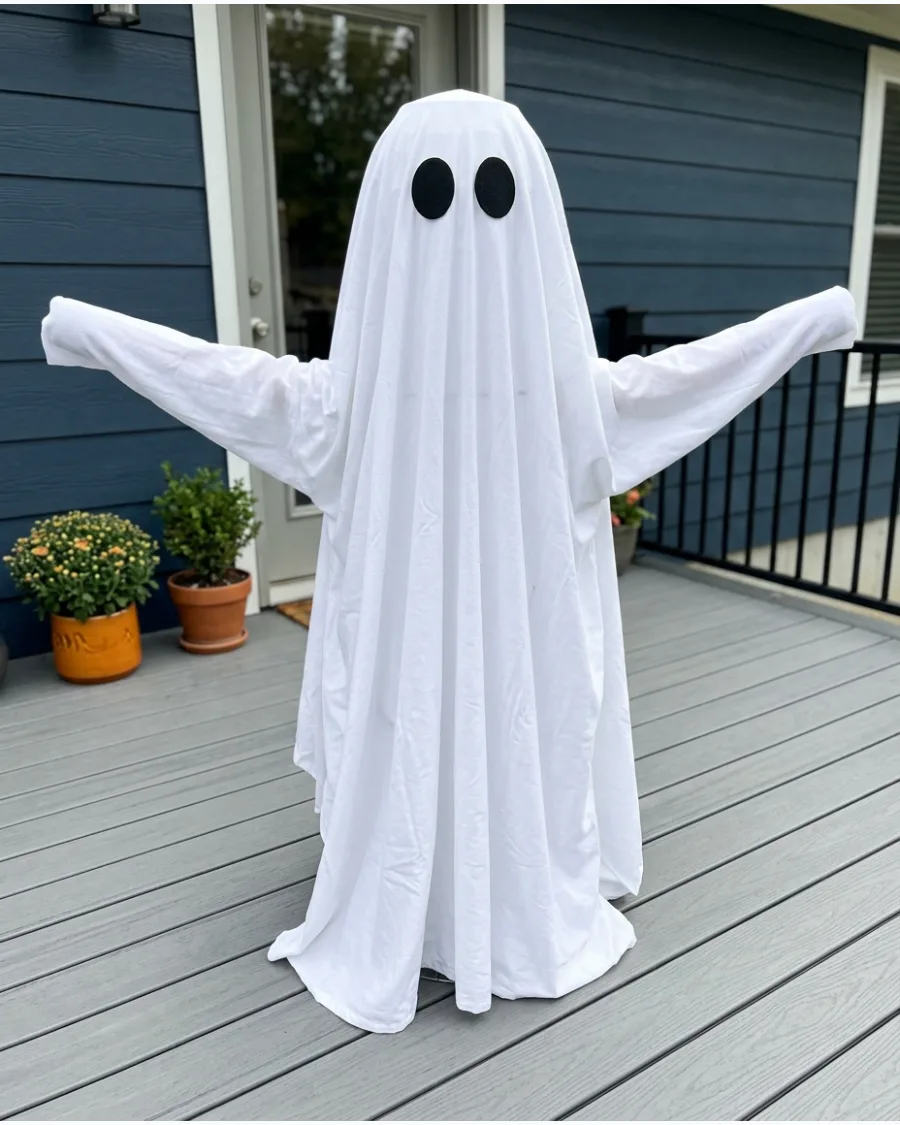
Slide foam pool noodles onto the horizontal wire rings of a tomato cage to create movable, bendable arms. This modification adds width and a more human-like silhouette to the standard cone-shaped ghost.
Drape a queen-sized flat sheet over the extended arm frame to ensure the fabric hangs naturally without catching on the wires. These ghosts look best when placed in pairs near an entryway to welcome guests.
- Blue or green pool noodles and a metal tomato cage.
- Duct tape the noodles to the wire for extra security before adding fabric.
- Choose extra-long king-size sheets to fully cover the wider arm span.
Most people skip this: Tape the pool noodles at a slight upward angle to make the ghost look like it is reaching out rather than just standing still.
13. Pool Noodle Standing Ghost
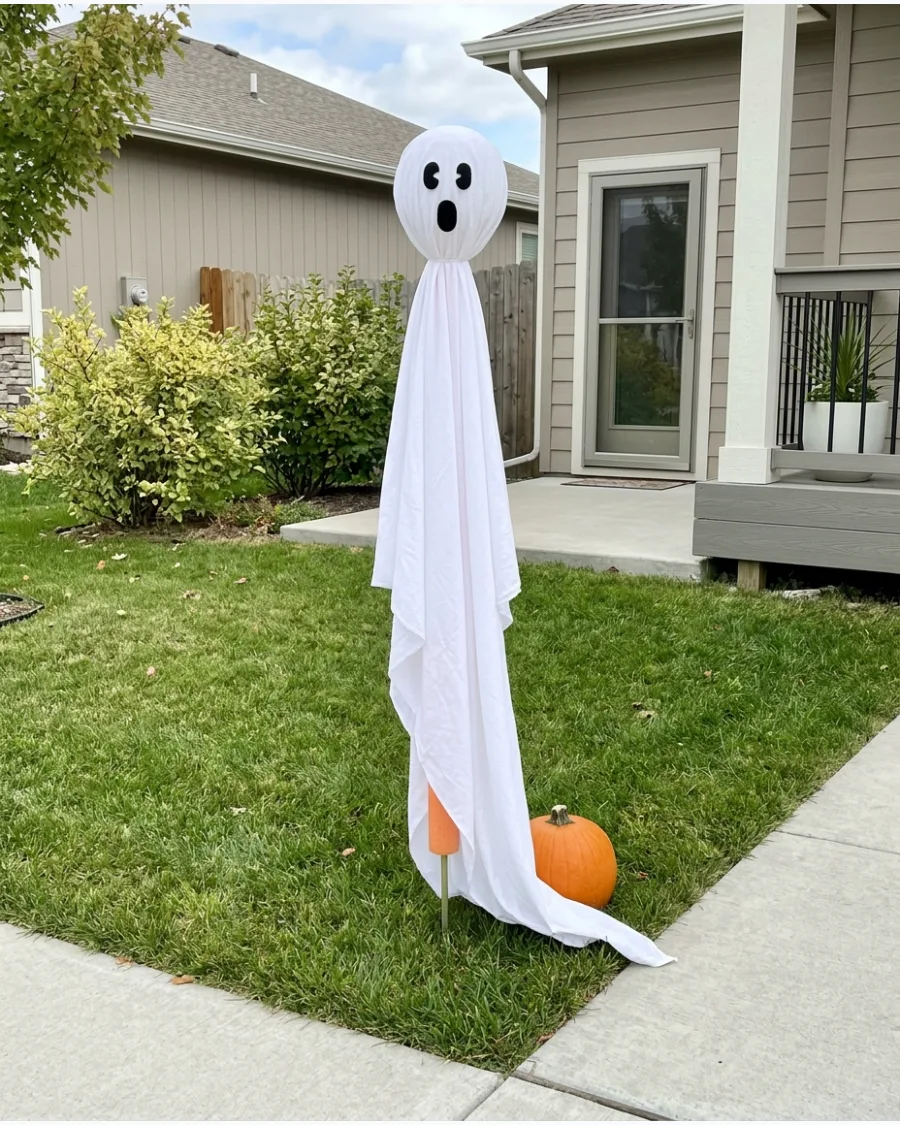
Insert a sturdy wooden dowel or a piece of rebar into the ground and slide a pool noodle over it to create a flexible spine. Top the noodle with a foam craft ball and drape it with lightweight white polyester fabric that catches the breeze.
Use a safety pin to attach the fabric directly to the foam head so the ghost stays assembled during autumn storms. This setup is perfect for creating a line of ghosts along a walkway or driveway.
- Foam pool noodles and 4-foot wooden dowels.
- Slide the noodle over the dowel for instant height and stability.
- Mix noodle lengths to create a family of ghosts at different heights.
Best shortcut: Use a serrated bread knife to easily cut pool noodles to the exact height needed without crushing the foam.
14. Chicken Wire Garden Ghost
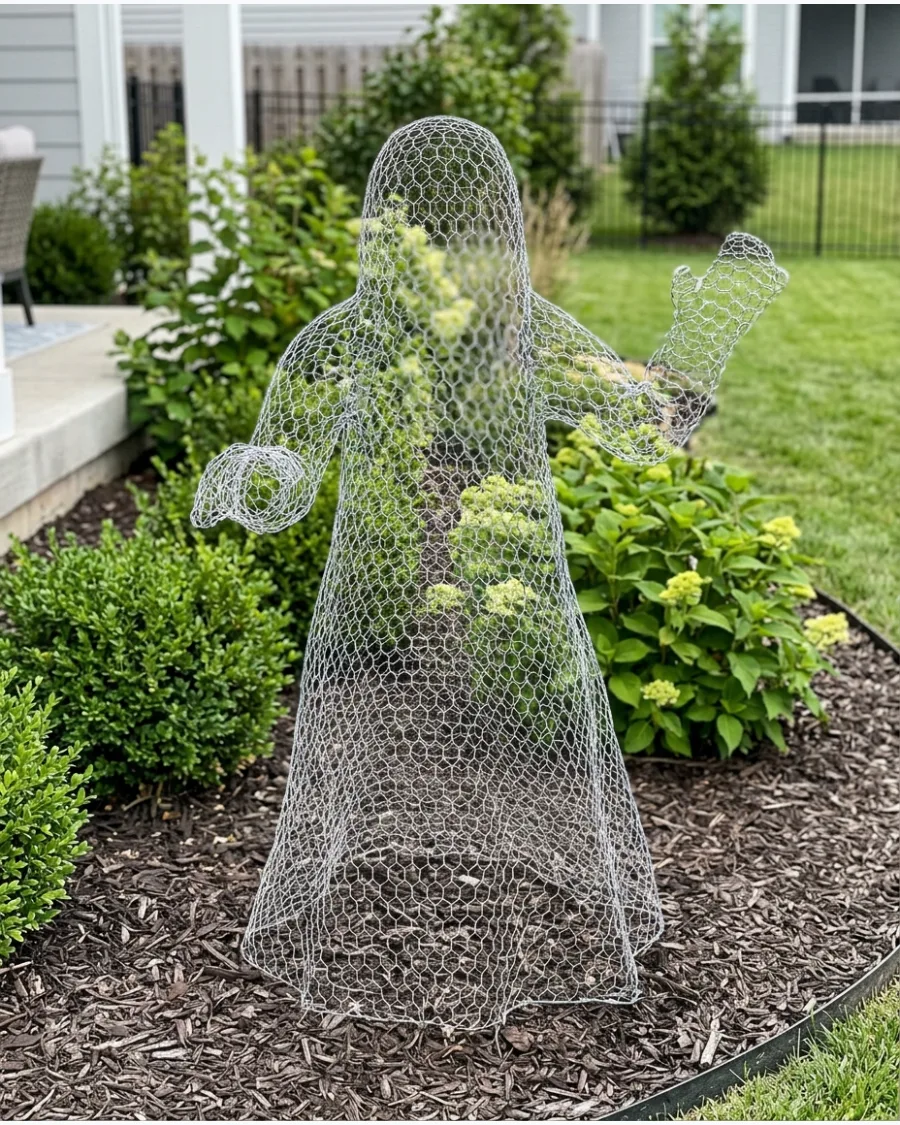
Mold silver chicken wire into a hollow, life-size human shape by wrapping it around a mannequin or a heavy object. The fine mesh becomes almost invisible against a dark landscape, creating a startling transparent effect in the yard.
Wear heavy-duty work gloves while shaping the wire to protect hands from sharp edges and snags. Position these figures in the middle of a garden bed for the most realistic look.
- 25-foot roll of galvanized chicken wire and wire snips.
- Shape the wire over a large trash can to get a uniform base.
- Spray with clear matte paint to prevent rust during rainy weather.
Quick win: Focus on the head and shoulder shapes first, as these are the most recognizable parts that define the ghostly silhouette.
15. Glowing Chicken Wire Ghost
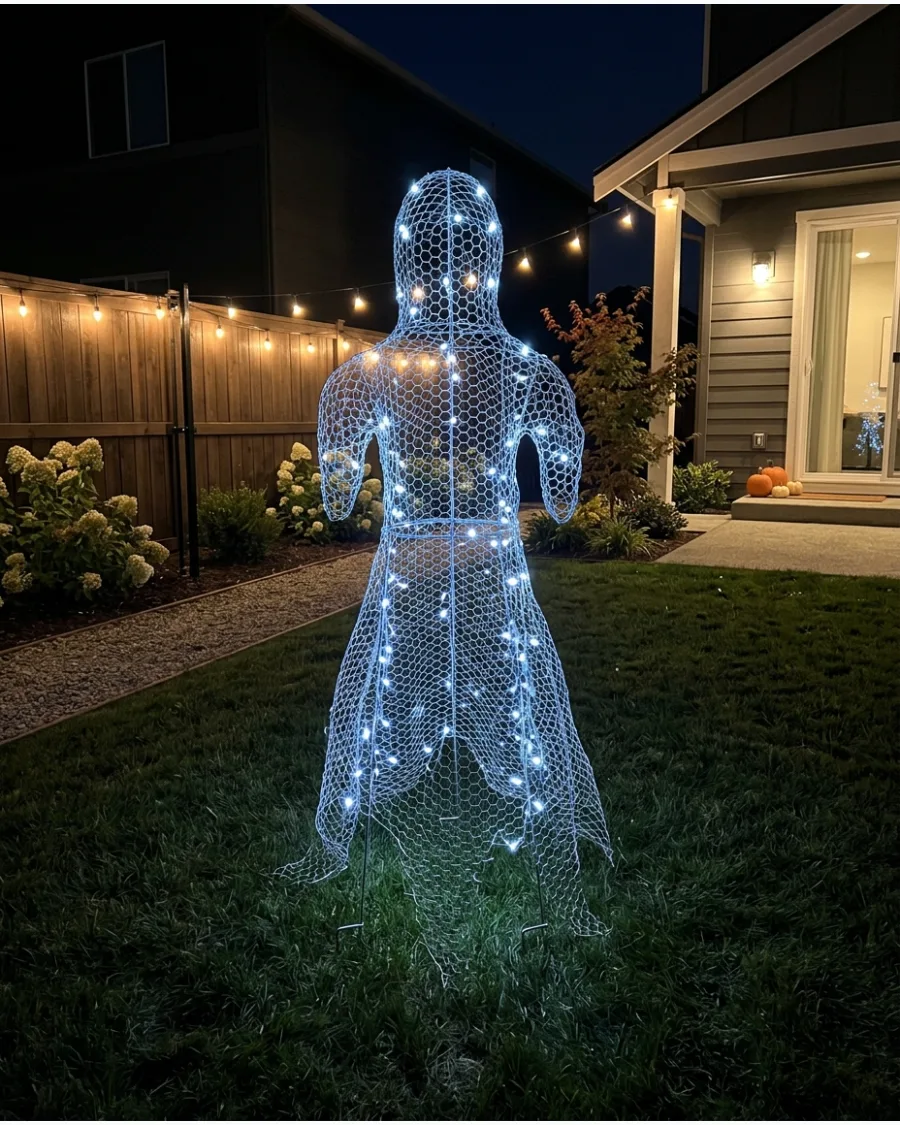
Build a mesh figure out of chicken wire and weave a string of cool-white LED lights through the interior of the frame. The lights reflect off the metal wire at night, making the figure appear to shimmer and hover in the dark.
Choose battery-operated lights with a timer function so the ghosts automatically illuminate at sunset without needing extension cords. This project provides high-impact visual drama with very little weight.
- Chicken wire and 100-count cool-white LED string lights.
- Secure the battery pack to the base of the wire frame with a zip tie.
- Use purple or orange lights to change the spooky mood for a party.
Most people skip this: Hide the battery box in a small plastic zip-top bag at the base of the ghost to keep it dry and out of sight.
16. PVC Pipe Life-Size Ghost
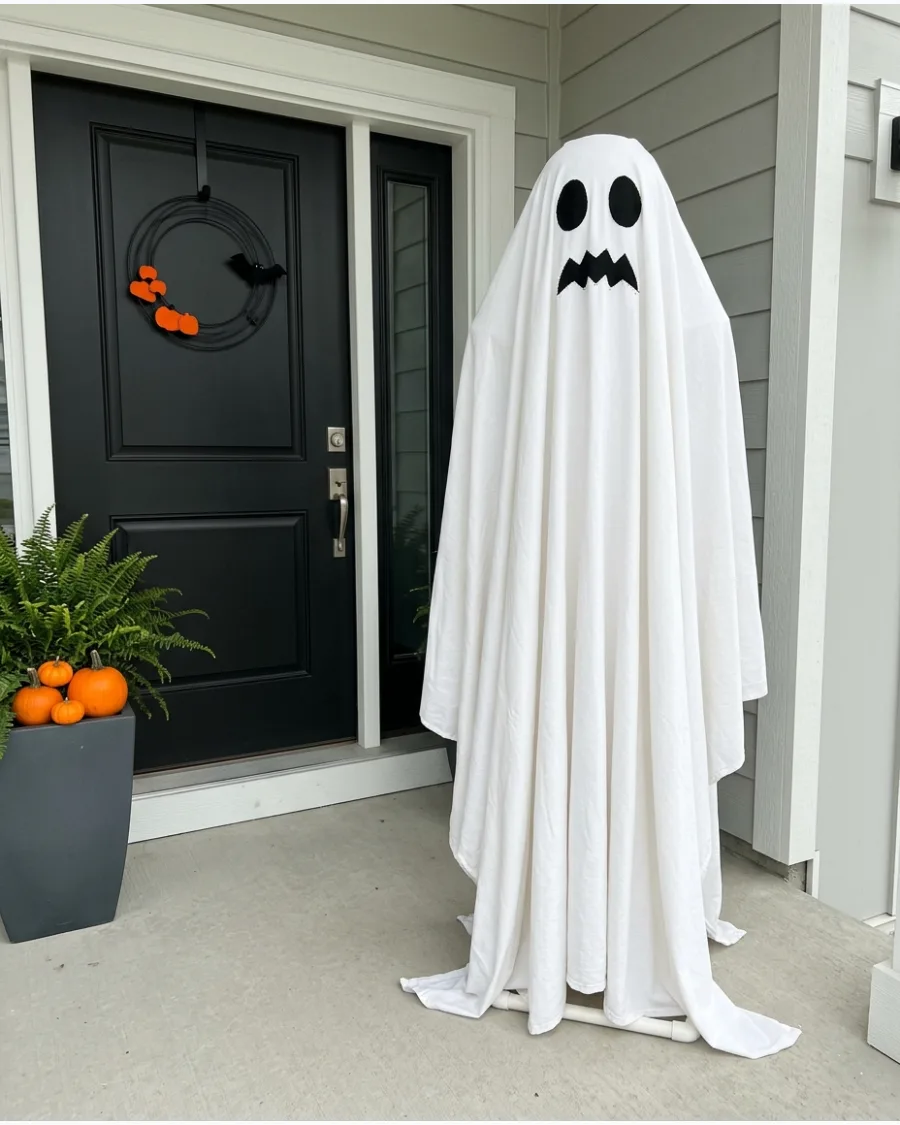
Assemble a basic skeleton frame using 1-inch PVC pipes and connectors to create a rigid structure. Drape the frame with a heavy white drop cloth or outdoor-rated fabric that will not shred in the wind.
Fill the bottom horizontal pipe with sand or gravel to provide enough weight to keep the ghost upright on a flat porch or patio. This structure is completely modular, meaning it can be taken apart and stored in a small box after the holiday.
- 1-inch PVC pipe and assorted elbow joints.
- No glue is required for the joints so the frame can be stored flat.
- Use a heavy canvas drop cloth for a more premium and durable look.
Best shortcut: Use 45-degree elbow joints instead of 90-degree ones to give the ghost's shoulders a more natural, sloped appearance.
17. Wooden Stake Yard Ghosts
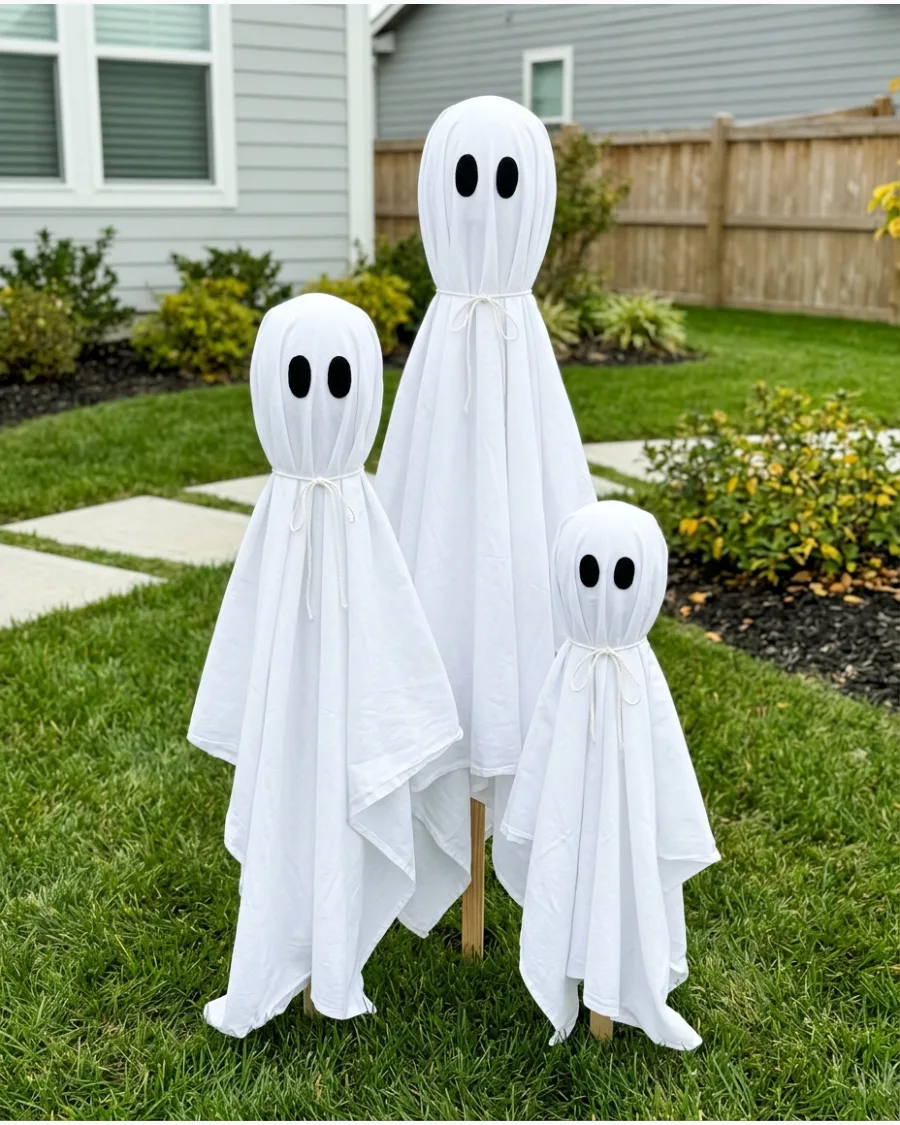
Hammer sharp wooden garden stakes into the lawn at varying depths to create a staggered group of figures. Staple a white foam ball to the top of each stake and cover them with squares of white cotton fabric.
Tie a piece of white string around the neck area to define the head and keep the fabric from sliding down the stake. These are the easiest ghosts to mass-produce to fill a large yard quickly.
- Wooden garden stakes and 6-inch foam balls.
- Hammer stakes at least 8 inches into the ground for wind resistance.
- Use white twin-size flat sheets cut into quarters for a budget-friendly option.
Quick win: Iron the fabric before putting it on the stakes to remove fold lines that can make the ghosts look like they just came out of a box.
18. Ghost Circle Around a Tree
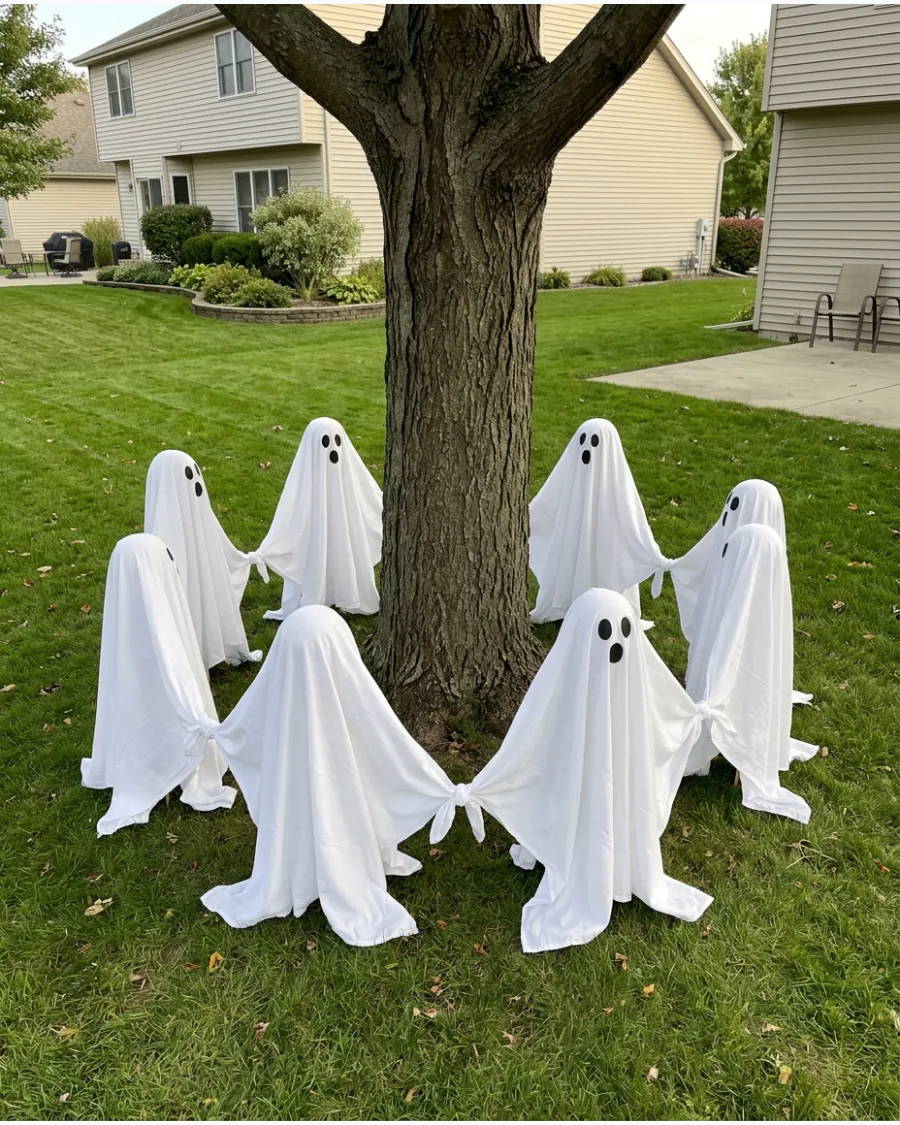
Create a ring of simple ghosts using stakes and sheets, then tie the corners of the fabric arms together to simulate a group dance. Position the circle around the base of a prominent tree in the front yard for a whimsical, storytelling display.
Angle the ghosts slightly inward toward the tree trunk to give the arrangement a more active and intentional look. This setup works best with at least five or six ghosts to complete the full circle.
- Five or more white sheets and wooden garden stakes.
- Use white zip ties to connect the fabric corners for a strong bond.
- Place the ghosts about 3 feet apart for a balanced and open circle.
Most people skip this: Stuff the heads with plastic grocery bags instead of foam balls to make the heads lighter and more weather-resistant.
19. Porch Railing Ghosts
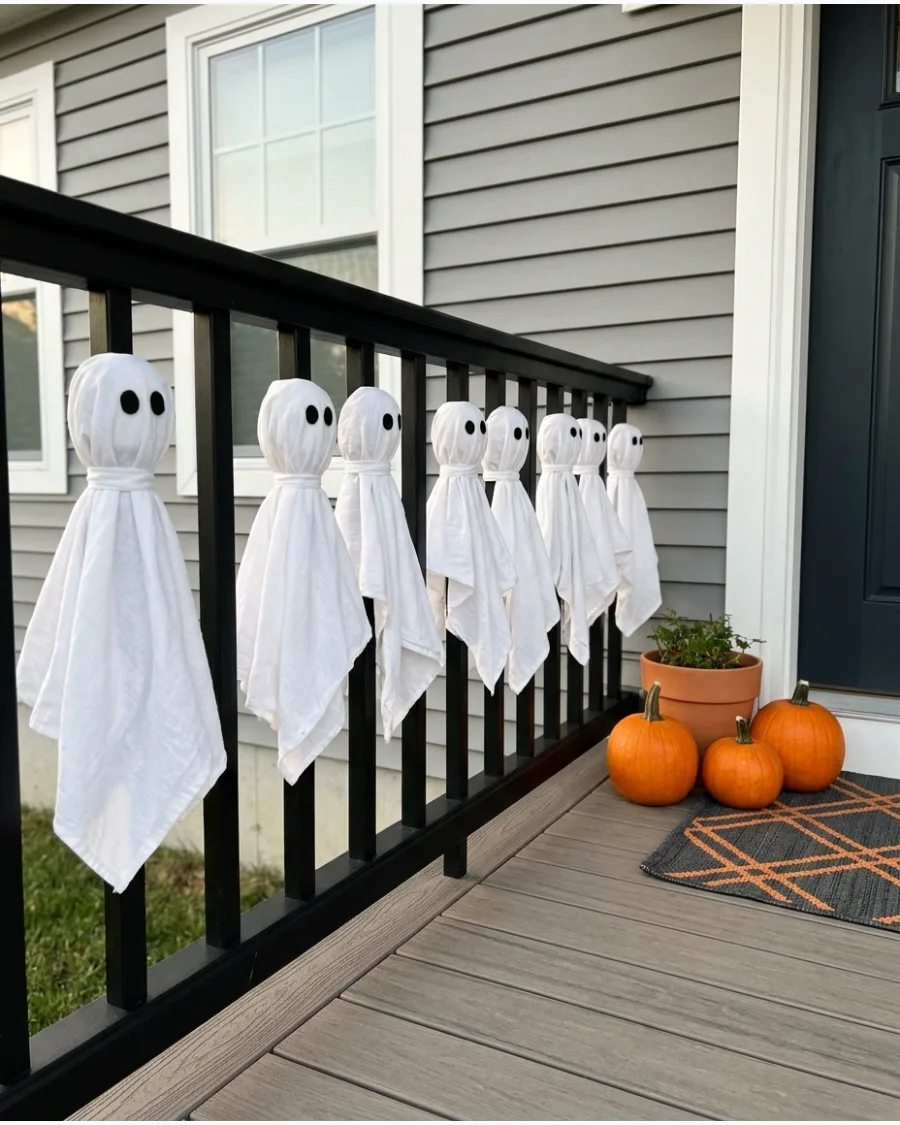
Wrap white fabric directly around the vertical spindles of a porch railing and secure them with clear fishing line or white zip ties. Add small black felt circles for eyes to transform each individual post into a tiny, upright ghost.
Space the ghosts every two or three spindles to keep the railing from looking cluttered while still creating a cohesive theme. This is an excellent solution for homes with small porches where floor space is limited.
- White fabric scraps and small black felt circles.
- Use clear zip ties for a nearly invisible and weather-safe attachment.
- Apply this to balcony railings for a renter-friendly apartment decoration.
Best shortcut: Use white athletic tape or vet wrap instead of fabric for a faster application that sticks to itself without needing ties.
20. Ghosts Peeking Over the Fence
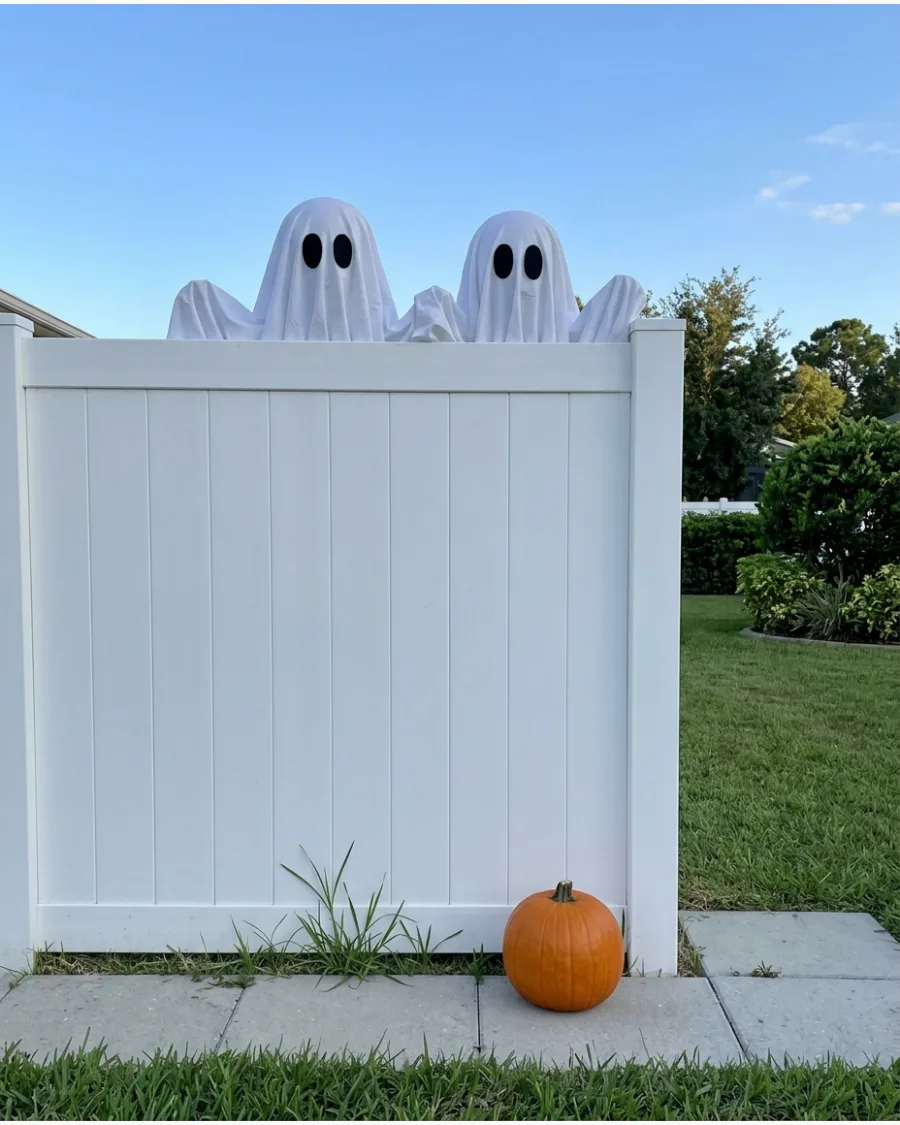
Attach foam heads to the back of a wooden or vinyl fence so only the top half of the ghost is visible from the street. Drape white fabric over the heads and let it hang down the back of the fence, securing the edges so they do not flap wildly.
Position the black felt eyes right at the top edge of the fence line to create the illusion that the ghosts are spying on the neighbors. This unexpected placement adds a sense of humor to a Halloween landscape.
- Half-round foam spheres and lightweight white fabric.
- Use outdoor-rated adhesive hooks to hang the heads on vinyl fences.
- Space the ghosts unevenly to make the scene look more spontaneous.
Quick win: Use glow-in-the-dark paint for the eyes so the peeking effect remains visible even after the sun goes down.
21. Outdoor Ghost Family
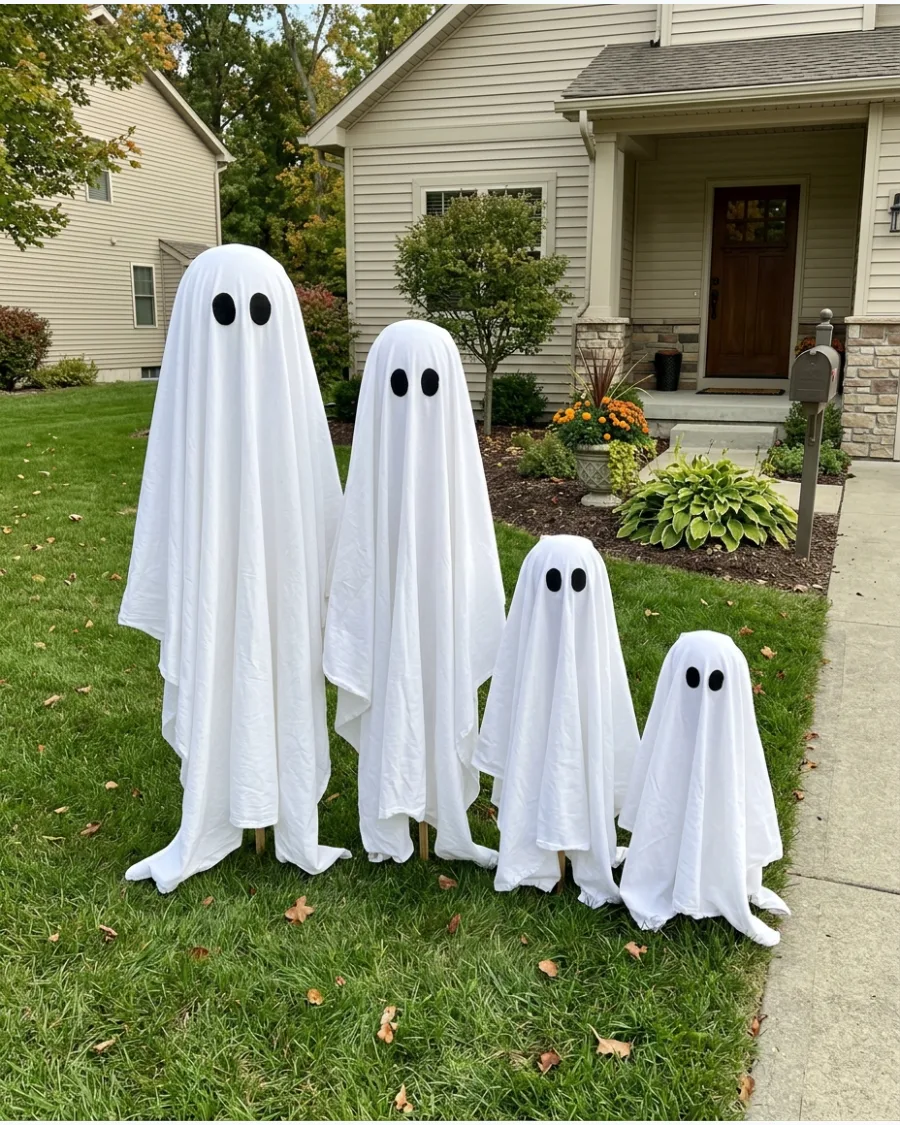
Build a group of ghosts using frames of varying heights to mimic a family unit. Use tomato cages or garden stakes to keep them upright in the wind.
Vary the eye shapes on each ghost to give them individual personalities. Grouping them together creates a more intentional look than a single lonely figure.
- $15-$30 for materials.
- Drive stakes into the ground for stability.
- Mix fabric textures for visual interest.
Quick win: Use a smaller cage for "child" ghosts to create a realistic scale.
22. Rainproof Yard Ghosts
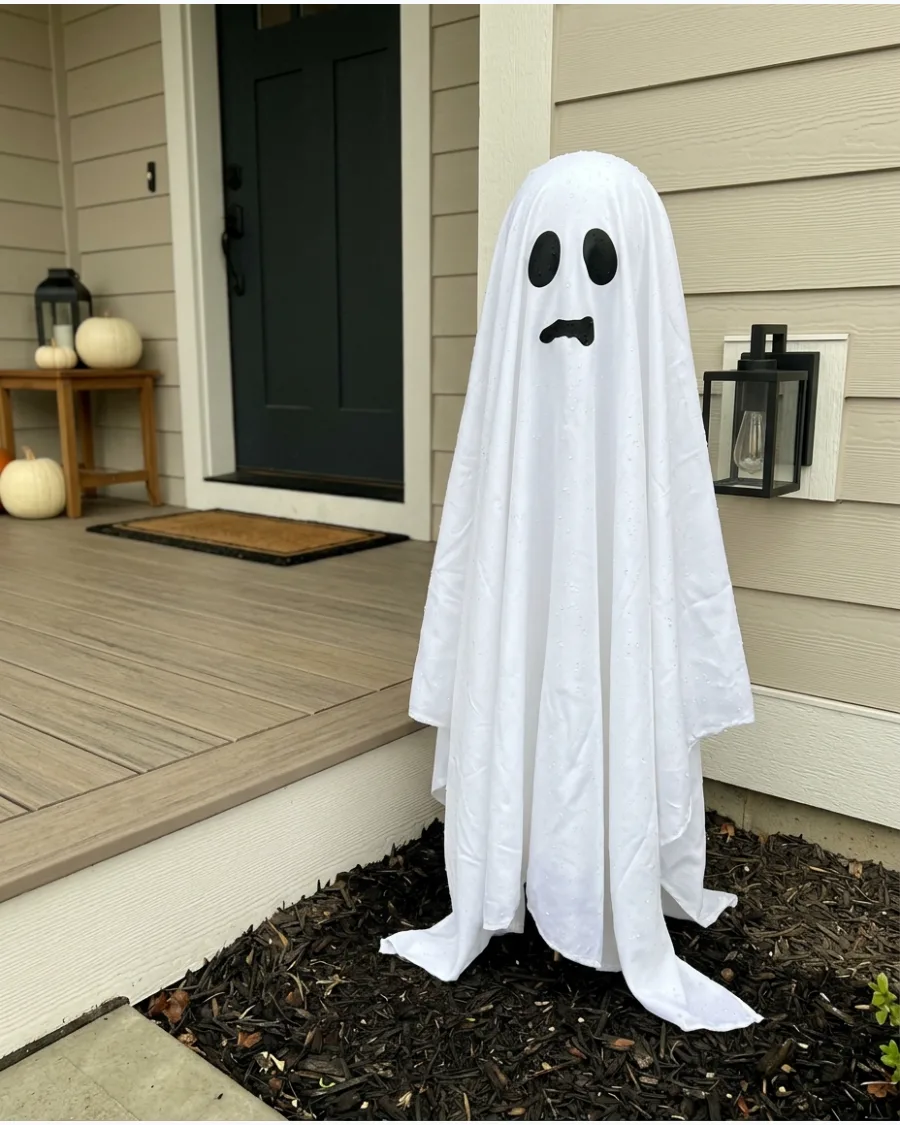
Swap traditional cotton sheets for white shower curtains or polyester fabric to handle wet weather.
These materials won't get heavy and sag when they get soaked. Secure the fabric to the base with heavy-duty zip ties to prevent it from blowing away. This choice keeps your decorations looking crisp all season long.
- Under $20 per ghost.
- Wipe clean with a damp cloth.
- Use waterproof adhesive for the faces.
Most people skip this: Check the fabric weight to ensure it doesn't become transparent when wet.
Hanging and Floating Ghost Decorations
23. Hanging Tree Ghosts
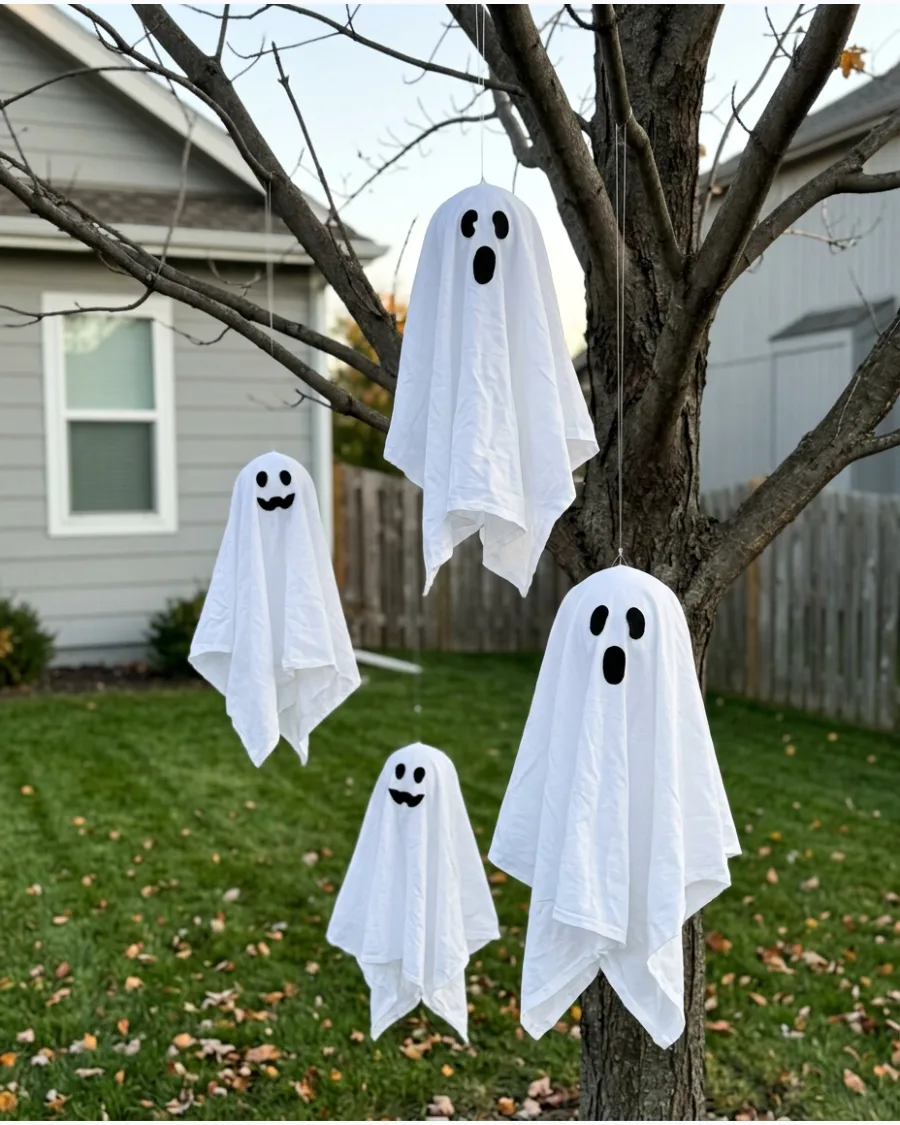
Use clear fishing line to hang small fabric ghosts from the lower branches of a deciduous tree. The invisible line makes them look like they are truly hovering in mid-air.
Space them at different heights to add depth and movement to the yard. They catch the breeze easily, creating a spooky, dynamic effect.
- $10 for a multi-pack of fabric.
- Use 10lb test fishing line for strength.
- Store in a bin to prevent tangles.
Best shortcut: Tie the line to a small washer inside the ghost's head to prevent the fabric from ripping.
24. Floating Umbrella Ghost
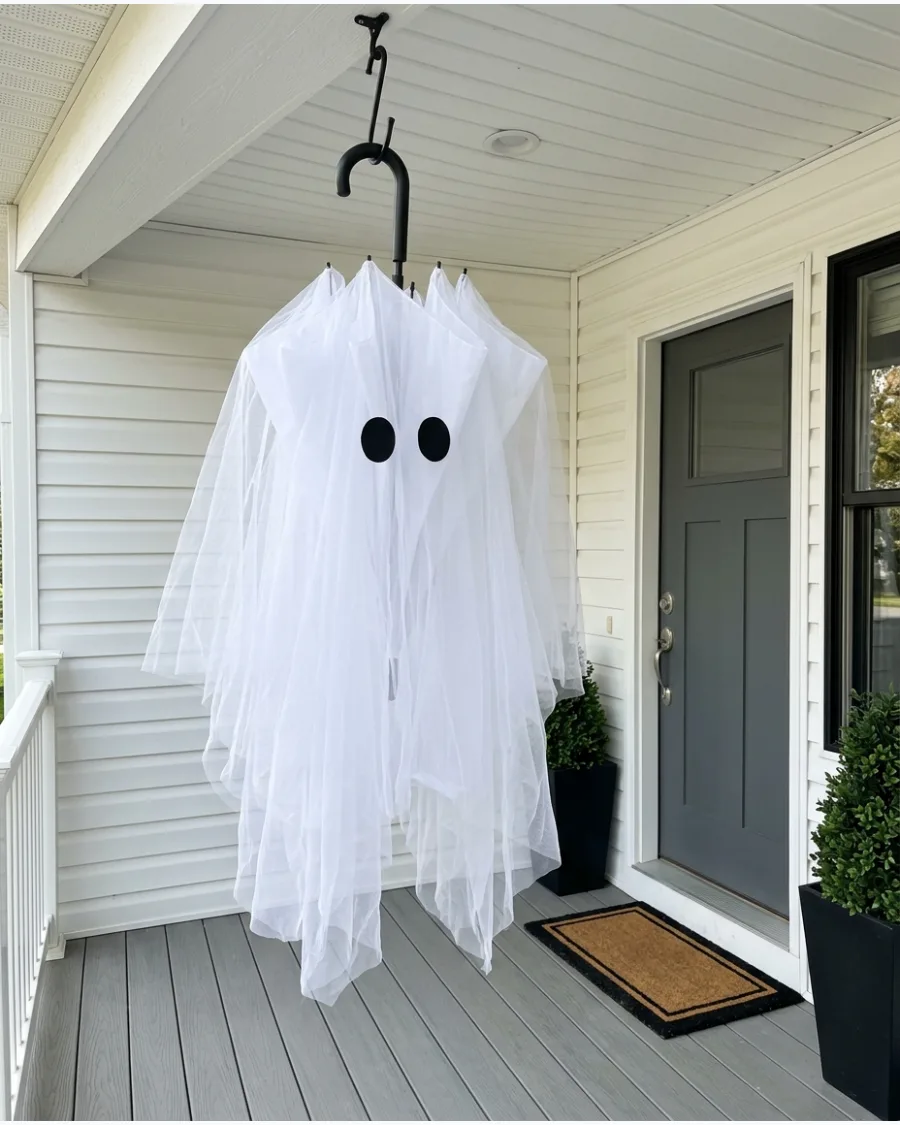
Open a white umbrella and drape sheer fabric over the top to create a wide, voluminous ghost. This method provides a sturdy internal structure that holds its shape better than a balloon or ball.
Hang it from a porch hook using a sturdy nylon cord for a dramatic entrance. It offers a much larger presence without the weight of heavy frames.
- Use an old umbrella or buy a cheap one.
- Hang in a covered area to protect from wind.
- Add a battery-operated puck light inside for a glow.
Quick win: Use a bubble umbrella for a more rounded, traditional ghost head shape.
25. Balloon-Shaped Hanging Ghosts
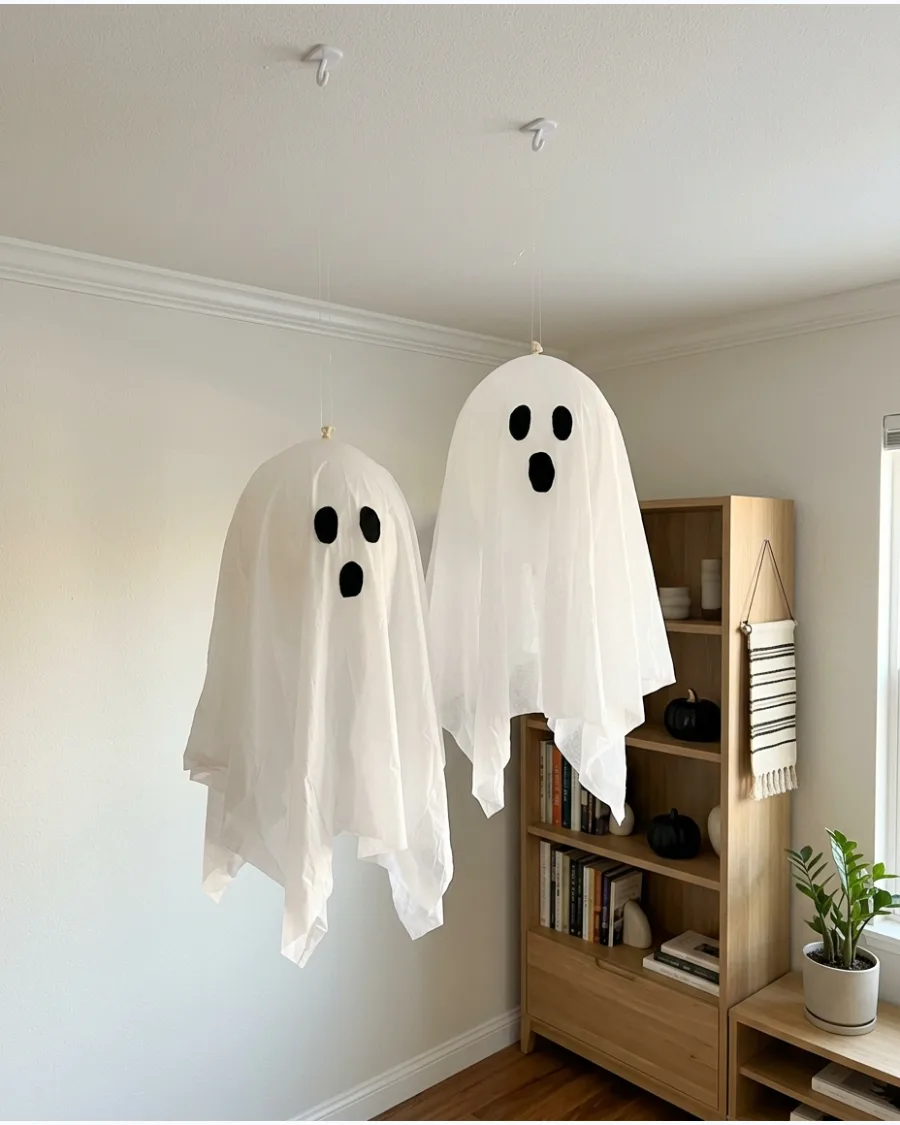
Inflate white balloons and cover them with lightweight white fabric or tissue paper. These are perfect for indoor spaces where you want a floating effect without heavy hardware.
Use clear adhesive dots to secure the fabric to the balloon so it doesn't slip. They are incredibly light and move with the natural airflow of the room.
- Very low cost.
- Best for indoor use only.
- Lasts about a week before the balloon deflates.
Most people skip this: Use high-quality balloons or treat them with hi-float to make the display last through Halloween night.
26. Ghosts Hanging From the Porch Ceiling
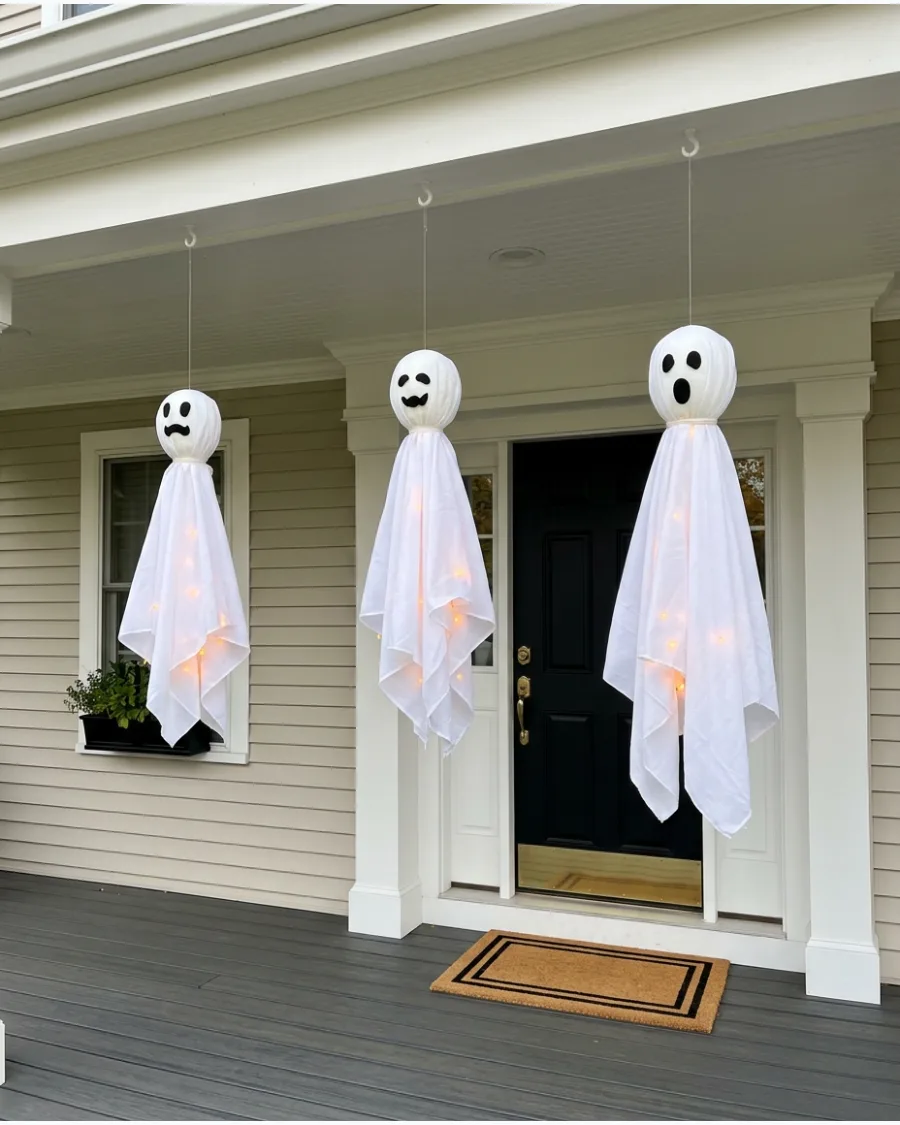
Create a ghostly welcoming committee by hanging several fabric-covered foam balls from your porch roof. The foam provides a consistent head shape that won't deflate like a balloon.
Insert battery-powered LED tea lights into the base of the foam balls for an eerie nighttime glow. This setup draws the eye upward and makes the porch feel fully decorated.
- $20-$40 total.
- Screw small hooks into the ceiling trim.
- Use outdoor-rated lights.
Best shortcut: Use a serrated knife to carve a small divot in the foam ball for the tea light to sit securely.
27. Floating Ghost Chandelier
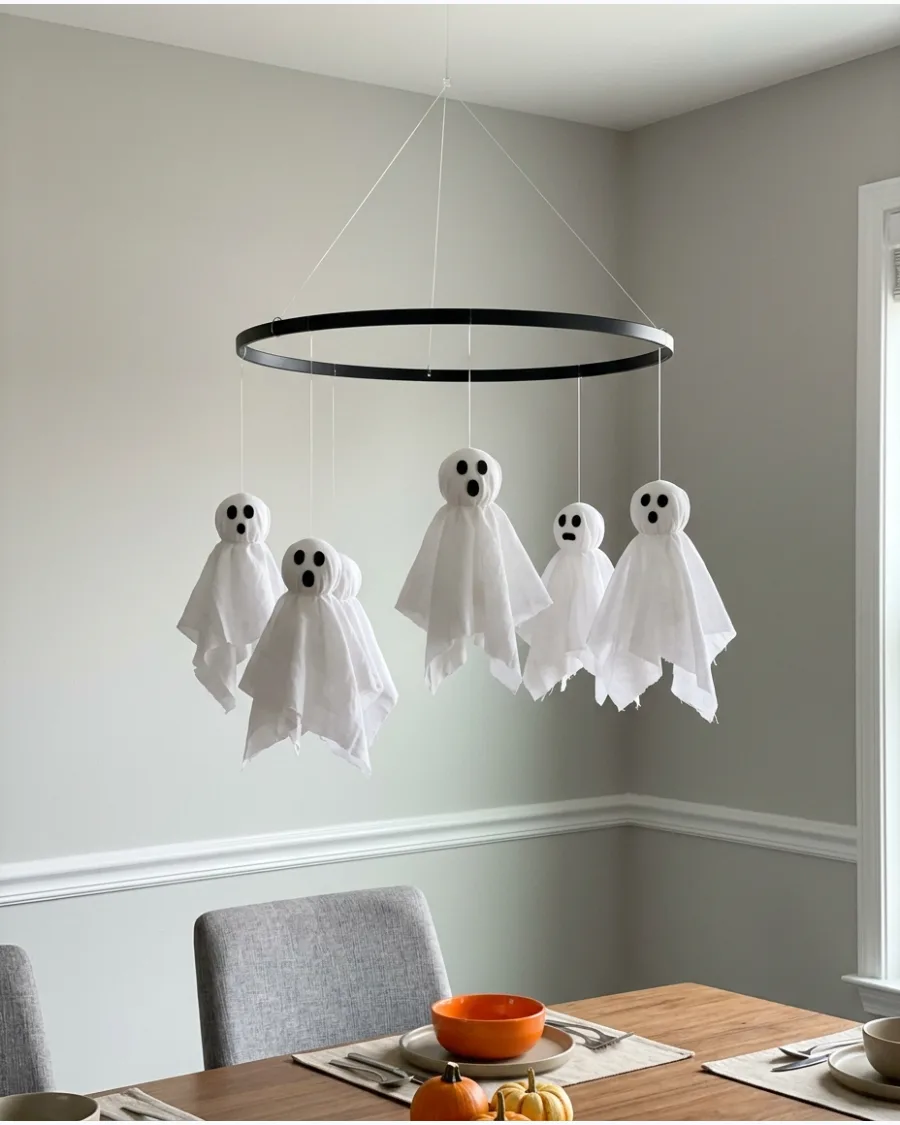
Attach several miniature ghosts to a simple metal or wood wreath form to create a custom chandelier. This works beautifully over a dining table or in a front entryway.
Hang the ghosts at alternating lengths to create a sense of organized chaos. It turns a basic craft into a sophisticated focal point for a party.
- DIY in under an hour.
- Use lightweight felt for the ghosts.
- Hang with a decorative ribbon that matches your room.
Quick win: Add a few sprigs of faux eucalyptus to the ring to soften the look.
28. Ghost Mobile
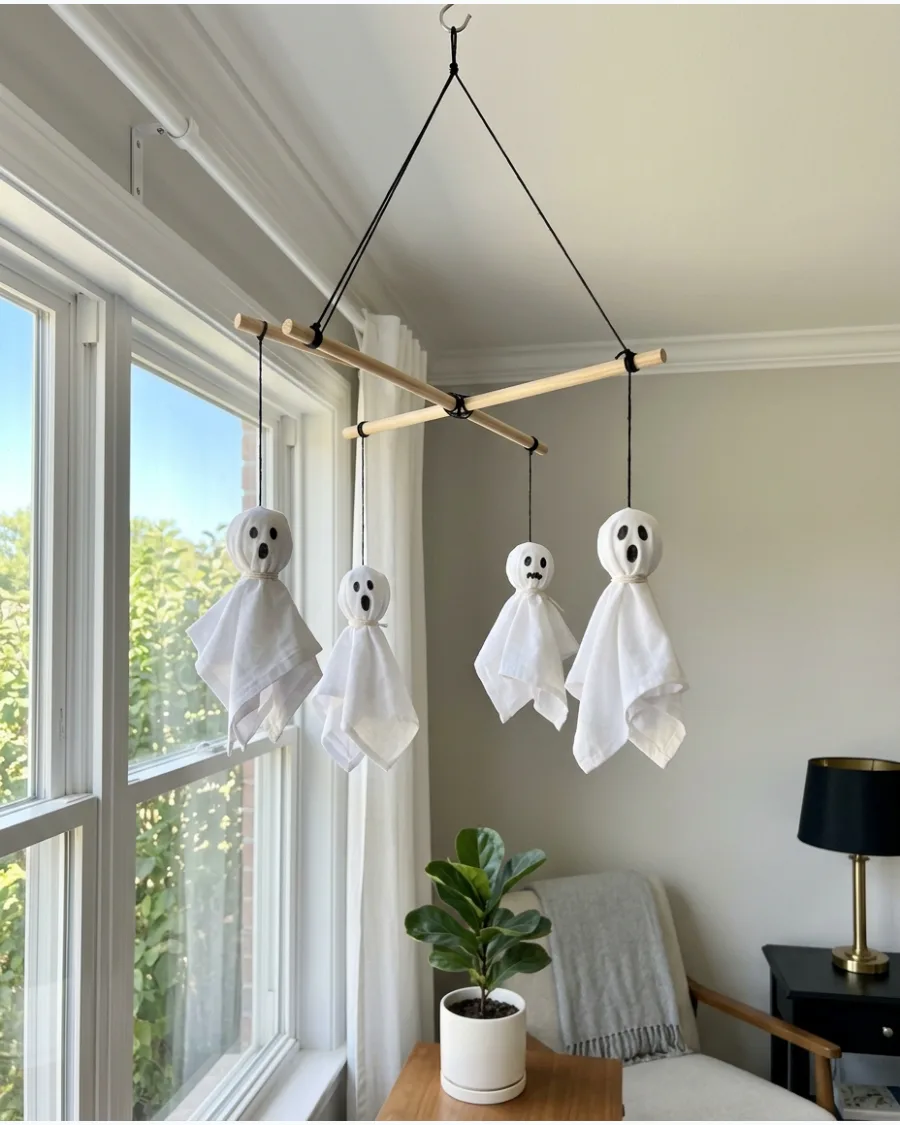
Balance several small ghosts on crossed wooden dowels to create a moving piece of art. This is a great way to fill an empty corner or a window nook.
Ensure the ghosts are light enough to move when someone walks past. It adds a subtle, kinetic element to your Halloween decor that kids especially love.
- Minimal tools needed.
- Use fishing line for a floating look.
- Balance the weights carefully before hanging.
Most people skip this: Use a tiny drop of hot glue on the dowel to keep the strings from sliding toward the center.
29. Staircase Ghost Display
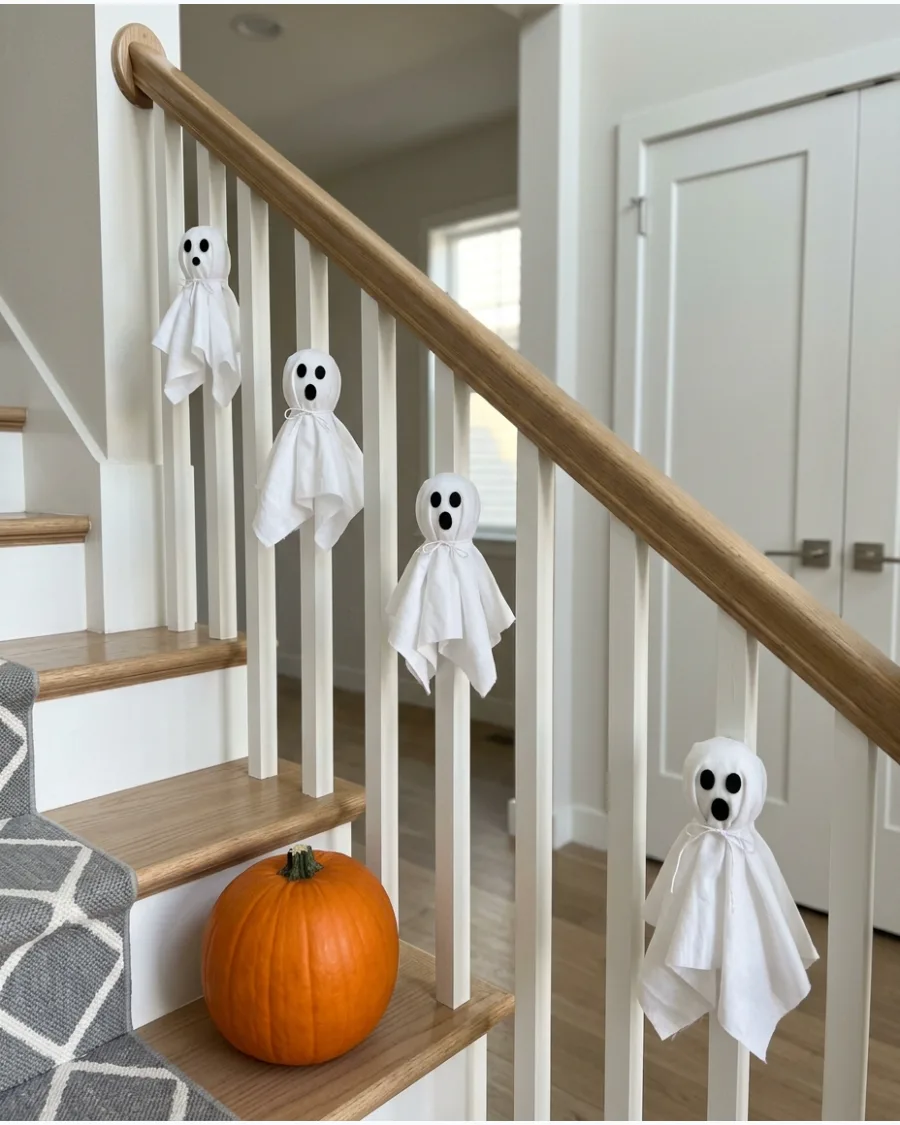
Line your banister with small ghosts tied directly to the spindles or handrail. This utilizes vertical space that often goes overlooked during the holidays.
Use white satin ribbon to tie them on so you don't damage the wood finish. It makes the transition between floors feel festive and cohesive.
- Use leftover fabric scraps.
- Space them evenly for a clean look.
- Safe for homes with pets or toddlers.
Best shortcut: Use "ghost" faces with different expressions—happy, surprised, and spooky—to keep it interesting.
30. Floating Doorway Ghosts
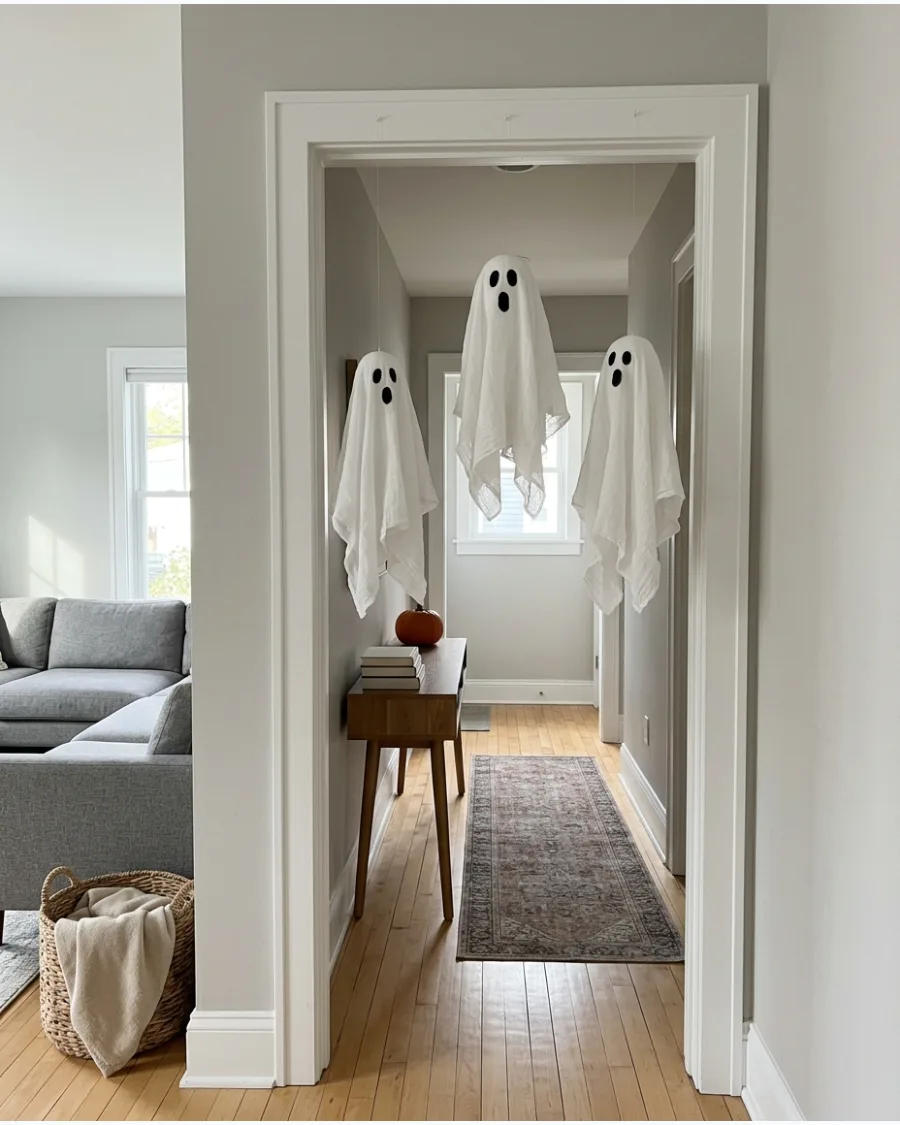
Create a ghostly curtain by hanging several ghosts across the top of a wide interior doorway. As people walk through, the fabric brushes against them for a classic haunted house feel.
Keep the ghosts short enough that they don't block the actual walkway or trip guests. It is a simple way to define a party space.
- Use tension rods for a renter-friendly setup.
- Lightweight gauze fabric works best.
- Secure with clear command hooks.
Quick win: Shred the bottom edges of the fabric with scissors to give the ghosts a more tattered, aged appearance.
Cheesecloth Ghost Decoration Ideas
31. Classic Stiffened Cheesecloth Ghost
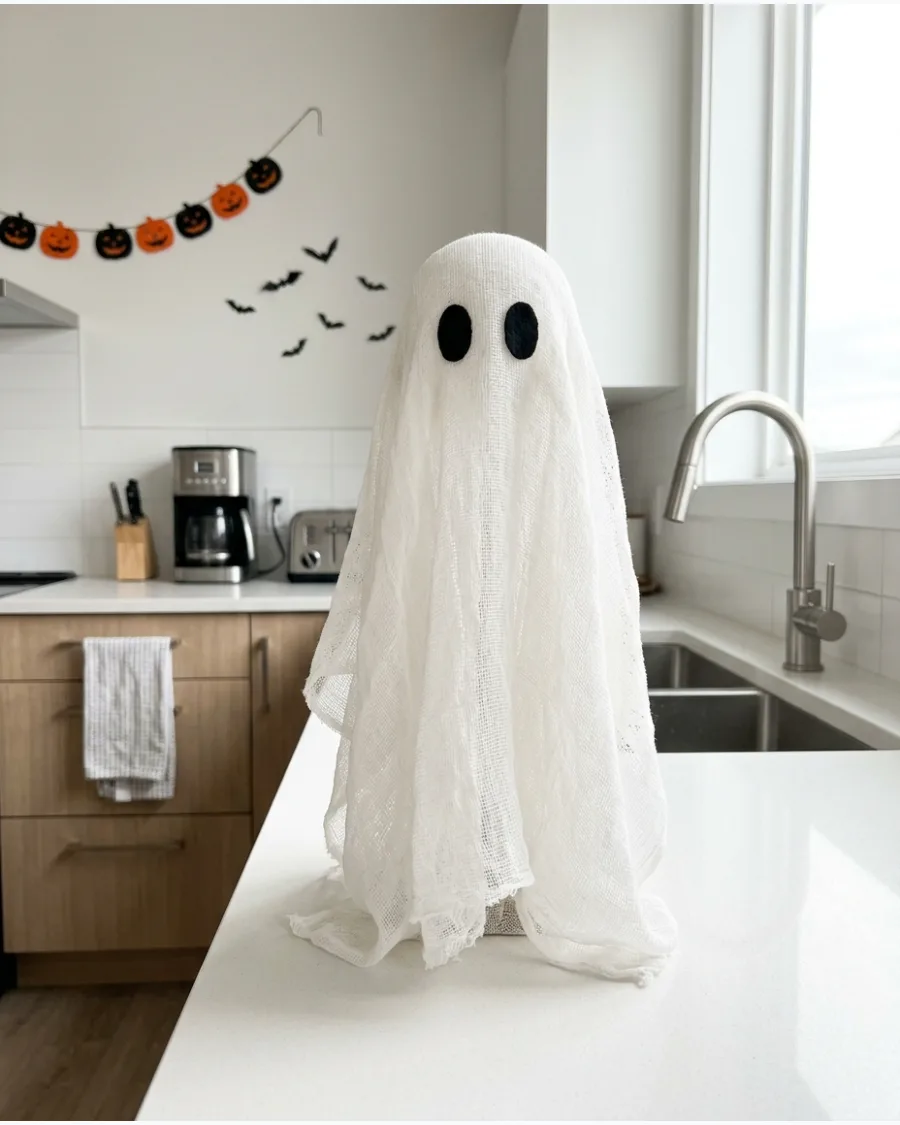
Draping fabric over a balloon and bottle form creates a freestanding figure that looks delicate and airy. Apply a fabric stiffener or a glue-and-water mixture generously to ensure the ghost holds its shape once dry. The result is a high-end decoration that stands on its own without any visible supports.
- Cheesecloth and fabric stiffener can be found at most craft stores.
- Set the ghost on a flat surface like a kitchen island or sideboard once dry.
- Use different sized bottles to vary the heights of multiple ghosts.
Quick win: Use a hairdryer on low heat to speed up the drying process if the fabric is still tacky after a few hours.
32. Light-Up Cheesecloth Ghost
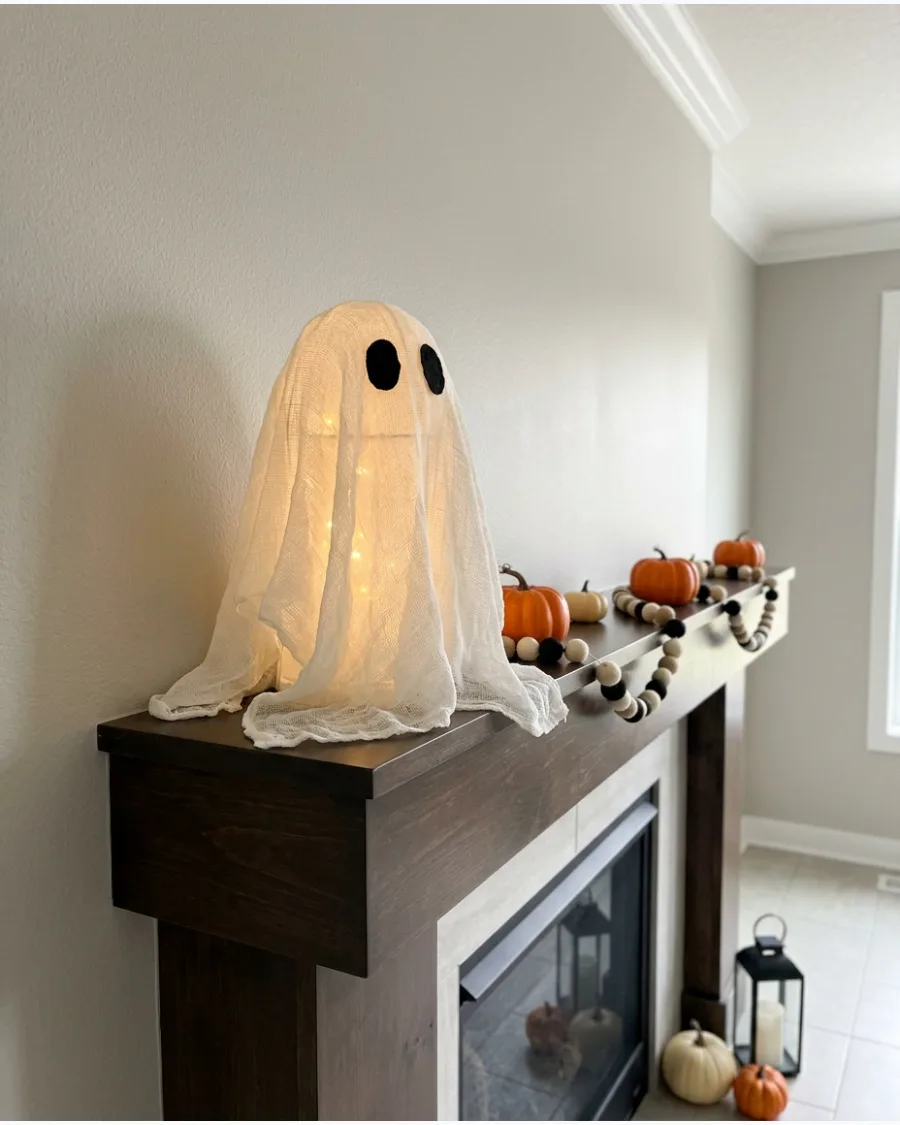
Adding a light source inside a hollow ghost turns it into a glowing focal point for a shelf or mantel. Select a battery-operated LED tea light or puck light to avoid any heat issues against the fabric. The translucent layers of cheesecloth catch the light for a soft, eerie effect that works perfectly in dim rooms.
- Use standard LED tea lights and white cheesecloth.
- Place on a mantel or bookshelf near other dark decor for contrast.
- Layer the cheesecloth for a more diffused and professional light look.
Most people skip this: Place the light on a small riser inside the ghost to keep the glow centered in the head area.
33. Cheesecloth Ghost Family
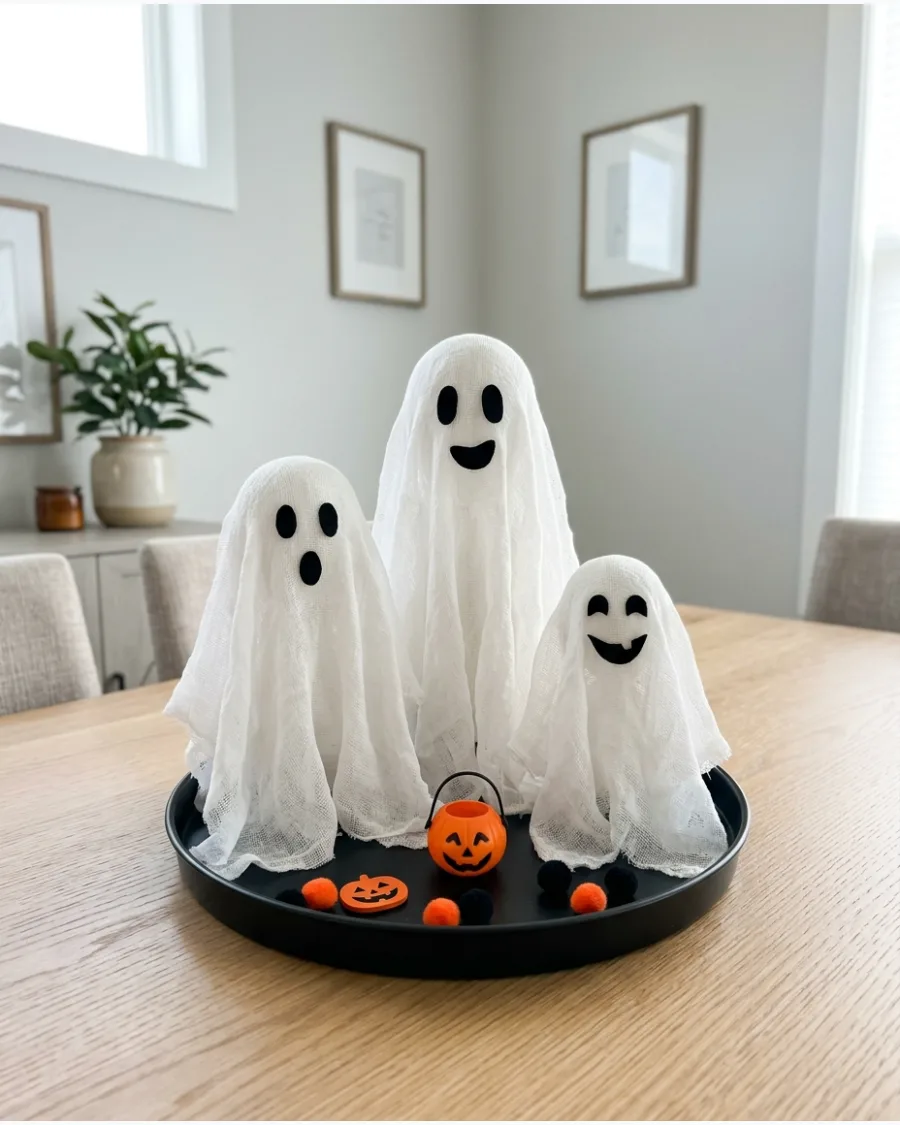
Creating a group of ghosts in various sizes adds a sense of personality and scale to your Halloween display. Arrange three or four ghosts of different heights on a decorative tray to keep the grouping contained and intentional. This works well as a centerpiece that doesn't block the view across a dining table.
- Use varying sizes of balloons and cheesecloth to create different figures.
- Group on a tray or runner in the center of a table for a quick setup.
- Mix heights to create visual interest and a sense of depth.
Best shortcut: Use small bouncy balls as molds for the baby ghosts to get perfectly round heads every time.
34. Cheesecloth Ghost Holding a Pumpkin
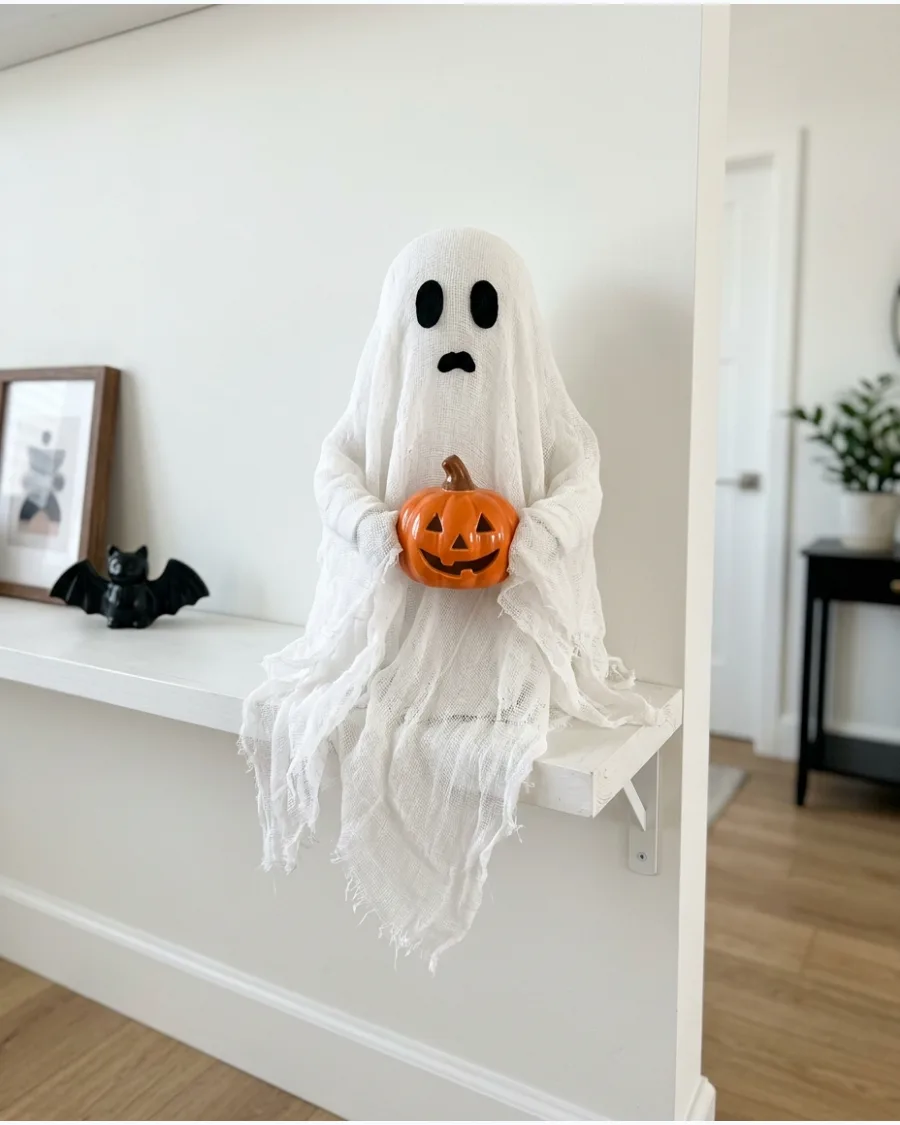
Shaping the wet fabric around a small prop gives the ghost a playful, interactive look for a shelf. Prop the arms up with wire or cardboard while the stiffener dries so the ghost can actually support a miniature pumpkin. This adds a pop of seasonal color to an otherwise monochromatic white decoration.
- Miniature pumpkins and stiffened cheesecloth are the primary materials.
- Display on a console table or shelf where the detail can be seen closely.
- Use lightweight foam pumpkins to prevent the arms from sagging during drying.
Quick win: A tiny bit of hot glue can help the pumpkin stay perfectly in place between the ghost's hands once dry.
35. Cheesecloth Ghost Under a Glass Cloche
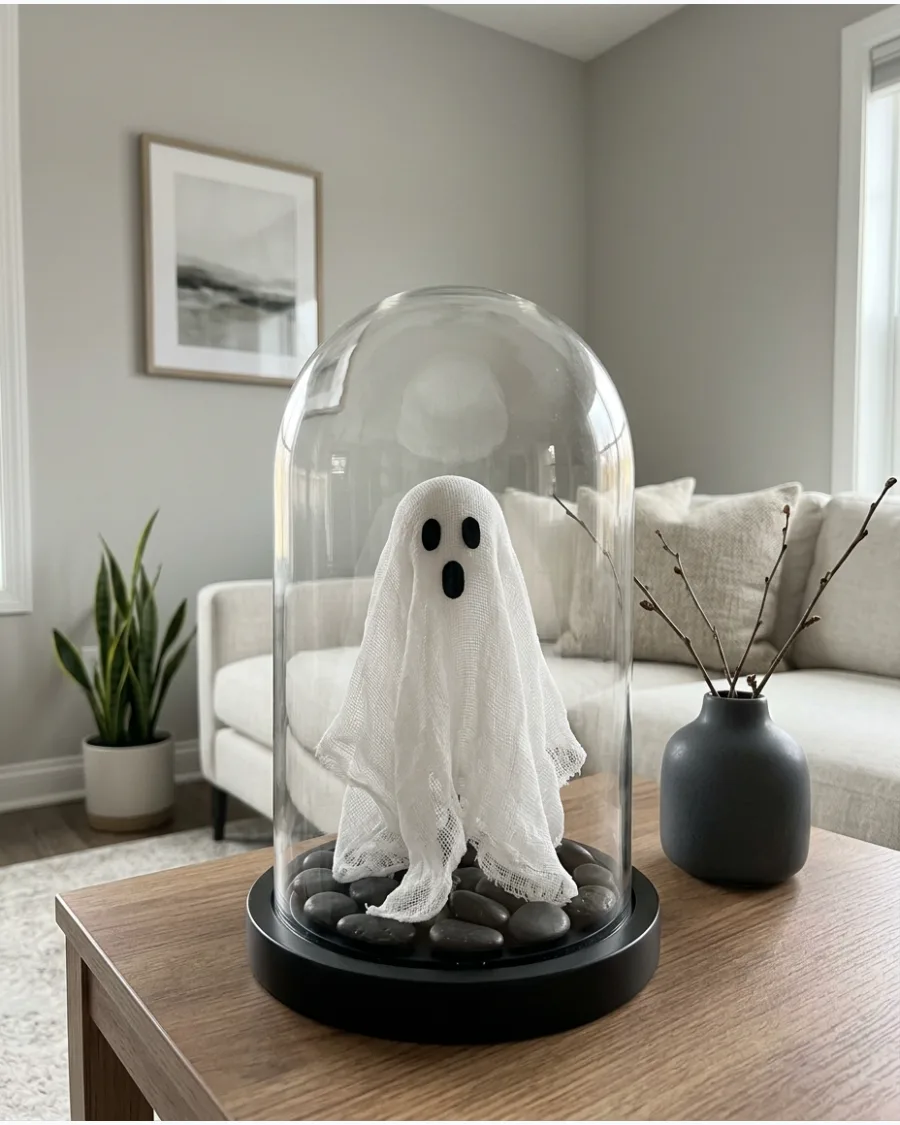
Enclosing a small ghost in glass makes it feel like a curated specimen or a high-end boutique find. Tuck a bit of dried moss or a few small pebbles around the base to ground the display inside the glass. The cloche protects the delicate fabric from dust while creating a polished, finished look.
- Pair a glass cloche with a miniature handmade cheesecloth ghost.
- Set on an entryway table or nightstand for a subtle festive touch.
- Choose a cloche with a wide enough base to fit the ghost's hem comfortably.
Most people skip this: Clean the inside of the glass thoroughly before assembly to avoid visible fingerprints or dust specks.
36. Dancing Cheesecloth Ghosts
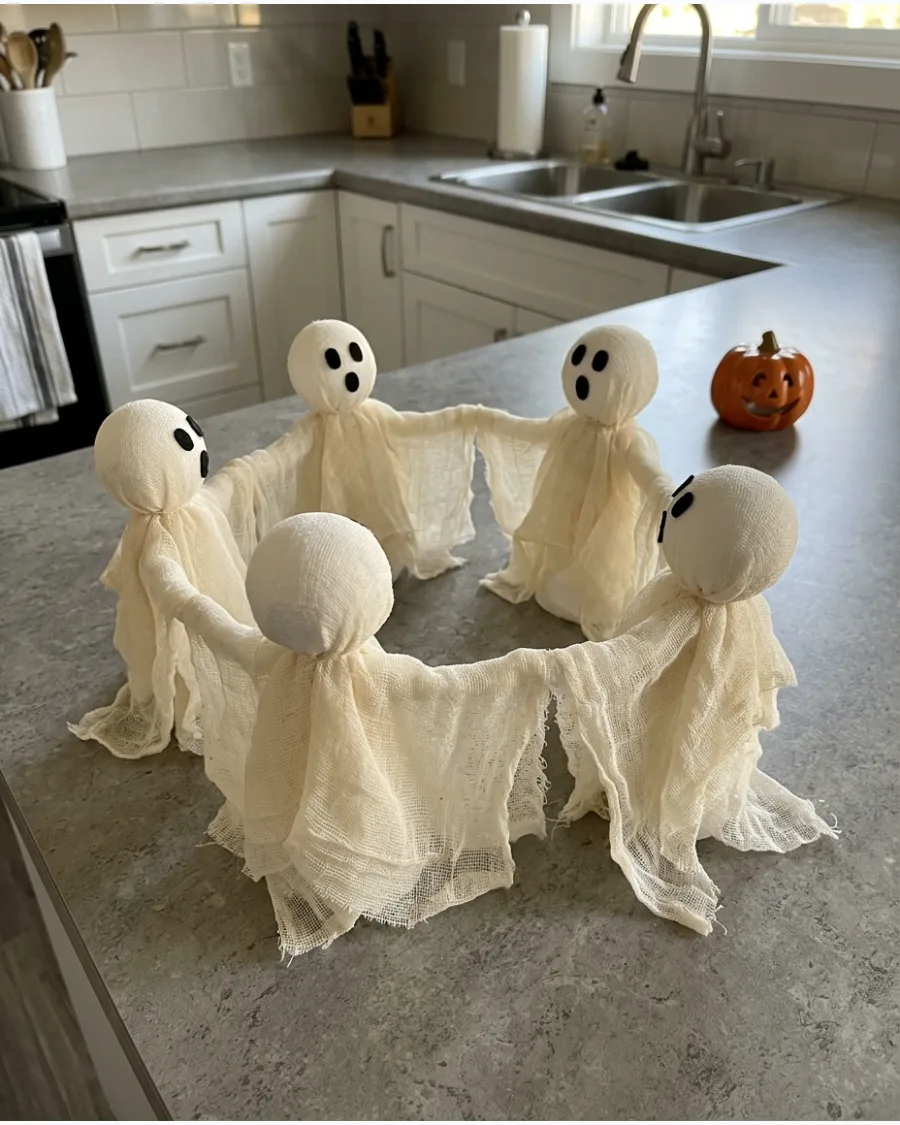
Positioning the ghosts with tilted heads and curved arms suggests movement and life in your display. Connect the hands of several ghosts with a small dot of glue to form a cohesive circle. This arrangement looks best when viewed from above on a coffee table or in the center of a round dining table.
- Requires fabric stiffener and multiple cheesecloth ghosts.
- Center on a dining or coffee table for maximum visibility.
- Angle the heads slightly to create a sense of motion and character.
Best shortcut: Use floral wire inside the cheesecloth arms before drying to hold more dramatic dancing poses.
37. Cheesecloth Ghost Wreath
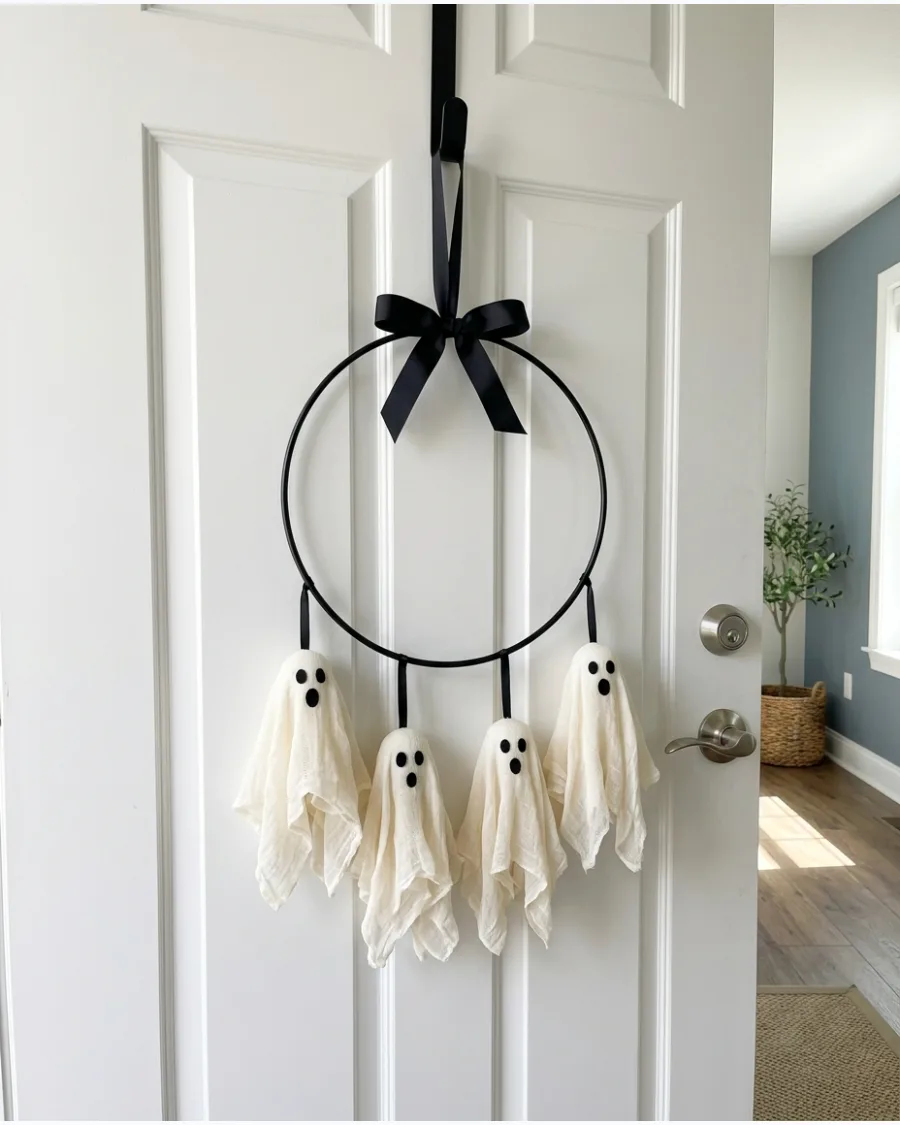
Small, lightweight ghosts can be attached to a simple hoop for a modern take on a Halloween wreath. Secure the ghosts to a metal or plastic wreath form using thin floral wire hidden beneath their fabric folds. This keeps the door decor looking clean and sophisticated rather than bulky or messy.
- Use a metal wreath hoop and several small cheesecloth ghosts.
- Hang on a front door or interior wall using a clear hook.
- Space the ghosts evenly or cluster them to one side for a modern look.
Quick win: Use a small Command hook on the door to keep the wreath from swinging when the door opens and closes.
38. Oversized Cheesecloth Porch Ghost
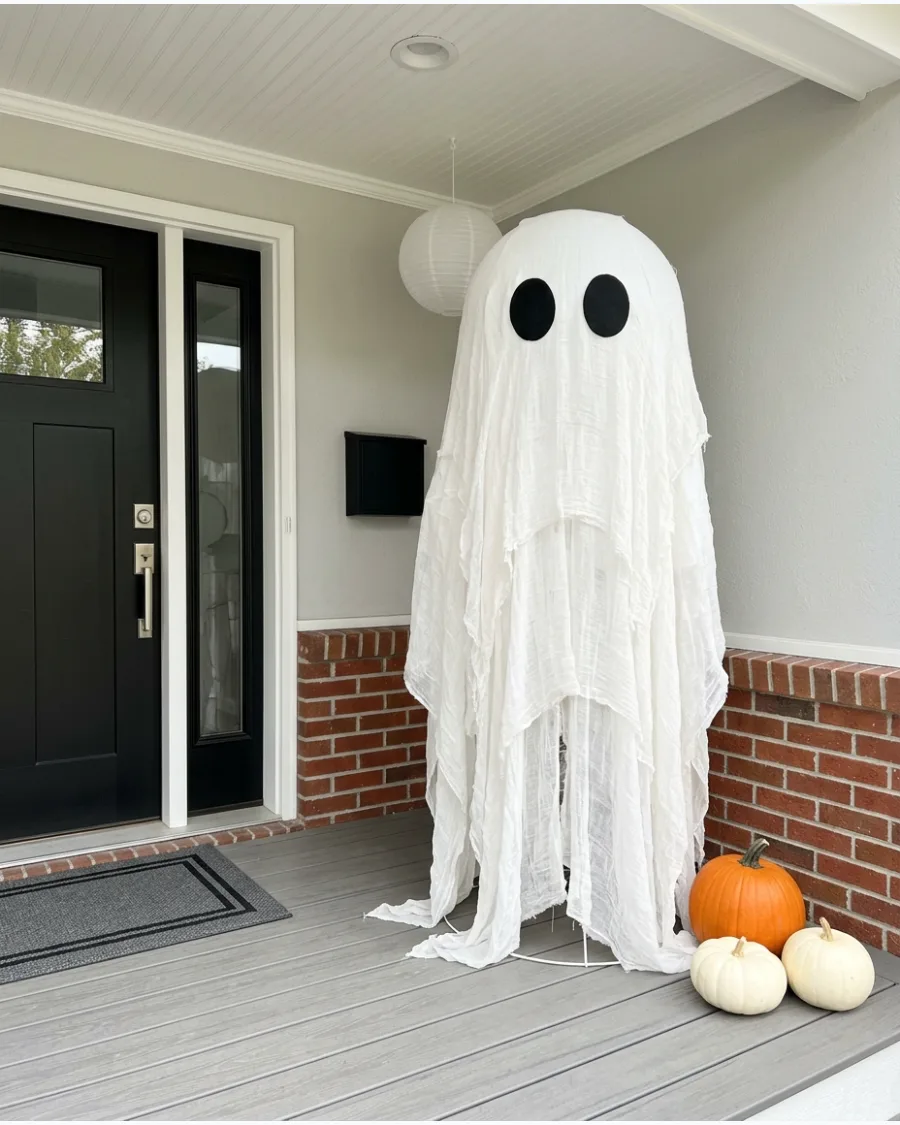
A large-scale ghost creates a big impact on a porch without the weight of traditional statues. Build a sturdy frame using a tall garden stake or a heavy-duty floor lamp base to support the layers of fabric. The flowing cheesecloth will move slightly in the breeze, adding a spooky element to your entry.
- Requires large quantities of cheesecloth and a tall, heavy stand.
- Place in a corner of the porch out of the direct wind to prevent damage.
- Layer at least three sheets of fabric for a fuller, more opaque look.
Most people skip this: Weigh down the base of the stand with a sandbag hidden under the fabric to prevent tipping in the wind.
Light-Up DIY Ghost Decorations
39. Mason Jar Ghost Lanterns
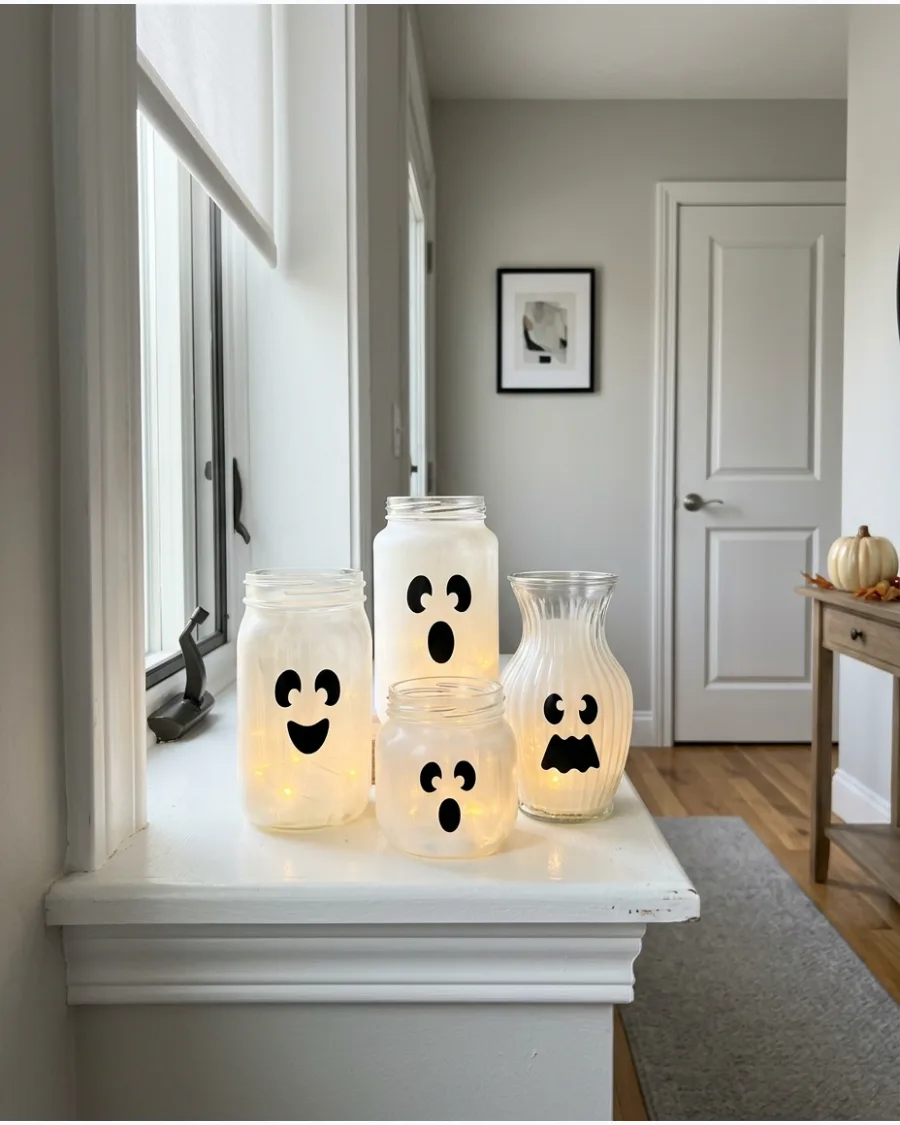
Glass jars provide a smooth surface for creating glowing lanterns that are safe for indoor use. Apply a thin layer of white acrylic paint to the inside of the jar or wrap the outside in white tissue paper for a frosted look. These are perfect for lining a hallway or filling a windowsill with light.
- Use mason jars and white paint or tissue paper for the body.
- Place on windowsills, steps, or a mantel for a glowing effect.
- Use black permanent marker or vinyl for the eyes and mouth shapes.
Best shortcut: Use spray paint specifically designed for glass to get a perfectly even, frosted finish in seconds.
40. Milk Jug Ghost Lights
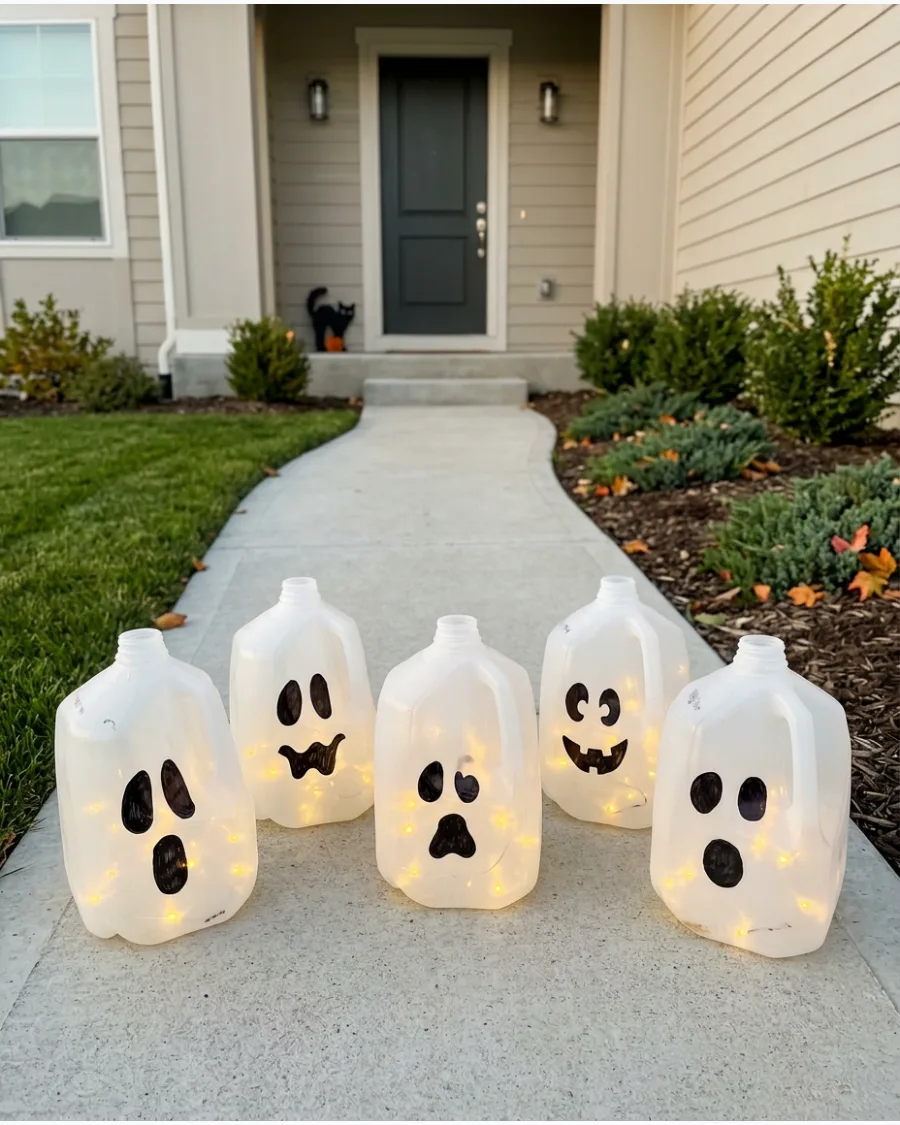
Recycled plastic jugs are naturally translucent, making them ideal for large-scale outdoor lanterns along a path. Cut a small hole in the back of each jug to easily insert a string of lights or a battery-powered puck. Lining a walkway with these creates a clear, festive path for trick-or-treaters.
- Gather clean milk jugs and black permanent markers for the faces.
- Line walkways, porch steps, or garden paths for safety and style.
- Fill the bottom with an inch of sand to keep them from blowing away in the wind.
Quick win: Use a thick chisel-tip permanent marker to make the black eyes and mouths bold enough to see from the street.
41. Paper Lantern Ghosts
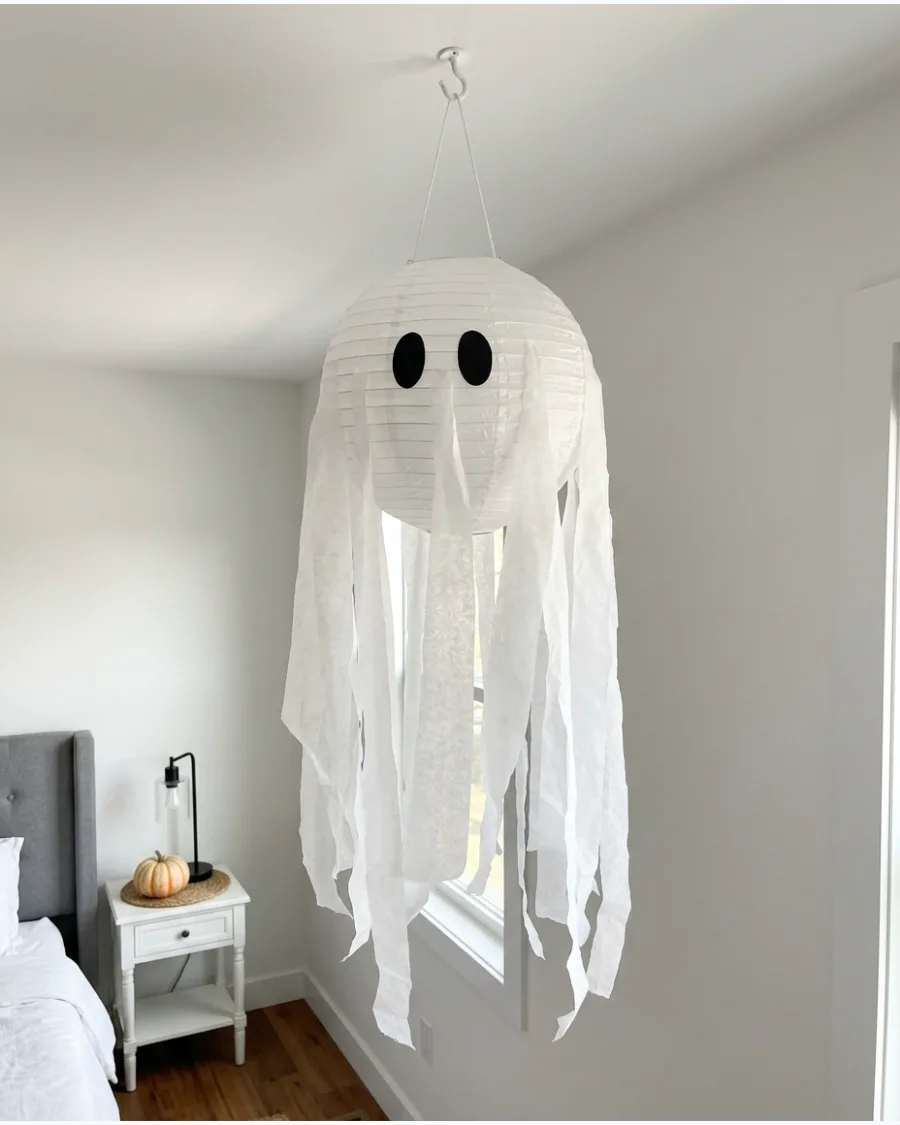
Round paper lanterns provide a perfect structural base for creating friendly, spherical ghost figures. Secure long strips of white tissue paper to the bottom rim with clear tape to create a flowing trail that moves with the air. These work best when grouped at different heights in a corner or entryway.
The spherical shape looks more intentional and modern than flat paper cutouts.
- Materials cost under fifteen dollars for a pack of lanterns and tissue paper.
- Hang them using clear fishing line and removable adhesive ceiling hooks.
- Add battery-operated LED puck lights inside for a glow that lasts all night.
Most people skip this: Use a hair dryer on a low, cool setting to gently blow out any wrinkles in the tissue paper streamers after hanging.
DIY Halloween Decor
42. Floating Tulle Ghost Lanterns
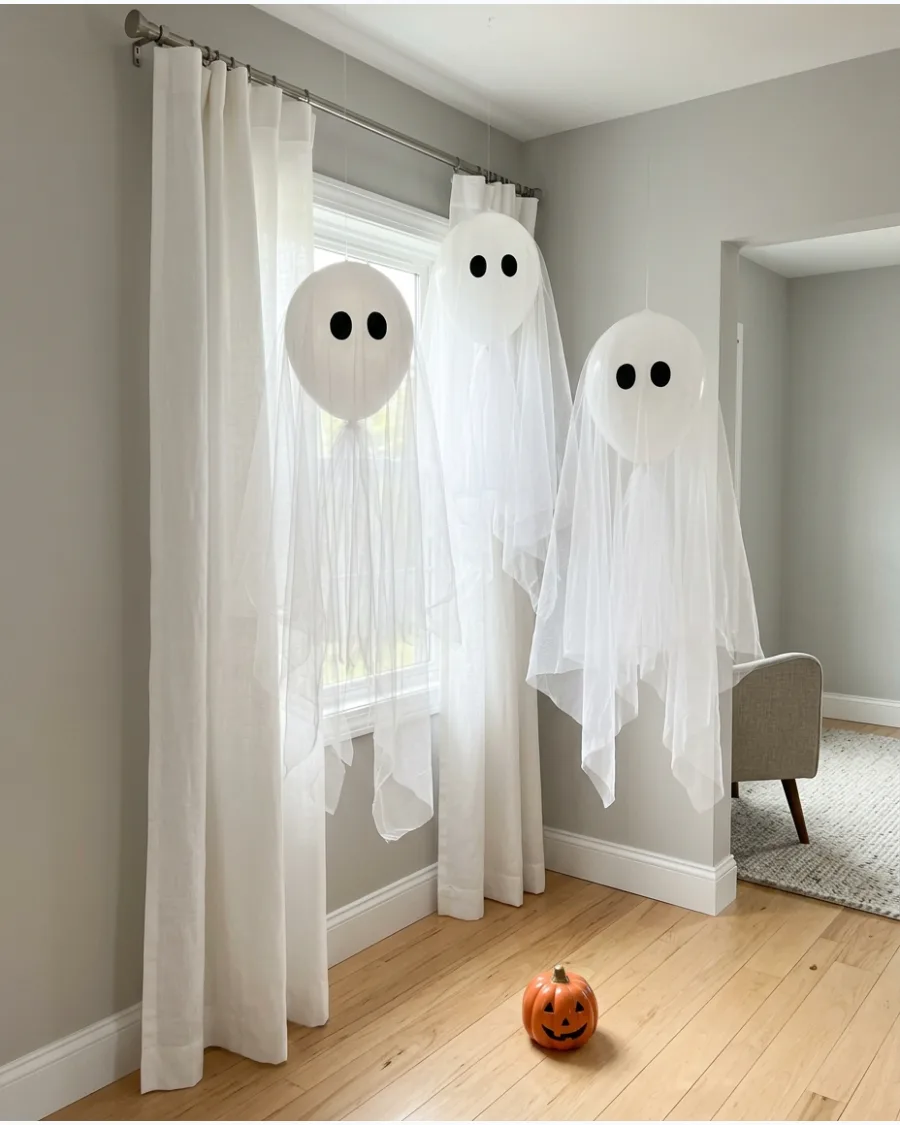
White balloons covered in sheer fabric create a soft, ethereal glow that looks more sophisticated than plastic versions. Insert a small LED finger light or glow stick into a white balloon before inflating it to provide the internal light source. Drape a layer of white tulle over the inflated balloon and secure it at the base with a clear rubber band.
Using fabric instead of paper prevents the ghosts from looking stiff and allows them to sway naturally in a breeze.
- Standard 12-inch white balloons and white tulle fabric are affordable essentials available at most craft stores.
- Use helium for floating ghosts or attach clear fishing line to the top of air-filled balloons to hang them from the ceiling.
- Draw simple eyes with a black permanent marker directly onto the tulle or the balloon surface for different visual depths.
Quick win: Draw the eyes on the balloon itself so they appear slightly blurred and more ghostly through the layer of tulle.
Light-Up DIY Ghost Decorations
43. Ghost Candle Holders
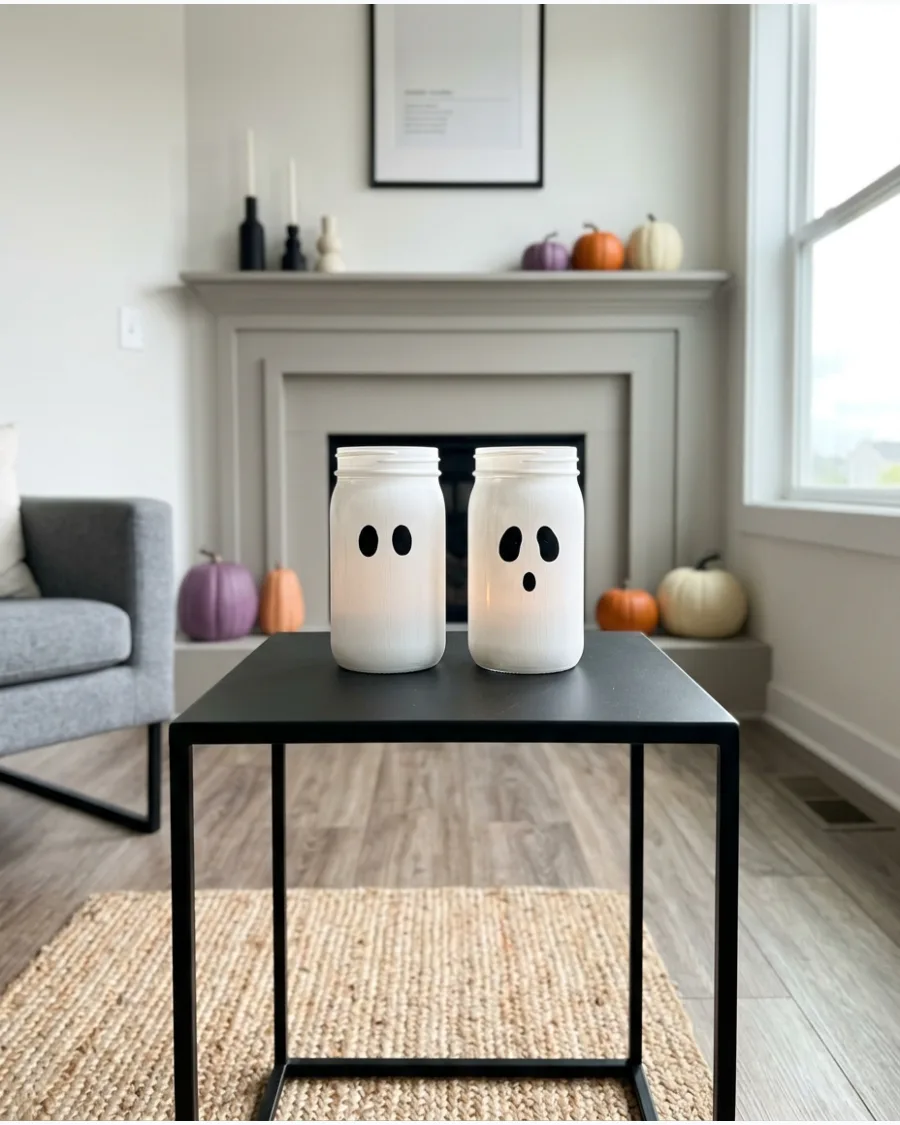
Plain glass jars or cylinder vases can be upcycled into glowing ghost accents with a few coats of paint. Apply a matte white spray paint to the exterior of the glass to create a soft, frosted look that diffuses light beautifully. Once dry, add simple black eyes using vinyl stickers or acrylic paint.
These look sophisticated when lined up on a mantel or a dining table runner.
- Reuse clean pickle or pasta jars for an eco-friendly and zero-cost base.
- Place on any flat surface like a bookshelf, console table, or windowsill.
- Swap traditional candles for flameless LED tea lights to ensure they are safe for children and pets.
Best shortcut: Use a black paint pen instead of a brush for the faces to get cleaner lines and more control over the expression.
44. Lighted Ghost Garland
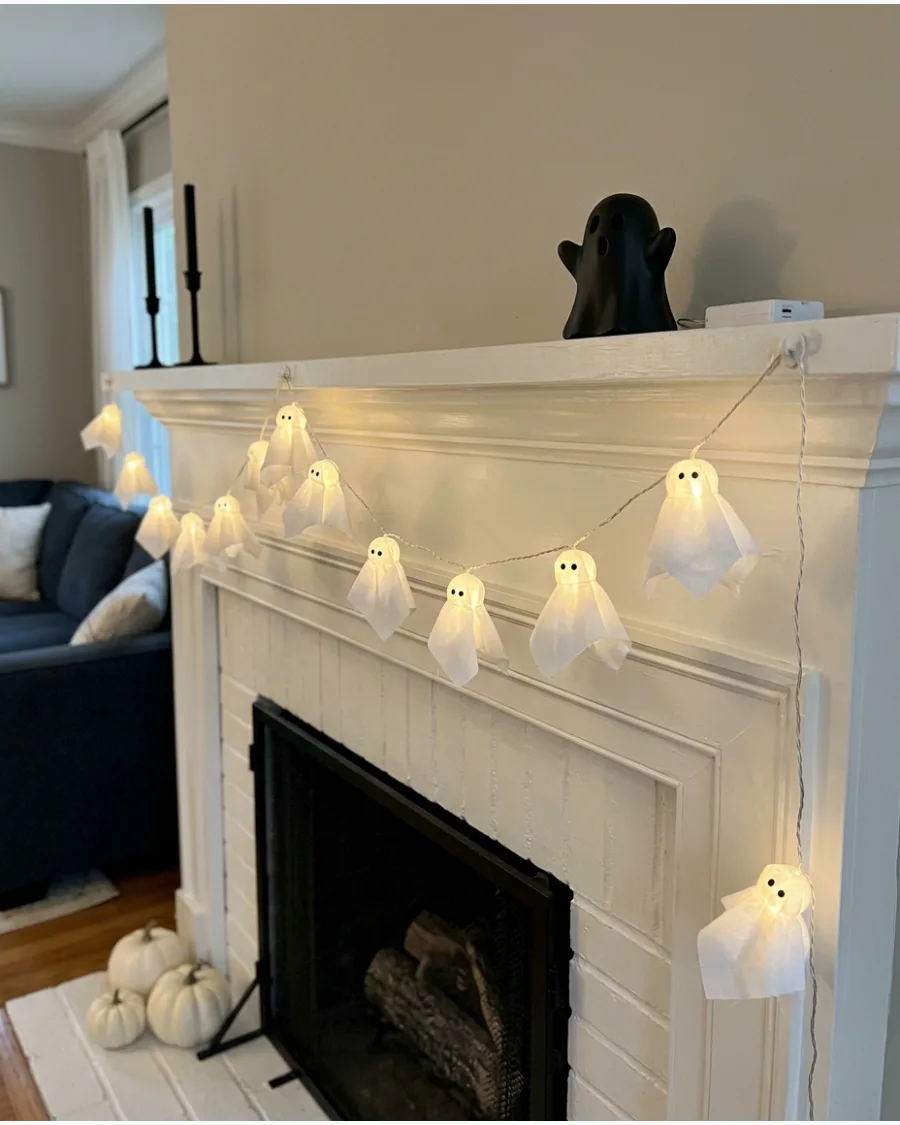
Elevate a basic strand of white fairy lights by giving each bulb its own fabric shroud. Cut small squares of white cotton fabric, drape them over the individual bulbs, and secure them at the neck with a small piece of white thread. Draw tiny dot eyes on each fabric head to create a line of miniature spirits.
The fabric softens the harshness of the LEDs, creating a cozy and atmospheric glow.
- Uses scrap fabric and a standard light strand for a low-cost DIY.
- Drape over mirrors, headboards, or along the top of a window frame.
- Choose warm white LED strands rather than cool blue-white for a more inviting look.
Most people skip this: Use pinking shears to cut the bottom edges of the fabric squares to prevent fraying and add a decorative zigzag texture.
45. Ghost Luminary Bags
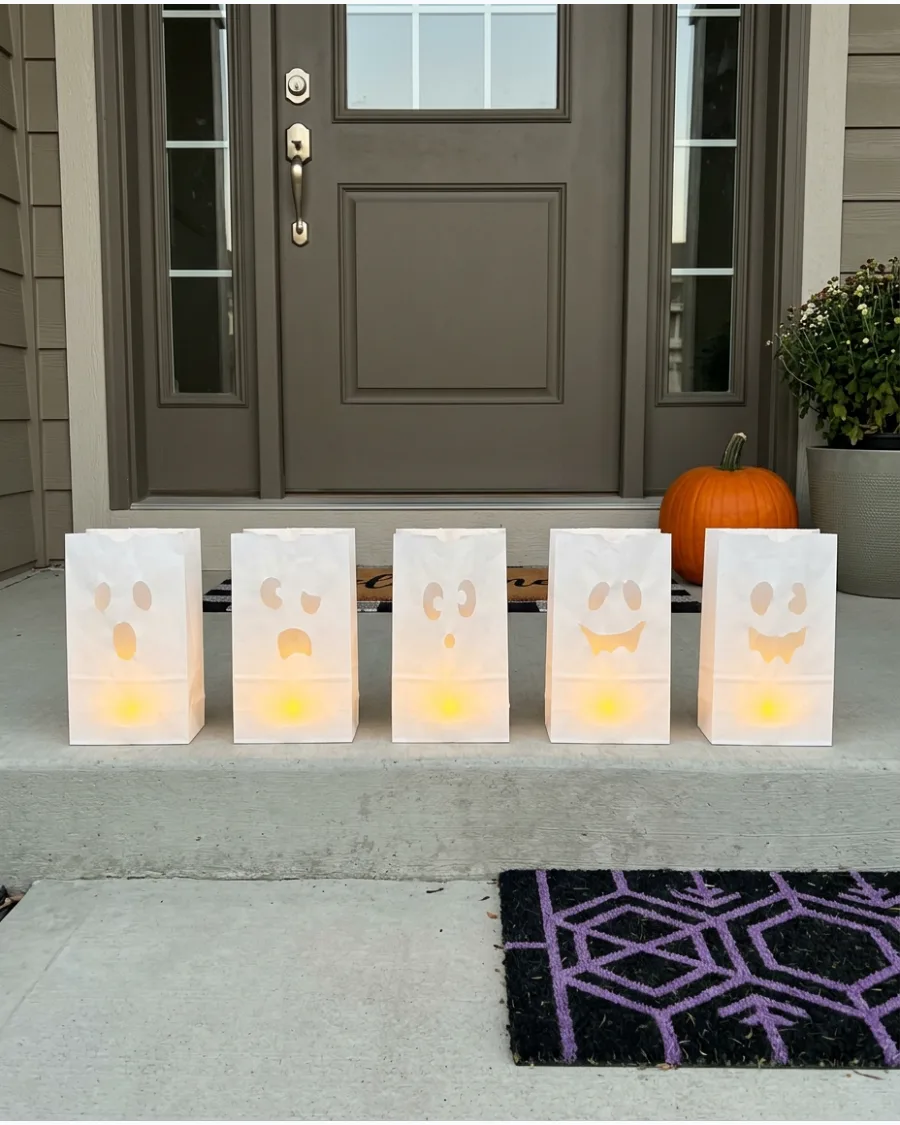
White paper bags are an underrated tool for creating a welcoming path for trick-or-treaters. Cut out ghost eye and mouth shapes from the front of the bag so the light shines directly through the openings. Place a heavy rock or a cup of sand inside each bag to keep them from shifting in the wind.
These provide a clean, modern alternative to traditional carved pumpkins.
- Extremely affordable project using bulk white lunch bags and tea lights.
- Space them exactly twelve inches apart for a professional, symmetrical look along a walkway.
- Fold the top inch of the bag over twice to create a sturdy rim that holds its shape.
Quick win: Use a large craft hole punch to create perfectly uniform circular eyes for a more graphic and modern aesthetic.
Cute Indoor Ghost Decorations
46. Yarn Tassel Ghosts
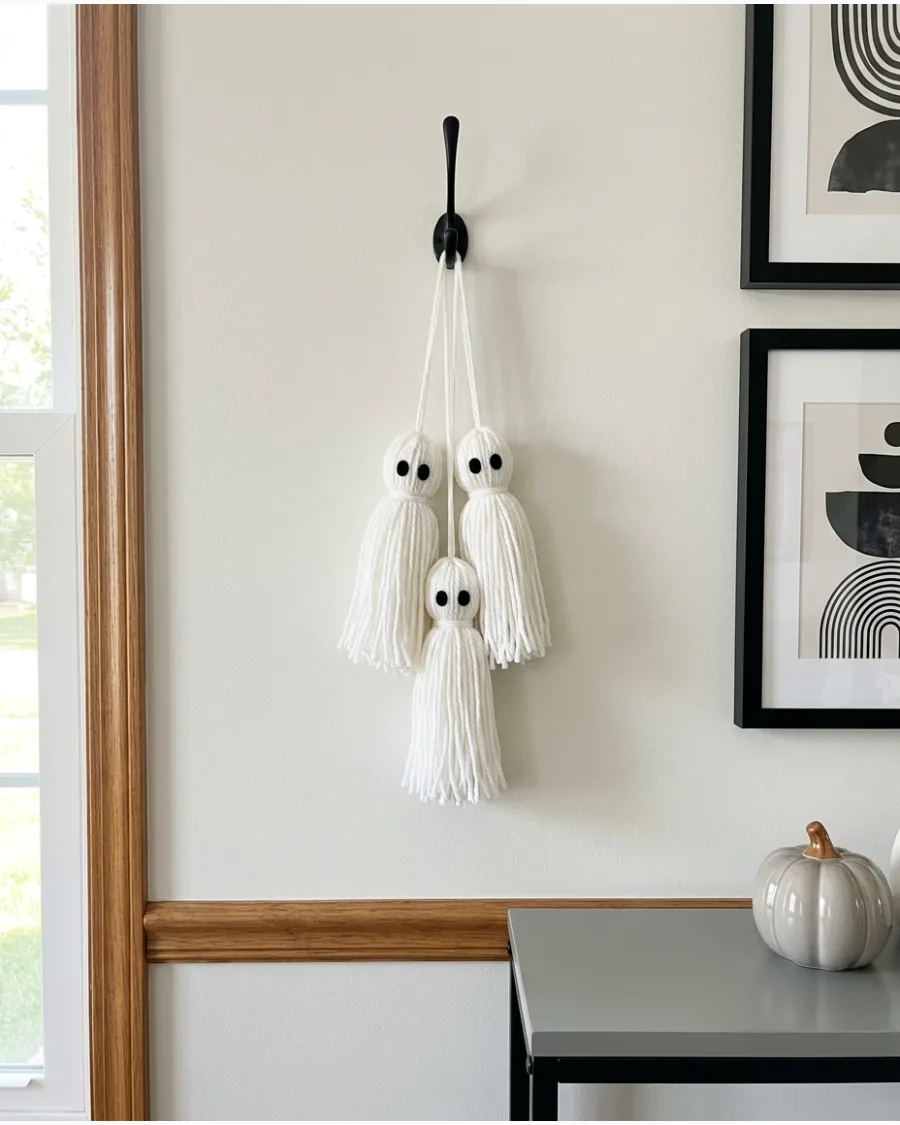
Handmade yarn tassels offer a textured, boho-inspired take on Halloween decor. Wrap white cotton yarn around a piece of cardboard fifty times before tying off the top and cutting the bottom loops to form the ghost body. Glue two small black felt circles onto the head portion to finish the look.
These are durable and can be packed away and reused for several years without losing their shape.
- Requires only yarn, scissors, and felt scraps; takes ten minutes per ghost.
- Hang them from doorknobs, cabinet handles, or a dedicated Halloween tree.
- Use thick wool yarn for a chunky look or thin cotton twine for a delicate appearance.
Best shortcut: Use a stiff pet brush to comb out the bottom of the yarn tassels for a fluffier, more ethereal 'cloud' effect.
47. Felt Ghost Ornaments
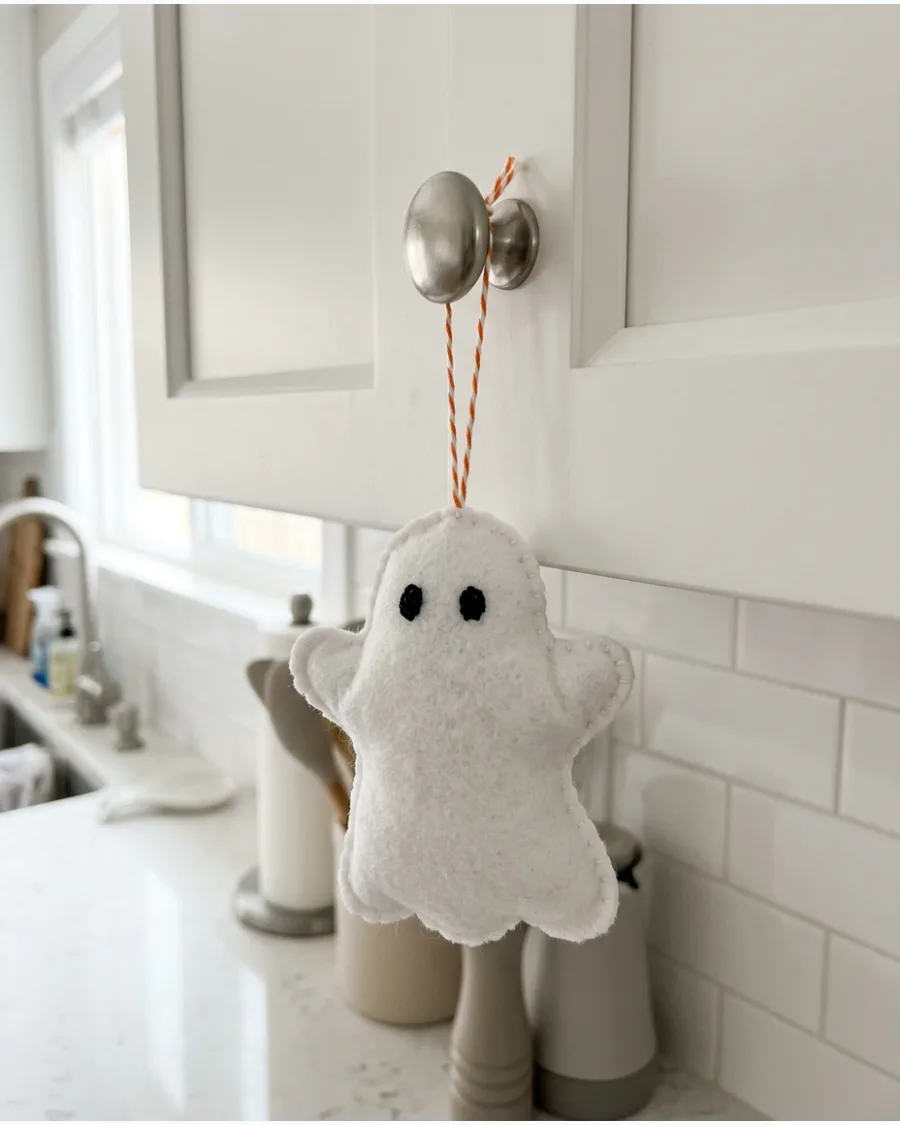
Soft felt ghosts add a cozy, tactile element to indoor Halloween styling. Cut two identical ghost shapes from white felt, sew them together with a simple running stitch, and add a small amount of polyester fiberfill before sealing. These stuffed figures have more presence than flat paper decorations.
They look especially high-end when hung from a minimalist branch display in a ceramic vase.
- Affordable craft using felt sheets and basic sewing supplies.
- Lightweight enough to hang on command hooks or even taped to the wall.
- Personalize each one by varying the mouth shapes or adding tiny felt bowties.
Most people skip this: Use black embroidery floss to sew the eyes instead of using glue to ensure the decoration looks polished from both sides.
48. Mini Clay Ghosts
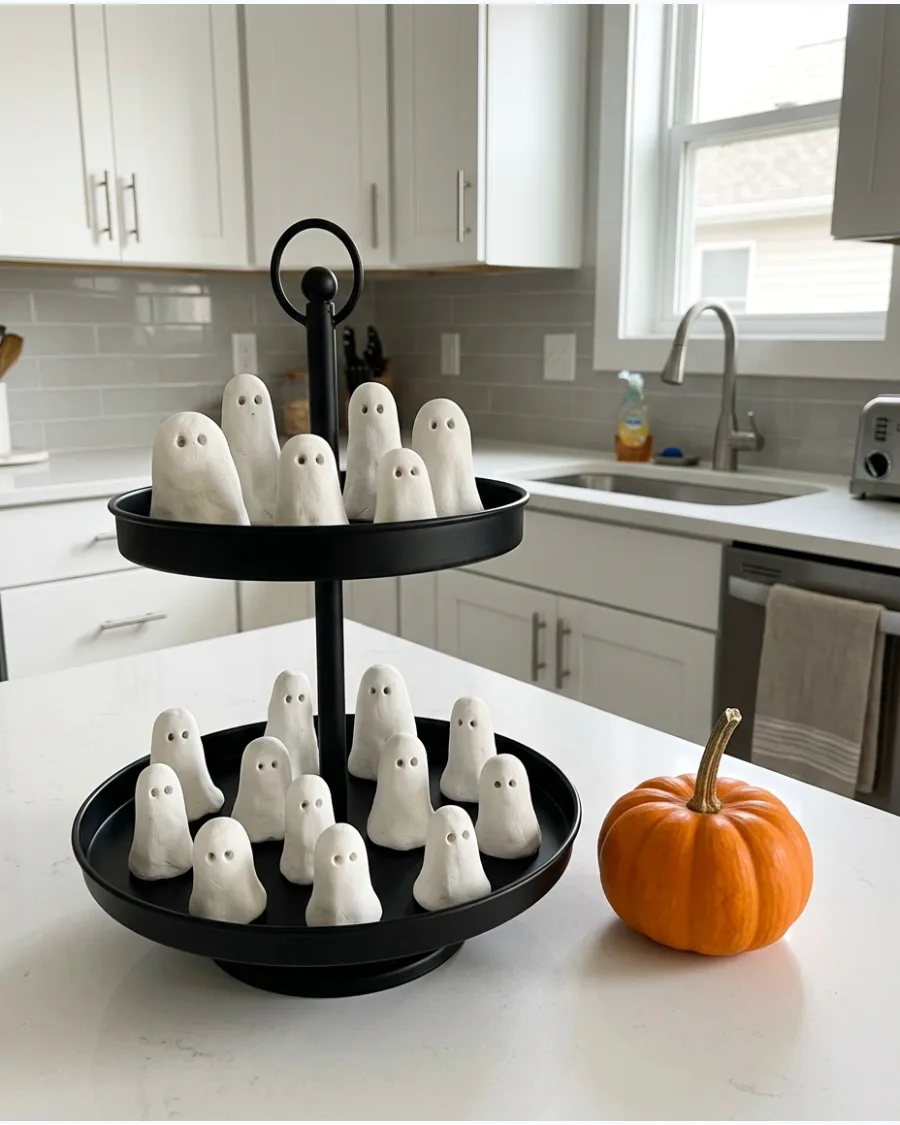
Air-dry clay allows for the creation of unique, sculptural ghosts with various personalities. Roll a small ball of clay into a cone shape and use your thumb to hollow out the bottom and pinch the edges into a wavy 'skirt'. Use a toothpick to poke small holes for the eyes while the clay is still wet.
Once dry, these freestanding figures can be placed anywhere from a tiered tray to a bathroom vanity.
- Air-dry clay is inexpensive and requires no oven or special equipment.
- Sand the ghosts with fine-grit sandpaper after they dry for a perfectly smooth finish.
- Apply a clear matte sealant to protect the clay from moisture and dust.
Quick win: Dip your finger in a small amount of water to smooth out any cracks or fingerprints while the clay is still pliable.
49. Cardboard Ghost Wall Display
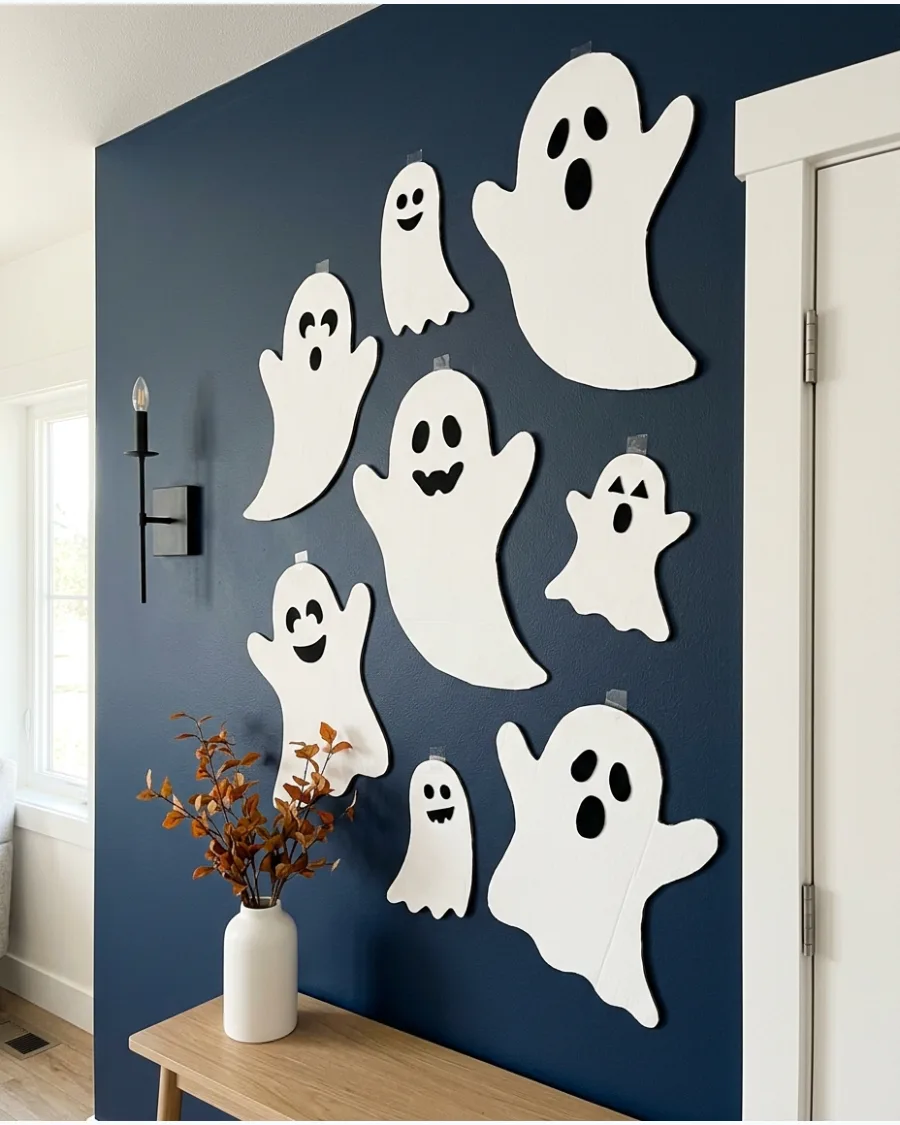
Transform recycled shipping boxes into a large-scale art installation for a blank wall. Cut varied ghost silhouettes from flat cardboard and apply two coats of white primer for a solid, opaque finish. Arrange them in a 'flying' pattern across a dark-colored wall to create a high-contrast focal point.
This is an excellent way to fill a large space without spending money on expensive retail decorations.
- Free project using recycled boxes and leftover house paint.
- Use removable adhesive strips to mount the ghosts without damaging the wall paint.
- Vary the sizes from six inches to two feet tall to create a sense of depth.
Best shortcut: Trace your shapes onto the cardboard with a pencil first, then use a sharp utility knife rather than scissors for much cleaner edges.
50. Ghost Reading a Miniature Book
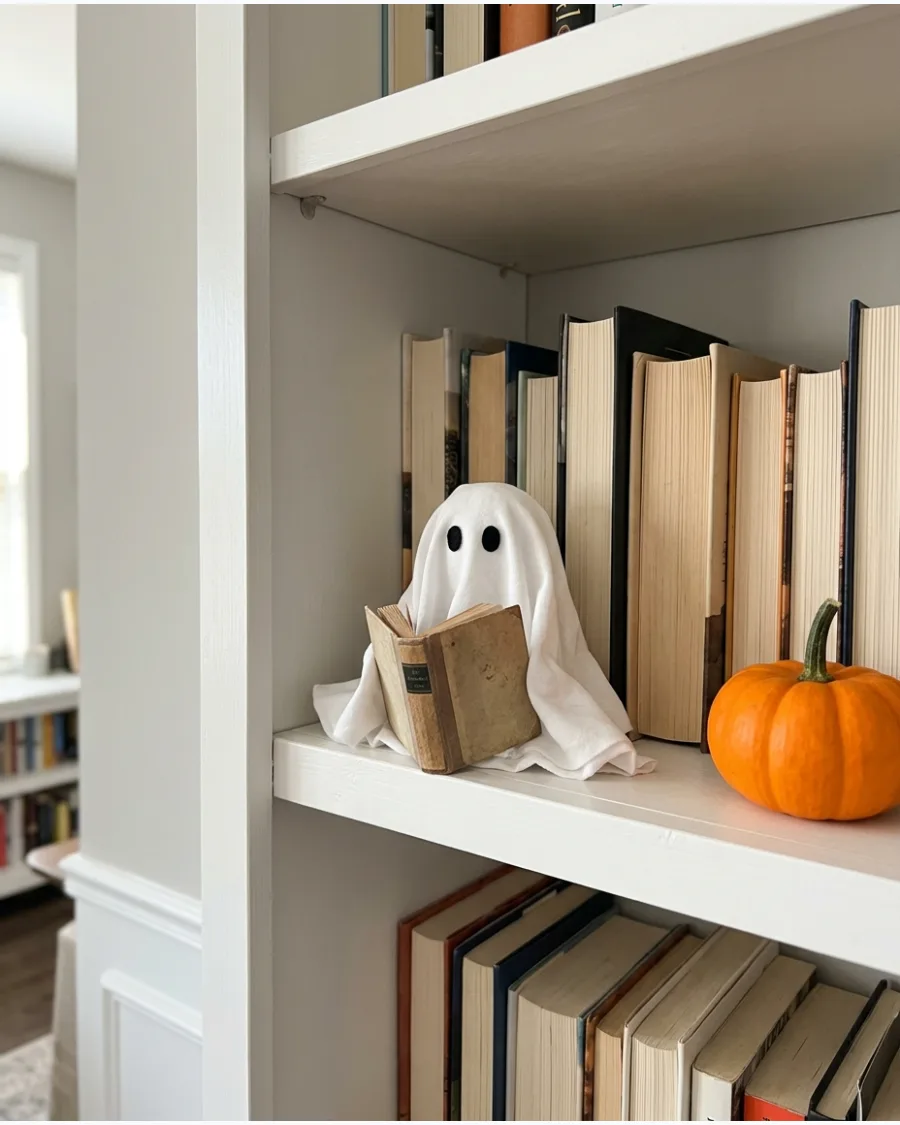
Create a whimsical scene on your bookshelf by posing a small ghost in a lifelike position. Stiffen a small piece of white fabric with a mixture of glue and water, then drape it over a ball of foil to dry in a seated shape. Once the ghost is rigid, place it next to a miniature book or a small stack of matchboxes painted to look like novels.
This adds an unexpected and charming detail to an existing library or reading nook.
- Uses small fabric scraps and household glue for a near-zero cost.
- Fits perfectly into small gaps on bookshelves or bedside tables.
- Scale the ghost to be about three inches tall so it fits proportionally with the books.
Most people skip this: Use a tiny bit of museum wax on the bottom of the ghost to keep it from tipping over or sliding off the shelf.
Frequently Asked Questions
What is the best fabric for making outdoor DIY ghosts?
White polyester or nylon is the best choice for outdoor use because these synthetic fabrics resist mold and dry quickly after rain. While cheesecloth provides a beautiful, tattered look, it is best reserved for covered areas where it won't get saturated and heavy.
How do you make DIY ghosts stand up on a porch without blowing away?
Construct a sturdy internal frame using PVC pipes or an upside-down tomato cage to give your ghost structure. To prevent them from blowing away, hide heavy weights like bricks or sandbags inside the base of the fabric.
How can I make my DIY ghosts glow at night?
Place battery-operated LED puck lights or waterproof fairy lights inside the ghost's frame for a soft, haunting glow. You can also use glow-in-the-dark fabric spray on the exterior to make the figure pop under a blacklight.
What are some modern alternatives to the 'sheet with two holes' look?
Try using chicken wire or wire mesh to sculpt a transparent, freestanding figure for a more artistic and eerie silhouette. Layering sheer chiffon or tulle also creates a wispy, high-end ethereal effect that looks much more sophisticated than a standard cotton sheet.
How do I store fabric ghost decorations so they don't get ruined for next year?
Make sure the fabric is completely dry and free of debris before folding to prevent mold and mildew growth. Store your ghosts in an airtight plastic bin in a cool, dry place to keep them clean and ready for next October.