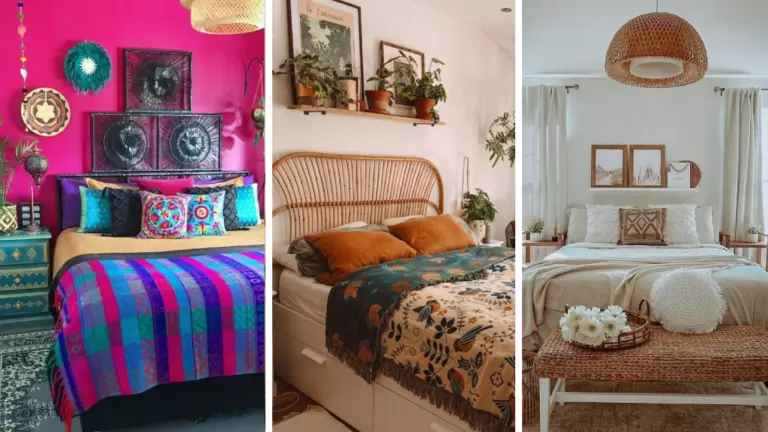
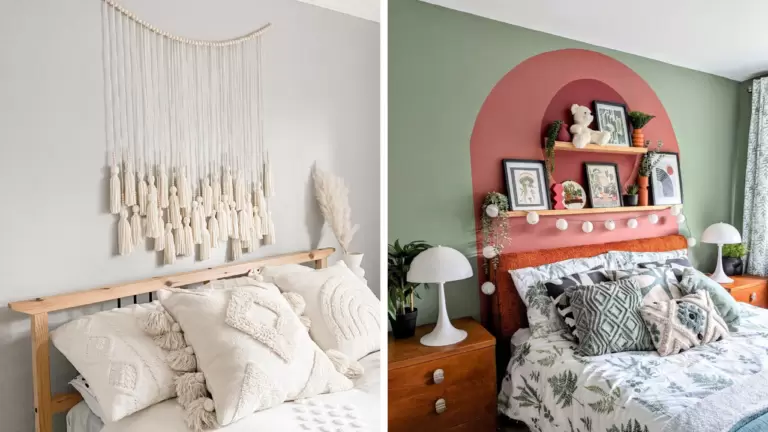
50 Stunning Bedroom Feature Wall Ideas

This post may contain affiliate links: full affiliate disclosure.
A single feature wall transforms a plain bedroom into a curated retreat without the stress of a full renovation. Choosing the right material or color behind the headboard creates an immediate focal point and anchors the entire design of the room.
1. Warm Khaki Feature Wall
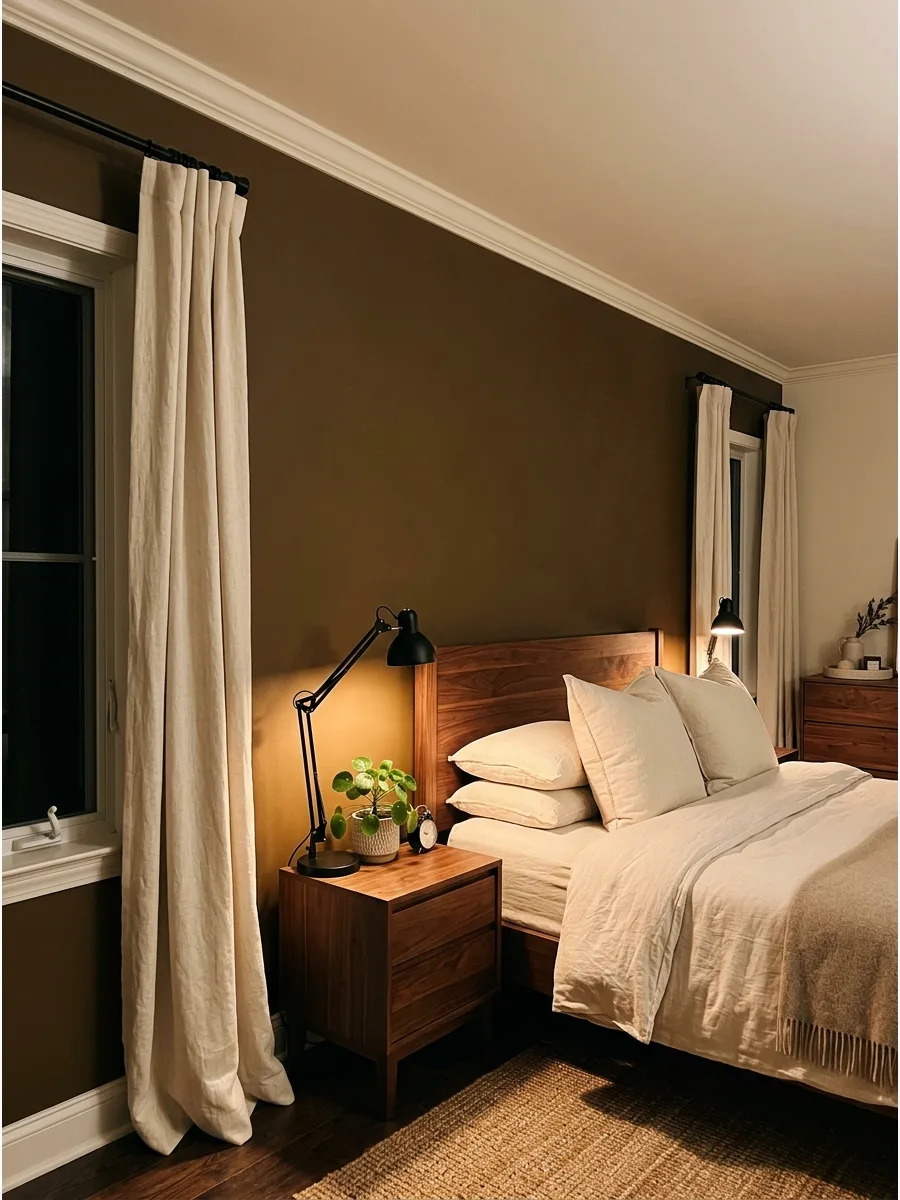
Paint the wall behind the bed in a grounding khaki shade to anchor the space. Pair this earthy tone with cream bedding and walnut furniture for a balanced, high-end look.
Use a matte finish to prevent light glare from washing out the depth of the color. Khaki works best when it leans more toward brown than green to keep the room feeling cozy.
- $40-$80 for paint and supplies
- Choose a khaki with yellow or brown undertones for warmth
- Swap for a peel-and-stick solid color film if renting
Quick win: Paint the outlet covers the same khaki color so they disappear into the wall.
2. Chocolate Brown Feature Wall
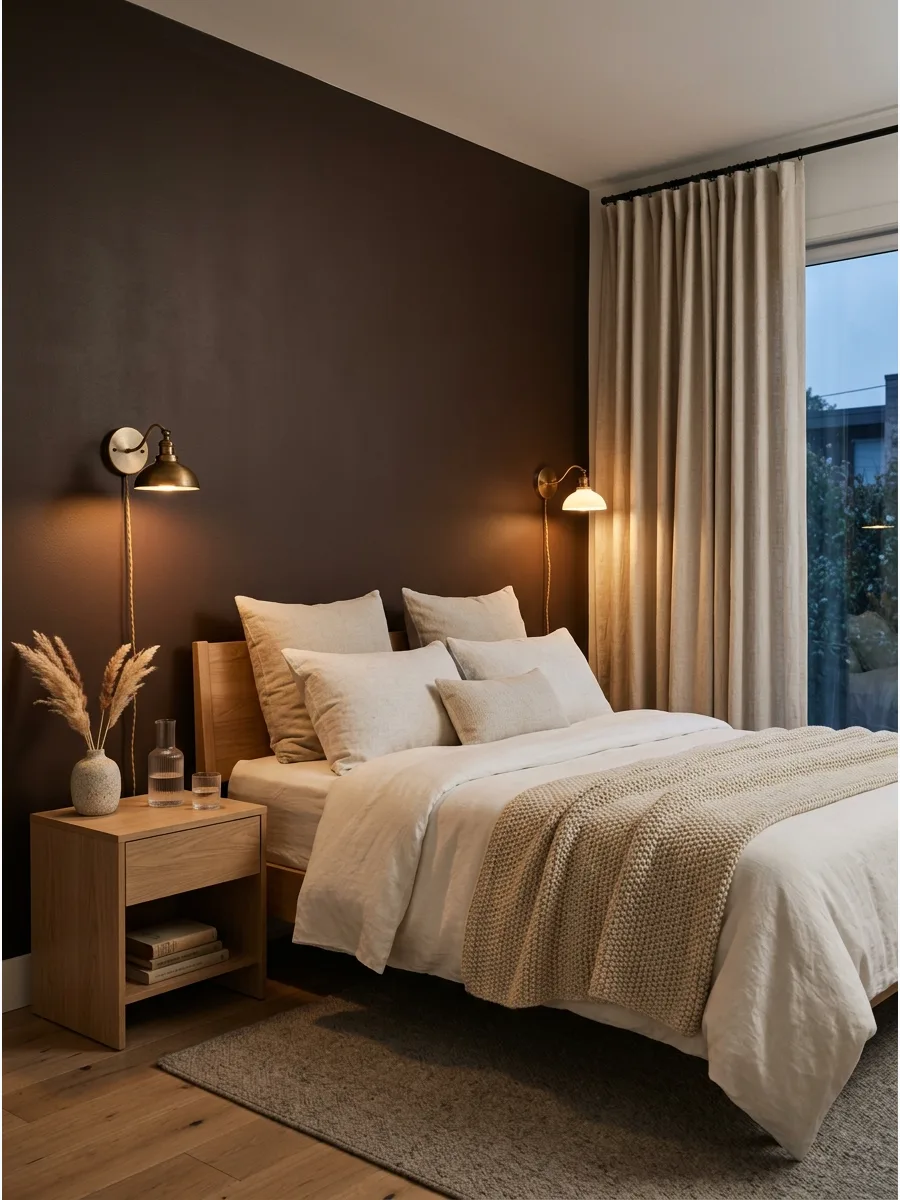
Deep chocolate brown creates a cocooning effect that makes a large bedroom feel more intimate. Contrast the dark wall with crisp off-white bedding and aged brass light fixtures to keep the mood sophisticated.
Test the paint color during the evening to ensure it does not turn black under artificial lighting. This shade provides a perfect backdrop for lighter wood nightstands.
- $50-$100 for premium dark-pigment paint
- Best for rooms with at least one large window
- Use a satin finish on trim for a subtle sheen contrast
Most people skip this: Sand the wall perfectly before painting dark colors, as every bump shows up on deep tones.
3. Walnut Wood Slat Wall
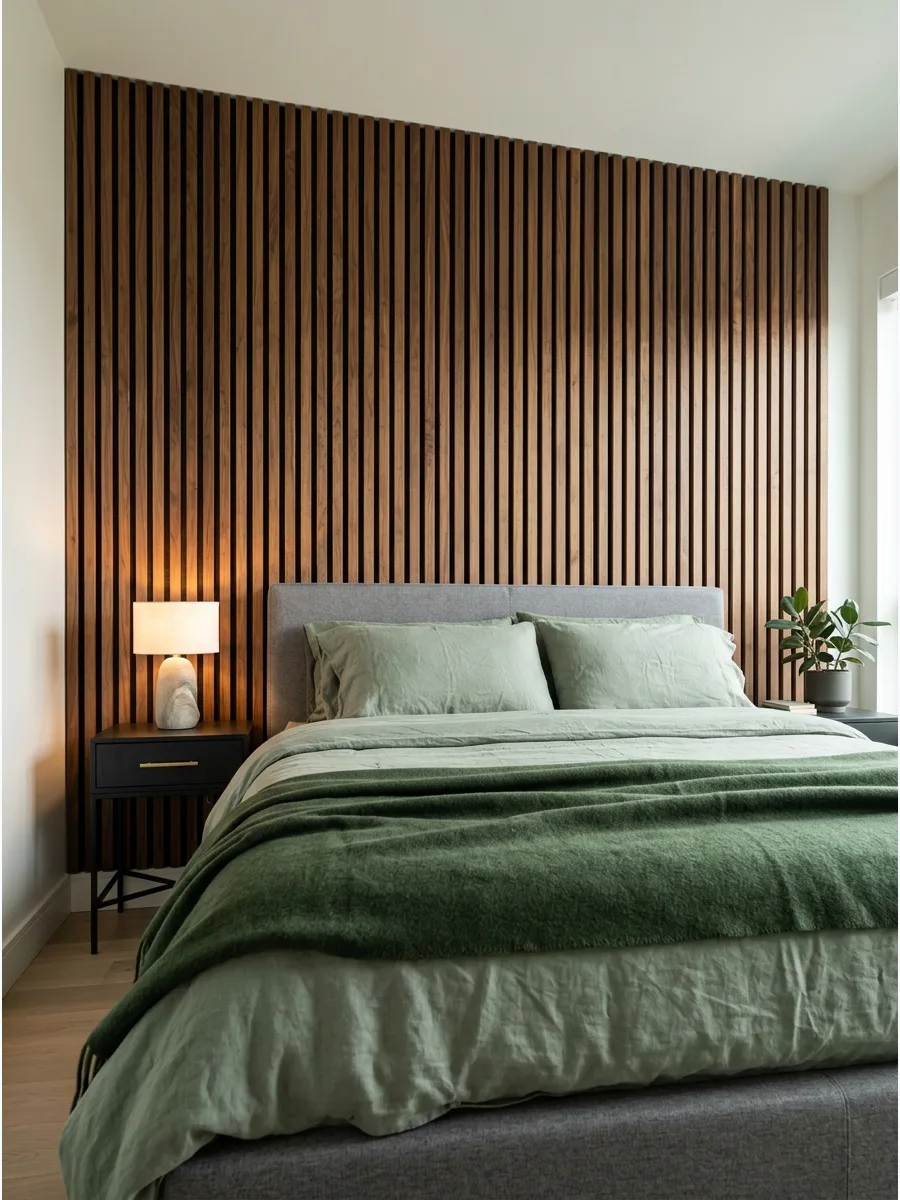
Vertical walnut slats add immediate architectural interest and a sense of height to the room. Extending the slats just past the nightstands creates a defined zone for the bed.
Install the slats over a black felt backing to hide the wall behind and improve room acoustics. This texture pairs beautifully with soft, organic fabrics like linen or wool.
- $300-$800 depending on wood quality
- Use a finish nailer for invisible attachment
- Try individual pine slats stained walnut for a lower budget
Best shortcut: Buy pre-assembled slat panels to save hours of individual spacing and leveling.
4. Fluted Panel Feature Wall
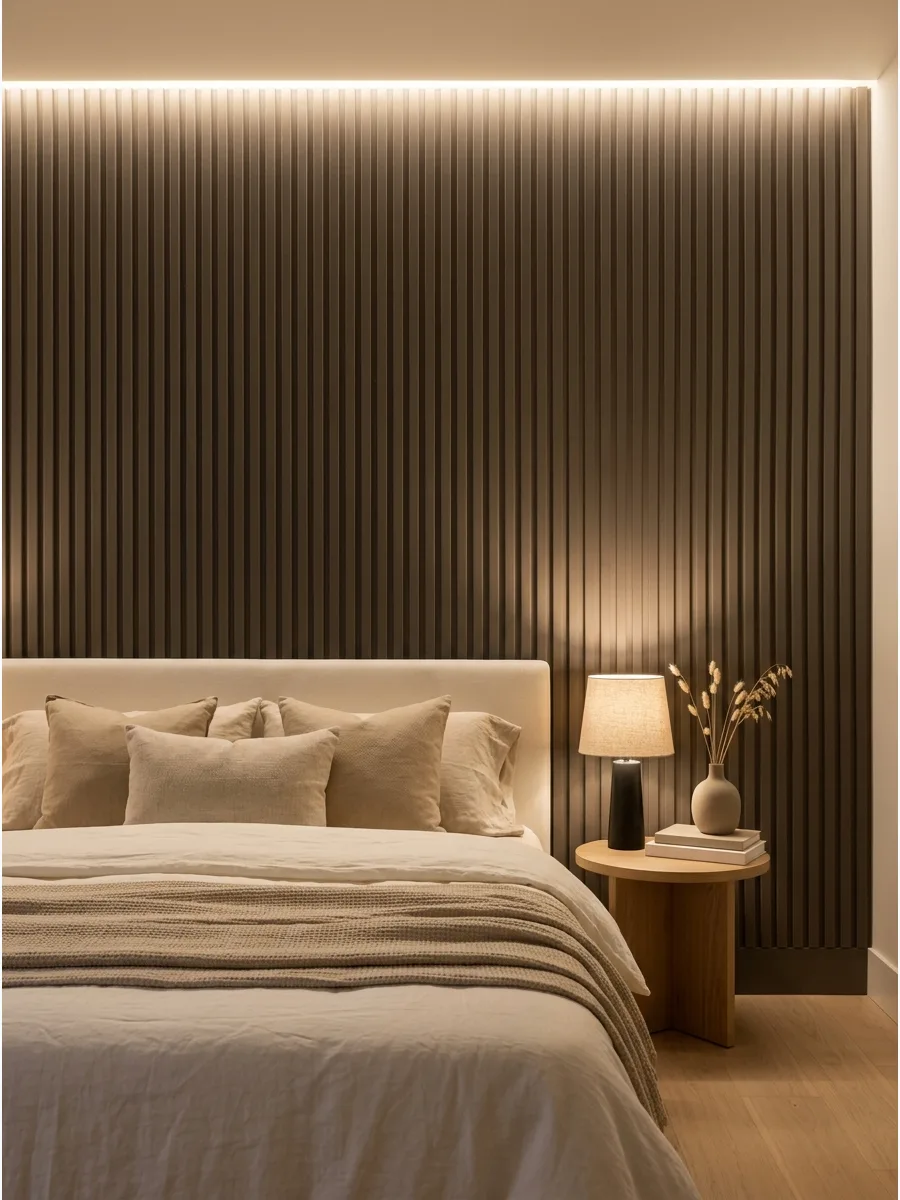
Fluted panels offer a modern, tactile surface that catches light in a unique way. Painting them in a soft olive or taupe adds sophistication without the visual noise of a busy pattern.
Run the panels horizontally if the goal is to make a narrow bedroom feel wider. These panels work well as a full wall or as a wide band behind the headboard.
- $200-$500 for MDF or polymer panels
- Caulk the seams between panels for a seamless look
- Apply two coats of high-quality furniture paint for a smooth finish
Quick win: Use a foam roller on fluted panels to avoid paint drips inside the deep grooves.
5. Floor-to-Ceiling Upholstered Wall
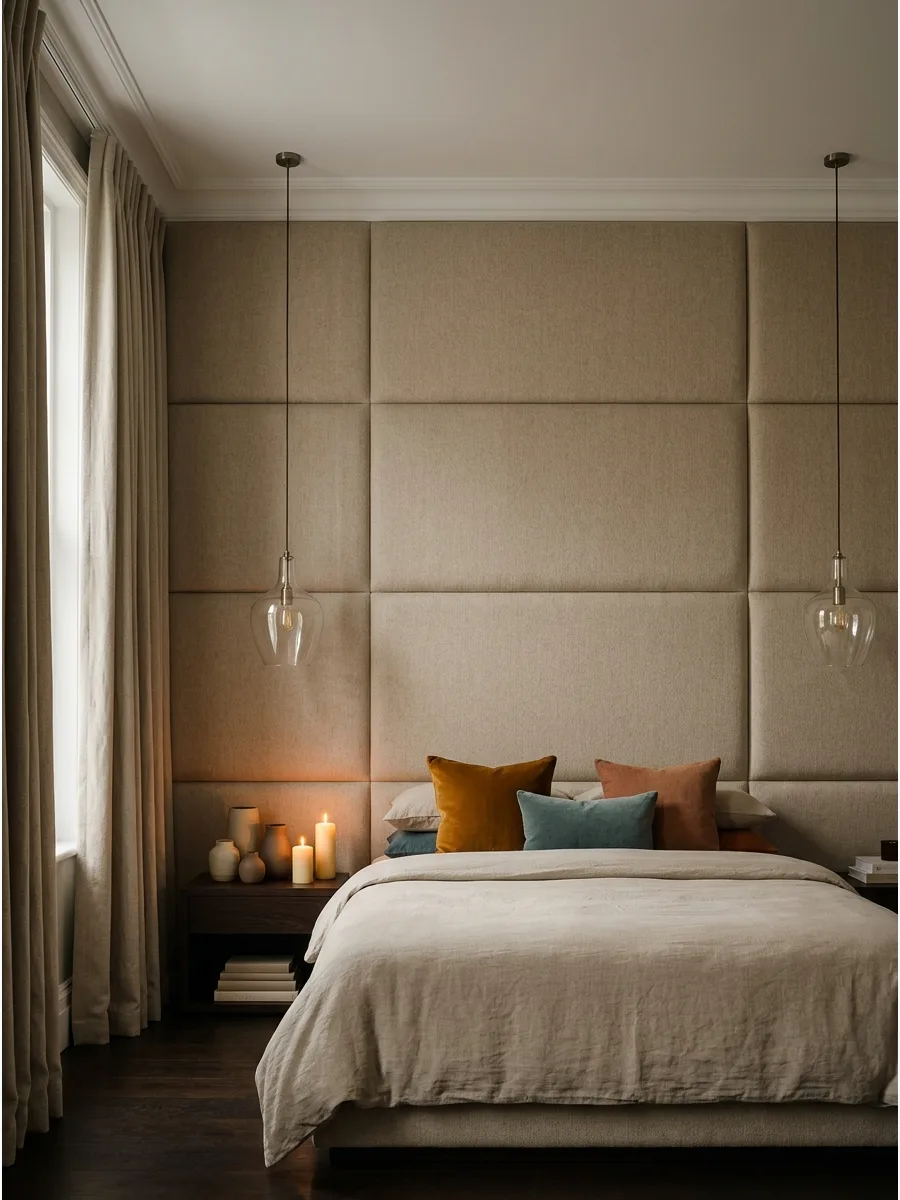
Upholstered panels bring a high-end hotel vibe and extra soundproofing to a primary bedroom. Choose a neutral fabric like mushroom or oatmeal to keep the look timeless and calming.
Mount the panels using Z-clips to ensure they stay flush against the wall without visible screws. This treatment eliminates the need for a separate headboard and creates a soft, plush backdrop.
- $400-$1,200 for custom or DIY panels
- Select a performance fabric for easy cleaning
- Use foam density of at least 1 inch for a premium feel
Most people skip this: Vacuum the panels once a month to prevent dust from settling into the fabric fibers.
6. Oversized Floral Wallpaper
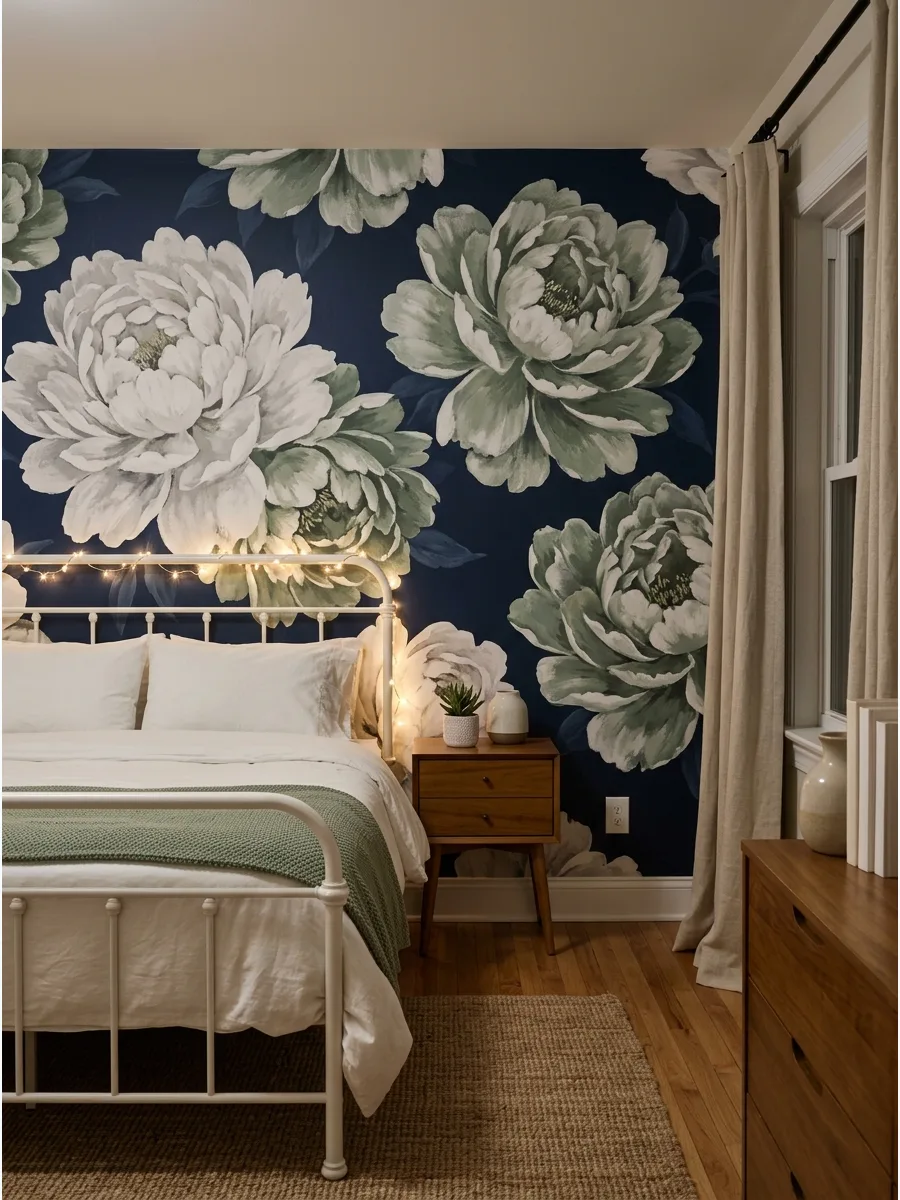
Large-scale florals act as a massive piece of art that defines the style of the entire room. Stick to a palette of two or three colors to prevent the pattern from becoming chaotic.
Coordinate the color of your shams with the secondary color in the wallpaper for a cohesive look. Simple, solid-colored bedding allows the wall to remain the undisputed star.
- $150-$400 for a standard feature wall
- Use paste-the-wall paper for a faster installation
- Opt for peel-and-stick versions for a renter-friendly update
Best shortcut: Start the first wallpaper strip in the center of the wall to ensure the pattern is perfectly symmetrical behind the bed.
7. Soft Botanical Mural
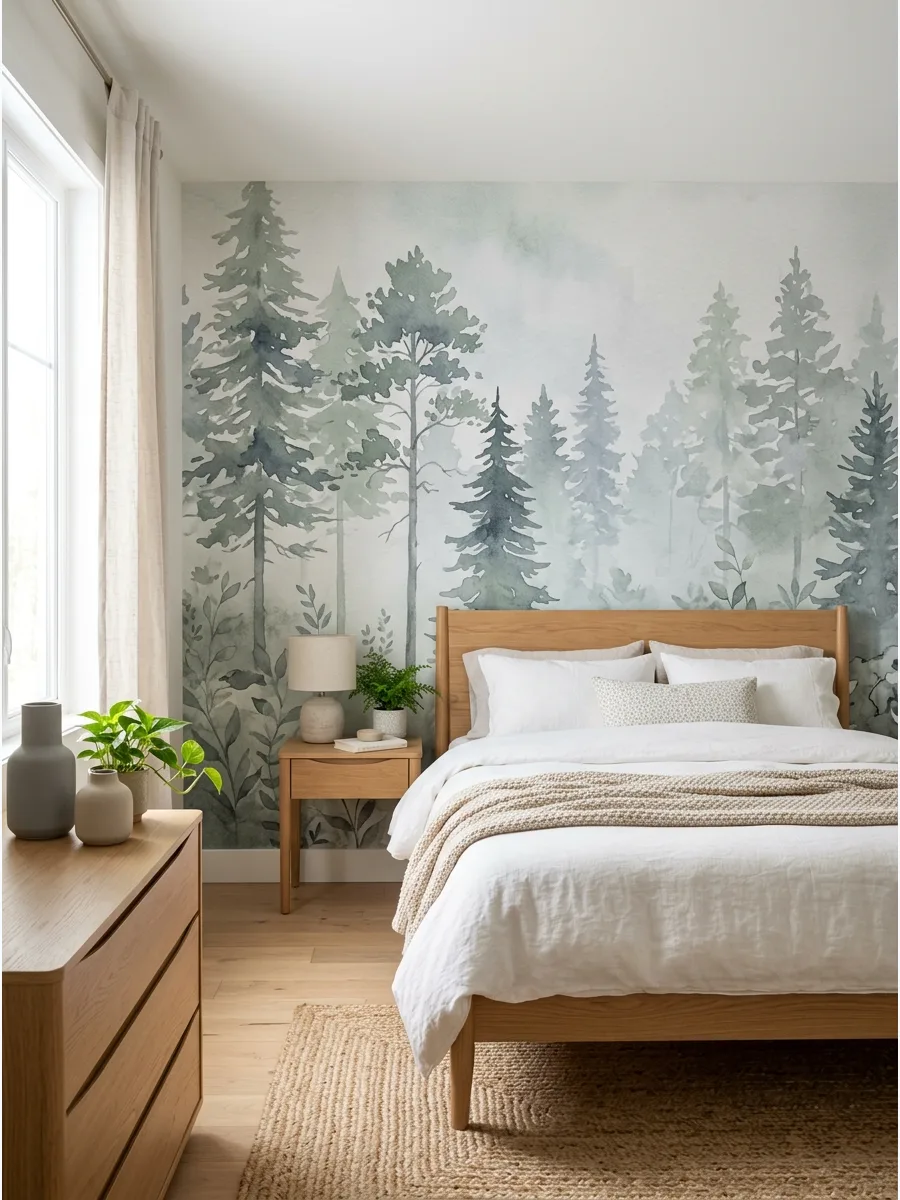
A botanical mural with misty greens and blues creates a peaceful, garden-like atmosphere. Unlike repetitive wallpaper, a mural offers a non-repeating scene that adds depth to the wall.
Select a mural with a faded or watercolor effect to keep the room feeling airy. This style works best in rooms with plenty of natural light to highlight the delicate details.
- $200-$600 for a custom-sized mural
- Measure the wall twice before ordering to avoid gaps
- Use a matte topcoat to protect the print from scuffs
Quick win: Match your curtain color to the lightest shade in the mural to make the room feel larger.
8. Scenic Landscape Mural
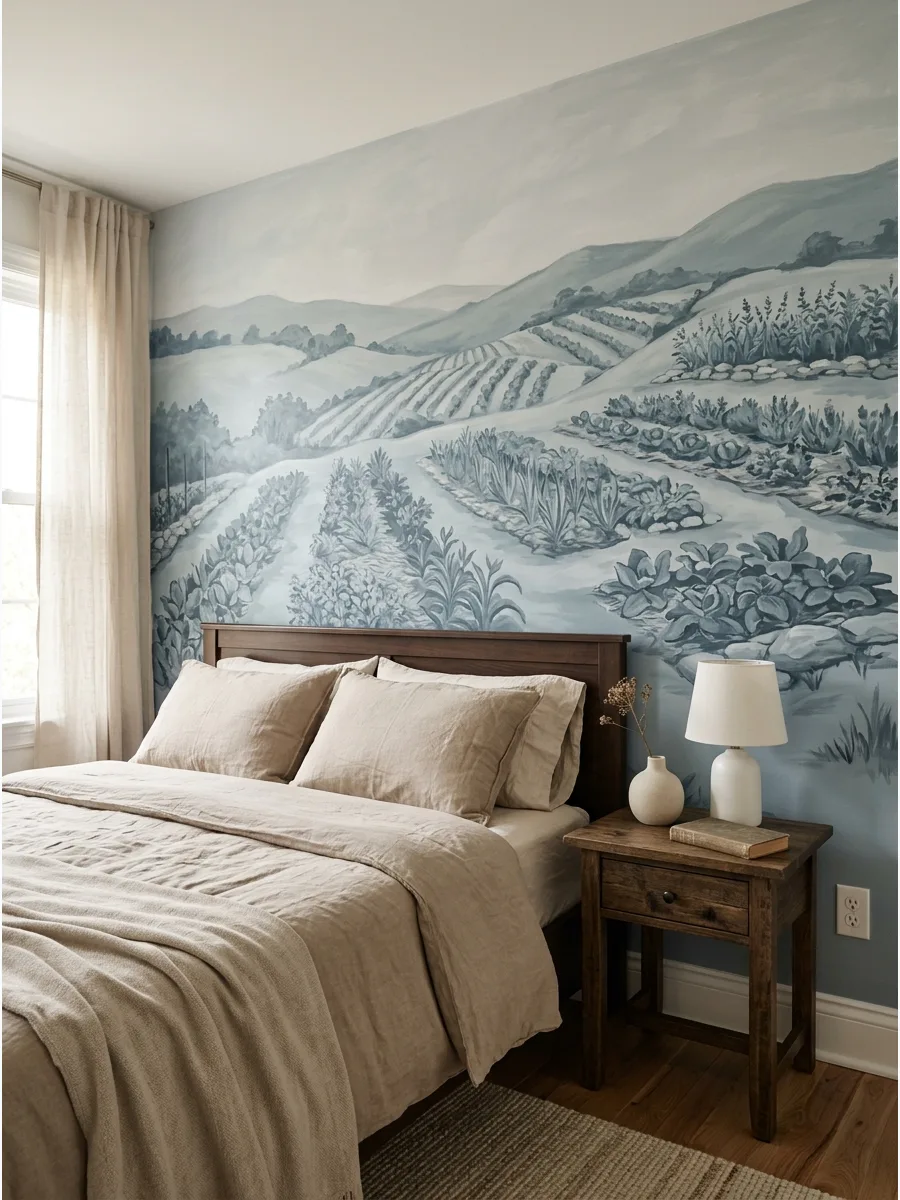
A scenic landscape mural featuring rolling hills or clouds brings a sense of the outdoors inside. Choosing a design with muted, desaturated tones prevents the wall from feeling like a giant photograph.
Position the main elements of the mural so they are not completely hidden by the headboard. This treatment adds a layer of sophisticated storytelling to a guest or primary bedroom.
- $250-$700 for high-quality vinyl or paper
- Install on the smoothest wall available for the best image clarity
- Use a level to ensure the horizon line stays straight
Most people skip this: Paint the adjacent walls a neutral color pulled directly from the mural background.
9. Limewash Feature Wall
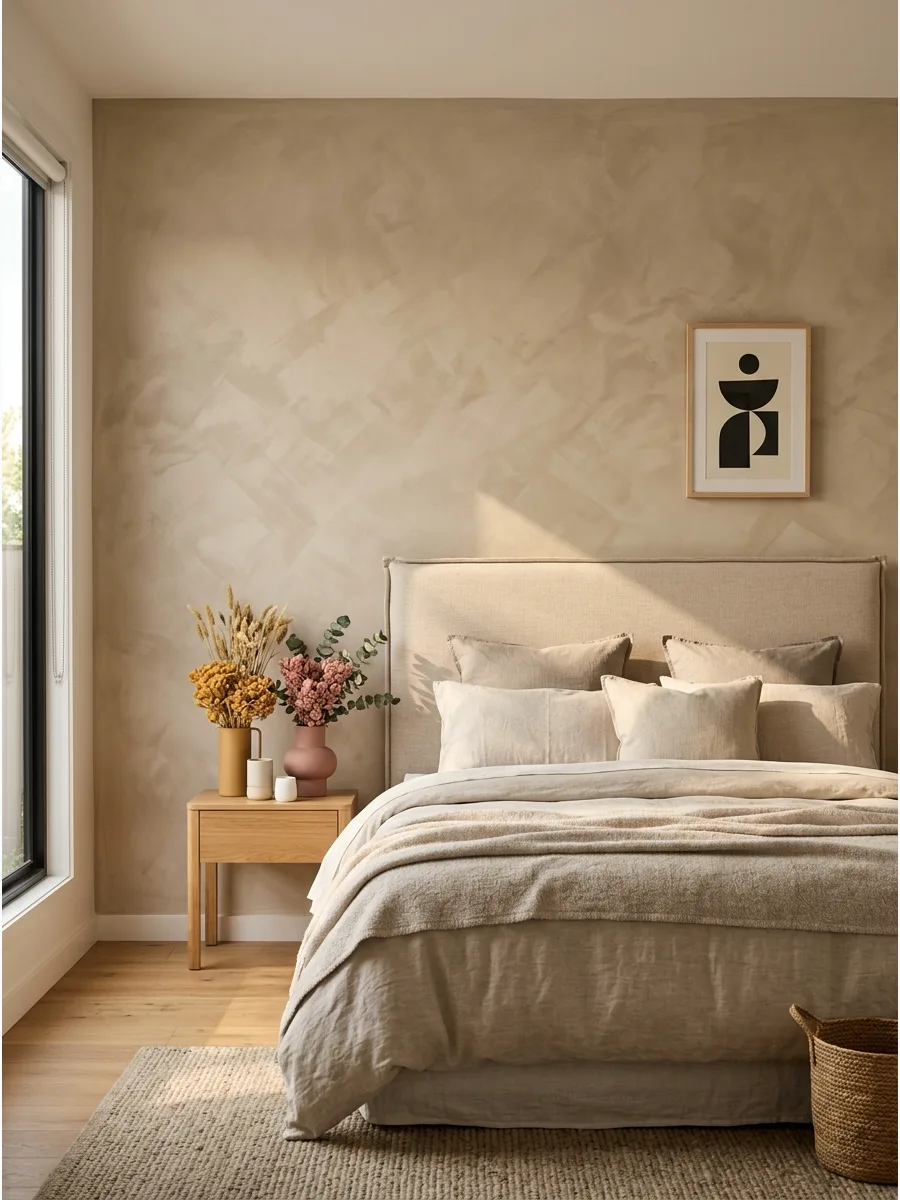
Limewash creates a textured, velvety finish that feels ancient and modern at the same time. The natural mineral pigments change appearance as light moves across the room during the day.
Apply the limewash in a cloud-like cross-hatch motion with a block brush to get the best texture. This finish is ideal for those who want color without the flat look of standard latex paint.
- $60-$150 for limewash paint and specialized brush
- Apply over a dedicated limewash primer for proper adhesion
- Keep the room ventilated while the lime cures
Best shortcut: Do not try to make the strokes perfect; the beauty of limewash is in its intentional irregularity.
10. Roman Clay Wall
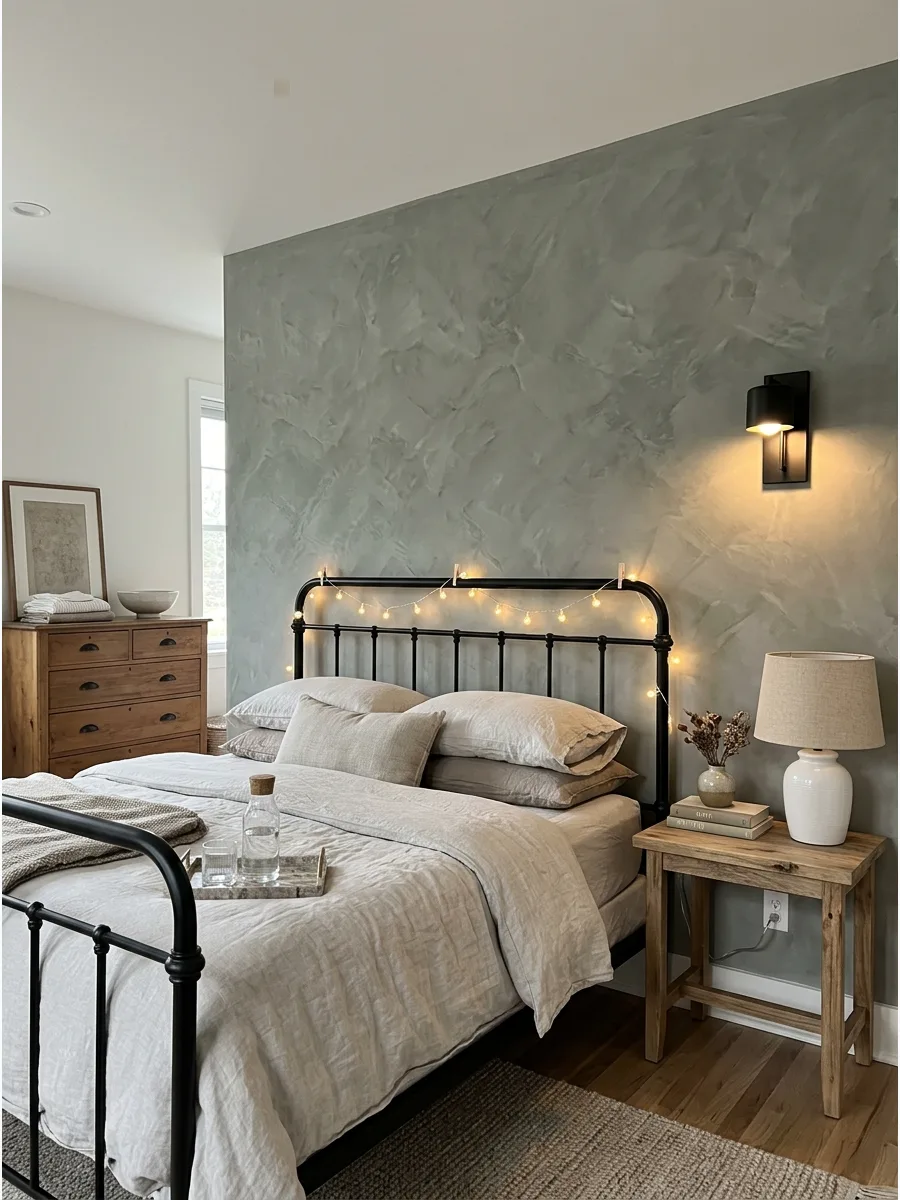
Roman clay offers a smooth, marble-like finish that feels cool to the touch and looks incredibly high-end. It provides subtle tonal shifts that add movement to a single-color wall.
Apply the clay in thin layers using a putty knife to build up the desired level of mottling. It is a durable choice for a feature wall that will not peel or fade over time.
- $100-$300 for clay and application tools
- Best for smooth drywall surfaces
- Seal with a specialized wax for a slight sheen and protection
Quick win: Use a plastic trowel instead of metal to prevent dark burnish marks on lighter clay colors.
11. Picture-Frame Molding Wall
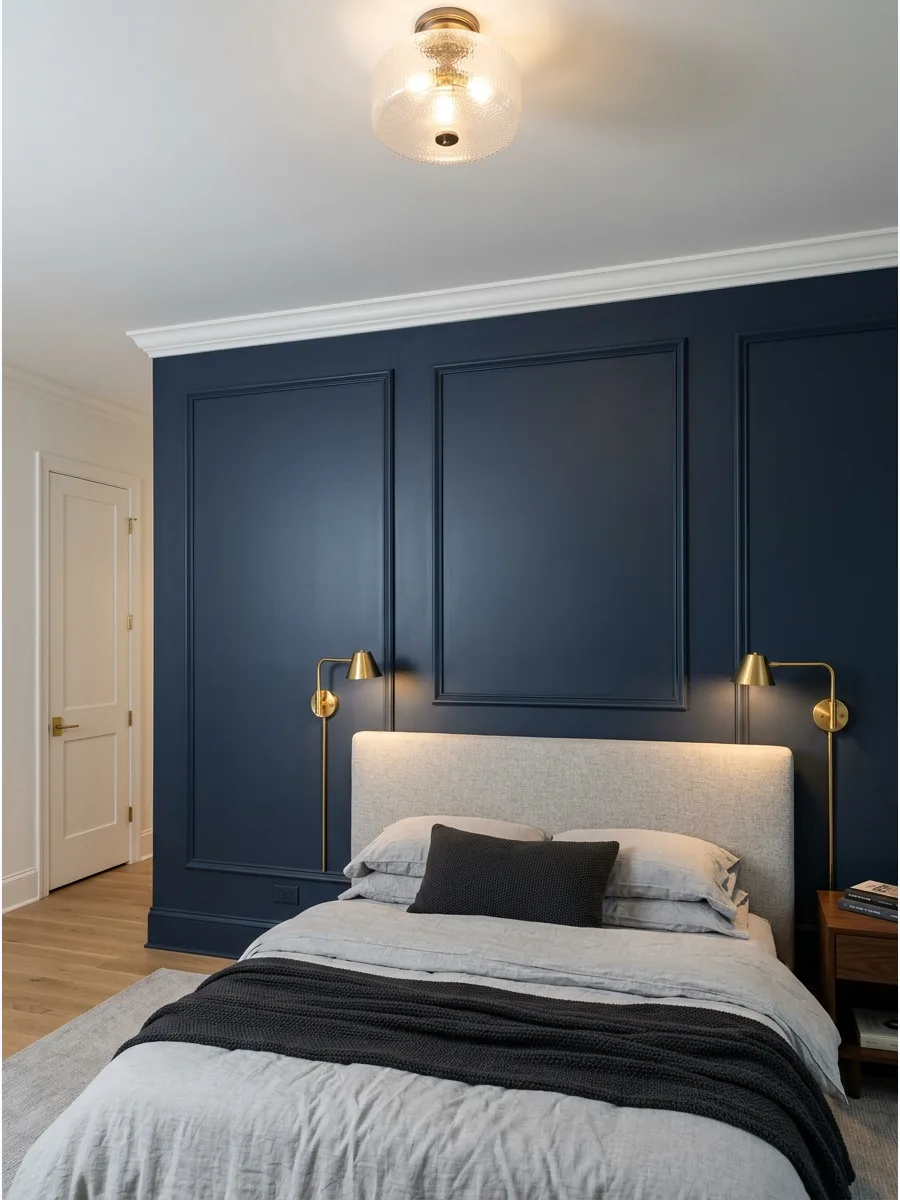
Picture-frame molding adds architectural bones to a standard builder-grade bedroom. Painting the molding and the wall in the same rich color creates a sophisticated, paneled look.
Space the frames evenly across the wall, leaving about 4 inches between the boxes and the ceiling or floor. This is a cost-effective way to add luxury without expensive materials.
- $50-$150 for pine or PVC molding and adhesive
- Use a miter box for clean 45-degree corner cuts
- Fill nail holes with wood filler before painting for a seamless finish
Most people skip this: Use a laser level to ensure all frames are perfectly aligned across the horizontal plane.
12. Tall Board-and-Batten Wall
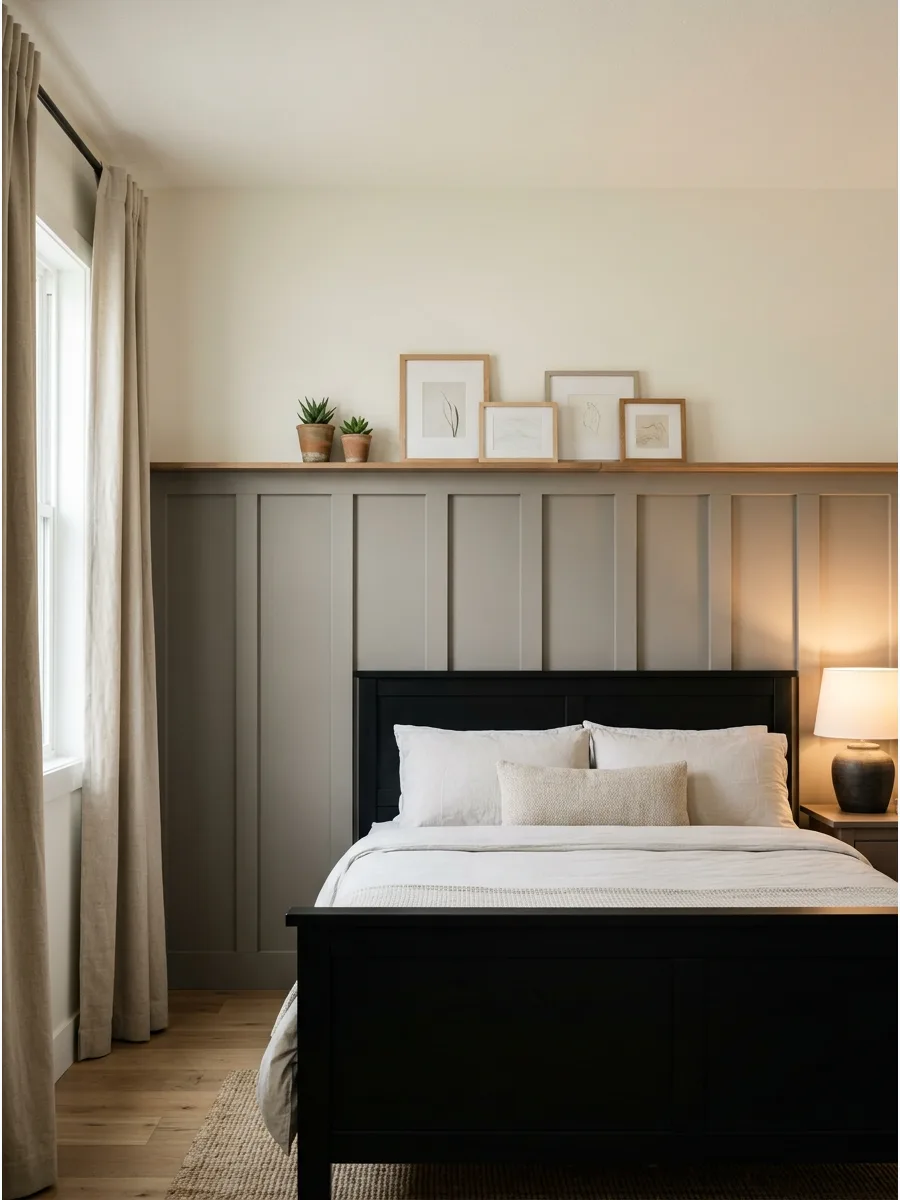
Board-and-batten that stops two-thirds of the way up the wall creates a sturdy, grounded feel. Painting the lower portion a warm neutral and the top a lighter cream makes the ceiling feel much higher.
Add a small ledge at the top of the battens to display small art pieces or framed photos. This style adds a classic touch that stays relevant for years.
- $100-$250 for MDF boards and paint
- Space vertical battens 12 to 16 inches apart
- Use construction adhesive and finish nails for a permanent hold
Best shortcut: Use 1×3 MDF strips instead of real wood to avoid warping and save money on sanding.
13. Full-Height Wainscoting
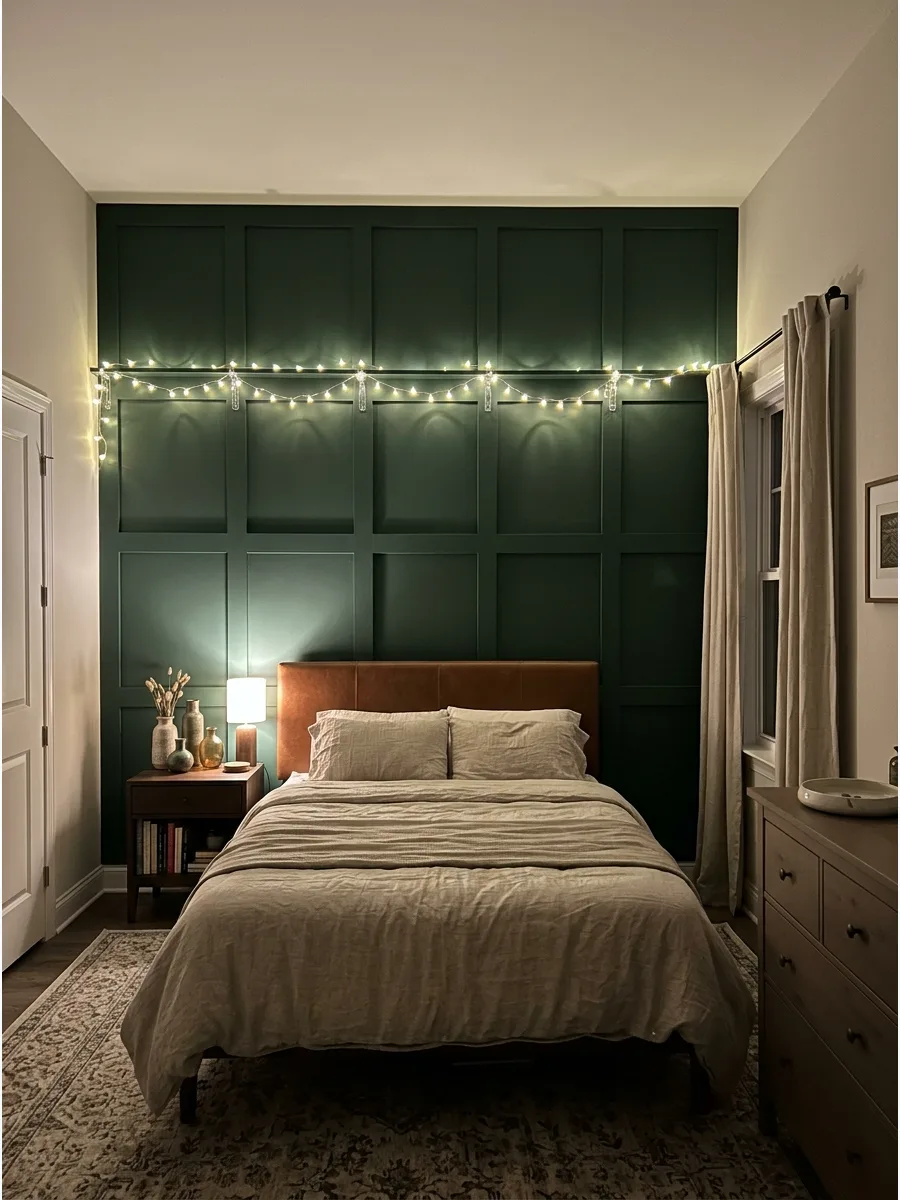
Full-height wainscoting covers the entire wall in a grid or recessed panel pattern for a traditional look. This treatment adds significant weight and presence to the room, making it feel like a custom-built space.
Choose a deep color like forest green or espresso to make the shadows in the panels pop. It works perfectly as a stand-alone feature that does not require extra wall decor.
- $300-$900 for materials and professional-grade paint
- Plan the grid around the bed width for symmetry
- Caulk every single joint to prevent visible gaps
Quick win: Paint the baseboards and crown molding the same color as the wainscoting for a unified, high-end look.
14. Framed Wallpaper Panels
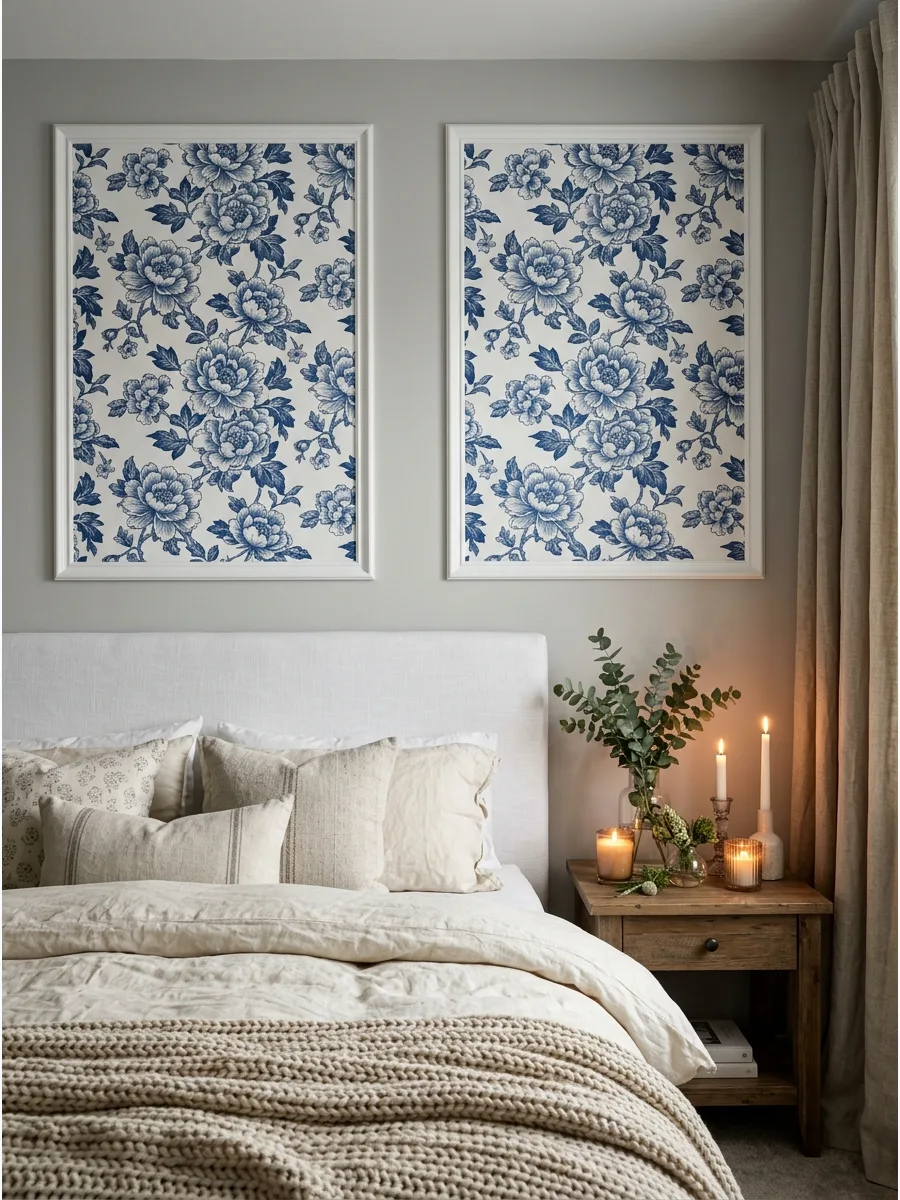
Framed wallpaper panels offer the look of expensive art without the high price tag. By placing a bold pattern inside molding frames, you get a pop of color that is not overwhelming.
Choose a wallpaper with a large repeat so the pattern looks continuous within the frame. This is a great way to use high-end designer wallpaper on a smaller budget.
- $100-$200 for wallpaper scraps and molding
- Best for renters if using peel-and-stick wallpaper
- Use a heavy-duty adhesive for the molding to support the paper
Most people skip this: Paint the wall inside the frame the same color as the wallpaper background for a professional finish.
15. Grasscloth Wallpaper Wall
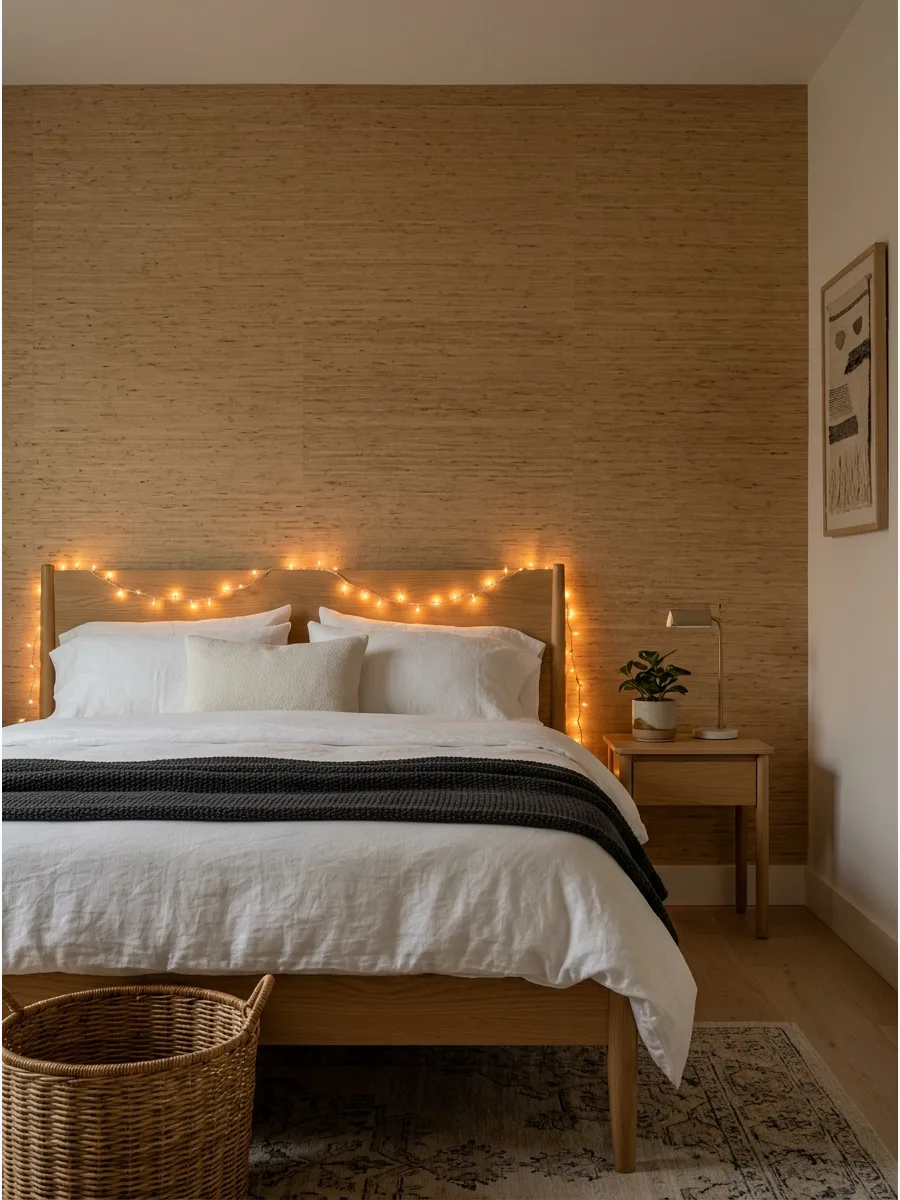
Grasscloth adds a unique organic texture and subtle horizontal lines that standard wallpaper cannot match. The natural fibers create slight color variations that give the wall a rich, handcrafted appearance.
Avoid using grasscloth in high-moisture rooms, as the natural fibers can warp or stain. Pair it with linen bedding and woven accents for a cohesive, earthy aesthetic.
- $200-$500 for a single feature wall
- Hire a professional if you are not comfortable with visible seams
- Use a soft brush to dust the wall periodically
Best shortcut: Buy faux grasscloth vinyl wallpaper for a similar look that is much easier to clean and install.
16. Tonal Striped Wallpaper
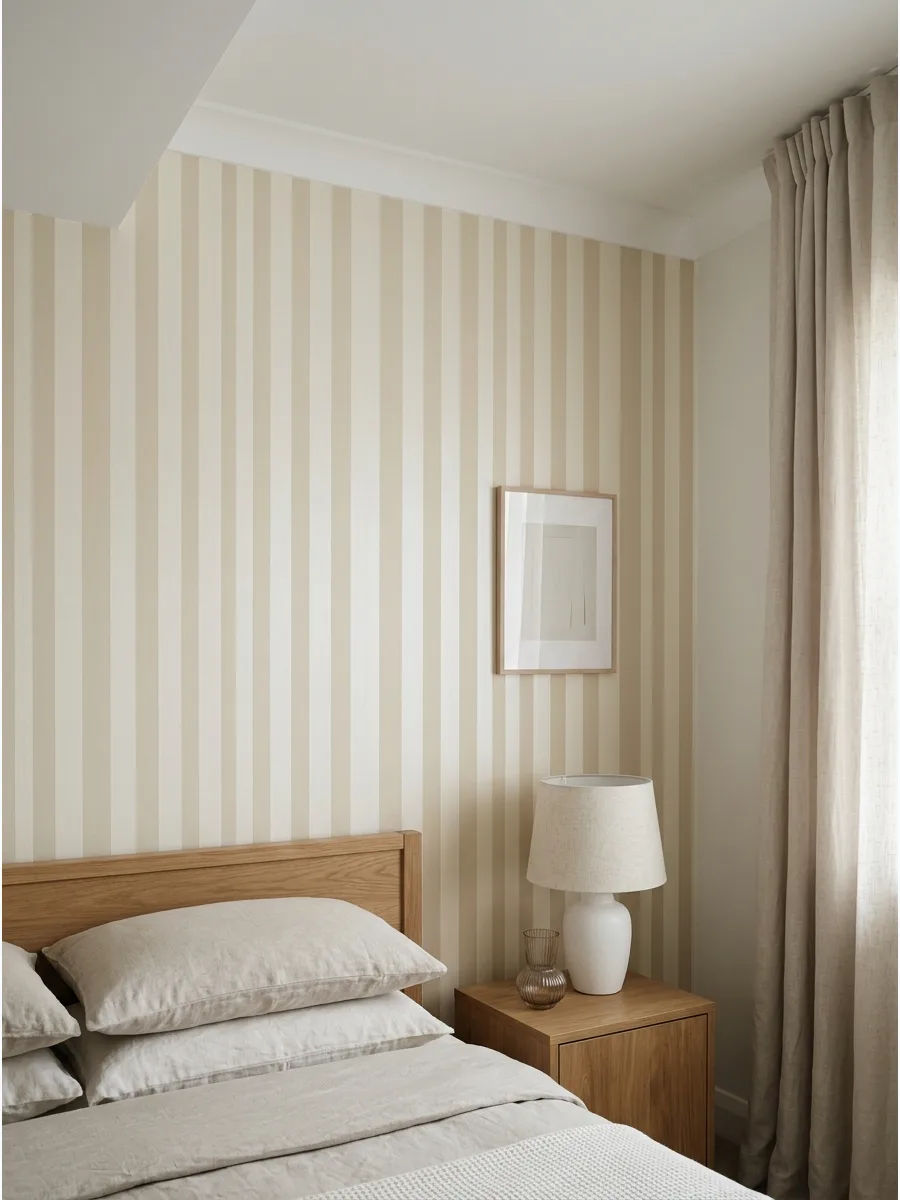
Tonal stripes create a sense of order and height without the visual noise of high-contrast patterns. Choosing colors like cream and beige allows the texture of the paper to stand out more than the print itself.
Install the stripes vertically to make a standard eight-foot ceiling feel significantly taller. Subtle patterns like these act as a neutral backdrop for bolder art pieces.
- Rolls cost $50 to $150 depending on the brand and material.
- Align the first strip with a plumb line for perfectly straight vertical lines.
- Try horizontal stripes in very narrow rooms to push the walls out visually.
Quick win: Use a matte finish wallpaper to prevent light glare from distorting the stripe colors.
17. Wallpaper Wrapped onto the Ceiling
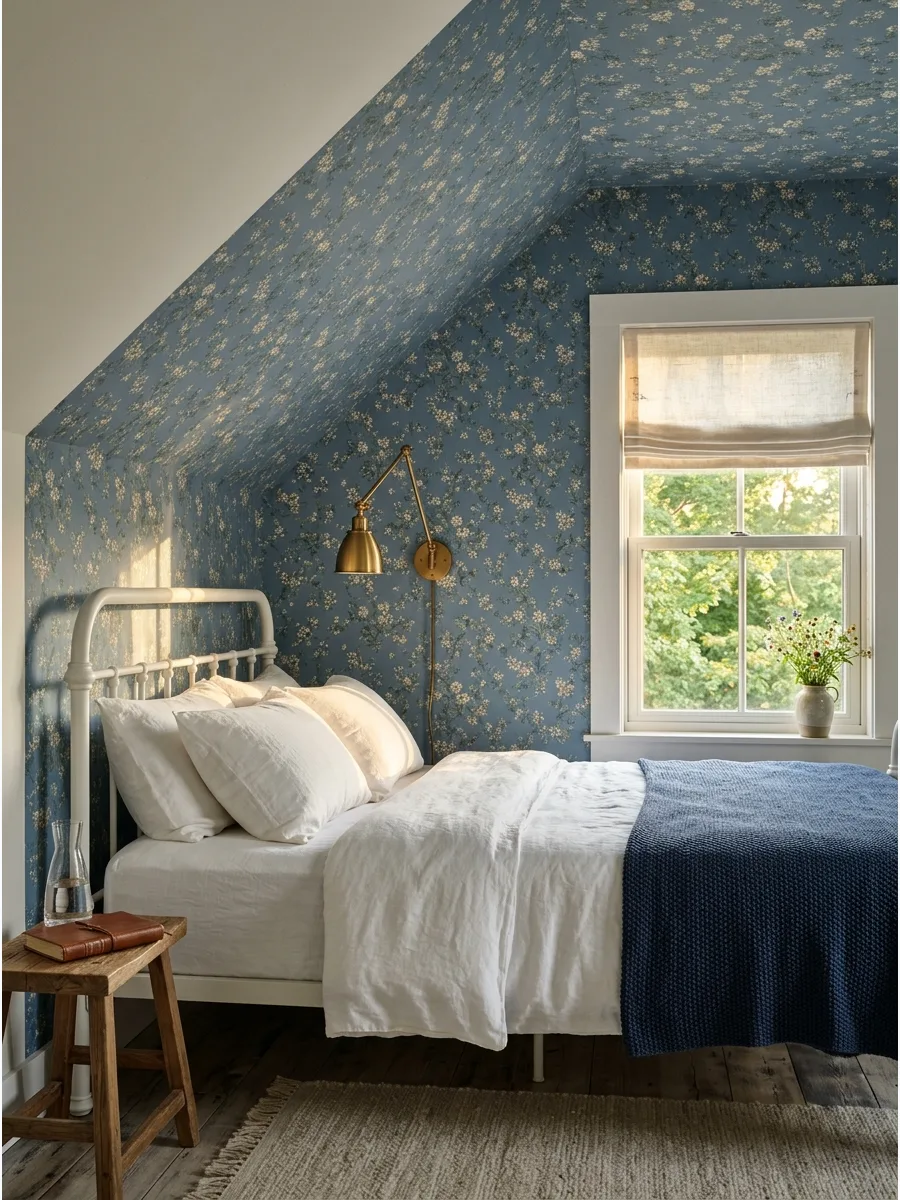
Extending wallpaper from the wall to the ceiling creates a canopy effect that feels incredibly intimate. This technique is a brilliant way to disguise awkward angles in an attic or a sloped room.
Stop the pattern at the first major ceiling joist or carry it over the entire bed area for a cocoon-like feel. It turns the ceiling from a forgotten surface into a major design element.
- Budget $200 to $400 for extra rolls and professional installation.
- Use extra adhesive on the ceiling portion to prevent gravity from peeling the edges.
- Choose a non-directional pattern so the transition from wall to ceiling looks seamless.
Most people skip this: Paint the remaining walls the exact background color of the wallpaper to unify the room.
18. Painted Ceiling and Feature Wall
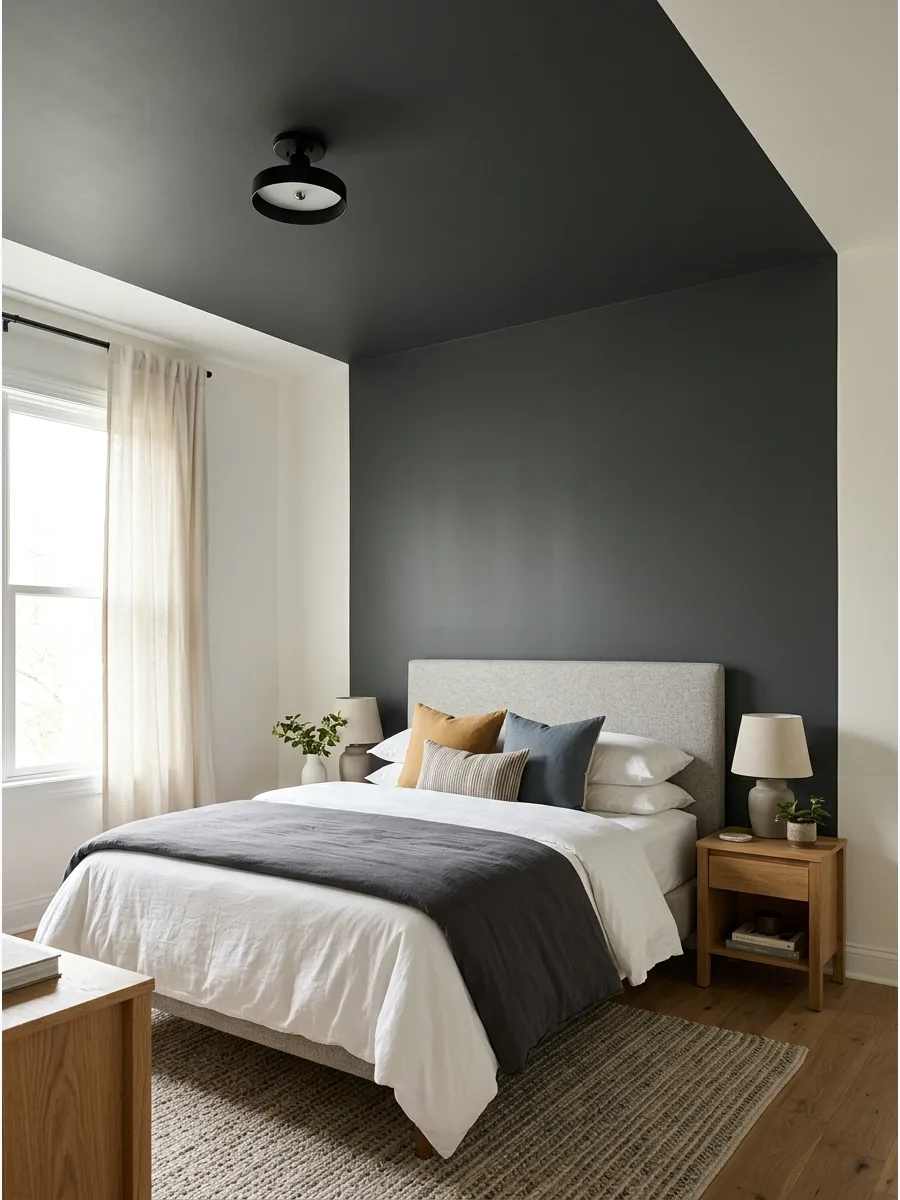
Painting the headboard wall and the ceiling the same color creates a block of color that defines the sleeping area. This works best when the other three walls stay a crisp, light neutral to provide contrast.
Select a flat or eggshell finish to keep the ceiling from reflecting too much light and looking oily. It is a high-impact way to make a large room feel more grounded and intentional.
- Two gallons of premium paint typically cover one feature wall and the ceiling area.
- Use high-quality painter's tape at the corners where the dark paint meets the light walls.
- This layout works best in rooms with plenty of natural light to prevent a cave-like feeling.
Best shortcut: Paint the ceiling first to avoid drips landing on the freshly finished feature wall.
19. Color-Drenched Headboard Wall
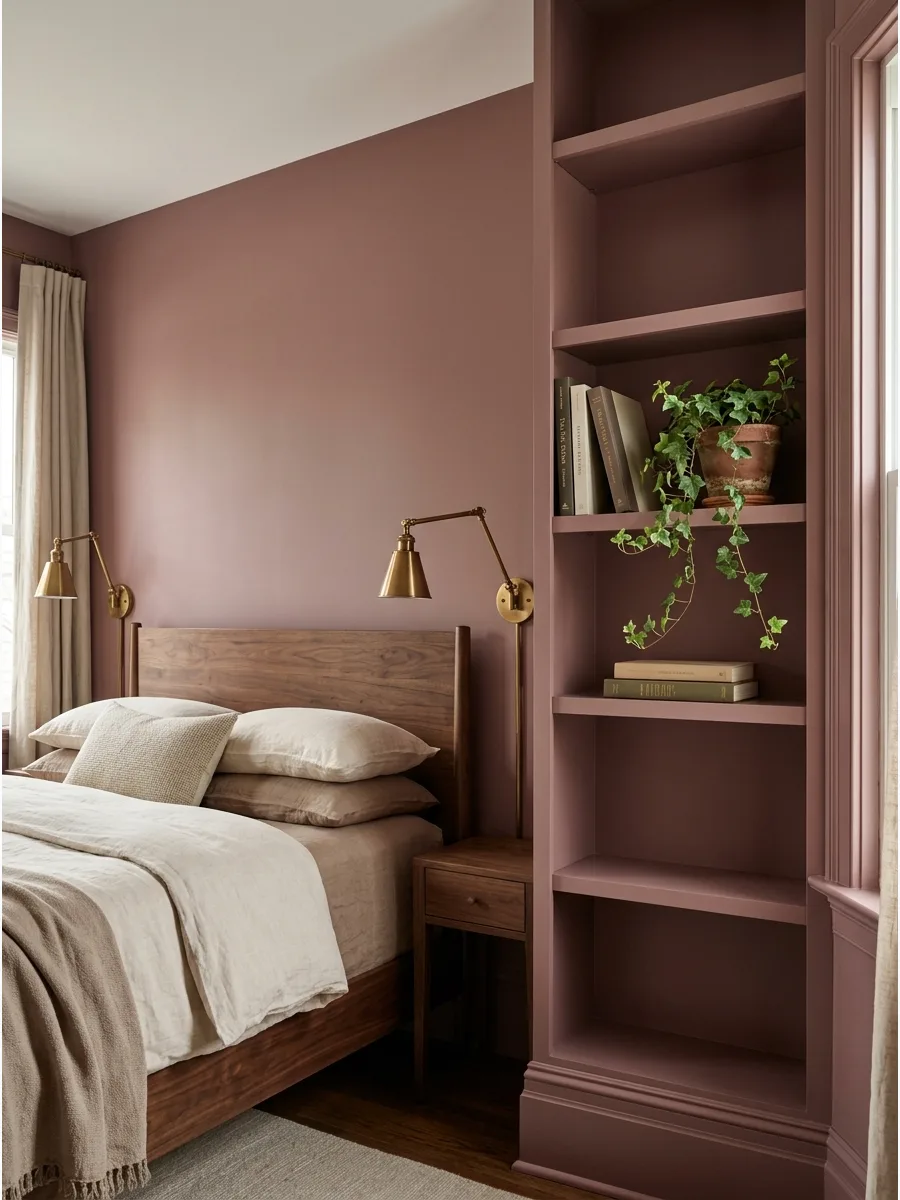
Color drenching involves painting everything on one wall, including baseboards and window trim, the same shade. This removes visual clutter and makes the architectural features of the wall blend into a single textured surface.
Use different sheens, like satin for trim and matte for the wall, to add subtle depth to the single color. It makes a bold statement without needing expensive materials.
- Requires different paint types for wood trim and drywall in the same color match.
- Sand the trim thoroughly before painting to ensure the color adheres to the wood.
- Darker colors like navy or forest green create the most dramatic drenching effect.
Most people skip this: Swap out plastic outlet covers for paintable versions to make them truly disappear.
20. Soft Ochre Feature Wall
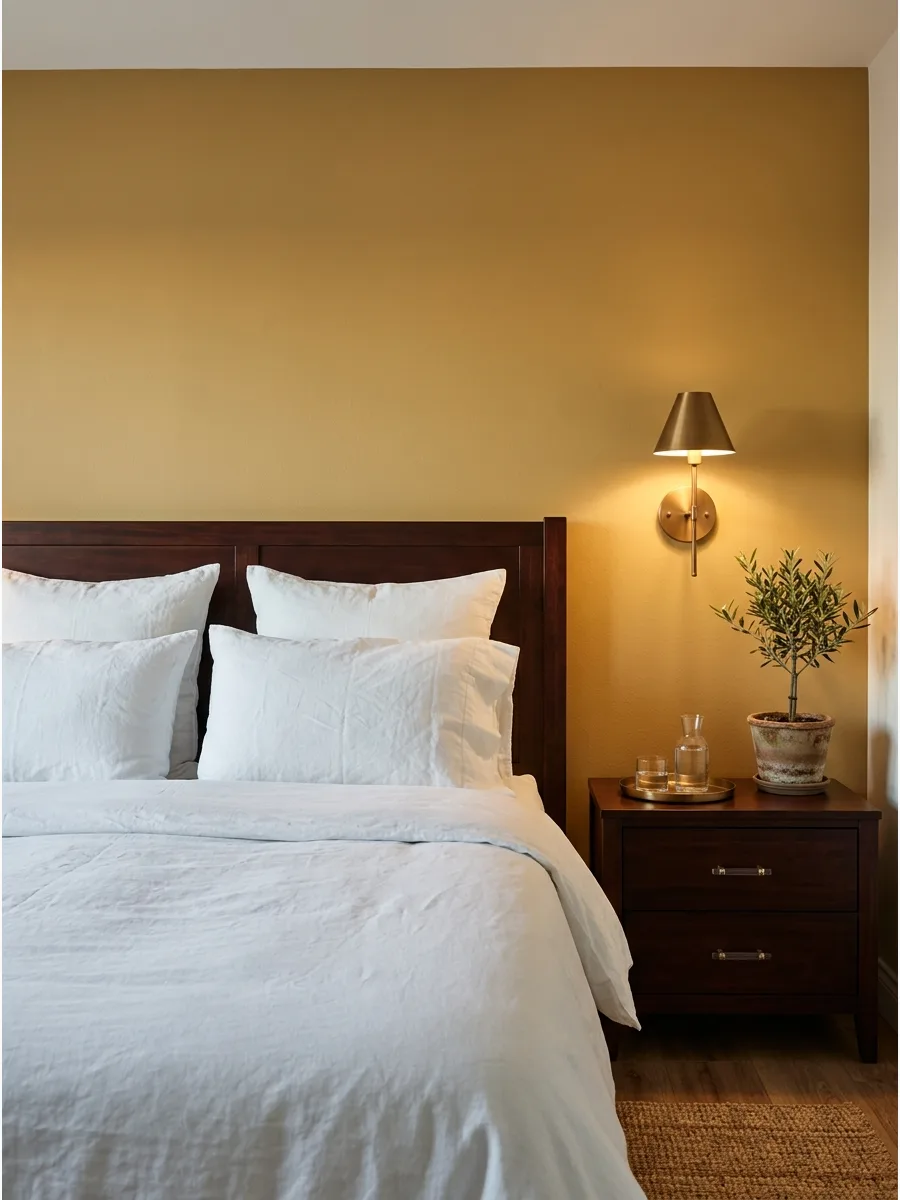
Ochre brings the warmth of sunshine into a bedroom without the intensity of bright yellow. It pairs beautifully with dark wood furniture and bronze hardware for a look that feels both vintage and modern.
Balance the golden tones with cool white bedding to keep the space from feeling too heavy. This color works exceptionally well in north-facing rooms that lack natural warmth.
- One gallon of paint is sufficient for a single standard feature wall.
- Test a large swatch at different times of day, as ochre can shift toward brown in low light.
- Incorporate woven textures like rattan or jute to complement the earthy yellow tones.
Quick win: Use black accents in frames or lamps to provide a sharp anchor for the warm ochre.
21. Muted Burgundy Wall
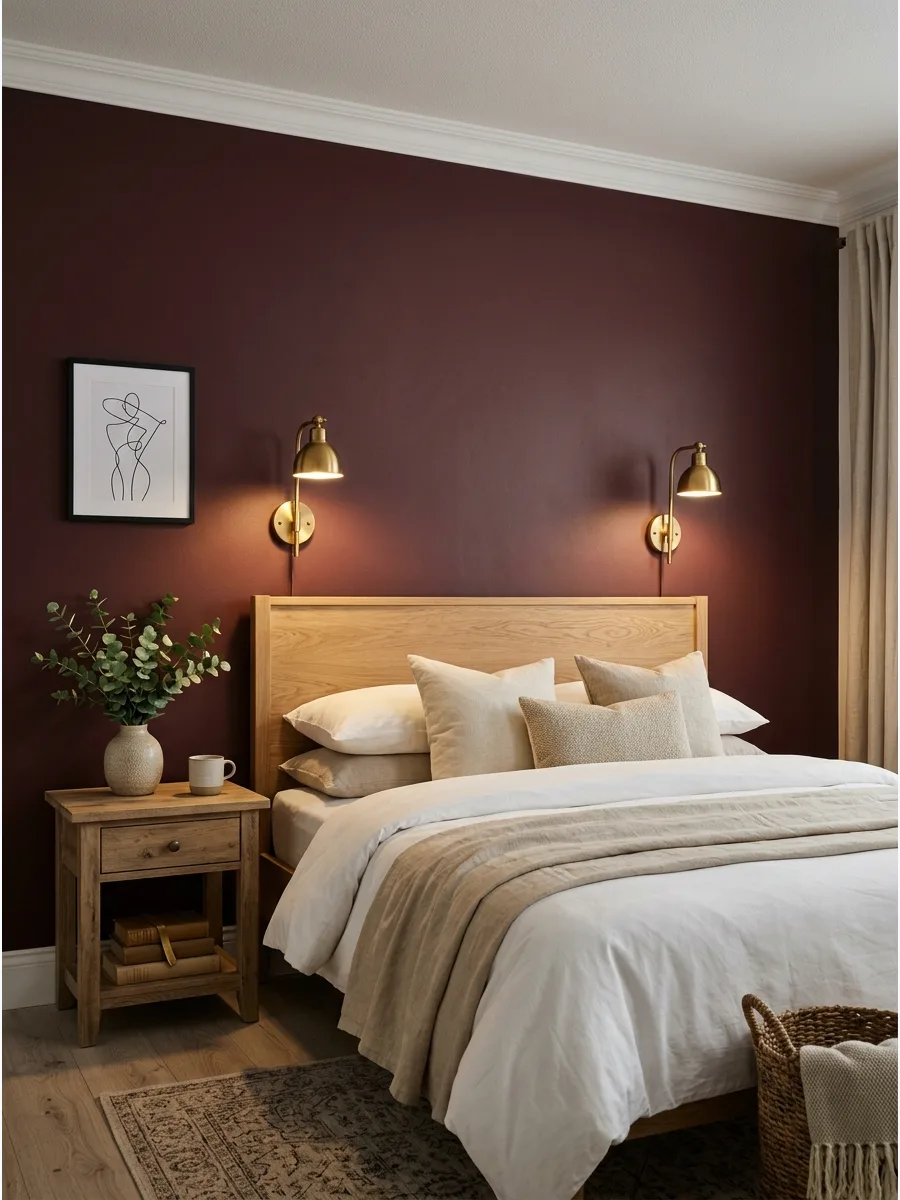
Burgundy is a sophisticated choice that adds instant depth and a sense of luxury to a bedroom. When paired with light oak and brass, it feels classic rather than dated.
Keep the rest of the room light and airy to let the dark red act as a focused anchor. It creates a cozy, library-like atmosphere that is perfect for winding down at night.
- Dark reds often require a tinted primer to achieve full color coverage in fewer coats.
- Style with cream or ivory textiles to brighten the overall look of the bed.
- Avoid high-gloss finishes which can make this color look like a commercial space.
Best shortcut: Use a small 4-inch roller for the edges to get a smoother finish than a brush provides.
22. Powder Blue Feature Wall
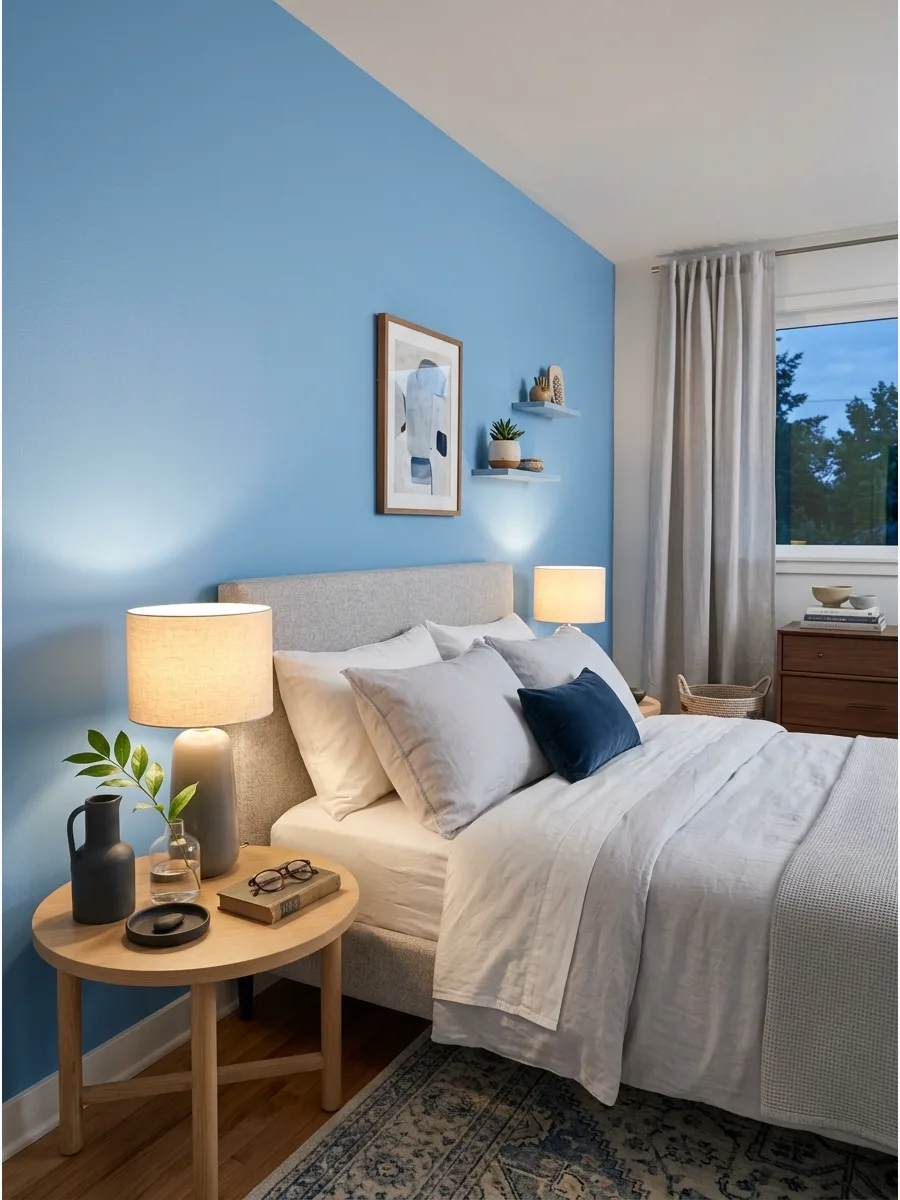
Powder blue offers a calm, spa-like feeling that encourages relaxation. It is a versatile color that works with both modern minimalist furniture and traditional cottage styles.
Layer different shades of white and gray in your bedding to create a sophisticated, monochromatic look. This light tone makes a small bedroom feel more open while still providing a clear focal point.
- Inexpensive update that can be completed in a single afternoon.
- Pairs best with cool-toned metals like silver or brushed nickel.
- Use a chalk-finish paint for a soft, velvety appearance on the wall.
Quick win: Add a piece of art with hints of orange or terracotta to create a pleasing color contrast.
23. Smoky Blue Paneling
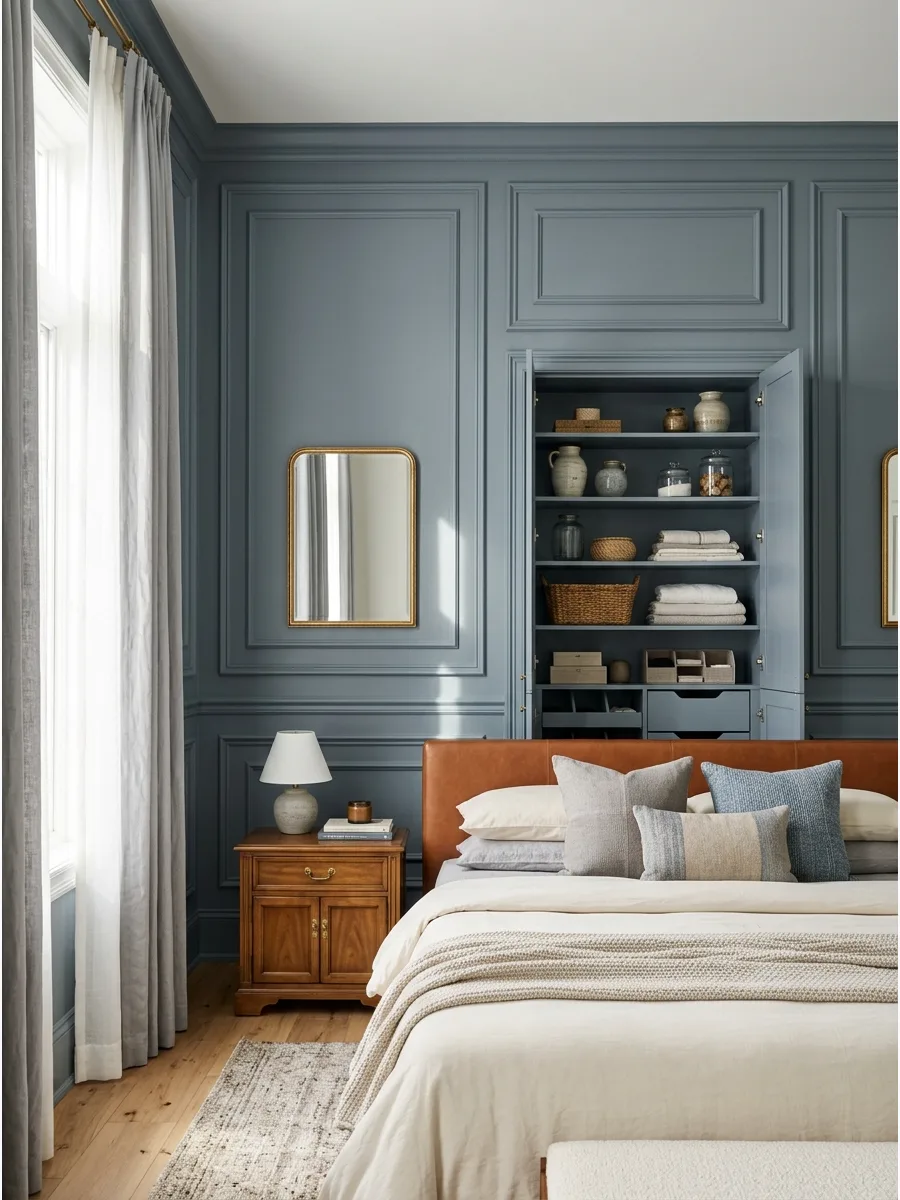
Combining architectural molding with a smoky blue paint adds structure and elegance to a flat wall. The shadows created by the paneling give the color more dimension and interest.
Choose a blue with gray undertones to ensure the wall feels mature and serene. It is an effective way to give a standard builder-grade room a custom, high-end feel.
- Molding kits or individual trim pieces are available at most home centers.
- Paint the molding and the wall the same color for a seamless, architectural look.
- Space the panels evenly based on the width of your headboard for a balanced layout.
Most people skip this: Use a wood filler on all the trim joints before painting to make the paneling look like one solid piece.
24. Earthy Mauve Wall
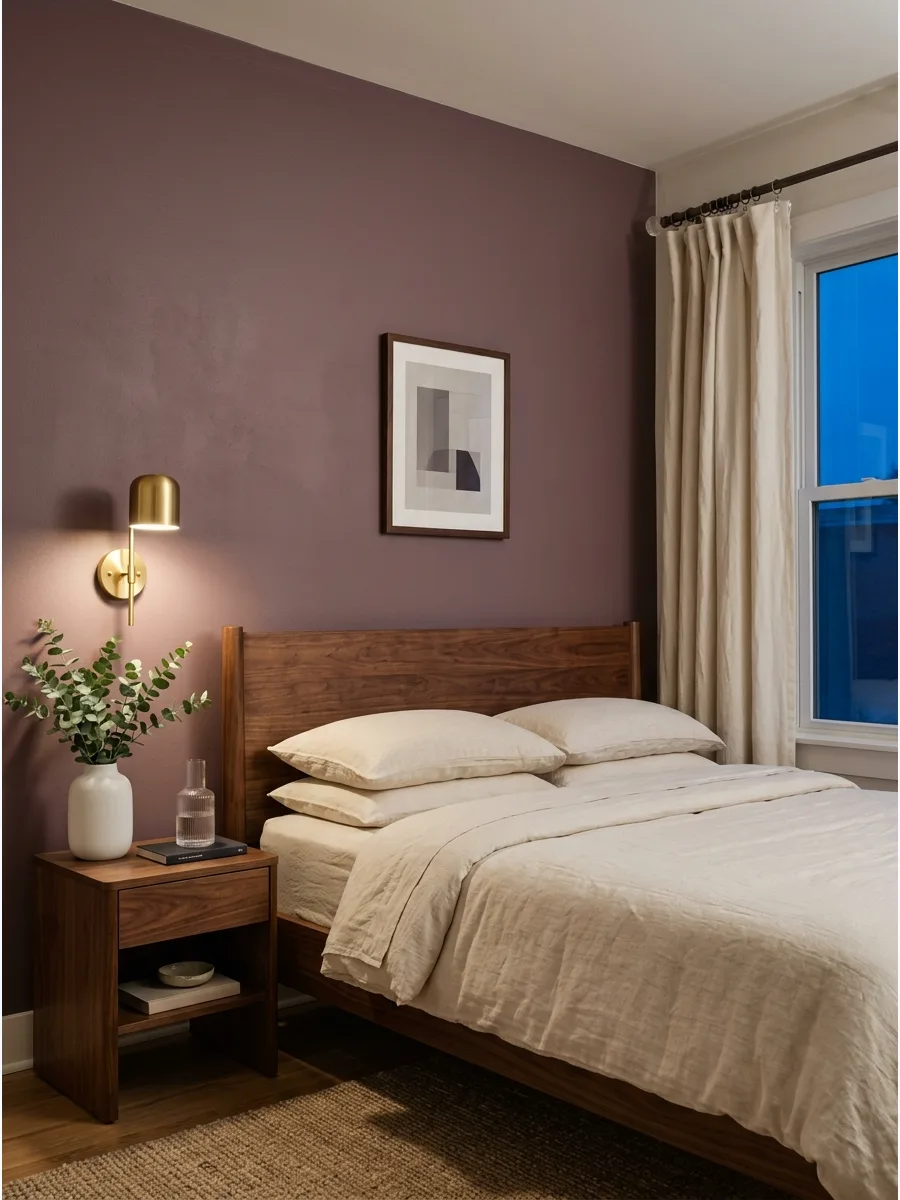
Earthy mauve is a grown-up version of pink that feels warm and grounded rather than sugary. It acts as a bridge between a neutral and a color, making it very easy to style with existing furniture.
Mix in walnut wood and cream textiles to highlight the purple-brown undertones of the paint. This shade creates a romantic but modern backdrop that changes beautifully with the evening light.
- Works best with warm-toned light bulbs to bring out the pink hues.
- One of the most forgiving colors for hiding minor wall imperfections.
- Keep accessories minimal to let the unique wall color be the star.
Quick win: Use a textured linen duvet cover to mimic the soft, organic feel of the mauve paint.
25. Coral Plaster-Effect Wall
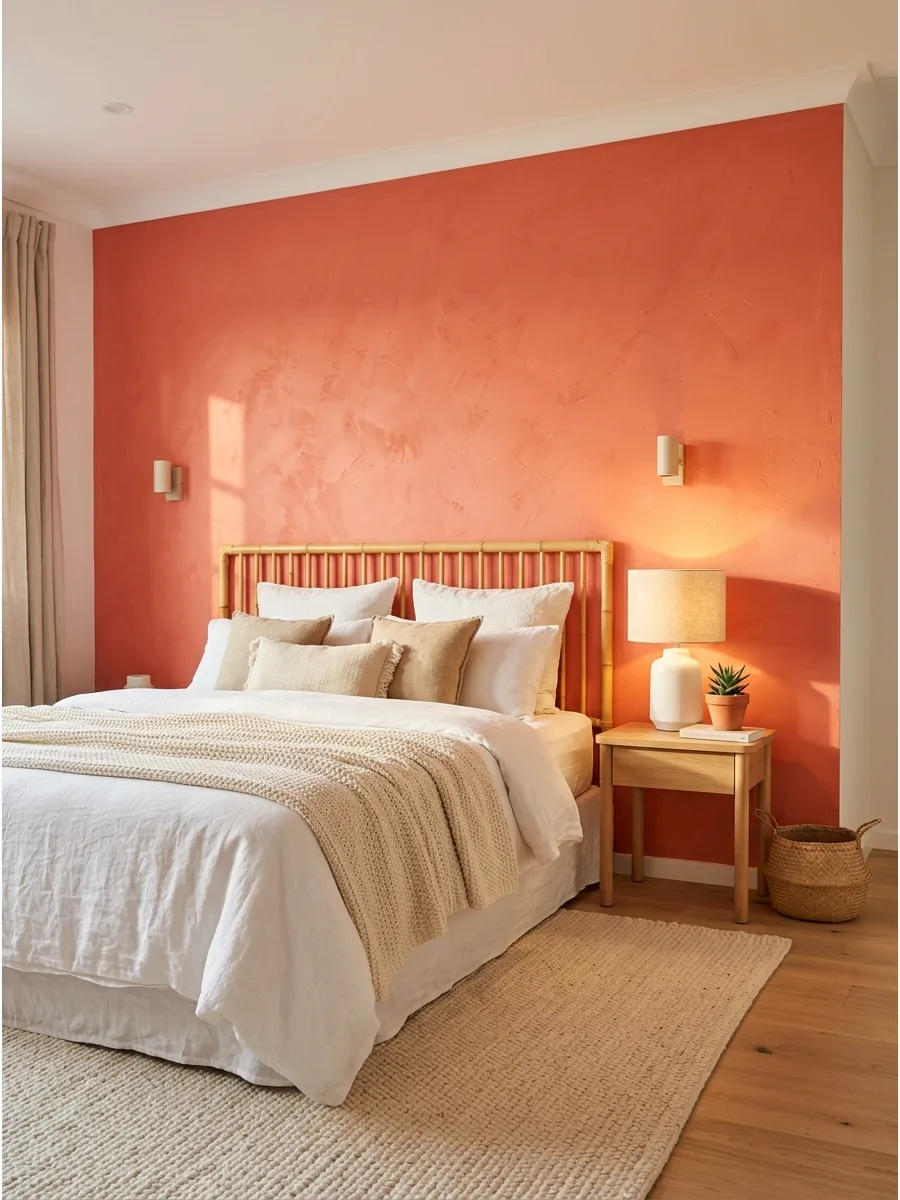
A coral wall with a plaster finish adds both vibrant color and tactile texture to the room. The variation in the plaster prevents the coral from feeling overwhelming or flat.
Style the area with bamboo or light wood to lean into a Mediterranean or tropical aesthetic. It provides a cheerful energy that makes the bedroom feel personalized and unique.
- Use a specialty plaster paint or a color-wash technique to get the mottled look.
- Requires a wide trowel or a large sponge for application.
- Balance the bright coral with plenty of neutral whites and tans in the room.
Best shortcut: Apply the plaster in random, overlapping X motions to create a natural, hand-applied look.
26. Two-Tone Feature Wall
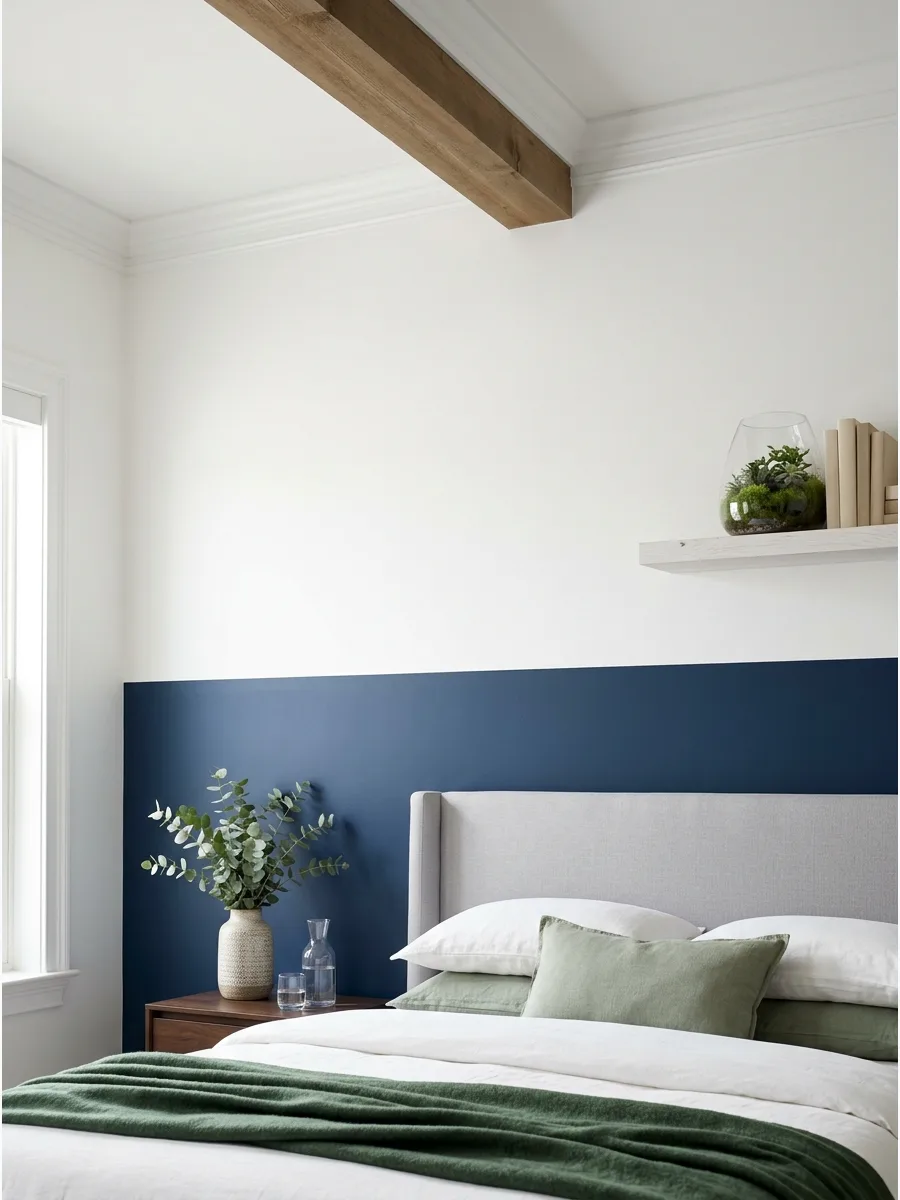
Dividing a wall horizontally is a clever way to introduce color without committing to a full dark wall. Placing the darker color on the bottom half creates a visual ground for the bed.
Align the paint transition with the top of your headboard or a few inches above for a custom look. This technique is especially useful in rooms with high ceilings to make them feel more proportionate.
- Use a laser level to ensure the dividing line is perfectly horizontal across the wall.
- Apply the lighter color first and let it dry completely before taping for the darker color.
- This is a great budget-friendly alternative to installing a chair rail.
Most people skip this: Paint the baseboards the same color as the bottom section to make the wall feel taller.
27. Ombre Painted Wall
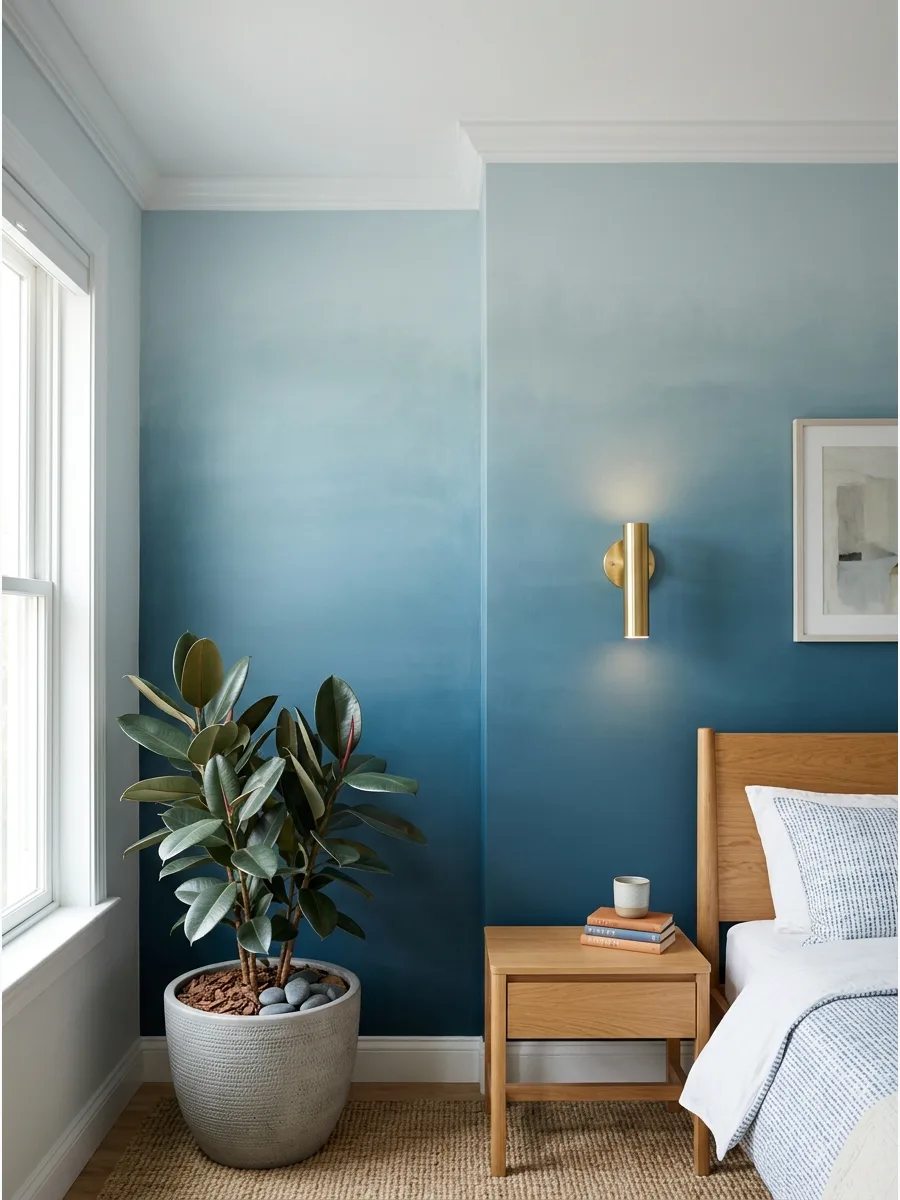
An ombre wall creates a soft, ethereal look that mimics the sky or a misty landscape. By blending a dark color at the bottom into a light color at the top, you draw the eye upward.
Use a dry brush or a damp sponge to blend the colors where they meet while the paint is still wet. It provides a custom, artistic touch that feels much softer than a solid block of color.
- Choose three shades from the same color strip for the most natural transition.
- Work in small sections to ensure the paint does not dry before you can blend it.
- This technique works best on smooth walls rather than heavily textured surfaces.
Best shortcut: Use a spray bottle with water to keep the paint edges workable longer while blending.
28. Painted Arch Behind the Bed
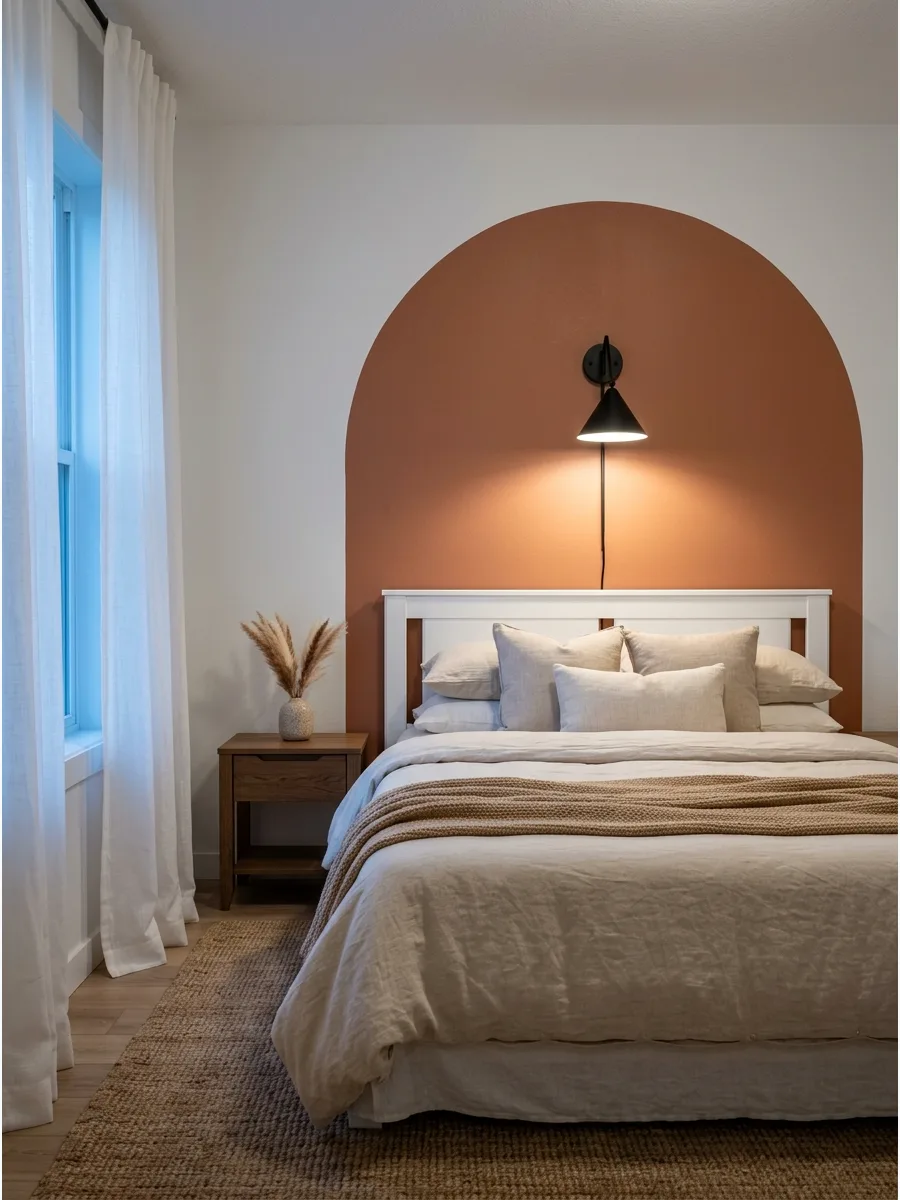
Painting a large arch is a fast, low-cost way to create a focal point and frame your bed. It mimics the look of expensive architectural niches without any construction.
Measure the width of your bed and add six inches to each side to determine the arch width. This shape adds a soft, organic element to a room filled with hard corners and straight lines.
- Use a string and a pencil as a compass to draw a perfect curve on the wall.
- A quart of paint is usually enough to complete this project.
- Choose a color that is at least three shades darker than the main wall for enough contrast.
Quick win: Use a flexible painter's tape designed for curves to get a crisp edge on the arched top.
29. Plaster Arch Niche
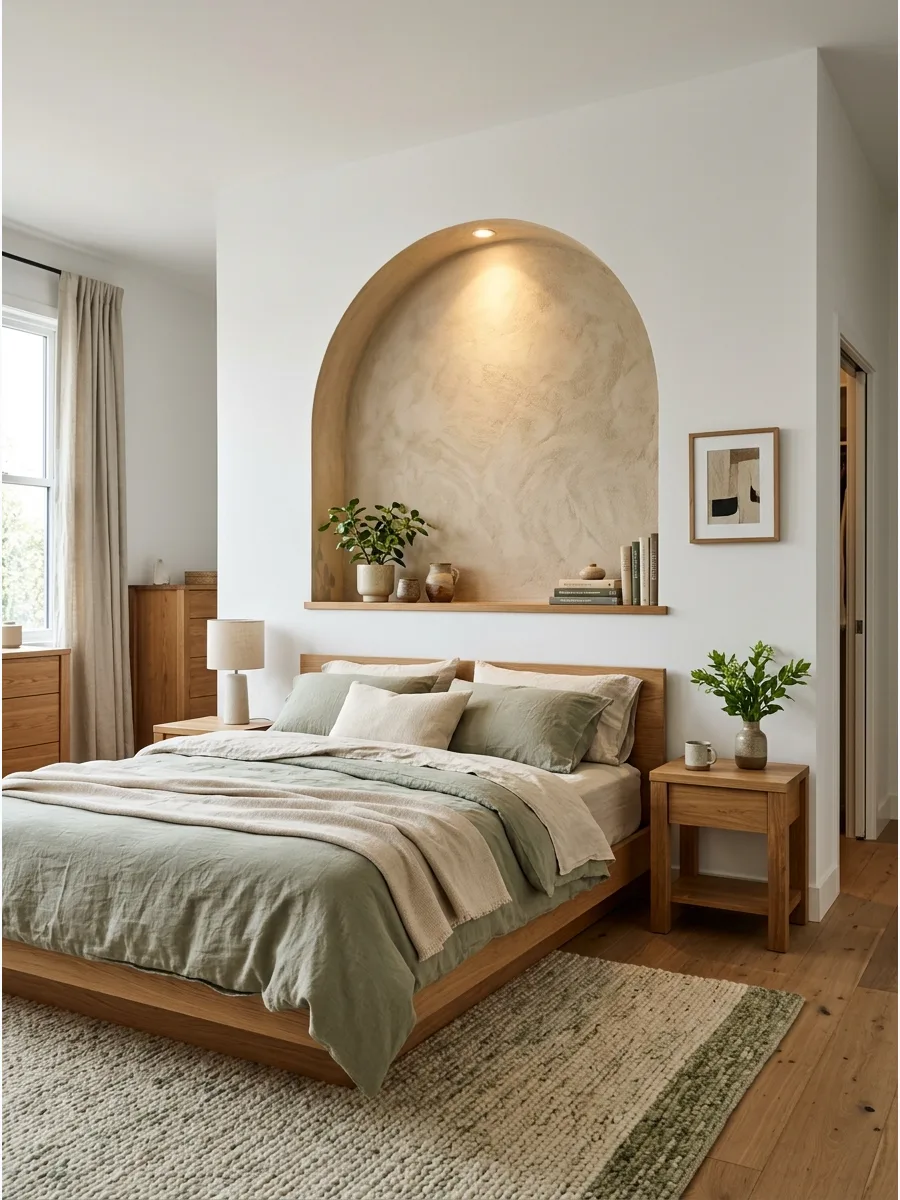
A shallow recessed arch built into the wall provides a permanent architectural feature that feels incredibly high-end. Finishing the inside with textured plaster or limewash adds even more depth.
Install a small LED strip or a puck light at the top of the niche for a soft glow. It acts as a built-in headboard and eliminates the need for bulky wall art.
- Requires basic framing and drywall skills or a professional contractor.
- Keep the depth between 2 and 4 inches so it does not eat into the room floor space.
- Finish with a matte plaster to emphasize the shadows and the curve.
Most people skip this: Ensure the arch is high enough so that you do not hit your head on the ledge when sitting up in bed.
30. Scalloped Feature Wall
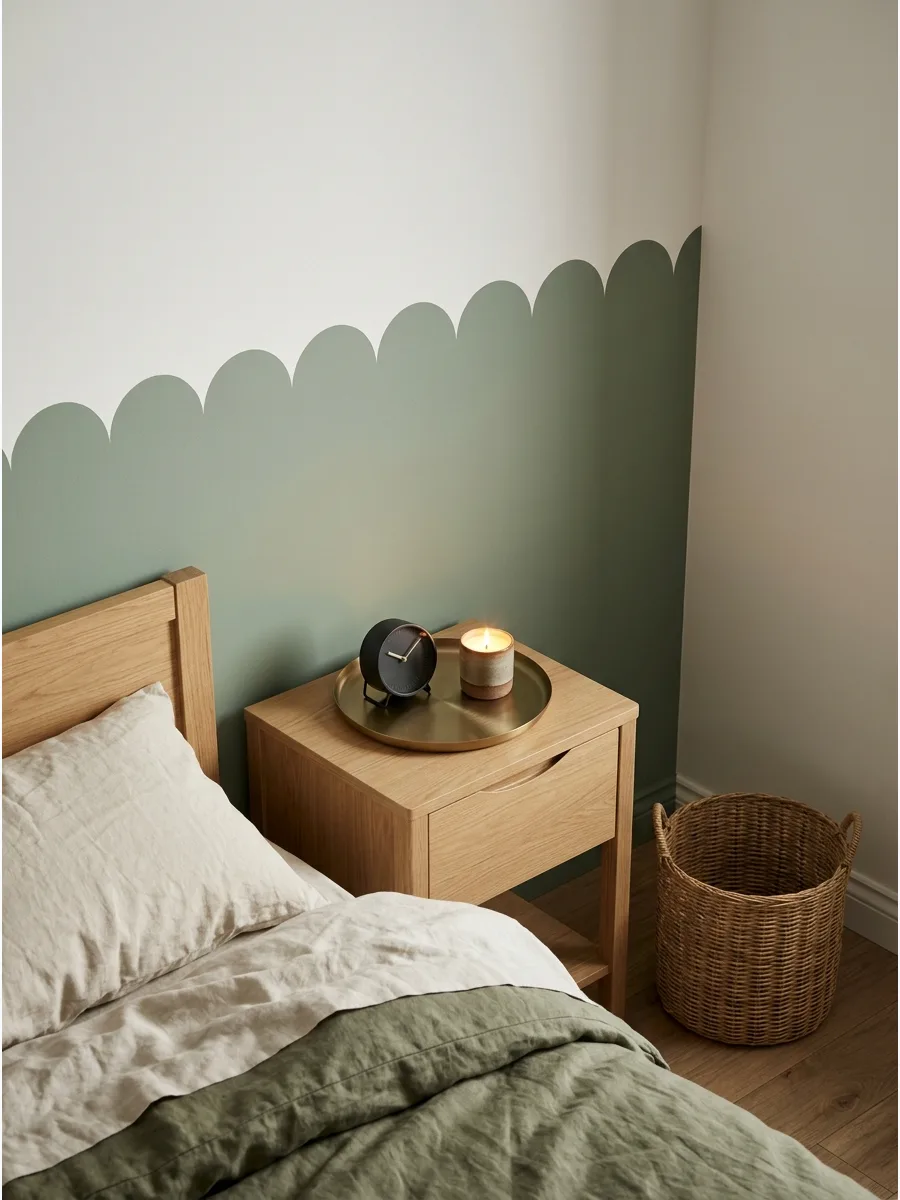
Scalloped edges bring a playful, custom feel to a bedroom wall. Whether you use paint or thin wood molding, the repeated curves add a soft rhythm to the space.
Use a circular object like a dinner plate or a large bowl to trace consistent curves before painting. It is a charming choice for a guest room or a cottage-style bedroom that needs a bit of personality.
- Works best on a single wall to avoid making the room feel too busy.
- Use a small artist brush to hand-paint the curved edges for precision.
- Paint the scallops in a contrasting color to the main wall to make the shape pop.
Quick win: If you are not confident painting curves, use scalloped wall decals for the same look with zero mess.
31. Asymmetrical Color Block
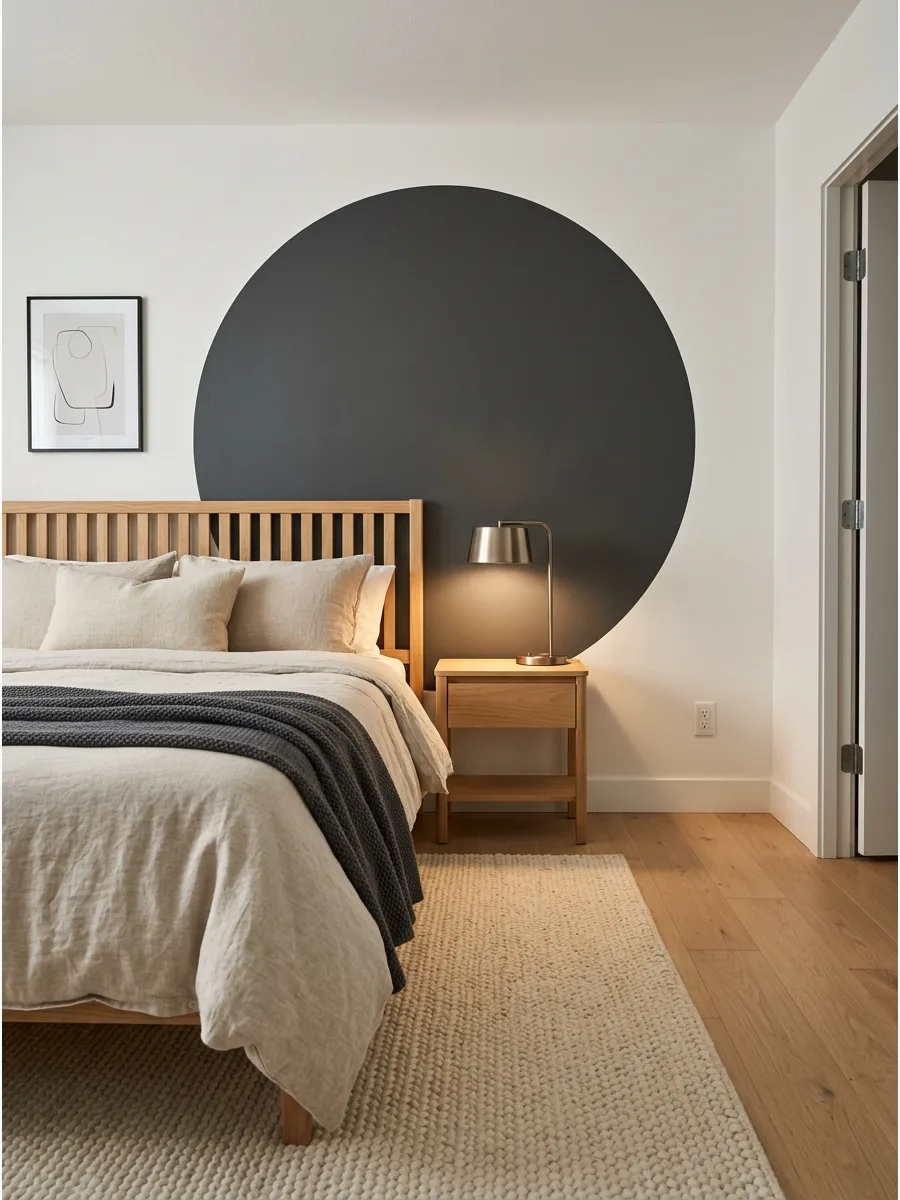
Paint a large, off-center shape like a circle or rectangle behind the bed to break up a plain wall. Coordinate the paint color with a rug or throw to make the design feel intentional rather than random.
Use painter's tape to map out the shape first to ensure the proportions look balanced with the furniture. This technique works best when the shape overlaps the edge of the headboard to anchor the bed to the wall.
- Budget-friendly project taking 2-3 hours
- Use a string and pencil to trace a perfect circle before painting
- Swap bold colors for soft pastels in small rooms to keep the space open
Quick win: Use a flat or matte finish for the shape to prevent light glare from distorting the geometry.
32. Reclaimed Wood Wall
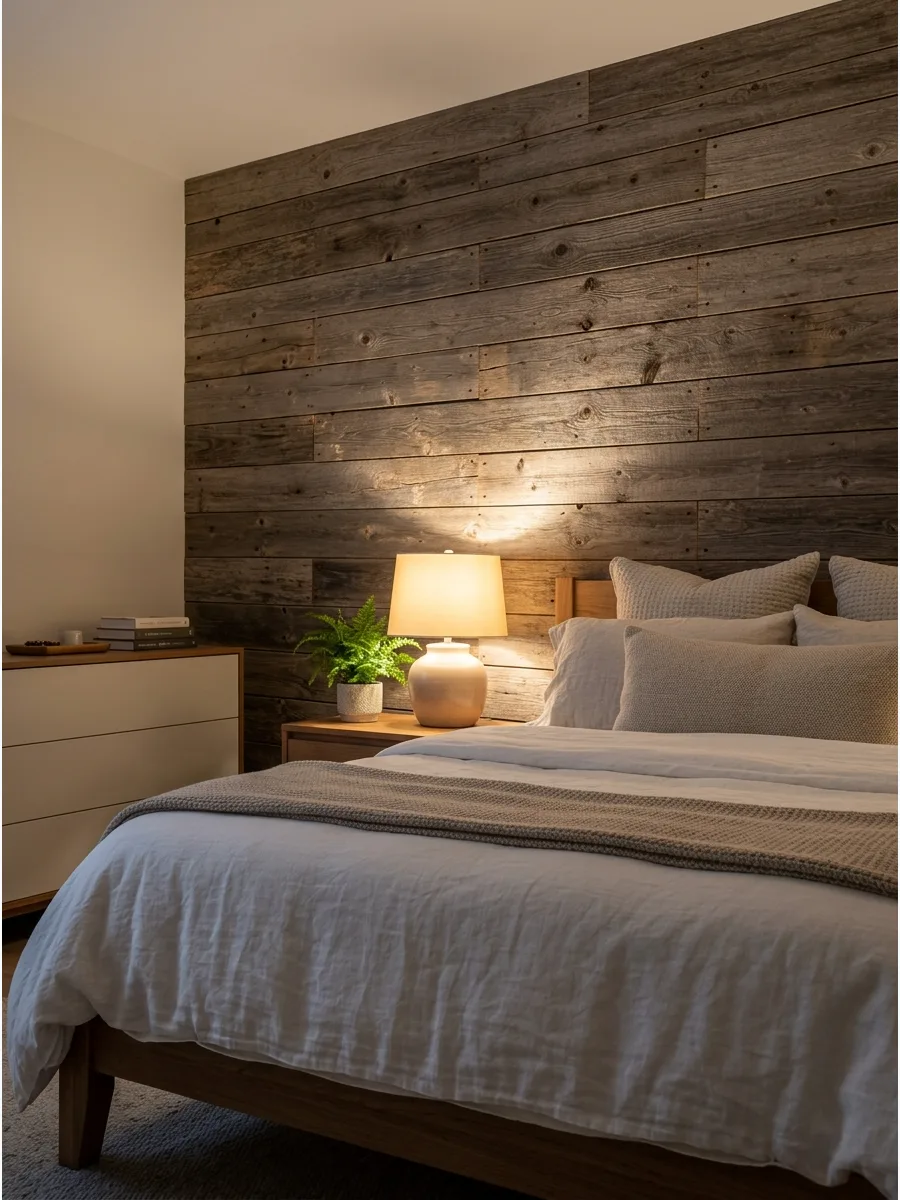
Install salvaged timber boards horizontally to bring natural texture and warmth into the sleeping area. A light white-wash or matte sealant protects the wood while letting the original grain and knots show through.
Stagger the joints between boards to avoid creating vertical lines that make the wall look like a fence. Real wood provides better sound insulation than thin peel-and-stick alternatives.
- Moderate budget depending on the wood source
- Secure boards directly into wall studs for safety and stability
- Use peel-and-stick wood planks for a faster, renter-friendly version
Most people skip this: Sand the edges of reclaimed boards before installation to prevent snags on pillows or bedding.
33. Light Oak Japandi Wall
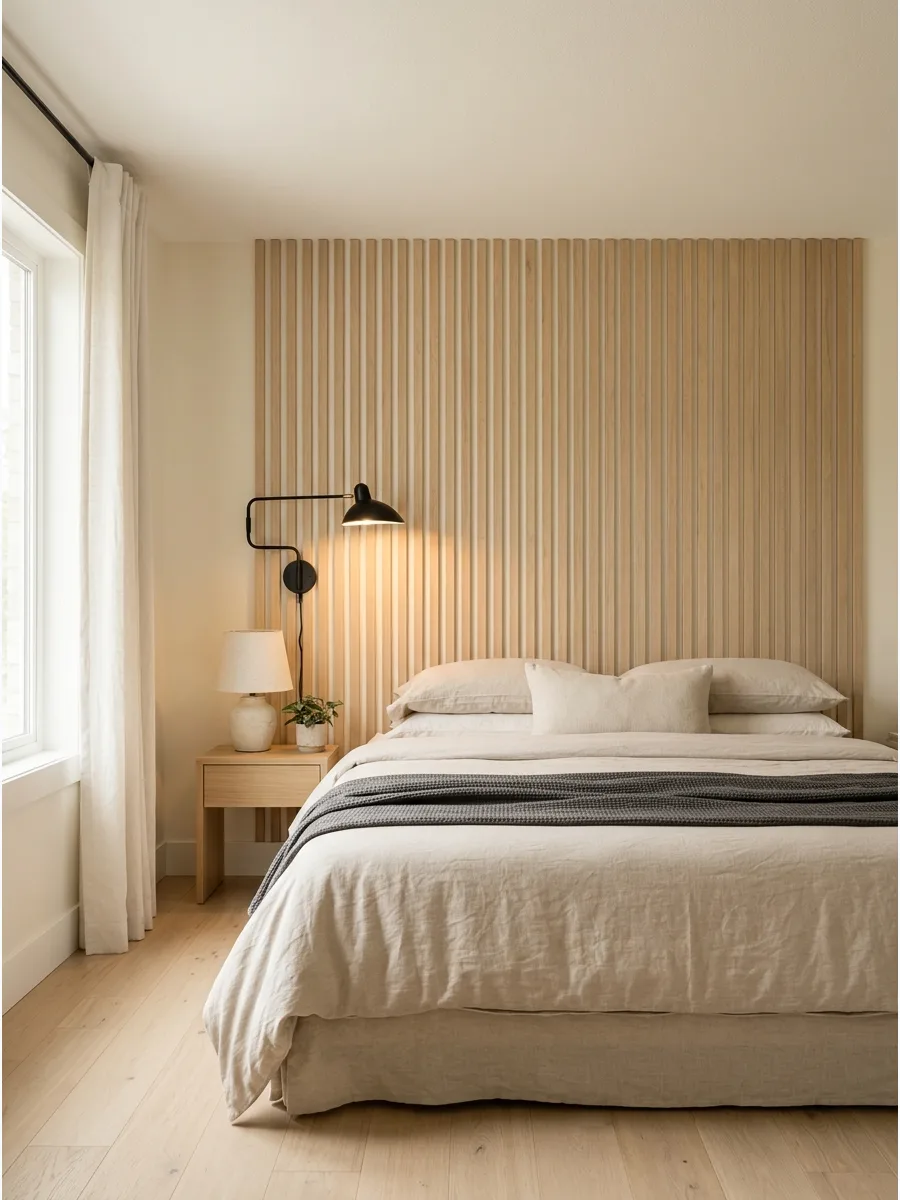
Use pale oak slats or panels to create a serene, minimalist backdrop that feels both modern and organic. Pair the wood with warm white walls and low-profile furniture to maintain a sense of openness.
Keep the spacing between slats consistent by using a spare piece of wood as a spacer during installation. This style creates a spa-like atmosphere that encourages rest and relaxation.
- High-end look achievable with pre-made DIY slat kits
- Install over a dark painted wall for extra depth behind the slats
- Choose pre-finished wood to save time on staining and sealing
Best shortcut: Paint the wall behind the slats black or navy to create a high-contrast shadow line.
34. Dark Wood Cocoon Wall
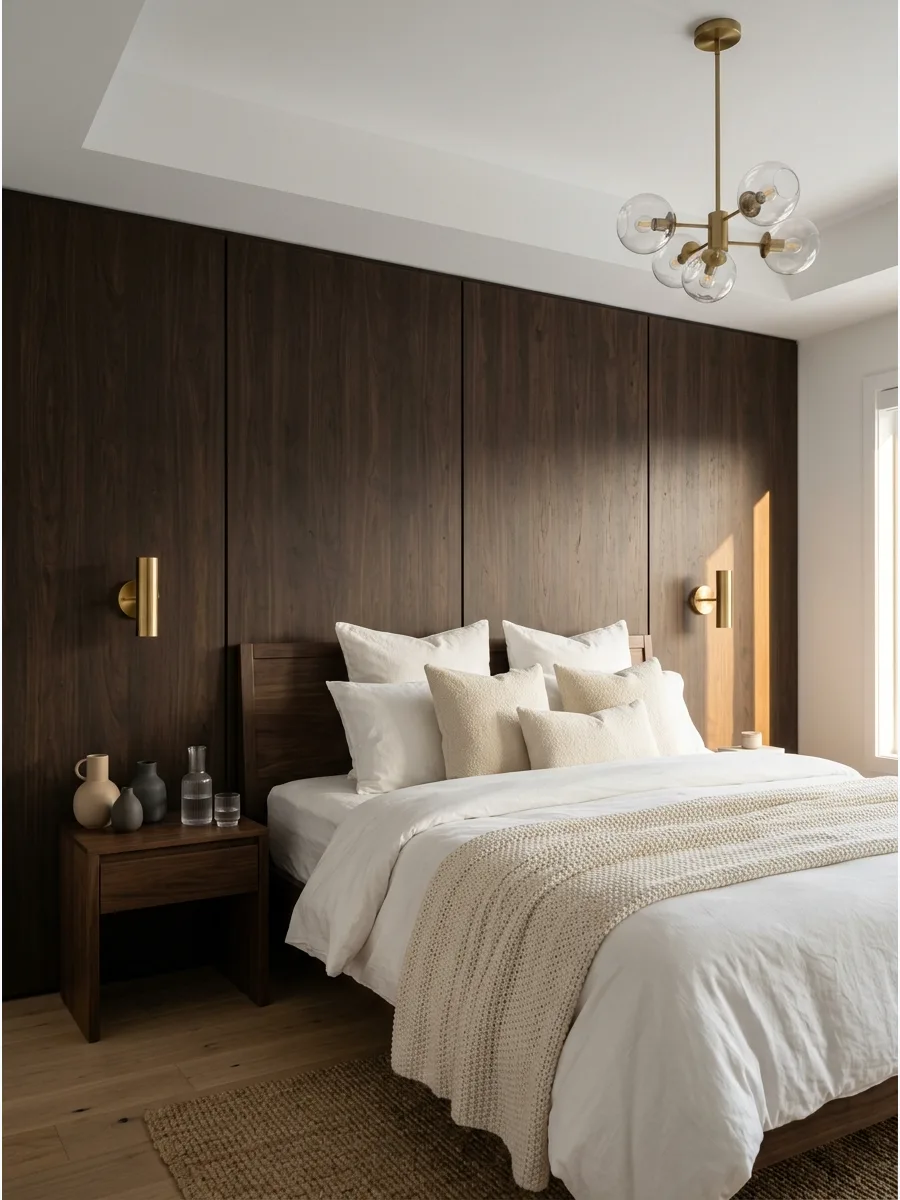
Cover the wall behind the bed in dark-stained timber to create a moody and intimate environment. Contrast the deep tones with crisp white bedding and warm metallic accents like brass or copper.
Install the panels all the way to the ceiling to make the room feel taller and more cohesive. Dark wood works exceptionally well in large bedrooms that need to feel more grounded and cozy.
- Investment piece for a long-term home improvement
- Use a hidden cleat system for a seamless look without visible nails
- Add a large mirror on the opposite wall to bounce light around the room
Quick win: Use a satin finish stain to allow just enough light reflection so the dark wall doesn't feel like a black hole.
35. Cane or Rattan Panel Wall
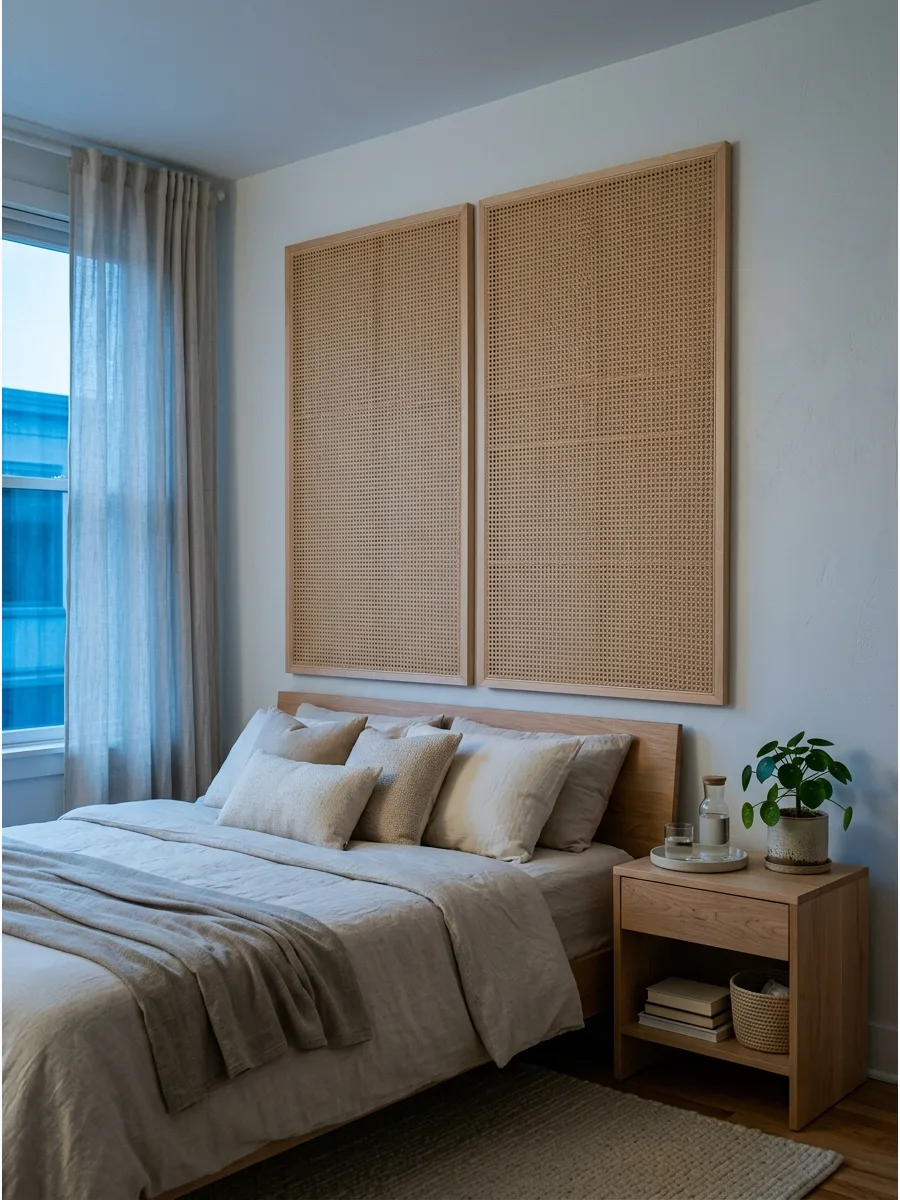
Frame large sections of woven cane or rattan with thin wood trim for a breezy, tropical aesthetic. This material adds significant visual interest and texture without the weight of solid wood or stone.
Soak the cane webbing in water before installing so it dries tight and flat against the wall. It is an excellent choice for adding a handmade, artisanal feel to a builder-grade room.
- Affordable material available in rolls for custom sizing
- Secure the cane with a heavy-duty staple gun before adding trim
- Paint the frames the same color as the wall for a subtle, tonal look
Best shortcut: Use pre-made cane radiator covers or screens as ready-to-hang wall art if you want to avoid DIY framing.
36. Cork Feature Wall
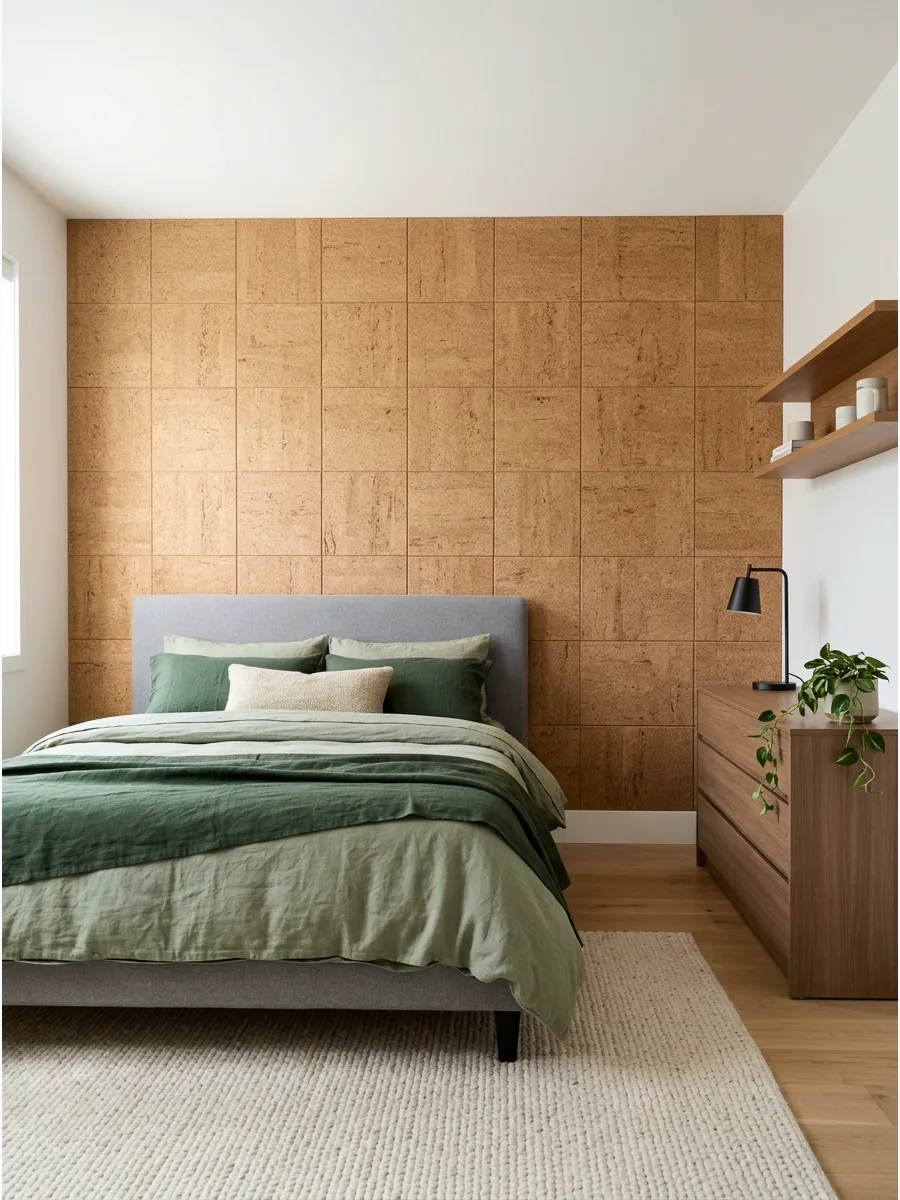
Apply thick cork tiles to the wall to introduce a soft, earthy texture that also helps dampen noise. The natural variation in cork provides a sophisticated look that pairs perfectly with modern, clean-lined furniture.
Vacuum the cork tiles after installation to remove any loose dust or debris before placing the bed. Cork is naturally antimicrobial and eco-friendly, making it a healthy choice for a sleeping space.
- Low to mid-range cost for a full feature wall
- Use a strong contact adhesive for a permanent, secure bond
- Choose darker smoked cork for a more formal or library-inspired vibe
Most people skip this: Let the cork tiles acclimate to the room's humidity for 48 hours before sticking them to the wall.
37. Acoustic Felt Panel Wall
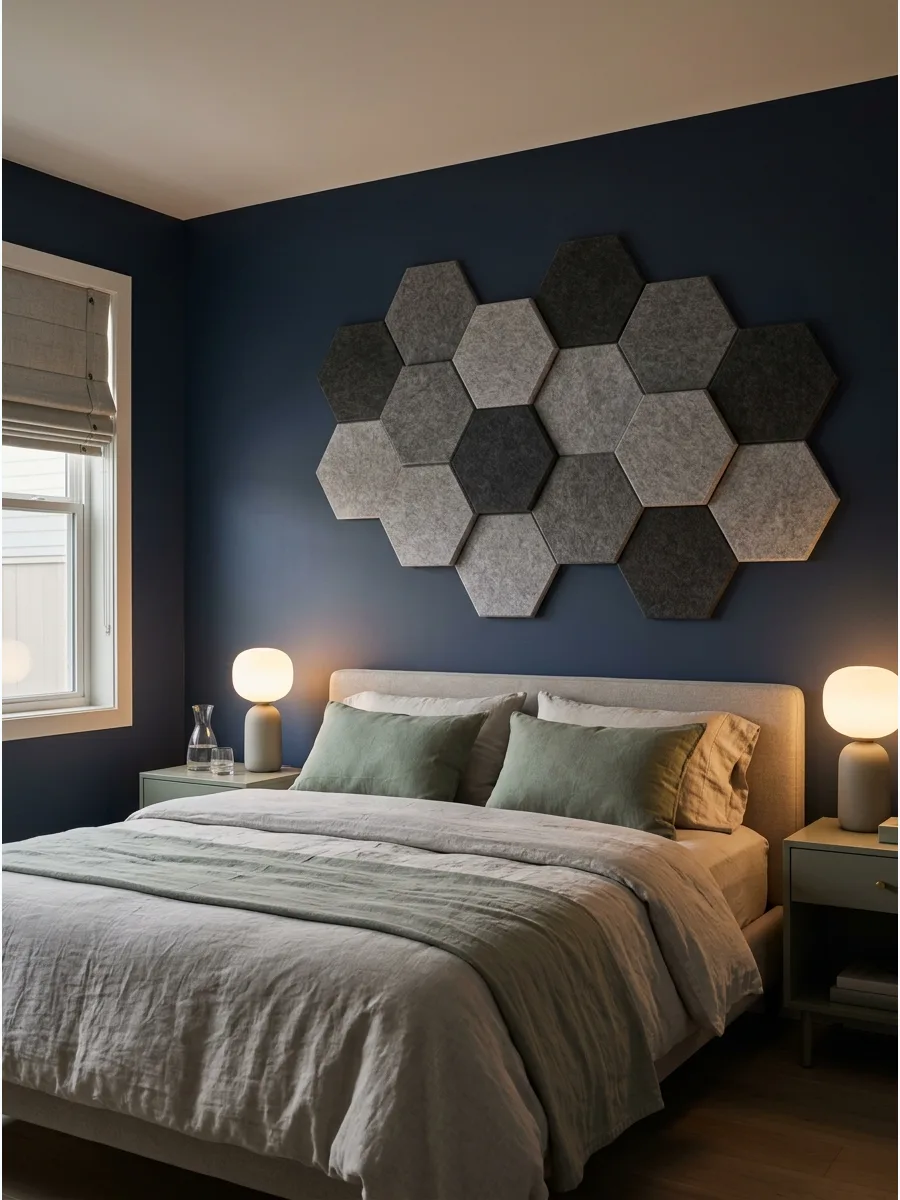
Arrange geometric felt panels in a custom pattern to create a soft, sound-absorbing focal point. These panels come in various colors and can be cut easily to fit around outlets or light switches.
Mix two similar shades of the same color to create a subtle 3D effect without overwhelming the room. This is a practical solution for apartments where blocking out hallway or neighbor noise is a priority.
- Budget-friendly and lightweight material for DIYers
- Use command strips for a renter-friendly and removable installation
- Choose felt made from recycled plastic for a sustainable decor option
Quick win: Map your pattern on the floor first to ensure you have enough panels to cover the desired area.
38. Microcement Feature Wall
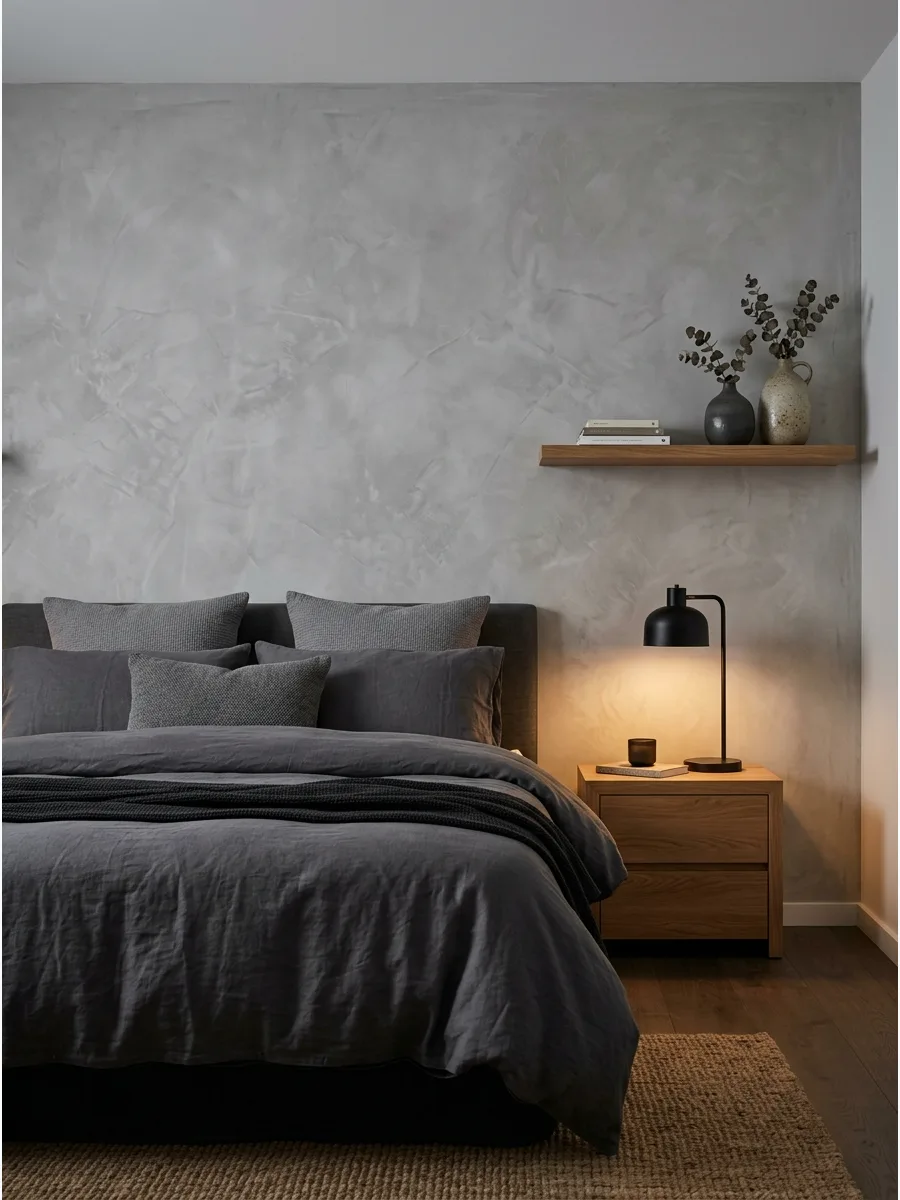
Apply a thin layer of microcement to achieve a smooth, industrial-chic surface with beautiful tonal movement. This finish offers the look of solid concrete but is light enough to be applied over existing drywall.
Work in small sections and use a trowel to create a randomized, hand-applied texture. It provides a cool, architectural backdrop that makes colorful bedding or wooden furniture pop.
- Requires some skill or a professional application for best results
- Apply a matte sealer to prevent staining from headboard contact
- Use a warm-toned gray to keep the concrete from feeling cold
Most people skip this: Prime the wall with a high-grit primer to help the microcement bond properly to the smooth drywall.
39. Limewashed Brick Wall
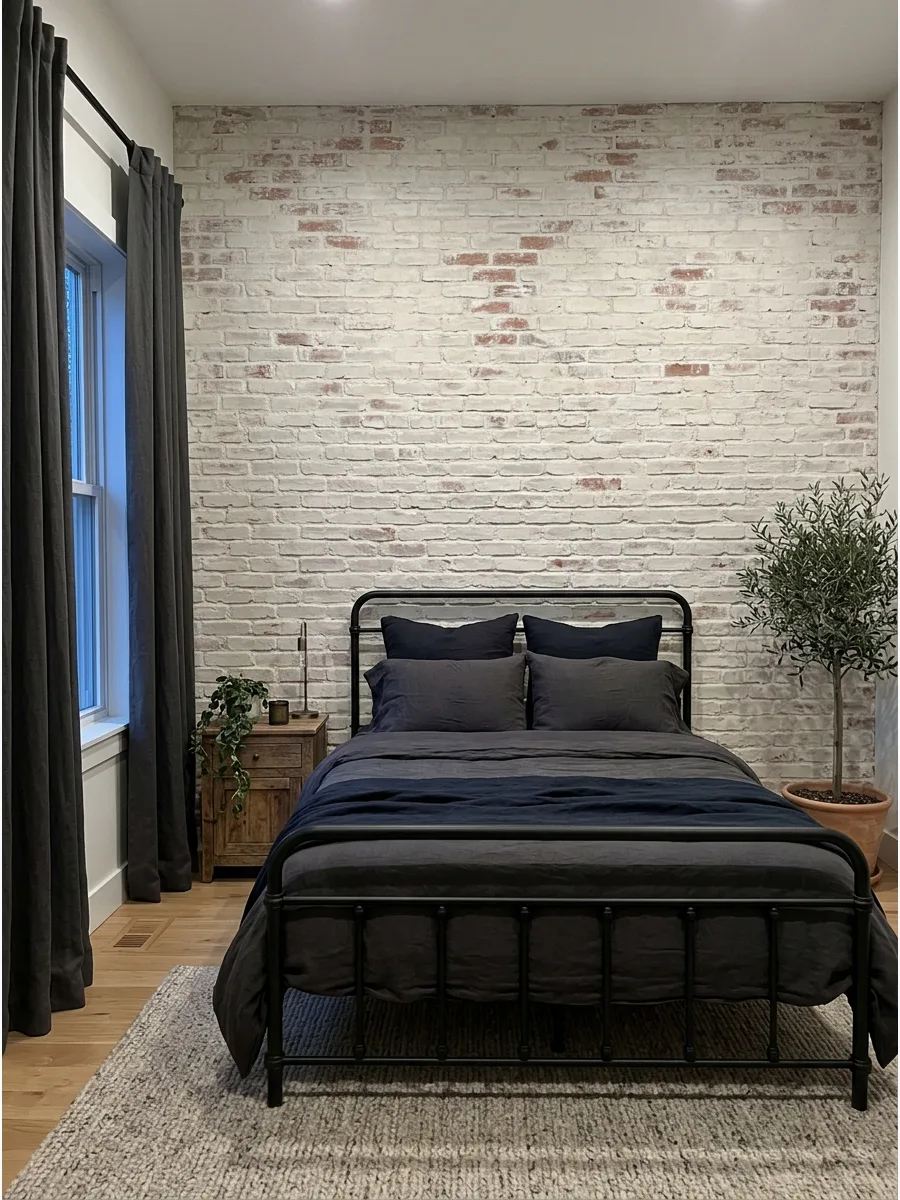
Update an existing brick wall or a brick veneer by applying a thin, breathable limewash coating. This technique softens the harsh reds of traditional brick while keeping the rugged, bumpy texture visible.
Apply the limewash with a large masonry brush and wipe it back with a damp rag to control the opacity. The result is a weathered, European-inspired look that feels bright and airy.
- Very affordable DIY project for a high-impact transformation
- Use real lime-based paint for the most authentic chalky finish
- Seal the brick first if it is old, dusty, or crumbling
Best shortcut: Use a spray bottle to dampen the brick before applying the wash to help the paint soak in evenly.
40. Thin Stone Veneer Wall
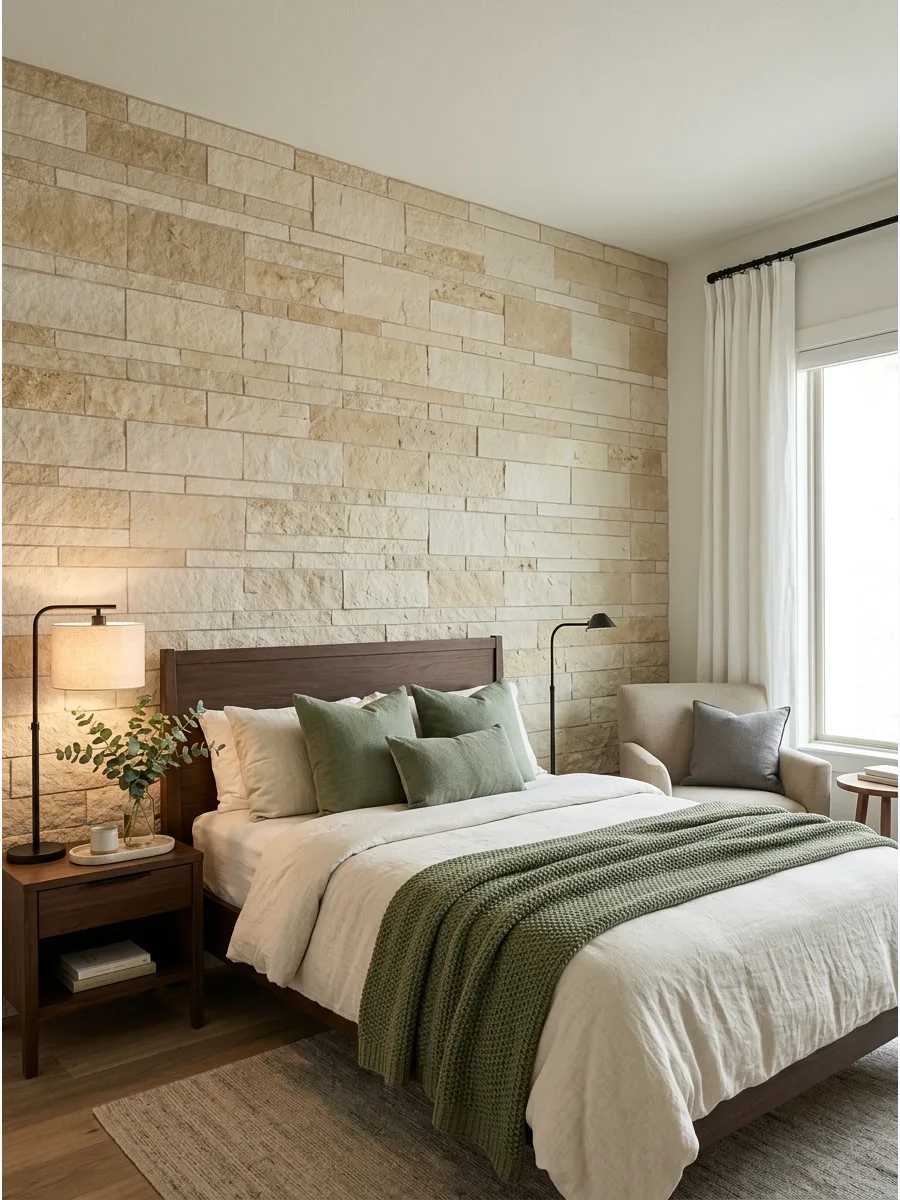
Use lightweight stone veneer to bring the timeless beauty of natural rock into the bedroom. Selecting a flat, honed stone like travertine or limestone creates a sophisticated look that doesn't feel too rustic or heavy.
Keep the grout lines thin and use a color that matches the stone for a seamless, high-end appearance. Stone adds a sense of permanent, architectural weight that paint simply cannot replicate.
- Higher budget for natural stone materials and adhesive
- Ensure the wall can support the extra weight of the stone panels
- Use a wet saw to get clean edges at the corners and ceiling
Quick win: Install the stone only on the center section of the wall behind the bed to create a framed focal point.
41. Backlit Wood Panel Wall
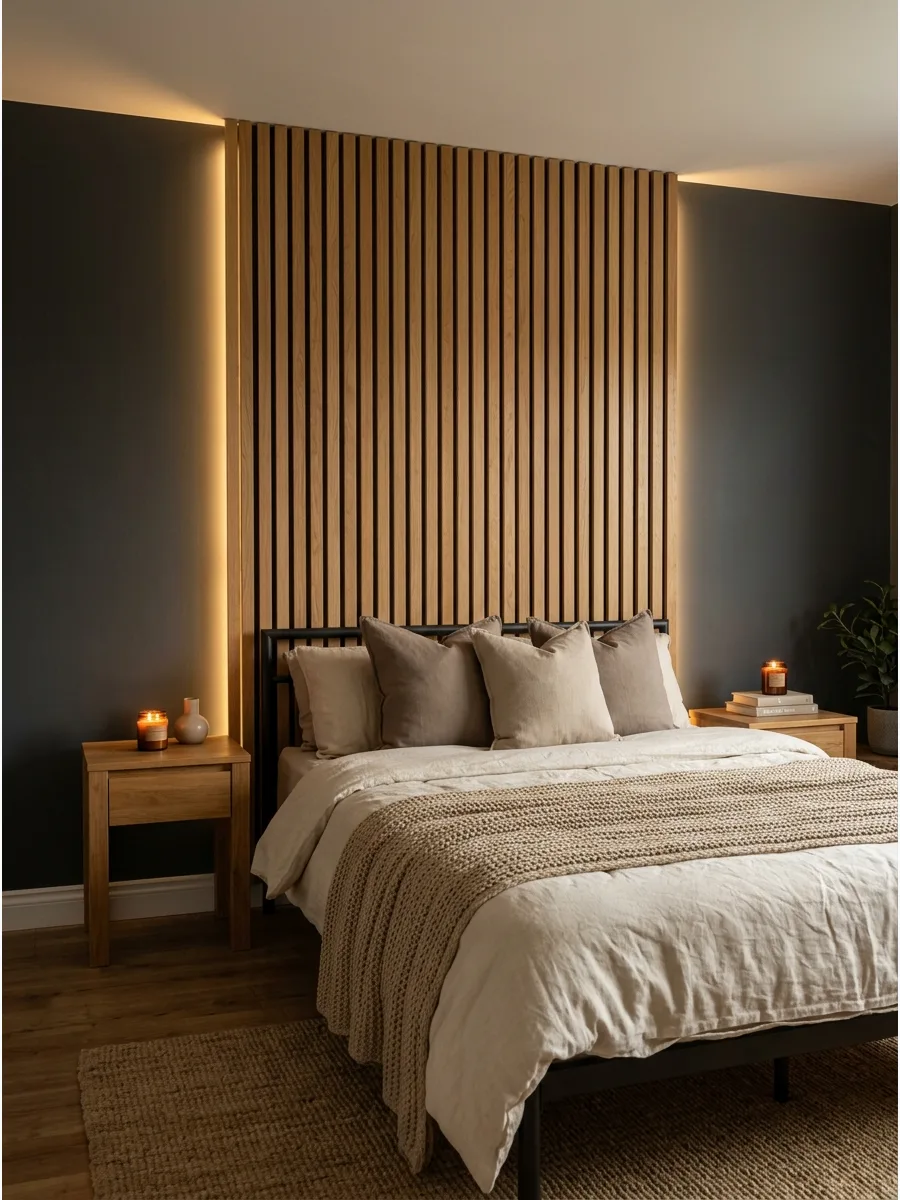
Install wood panels with a small gap behind them to house hidden LED light strips. The indirect light creates a soft, ambient glow that is perfect for winding down in the evening.
Place the light strips facing the wall rather than the room to ensure the light is diffused and gentle. This feature acts as both a decorative wall treatment and a functional mood light.
- Mid-range budget including the cost of wood and lighting
- Use smart LED strips to control brightness and color from a phone
- Hide the power cord behind the paneling or inside the wall for a clean finish
Most people skip this: Use a diffuser channel for the LED strips to prevent bright spots of light on the wall.
42. Wall-to-Wall Headboard
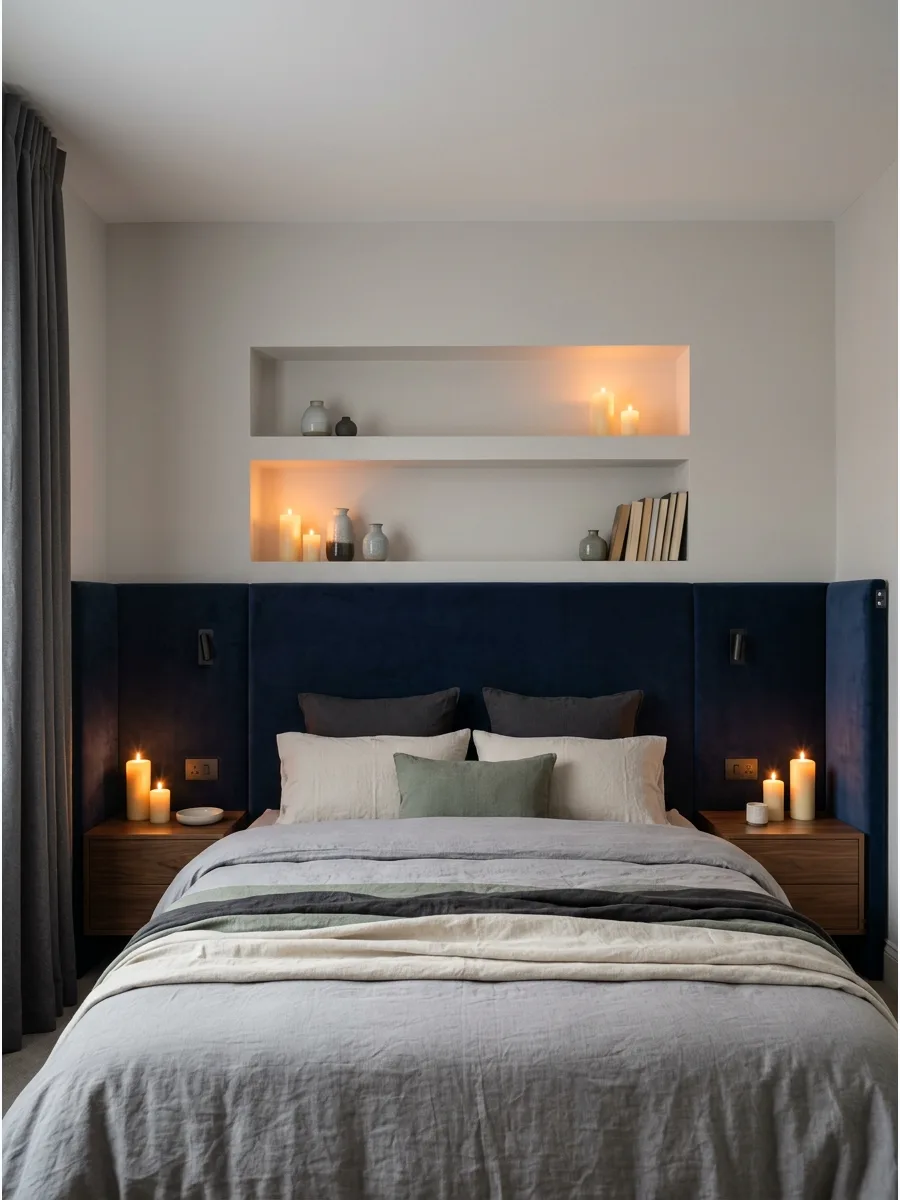
Create a custom headboard that spans the entire width of the room to give the space a luxury hotel feel. This horizontal line draws the eye across the room, making even a narrow bedroom feel much wider.
Incorporate integrated outlets into the headboard so you don't have to reach behind it for chargers. Upholstering the entire width adds extra comfort and acts as a massive sound absorber.
- Custom build or high-end furniture purchase required
- Align the height of the headboard with the top of the nightstands
- Use a durable performance fabric that is easy to spot clean
Best shortcut: Use modular upholstered wall panels to build the wide headboard without needing a massive single frame.
43. Curved Upholstered Panels
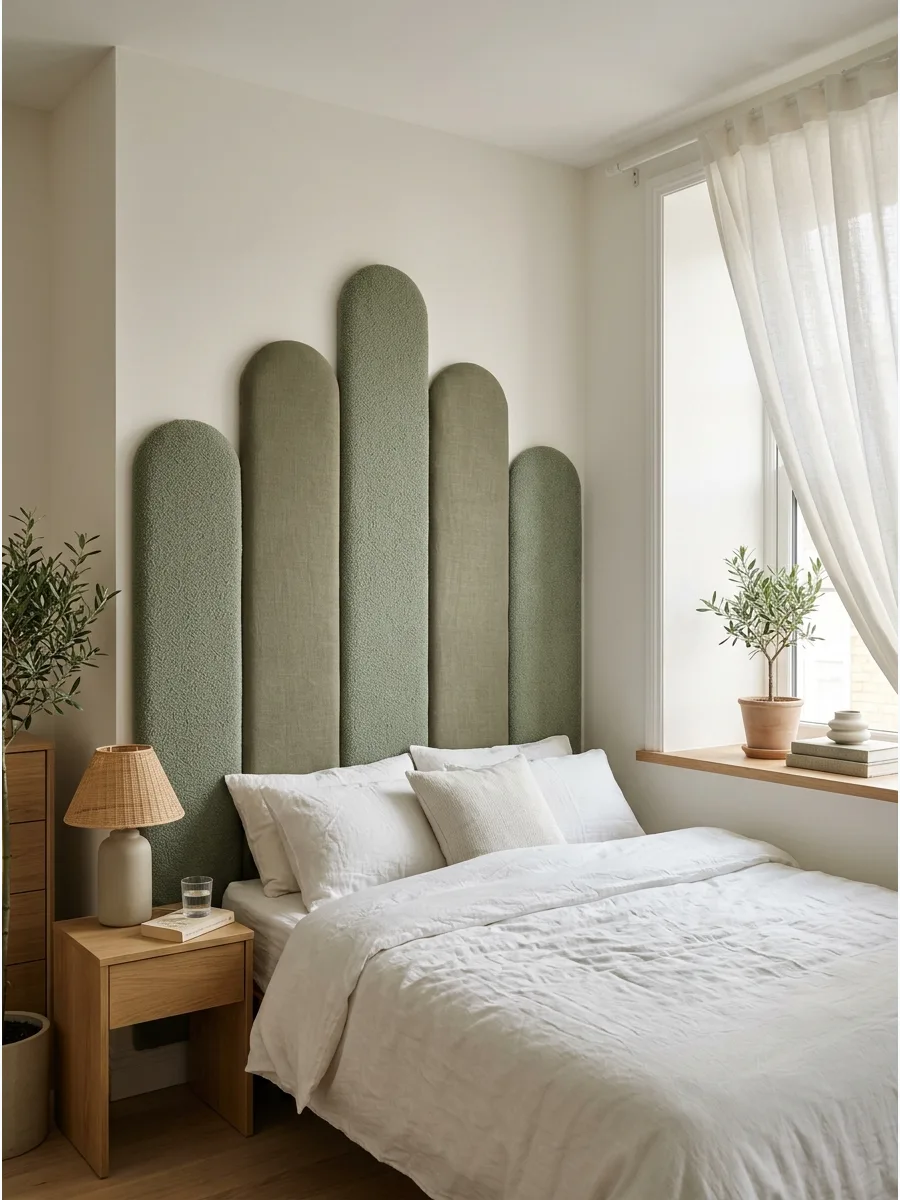
Install vertical upholstered panels with rounded tops to introduce soft curves and a sculptural element to the room. Varying the heights of the panels creates a sense of movement and visual rhythm behind the bed.
Choose a textured fabric like bouclé or linen to add another layer of sensory interest. These panels provide a comfortable backrest for reading in bed while looking like a custom art installation.
- Mid-range budget for custom upholstery or individual panels
- Mount panels individually with heavy-duty velcro for easy removal
- Keep the bedding simple to let the unique panel shapes stand out
Quick win: Use a contrasting piping or trim on the edges of the panels to highlight the curved shapes.
44. Built-In Bedside Shelving
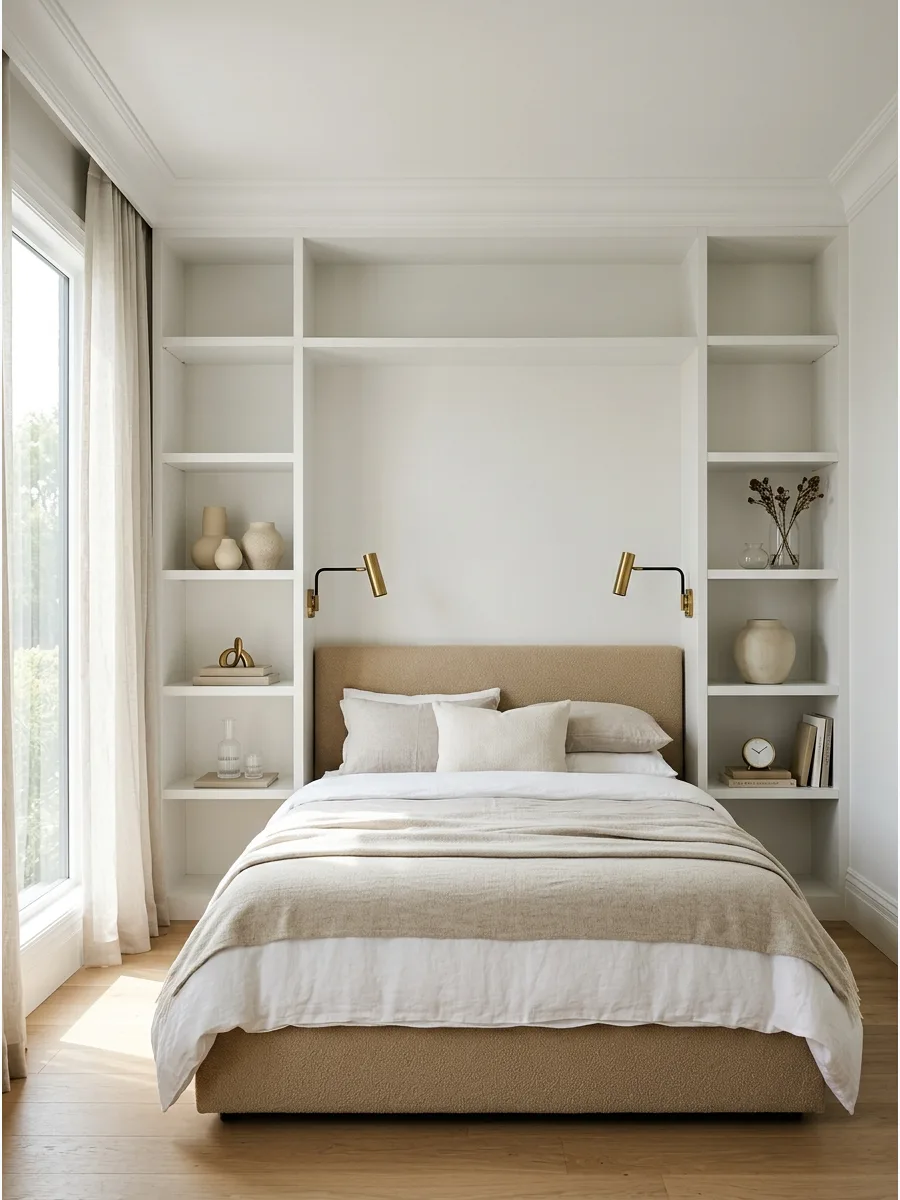
Surround the bed with custom shelving or recessed niches to maximize storage and create a built-in look. Painting the shelves the exact same color as the wall makes the entire unit feel like a part of the architecture.
Leave the middle section open and wide enough to accommodate future headboard or mattress changes. This setup eliminates the need for bulky nightstands and keeps the floor area clear.
- Higher budget for professional carpentry or custom units
- Install dimmable puck lights inside the niches for nighttime reading
- Use the lower shelves for books and the upper ones for decorative items
Most people skip this: Add a small lip to the front of recessed shelves to prevent items from being knocked off during the night.
45. Bed Nook Feature Wall
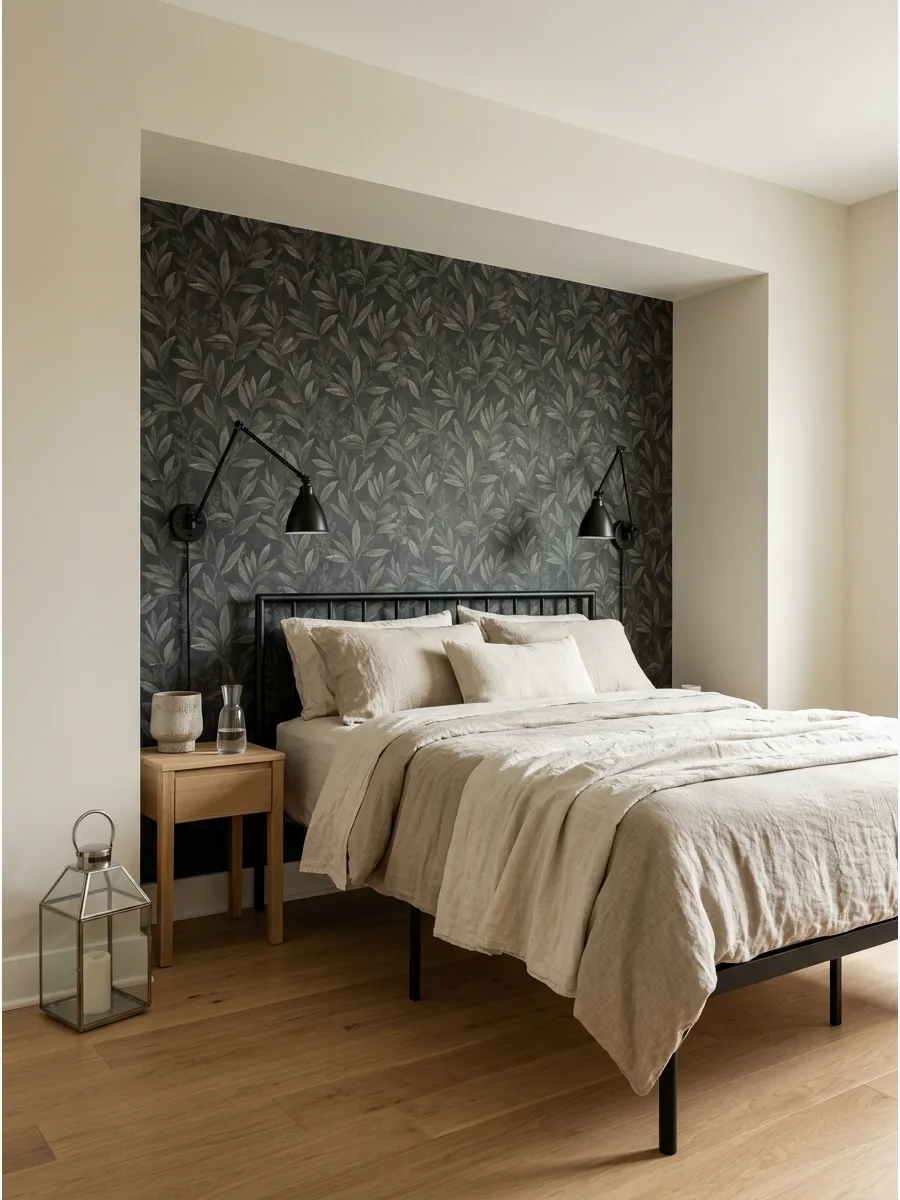
Create a dedicated sleeping zone by lining a shallow alcove with wallpaper or a contrasting paint color. This room-within-a-room feeling provides a sense of security and makes the bed the undisputed star of the space.
Add wall-mounted sconces inside the nook to save space and provide focused task lighting. It is an ideal way to make a large, cavernous bedroom feel more intimate and intentional.
- Requires an existing alcove or a simple stud-wall addition
- Use a bold pattern inside the nook and a solid color on the outer walls
- Install a curtain rod across the front of the nook for extra privacy
Best shortcut: Use a dark paint color inside the nook to create a receding effect that makes the space feel deeper than it is.
46. Full-Wall Curtain Backdrop
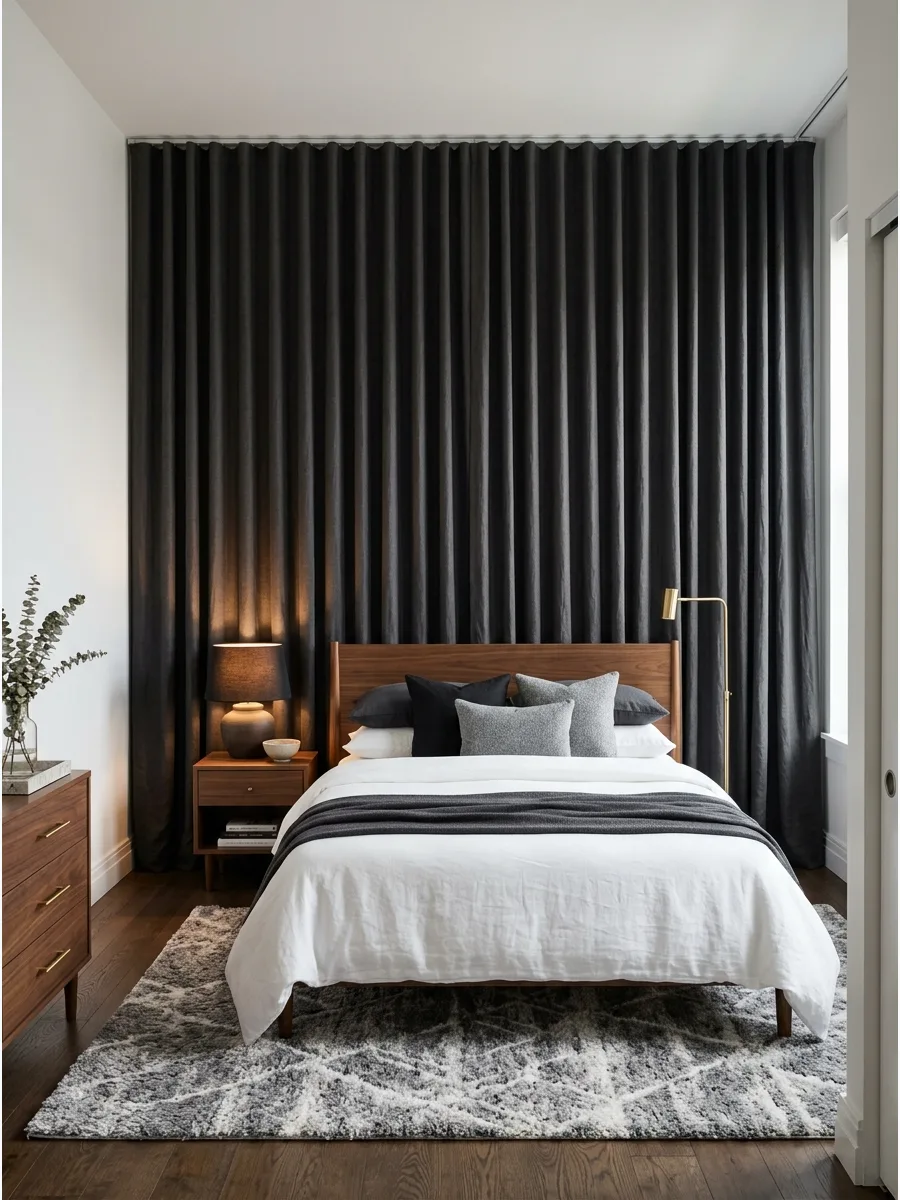
Covering the entire wall behind the bed with fabric creates a soft, hotel-like atmosphere. It hides wall imperfections and adds instant acoustic dampening to a noisy room.
Install a ceiling-mounted track from wall to wall to ensure the fabric hangs straight and covers every inch of the drywall. This trick makes a standard ceiling feel much taller than it actually is. The fabric softens the room, conceals an uneven wall, and creates a luxurious layered effect.
- Budget: Expect to spend $100 to $300 for a heavy-duty ceiling track and multiple curtain panels.
- Setup: Use a laser level to mark the drilling points on the ceiling for a perfectly straight track.
- Adaptation: Swap heavy velvet for sheer white fabric to create a lighter, airy summer look in a small room.
Quick win: Use double the width of the wall in fabric panels to get rich, deep folds instead of a flat sheet look.
47. Large Decorative Tapestry
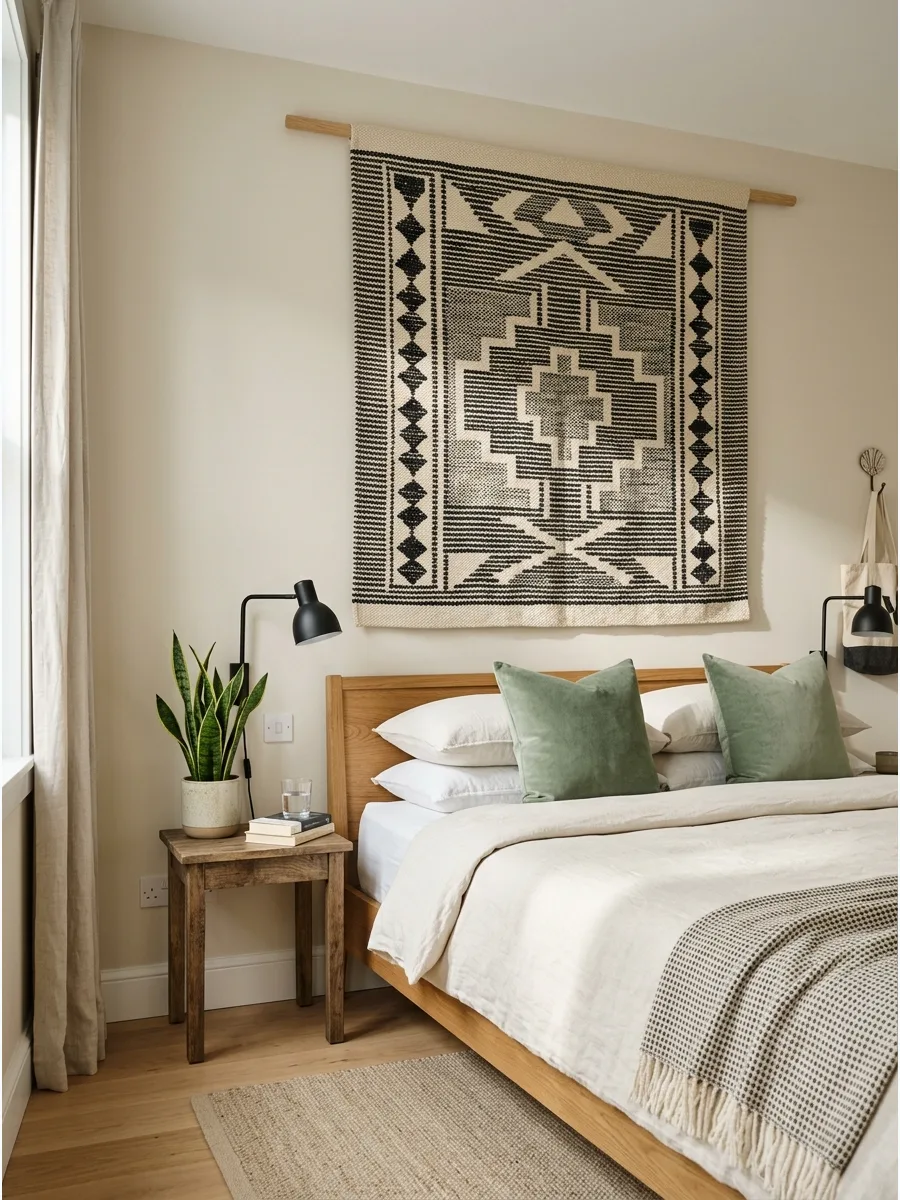
A large woven textile provides a high-impact focal point that can be swapped out whenever the mood changes. This is a great way to introduce texture and pattern without the commitment of wallpaper or paint.
Secure the top edge of the fabric to a thin wooden dowel to keep the tapestry hanging flat against the wall. It adds a layer of warmth that makes a large bedroom feel more intimate. Woven textiles add pattern, softness, and a sense of craftsmanship without permanent installation.
- Sourcing: Look for handmade pieces at local craft markets or vintage textile shops for a unique look.
- Placement: Center the piece exactly above the headboard, leaving about six inches of wall space visible for breathing room.
- Adaptation: Use a lightweight cotton quilt for a traditional look or a textured macrame piece for a bohemian feel.
Most people skip this: Steam the fabric thoroughly after hanging to remove all fold lines from shipping.
48. Decorative Folding Screen Headboard
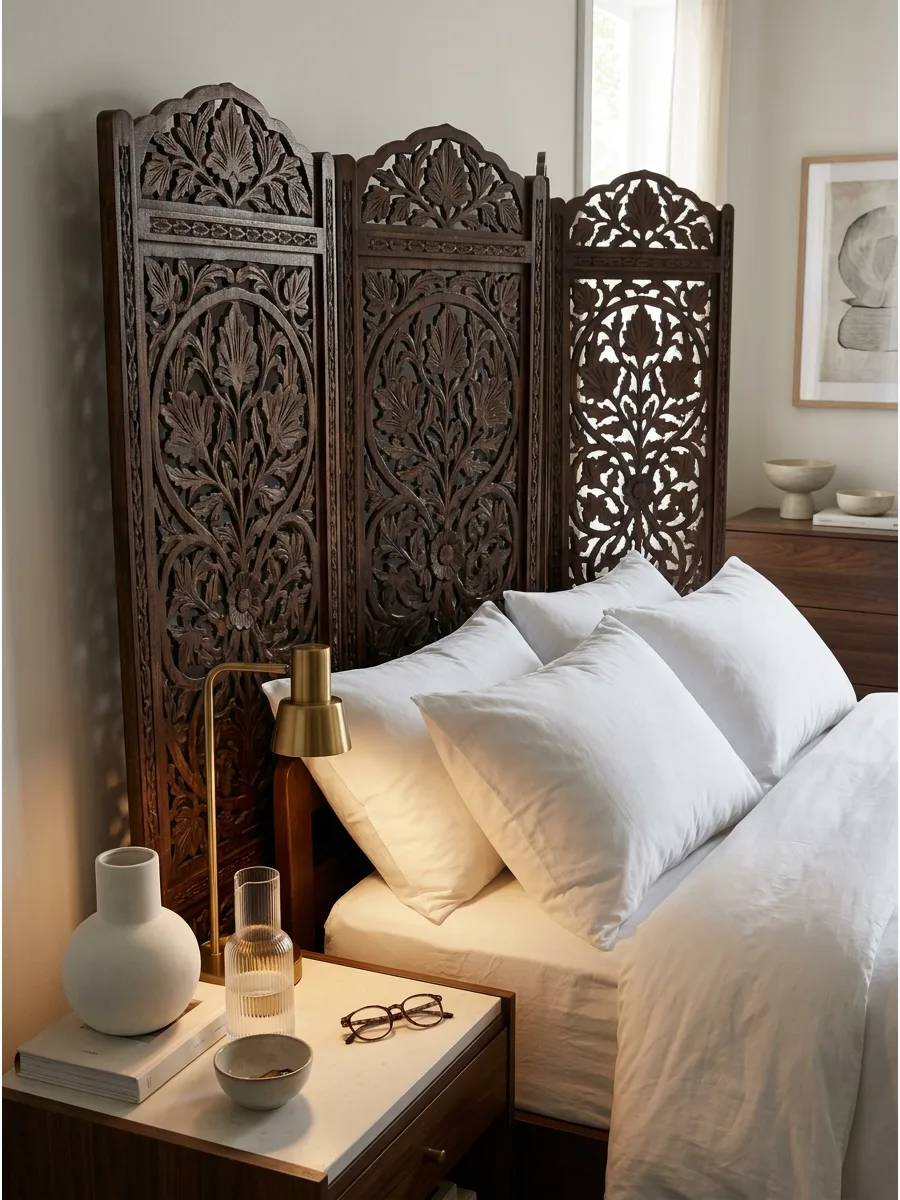
A folding screen acts as a portable architectural element that adds height and depth to the room. It works particularly well in rentals where you cannot mount heavy items to the wall.
Angle the side panels slightly inward to create a cocoon effect that frames the bed and nightstands. This setup creates a structured look that mimics expensive custom millwork.
Choose carved wood, woven cane, painted panels, or fabric-covered sections that complement the room’s palette.
- Timing: This feature wall can be set up in under ten minutes with no tools or hardware required.
- Logistics: Tuck the bottom of the screen between the wall and the bed frame to ensure it stays stable and upright.
- Adaptation: Paint a vintage screen in a bold accent color to make it pop against neutral walls.
Best shortcut: Add felt pads to the bottom of the screen feet to protect hardwood floors from scratches.
49. Minimal Art-Ledge Wall
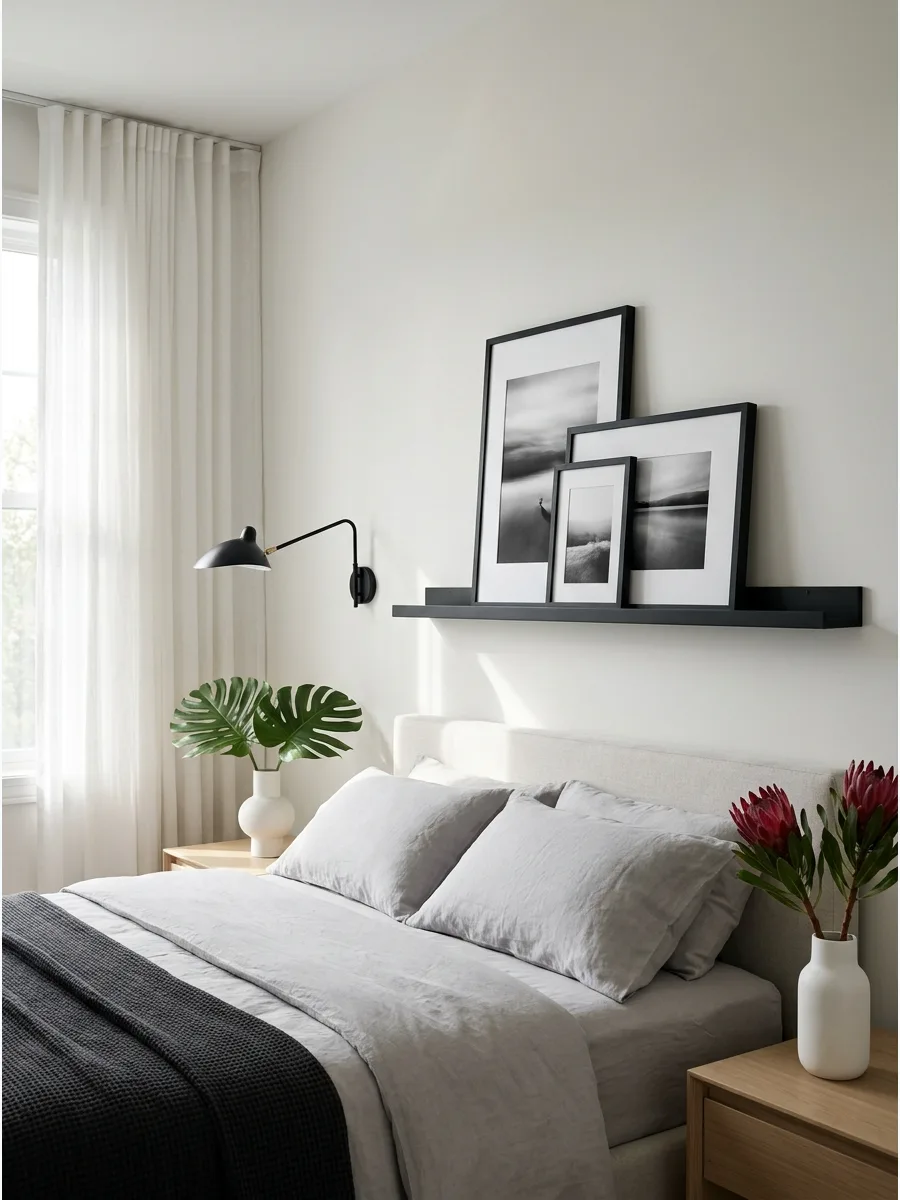
Installing a single long ledge allows for a rotating gallery of art without dozens of nail holes. Layering frames of different heights creates a casual, curated vibe that feels lived-in.
Mount the ledge at least eighteen inches above the mattress to avoid bumping your head while sitting up in bed. This is a smart way to fill a large blank wall without buying one massive, expensive piece of art. Keep the artwork within a coordinated palette to create interest without making the wall look cluttered.
- Budget: A basic picture ledge costs between $30 and $60 plus the cost of your favorite frames.
- Setup: Use heavy-duty wall anchors to ensure the shelf can safely support the weight of multiple glass frames.
- Adaptation: Swap framed photos for small potted trailing plants or decorative ceramics to add more dimension.
Quick win: Use museum putty on the bottom corners of frames to keep them from sliding or tilting on the ledge.
50. Removable Renter-Friendly Wall
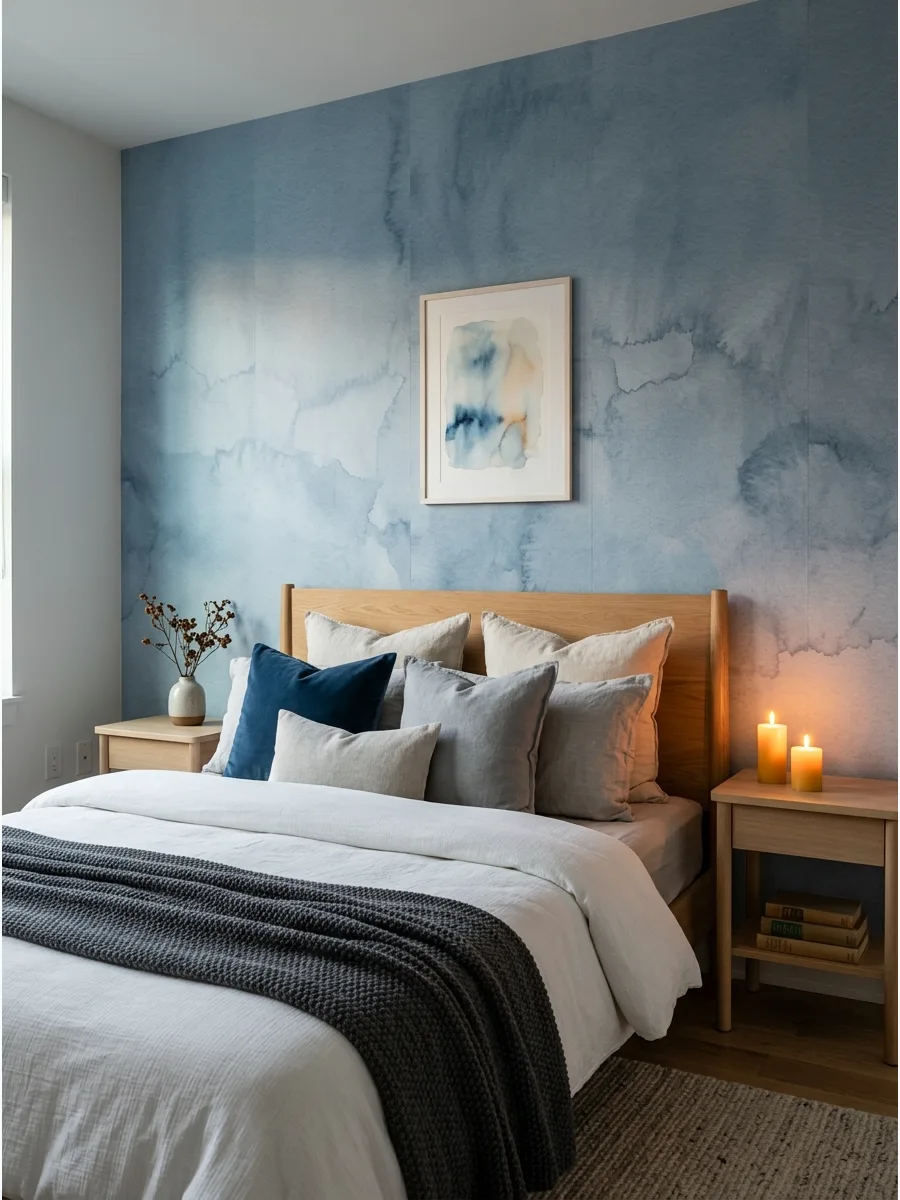
Peel-and-stick materials offer a high-end look that can be removed in minutes when it is time to move. These products have come a long way and now feature realistic textures like wood grain or woven fabric.
Apply the material from the top of the wall downward, smoothing out air bubbles with a plastic squeegee as you go. It is an easy way to experiment with a bold pattern without the fear of a permanent mistake.
Select a design that connects with the bedding and furniture so it appears intentional rather than temporary.
- Sourcing: Many online retailers specialize in high-quality removable vinyl and fabric wallpapers that mimic high-end brands.
- Setup: Clean the wall with a damp cloth and let it dry for 24 hours before applying the adhesive for the best stick.
- Adaptation: Use removable molding strips to create a faux-paneling look that peels right off when the lease ends.
Most people skip this: Leave a tiny overlap between wallpaper panels to account for slight material shrinkage over time.
Frequently Asked Questions
Which wall should be the feature wall in a bedroom?
The wall behind your headboard is usually the best choice since it serves as the room's natural focal point. You can also pick the first wall you see when entering to create an immediate and welcoming visual impact.
How do I choose a feature wall color for a small bedroom?
Opt for receding colors like soft blues or cool grays to make the space feel more open and airy. Vertical patterns can also help by drawing the eye upward, which prevents the room from feeling closed in.
What are the best renter-friendly feature wall ideas?
Peel-and-stick wallpaper is a fantastic way to add bold patterns without damaging the paint underneath. You can also try hanging large-scale art or using tension rods to create a floor-to-ceiling drapery wall for a soft, textured look.
Should the feature wall be darker or lighter than the other walls?
A darker feature wall creates a bold contrast that draws the eye and adds sophisticated depth to your room's architecture. While darker tones are more common for accents, a lighter wall can also work to highlight specific textures or brighten a dim space.
How do I coordinate my bedding with a bold accent wall?
Balance a busy or vibrant wall by choosing neutral bedding in whites, creams, or grays to keep the sleeping area restful. For a more sophisticated look, try a monochromatic approach by selecting textiles in tonal shades that match the accent wall's color palette.