30 Beautiful Lake House Kitchen Ideas
This post may contain affiliate links: full affiliate disclosure.
A great lake house kitchen prioritizes the surrounding scenery while handling a rotating door of guests. Focus on durable materials and open layouts that keep the cook connected to the party and the water view.
1. Full Window Backsplash
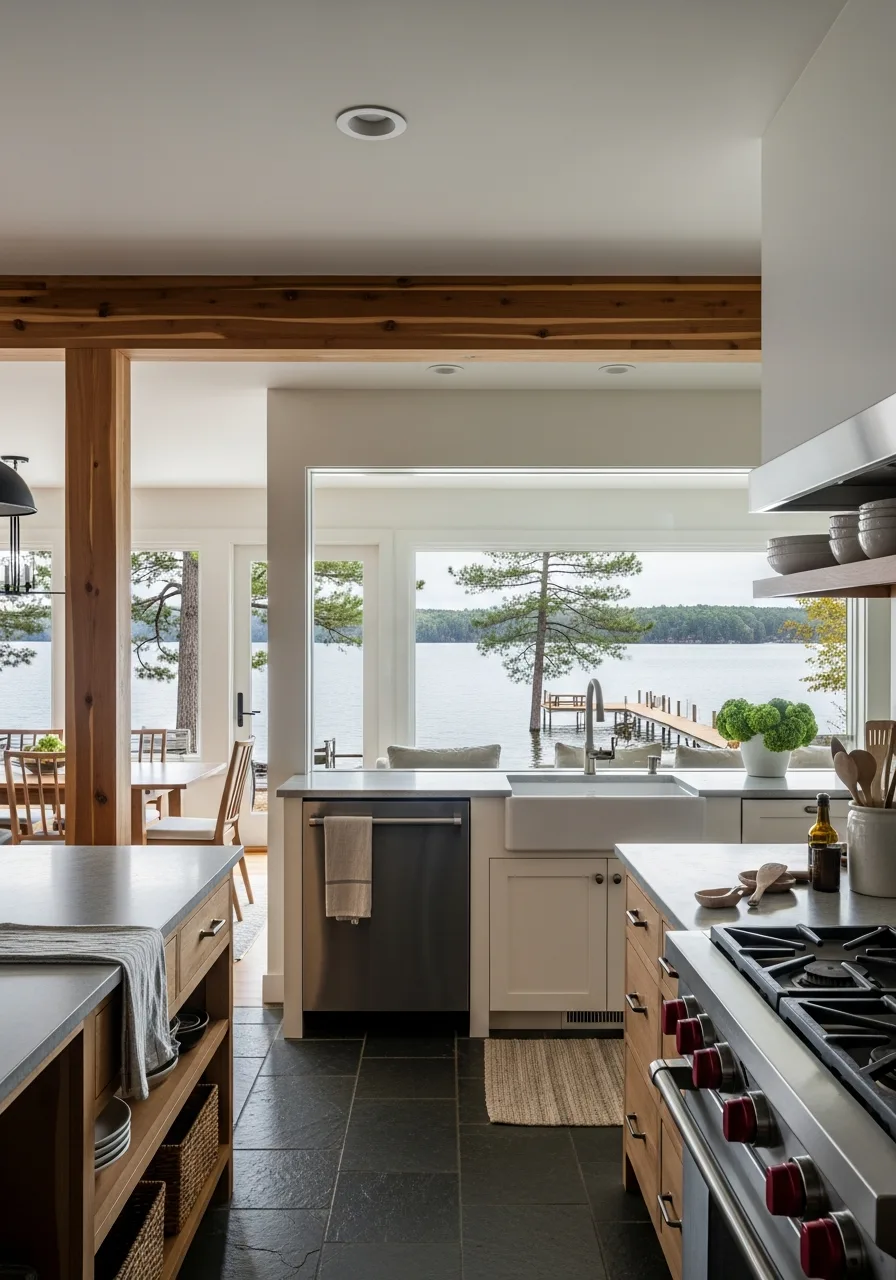
A window backsplash replaces traditional tile with a direct view of the lake. This setup floods the room with natural light and makes the counter space feel infinite.
Swap out your standard tile backsplash for a single sheet of tempered glass to create a seamless connection to the outdoors. Best move: Using a fixed window rather than one that opens prevents screen mesh from blocking the scenery.
- Custom tempered glass usually requires a three-week lead time from local glaziers.
- Position the bottom of the window frame flush with the countertop for a clean look.
- If a full window is too expensive, try a series of small square windows instead.
Quick win: Apply a rain-repellent coating to the exterior glass to keep water spots from ruining the view.
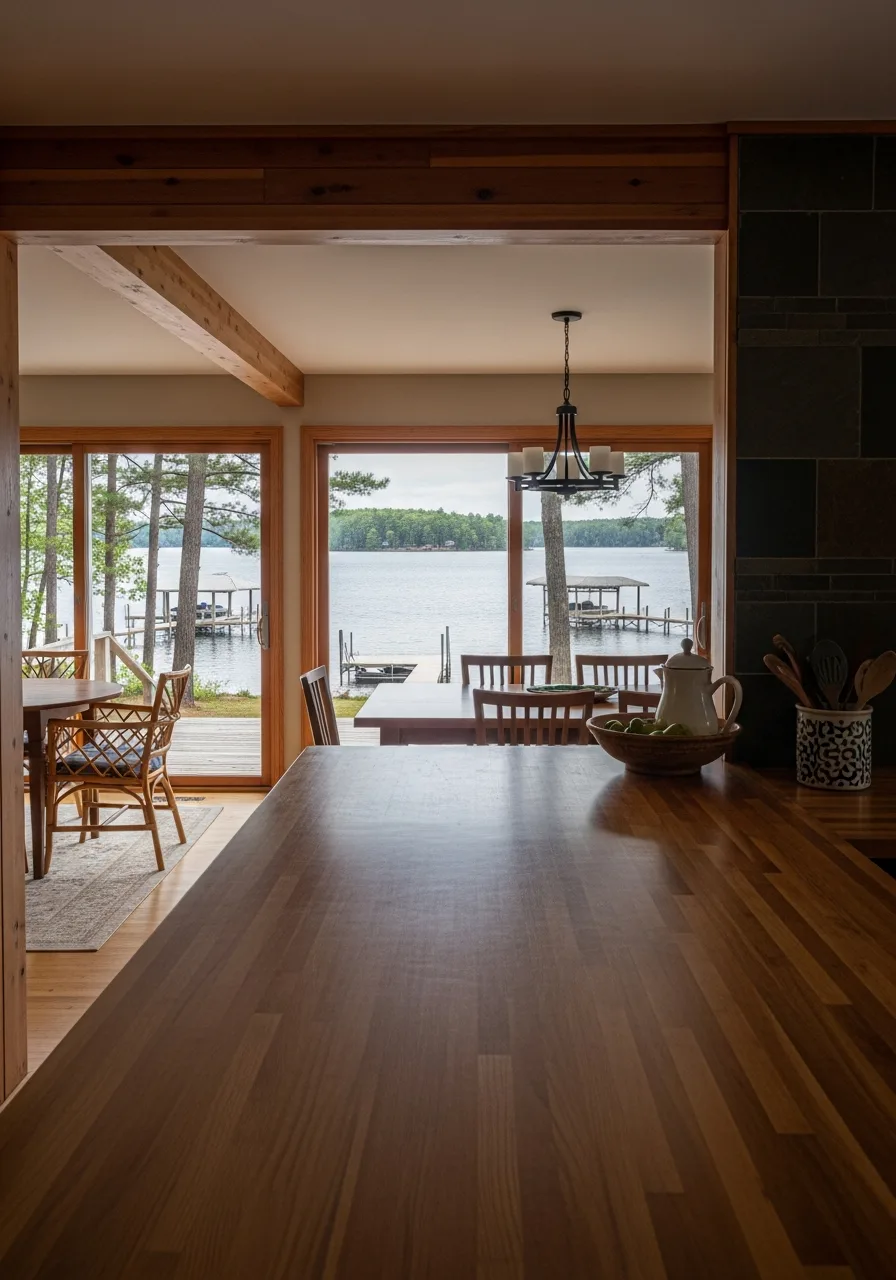
2. Reclaimed Wood Island
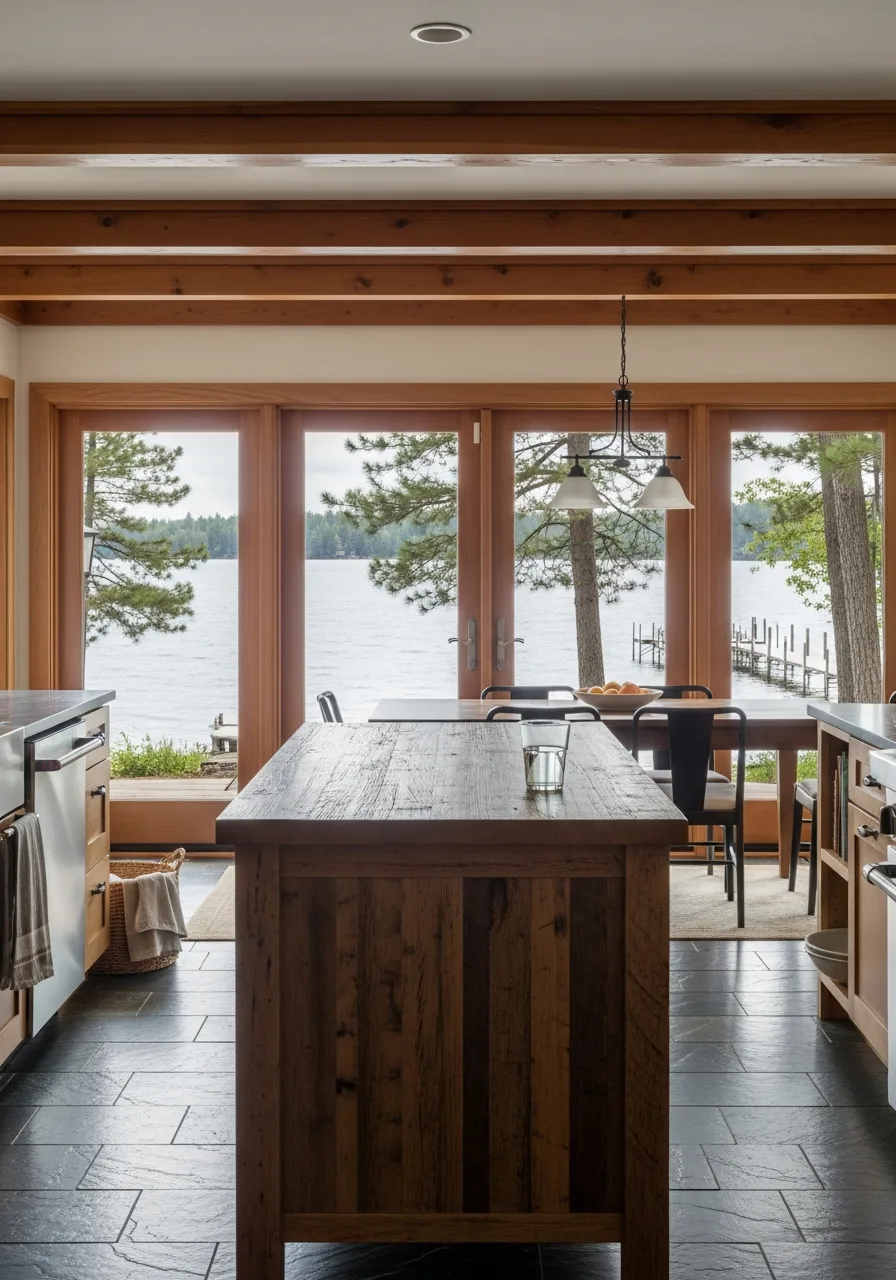
An island topped with reclaimed wood adds immediate warmth and history to a new kitchen. It acts as a furniture piece rather than just a cabinet, which fits the relaxed lake vibe perfectly.
Seal the wood with a food-safe matte finish to protect it from spills while keeping the natural texture visible. What works: Distressed wood hides the inevitable dings and scratches that come with vacation house use.
- Budget around fifty dollars per square foot for high-quality reclaimed white oak or pine.
- Ensure the wood is kiln-dried to prevent warping in humid lake environments.
- Use a contrasting paint color on the island base to make the wood top pop.
Best shortcut: Use a pre-made butcher block and distress it yourself with a hammer and chain for a weathered look.
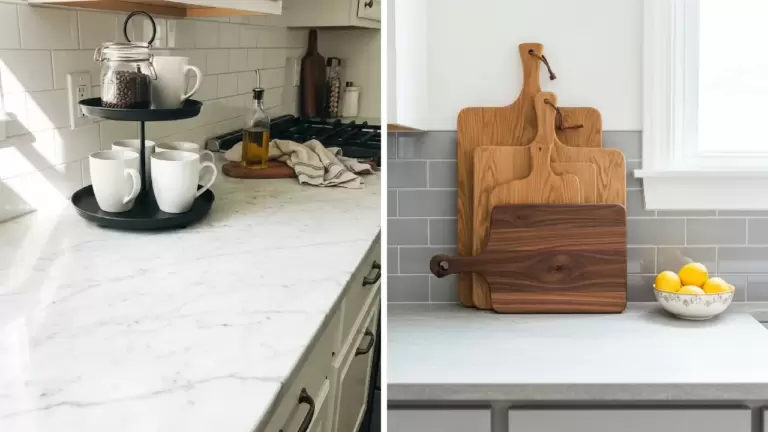
3. Open Guest Shelving
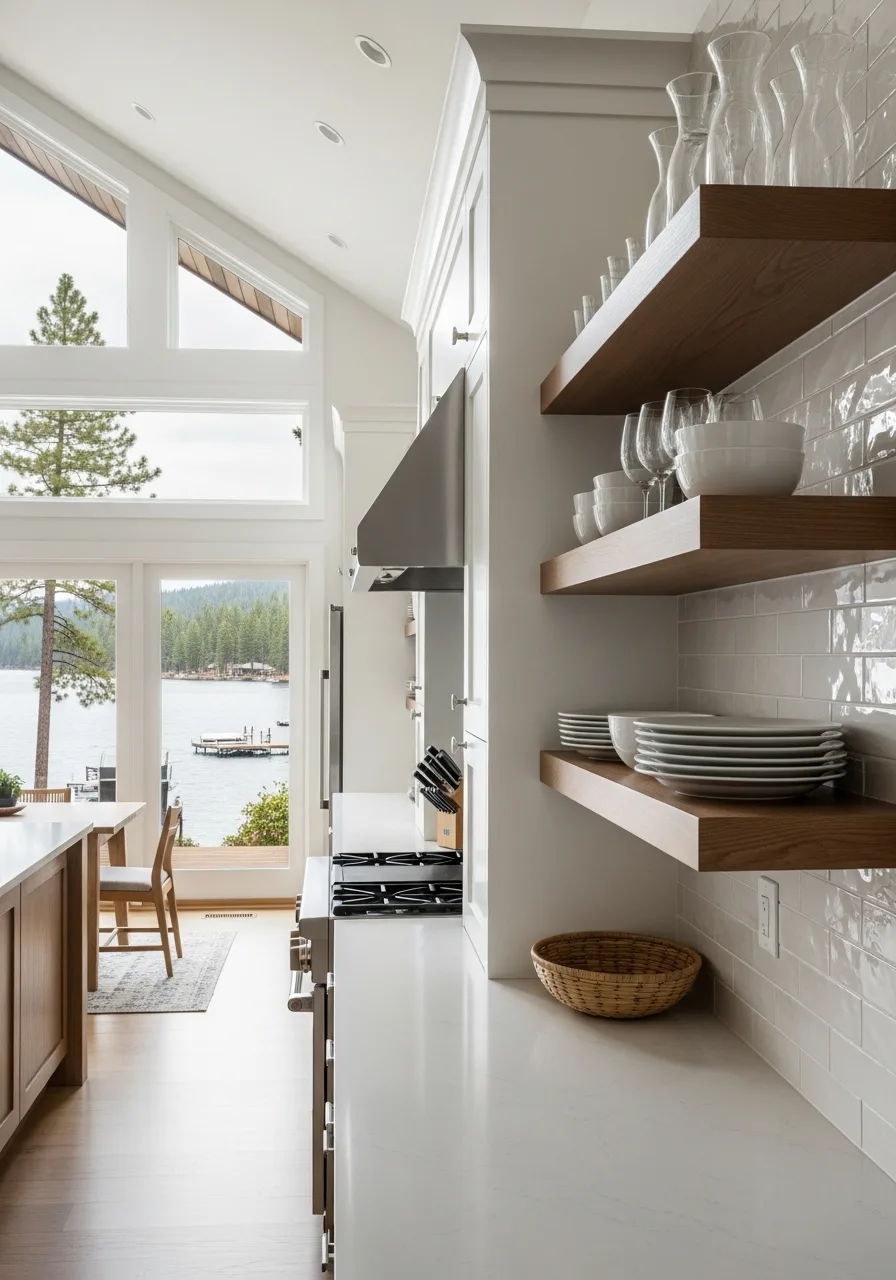
Open shelves make it easy for visitors to find coffee mugs and water glasses without asking where they are. This layout keeps the kitchen feeling airy and prevents the heavy look of too many upper cabinets.
Mount thick wooden shelves using heavy-duty hidden brackets for a clean and floating appearance. Worth doing: Grouping everyday items like white plates and clear glasses creates a tidy look without much effort.
- Standard pine boards are affordable, but white oak holds up better against humidity.
- Install the lowest shelf about eighteen inches above the countertop for easy reaching.
- In small kitchens, use glass shelves to keep the sightlines open and bright.
Most people skip this: Leave at least twelve inches of vertical space between shelves to fit tall pitchers or vases.
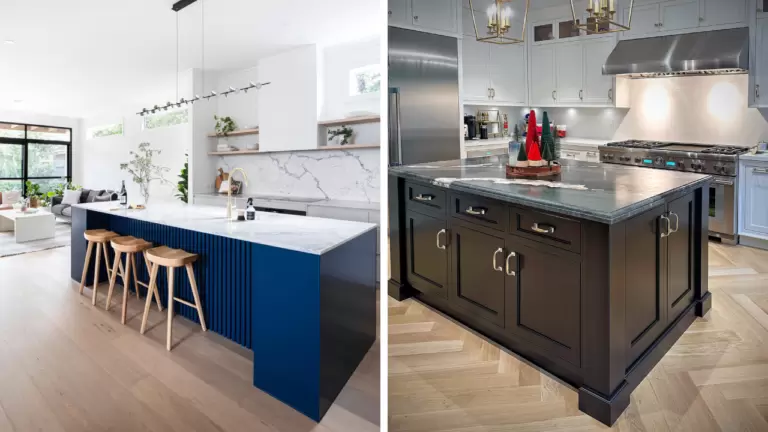
4. Deep Navy Cabinetry
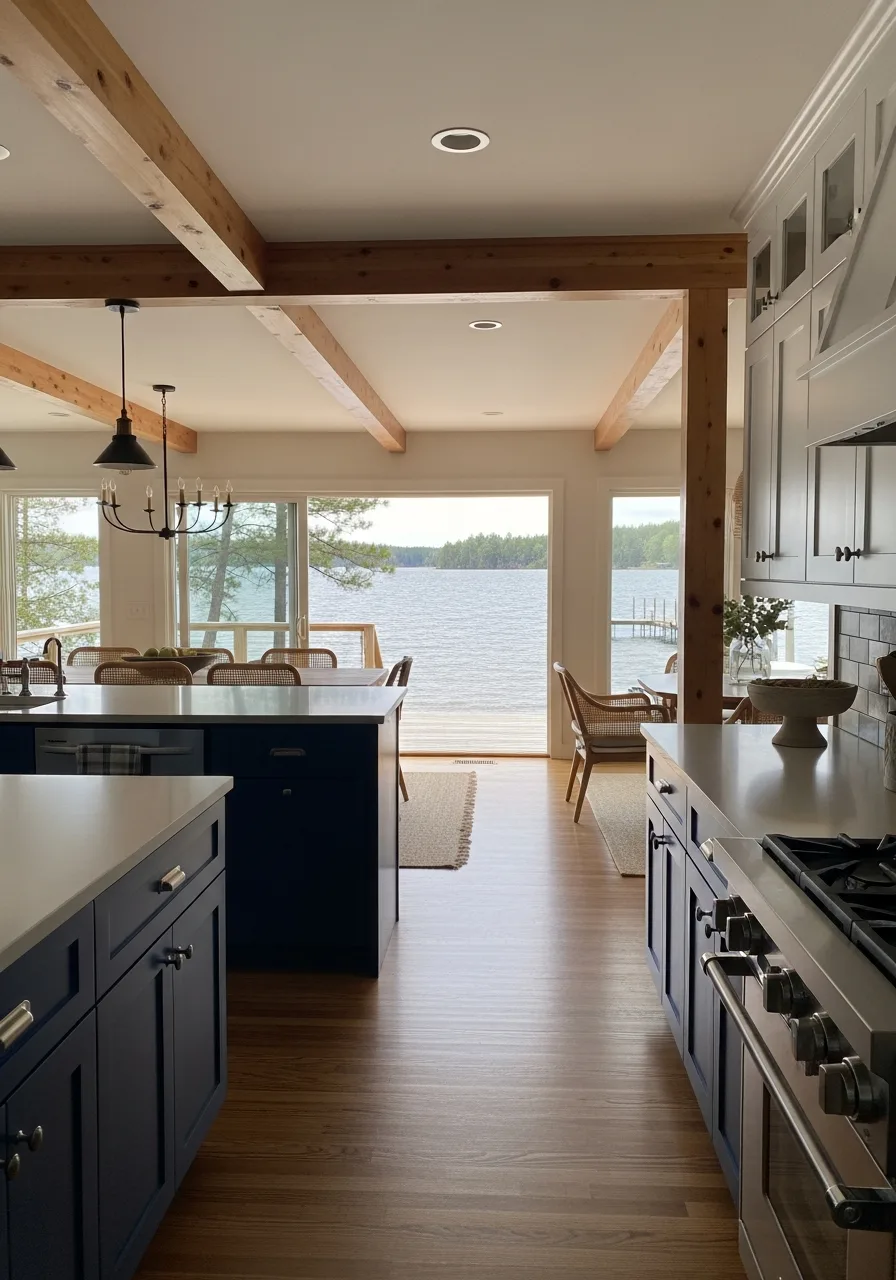
Navy blue cabinets mirror the color of the water and provide a sophisticated alternative to all-white kitchens. This dark hue hides scuffs from coolers and gear better than lighter colors.
Pair dark blue lower cabinets with white upper cabinets to keep the room from feeling too heavy or dark. Best move: Use a satin finish on the paint to make cleaning up sticky fingerprints much easier.
- High-quality cabinet paint costs more but saves time because it requires fewer coats.
- Test your blue paint swatches at different times of day to see how the lake light changes them.
- Stick to navy on just the island if you are worried about the color being too bold.
Quick win: Use gold or brass hardware to add warmth and contrast against the cool blue tones.
5. Under Counter Beverage Center
A dedicated drink fridge keeps guests out of the main cooking zone when they need a soda or beer. This setup is essential for lake houses where people are constantly coming in for refreshments.
Place the beverage center at the end of an island or near the deck door for easy access. What works: Choosing a model with a glass door allows everyone to see what is in stock without opening it.
- Units usually cost between five hundred and twelve hundred dollars depending on the zone features.
- Leave a one-inch gap around the unit for proper ventilation if it is not front-venting.
- Convert a small pantry or end-cabinet into a drink station if you lack island space.
Best shortcut: Store a dedicated set of outdoor acrylic glasses right above the beverage fridge.
6. Fireclay Farmhouse Sink

A deep farmhouse sink is practical for washing large pots or even rinsing off sandy lake toys. Fireclay is extremely durable and resists the staining and scratching that can happen with heavy use.
Install an oversized thirty-six-inch sink to handle the heavy dish loads that come with weekend crowds. Worth doing: Choosing a white sink provides a crisp contrast against wood or stone counters.
- These sinks are very heavy and require a reinforced cabinet base for support.
- Expect to pay more for professional installation due to the custom cabinet cuts needed.
- Stainless steel versions are a cheaper, lighter alternative that still offers the deep basin shape.
Quick win: Buy a bottom grid for the sink to prevent heavy pots from chipping the finish.
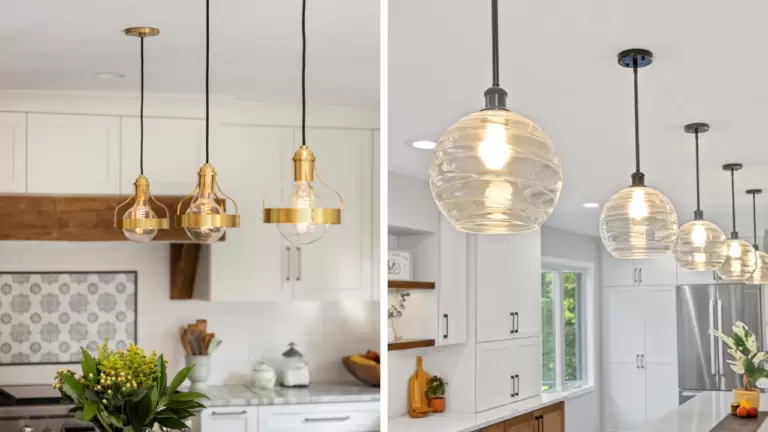
7. Natural Woven Pendants
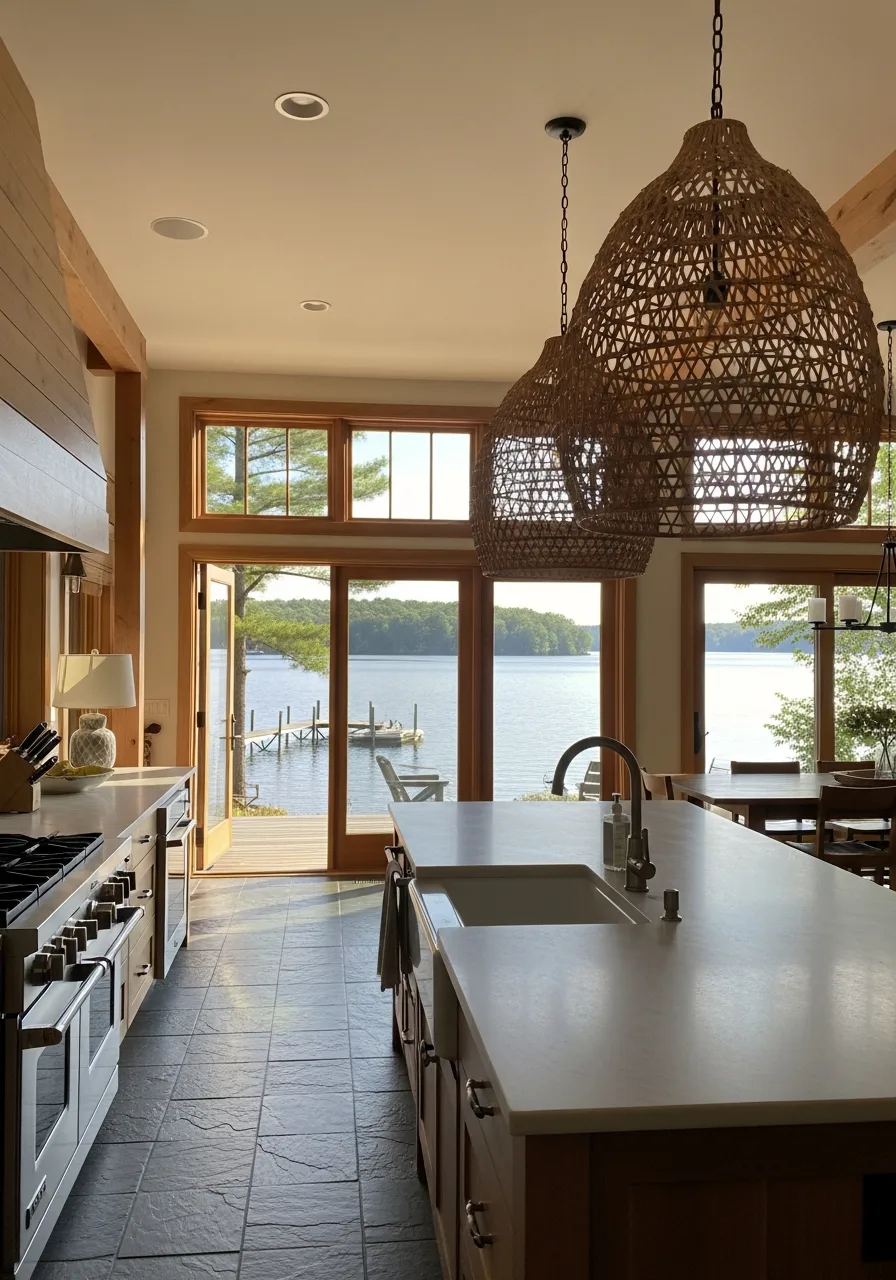
Large woven light fixtures add organic texture that softens the hard surfaces of a kitchen. They bring in a coastal, relaxed feeling without using kitschy lake decor.
Hang two or three oversized rattan pendants over the island to create a clear focal point in the room. What works: The open weave of these lights casts beautiful shadows and keeps the ceiling feeling high.
- Prices for quality woven lights range from eighty to three hundred dollars each.
- Hang the bottom of the light thirty to thirty-six inches above the island surface.
- Choose synthetic wicker for kitchens with high humidity to prevent the material from sagging.
Most people skip this: Use warm-toned LED bulbs to enhance the natural golden hues of the woven material.
8. Folding Pass Through Window
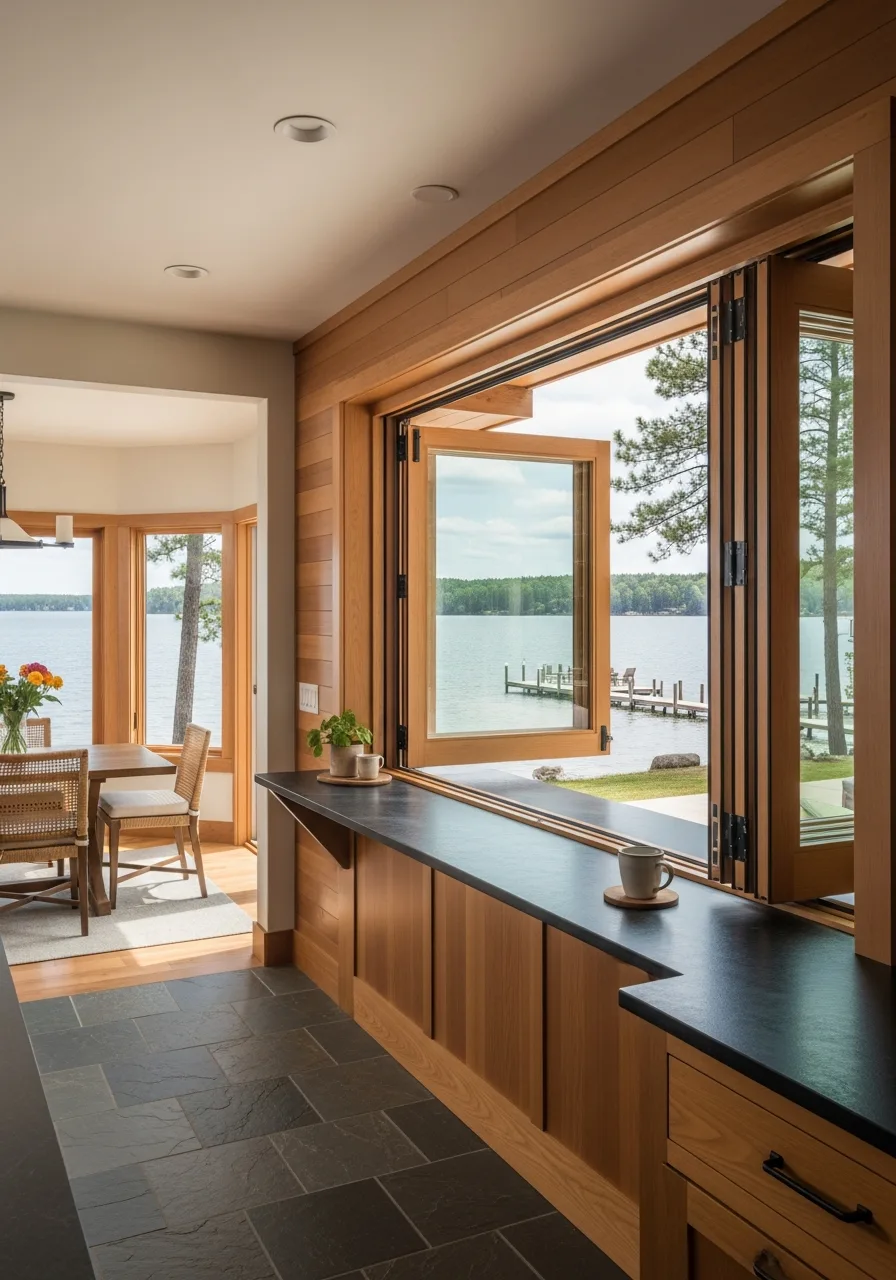
A pass-through window connects the kitchen directly to the outdoor deck or patio. This makes serving food to the outdoor table much faster and keeps the cook involved in the conversation.
Install a bifold or sliding window system that stacks to the side for a completely open opening. Best move: Extend the kitchen countertop through the window to create an outdoor bar ledge.
- Bifold window systems are a major investment and usually require professional structural framing.
- Ensure the window has a tight weather seal to keep out lake bugs and humidity.
- A simple sliding window is a more budget-friendly way to achieve the same function.
Best shortcut: Install a retractable screen that pulls down from the top to keep flies out while the window is open.
9. Matte Quartz Surfaces
Quartz is non-porous and resists stains from wine or juice, making it perfect for a low-maintenance vacation home. A matte or 'honed' finish looks more like natural stone and hides fingerprints better than polished surfaces.
Select a light gray or sand-colored quartz to mimic the look of lake stones and beach sand. What works: Unlike marble, quartz never needs to be sealed or polished.
- Slabs are typically sold in standard sizes, so plan your island dimensions to avoid extra seams.
- Wipe up spills with simple soap and water; avoid harsh chemicals that can dull the finish.
- Look for 'jumbo' slabs if you have a very large island to avoid a center seam.
Quick win: Use a quartz remnant from a local stone yard for a small coffee bar to save money.
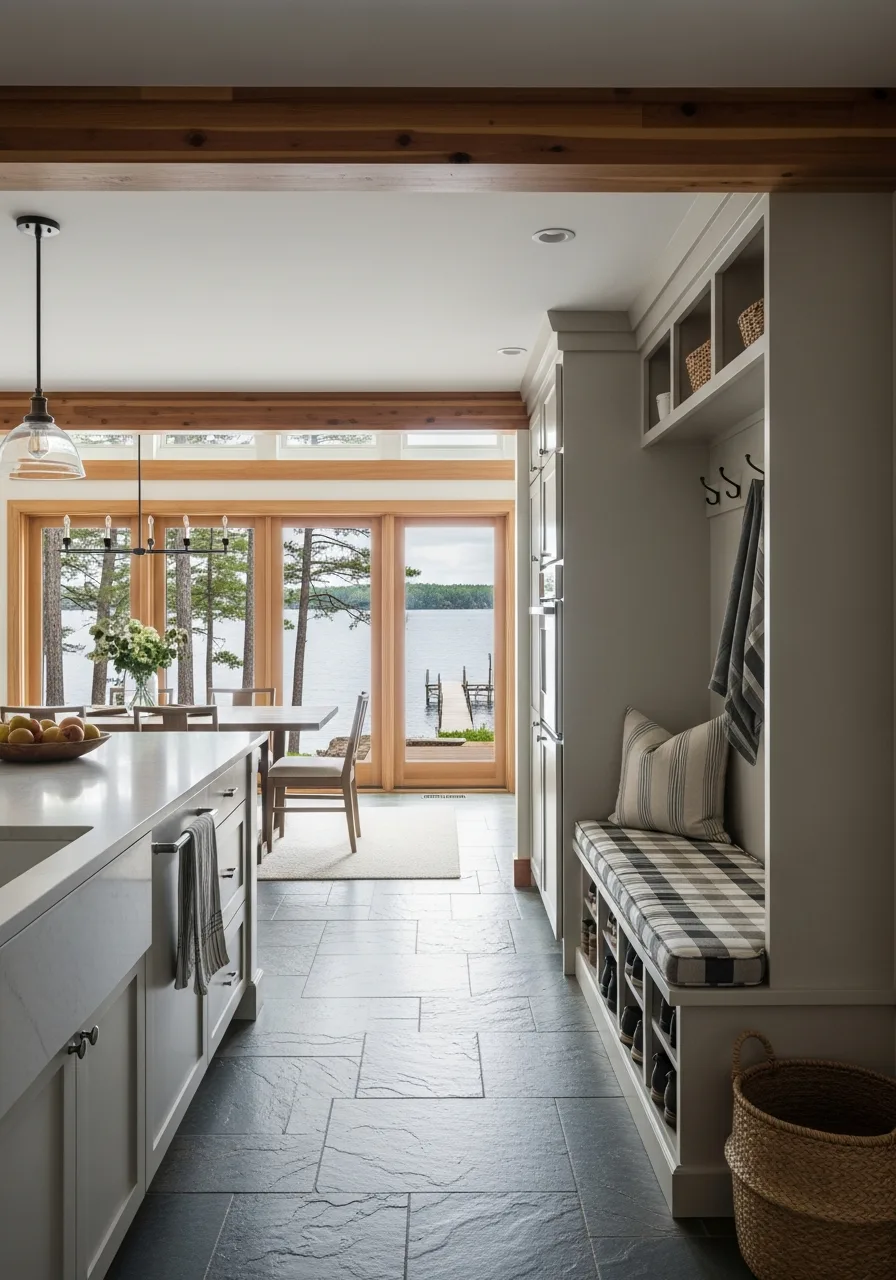
10. Entryway Hook Wall
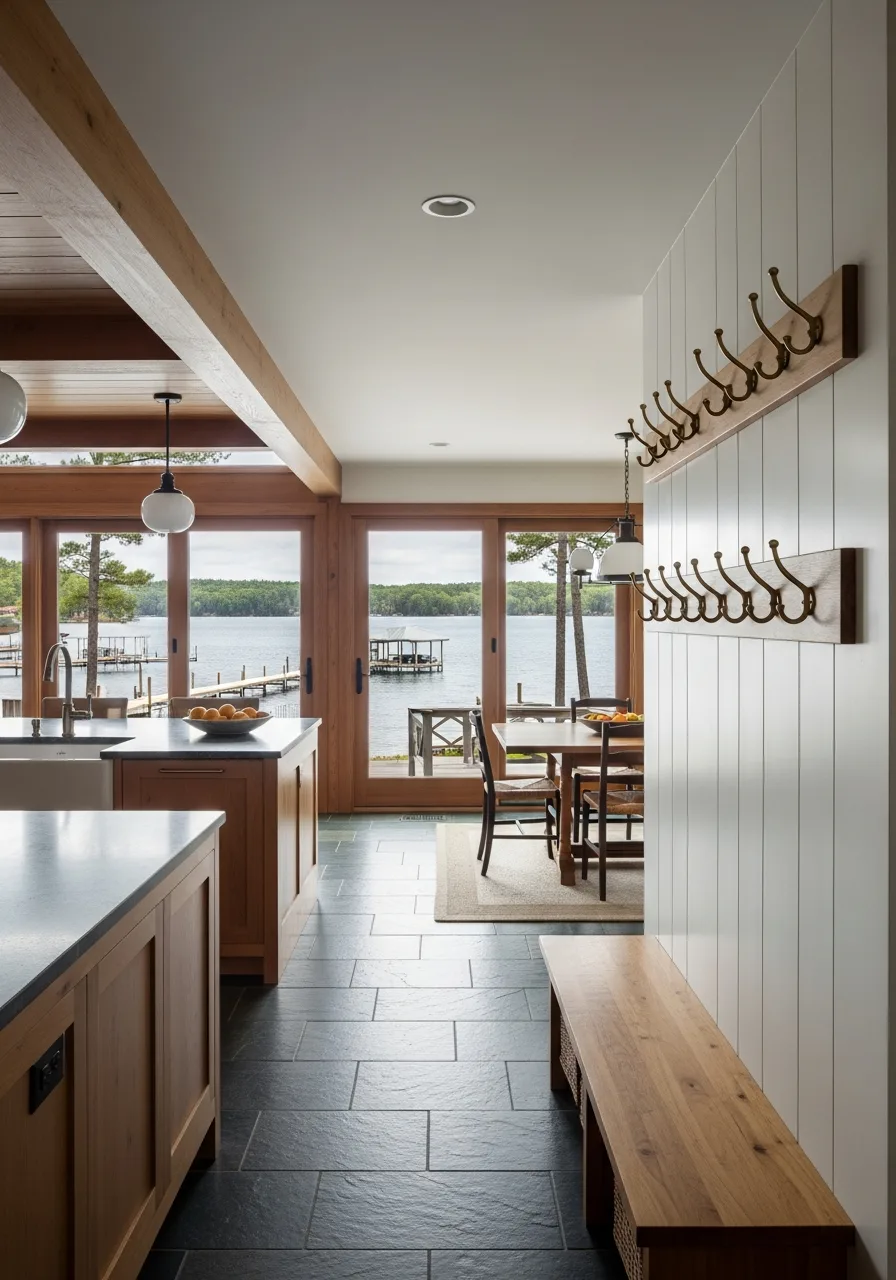
Many lake kitchens serve as the main entry point from the water, leading to a mess of wet towels and bags. A dedicated hook wall near the door keeps the floor clear and the kitchen organized.
Install a row of heavy-duty brass or matte black hooks at two different heights for adults and kids. Worth doing: Adding a bench underneath the hooks provides a spot to kick off flip-flops.
- Space hooks at least twelve inches apart so wet towels have room to air dry.
- Mount the hooks into wall studs or use heavy-duty anchors to prevent them from pulling out.
- Use a washable rug or runner in front of the hooks to catch water and sand.
Most people skip this: Label the hooks with name tags or different colors so every guest has their own spot.
11. Exposed Wood Beams
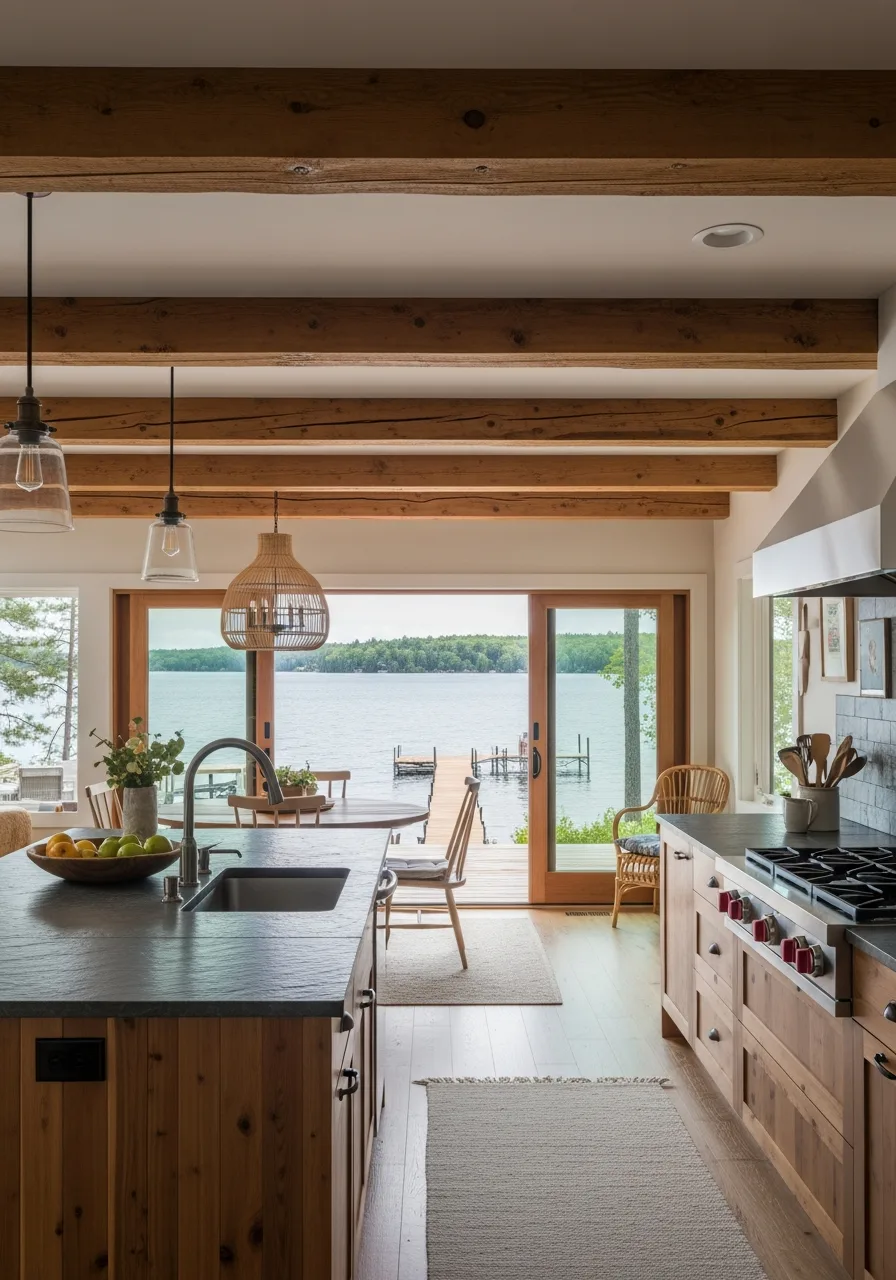
Exposed ceiling beams add architectural interest and make a standard kitchen feel like a rustic cabin. They draw the eye upward and emphasize the height of the room.
Use reclaimed timber or lightweight faux-wood beams to add character without needing heavy structural support. Best move: Staining the beams to match the floor creates a cohesive, high-end look.
- Faux beams made of high-density foam are easy to install with basic DIY tools.
- Real wood beams require at least two people and a lift for safe installation.
- Space beams every four to six feet to mimic traditional timber-frame construction.
Quick win: Paint the ceiling between the beams a bright white to make the wood grain stand out.
12. Warm Brass Hardware
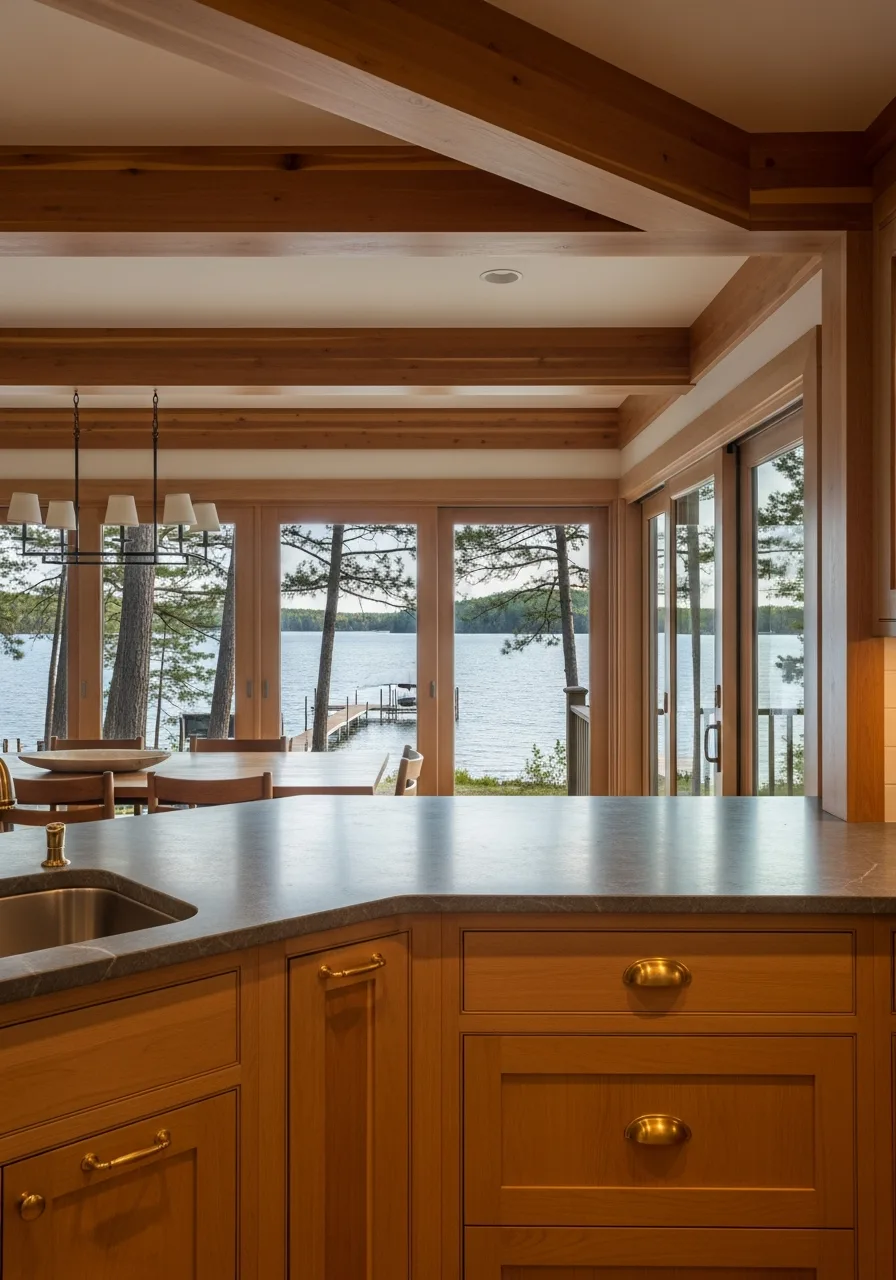
Brass hardware adds a touch of warmth and shine that balances out cool lake colors like blue and gray. It feels more modern than chrome and develops a beautiful patina over time.
Choose unlacquered brass pulls that will age naturally and look better as the years go by. What works: Mixing knobs on upper cabinets and pulls on lower drawers adds a custom feel.
- Quality solid brass hardware costs between eight and twenty dollars per piece.
- Clean brass with a damp cloth; avoid abrasive cleaners that can strip the finish.
- Standard three-inch center-to-center pulls are the easiest to find and replace later.
Best shortcut: Replace just the hardware on existing cabinets for an instant weekend kitchen refresh.
13. Built In Window Seat
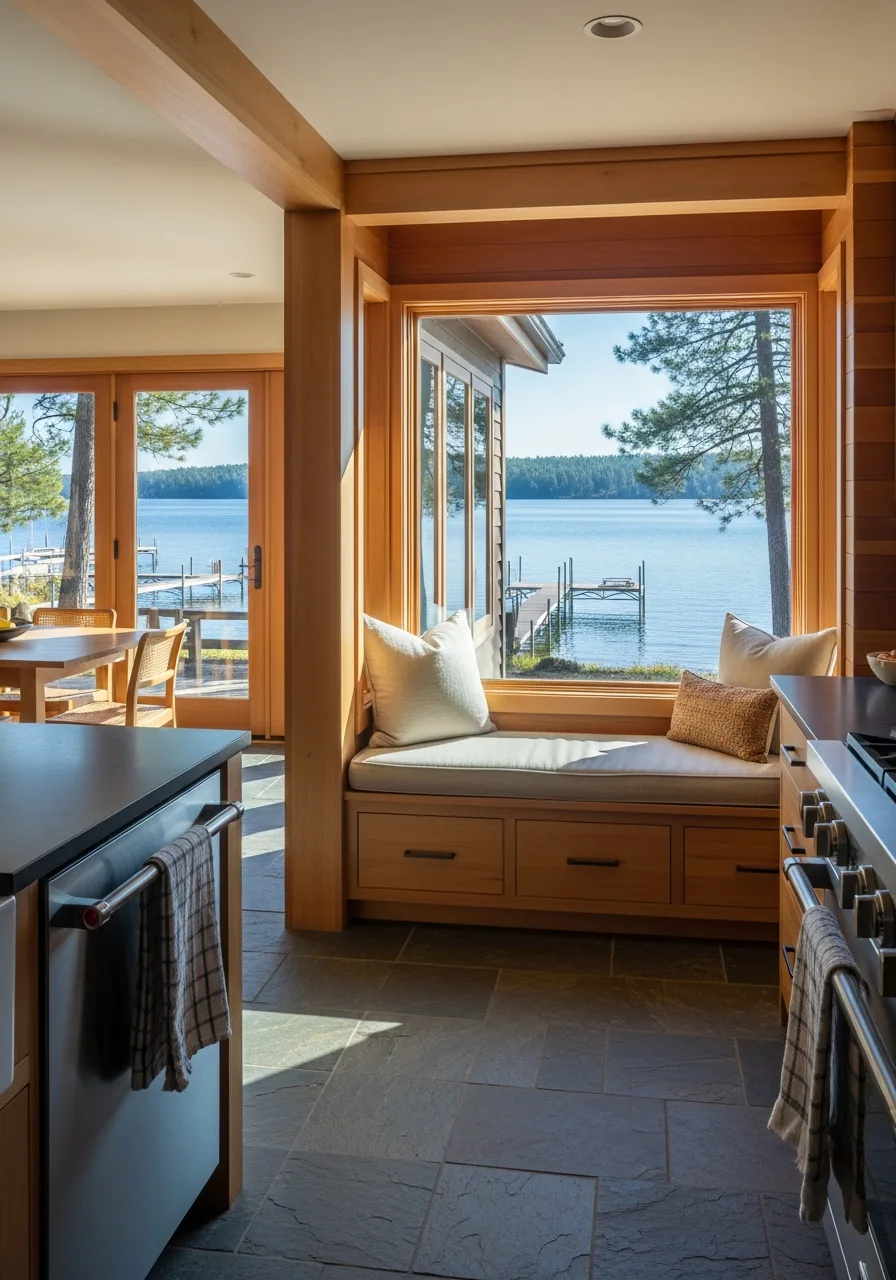
A window seat in the kitchen provides extra dining space and a cozy spot to watch the lake. It utilizes 'dead' space under windows and can include hidden storage for seasonal items.
Build a simple box bench and top it with a custom-fit cushion in a durable outdoor fabric. Worth doing: Including pull-out drawers in the base of the bench is easier to access than lift-up lids.
- Use high-density foam for the cushion so it stays comfortable for years of use.
- Outdoor fabrics like Sunbrella are best for window seats to prevent sun fading from the lake glare.
- Ensure the bench height is eighteen inches from the floor for standard dining comfort.
Quick win: Toss a few throw pillows on the bench to make it feel like a lounge area instead of just a chair.
14. Hidden Panel Appliances

Panel-ready appliances allow you to cover the fridge and dishwasher with wood that matches your cabinets. This prevents the kitchen from looking too 'industrial' and keeps the focus on the view and natural materials.
Order extra cabinet doors from your manufacturer specifically designed for appliance integration. What works: This is especially helpful in open-concept lake houses where the kitchen is visible from the living room.
- Panel-ready appliances usually cost about fifteen percent more than standard models.
- You must hire a professional installer to ensure the panels align perfectly with the cabinetry.
- This look works best with integrated hinges that allow the appliance to sit completely flush.
Most people skip this: Make sure the appliance handles match your other cabinet hardware for a seamless look.
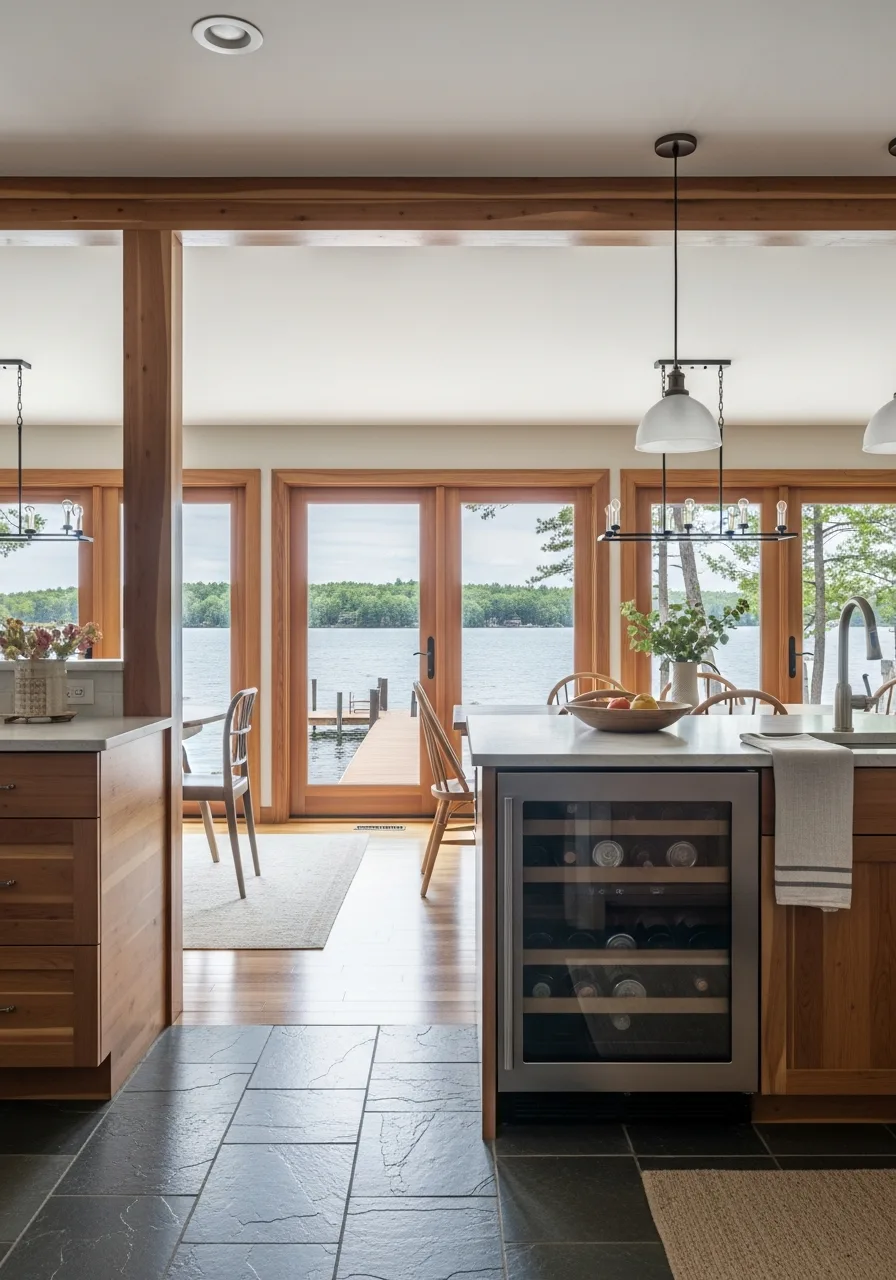
15. Durable Slate Flooring
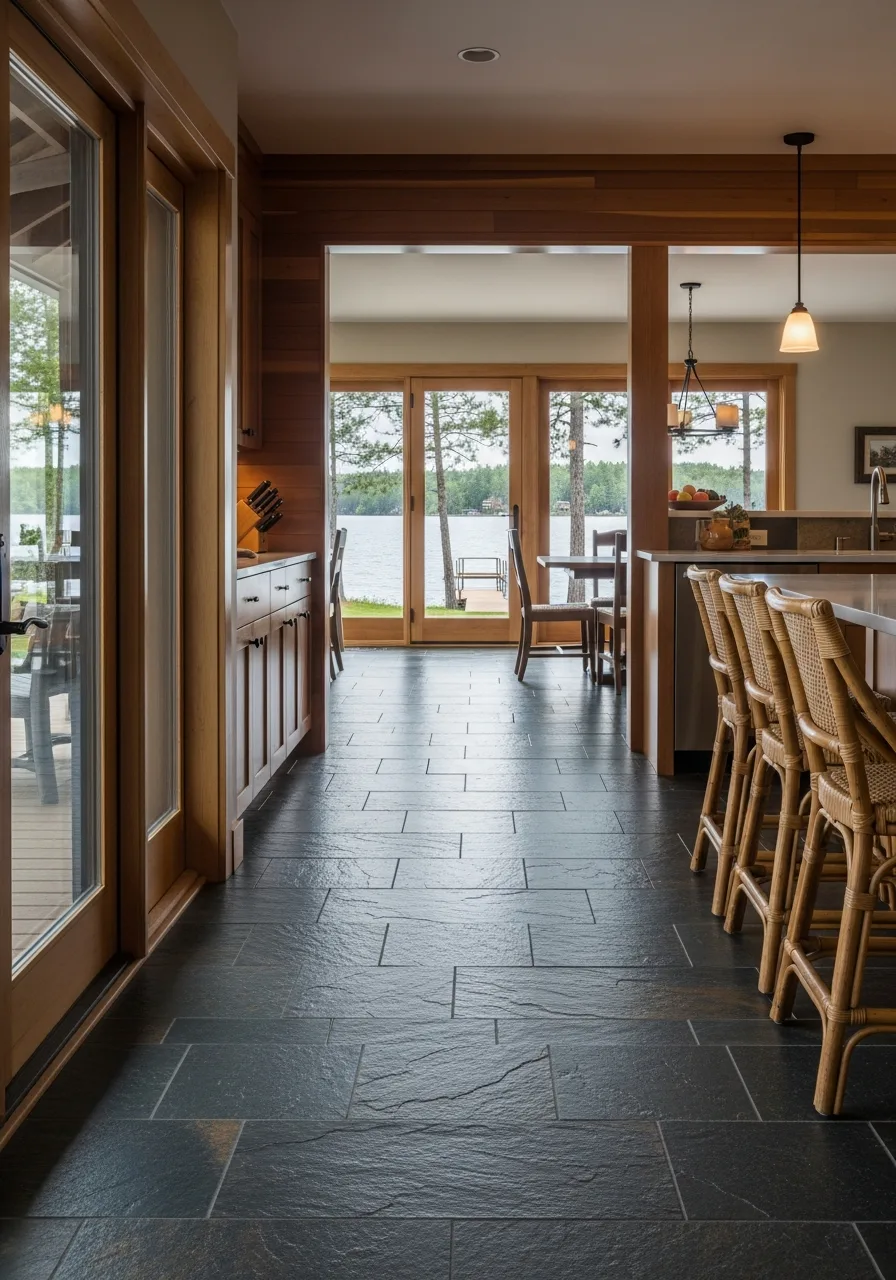
Slate tile is naturally slip-resistant and stays cool underfoot during hot summer months. Its dark, varied tones are excellent at hiding the dirt and lake water that get tracked inside.
Choose large-format slate tiles with a natural cleft finish for a modern but rustic look. Best move: Using a dark grout color prevents the floor from looking dirty as it ages.
- Natural slate should be sealed once every two years to prevent moisture absorption.
- Porcelain tiles that look like slate are a cheaper and even lower-maintenance option.
- Install radiant heating under the tile if the lake house is used during the winter months.
Quick win: Use a stone enhancer sealer to bring out the deep blues and greens in the natural slate.
16. Blue and White Patterned Tiles
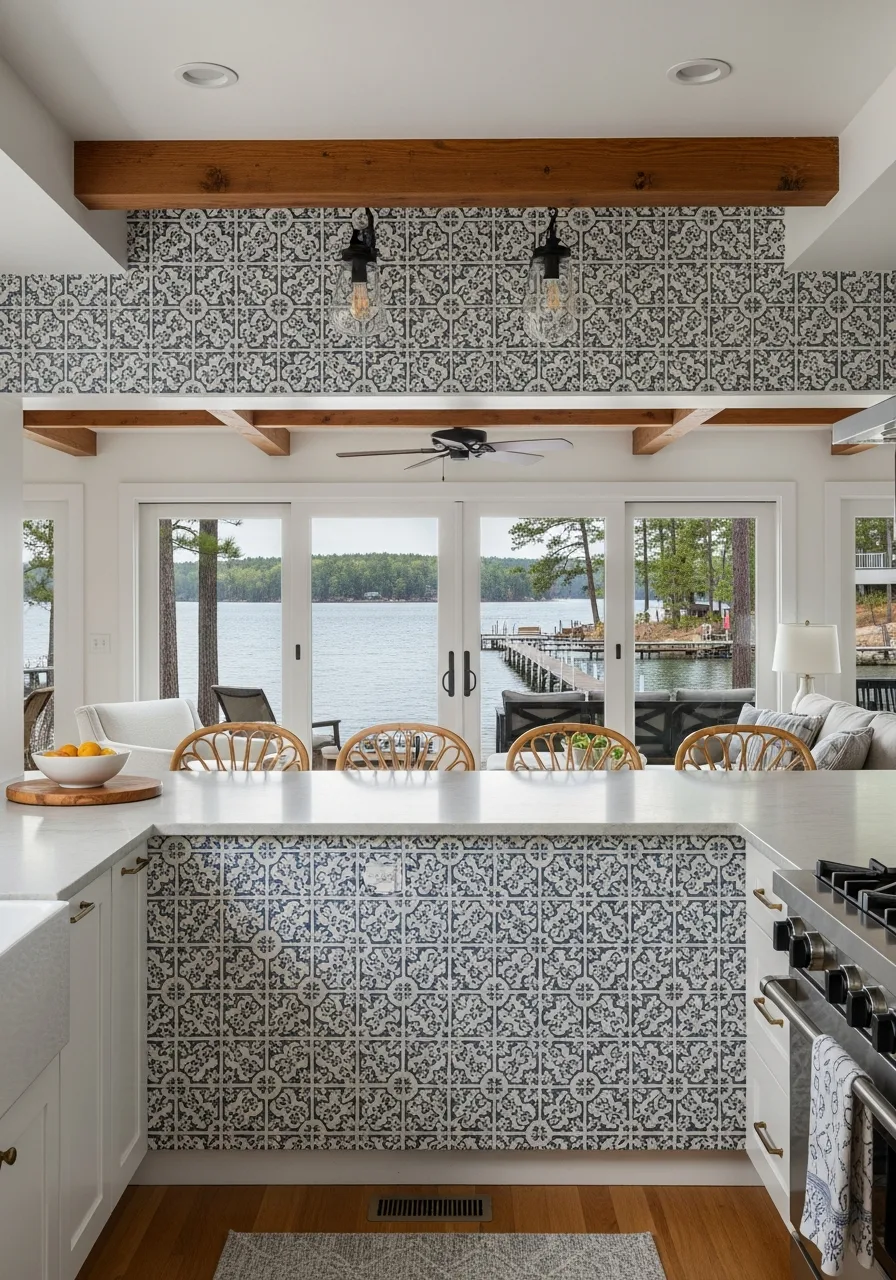
Using patterned tiles adds a classic nautical touch without being cheesy. It brings color to the wall behind the stove or sink.
Install a ceramic tile backsplash with a soft blue pattern to anchor the room. What works: Keeping the rest of the palette neutral to let the tile shine.
- Cost: $10-$25 per square foot depending on the ceramic quality.
- Set tiles with a thin grout line for a seamless look.
- Swap for peel-and-stick versions if renovating a rental cabin.
Quick win: Use a slightly darker grout to hide splashes and spills.
17. Warm Butcher Block Counters
Wood counters make a kitchen feel cozy and lived-in. They provide a soft surface that handles the wear and tear of vacation life.
Apply a food-safe mineral oil monthly to keep the wood from drying out. Best move: Using wood on the island only to balance stone on the perimeter.
- Budget: $200-$600 for a standard island top.
- Mount to cabinets with expansion brackets to allow for humidity changes.
- Choose bamboo instead of maple for a more sustainable, budget-friendly option.
Most people skip this: Sand the edges slightly to give it a softer, aged feel.
18. Horizontal White Shiplap Walls
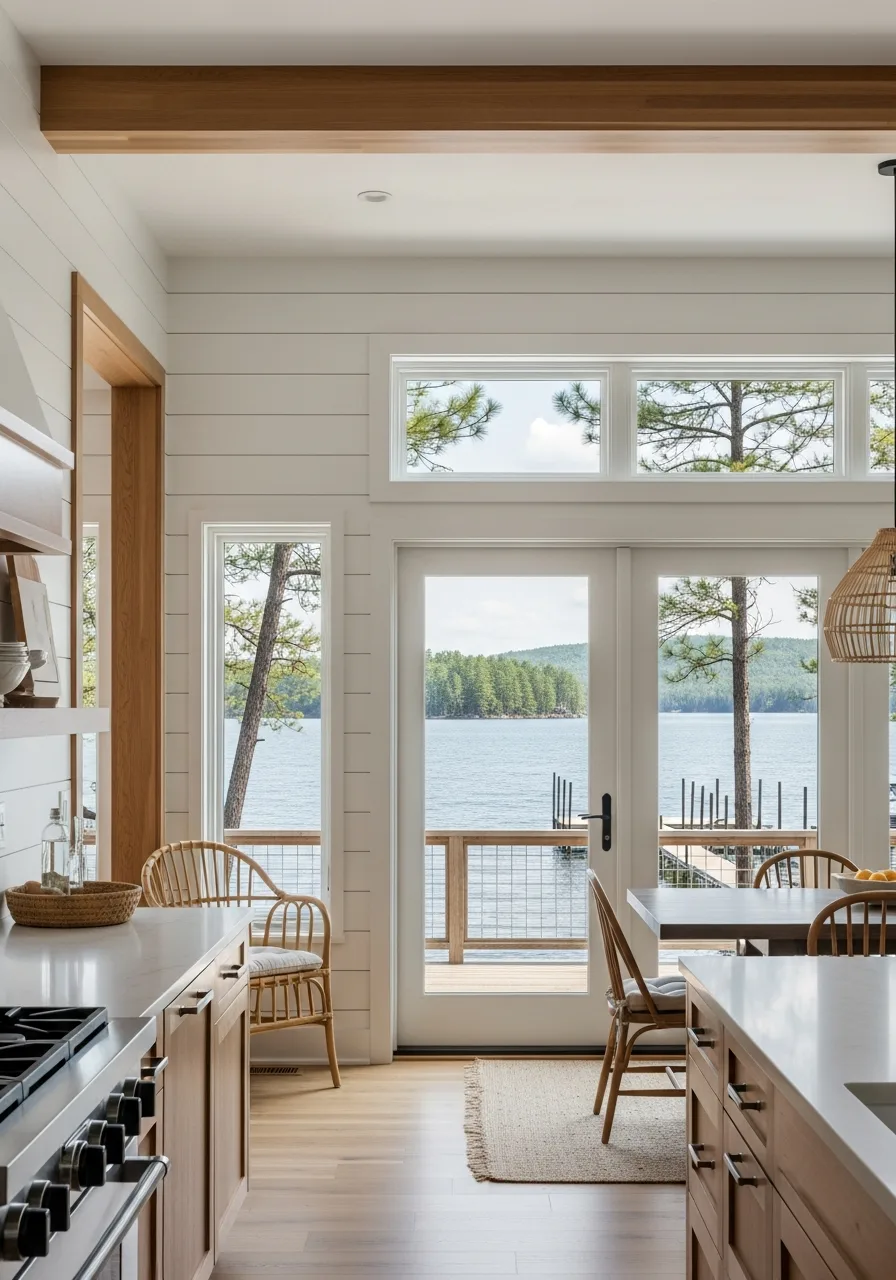
Shiplap adds texture to a kitchen without the weight of heavy stone. It creates a clean, coastal backdrop that feels bright.
Run the boards horizontally across the entire room to make the space feel wider. Worth doing: Painting the boards in a satin finish for easier cleaning.
- Cost: $2-$5 per square foot for MDF or pine boards.
- Use a nickel-gap spacer during installation for consistent lines.
- Use vertical boards instead of horizontal if the kitchen has low ceilings.
Quick win: Fill nail holes with wood filler before painting for a high-end look.
19. Glass Front Upper Cabinets
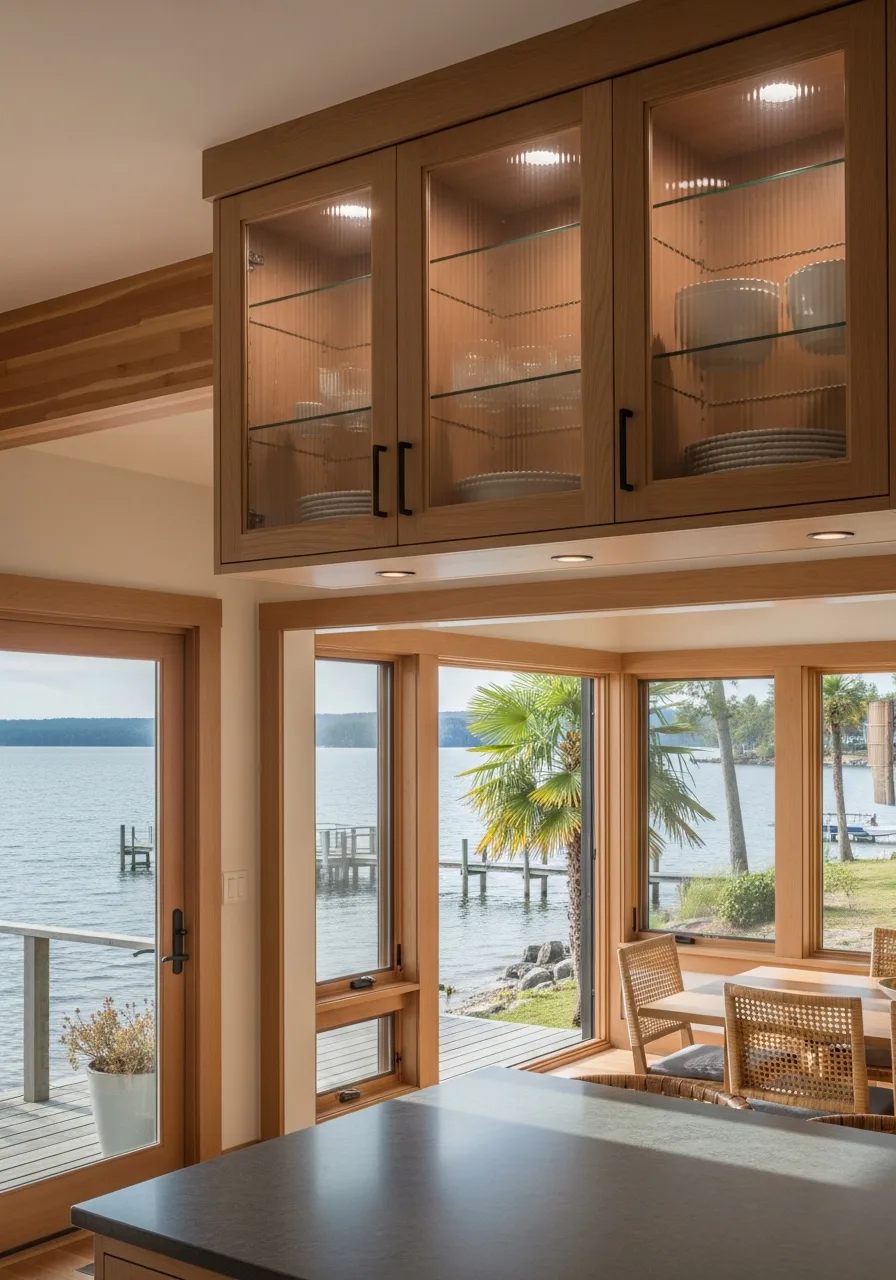
Solid cabinets can make a small lake kitchen feel cramped. Glass doors open up the view and let you see your favorite dishes.
Install interior cabinet lighting to create a soft glow during evening gatherings. Smart shortcut: Frosted glass hides clutter while still keeping the airy feel.
- Cost: $100-$300 extra per cabinet door for glass inserts.
- Organize dishes by color to keep the visual look clean.
- Use adhesive window film to get the look without replacing the glass.
Most people skip this: Paint the inside of the cabinet a contrasting color for extra depth.
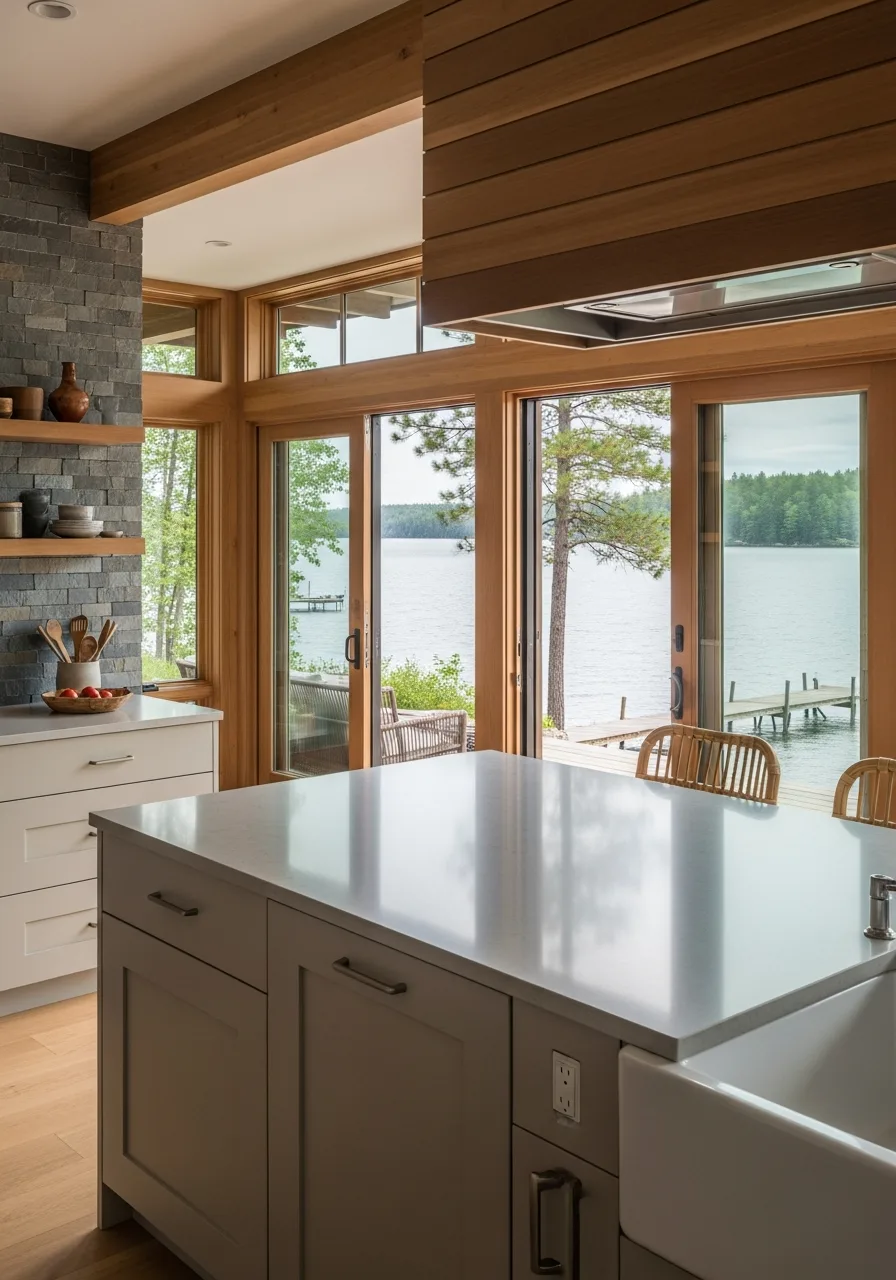
20. Large Multi Purpose Island
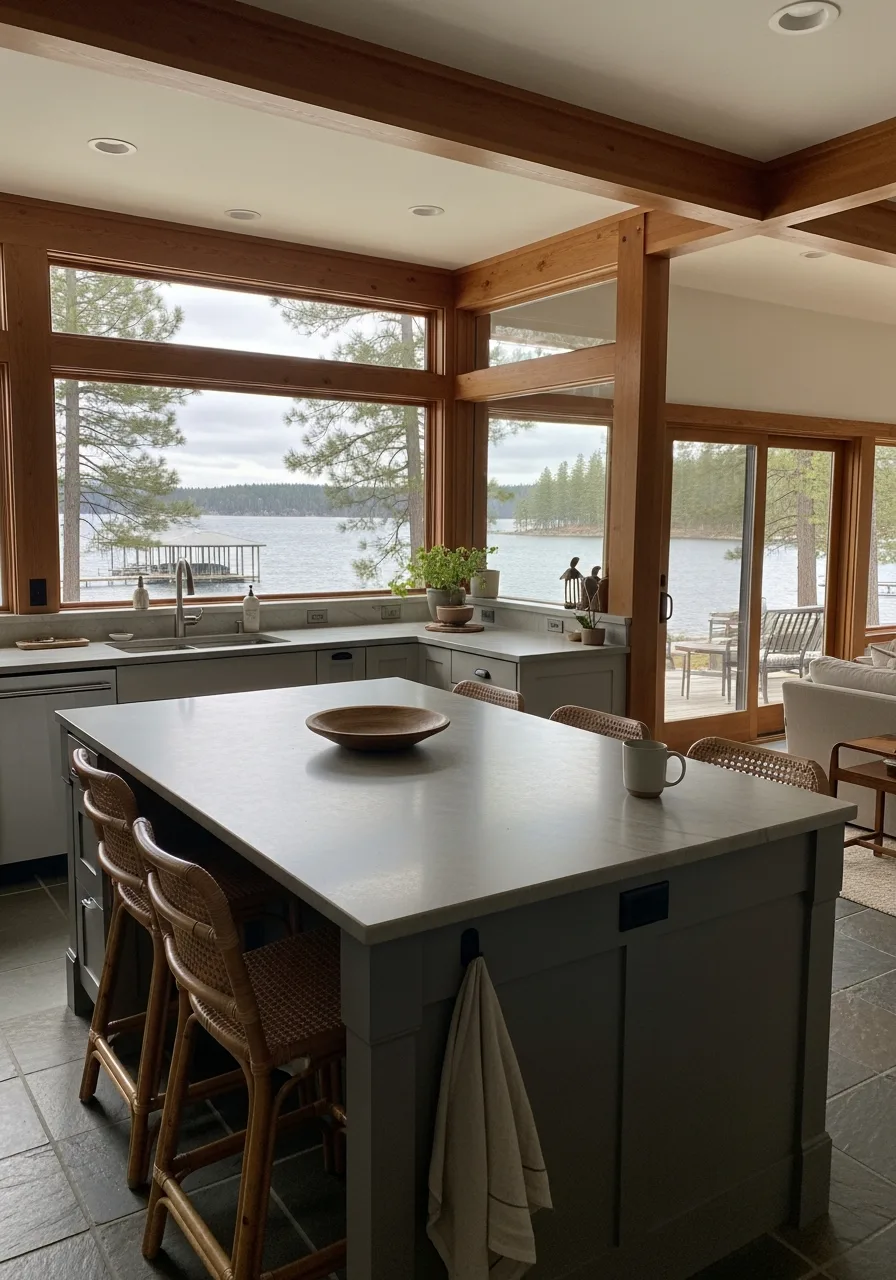
A big island serves as the hub for cooking and socializing. It replaces the need for a formal dining table in a relaxed lake setting.
Extend the countertop by twelve inches to provide comfortable legroom for guests. Best move: Adding power outlets to the ends for easy appliance use.
- Budget: $1,500-$4,000 including base and stone top.
- Ensure at least 36 inches of walkway space around all sides.
- Add wheels to a smaller island for flexibility in tight spaces.
Best shortcut: Use a different color for the island base than the perimeter cabinets.
Home Decor
21. Swing-Arm Lake Kitchen Pot Filler
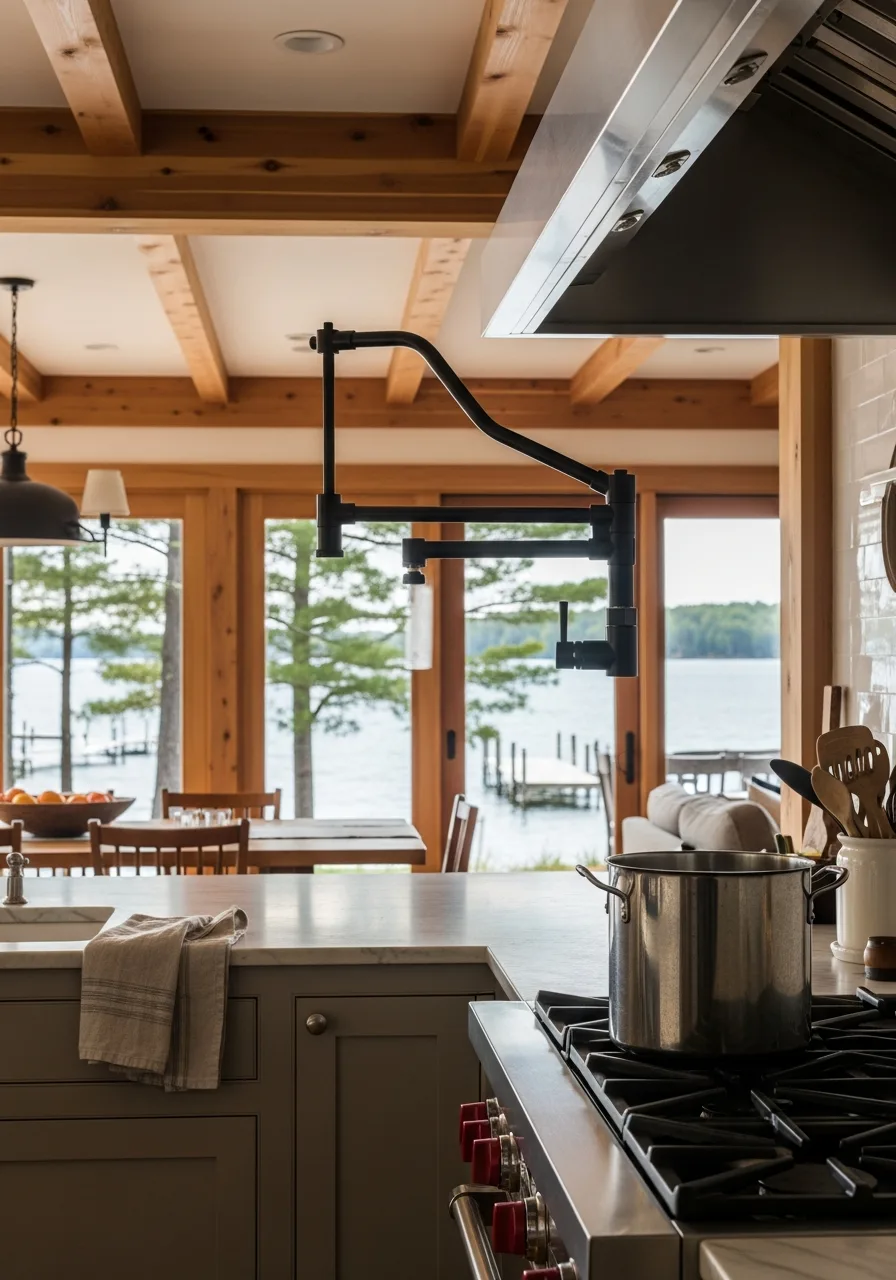
A wall-mounted pot filler eliminates the need to carry heavy, water-filled stockpots from the sink to the stove. This is particularly useful in lake houses where large-batch cooking for guests is frequent.
Install the faucet directly above the range at a height that clears the tallest lobster or pasta pot. What works: Choosing a finish like oil-rubbed bronze or matte black adds a high-end, custom feel to a rustic lakeside aesthetic.
- Expect to spend $150–$500 for the fixture plus the cost of a dedicated cold-water line during a renovation.
- Ensure the swing arm reaches all burners and folds flat against the backsplash to stay out of the way when not in use.
- Match the metal finish to the main kitchen faucet or the cabinet hardware for a cohesive, intentional look.
Most people skip this: Install a secondary shut-off valve in a nearby cabinet to make future maintenance easier without turning off the main water line.
22. Natural Wicker Bar Stools
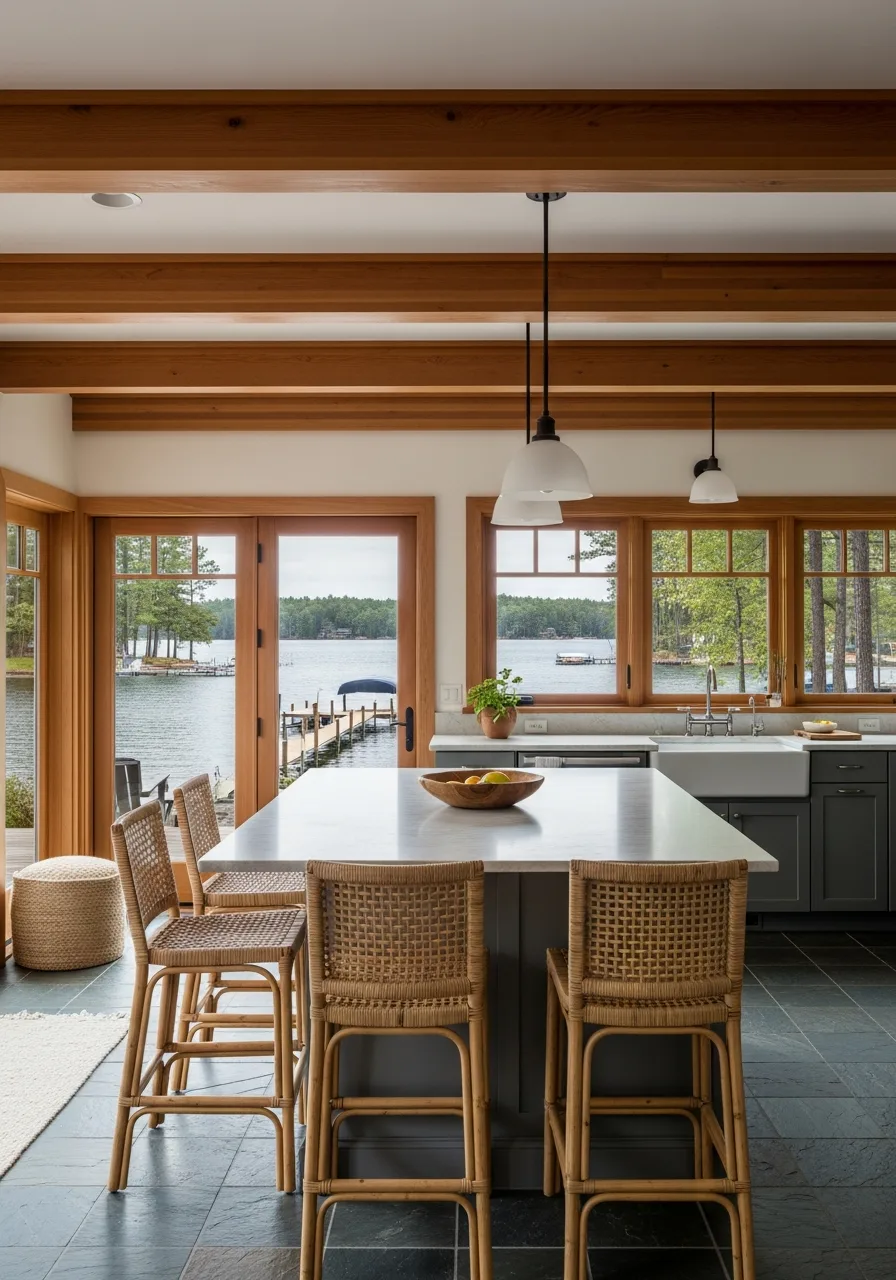
Wicker adds an organic texture that fits perfectly near the water. It is lightweight and easy to move around for extra seating.
Select stools with a backrest to encourage guests to linger longer. What works: Using a clear coat spray to protect the fibers from moisture.
- Budget: $150-$300 per stool for quality resin or rattan.
- Measure the counter height carefully to ensure a 10-inch gap for legs.
- Choose synthetic wicker if the kitchen is open to an outdoor porch.
Best shortcut: Add tie-on cushions for a pop of color and extra comfort.
23. Vertical Wall Plate Rack
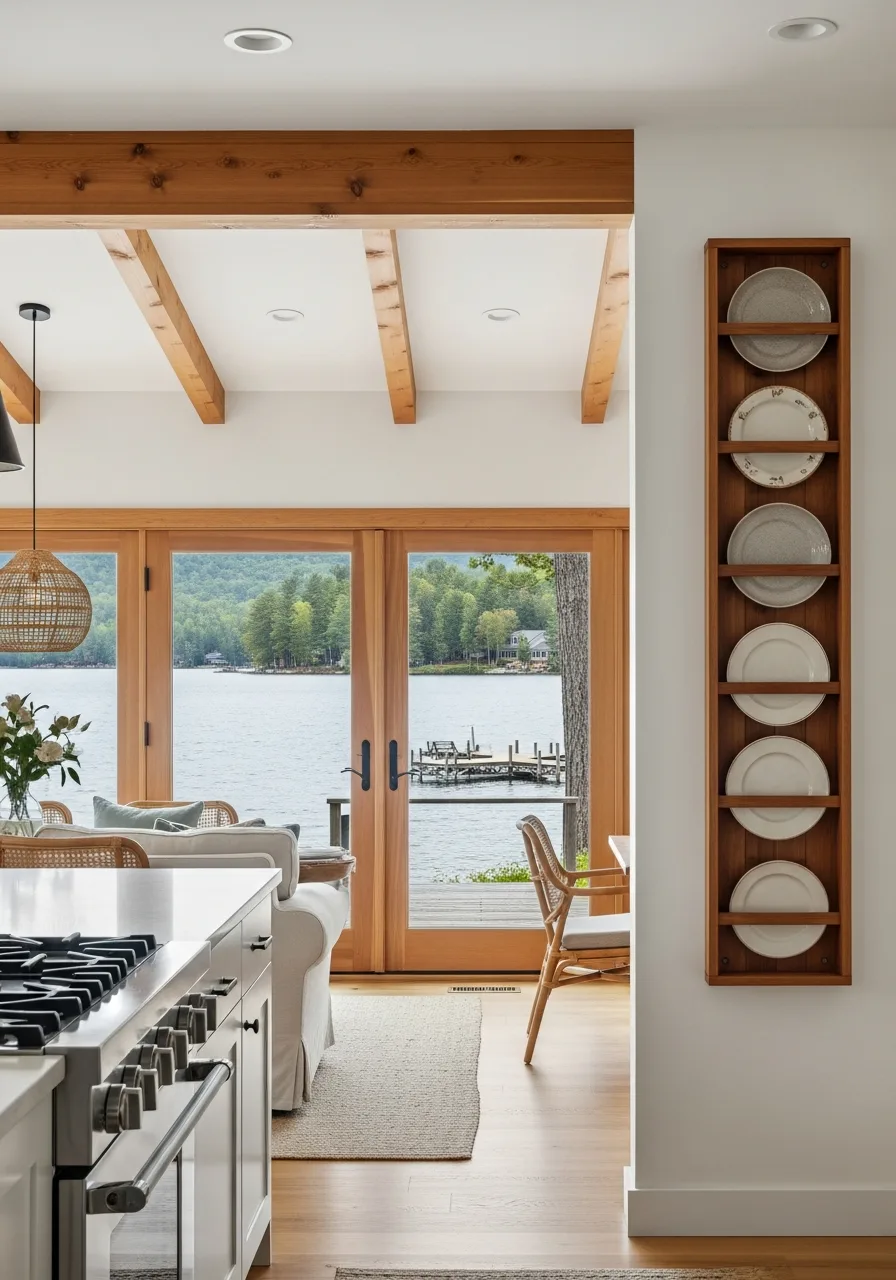
Stacking plates in a drawer takes up valuable real estate. A wall-mounted rack displays your everyday dishes and keeps them within reach.
Screw the rack directly into wall studs to handle the weight of heavy stoneware. Best move: Placing it right above the dishwasher for easy unloading.
- Cost: $80-$200 for a pre-made wood or metal rack.
- Leave enough space between slots for thick ceramic bowls.
- Paint it the same color as the walls to make it blend in.
Most people skip this: Use the bottom shelf for mugs or small spice jars.
24. Classic White Beadboard Ceiling
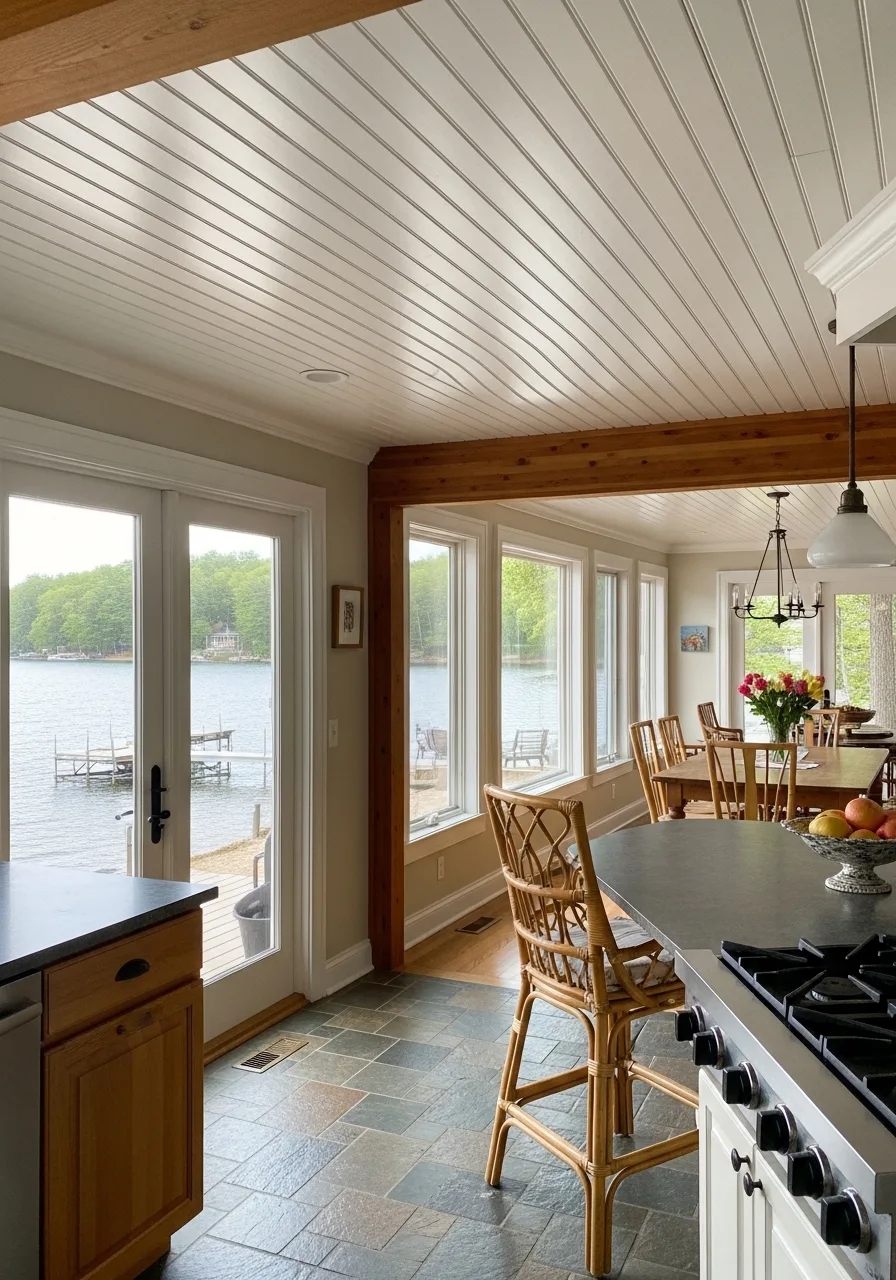
Ceilings are often ignored, but beadboard adds a cozy cottage vibe.
It covers up old plaster or drywall imperfections beautifully. Apply a semi-gloss paint to reflect light and make the room feel taller. Smart shortcut: Use beadboard wallpaper for a similar look on a tight budget.
- Cost: $1.50-$3 per square foot for paneling.
- Install with a brad nailer and construction adhesive for a secure fit.
- Run the panels parallel to the longest wall to elongate the room.
Quick win: Use pre-finished white panels to save hours of overhead painting.
25. Slim Pull Out Pantry
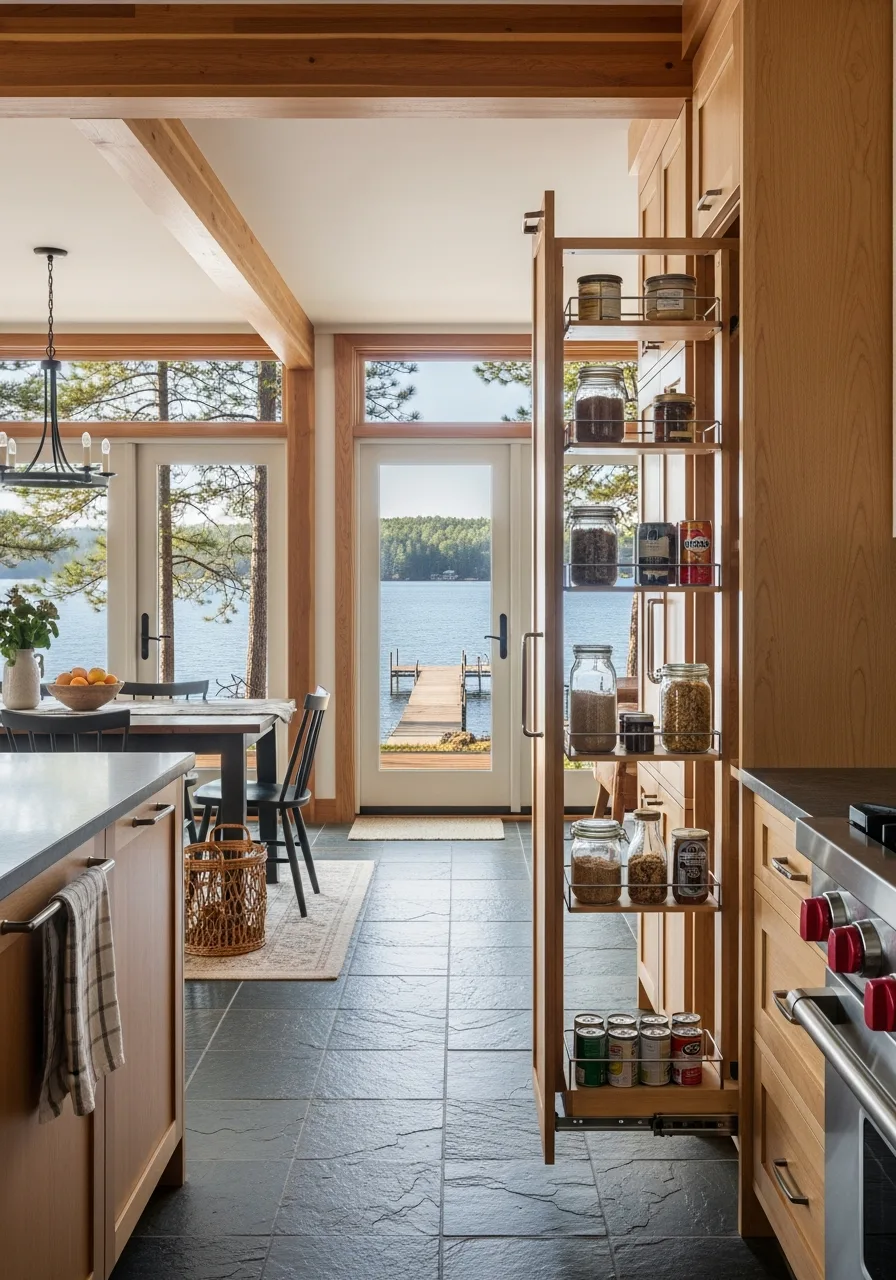
Lake houses often have awkward corners or narrow gaps. A pull-out pantry turns a six-inch space into organized storage for cans and jars.
Install heavy-duty slides so the shelf glides smoothly even when fully loaded. Worth doing: Using clear bins inside to keep small items from falling out.
- Budget: $150-$400 for hardware and wood.
- Measure the depth of your cabinets to ensure the slides fit perfectly.
- Add a decorative front panel that matches your existing cabinets.
Best shortcut: Buy a pre-assembled metal unit that fits into standard cabinet widths.
26. Hanging Copper Cookware
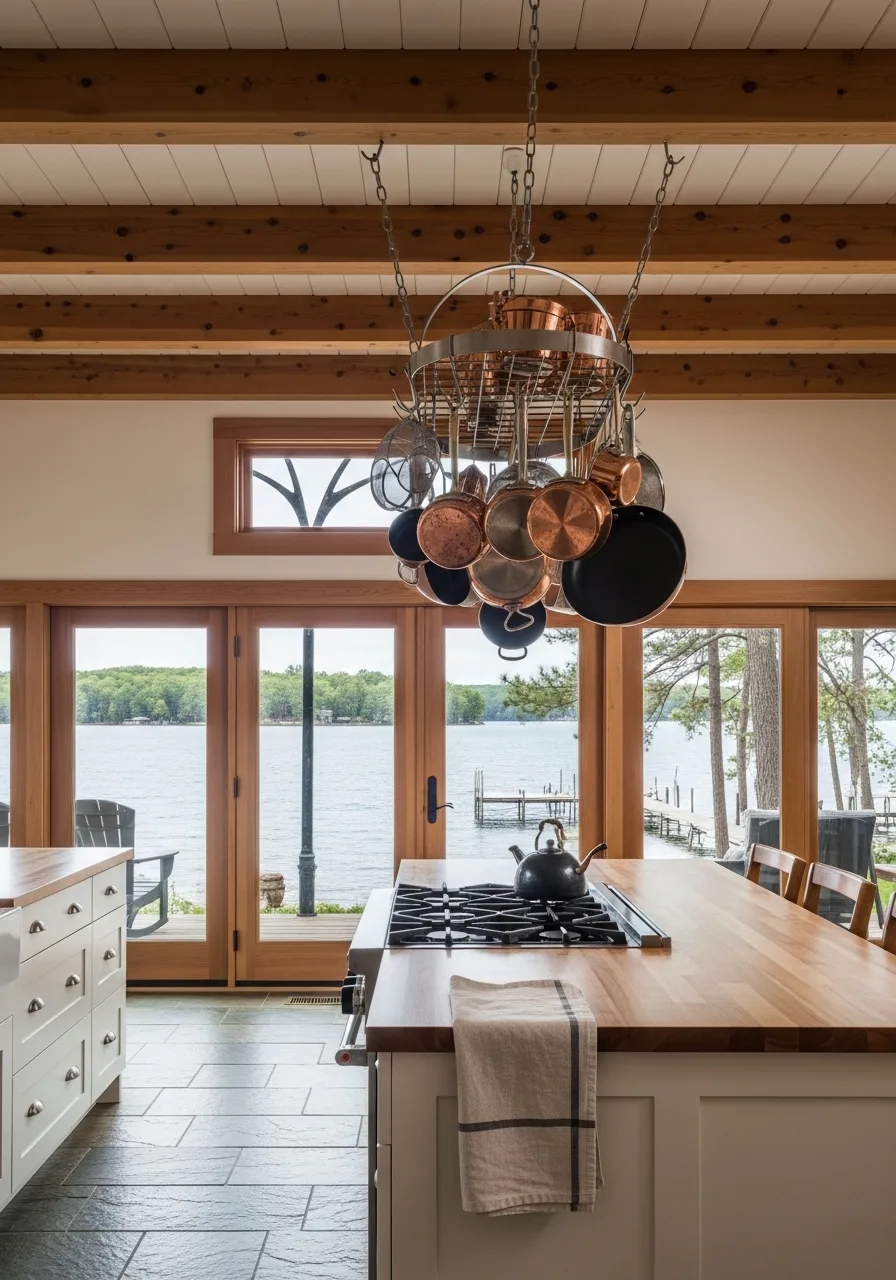
Copper adds a warm, metallic glow that feels high-end yet rustic. Hanging pots on a rack frees up cabinet space for small appliances.
Use a ceiling-mounted rack centered over the island for a focal point. What works: Mixing copper with stainless steel for a curated look.
- Cost: $50-$150 for the rack; pots vary by brand.
- Ensure the ceiling hooks are anchored into a joist to prevent sagging.
- Hang the rack at a height where the tallest person can reach without straining.
Quick win: Keep a bottle of copper cleaner handy to maintain the shine.
27. Window Sill Herb Garden
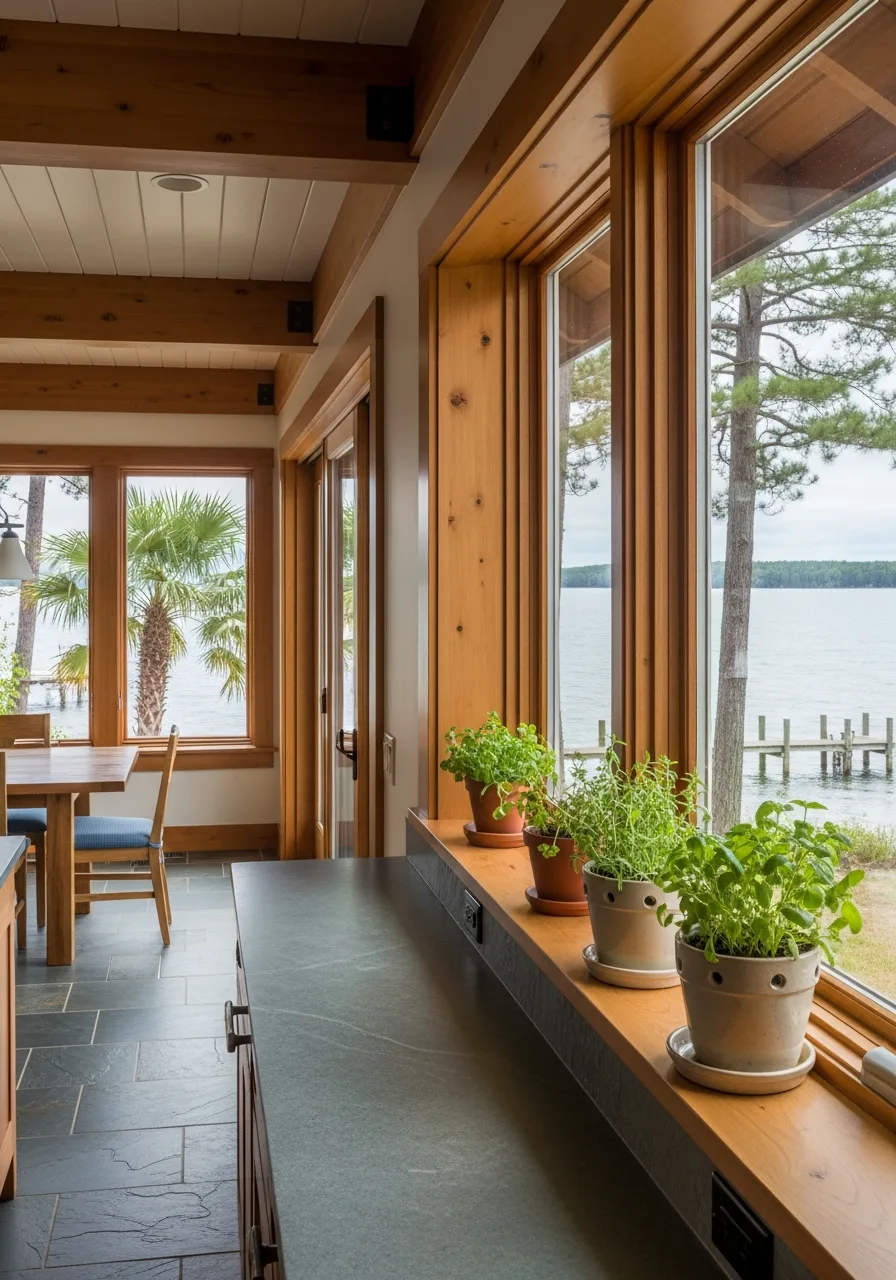
Fresh herbs make cooking better and add life to the kitchen. A dedicated spot on the sill ensures they get the light they need.
Use matching ceramic pots with drainage holes to keep the look cohesive. Smart shortcut: Use a self-watering system if you only visit the lake house on weekends.
- Budget: $30-$100 for pots and starter plants.
- Place the garden in a south-facing window for maximum sunlight.
- Use a tray underneath to protect your windowsills from water damage.
Most people skip this: Rotate the pots every week so the plants grow evenly.
28. Matte Black Industrial Pendants
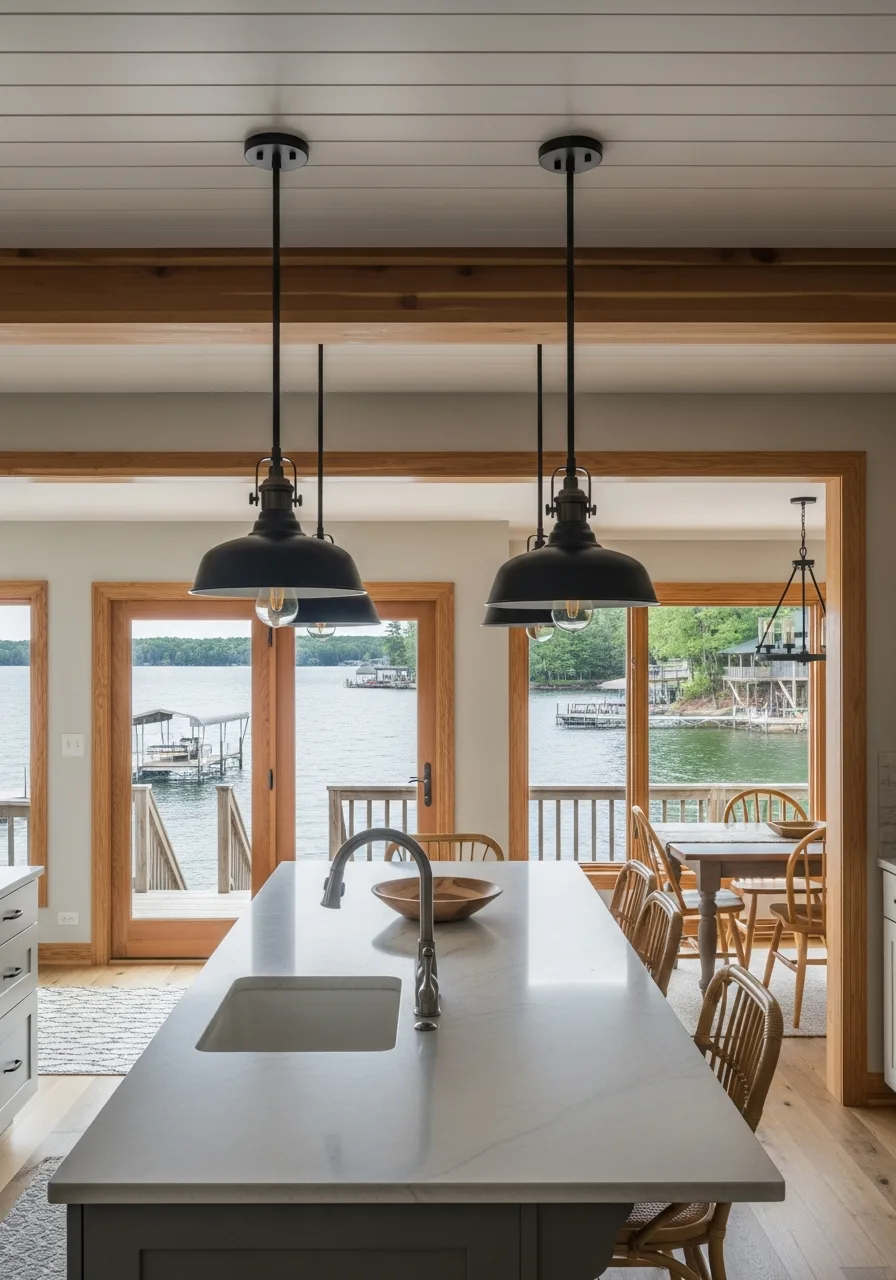
Industrial lights provide a sharp contrast to soft lake house colors. They offer focused task lighting over the island or sink.
Hang the bottom of the light thirty inches above the countertop for the best scale. Worth doing: Using Edison bulbs for a warm, vintage glow.
- Cost: $60-$200 per fixture.
- Hire an electrician to install a dimmer switch for adjustable ambiance.
- Choose a size that is proportional to the width of your island.
Quick win: Clean the inside of the metal shades monthly to prevent dust buildup.
29. Integrated Kitchen Mudroom Bench
Coming in from the lake often means wet shoes and towels. A bench near the back door keeps the mess out of the main cooking area.
Add cubbies underneath the seat for easy shoe storage. What works: Using an outdoor-grade fabric for the bench cushion to handle moisture.
- Budget: $300-$800 for a custom built-in unit.
- Place hooks above the bench for raincoats and life jackets.
- Use a durable laminate or tile floor around the bench area.
Best shortcut: Repurpose a sturdy storage chest as a bench to save on construction.
30. Soft Sage Green Cabinets
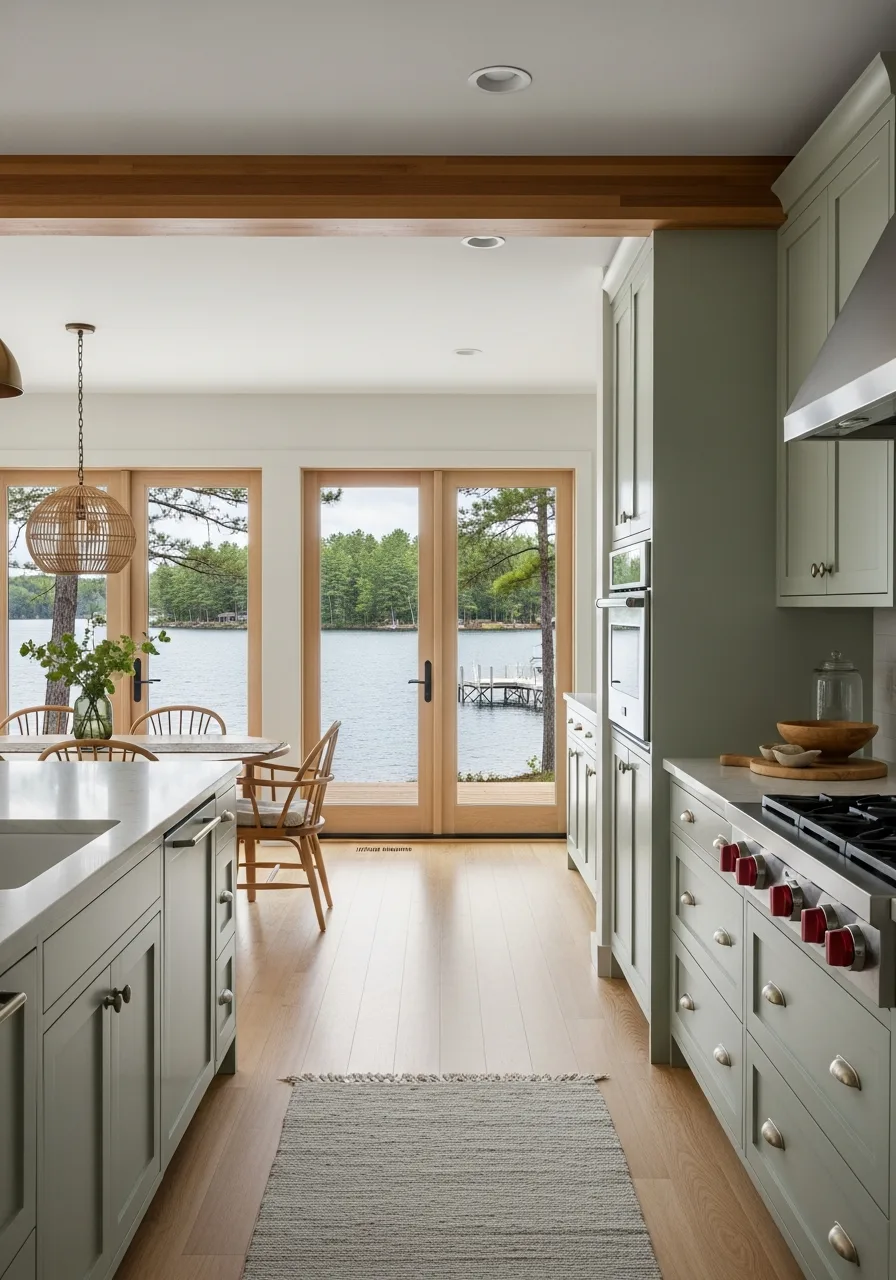
Sage green pulls the colors of the surrounding trees into the home. It is a calming alternative to standard white or gray.
Choose a matte finish to give the cabinets a soft, velvety appearance. Best move: Pairing green cabinets with light wood accents for a natural look.
- Cost: $500-$2,000 to repaint existing cabinets professionally.
- Test paint samples at different times of day to see how the light changes.
- Use black or brass hardware to give the green a modern edge.
Quick win: Paint just the lower cabinets green and keep the uppers white to open the space.
Frequently Asked Questions
How do I maximize lake views without losing all my upper cabinet storage?
To keep your views unobstructed, consider installing expansive windows and shifting your storage to a spacious walk-in pantry. You can also utilize oversized drawers in a large kitchen island to provide ample room for dishes and cookware below eye level.
What are the best durable materials for a high-traffic lake house kitchen?
Choose moisture-resistant materials like quartz countertops and slate flooring that can easily withstand tracked-in sand and damp towels. Engineered hardwood is another practical option, offering the classic look of wood with the stability needed for humid lakeside environments.
How can I make a modern kitchen feel like a cozy lake retreat?
Incorporate organic textures such as reclaimed wood ceiling beams and woven pendant lighting to soften modern lines. A natural stone backsplash also adds a tactile, earthy element that connects your indoor space to the rugged beauty of the outdoors.
What color palettes work best for a kitchen on the water?
Draw inspiration from the landscape by using a palette of watery blues, deep forest greens, and warm earth tones. These hues help pull the outside colors inward, creating a serene and seamless transition between the kitchen and the lake.
How do I design a lake house kitchen for large groups and entertaining?
An open-concept layout that flows directly into the living area is ideal for keeping everyone connected during gatherings. Incorporating double islands for extra prep space and a dedicated beverage station will also help manage traffic flow when hosting a crowd.