45 Clever Kids Bedroom Decor Ideas
This post may contain affiliate links: full affiliate disclosure.
Creating a room for a child is about more than just picking a color. It needs to handle rough play, quiet study time, and deep sleep all in one small space.
Focus on pieces that grow with them so you are not redecorating every single year.
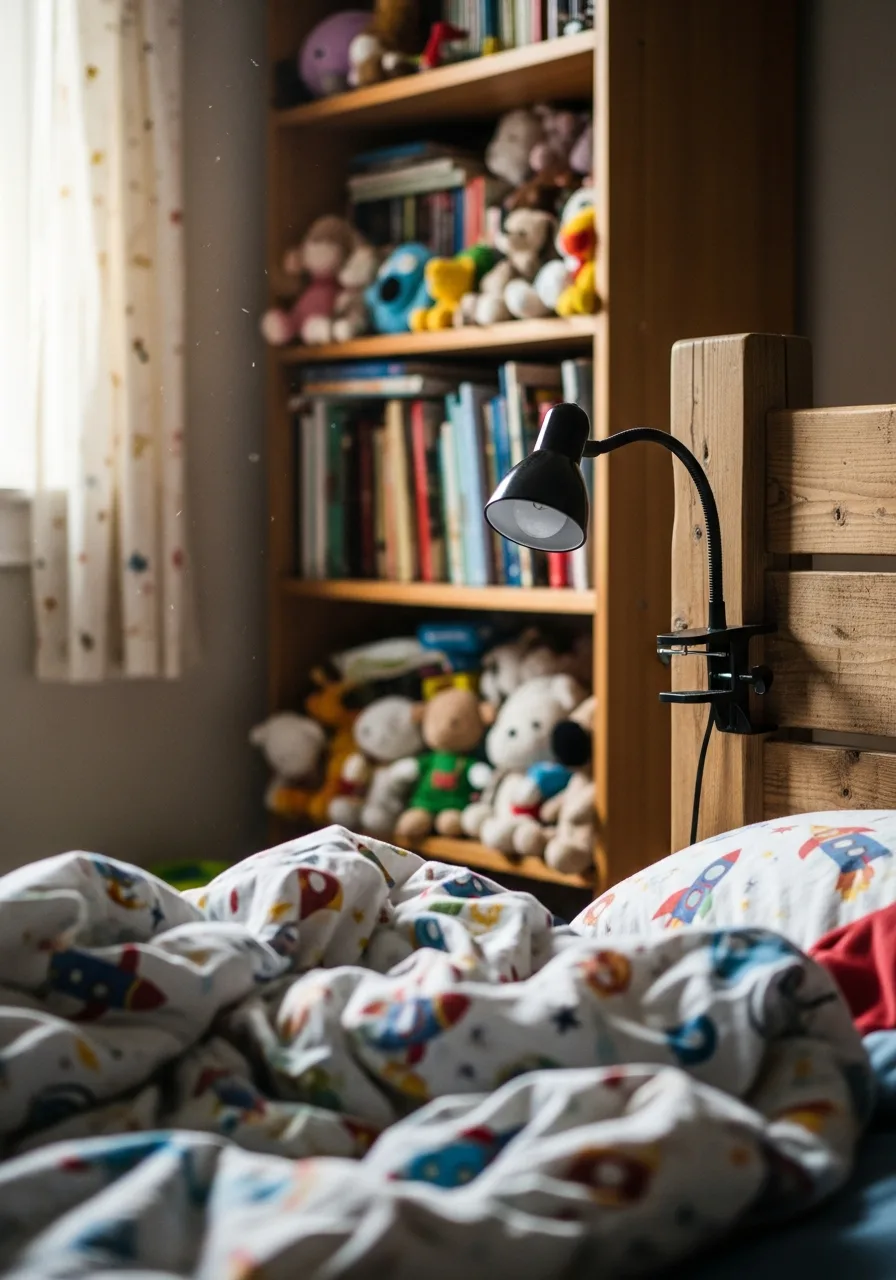
1. Elevated Loft Beds
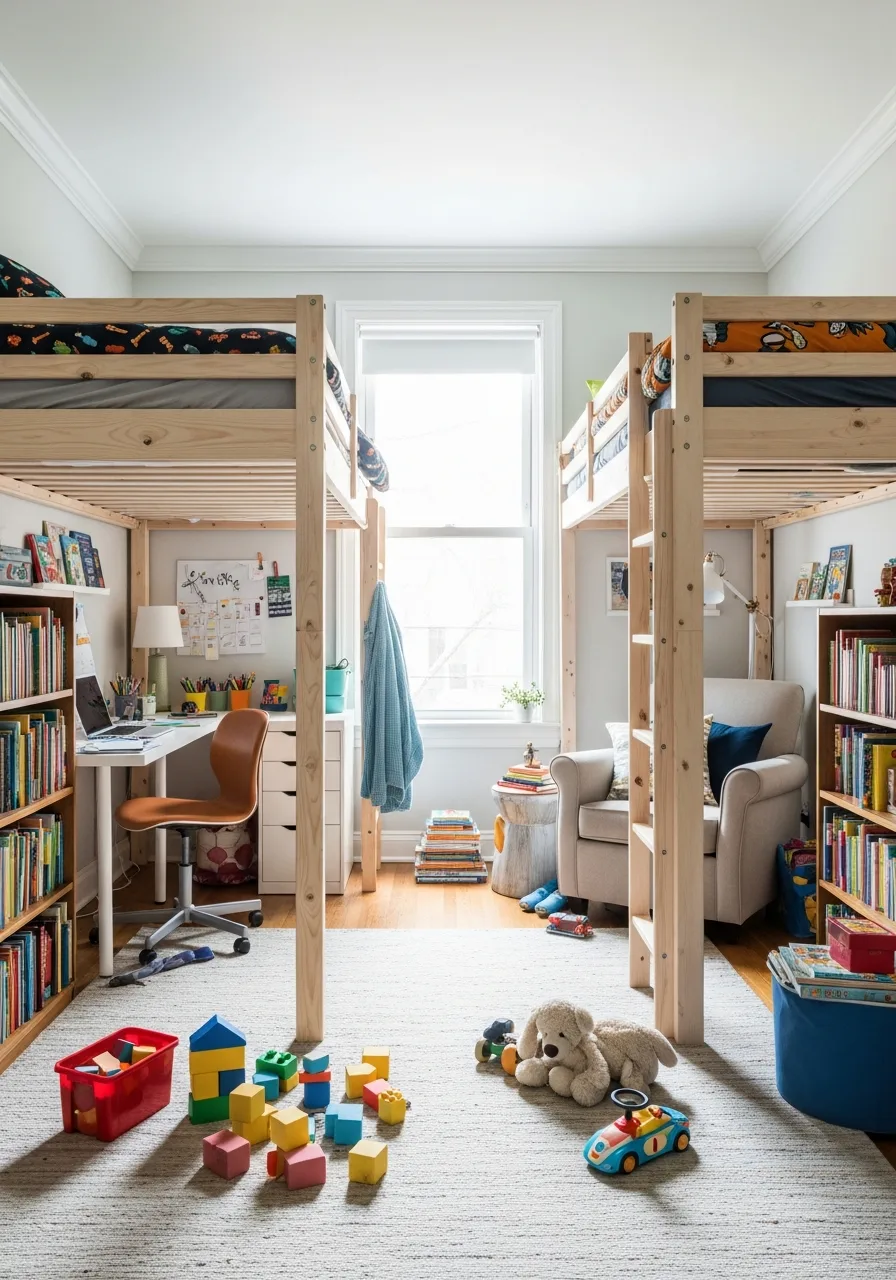
A loft bed lifts the mattress off the ground to double the usable floor space. This creates a secret spot underneath for a desk or a reading chair.
Measure your ceiling height before buying to ensure there is enough clearance for sitting up. Best move: Use the extra space for a desk to keep homework and sleep separate.
- Budget: $200-$500 depending on materials.
- Setup: Needs two people for safe assembly.
- Adaptation: Choose a low loft for younger children to keep them closer to the ground.
Quick win: Add a clip-on lamp to the top rail for nighttime reading.
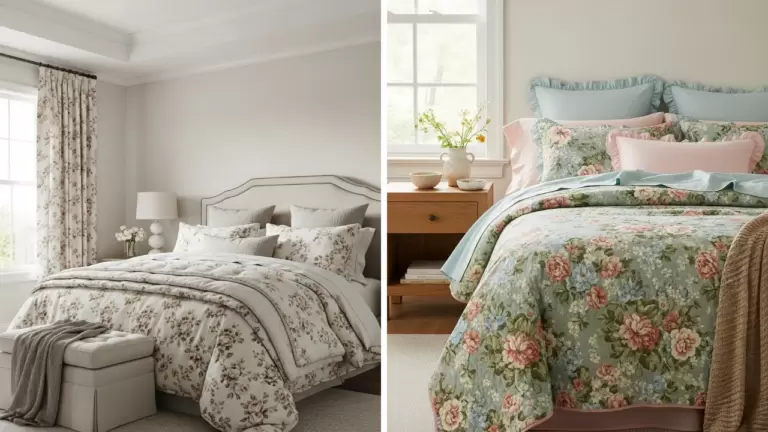
2. Peel and Stick Wallpaper
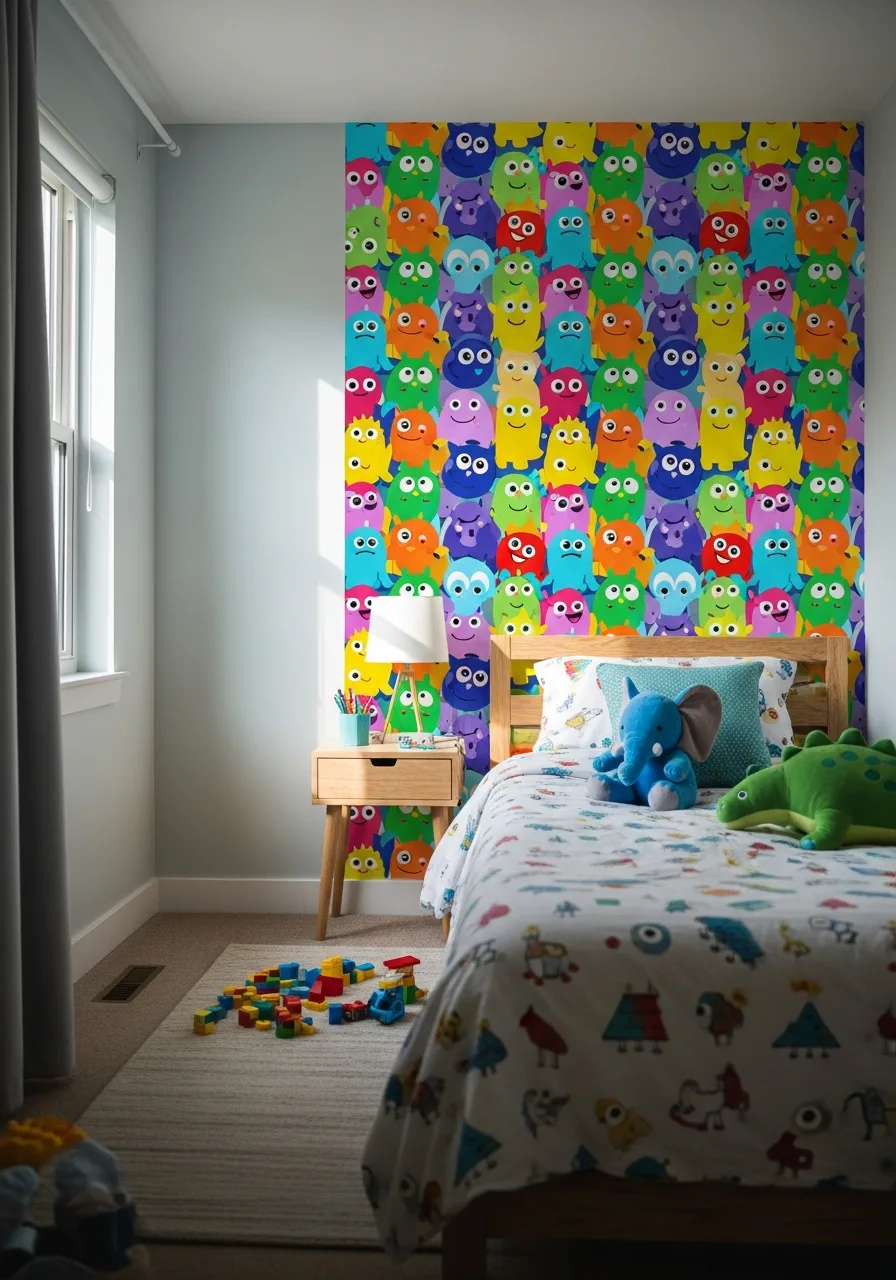
Removable wallpaper adds a huge pop of pattern without the commitment of traditional paper. It is perfect for kids who might change their favorite style or characters in a few years.
Smooth out air bubbles with a plastic squeegee as you apply each panel. Smart shortcut: Only do one accent wall to save money and time.
- Budget: $30-$100 per roll.
- Setup: Wipe the wall with a damp cloth and let it dry before starting.
- Adaptation: Use leftovers to line the inside of dresser drawers for a hidden detail.
Quick win: Buy one extra roll to cover mistakes or for future repairs.
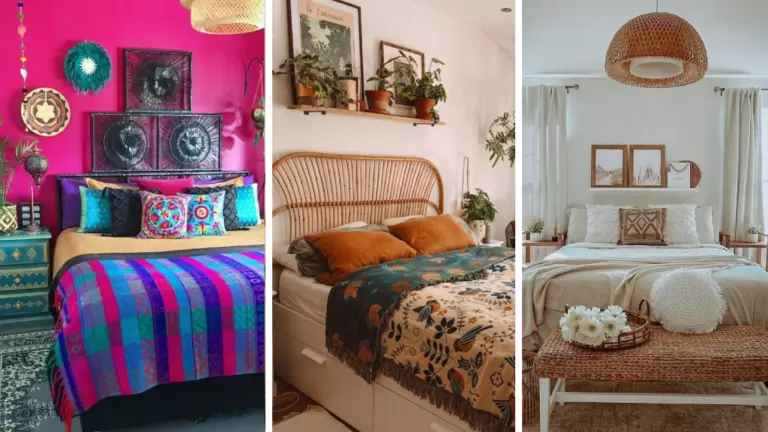
3. Oversized Floor Pillows
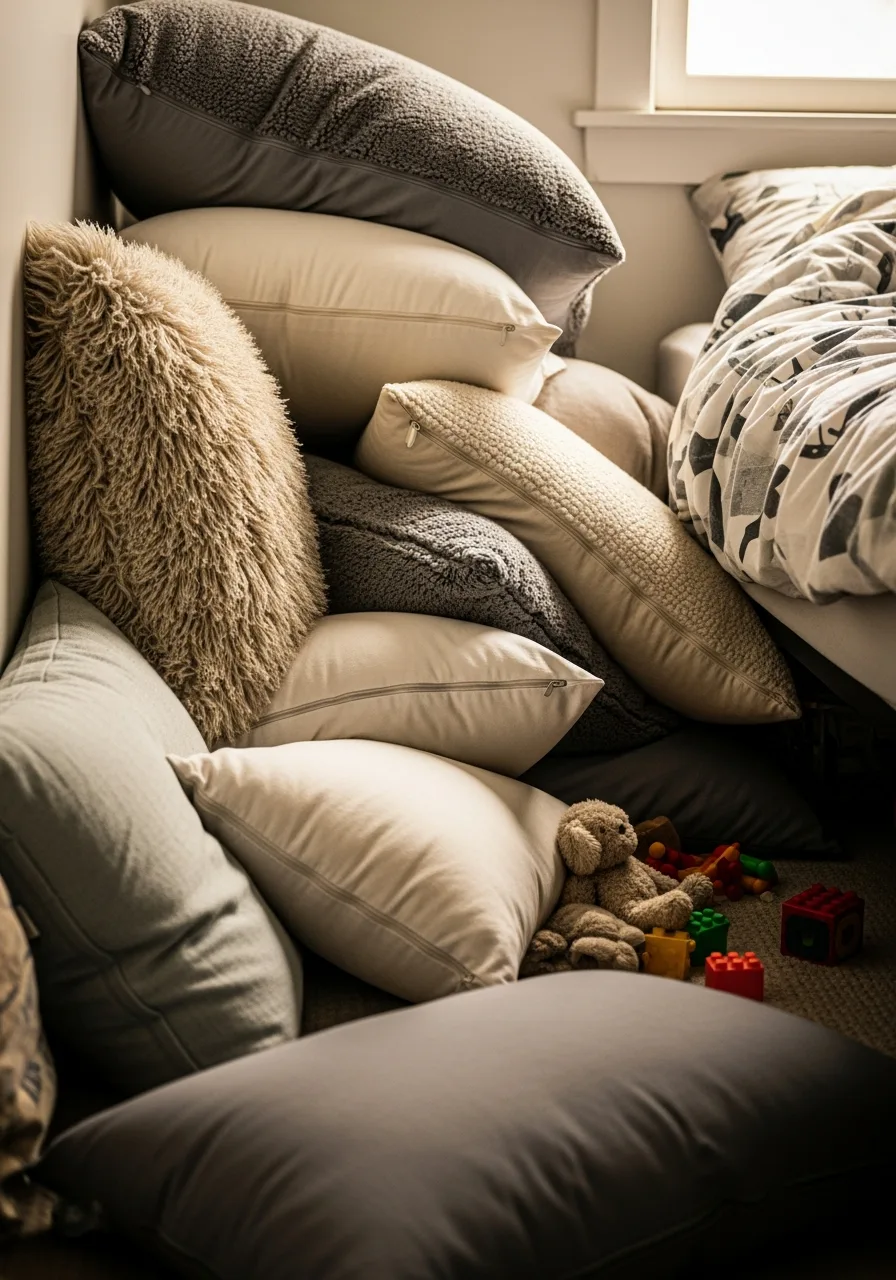
Large pillows provide soft seating for reading or playing video games on the floor. They are easy to move around and can be stacked in a corner when the floor needs to be clear.
Choose covers with zippers so you can toss them in the washing machine regularly. What works: Mix different textures like faux fur and cotton to make the room feel cozy.
- Budget: $20-$50 per pillow.
- Setup: Group them in a corner to create an instant lounge area.
- Adaptation: Use smaller pillows in a small room to avoid cluttering the walkway.
Most people skip this: Check the fill material to ensure it is firm enough to hold its shape over time.
4. Wall Mounted Pegboards
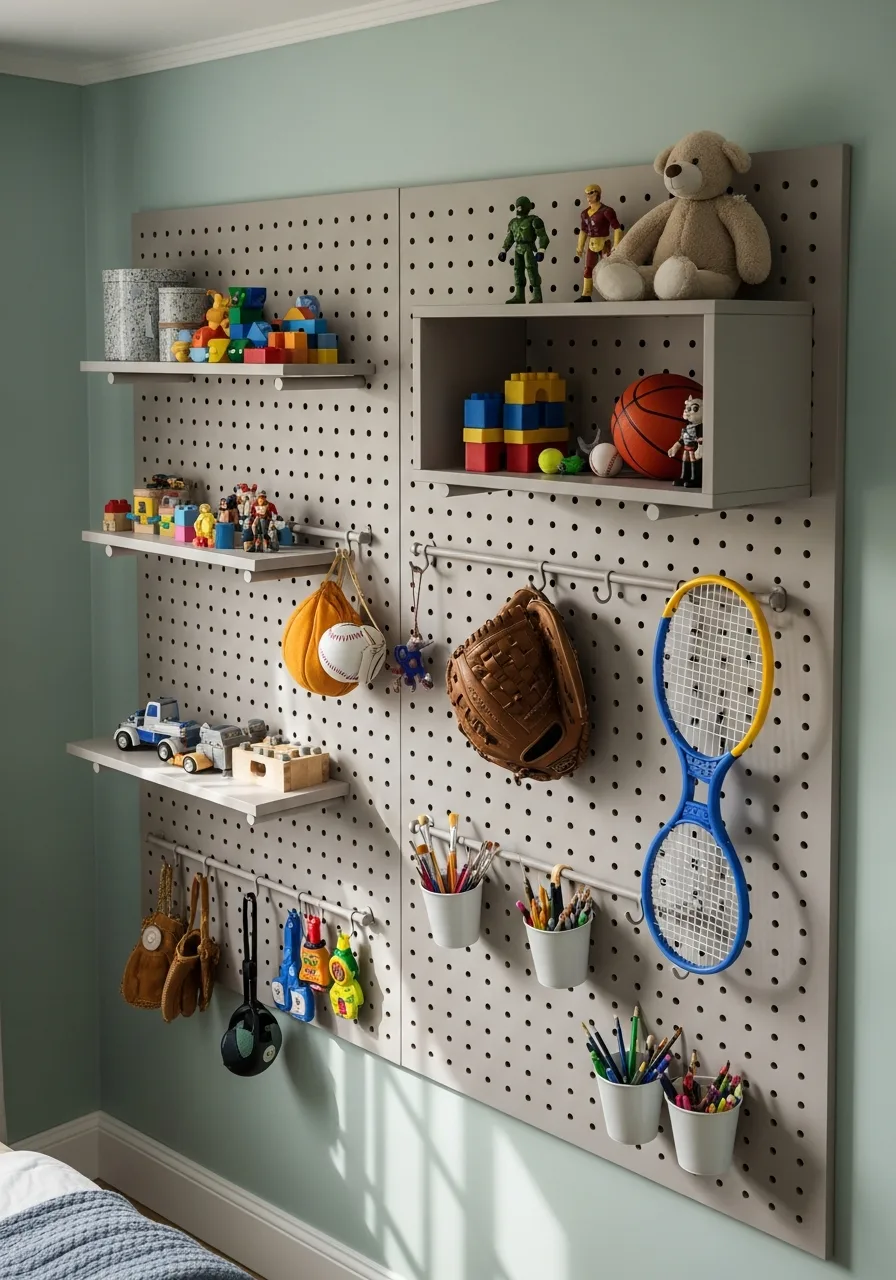
Large pegboards turn an empty wall into a flexible storage system. You can move hooks and shelves around as your child’s hobbies change from toys to sports.
Mount the board at a height where your child can reach the most-used items easily. What works: Paint the board the same color as the wall for a clean, built-in look.
- Budget: $30-$60 for a full kit.
- Setup: Use heavy-duty wall anchors to prevent the board from pulling away.
- Adaptation: Use small square boards if you have limited wall space.
Most people skip this: Sand the edges of wooden pegs to prevent splinters during use.
5. Clear Toy Storage Bins
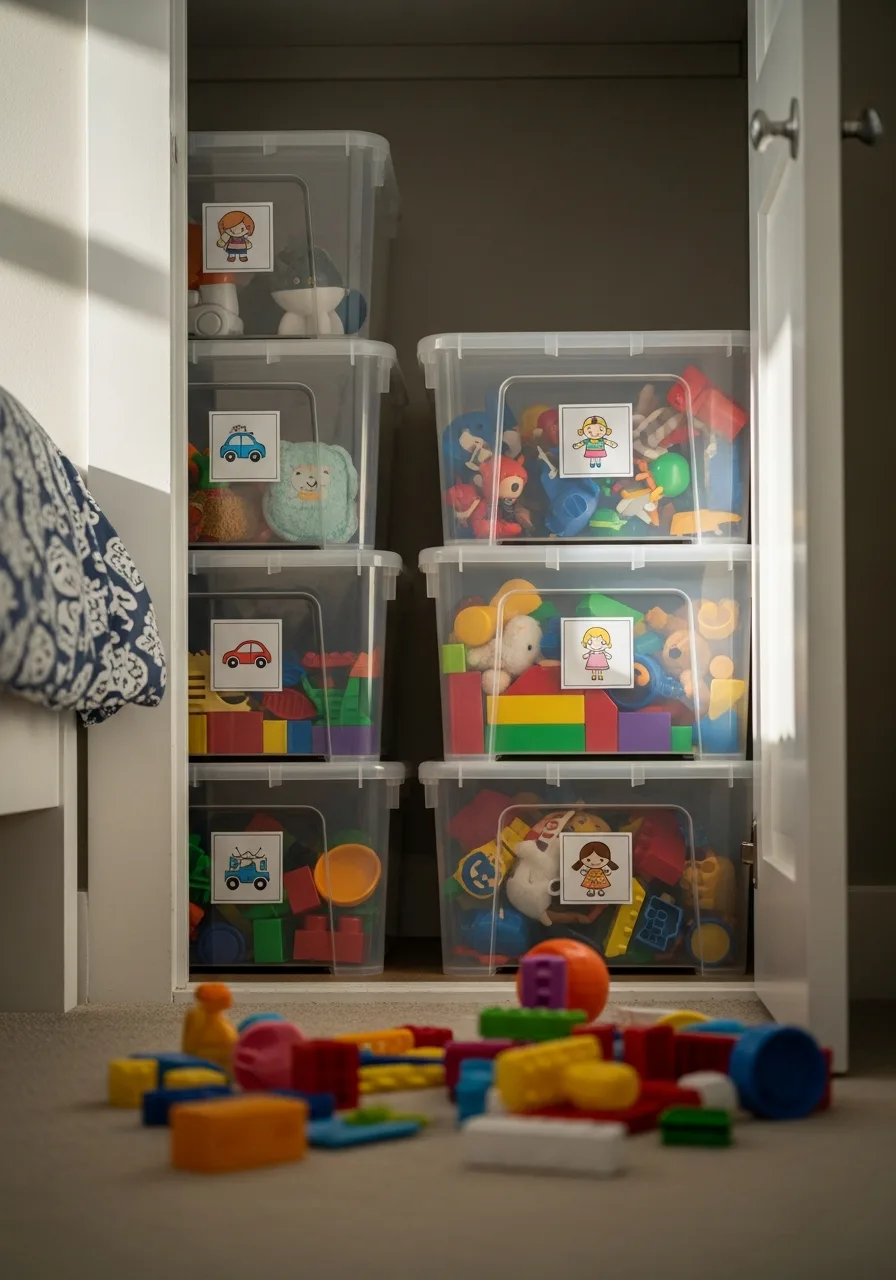
Clear plastic bins make it easy for kids to see exactly what is inside without dumping everything on the floor. This encourages them to play with different toys and helps with the cleanup process.
Label each bin with a simple picture so even younger children know where things go. Smart shortcut: Stack these in a closet to keep the main floor area open for play.
- Budget: $20-$40 for a set of three.
- Setup: Place the heaviest bins on the bottom of the stack for stability.
- Adaptation: Use tinted bins for a more colorful look in open shelving units.
Quick win: Use small bins for LEGO sets to keep specific pieces together.
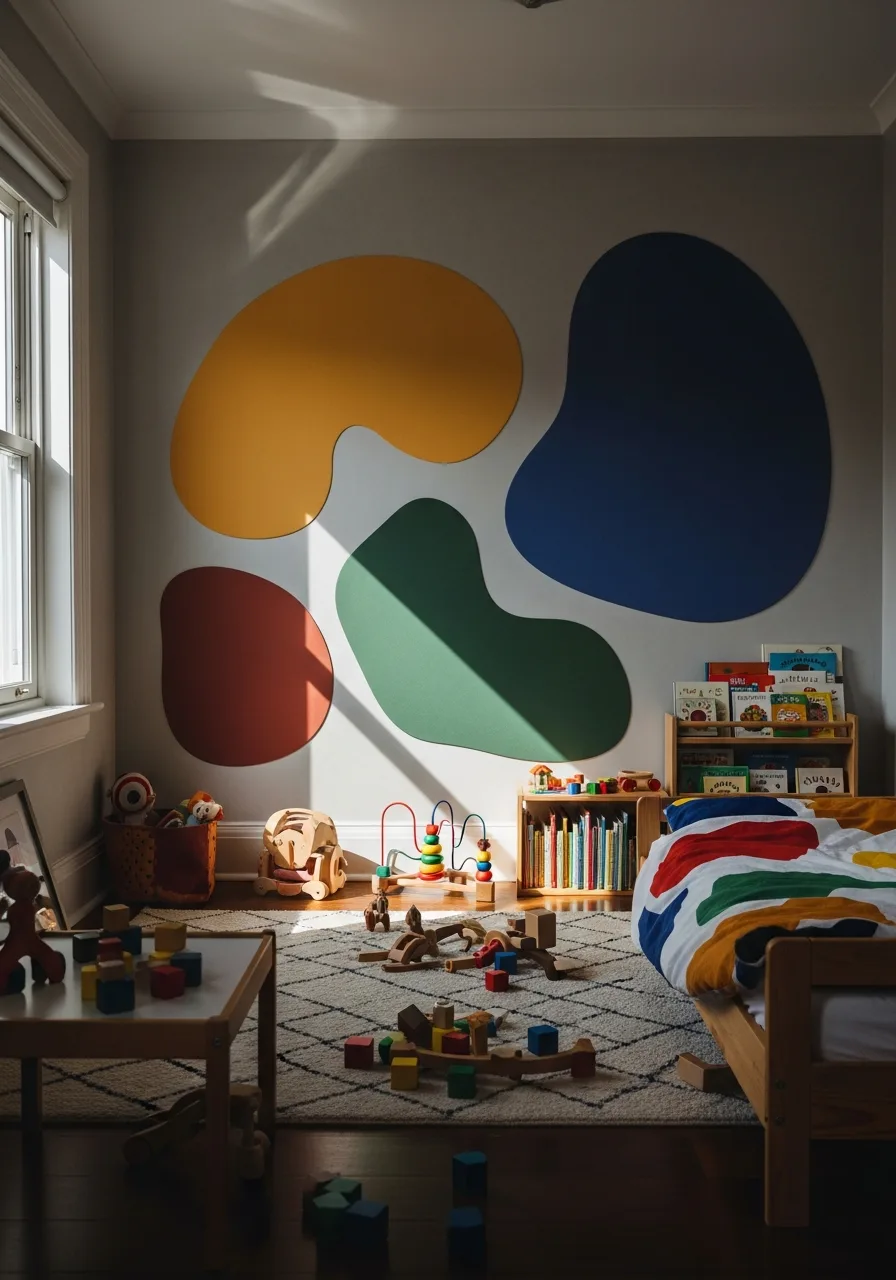
6. Chalkboard Wall Section
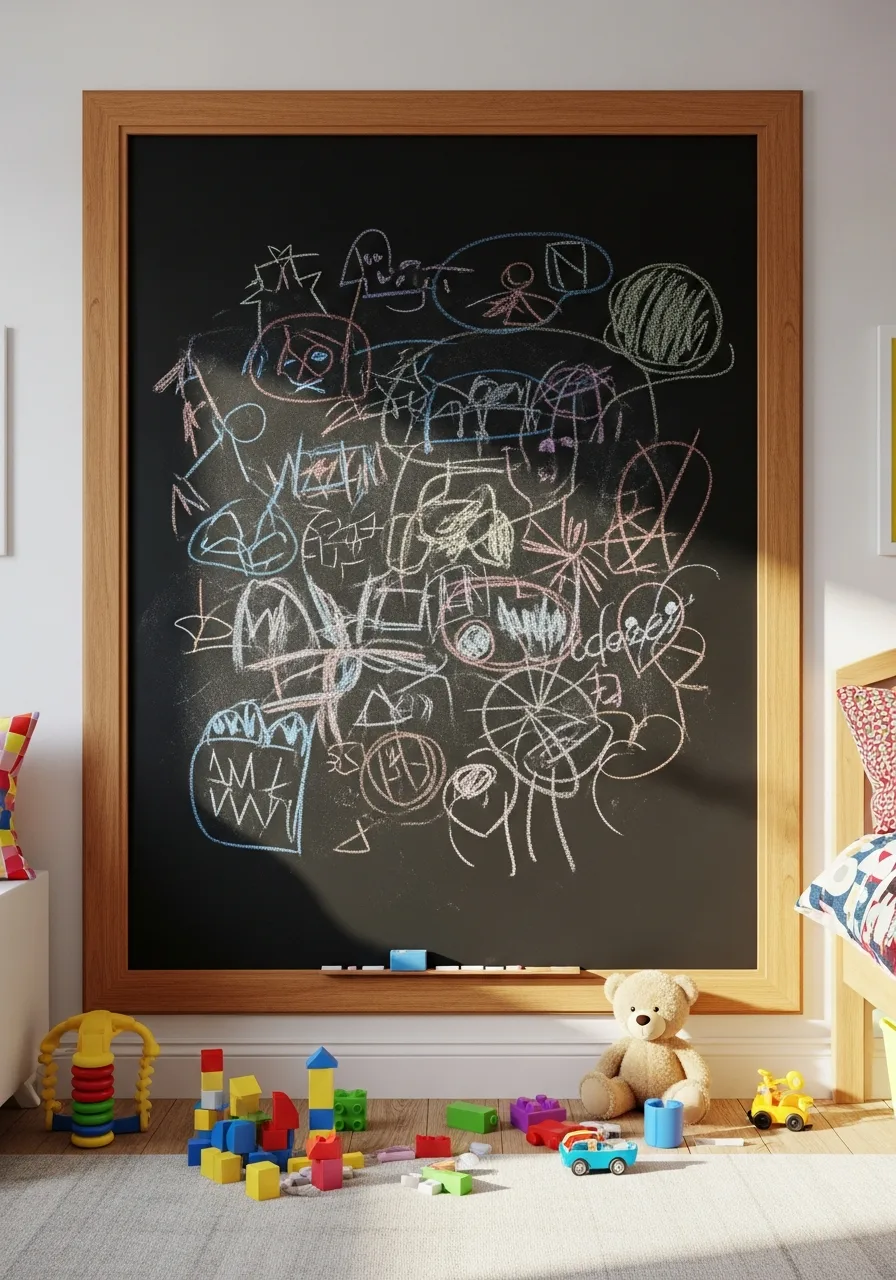
Painting a section of the wall with chalkboard finish gives kids a place to express themselves. It keeps them from drawing on the actual furniture or other walls.
Apply at least three coats of paint to ensure a smooth, durable writing surface. Best move: Frame the painted area with wood trim to make it look like a giant framed board.
- Budget: $15-$30 for a quart of paint.
- Setup: Allow the paint to cure for three days before writing on it.
- Adaptation: Use chalkboard decals if you are renting and cannot paint the walls.
Best shortcut: Season the board by rubbing the side of a piece of chalk over the whole surface and erasing it before first use.
7. LED Globe String Lights

String lights provide a soft glow that works perfectly as a nightlight. They make a room feel magical and are much safer than candles or hot lamps.
Use command hooks to drape the lights along the ceiling or around a bed frame. Worth doing: Pick lights with a remote control so you can turn them off from the doorway.
- Budget: $10-$25 per strand.
- Setup: Keep the plug-in area accessible but hidden behind furniture.
- Adaptation: Use battery-powered versions for areas without a nearby outlet.
Quick win: Choose ‘warm white’ bulbs to create a relaxing environment before bedtime.
8. Floating Book Ledges
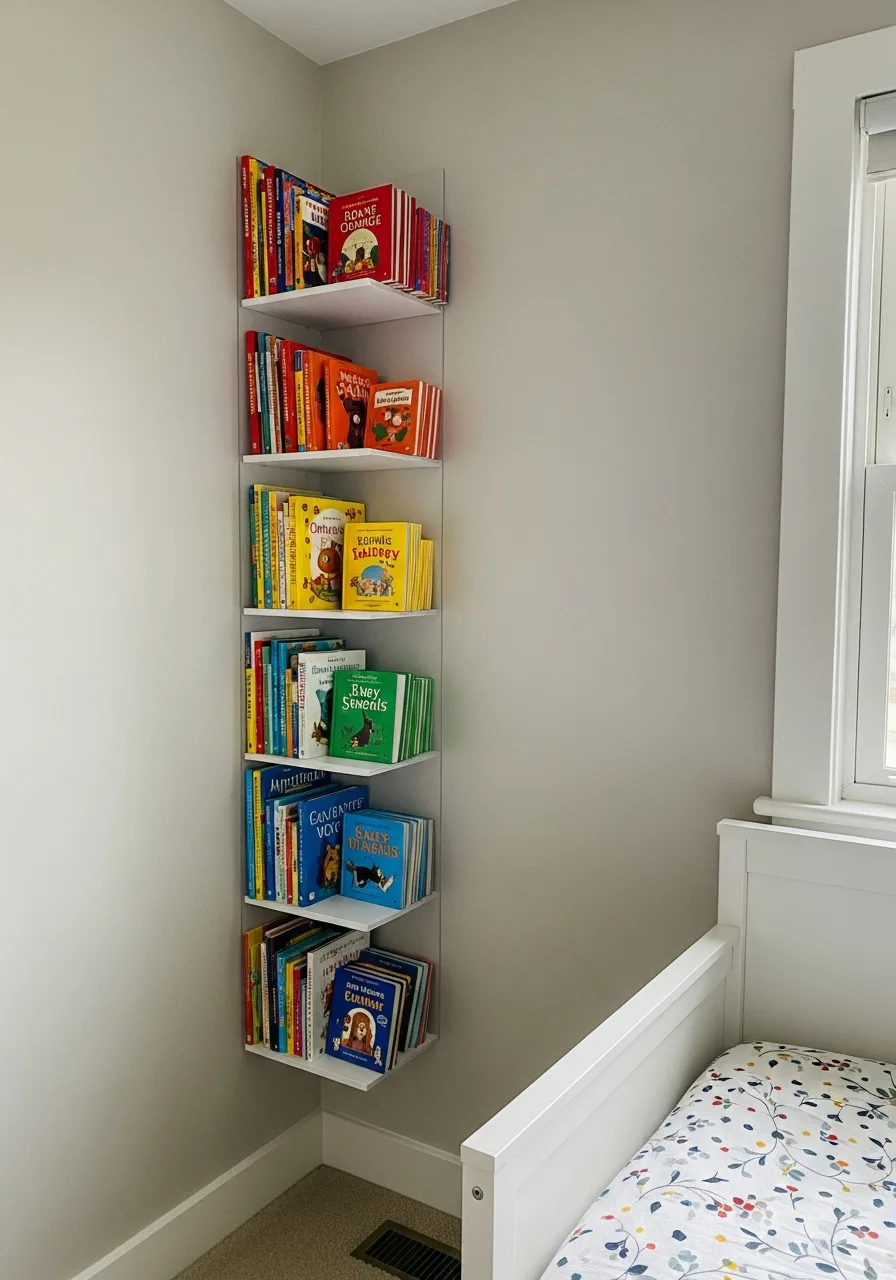
Slim ledges allow you to display books with the covers facing forward instead of the spines.
This makes it much easier for kids to find their favorite stories and encourages more reading. Install three or four ledges vertically to create a library look in a small corner. What works: Arrange books by color to create a rainbow effect on the wall.
- Budget: $25-$50 for a set.
- Setup: Use a level during installation to keep the ledges perfectly straight.
- Adaptation: Use shorter ledges in tight spots behind bedroom doors.
Most people skip this: Leave enough vertical space between ledges for tall picture books.
9. Growth Chart Decals
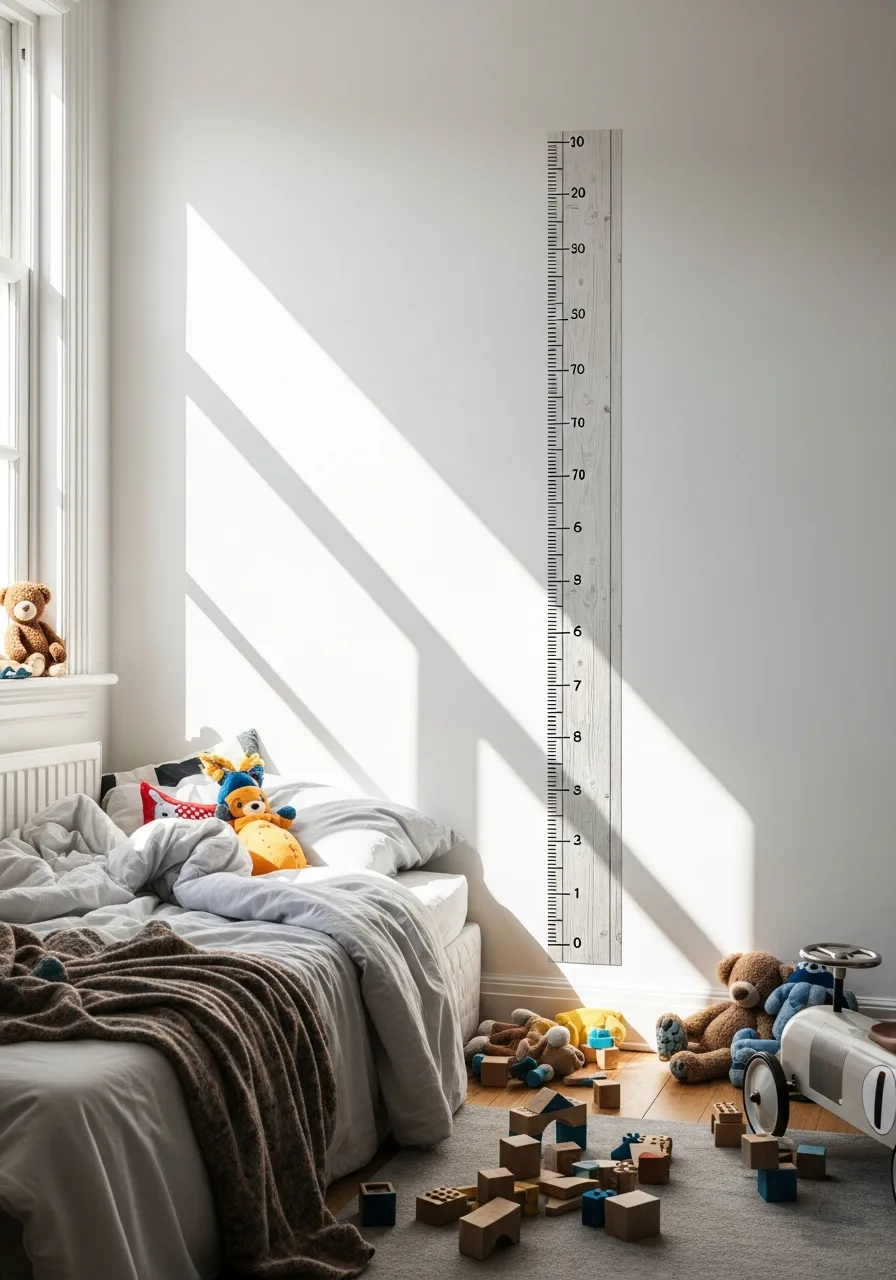
A wall-mounted growth chart is a fun way to track how much your child grows each year. Unlike marks on a door frame, you can take a decal or a wooden chart with you if you move houses.
Apply the chart starting exactly twelve inches from the floor for accuracy. Smart shortcut: Use a permanent marker to record the date and the child’s age directly on the chart.
- Budget: $15-$40.
- Setup: Ensure the wall surface is smooth so the decal sticks properly.
- Adaptation: Choose a wooden ruler style for a more classic, farmhouse look.
Best shortcut: Place the chart behind a door to keep the room looking uncluttered.
10. Bedside Storage Caddies
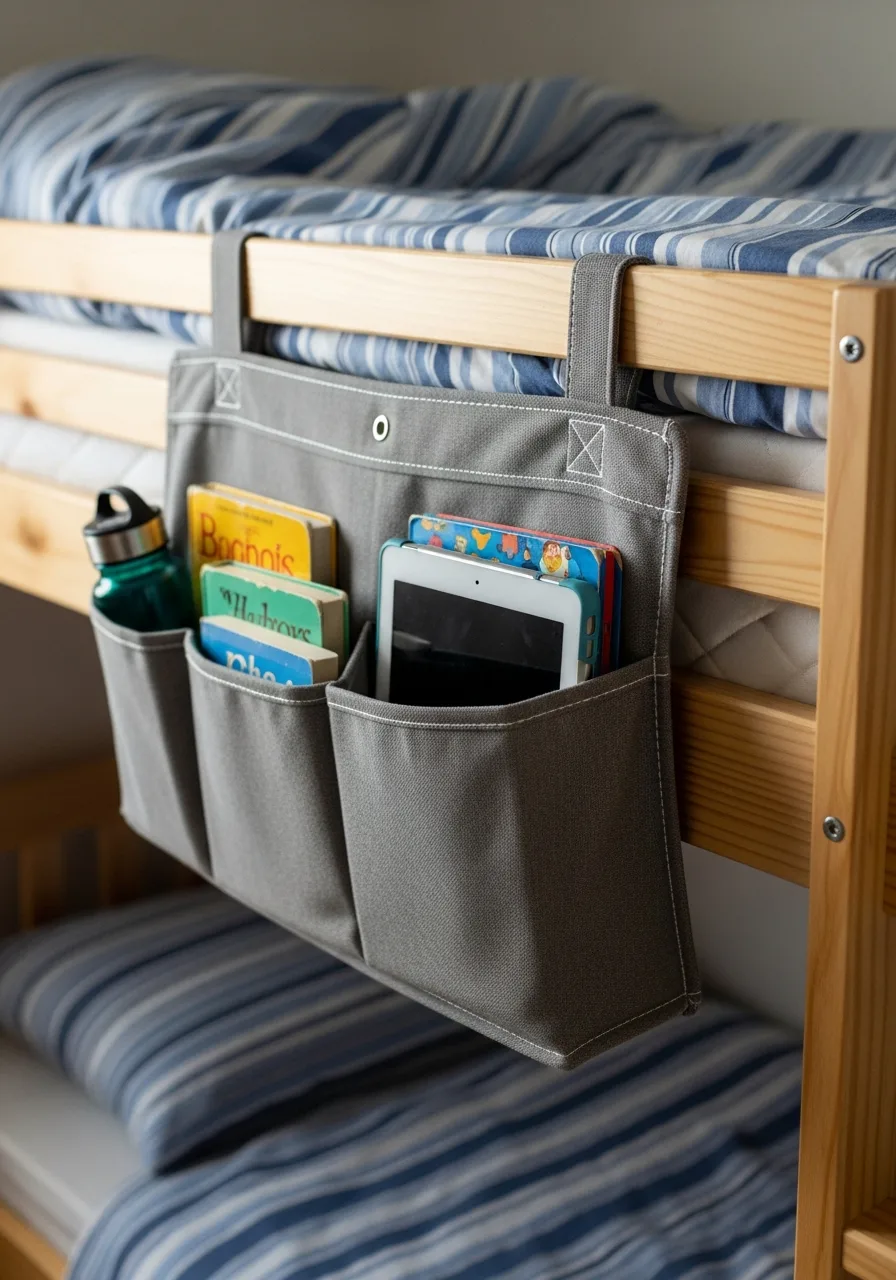
A fabric caddy slips under the mattress and hangs off the side of the bed. It provides a spot for a water bottle, a tablet, or a book without needing a bulky nightstand.
Check that the caddy has reinforced stitching to handle the weight of heavy books. Worth doing: Use these for bunk beds where there is no room for a table.
- Budget: $10-$20.
- Setup: Slide the long flap deep under the mattress to keep it from slipping.
- Adaptation: Choose a color that matches the bedding for a seamless look.
Quick win: Use the smaller pockets for eyeglasses or a small flashlight.
11. Storage Ottomans
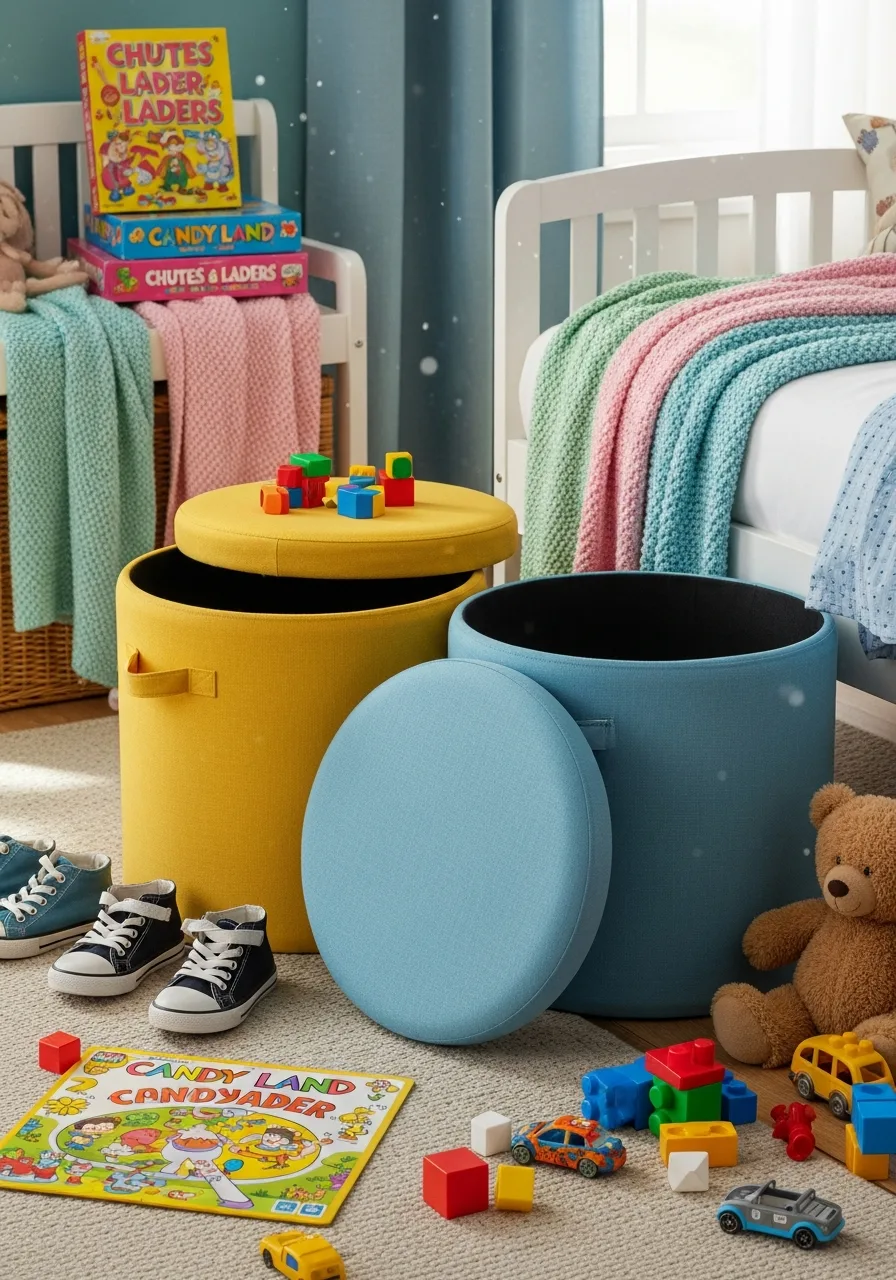
Ottomans serve as both a comfortable seat and a hidden storage box for extra blankets or shoes. They help keep the room tidy while providing a place for parents to sit during story time.
Select a round version to avoid sharp corners in a high-activity play area. Best move: Get a pair of them to use as a makeshift table for board games.
- Budget: $30-$70.
- Setup: No assembly is usually required for these pieces.
- Adaptation: Buy a collapsible version if you only need the extra storage occasionally.
Most people skip this: Look for a fabric that is pre-treated for stain resistance.
12. Reading Nook Canopy
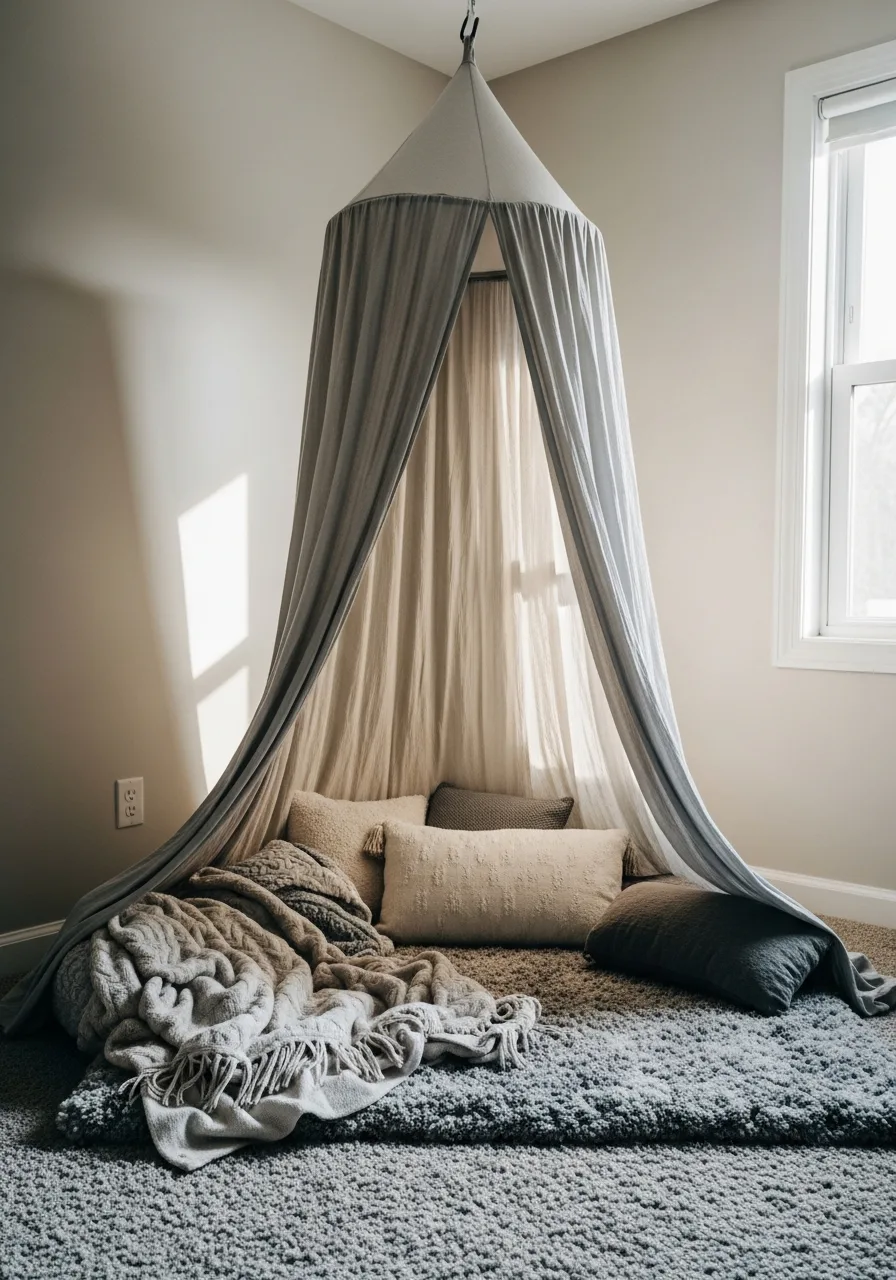
A fabric canopy hanging from the ceiling creates an instant secret hideout for reading or quiet time. It adds height to the room and makes a large space feel more cozy and secure.
Secure the ceiling hook into a joist to make sure it stays up during play. Worth doing: Toss a few soft blankets and a rug inside to complete the space.
- Budget: $25-$60.
- Setup: Steam the fabric before hanging to remove packing wrinkles.
- Adaptation: Use a sheer canopy for a lighter, airy look in smaller rooms.
Quick win: Wrap battery-operated fairy lights around the top of the hoop for a glow.
13. Art Display Wires

A simple wire with clips lets you display the latest school projects and drawings without using tape. This keeps the walls clean and makes it very easy to swap out old art for new masterpieces.
Hang the wire at eye level for the child so they can participate in choosing what to show off. Smart shortcut: Use two parallel wires if your child produces a lot of artwork.
- Budget: $15-$25.
- Setup: Use wall anchors if the wire is longer than three feet to prevent sagging.
- Adaptation: Paint the clips bright colors for extra personality.
Quick win: Use the wire to hang lightweight birthday cards or photos too.
14. Low Pile Area Rugs
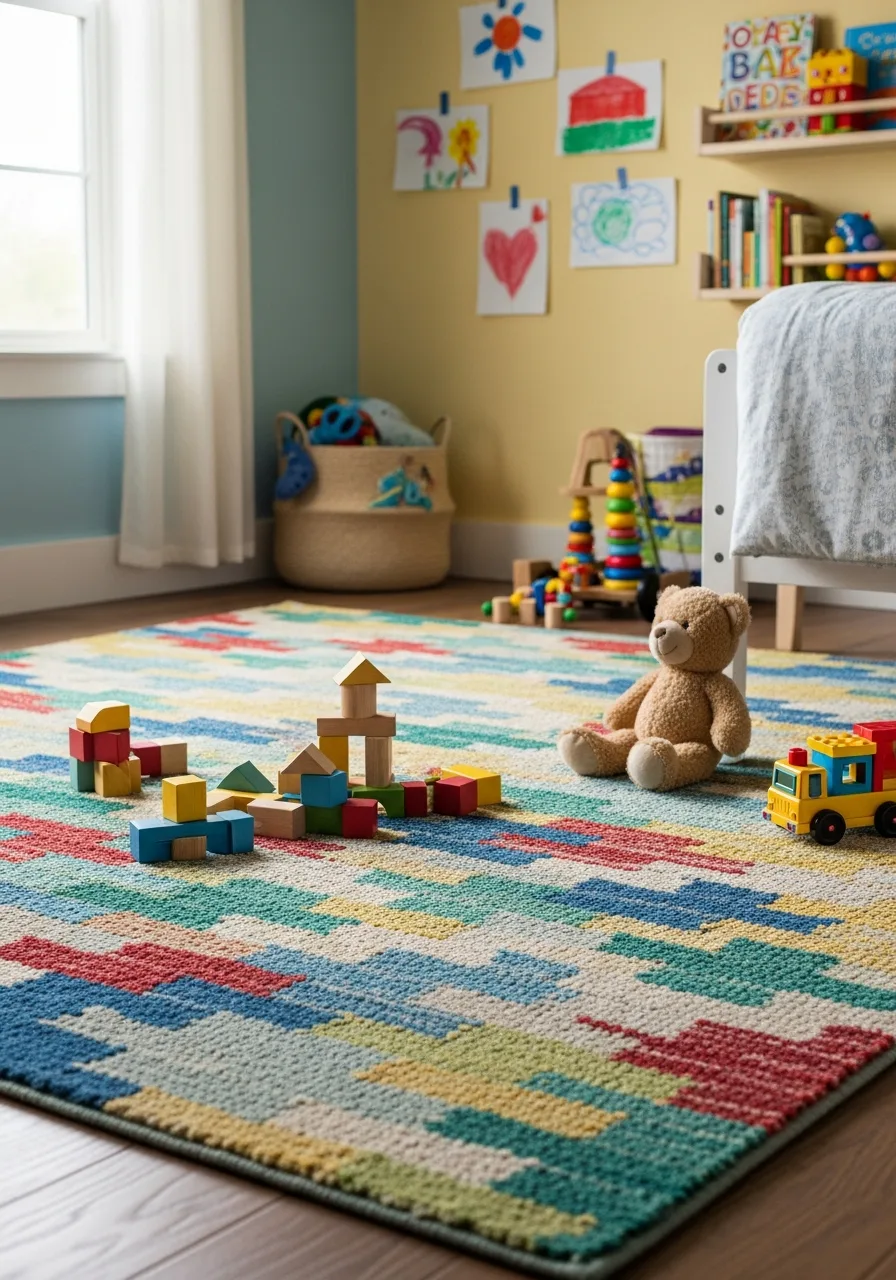
A rug defines the play area and protects the floor from scratches and spills. Low pile rugs are better for kids’ rooms because they are easier to vacuum and won’t trap small toy pieces like LEGOs.
Place a non-slip rug pad underneath to prevent the rug from sliding during rough play. What works: Pick a pattern with multiple colors to hide small stains between cleanings.
- Budget: $50-$150 for a standard size.
- Setup: Let the rug sit flat for 24 hours to remove any curling from shipping.
- Adaptation: Use carpet tiles if you want to be able to replace just one small section.
Best shortcut: Choose a synthetic fiber like polyester for the easiest stain removal.
15. Adjustable Height Desks
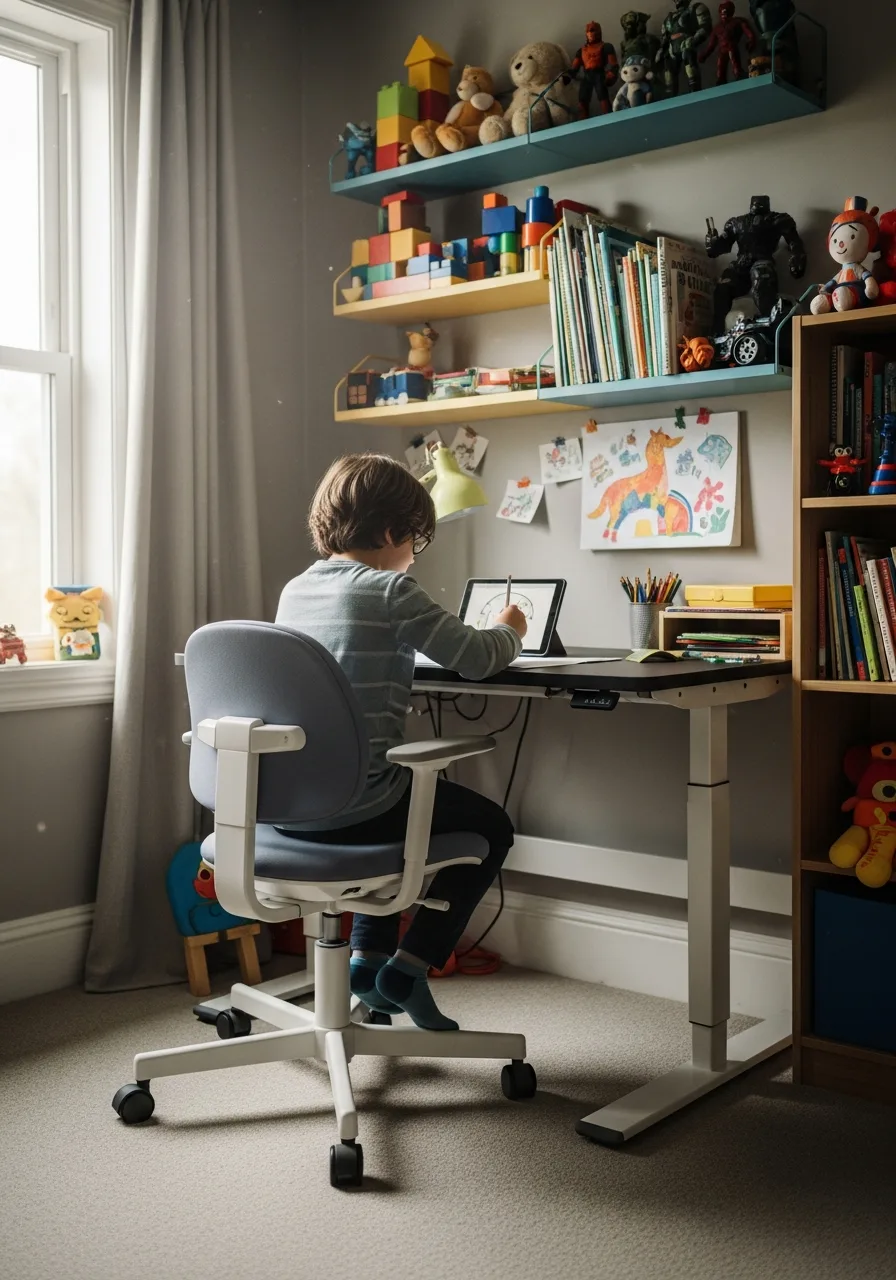
An adjustable desk grows along with your child from elementary school through their teenage years. It prevents the need to buy new furniture every few years as they get taller.
Set the desk height so their elbows are at a ninety-degree angle when typing or writing. Worth doing: Pair it with a high-quality chair that also has height adjustments.
- Budget: $100-$300.
- Setup: Ensure all bolts are tightened every six months as the desk is used.
- Adaptation: Choose a white or wood finish to match any future room colors.
Best shortcut: Add a power strip to the underside of the desk to manage computer cords.
16. Magnetic Wall Panels
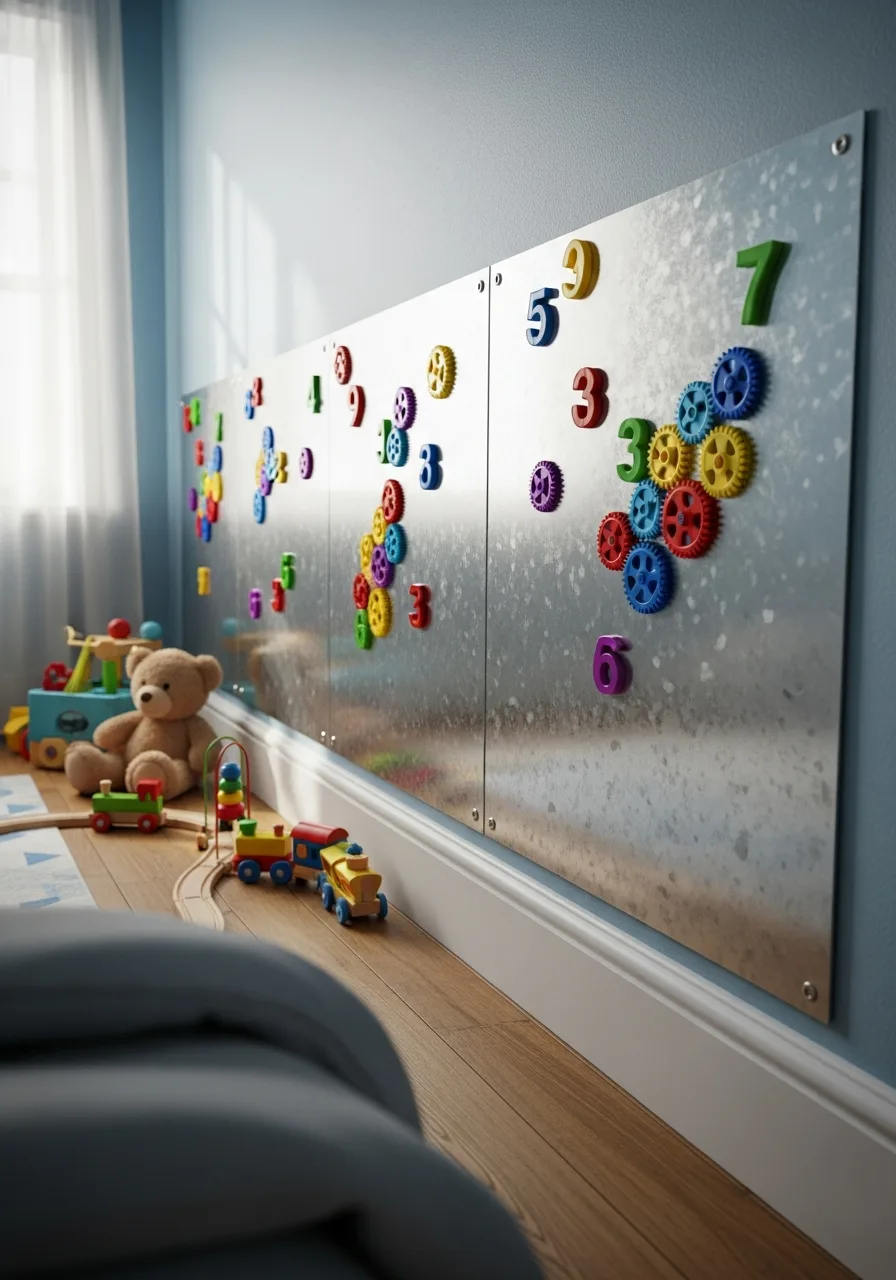
Magnetic panels turn a plain wall into an interactive play zone for children. These surfaces allow kids to move letters, numbers, or magnetic gears around without making a mess on the floor.
Mount the panels at the child’s eye level to ensure they can reach every inch of the surface. Best move: Use galvanized steel sheets for a sleek, industrial look that lasts through the teenage years.
- Budget around $30 to $60 for a set of high-quality metal panels.
- Use heavy-duty adhesive strips or screws to secure the panels firmly to the drywall.
- Paint the panels the same color as the wall to make them blend in when they are not in use.
Quick win: Use magnets with soft felt backings to prevent scratching the panel surface during play.
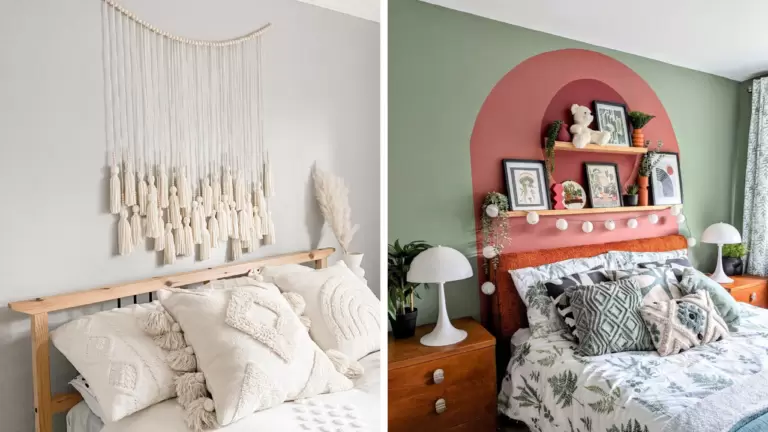
17. Hanging Macrame Chair
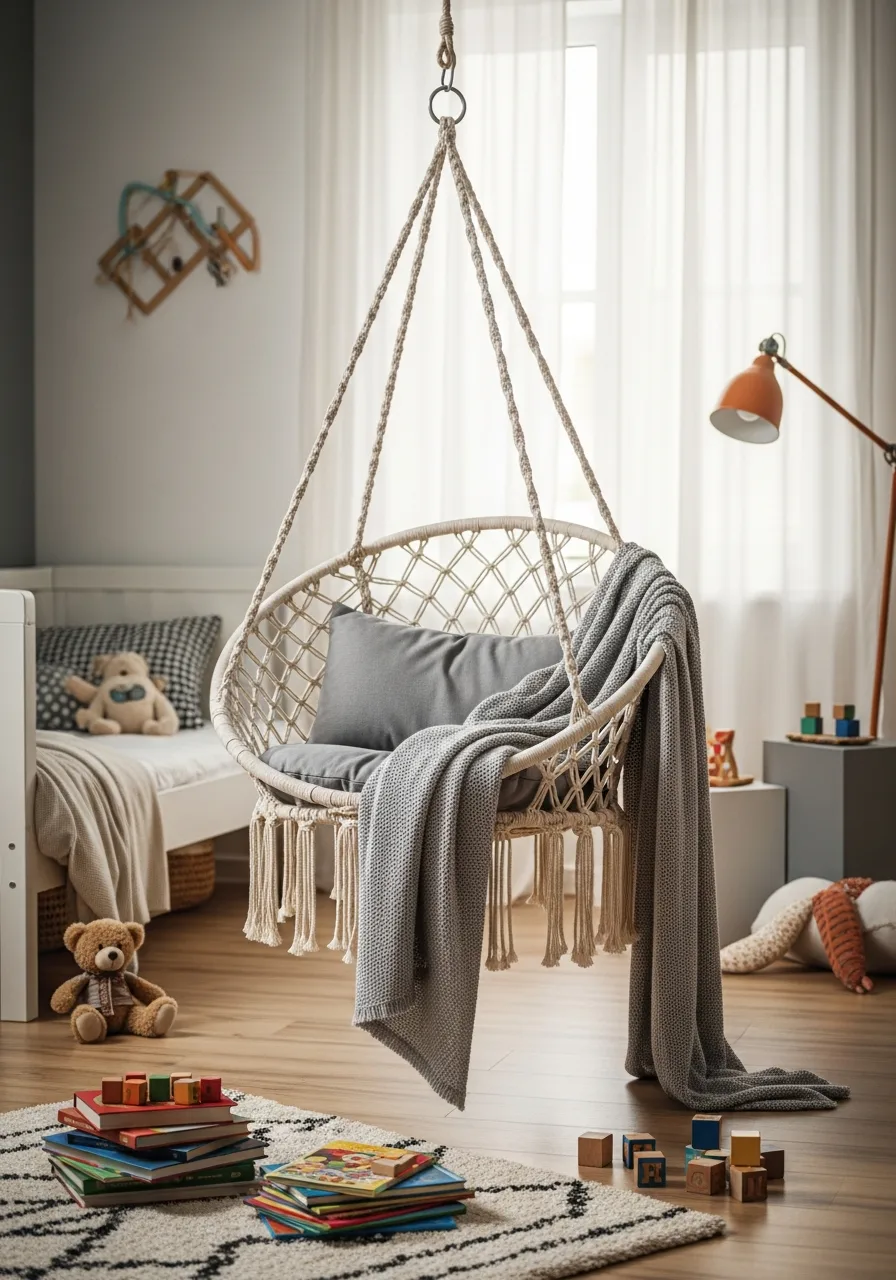
A hanging chair provides a cozy spot for reading or relaxing while freeing up valuable floor space. It adds a bohemian touch that feels more grown-up than a standard plastic seat.
Install a heavy-duty ceiling hook into a structural joist to ensure the chair is safe for daily use. Worth doing: Pick a neutral cream or grey color so the chair matches future room updates.
- Find quality cotton macrame chairs for under $100 at most home retailers.
- Place the chair at least two feet away from walls to allow for gentle swaying without damage.
- Swap the standard hanging rope for a colorful heavy-duty climbing rope for a modern look.
Most people skip this: Check the weight limit of the ceiling hardware every six months to ensure safety.
18. Rotating Gallery Frames

These frames open like a book, making it easy to swap out new masterpieces without taking the frame off the wall. They store up to 50 drawings behind the current one, acting as a built-in portfolio for school projects.
Group three or four frames together to create a dedicated art station that grows with the child. Smart shortcut: Use frames with an elastic strap inside to keep the papers from sliding down.
- Buy a multi-pack of front-opening frames to save significantly on the per-unit cost.
- Hang the frames at a height where the child can help change the pictures themselves.
- Use command strips for a renter-friendly installation that avoids making holes in the wall.
Quick win: Label the back of each drawing with the date before tucking it away in the frame.
19. Built In Window Bench
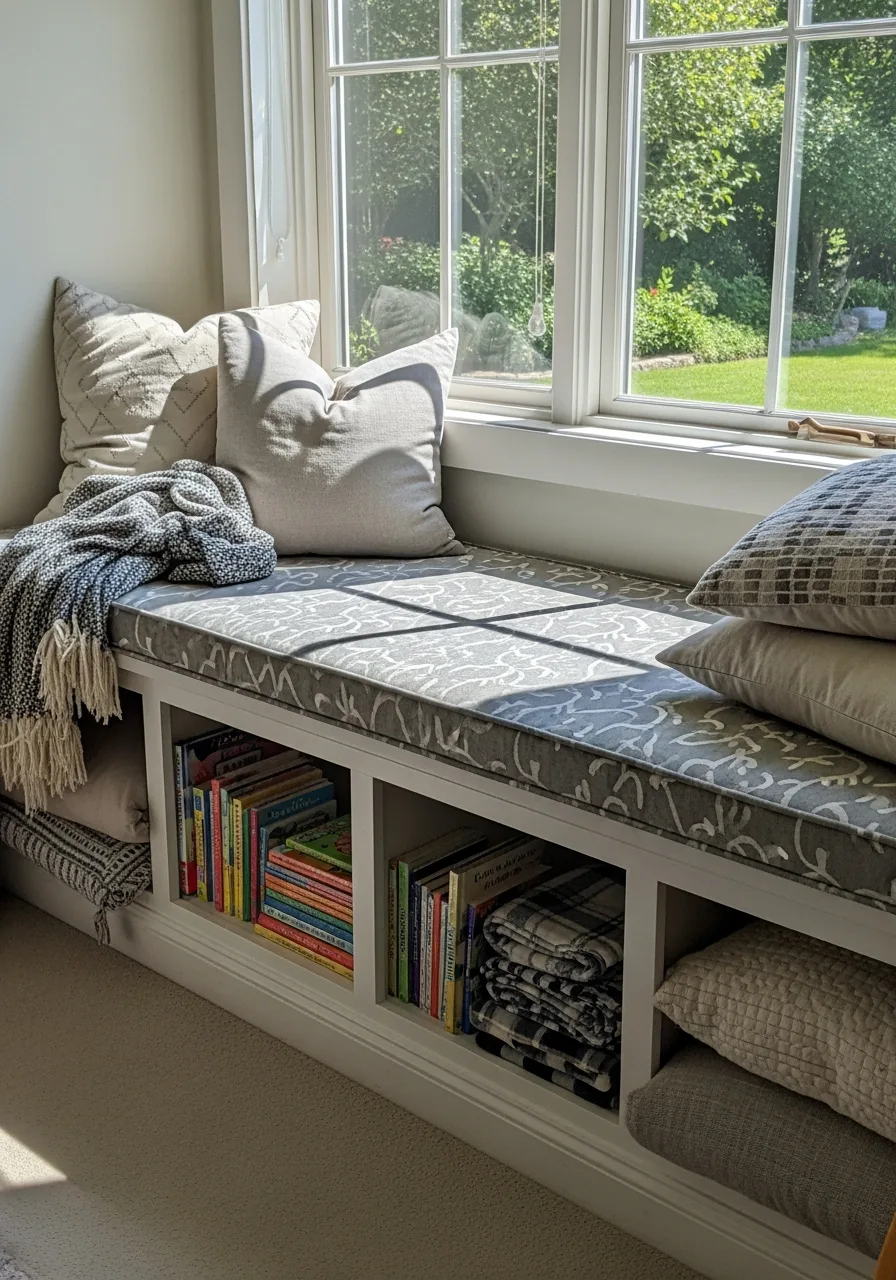
A simple storage bench placed under a window creates a perfect reading nook and extra seating for friends. It makes use of often-wasted space while providing a hidden spot to hide bulky blankets or pillows.
Top the bench with a thick foam cushion wrapped in outdoor fabric for easy cleaning. What works: Use a bench with open cubbies to keep favorite books within arm’s reach of the child.
- Look for pre-made storage benches at big-box retailers to keep project costs low.
- Ensure the bench is the same width as the window frame for a custom, built-in look.
- Add a few throw pillows in different textures to make the space feel cozy and inviting.
Best shortcut: Use a standard kitchen cabinet turned on its side as a sturdy base for a DIY window bench.
20. Bed Tent Privacy Cover
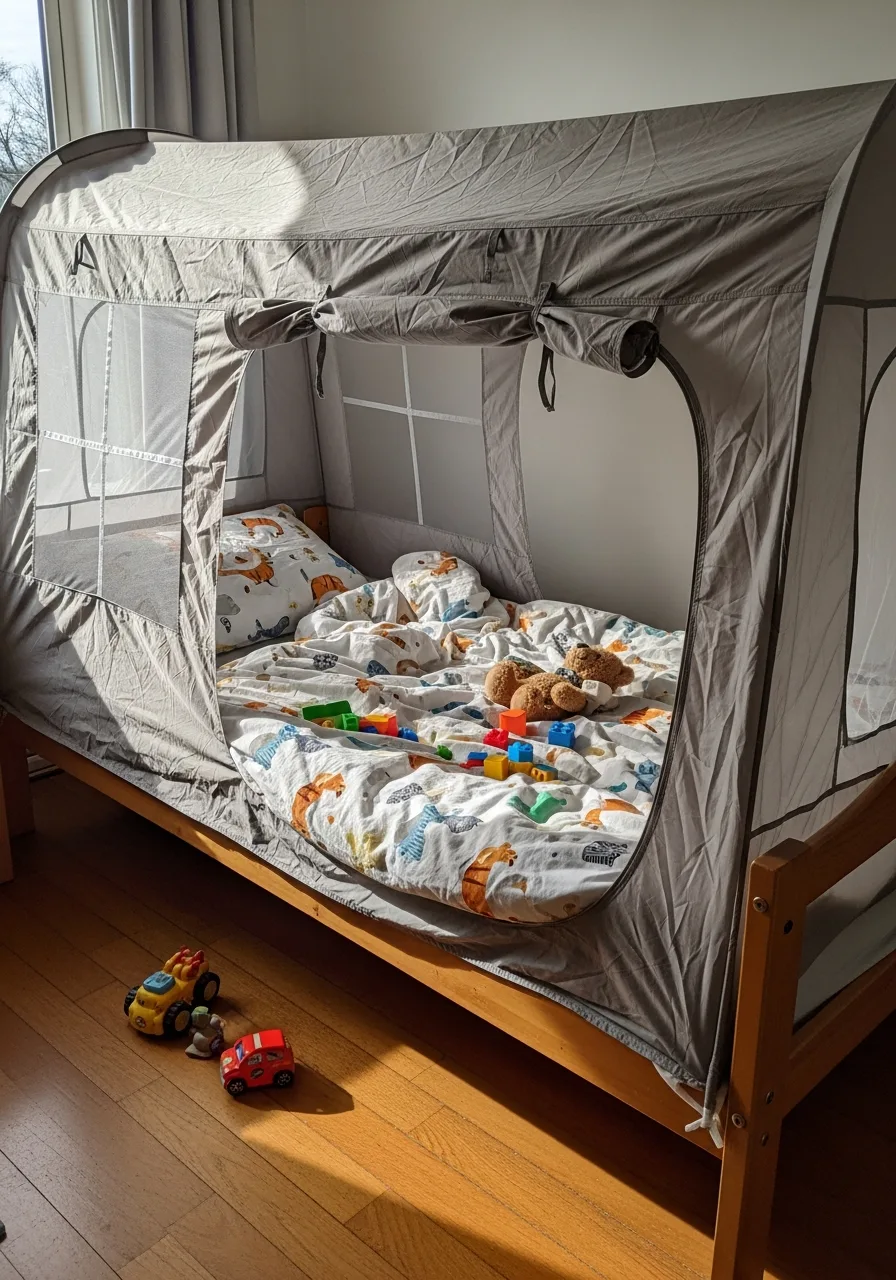
A bed tent fits over a twin mattress to create a private hideout for sleep or quiet play. It helps children feel secure in their own space and adds a whimsical element to a standard bed frame.
Choose a tent with mesh windows to ensure proper airflow while the child is sleeping. Best move: Select a pop-up style that can be folded flat and stored under the bed when not in use.
- Expect to spend $25 to $50 for a durable polyester bed tent that fits a twin mattress.
- Secure the tent corners under the mattress corners to keep the structure from shifting.
- Pick a dark color if the child needs a dimmer environment for daytime naps or early bedtimes.
Quick win: Clip a battery-operated reading light to the inside frame of the tent for late-night stories.
21. Cork Tile Feature Wall

Covering a section of the wall with thick cork tiles allows for a massive, ever-changing mood board for photos and schedules. It is the perfect spot for school reminders and lightweight mementos.
Apply the cork tiles in a geometric pattern like a herringbone or chevron for a sophisticated look. Worth doing: Use push pins with colorful heads to add a pop of brightness to the natural brown cork.
- Purchase self-adhesive cork tiles in bulk to cover larger wall areas affordably.
- Clean the wall surface with rubbing alcohol before sticking tiles to ensure a strong, long-lasting bond.
- Cut the tiles with a sharp utility knife to fit around electrical outlets or into tight corners.
Most people skip this: Use 1/2-inch thick cork so that standard push pins do not poke through to the drywall.
22. Modular Foam Play Couch
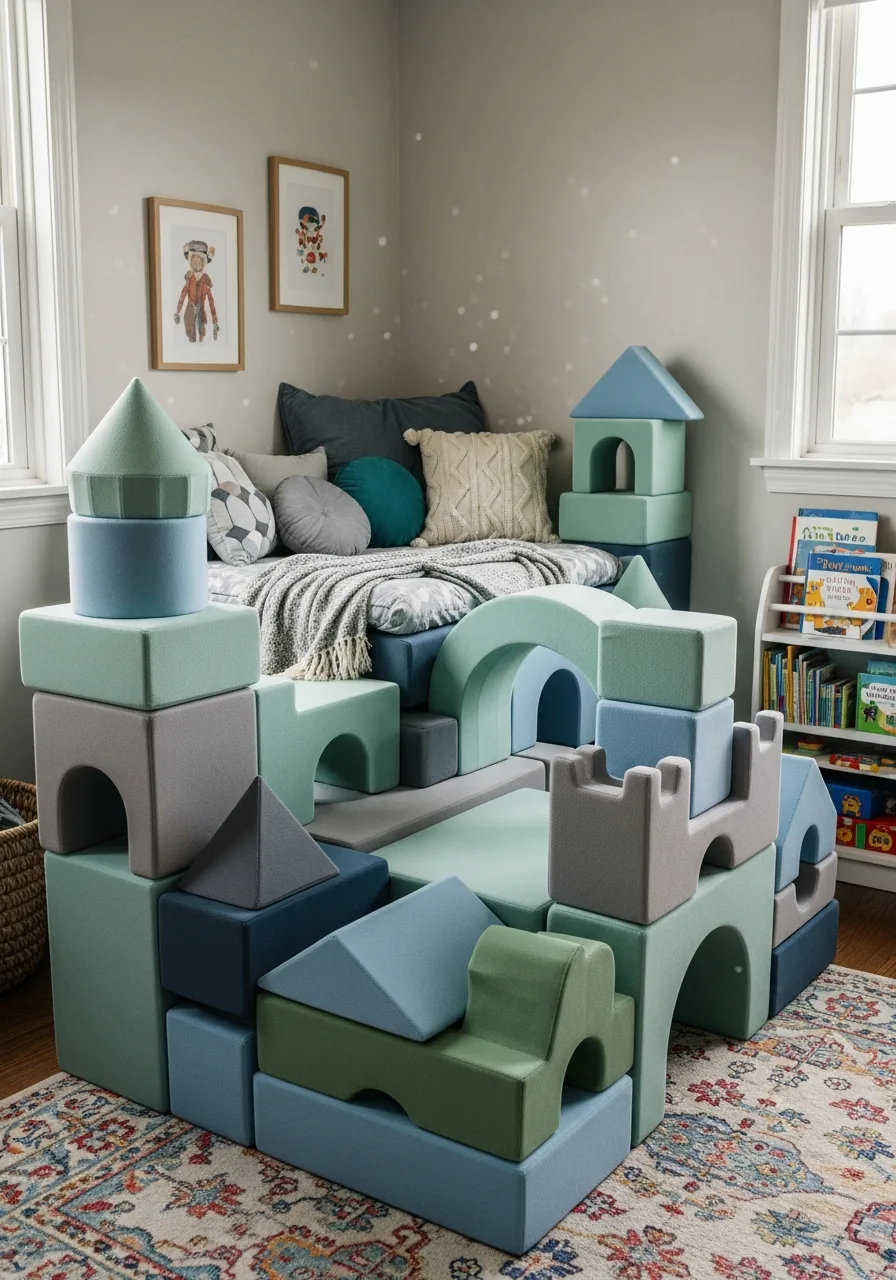
This versatile piece of furniture consists of foam shapes that can be stacked into forts or laid flat for sleepovers. It replaces a traditional sofa with something that encourages active play and creativity.
Position the couch in a corner to provide a soft landing spot for high-energy activities. What works: Choose a version with a washable microsuede cover to handle spills and stains easily.
- Quality foam couches range from $200 to $400 depending on the number of pieces included.
- Keep the pieces pushed together when they are not in use to maintain a tidy room appearance.
- Use the triangular pieces as backrests for floor-level gaming or reading sessions.
Best shortcut: Buy extra covers in different colors to quickly change the room’s theme without buying new furniture.
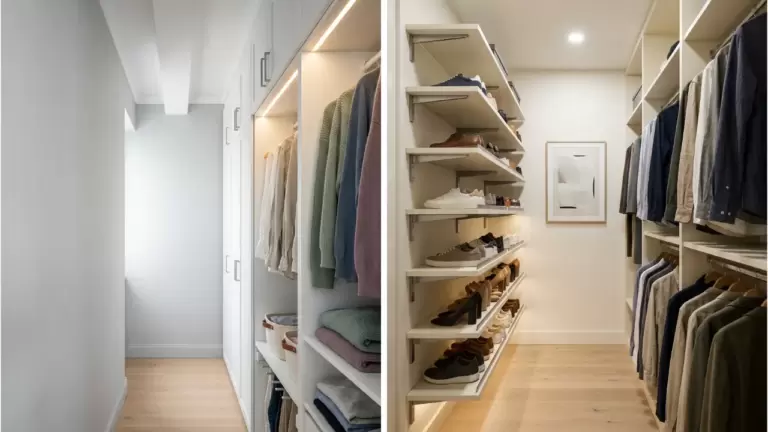
23. Rainbow Closet Dividers
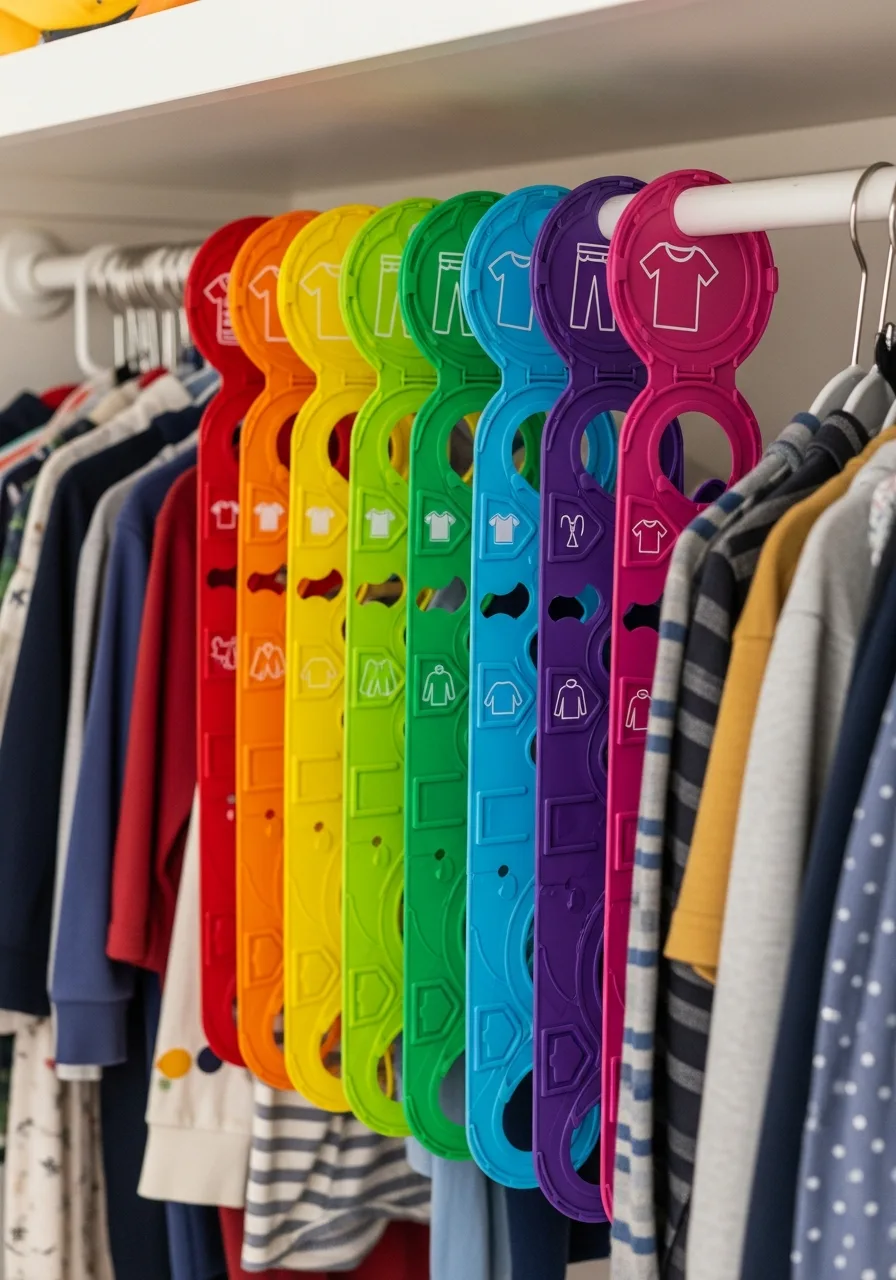
Color-coded dividers make it easy for children to identify where their shirts, pants, and sweaters belong in the closet. This system encourages independence during morning routines and simplifies the laundry process for everyone.
Label the dividers with both words and icons so pre-readers can help put clothes away. Smart shortcut: Use plastic rings that snap directly onto the closet rod for the fastest setup.
- Sets of blank dividers are very inexpensive and can be customized with permanent markers.
- Arrange clothes by color within each section to create a visually pleasing and organized closet.
- Move the dividers as the child’s wardrobe grows or changes with the different seasons.
Quick win: Use a different color divider for school clothes versus weekend play clothes to save time.
24. Glow Star Ceiling Map
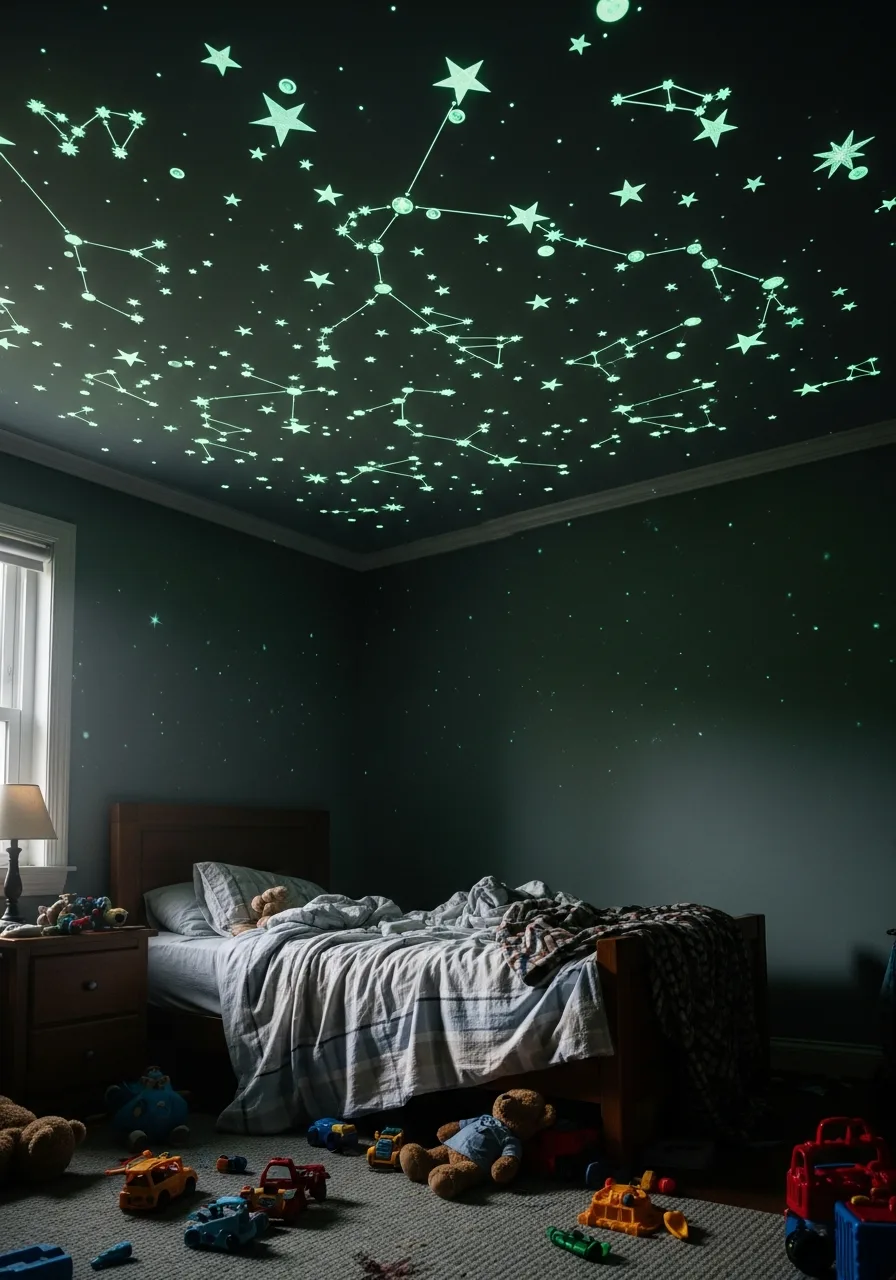
Classic glow-in-the-dark stars turn a bedroom ceiling into a calming night sky that helps kids drift off to sleep. Instead of a random pattern, they can be arranged into actual constellations for an educational touch.
Use a small amount of poster putty for any stars that lose their stickiness over time. Best move: Mix different sizes of stars to create a sense of depth and realism on the ceiling.
- A pack of several hundred stars usually costs less than $15 at most craft or toy stores.
- Use a stepladder and a steady hand to place the stars while the room is brightly lit.
- Focus the densest clusters of stars directly over the head of the bed for the best view.
Most people skip this: Charge the stars with a bright LED light for 10 minutes before bedtime for the strongest glow.
25. Rolling Underbed Drawers
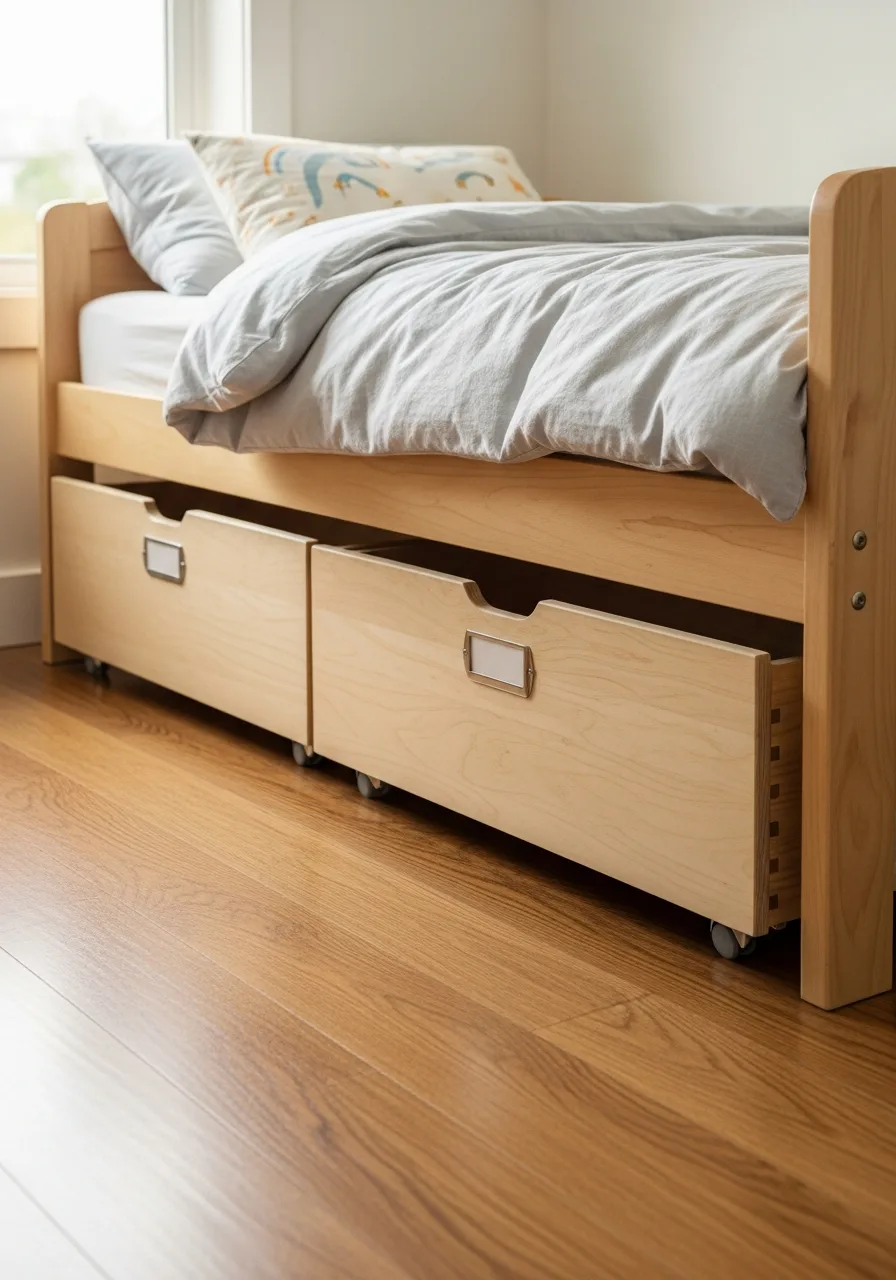
Low-profile drawers on wheels make use of the hidden space beneath the bed for shoes or seasonal clothing. They are much easier for a child to pull out than heavy plastic bins that scrape against the floor.
Label the front of each drawer so the child knows exactly what is stored inside. Worth doing: Match the drawer material to the bed frame for a cohesive, built-in appearance.
- Wooden or wire rolling drawers can be found for $30 to $50 each at home organization stores.
- Measure the clearance between the floor and the bed rail before purchasing any drawers.
- Use these for heavy items like wooden blocks or train tracks that are otherwise hard to carry.
Best shortcut: Add stick-on felt pads to the wheels if you have hardwood floors to prevent scratches.
26. Floor Gaming Rocker
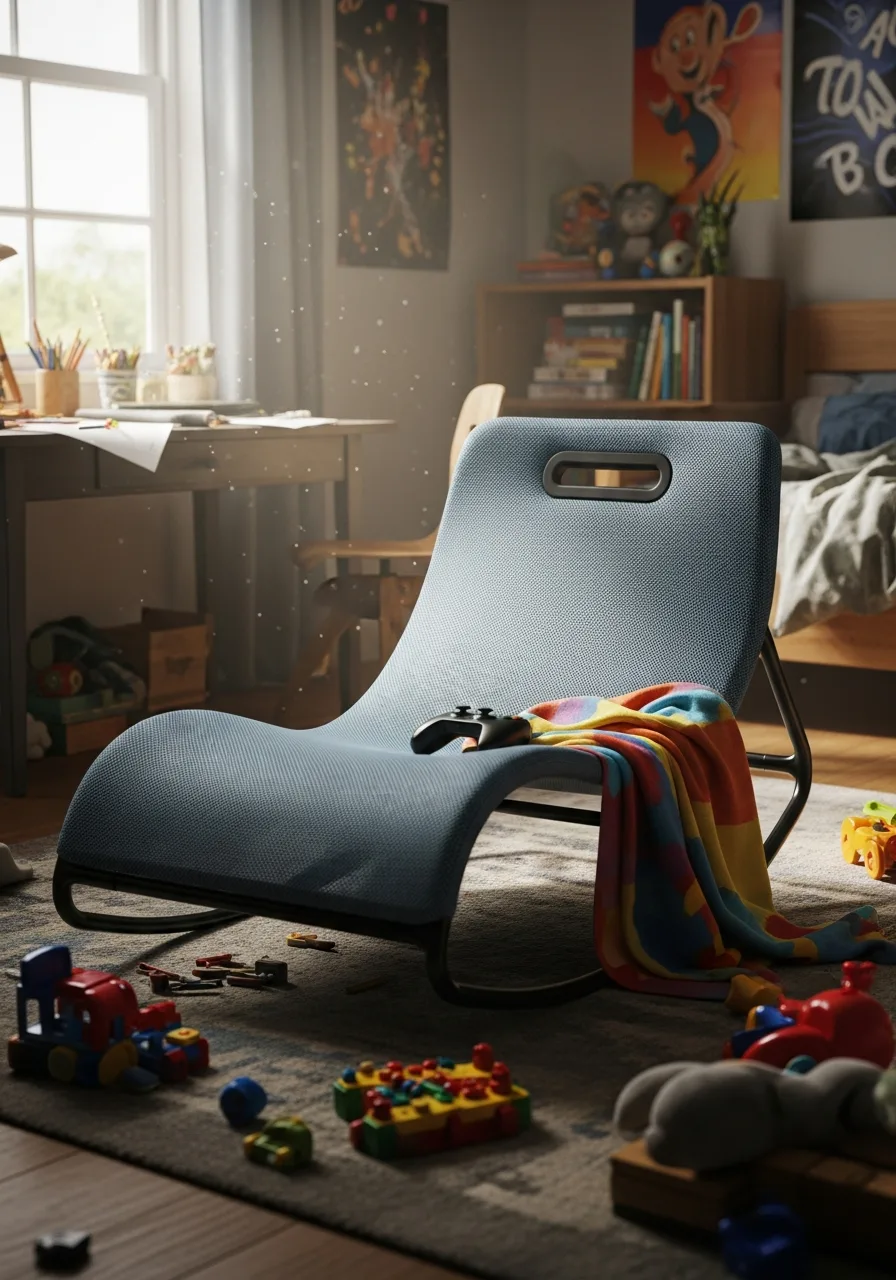
A low-profile rocking chair provides an ergonomic spot for playing video games or reading on the floor. It offers better back support than a standard pillow and can be tucked away when not in use.
Choose a chair with a handle on top to make it easy for the child to move around. What works: Select a breathable mesh fabric to keep the child cool during long periods of sitting.
- Basic gaming rockers start around $50, while high-end versions include built-in speakers.
- Place the chair on a small rug to define the gaming zone and protect the floor surface.
- Look for a foldable model if the room is small and needs to be cleared for active play.
Quick win: Wipe down the seat with a damp cloth once a week to keep dust from settling in the fabric.
27. Fabric Wall Decals
Fabric decals are a step up from vinyl stickers because they are thicker, matte, and can be moved many times without tearing. They allow for a complete room transformation in minutes without the permanence of paint.
Apply the largest decals first to set the focal point of the wall design. Smart shortcut: Save the original backing paper so you can take the decals with you if you move.
- High-quality fabric decals are more expensive than vinyl but last much longer and look better.
- Smooth the decals from the center outward to prevent air bubbles from forming under the surface.
- Use a hair dryer on a low setting to gently warm the adhesive if a decal is difficult to remove.
Most people skip this: Wipe the wall with a dry microfiber cloth before applying to remove hidden dust.
28. Galaxy Projector Light
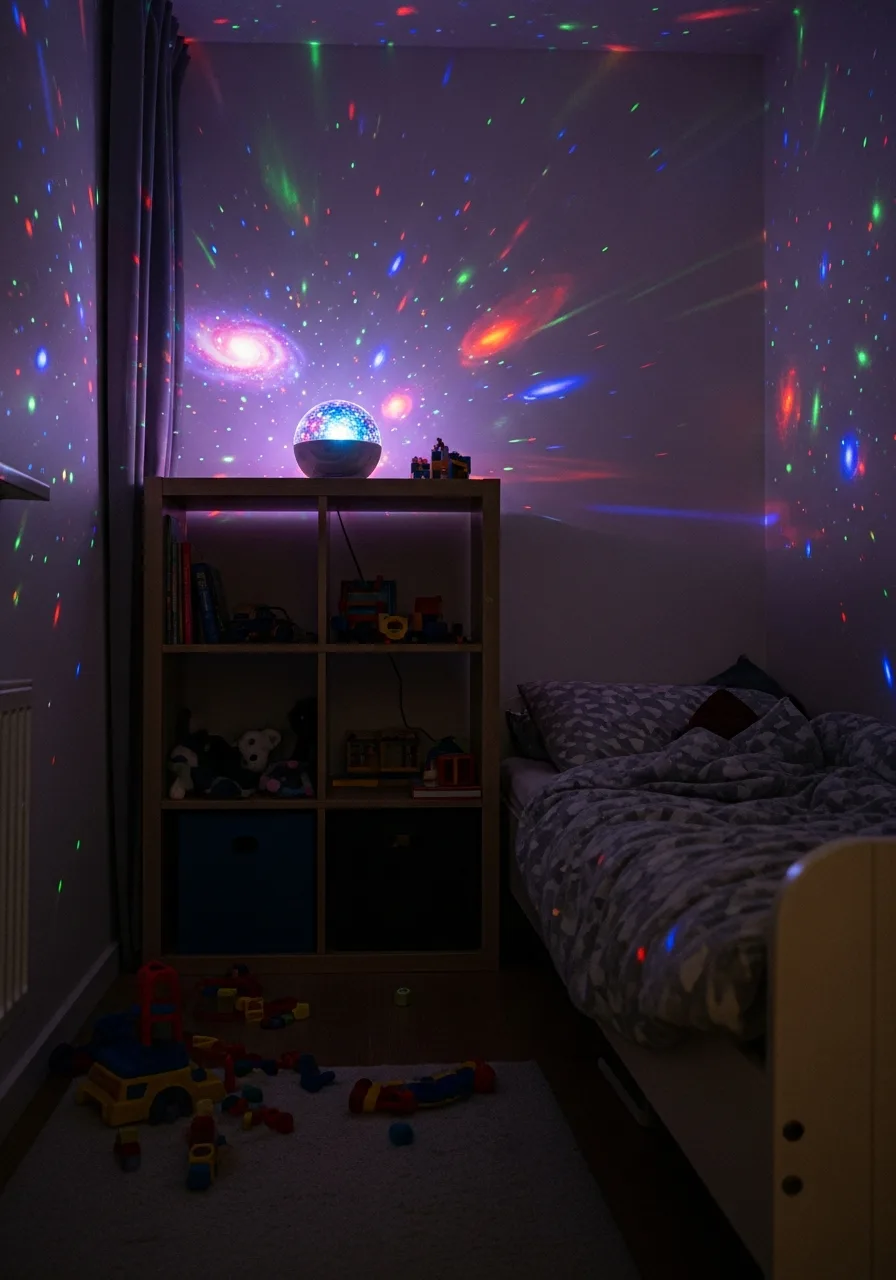
This device projects a moving field of stars and nebulae onto the walls and ceiling to create a soothing atmosphere. It functions as a high-tech night light that can help children who feel uneasy in the dark.
Set the built-in timer so the projector turns off automatically after the child falls asleep. Best move: Position the projector on a high shelf in the center of the room for the best coverage.
- Look for projectors with remote controls and adjustable brightness settings for ease of use.
- Use the white noise feature if the model includes it to help drown out household sounds.
- Change the color settings to red or orange at night to promote better sleep hygiene.
Best shortcut: Angle the projector toward a corner to create a portal effect on the walls.
29. Woven Seagrass Baskets
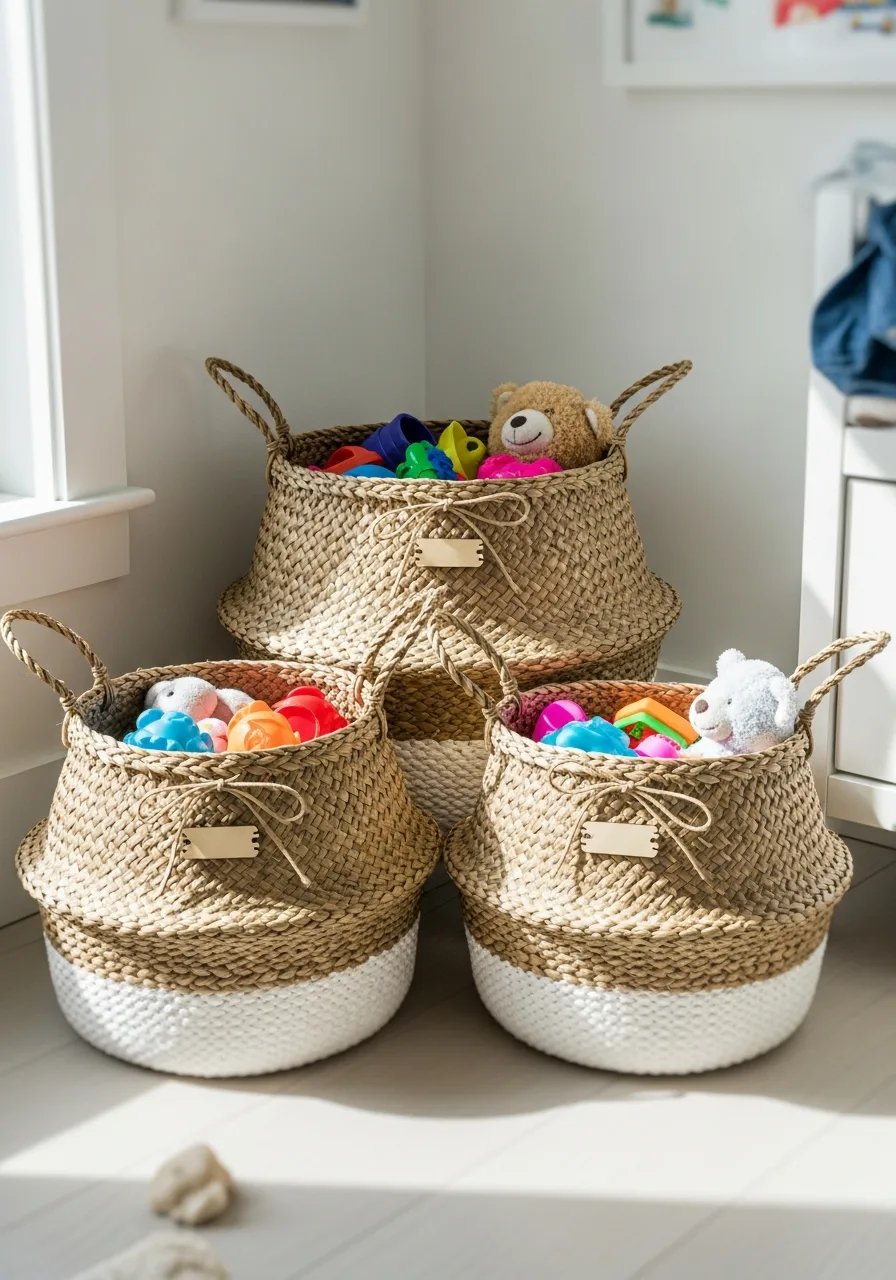
Natural seagrass baskets add warmth and texture while hiding a large volume of plastic toys or stuffed animals. They are sturdy enough to hold heavy items but light enough for a child to drag across the room.
Tie a wooden tag to the handle of each basket to help organize toys by category. Worth doing: Buy baskets in a set of three different sizes to create a visual grouping in a corner.
- Seagrass baskets are widely available at home decor stores for $15 to $40 each.
- Choose baskets with reinforced handles to prevent them from breaking under the weight of toys.
- Line the baskets with a simple fabric bag if you are storing small items like building bricks.
Quick win: Spray the baskets with a light mist of water if they become misshapen to make them pliable again.
30. Custom Wood Name Sign

A large laser-cut wood sign over the headboard makes the space feel personal and permanent for the child. It is a classic decor piece that transitions well from a nursery to a big-kid bedroom.
Paint the wood sign a high-contrast color against the wall to make the name stand out. What works: Use a script font for a traditional look or a block font for a modern feel.
- Custom wood signs usually take one to two weeks for production and shipping.
- Use small finishing nails or heavy-duty mounting tape to secure the sign flat against the wall.
- Order the sign in a natural wood finish so you can stain or paint it yourself later if the room changes.
Most people skip this: Trace the sign on paper and tape the paper to the wall first to find the perfect placement.
31. Hanging Art Clipboards
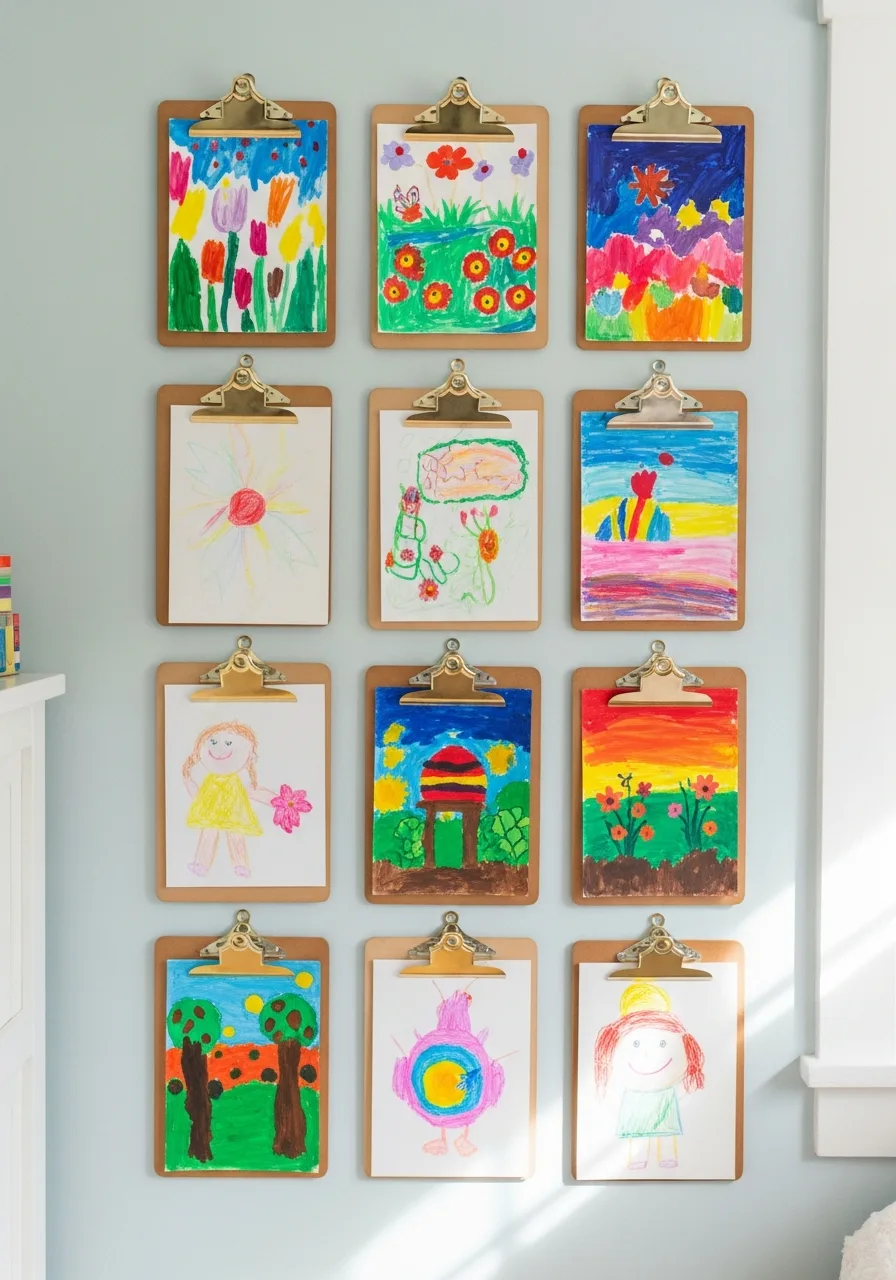
Standard office clipboards can be mounted on the wall to hold the latest drawings and paintings. They make it easy to swap out art without damaging the paper or the wall.
Line up six or nine clipboards in a grid to create a professional gallery look. Best move: Paint the clips in a metallic color like gold or silver for an upgraded feel.
- Buy clipboards in bulk online to save money on the set.
- Use adhesive strips on the back of the boards for a no-drill installation.
- Space them exactly three inches apart for a clean, balanced appearance.
Quick win: Use the clipboards to hold chore charts or calendars alongside the artwork.
32. Stuffed Animal Storage Beanbag
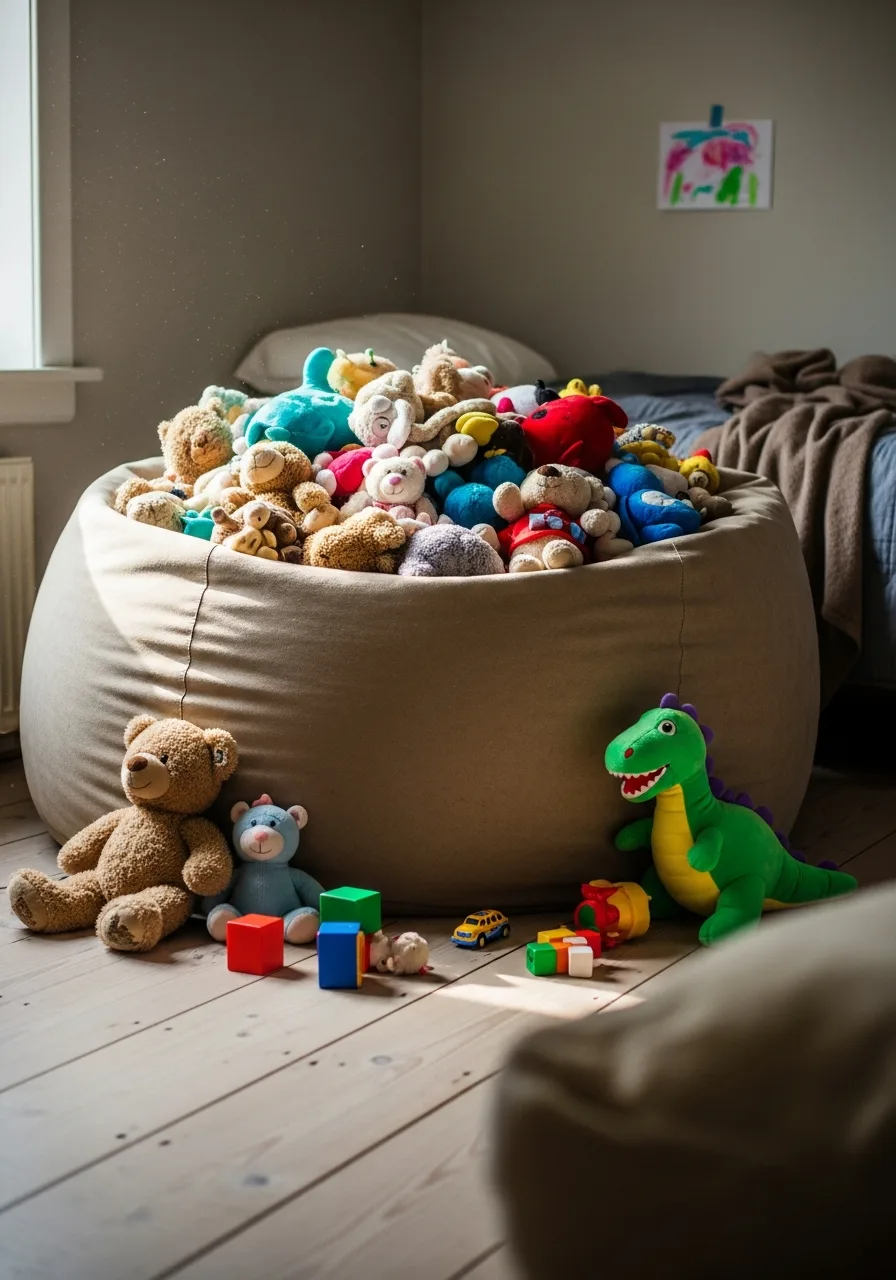
This clever cover turns a mountain of plush toys into a functional seat. It hides the clutter of stuffed animals while keeping them easy to reach for playtime.
Stuff the bag with soft items only to ensure the chair remains comfortable for reading. Best move: Choose a heavy-duty canvas material that can withstand jumping and dragging.
- Available for under twenty dollars at most major retailers.
- Place it in a corner to create an instant reading nook.
- Buy an extra-large size if the toy collection is growing fast.
Most people skip this: Wash the cover once a month to keep the seating area fresh.
33. Tiered Art Supply Cart
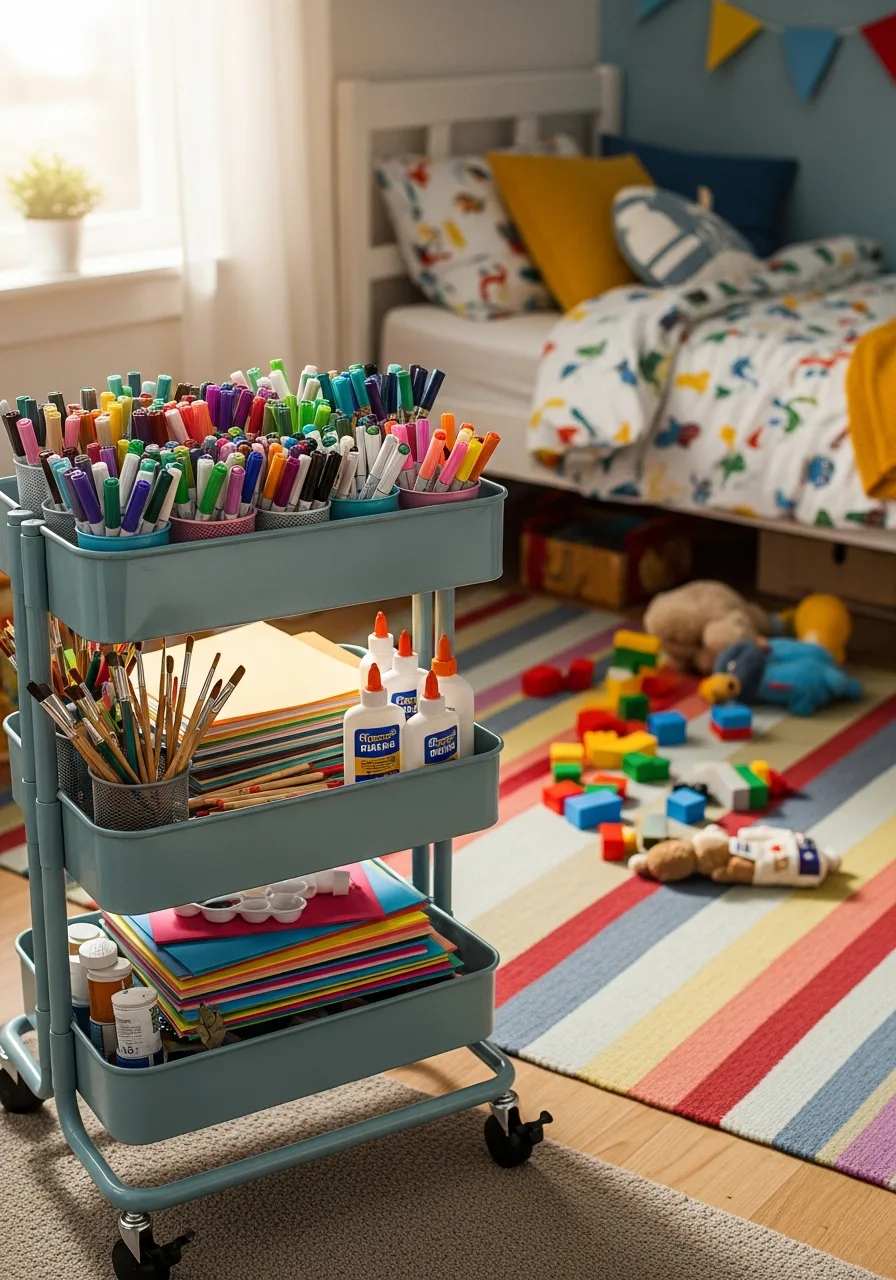
A metal rolling cart keeps markers, paper, and glue organized in one spot. It can move from the desk to the floor depending on where the project is happening.
Use small cups inside the tiers to keep pencils and brushes from rolling around. Smart shortcut: Label each tier so kids know exactly where to return their supplies.
- Metal carts are sturdier than plastic and last for years.
- Lock the wheels when the cart is in use to prevent it from sliding.
- Pick a bright color to make the cart a focal point in the room.
Best shortcut: Use magnetic hooks on the side of the cart to hold scissors or aprons.
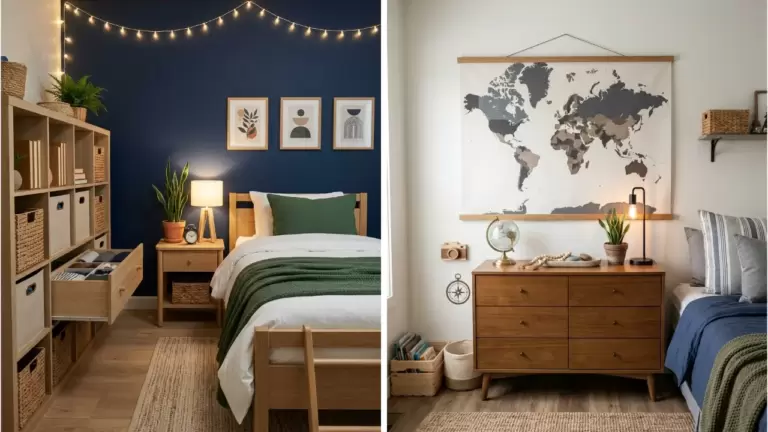
34. Oversized World Map Mural

A large map covers a big section of the wall and adds an educational element to the room. It sparks curiosity about travel and geography while acting as a bold piece of art.
Select a map with vibrant colors that match the rest of the bedding or furniture. Worth doing: Frame the edges with thin wood trim for a more finished, custom look.
- Large paper murals are more affordable than custom wallpaper.
- Use a squeegee during installation to remove air bubbles.
- Choose a laminated version if you want kids to mark places they have visited.
Quick win: Use colorful push pins to track family vacations or dream trips.
35. Bunk Bed Privacy Curtains
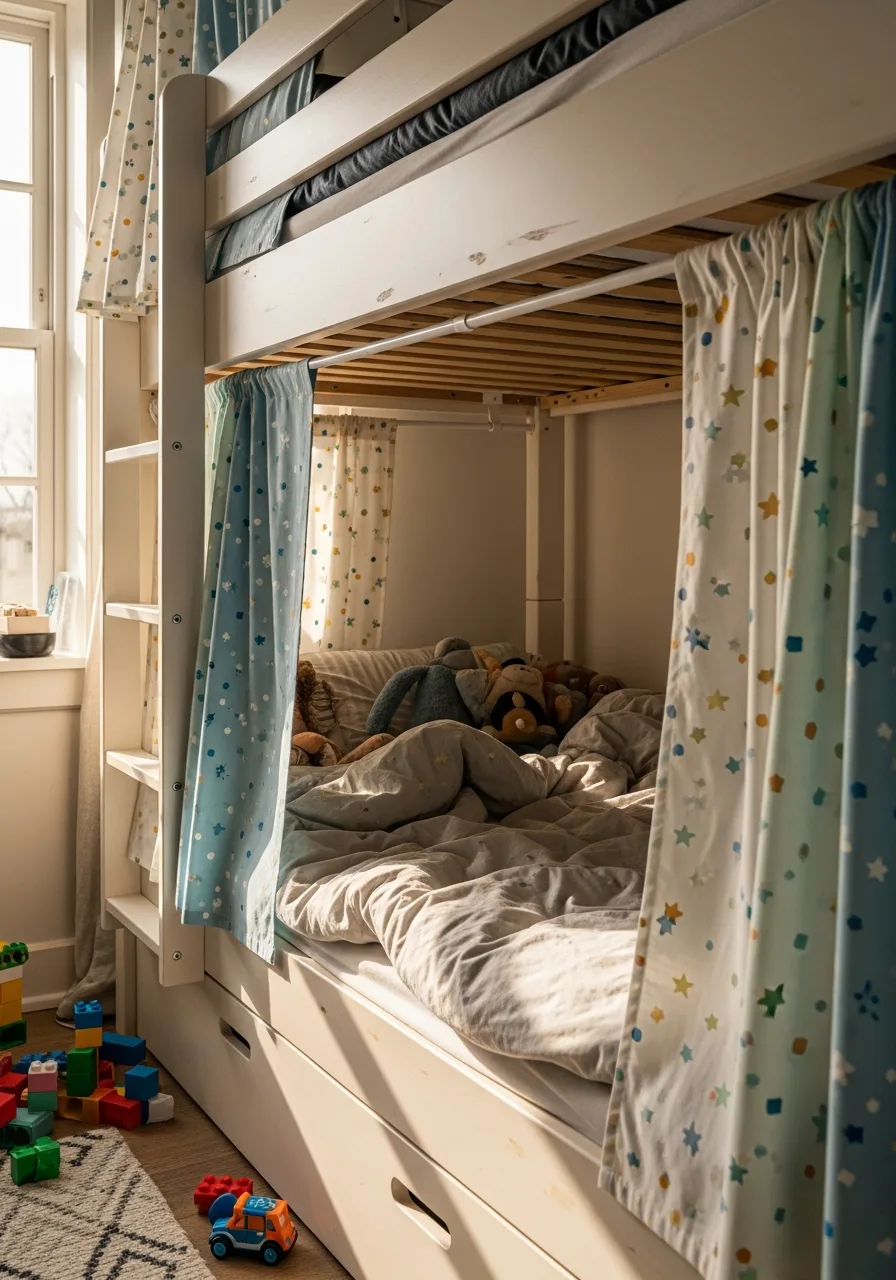
Adding fabric panels to the bottom bunk creates a secret hideout or a dark space for sleeping. It gives children in shared rooms a sense of their own private territory.
Install a simple tension rod inside the bed frame to hang the fabric without drilling. Best move: Use a lightweight cotton fabric that breathes well and is easy to machine wash.
- Fabric remnants from a craft store are a cheap way to customize the look.
- Measure the height of the bunk opening before buying rods.
- Use clip-on rings so the curtains slide open and shut smoothly.
Most people skip this: Add a battery-powered light inside the bunk so the space isn’t too dark.
36. Felt Letter Board
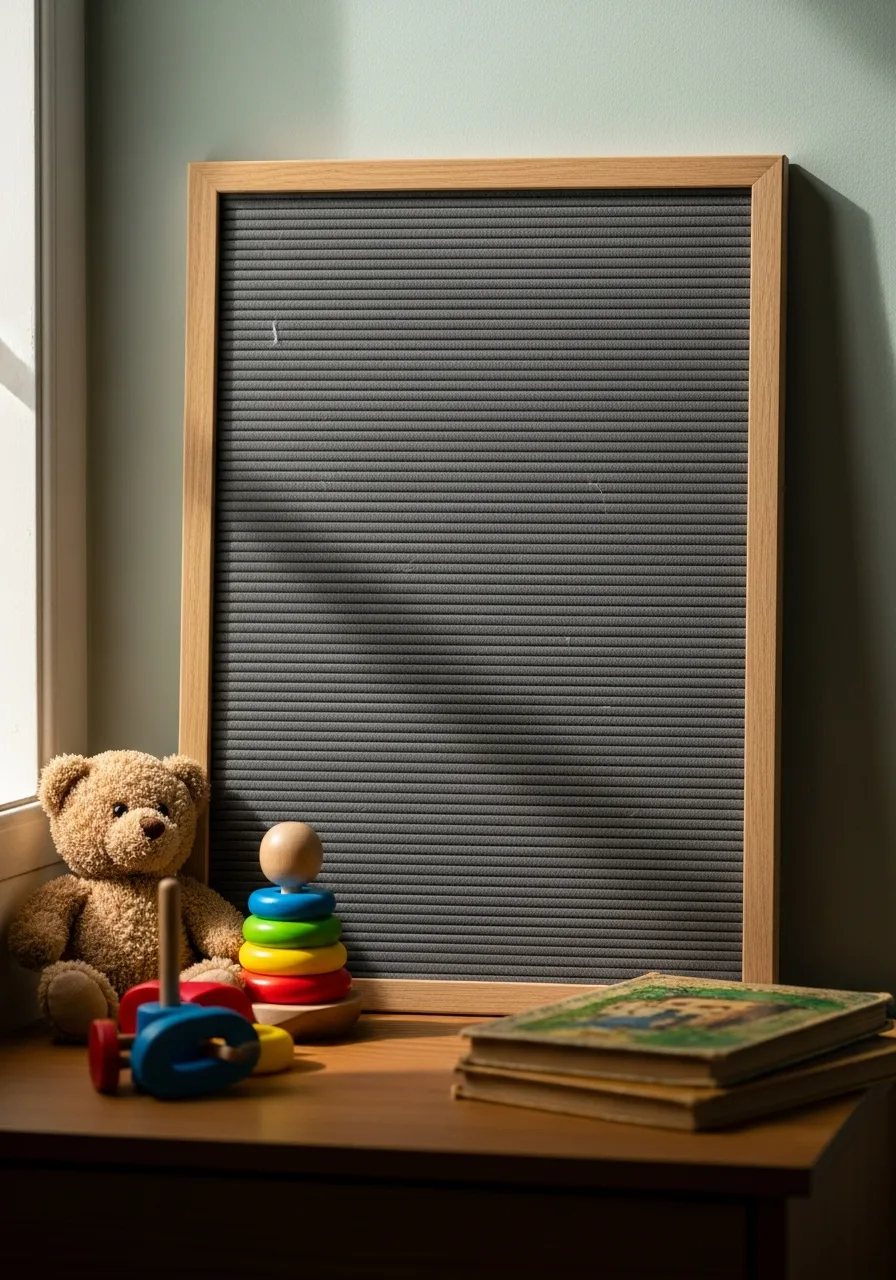
This board allows kids to display their favorite quotes or a countdown to a special event. It is an easy way to let them express their personality without permanent changes to the room.
Change the message every week to keep the decor feeling fresh and interactive. What works: A wooden frame around the felt adds a touch of warmth to a modern space.
- These boards are widely available and very budget-friendly.
- Hang it at eye level so the child can reach the letters themselves.
- Store extra letters in a small plastic organizer to prevent losing them.
Quick win: Use the board to practice spelling words or math problems in a fun way.
37. Clip On Bedside Lamp
A small lamp that attaches directly to the headboard or a shelf saves space on a nightstand. It provides focused light for reading without brightening the whole room.
Point the light directly at the book to prevent eye strain during evening reading sessions. Smart shortcut: Look for a model with a flexible neck for easy positioning.
- Shop for LED versions to ensure the lamp stays cool to the touch.
- Position the clip on a sturdy part of the bed frame for safety.
- Choose a USB-powered lamp if there are no outlets near the bed.
Best shortcut: Get a lamp with a dimming feature to transition from reading to sleeping.
38. Geometric Floor Tiles
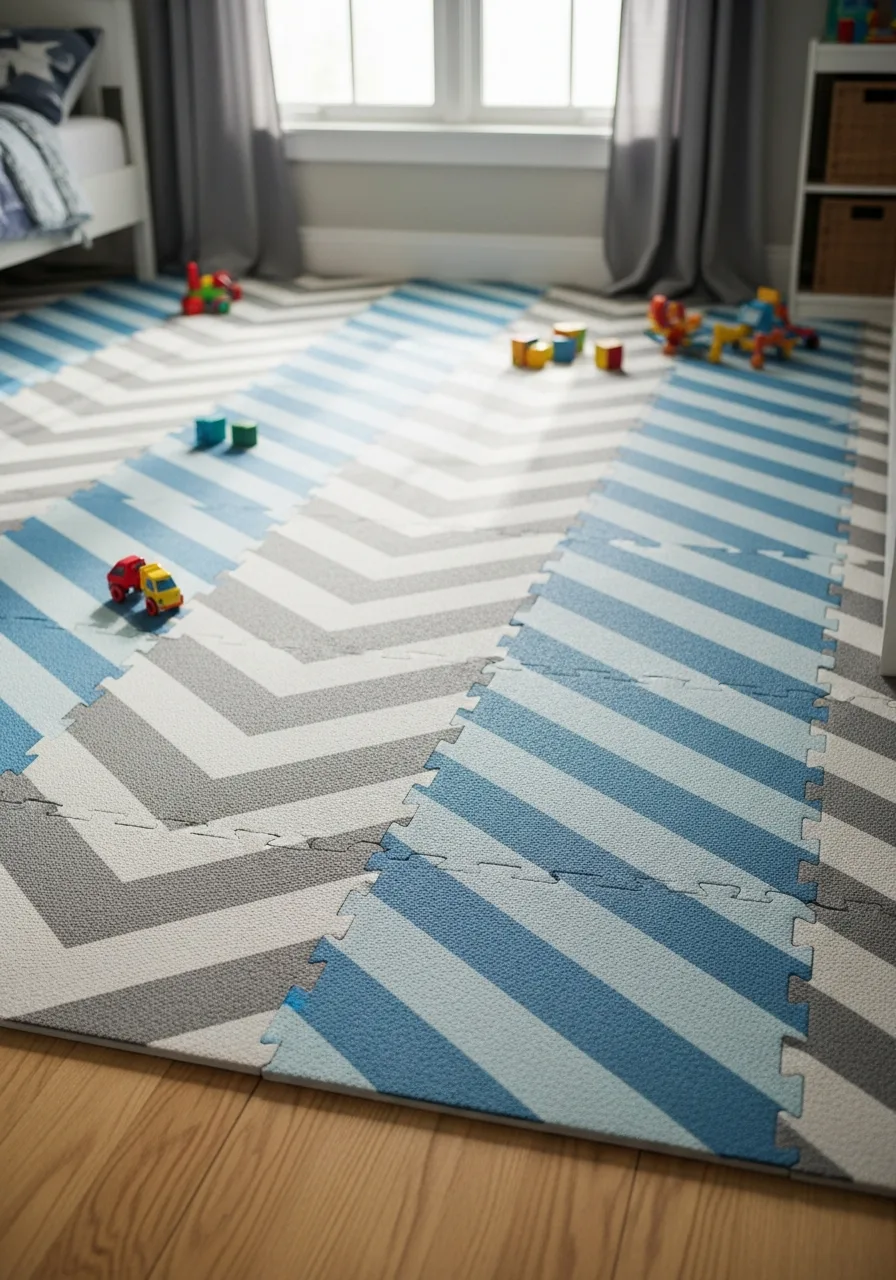
Interlocking foam or carpet tiles allow for a custom rug design that fits any room size. They are soft for playing on the floor and can be replaced individually if one gets stained.
Arrange the tiles in a chevron or striped pattern to add visual interest to the floor. Worth doing: Stick to two or three colors to keep the room from looking too busy.
- Buying individual tiles is often cheaper than one large high-quality rug.
- Ensure the floor is clean and dry before laying the tiles.
- Use foam tiles in play areas and carpet tiles in sleeping areas.
Quick win: Rotate the tiles every few months to even out the wear and tear.
39. Indoor Play Teepee

A canvas teepee provides a cozy spot for reading, napping, or imaginative play. It adds height to the room decor and creates a distinct zone for quiet time.
Layer a soft rug and a few pillows inside to make the space extra inviting. Best move: Choose a collapsible model that can be tucked away when the floor needs to be cleared.
- Higher-end canvas models last longer than thin polyester versions.
- Place the teepee in a corner to maximize floor space.
- String battery-operated lights around the poles for a magical evening glow.
Most people skip this: Check the rubber feet on the poles to ensure they don’t scuff wood floors.
40. Wall Mounted Sports Rack
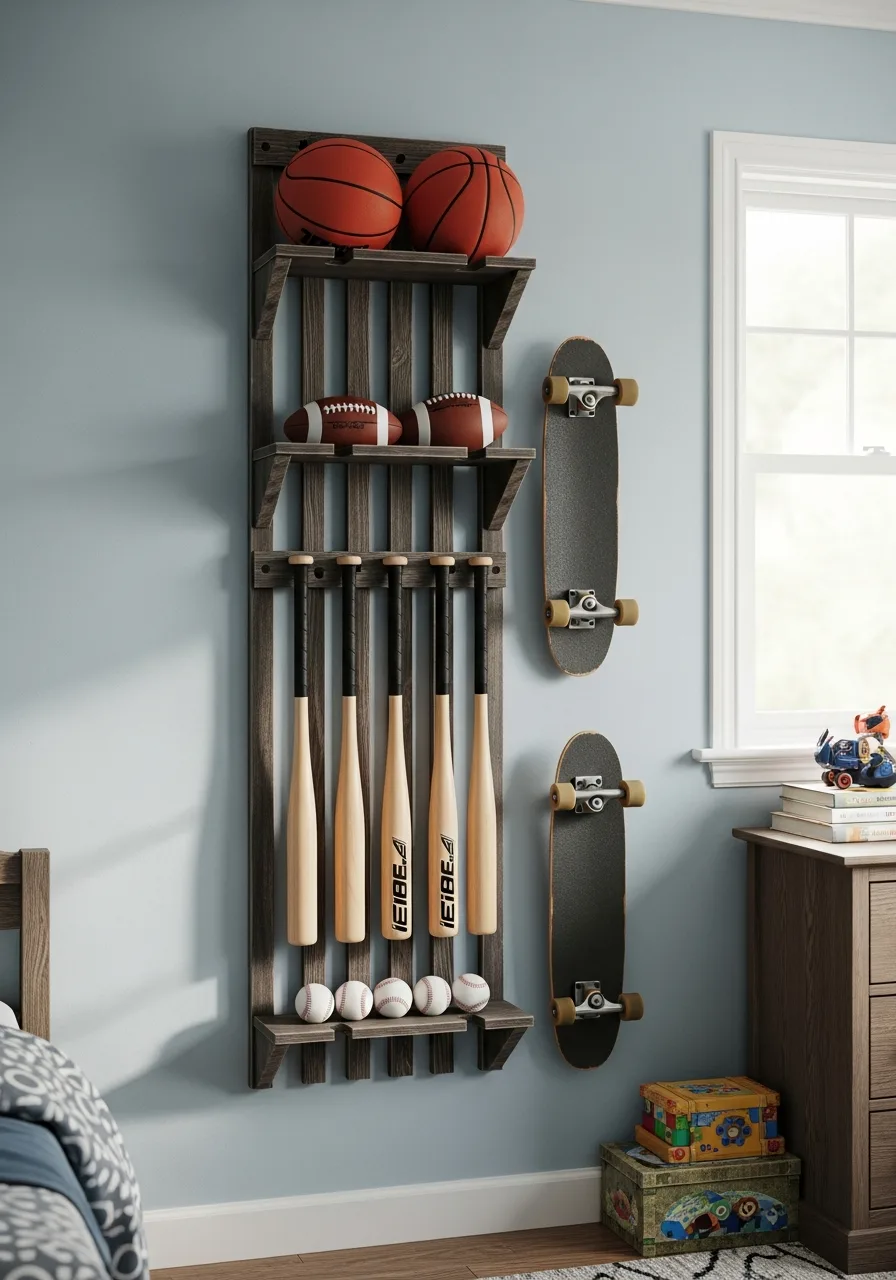
A dedicated rack for basketballs, bats, or skateboards keeps sports gear off the floor. It turns equipment into a part of the room’s theme while keeping it organized.
Mount the rack at a height where the child can easily grab their own gear. What works: Vertical storage is the best way to handle bulky items in small bedrooms.
- Heavy-duty metal racks are best for supporting the weight of multiple balls.
- Use a stud finder to ensure the rack is securely fastened to the wall.
- Group similar items together to make finding gear faster before practice.
Best shortcut: Add a small basket nearby for smaller items like tennis balls or goggles.
41. Colorful Paper Lanterns

Hanging several paper lanterns from the ceiling adds a soft, whimsical touch to the room. They are a low-cost way to fill empty overhead space and add a pop of color.
Group three lanterns of different sizes together at varying heights for a professional look. Smart shortcut: Use clear fishing line to hang them so they appear to be floating.
- Paper lanterns are extremely inexpensive and can be found in many colors.
- Use adhesive ceiling hooks to avoid making permanent holes.
- Avoid hanging them directly over a bed if they contain light bulbs.
Quick win: Insert battery-operated LED puck lights into the lanterns for a soft nightlight.
42. Wood Activity Table
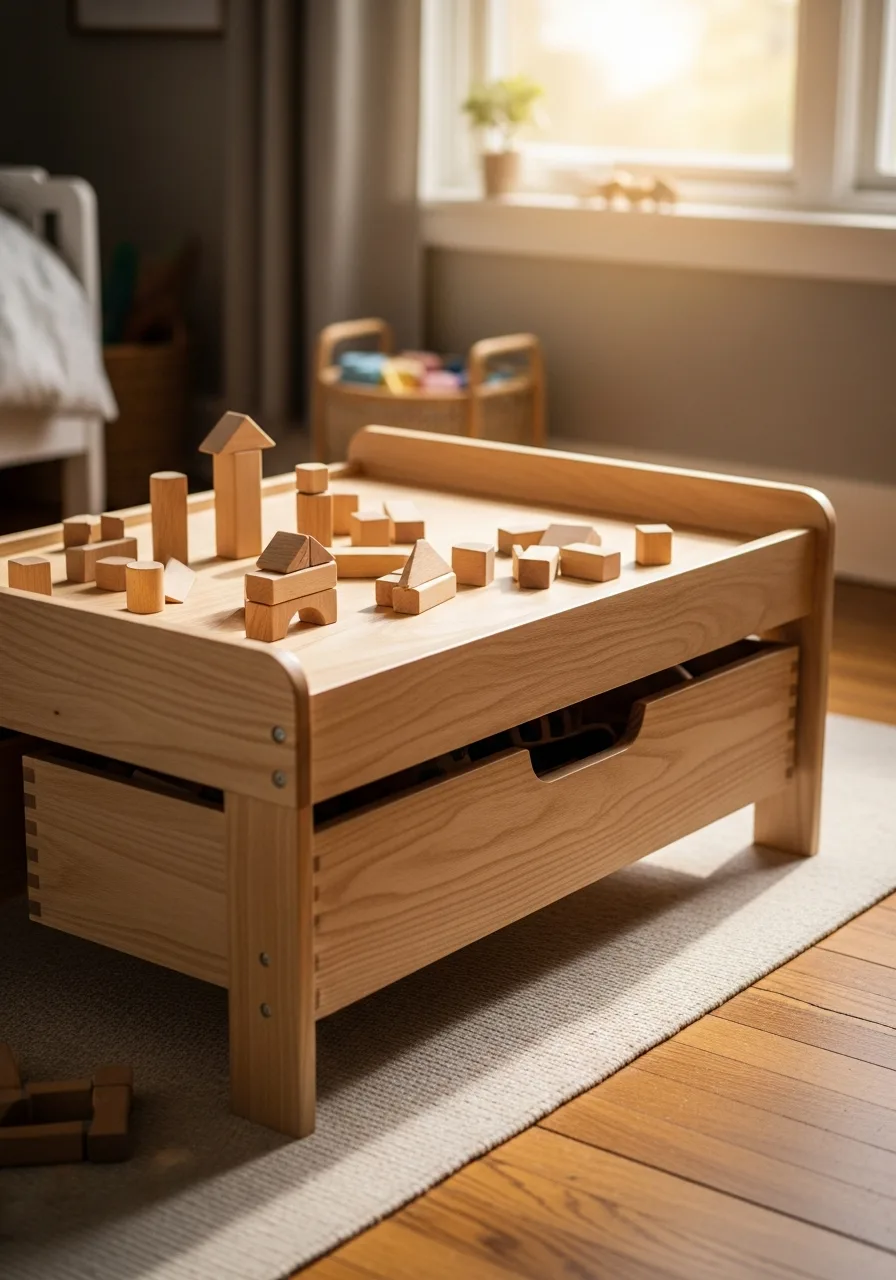
A sturdy table at a child-friendly height provides a dedicated space for building blocks or puzzles. It keeps these activities off the main floor and provides a flat surface for creativity.
Choose a table with a lipped edge to prevent small pieces from falling onto the rug. Worth doing: Look for a table with built-in storage drawers to keep the area tidy.
- Solid wood tables are more durable than particle board for heavy play.
- Place the table near a window for natural light during daytime projects.
- Pick a finish that matches the rest of the room’s wood furniture.
Most people skip this: Apply a clear coat of polyurethane to the tabletop to protect it from paint or markers.
43. Fabric Storage Cubes
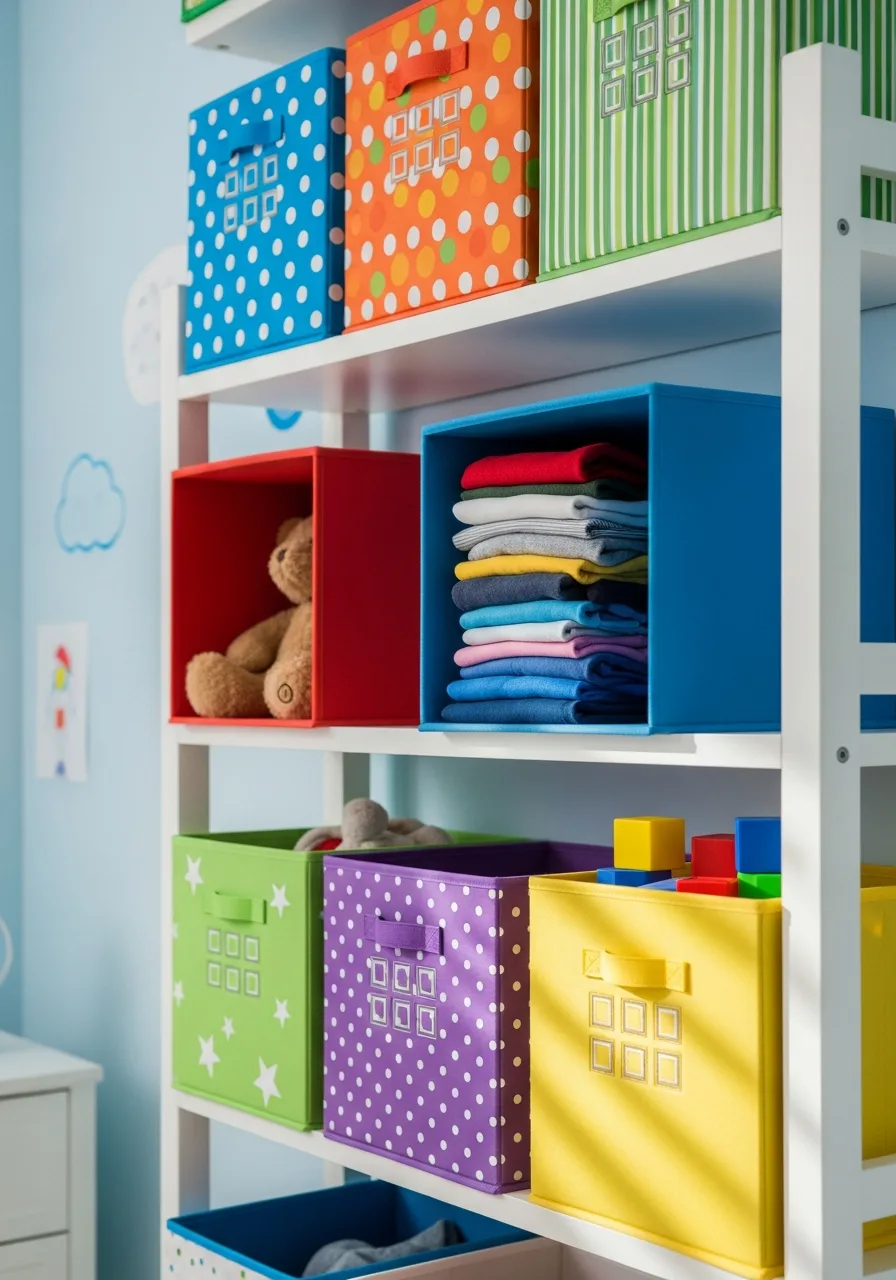
These cubes fit into standard shelving units and hide a variety of toys and clothes. They come in many colors and patterns, making it easy to match the room’s theme.
Mix and match different colors to create a bright pattern on a plain white shelf. Best move: Use different colored cubes for different types of toys to make cleanup easier for kids.
- These are very affordable and can be replaced easily if they get worn.
- Measure your shelf openings before buying to ensure a snug fit.
- Choose cubes with reinforced handles for easier pulling and carrying.
Quick win: Iron the cubes on a low setting when they arrive to remove fold lines.
44. Magnetic Strip Car Display
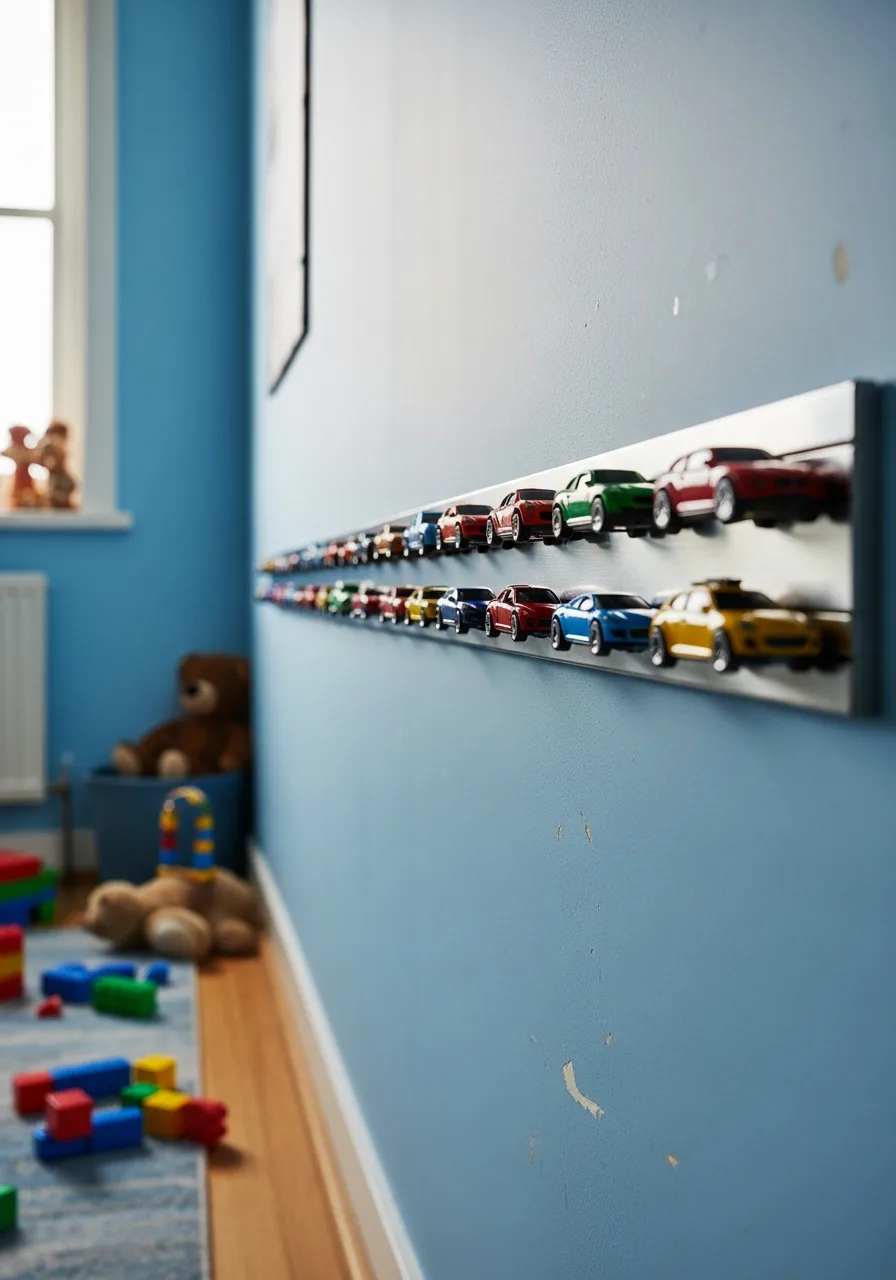
A magnetic strip mounted on the wall is a perfect way to display and store metal toy cars. It keeps the floor clear and turns a toy collection into a wall art feature.
Install the strip horizontally at chest height so the cars are easy to see and reach. What works: This method uses zero floor space and keeps the cars from getting scratched in a bin.
- Standard kitchen magnetic strips work perfectly for this project.
- Use heavy-duty wall anchors to keep the strip from sagging.
- Test the cars first to ensure they have enough metal to stick.
Best shortcut: Paint the strip the same color as the wall to make the cars really stand out.
45. Decorative Wall Hooks
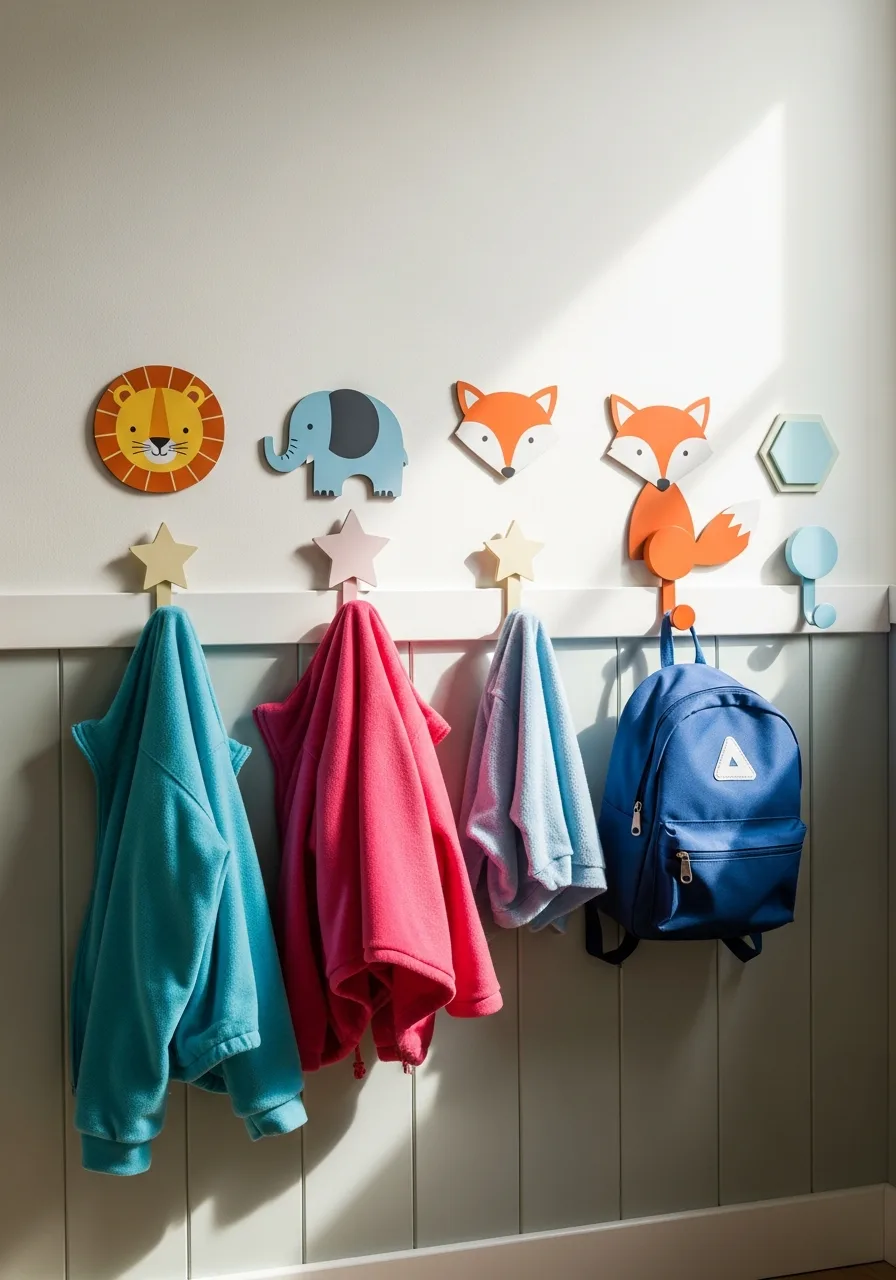
Fun hooks shaped like animals, stars, or geometric shapes encourage kids to hang up their coats and bags. They add personality to the walls while providing essential organization.
Space the hooks out along a low wall so the child can reach them without help. Smart shortcut: Use a level to ensure a row of hooks stays perfectly straight.
- Decorative hooks are a cheap way to add a theme to a room.
- Mount hooks into wall studs if they will be holding heavy backpacks.
- Use command-style adhesive hooks if you cannot drill into the walls.
Quick win: Hang a pre-packed outfit on a hook the night before to make mornings faster.