30 Cork Board Ideas for a Bedroom
This post may contain affiliate links: full affiliate disclosure.
A bedroom cork board should balance utility with personal style. Transforming a basic office tool into a curated display keeps the space organized without feeling like a classroom.
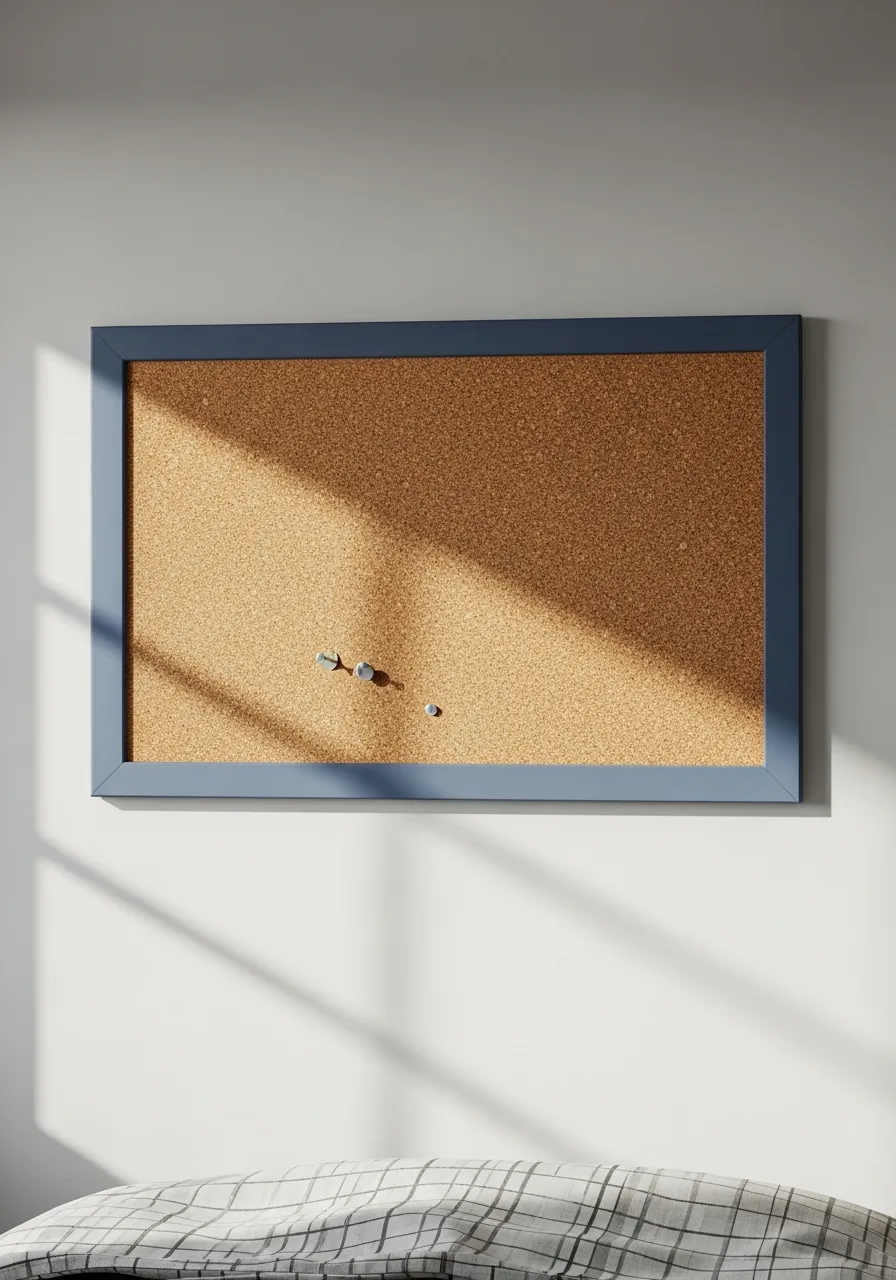
1. Large Board Above the Desk
Hang an oversized cork board directly above the bedroom desk to create a practical study station. Mount the board at eye level when seated to ensure every reminder stays within your line of sight. It keeps the desk surface clear for actual work.
A larger board prevents the wall from looking cluttered with tiny, separate pieces of paper.
- Expect to spend $30 to $50 for a high-quality large board.
- Use a stud finder to ensure the mounting screws are secure.
- Renters can use heavy-duty adhesive strips to avoid wall holes.
Quick win: Align the width of the board with the width of the desk for a balanced, custom look.
2. Full Cork Wall Behind Desk
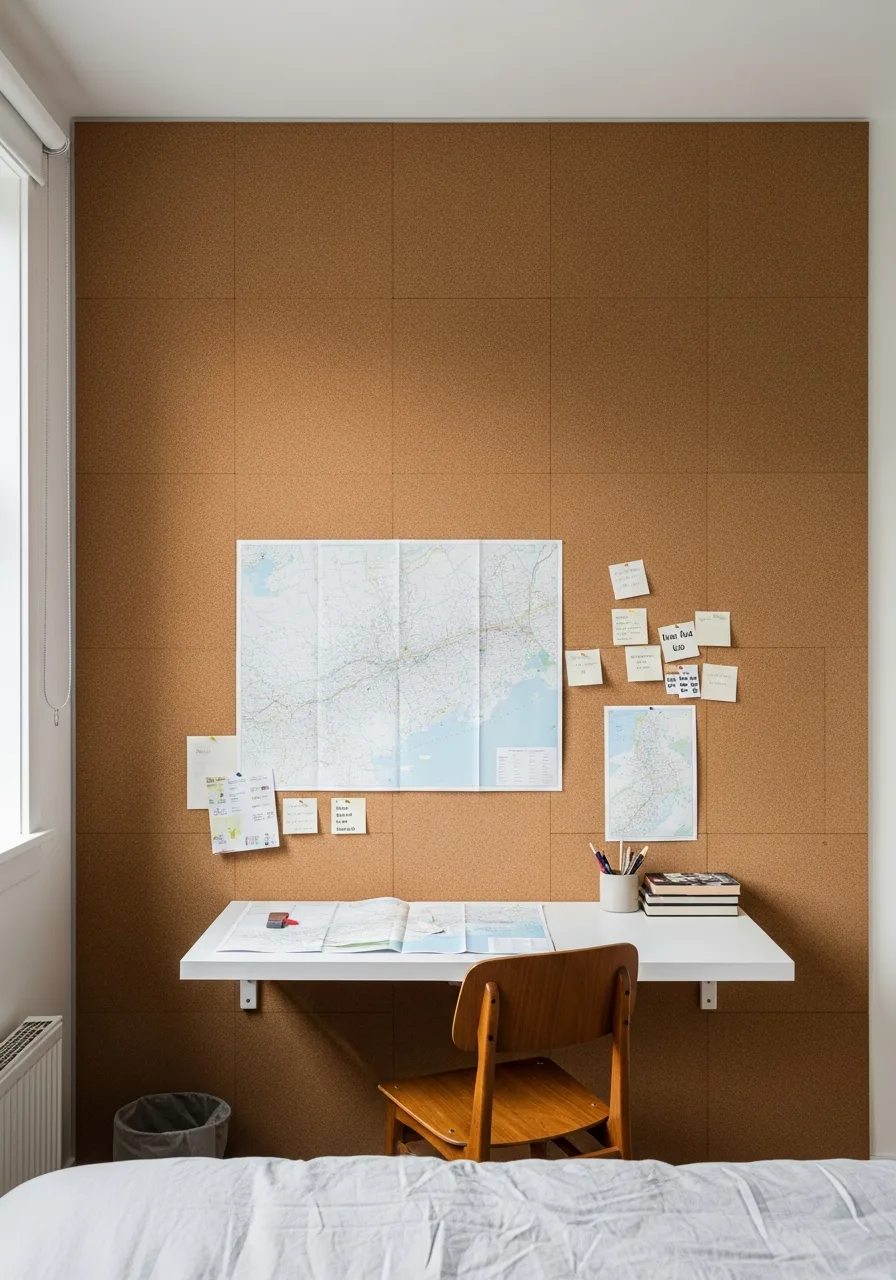
Cover the entire wall behind a desk with cork tiles or cork sheets. Apply adhesive to the wall in small sections to ensure the sheets lay perfectly flat without air bubbles. The large surface provides plenty of space for planning, artwork, and frequently changing displays.
This approach turns the entire wall into a functional design feature.
- Cork rolls or tiles are available at most home improvement stores.
- Measure the wall twice and cut the cork with a sharp utility knife.
- Natural cork works as a great sound dampener for noisy rooms.
Most people skip this: Seal the cork with a clear matte spray to prevent it from crumbling over time.
3. Polaroid Photo Cork Board
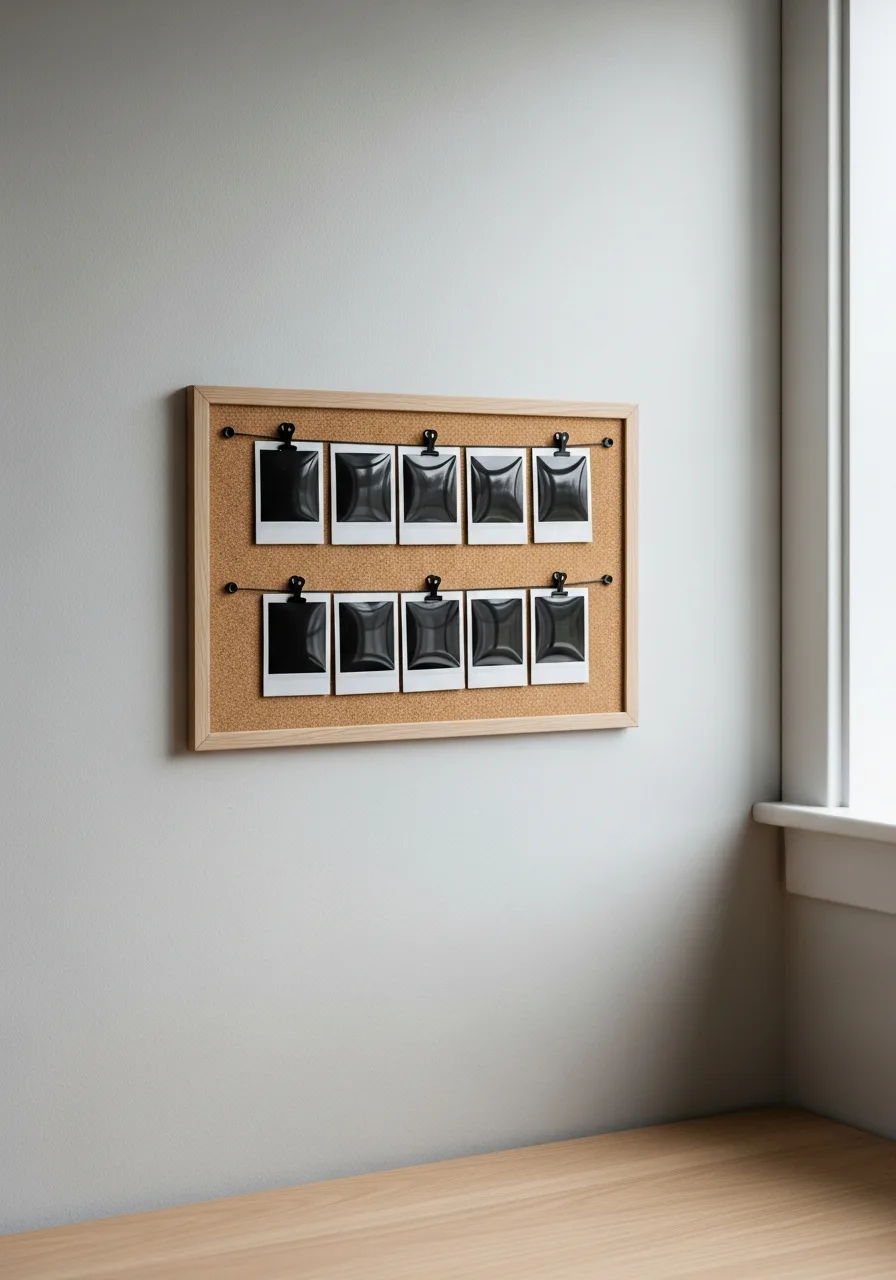
Arrange instant-style photos across the board in neat rows or a relaxed collage. Leave small spaces between the pictures so you can add dates, captions, tickets, or handwritten notes. It creates a visual timeline of memories that is easy to update.
Using uniform clips instead of pins keeps the photos in perfect condition.
- Budget $10 for a basic board plus the cost of photo prints.
- Space photos exactly two inches apart for a clean, gallery feel.
- Switch to string and clips to hang photos across the cork surface.
Best shortcut: Use mini clothespins instead of push pins to avoid putting holes through your favorite photos.
4. Bedroom Vision Board
Use the cork board to display goals, encouraging words, travel inspiration, and images representing future plans. Divide the board into areas such as school, wellness, hobbies, and personal goals using thin washi tape. This helps organize different aspects of life into one visual space.
Looking at these goals daily keeps motivation high without feeling like a chore.
- Gather magazines, stickers, and printouts over a few weeks.
- Update the board every six months to reflect changing priorities.
- Use a small board to keep the focus on 3 to 5 main goals.
Quick win: Use washi tape to create grid lines that don't damage the cork surface when removed.
5. Fabric-Covered Cork Board
Cover a plain cork board with linen, gingham, velvet, or another decorative fabric. Pull the fabric tight and staple it to the back of the board to create a professional, upholstered finish. Choose a material that coordinates with the bedding or curtains for a more polished look.
Fabric also hides pinholes, which keeps the board looking new for years.
- One yard of fabric is usually enough for a standard board.
- Iron the fabric before mounting to remove all wrinkles and folds.
- Add a layer of thin batting under the fabric for a quilted look.
Most people skip this: Iron the fabric with heavy steam before stapling to ensure it doesn't sag later.
6. Framed Cork Board
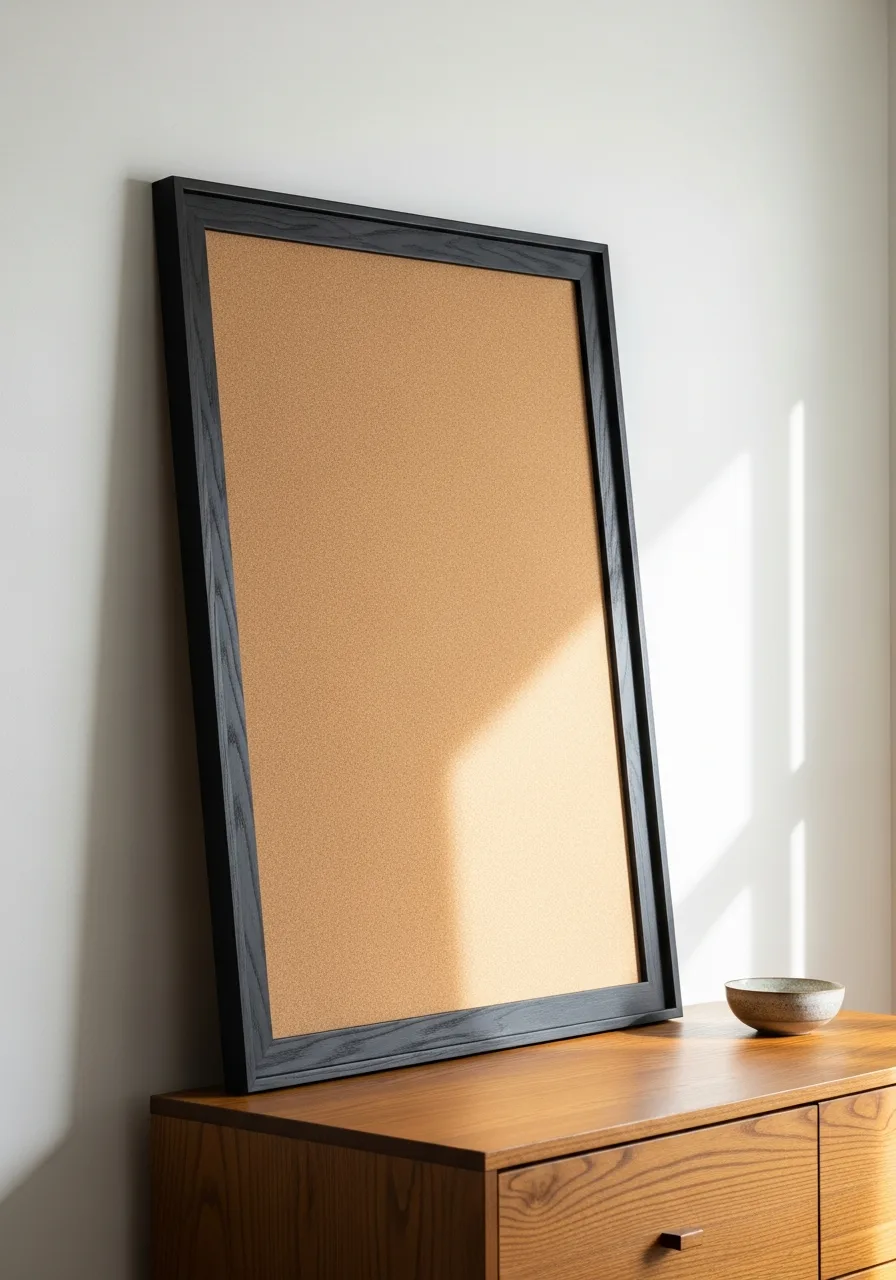
Add a decorative wood, painted, or vintage-style frame around the cork. Choose a frame that is at least two inches wide to give the board the presence of a real piece of art. A substantial frame makes the board feel intentional rather than like an office leftover.
It is an easy way to make a cheap board look high-end.
- Upcycle a thrift store frame and replace the glass with cork.
- Ensure the frame is deep enough to hold the thickness of the cork.
- Paint the frame a metallic gold or silver for a glam bedroom.
Best shortcut: Check thrift stores for large, cheap art; the frames are often worth more than the board itself.
7. Painted Cork Board Frame
Refresh an inexpensive cork board by painting its existing frame. Use high-quality painter's tape to protect the cork surface before applying two thin coats of acrylic paint. Soft white, sage green, or warm beige can help it coordinate with a modern bedroom palette.
This is the fastest way to customize a standard store-bought board.
- A small 2-ounce bottle of acrylic paint is enough for one frame.
- Sand the wooden frame lightly before painting for better adhesion.
- Use a foam brush to avoid leaving visible brush marks on the wood.
Quick win: Remove the cork from the frame entirely before painting to get the cleanest edges possible.
8. Cork Tile Grid

Arrange square cork tiles in an organized grid above a desk or dresser. Use a level and a ruler to ensure the gaps between tiles are perfectly even across the entire grid. This creates a clean geometric pattern while separating different categories of notes.
It works better in small rooms where one giant board might feel overwhelming.
- Tiles usually come in packs of four or eight.
- Leave exactly one inch between tiles for a professional look.
- Apply extra adhesive to the corners to prevent peeling.
Most people skip this: Use a laser level to keep the entire grid perfectly straight on the wall.
9. Hexagon Cork Tile Display
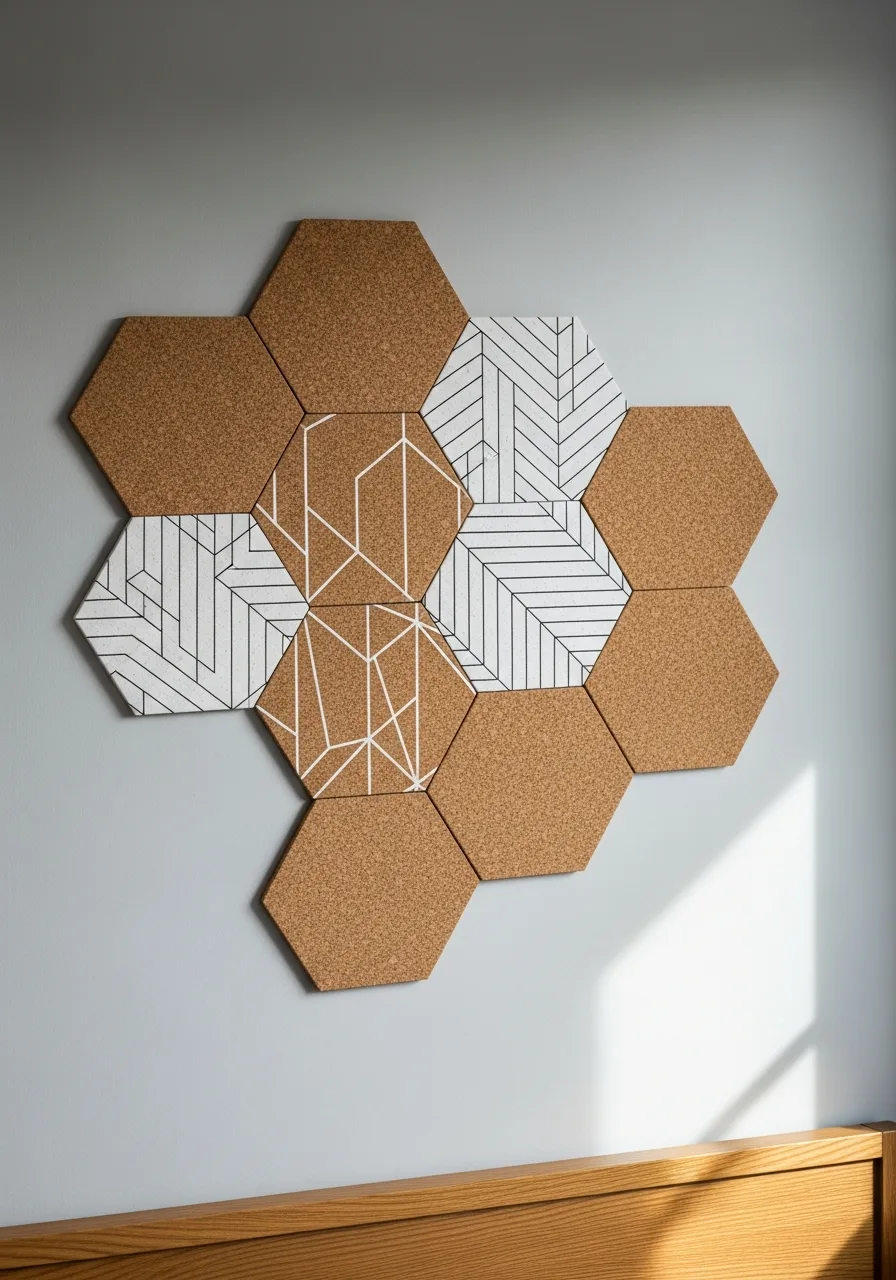
Use hexagonal cork tiles to form a honeycomb-style wall arrangement. Mix functional natural tiles with a few painted or fabric-covered pieces to add color and visual variety. The shape adds a modern touch to the bedroom wall.
You can start with a small cluster and add more tiles as your needs grow.
- Hexagon tiles are often thinner and lighter than standard boards.
- Arrange the tiles on the floor first to find the best layout.
- Use them to display small items like jewelry or single photos.
Best shortcut: Use a paper template of the hexagon shape to mark your layout on the wall with a pencil first.
10. Arch-Shaped Cork Board
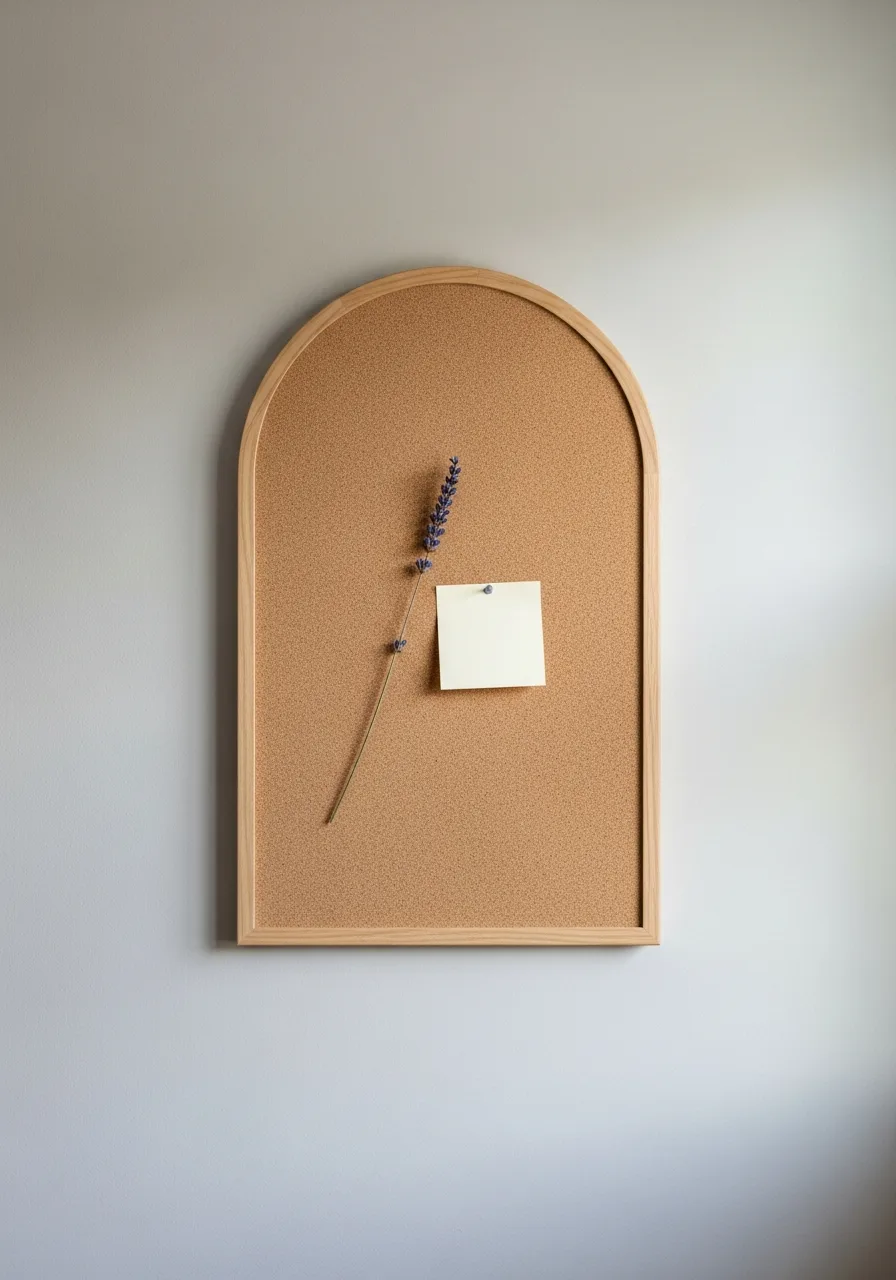
Choose or create a cork board with a rounded or arched top. Position the arched board centered above a nightstand or dresser to mimic the look of a decorative mirror. The softer shape works especially well in calm, modern, or neutral bedrooms.
It breaks up the straight lines of standard bedroom furniture.
- You can cut an arch from a thick cork sheet using a jigsaw.
- Look for boards with a thin wooden rim for a finished look.
- Hang it vertically to add height to a low-ceiling bedroom.
Quick win: Hang the arch so the bottom edge is just 4 inches above your furniture for a grounded look.
11. Scalloped Cork Board
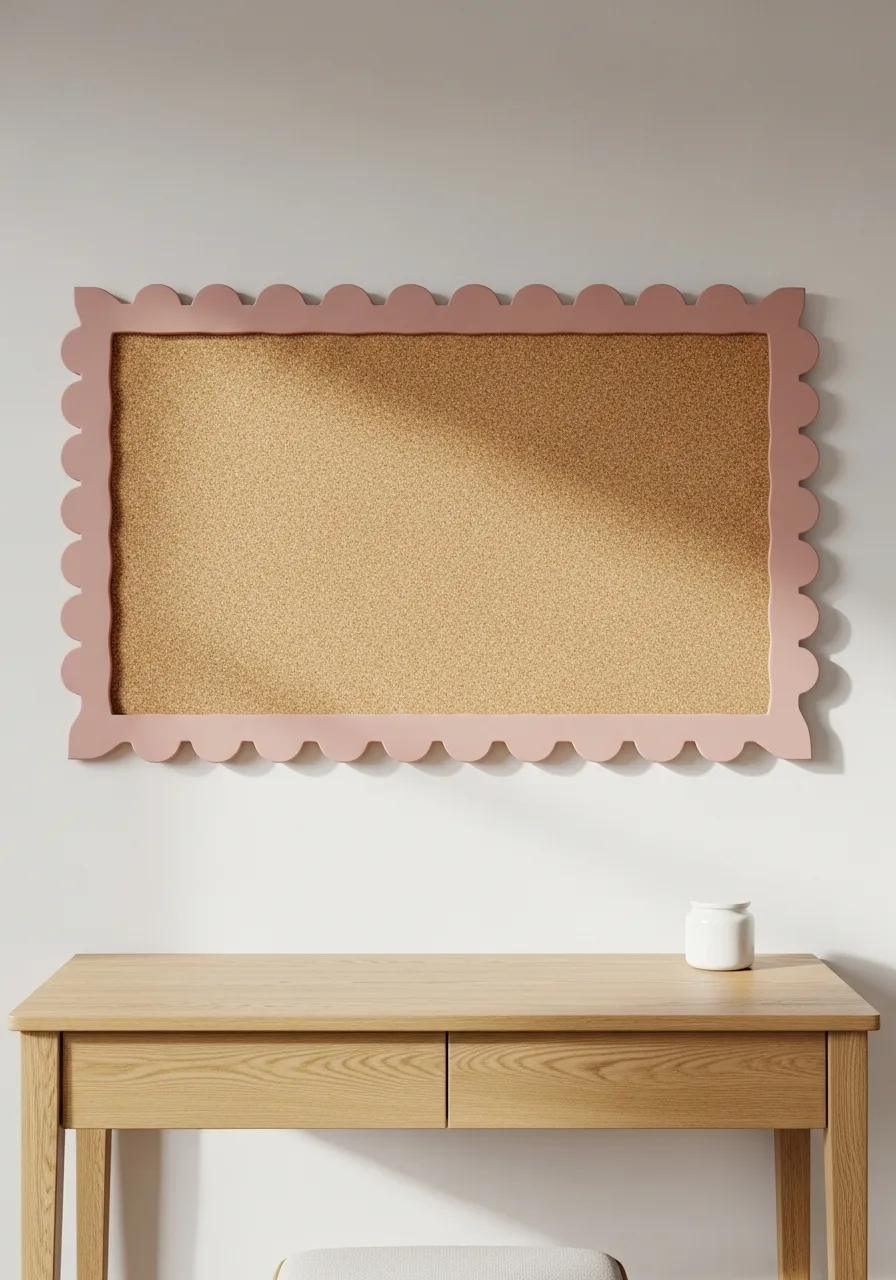
Frame the cork surface with a painted scalloped border for a playful decorative feature. Trace a circular object like a glass to create a consistent scallop pattern on a piece of thin plywood before cutting and attaching it. This design adds character to a creative bedroom.
It turns a utility item into a whimsical focal point.
- This project takes about two hours of active DIY time.
- Paint the scallops a contrasting color to make the shape pop.
- Use wood glue and small clamps to secure the border to the board.
Most people skip this: Sand the inner curves of the scallops thoroughly so the paint finish looks smooth.
12. Cork Board With Lights
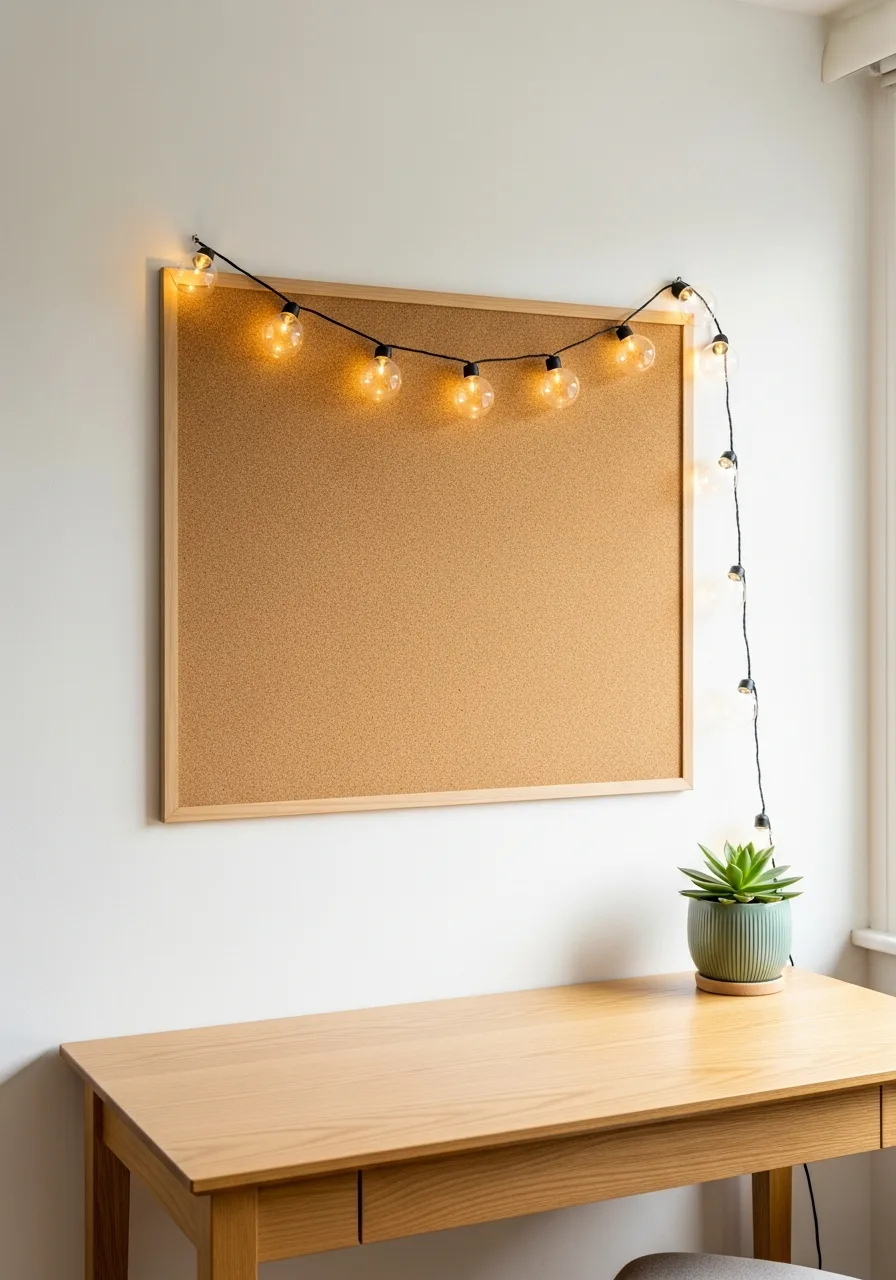
Place battery-powered or low-heat LED string lights around the outer edge of the board. Secure the light strand with small clear adhesive hooks to keep the wires hidden behind the frame. The lighting creates a warm evening glow and draws attention to favorite photos.
It makes the display feel cozy rather than clinical.
- Copper wire fairy lights are the easiest to shape around corners.
- Ensure the battery pack is hidden behind the board for a clean look.
- Use low-heat LEDs to ensure the cork doesn't dry out or scorch.
Best shortcut: Use battery packs with built-in timers so the board lights up automatically every evening.
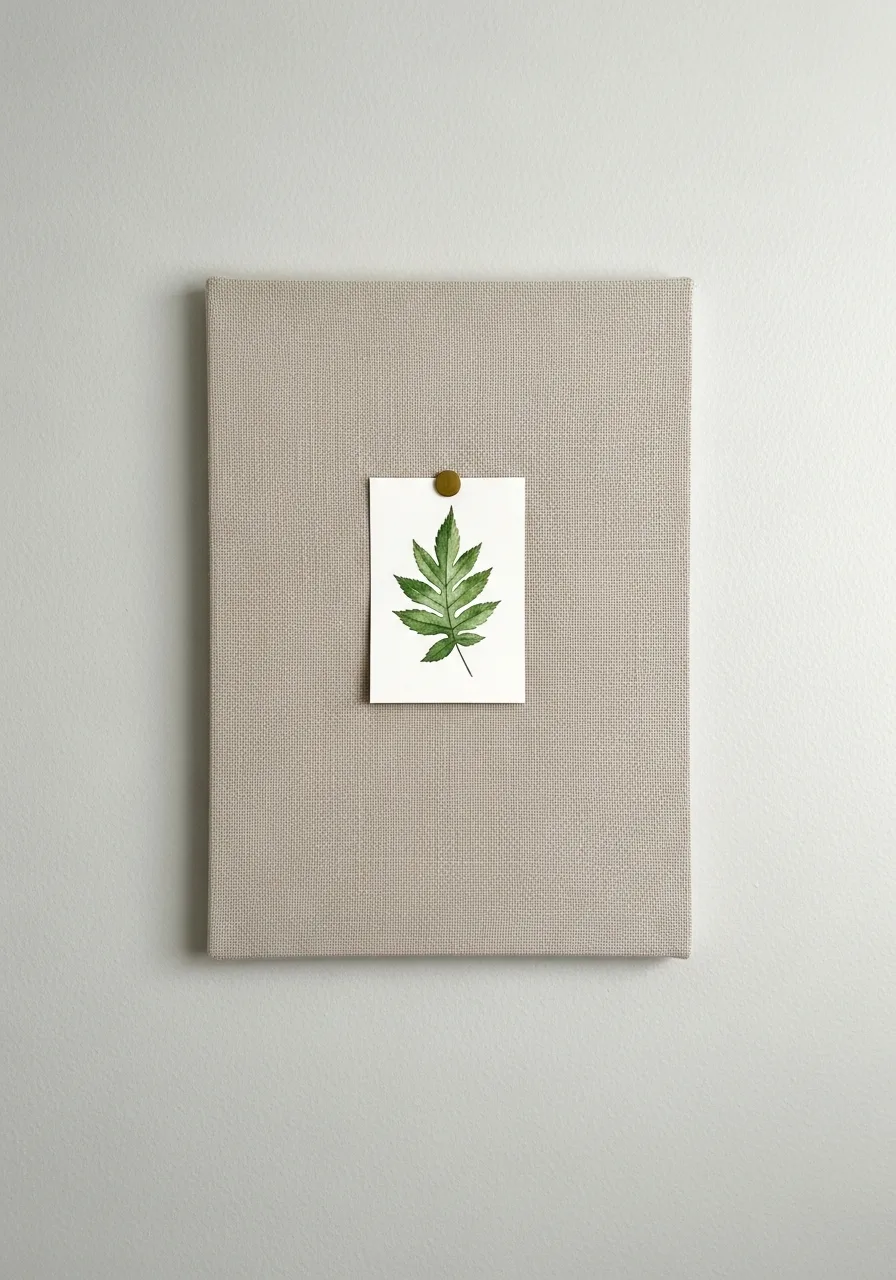
13. Minimalist Neutral Mood Board
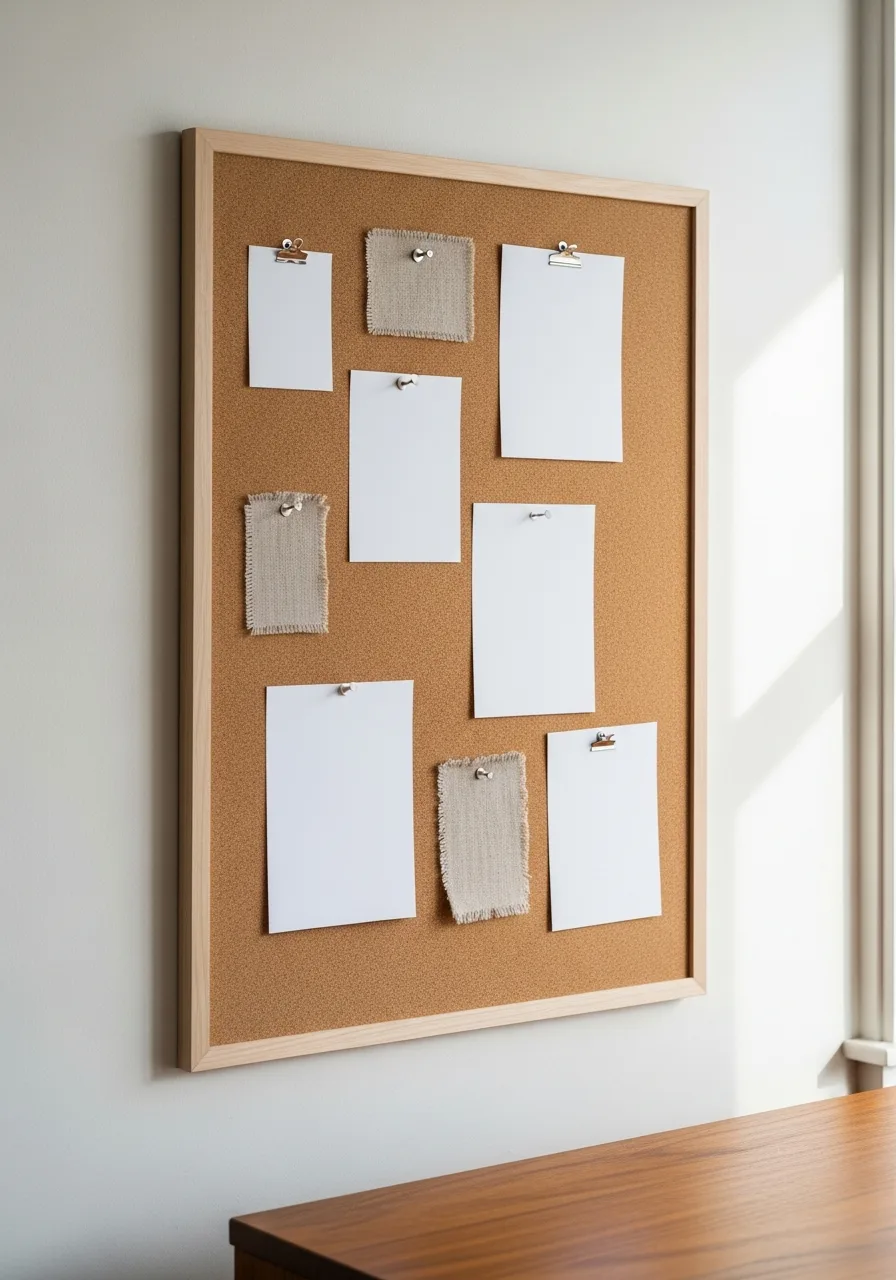
Create a restrained display using neutral photos, fabric samples, typography, and natural textures. Limit the palette to two or three coordinating colors like cream, tan, and white for a calm appearance. This style works best in bedrooms designed for relaxation.
It provides inspiration without creating visual noise.
- Use high-quality cardstock for any printed quotes or text.
- Incorporate textures like raw linen, twine, or dried flowers.
- Leave plenty of 'white space' on the cork so it doesn't look busy.
Quick win: Use white or clear push pins to keep the focus on the content rather than the hardware.
14. Colorful Maximalist Cork Board
Fill the board with bright artwork, postcards, stickers, photos, and decorative pins. Allow pieces to overlap slightly to create a layered, high-energy display that covers every inch of cork. This maximalist approach is perfect for showcasing a large collection of mementos.
It acts as a colorful anchor for a vibrant room.
- Start with the largest items in the back and layer smaller ones on top.
- Use colorful or novelty push pins to add to the busy aesthetic.
- This style is great for hiding a board that has many old pinholes.
Most people skip this: Use double-sided tape for the bottom layers to keep them flat without using a hundred pins.
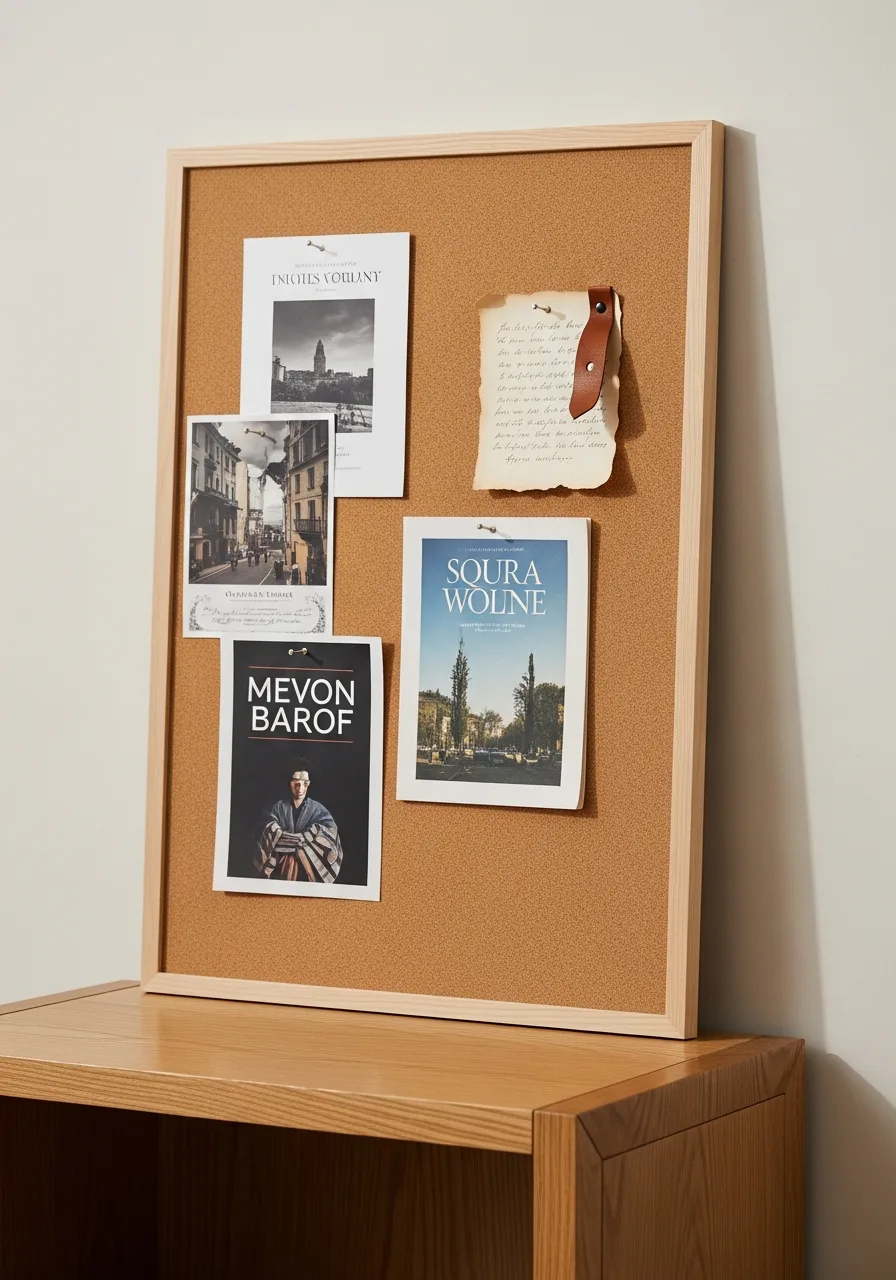
15. Vintage-Inspired Cork Board
Decorate the board with old postcards, botanical prints, handwritten notes, and sepia-toned photographs. Use dark wood framing or aged-look brass pushpins to strengthen the vintage aesthetic. This style adds a sense of history and warmth to the bedroom.
It works beautifully with antique furniture or moody paint colors.
- Print digital images on matte paper for a more authentic look.
- Source vintage-style pins with flat brass or black metal heads.
- Incorporate a small skeleton key or antique ribbon for texture.
Best shortcut: Soak new white paper in black tea for five minutes to give it an instant aged, yellowed look.
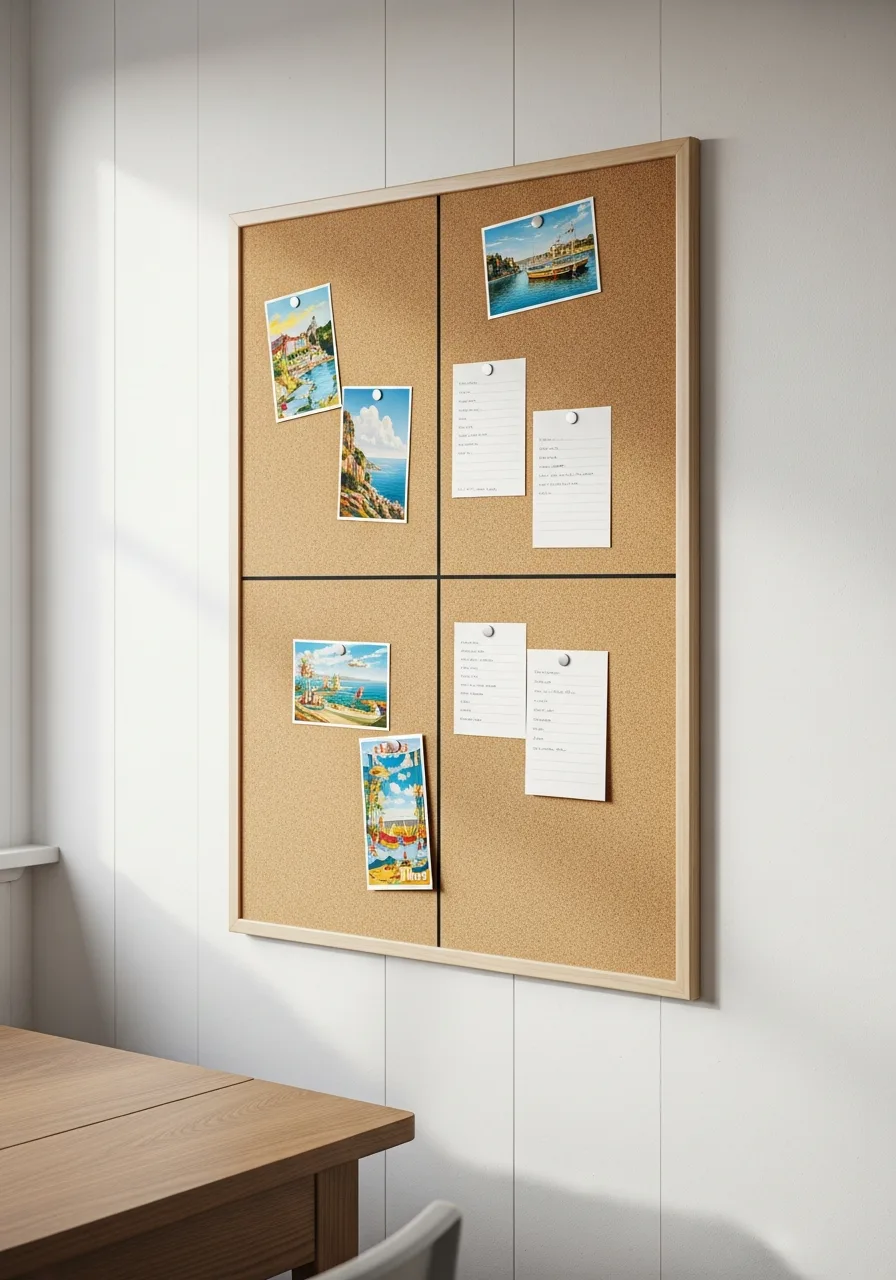
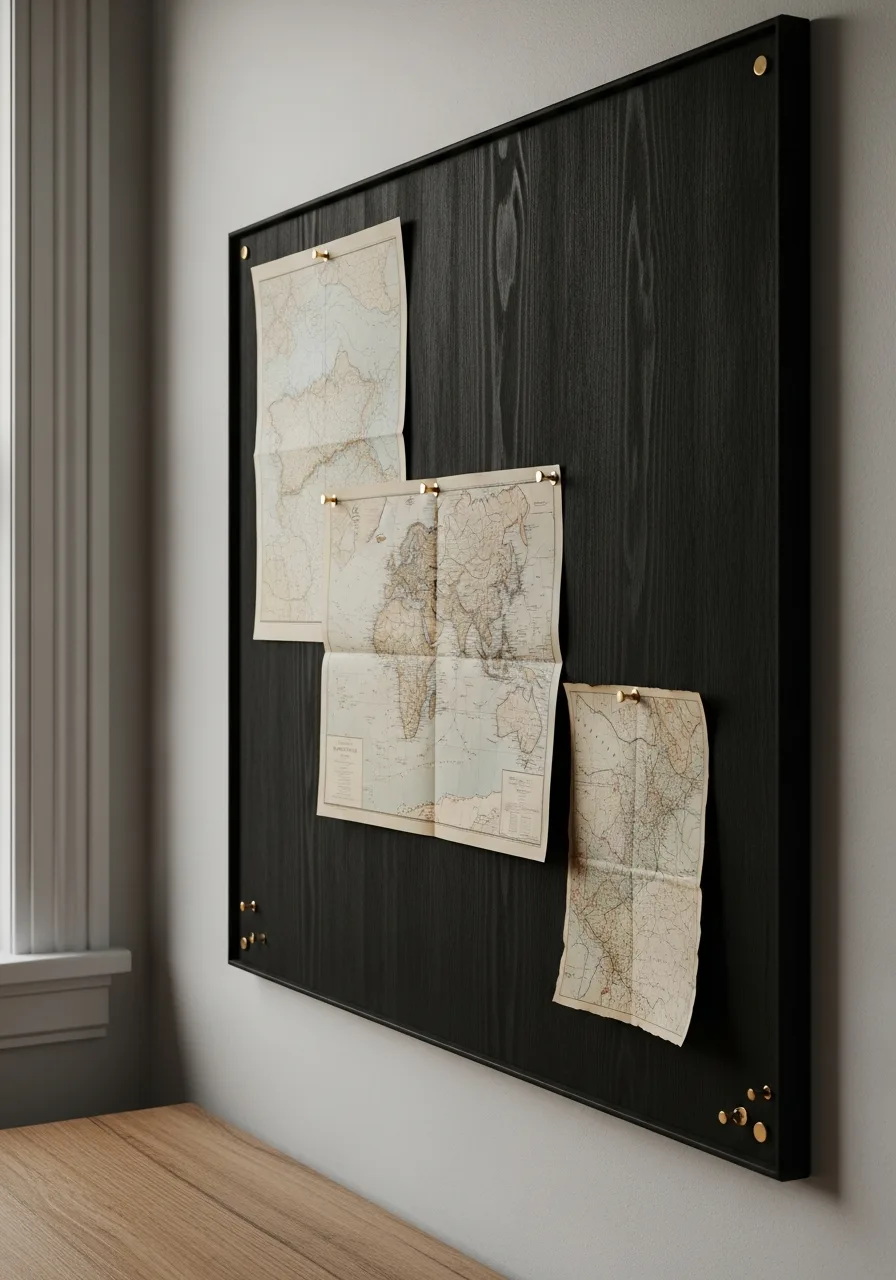
16. Travel Memory Board
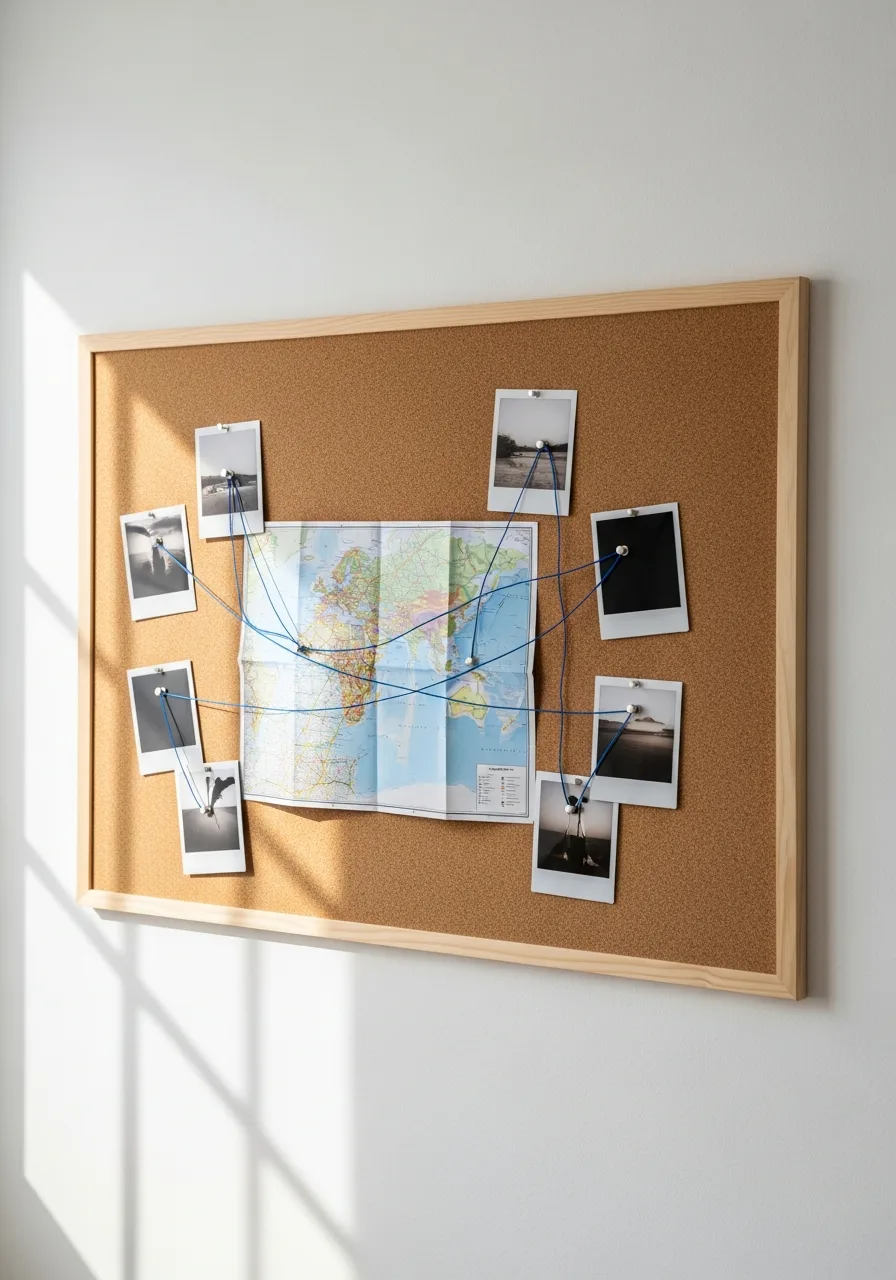
Pin maps, boarding passes, and vacation photographs to the board to build a personal gallery of adventures. Connect related items with string or organize them by destination to create a visual travel diary.
Group items by specific trips to prevent the board from looking like a cluttered junk drawer. Using small wooden clothespins instead of standard tacks keeps delicate tickets from getting holes.
- Buy a standard 24×36 board for under thirty dollars at most big-box stores.
- Use clear map tacks to mark specific cities without covering the text of the map.
- Swap out photos seasonally to keep travel goals and favorite memories front and center.
Quick win: Use colored string to create a flight path between different destination clusters.
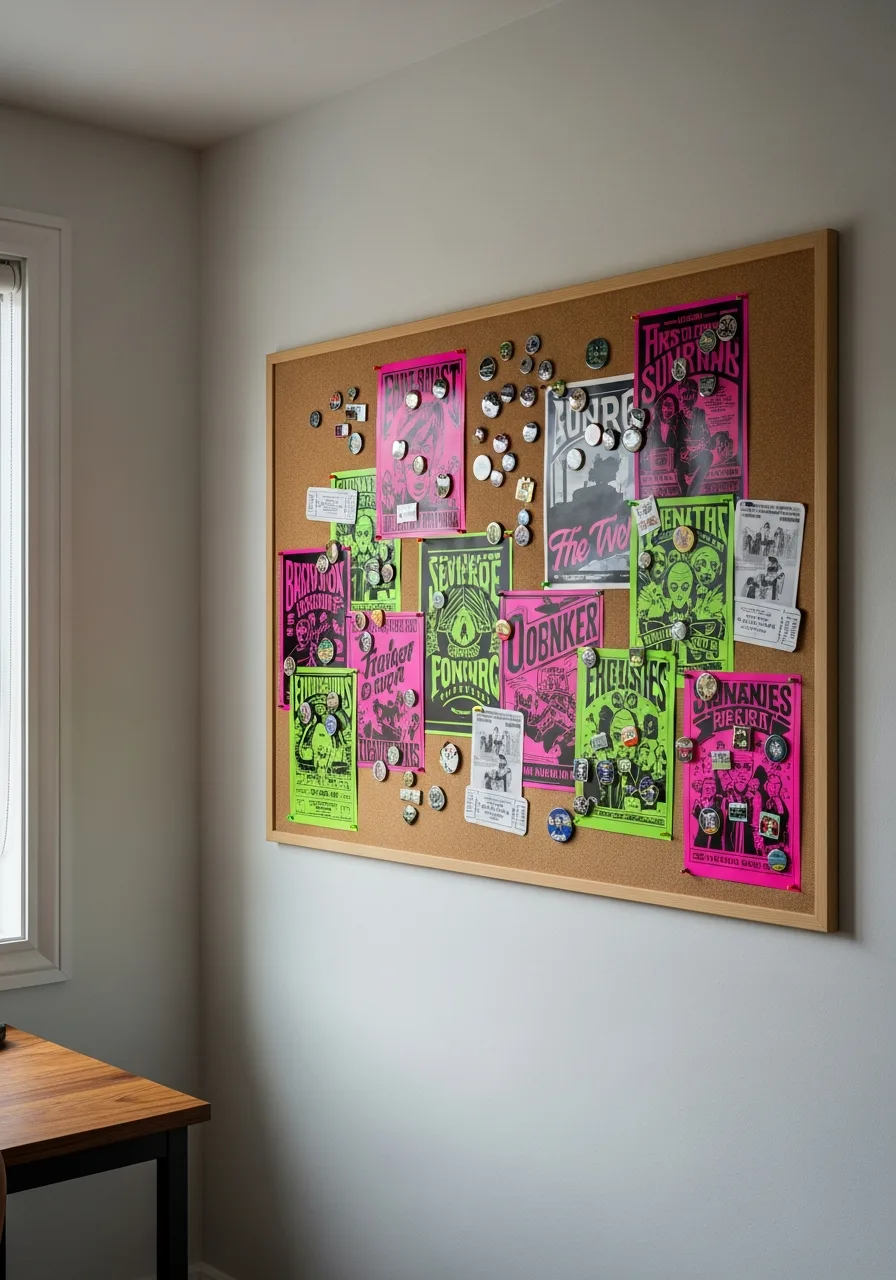
17. Music-Themed Cork Board
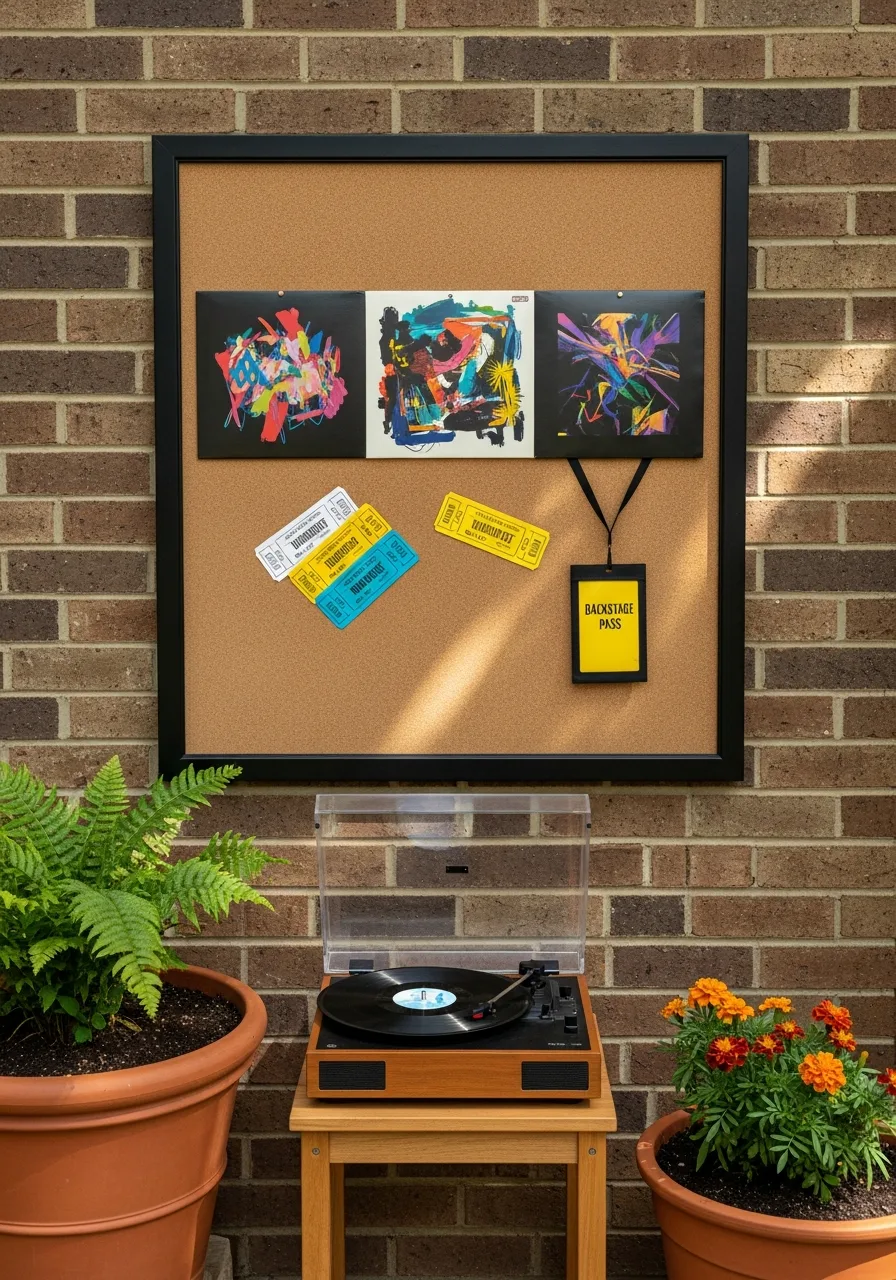
Display concert tickets, album artwork, and favorite artist photos in a dedicated music corner. Keep the arrangement within a consistent color palette so the display remains visually balanced and professional.
Mount ticket stubs in small clear sleeves before pinning to preserve the ink and paper quality. A black-framed board provides a sharp, stage-like backdrop for colorful band posters.
- Budget fifteen dollars for a basic board and five dollars for protective archival sleeves.
- Center the largest poster first and build smaller items like tickets around the edges.
- Lean a large board against the wall on top of a low dresser for a renter-friendly setup.
Best shortcut: Use guitar picks as decorative tacks by gluing a flat-head pin to the back of each pick.
18. Book-Lover’s Inspiration Board
Use the board for reading lists, favorite quotations, and printed book covers. Add a small envelope or pocket for bookmarks and handwritten recommendations you want to save.
Layer quotes over book-themed illustrations to create a rich, literary aesthetic that feels like a library. This setup works best when placed near a cozy reading chair or bedside lamp.
- Print book covers at home to keep the project cost near zero.
- Use brass upholstery tacks to give the board a classic, antique library feel.
- Rotate the featured quote every week to stay inspired by new authors.
Most people skip this: Use a small decorative envelope pinned to the board to hold library receipts and due-date reminders.
19. Rotating Art Display
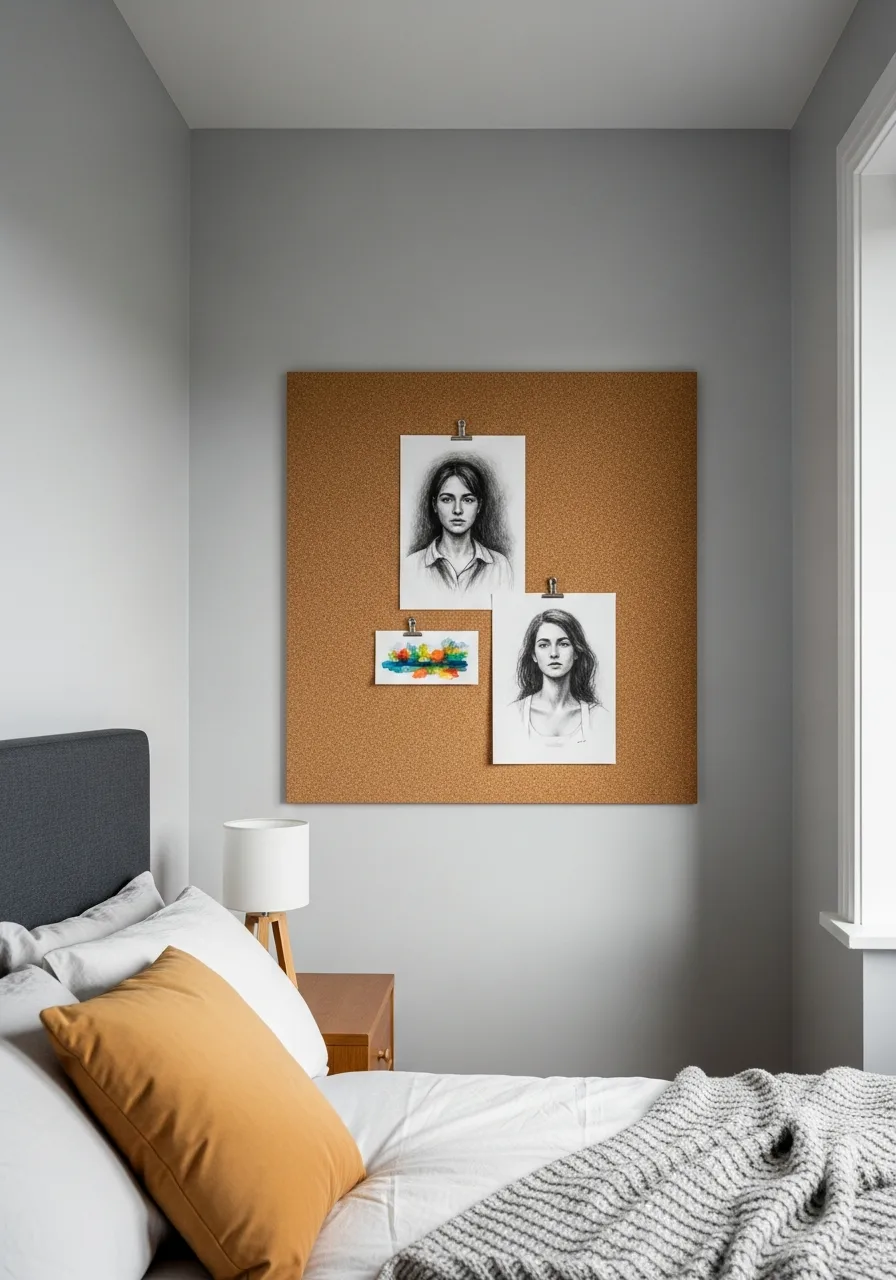
Showcase drawings, paintings, and prints on a large cork surface to turn a bedroom wall into a gallery. Rotate the artwork regularly so the bedroom display continues to feel fresh and inspiring.
Use high-quality bulldog clips pinned to the cork to hold art without piercing the paper itself. This is a great way to test out new art pieces before committing to permanent frames.
- Invest in thick cork tiles that can handle heavier paper and larger clips.
- Space the artwork at least two inches apart to give each piece breathing room.
- Mix in a few postcards or art gallery flyers to add variety to the scale of the display.
Quick win: Paint the cork the same color as the wall to make the artwork appear to float.
20. Study Planning Cork Board
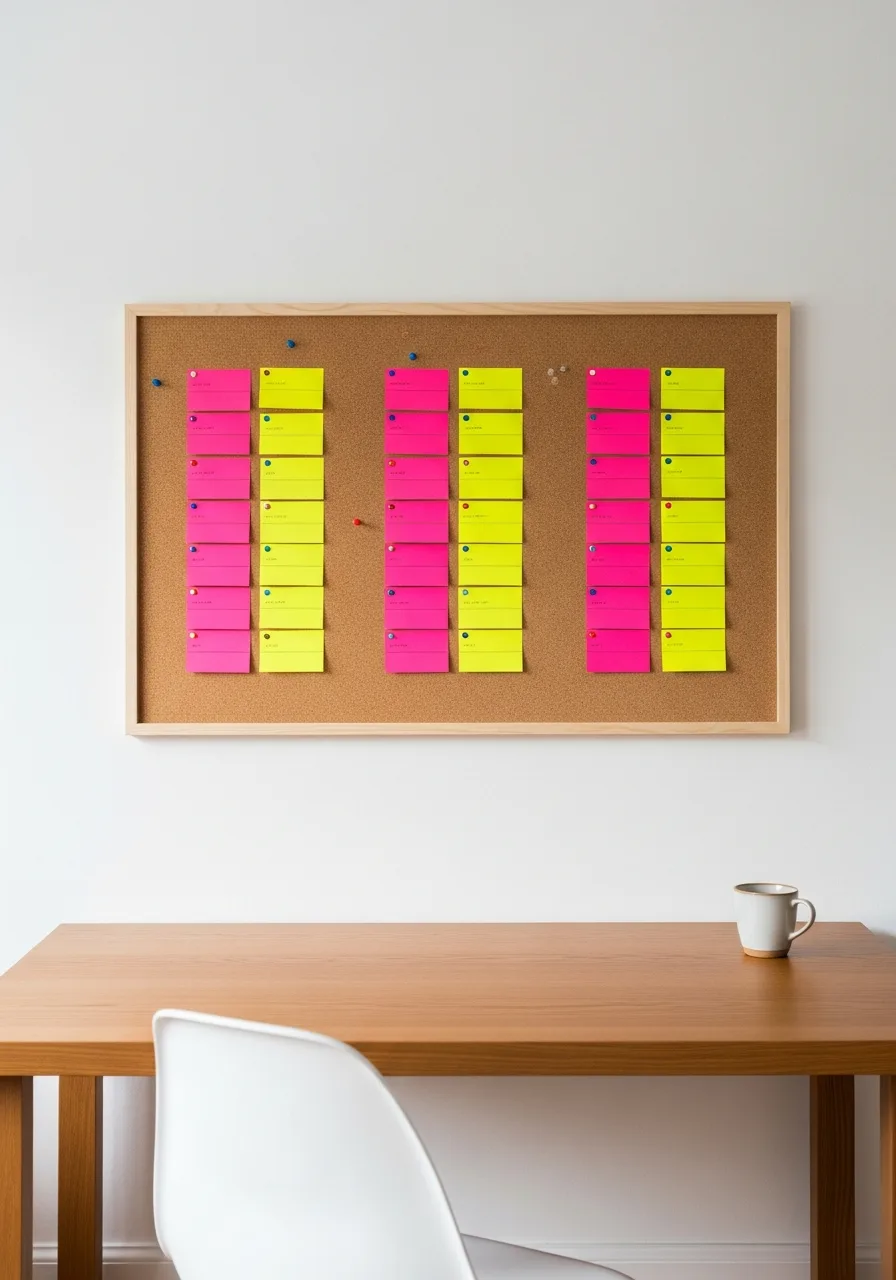
Divide the board into sections for weekly tasks, deadlines, and revision notes to stay organized. Use removable labels or colored cards so the layout can change throughout the school year or work season.
Assign a specific color of pushpin to each subject or project to identify priorities at a glance. Keeping this board at eye level while sitting ensures important dates are never missed.
- A large 36×48 board offers enough space for a full semester of deadlines.
- Mount the board using heavy-duty command strips to avoid damaging bedroom walls.
- Place a small magnetic strip along the bottom of the frame to hold metal pens or clips.
Best shortcut: Use a t-square or ruler to align your columns perfectly for a clean, professional look.
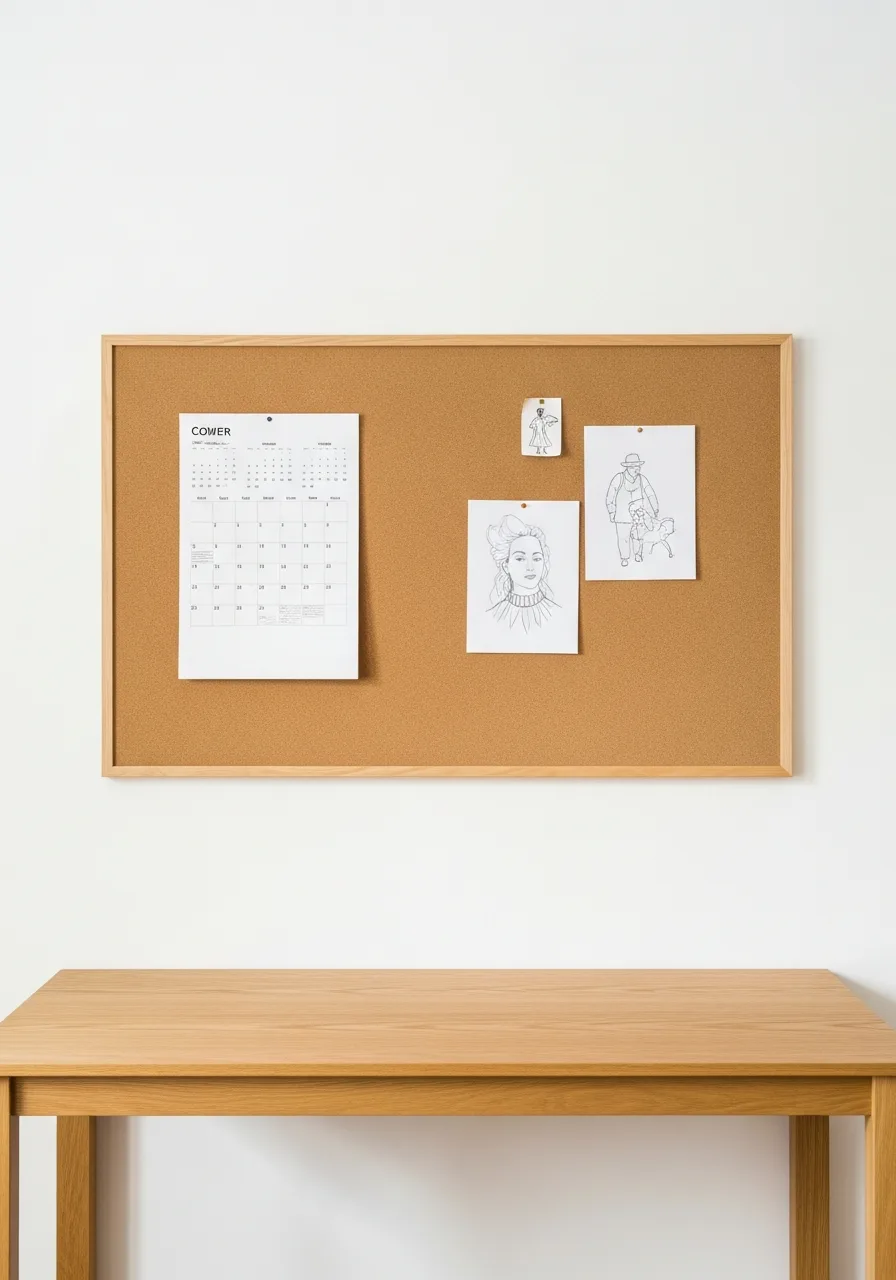
21. Monthly Calendar Cork Board
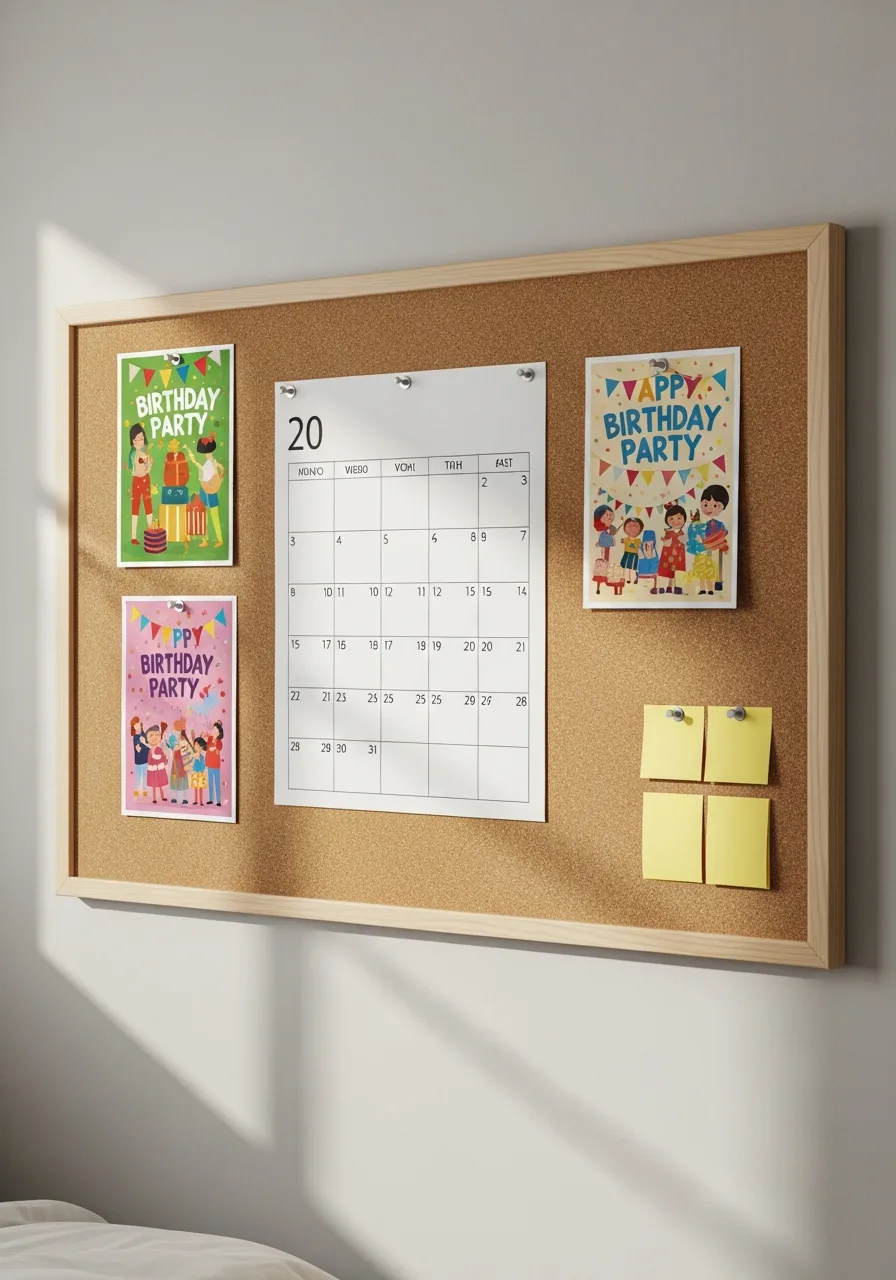
Pin a reusable paper calendar in the center and surround it with reminders and notes. Leave a separate section for upcoming events, appointments, and important deadlines that fall outside the current month.
Choose a calendar with large boxes so you can pin physical items like invitations directly onto specific dates. This centralizes your schedule and visual reminders in one spot.
- Look for 'combo' boards that feature both cork and a dry-erase surface for maximum utility.
- Pin a small pouch to the side to hold extra calendar stickers or highlighters.
- Mount the board near the bedroom door so you can check your schedule as you leave.
Most people skip this: Pin a small mirror next to the calendar to create a quick 'last look' station by the door.
22. Cork Board With Storage Pockets
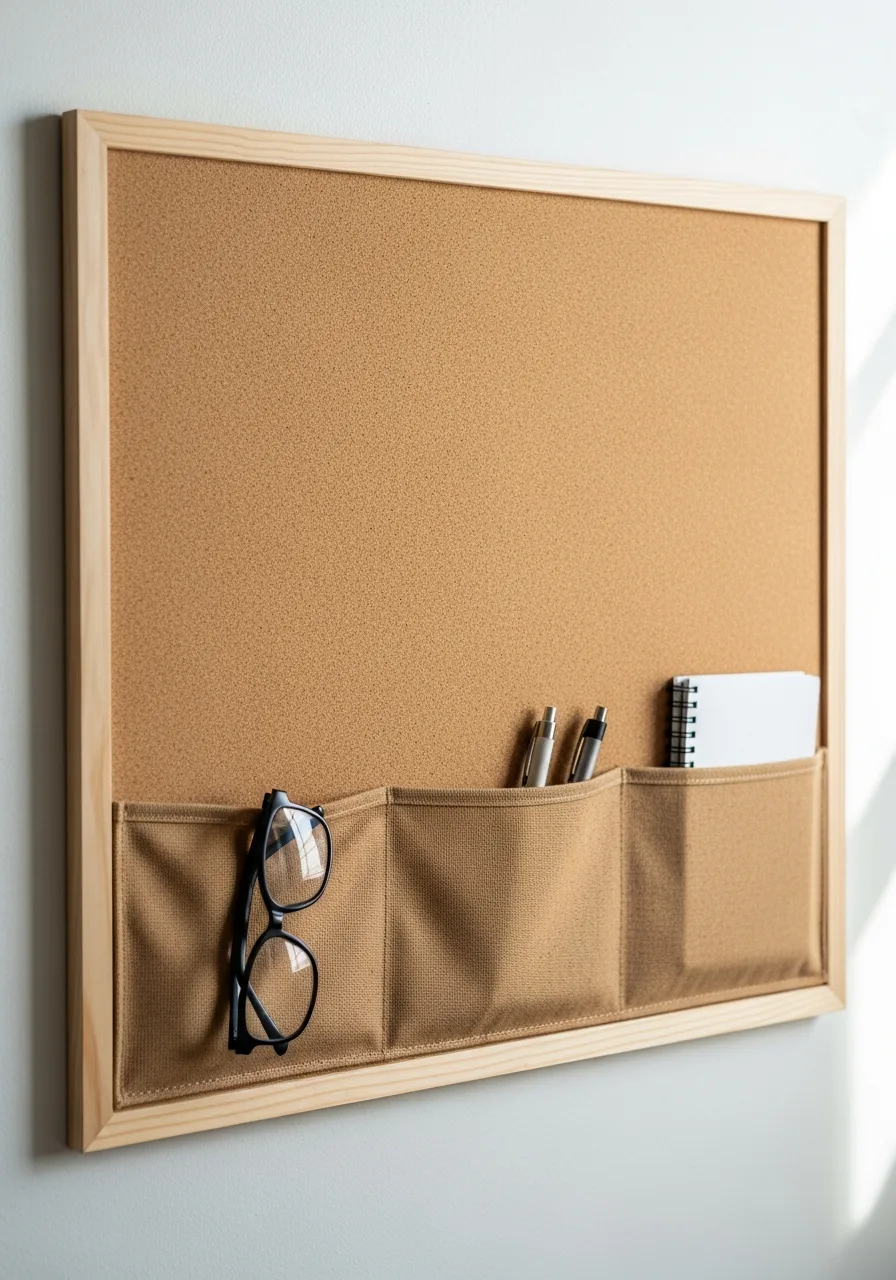
Attach fabric or felt pockets along the lower part of the board to hold loose items. Use them to store notes, pens, small notebooks, or chargers that usually clutter the desk surface.
Select pockets in a contrasting color to make the storage zone easy to find and use. This turns a flat wall display into a three-dimensional organization system.
- Fabric pockets can be found at craft stores or made from scrap material and heavy staples.
- Limit the weight in the pockets to prevent the cork from pulling away from the frame.
- Use the upper portion for visual items like photos to keep the board balanced.
Quick win: Use heavy-duty upholstery staples to ensure the pockets stay attached when full.
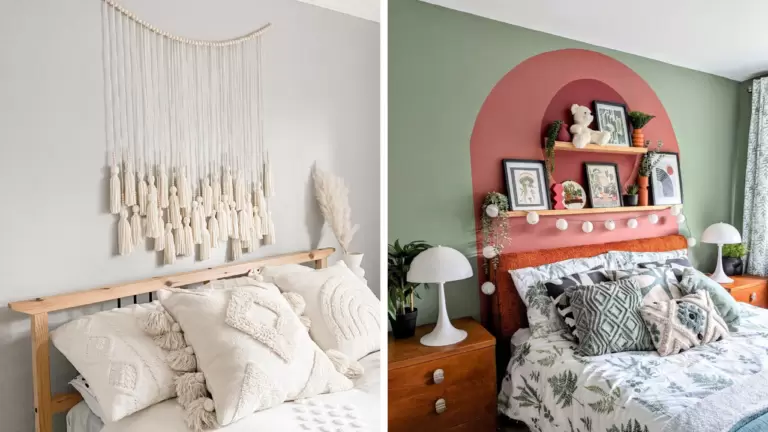
23. Cork Board With a Small Shelf
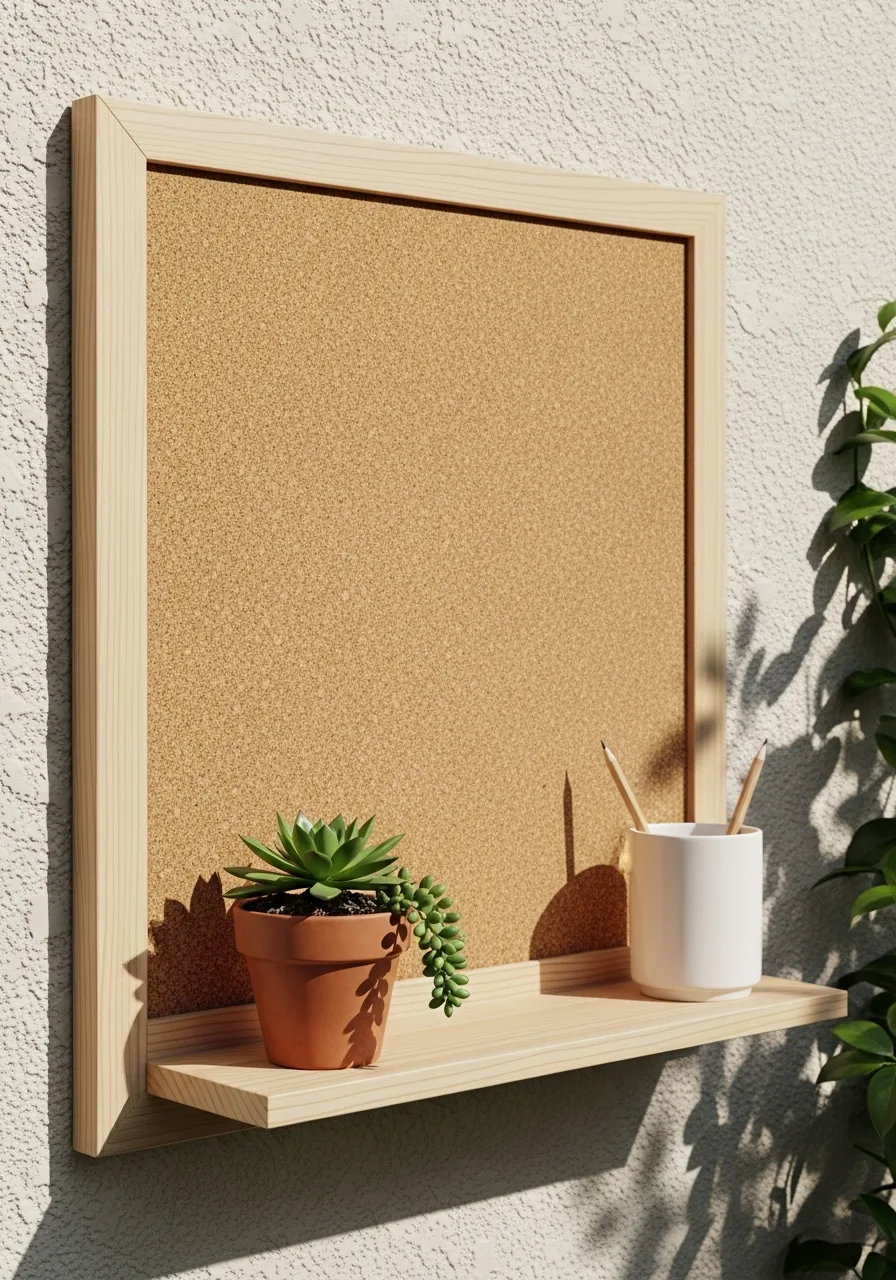
Install a narrow shelf beneath the board for plants, books, or stationery. The shelf visually anchors the board while adding practical bedroom storage for items that cannot be pinned.
Place a small trailing plant on the shelf to soften the straight lines of the cork board. This combination creates a functional wall feature that feels like a piece of custom furniture.
- Ensure the shelf is securely anchored into wall studs if it will hold heavy items like books.
- Match the shelf wood finish to the cork frame for a cohesive, built-in look.
- Use the shelf for decorative objects that complement the items pinned above it.
Best shortcut: Buy a pre-made 'ledge' shelf and mount the cork board exactly one inch above it for a similar look without the difficult assembly.
24. Cork Board and Pegboard Combination
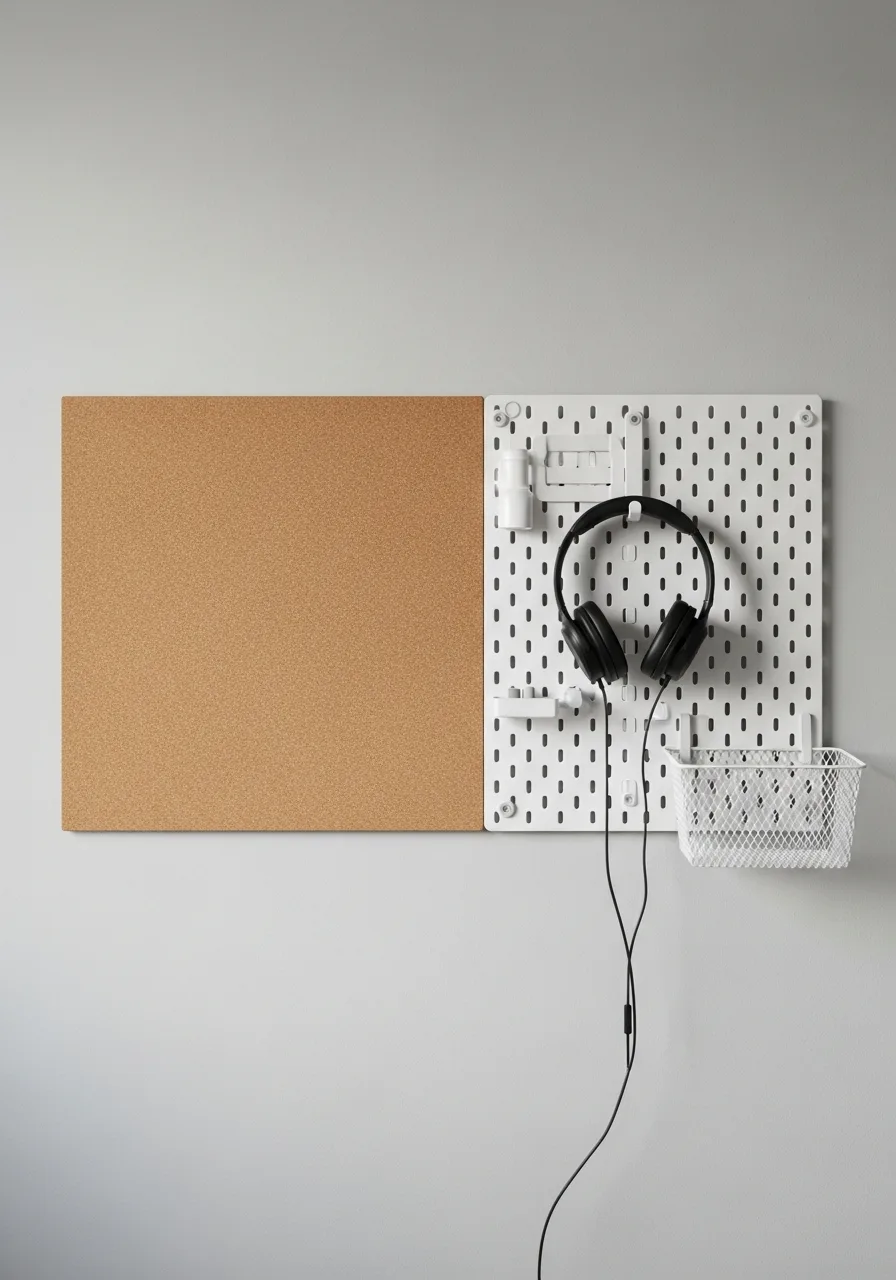
Place a cork section beside a pegboard to create a flexible organization wall for various needs. Use the cork for photos and paper items while the pegboard holds baskets, headphones, or larger accessories.
Align the tops of both boards perfectly to create a clean, intentional design across the wall. This hybrid approach handles both flat and bulky items easily.
- Modular kits are available that allow you to swap panels as your storage needs change.
- Use the pegboard side for heavy items and the cork side for lightweight inspiration.
- Choose a uniform color for all hooks and pins to tie the two different materials together.
Most people skip this: Leave a small gap between the boards to prevent them from rubbing and scratching the wall paint.
25. Cork Board Jewelry Organizer
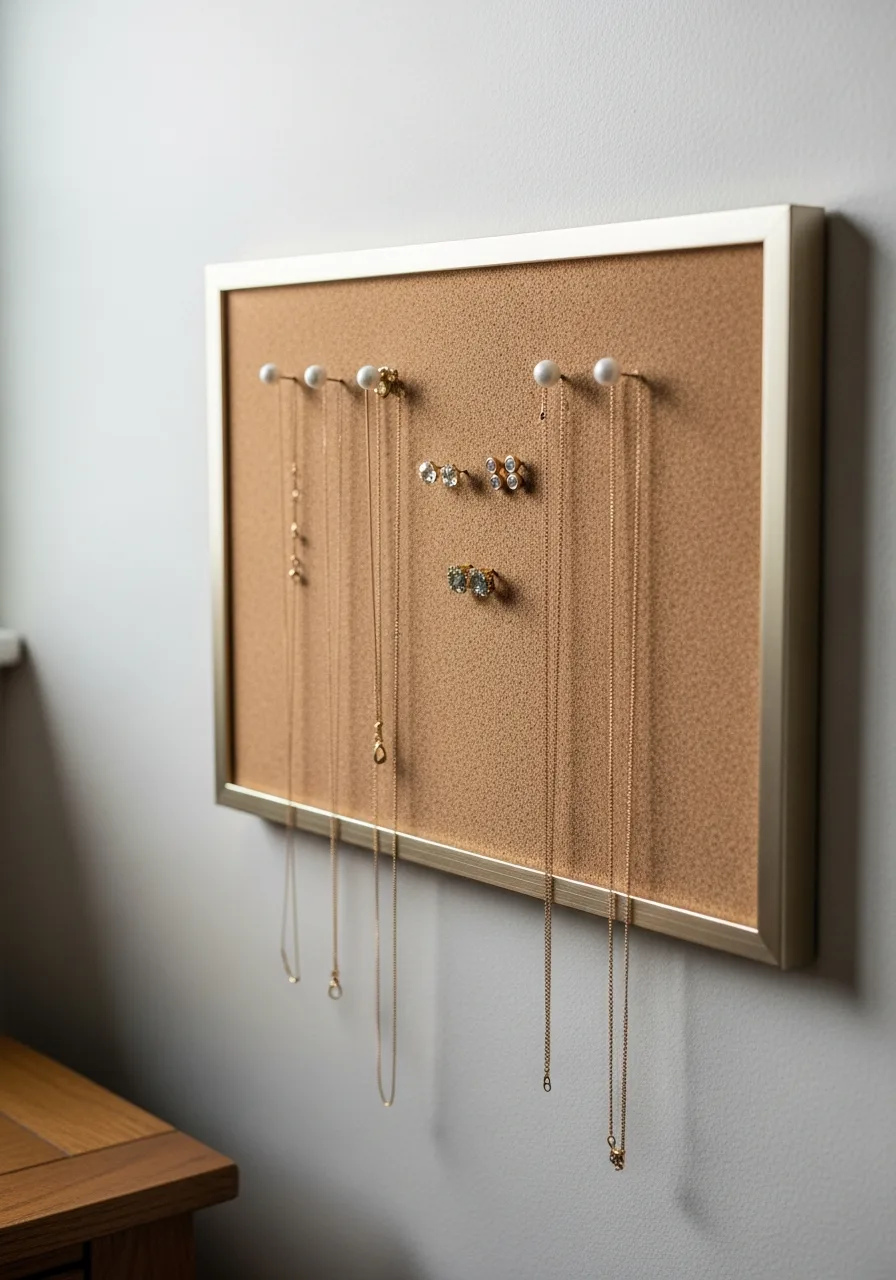
Add hooks or decorative pins to a cork board to organize lightweight necklaces, bracelets, and earrings. Reserve part of the board for photos and notes so it remains a decorative feature rather than just a storage rack.
Use long-neck pushpins to prevent necklaces from sliding off and getting tangled. This keeps your favorite pieces visible and easy to grab in the morning.
- A 12×18 board is usually plenty of space for a standard jewelry collection.
- Cover the cork in a dark velvet fabric to make gold and silver jewelry pop visually.
- Mount the board at chest height near a mirror for easy accessorizing.
Quick win: Use a decorative thumbtack to hang a small ring dish from a loop of ribbon pinned to the board.
26. Bedside Cork Board
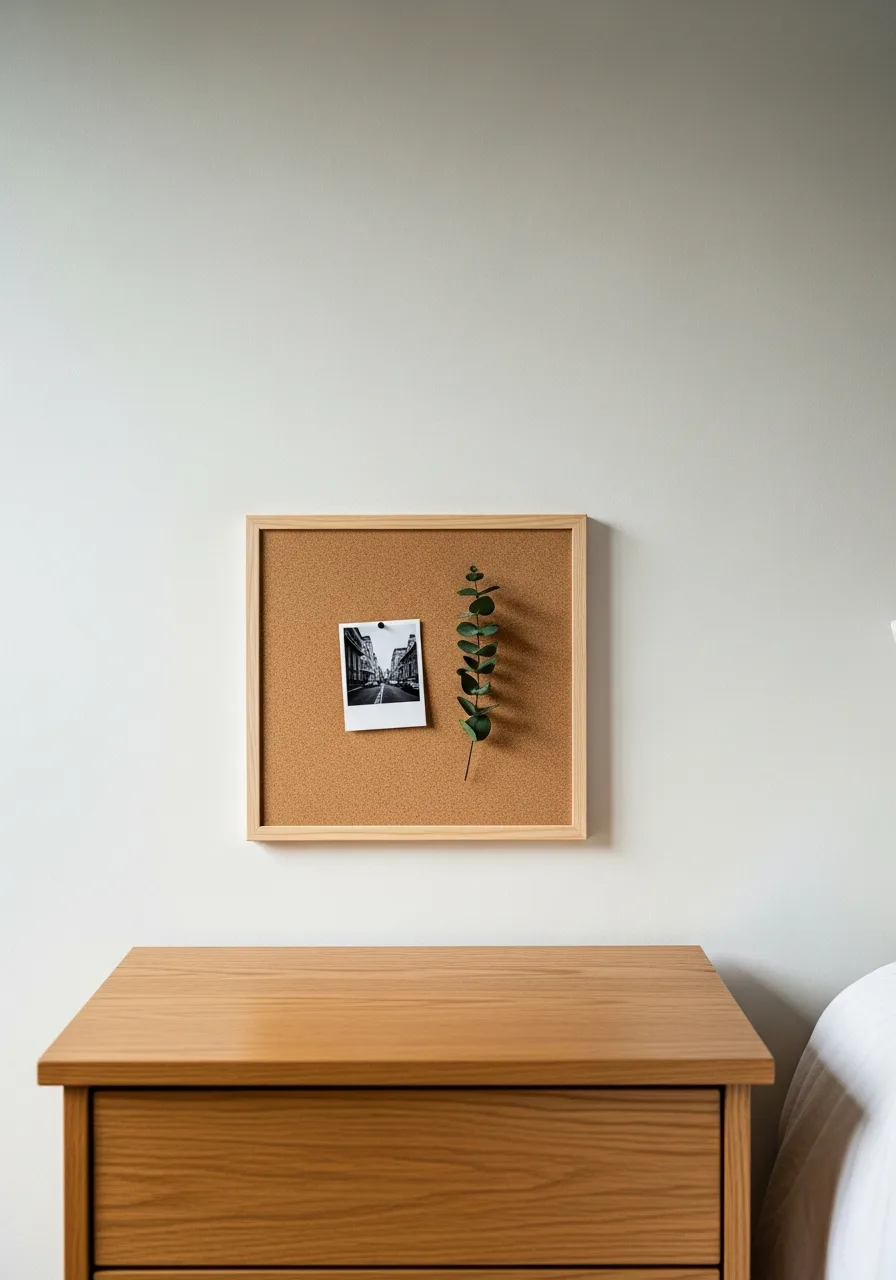
Hang a small cork board above the nightstand for a reading list, morning reminders, or favorite photographs. Keep the display simple to maintain a restful and calm sleeping area.
Limit the number of items on this board to avoid creating visual clutter right next to your bed. It is the perfect spot for an encouraging quote to see first thing in the morning.
- A small square board costs less than ten dollars and takes minutes to install.
- Use soft-colored pins like wood or white to keep the look quiet and bedroom-appropriate.
- Avoid pinning bright or stressful to-do lists here to keep the sleep zone relaxed.
Best shortcut: Use adhesive cork squares for a low-profile look that doesn't require nails in the wall.
27. Cork Board Headboard Accent
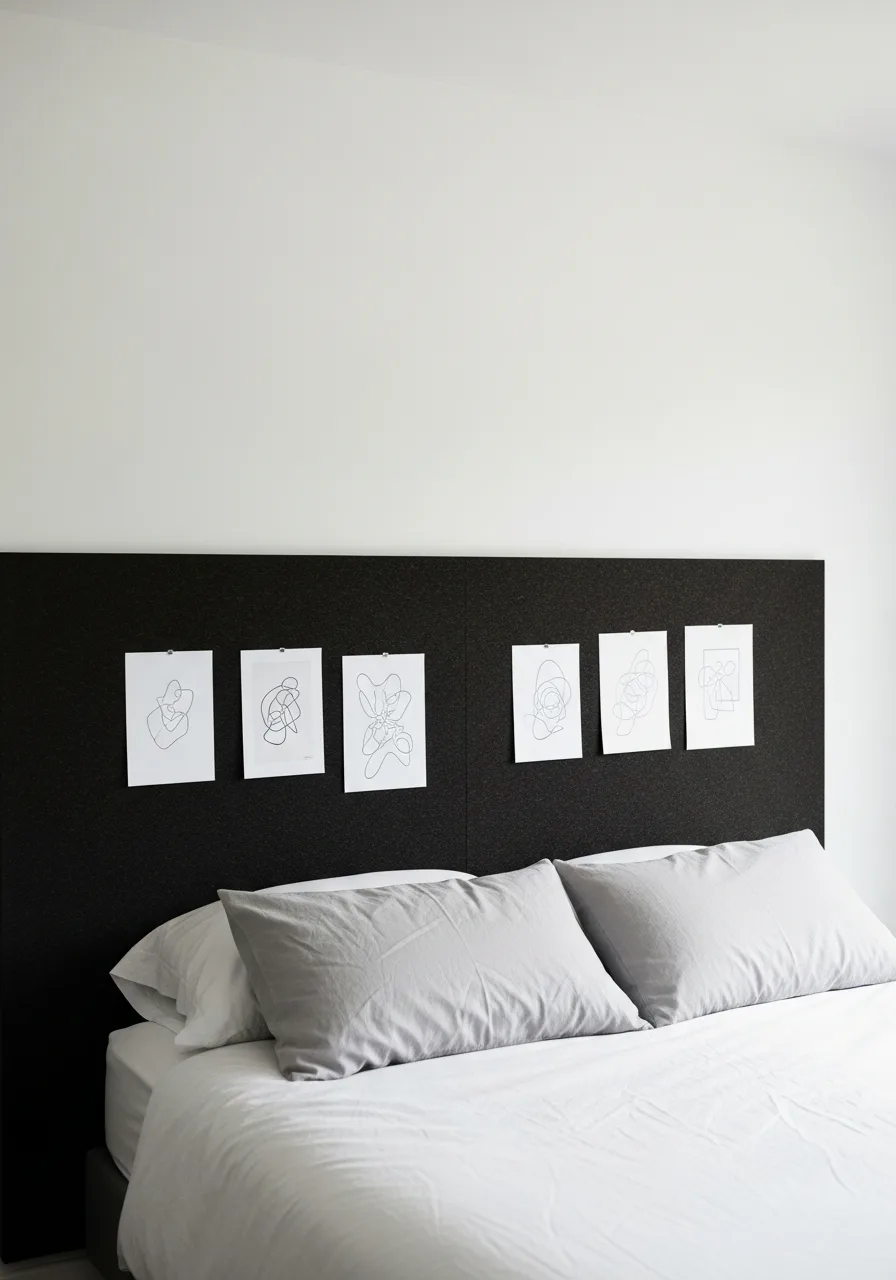
Install a wide cork panel behind the bed to serve as a unique and decorative headboard feature. Pin only lightweight, flat decorations and keep sharp pins away from any areas that could be touched while sleeping.
Use cork rolls to create a seamless look that spans the entire width of the bed frame. This adds texture to the room while providing a massive canvas for personal expression.
- Use 1/4-inch thick cork rolls for the best balance of durability and ease of installation.
- Apply a strong construction adhesive for a permanent mount on smooth drywall.
- Frame the edges with thin wood trim to give the cork a finished, professional appearance.
Most people skip this: Vacuum the cork surface once a month with a brush attachment to keep dust from settling in the texture.
28. Cork Strip Along the Wall
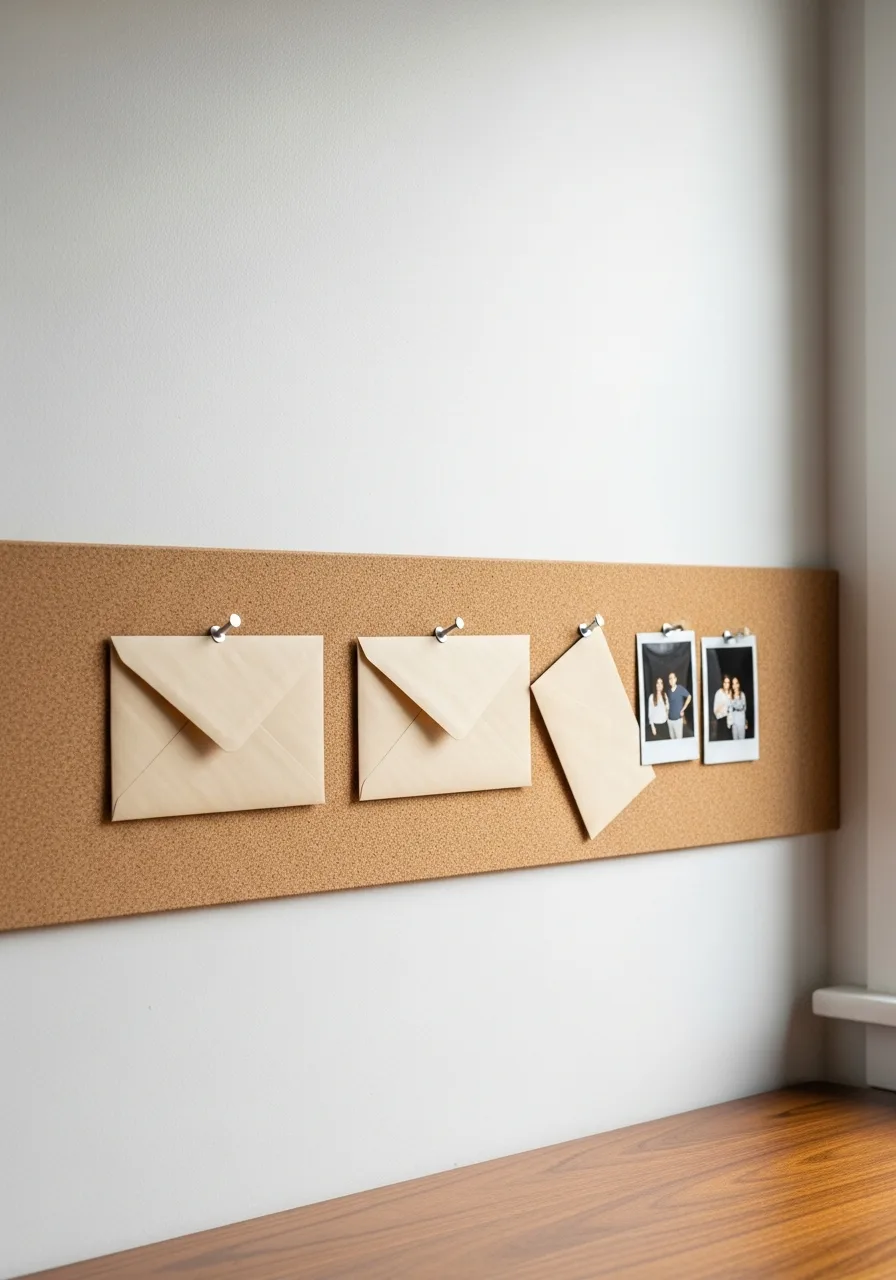
Use one long, narrow cork strip above a desk, dresser, or shelf for a modern look. This streamlined option provides space for reminders and photographs without visually dominating a small bedroom.
Install the strip at eye level to create a continuous horizontal line that makes the room feel wider. It is an excellent choice for minimalist bedrooms that need a touch of function.
- Self-adhesive cork strips are very budget-friendly and require no tools for setup.
- Run multiple strips parallel to each other to create a custom-sized display area.
- Use the strip to hold thin items like concert tickets or postcards to maintain the slim profile.
Quick win: Use a laser level to ensure the strip is perfectly straight over long distances.
29. Cork Board Inside a Closet Door
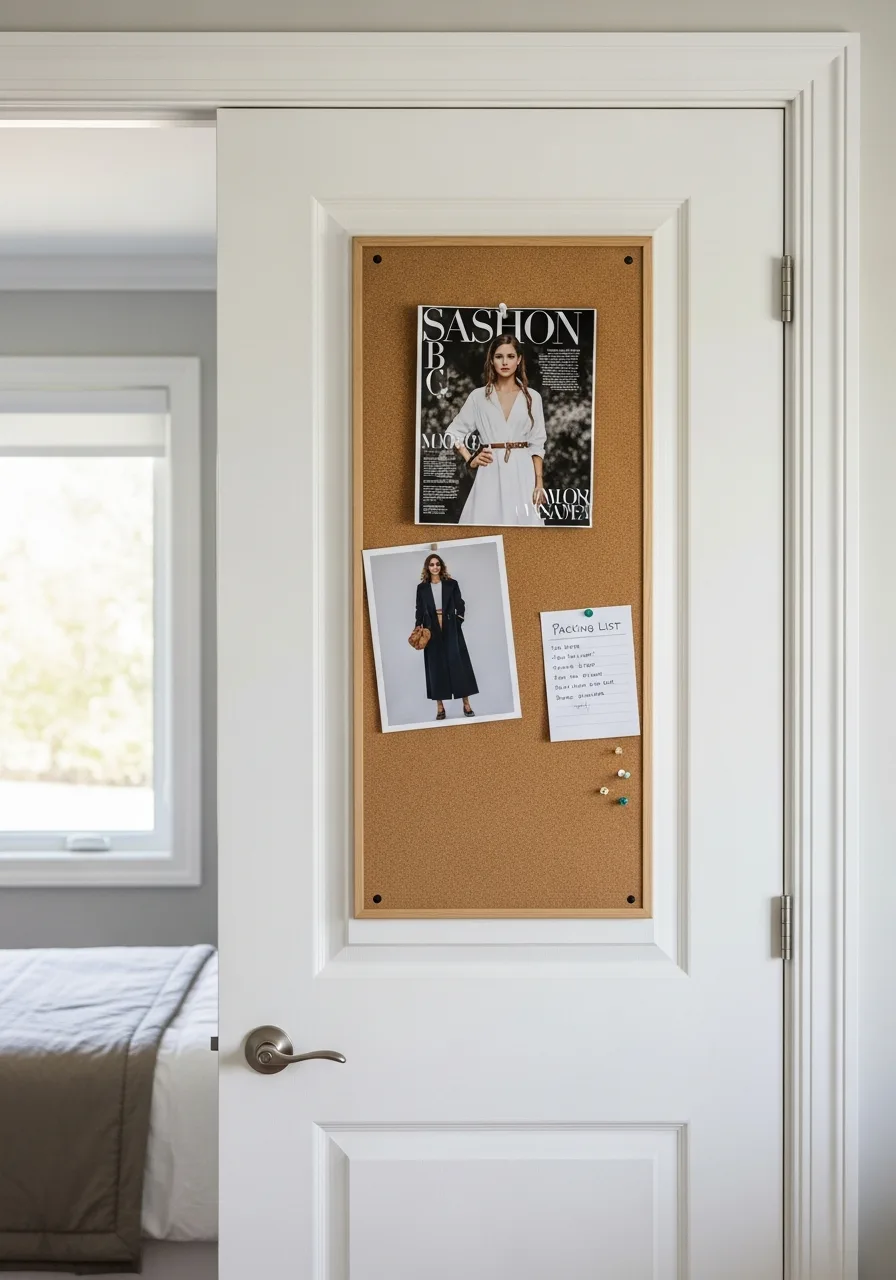
Mount a lightweight board inside the closet door for outfit ideas, packing lists, and daily reminders. This keeps the organization system accessible but hidden when the door is closed for a cleaner room look.
Pin photos of your favorite outfit combinations to make getting dressed in the morning much faster. It is a great way to utilize vertical space that usually goes to waste.
- Choose a thin cork board to ensure the closet door can still close completely.
- Use heavy-duty double-sided tape so you don't have to drill into the door material.
- Add a small mirror next to the board to create a complete dressing station inside the closet.
Best shortcut: Use magnetic clips if your closet door is metal to avoid using adhesives or nails.
30. Multi-Panel Organization Wall
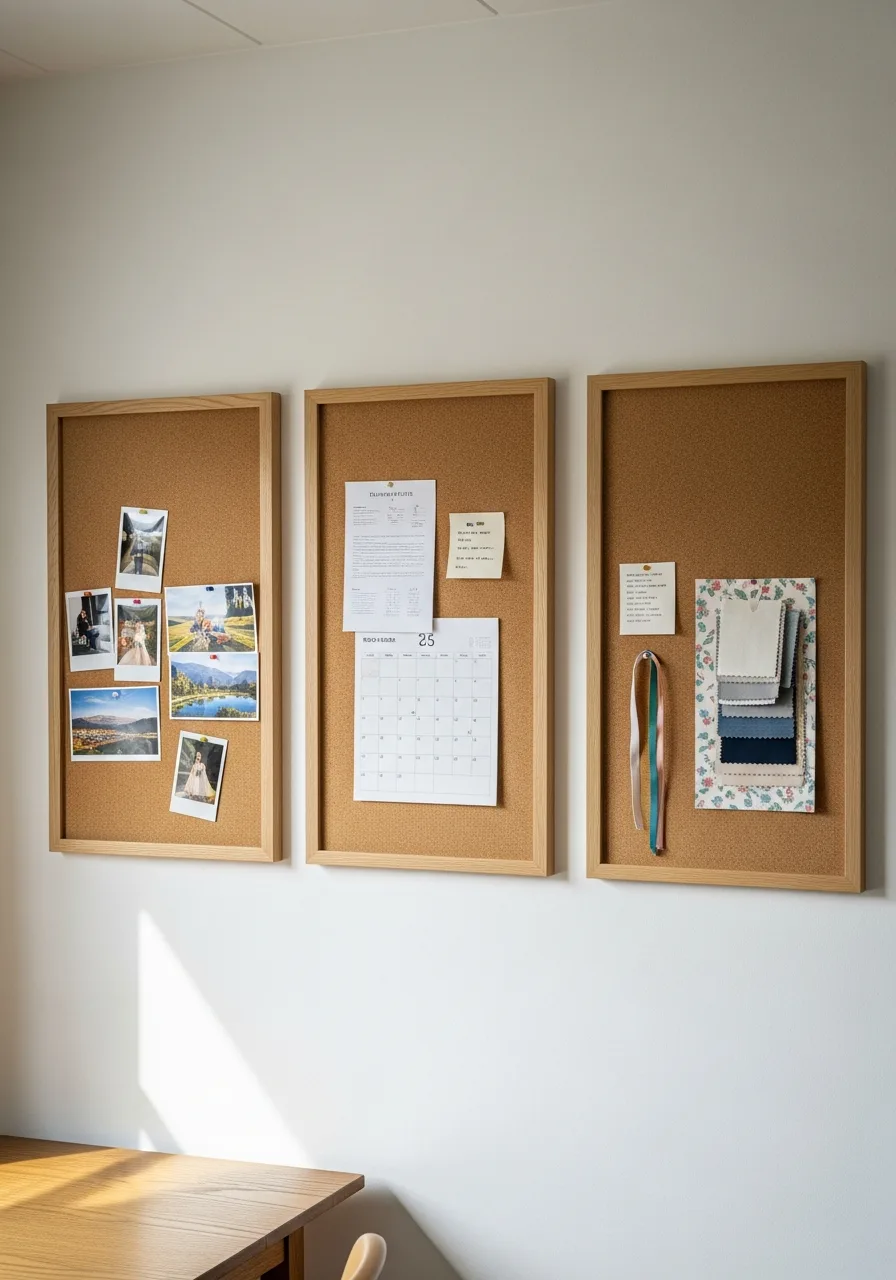
Arrange several smaller framed cork boards in a cluster to create a modular organization wall. This allows you to dedicate each board to a specific category, like memories, work, or art.
Mix different frame styles in the same color to create a curated, gallery-wall feeling. This approach is much easier to expand over time than one single large board.
- Buying a set of matching boards is often cheaper than buying one oversized custom board.
- Leave exactly three inches between each frame for a balanced and tidy appearance.
- Swap one cork board for a framed mirror or print to break up the texture.
Most people skip this: Trace the boards onto paper and tape the paper to the wall first to test the layout before hammering nails.
Frequently Asked Questions
How do I make a cheap cork board look expensive for my bedroom?
You can elevate a basic board by adding a custom wooden frame or painting the cork a chic neutral color. For a high-end look, wrap the board in a textured linen fabric that coordinates with your bedding.
Where is the best place to hang a cork board in a small bedroom?
Vertical placement is key in tight spaces, so consider hanging it behind a door or above a small vanity. It also works beautifully when integrated into a gallery wall to blend functionality with your existing decor.
How can I hang a cork board without damaging my bedroom walls?
Heavy-duty Command strips are the best renter-friendly option for securing boards without nails. Alternatively, you can lean a large, framed cork board against a wall or on top of a dresser for a relaxed, stylish vibe.
What should I pin to my bedroom cork board to keep it looking aesthetic?
Stick to a cohesive color palette by pinning Polaroids, fabric swatches, and dried flowers. Mix in a few inspiring quotes on high-quality paper to create a curated mood board rather than a cluttered space.
Is a cork board better than a wire grid for bedroom organization?
Cork boards offer a warmer, more solid visual weight that effectively hides wall clutter compared to open grids. While wire grids suit a minimalist industrial look, cork is more versatile for pinning small scraps and delicate mementos.