30 Cheap DIY Walkway Ideas
This post may contain affiliate links: full affiliate disclosure.
Building a path doesn’t need to cost a fortune or take weeks of hard labor. I’ve found that the best projects use simple materials found at any local hardware store. My take: focus on good drainage so your hard work lasts through every season.
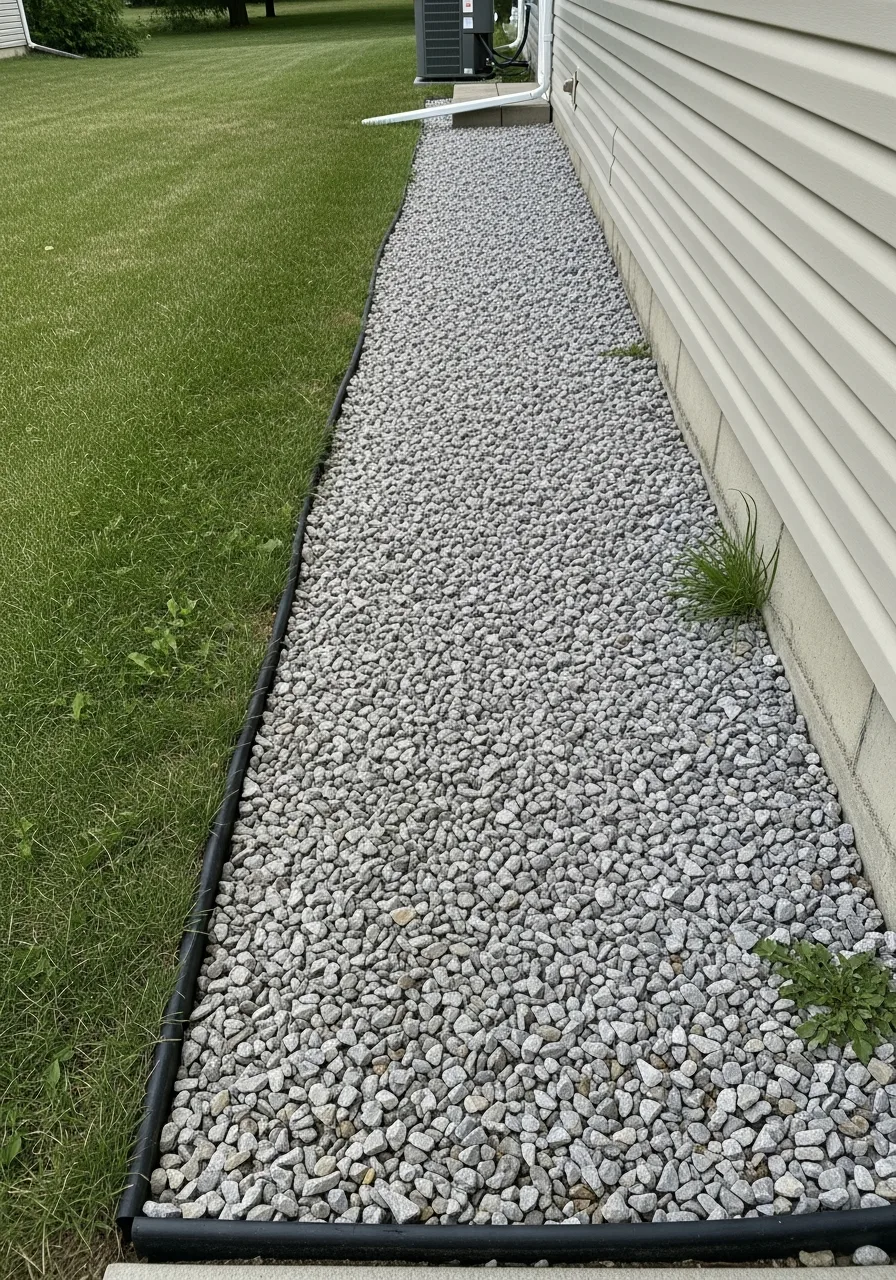
1. Classic Gravel Pathway
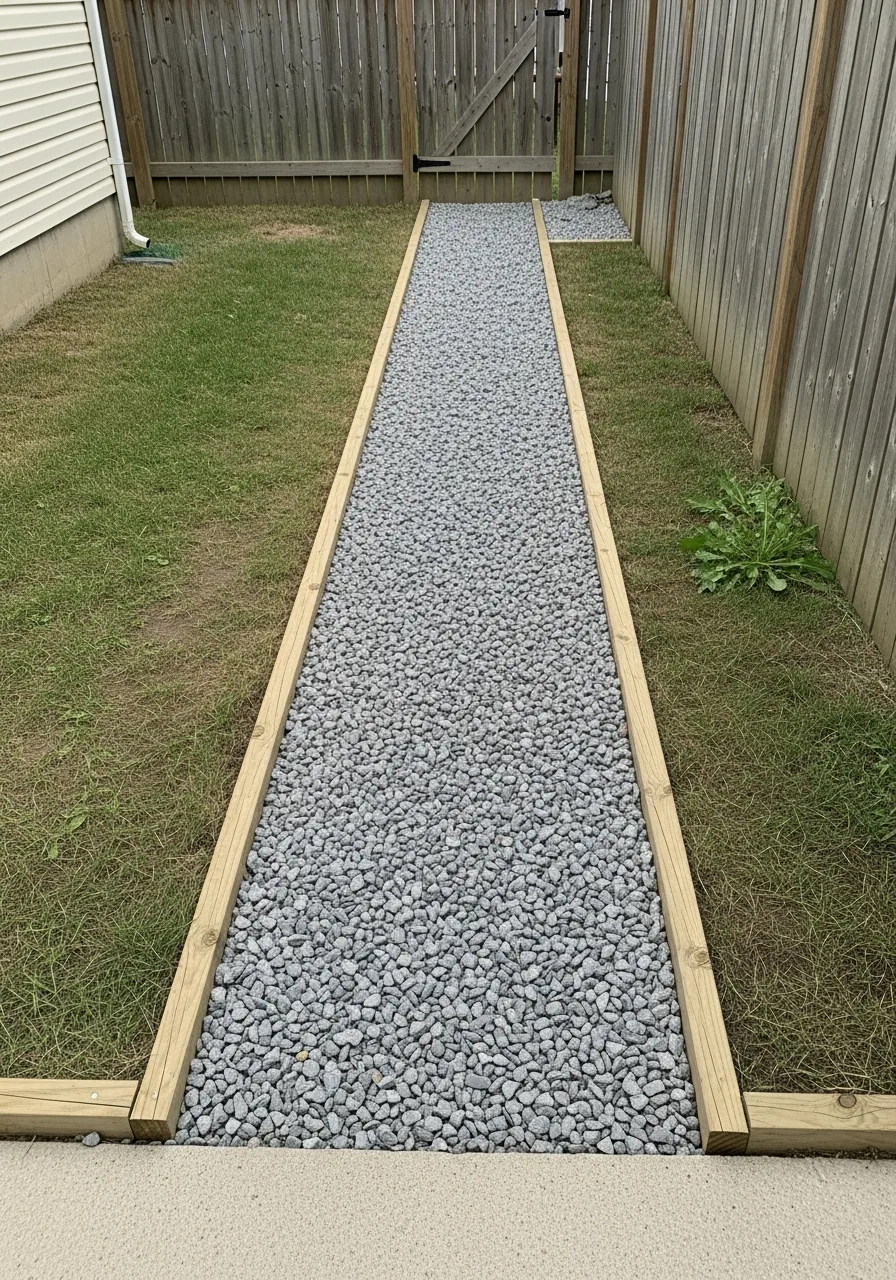
This is a classic low-cost option using pea gravel or crushed stone. It provides great drainage and is one of the easiest ways to cover ground quickly. Honestly, I prefer pea gravel because it feels much softer under your feet.
- Clear the grass first
- Lay landscape fabric down
- Pour gravel four inches deep
Pro Tip: Most people skip this: Use a metal rake to level the stones perfectly.
2. Stepping Stones on Grass
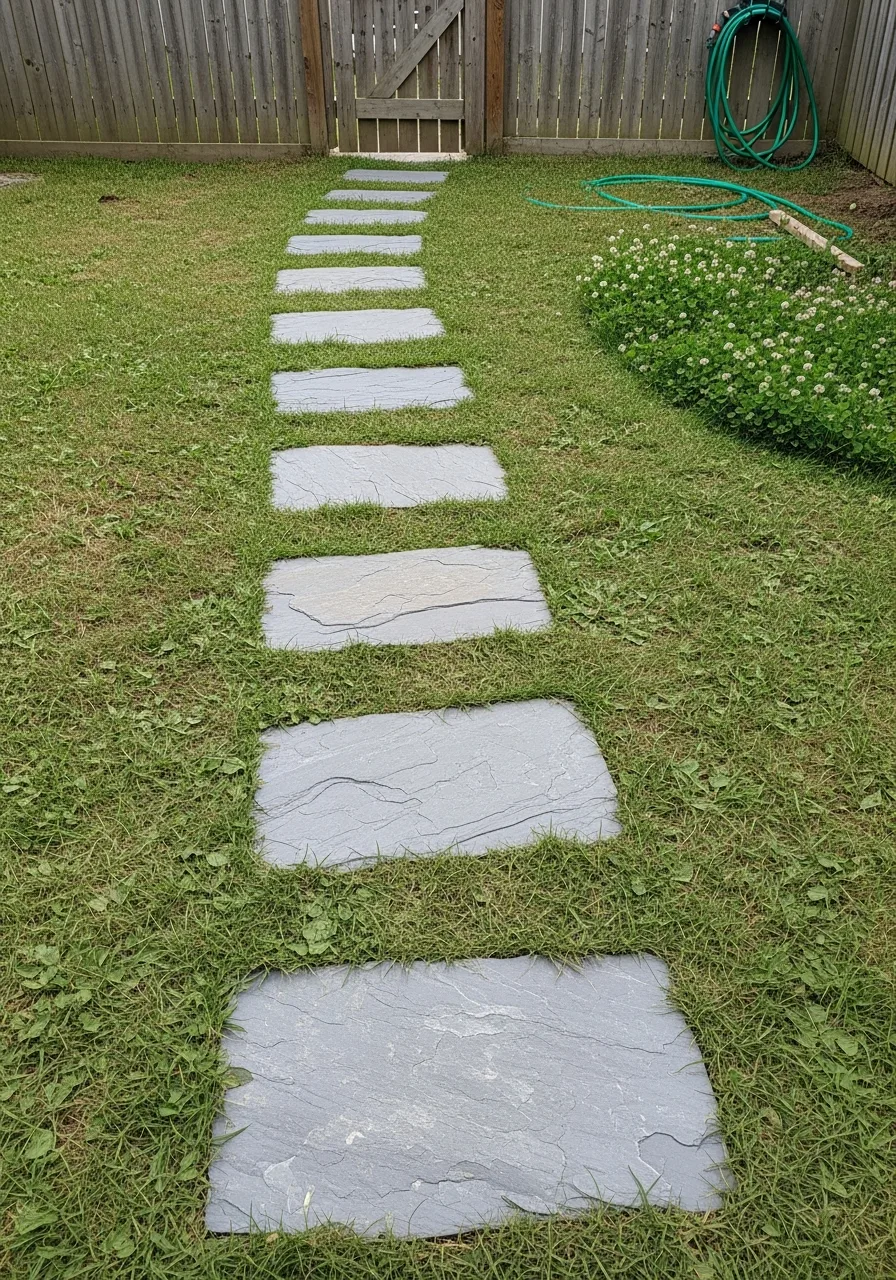
You place flat stones directly on your lawn to create a simple path. This works well because it requires almost no digging or heavy prep work. My take: make sure the stones are level with the grass for easy mowing.
- Space stones for natural strides
- Dig small holes for stability
- Choose flat weather-resistant stones
Pro Tip: Quick win: Move the mower over them to check the height.
3. Recycled Brick Path
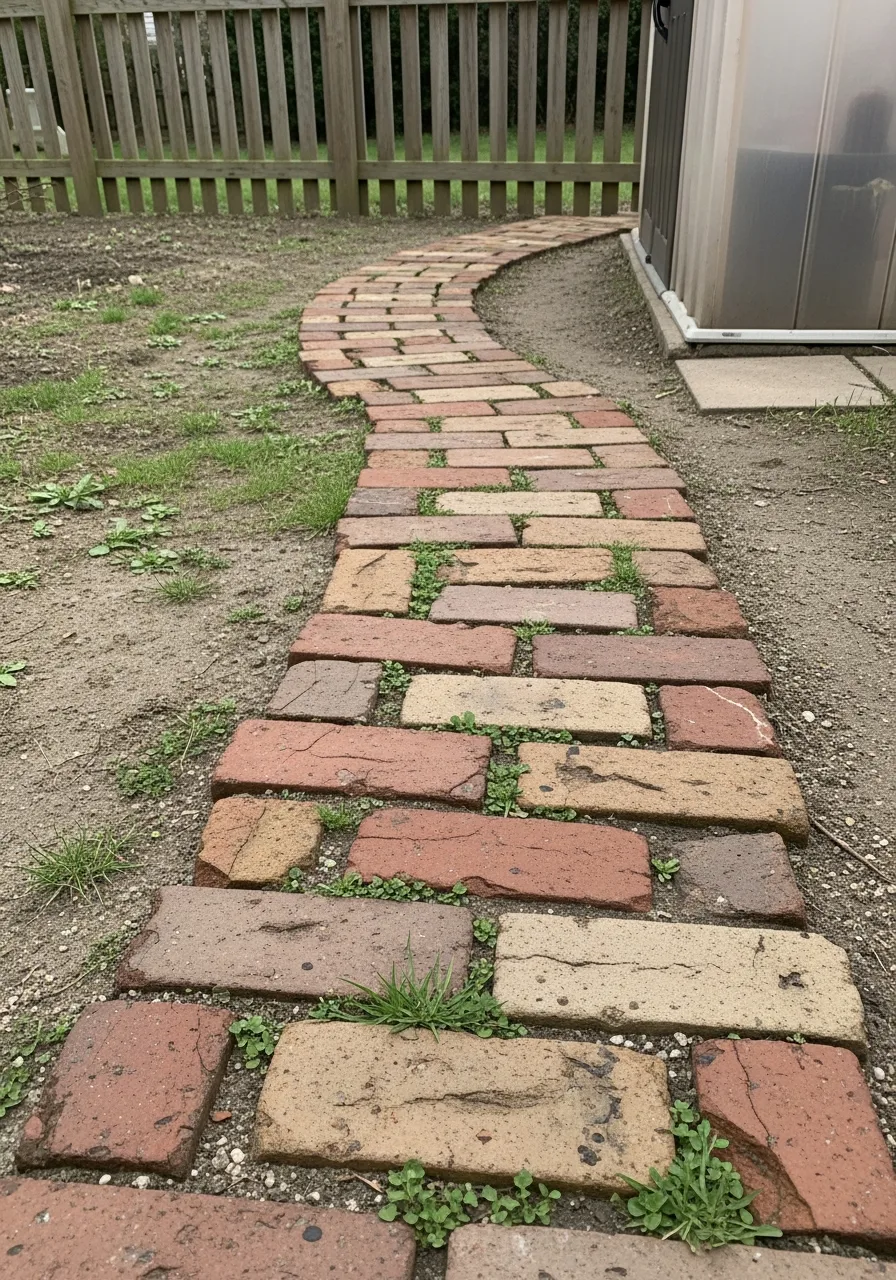
This path uses old bricks found at yard sales or construction sites. It looks high-end and vintage without the price tag of new materials. I always look for free bricks on local community boards first.
- Clean old mortar off bricks
- Lay them in patterns
- Pack sand between the joints
Pro Tip: Here’s what I do: Use a rubber mallet to set them firmly.
4. Natural Mulch Walkway
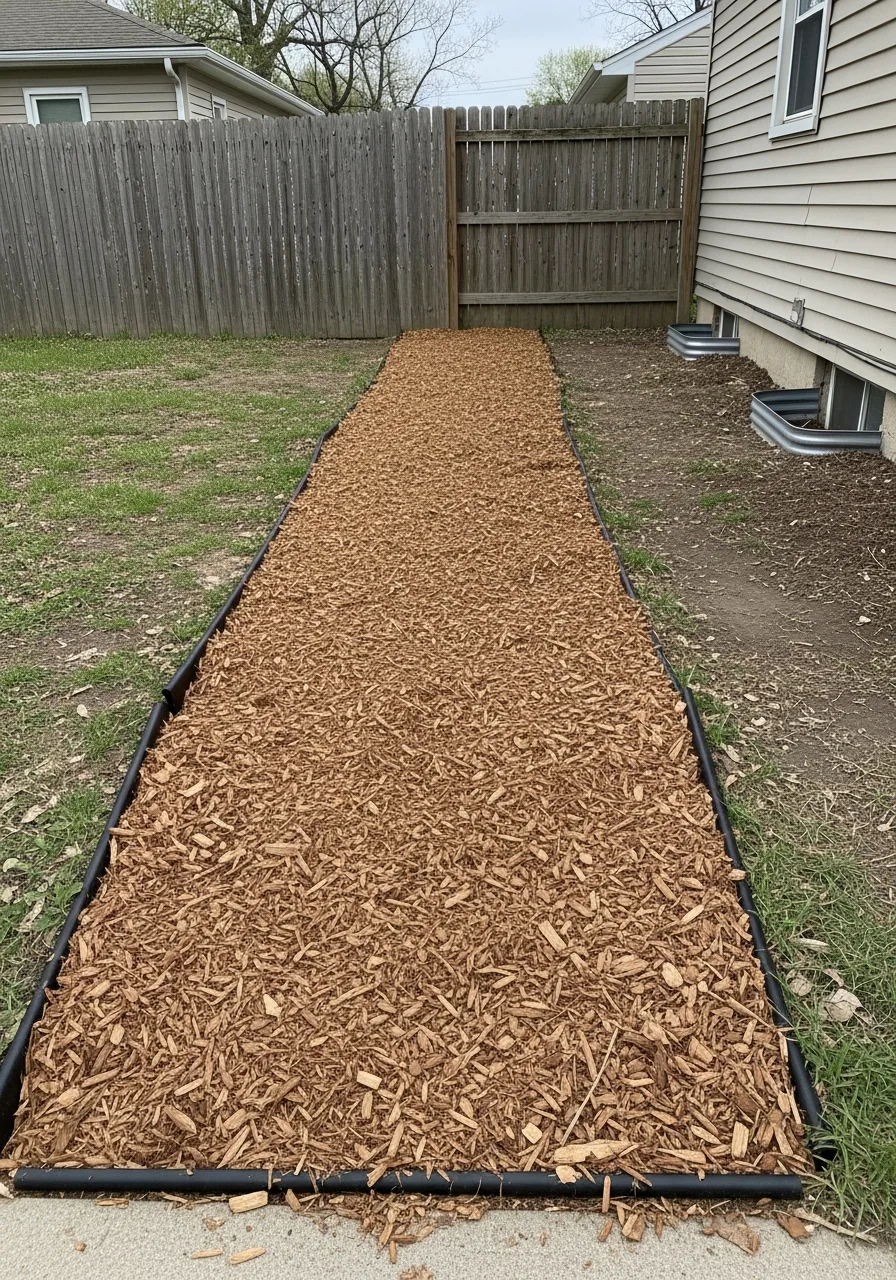
Wood mulch or bark creates a soft and natural-looking garden path. It is incredibly cheap and takes very little time to spread out. Honestly, you should refresh it every year to keep it looking fresh.
- Edge the path with wood
- Lay thick plastic underneath
- Spread mulch evenly
Pro Tip: Quick win: Use cedar mulch to help repel local bugs.
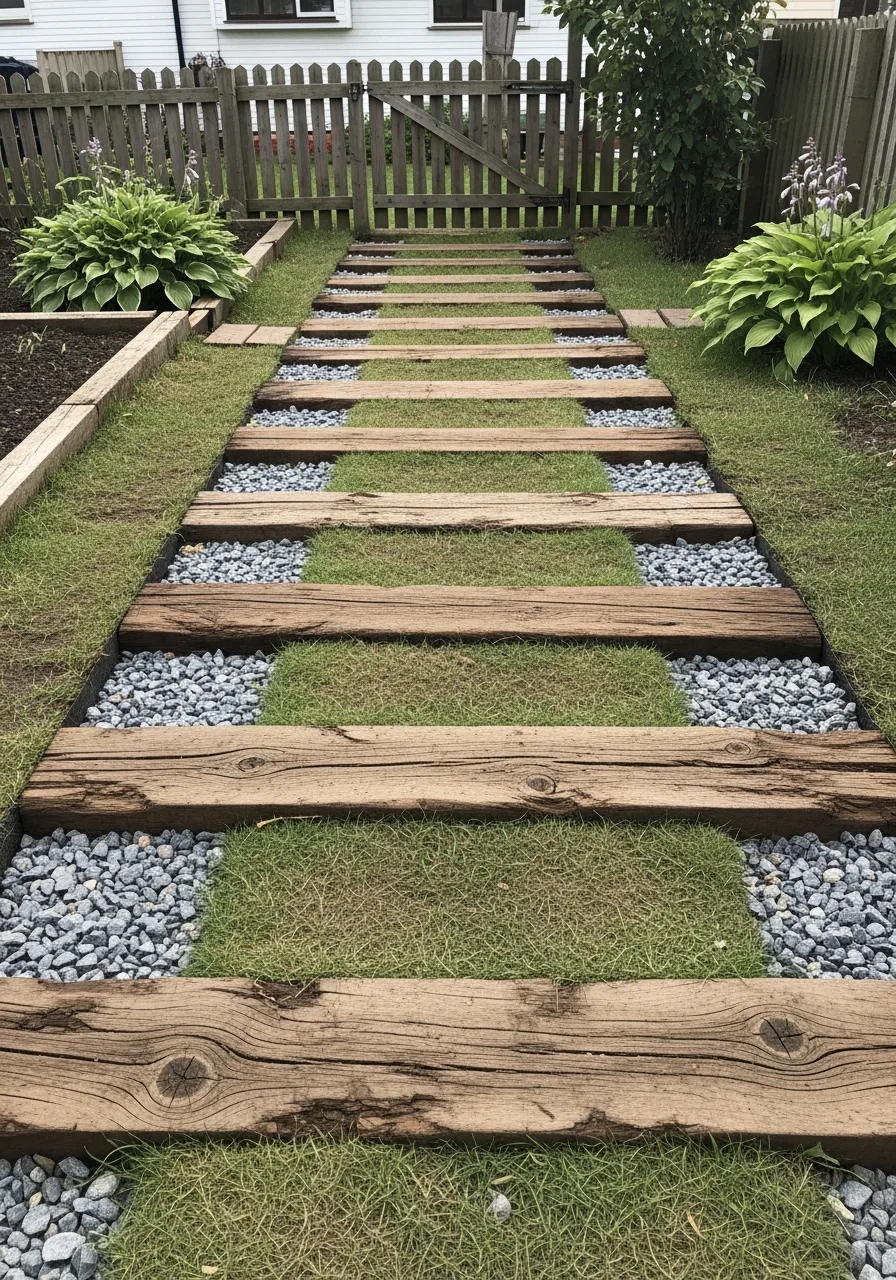
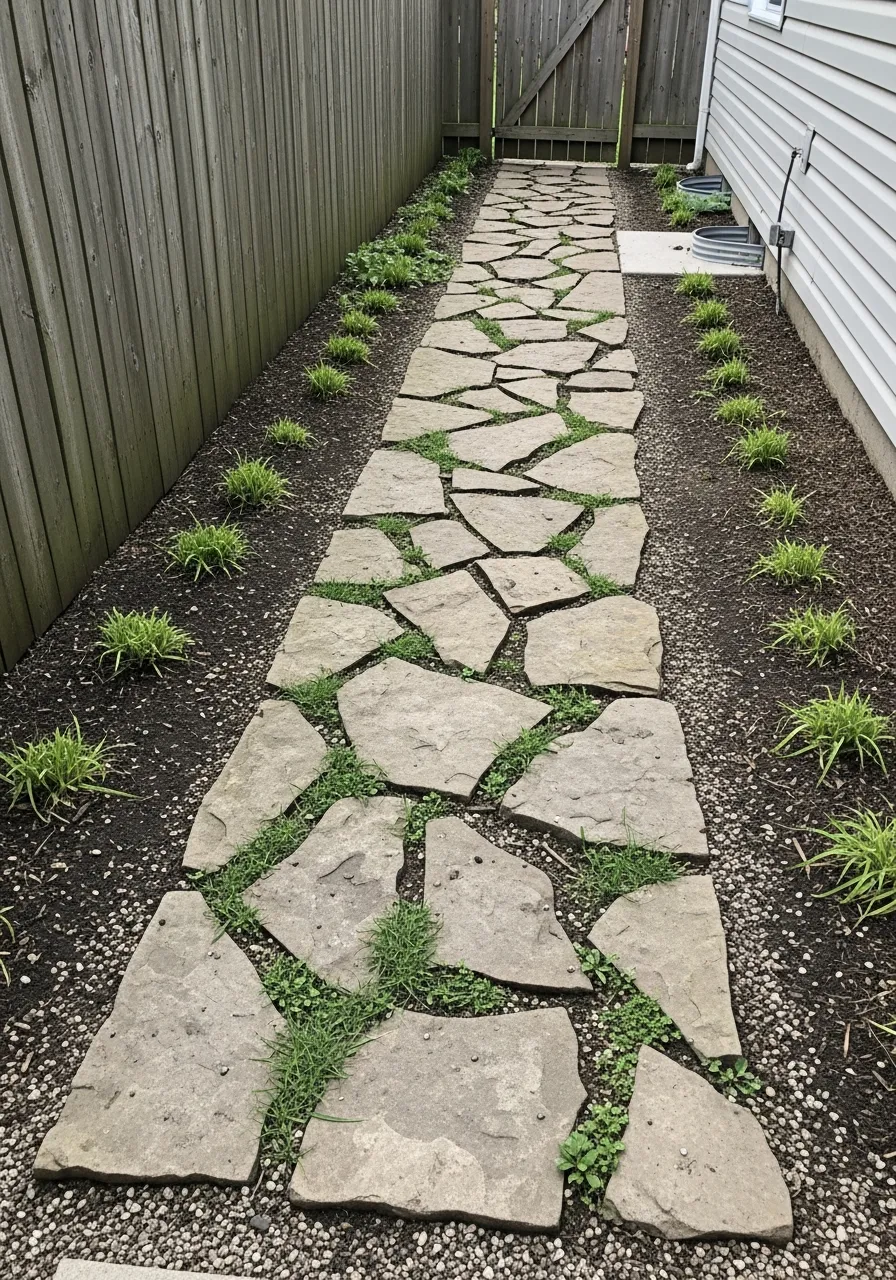
5. Gravel and Stone Combo
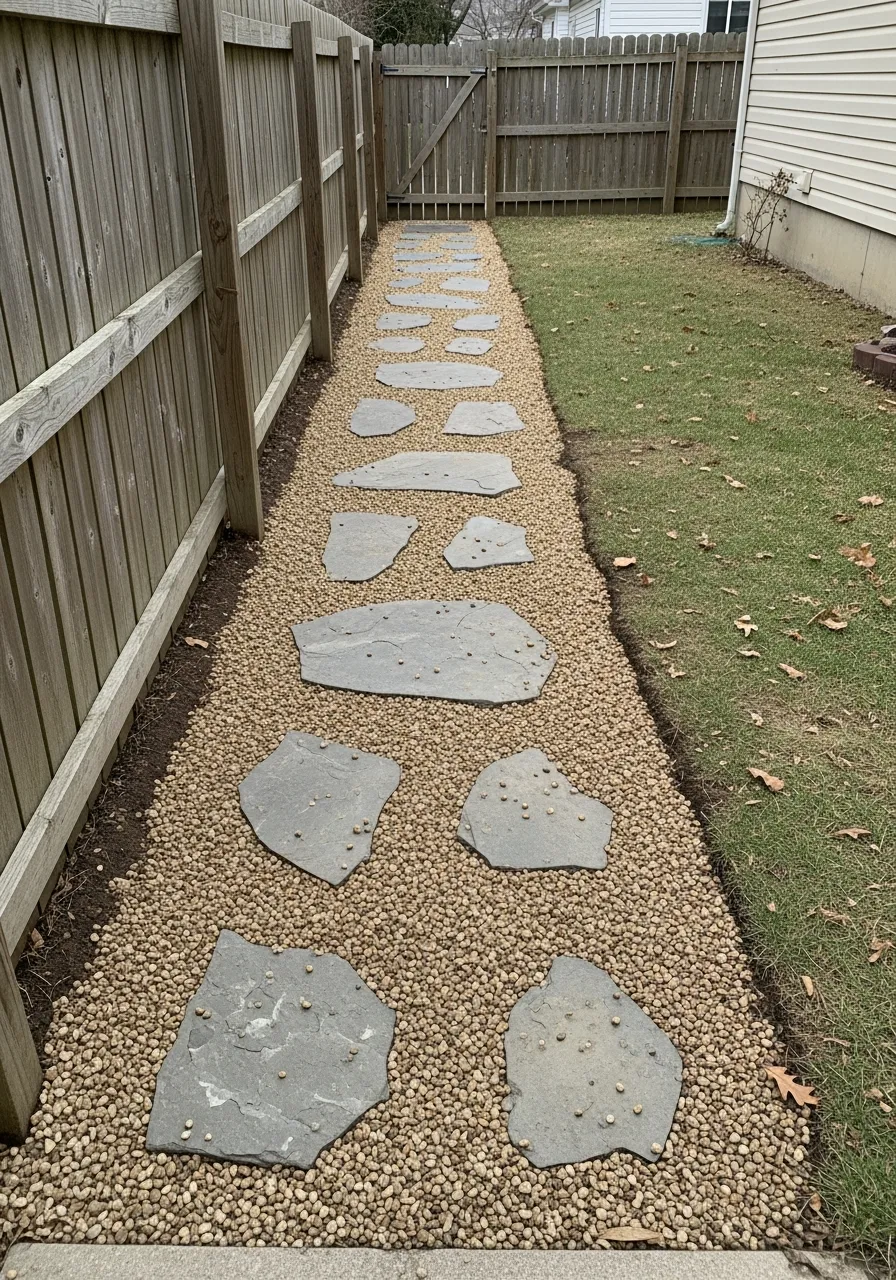
This design mixes small gravel with large, flat stepping stones for a polished look. It offers a more stable walking surface than loose gravel alone. I’ve found that larger stones make the path feel much safer.
- Set large stones first
- Fill gaps with small gravel
- Use contrasting colors for style
Pro Tip: Most people skip this: Tamp the ground before laying any stones.
6. Wooden Pallet Walkway
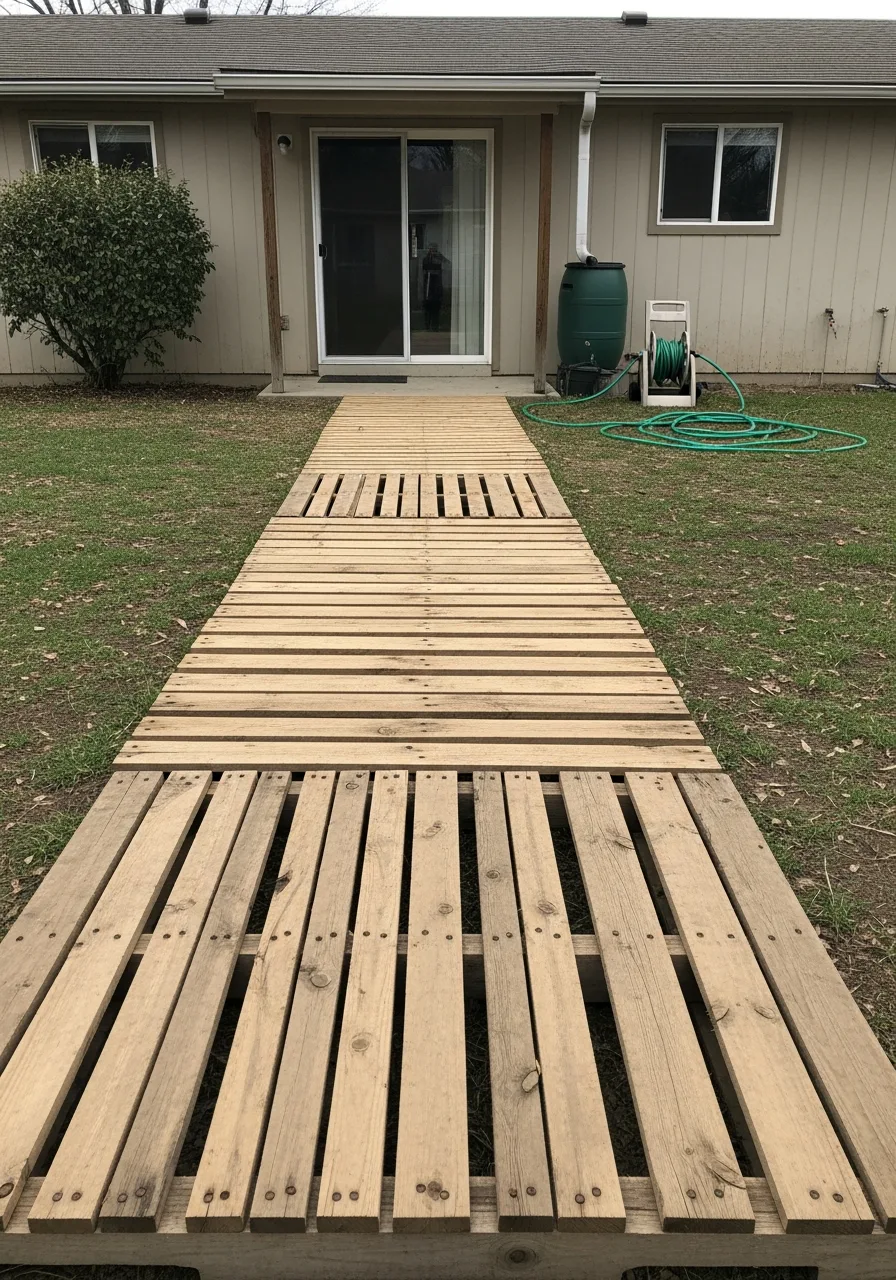
You can break down shipping pallets into planks to create a rustic boardwalk. This is a perfect way to get a walkway for almost zero dollars. My take: only use pallets marked with HT so they are safe.
- Remove all old nails
- Sand the wood for safety
- Seal against rain and rot
Pro Tip: Here’s what I do: Space planks slightly for water drainage.
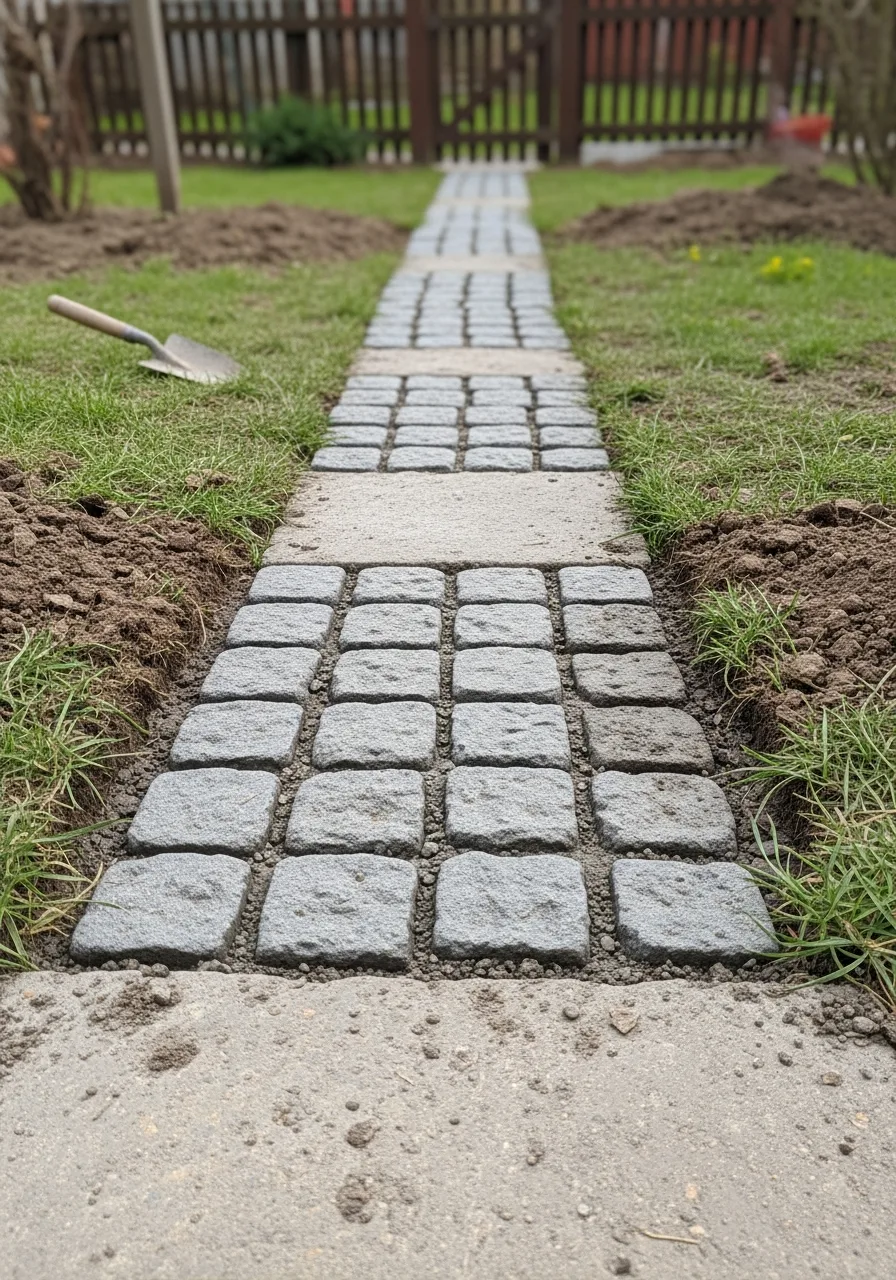
7. Concrete Paver Path
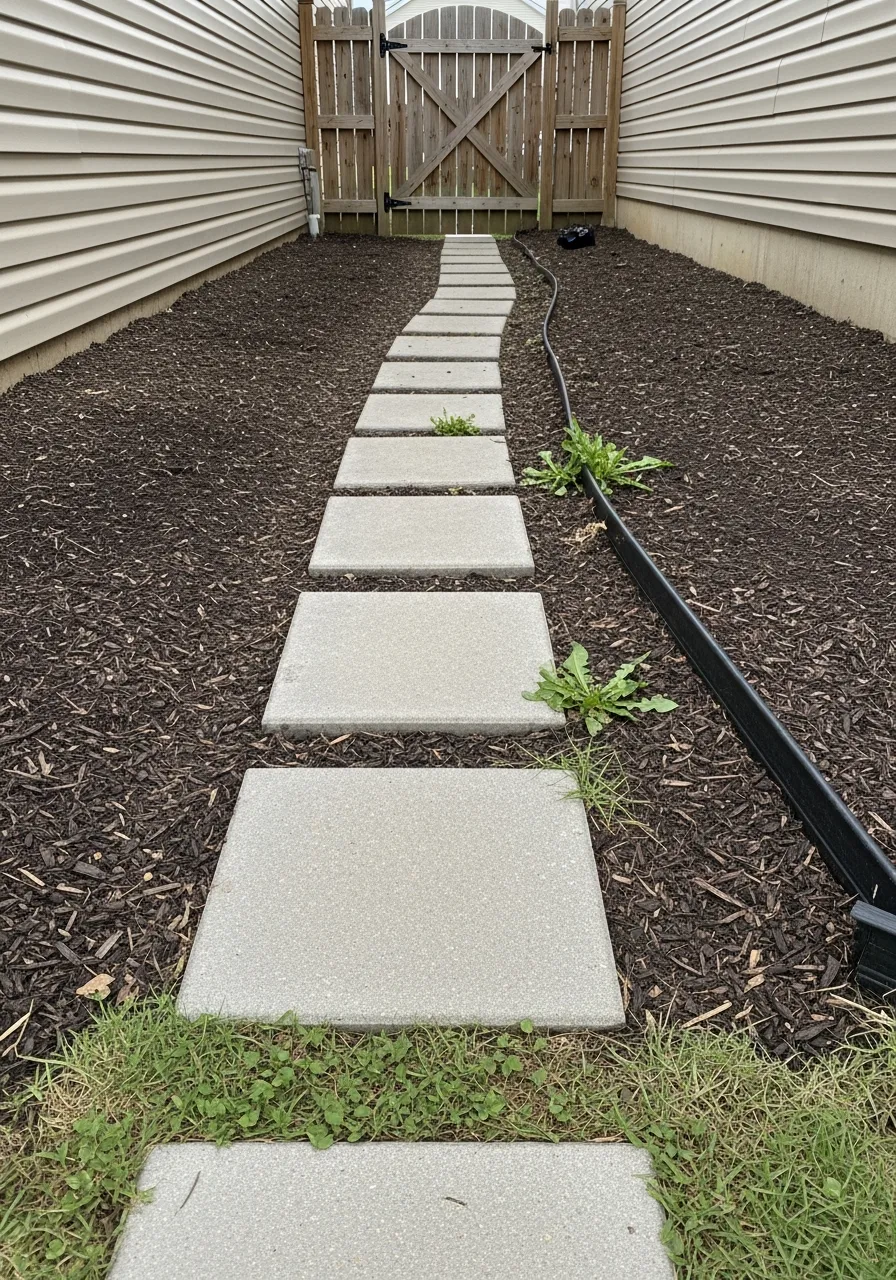
Inexpensive square concrete pavers create a very clean and modern-looking walkway. They are durable enough to handle heavy foot traffic for many years. I always recommend these for the main path to the door.
- Level the soil with sand
- Keep pavers close together
- Sweep sand into the cracks
Pro Tip: Quick win: Use a string line to keep the path straight.
8. Garden Wood Chip Path
Spread wood chips for a casual trail that feels like a park. They are very cheap and easy to move if you change your mind. Honestly, they work best for side yards or vegetable gardens.
- Apply a thick layer
- Use a sturdy garden rake
- Add fresh chips every spring
Pro Tip: Most people skip this: Call local tree services for free chips.
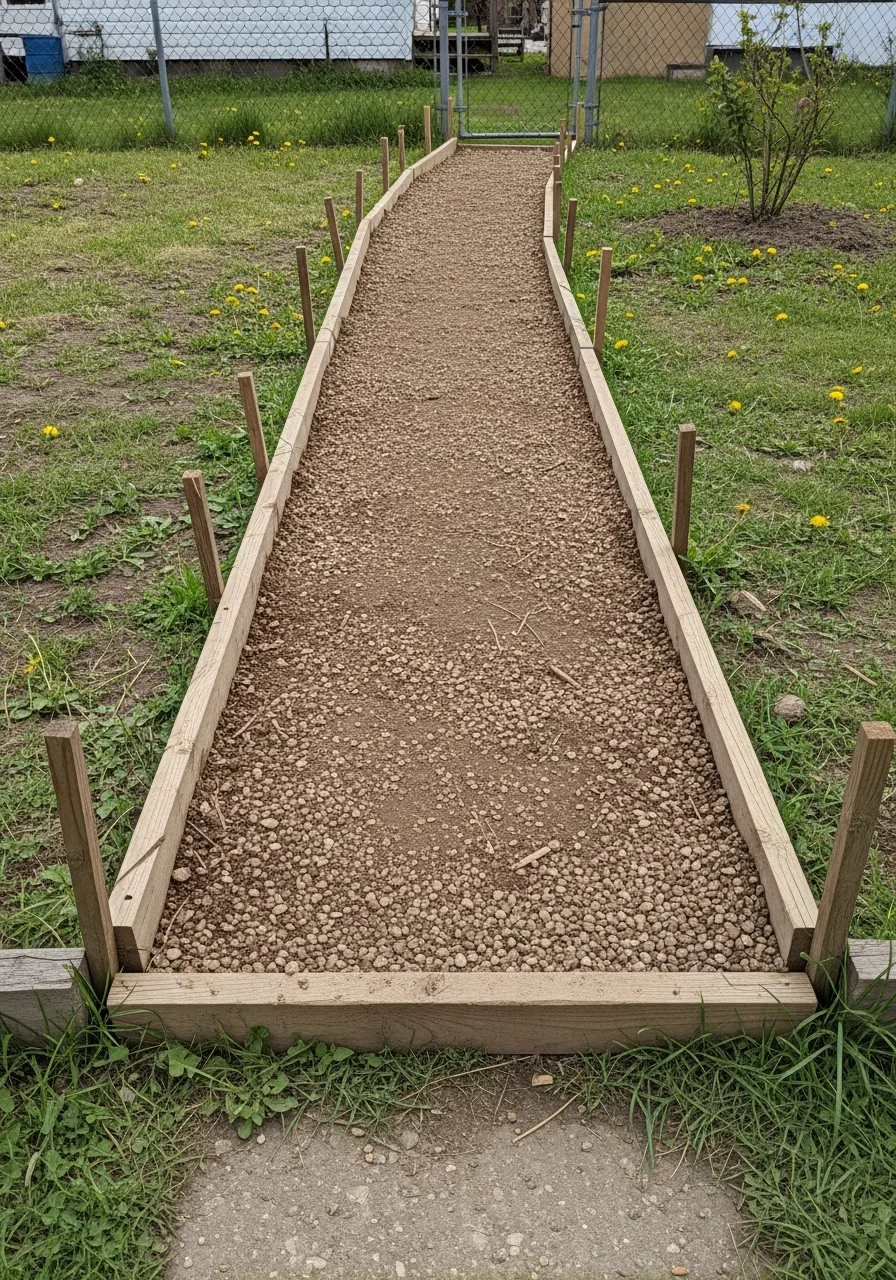
9. Crushed Stone Walkway
Crushed stone is a bit more rugged than gravel and stays in place better. It compacts down into a hard surface that is very easy to walk on. What works here is using a heavy tamper to lock it in.
- Dig a shallow trench
- Add a sturdy border
- Compact the stone in layers
Pro Tip: Quick win: Wet the stone before tamping for better grip.
10. DIY Concrete Mold Path
You use plastic molds to pour wet concrete into custom stone shapes. This saves a lot of money compared to buying pre-made heavy slabs. My take: add concrete dye to the mix for a custom look.
- Mix concrete to thick consistency
- Fill every corner of mold
- Smooth the top with trowel
Pro Tip: Most people skip this: Wash the mold between every single pour.
11. Log Slice Walkway
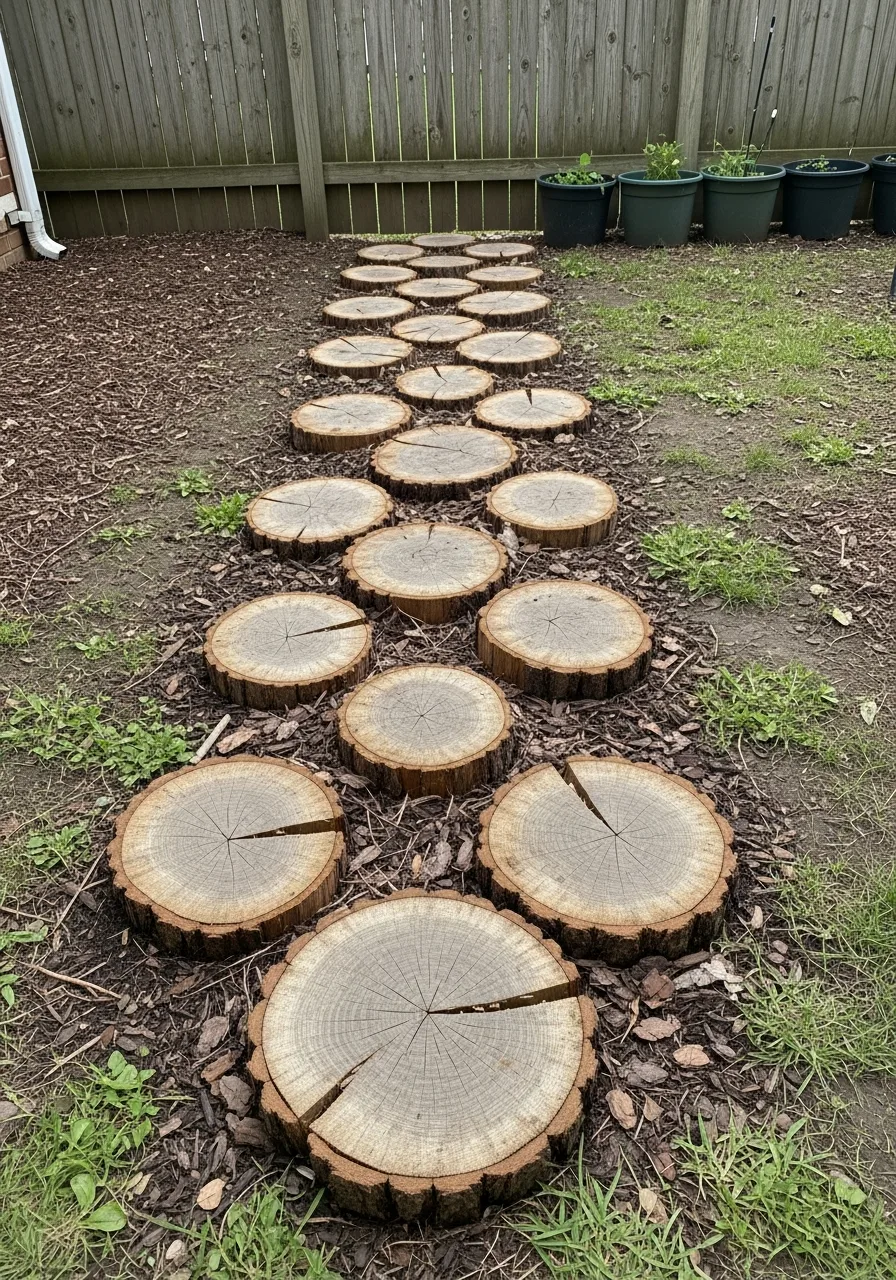
Cut tree logs into thin rounds and set them into the ground. This creates a beautiful woodland look using wood you might find for free. Honestly, you must seal the wood to prevent it from rotting quickly.
- Level the ground first
- Space slices for easy walking
- Fill gaps with small gravel
Pro Tip: Most people skip this: Use pressure-treated wood if you aren’t cutting logs.
12. Decking Board Path
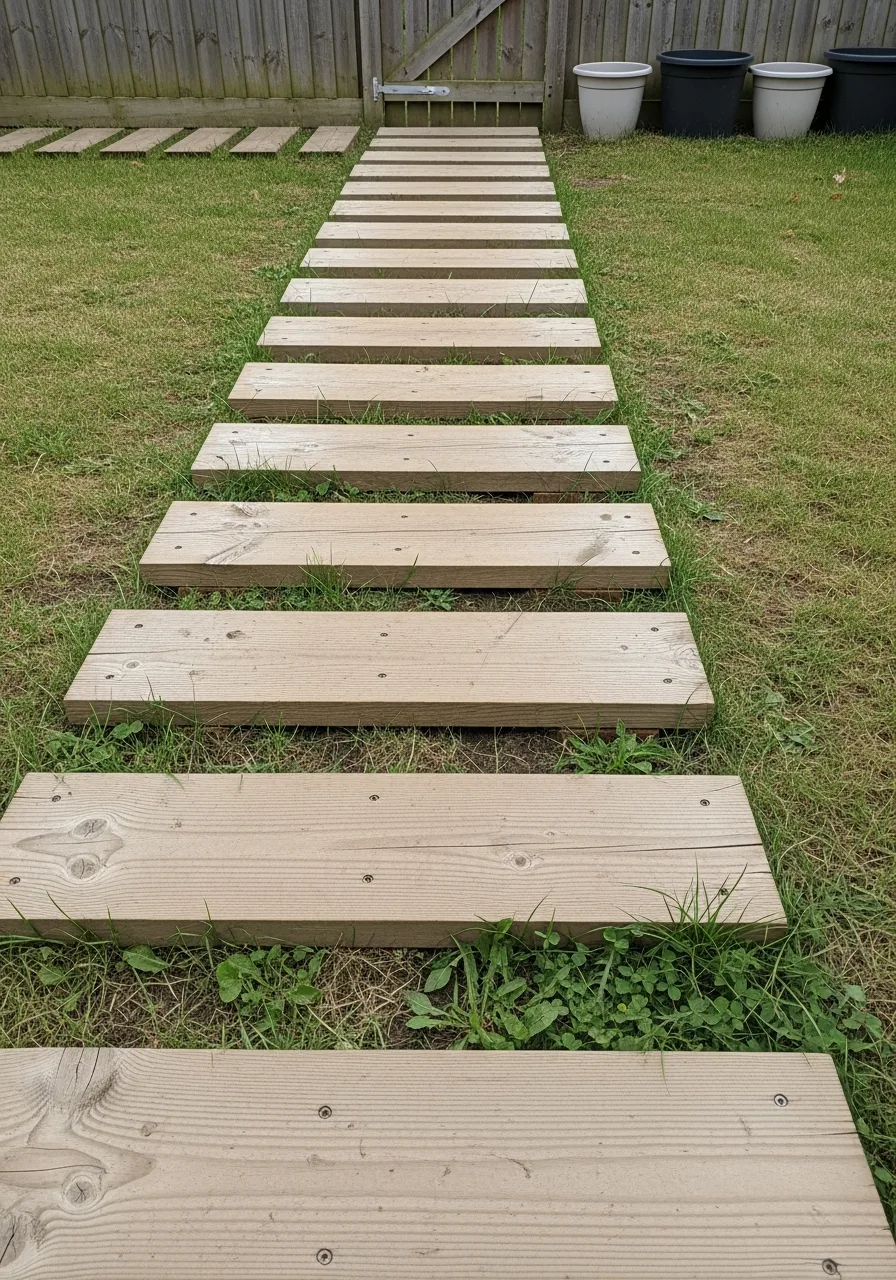
Lay affordable wooden decking boards horizontally to create a clean boardwalk. This is a smart way to bridge muddy areas in your yard. I always use screws instead of nails so the boards stay flat.
- Build a simple wood frame
- Use weather-resistant deck screws
- Leave gaps for water flow
Pro Tip: Quick win: Use a spacer to keep the gaps even.
13. Pebble Mosaic Path
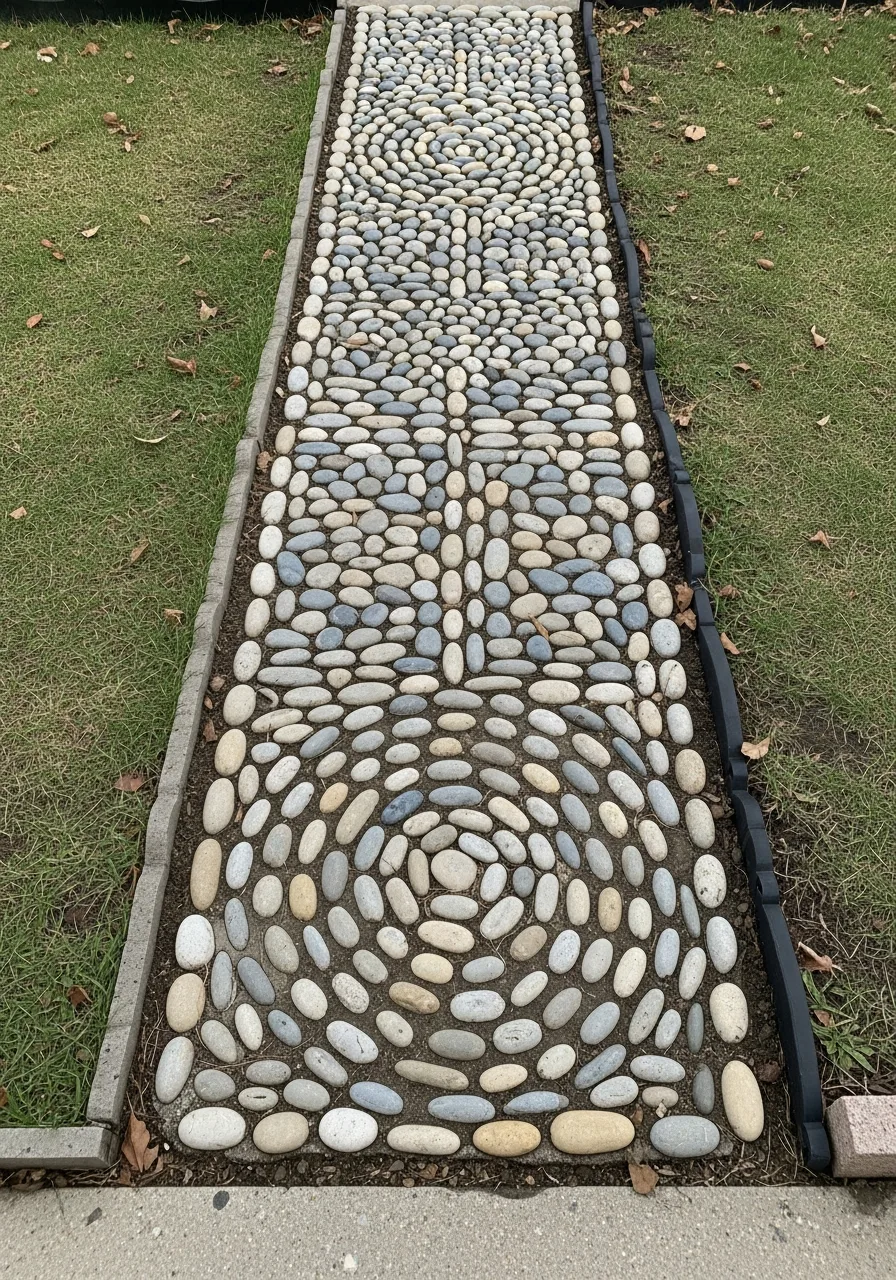
Use small stones or pebbles to create decorative patterns in a bed of wet mortar. This is a great way to turn a path into a work of art. My take: keep the design simple so it is easier to finish.
- Sort pebbles by color
- Press stones into wet concrete
- Wipe away excess cement
Pro Tip: Here’s what I do: Practice your pattern on dry sand first.
14. Dirt Path with Edging
This is just a cleared dirt trail defined by a neat border. It costs almost nothing and keeps your yard looking organized and intentional. What works here is using heavy stones to keep the dirt contained.
- Scrape away all the weeds
- Pack the dirt down tight
- Install sturdy plastic edging
Pro Tip: Quick win: Spray weed killer before you start the path.
15. Recycled Urbanite Path
Break old concrete slabs into irregular shapes and reuse them like natural stone. This is the ultimate budget move because people often give away old concrete for free. I’ve found that it looks best when you leave wide joints.
- Use a sledgehammer for pieces
- Fit them together like puzzles
- Fill joints with ground cover
Pro Tip: Most people skip this: Wear safety goggles when breaking concrete.
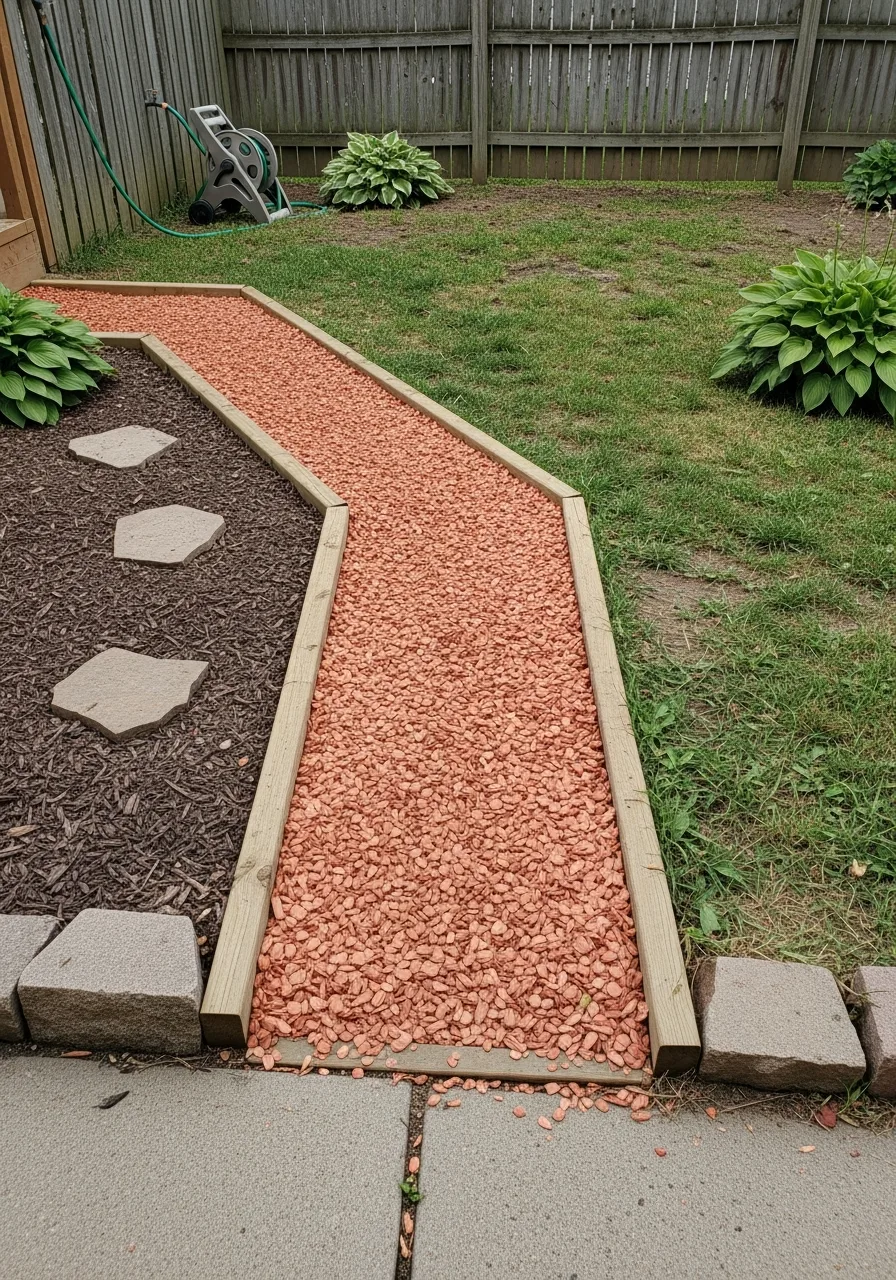
16. Brick Border Gravel Fill
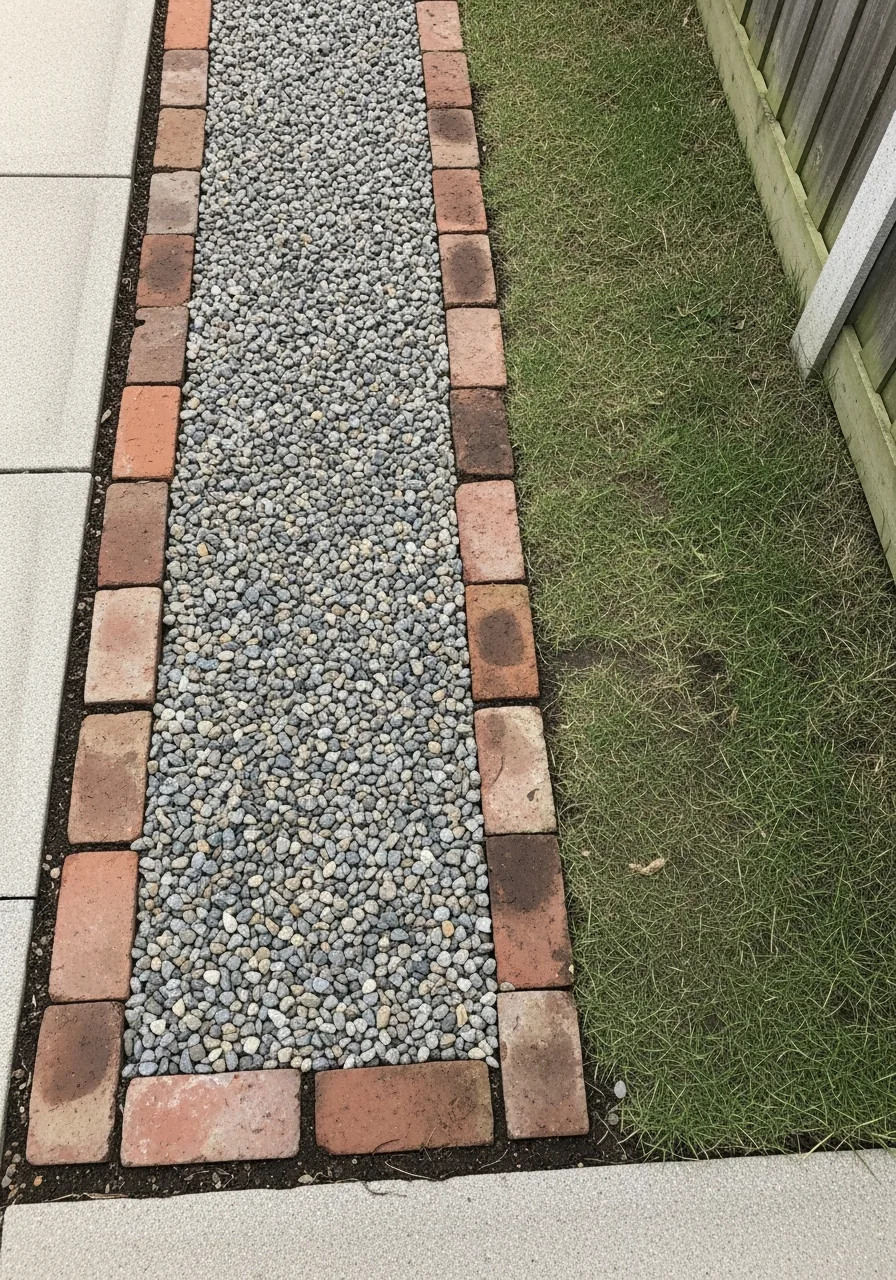
Outline the path with bricks and fill the center with loose gravel. The bricks keep the gravel from spreading into your lawn or flower beds. Honestly, it looks much more expensive than it actually is.
- Set bricks in a trench
- Level the center area
- Pour gravel to brick height
Pro Tip: Quick win: Use a level to keep the bricks even.
17. Artificial Turf Pathway
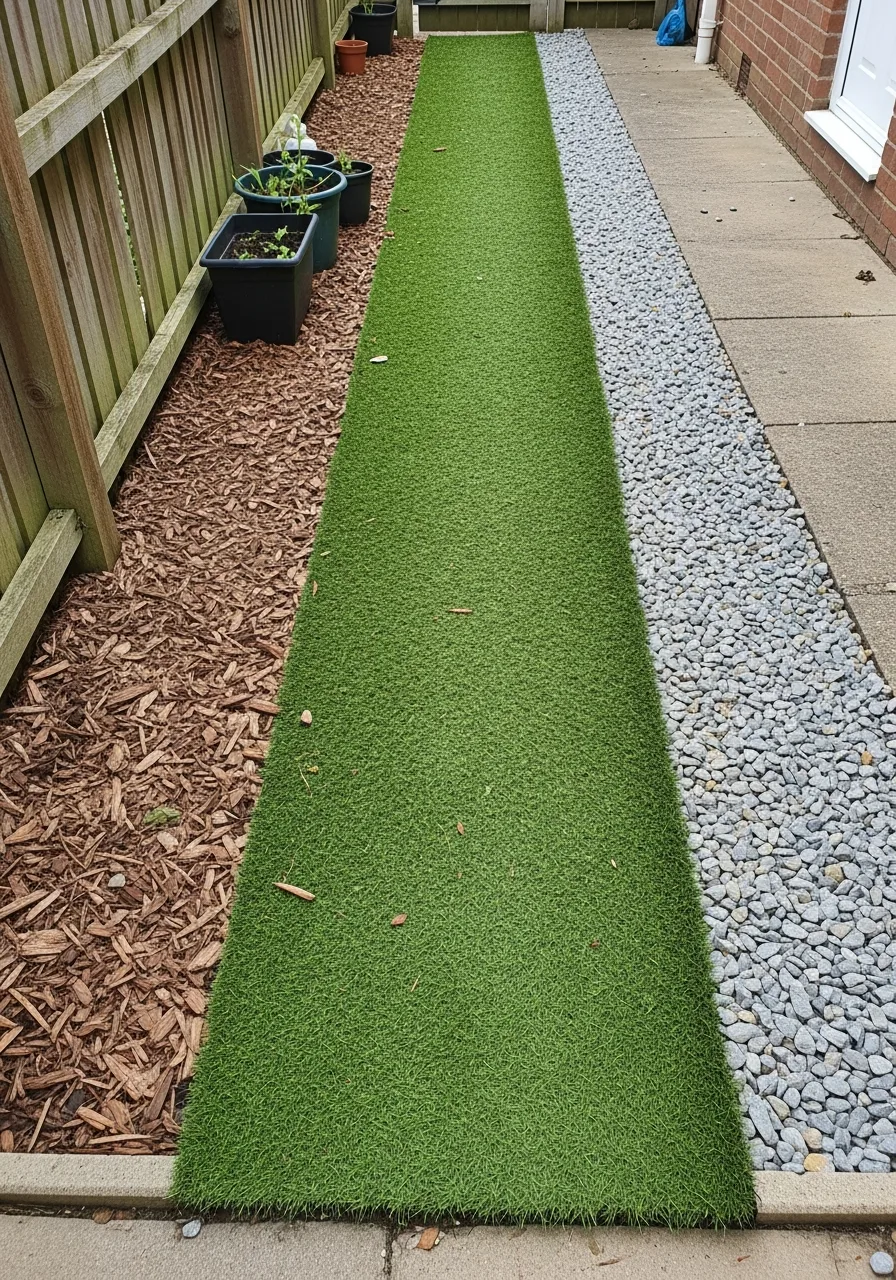
Use leftover artificial grass strips to create a green walkway that never needs water. It stays green all year and is very soft for bare feet. I always secure the edges with long garden staples.
- Cut turf with sharp knife
- Stake the edges down firmly
- Brush the blades to stand up
Pro Tip: Here’s what I do: Lay it over a sand base.
18. Sand and Stone Path
Lay stepping stones over a thick bed of sand for a quick and easy install. The sand makes it simple to level each stone perfectly without much digging. My take: this works best in dry or sandy climates.
- Level a thick sand base
- Twist stones into the sand
- Fill gaps with more sand
Pro Tip: Quick win: Use a broom to finish the joints.
19. Tire Tread Path
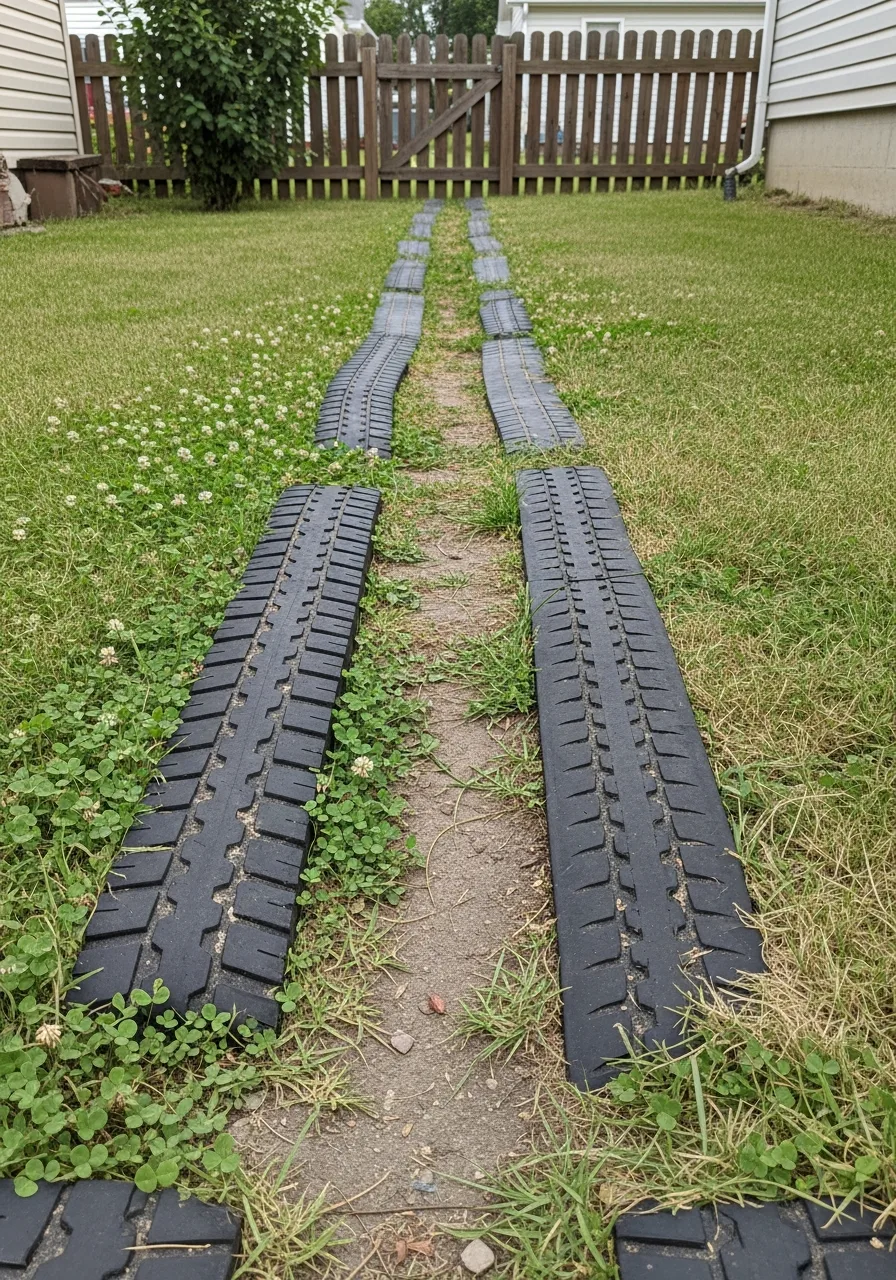
You cut the treads off old tires and lay them as durable pads. These are waterproof and provide amazing traction in muddy areas of the yard. My take: this is the ultimate way to recycle something for free.
- Use a heavy-duty blade
- Scrub the rubber clean
- Stake the ends down
Pro Tip: Here’s what I do: Use them in the vegetable garden.
20. Painted Concrete Slab Path
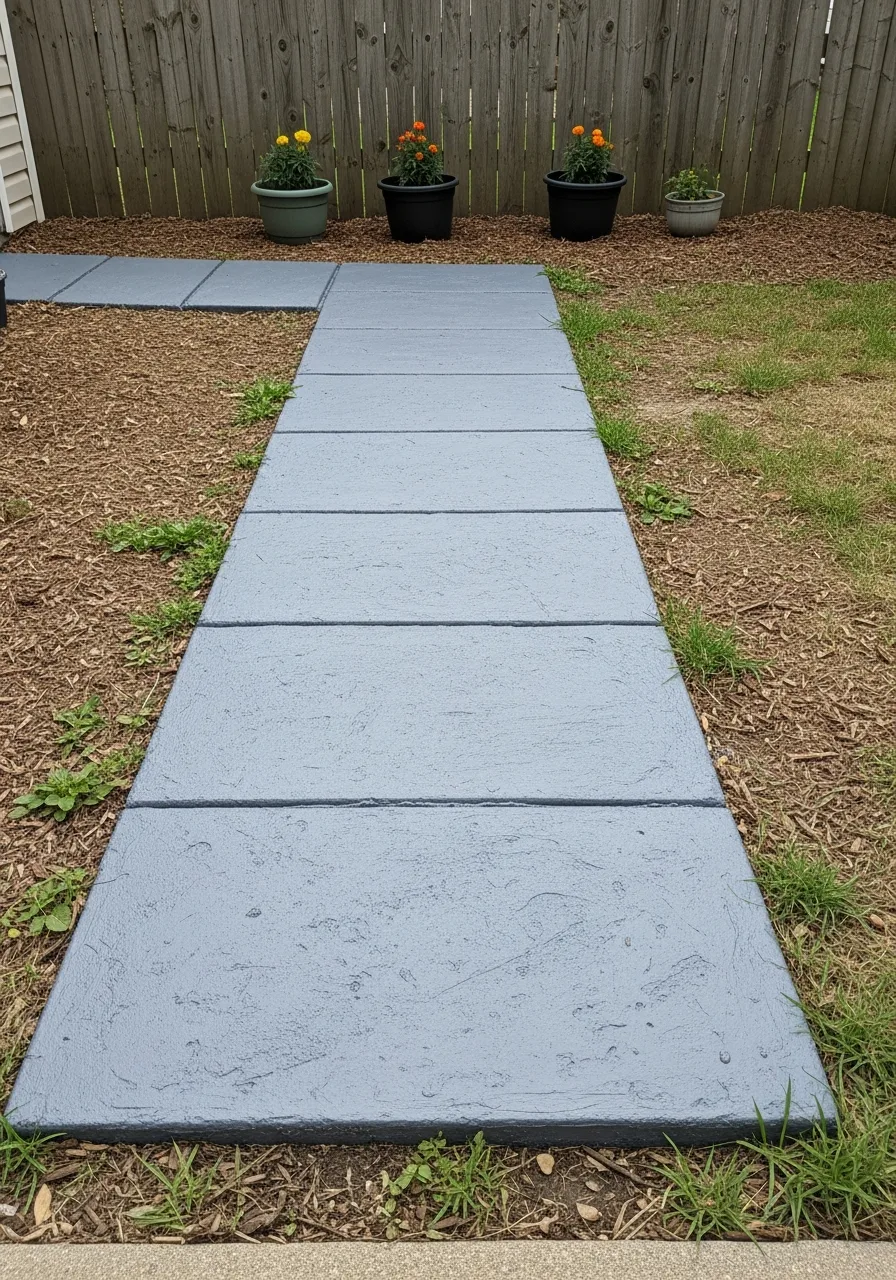
You take basic grey concrete slabs and add color or patterns with paint. It transforms a boring path into a focal point for very little money. I’ve found that using a stencil makes the design look professional.
- Clean the slabs thoroughly
- Use outdoor porch paint
- Apply a clear sealer
Pro Tip: Here’s what I do: Add sand to paint for extra grip.
21. Stone and Moss Walkway
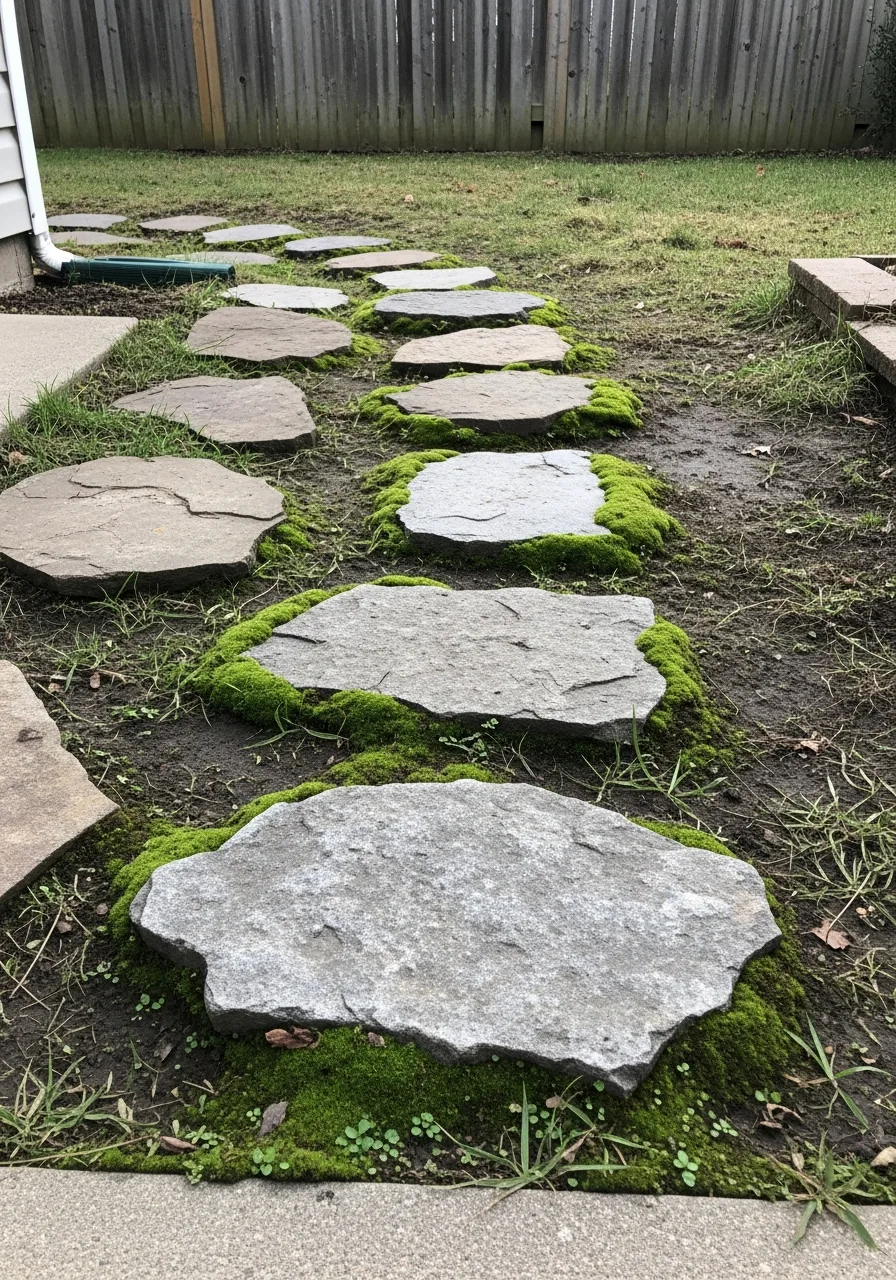
Combine flat stones with natural moss or low ground cover in the gaps. This creates a very soft and organic look that blends into a shade garden. Honestly, this is the most relaxing path to walk on.
- Space stones several inches apart
- Plant moss in the gaps
- Keep the area slightly damp
Pro Tip: Quick win: Use a spray bottle to water the moss.
22. Cinder Block Path
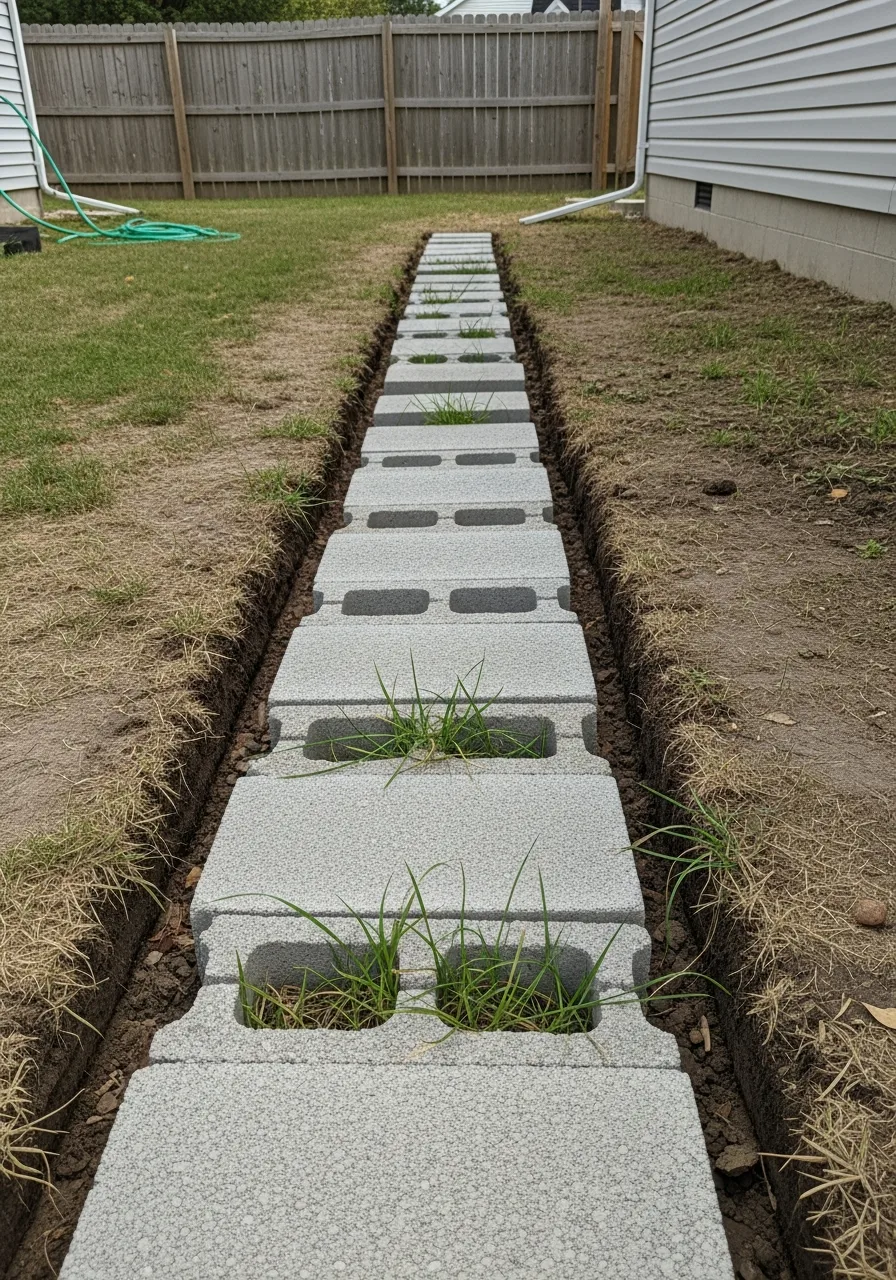
Arrange cinder blocks creatively and fill the holes with gravel or small plants. It gives your garden a modern and industrial look on a very tight budget. I always fill the holes to prevent tripping.
- Lay blocks flat or upright
- Fill holes with crushed stone
- Level the ground before laying
Pro Tip: Most people skip this: Use a thin layer of sand underneath.
23. Rope-Edged Gravel Path
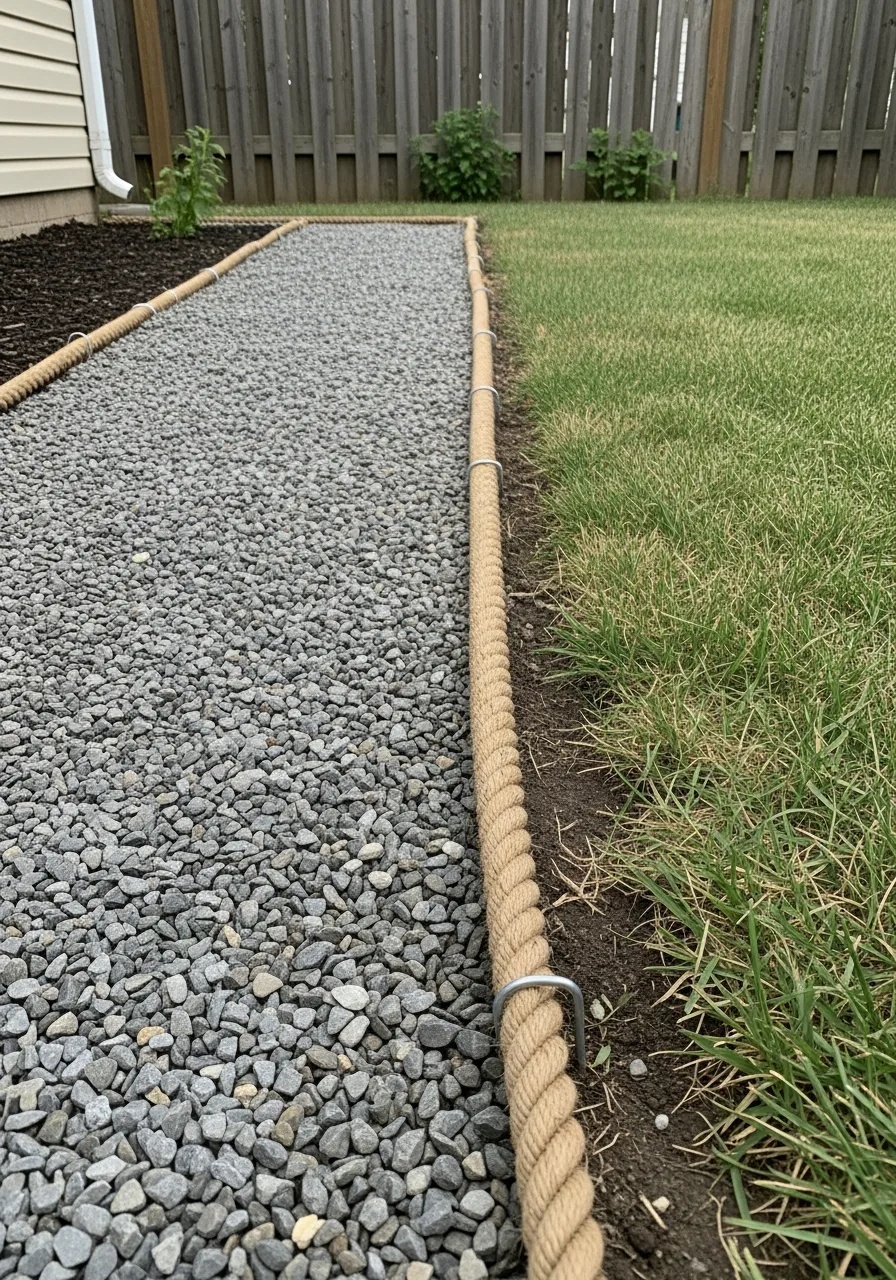
This idea uses thick nautical rope to line the sides of a gravel path. It gives your yard a coastal feel without needing expensive stone borders. I always secure the rope with landscape staples so it stays put.
- Buy thick manila rope
- Hammer in garden staples
- Keep the gravel level
Pro Tip: Quick win: Knot the ends to prevent the rope fraying.
24. Broken Tile Mosaic Path
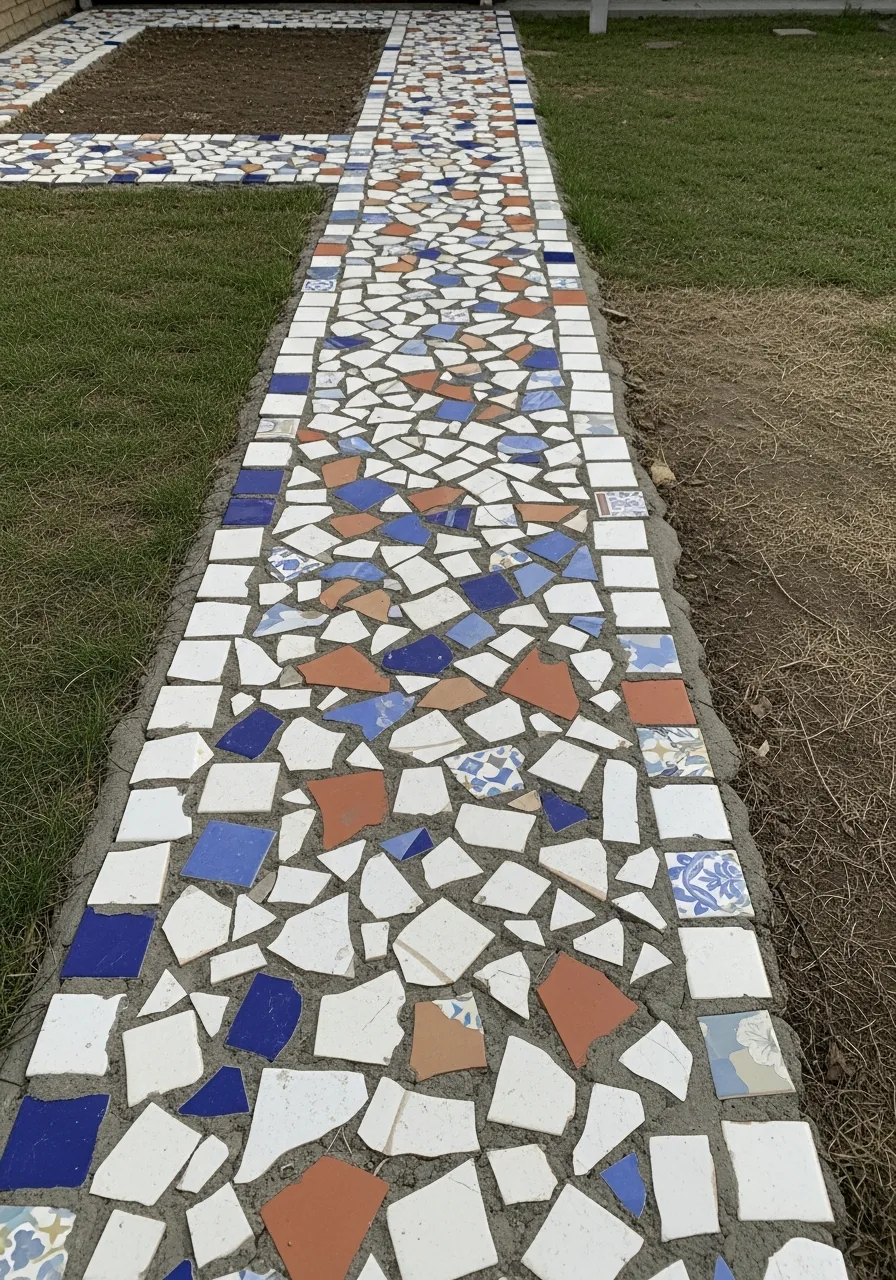
Reuse old tiles to create a colorful mosaic walkway with almost zero material cost. This is a great way to use up leftovers from a bathroom or kitchen renovation. My take: use textured tiles so they aren’t slippery.
- Break tiles into small pieces
- Set into a wet mortar bed
- Grout the pieces for safety
Pro Tip: Here’s what I do: Wear thick gloves while handling tiles.
25. Wooden Sleepers Path
Lay reclaimed wood sleepers in rows for a structured yet affordable pathway. They provide a very solid surface that works well for steep or uneven yards. I always recommend using pressure-treated wood for durability.
- Dig shallow trenches for wood
- Level each piece as you go
- Backfill with dirt or gravel
Pro Tip: Most people skip this: Drill holes for drainage through the wood.
26. Leaf or Needle Path
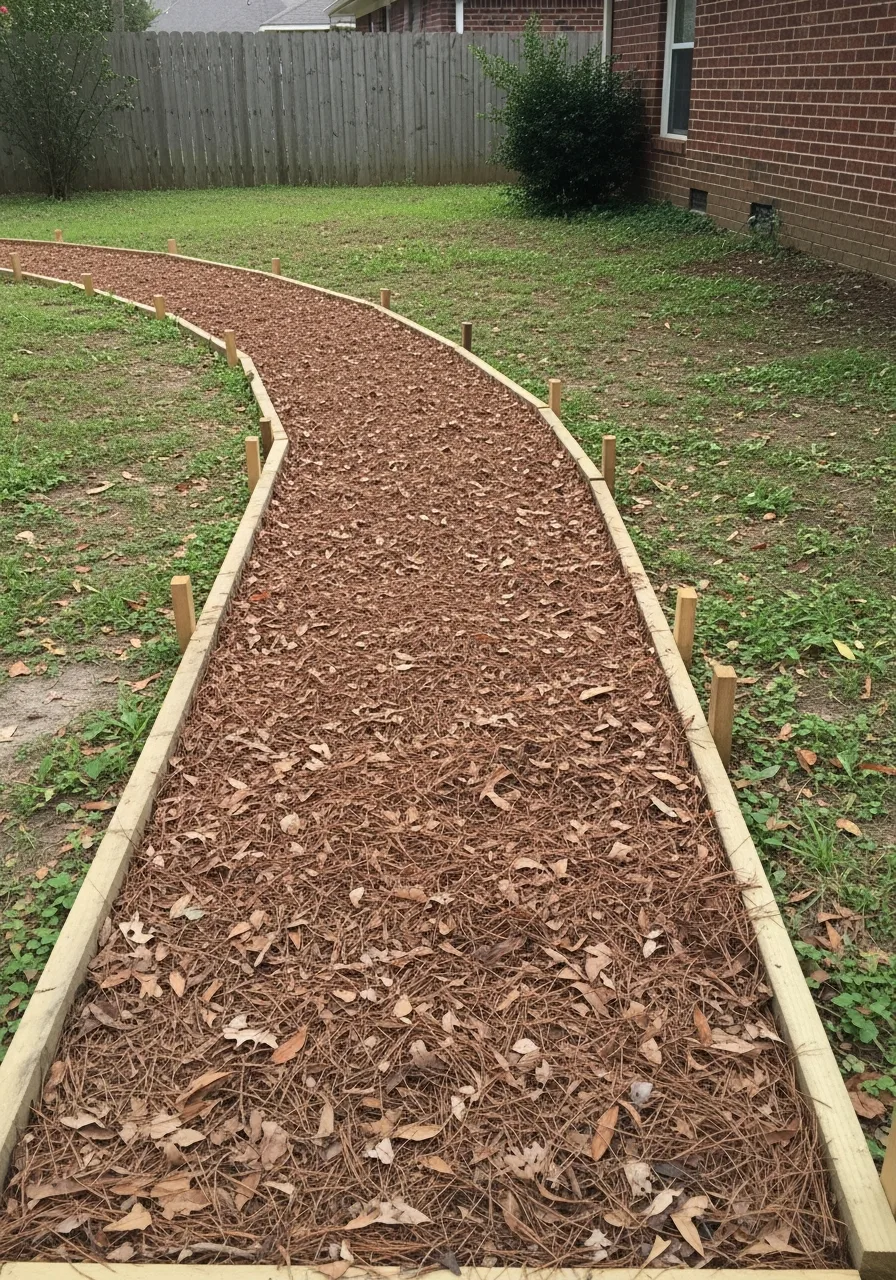
You use natural garden debris like pine needles to form a walkway. It is completely free and works perfectly for quiet paths in the woods. I’ve found that this looks best when edged with fallen branches.
- Rake needles into a pile
- Pack them down with boots
- Add more every autumn
Pro Tip: Quick win: Use this only in low-traffic areas.
27. Brick-on-Sand Walkway
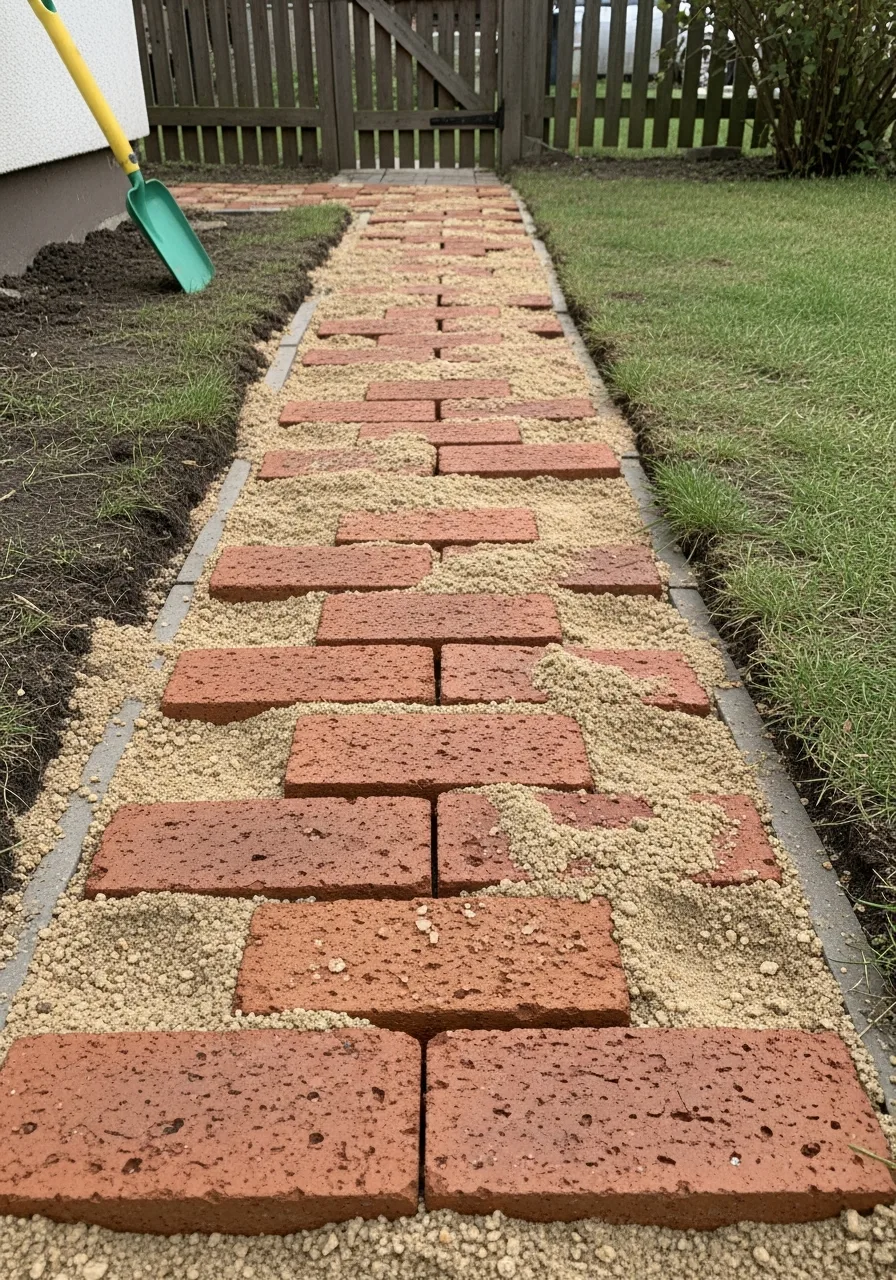
You lay bricks directly onto a bed of leveled sand without mortar. It is much cheaper than a permanent patio and allows for easy repairs. Honestly, the sand base makes the whole project go much faster.
- Level the ground carefully
- Pour two inches of sand
- Tap bricks with a mallet
Pro Tip: Most people skip this: Use a long board to level sand.
28. Recycled Rubber Tile Path
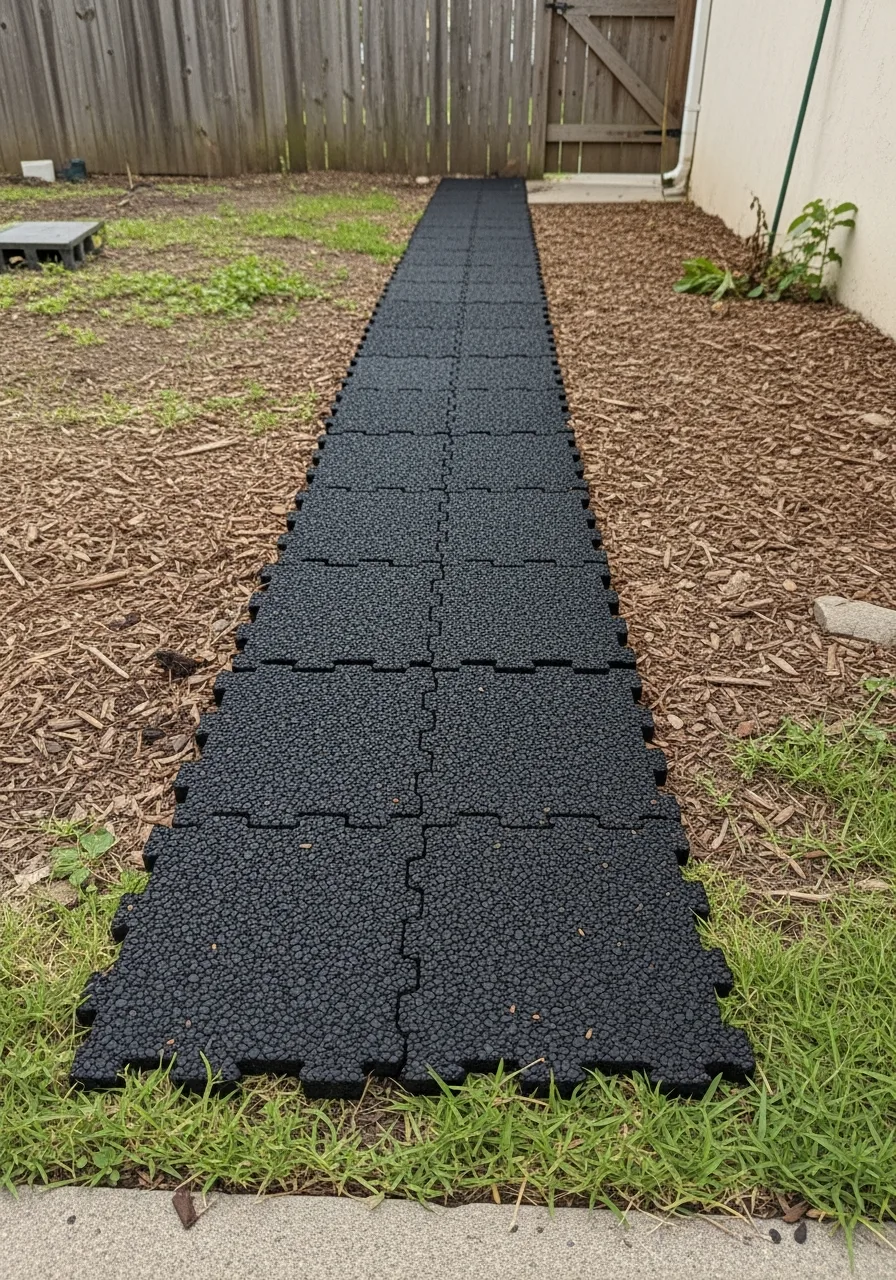
Use affordable rubber tiles for a soft, slip-resistant walkway option. These are often made from recycled tires and are very easy to install on flat ground. My take: these are perfect for kids’ play areas.
- Interlock the tile edges
- Cut to fit with a knife
- Lay on a flat surface
Pro Tip: Quick win: Use them where you stand often.
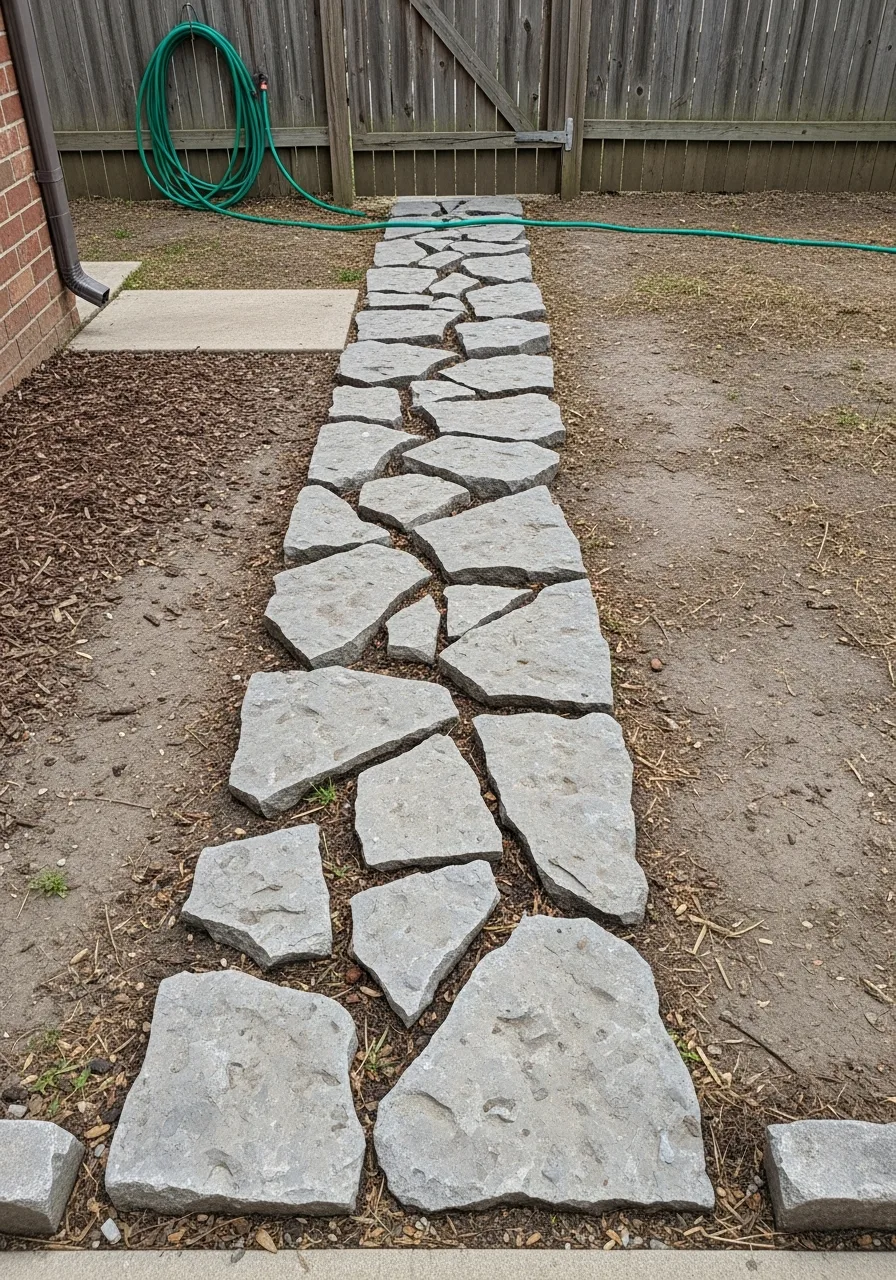
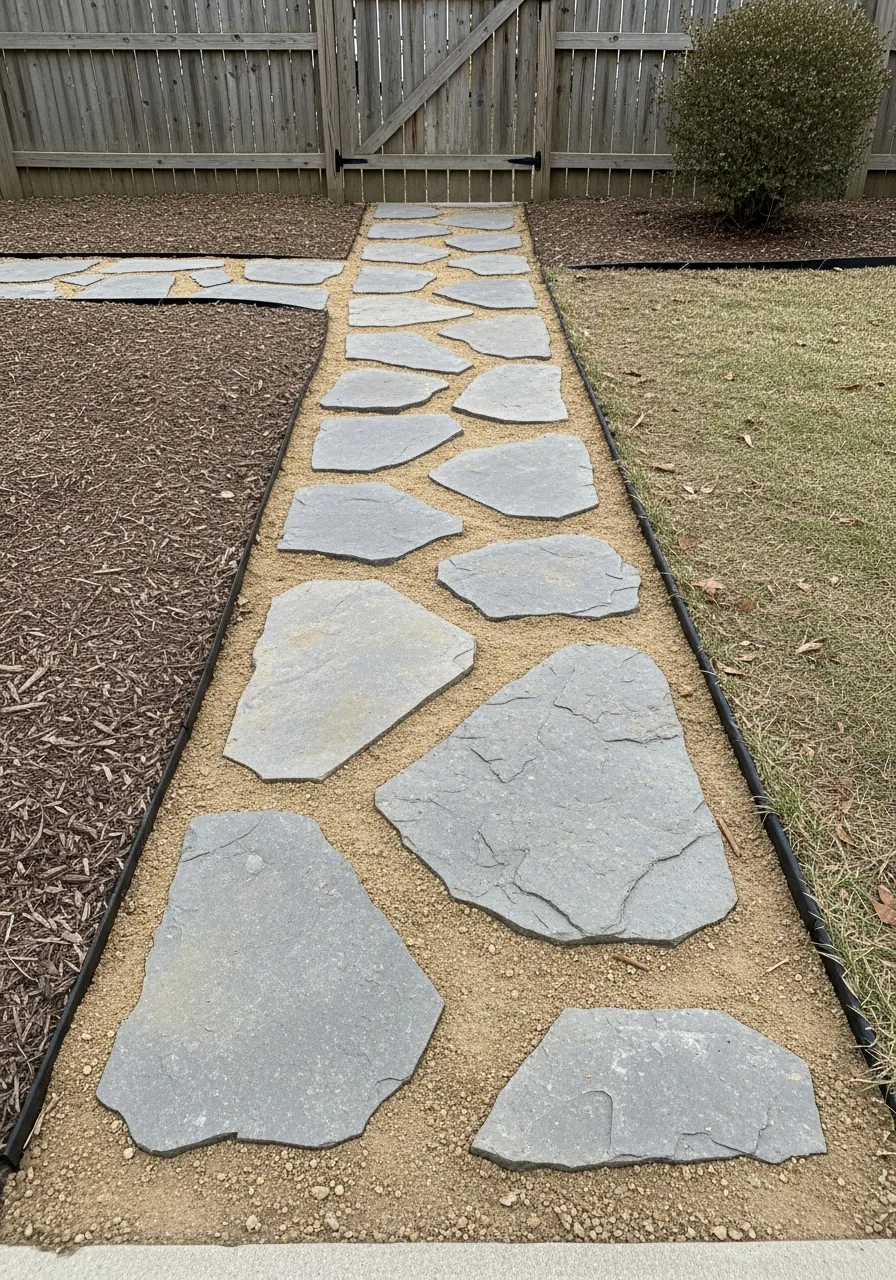
29. Flagstone Offcuts Path
Use leftover or discounted flagstone pieces to create a natural stone walkway. These irregular shapes give your garden a custom, high-end feel for a fraction of the cost. I always look for ‘pallet ends’ at stone yards.
- Fit large pieces together first
- Fill small gaps with dirt
- Plant grass between the stones
Pro Tip: Here’s what I do: Buy by weight to save money.
30. Mixed Material Patchwork Path
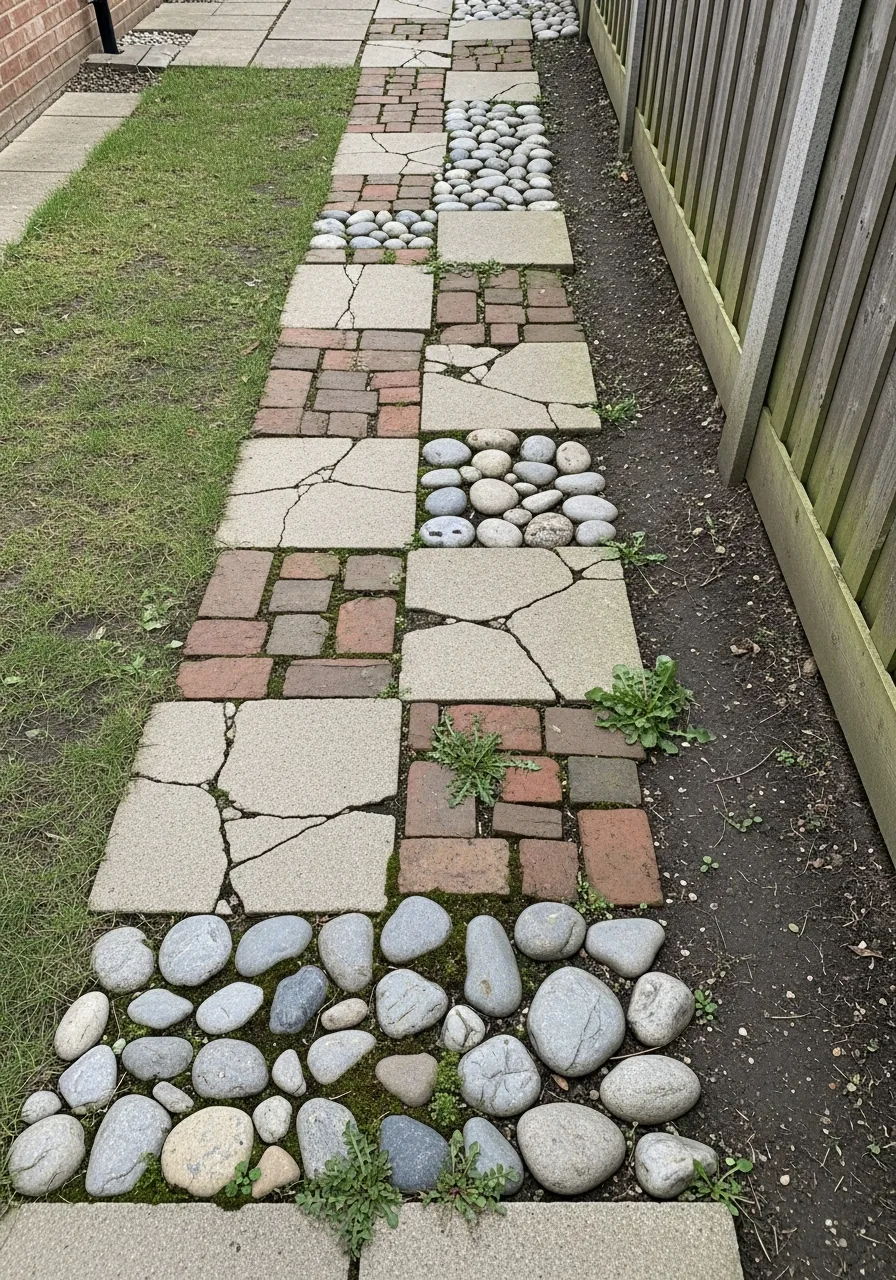
This path combines leftover bricks, stones, and gravel into a unique pattern. It is the perfect way to use up scraps from other home projects. My take: keep the colors similar so it looks intentional, not messy.
- Sort your materials by height
- Lay largest pieces first
- Fill small gaps with gravel
Pro Tip: Here’s what I do: Draw a plan on paper first.
Choosing the right walkway is about balancing your budget with your home’s style. I always recommend starting small and adding more detail as you go. Honestly, a well-organized path makes any backyard feel more like a home.