50 Kitchen Cabinet Makeover Ideas

This post may contain affiliate links: full affiliate disclosure.
Your cabinet layout may still work even when the doors feel dated.
These 50 ideas show different ways to change the result, from a handle swap to fitted drawers.
Save the ideas that suit your existing counters and daily routine.
1. Warm white cabinets with the dark countertop you already own
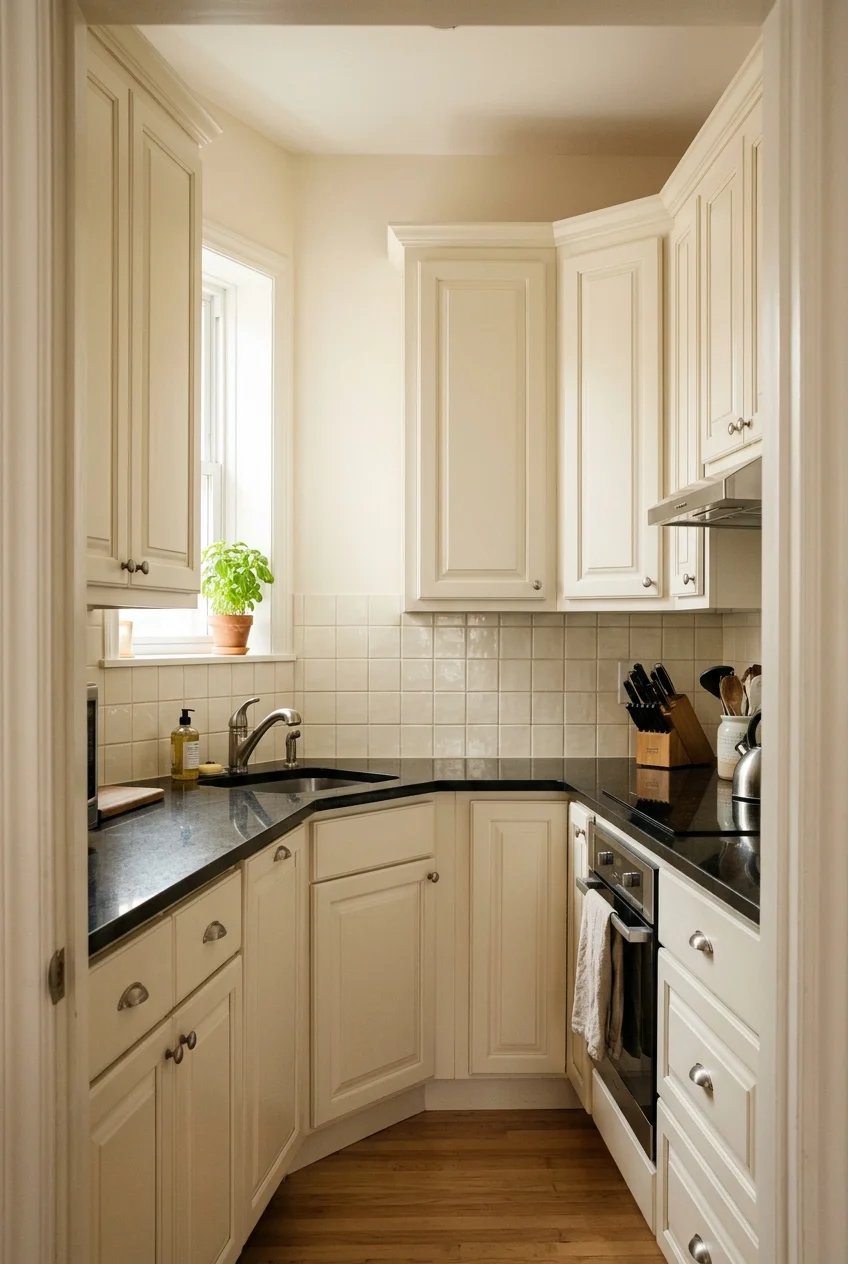
A black countertop can become a deliberate outline around creamy cabinets. Choose a white that relates to the backsplash rather than matching printer paper.
Hold painted sample boards beside the counter edge and existing trim. Check them under your evening bulbs before committing to a whole cabinet run.
If the tile is your next decision, these backsplash ideas for white cabinets can help you compare color and pattern before buying materials.
Setup note Before sanding older painted cabinets, address possible lead paint, especially in pre-1978 homes. EPA recommends a lead-safe certified contractor for this work.
2. Keep honey oak and simplify everything attached to it
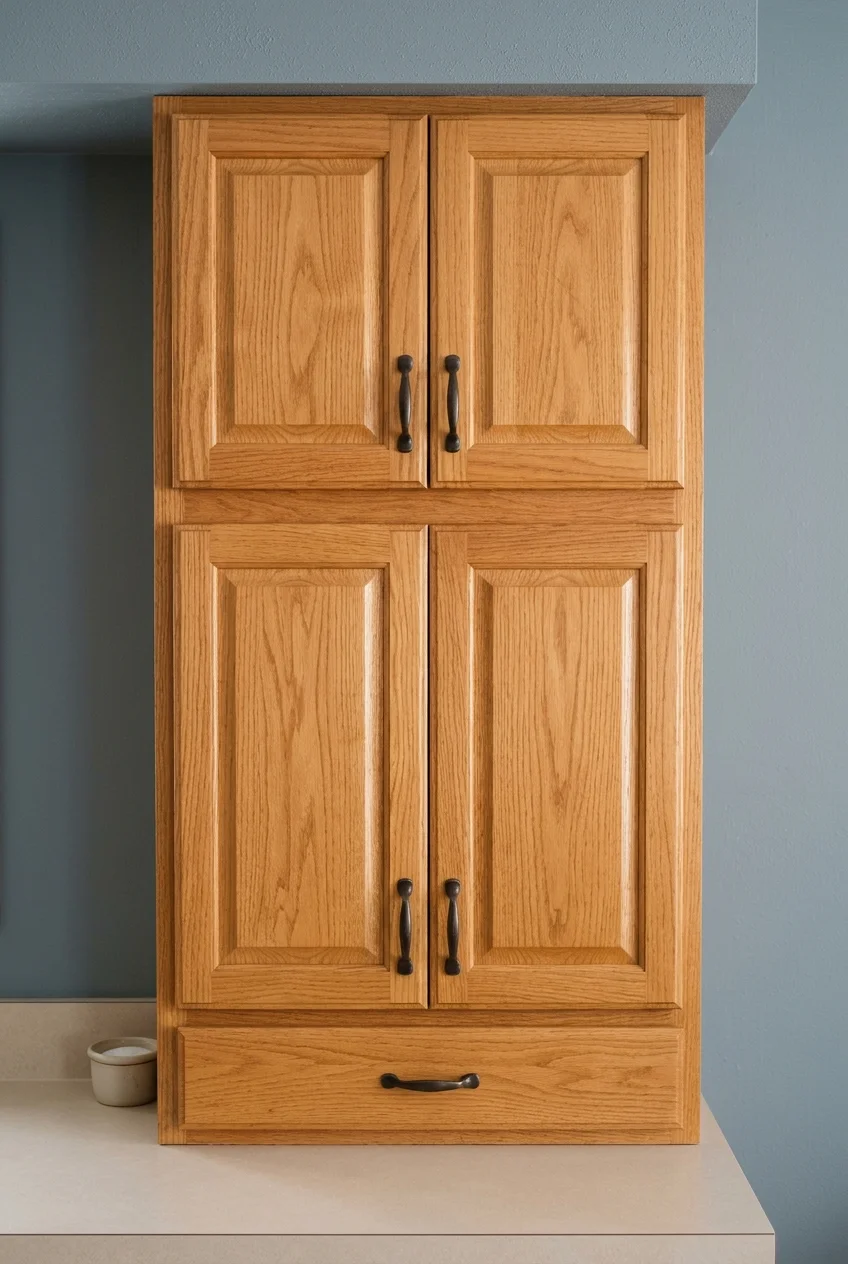
Strong wood grain can stay the main feature when the surrounding choices become quieter. Try plain pulls and a restrained wall color before covering sound oak.
Set one proposed handle against a door and compare its shape with the existing hinges. Too many ornate outlines can compete with an already active grain.
Clean according to the existing finish instructions, then assess the result. If the coating is failing, hardware alone will not restore its protection or appearance.
3. Split the room horizontally with green bases and pale uppers
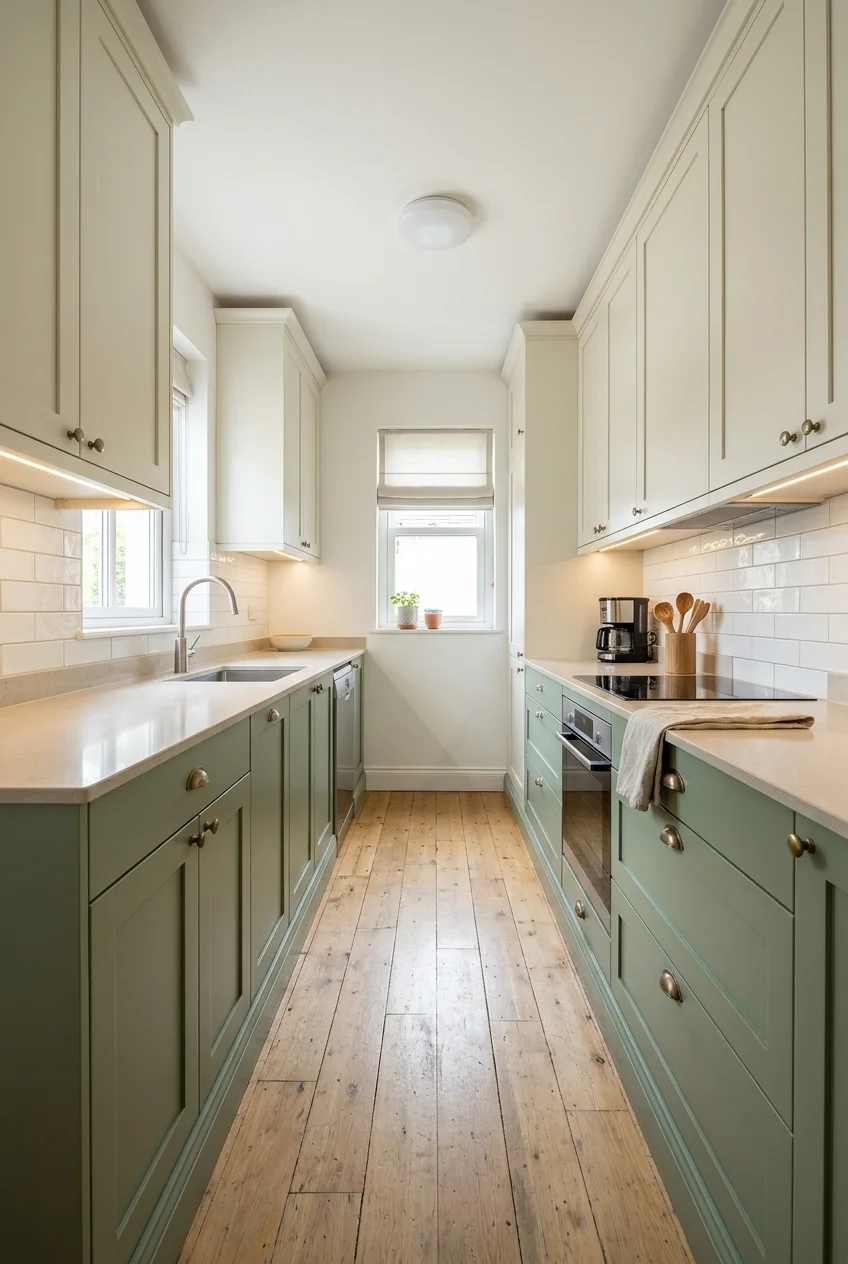
Putting color below the counter leaves the upper cabinets visually quieter. A muted green base run can connect to garden views without requiring botanical accessories.
Carry the lower color across drawer fronts and exposed base ends. Stop at a clear cabinet boundary so the division follows the joinery.
Compare both colors beside your counter in one sample arrangement. A pairing that looks balanced separately can feel disconnected when the countertop divides it.
4. Make the island the only painted accent
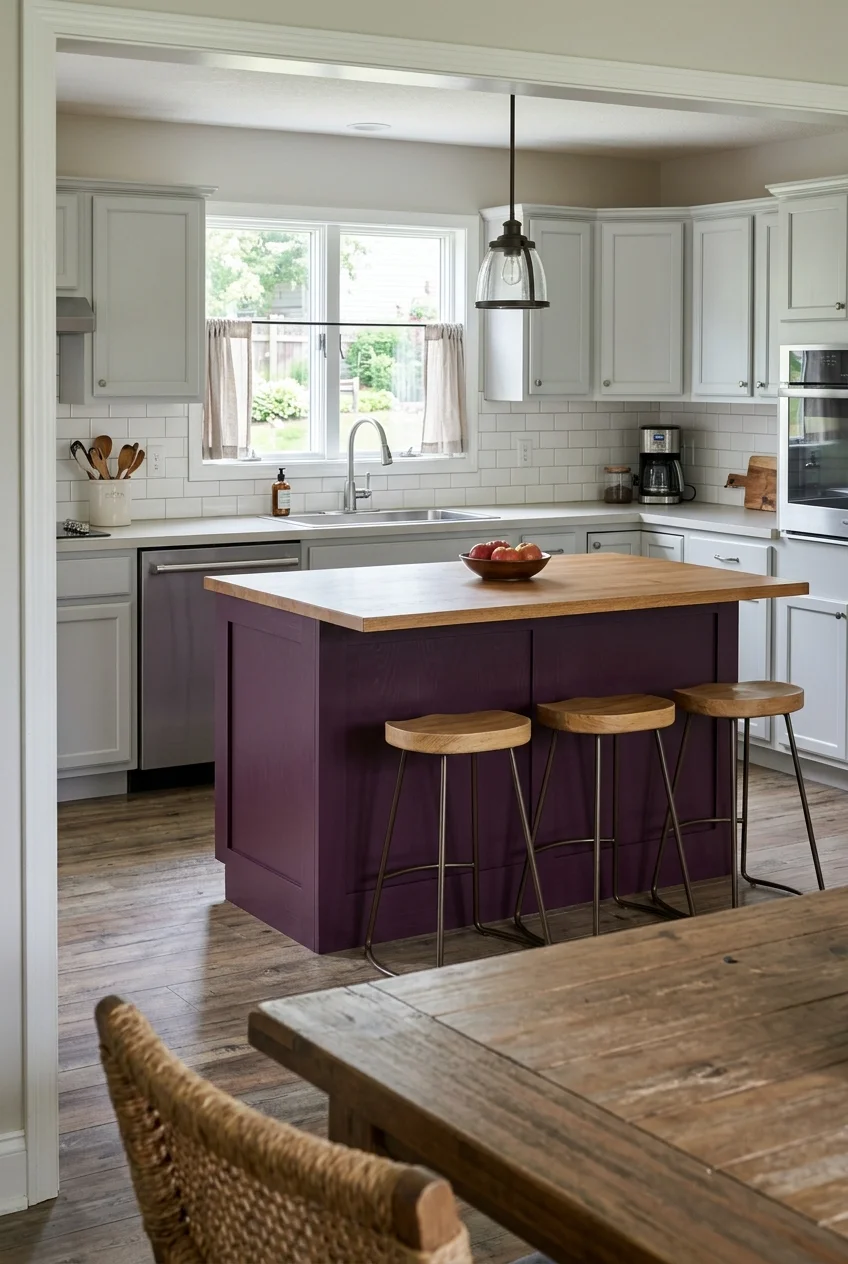
A separate island gives a strong color a natural stopping point. Keep perimeter cabinets as they are and choose one accent with enough contrast to register.
Paint the seating side and end panels as part of the same piece. Leaving those surfaces unmatched makes the change look unfinished from the living area.
Try a full-size sample on the island end before selecting the shade. It should work with both the kitchen finishes and nearby dining furniture.
5. Blend a tall pantry run into the wall color
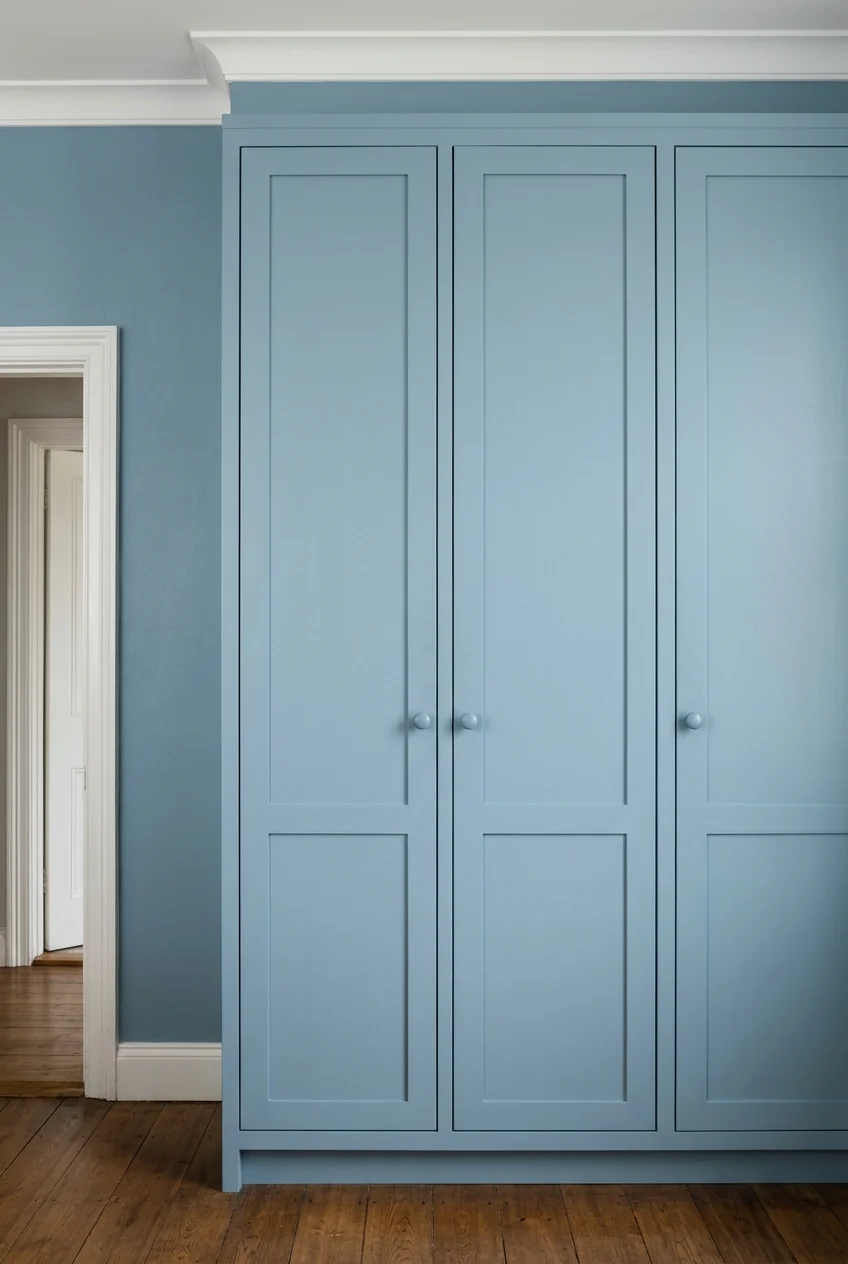
Matching a bank of tall cabinets to its surrounding wall reduces the patchwork of separate surfaces. The door outlines remain, but the whole elevation feels calmer.
Use a cabinet coating on the doors and an appropriate wall finish beside them. Similar color does not mean the same paint suits both surfaces.
6. Pair painted base cabinets with wood upper doors
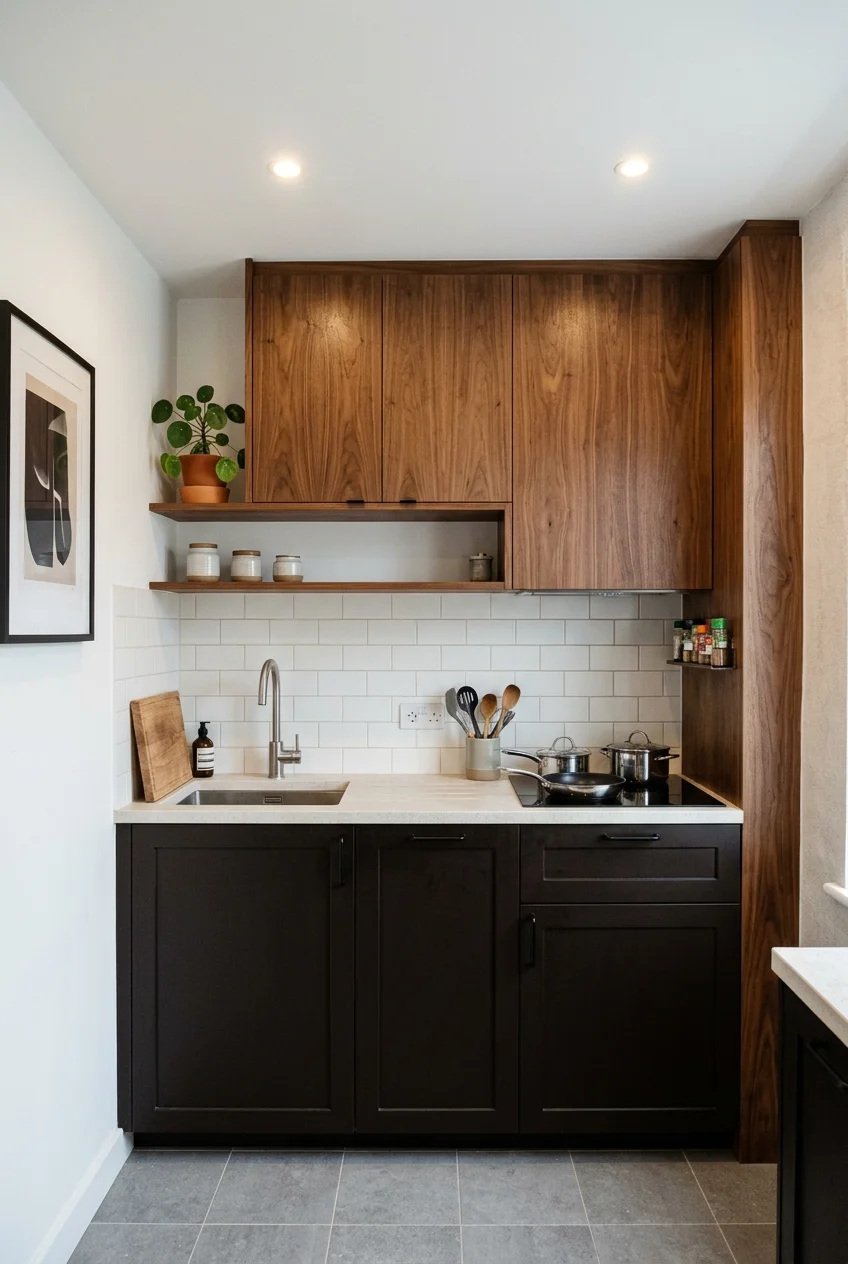
Keeping wood at eye level changes how a two-tone kitchen reads. Painted bases supply a solid foundation while the upper grain becomes the visible detail.
Choose a lower color already suggested by the wood, such as brown-black beneath walnut. Keep the hardware shape consistent to connect the two finishes.
Check exposed upper ends and filler strips before ordering replacement fronts. Matching only the doors can leave distracting fragments of the previous finish around them.
7. Give flat-front cabinets a butter-yellow retro direction
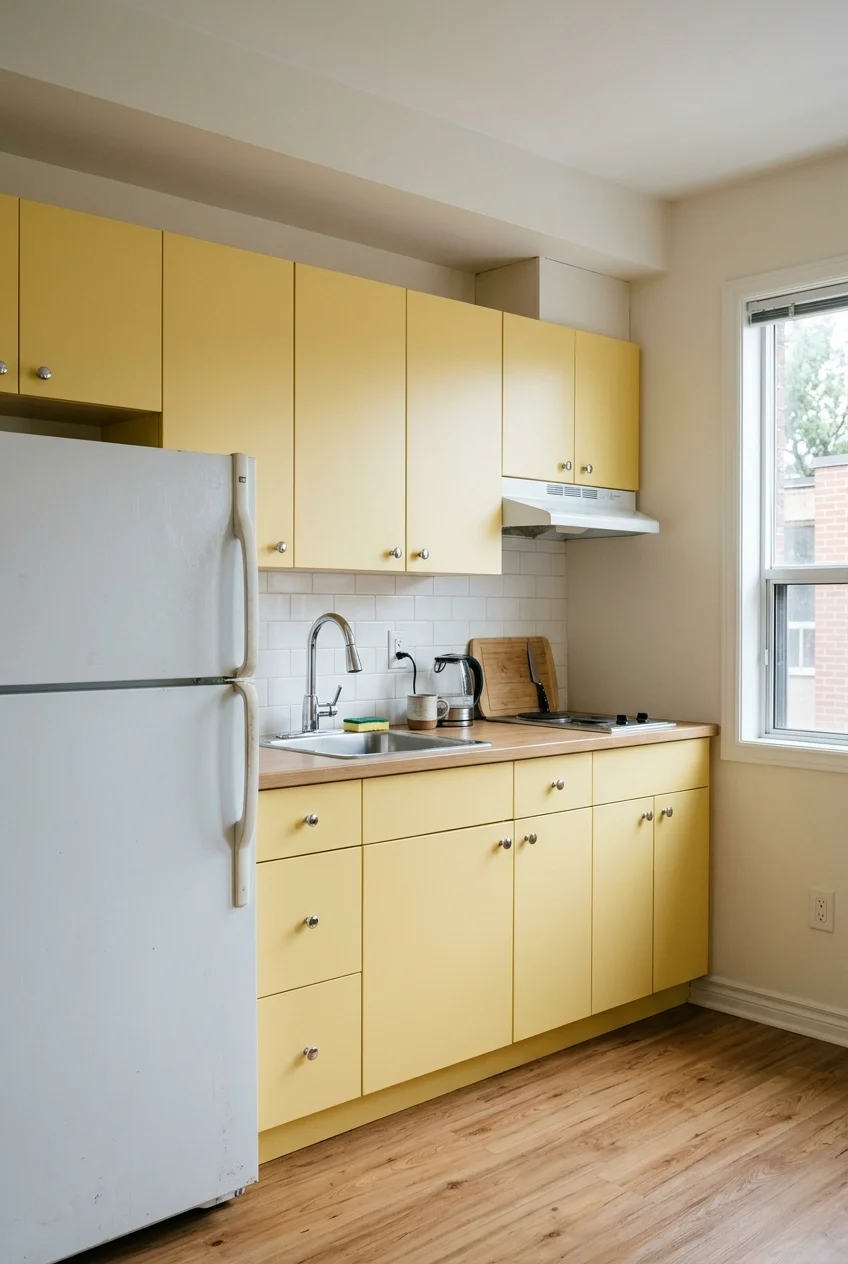
Pale yellow works especially clearly on simple doors with few competing lines. Pair it with compact chrome knobs to emphasize the flat fronts and rounded hardware.
Keep a sample beside any white appliances you are retaining. A yellow that looks creamy alone can appear much stronger against a bright refrigerator.
8. Paint the inside of one cupboard a contrasting color
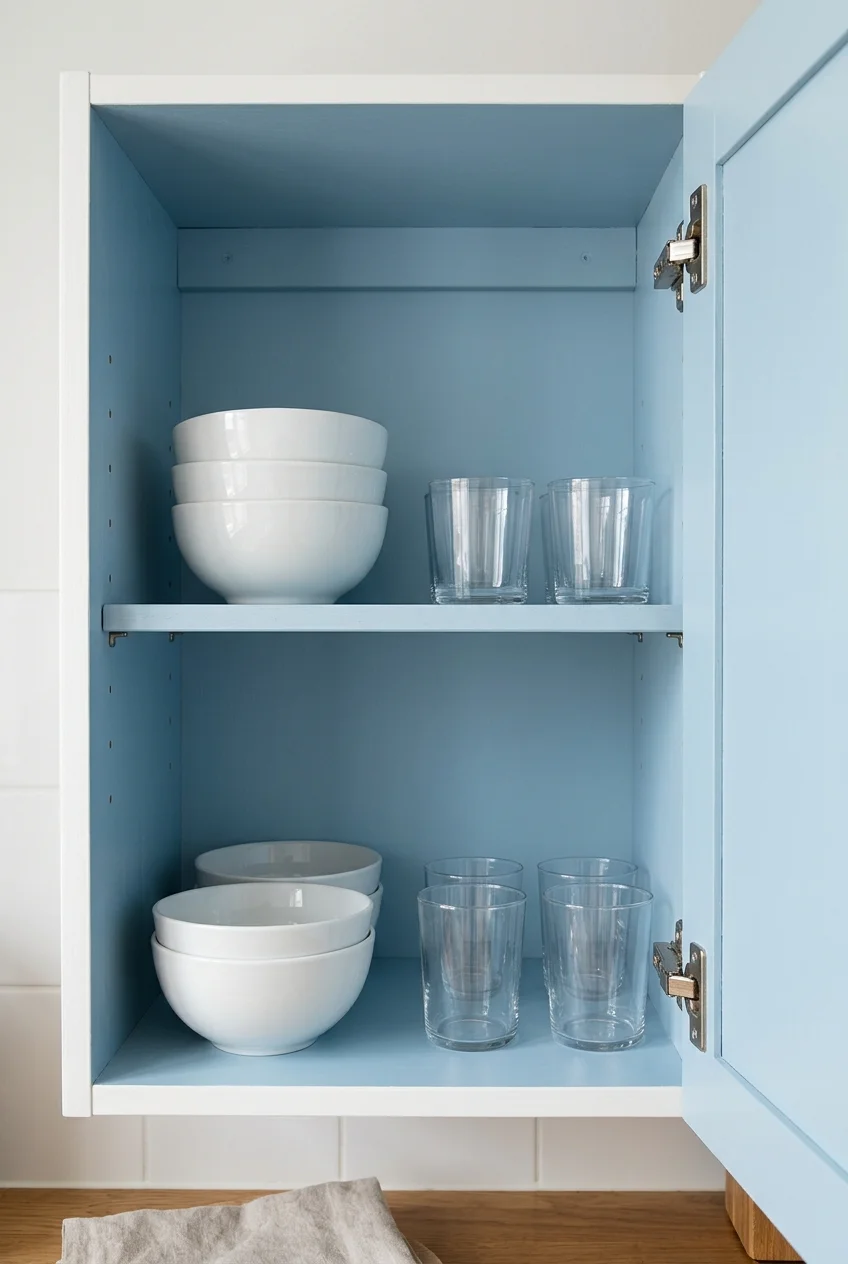
A colored interior makes opening an everyday cupboard part of the makeover. Try pale blue inside a white cabinet used for bowls and drinking glasses.
Remove adjustable shelves before painting so their edges and the inner corners receive an even finish. Keep shelf-pin holes clear and protect hinge mechanisms.
Use a coating system intended for the actual interior material. Follow its recoat and return-to-service instructions before putting shelves and dishes back in place.
Practical tip Paint a removable sample panel first and place it behind your dishes. White ceramics can make a pale color appear brighter than an empty cupboard suggests.
9. Use a glossy finish to emphasize smooth cabinet fronts
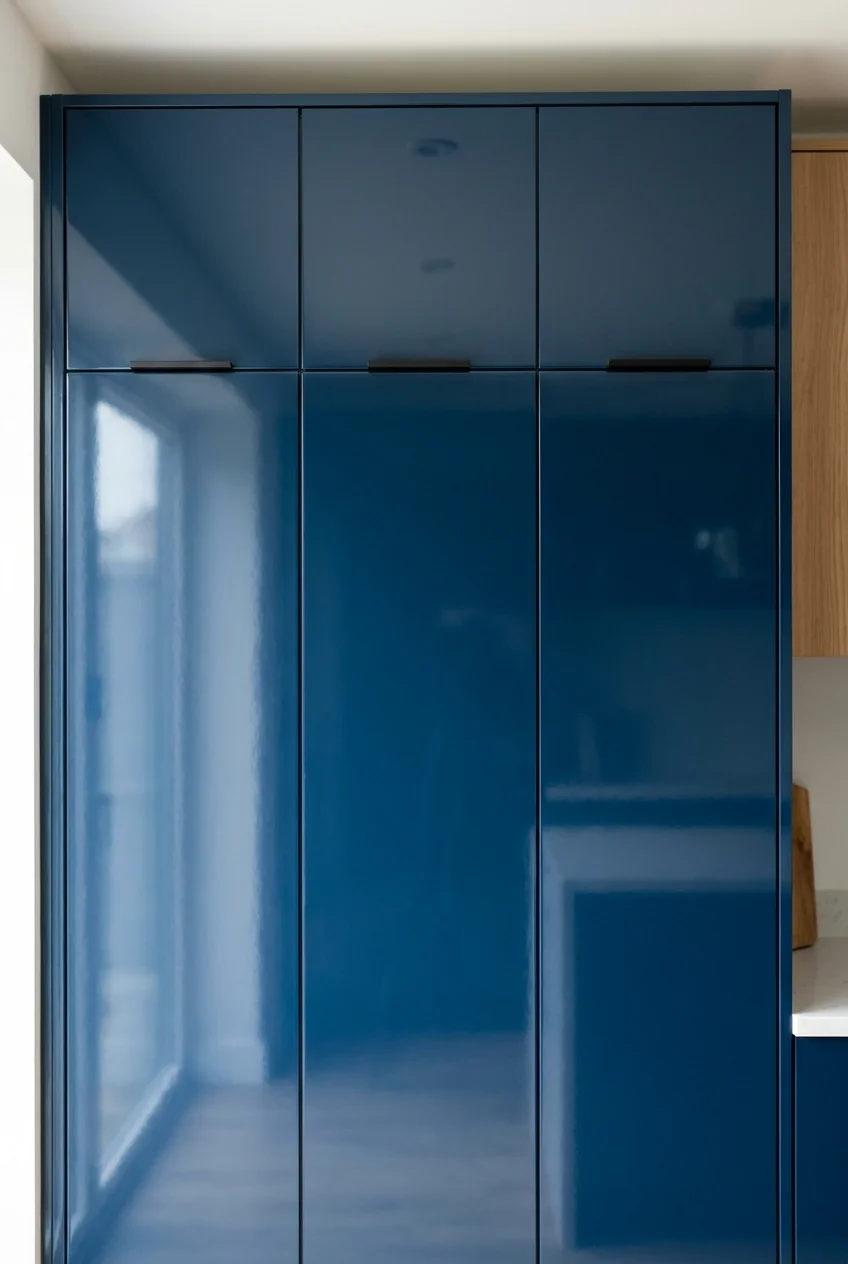
On broad slab fronts, reflected light can become the main detail. A glossy ink-blue finish creates a different effect from adding another decorative door profile.
Reflections reveal surface waviness, repairs, and brush marks. Request a finished sample from a cabinet refinisher before deciding whether your existing fronts suit the treatment.
Choose the sheen as part of a cabinet-rated coating system. A shinier wall paint is not automatically suitable for repeated handling around a kitchen.
10. Refinish good wood instead of hiding it
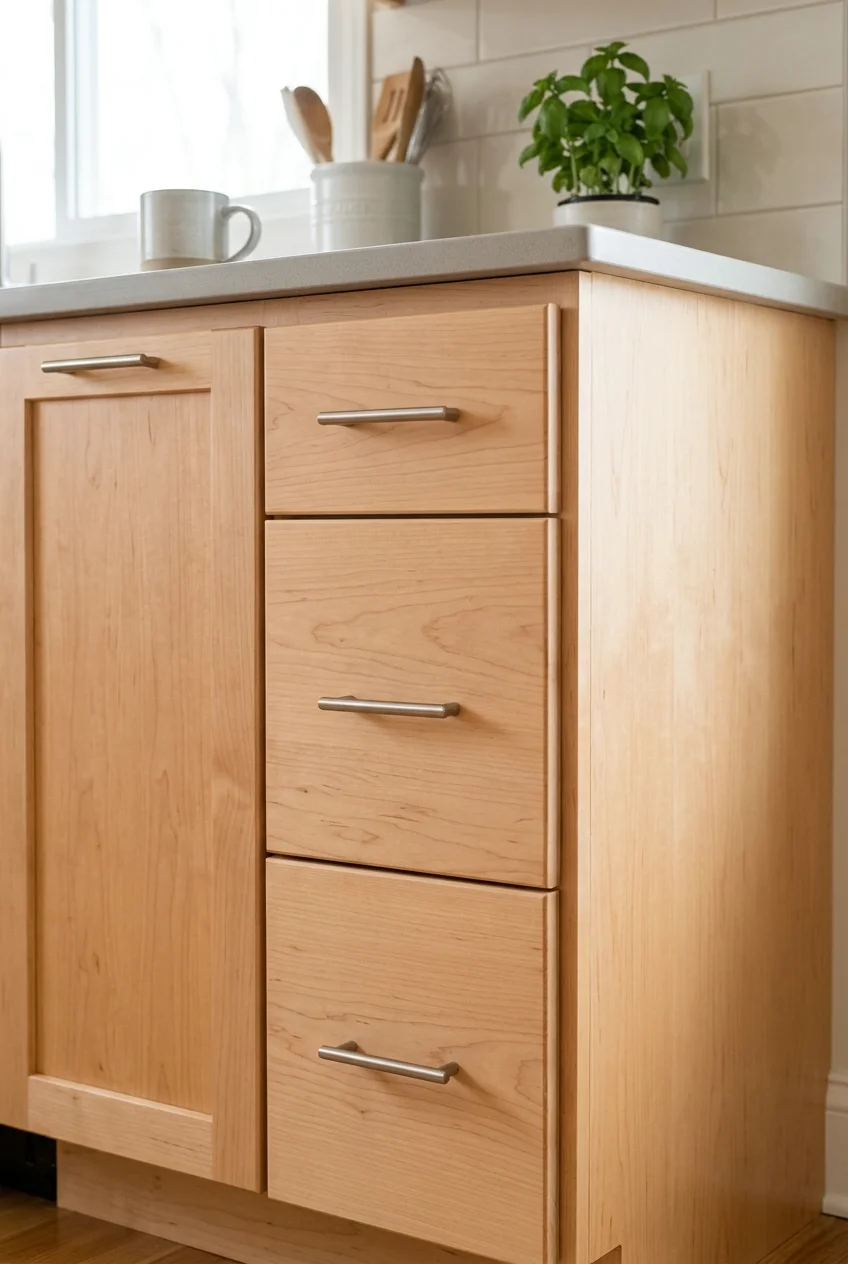
A clear or lightly tinted finish lets well-matched wood become the makeover. This suits cabinets whose construction and grain you like more than their current coating.
Inspect a concealed area to establish what is solid wood, thin veneer, or a printed surface. Those materials cannot all tolerate the same preparation.
- Identify the existing finish and test the proposed refinishing system on a hidden area.
- Remove and label doors and hardware before the main work.
- Prepare and finish a sample door before treating the remaining cabinets.
- Let the chosen finish reach its specified return-to-service stage before reassembly.
Changing to a much lighter wood tone may require removing the old finish and stain. Get a refinisher to assess this before buying stripping products.
Follow the finishing product instructions for ventilation, protective equipment, and waste disposal. Do not assume a clear coating is harmless because it leaves the wood visible.
Watch for Painted doors may conceal mixed woods or previous repairs. If the test area looks patchy, a painted finish or replacement fronts may be the better choice.
11. Replace ornate doors with narrow-frame Shaker fronts
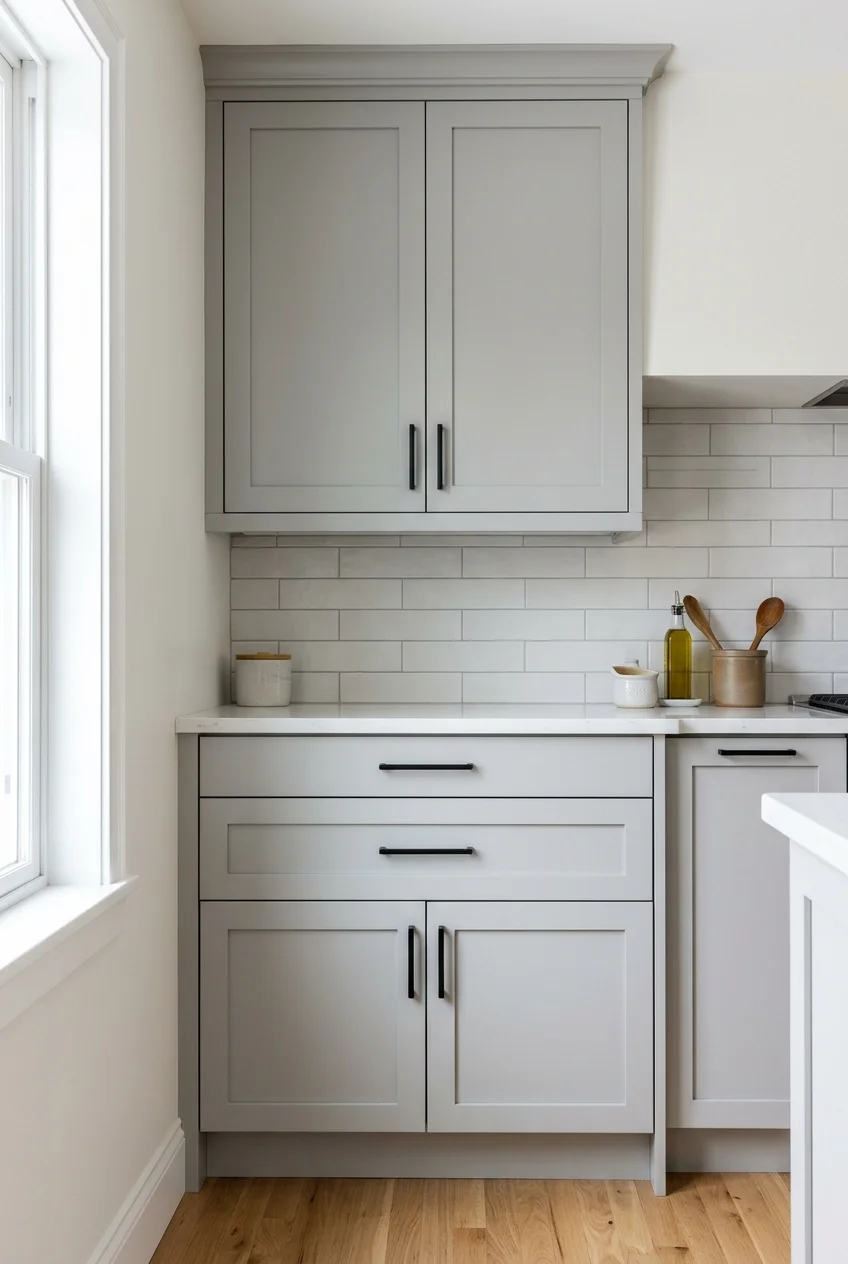
A slim frame leaves more flat center panel visible than a chunky surround. It can simplify a kitchen while keeping more detail than a slab door.
Order from measurements and overlay requirements for your actual cabinets. Copying the old door width without checking its fit can preserve problems you hoped to fix.
- Confirm face-frame or frameless construction.
- Record each opening and required door overlay.
- Check hinge boring, door thickness, and corner clearance.
- Approve one finished sample before ordering the full set.
Coordinate drawer fronts with the available rail width. A very shallow drawer may look cleaner as a slab than as a squeezed miniature Shaker frame.
12. Switch to slab doors for an uninterrupted cabinet wall
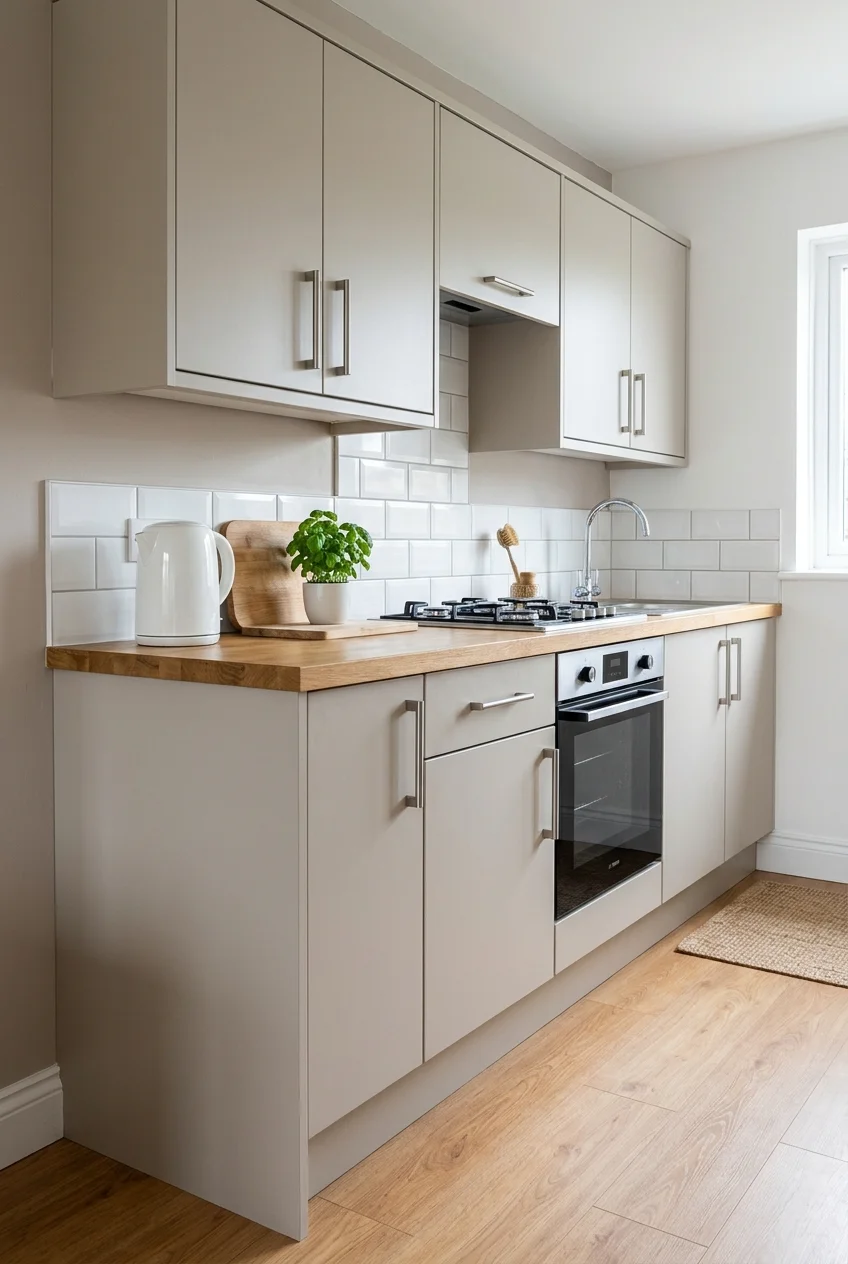
Flat replacement fronts remove the visual pattern of raised panels. They work well when you want the cabinet run to read as broad, simple surfaces.
Plan all visible edges as carefully as the front faces. Matching edge banding and end panels matter more when there is little molding to distract attention.
Keep the existing cabinet construction in mind when selecting hinges. Slab fronts alone do not convert a framed kitchen into a frameless cabinet system.
A sample door lets you check how fingerprints, reflections, and the edge finish look together. Handle it before ordering an entire kitchen of fronts.
13. Add beadboard detail inside a few recessed panels
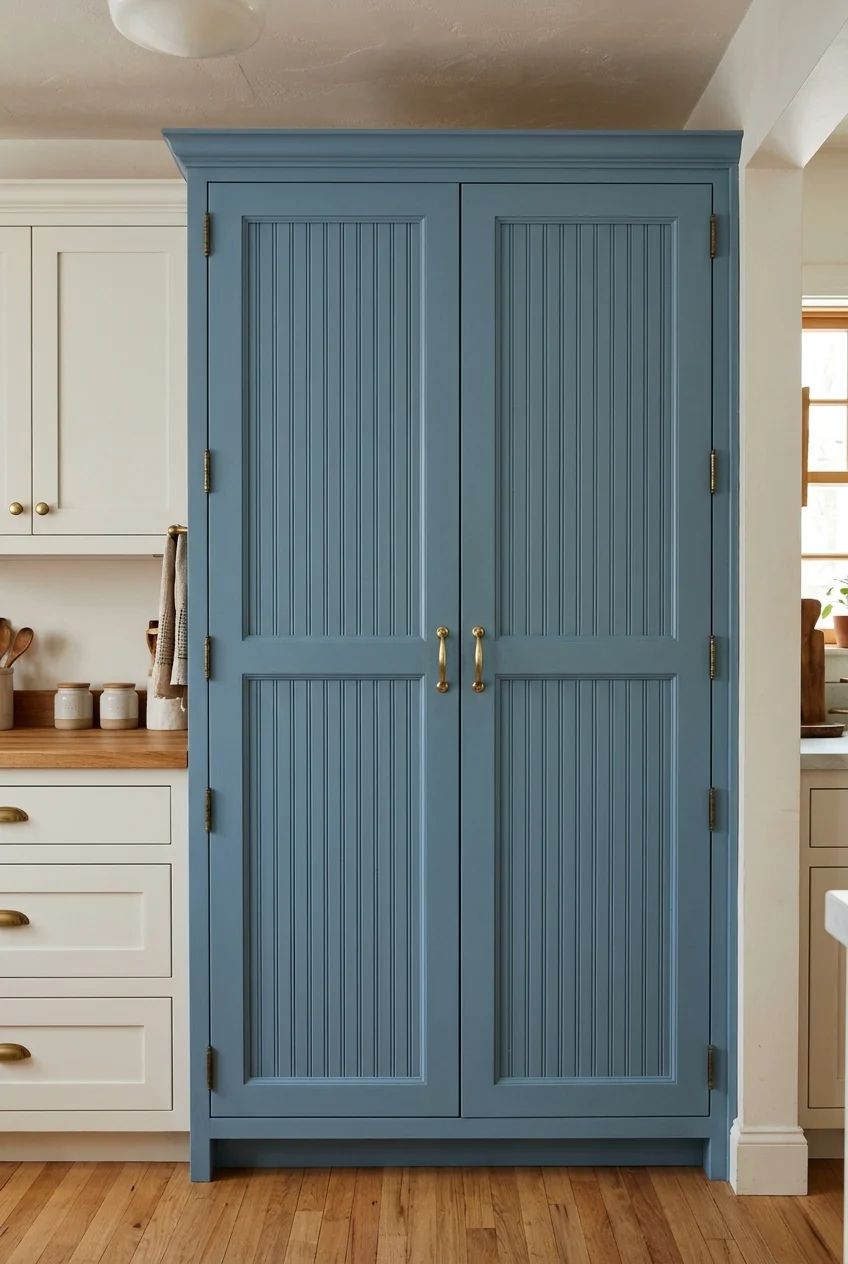
Narrow vertical grooves give plain recessed doors a stronger rhythm. Limit the detail to one cabinet bank so the kitchen does not become visually striped.
Check whether an insert can sit securely within the recess without crowding the frame or handle screws. Added material changes the door thickness and weight.
For a cleaner result, order doors made with a beadboard center rather than attaching heavy boards over existing panels. Keep the finished grooves easy to wipe.
14. Reserve fluted fronts for an island or one drawer bank
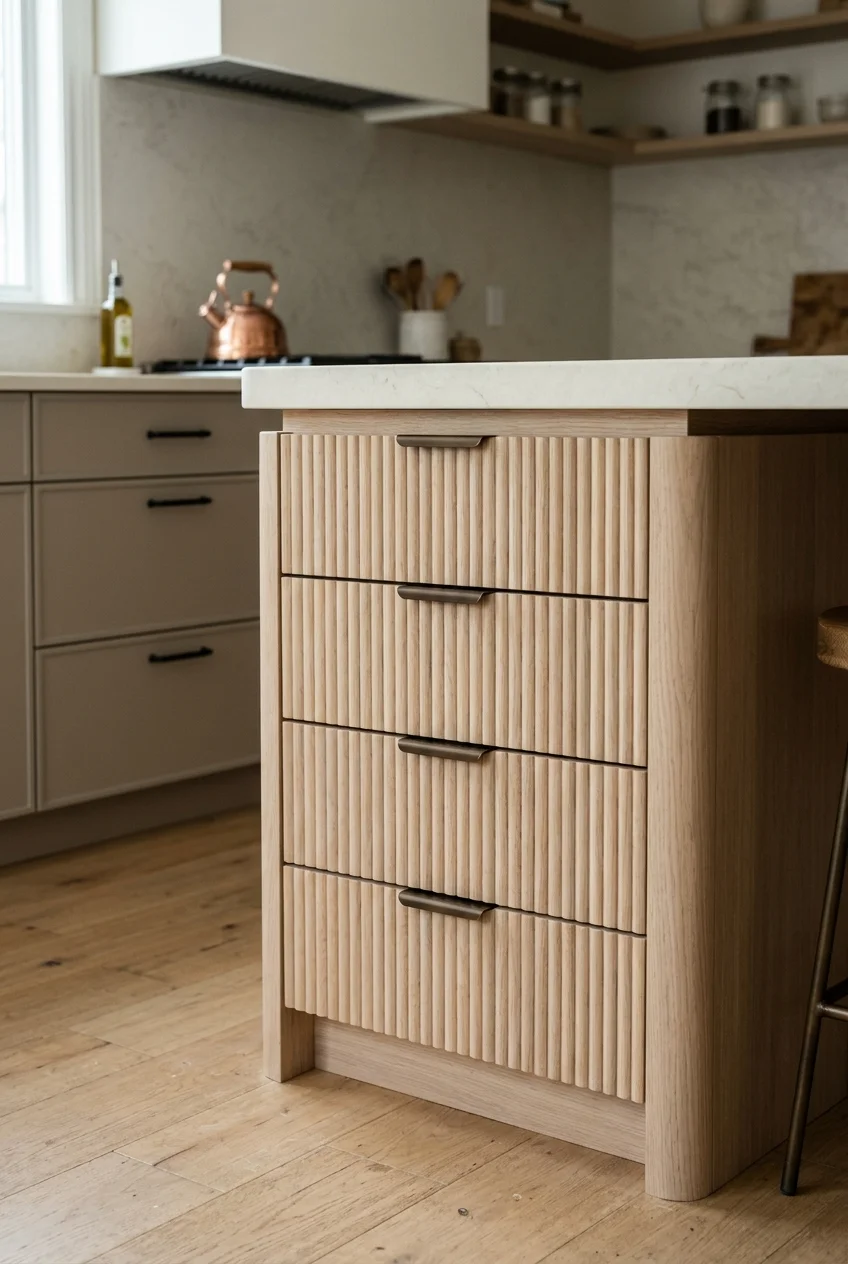
Rounded vertical fluting casts small shadows that give a cabinet surface depth. Using it on one focal bank keeps the detail distinct from surrounding plain fronts.
Choose purpose-made fronts or discuss the added thickness with a cabinetmaker. Applied strips can interfere with handles, adjacent doors, and the clearance below an overhang.
Try cleaning a sample groove before ordering. Closely spaced ridges near food preparation areas ask more of routine wiping than a flat painted panel.
15. Use reeded glass where you want softened visibility
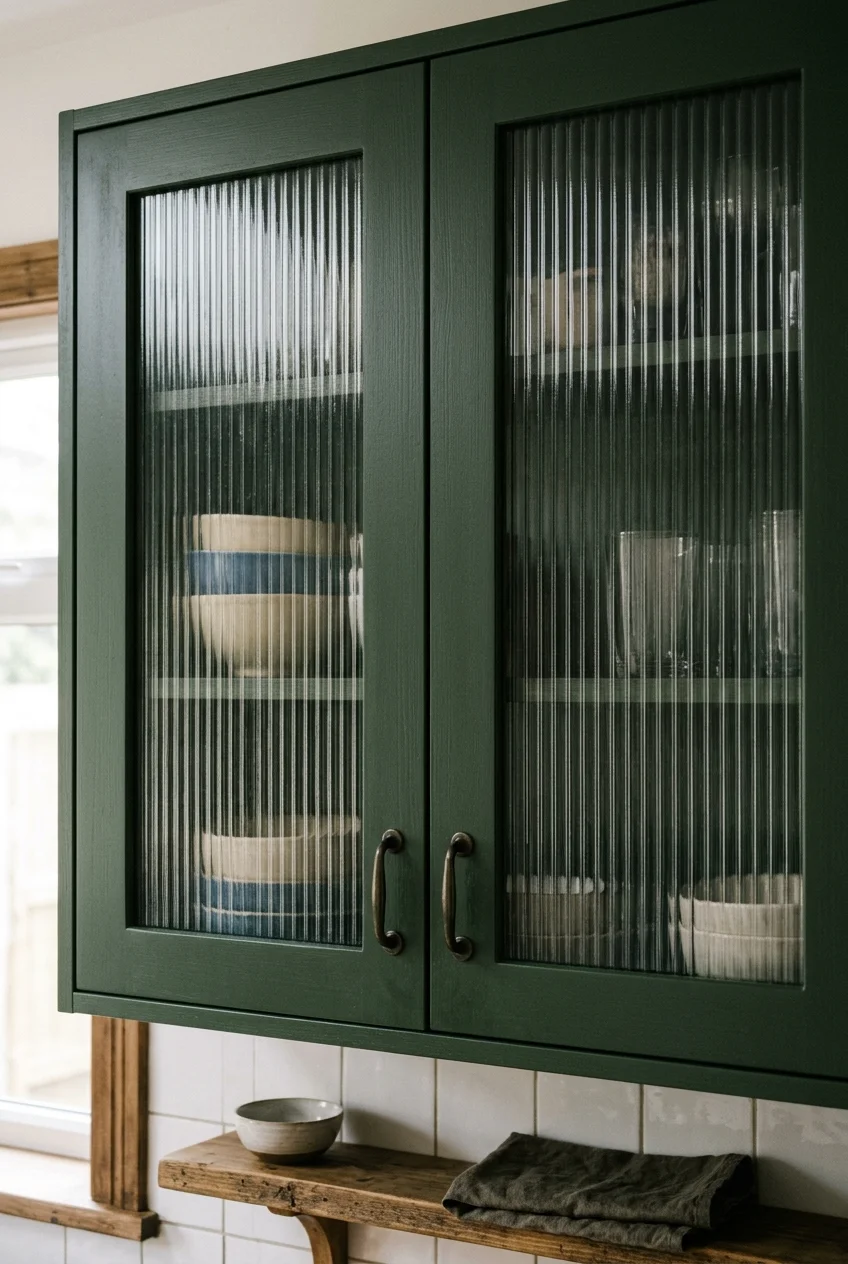
Vertical glass texture makes the contents less sharply defined while retaining a sense of depth. It suits one upper pair holding ordinary glasses and dishes.
Reeded glass blurs rather than completely conceals. Place your actual cupboard contents behind a sample before treating it as a solution for visually busy storage.
- Ask the door supplier which glazing thickness and type its frame accepts.
- Confirm the retaining method and hinge capacity.
- Keep the rib direction consistent across neighboring panes.
Have a cabinetmaker or glazier assess existing doors before altering their panels. A molded or fragile door may be unsuitable for a glass conversion.
16. Turn one upper pair into a clear-glass display
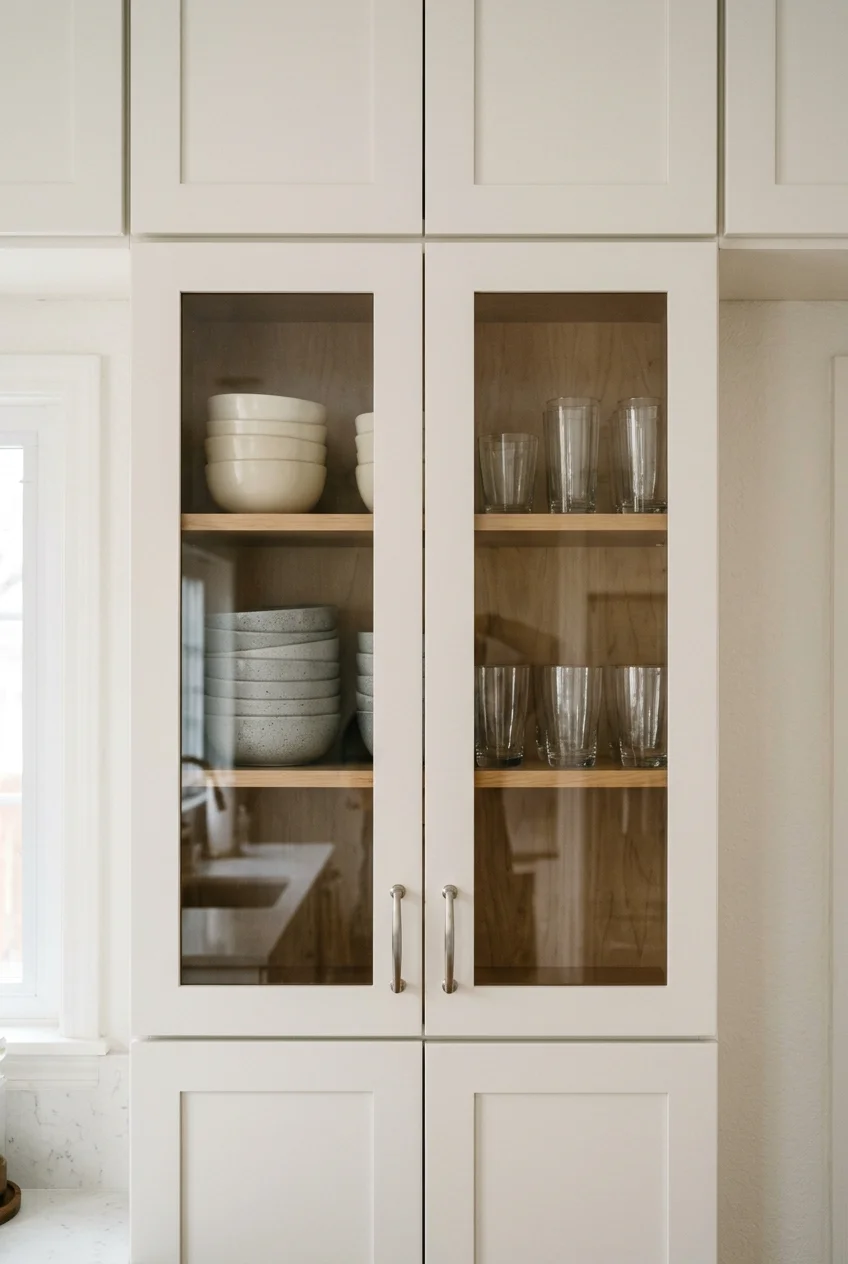
Clear glass makes the shelf arrangement part of the kitchen elevation. Choose a cupboard where the things you use already form a manageable display.
Group bowls by shape and give taller pieces their own shelf height. Leaving space around useful objects looks more convincing than filling every inch with decor.
Order properly glazed doors or have suitable existing frames assessed professionally. Glass weight, edge protection, and secure retention matter more than copying a photographed door.
If you prefer to store mixed packaging behind that cupboard, keep its solid doors. A display conversion is useful only when the visible contents suit you.
17. Fit perforated metal panels into a utility cupboard
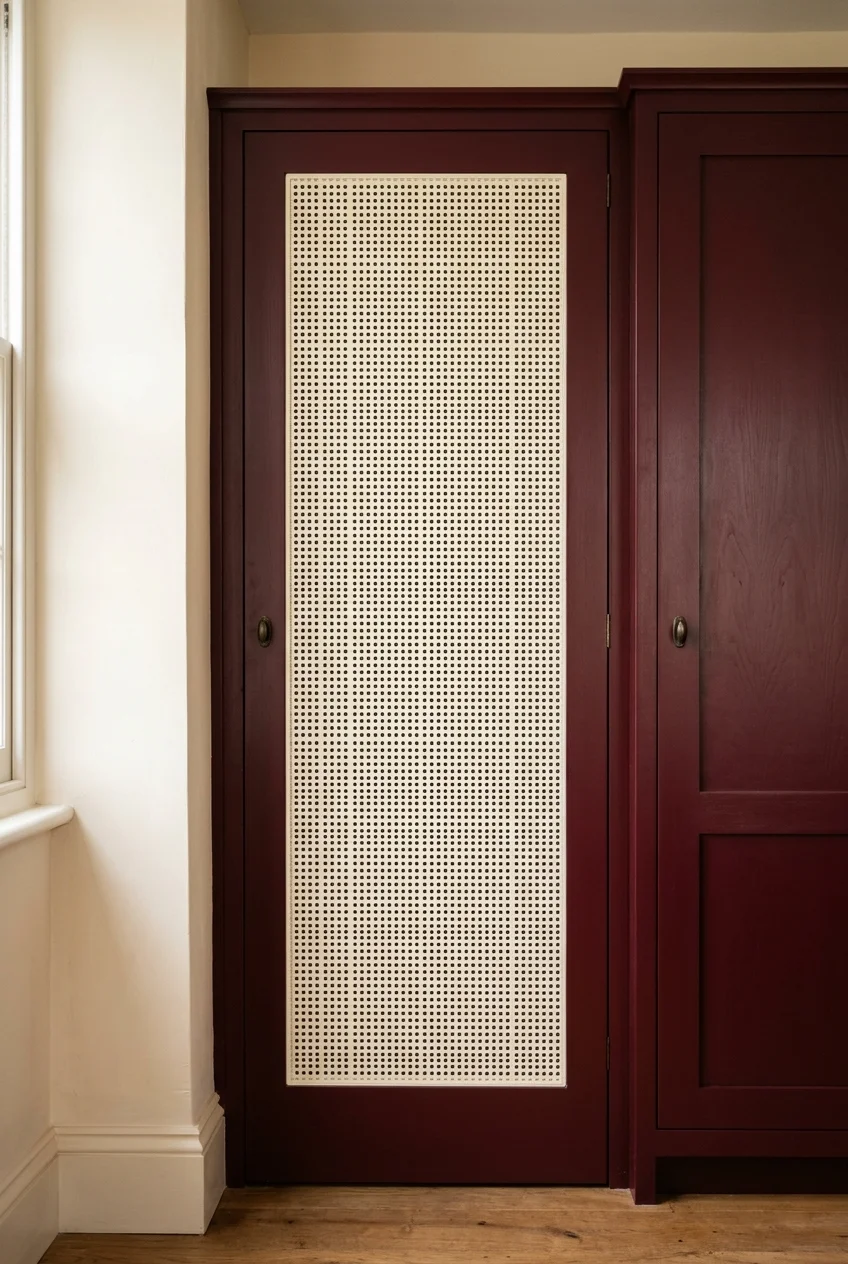
A finely perforated metal insert gives a pantry door an industrial detail without using transparent glass. Choose a pattern small enough to suit the door frame.
Have panels cut and edged for the opening, then securely retained. Avoid exposed sharp edges and check the added weight against the hinges and frame.
Treat the holes as a visual texture, not proof of ventilation capacity. Any equipment behind the door still needs the clearances required by its manufacturer.
18. Give a dry pantry door a framed cane insert
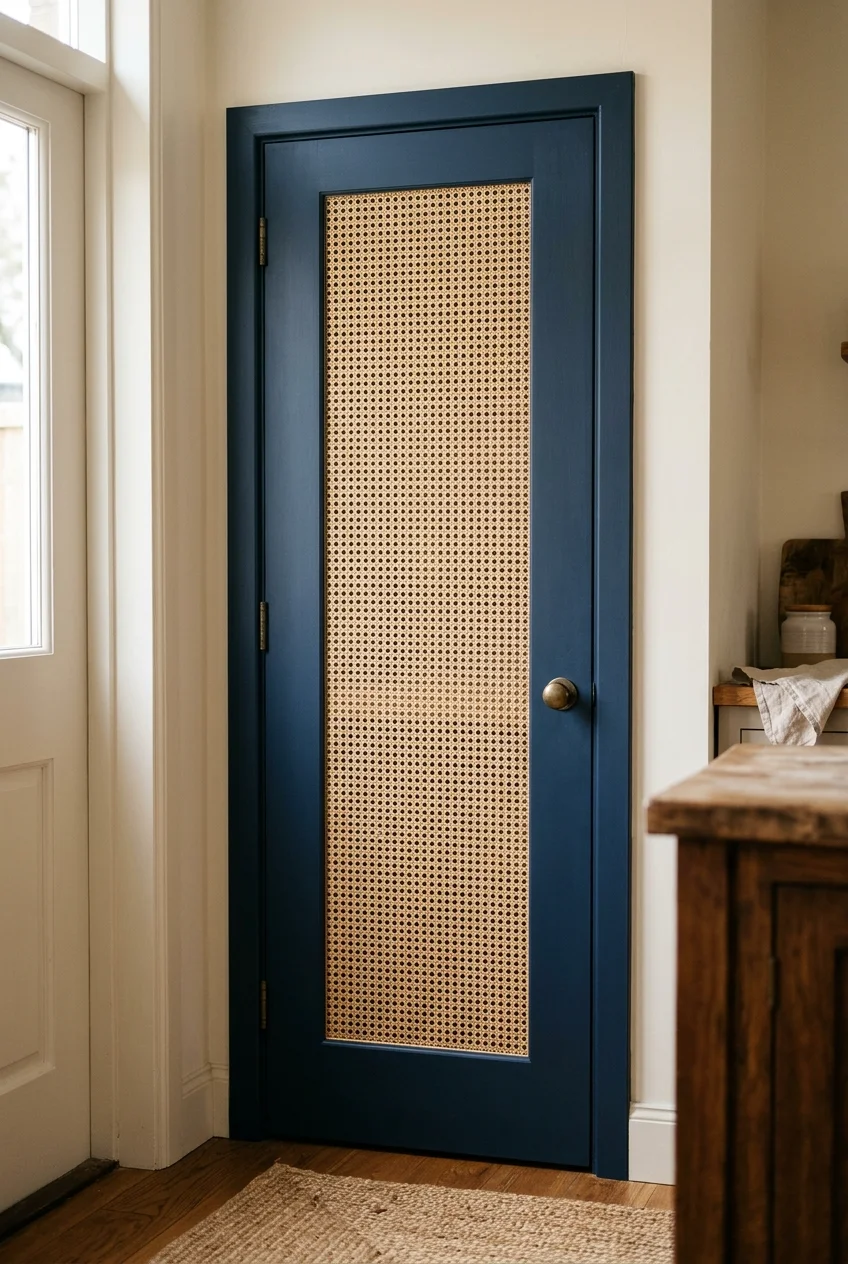
Woven cane introduces a lighter texture than a solid panel. A dry pantry door away from splashes is a more practical location than the sink base.
Choose a door designed to hold the insert or ask a cabinetmaker to assess the frame. The weave needs secure retention without exposed fragile edges.
Keep frequently splashed food and cleaning supplies behind wipeable solid fronts. If you want the woven look with less exposure, use a small upper accent door.
19. Reface sound cabinet boxes in a coordinated wood veneer
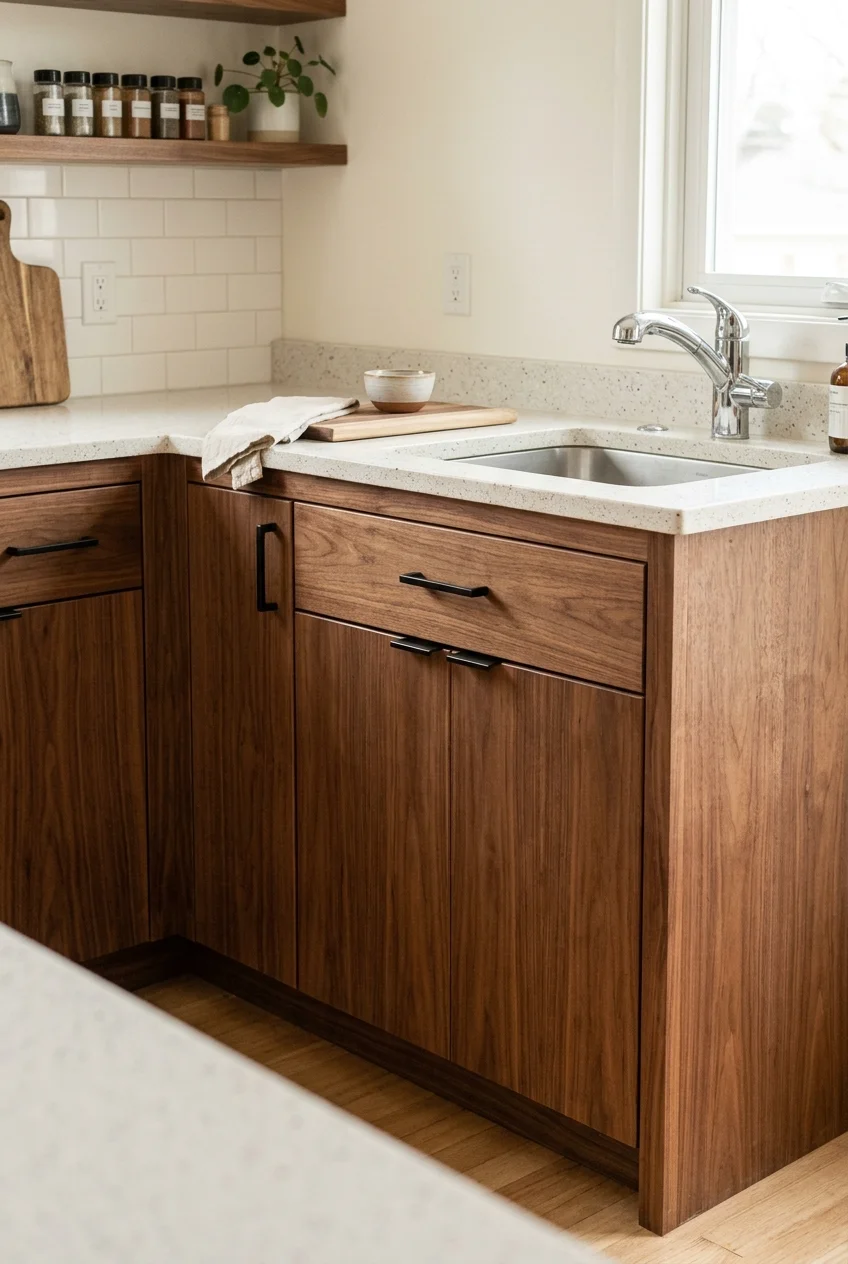
Refacing changes the visible skin of existing cabinets while retaining their layout. New walnut fronts and matching veneer can make mismatched finishes read as one system.
Start with the condition of the boxes, not a veneer sample. Swollen panels, loose joints, and an unsuitable layout deserve attention before decorative surfaces are ordered.
- Map face frames, exposed cabinet ends, fillers, and trim.
- Check whether the current door shapes can be refaced or need replacement.
- Approve grain direction and a finish sample together.
- Account for extra surface thickness at corners and neighboring doors.
Smooth, clean substrates matter because bumps can show through thin veneer. Follow the veneer system instructions for preparation, adhesive pressure, edge trimming, and finishing.
Raised-panel doors are not simple flat wrapping surfaces. Replacement doors may be the sensible partner for veneered frames rather than an attempt to cover every contour.
Price the complete visible elevation, including end panels and moldings. A small sheet price tells you little about the work required to finish a whole kitchen.
Watch for Refacing keeps the existing footprint. If poor access or a cramped layout is your main frustration, new surfaces alone will leave that problem in place.
20. Wrap smooth slab fronts with cabinet-suitable film
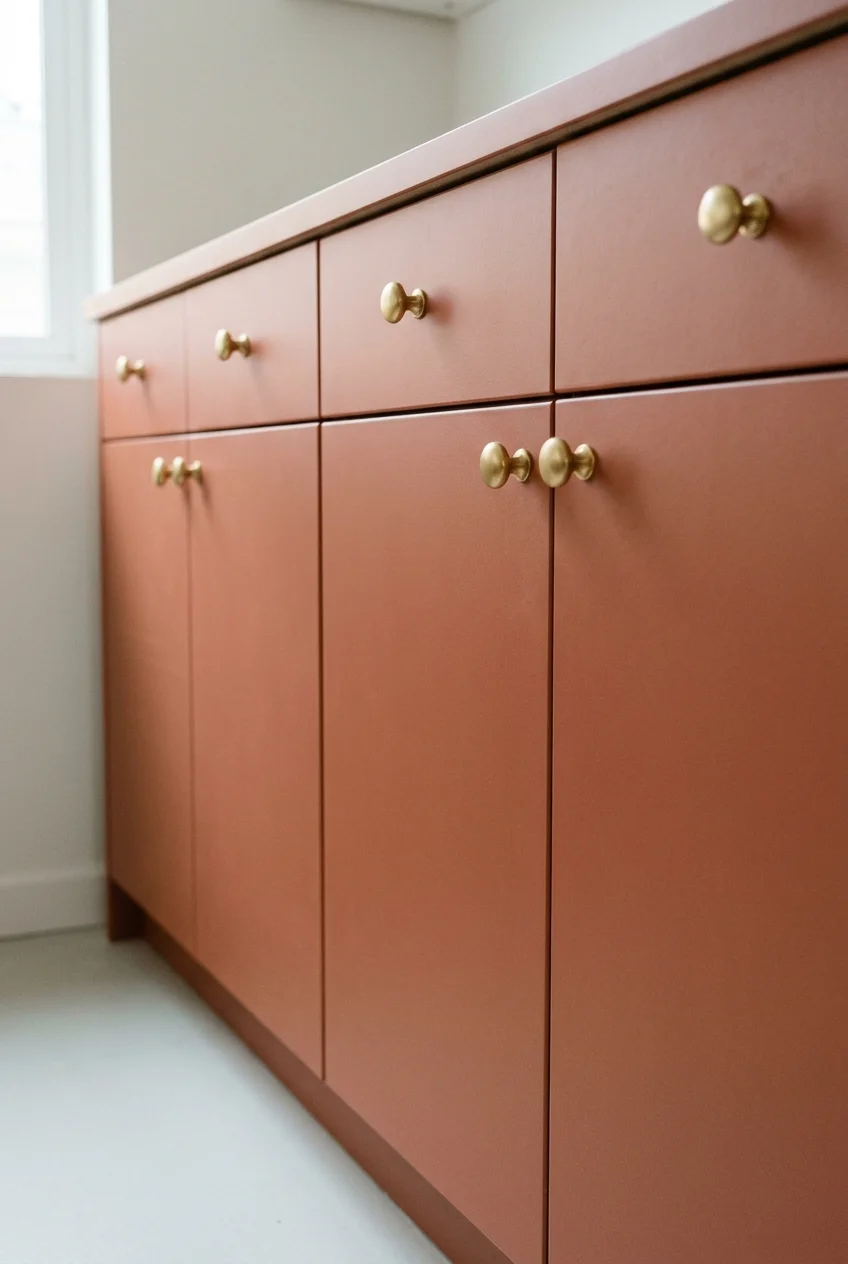
A solid-color furniture film can change intact flat fronts without introducing a new door profile. Smooth slab doors offer a simpler starting point than ornate raised panels.
Check the film instructions for the actual surface, edge treatment, and heat exposure. Ordinary decorative film is not a substitute for appliance heat shields or countertop material.
- Obtain permission if you rent, including agreement about removal and possible finish damage.
- Test adhesion and removal in a hidden spot.
- Clean and dry the approved surface before applying a sample door.
- Check corners, handle openings, and door movement before wrapping the remaining fronts.
Keep realistic expectations about reversibility. Adhesive can lift weak coatings or leave residue, so a removable label does not guarantee a damage-free rental makeover.
Choose a finish you can repeat across visible edges and fillers. If those surfaces cannot accept the film, their original color remains part of the design.
21. Finish upper cabinets with a proportionate crown molding
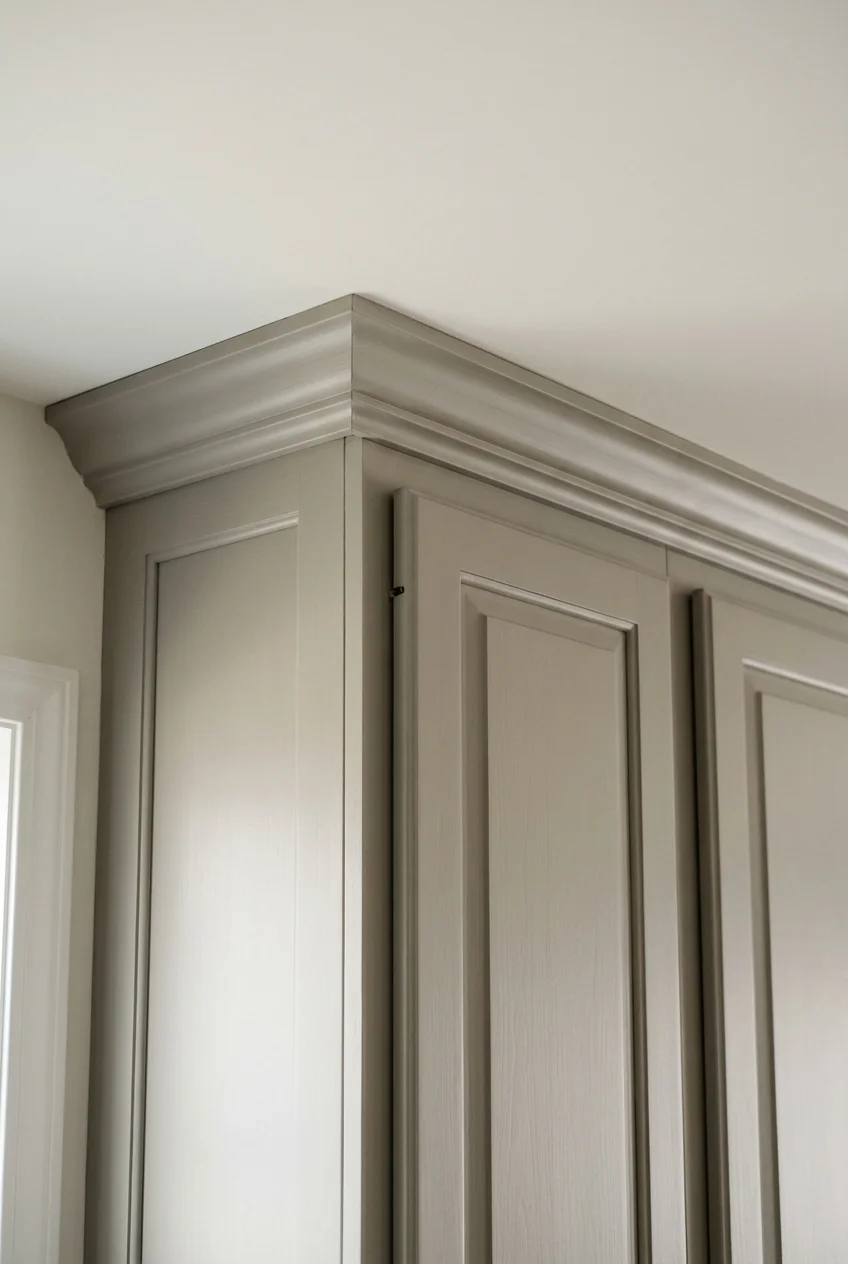
A modest crown profile connects traditional doors to the top of the cabinet run. Match its scale to the doors rather than choosing the deepest molding available.
Measure the available height and check ceiling irregularities before selecting the profile. A full-size sample held in place reveals whether the trim crowds the room.
Provide secure backing and maintain door clearance at the top corners. If you dislike ornate detail, a plain top trim can finish the edge more quietly.
22. Close a shallow ceiling gap with a simple painted infill
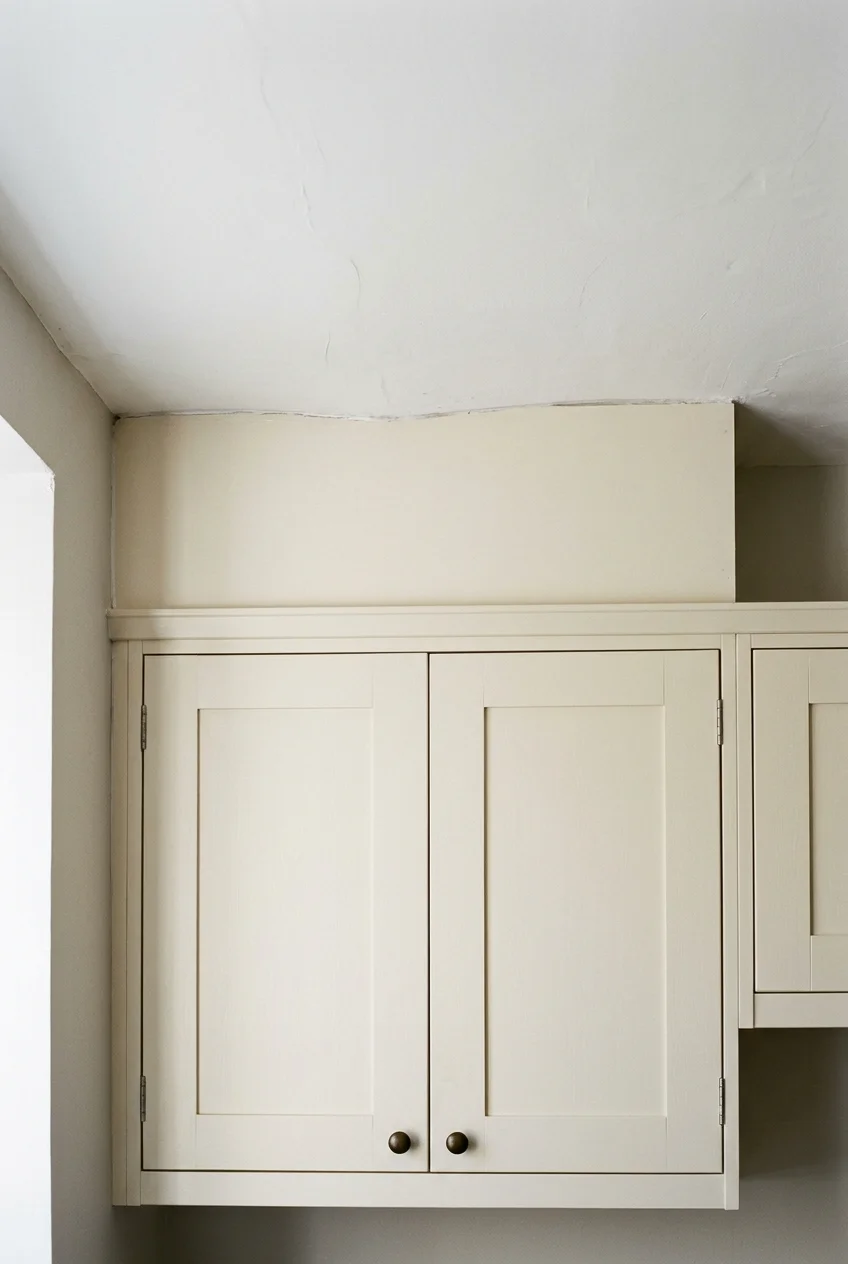
A narrow gap above cabinets can look more deliberate when closed with a plain infill. Painting it to match creates a quieter line than oversized decorative trim.
Inspect the space for vents, wiring access, and other services before enclosing it. Have the supporting framework planned so the infill does not depend on thin cabinet backs.
A scribed top edge can accommodate an uneven ceiling. Test the proportions first; a large blank band may look heavier than leaving a genuinely tall gap open.
Setup note Keep required access panels and ventilation paths usable. A cabinet top that looks like empty space may still serve equipment or concealed building services.
23. Add a usable row of stacked upper cabinets
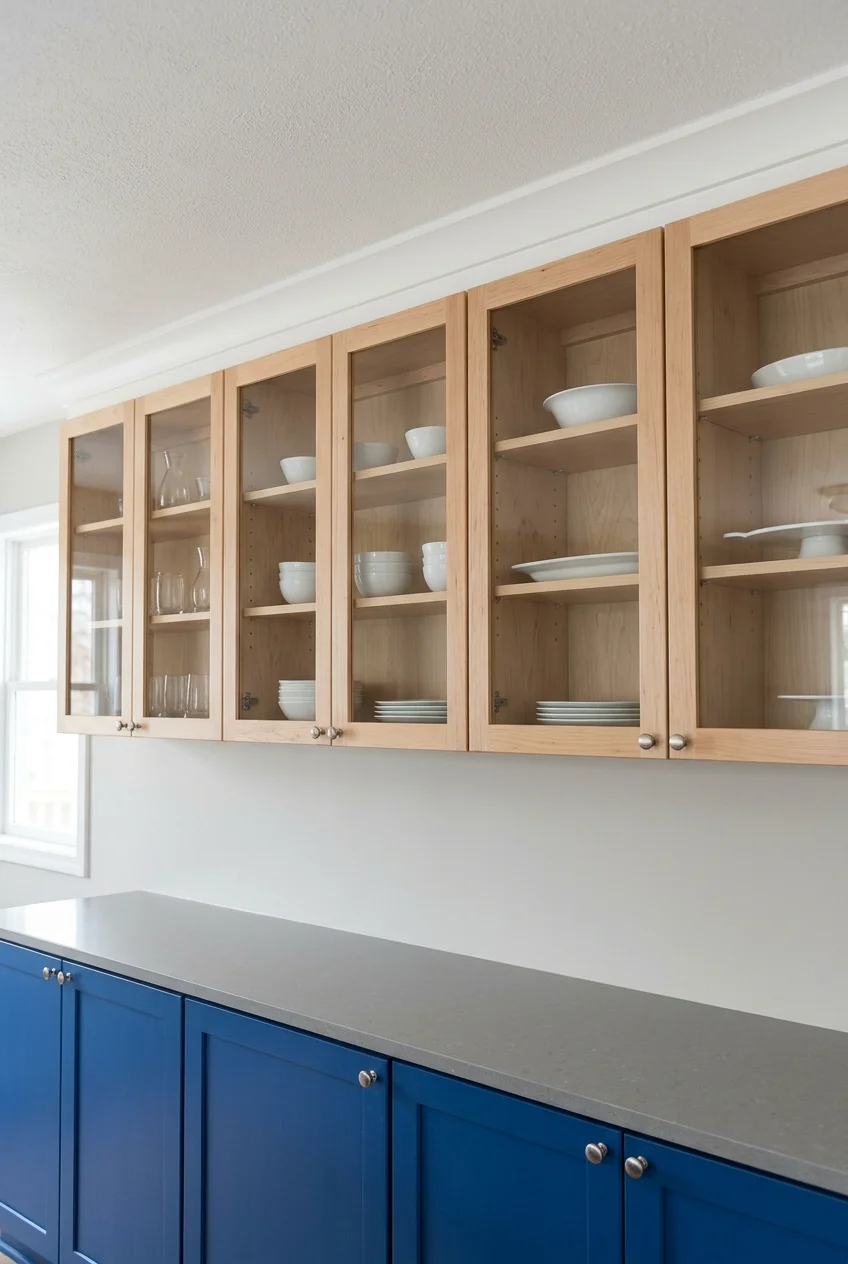
Where the gap is substantial, real upper boxes can add enclosed storage instead of a blank panel. Treat this as a cabinet installation project with new doors.
Check ceiling height, wall support, and how the new units will connect to the existing installation. Do not assume the old cabinet tops can carry the addition.
- Measure the space above every cabinet, not just one end.
- Plan wall fastening and support with the installer.
- Check crown, ceiling, and door swing clearances.
- Choose items you can retrieve without climbing on the counter.
Use the highest storage for lightweight, infrequently needed items. If reaching it safely is awkward, a decorative infill or shorter cabinet run may suit you better.
Match the new doors to the lower profiles or make the difference intentional. A small glass-front top row can look lighter than another tall solid band.
24. Frame an exposed cabinet end like a finished door
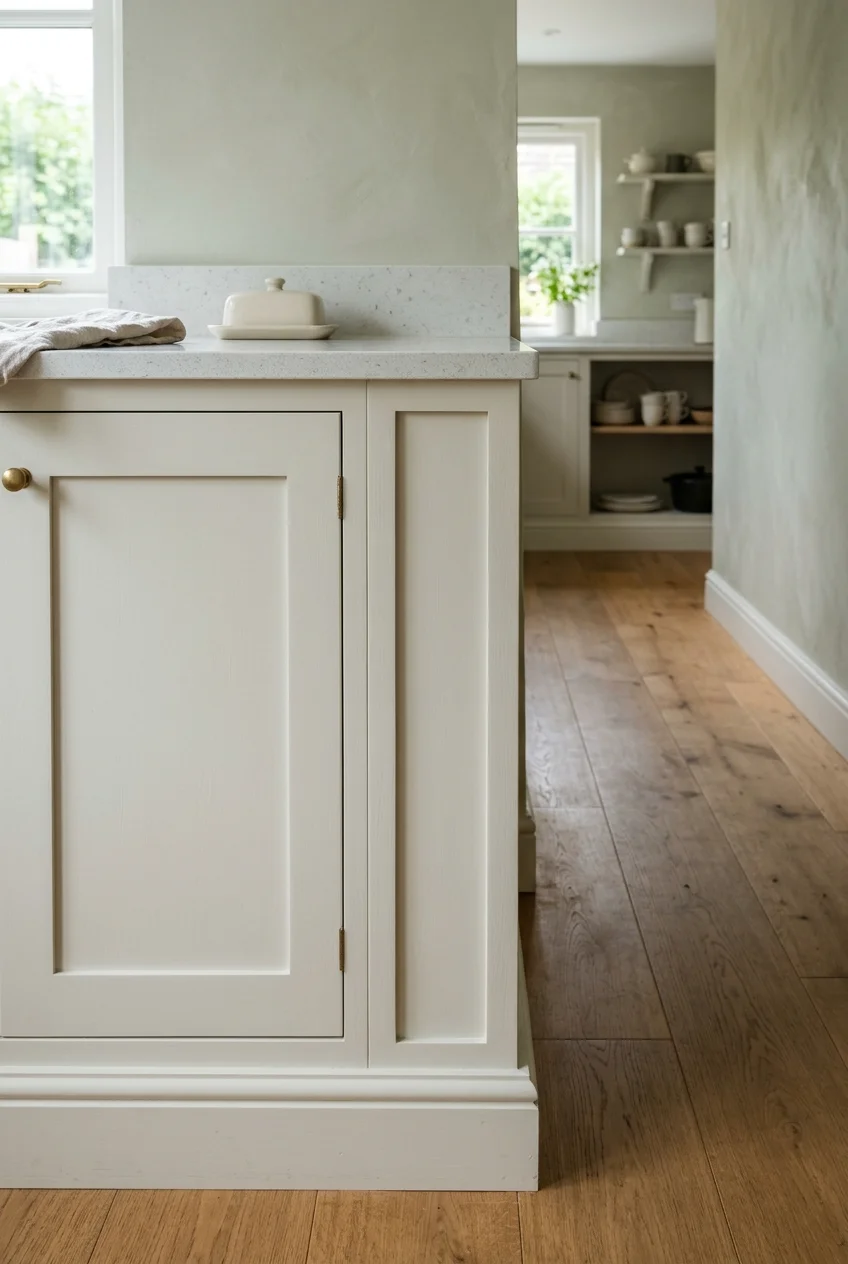
An end panel faces the room even when every door is closed. Adding a shallow frame can connect that blank side to existing paneled fronts.
Match the surrounding rail widths and finish rather than introducing a second molding language. Check nearby handles and walkways before adding anything that projects beyond the cabinet.
Keep attachment within suitable solid material and account for the cabinet construction. A decorative frame should not be mistaken for structural reinforcement of a damaged box.
25. Give the peninsula back a washable beadboard panel
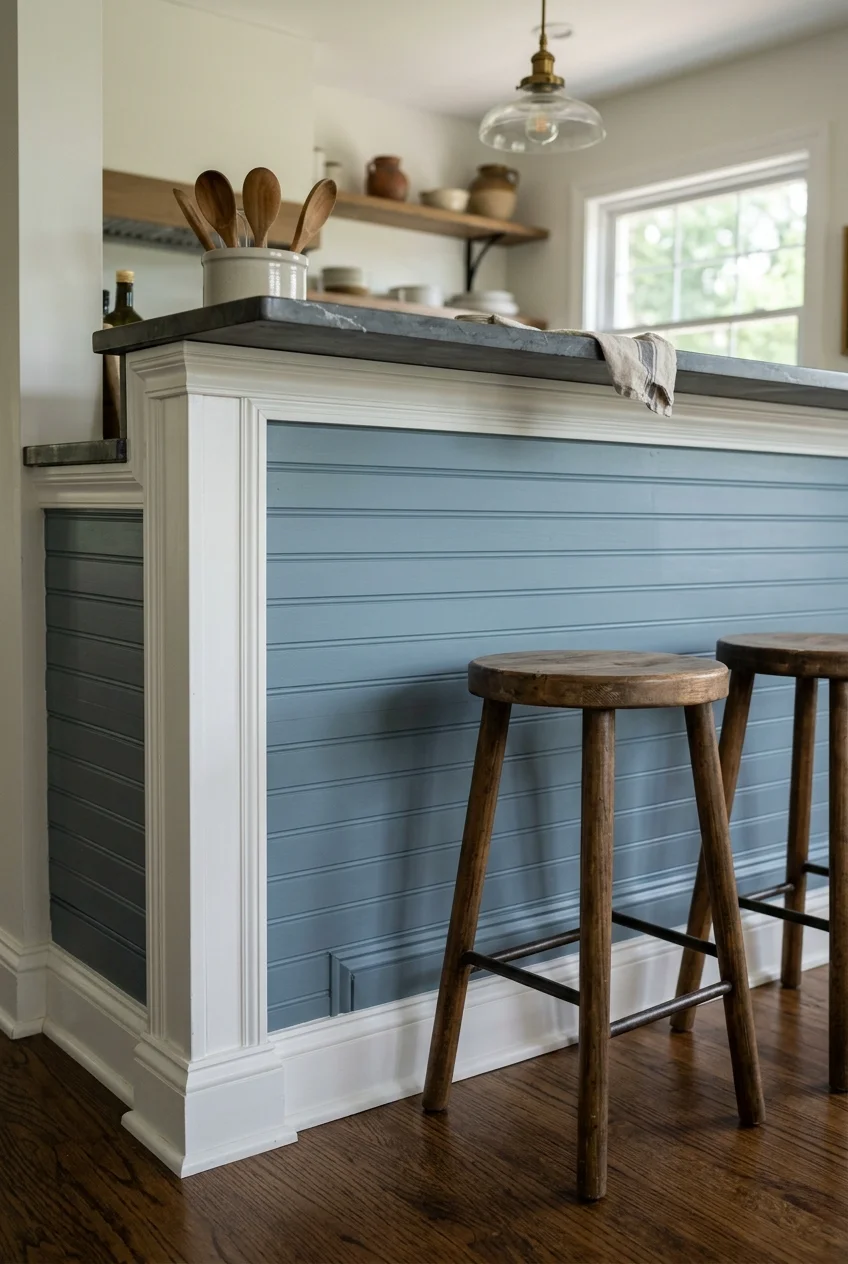
The back of a peninsula can read as one broad wall of cabinetry. Vertical beadboard gives that surface detail while leaving the working doors unchanged.
Choose material and a finish suitable for occasional shoe marks and spills. Seal vulnerable cut edges according to the panel instructions, especially near the floor.
End the panel cleanly at both corners and retain seating clearance below the counter. Consider a smooth panel if close grooves would make cleanup frustrating.
26. Replace mismatched toe-kick covers with a coordinated recess
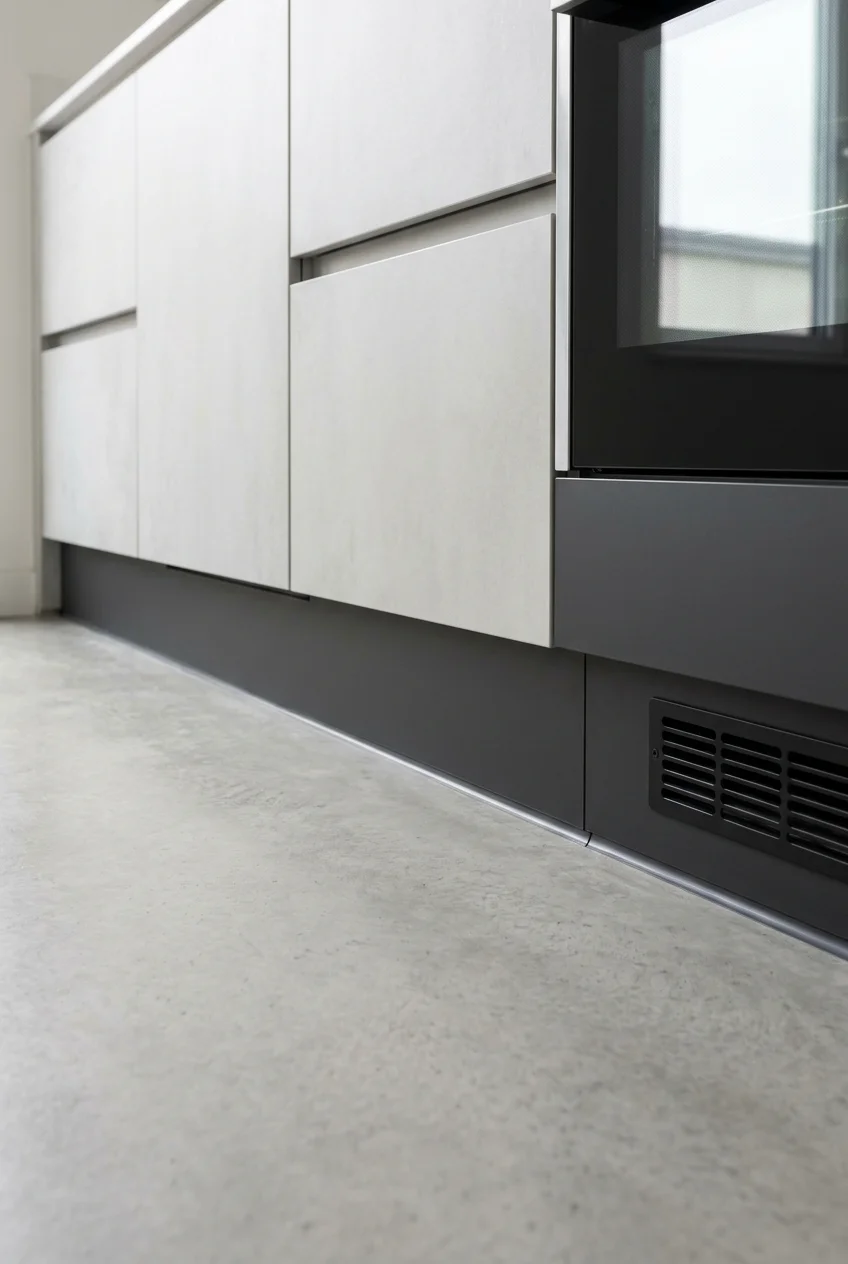
A continuous recessed base line helps separate the cabinets from the floor. Matching the toe-kick finish can quiet a patchwork left by previous repairs.
Preserve the existing foot recess and any appliance ventilation or access. Cover panels should follow the cabinet geometry rather than turn the base into a projecting plinth.
27. Add furniture-style feet at selected cabinet ends
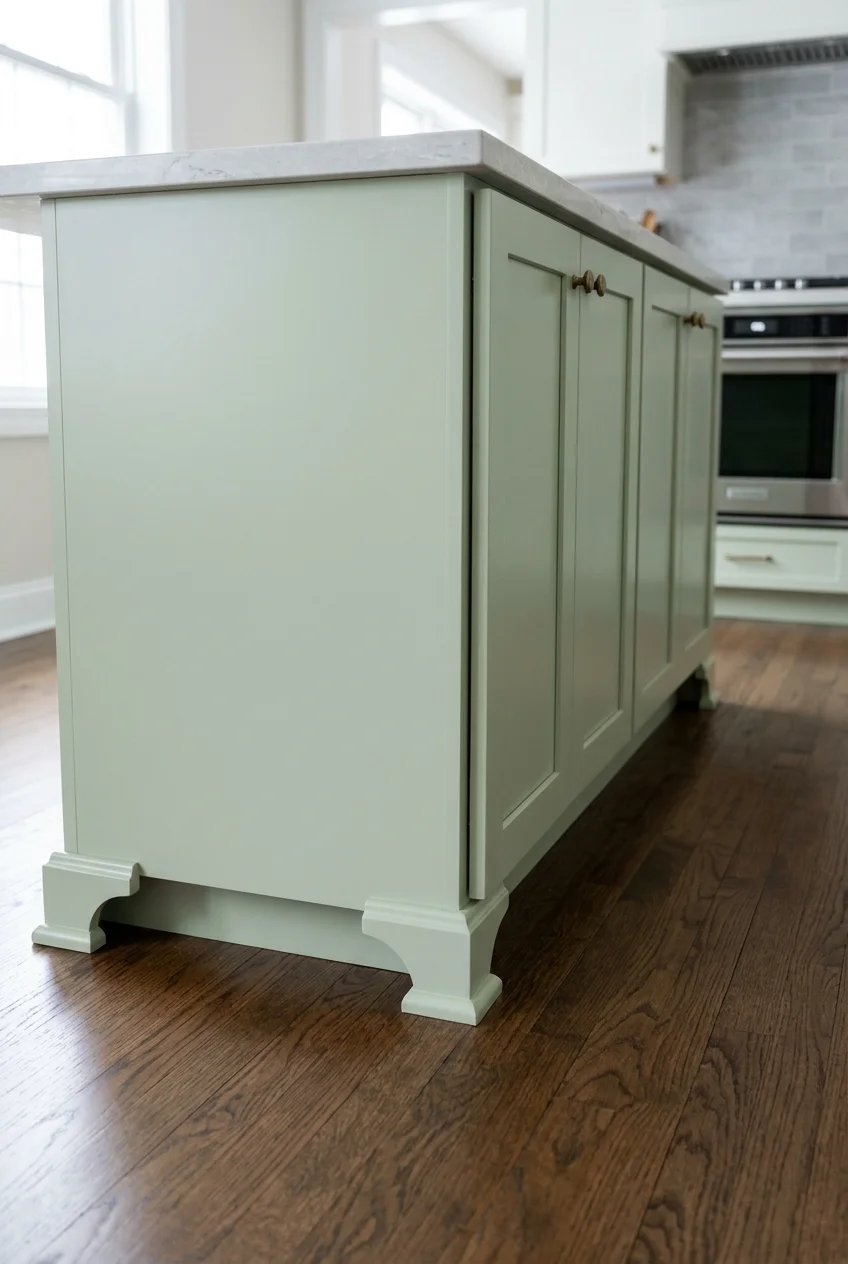
A pair of decorative feet can give a sink cabinet or island a furniture-like outline. Restrict them to one piece so the detail has a clear purpose.
Keep the original cabinet support and toe space functional. Decorative blocks do not replace leveling legs, and large projections can become an obstacle in a narrow aisle.
Match the paint and choose a shape with room for cleaning around it. A modest bracket often works better than an elaborate turned foot.
28. Replace an ornate sink valance with a straight trim line
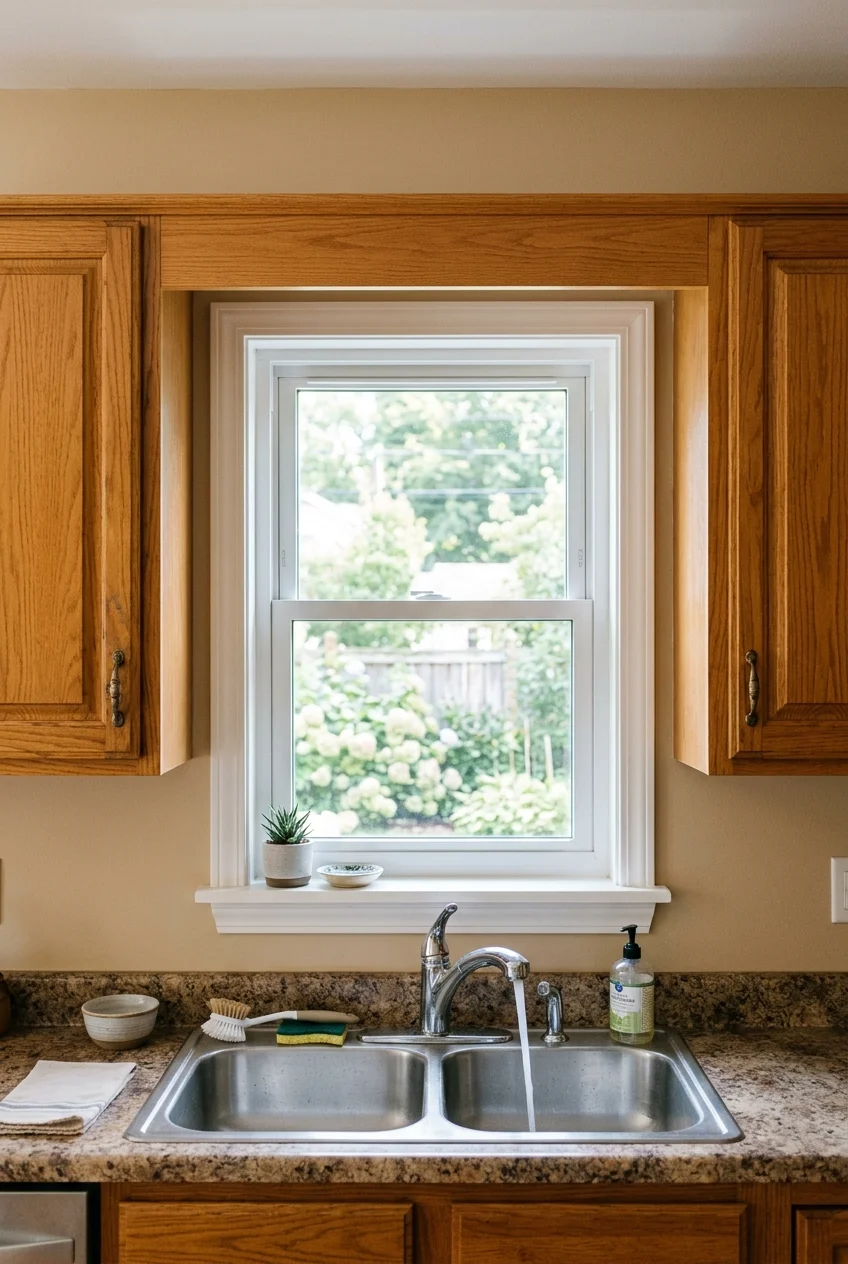
A scalloped board above a sink can date otherwise useful cabinets. A straight replacement changes that outline while preserving the surrounding doors and window arrangement.
First establish whether the piece is purely decorative or conceals lighting, wiring, or supports. Have concealed services assessed before removing or cutting the board.
Finish the new trim to coordinate with the cabinets and keep the window unobstructed. Leaving the opening clear may be preferable if no replacement is needed.
29. Replace handles while reusing the existing mounting holes
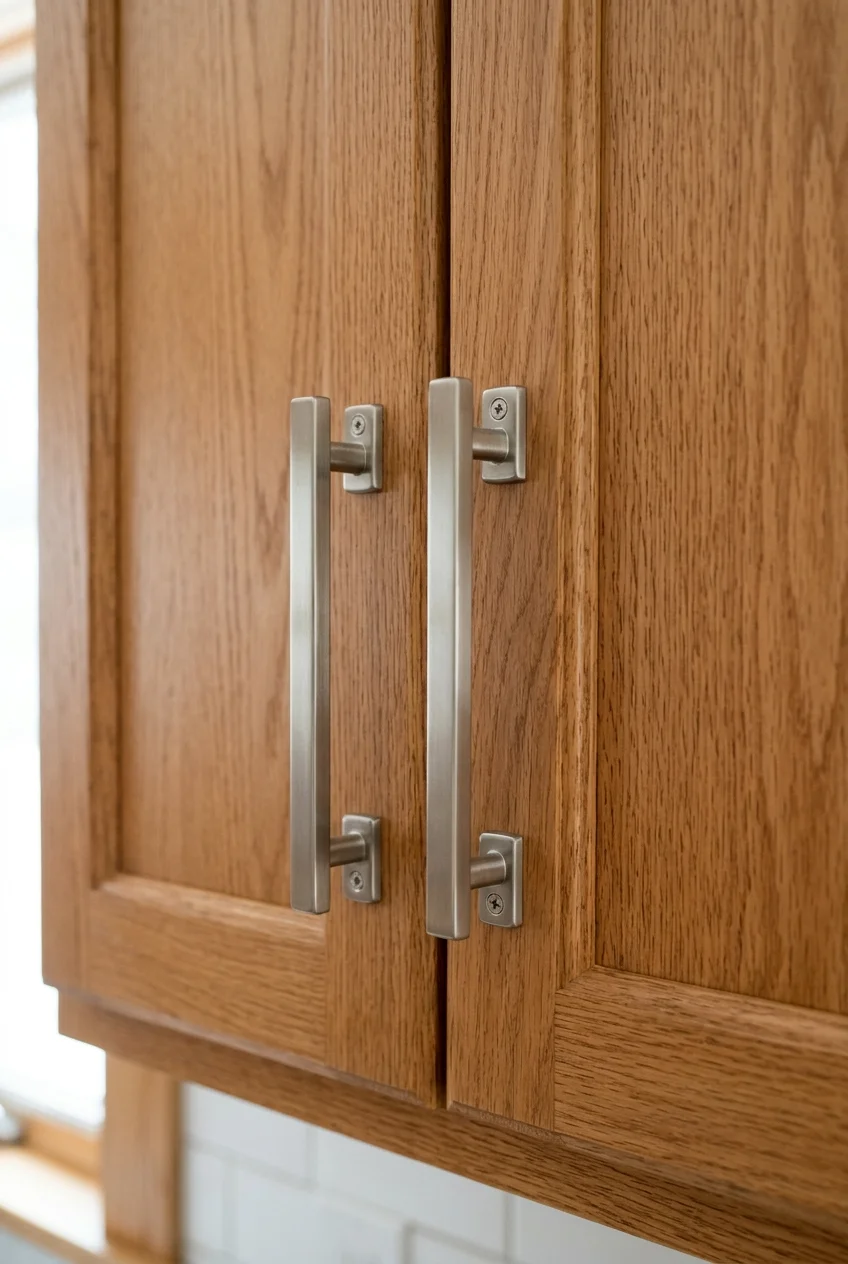
New handles can sharpen the outline of existing doors without repainting them. Measure the distance between screw centers; overall handle length is a different measurement.
Bring one old pull to compare with replacements and buy a sample first. Check finger clearance, screw length, and whether the ends catch nearby doors.
Keep the removed hardware if you rent or might reverse the change. Reusing sound holes makes this a smaller commitment than drilling a new pattern.
30. Combine cup pulls on drawers with knobs on doors
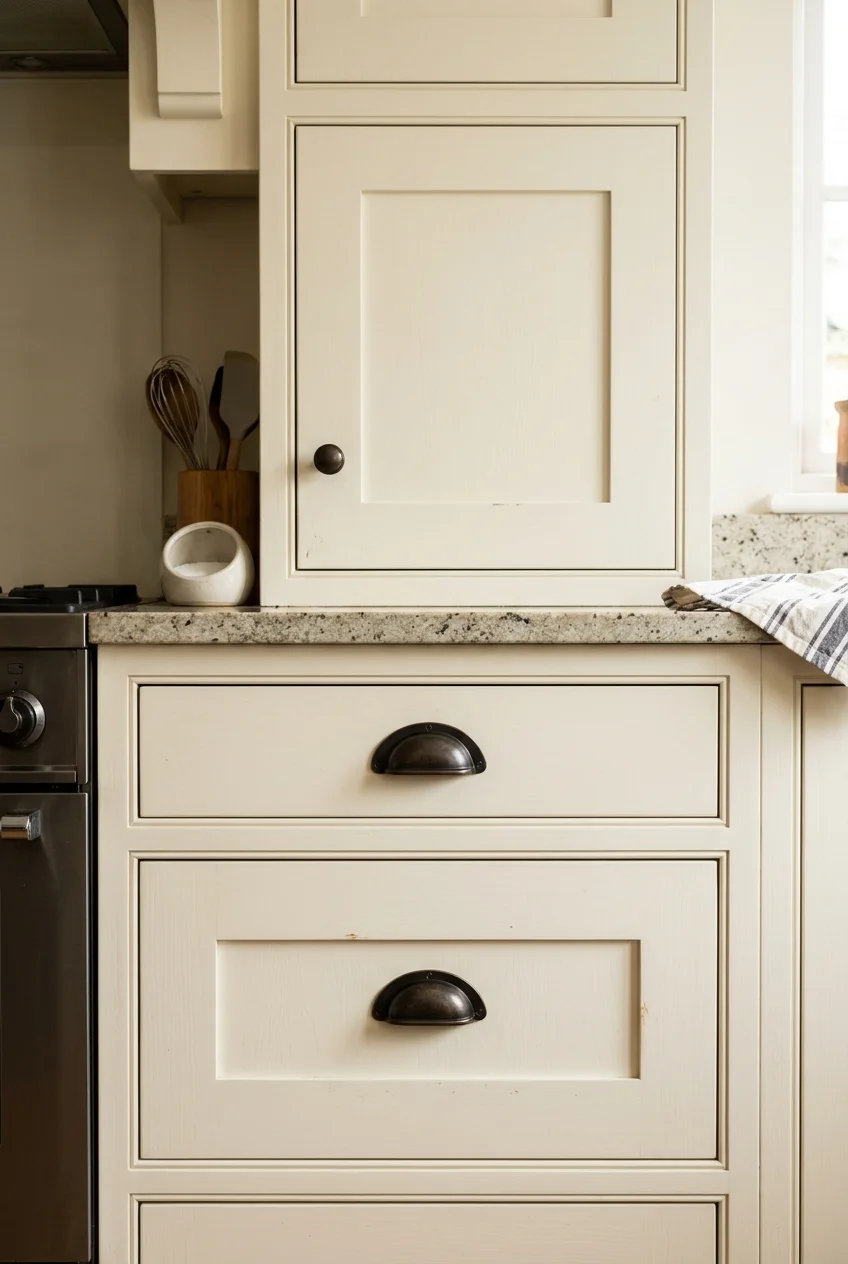
Different shapes can distinguish drawers from doors while one finish connects them. Cup pulls emphasize horizontal drawer fronts, and small knobs keep upper doors visually lighter.
Check the cup pull mounting arrangement before ordering. Its visible body may cover existing marks, but its screw spacing still has to match your plan.
For new holes, a Kreg cabinet hardware jig (paid link) helps repeat placement. Confirm the jig supports your selected spacing before drilling.
- Position a sample pull and knob with removable tape to judge their relationship.
- Mark one consistent reference edge for each door or drawer type.
- Test the jig setup on scrap and verify the actual hardware fits.
- Drill only after checking front orientation and the required fasteners.
Use one pull on a narrow drawer unless its construction and use suggest otherwise. Adding a second handle for symmetry can make everyday opening less convenient.
31. Use slim edge pulls on suitable flat-front doors
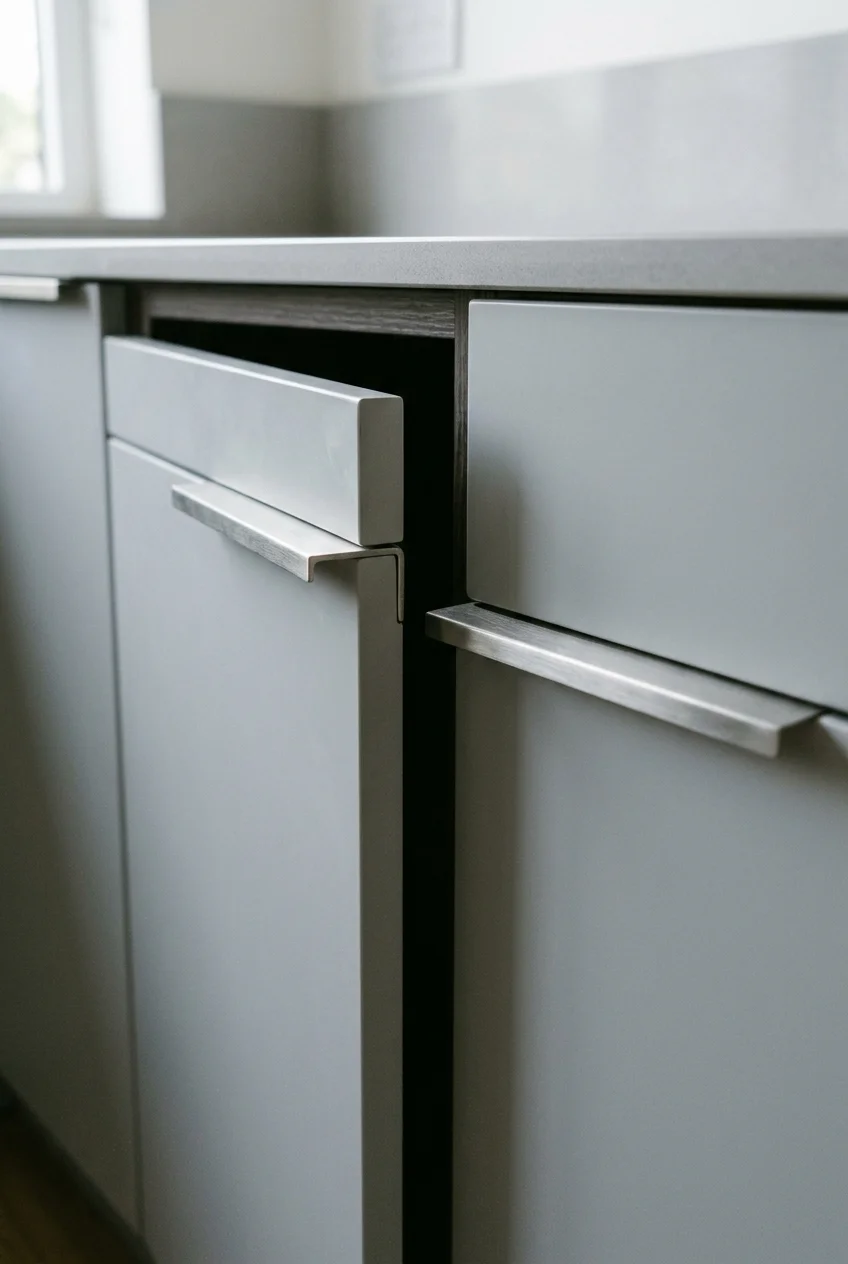
An edge-mounted pull leaves most of a slab front uninterrupted. The small horizontal tab becomes the detail, so consistent placement matters more than an elaborate finish.
Check door thickness, the mounting method, and the gap needed behind the pull. Some designs require recessing or drilling and will not suit every existing front.
Try a sample with neighboring doors fully open and closed. Choose a comfortable projection that does not catch clothing or collide with the cabinet above.
32. Use backplates to make a hardware change look deliberate
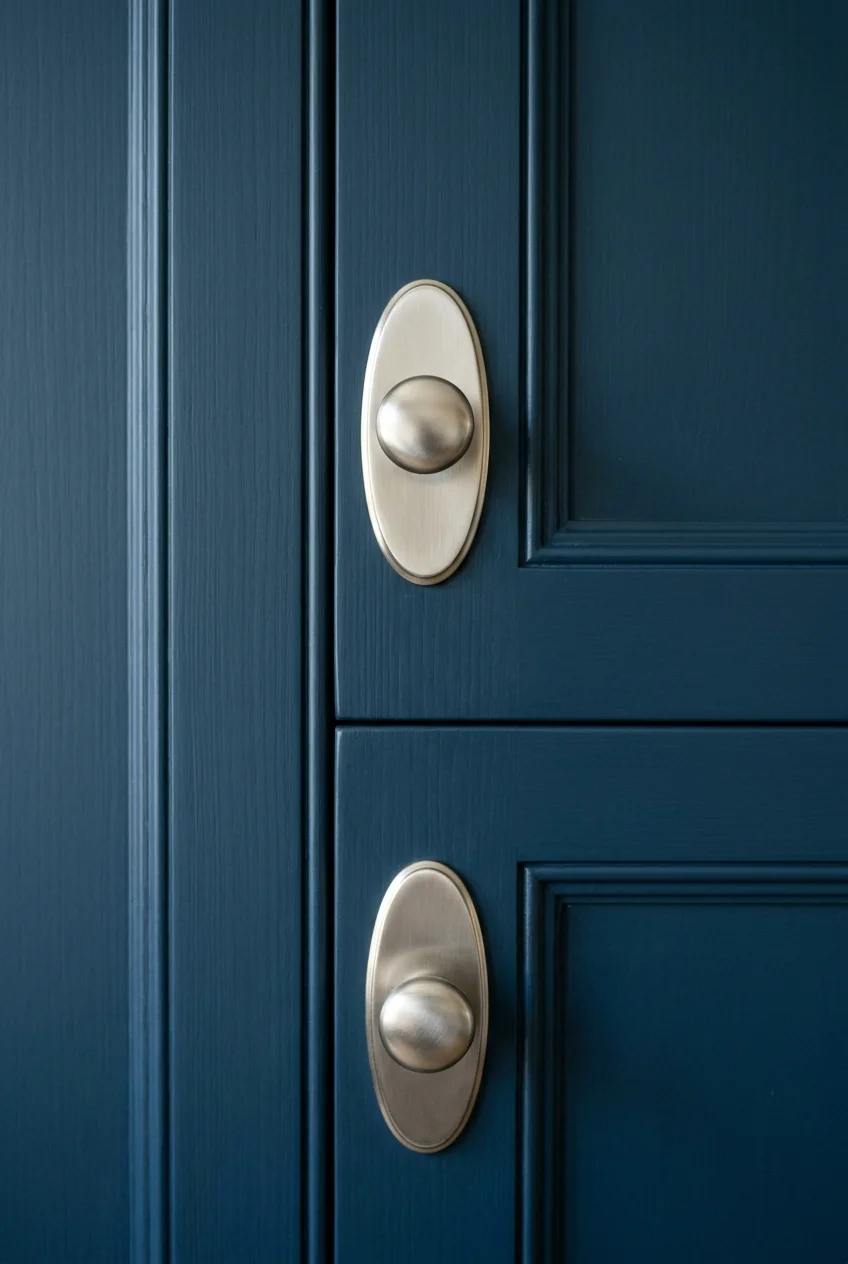
A backplate can turn a small knob into a more defined feature while concealing minor finish marks. Choose a shape that relates to the door profile.
Check the plate dimensions against every mark you hope to cover. It will not repair stripped screw holes or make a loose handle secure.
Test the complete plate-and-knob combination on one door. Too much metal can overwhelm narrow rails, especially where several cabinets meet in a small corner.
33. Coordinate exposed hinges with the new handles
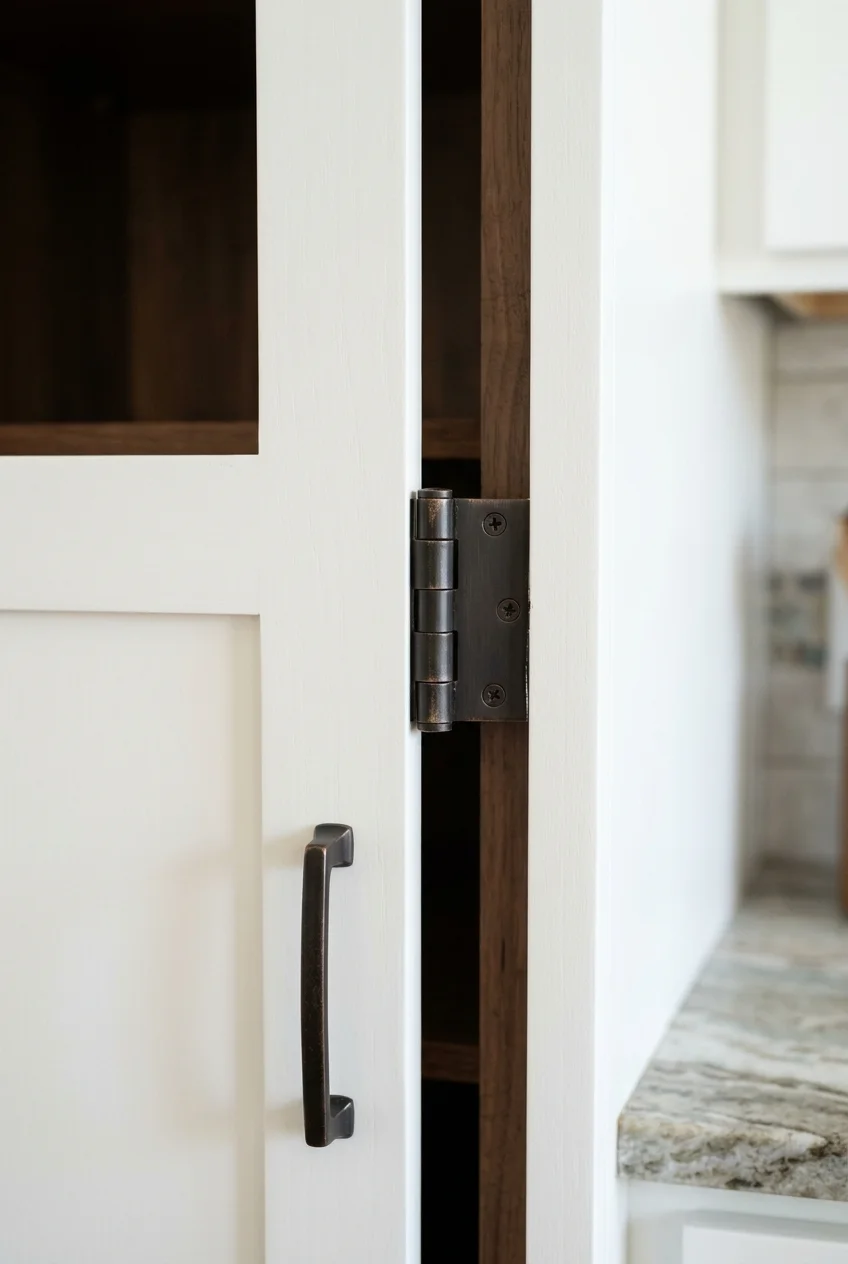
Visible hinges are part of the hardware composition, especially on older framed cabinets. Matching their general finish to the handles can reduce an unintended mix of metals.
Identify the exact hinge geometry before replacing anything. Similar-looking exposed hinges can differ in overlay, offset, screw pattern, and how the door sits against the frame.
Test a compatible pair on one supported door before ordering the rest. Keep functioning originals if a cosmetic swap would require uncertain drilling or poor alignment.
34. Convert suitable doors to concealed soft-close hinges
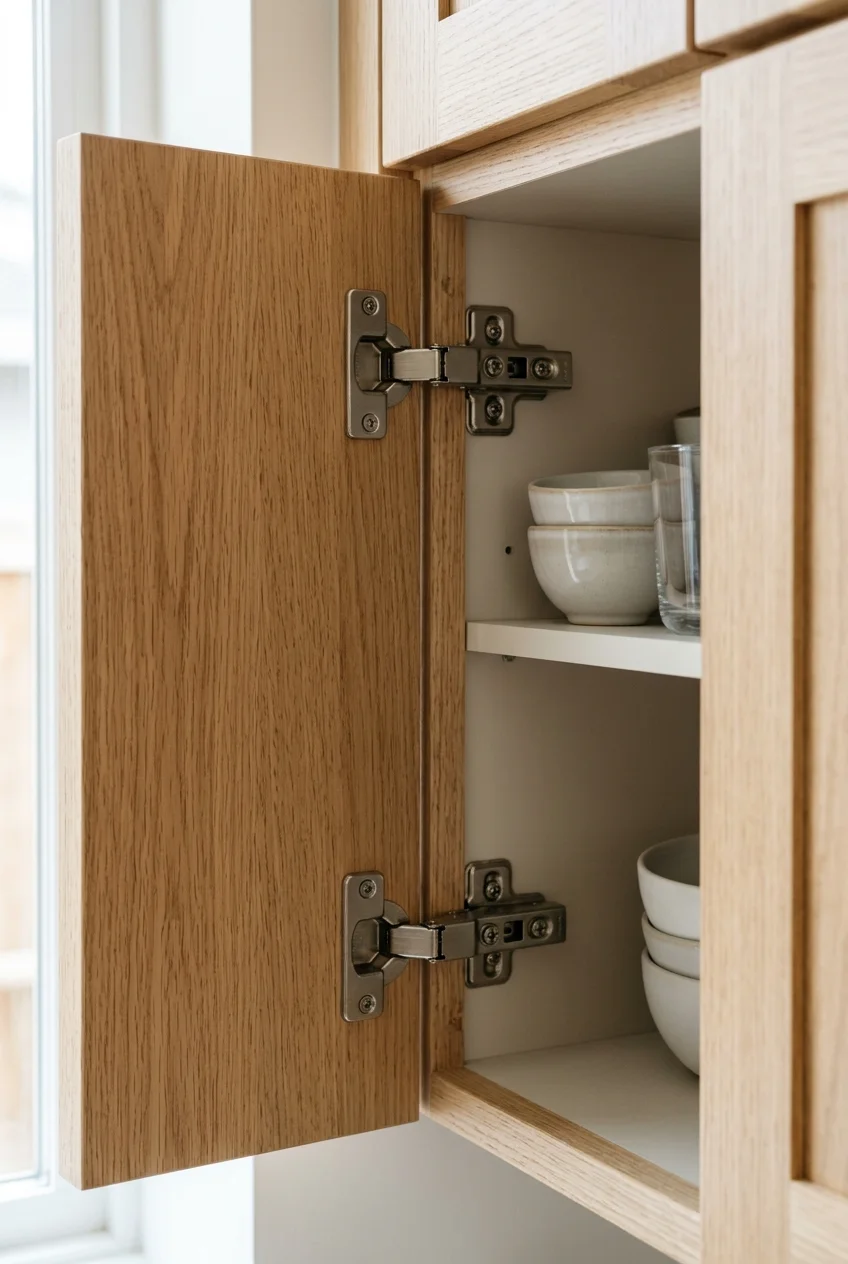
Hidden hinges remove visible metal from the cabinet elevation and can add a controlled closing action. The conversion depends on the door and box construction.
Identify face-frame or frameless cabinets, the required overlay or inset relationship, and existing hinge holes. A generic soft-close label does not establish compatibility.
- Check door thickness and material before any hinge-cup boring.
- Match hinge type, opening angle, cup position, and mounting plate.
- Verify the hinge quantity against the door size and weight.
- Confirm clearances near corners, fillers, and internal pullouts.
A cabinetmaker can assess older thin doors or unusual frames before irreversible drilling. The new hinge and its plate must work together as a system.
Install and adjust one supported test door before proceeding across the room. Uneven gaps or a door that binds may indicate a geometry problem, not weak damping.
Test closure with the cupboard loaded as usual, watching for contact with shelf contents. Follow the hinge instructions for damping adjustment rather than forcing a binding door.
35. Restore even door gaps before changing the finish
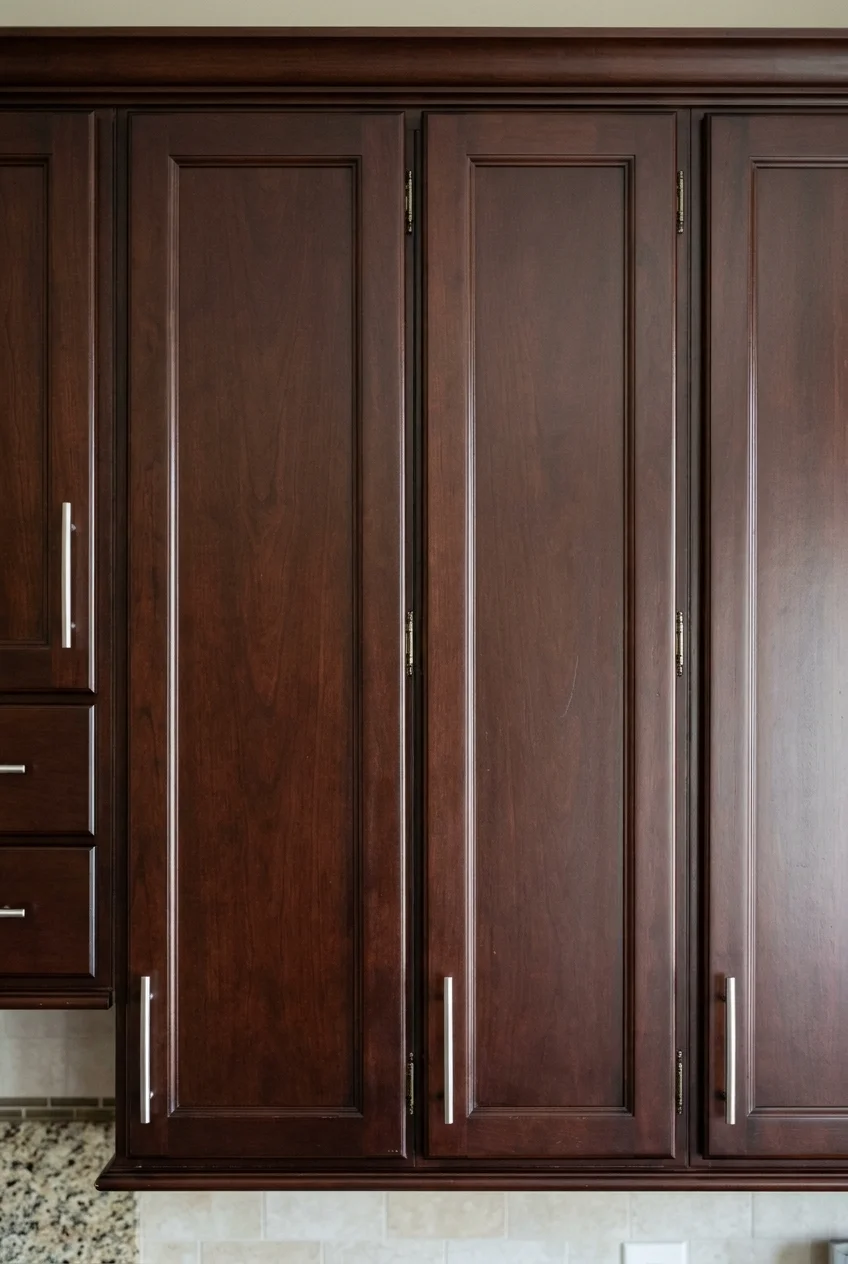
Crooked reveals can make good cabinets look tired. Bringing adjacent doors into alignment may improve the whole run while preserving a finish you already like.
Inspect loose screws, worn hinges, and cabinet movement before adjusting anything. A sagging or damaged box needs repair rather than repeated tweaks to the doors.
- Support the door and identify the adjustment instructions for its hinge.
- Make a small adjustment, then close the door to check the neighboring gaps.
- Check drawer clearance and the full door swing.
- Secure the hardware and recheck after opening the door several times.
Stop if screws no longer hold or the door remains twisted. Repairing the mounting area or replacing a damaged component is more useful than disguising it with paint.
36. Refresh drawer interiors with fitted nonadhesive liner
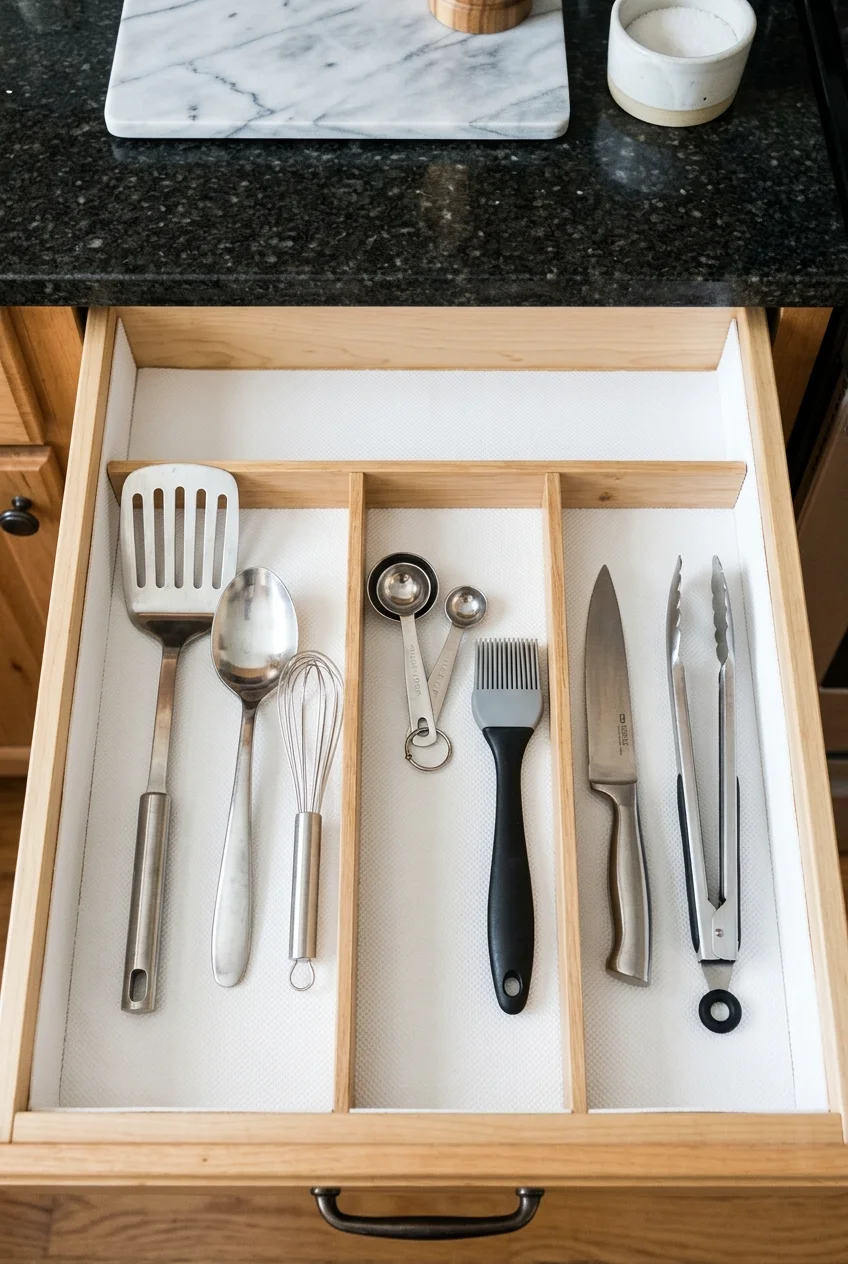
A fresh drawer interior makes the makeover visible during everyday use. Cut a simple liner neatly to fit instead of covering usable space with decorative organizers.
A cut-to-fit option is Duck EasyLiner Select Grip (paid link). Check roll width against the drawer and confirm compatibility with its finish before lining.
Clean and dry the drawer first, then make a paper template around awkward corners. Follow the liner and coating instructions, especially on newly refinished surfaces.
This open-texture liner is not a waterproof repair for a damaged base. Fix moisture problems and inspect beneath it periodically rather than hiding stains permanently.
37. Remove the doors from one everyday dish cupboard
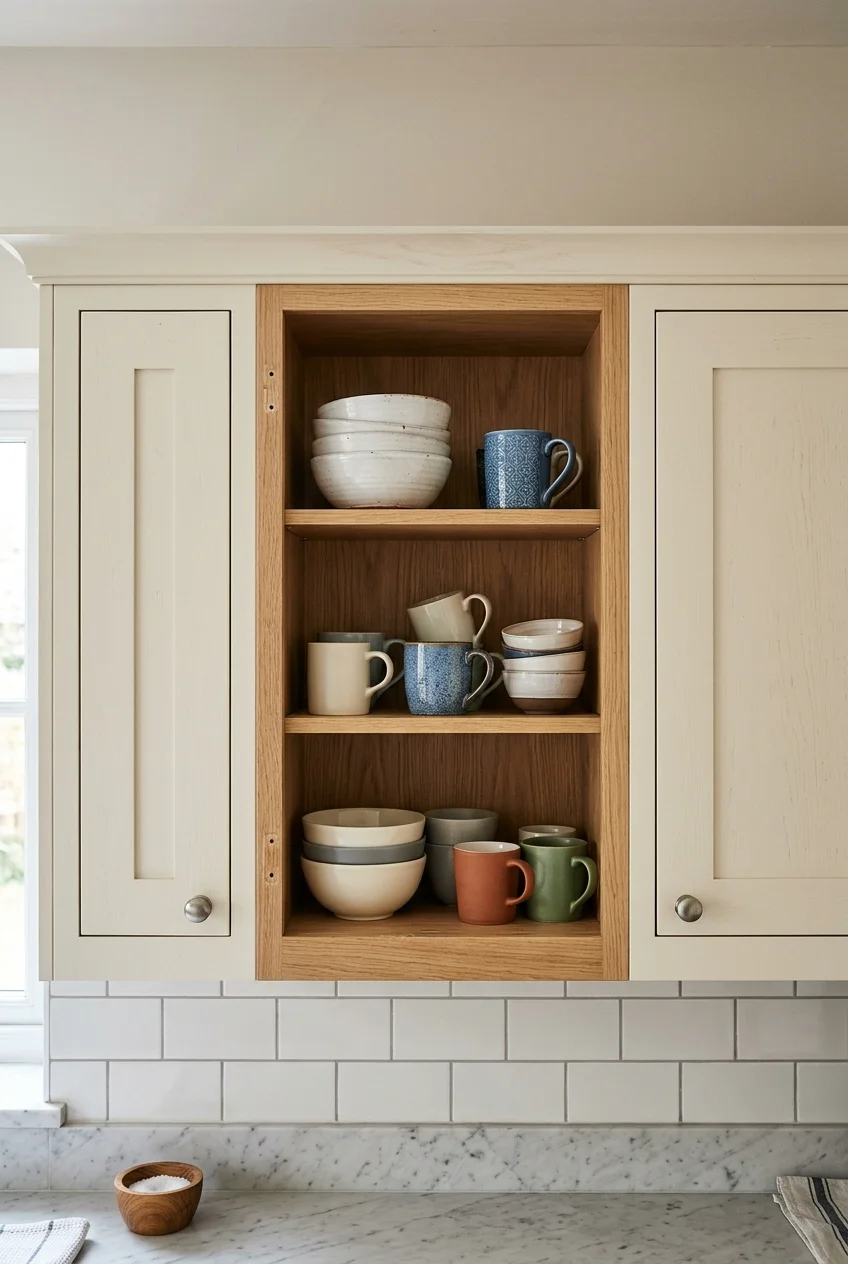
An open bay breaks up a long wall of solid fronts and puts frequently used bowls within view. Start with one cupboard rather than the entire kitchen.
Remove the doors and accessible hardware without cutting the cabinet structure. Store labeled parts if you want the option to put the doors back later.
Finish visible screw holes and edges appropriately, then adjust shelf heights around real dishes. Keep heavy items on shelves and supports rated for their weight.
Practical tip Try living with the doors open before removing them. You will quickly see whether the visible contents and extra dusting suit your routine.
38. Add pattern with a removable back panel
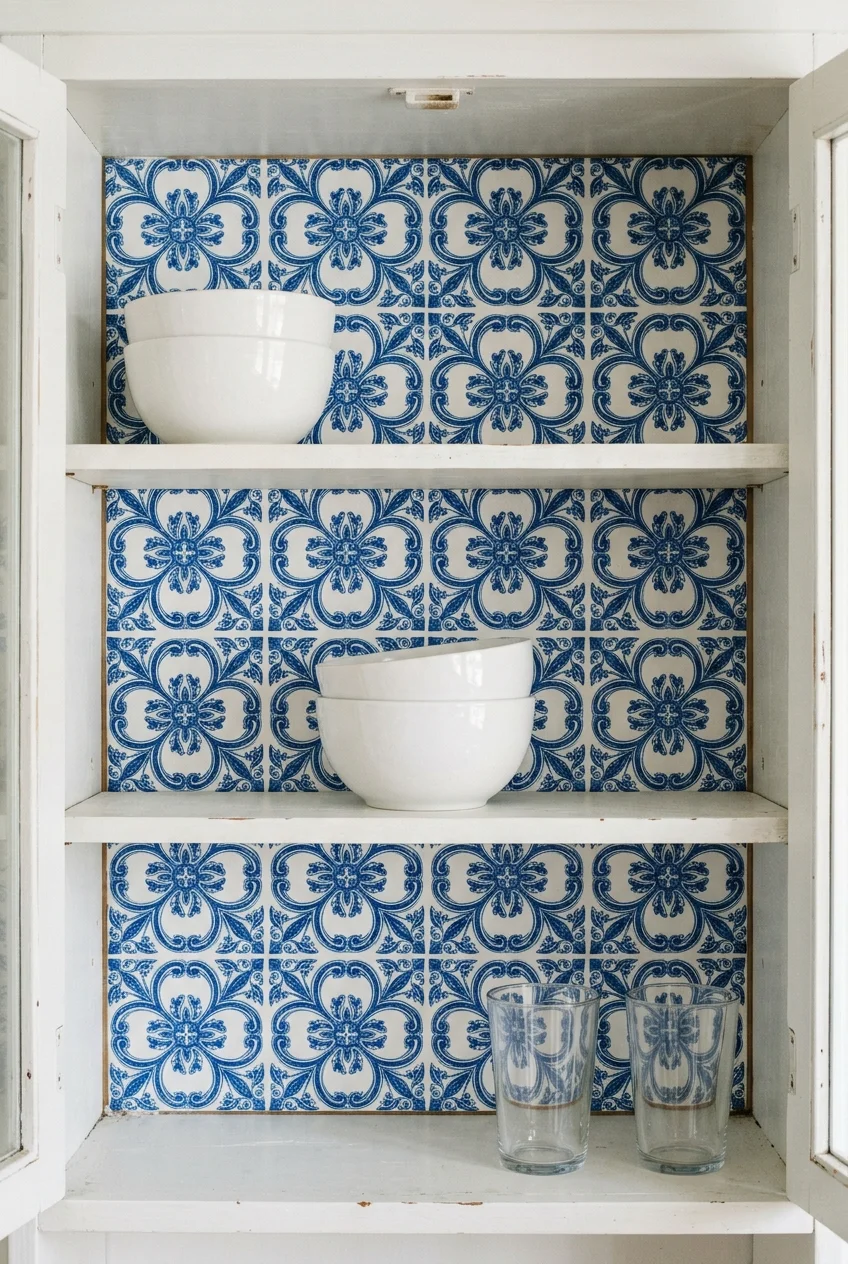
Wallpaper on a fitted back panel gives an open cupboard a distinct background. A small pattern can stay visible between dishes without competing with their shapes.
Cover a removable board rather than sticking paper directly to a finish you want to preserve. Fit it securely without obstructing shelf supports or the door.
Use the panel in a dry cupboard and keep paper away from heat or splashes. Take it out for cleaning rather than scrubbing a delicate surface.
39. Use a dark cupboard back to outline pale dishes
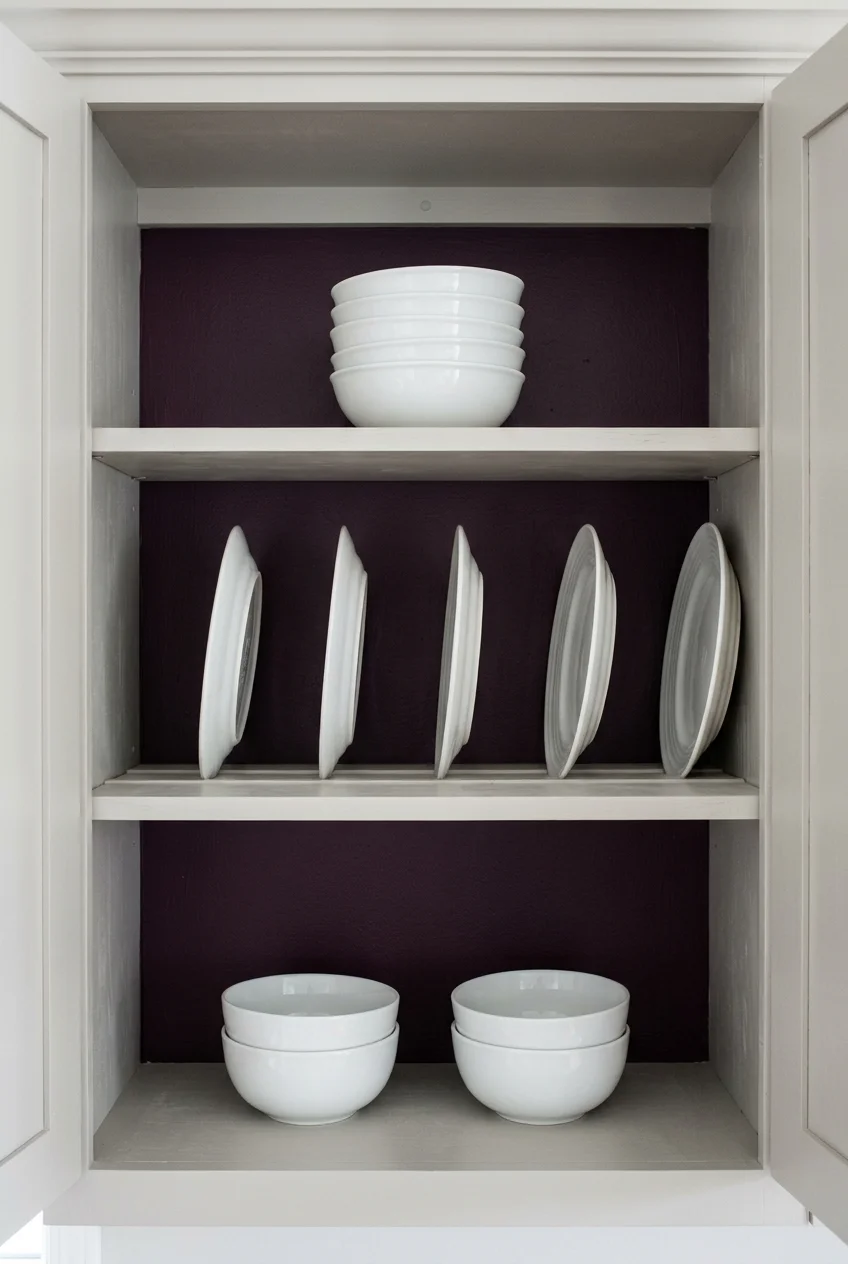
A deep painted back creates contrast behind white ceramics without darkening the entire cabinet. Keeping the sidewalls lighter makes the change feel contained and intentional.
Test the color with the pieces you actually own. Clear glass may disappear against a dark background, while pale bowls and plates become more defined.
40. Add concealed task lighting beneath the upper cabinets
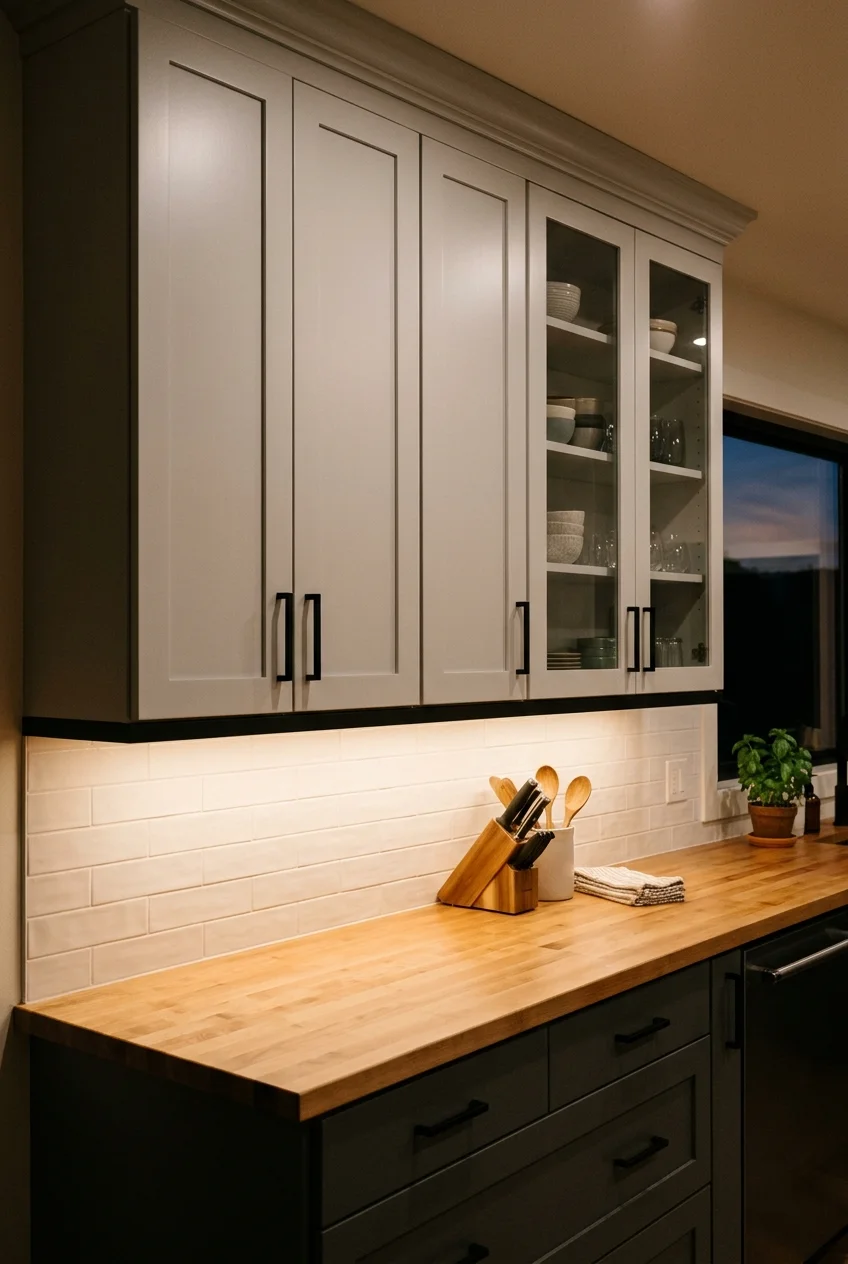
Light along the working counter makes the lower edge of the cabinets more defined. A continuous diffused line is usually calmer than isolated visible LED dots.
Plan the light position with your actual countertop. Reflective surfaces can reveal glare, so temporarily test the placement before fixing channels or strips in place.
- Match tape voltage, power supply, connectors, and dimming components.
- Calculate the load from the selected product specifications.
- Plan supported cable routes away from heat and door movement.
- Keep the driver accessible as its instructions require.
A listed plug-in system can simplify a suitable installation, but it still needs a sensible outlet and cord route. Use a qualified electrician for hardwired work.
Choose color temperature by testing it beside the existing room lighting and cabinet samples. A strong mismatch can make the same paint look different across one room.
41. Light a glass-front cupboard from within
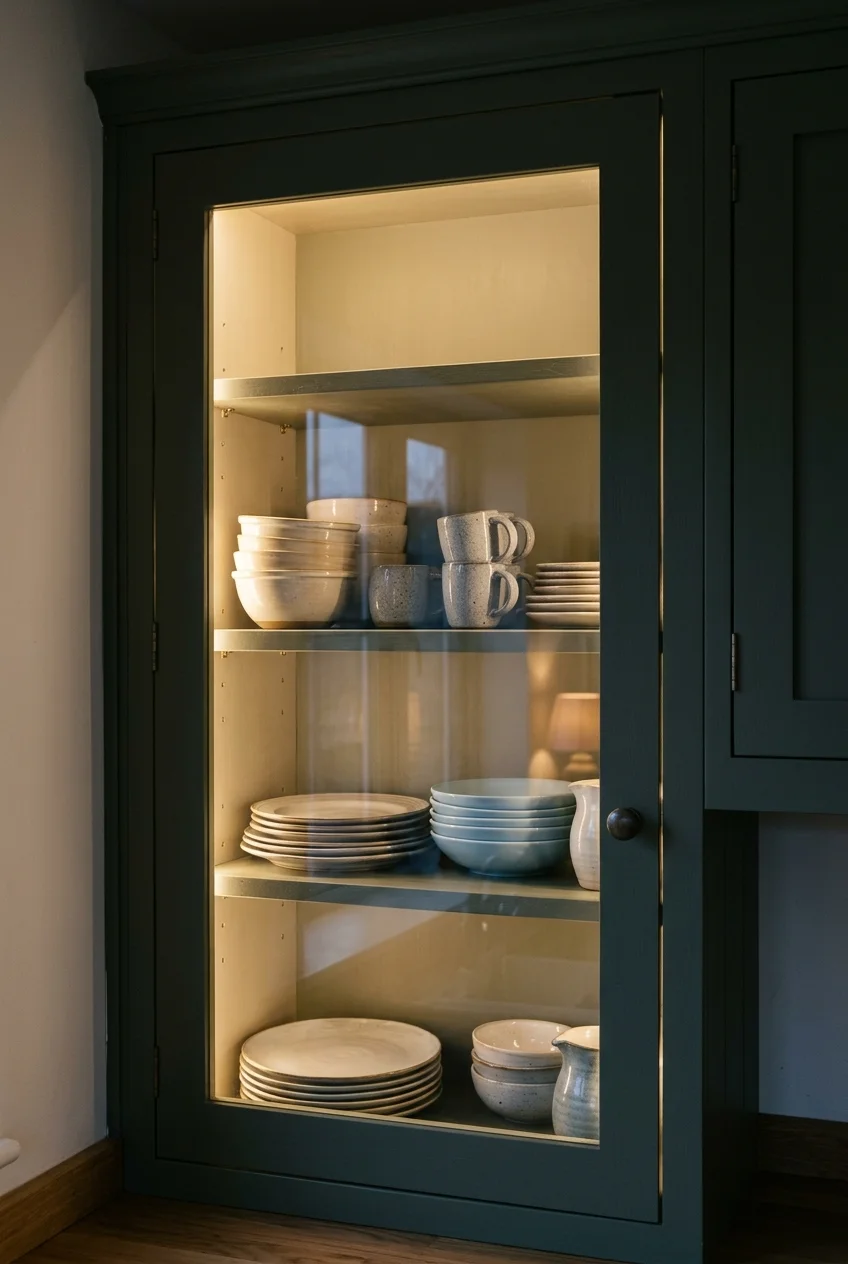
Interior lighting draws attention to the cabinet depth after dark. Position it to reveal the shelves and dishes rather than shining straight into the room.
Test light placement with every shelf installed; a single top light may leave the lower section in shadow. Choose components designed for the intended cabinet installation.
Plan cable paths, door clearance, heat management, and access to the power supply. Follow the product instructions and have hardwired electrical connections handled by a qualified electrician.
Keep the display restrained so the lighting can outline useful shapes. Multiple small reflective objects can create distracting highlights through the glass instead of a readable arrangement.
42. Turn an open upper bay into a vertical plate rack
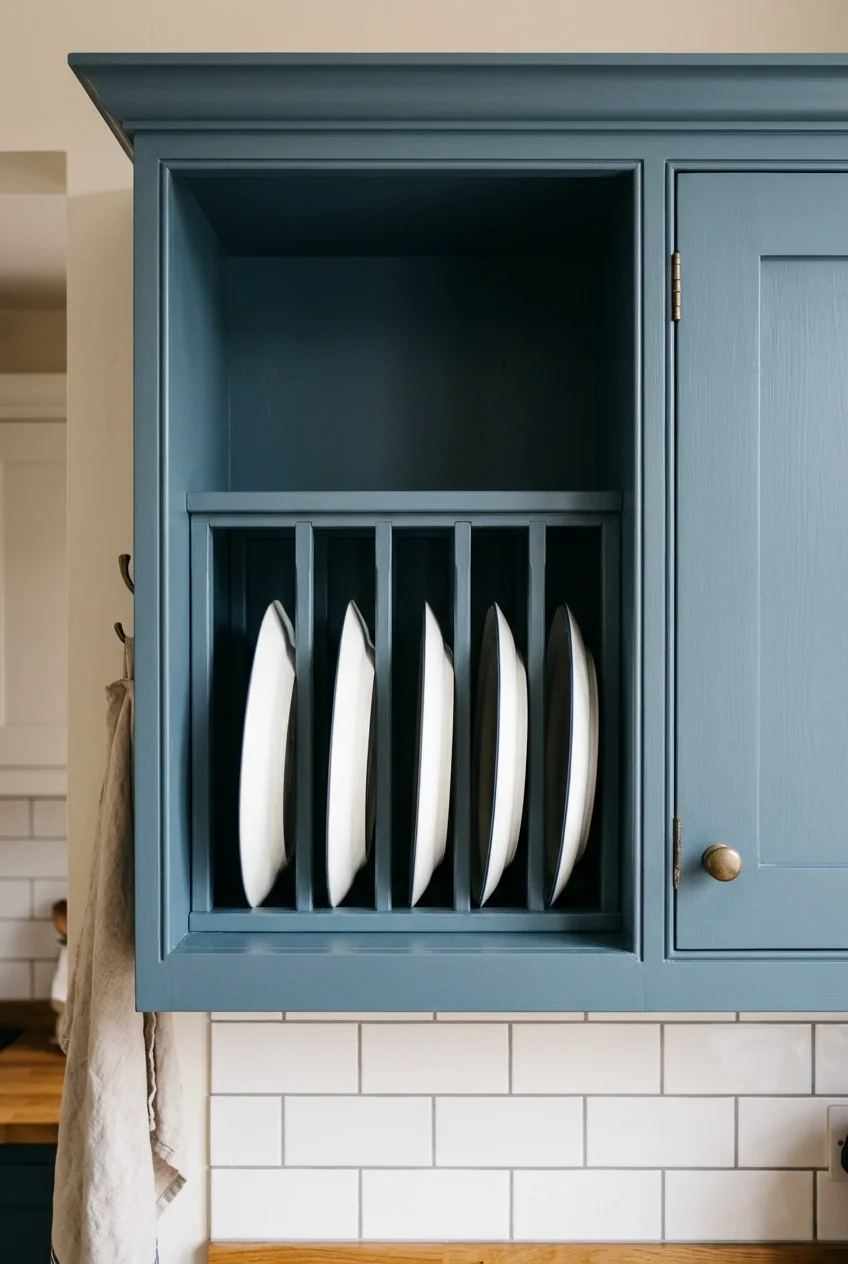
Vertical dividers make plates part of the cabinet design while separating them for retrieval. This is a storage insert, not a reason to remove cabinet supports.
Measure the diameter and thickness of your actual plates before spacing the slots. The rack must support them securely and leave room to lift each one out.
Have the insert fixed to suitable cabinet material and check the shelf load capacity. Use dry plates and keep everyday pieces at a height you can reach comfortably.
If custom joinery is too much for the cupboard, a correctly sized freestanding rack on a supported shelf gives a simpler version of the same arrangement.
43. Bring deep shelves forward with fitted rollouts
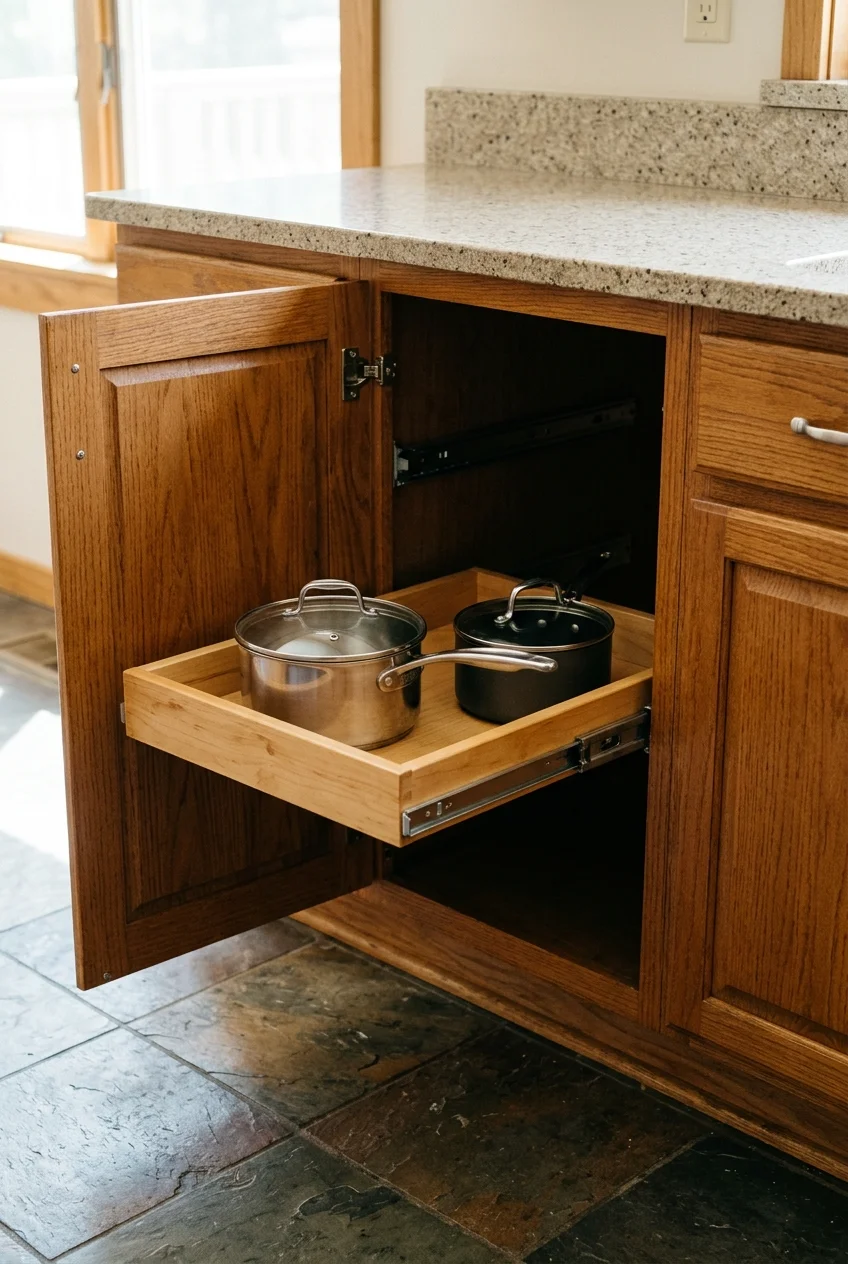
A shallow rollout tray brings the back of a base cabinet into view. It works especially well for cookware that otherwise disappears behind a front row.
Measure the clear opening with the door open, not just the cabinet width. Hinges and center stiles can reduce the space available to a sliding tray.
- Check usable width, depth, and height at the intended mounting position.
- Allow for hinge protrusions, door opening angle, and adjacent handles.
- Confirm sound mounting material and the system load limit.
- Leave enough height above each tray for its tallest item.
Choose side spacers or a mounting system designed for your construction where needed. Do not improvise support from thin backing or assume every shelf is removable.
Mock up the stored items before placing a second rollout above the first. A tall pot may make two tightly spaced trays less useful than one.
A removable handled bin is the simpler alternative when drilling is unwelcome. It can bring lighter items forward, although it will not provide the same guided movement.
44. Convert a door-front base cabinet into deep drawers
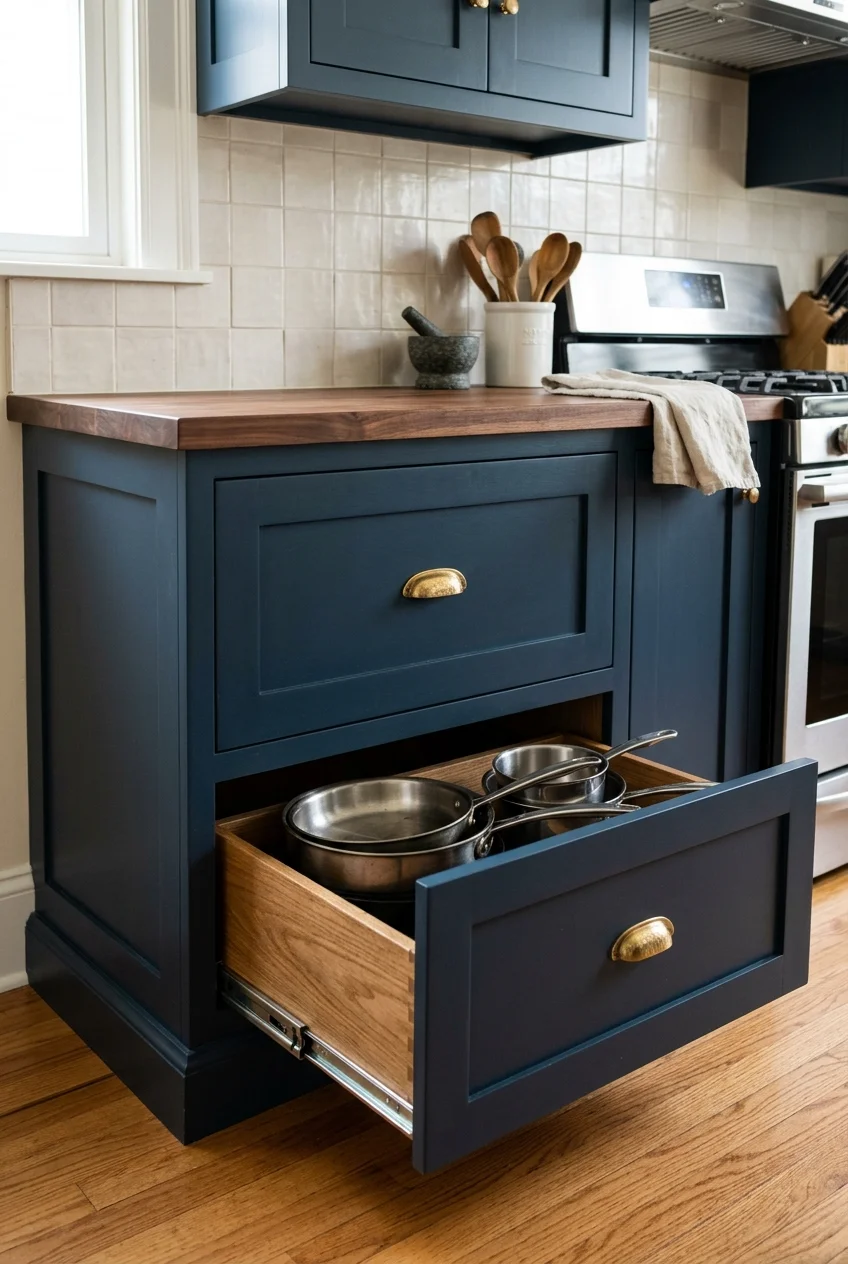
Deep drawers change access more substantially than a new finish. The fronts create broad horizontal lines, while the contents come forward without reaching through a doorway.
This conversion needs compatible drawer boxes, slides, and front attachments. Existing face frames, center stiles, and cabinet squareness determine what the retrofit can accommodate.
- Ask a cabinetmaker to assess the box, frame, and available opening.
- Plan drawer heights around cookware and the required slide clearances.
- Confirm the slide load rating and suitable fastening locations.
- Fit and test the boxes before final front alignment and handle placement.
Do not cut a center stile simply because it obstructs the proposed drawers. Its role and the cabinet structure must be assessed before any alteration.
A narrower drawer arrangement may preserve more of the existing frame. If the conversion demands extensive rebuilding, compare its full cost with replacing that single cabinet.
Keep an honest view of capacity: drawer sides and slide clearances use space. The gain is often easier access and separation rather than a larger internal volume.
45. Store baking sheets vertically behind a retained door
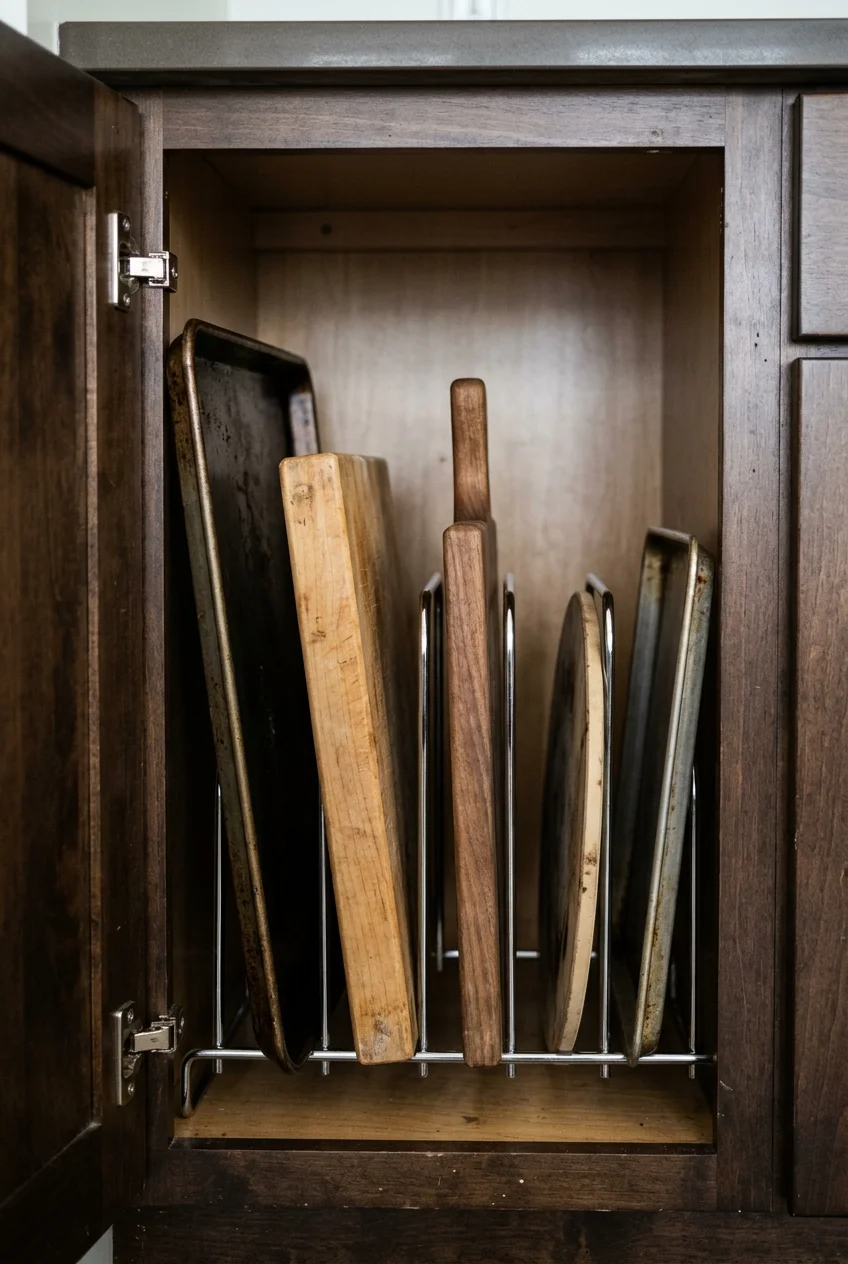
Upright dividers separate trays and boards so you can remove one without unstacking the rest. A narrow base cupboard can become useful without changing its exterior.
For a mounted option, consider Rev-A-Shelf tray dividers (paid link). Verify the exact model dimensions and mounting clearance against your cupboard before ordering.
The selected listing specifies a minimum opening of 3 inches wide, 19.75 inches deep, and 12.25 inches high. Stored trays still need their own clearance.
Test your tallest board through the door opening and leave room to grip it. Place narrow dividers close enough to prevent trays leaning into neighboring slots.
Budget tip A freestanding rack avoids mounting holes if its base remains stable with your trays. Check that pulling out one board does not tip the remaining contents.
46. Hide waste and recycling in a fitted pullout
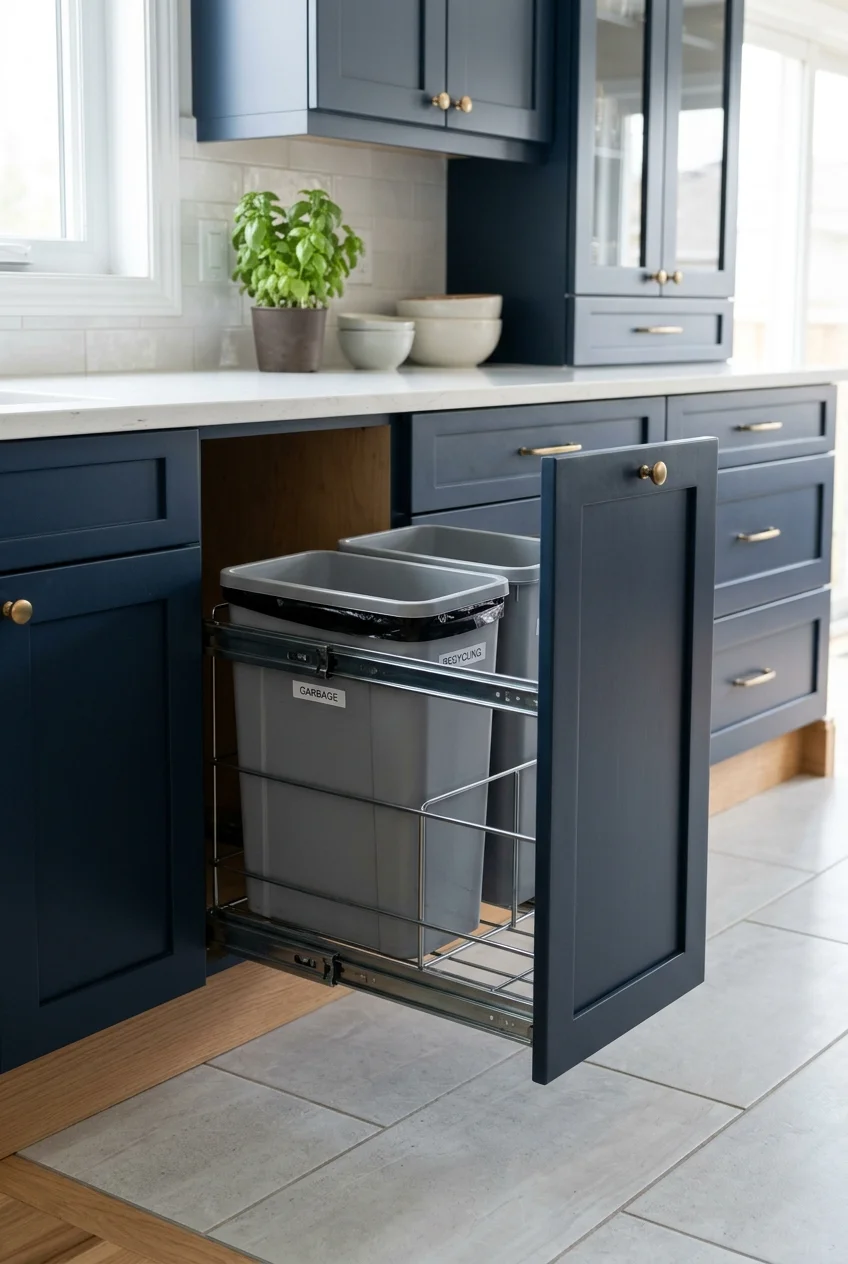
A waste pullout clears a freestanding bin from the floor and gives the cabinet a new daily function. Choose the mechanism around the usable opening first.
Door-mounted and behind-door systems work differently. A door-mounted version moves the front with the bin frame, while another design requires opening the hinged door first.
- Measure width, depth, height, and the full extension path.
- Allow clearance to lift bins out, not merely slide them forward.
- Match cabinet construction and suitable mounting surfaces.
- Check nearby plumbing, handles, and door swing.
- Choose bin sizes that fit your actual waste-sorting routine.
Confirm what the kit includes before removing the old hinges or attaching the door. A separate mounting bracket may be required for the chosen configuration.
Keep the unit accessible for wiping beneath and around the bins. A removable inner container matters more to cleanup than a decorative cabinet front.
If the cabinet is too shallow or obstructed, retain a well-placed freestanding bin. An undersized retrofit that constantly overflows will not improve how the kitchen works.
47. Build the under-sink layout around the plumbing
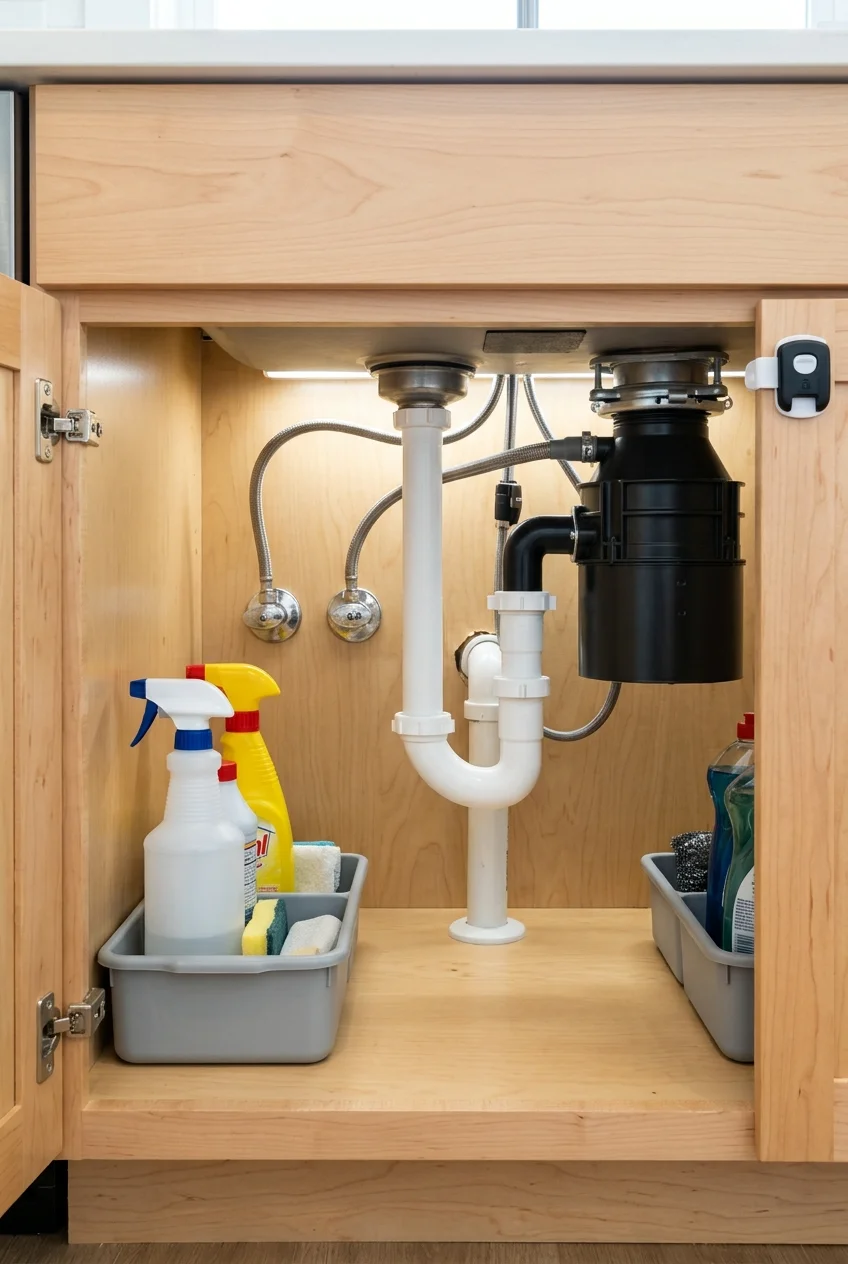
An under-sink makeover succeeds when storage fits the pipes instead of hiding them. Separate shallow removable caddies can be more useful than a large rigid organizer.
Map the drain trap, supply valves, disposal, and any dishwasher connections before buying. Leave service access and do not mount hardware where concealed plumbing could be damaged.
Choose a rollout only if its moving path clears every obstruction. A two-tier unit that fits the floor may still collide with the trap above it.
- Keep shutoff valves reachable.
- Store cleaning products in their original containers.
- Use an appropriate child-resistant latch where children could reach hazardous products.
- Remove organizers to inspect and dry the cabinet base.
Address active leaks or swollen material before adding liners and bins. A tray can make small drips easier to notice, but it does not repair plumbing.
48. Fit a purpose-made mechanism into a blind corner
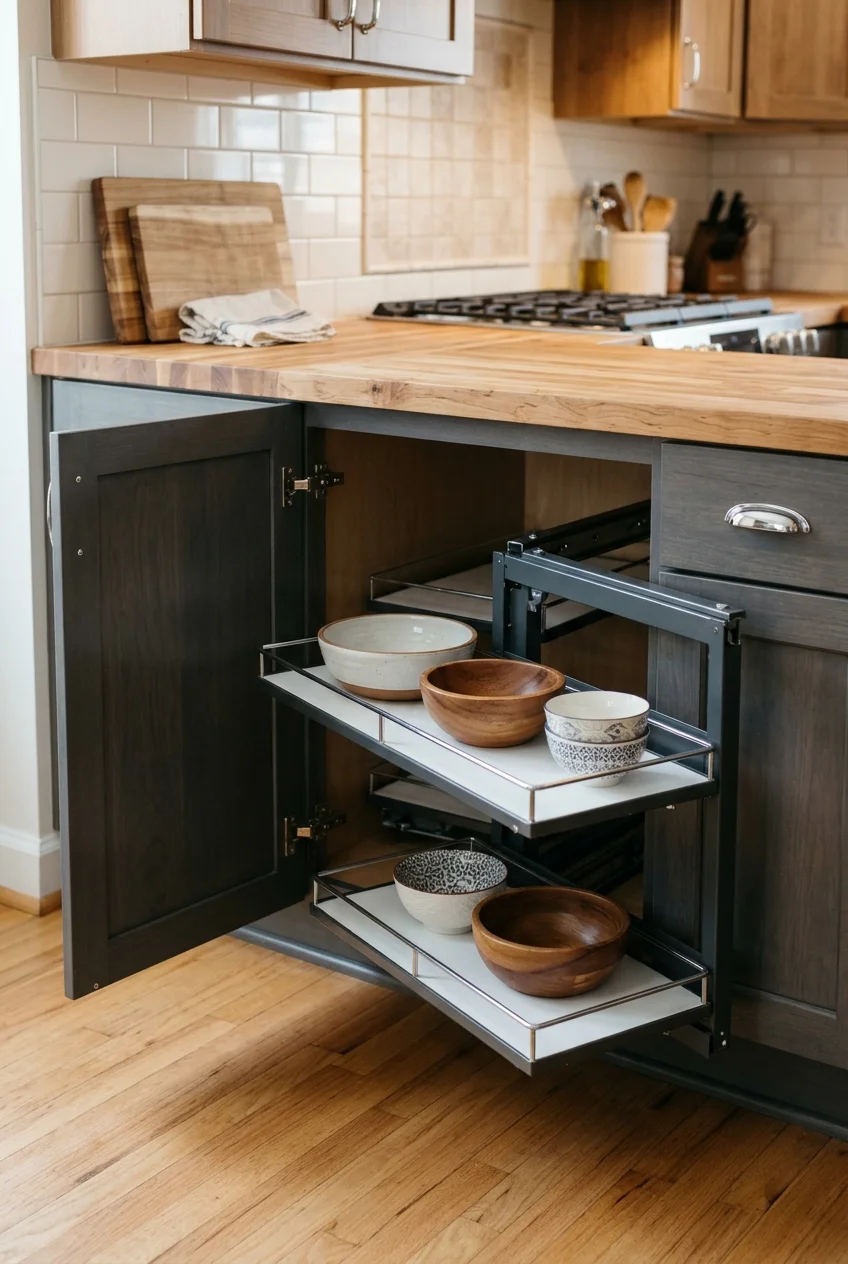
A blind-corner mechanism brings stored items out of the hidden side of a cabinet. It changes access more dramatically than placing another shelf inside the recess.
Determine whether you have a true blind corner, an angled cabinet, or another layout. Mechanisms for these openings are not interchangeable, even when their trays look similar.
- Record the usable door opening and internal corner depth.
- Identify left-hand or right-hand orientation where the model requires it.
- Check hinge, frame, pipe, and handle obstructions.
- Map the complete swing and extension path in the aisle.
- Confirm load limits and the cabinet strength needed for mounting.
Use the manufacturer drawings for the exact system rather than estimating from a photograph. The tray envelope during movement can be much larger than the closed opening.
Have an installer assess uncertain cabinet construction before ordering. A mechanism attached to weak material can fail even when its nominal dimensions appear correct.
If the full mechanism is impractical, use the corner for infrequent items in handled containers. Put daily cookware elsewhere rather than forcing an expensive incompatible retrofit.
49. Turn a suitable narrow cabinet into a spice pullout
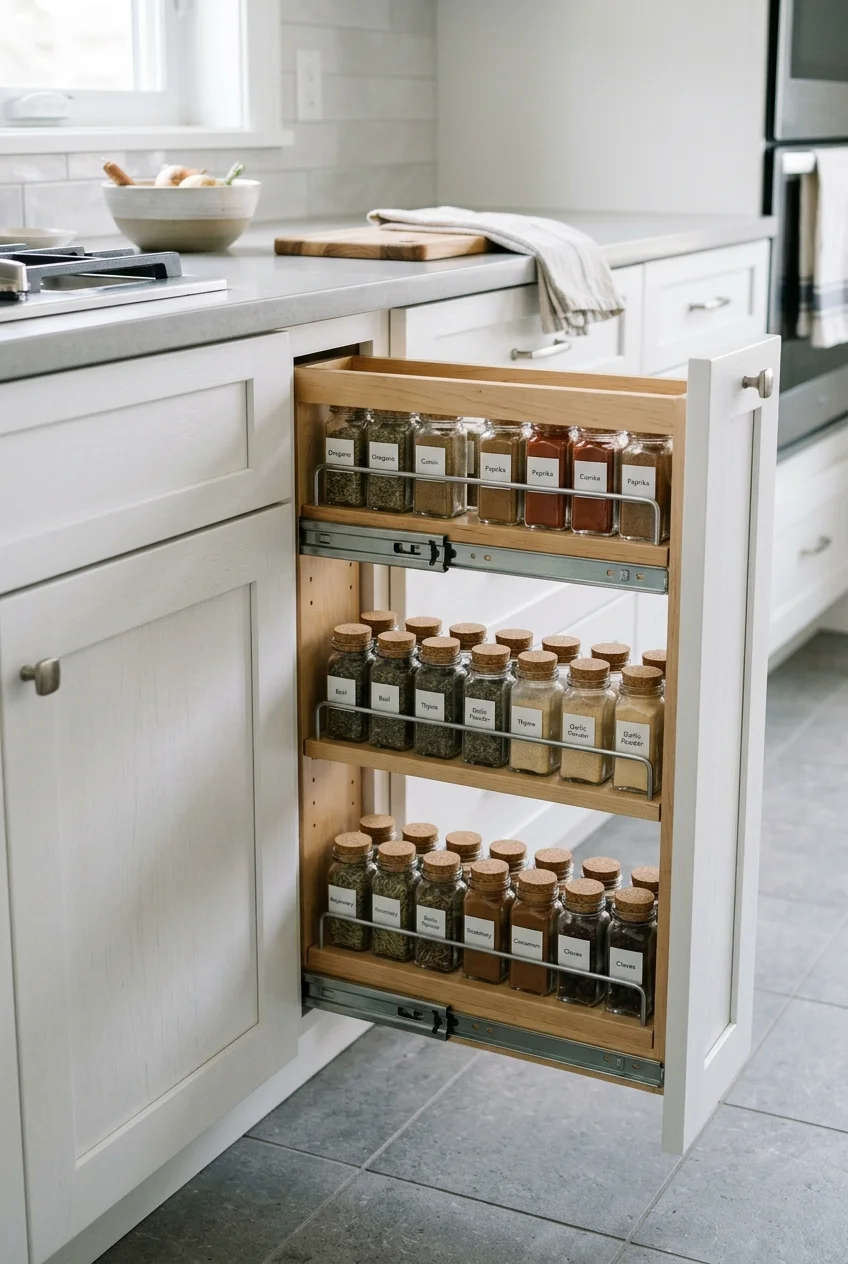
A narrow pullout makes jars visible in a single accessible unit. It suits an existing slim cabinet better than an improvised squeeze between appliances.
Measure the opening and available internal depth with the door hardware included. Choose a model for your cabinet construction and check the tallest jar against shelf spacing.
Keep the unit away from heat exposure that conflicts with the mechanism or stored ingredients. Do not convert an appliance clearance gap into storage without manufacturer approval.
Test the loaded pullout before final door adjustment. Rails should remain supported throughout movement, and jars need retaining edges so they do not fall into the cabinet.
Practical tip Store only the spices you use in the narrow pullout. Larger refills can stay elsewhere, leaving enough room to grasp each jar without lifting its neighbors.
50. Create an appliance garage with a door that clears the counter
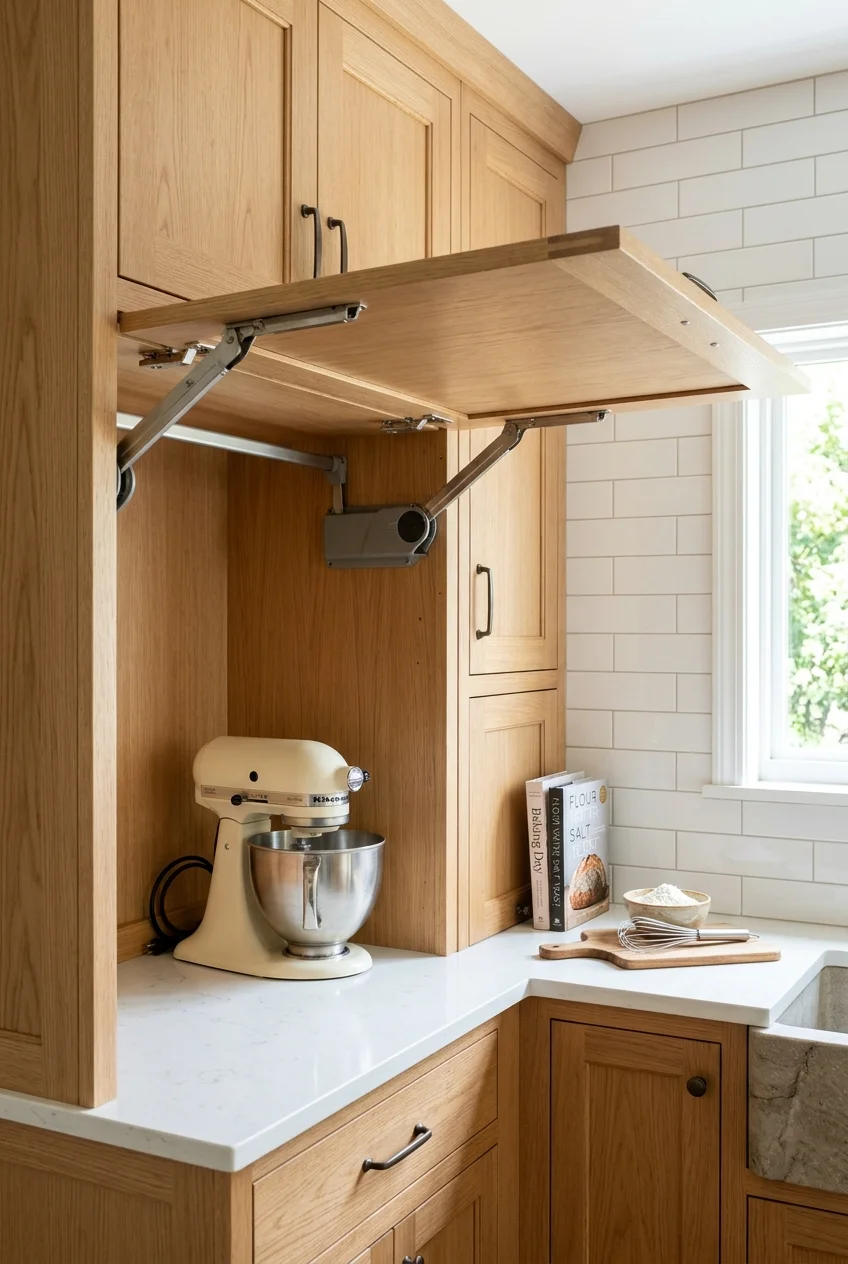
A countertop cupboard can conceal a mixer or coffee supplies when the work surface is idle. Its door system should open without occupying your main preparation area.
Check the appliance dimensions in its stored and usable positions, including lids and attachments. A cupboard that fits the body may still prevent normal access.
- Allow room to grasp and move the appliance safely.
- Check the entire door swing or lift path.
- Keep cords free of hinges, tracks, and pinch points.
- Verify appliance ventilation and operating clearances from its instructions.
Treat the garage as storage unless the appliance manufacturer explicitly permits the proposed enclosed use. Move heat- or steam-producing appliances to a suitable open operating position.
Plan access to outlets and any new electrical work with a qualified electrician. Do not route a cord through a closing door or rely on an improvised extension.
A cabinetmaker can assess lift-up, pocket, or retracting door hardware for the available opening. Each needs space for its mechanism that will reduce usable internal storage.
Watch for If the cabinet would consume your only preparation counter, a different storage location may be more useful. Mock up its full footprint before commissioning the doors.
Do not treat those surfaces as interchangeable with bare wood.
Loose thermofoil, delaminated laminate, and swollen cores need repair or replacement before a cosmetic finish.
Use the coating instructions for recoat time, reassembly, and normal service.
Temperature, humidity, ventilation, and coat thickness can change the wait.
Painting suits a door shape and layout you already want to keep.
Replacement deserves consideration when boxes are damaged or the layout fails your needs.