60 Stunning DIY Thanksgiving Centerpieces

This post may contain affiliate links: full affiliate disclosure.
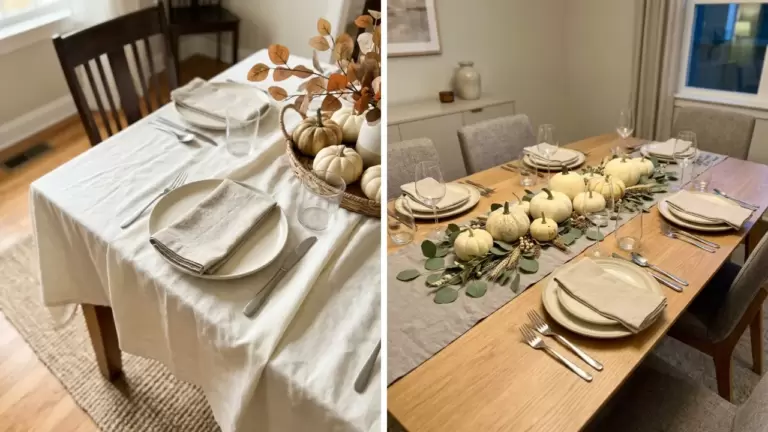
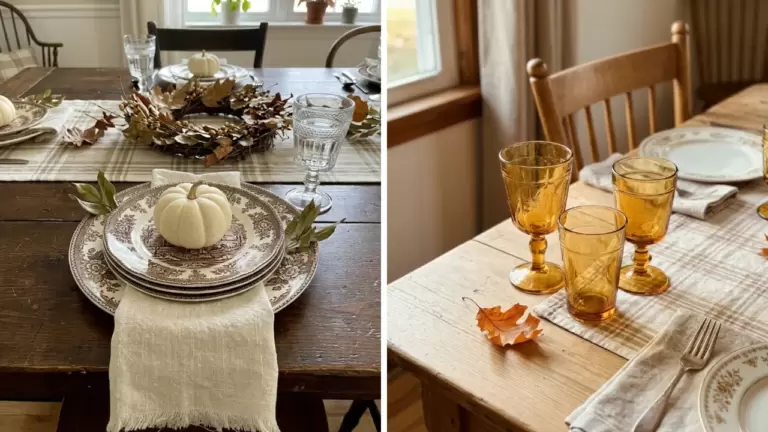
Designing a beautiful holiday table does not require a massive budget or a professional florist. Using pumpkins as the base for a centerpiece is a smart way to create a seasonal look that feels both warm and polished.
These simple projects use affordable materials to help transform any dining space for the harvest season.
EASY PUMPKIN DIY THANKSGIVING CENTERPIECES
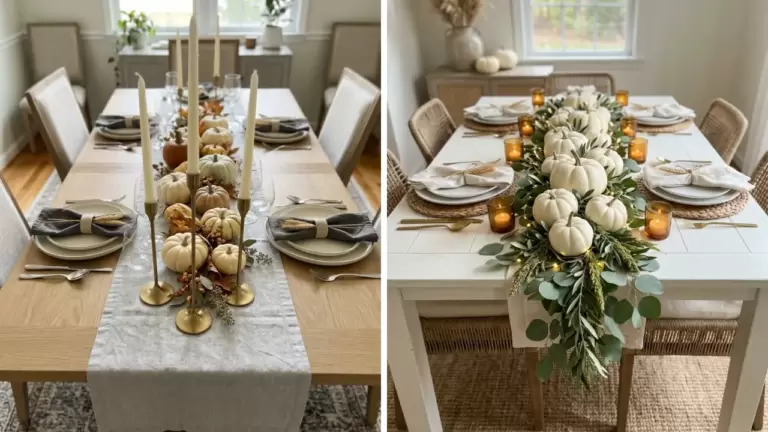
1. DIY Pumpkin and Eucalyptus Centerpiece
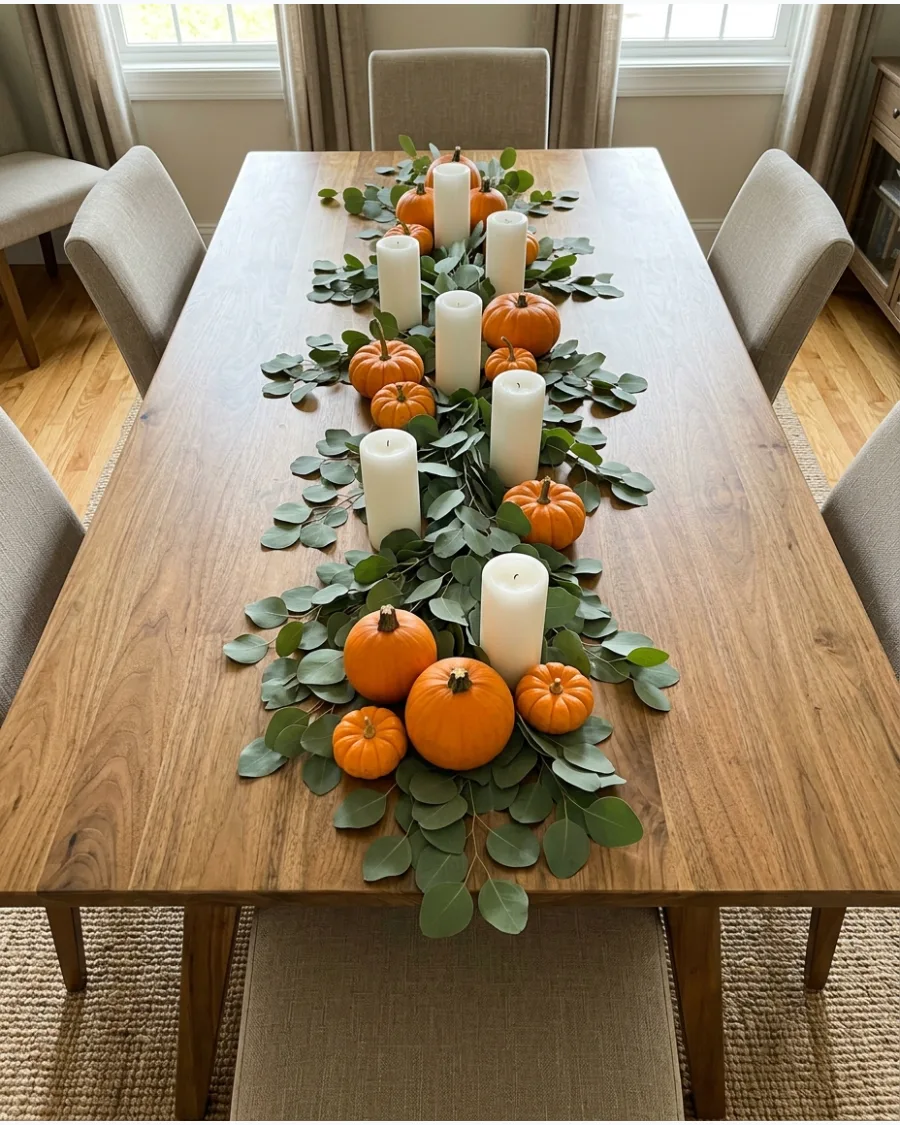
Layering greenery and small gourds creates instant volume. Space out the pumpkins along the eucalyptus vine so the table doesn't look overcrowded. Battery-operated candles provide a flicker without the worry of wax dripping on the leaves.
- Buy silver dollar eucalyptus for the best leaf shape.
- Lay the greenery down first as a base layer.
- Swap the greenery for dried versions to make it last for weeks.
Quick win: Gently bend the eucalyptus stems to follow the curve of your table for a more natural flow.
2. DIY White Pumpkin Centerpiece
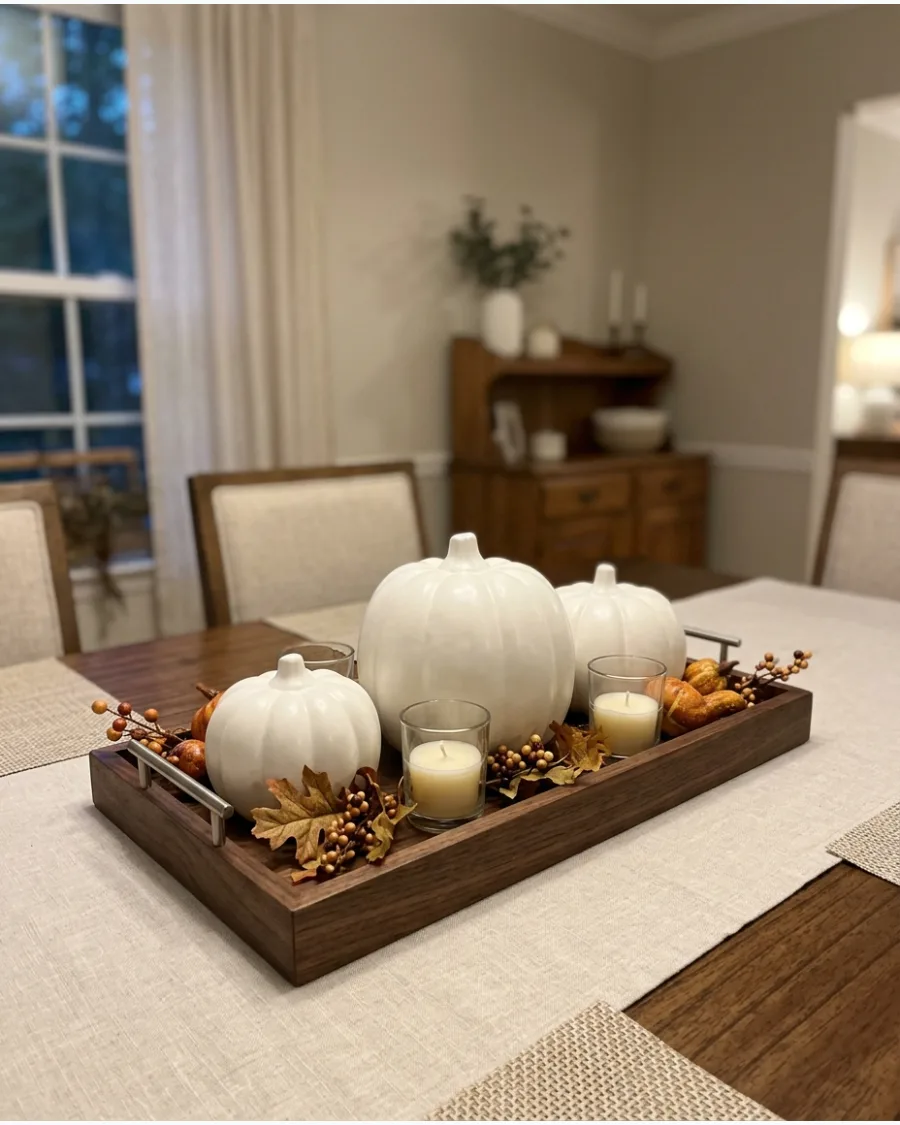
Monochromatic looks always feel more expensive than they are. Anchor the pumpkins on a tray to keep the arrangement contained and easy to move when serving food. Mix in a few sprigs of olive or bay leaves for a subtle color contrast.
- Use a mix of matte and satin finish pumpkins.
- Place the largest pumpkin in the center and work outward.
- Use a tray with handles for easy transport.
Most people skip this: Wipe down pumpkins with a damp cloth to remove any field dirt before placing them on a clean tray.
3. DIY Heirloom Pumpkin Centerpiece
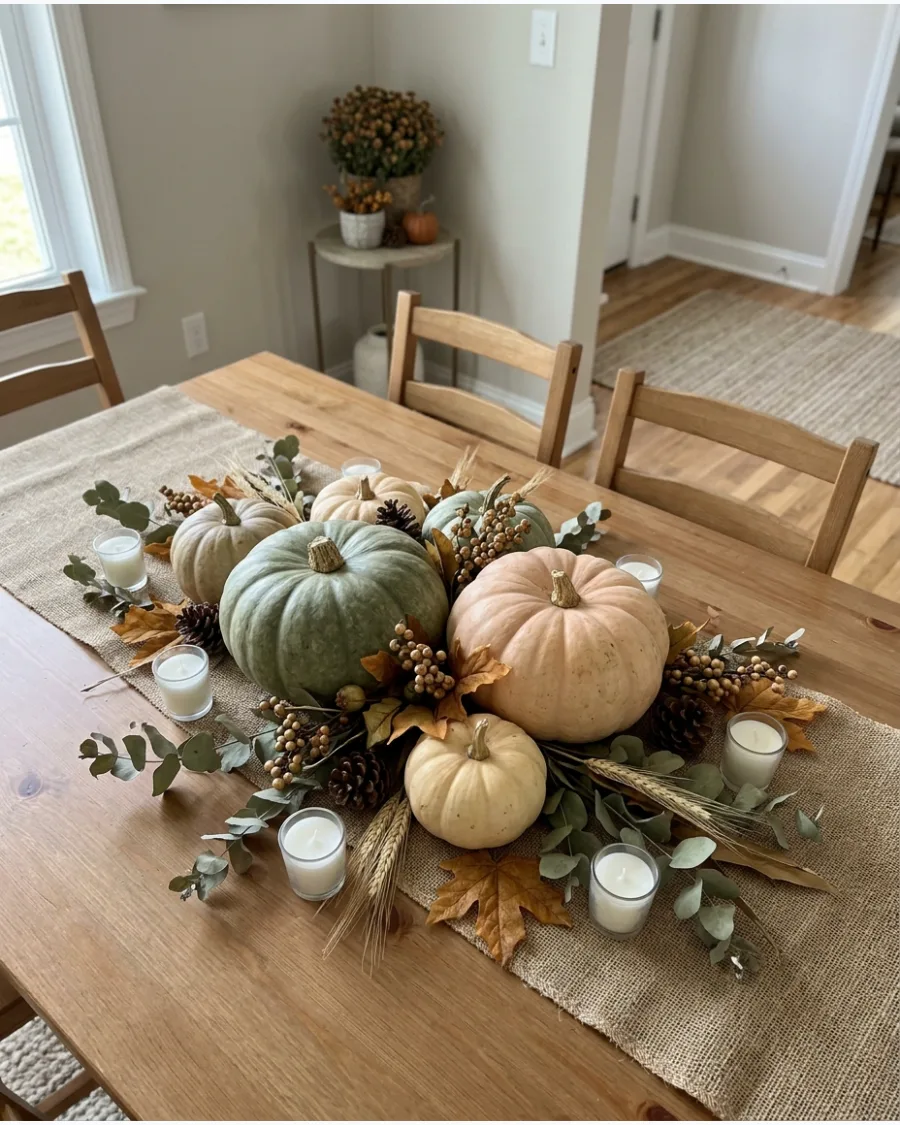
Heirloom varieties offer unique shapes and muted colors that look sophisticated. Tumble the pumpkins down the center of the table in a zigzag pattern to create visual movement. These colors pair perfectly with gold or copper flatware.
- Look for Fairytale or Jarrahdale varieties at the market.
- Stick to a palette of sage green, cream, and dusty peach.
- Keep the arrangement low so guests can see each other across the table.
Best shortcut: If you can't find real heirloom pumpkins, use high-quality foam ones and paint them with matte craft paint.
4. DIY Pumpkin Vase Centerpiece
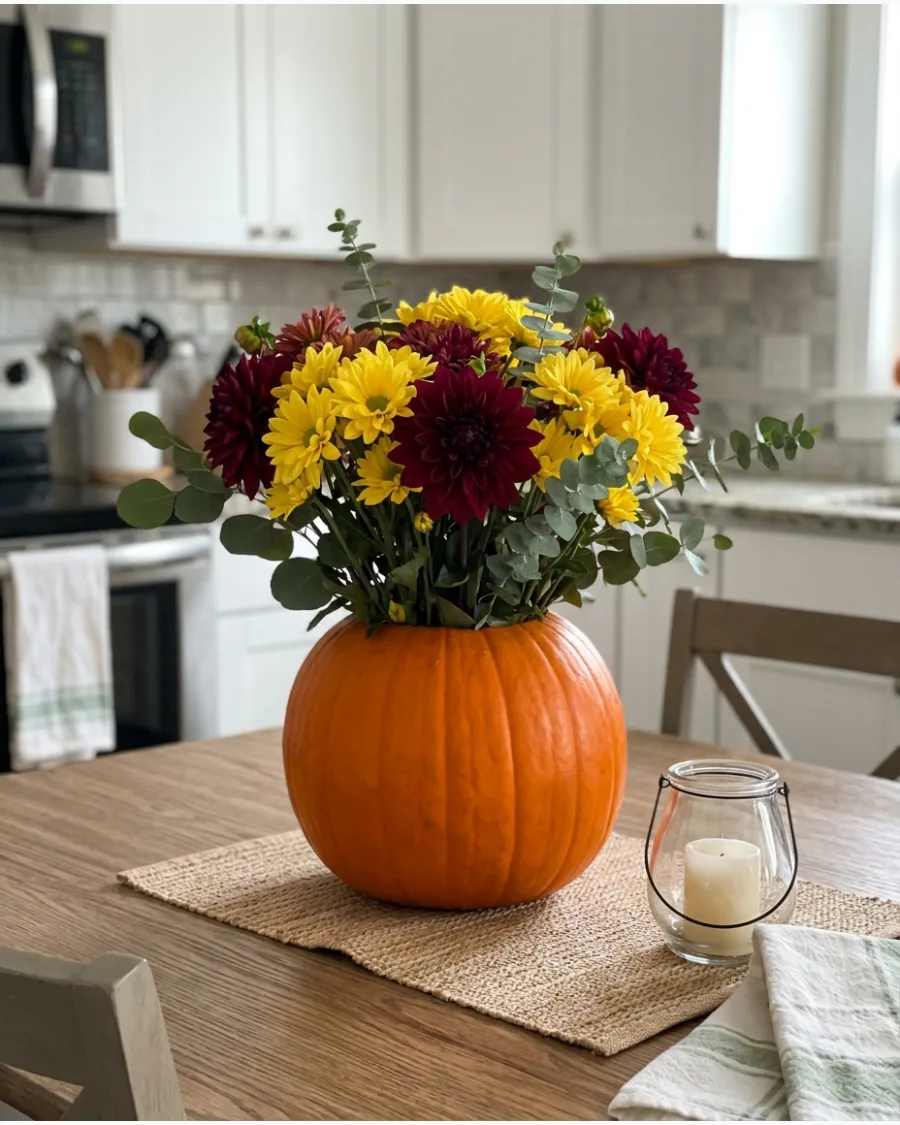
Turning a pumpkin into a vase is a classic move that never fails to impress. Insert a glass jar or plastic container inside the hollowed pumpkin to hold water and keep the stems fresh. This prevents the pumpkin from getting soggy from the inside out.
- Select a medium-sized pumpkin with a flat bottom for stability.
- Use floral foam inside the jar to help position heavy blooms.
- Cut the pumpkin lid at an angle so it doesn't fall through.
Quick win: Coat the cut edges of the pumpkin with petroleum jelly to help it stay fresh for the whole holiday weekend.
5. DIY Mini Pumpkin Candle Centerpiece
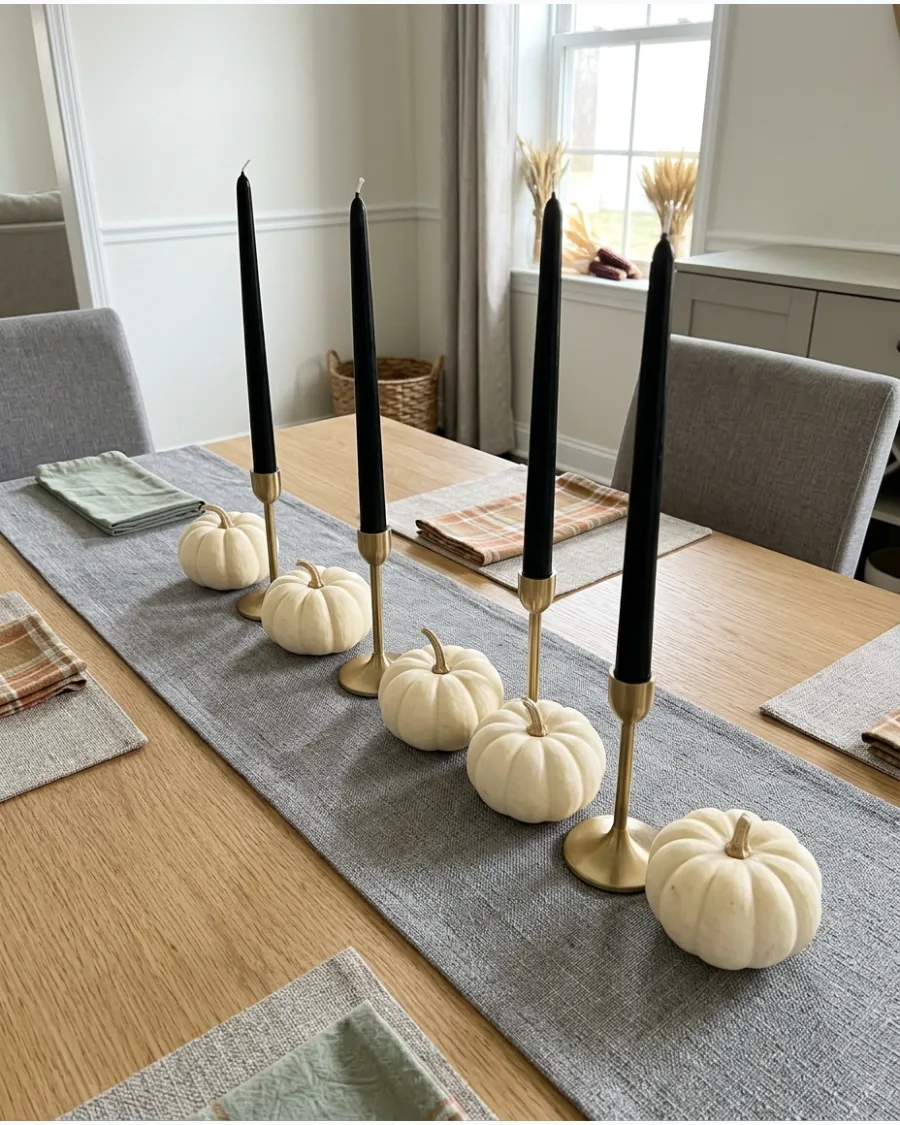
This linear setup works best for long, narrow tables. Place a taper candle between every two pumpkins to create a rhythmic, balanced line. The height of the candles adds drama without blocking the view of the person sitting across from you.
- Use brass or black candleholders for a modern touch.
- Choose mini pumpkins that are uniform in size.
- Opt for unscented candles so they don't compete with the smell of the food.
Most people skip this: Use a tiny bit of museum wax on the bottom of the pumpkins to keep them from rolling if the table gets bumped.
6. DIY Pumpkin and Hydrangea Centerpiece
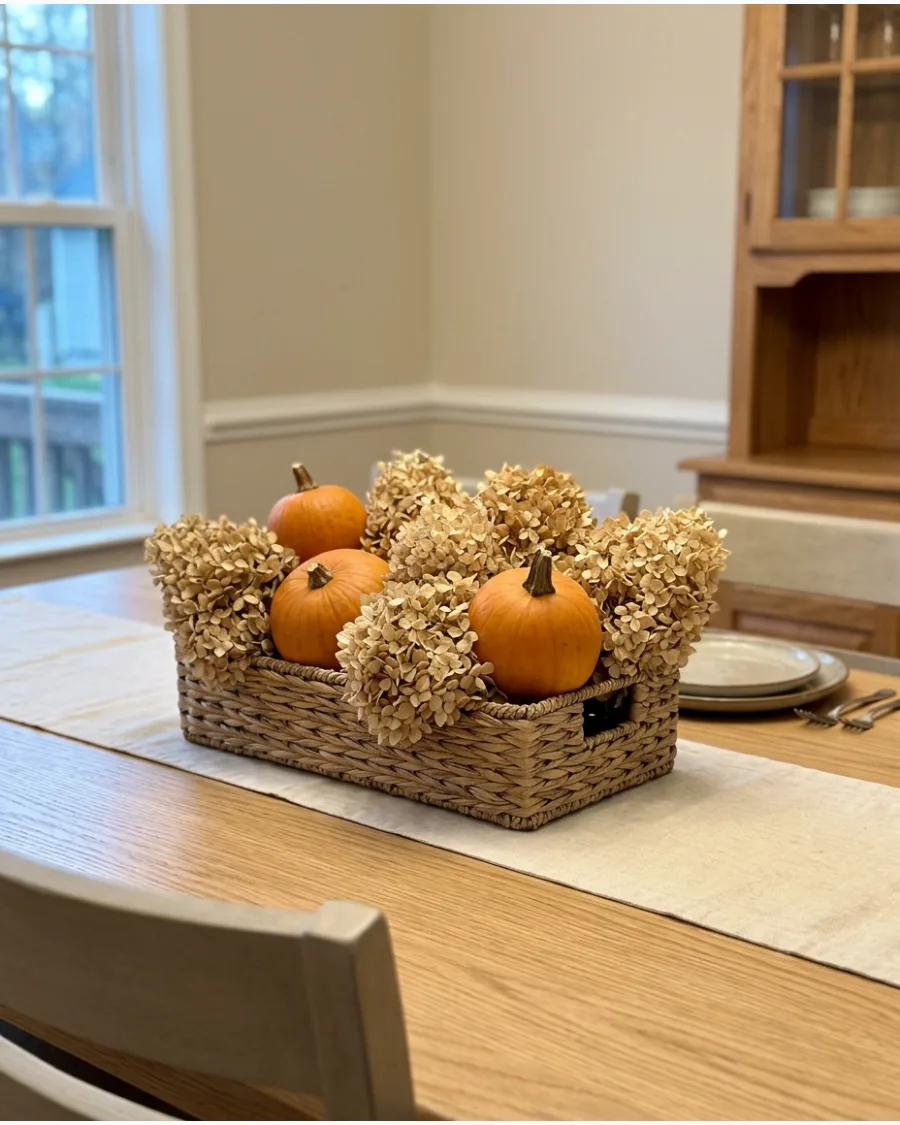
Dried hydrangeas have a wonderful airy texture that fills space quickly. Nestle small pumpkins into the hydrangea clusters to hide the stems and create a seamless look. This arrangement works well in a shallow basket to keep everything tucked together.
- Harvest hydrangeas in late summer and hang them upside down to dry.
- Use a low basket to keep the centerpiece below eye level.
- Add a few sprigs of dried wheat for extra height.
Best shortcut: Use a blow dryer on the cool setting to gently remove dust from dried hydrangeas before arranging.
7. DIY Pumpkin Dough Bowl Centerpiece
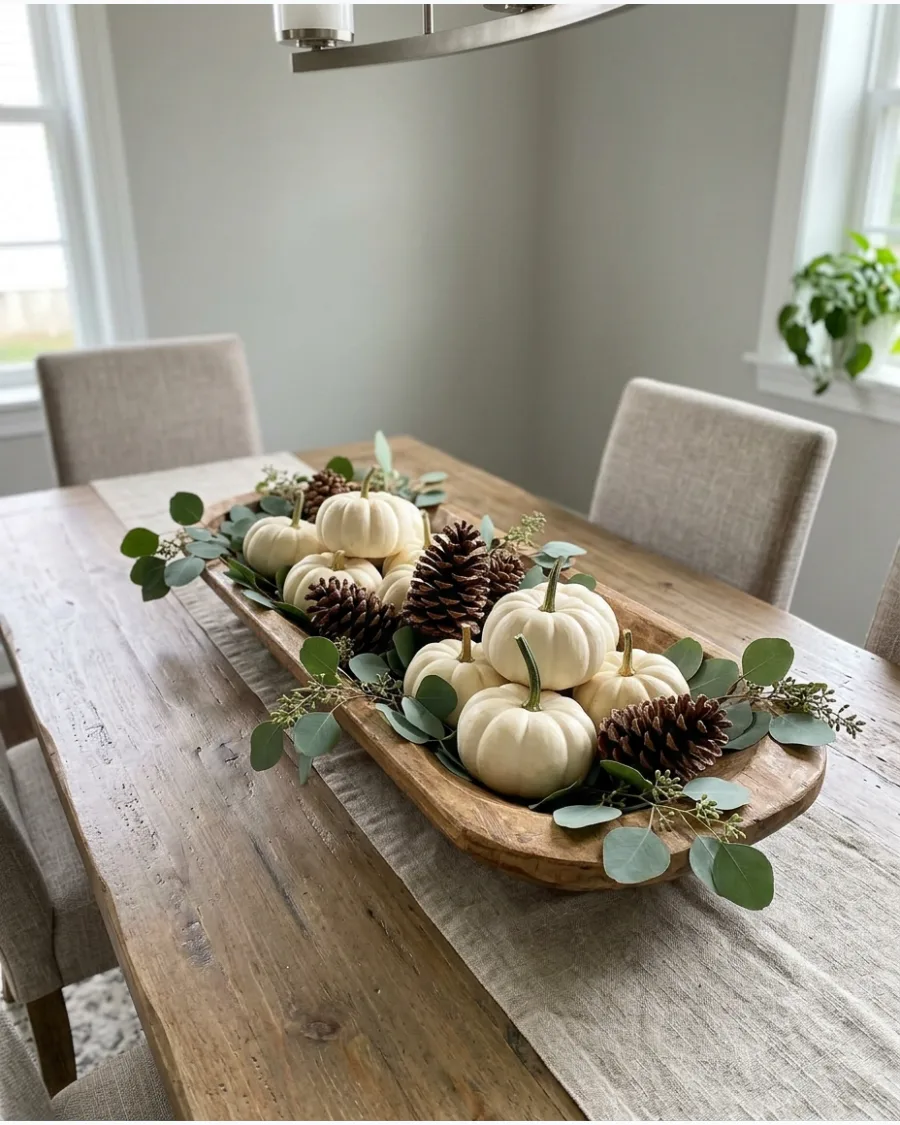
A dough bowl provides a sturdy base for a lush, overflowing display. Layer the larger pumpkins first, then fill the gaps with smaller items like pinecones and acorns. This creates a professional look with very little effort.
- Choose a bowl that is at least 20 inches long for a standard table.
- Mix textures by adding soft eucalyptus leaves and rough pinecones.
- Use odd numbers of pumpkins for a more natural feel.
Quick win: If the pumpkins are sitting too low in the bowl, stuff the bottom with crumpled brown paper to give them a boost.
8. DIY Pumpkin Basket Centerpiece
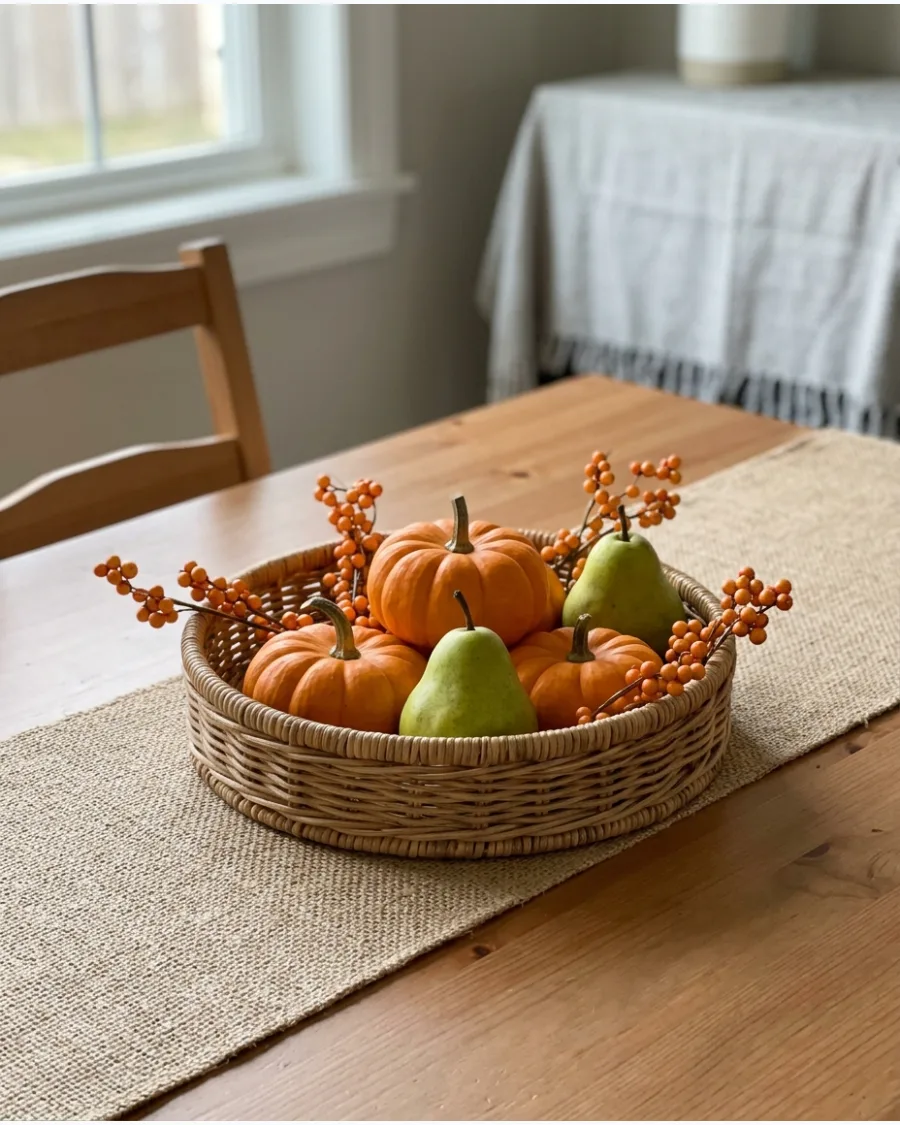
Baskets add a cozy, tactile element to the table. Combine pumpkins with seasonal fruits like pears or apples to make the arrangement feel like a true harvest. The mix of shapes and colors makes the centerpiece look custom-made.
- Use a shallow basket so the contents are visible from the side.
- Tuck in some fresh rosemary or thyme for a subtle herbal scent.
- Stick to a warm color palette of oranges, yellows, and deep reds.
Most people skip this: Line the basket with a cloth napkin or piece of fabric to protect the table from any scratches.
9. DIY Pumpkin Pedestal Centerpiece
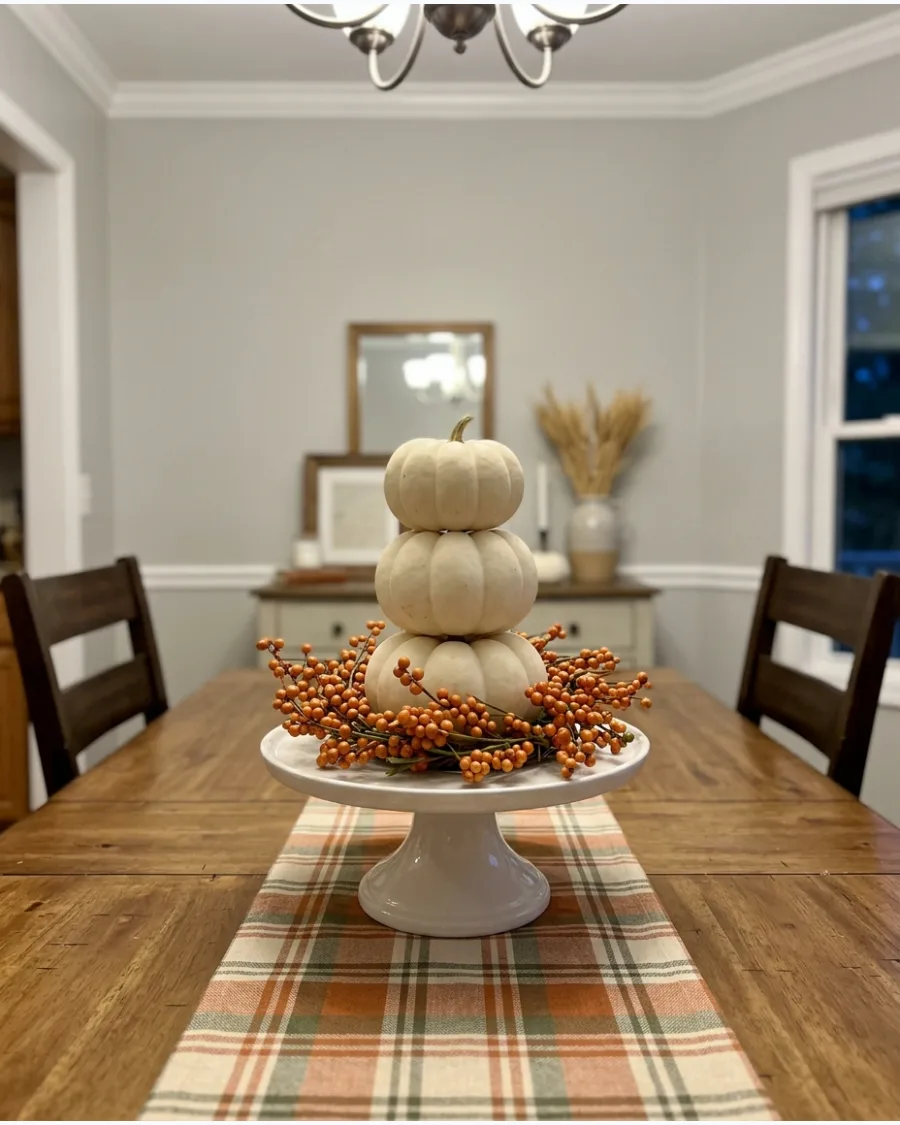
Elevating your decor helps clear up space on the actual table surface. Stack two or three small pumpkins on a cake stand to create a focal point with height. Surround the base with a few loose leaves or berries to ground the look.
- Use a simple white or glass cake stand to keep the focus on the pumpkins.
- Secure stacked pumpkins with a small piece of double-sided tape.
- Ensure the bottom pumpkin has a very flat top for a stable stack.
Best shortcut: If you don't have a cake stand, flip a sturdy bowl upside down and place a plate on top of it.
10. DIY Neutral Pumpkin Tray Centerpiece
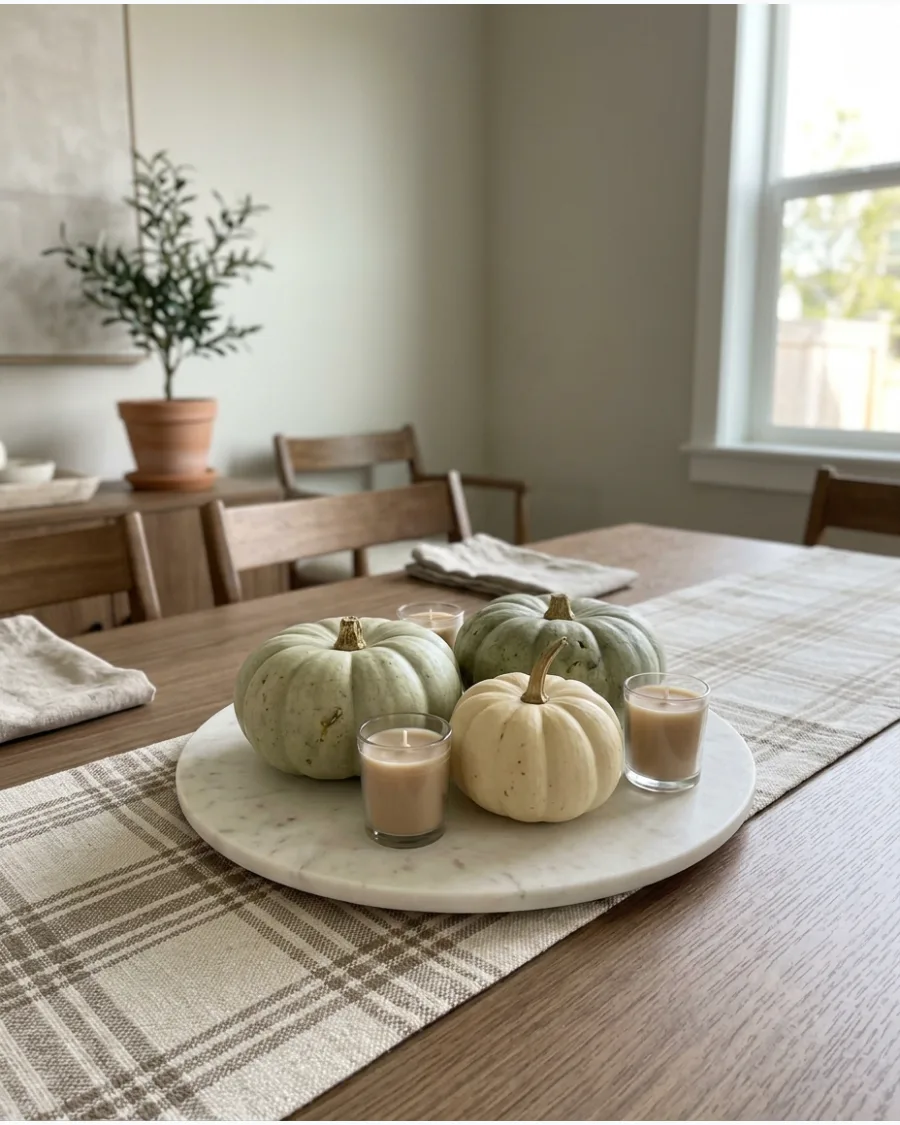
A neutral palette of cream and pale green feels modern and calm. Incorporate different materials like stone, wood, and glass to add interest without adding bright colors. This style works perfectly in homes with a minimalist or contemporary aesthetic.
- Use a stone or marble tray for a high-end feel.
- Add dried grasses like pampas or bunny tails for a soft texture.
- Keep candles in the same color family as the pumpkins.
Quick win: Use a mix of heights with your candles to keep the tray from looking flat and one-dimensional.
CANDLE DIY THANKSGIVING CENTERPIECES
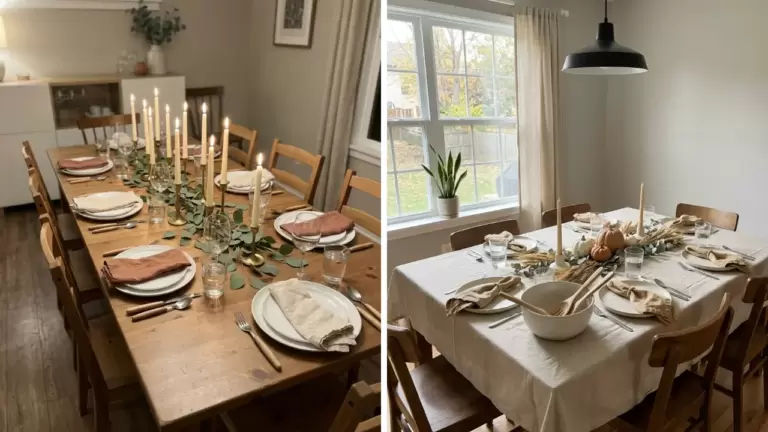
11. DIY Taper Candle and Greenery Centerpiece
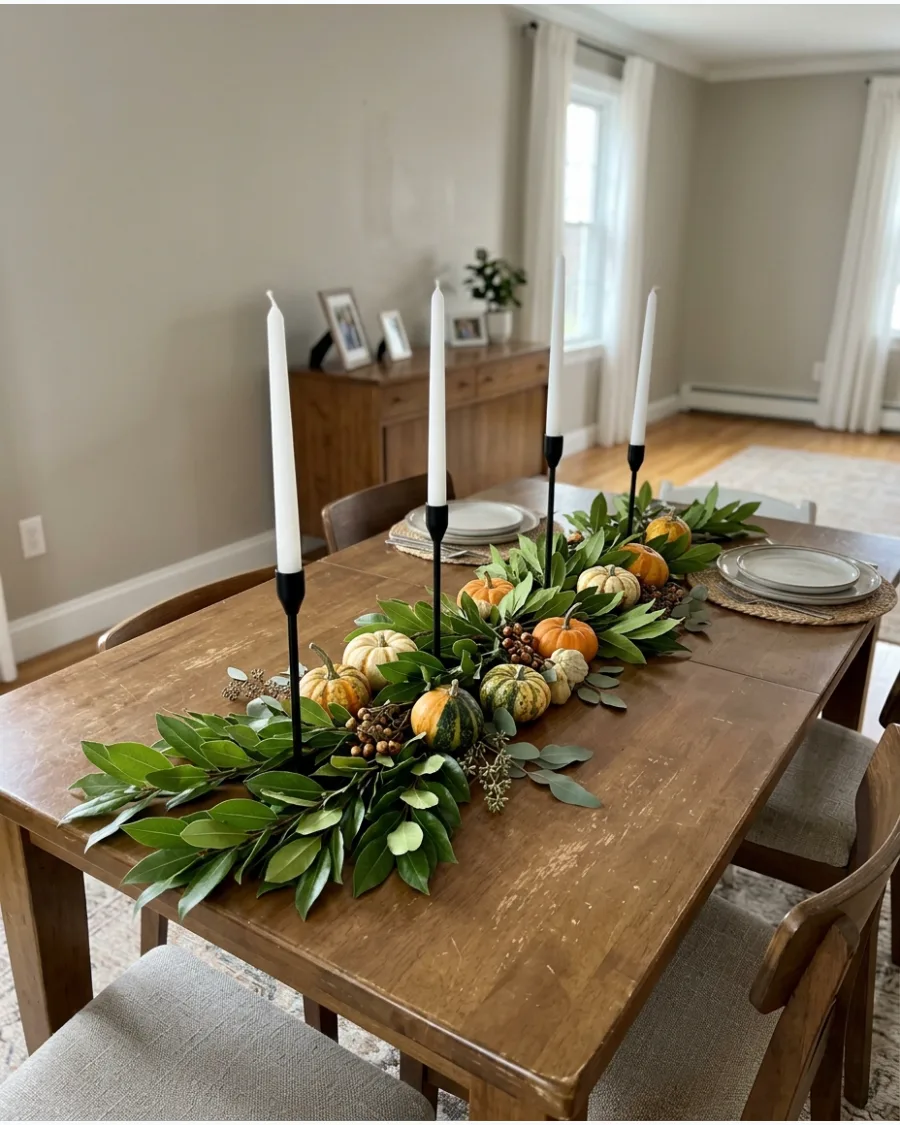
Layering fresh greenery like bay leaves or seeded eucalyptus creates a lush base that feels high-end without the florist price tag. Nestle slim taper candles directly into the foliage to provide height and a soft glow across the entire table.
Trim any low-hanging leaves away from the candle flames to keep the display safe throughout dinner. This minimalist approach lets the natural textures of the plants shine.
- Buy bunches of eucalyptus or bay leaves from a local grocery store for under $15.
- Lay the greenery stems overlapping down the center of the table and place candle holders in the gaps.
- Use faux greenery if you want to set the table a few days in advance.
Best shortcut: Use museum wax on the bottom of candle holders to keep them from tipping on uneven greenery.
12. DIY Mixed-Height Candle Centerpiece
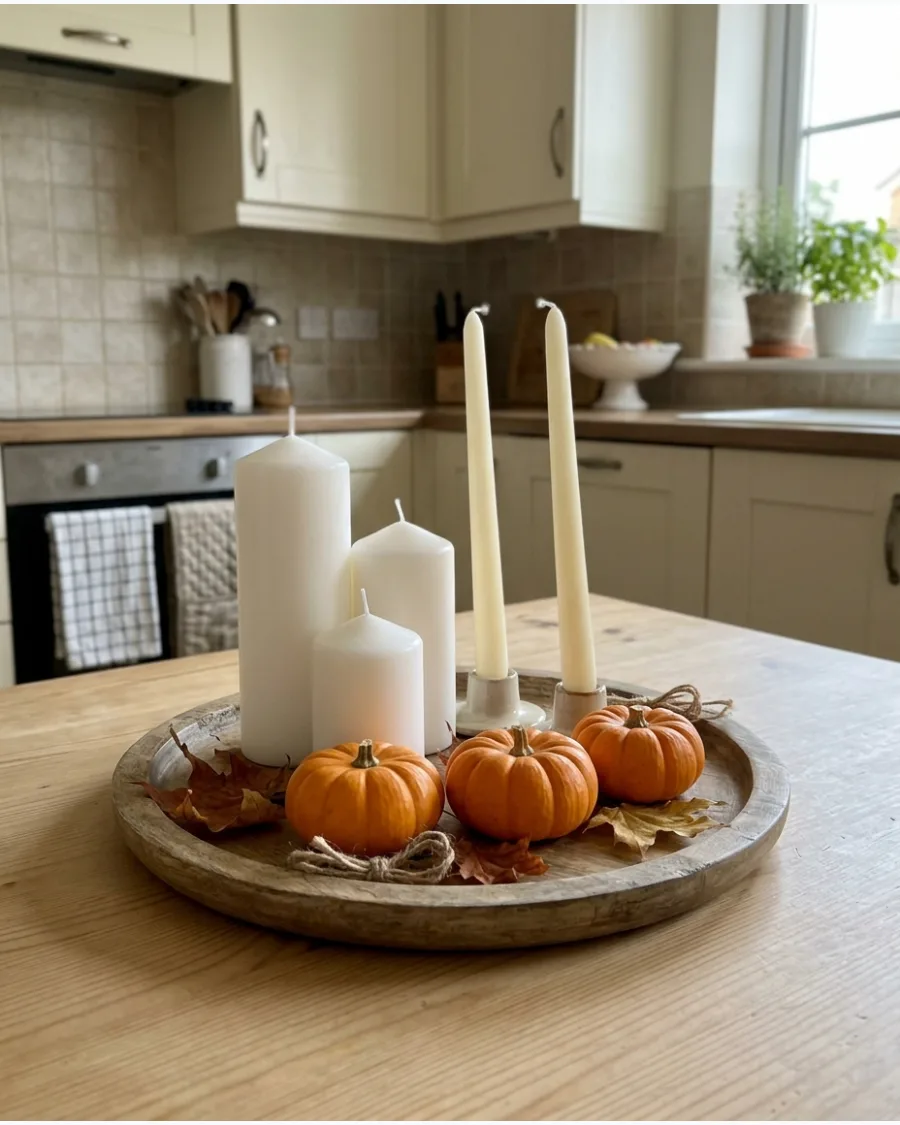
Gathering candles of different sizes creates a focal point that draws the eye without blocking conversation across the table. Use a mix of thick pillar candles and slender tapers on a flat tray to keep the arrangement contained and easy to move.
Place the tallest candles in the center and work outward with smaller votives and mini pumpkins to create a balanced pyramid shape. It turns a random collection of wax into a deliberate design statement.
- Look for unscented candles so the smell of the food remains the main attraction.
- Group everything on a tray or large plate to protect the table surface from wax drips.
- Swap the pumpkins for gold-painted acorns for a more formal evening look.
Quick win: Stick to one color of wax, like cream or ivory, to make different candle shapes look like a matched set.
13. DIY Amber Glass Candle Centerpiece
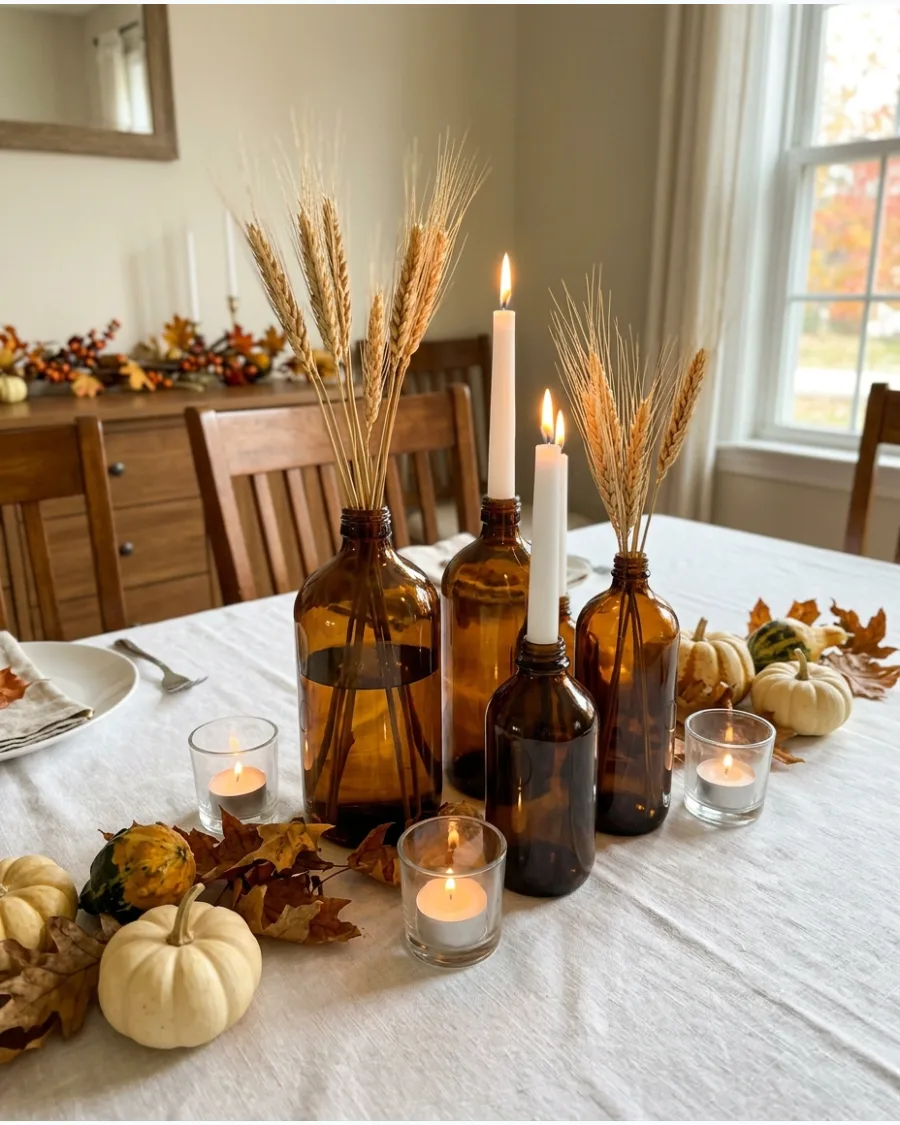
Amber glass adds an instant warm, autumnal tint to the table that mimics the glow of a sunset. Use a variety of brown bottles or jars as bud vases for single stems of dried wheat or fall leaves.
Mix these glass pieces with small tea lights to let the light bounce off the warm brown tones of the glass. This is a great way to repurpose old bottles into something that looks intentional and sophisticated.
- Clean out old vanilla extract bottles or supplement with a set of amber bud vases.
- Arrange the bottles in a tight cluster in the middle of the table for a high-impact look.
- Use battery-operated tea lights if you are worried about heat near the glass.
Most people skip this: Remove all label residue with rubbing alcohol to ensure the glass looks professional and clean.
14. DIY Mason Jar Candle Centerpiece
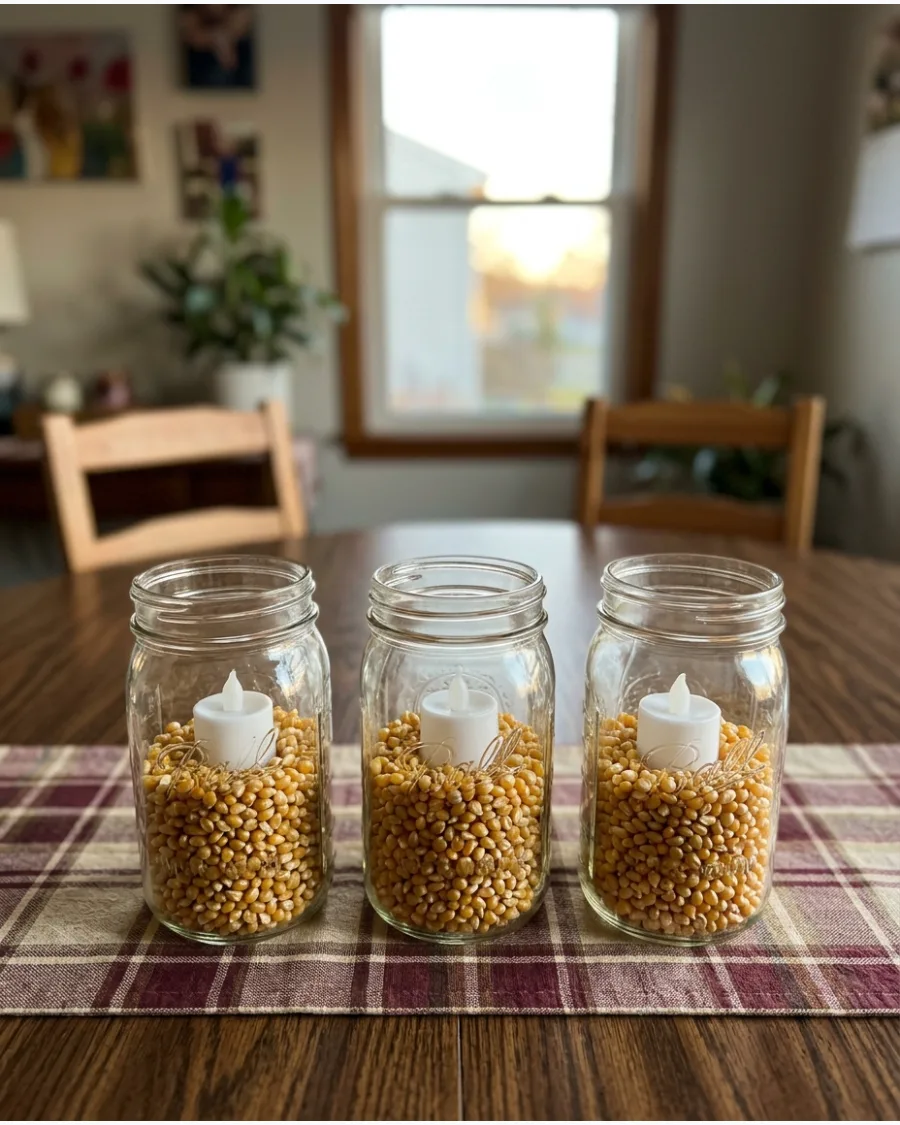
Filling clear jars with natural harvest items provides a sturdy base for candles and adds a layer of seasonal color. Use corn kernels, dried beans, or small acorns to fill the bottom third of the jar before nesting a candle inside.
Opt for battery-operated LED candles to avoid the jars getting too hot from trapped flames. The texture of the grains against the glass gives the table a grounded, cozy feeling.
- Check the pantry for dried lentils, split peas, or kidney beans to get different colors for free.
- Line the jars up in a row on a simple fabric runner for a clean, modern look.
- Wrap a piece of twine around the rim of the jar for a tiny bit of extra detail.
Best shortcut: Use a funnel to pour the grains into the jars to avoid a mess on your clean tablecloth.
15. DIY Floating Candle Thanksgiving Centerpiece
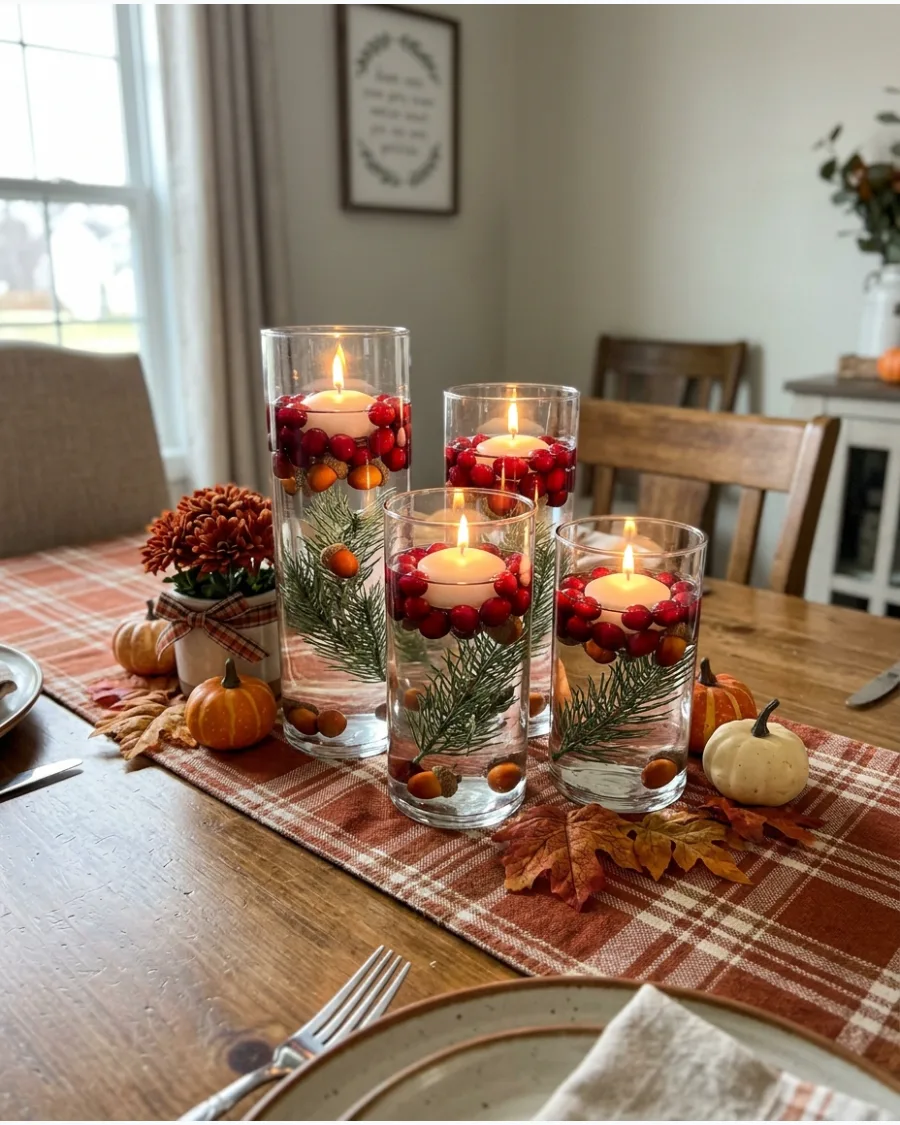
Water-filled vessels create a beautiful reflection that brightens up a dark dining room. Submerge red cranberries or sprigs of rosemary in clear glass cylinders to add a pop of color that stays fresh all day.
Fill the water to within an inch of the rim so the floating candle sits high enough to be seen by every guest. This style looks expensive but only takes a few minutes to assemble right before dinner.
- Buy a bag of fresh cranberries in the produce aisle for a few dollars.
- Place the vases on a mirror or a metallic tray to double the light reflection on the table.
- Use distilled water if your tap water is cloudy to keep the display crystal clear.
Quick win: Add the heavy items like cranberries first, then the water, and place the candle last to keep the wick dry.
16. DIY Brass Candlestick Centerpiece
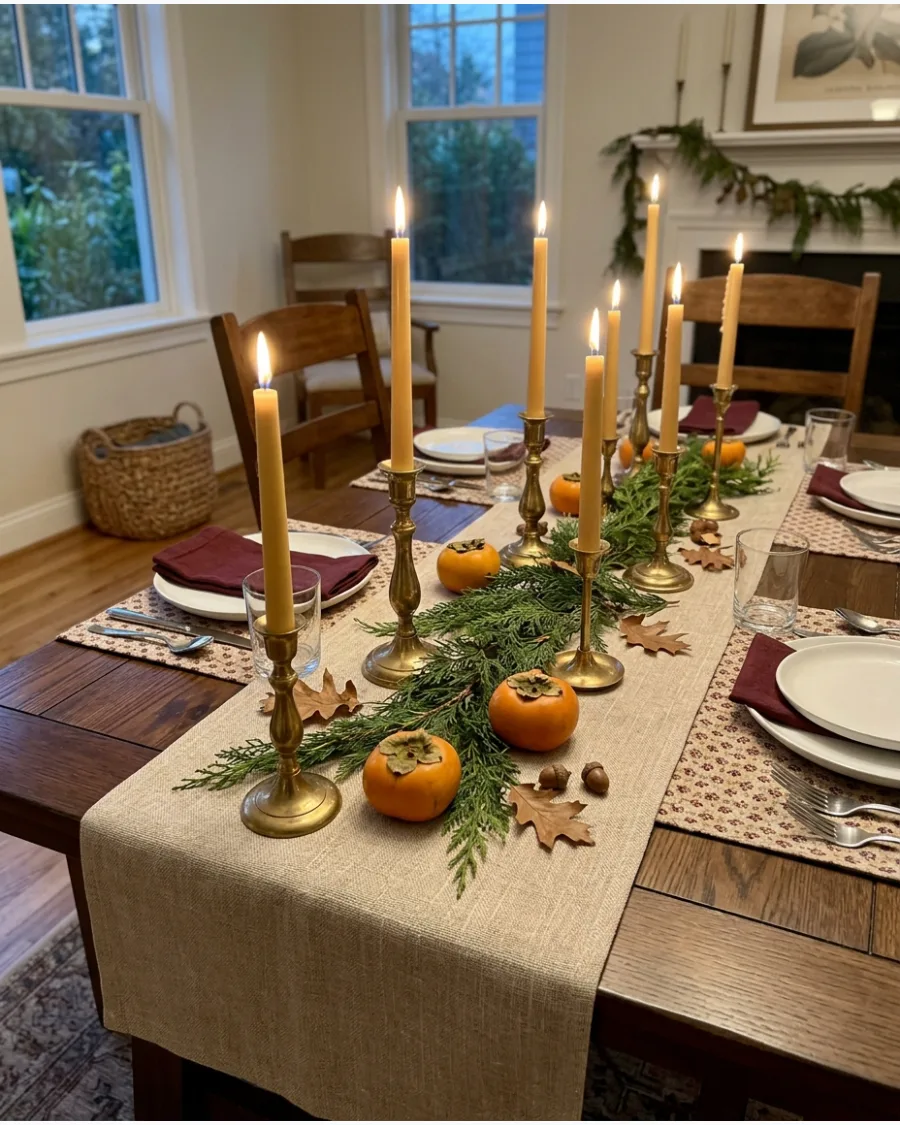
Mismatched brass holders bring a vintage charm that feels curated and personal rather than store-bought. Pair these metallic tones with deep green foliage and bright seasonal fruits like persimmons or small apples.
Keep the heights varied across the table to create a sense of movement that leads the eye down the length of the display. The warmth of the brass perfectly complements the traditional colors of a Thanksgiving meal.
- Scour local thrift stores or flea markets for heavy brass pieces with interesting shapes.
- Mix in a few small bowls of walnuts or pecans to fill the gaps between the candlesticks.
- Polish the brass lightly but leave some patina for a more authentic, lived-in look.
Most people skip this: Use candle snuggers or a small piece of folded paper to make sure thin tapers stand perfectly straight in wider holders.
17. DIY Candle and Pinecone Centerpiece
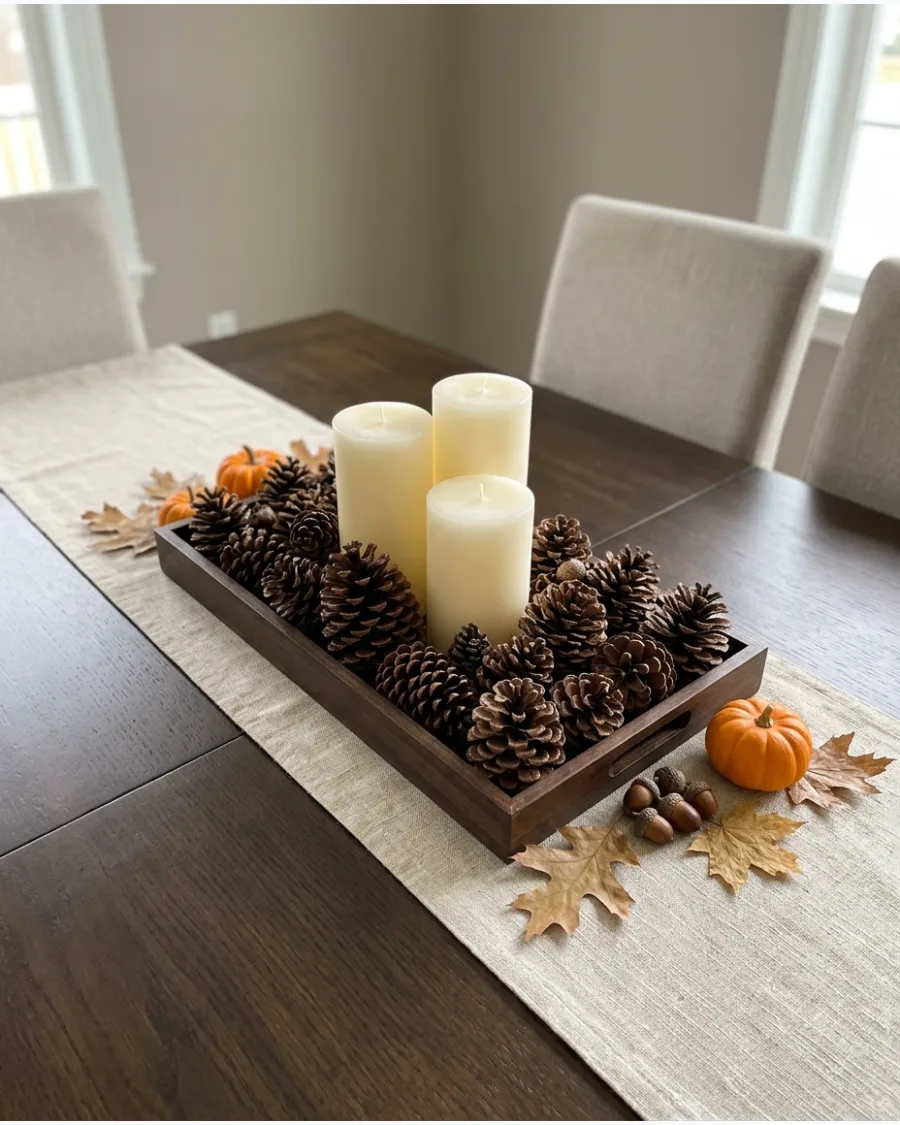
Pinecones are a free and easy way to add a lot of volume and texture to a centerpiece without much effort. Surround thick ivory candles with a heap of pinecones and small twigs on a wooden tray or board.
Spray a light coat of clear sealer on the pinecones to give them a subtle shine and prevent them from shedding debris on the table. It is a classic look that works in almost any dining room style.
- Collect pinecones from the yard or buy a scented bag for a subtle cinnamon aroma.
- Add a few sprigs of dried eucalyptus to soften the look of the woody pinecones.
- Use various sizes of pinecones to fill every small gap around the candle bases.
Best shortcut: Bake gathered pinecones in the oven at 200 degrees for 30 minutes to get rid of any hidden bugs before putting them on the table.
18. DIY Candle and Pear Centerpiece
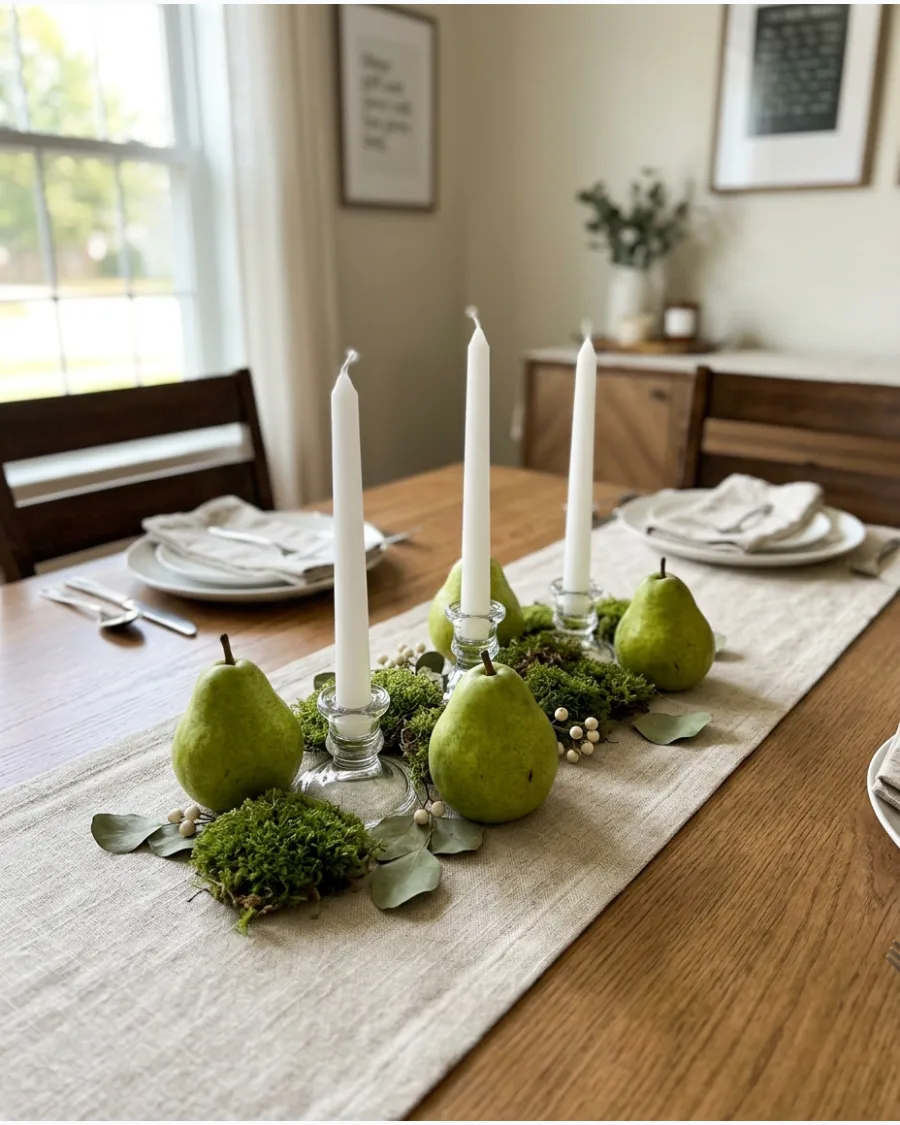
Using fresh fruit is a smart way to get a professional look on a tight budget. Pears have a beautiful, sculptural shape and come in soft greens and reds that look stunning next to white candles.
Tuck small pieces of green moss or boxwood clippings between the fruit and candles to hide the bases of the holders. This centerpiece feels organic and sophisticated without requiring any complex crafting skills.
- Choose pears that are firm and slightly underripe so they hold their shape and color for several days.
- Space the candles out in a zig-zag pattern and nestle the pears in the curves.
- Wipe the pears with a damp cloth to make the skin look bright and clean.
Quick win: Use Bosc pears for a matte, bronze look that pairs perfectly with gold or copper accents.
19. DIY Candle Lantern Thanksgiving Centerpiece
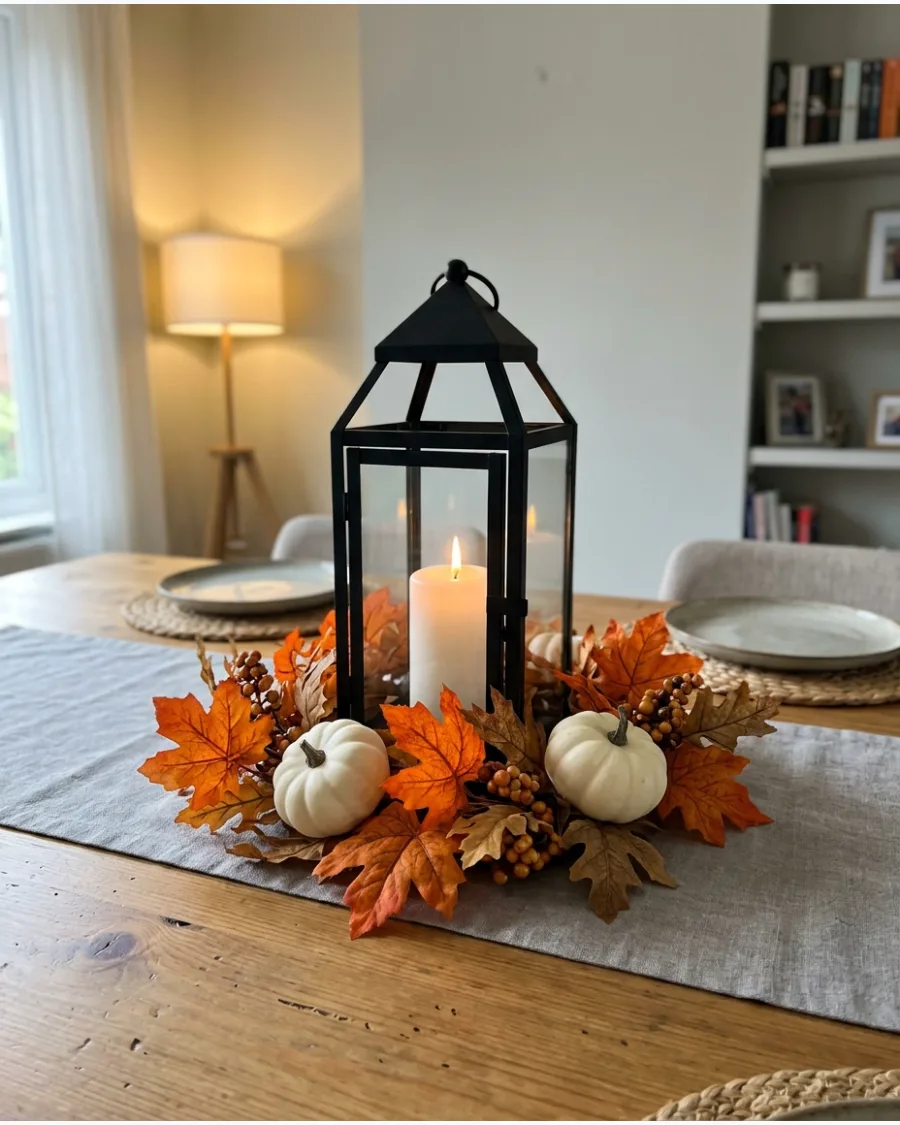
A single large lantern acts as a strong anchor for the center of a table, especially in a large room. Surround the base of the lantern with a wreath of autumn leaves and mini pumpkins to ground the height of the piece.
Choose a lantern with clear glass panels to ensure the candle flame is visible from all angles of the seating area. This setup is easy to move if you need more space for serving platters during the meal.
- Select a lantern that is at least 12 inches tall so it doesn't get lost among the dinner plates.
- Use a battery-operated candle with a timer so the lantern glows automatically as the sun sets.
- Place the lantern on a decorative charger plate to give it a more finished look.
Most people skip this: Clean the glass panels of the lantern inside and out to prevent smudges from dulling the candle's light.
20. DIY Candle-Only Thanksgiving Centerpiece
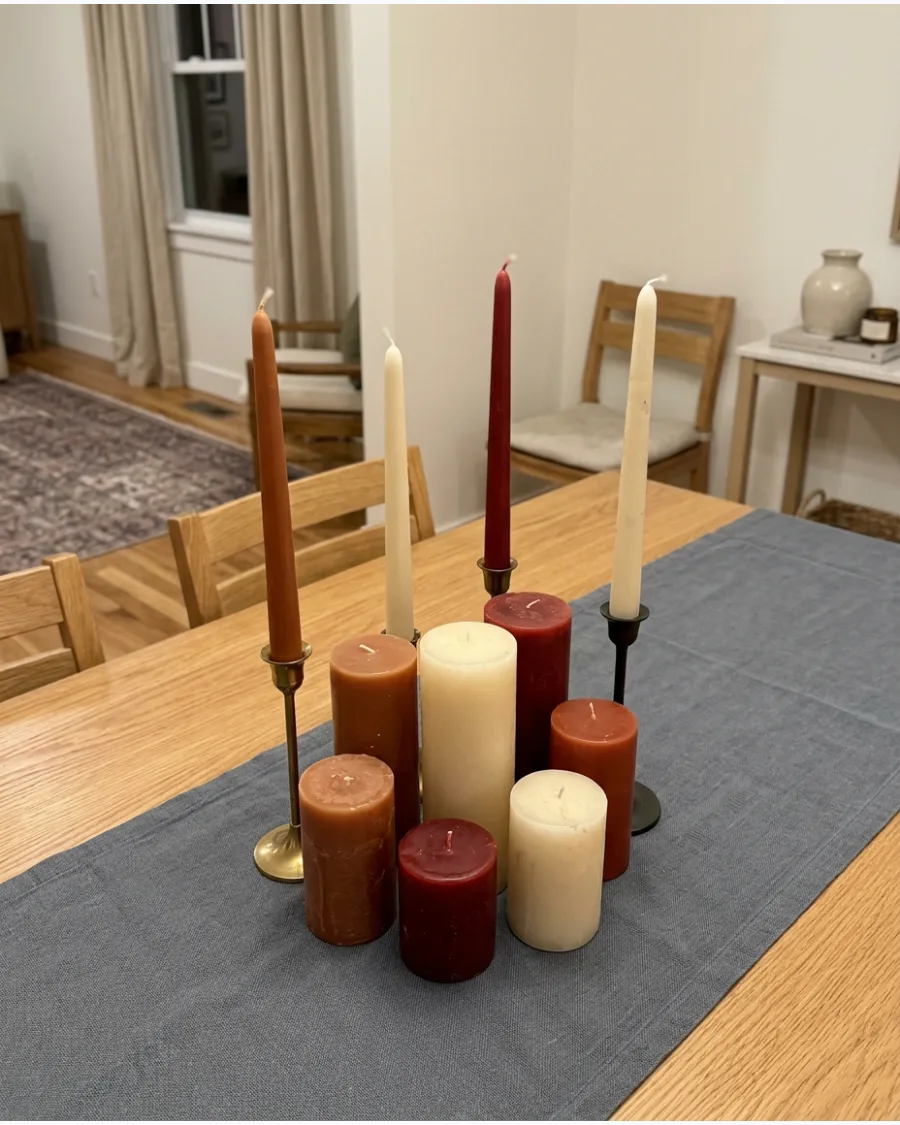
A mass of candles in different heights and shades of the same color family creates a high-impact, modern look. Use a palette of rust, cream, and burgundy to reflect the colors of the season without using any foliage or pumpkins.
Group at least seven to nine candles together to make the arrangement feel like a singular, powerful design element. The flickering light from a large group of candles creates an incredibly cozy and intimate atmosphere.
- Stick to a consistent color palette of three colors to keep the look from feeling messy.
- Use a mix of textures, like smooth wax and ribbed candles, to add visual interest.
- Ensure the candles are placed far enough apart that they don't melt each other from the heat.
Best shortcut: Use unscented candles exclusively for this many flames to avoid overwhelming the room with a heavy fragrance.
MASON JAR & GLASS DIY CENTERPIECES
21. DIY Fall Flower Mason Jar Centerpiece
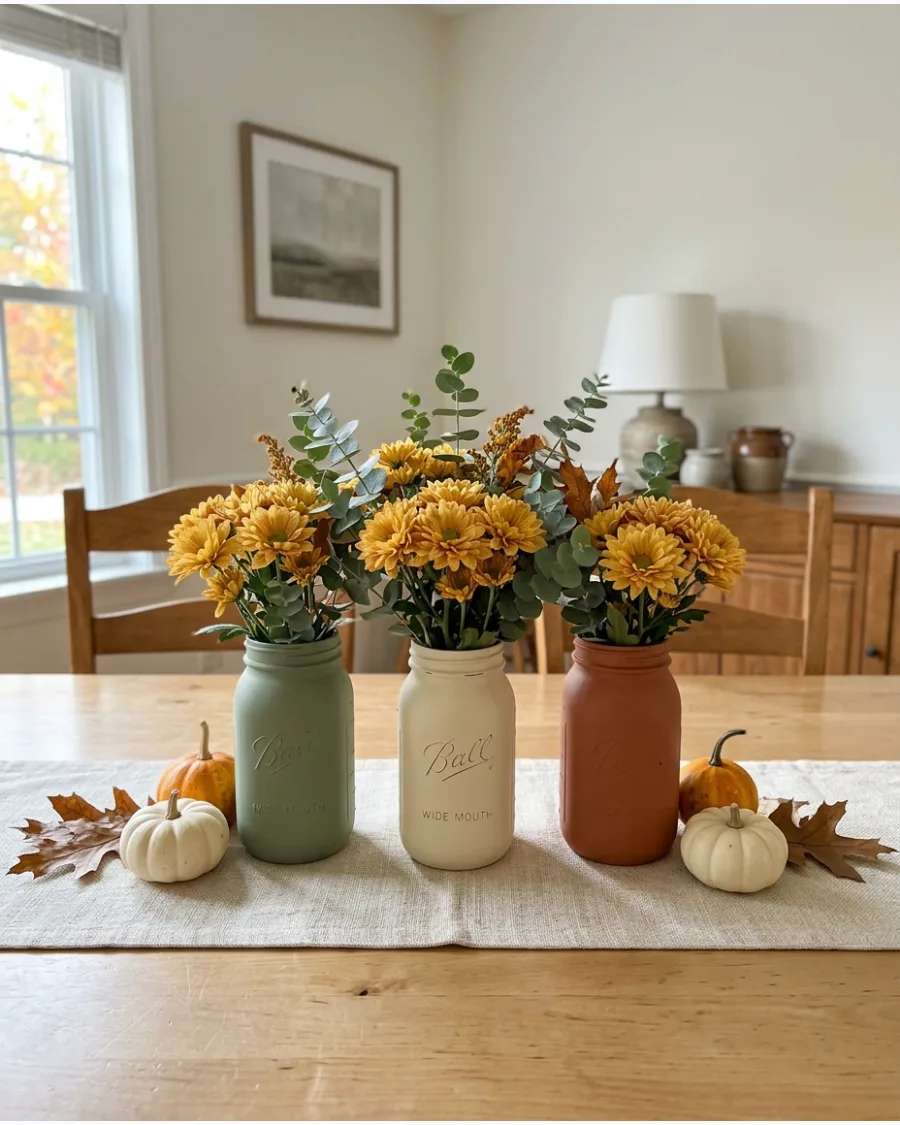
Painted jars hide messy stems and keep the focus on the beautiful autumn blooms. Use chalk paint for a matte finish that looks expensive and resists showing fingerprints.
Grouping three jars of different heights creates a natural focal point without much effort. Matte finishes prevent the glass from reflecting harsh overhead dining room lights during dinner.
- Buy jars in bulk at craft stores for under ten dollars to save on the base materials.
- Apply two thin coats of chalk paint and sand the edges lightly for a smooth, professional look.
- Swap fresh flowers for dried wheat or cotton stems to make the arrangement last all month.
Quick win: Use a rubber band around the jar neck to guide your paint line for a perfectly clean edge.
22. DIY Leaf Mason Jar Centerpiece
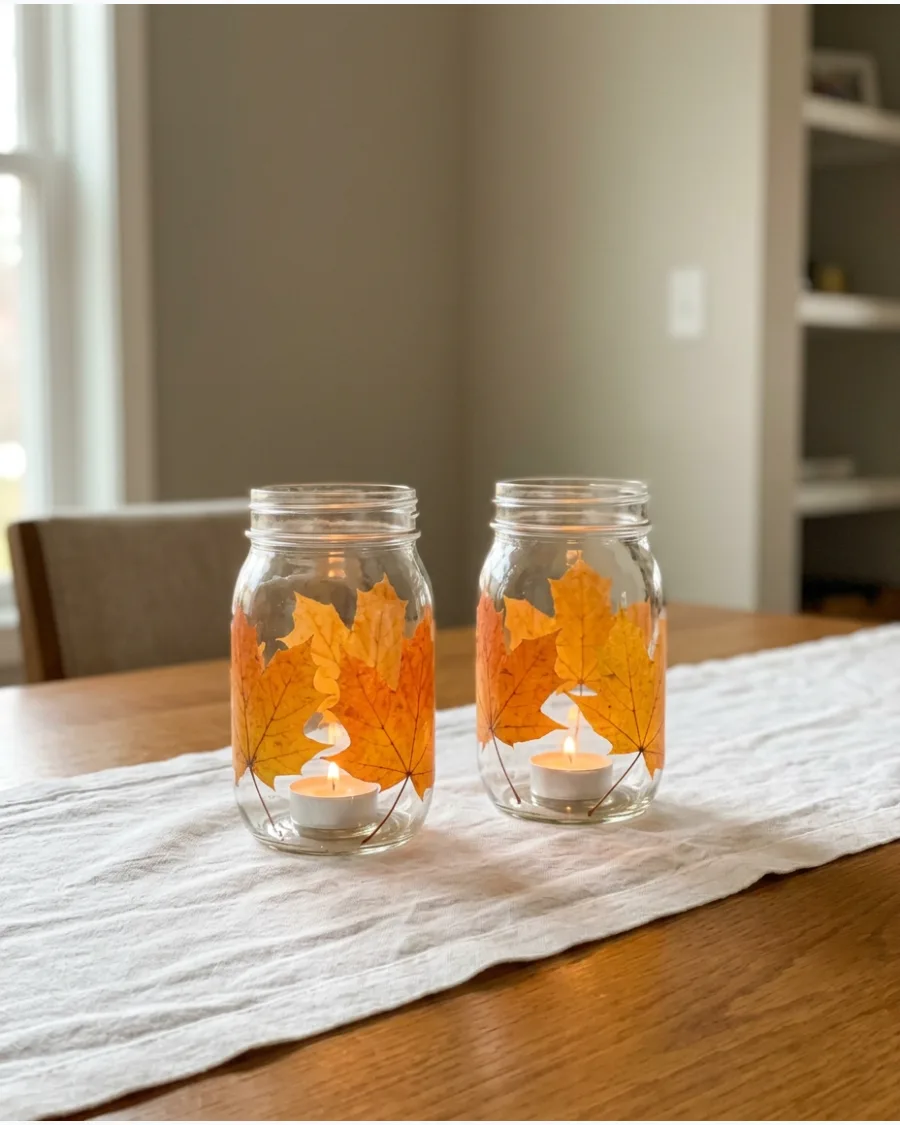
Pressed leaves bring the outdoors in without the mess of crunchy, dry foliage on the tablecloth. Mod Podge works best to seal the leaves flat against the glass surface for a permanent bond.
Clear jars allow candlelight to glow through the leaf veins for a warm evening effect. Real leaves look better than fabric ones because of their unique, imperfect shapes and natural color gradients.
- Collect colorful fallen leaves from the yard and press them in a heavy book for two days before starting.
- Use matte Mod Podge to avoid a sticky or overly shiny plastic appearance on the glass.
- Place the jars on a mirrored tray to double the light output and create a brighter table center.
Best shortcut: Use a sponge brush to apply the glue to prevent visible brush strokes on the glass surface.
23. DIY Corn-Filled Glass Vase Centerpiece
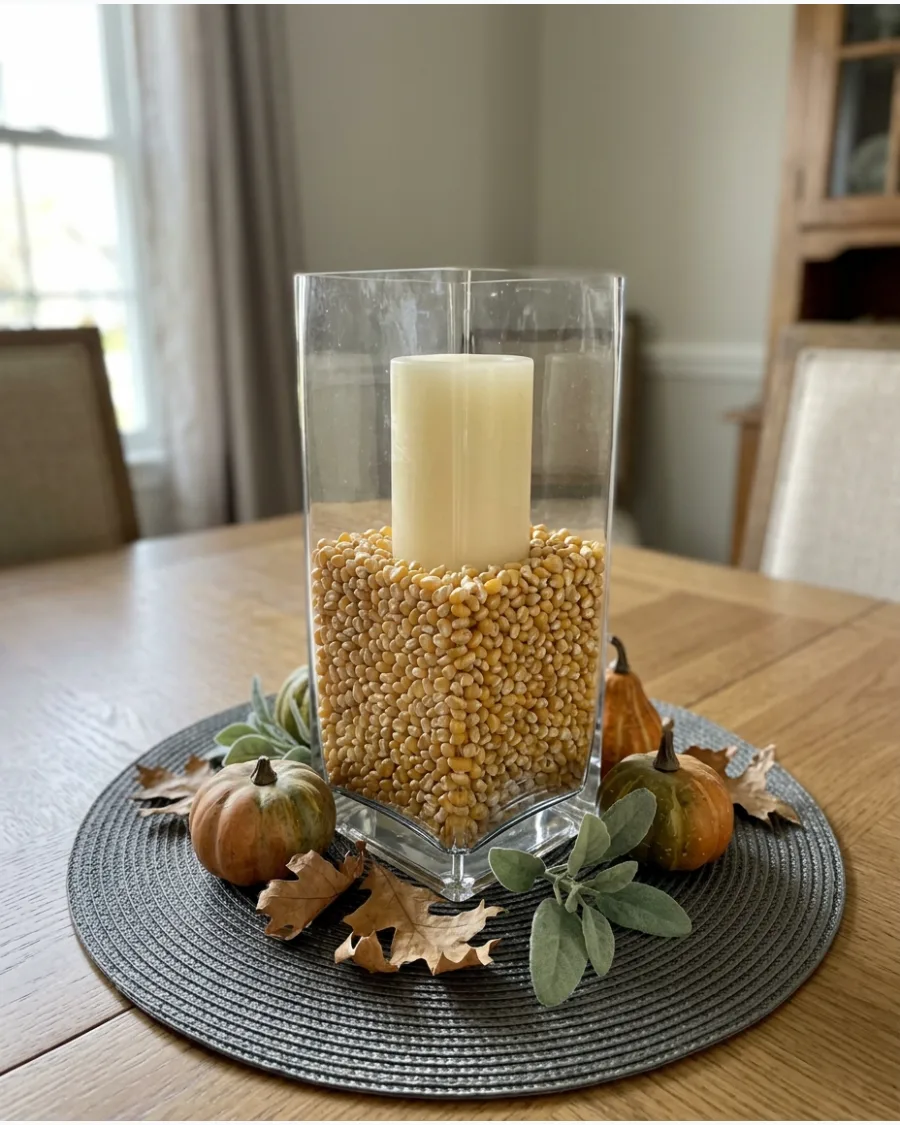
Dried corn kernels provide a sturdy base for heavy pillar candles or tall seasonal branches. The yellow and orange tones add instant warmth to a neutral table setting without needing extra dye.
Pour the kernels slowly to keep the layers even and prevent the candle from tipping over. Avoid using popcorn kernels as they are too small and lack the rustic texture of whole dried corn.
- Find bags of whole dried corn at feed stores or in the bird seed aisle for the most budget-friendly price.
- Wipe the inside of the glass with a microfiber cloth before filling to remove any visible fingerprints.
- Use a battery-operated candle if you plan to leave the centerpiece unattended for long periods.
Most people skip this: Clean the corn kernels in a colander first to remove dust that can cloud the glass over time.
24. DIY Acorn-Filled Candle Vase
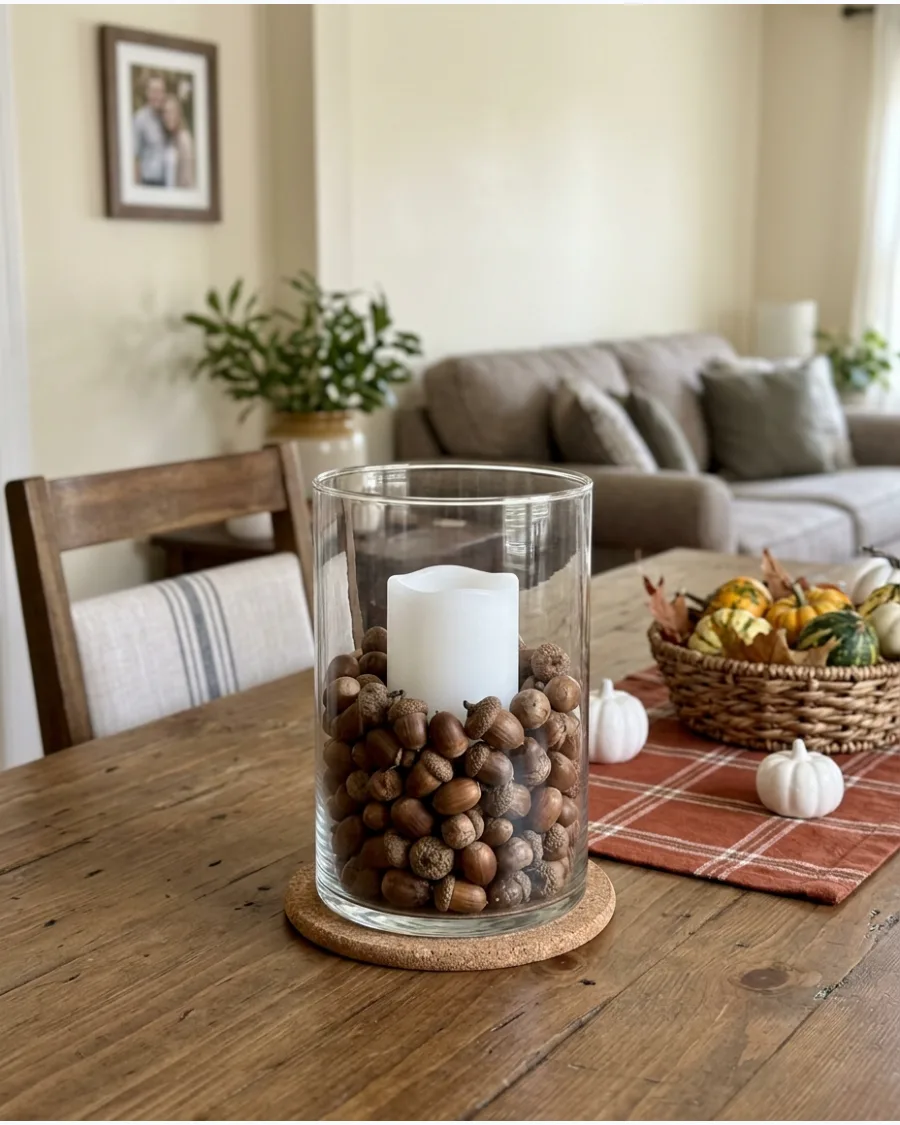
Acorns offer a deep brown texture that anchors a colorful Thanksgiving table beautifully. They work perfectly in clear cylinders to create a woodland vibe that is sophisticated rather than literal.
Tuck a few dried oak leaves around the base of the candle to hide the plastic bottom of an LED pillar. Real acorns should be baked at a low temperature to ensure they are clean for indoor use.
- Gather acorns from the yard or buy a bag of realistic resin ones for a reusable option next year.
- Bake real acorns at 200 degrees for two hours to dry them out completely and remove any pests.
- Space three cylinders of varying widths down the center of the table for a modern, layered look.
Best shortcut: Buy artificial acorns if you want a uniform color and do not want to deal with the cleaning process.
25. DIY Cranberry Glass Vase Centerpiece
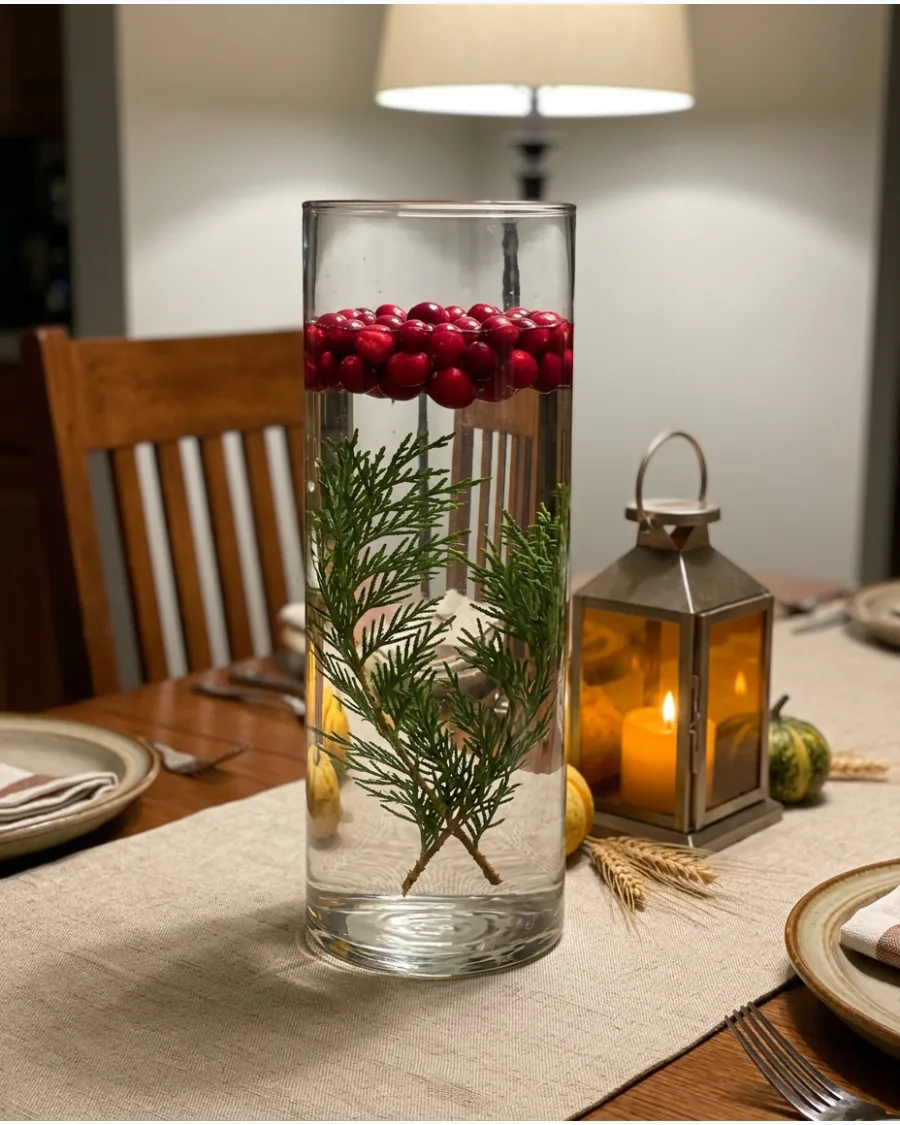
Fresh cranberries float easily, making them perfect for layered water displays in tall glass containers. The bright red color pops against green foliage like cedar, pine, or eucalyptus.
Add water after the berries and greenery are in place to prevent them from splashing the sides of the glass. This look stays fresh for about a week if kept in a cool room away from direct heat.
- Use one bag of fresh cranberries from the grocery store produce section for a standard-sized vase.
- Change the water every two days to keep the berries looking plump and the greenery bright.
- Mix in a few gold beads or small ornaments for a tiny bit of holiday shimmer among the berries.
Quick win: Use distilled water to prevent tiny bubbles from forming on the glass and the submerged greenery.
26. DIY Amber Bottle Flower Centerpiece
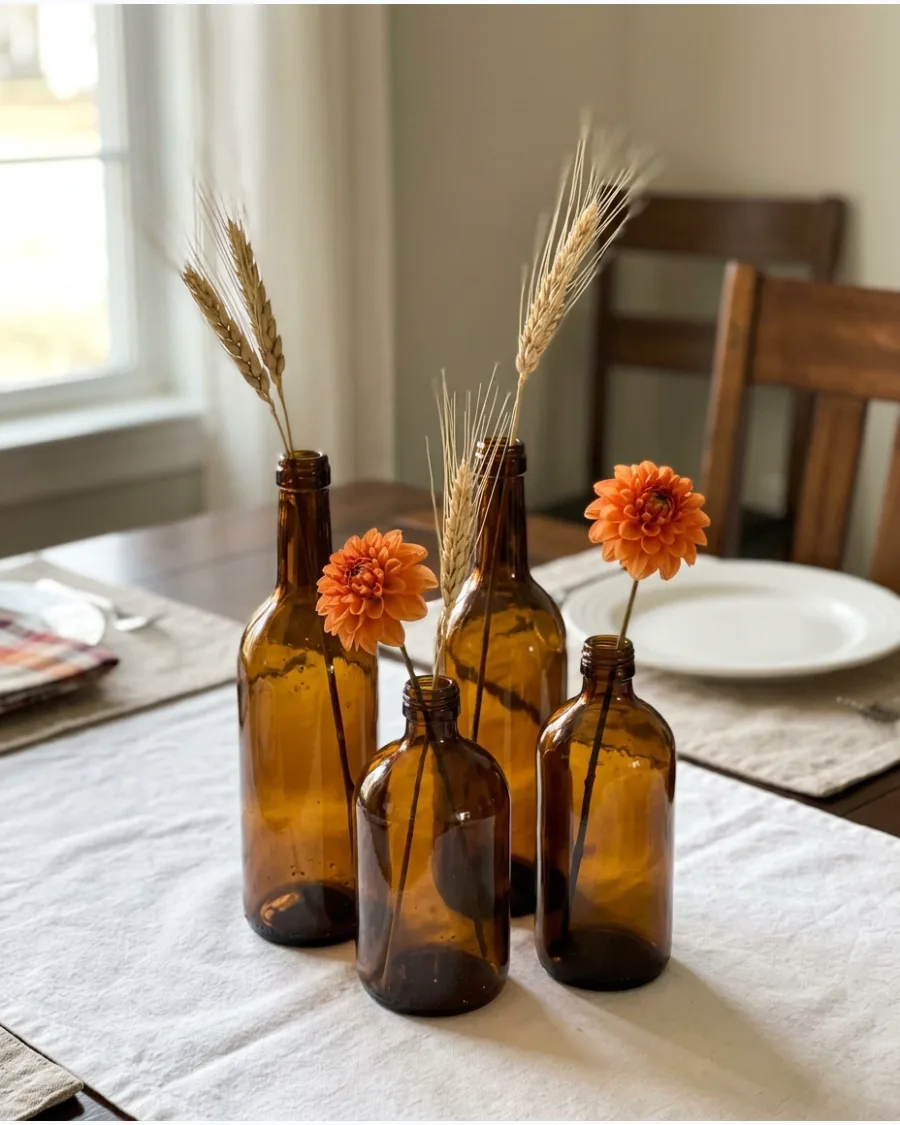
Amber glass naturally filters light into a warm, golden glow that mimics autumn sunshine. Mixing different heights and shapes makes the arrangement look collected over time rather than store-bought.
Stick to one or two stems per bottle to keep the look clean and intentional. These bottles are heavy enough to hold tall dried stems without the risk of tipping over during the meal.
- Look for amber bottles at thrift stores or reuse old cider and kombucha bottles to save money.
- Group bottles in odd numbers like three or five for the most pleasing visual balance on the table.
- Use dried flowers so you do not have to worry about refilling water during the busy holiday week.
Most people skip this: Remove sticky label residue with rubbing alcohol to keep the glass looking pristine and high-end.
27. DIY Mini Bud Vase Centerpiece
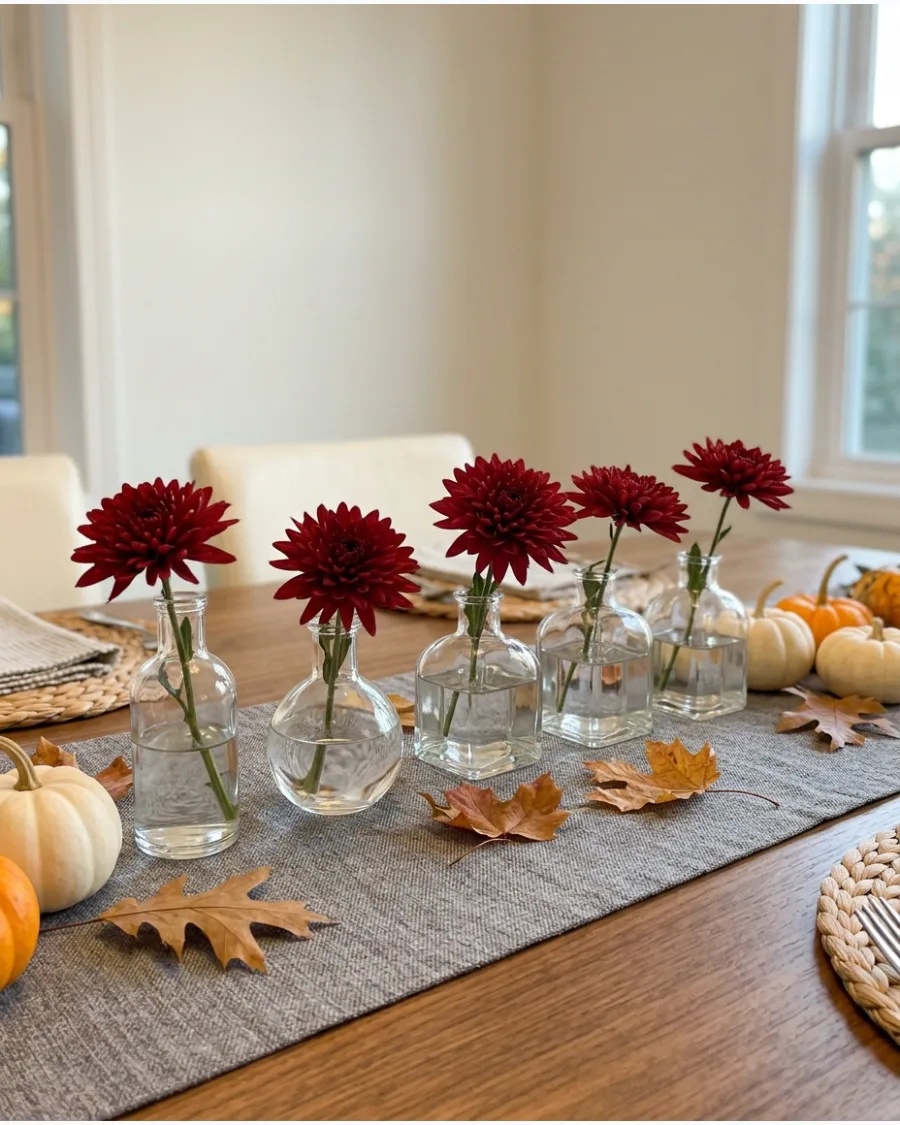
Bud vases are the best solution for long tables where you want guests to see each other easily across the centerpiece. They allow for individual pops of color without the bulk of a massive, expensive floral arrangement.
Place one vase at every other place setting to create a continuous line of decor down the table. Using different types of flowers in the same color family keeps the look cohesive and professional.
- Purchase a set of mismatched bud vases to get a variety of heights and shapes instantly.
- Cut stems at a sharp angle so they can drink more water and stay fresh for the entire dinner.
- Add a single sprig of rosemary to each vase for a subtle, fresh scent that complements the meal.
Quick win: Use a small funnel to fill the vases so you do not get water spots on your table runner.
28. DIY Glass Pumpkin Bowl Centerpiece
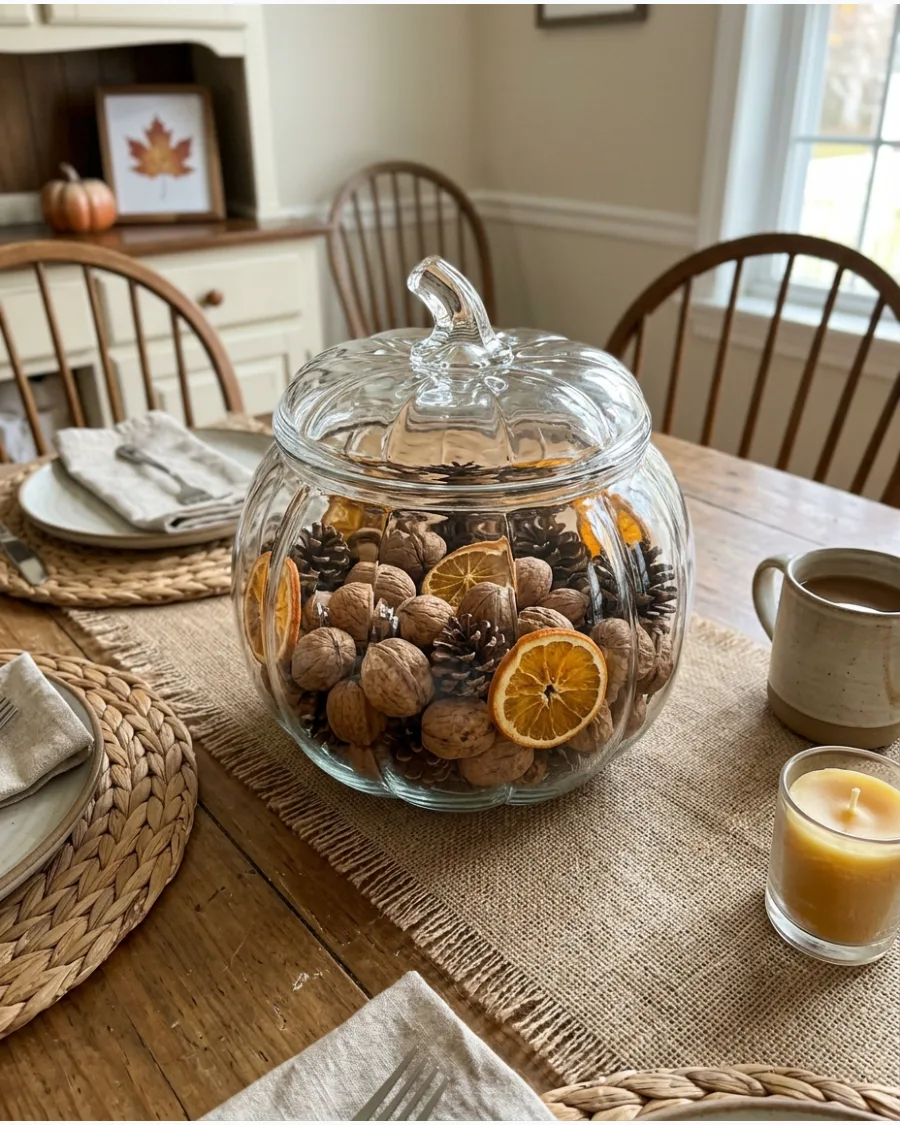
A pumpkin-shaped bowl serves as a festive container that transitions well from October through late November. Filling it with natural textures like walnuts or pinecones keeps the display grounded and sophisticated.
Layer the largest items at the bottom and save the smallest details for the top to fill in gaps. Glass containers allow the rich colors of the harvest to be seen from every angle.
- Use a bowl with a removable lid so guests can see the textures clearly and smell any added spices.
- Mix in a few cinnamon sticks to add a natural, spicy fragrance to the dining area without candles.
- Place the bowl on a wooden cutting board to add an extra layer of height and texture to the table.
Best shortcut: Buy a pre-mixed bag of unscented natural potpourri for a fast and easy bowl filler.
29. DIY Apothecary Jar Harvest Centerpiece
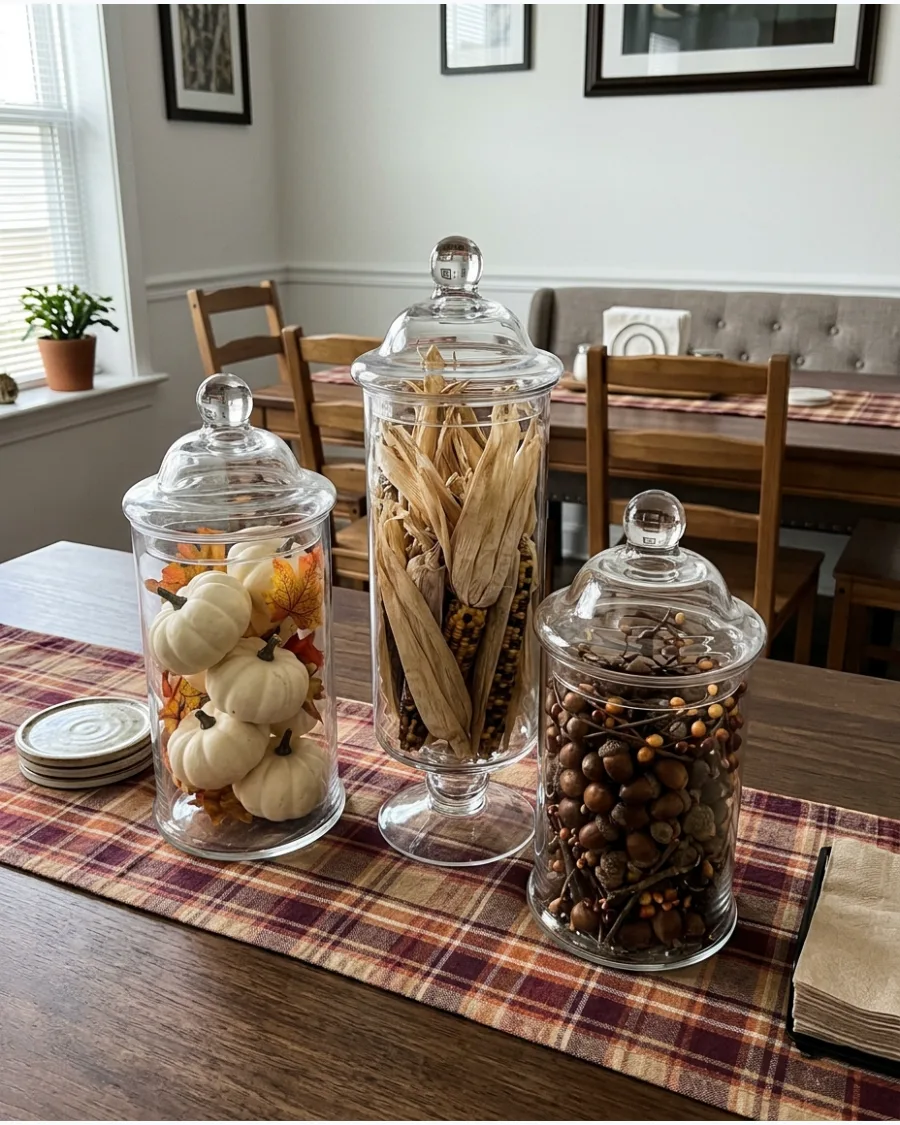
Apothecary jars add height and a touch of formality to a Thanksgiving buffet or a large dining table. Filling them with different harvest elements creates a curated look that feels like a professional display.
Choose jars with different lid styles to add visual interest to the grouping. These jars protect delicate items like dried leaves or feathers from being crushed by passing dishes.
- Use lightweight fillers like dried moss at the bottom to save money on more expensive decorative items.
- Clean the glass with a vinegar solution for a streak-free shine before filling the jars.
- Group the jars at one end of the table if you need more space for large serving dishes in the center.
Most people skip this: Use a long pair of tongs to place items inside deep jars so they do not break or tumble messily.
Thanksgiving centerpieces diy
30. Layered Moss Glass Cloche
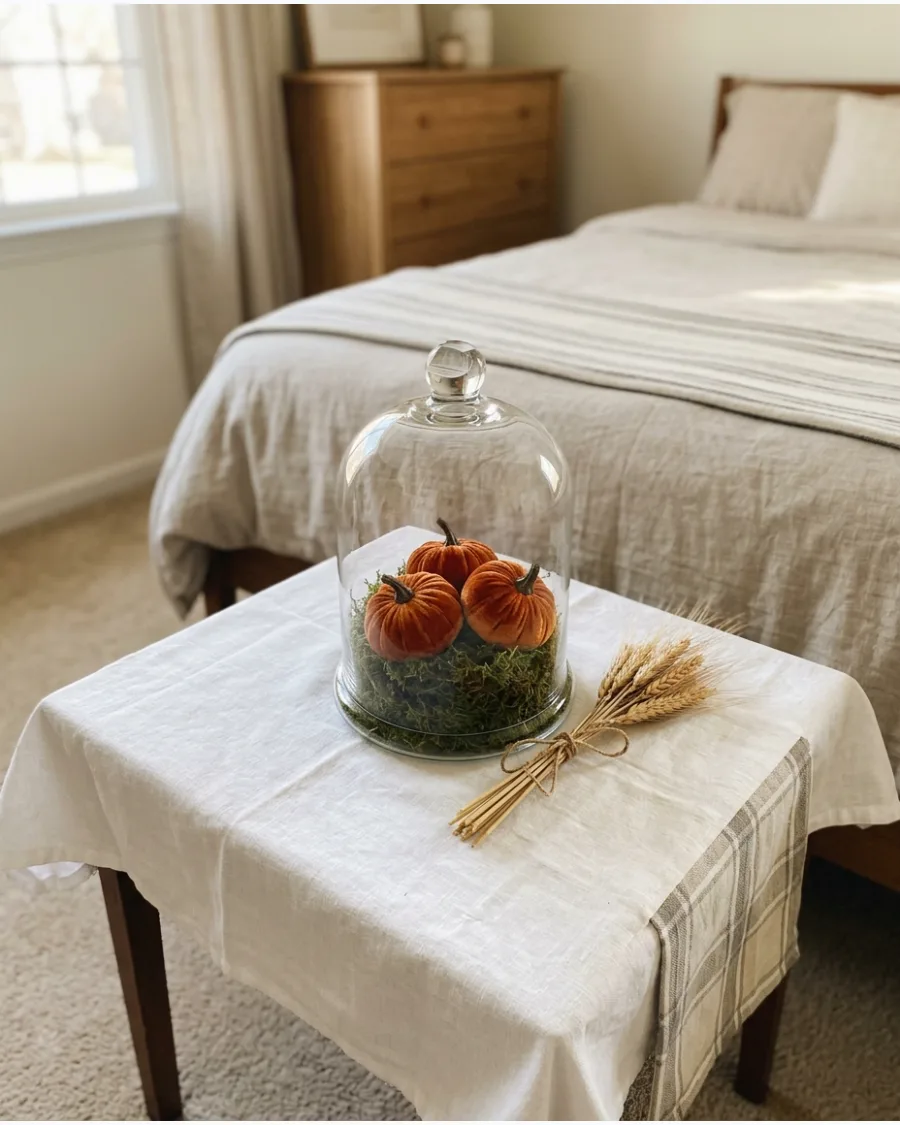
A glass cloche offers a dust-free way to showcase delicate seasonal elements like dried pods, velvet pumpkins, or preserved leaves. Using a base of reindeer moss creates a lush, organic foundation that makes even simple items look intentionally curated.
Place the tallest element slightly off-center inside the glass to create a more dynamic and professional-looking silhouette. Natural textures under glass provide a sophisticated contrast to the heavy fabrics of a holiday table. Opting for a wooden base rather than marble adds necessary warmth and prevents the display from feeling too formal or cold.
- Source cloches at craft stores or thrift shops for under $20, looking for thick glass without visible bubbles or distortions.
- Secure the moss to the base with a small dab of floral putty to keep the arrangement from shifting when the table is bumped.
- Swap the pumpkins for pinecones or silver acorns to transition the display from Thanksgiving into the winter months.
Quick win: Clean the inside of the glass with a lint-free cloth and rubbing alcohol right before sealing to prevent fingerprints or interior fogging.
NATURAL & FORAGED DIY CENTERPIECES
31. DIY Foraged Branch Thanksgiving Centerpiece
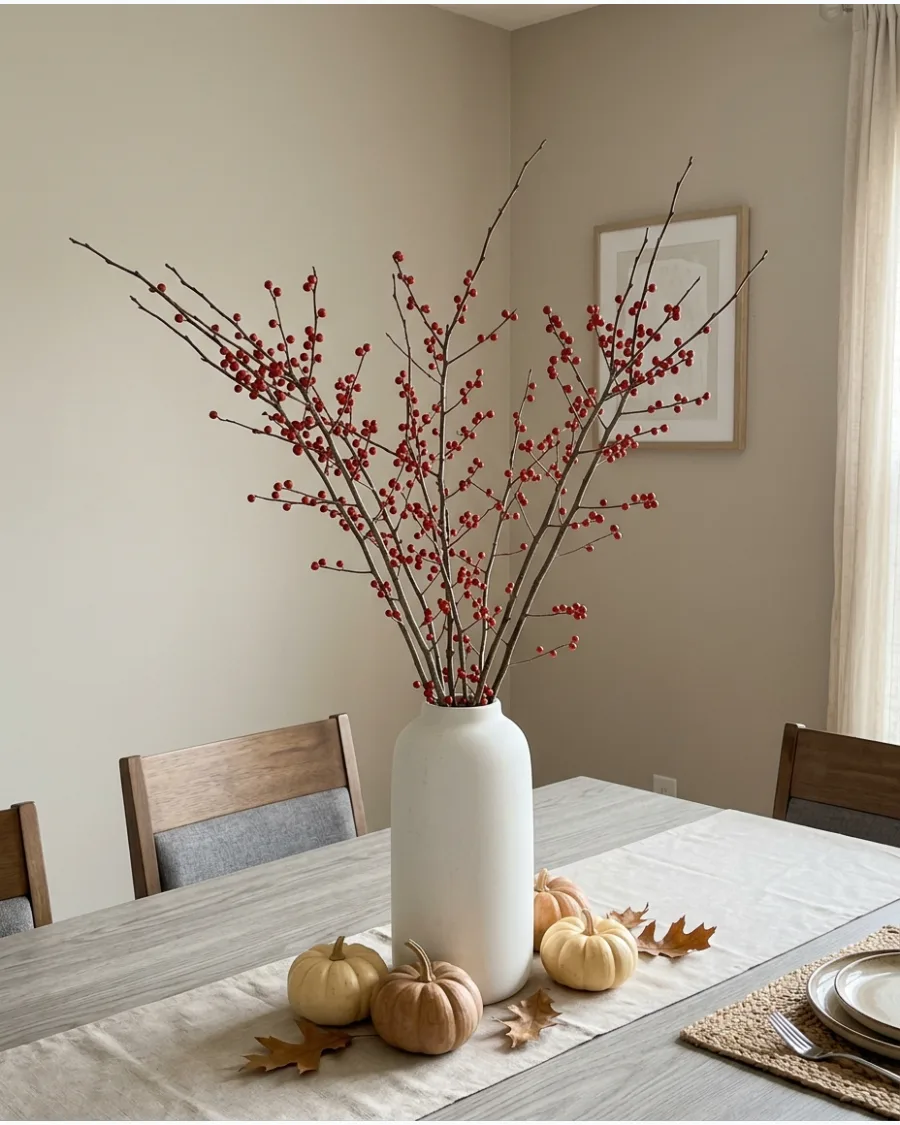
Bringing the outdoors in creates a dramatic height that store-bought items rarely achieve. Look for branches with interesting curves or lingering berries to add texture without spending a dime.
Place a heavy stone at the bottom of your vase to keep the tall branches from tipping over during dinner. This method works best in a heavy ceramic vessel that can anchor the weight.
- Source branches from your own backyard or a local park.
- Trim the ends of the branches at a sharp angle to help them sit securely.
- Use a clear glass vase instead of ceramic for a more modern, minimal look.
Quick win: Strip small twigs from the bottom few inches of the branches so the vase neck stays clean and uncluttered.
32. DIY Oak Leaf and Acorn Centerpiece
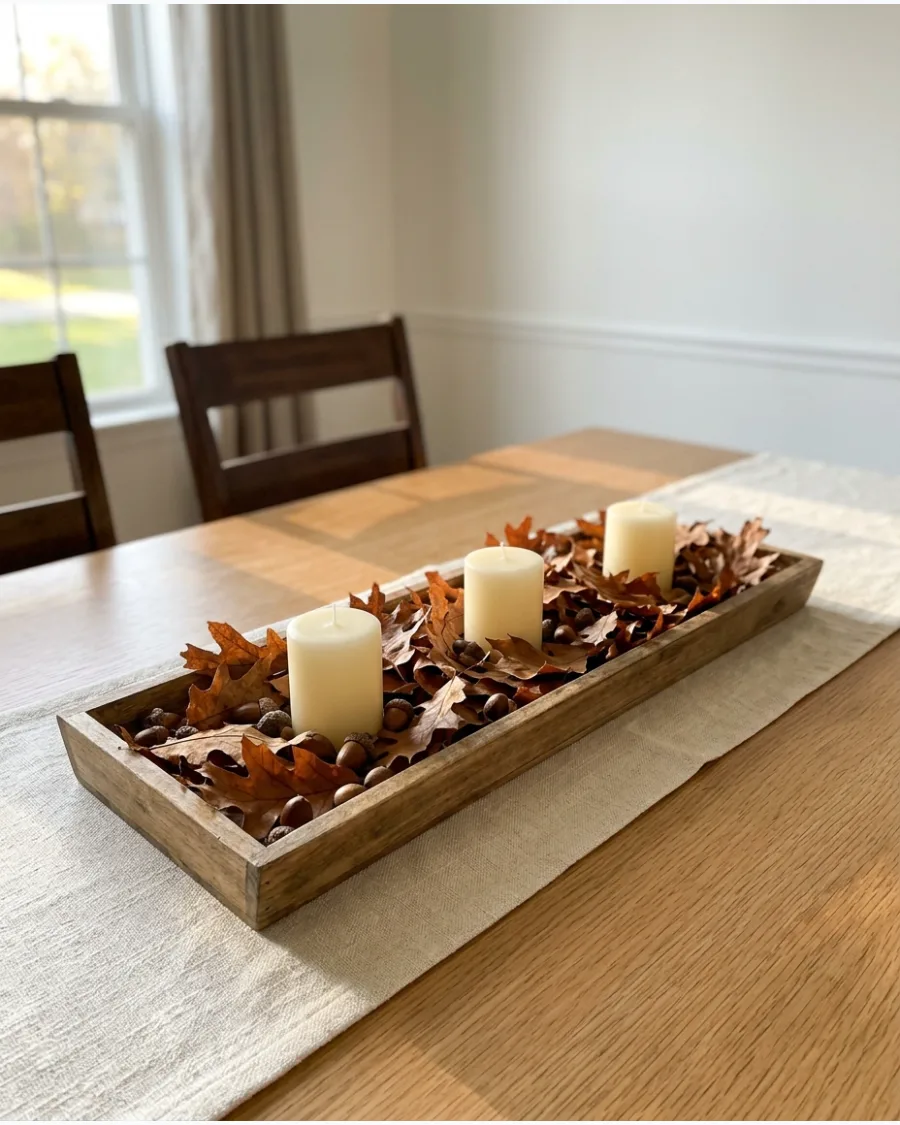
A low-profile arrangement ensures guests can see each other across the table. Layering natural elements like oak leaves and acorns provides a rich, organic base for your candles.
Press your leaves between heavy books for 24 hours before using them to prevent the edges from curling. This simple prep keeps the display looking fresh and flat throughout the holiday.
- Gather leaves and acorns during a neighborhood walk.
- Layer the leaves first to create a full base before adding heavier items.
- Paint the acorn caps gold or silver to add a touch of holiday shine.
Most people skip this: Wipe foraged acorns with a damp cloth to remove dirt and bring out their natural deep brown color.
33. DIY Pinecone Thanksgiving Centerpiece
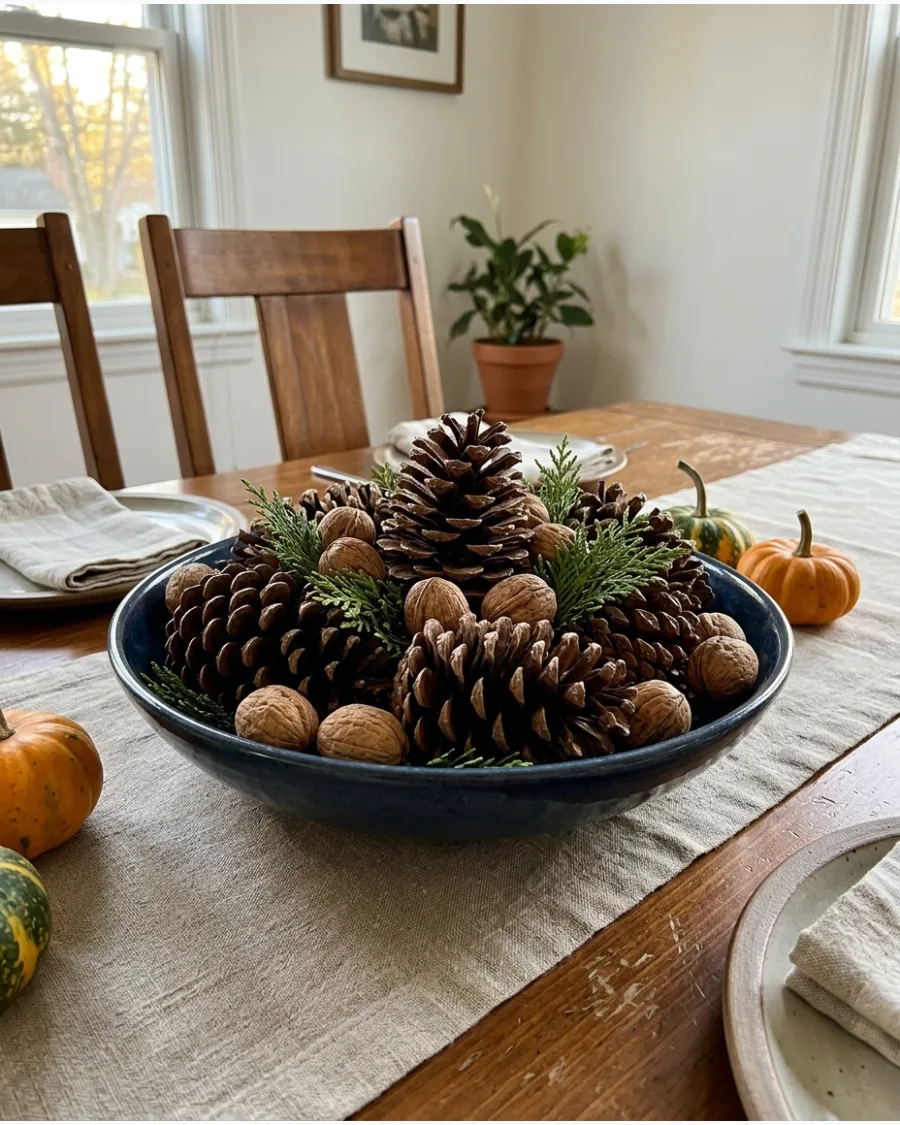
Filling a wide bowl with pinecones is one of the fastest ways to decorate a large table. Intersperse them with walnuts and sprigs of evergreen to break up the brown tones.
Tuck small pieces of live greenery between the pinecones to add a pop of color and a fresh scent. It is a classic look that feels substantial without being cluttered.
- Buy bags of unscented pinecones at a craft store or collect them from the forest floor.
- Stack larger cones at the bottom and place smaller ones on top to create a mound shape.
- Add a few mini white pumpkins into the mix for a bright visual contrast.
Best shortcut: Bake foraged pinecones on a foil-lined sheet at 200 degrees for 30 minutes to clear out any small bugs.
34. DIY Wheat Bundle Centerpiece
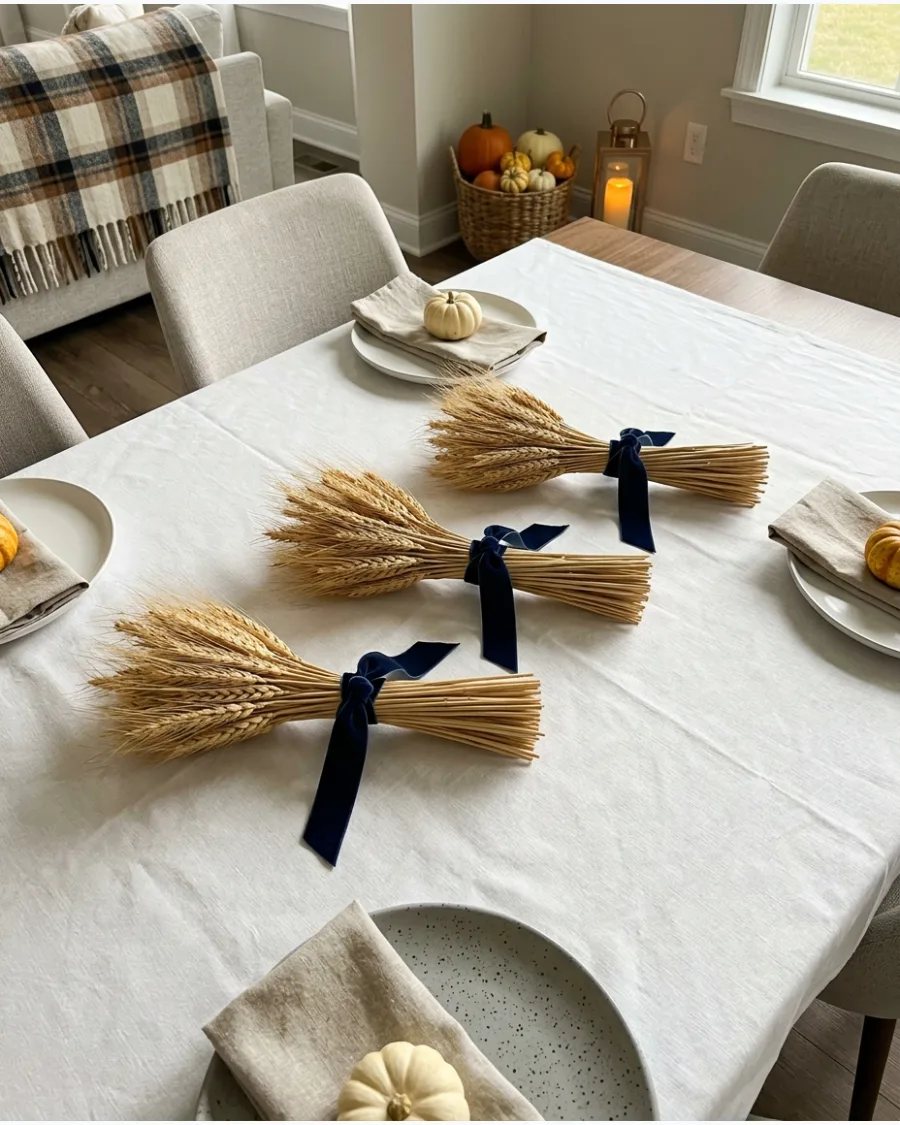
Dried wheat symbolizes the harvest and adds a beautiful golden hue to the room. Tying them into tight bundles allows them to stand upright or lay flat along a runner.
Wrap the center of each bundle with a thick velvet ribbon to hide the floral wire and add a high-end finish. This is a great option for narrow tables where space is limited.
- Find dried wheat at most craft stores or in the dried floral section of the grocery store.
- Use hidden rubber bands to secure the bundles before tying the decorative ribbon.
- Stand the bundles upright in small mason jars if you need to add height to the table.
Quick win: Mist the wheat bundles lightly with hairspray to prevent the seeds from shedding onto the dinner plates.
35. DIY Magnolia Leaf Centerpiece
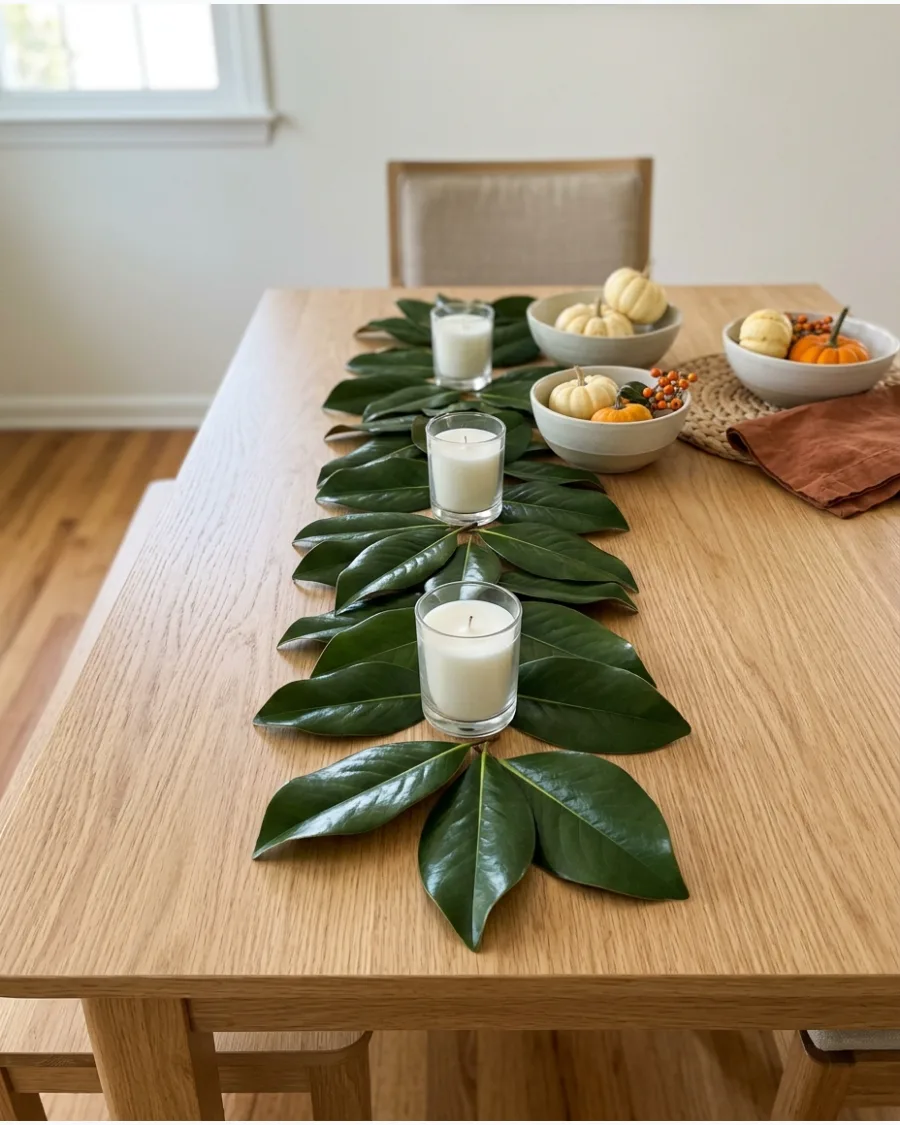
Magnolia leaves have a stunning waxy green side and a soft brown underside that looks naturally sophisticated. Layering them down the center of the table creates a lush, built-in runner.
Overlap the leaves like shingles to hide the stems and create a seamless green path. Adding a few white candles creates a striking contrast against the dark foliage.
- Ask a local florist for fresh magnolia clippings or check your own garden.
- Work from the outer ends of the table toward the middle for a symmetrical look.
- Use gold spray paint on every third leaf to create a metallic pattern.
Most people skip this: Use a tiny bit of olive oil on a paper towel to buff the leaves for a high-gloss shine.
36. DIY Eucalyptus Garland Centerpiece
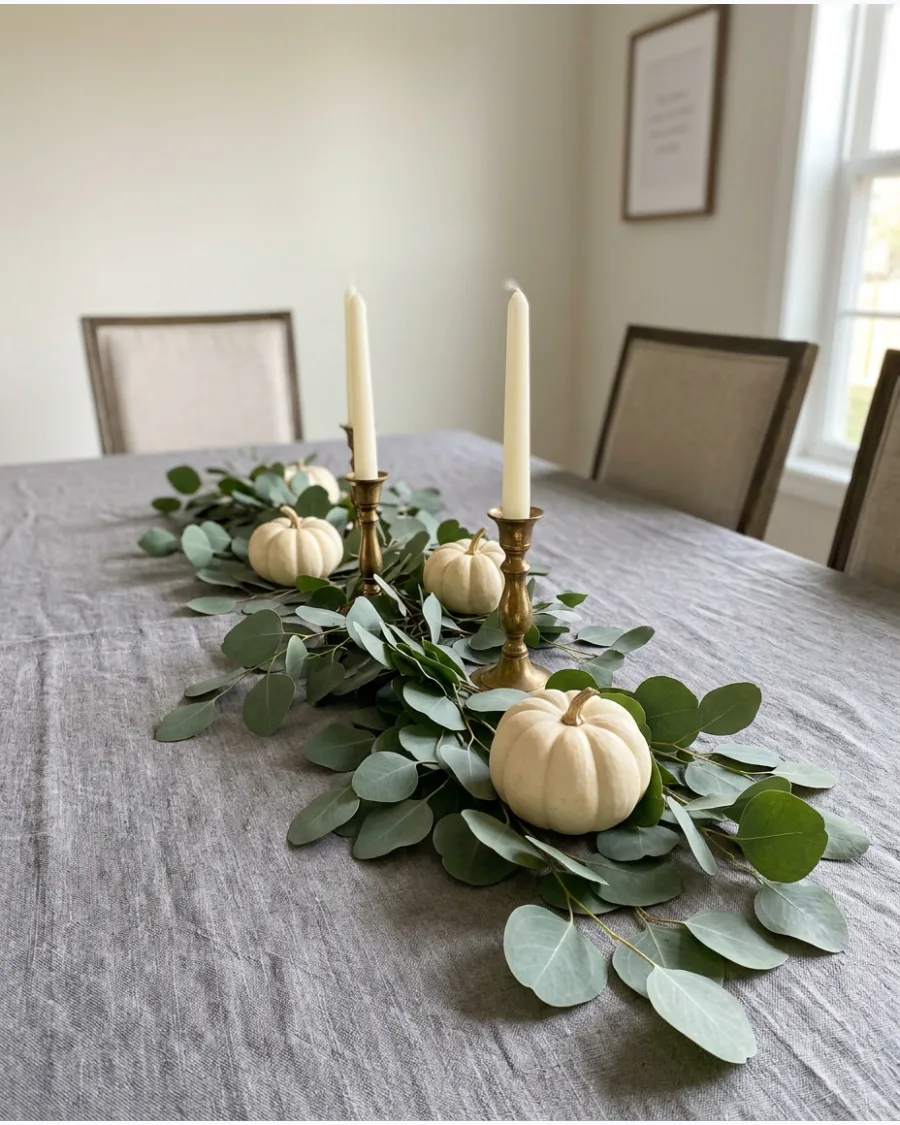
A loose garland feels relaxed and modern compared to stiff, formal arrangements. You can weave it around existing decor like salt shakers and wine bottles without it looking messy.
Nestle miniature white pumpkins into the curves of the eucalyptus stems to anchor the greenery to the table. This airy style leaves plenty of room for large serving platters.
- Pick up fresh eucalyptus bunches from the grocery store floral aisle.
- Lay the longest stems down first and fill in gaps with smaller clippings.
- Incorporate dried orange slices or cinnamon sticks for extra color and scent.
Best shortcut: Buy "seeded" eucalyptus to get extra texture and visual interest without any extra assembly work.
37. DIY Dried Grass Thanksgiving Centerpiece
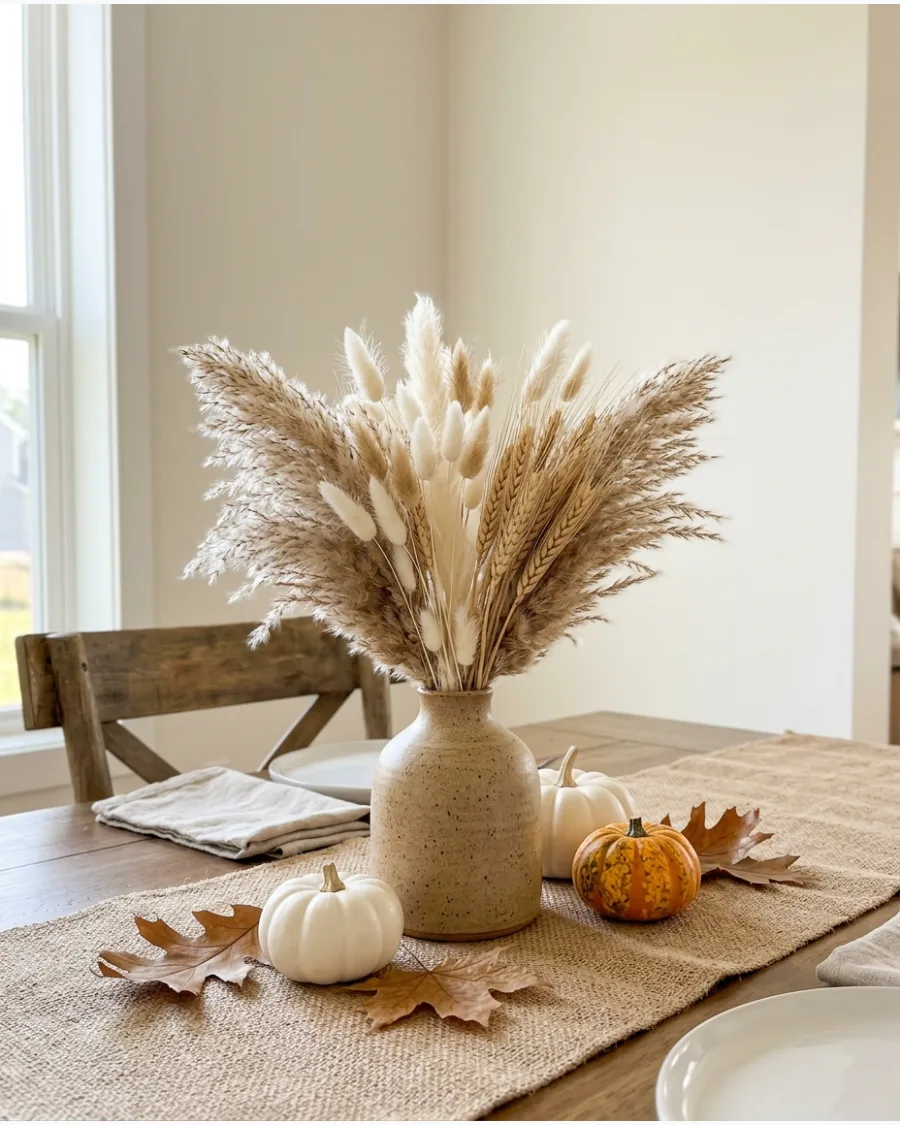
Using pampas grass and bunny tails brings a soft, feathery texture that balances out hard table surfaces. These neutral tones match almost any dishware or tablecloth you already own.
Trim the stems at different lengths to create a tiered, fluffy shape that fills the visual space. It provides a modern, earthy look that stays beautiful long after the meal is over.
- Order a variety pack of dried grasses from an online floral shop.
- Shake the stems gently outside before bringing them in to remove loose fluff.
- Switch to a colored glass vase to add a subtle tint to the arrangement.
Quick win: Give pampas grass a light shake outdoors and a quick spray of hairspray to fluff up the plumes before putting them in the vase.
38. DIY Woodland Moss Centerpiece
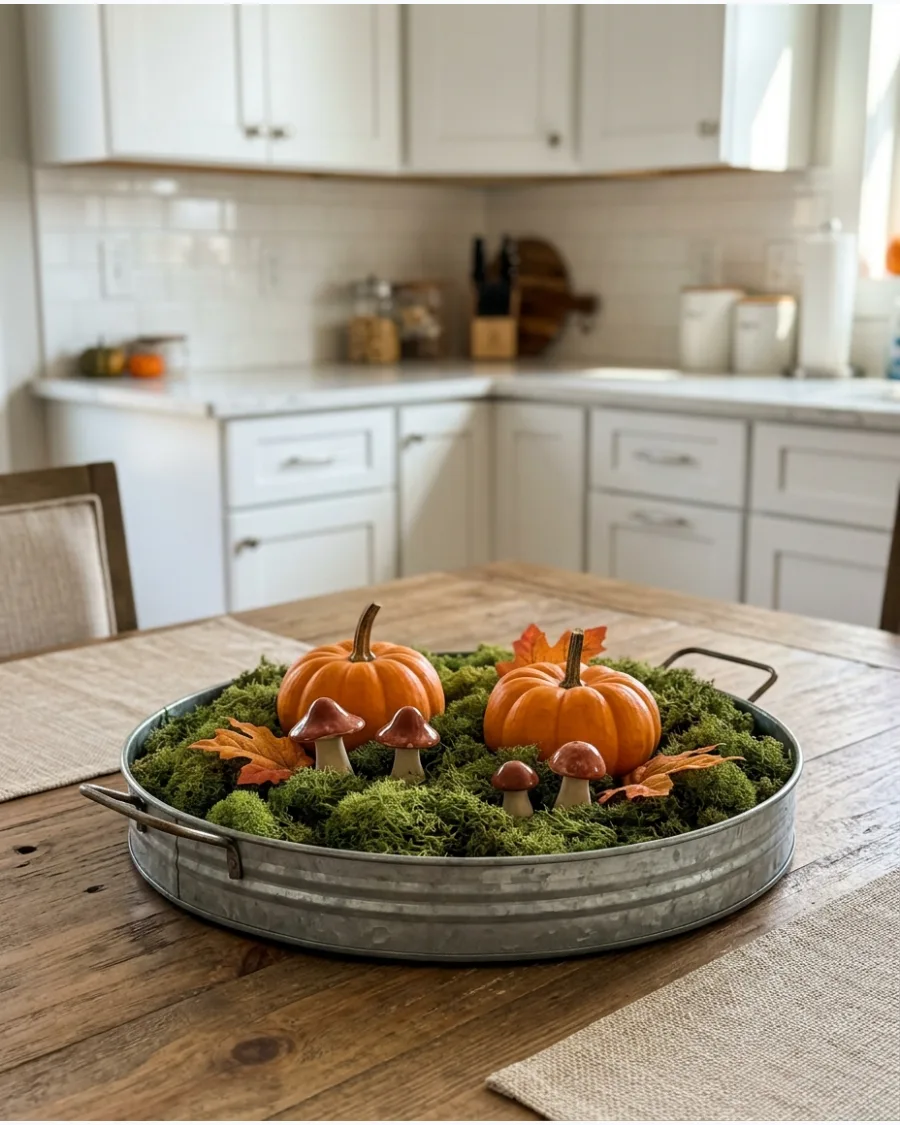
Creating a mini landscape on a tray brings a whimsical, nature-inspired feel to the dining room. Preserved moss stays green without water, making it a low-maintenance base for other decorations.
Use hot glue to secure small ceramic mushrooms or acorns to the moss so they stay in place when the tray is moved. This works perfectly as a conversation starter for guests.
- Purchase bags of preserved sheet moss from a local craft store.
- Fill the edges of the tray first to ensure the base is completely covered.
- Place a small lantern or a thick pillar candle in the center to act as a focal point.
Most people skip this: Mix two different shades of green moss to make the display look more realistic and deep.
39. DIY Twig and Candle Centerpiece
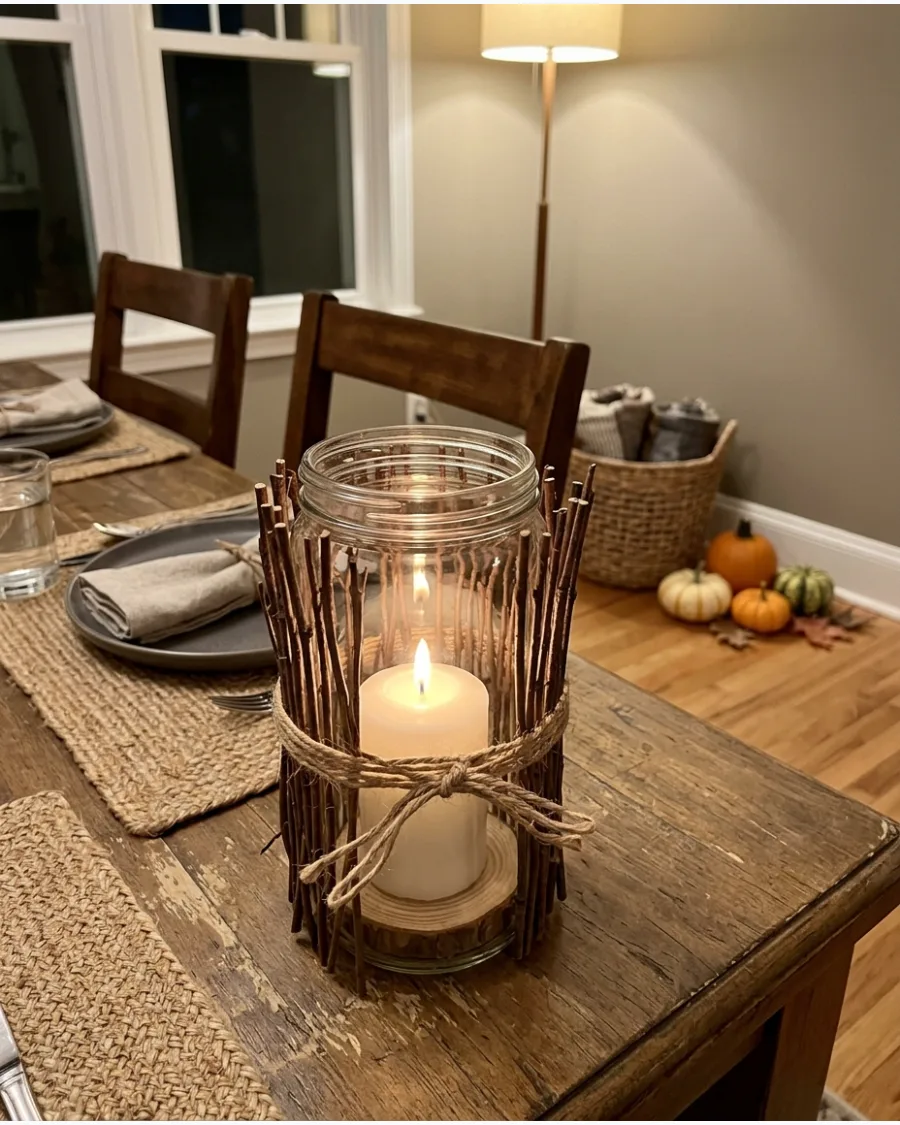
Twigs add a rustic, architectural element to simple glass candleholders. This project turns basic household items into something that looks custom-made.
Secure thin twigs vertically around a glass jar using a rubber band, then cover the band with twine for a finished look. The candlelight flickering through the branches creates beautiful shadows on the table.
- Collect small, thin twigs from yard trimmings or fallen branches.
- Use garden shears to cut all the twigs to the same height as your glass container.
- Substitute birch bark strips for twigs for a smoother, more uniform look.
Best shortcut: Use a hot glue gun to attach the twigs directly to the glass if you want a more permanent, sturdy decoration.
40. DIY Fall Leaf Branch Centerpiece
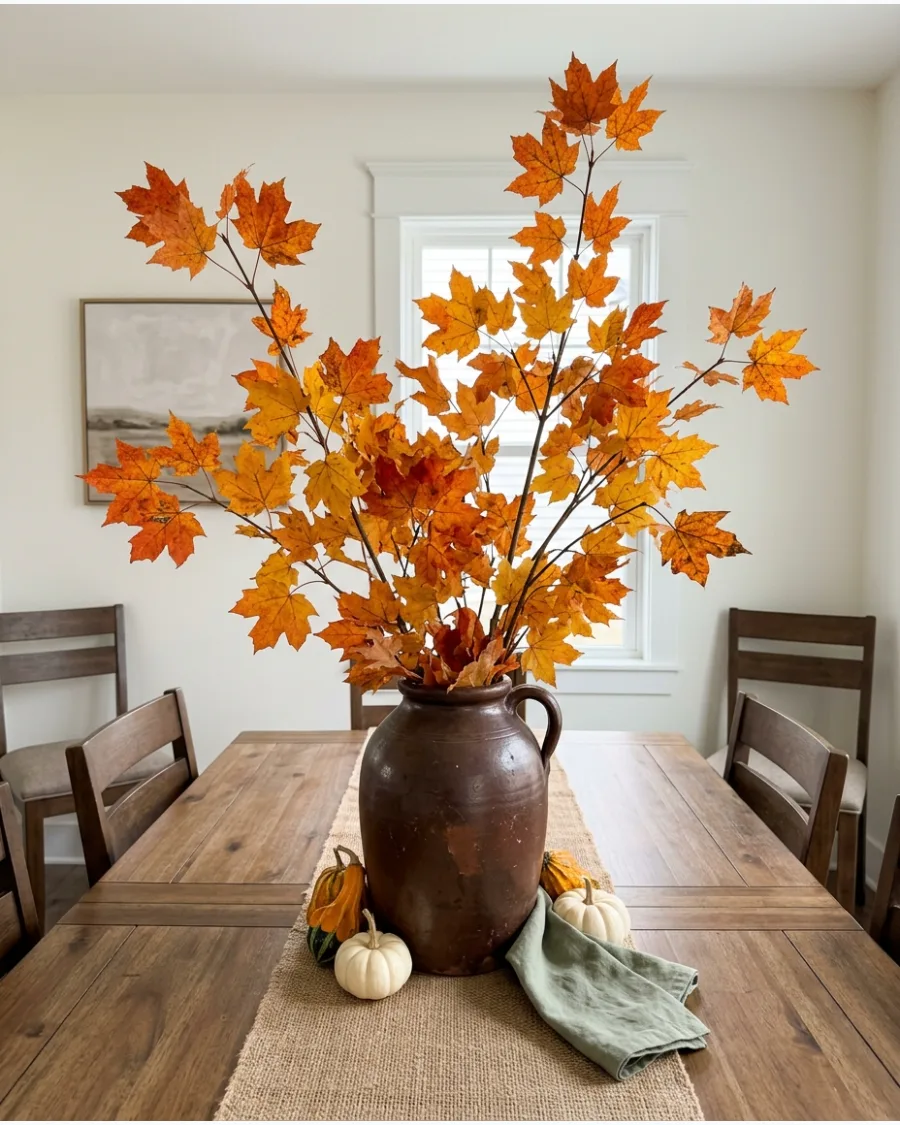
Tall branches with vibrant leaves make a massive impact in a room with high ceilings. They provide a burst of seasonal color that feels more authentic than silk flowers.
Change the water every two days to keep the leaves from drying out and dropping too early. A heavy pottery vase is essential here to balance the height and prevent accidents.
- Cut branches from a backyard maple, oak, or liquidambar tree.
- Remove any leaves that fall below the water line to keep the water clear.
- Use a clear glass pitcher if you do not have a heavy pottery jug on hand.
Quick win: Smashing the bottom inch of woody stems with a hammer helps the branches soak up more water and stay fresh longer.
FRUIT & HARVEST DIY THANKSGIVING CENTERPIECES
41. DIY Pear and Eucalyptus Centerpiece
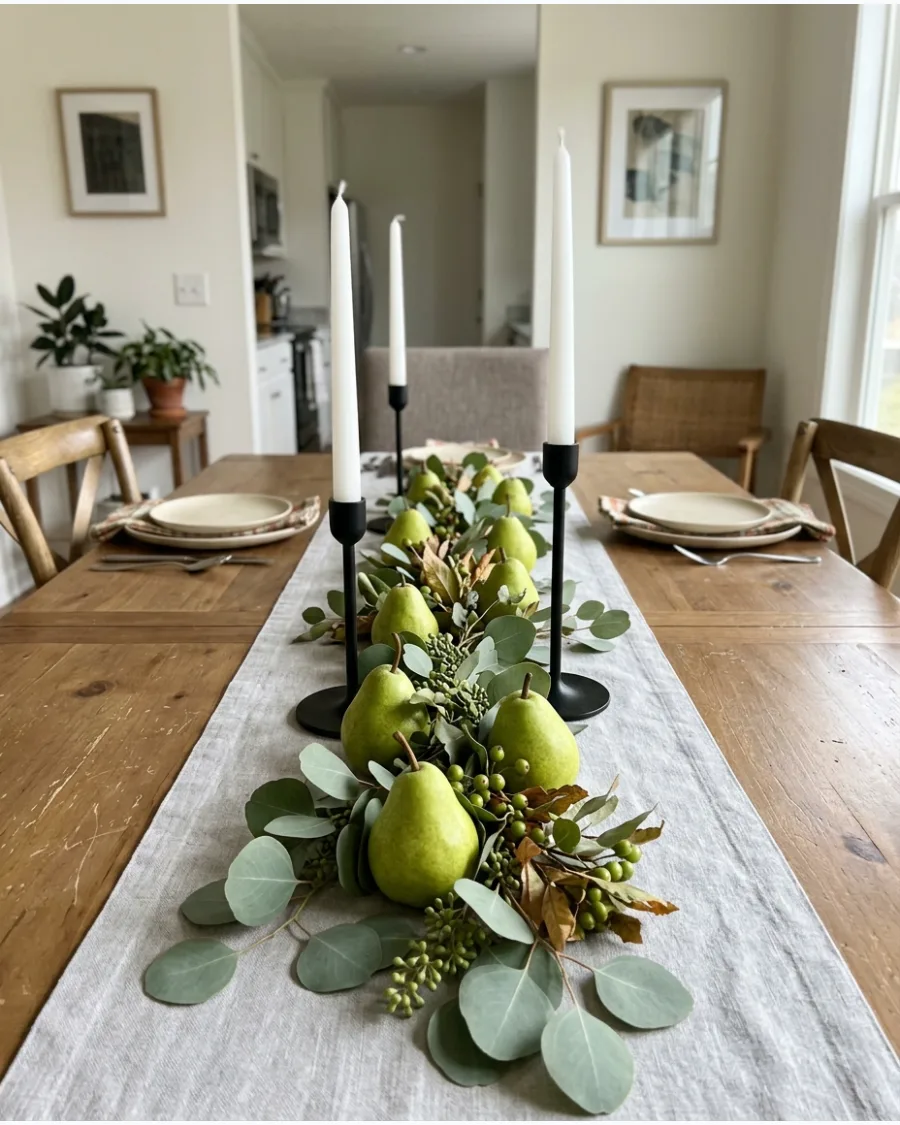
Arrange green or golden pears along eucalyptus branches with taper candles for a fresh harvest-inspired centerpiece. The matte fruit texture balances the waxy leaves and creates a natural, organic flow down the table.
Layer the eucalyptus first to create a base before nestling the pears into the curves of the branches. Using odd numbers of pears prevents the arrangement from looking too symmetrical or stiff.
- Sourcing pears from a local grocery store for under $10.
- Laying the greenery flat along the center of the table for a low-profile look.
- Substituting faux eucalyptus for a reusable version next year.
Quick win: Rub a tiny bit of olive oil on the pears to give them a subtle, healthy glow under candlelight.
42. DIY Apple Basket Centerpiece
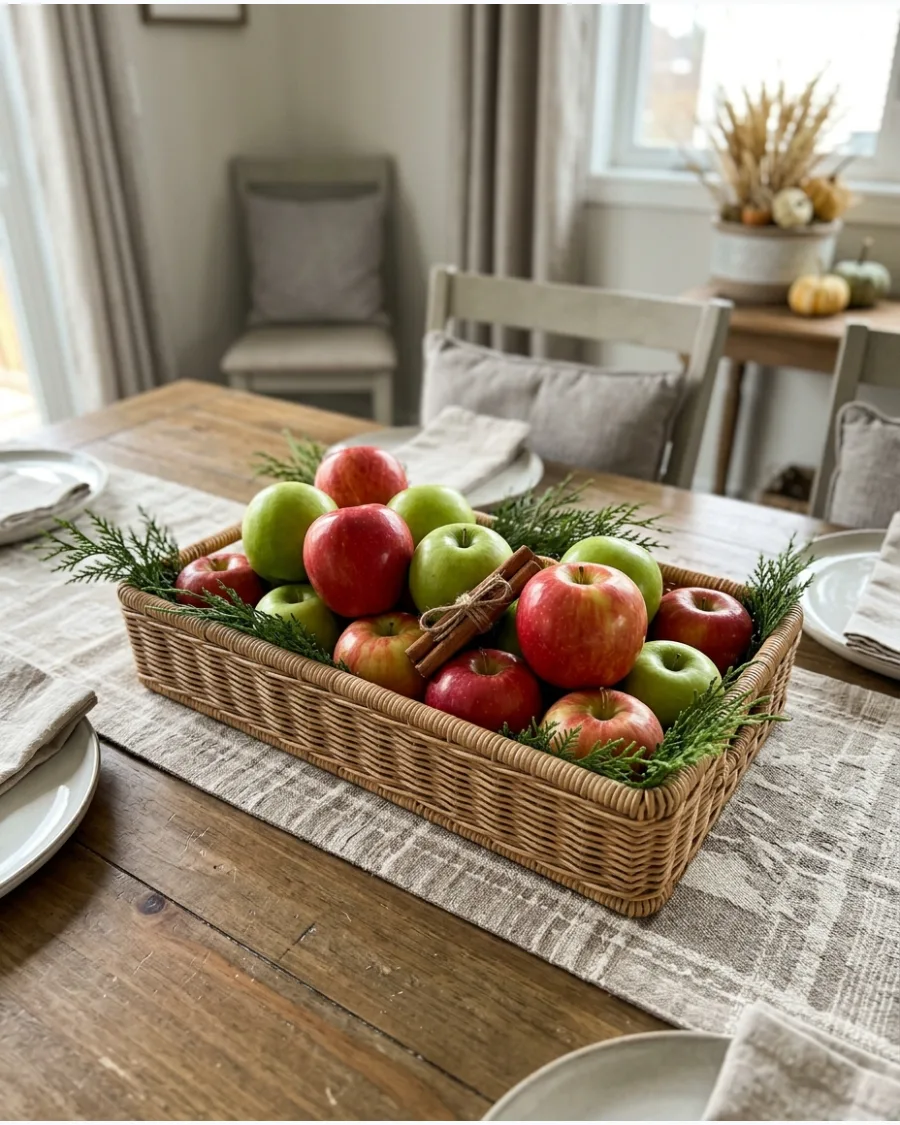
Fill a rustic basket with red and green apples, greenery, and cinnamon sticks for an easy display. This setup brings a cozy orchard feel to the dining room without needing a traditional vase.
Intersperse small bundles of cinnamon sticks tied with twine to add height and a natural scent. Deep red apples provide a classic color pop that anchors a neutral room.
- Finding a shallow basket at a craft store or thrift shop.
- Stacking apples in a pyramid shape for stability and visual impact.
- Swapping fresh greenery for silk leaves to make the display last the whole month.
Best shortcut: Place a crumpled paper bag at the bottom of the basket so you need fewer apples to make the container look full.
Home Decor
43. Pomegranate and Velvet Table Runner
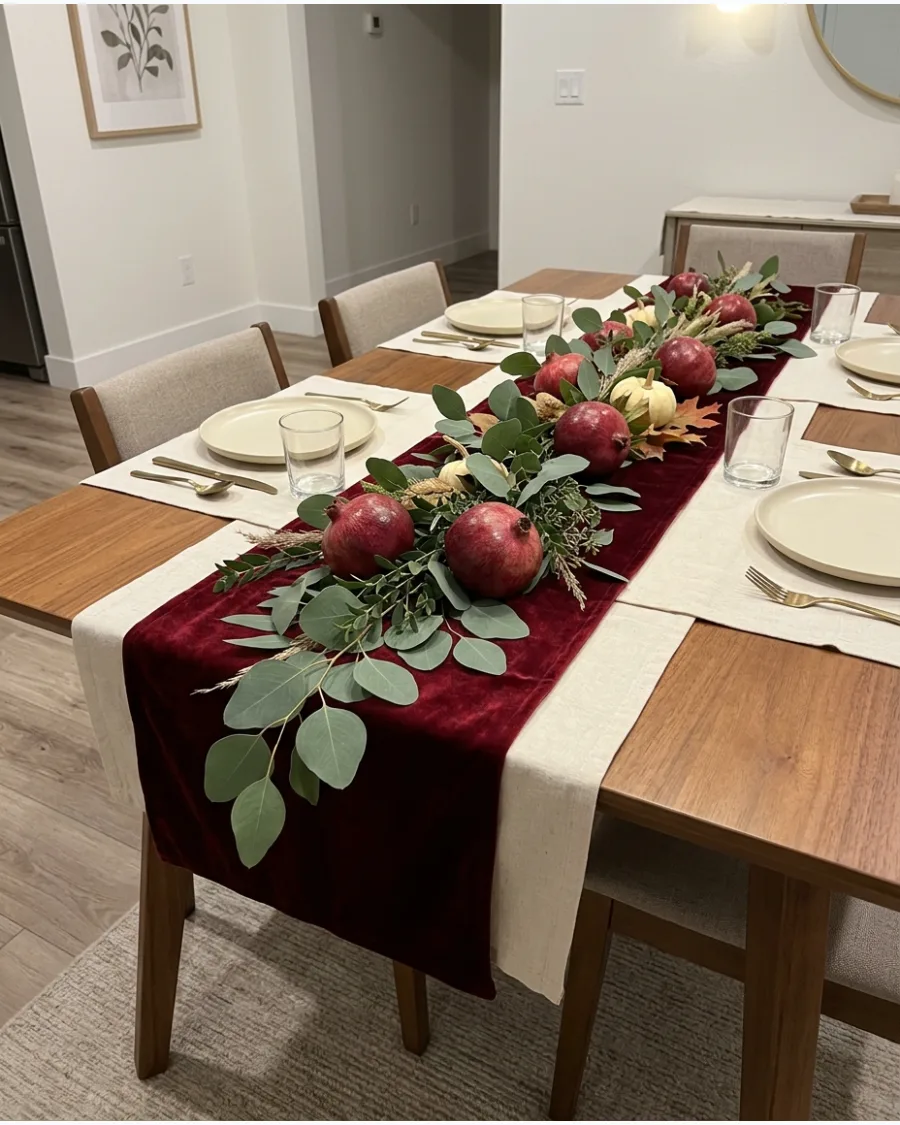
Deep red pomegranates provide a natural, jewel-toned contrast to neutral linens. This arrangement uses whole fruit and fresh greenery to create a lush, low-profile runner that doesn't block conversation.
Layer seeded eucalyptus branches down the center of the table before nesting three to five pomegranates at varying intervals. Pomegranates are superior to pumpkins for late November because their glossy skin reflects candlelight beautifully.
- Source pomegranates 3-4 days before the event to ensure the skins remain firm and vibrant.
- Secure the greenery with small hidden weights or floral wire to prevent the fruit from rolling toward guests.
- Substitute eucalyptus with dried magnolia leaves to transition the look toward a more rustic, golden-brown palette.
Quick win: Rub a tiny drop of olive oil onto the pomegranate skins to give them a high-end, polished sheen.
FRUIT & HARVEST DIY THANKSGIVING CENTERPIECES
44. DIY Fig and Grape Centerpiece
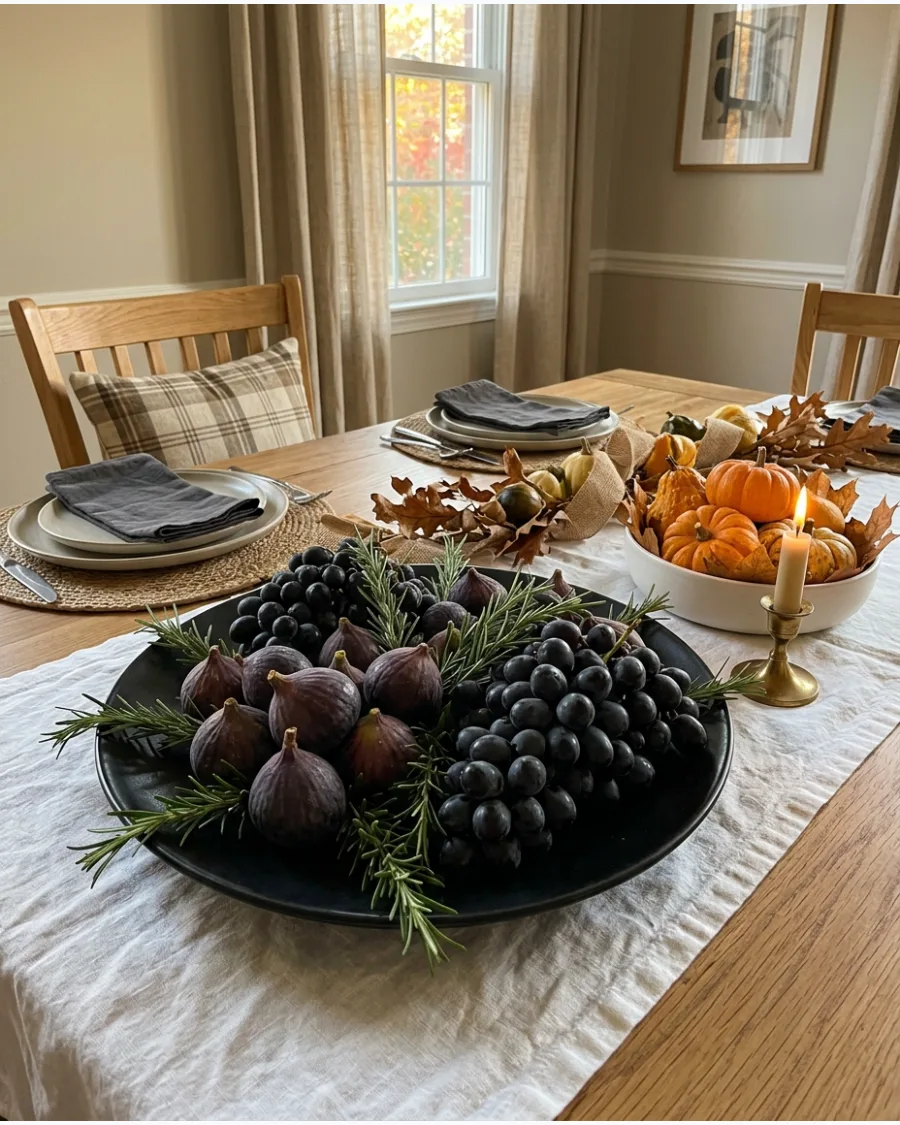
Arrange figs and dark grapes on a platter with greenery and candles for an abundant old-world centerpiece. This style looks lush and full, perfect for a heavy harvest meal.
Drape the grape clusters over the edge of the platter to create a sense of movement and depth. It works well because the dark purples and greens feel naturally festive without being too bright.
- Selecting ripe but firm fruit to avoid any messy juice on the linens.
- Layering the largest grape clusters first as the foundation of the arrangement.
- Adding small blocks of cheese to turn the centerpiece into a functional appetizer.
Quick win: Use champagne grapes if you can find them; their tiny size adds a delicate, professional look to the platter.
45. DIY Citrus and Cinnamon Centerpiece
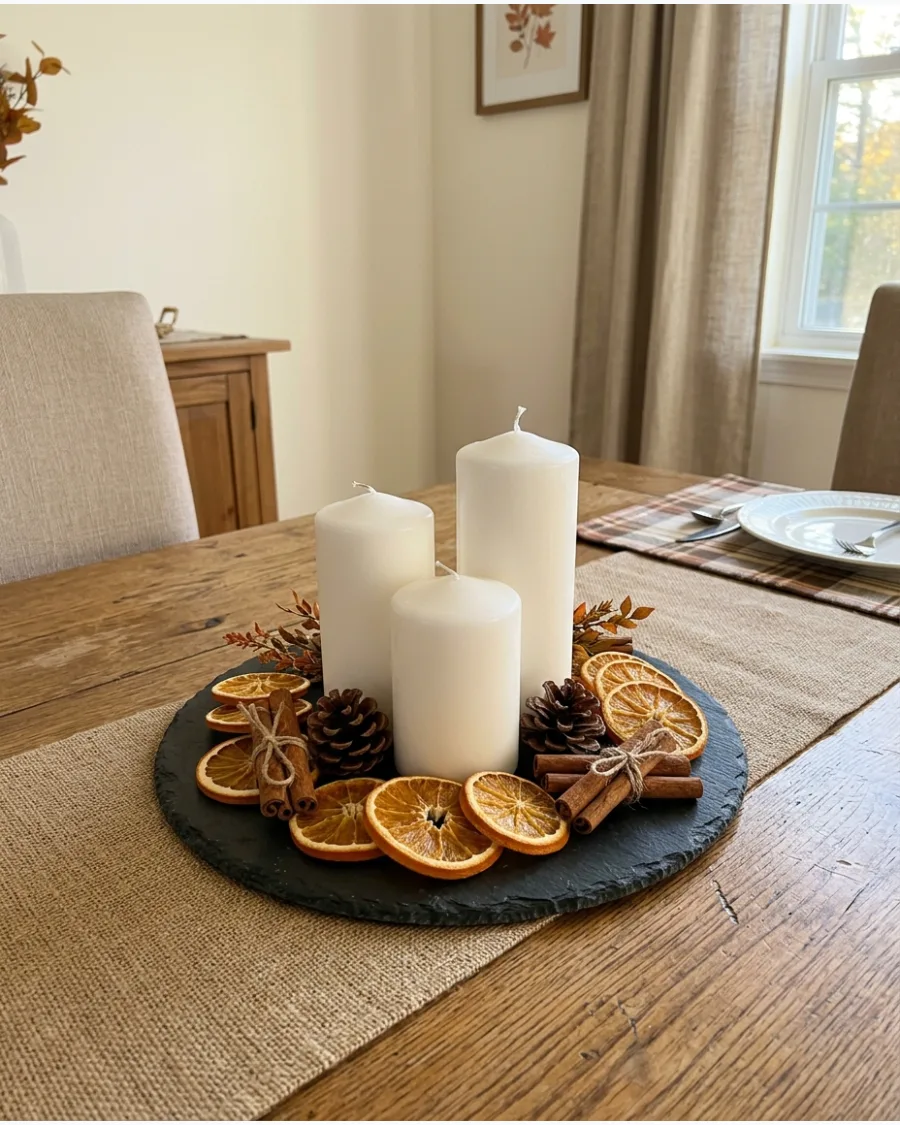
Combine dried orange slices, cinnamon sticks, greenery, and candles for a centerpiece full of warm fall texture. This is a great way to introduce warm orange tones without using pumpkins.
Thread the orange slices onto a piece of twine to create a small garland you can weave through the candles. The combination of woodsy pinecones and bright citrus creates a balanced, earthy fragrance.
- Drying orange slices in a low-temperature oven for three hours.
- Grouping items in clusters of three around the candles for visual balance.
- Adding a few sprigs of real pine for a fresh, seasonal scent.
Best shortcut: Buy pre-dried citrus slices from a craft store if you do not have time to bake your own.
46. DIY Harvest Corn Centerpiece
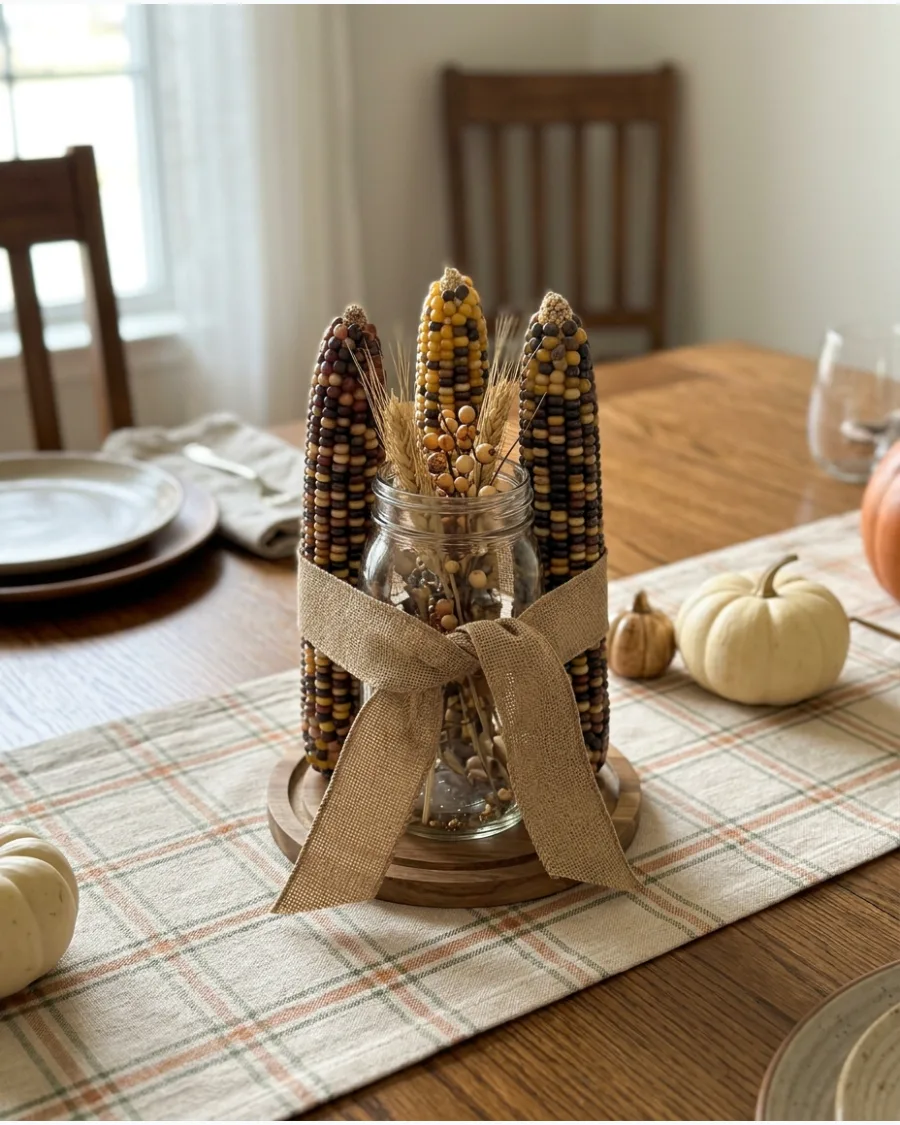
Bundle dried decorative corn together or arrange colorful corn cobs around a candle for a traditional harvest look. The varied colors of flint corn bring an immediate seasonal vibe to the space.
Secure three ears of corn around a glass candle jar using a thick rubber band, then hide the band with burlap ribbon. It is a sturdy option that will not wilt if the house gets warm from the oven.
- Picking up decorative corn at a local farmer's market or grocery store.
- Peeling back the husks to show the colorful kernels inside.
- Using a battery-operated LED candle inside the jar for a safer display.
Most people skip this: Dust the corn kernels with a soft cloth to remove dirt and make the natural colors pop.
47. DIY Fruit Bowl Thanksgiving Centerpiece
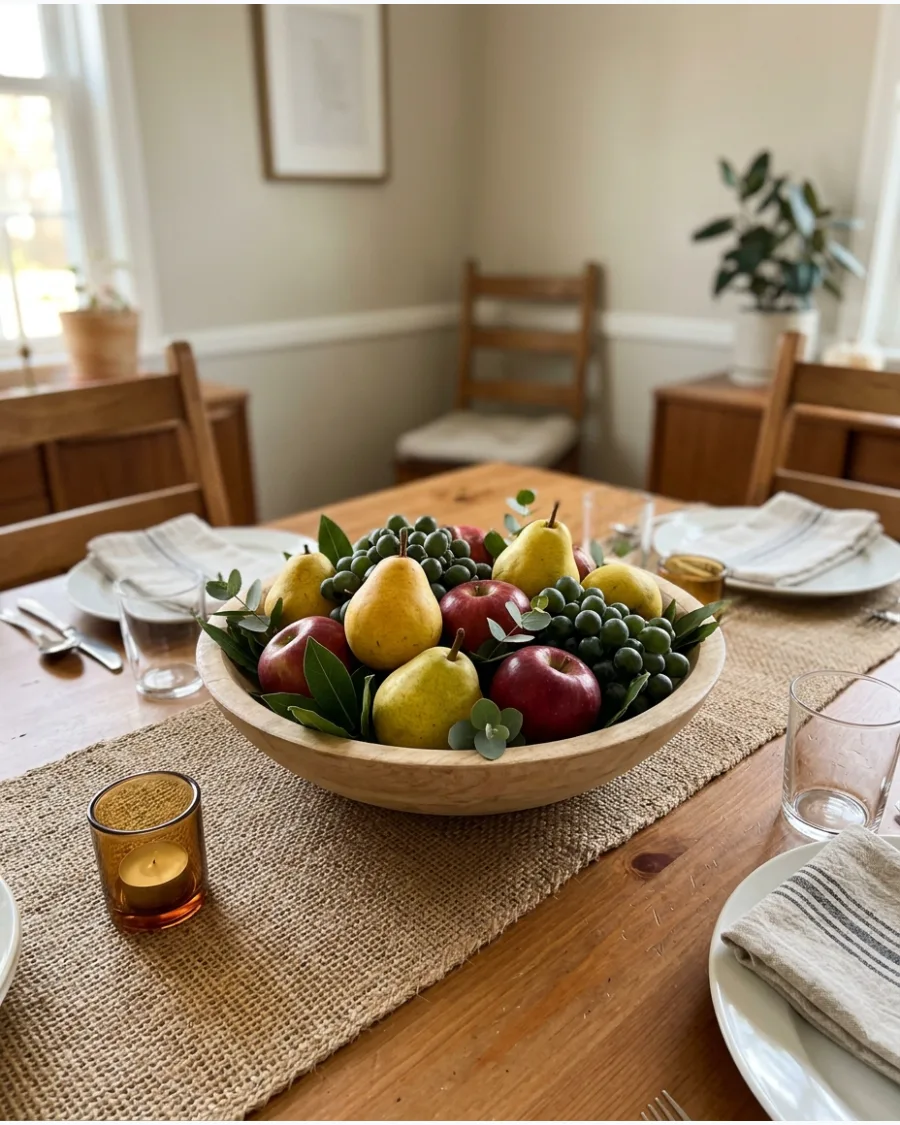
Fill a large wood or ceramic bowl with pears, apples, pomegranates, and greenery for a centerpiece you can assemble in minutes. A big bowl of fruit is the easiest centerpiece to build when you are short on time.
Tuck small sprigs of eucalyptus or boxwood into the gaps between the fruit to hide the bottom of the bowl. Using a mix of different fruit shapes keeps the arrangement from looking like a simple grocery store display.
- Choosing a bowl that is at least 12 inches wide to make a statement on the table.
- Washing and drying all fruit thoroughly before arranging to prevent mold.
- Using this as a secondary centerpiece on a buffet if the main table is full.
Quick win: Place the heaviest fruits at the bottom and the lighter, more delicate items like grapes on top to prevent bruising.
Home Decor
48. Floating Cranberry Glass Trough
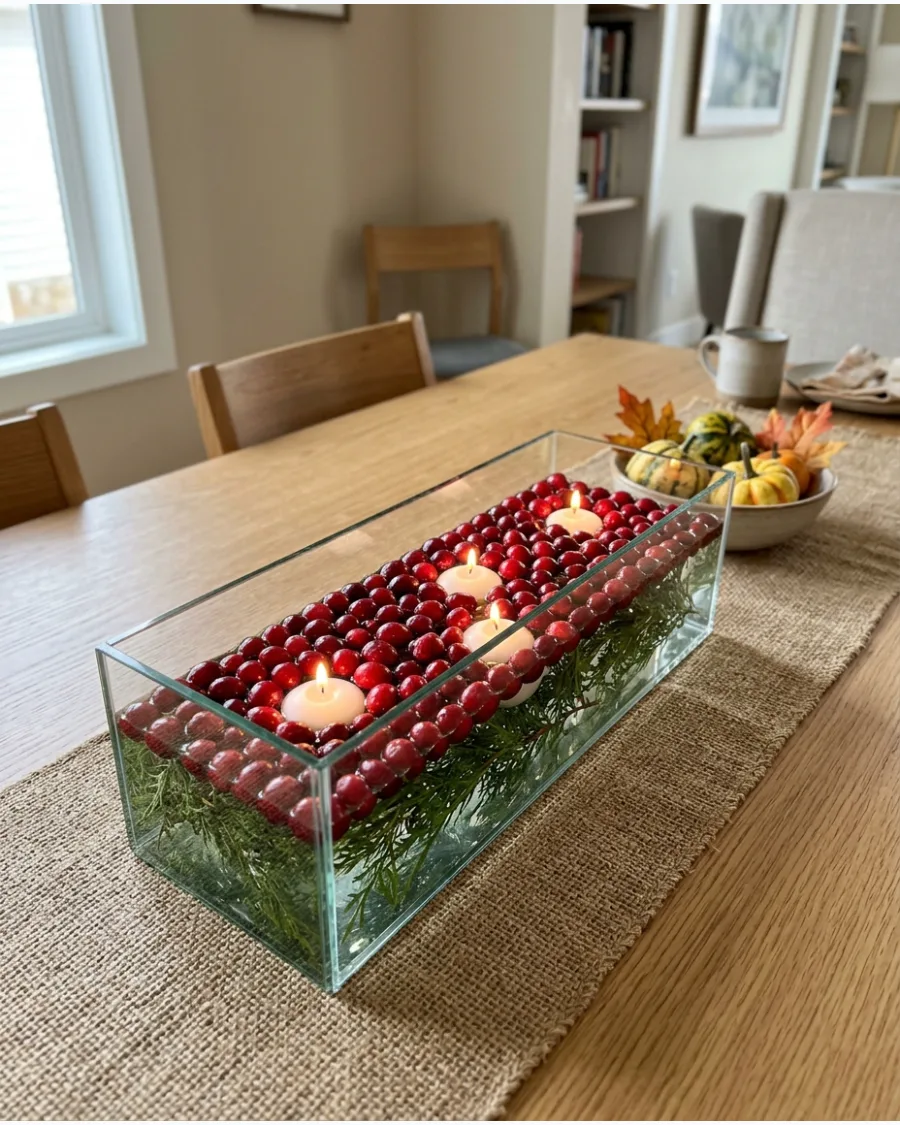
This centerpiece uses clear glass vessels filled with water to create a vibrant, reflective display that stays below eye level for easy conversation. Layer fresh cedar sprigs at the base of a rectangular vase before adding a dense layer of floating cranberries on top. The contrast between the deep red berries and forest green needles provides a traditional palette with a modern, clean execution.
Using distilled water prevents air bubbles from forming on the glass, keeping the look crisp and professional throughout the holiday meal.
- Sourcing: Buy fresh cranberries in bulk from the grocery store and clip cedar or pine from the backyard to keep costs under ten dollars.
- Setup: Place the glass vessel in its final position on the table before filling with water to avoid heavy lifting or spills.
- Adaptation: Swap the cedar for rosemary sprigs to add a subtle herbal scent that complements the Thanksgiving menu.
Most people skip this: Give the cranberries a quick rinse in cold water first to remove any dust or soft berries that might cloud the water.
FLORAL DIY THANKSGIVING CENTERPIECES
49. DIY Grocery Store Flower Centerpiece
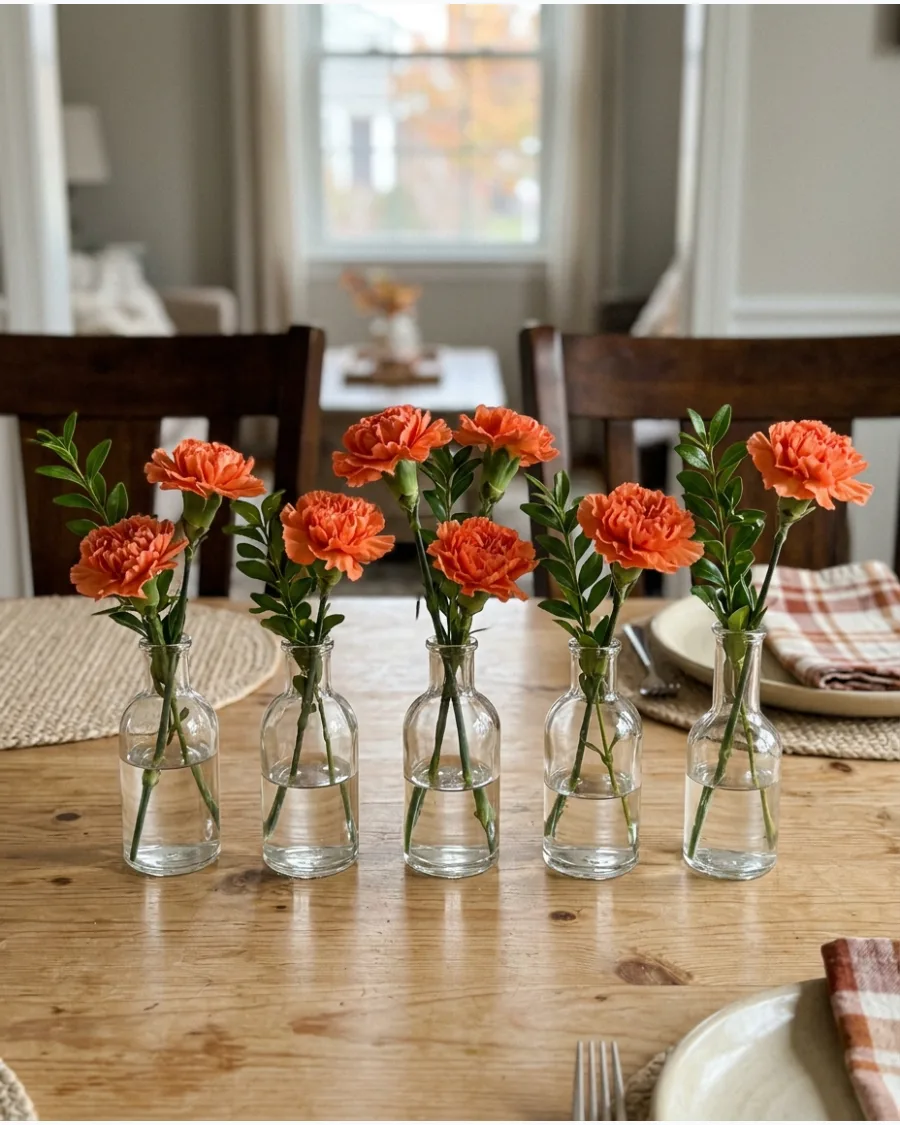
Divide one inexpensive fall bouquet among several small jars and arrange them down the middle of the table. This approach makes a single bunch of flowers look much more expensive and intentional.
Arrange the jars in a straight line to create a low runner of blooms. It works because it keeps the flowers low, so guests can easily see each other across the table.
- Picking up a fall mix bouquet from the grocery store to save money.
- Trimming stems at an angle so they sit at different heights in the jars.
- Using recycled jelly or spice jars for a varied, eclectic look.
Most people skip this: Remove any leaves that would sit below the water line to prevent the water from turning cloudy and smelling.
50. DIY Dried Hydrangea Centerpiece
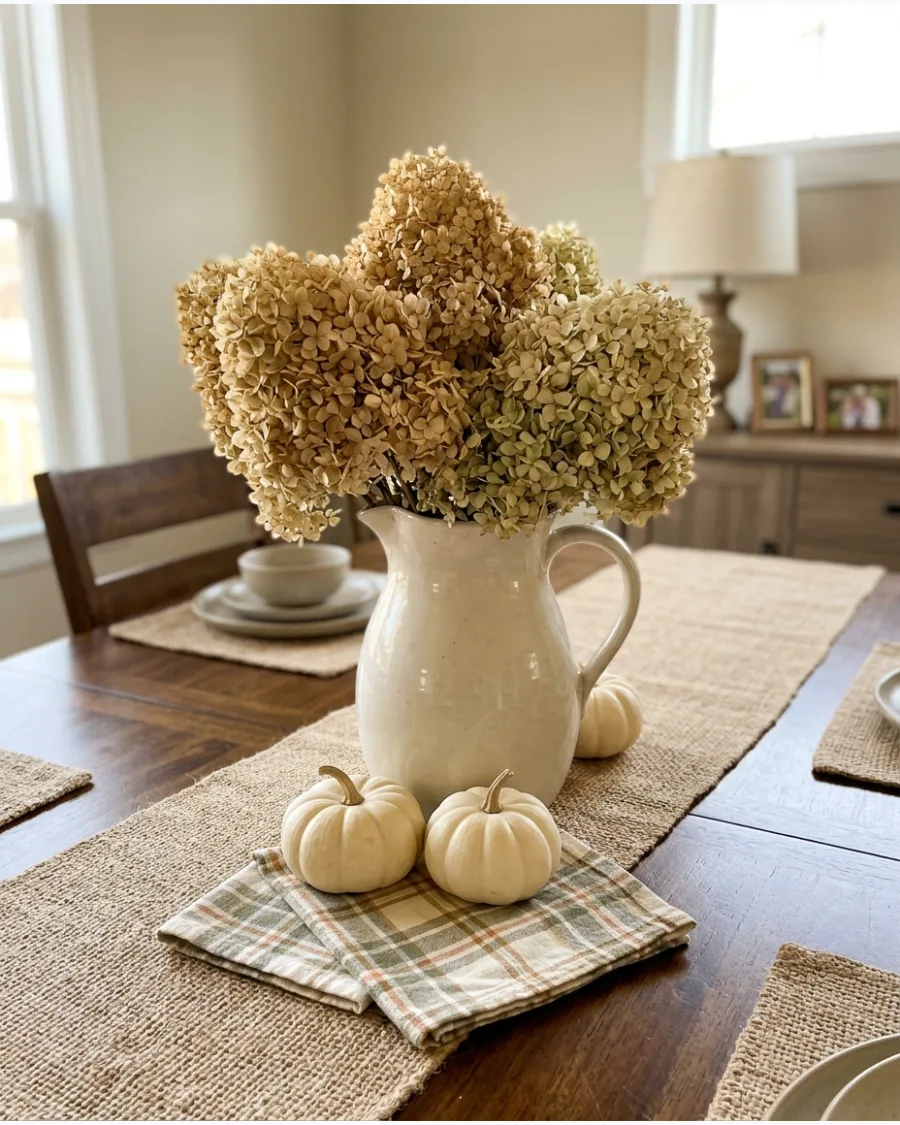
Fill a pottery vase with dried hydrangeas and add small pumpkins around the base. Dried flowers offer a muted, vintage color palette that fits the transition into late autumn perfectly.
Gently fluff the dried petals with your fingers to give the arrangement more volume without adding more stems. It is a low-maintenance choice since it requires no water and can be prepared weeks in advance.
- Drying hydrangeas from the garden by hanging them upside down in a dark room.
- Choosing a heavy ceramic vase to support the weight of the large flower heads.
- Substituting dried hydrangeas for high-quality silk ones for a more durable option.
Quick win: Spray the dried flower heads with a light coat of hairspray to prevent the tiny petals from shedding onto the tablecloth.
51. DIY Mum and Pumpkin Centerpiece
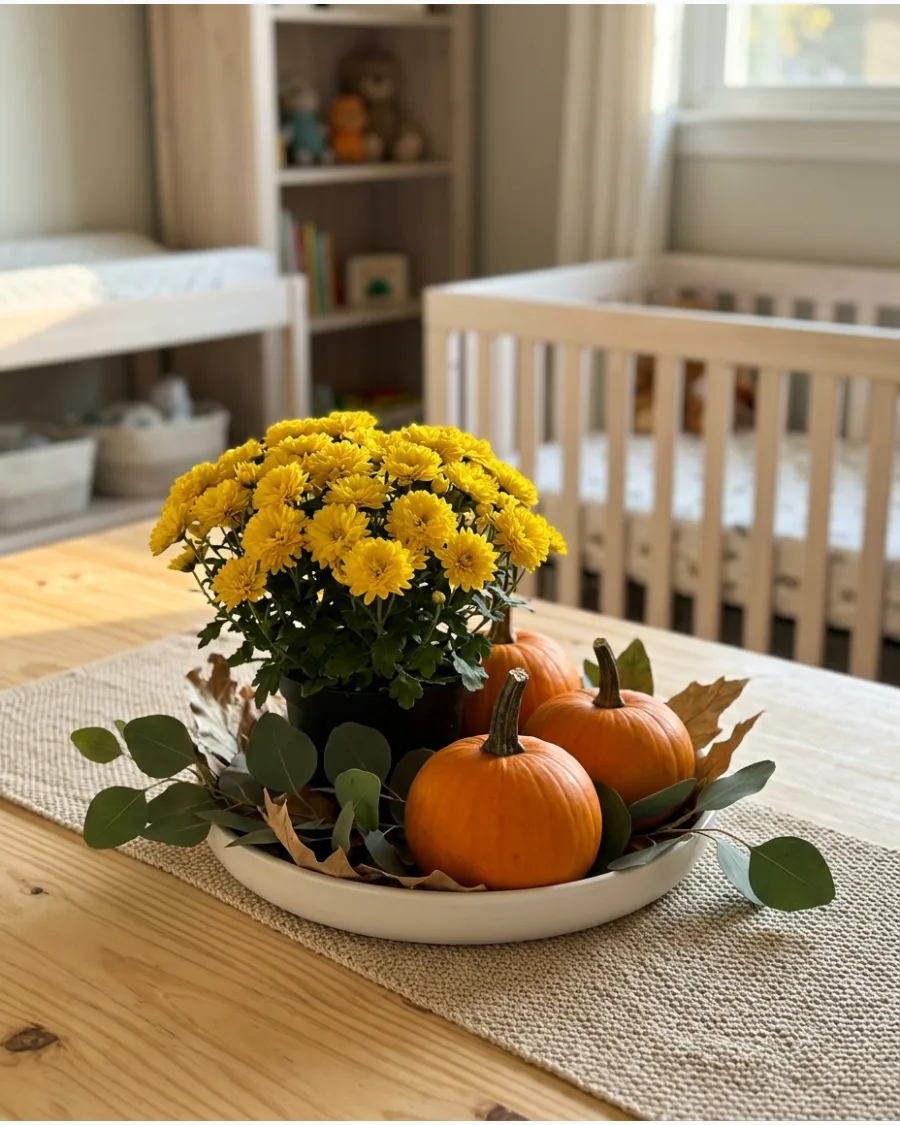
Mixing grocery store mums with fresh mini pumpkins creates a layered look that feels expensive. Use a low ceramic dish to keep the arrangement below eye level so guests can talk across the table.
Tuck sprigs of eucalyptus and small seasonal branches into the gaps to hide the plastic nursery pots. This setup stays fresh for days if the mums are kept hydrated in their original soil.
- Buy 4-inch potted mums and mini pumpkins for under twenty dollars.
- Nestle the pots into a shallow tray and cover the rims with moss or leaves.
- Swap out the pumpkins for pears or apples to refresh the look for a different meal.
Most people skip this: soak the eucalyptus in water for an hour before styling to keep the leaves from curling too quickly.
52. DIY Burgundy Floral Thanksgiving Centerpiece
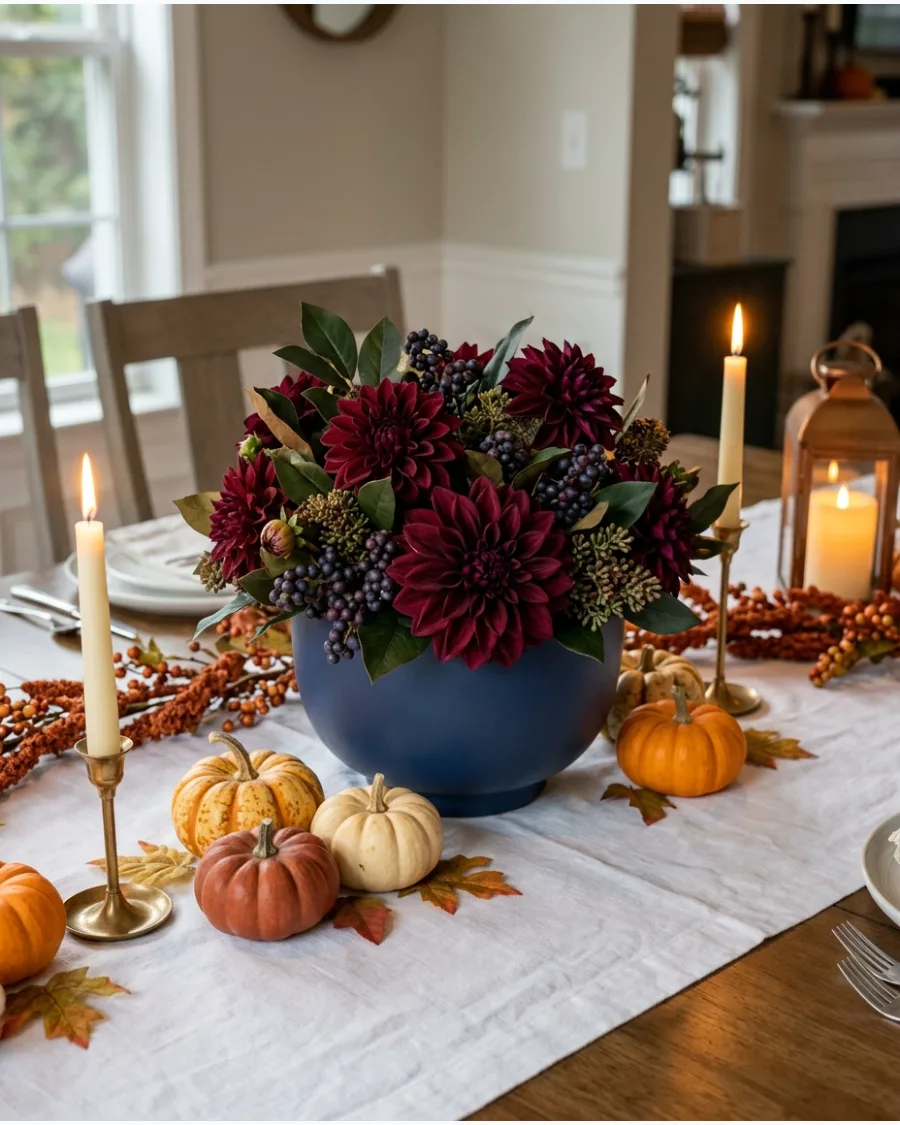
Deep red tones bring a sophisticated, modern energy to the Thanksgiving table. Combining burgundy dahlias with dark berries and foliage creates a moody palette that stands out against a white tablecloth.
Trim the stems at different lengths to create a natural, rounded shape within a simple bowl. This style works best when the colors are concentrated rather than scattered.
- Source dahlias and dark berries from a local florist or high-end grocery store.
- Use a floral frog or a grid of clear tape across the bowl rim to hold heavy stems.
- Keep the arrangement in a cool room away from direct sunlight to prevent wilting.
Quick win: add a splash of bleach to the vase water to keep the stems from turning the water cloudy and smelly.
53. DIY Wildflower Thanksgiving Centerpiece
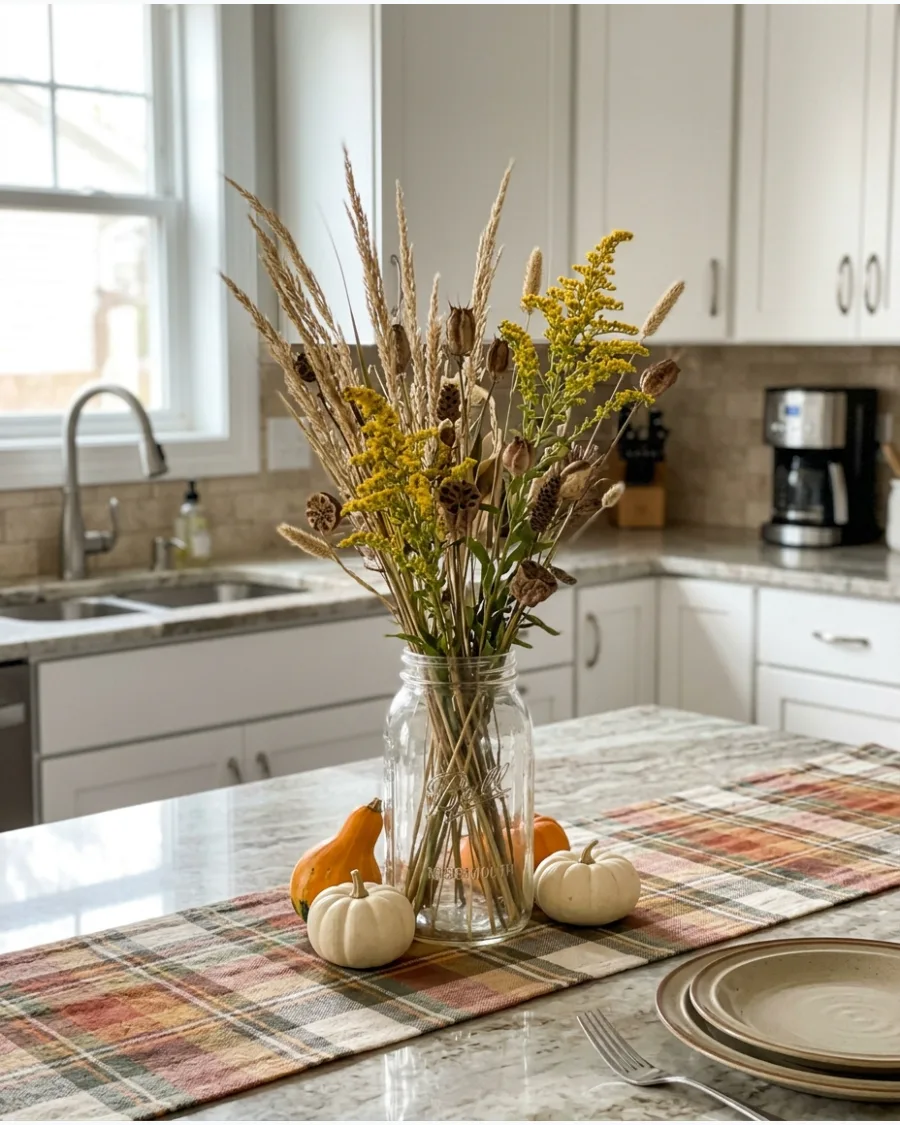
A relaxed arrangement feels less stuffy and more like a home-cooked harvest meal. Use tall grasses, seed heads, and loose seasonal blooms to create a sense of movement.
Place the tallest stems in the center of a wide-mouth jar and let the smaller flowers spill over the sides. It provides a rustic charm that doesn't require professional floral tape or foam.
- Gather dried grasses and wild stems from a backyard or a craft store floral aisle.
- Clean the bottom of the stems thoroughly so the water stays clear in the glass jar.
- Group three jars of different sizes together for a more impactful table display.
Best shortcut: use hairspray on dried grass plumes to prevent them from shedding seeds onto the dinner plates.
54. DIY Floral Pumpkin Centerpiece
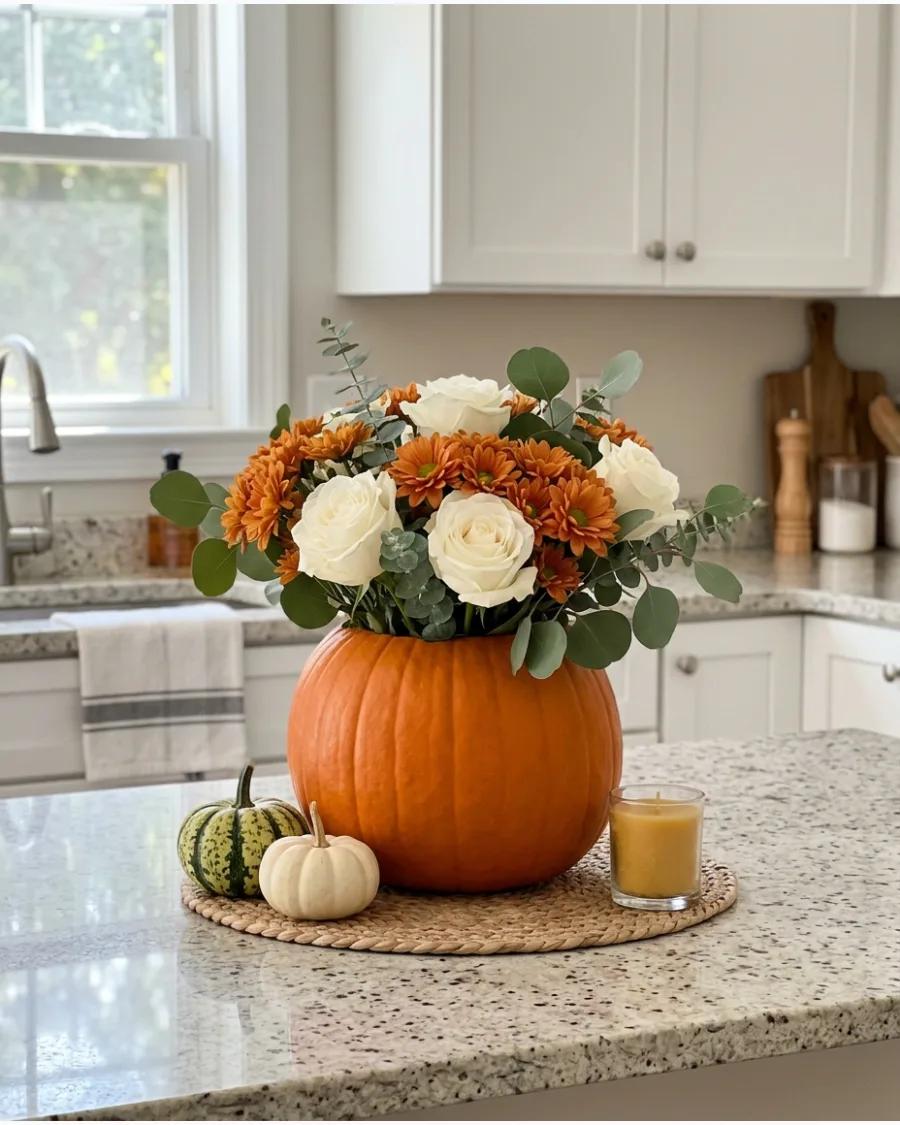
Turning a hollowed-out pumpkin into a vase is a classic move that never fails to impress. Use a medium pumpkin as the base and fill it with a mix of roses, mums, and silver dollar eucalyptus.
Insert a small glass jar or plastic container inside the pumpkin to hold the water and flowers. This prevents the pumpkin from getting soggy and helps the arrangement last longer.
- Select a pumpkin with a flat bottom so it sits securely on the table surface.
- Cut the hole in the top slightly smaller than your water container for a snug fit.
- Discard the pumpkin base after two or three days to avoid any rot on the table.
Quick win: wipe the outside of the pumpkin with a little vegetable oil to give it a soft, healthy glow.
BUDGET & CREATIVE DIY THANKSGIVING CENTERPIECES
55. DIY Dollar Store Thanksgiving Centerpiece
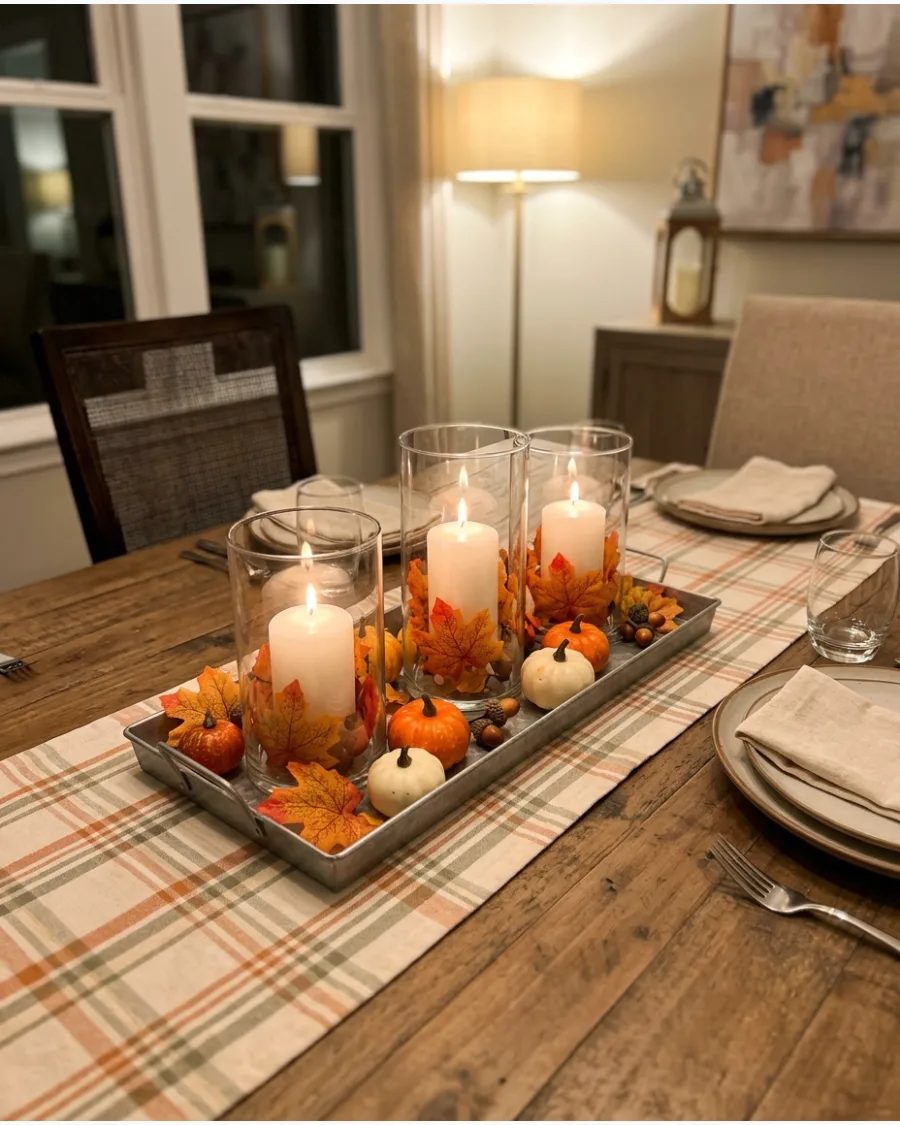
A high-end look is achievable using basic glass candleholders and a few craft supplies. Arrange white pillar candles on a simple metal tray and surround them with faux silk leaves.
Scatter a handful of mini pumpkins around the base of the candles to add height and texture. Using a tray keeps the decor contained so it is easy to move when it is time to serve the food.
- Find glass cylinders and metal trays at local discount or dollar stores.
- Stick to a single color for the candles to make the arrangement look more expensive.
- Use battery-operated candles if children or pets will be close to the table.
Most people skip this: clean the glass cylinders with rubbing alcohol to remove fingerprints before placing them on the table.
56. DIY Thrifted Bowl Thanksgiving Centerpiece
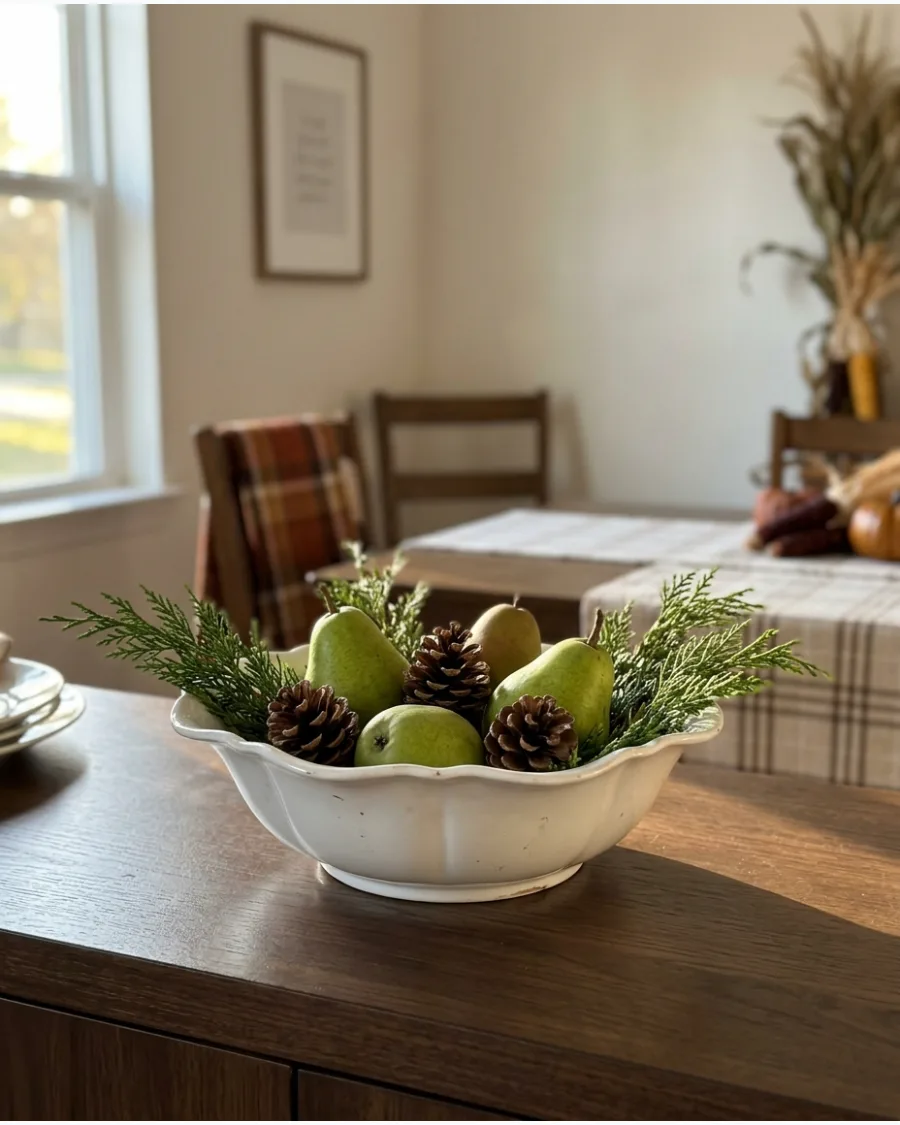
Second-hand shops are full of unique bowls that make perfect foundations for a harvest display. Fill a vintage porcelain or ceramic bowl with a mix of pears, pinecones, and cedar sprigs.
Place the largest items in the bottom of the bowl first to build a solid base for smaller accents. This is a sustainable way to decorate that adds character to the dining room.
- Look for bowls with interesting textures or scalloped edges at thrift stores.
- Mix real fruit with dried elements like pinecones for a variety of textures.
- Add a few drops of cedar essential oil to the pinecones for a subtle holiday scent.
Best shortcut: use crumpled newspaper in the bottom of deep bowls to lift the decor so you need fewer materials.
57. DIY Wooden Crate Thanksgiving Centerpiece
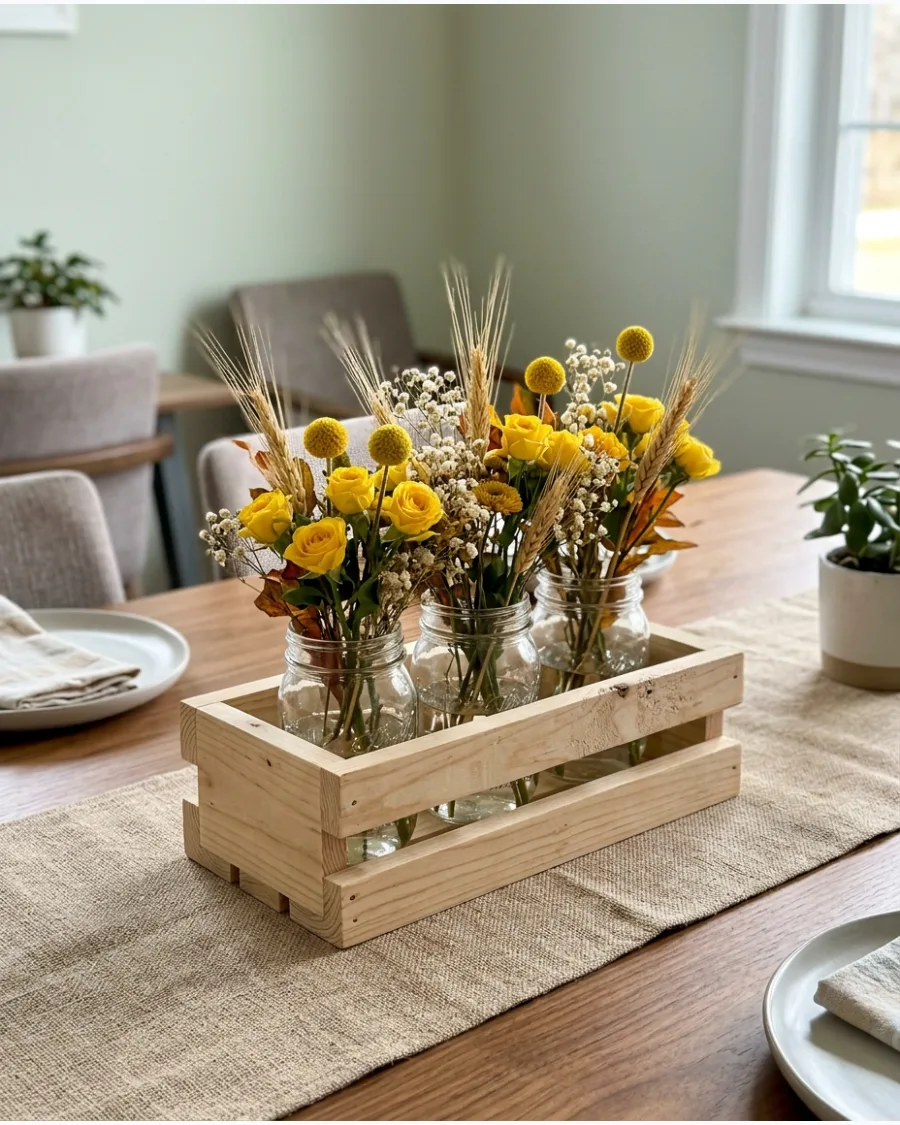
A small wooden crate provides a structured way to organize multiple decor elements. Fill the crate with small jars of flowers and bundles of dried wheat for a clean, organized look.
Line the bottom of the crate with a bit of moss to fill the gaps between the jars. This setup is very stable and works well for long rectangular tables.
- Buy or build a small crate that is no wider than six inches to save table space.
- Use jars of varying heights to create visual interest inside the crate.
- Wrap the jars in twine or ribbon to match the color of your napkins.
Quick win: tie the wheat bundles with a simple rubber band first, then cover the band with twine for a neat finish.
58. DIY Paper Leaf Thanksgiving Centerpiece
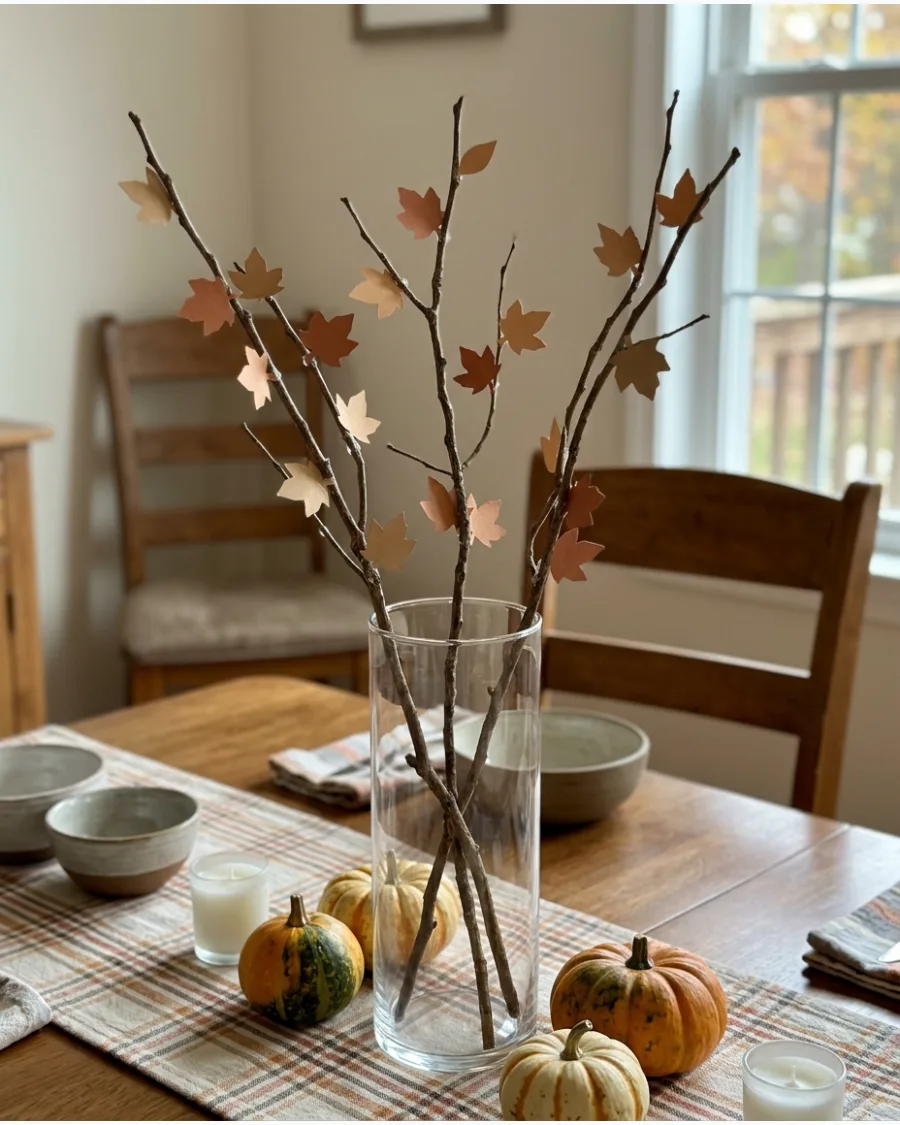
Handmade paper leaves offer a modern and budget-friendly alternative to fresh flowers. Cut leaf shapes from textured cardstock in autumn colors and attach them to real branches.
Arrange the branches in a tall glass vase to create a striking vertical element on the table. It is a great project for adding a personal touch without the worry of plants wilting.
- Use a mix of tan, terracotta, and cream paper for a sophisticated color palette.
- Find interesting branches in the backyard or at a local park.
- Glue the leaves sparingly to keep the arrangement looking light and airy.
Most people skip this: gently fold the paper leaves down the center to give them a 3D, realistic shape.
59. DIY Painted Pumpkin Centerpiece
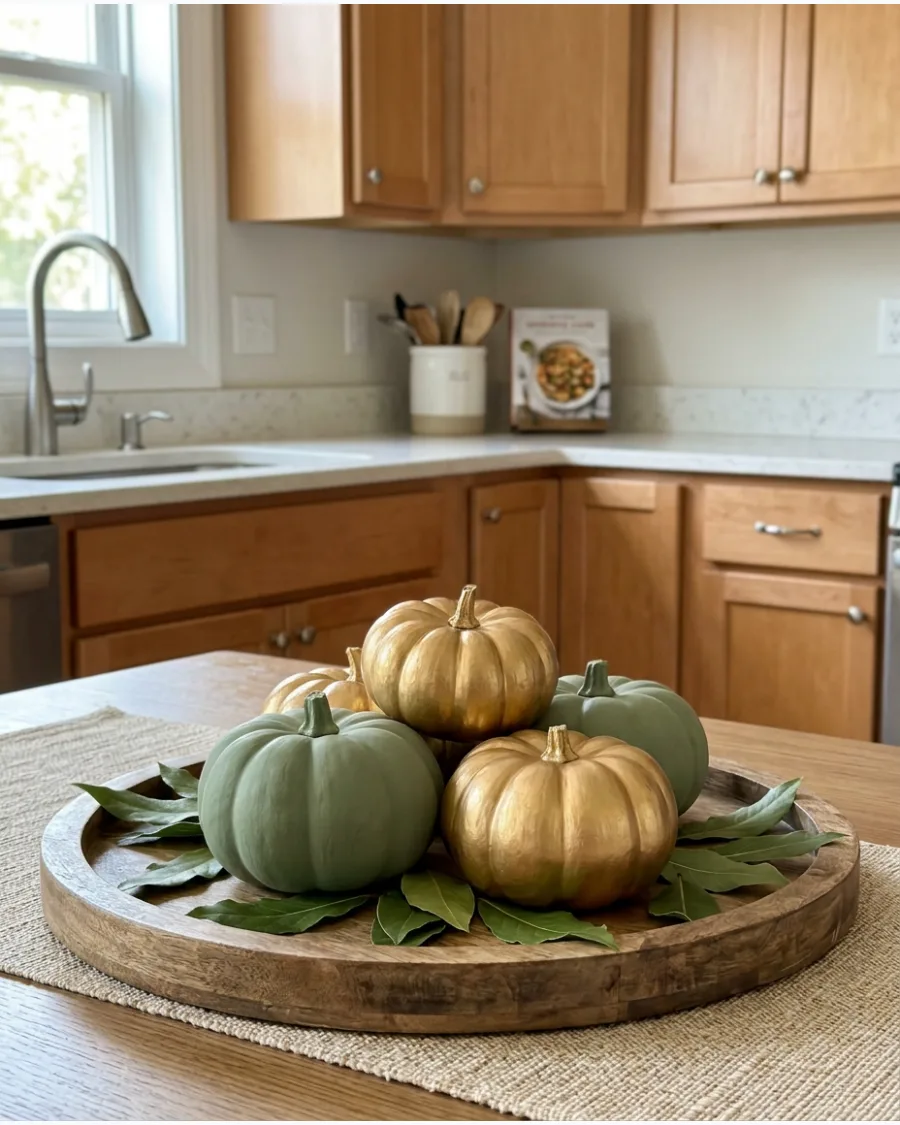
Painting mini pumpkins allows you to match your centerpiece to your specific room colors. Use matte sage green or metallic gold paint to transform standard orange pumpkins into high-end decor.
Arrange the painted pumpkins on a wooden tray and surround them with fresh bay leaves. This look is clean, intentional, and much more polished than unpainted gourds.
- Use acrylic craft paint for the best coverage on pumpkin skins.
- Let the pumpkins dry completely for at least four hours before placing them on a tray.
- Mix matte and metallic finishes to add depth to the arrangement.
Best shortcut: use a sponge brush instead of a bristle brush to avoid leaving visible stroke marks on the pumpkins.
60. DIY 10-Minute Thanksgiving Centerpiece
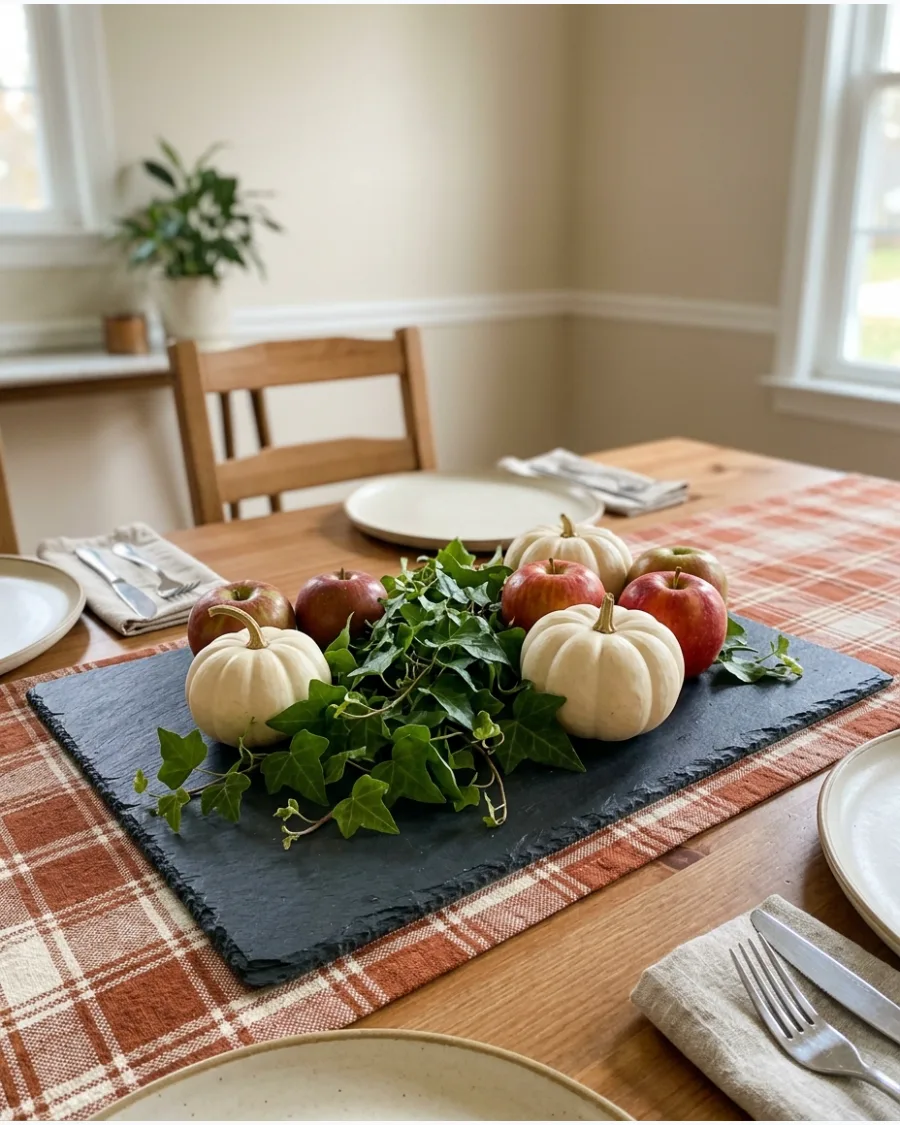
You can create a beautiful table focal point in minutes using items you likely already have. Simply place a few grocery-store pumpkins and seasonal fruit onto a large tray or board.
Tuck in some greenery from the backyard and a couple of white candles to finish the look. It proves that styling is more about placement and layers than complicated crafting.
- Use a slate board or a large wooden cutting board as your base.
- Combine different textures like smooth pumpkins, waxy apples, and rough leaves.
- Place the largest items in the center and work outward to the edges.
Quick win: use an odd number of items—like three pumpkins and five apples—to make the arrangement look more natural.
Frequently Asked Questions
How do I keep my DIY centerpiece low enough for guests to see over?
To ensure conversation flows easily, follow the "elbow rule" by keeping your arrangement under 12 inches tall. You can test this by placing your elbow on the table; if your hand is higher than the flowers, your guests will have a clear line of sight.
What are the best grocery store flowers for a Thanksgiving look?
Look for hardy, budget-friendly options like chrysanthemums and carnations in warm autumnal shades. Adding sprigs of silver dollar eucalyptus provides a professional, fragrant touch that stays fresh throughout the holiday weekend.
How can I make a centerpiece that lasts from the weekend before until Thanksgiving day?
Focus on long-lasting elements like mini pumpkins, gourds, and dried wheat stalks that don't require water. If you use fresh stems, hydrate them in soaked floral foam and keep the arrangement in a cool spot away from direct sunlight.
What are some non-floral DIY centerpiece ideas for people with allergies?
Create a beautiful, allergy-safe display using a mix of unshelled nuts, fresh pears, and unscented pillar candles. Incorporating natural wooden dough bowls or driftwood adds rustic texture without the risk of pollen or heavy scents.
How do I choose the right size centerpiece for my specific table shape?
For rectangular tables, a long garland or a series of small bud vases creates a balanced look that spans the length of the surface. If you have a round table, a single, lush cluster placed in the center provides a perfect focal point without crowding the place settings.