30 Pony Wall Shower Ideas

This post may contain affiliate links: full affiliate disclosure.
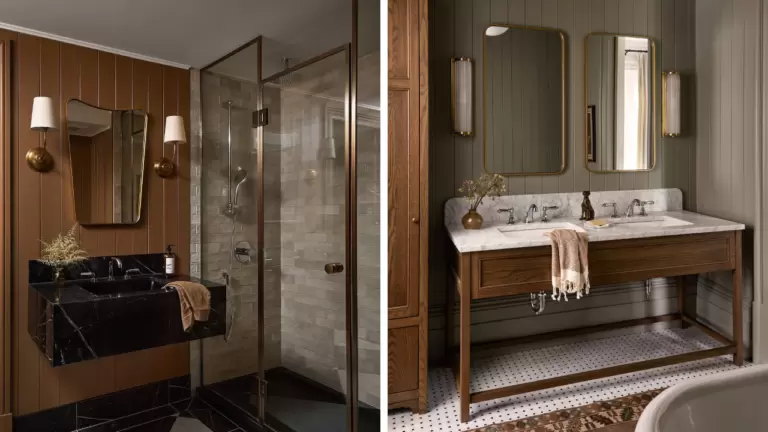
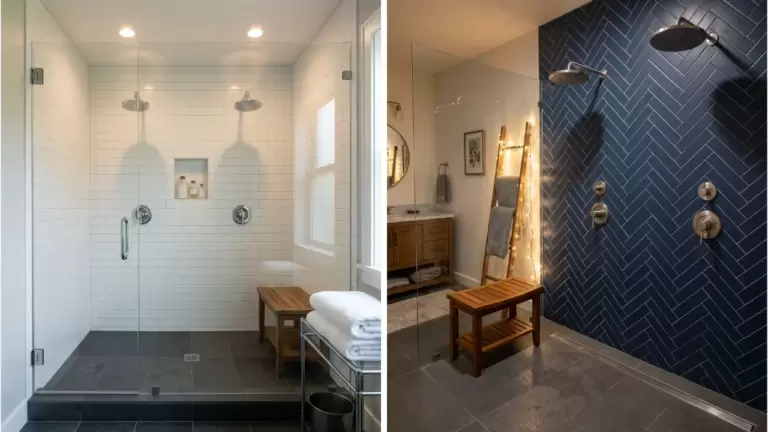
Pony walls provide the perfect balance between an open walk-in shower and a private enclosure. They hide messy shampoo bottles while letting light flow through the entire room.
These half-height walls also save money by reducing the amount of custom glass needed for a remodel.
1. Modern Pony Wall Shower
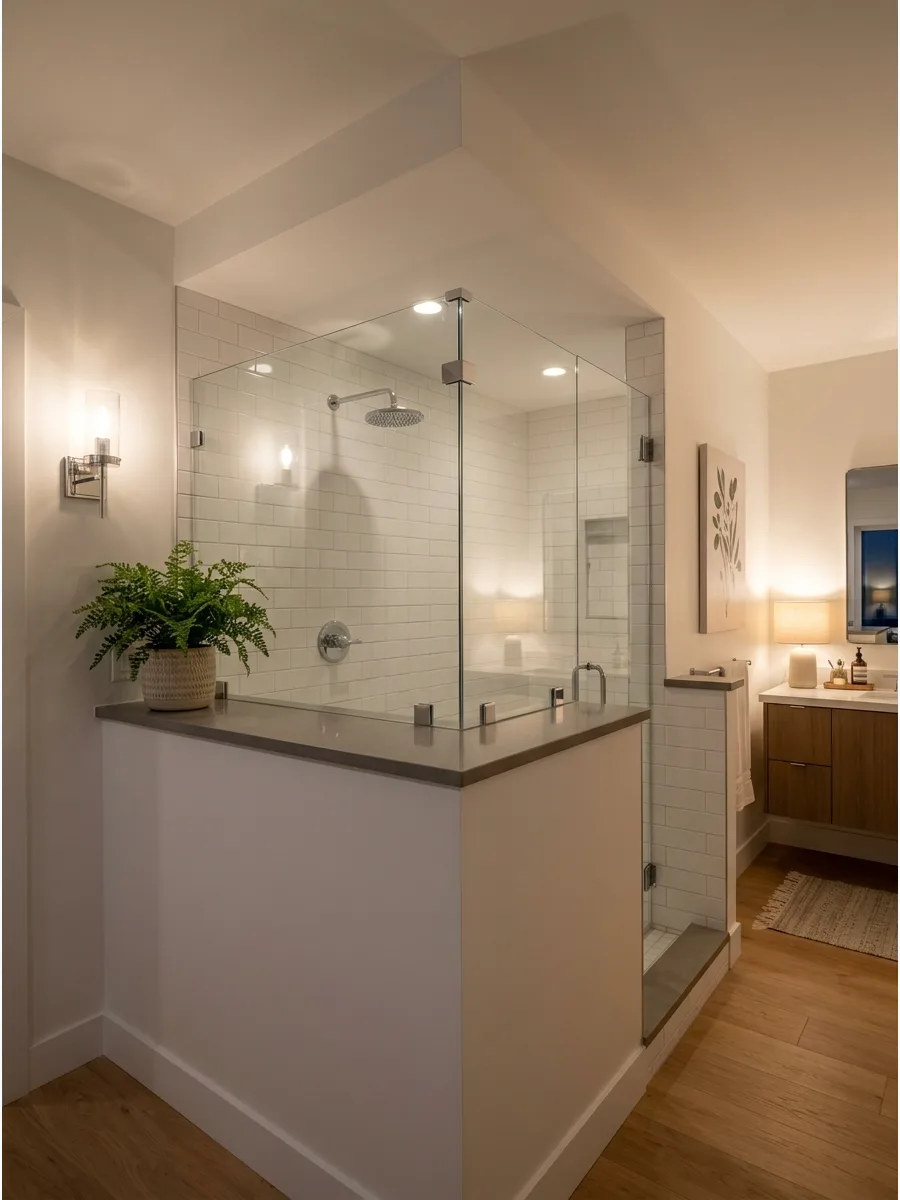
A half-height wall creates a clear boundary without blocking the view of the rest of the room. It makes the shower feel like its own zone while keeping the floor plan airy.
Cap the wall with a solid stone slab to prevent water from seeping into the grout lines on top. Using a pony wall is often cheaper than installing a full floor-to-ceiling glass panel.
- Budget 3 to 5 days for framing and tiling.
- Frame the wall with pressure-treated lumber to prevent rot.
- Use this in medium-sized bathrooms to define the wet area.
Quick win: Match the cap material to the bathroom vanity countertop for a cohesive look.
2. Pony Wall Glass Panel
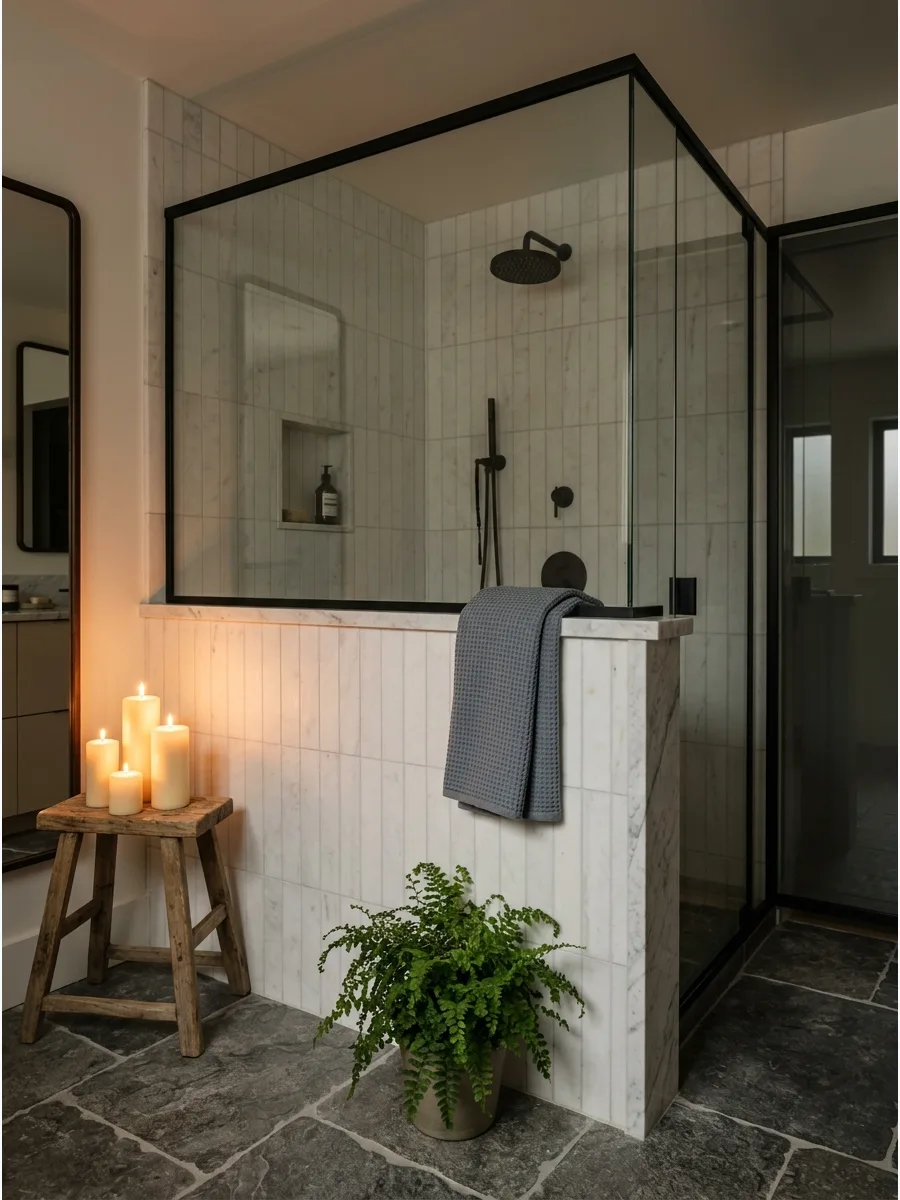
Adding a fixed glass panel on top of the wall keeps water inside the shower while maintaining sightlines. This setup offers better splash control than a wall alone.
Ensure the glass is professionally measured and tempered for safety and a perfect fit. It provides a high-end look without the weight of a full-height glass door.
- Expect to pay $400 to $800 for custom-cut glass.
- Mount the glass using a metal U-channel or small clips for stability.
- Perfect for showers with high-pressure rainfall heads.
Most people skip this: Apply a water-repellent coating to the glass before the first use to prevent spots.
3. Curbless Pony Wall Shower
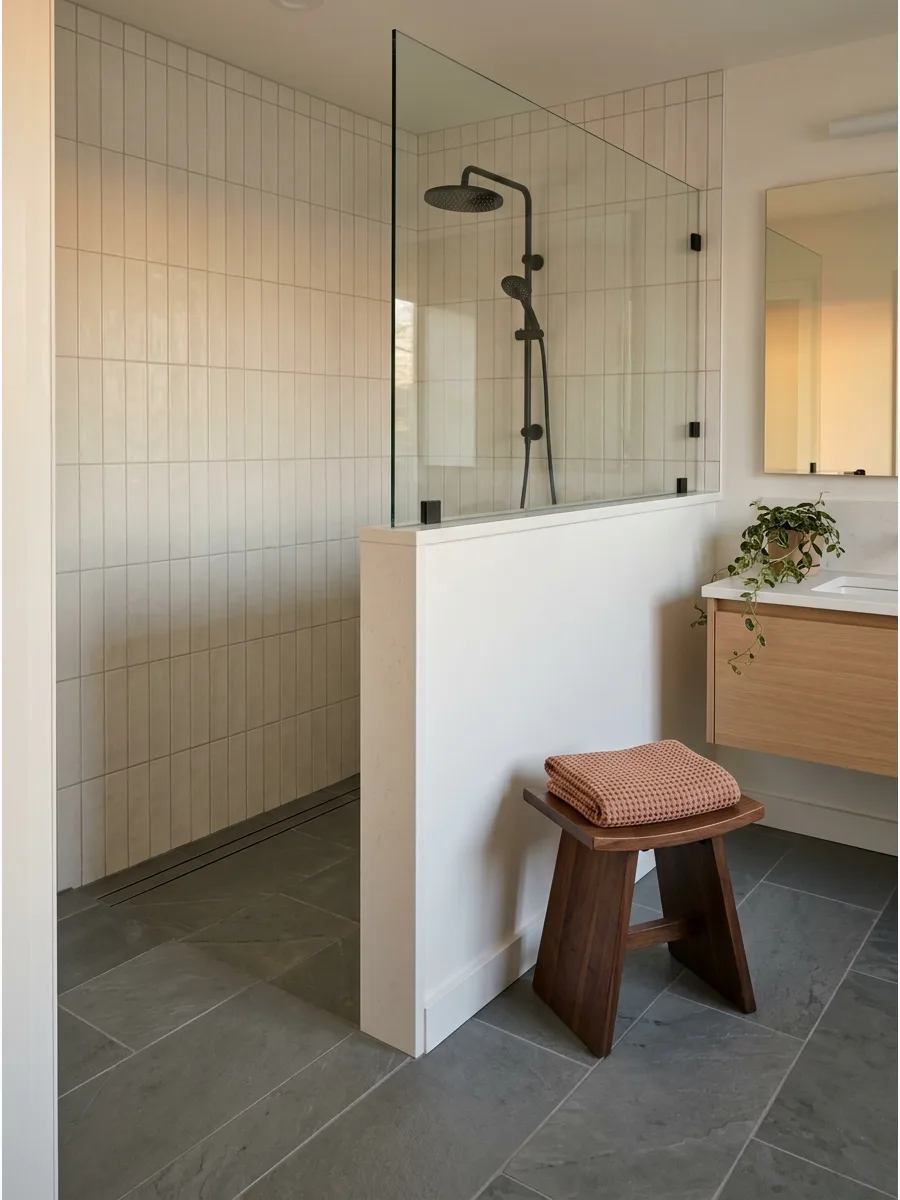
Pair a pony wall with a curbless floor for a seamless transition from the main bathroom into the shower. This design removes tripping hazards and creates a high-end, modern aesthetic.
Slope the shower floor toward a linear drain to ensure water moves away from the opening. It makes even a standard bathroom feel like a luxury wet room.
- Requires professional floor sloping and structural adjustments.
- Install a waterproof membrane across the entire bathroom floor.
- Ideal for aging-in-place or accessible design.
Best shortcut: Use a linear drain to simplify the floor tile layout and drainage.
4. Minimalist Pony Wall Shower
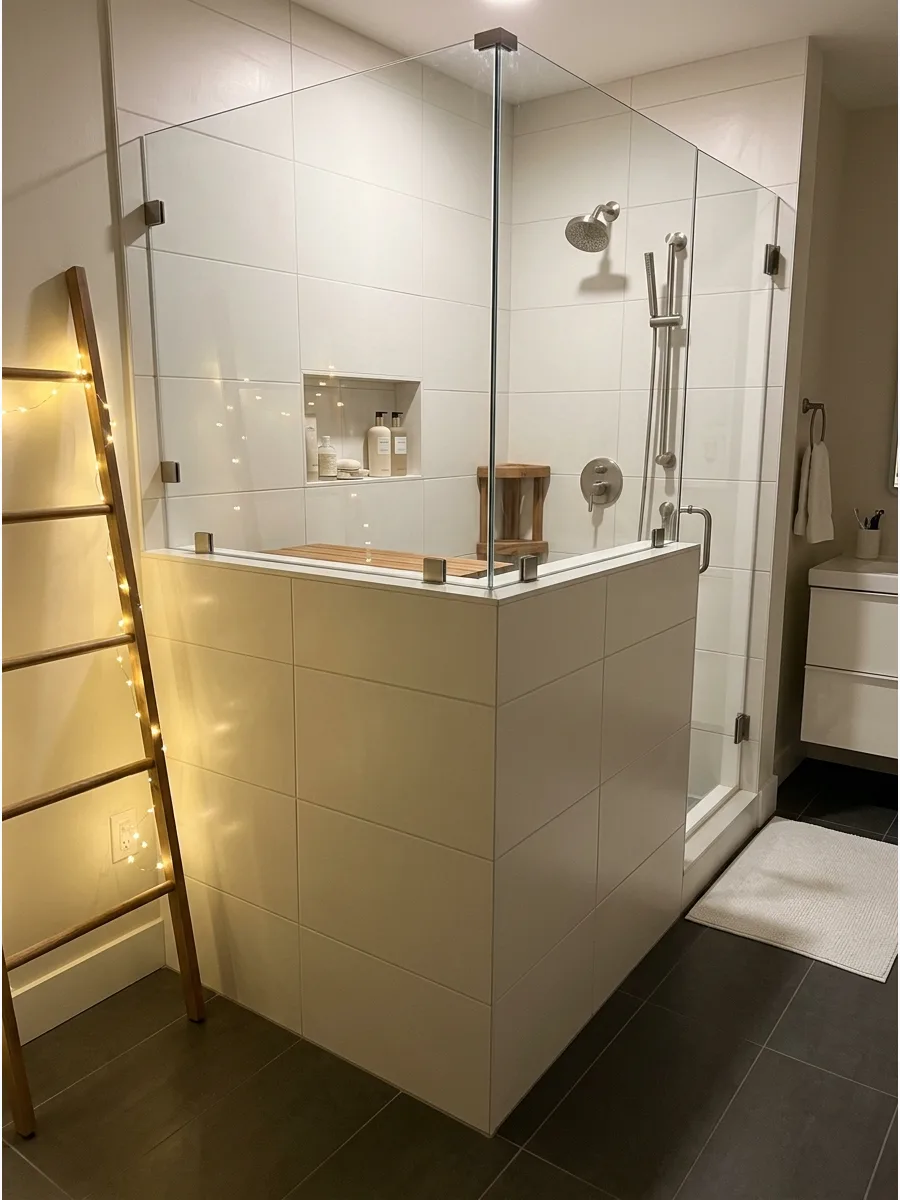
Use simple tile and clean edges to create a sleek, spa-style design. Hidden storage inside the wall keeps clutter out of sight from the rest of the room.
Choose mitered tile edges on the corners of the pony wall for a sharp, clean finish. This approach works best in bright, monochromatic spaces.
- Budget $1,500 to $3,000 for tile and labor.
- Use a matching grout color to make the wall feel like one solid piece.
- Works well in modern or Scandinavian-style homes.
Quick win: Use a Schluter strip for the edges if mitered tile is too expensive for the budget.
5. Small Bathroom Pony Wall
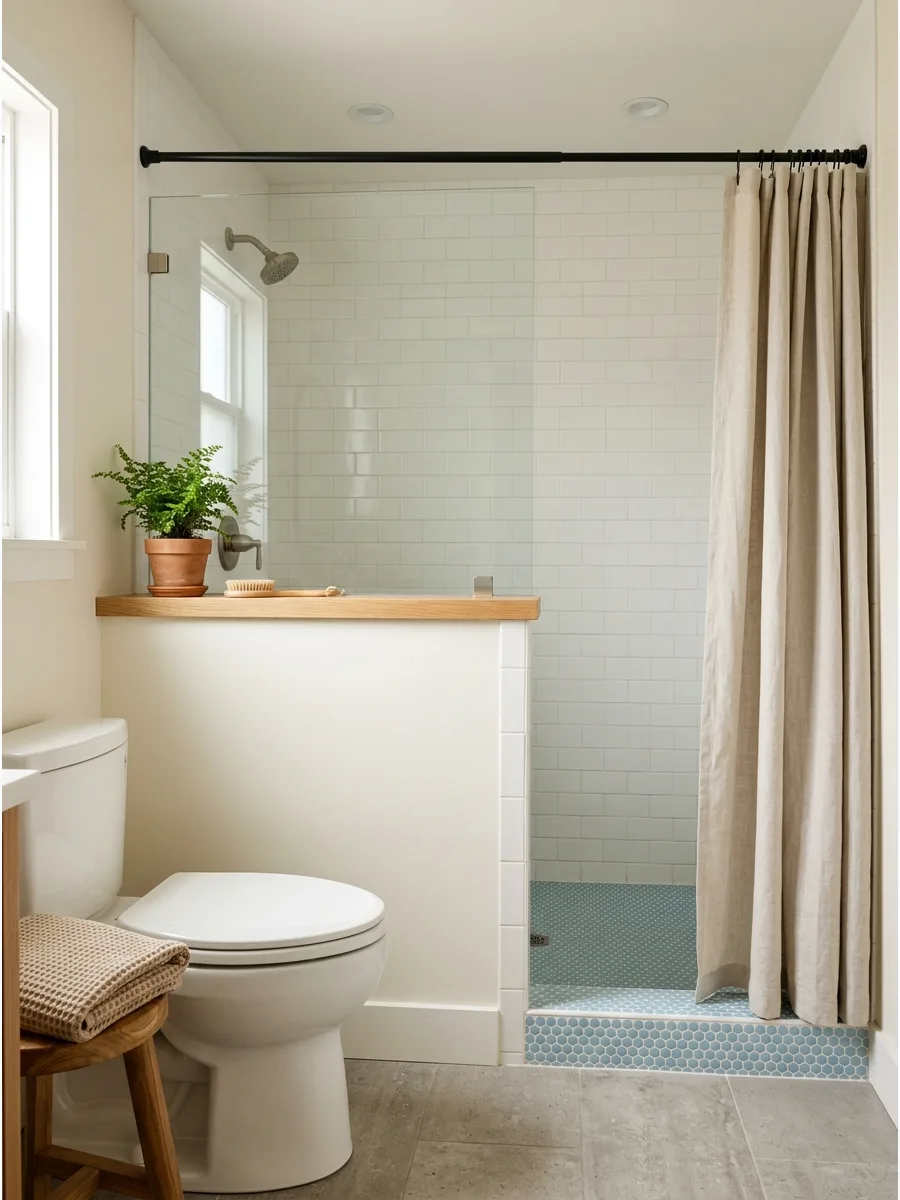
A pony wall separates the shower from the toilet area without making the room feel cramped. It provides a visual break that feels much more intentional than a shower curtain.
Keep the wall height around 36 to 42 inches to maintain an open feeling at eye level. This is a smart way to maximize every inch of a tight floor plan.
- Simple 1-day framing project for most contractors.
- Position the wall exactly 15 inches from the center of the toilet for code compliance.
- Best for guest baths or studio apartments.
Most people skip this: Paint the wall the same color as the bathroom walls to make the space look larger.
6. Corner Pony Wall Shower
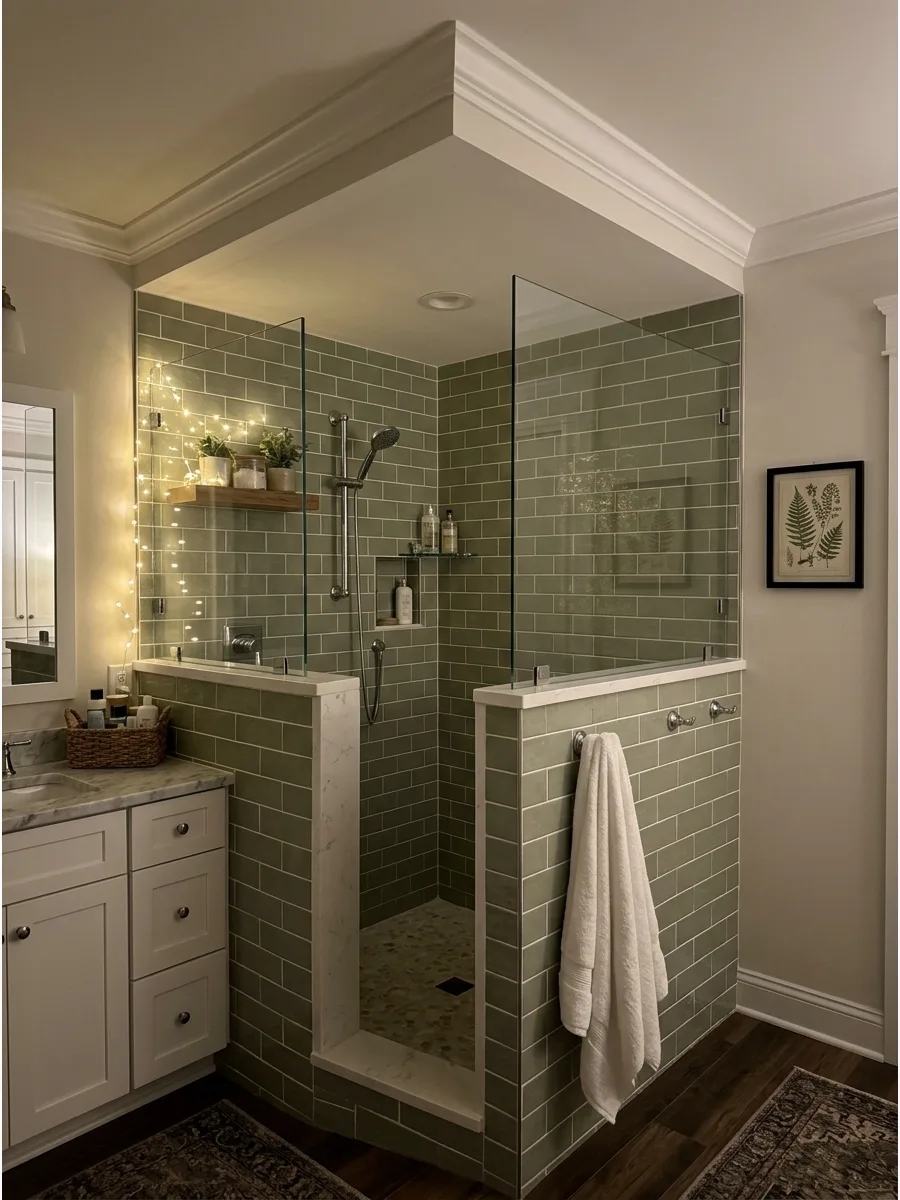
Placing the pony wall on one side of a corner shower saves space and helps control water spray. It creates a cozy, enclosed feel while still letting in light from above.
Tile the top of the pony wall at a slight inward angle so water drains back into the shower. This layout is perfect for replacing an old corner tub or small stall.
- Budget $2,000 to $4,000 for a full corner remodel.
- Secure the wall to both the floor and the main wall for maximum stability.
- Great for square bathrooms with limited wall space.
Best shortcut: Use a prefabricated shower pan to save time on the floor installation.
7. Pony Wall Beside Toilet
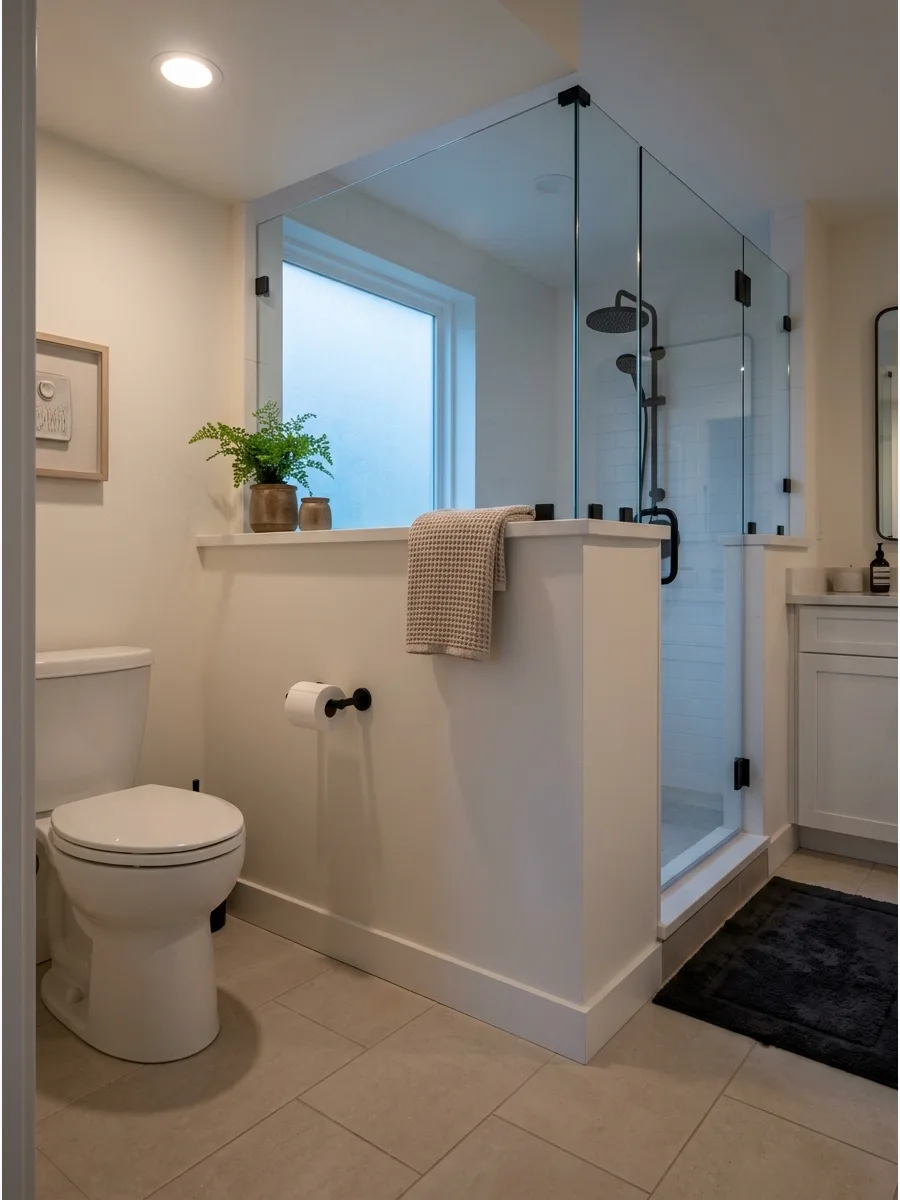
Building a half-wall between the toilet and shower offers privacy and splash protection for the toilet paper. It creates a dedicated water closet feel without the cost of a full partition.
Install the toilet paper holder directly onto the pony wall for easy access and a clean look. This creates a much more polished layout than leaving the toilet exposed to the shower glass.
- Low-cost framing addition during a standard remodel.
- Add extra wood blocking inside the wall during framing to support the toilet paper holder.
- Best for shared family bathrooms where privacy is needed.
Quick win: Use the top of this wall as a spot for a small plant or a decorative tray.
8. Pony Wall Beside Vanity
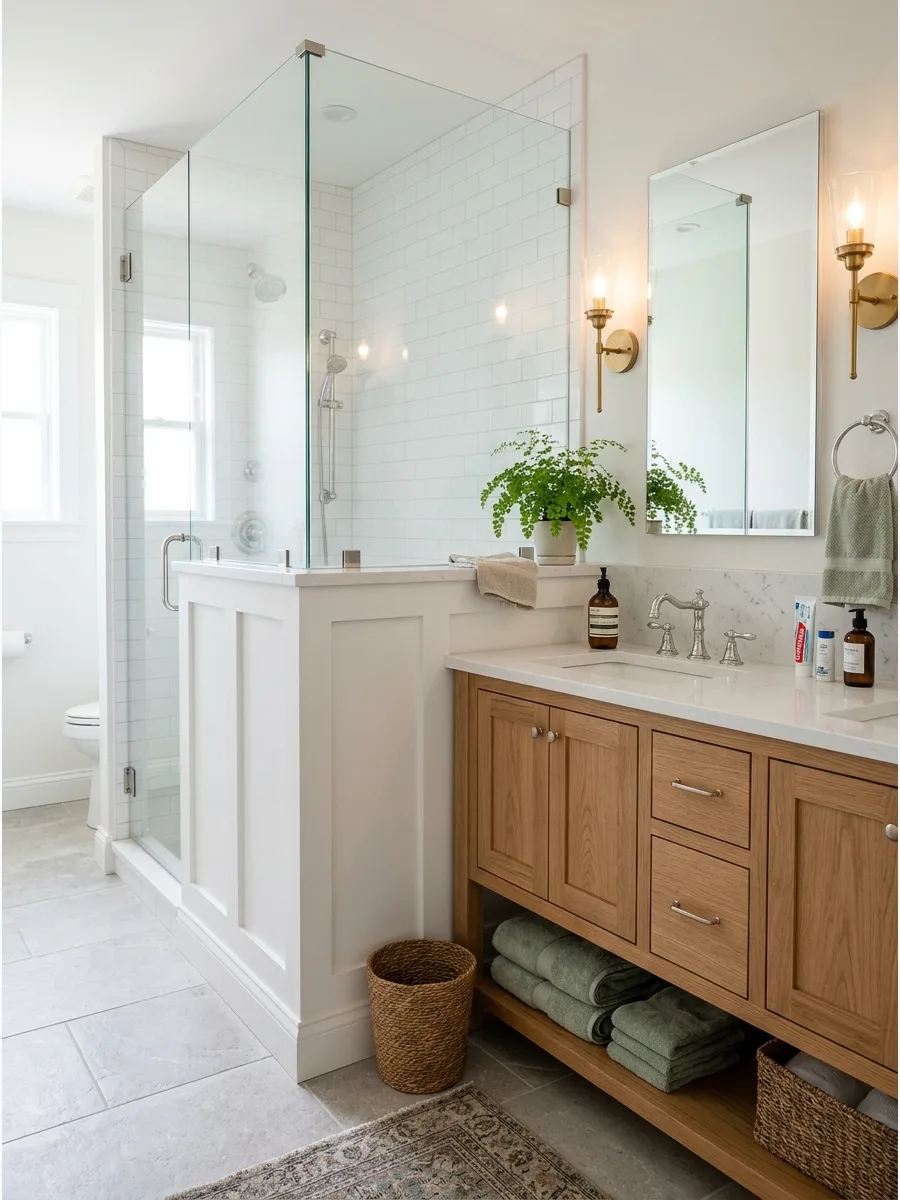
Placing a pony wall next to the vanity protects the cabinet wood from constant water exposure and humidity. It also hides the side of the vanity, which often isn't as decorative as the front.
Match the height of the pony wall to the height of the vanity backsplash for a custom, built-in look. This prevents water from splashing onto the vanity mirror or countertop.
- Budget $200 to $500 for the wall build and tile.
- Leave a small gap between the wall and vanity for cleaning access or seal it completely.
- Essential for protecting expensive wood vanities from moisture damage.
Most people skip this: Use a waterproof silicone caulk where the pony wall meets the vanity to prevent mold.
9. Pony Wall Built-In Bench
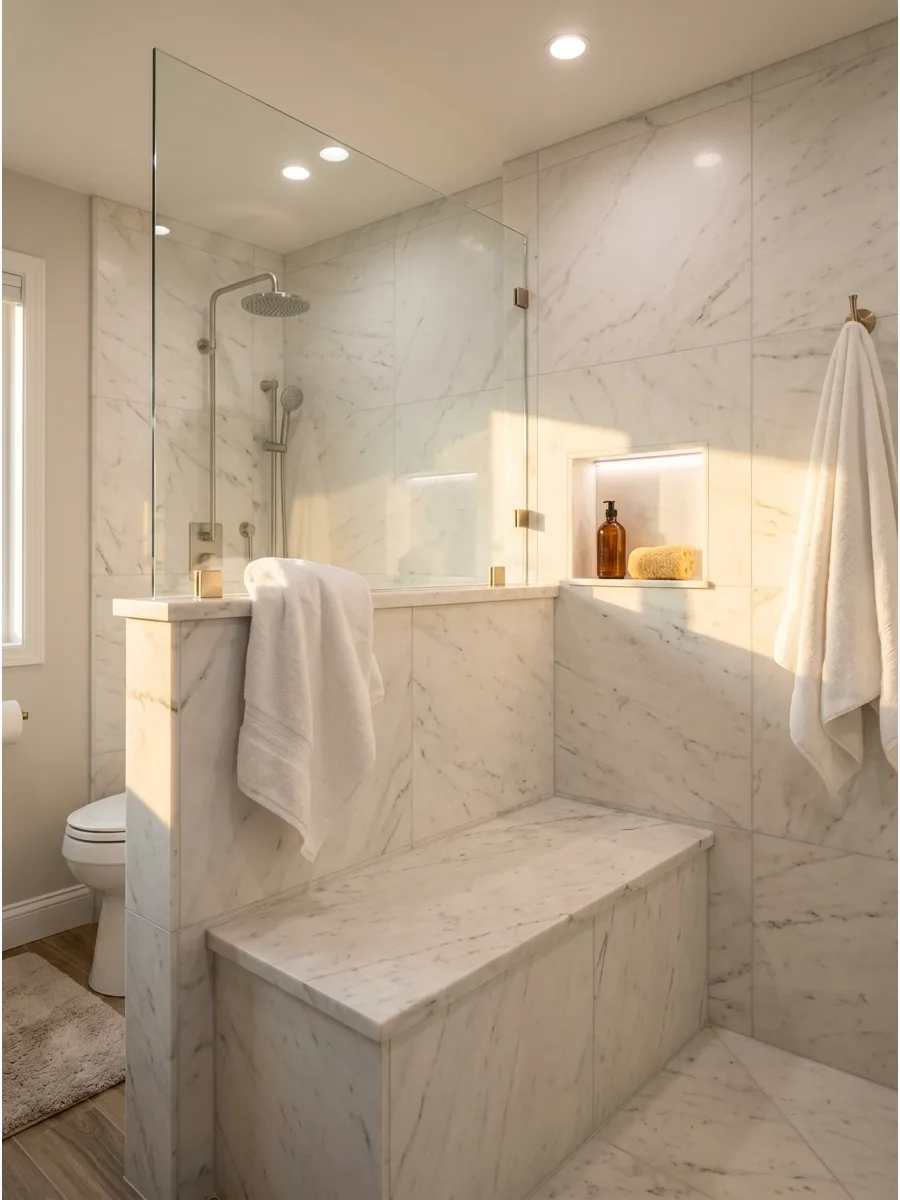
A built-in bench provides a comfortable spot to sit and relax while making the shower feel like a private spa. It uses the structure of the pony wall to provide support and stability.
Ensure the bench seat slopes slightly toward the drain to prevent water from pooling. This is a great feature for long-term comfort and accessibility.
- Adds $500 to $1,000 to the shower cost for framing and finishing.
- Use a solid stone slab for the bench seat for a smoother feel than tile.
- Best for large walk-in showers with extra floor space.
Quick win: Install a handheld shower head near the bench for easy rinsing while sitting.
10. Floating Bench Pony Wall
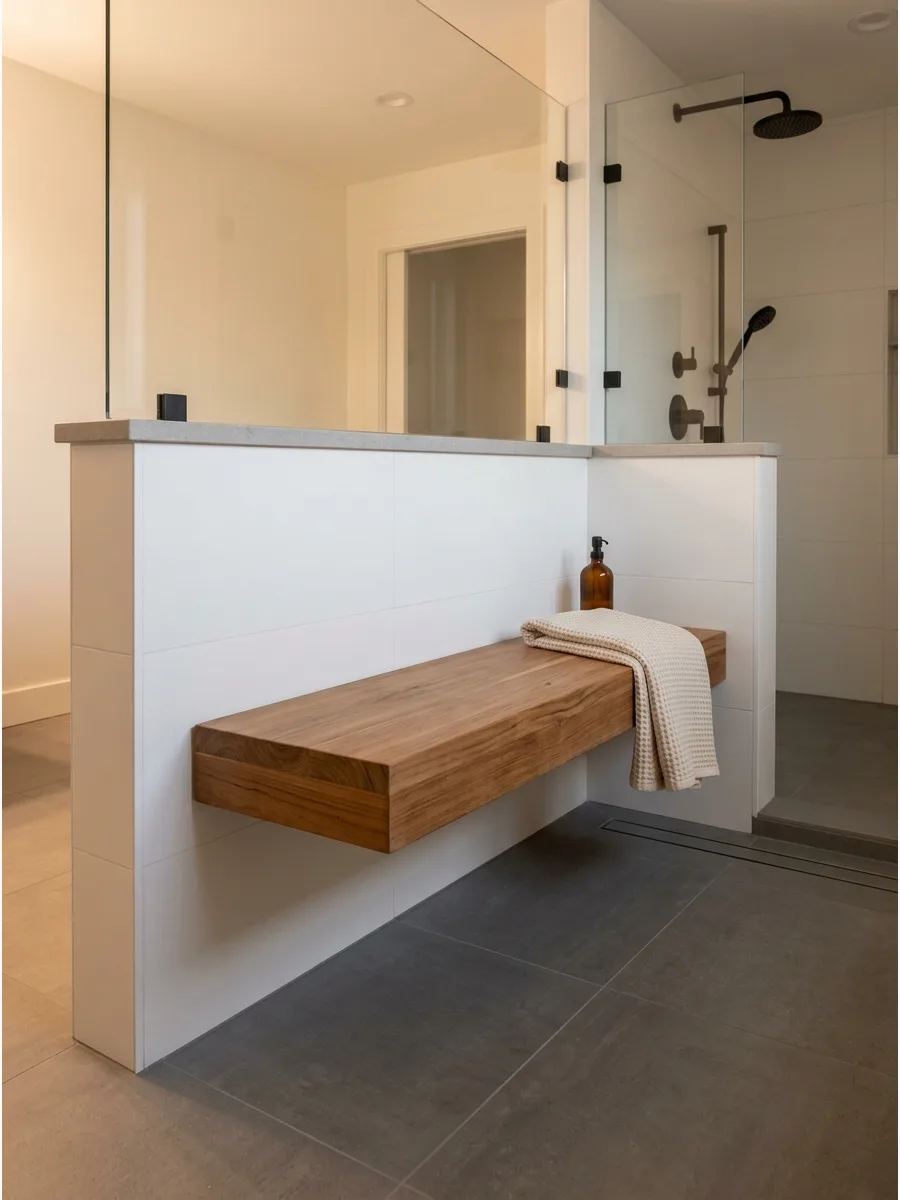
Using a floating bench instead of a solid one creates a lighter, more modern look inside the shower.
The pony wall provides a sturdy anchor point for the bench brackets. Use heavy-duty stainless steel brackets hidden behind the tile to support the weight safely. This design makes the shower floor easier to clean since there are no legs in the way.
- Budget $300 to $600 for the bench and specialized hardware.
- Requires professional installation to ensure the wall can support the weight.
- Perfect for minimalist or industrial bathroom designs.
Best shortcut: Buy a pre-made teak floating bench kit to ensure the wood is shower-ready.
11. Large-Format Tile Pony Wall
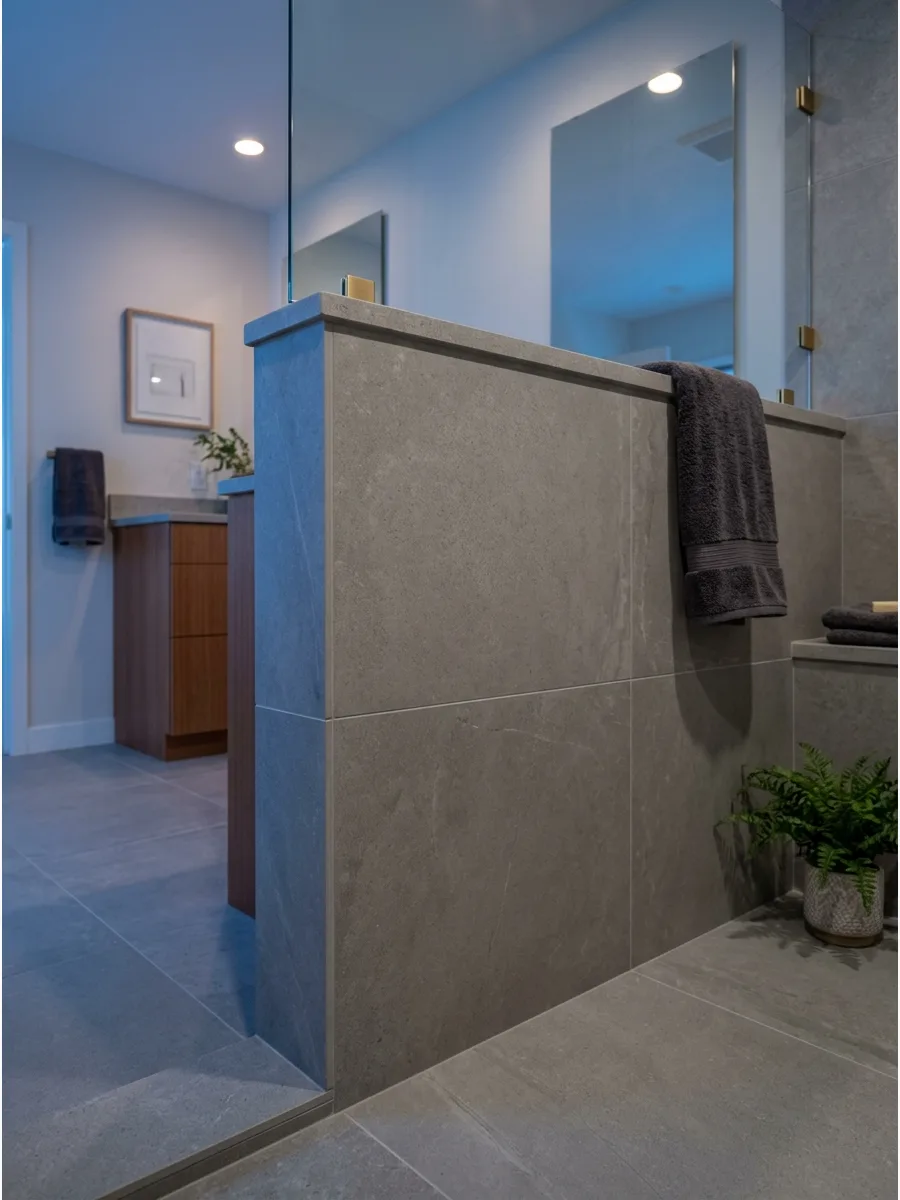
Large-format tiles create a seamless look with fewer grout lines to clean. This makes the pony wall appear like a solid block of stone rather than a tiled surface.
Align the grout lines of the pony wall with the floor tiles for a perfectly tailored appearance. This is a major trend for 2026 because it makes small showers feel much larger.
- Costs $10 to $20 per square foot for tile materials.
- Hire a tiler experienced with large-format porcelain to avoid uneven edges.
- Best for high-end, contemporary bathroom remodels.
Quick win: Use a color-matched epoxy grout for the most seamless look possible.
12. Zellige Tile Pony Wall
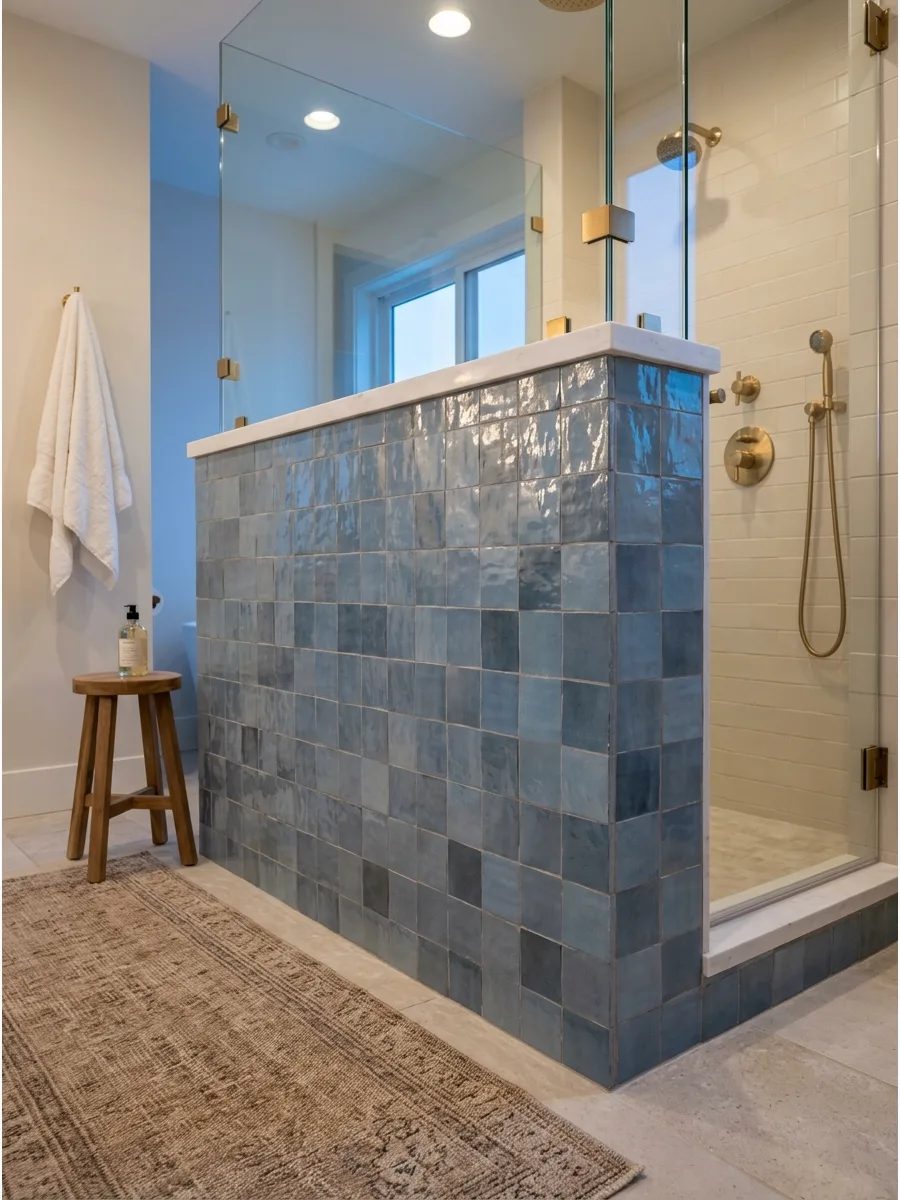
Handmade-look Zellige tiles add texture and character to the shower with their varied colors and edges. The pony wall is the perfect place to showcase these tiles because they catch the light beautifully.
Install Zellige tile with very thin grout lines to emphasize the natural variation of the pieces. This adds a rustic, artisanal feel to a modern bathroom layout.
- Budget $15 to $30 per square foot for authentic Zellige.
- Expect color variations; layout the tiles on the floor first to mix the shades.
- Ideal for Mediterranean or boho-style bathrooms.
Most people skip this: Use a high-quality sealer on Zellige tile to protect the unglazed edges from moisture.
13. Pony Wall Shower Niche
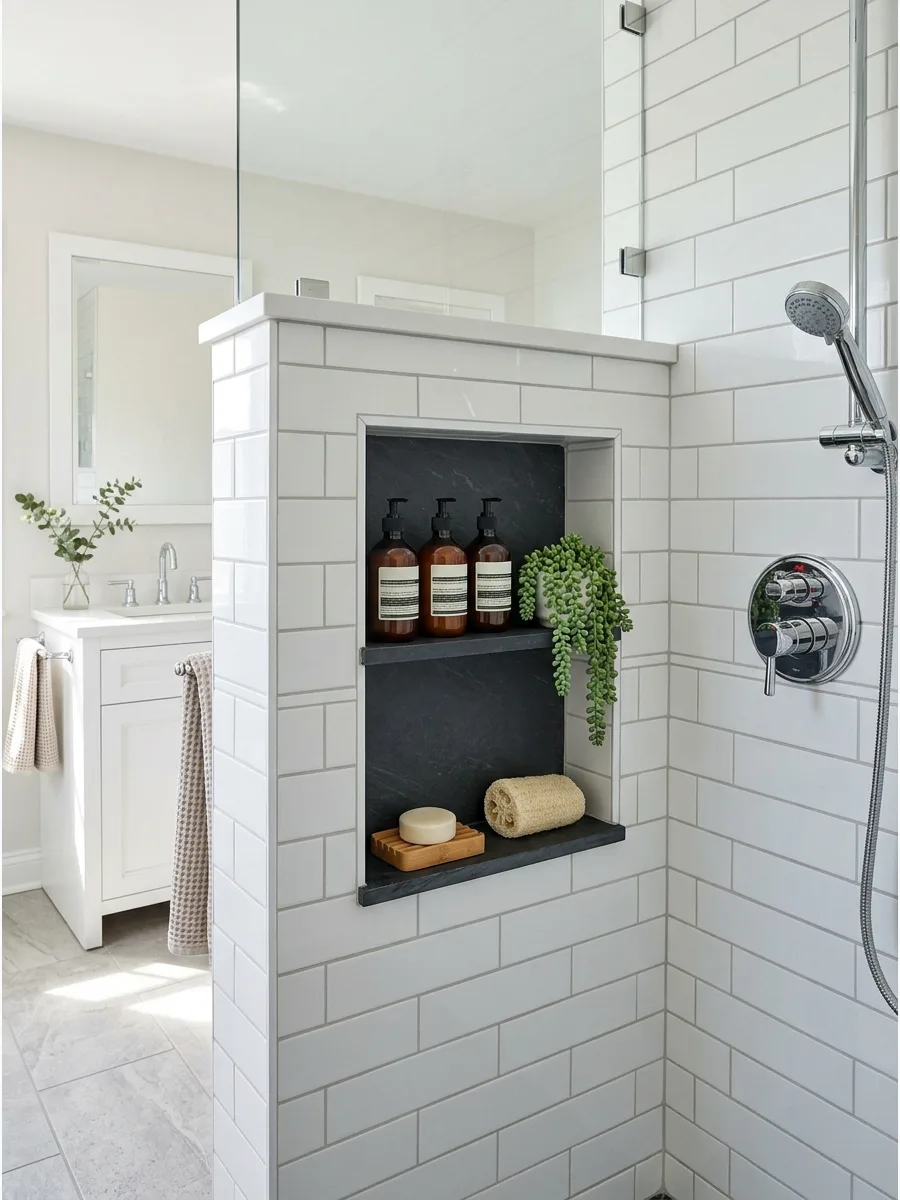
Building a niche into the pony wall provides a dedicated home for shampoo and soap without cluttering the main walls. It keeps products within arm's reach but out of the direct line of sight from the door.
Size the niche to fit tall shampoo bottles to ensure everything has a place. This is a simple structural addition that makes a huge difference in daily use.
- Adds $100 to $300 to framing and tiling costs.
- Use a pre-formed waterproof niche box to prevent leaks behind the tile.
- Best for families with multiple shower products.
Best shortcut: Buy a stainless steel niche insert for a modern look that requires zero tiling inside the hole.
14. Hidden Niche Behind Pony Wall
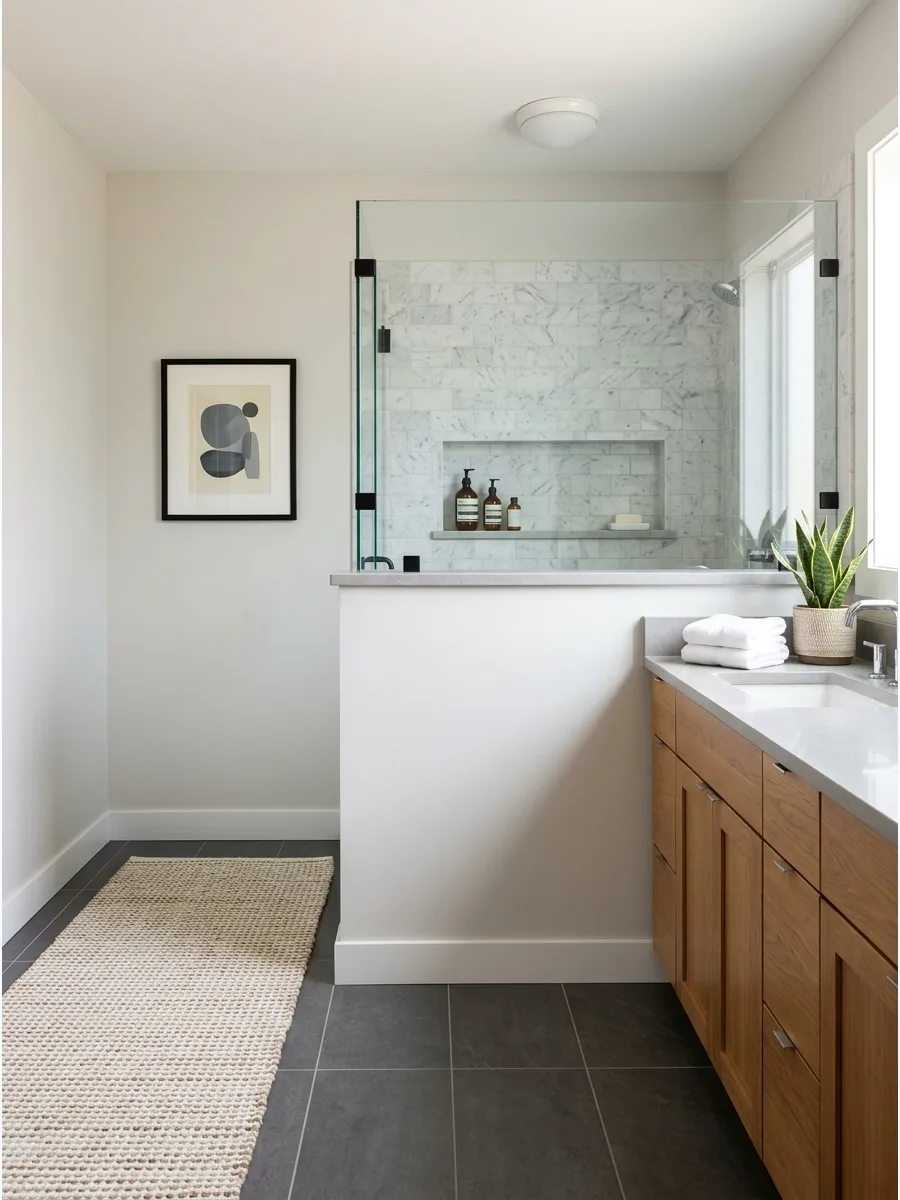
Placing the niche on the inner side of the pony wall hides messy bottles from the rest of the bathroom. This keeps the shower looking clean and curated even when it's full of daily essentials.
Position the niche away from the direct spray of the shower head to keep soap from melting. It's the ultimate trick for a Pinterest-perfect bathroom that still functions for a real family.
- No extra cost if planned during the initial framing phase.
- Ensure the wall is at least 6 inches thick to accommodate the niche depth.
- Best for homeowners who hate visual clutter on the bathroom counter.
Quick win: Use a piece of the wall's stone cap as the shelf inside the niche for a high-end detail.
15. Tub and Shower Pony Wall
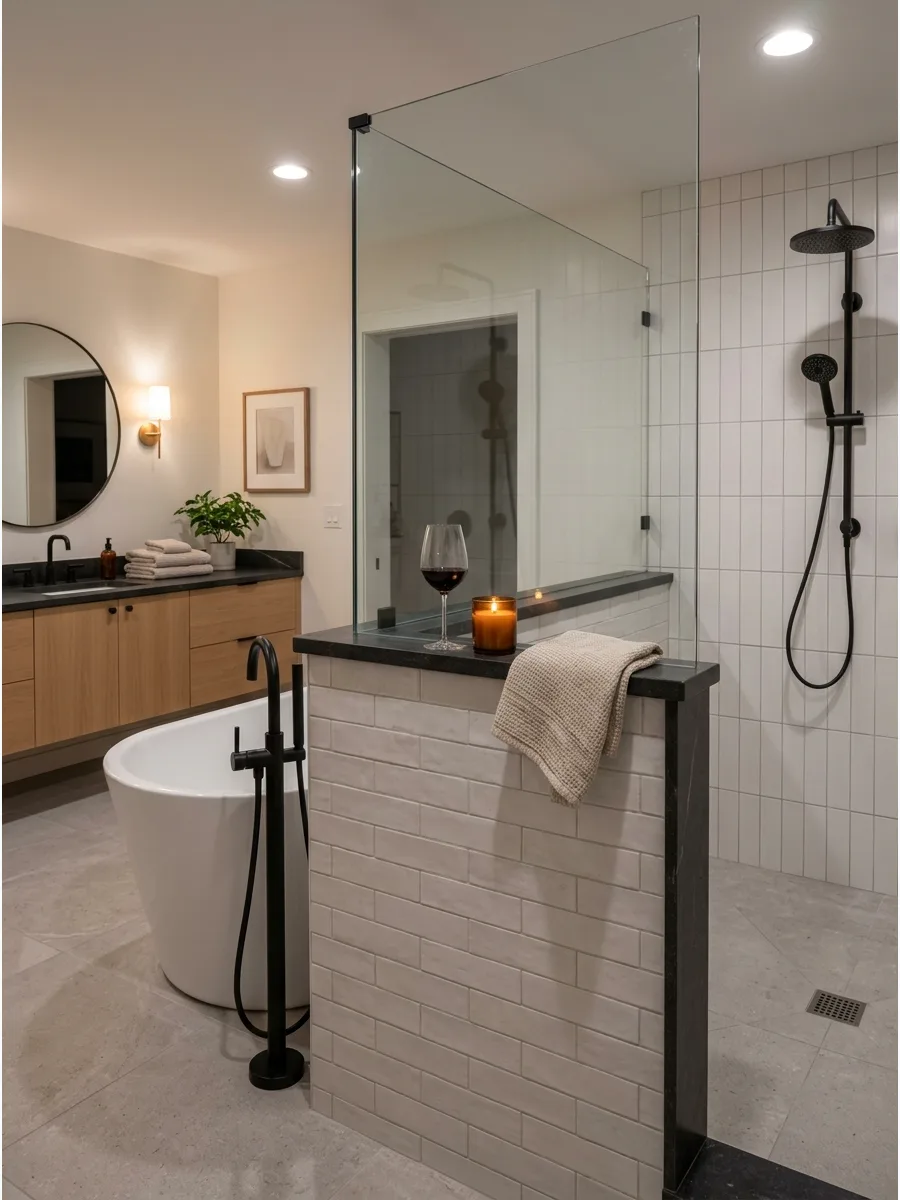
A pony wall between a freestanding tub and a walk-in shower creates a high-end wet room layout. It provides a splash barrier while keeping the two areas connected for a spa-like feel.
Use the top of the pony wall as a ledge for tub accessories like candles or a glass of wine. This layout maximizes floor space in large primary bathrooms.
- Budget $5,000 to $10,000 for a full wet room setup.
- Ensure the floor is waterproofed as a single continuous unit under the tub.
- Best for luxury primary suite renovations.
Most people skip this: Install a dedicated floor drain for the tub area in addition to the shower drain.
16. Simple Pony Wall Shower Layout
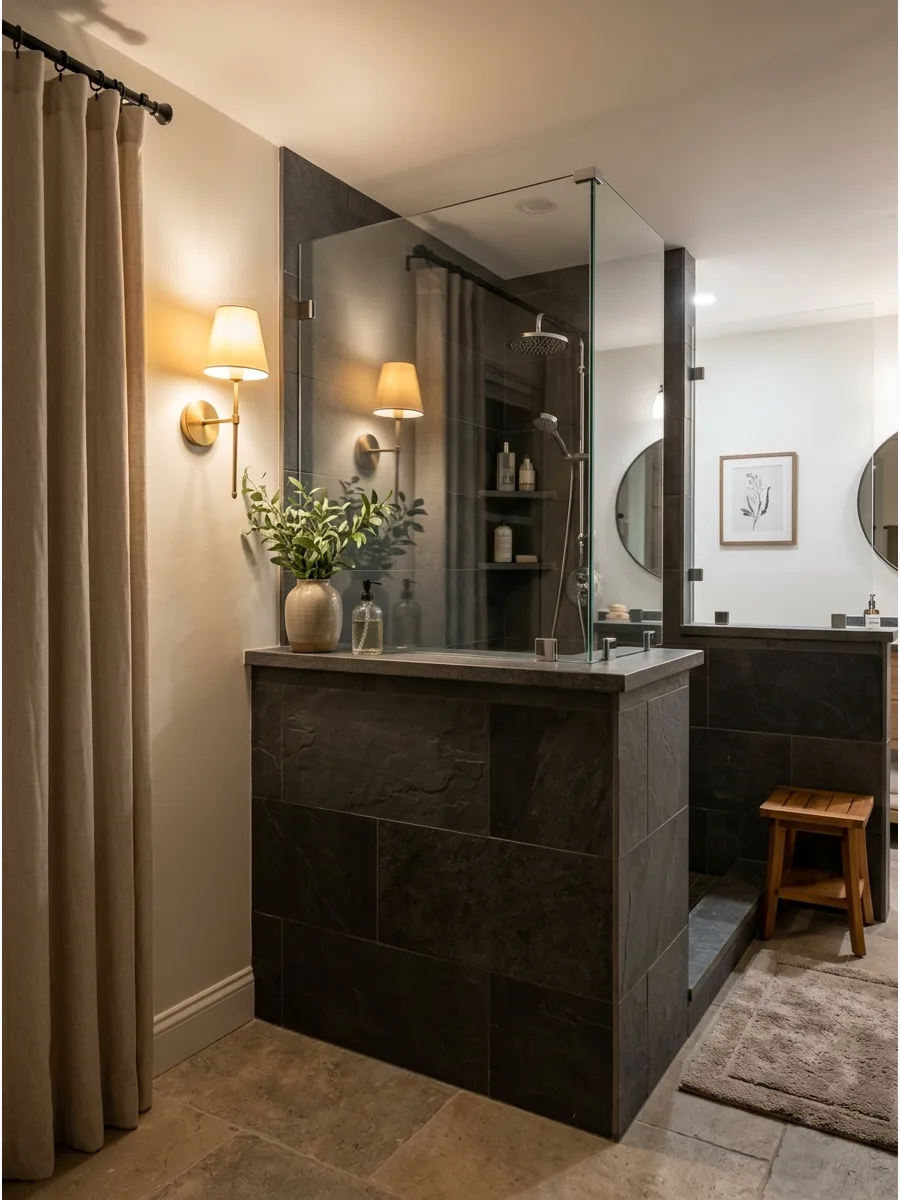
A half-height wall creates a clear boundary for the shower without boxing in the room. This setup allows natural light from windows to reach the shower floor, making the whole bathroom feel larger.
Install a 42-inch high wall to block the view of the shower floor while keeping the top half open for light. It is a smart way to get the walk-in feel on a budget.
- Standard framing and tile materials fit most modest renovation budgets.
- Align the wall height with the top of the vanity for a consistent visual line.
- Perfect for homeowners who want to ditch the shower curtain without the cost of full glass.
Most people skip this: Ensure the top of the wall slopes slightly toward the shower so water doesn't sit on the ledge.
17. Fixed Glass Pony Wall Divider
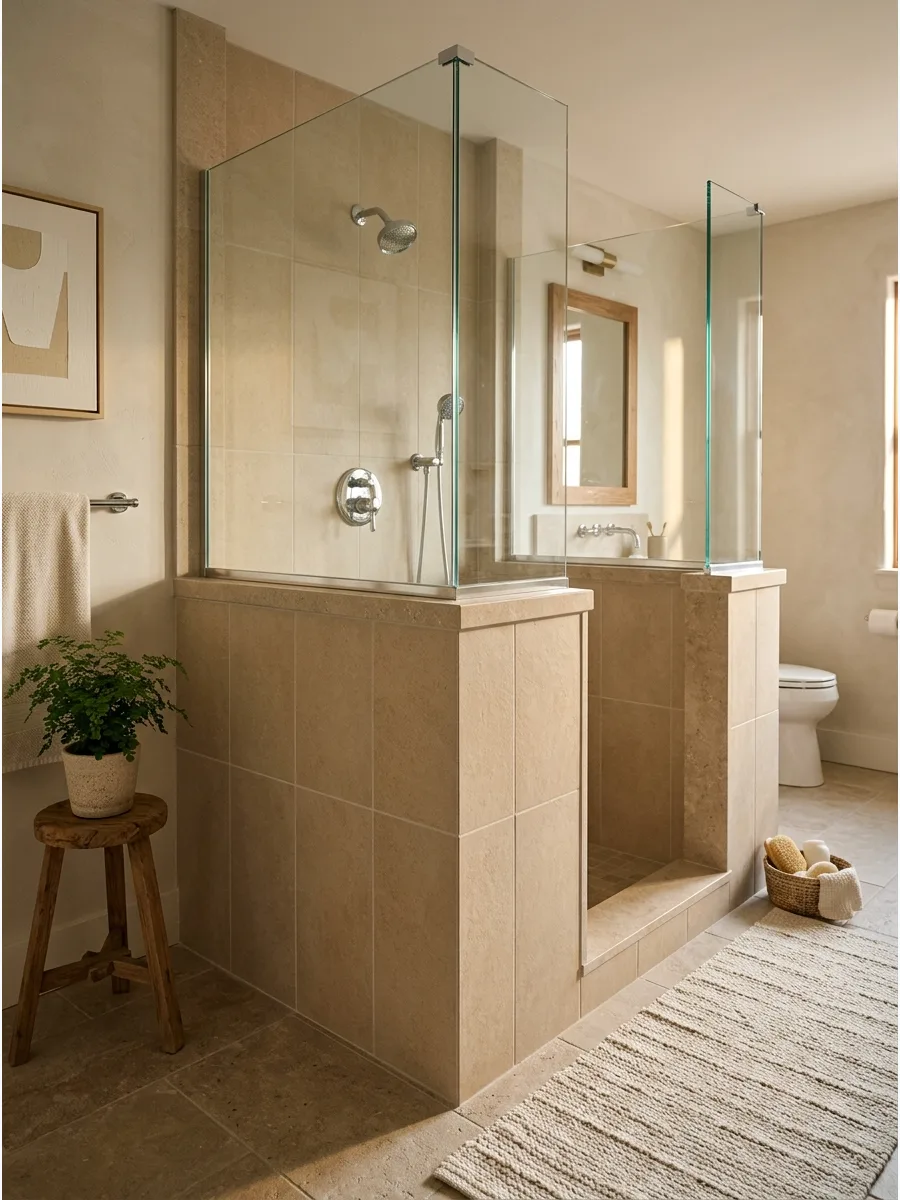
Adding a glass panel on top of the pony wall provides extra splash protection while maintaining a transparent look. This design works well in mid-sized bathrooms where water spray might reach the dry area.
Seal the glass panel directly into a channel on the wall cap for a seamless look without bulky metal clips. It gives you the benefits of a full glass wall with more structural stability.
- Custom glass panels typically take two weeks for fabrication and delivery.
- Use a 1/2-inch thick tempered glass panel for maximum durability and safety.
- Ideal for households with kids where water splashing is a frequent concern.
Quick win: Use a Rain-X treatment on the glass before the first shower to prevent early soap scum buildup.
18. Zero Entry Pony Wall Shower
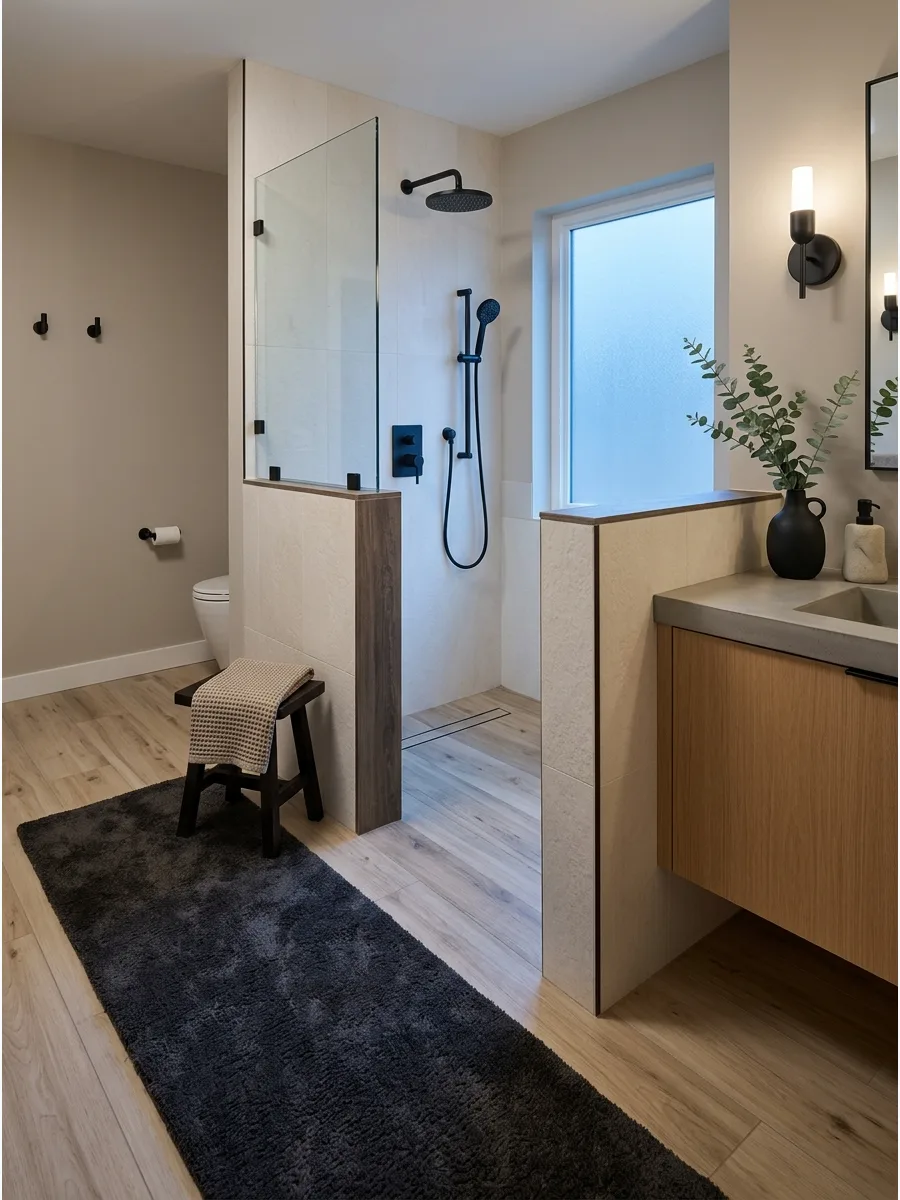
Combining a pony wall with a curbless entry creates an accessible, high-end look. This layout removes the tripping hazard and makes the bathroom feel like a continuous suite.
Slope the floor toward a back wall drain so you can skip the shower curb entirely. It is the ultimate choice for a modern, aging-in-place bathroom design.
- Requires professional floor joist adjustment to create the necessary drainage slope.
- Place the pony wall opposite the entry to act as a splash guard for the rest of the room.
- Great for small bathrooms to create an uninterrupted floor line that adds visual depth.
Best shortcut: Choose a linear drain at the back of the shower to make the floor sloping process much simpler.
19. Sleek Minimalist Shower Half Wall
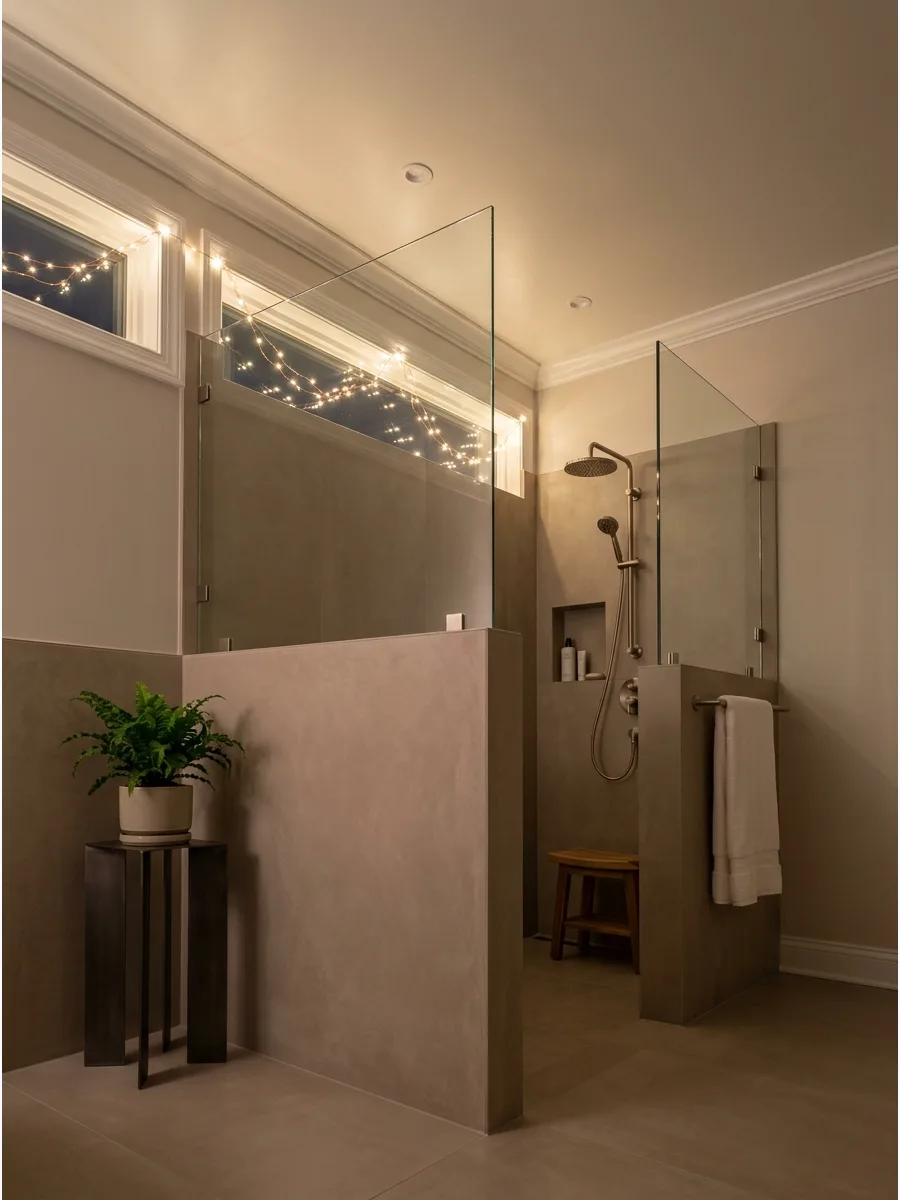
A minimalist pony wall uses clean edges and hidden storage to maintain a spa-like atmosphere. By using the same material for the wall and the floor, the structure almost disappears into the room.
Choose a tile that matches your bathroom walls to make the pony wall blend in perfectly. This approach keeps the focus on the high-quality fixtures and open space.
- Budget for high-quality mitered tile edges to achieve a professional, seamless corner.
- Keep the wall thin by using 2×4 framing to maximize every inch of shower space.
- Works best in monochromatic bathrooms where texture is more important than color.
Most people skip this: Use a solid stone slab for the wall cap rather than tiled grout lines for a cleaner look.
20. Doorless Pony Wall Walk-In Shower
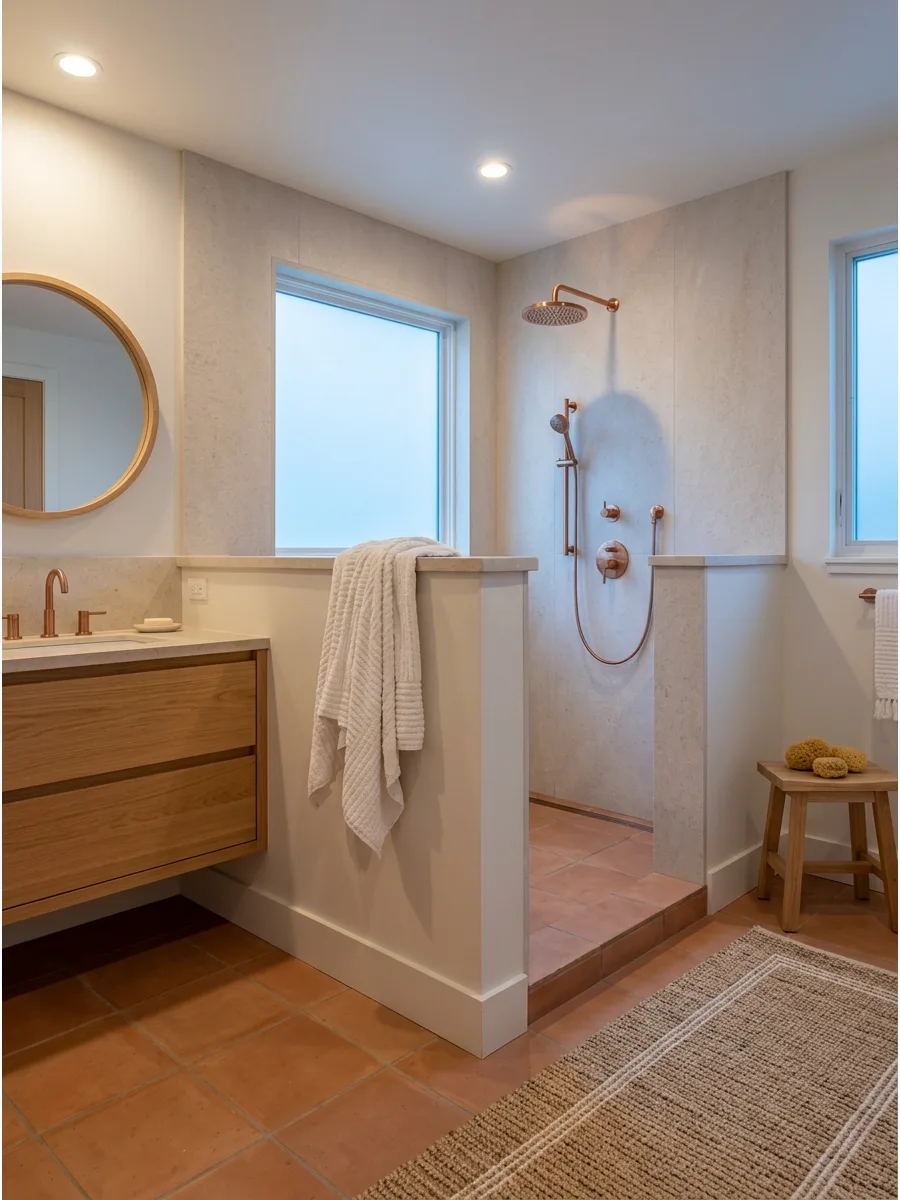
A doorless entry paired with a pony wall provides easy access and eliminates the need for cleaning glass hinges. The pony wall hides the shower floor and plumbing while the open entry feels inviting.
Leave at least a 30-inch opening for the walk-in entry to ensure easy access without a door. This layout is perfect for large master suites that want a resort-style feel.
- Ensure the shower is at least 60 inches deep to prevent water from splashing out the doorless entry.
- Position the shower head so it points away from the opening and toward the pony wall.
- Excellent for low-maintenance bathrooms since there is no glass door to scrub.
Quick win: Install a heat lamp or heated floors nearby since doorless showers can feel cooler than enclosed ones.
21. Matte Black Fixture Pony Wall
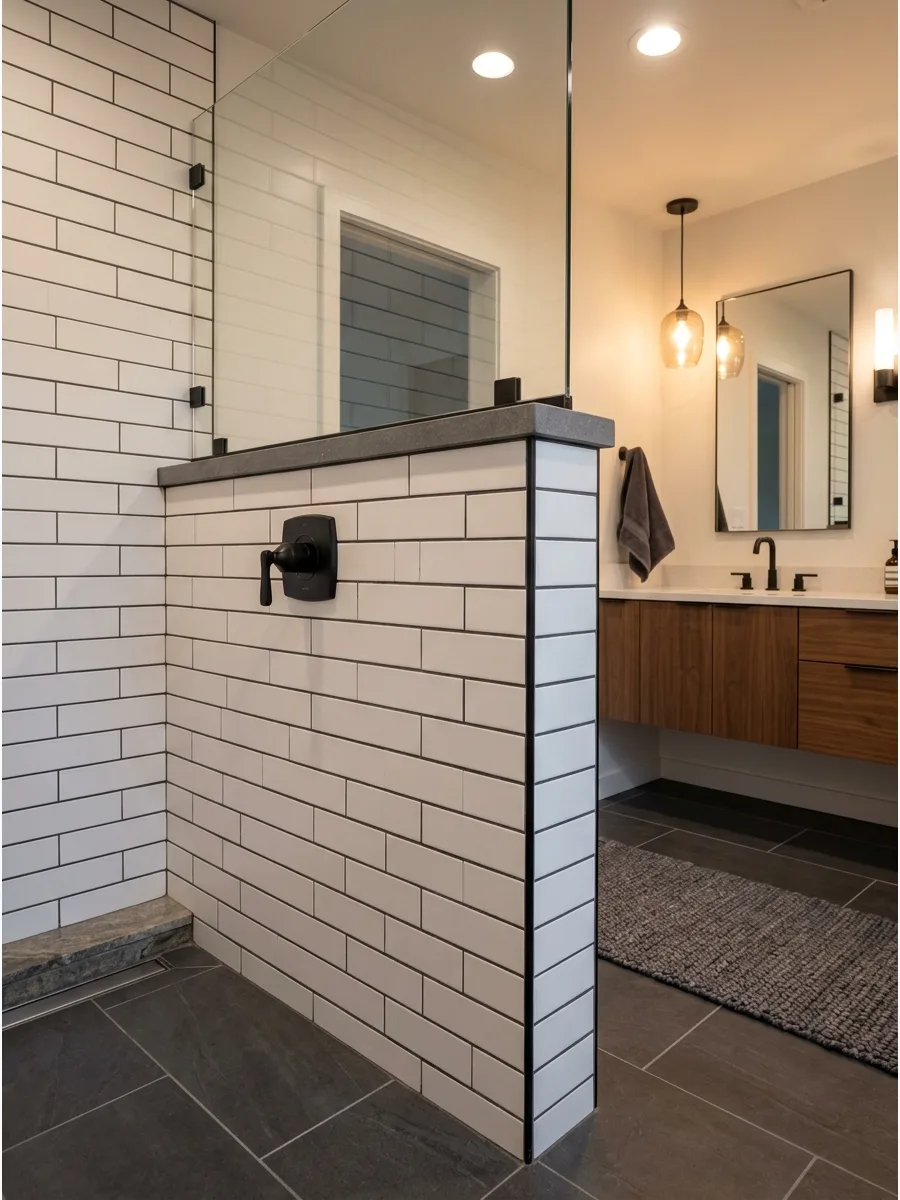
Matte black hardware creates a sharp, modern contrast against a neutral pony wall. Mounting the controls on the pony wall itself allows you to adjust the temperature before stepping under the spray.
Mount the shower valve on the pony wall so you can turn on the water without getting wet. This functional placement is a hallmark of thoughtful custom design.
- Black fixtures show water spots easily; look for PVD finishes that resist spotting.
- Run plumbing through the pony wall during the framing stage for the easiest installation.
- Pairs beautifully with white subway tile or light gray concrete-look floors.
Best shortcut: Use black Schluter strips on the edges of the pony wall to match your black fixtures perfectly.
22. Warm Brass Fixture Pony Wall
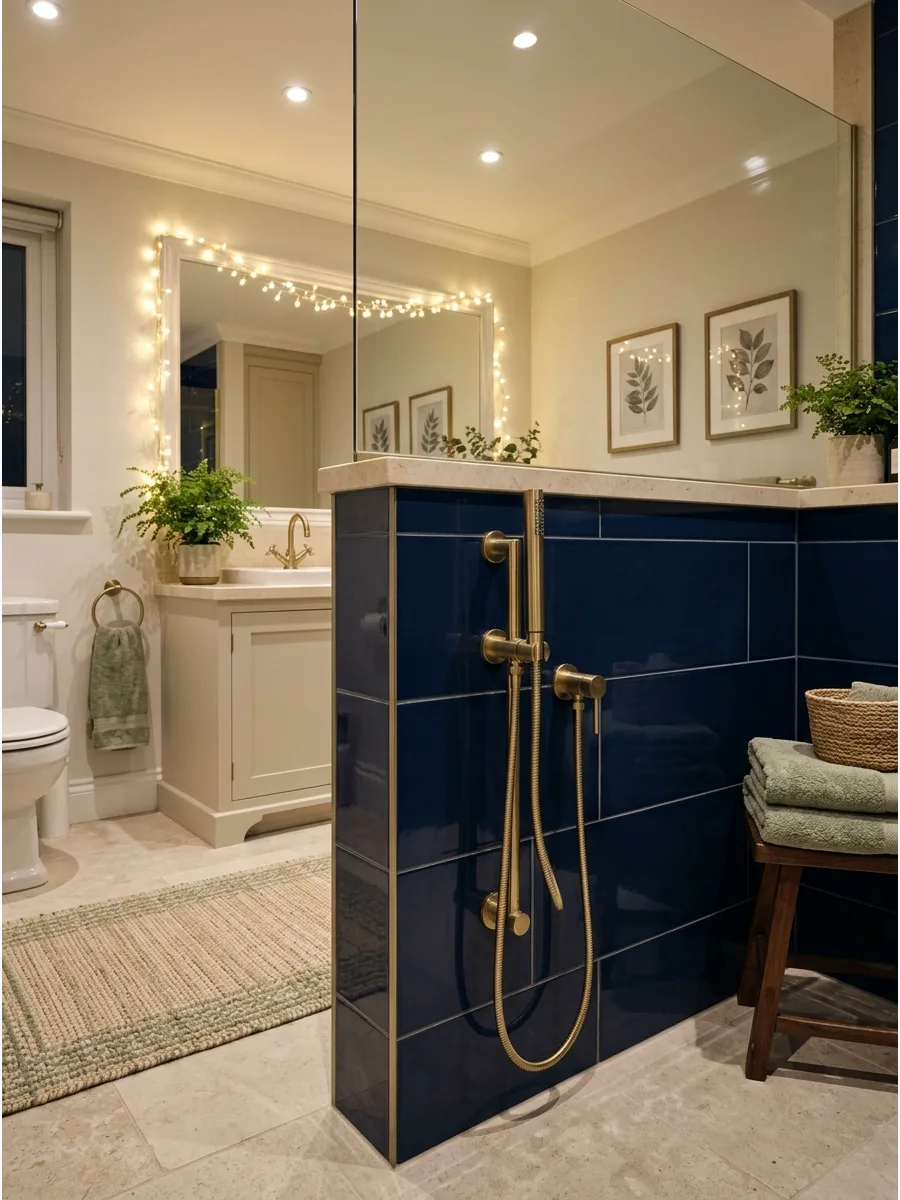
Brass fixtures bring warmth to a bathroom, especially when paired with earthy or stone-look tiles. The pony wall serves as a sturdy mounting point for hand showers or body sprays.
Coordinate the wall cap material with your vanity countertop for a high-end designer look. This creates a cohesive color palette that feels intentional and expensive.
- Brass finishes vary between brands; try to buy all fixtures from the same manufacturer.
- Use the pony wall to hide the bulky plumbing required for a handheld shower wand.
- Matches the 2026 trend of moving away from cold grays toward warmer, organic tones.
Most people skip this: Choose 'unlacquered brass' if you want a living finish that develops a vintage patina over time.
23. Frameless Glass Half Wall Shower
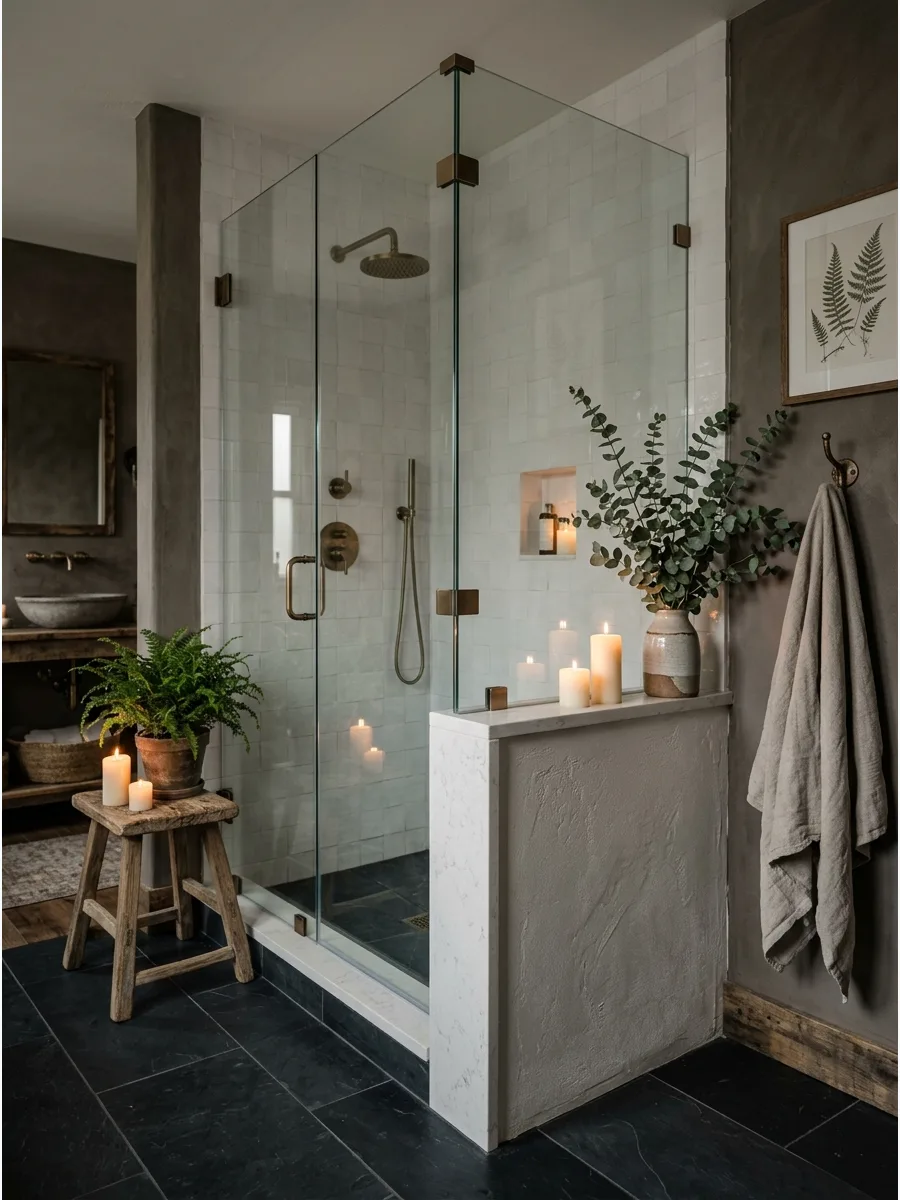
Frameless glass sitting on a pony wall offers the cleanest sightlines possible. Because the glass is supported by the wall, it doesn't require heavy headers or frames.
Use a clear glass panel at least 3/8-inch thick to ensure the divider feels sturdy and safe. This design maximizes light while providing a solid structural base.
- Requires precise measurement after the pony wall and tile are fully installed.
- Secure the glass with small, low-profile floor and wall clamps for a floating effect.
- Perfect for showcasing intricate tile work inside the shower that shouldn't be hidden.
Quick win: Order 'low-iron' glass to avoid the green tint common in standard thick glass panels.
24. Compact Bathroom Pony Wall Setup
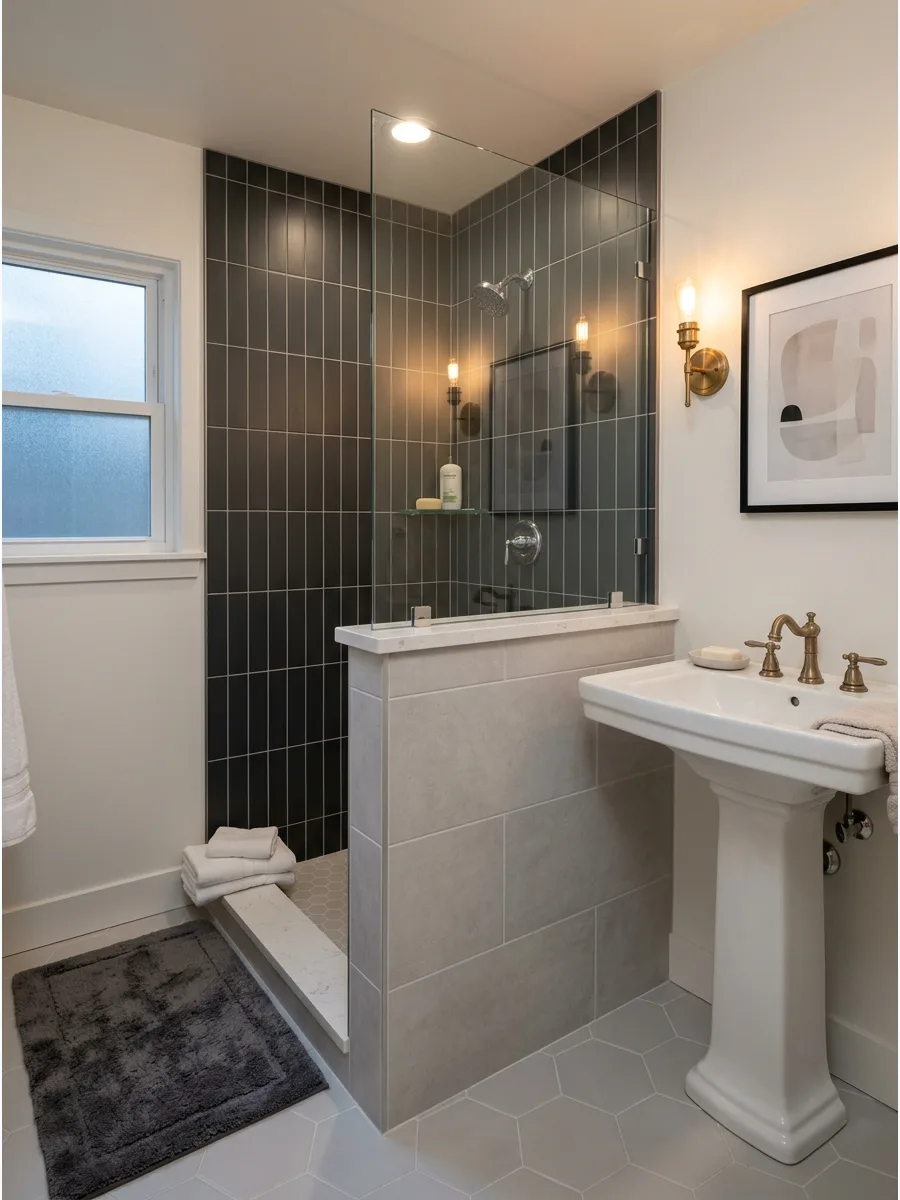
In a small bathroom, a pony wall provides a sense of separation without making the space feel like a closet. It allows the eye to travel across the room, which makes the floor plan feel open.
Keep the wall height aligned with the vanity or toilet tank to create a clean horizontal line. This trick prevents the room from looking cluttered with different heights.
- Great for bathroom remodels under $5,000 where space is the biggest challenge.
- Use light-colored grout to keep the small space feeling airy and bright.
- Helps define the shower zone in bathrooms that lack a separate toilet room.
Best shortcut: Use a large mirror on the wall above the vanity to reflect the open space above the pony wall.
25. Angled Corner Pony Wall Design
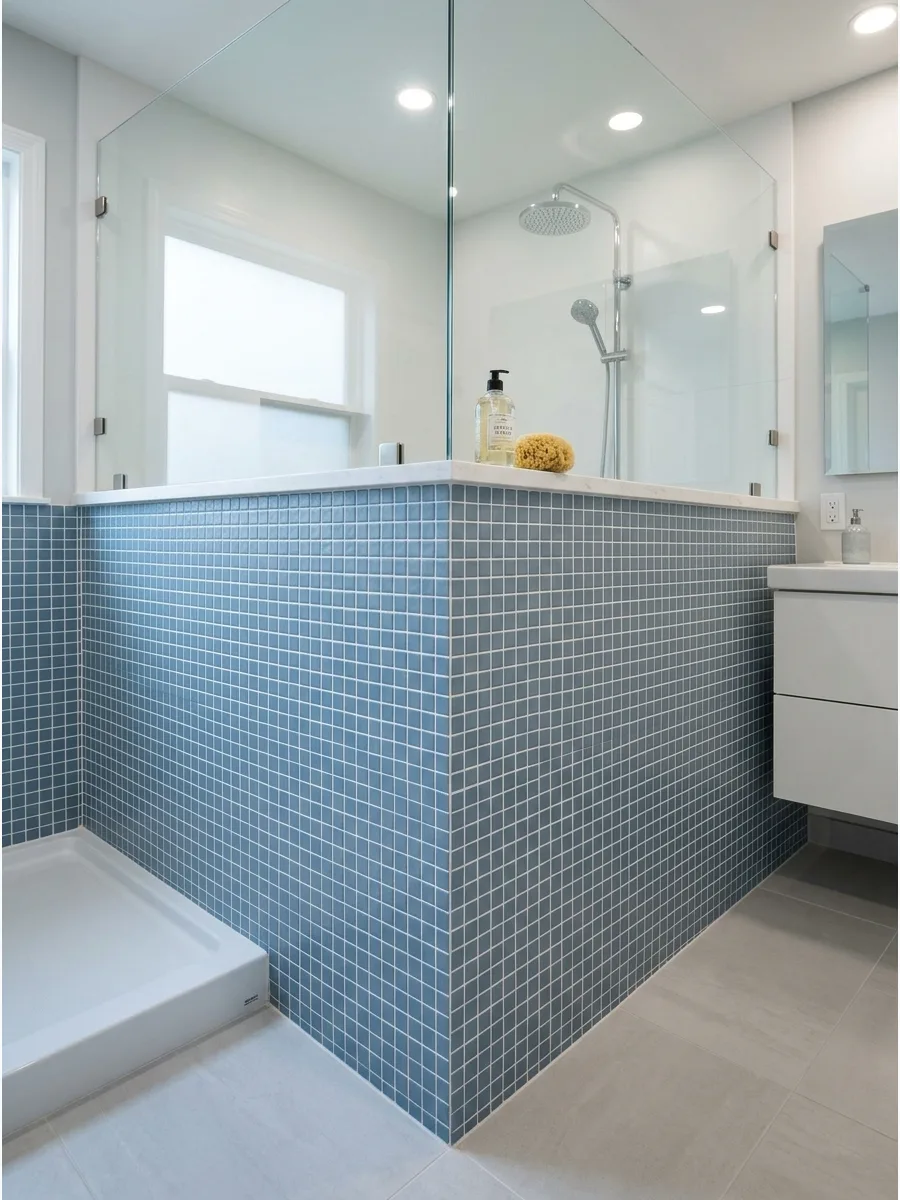
An angled pony wall in a corner shower can save significant floor space in tight layouts. It creates a wider walkway while still providing enough of a barrier to keep water in the shower.
Position the pony wall on the side farthest from the door to maximize the feel of the floor space. This smart geometry makes a standard 3×3 shower feel much larger.
- Angled walls require more complex framing but offer better traffic flow.
- Ensure the angle is at least 135 degrees to prevent the interior from feeling cramped.
- Works well for guest bathrooms where every square inch of floor space counts.
Most people skip this: Build a small triangular shelf inside the angled wall for extra soap storage without taking up wall space.
26. Narrow Bathroom Pony Wall Solution
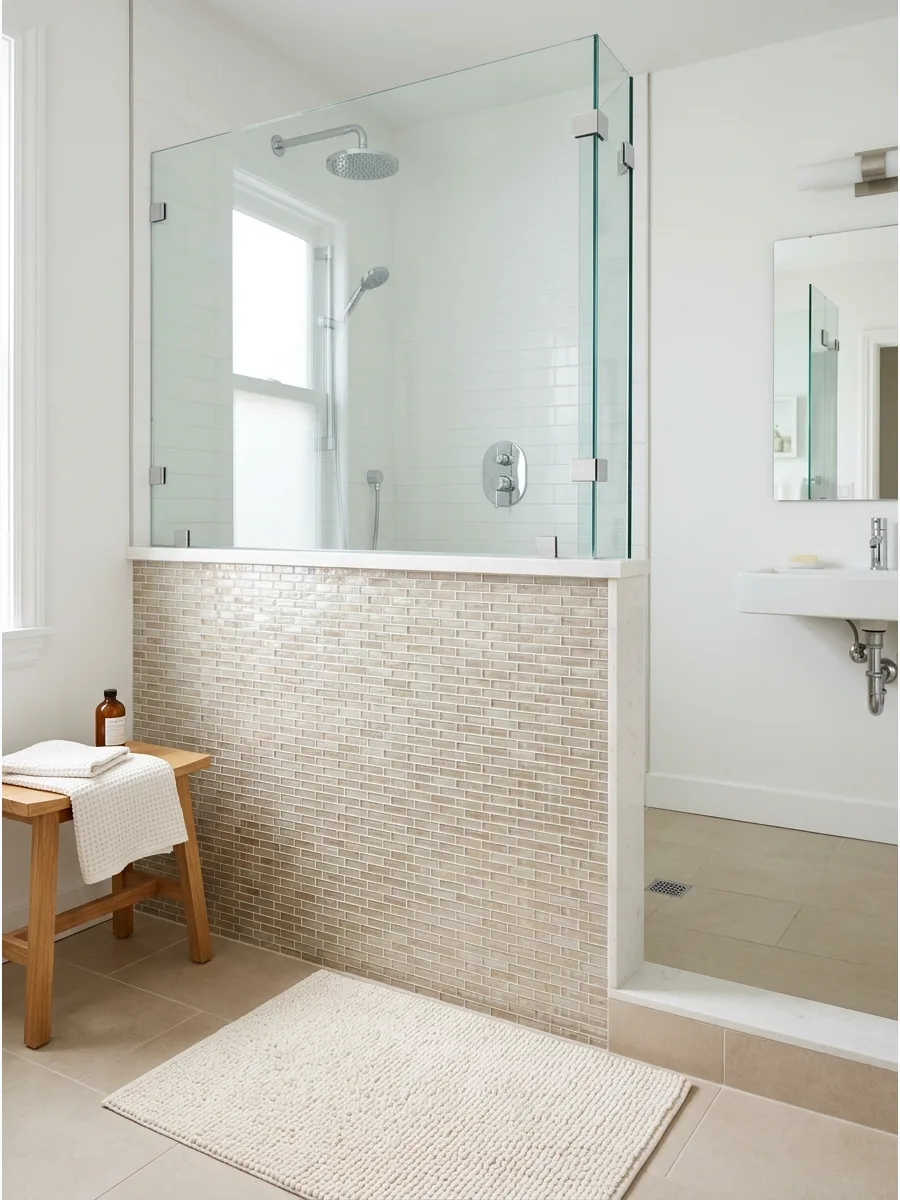
Narrow bathrooms often struggle with a 'tunnel' feel when using full-height shower walls. A slim pony wall breaks up the length of the room while keeping the upper half open.
Build the wall just wide enough to cover the shower valve and plumbing stack. This keeps the shower footprint as small as possible while remaining functional.
- Use 2×3 studs instead of 2x4s to save an extra inch of width in very tight rooms.
- Finish the wall with a high-gloss tile to reflect light and add a sense of depth.
- Ideal for long, skinny bathrooms in older homes or converted apartments.
Quick win: Use a sliding glass door on top of the pony wall to save swing space in a narrow walkway.
27. Toilet Privacy Pony Wall Divider
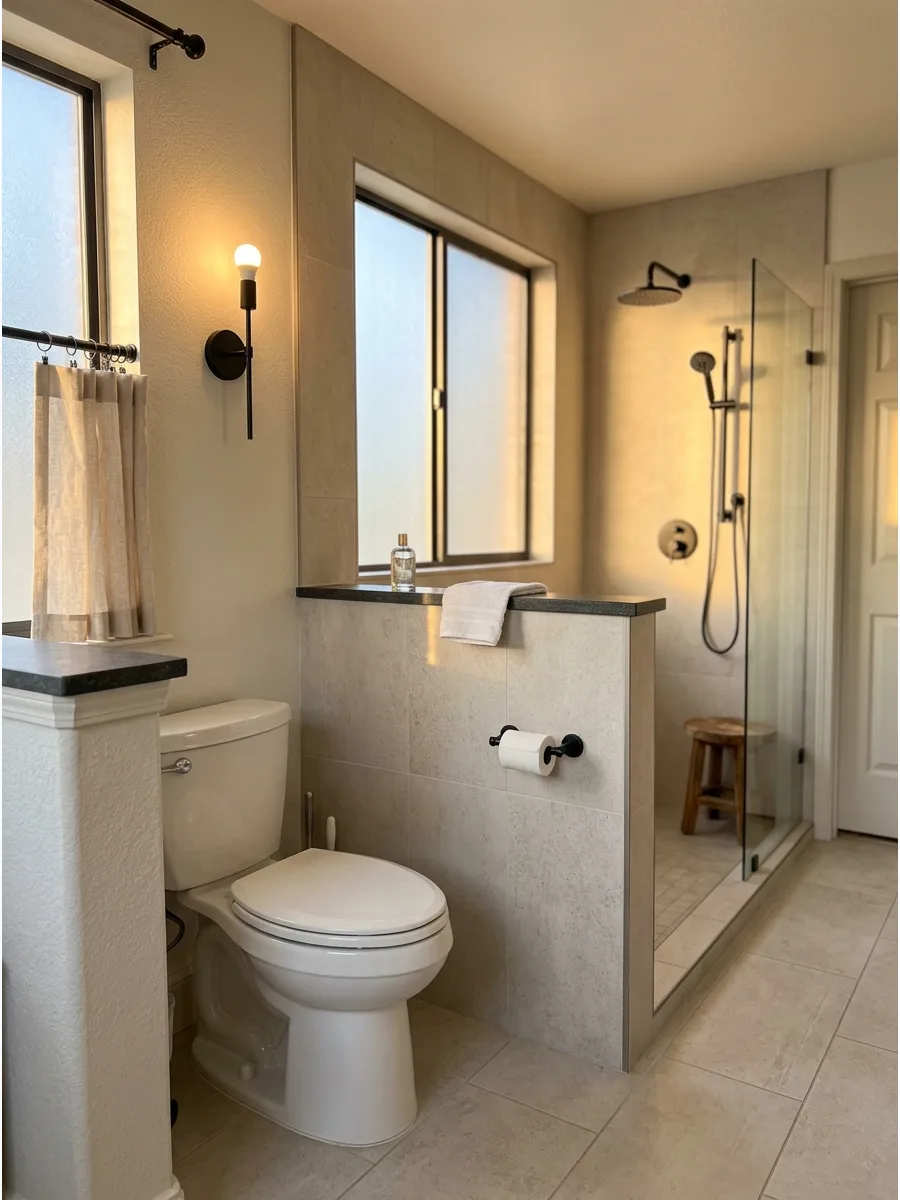
Placing a pony wall between the toilet and the shower offers privacy without the need for a separate water closet. It also protects the side of the toilet from shower splashes.
Extend the pony wall 6 inches past the toilet to create a dedicated alcove feel. This simple addition makes the bathroom layout feel much more organized and private.
- Ensure there is at least 15 inches from the center of the toilet to the pony wall for code compliance.
- Mount the toilet paper holder directly onto the pony wall for easy reach.
- A cost-effective way to hide the toilet from view when the bathroom door is open.
Best shortcut: Add a small recessed niche on the toilet side of the wall to store extra rolls of paper.
28. Vanity Side Pony Wall Shield
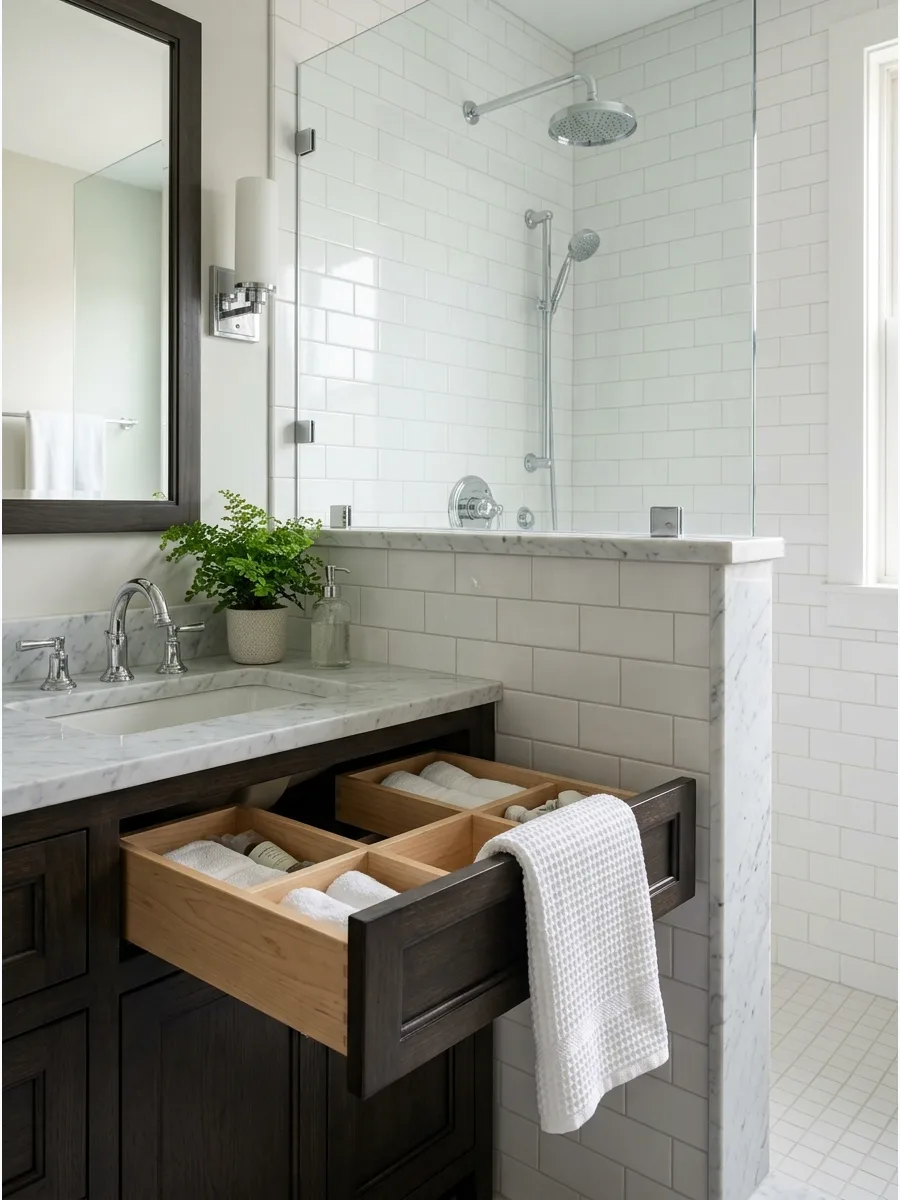
A pony wall next to a vanity protects wood cabinets from water damage and humidity. It provides a solid surface to end the vanity backsplash for a clean, finished look.
Apply a waterproof membrane over the entire pony wall before tiling to prevent leaks into the vanity cabinet. This is a practical choice for high-traffic family bathrooms.
- Match the height of the pony wall to the top of the vanity mirror for visual balance.
- Leave a 1/2-inch gap between the vanity and the pony wall to prevent moisture traps.
- Perfect for protecting expensive custom cabinetry from daily shower steam.
Most people skip this: Use the dry side of the pony wall to mount a magnifying makeup mirror or extra towel bar.
29. Tiny Wet Room Half Wall
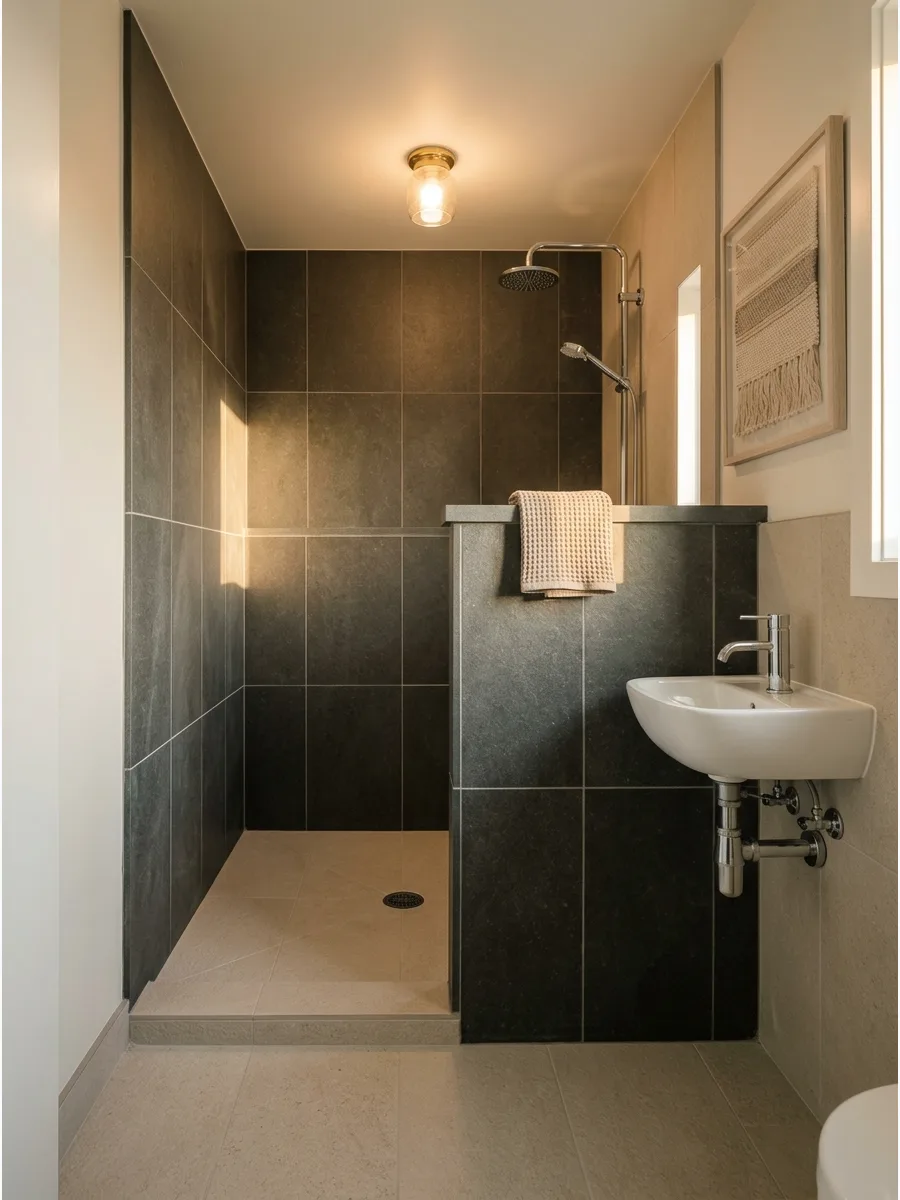
In a tiny wet room, a pony wall helps direct water toward the drain without closing off the room. It creates a splash zone that keeps the sink and toilet area drier.
Select a non-slip textured tile for the entire wet room floor to keep the space safe. This European-style layout makes the most of a very small footprint.
- Wet rooms require full tanking (waterproofing) of all walls and floors.
- Use a wall-hung toilet and vanity to make cleaning the wet room floor much easier.
- The most efficient layout for bathrooms smaller than 40 square feet.
Quick win: Choose a handheld shower head with a long hose to make cleaning the entire wet room floor a breeze.
30. Light Toned Pony Wall Shower
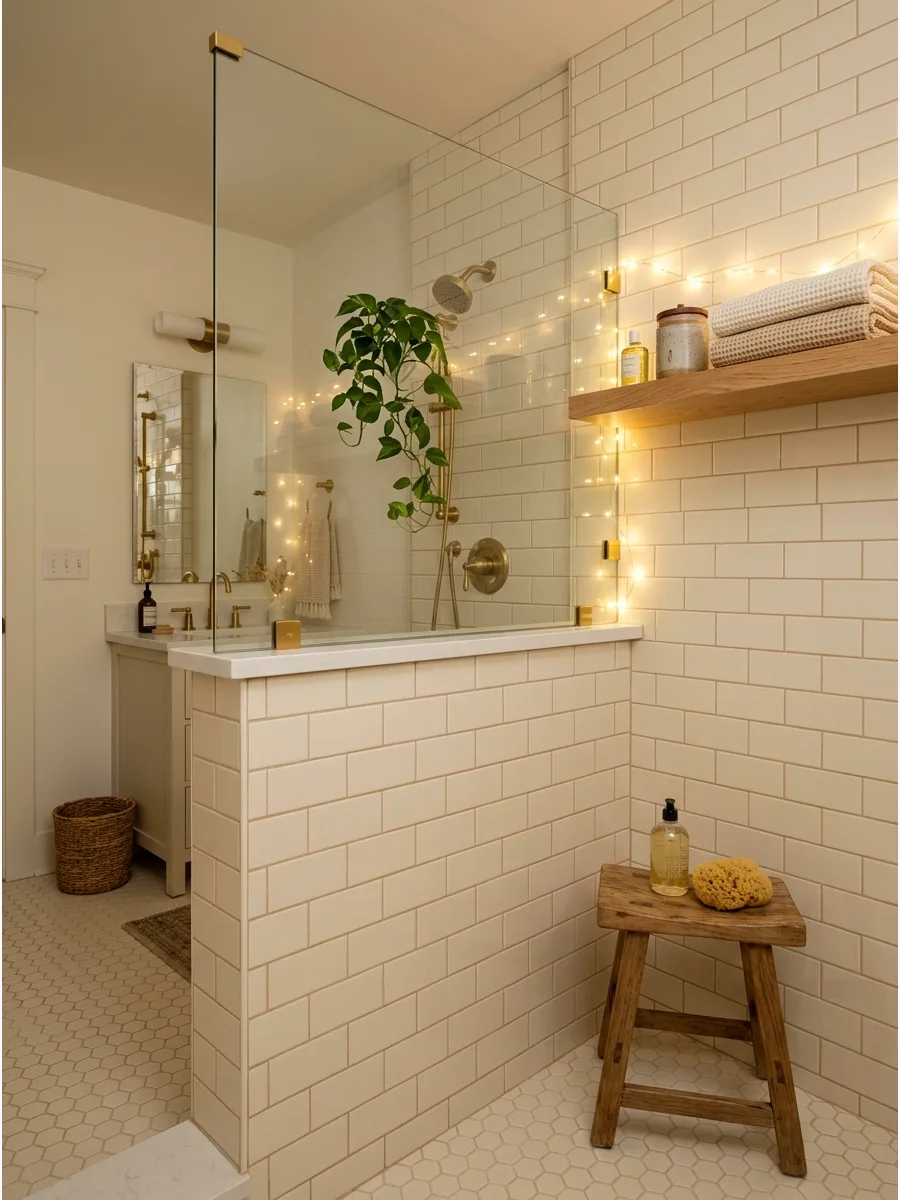
Light-toned tiles like cream, soft gray, or bone make a pony wall shower feel incredibly airy and clean. These colors reflect light, which is essential for bathrooms that lack large windows.
Use a warm cream or bone-colored grout to prevent the light tile from looking too clinical. It creates a timeless look that won't feel dated in a few years.
- Light colors are the best choice for resale value in any home renovation.
- Pair with light wood accents to lean into the popular organic modern style.
- Works well in bathrooms of any size to create a peaceful, bright atmosphere.
Best shortcut: Use an epoxy grout with light tiles to prevent the yellowing or staining common with standard grout.
Frequently Asked Questions
What is the standard height for a shower pony wall?
A standard shower pony wall typically stands between 36 and 42 inches high to balance privacy with an open feel. It is common practice to align the wall's height with your adjacent bathroom vanity for a clean, continuous sightline.
Do you have to put glass on top of a pony wall?
You do not have to use glass; leaving the top open creates a breezy, walk-in feel that serves as a simple splash guard. However, adding a glass panel helps fully enclose the space to trap steam and heat while maintaining visibility.
Can a pony wall support a shower bench?
Yes, a pony wall is an excellent structural support for an internal shower bench or a built-in seat. It provides a sturdy backrest and allows for seamless tiling between the wall and the bench for a cohesive, professional look.
How do you waterproof the top ledge of a shower pony wall?
To prevent water pooling, the top ledge should be slightly pitched toward the shower drain and covered with a solid surface like quartz or marble. Proper waterproofing membranes beneath the cap are also essential to protect the internal framing.
Is a pony wall cheaper than a full glass shower door?
Generally, framing and tiling a pony wall is more budget-friendly than installing a custom, floor-to-ceiling tempered glass door. While it requires more labor for tile work, it significantly reduces the cost associated with large, heavy-duty glass panels.