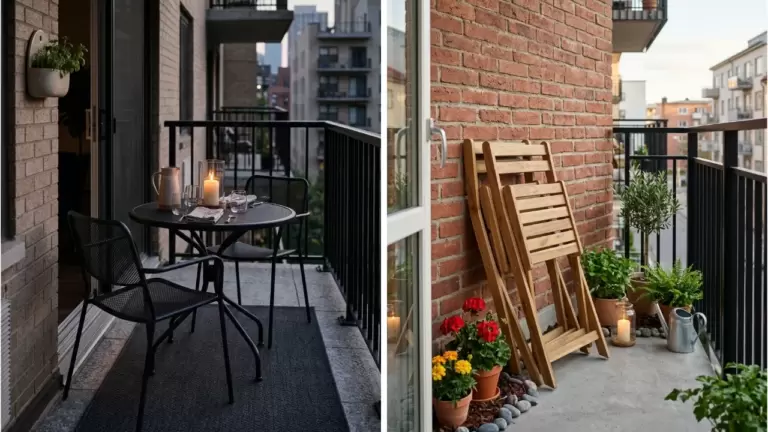
50 Breakfast Nook Ideas

This post may contain affiliate links: full affiliate disclosure.
Creating a dedicated dining spot doesn't require a massive floor plan. A well-designed nook turns an empty corner into a functional space for morning coffee or casual meals.
These ideas focus on smart layouts and practical seating that maximize every inch of the kitchen.
1. Built-In Banquette Breakfast Nook
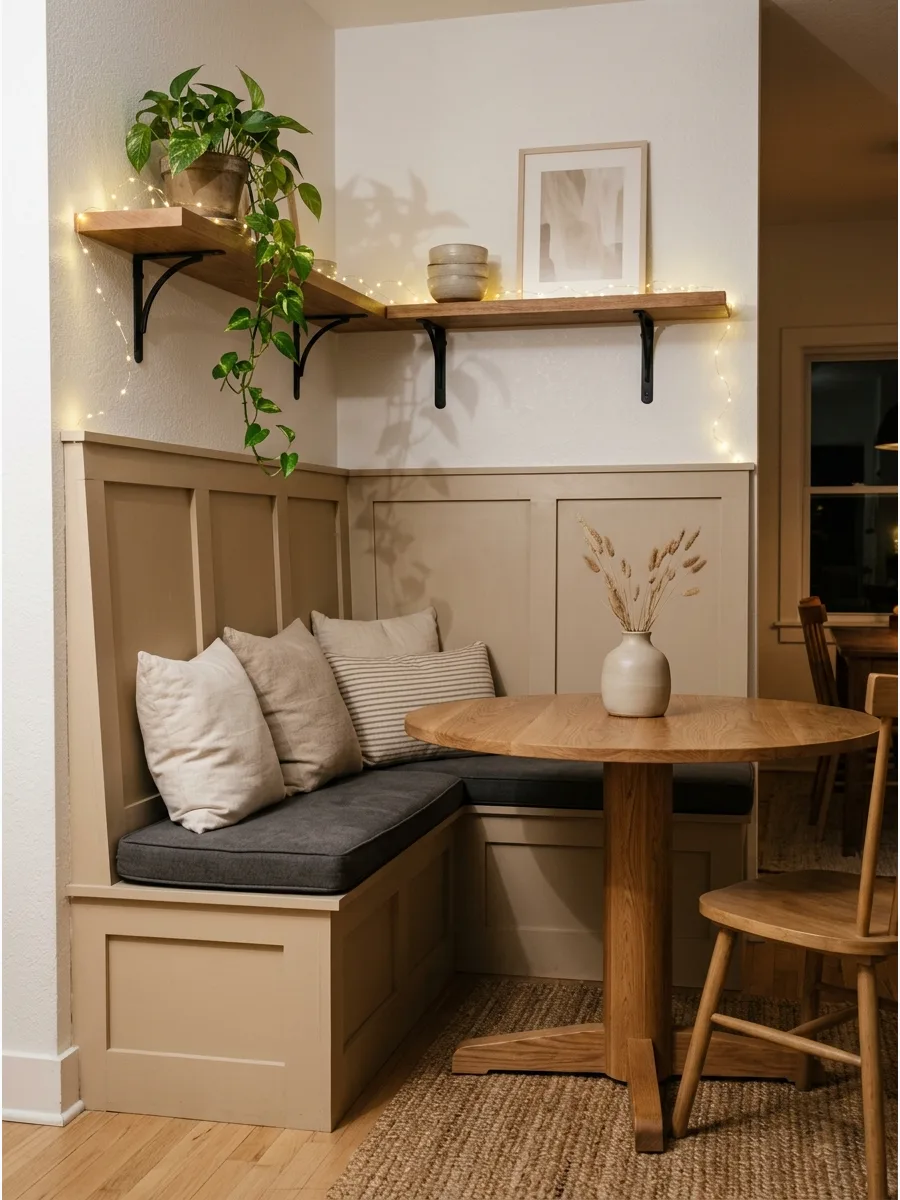
Custom benches make a kitchen feel intentional and save significant floor space compared to loose chairs. This setup works best when the bench is built directly against a wall to create a seamless, furniture-like look.
Install a bench with a high back to provide extra support and define the dining area as a separate room. Most people underestimate how much a custom bench increases the overall value and functionality of a kitchen layout.
- Budget $500 to $2,000 depending on custom carpentry or DIY kits.
- Secure the bench frame directly to wall studs for long-term stability.
- Use high-performance outdoor fabric for the cushions to prevent permanent food stains.
Quick win: Match the bench height to your existing kitchen chair seats, usually 18 inches, for the best ergonomics.
2. L-Shaped Corner Banquette
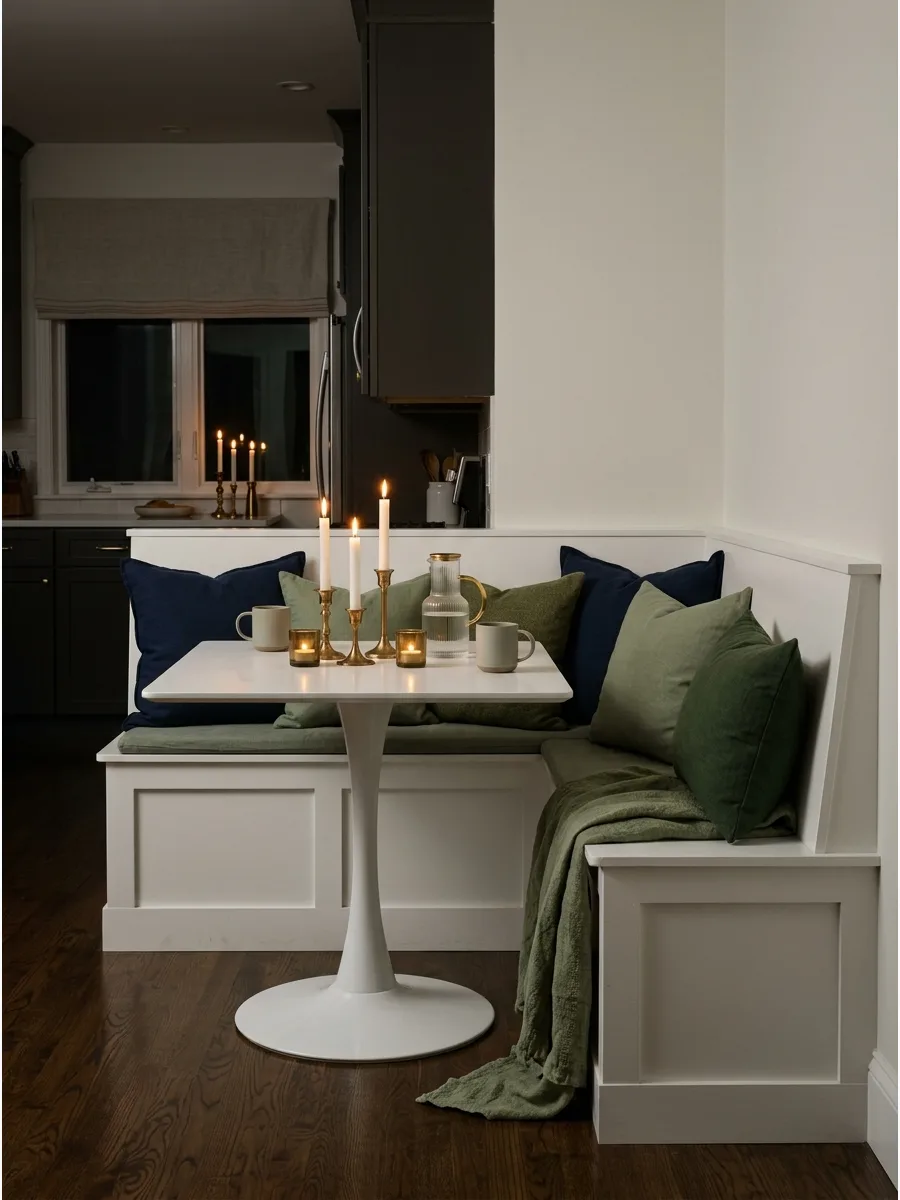
An L-shaped bench maximizes every square inch of a kitchen corner by providing wrap-around seating. It provides plenty of room for a family without the visual clutter of multiple chair legs.
Tuck a pedestal table into the intersection of the bench so guests can slide in and out without hitting their knees. Corners often go to waste, but a banquette turns them into a high-traffic destination for the home.
- Sourcing can be done through kitchen cabinet retailers for a matching look.
- Ensure at least 12 inches of overhang from the table edge to the bench seat.
- Paint the bench base the same color as the lower kitchen cabinets for a cohesive feel.
Most people skip this: Leave a small gap between the bench and the floor to make cleaning under the nook easier.
3. U-Shaped Breakfast Nook
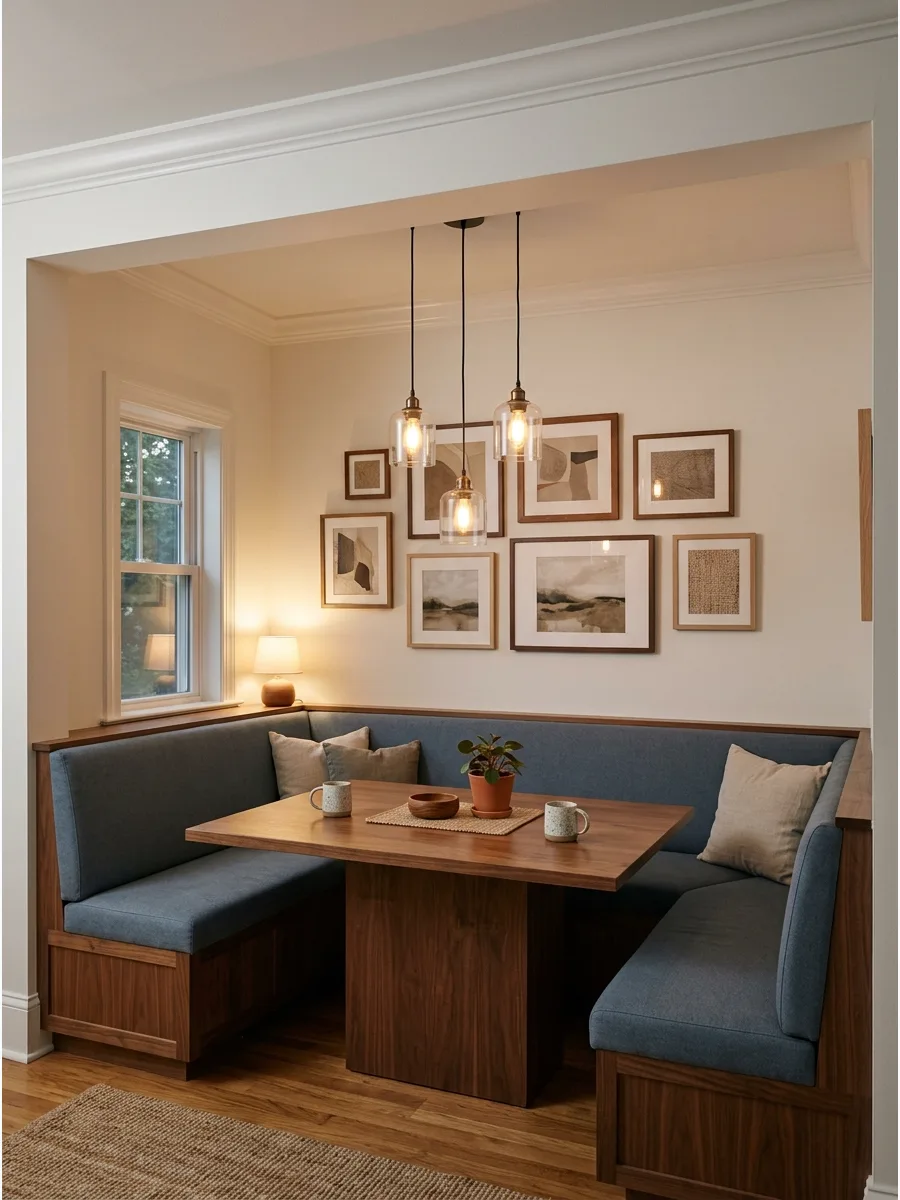
A U-shaped banquette creates a cozy restaurant-style seating area that feels perfect for family breakfasts and long conversations. This layout encloses the table on three sides, creating a very intimate and protected atmosphere.
Choose a table that is slightly smaller than the interior opening to allow for easy entry and exit. This layout works best in larger kitchens where the nook can act as a primary dining zone.
- Requires a minimum space of 6 feet by 6 feet for comfortable seating.
- Build the bench with a slight backward lean in the backrest for better comfort.
- Add a large area rug under the entire U-shape to ground the furniture.
Best shortcut: Use a pedestal table instead of a four-legged table to avoid blocking the legroom of people in the corners.
4. Window Seat Breakfast Nook
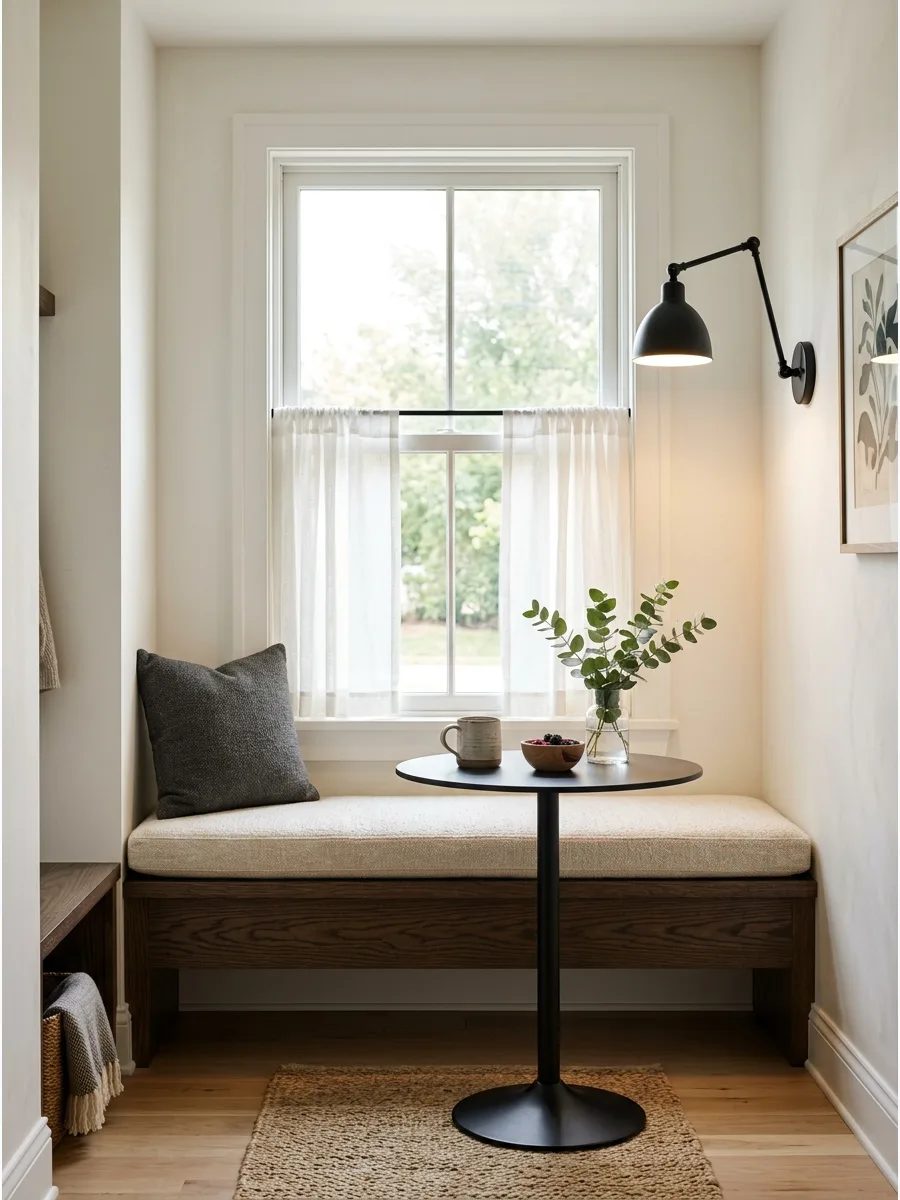
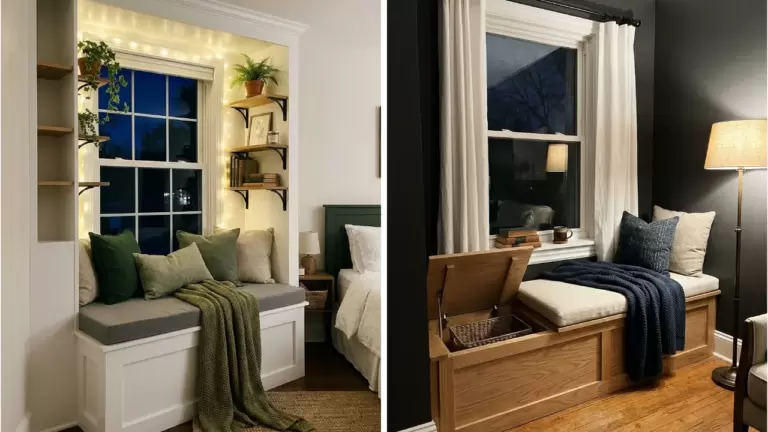
Placing a bench under a window turns natural light into the main feature of the dining area. This setup makes the kitchen feel larger by drawing the eye toward the outdoors during meals.
Use a low-profile bench that sits exactly at the window sill height to avoid blocking the view. A window-side nook is the best way to make a small kitchen feel airy and bright without adding windows.
- Measure window height before buying or building to ensure the bench doesn't block the glass.
- Install window film or café curtains for privacy while eating.
- Use UV-resistant fabric for cushions to prevent fading from direct sunlight.
Quick win: Add a few potted herbs on the window sill to bring life and scent to the breakfast area.
5. Bay Window Breakfast Nook
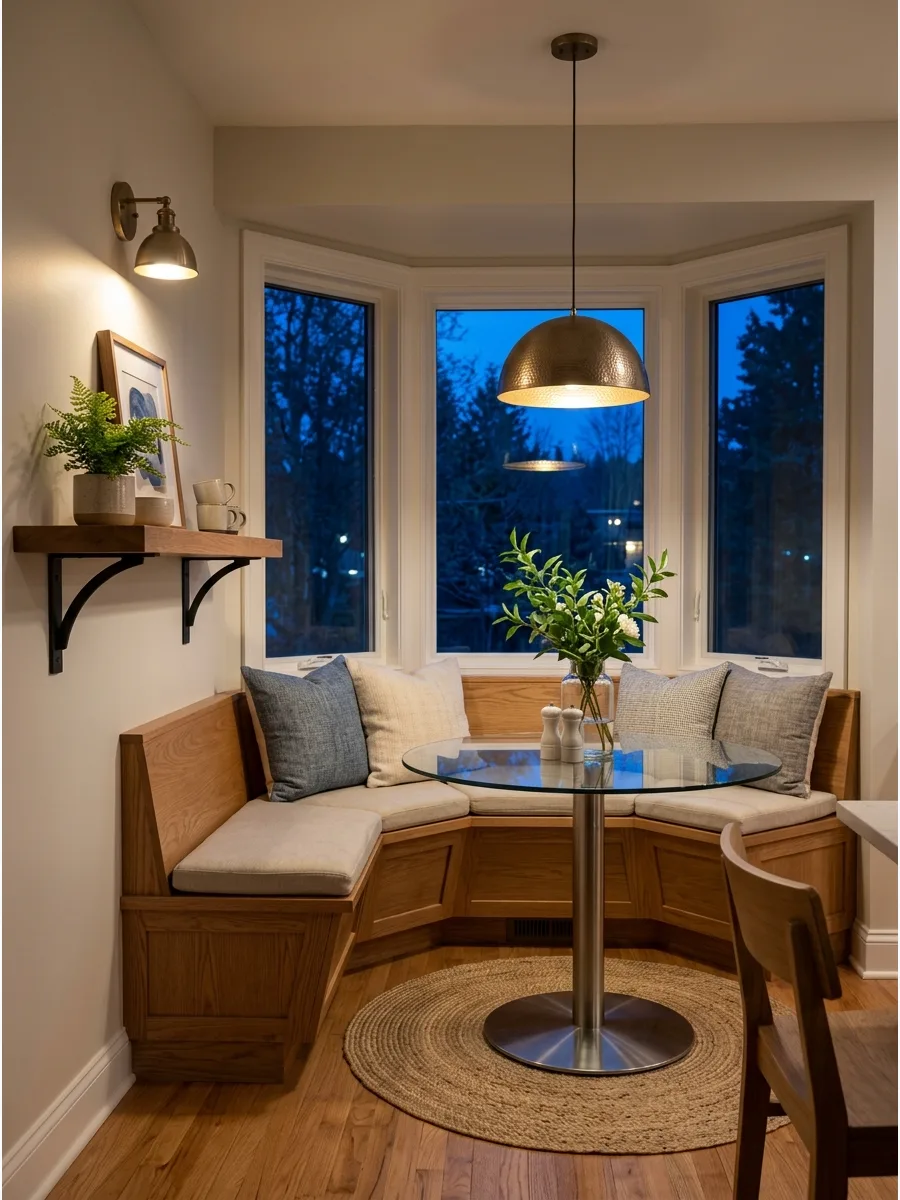
A bay window offers a natural architectural niche that is perfectly suited for a curved or angled bench. This design utilizes a space that is often left empty or underused in traditional kitchen layouts.
Select a round or oval table that mimics the curve of the window to create a balanced look. It is the most charming way to add a dedicated dining spot that feels like an intentional part of the home's architecture.
- Custom carpentry is usually required to match the specific angles of a bay window.
- Ensure the table is centered within the middle window pane for visual symmetry.
- Opt for cordless blinds to keep the space looking clean and safe for kids.
Most people skip this: Install a floor outlet under the bench so you can charge laptops while working at the table.
6. Built-In Bench With Storage
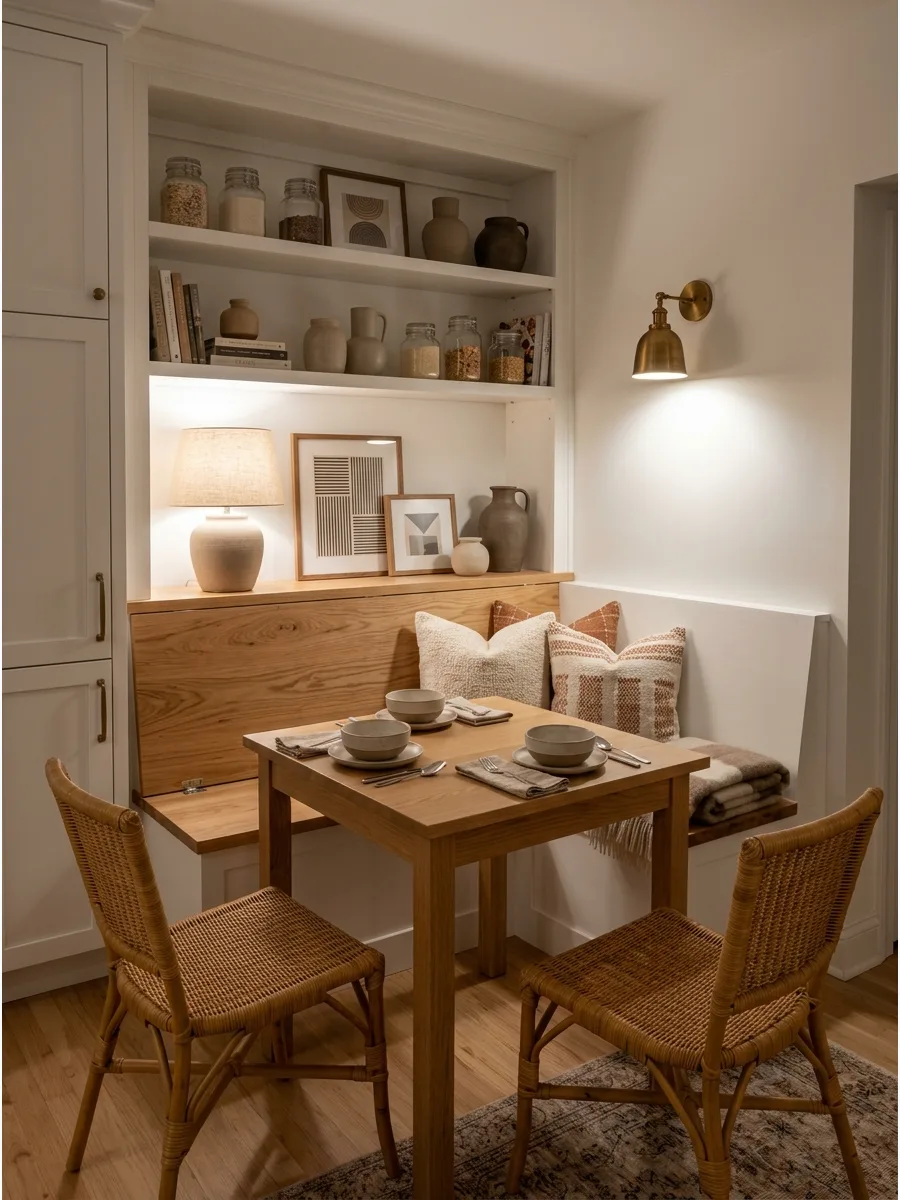
Choosing a bench with hidden storage underneath is a smart move for kitchens with limited cabinetry. The space inside the bench can hold bulky items like seasonal linens, large pots, or even kids' craft supplies.
Use a flip-top lid with soft-close hinges to make accessing the storage safe and easy for everyone. Functional storage hidden in plain sight is the ultimate win for small-space living.
- Budget for high-quality hinges to prevent the lid from slamming on fingers.
- Use plastic bins inside the bench to keep items organized and dust-free.
- Ensure the bench is at least 18 inches deep to provide enough storage volume.
Best shortcut: If building a flip-top is too complex, use a bench with an open bottom and slide in decorative baskets.
7. Floating Bench Breakfast Nook
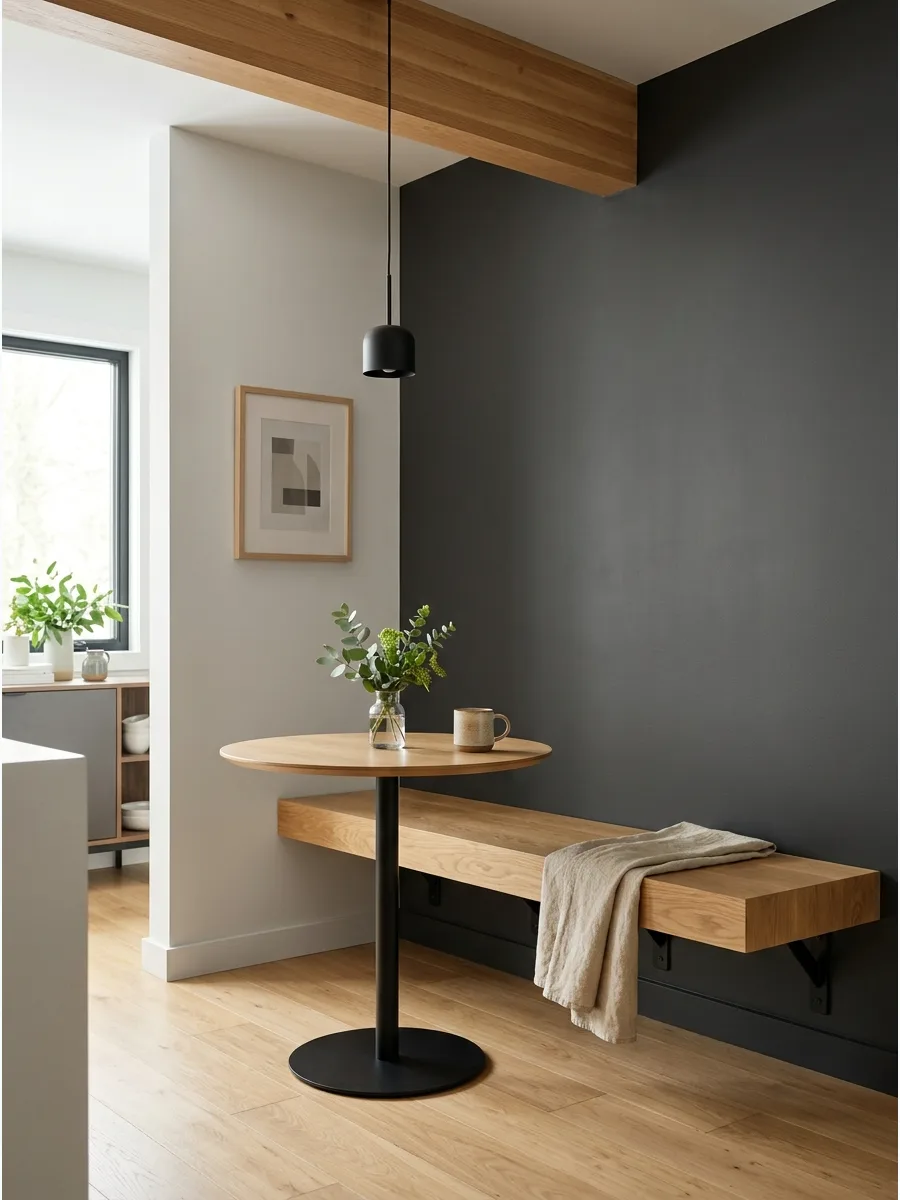
A wall-mounted floating bench offers a clean and modern look that makes the floor appear more spacious. Without legs or a solid base, the nook feels lighter and allows for easier floor cleaning.
Reinforce the wall with extra blocking during installation to ensure the bench can support the weight of multiple adults. This minimalist approach is perfect for contemporary kitchens that prioritize open, uncluttered lines.
- Requires professional installation or advanced DIY skills to ensure weight capacity.
- Best for concrete or well-reinforced stud walls.
- Keep the area under the bench clear of clutter to maintain the modern aesthetic.
Quick win: Install LED strip lighting under the floating bench for a high-end, glowing effect at night.
8. Built-In Nook With Drawers
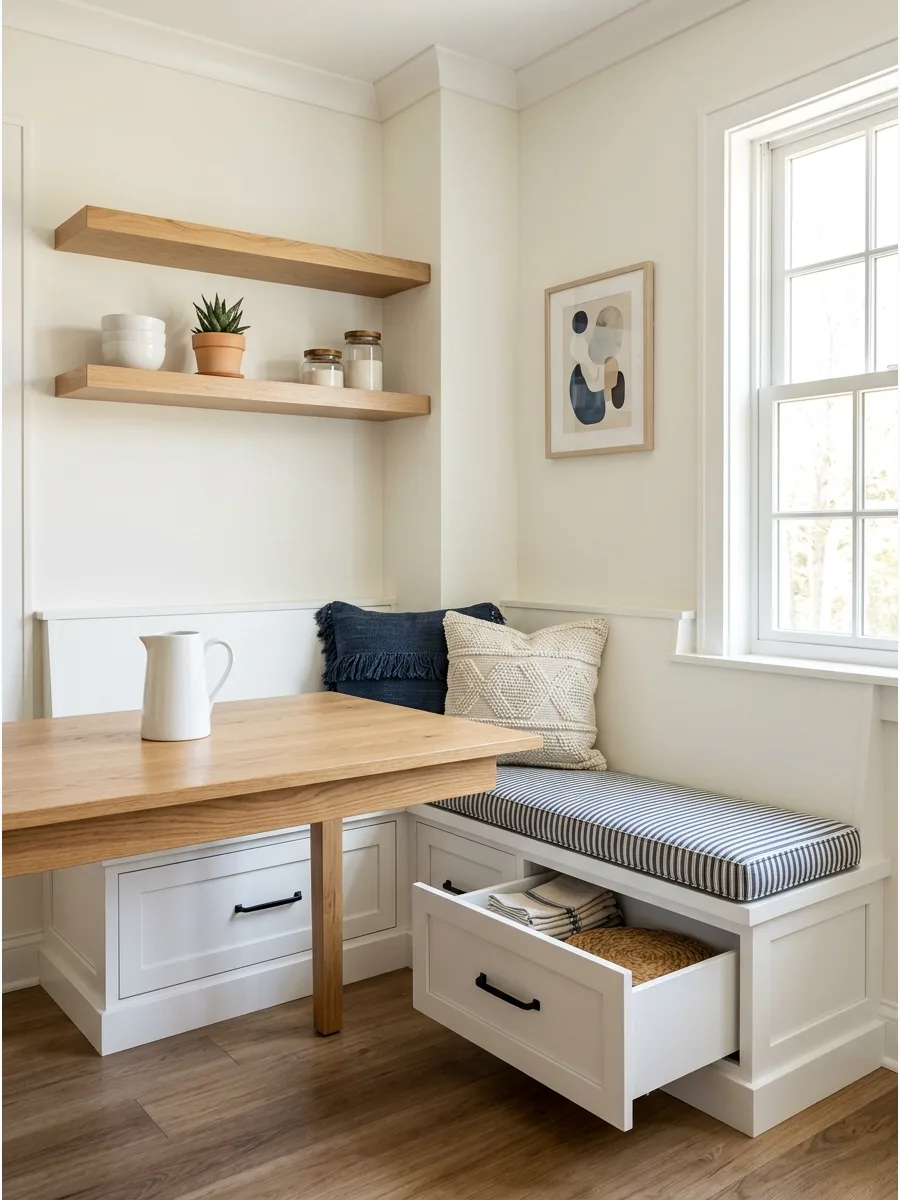
Adding drawers to the base of a banquette is more functional than a flip-top lid because you don't have to move the cushions to get inside. These drawers are ideal for storing placemats, napkins, or everyday kitchen overflow.
Install heavy-duty drawer slides so the drawers can handle the weight of heavy kitchen gadgets. This is the most efficient way to turn a seating area into a hard-working storage zone.
- Cost is higher than standard benches due to drawer hardware and construction.
- Ensure there is enough clearance in front of the bench for the drawers to open fully.
- Use recessed drawer pulls to prevent them from catching on people's legs.
Most people skip this: Label the drawers or use dividers to keep small items like batteries or pens from getting lost.
9. Small Corner Breakfast Nook
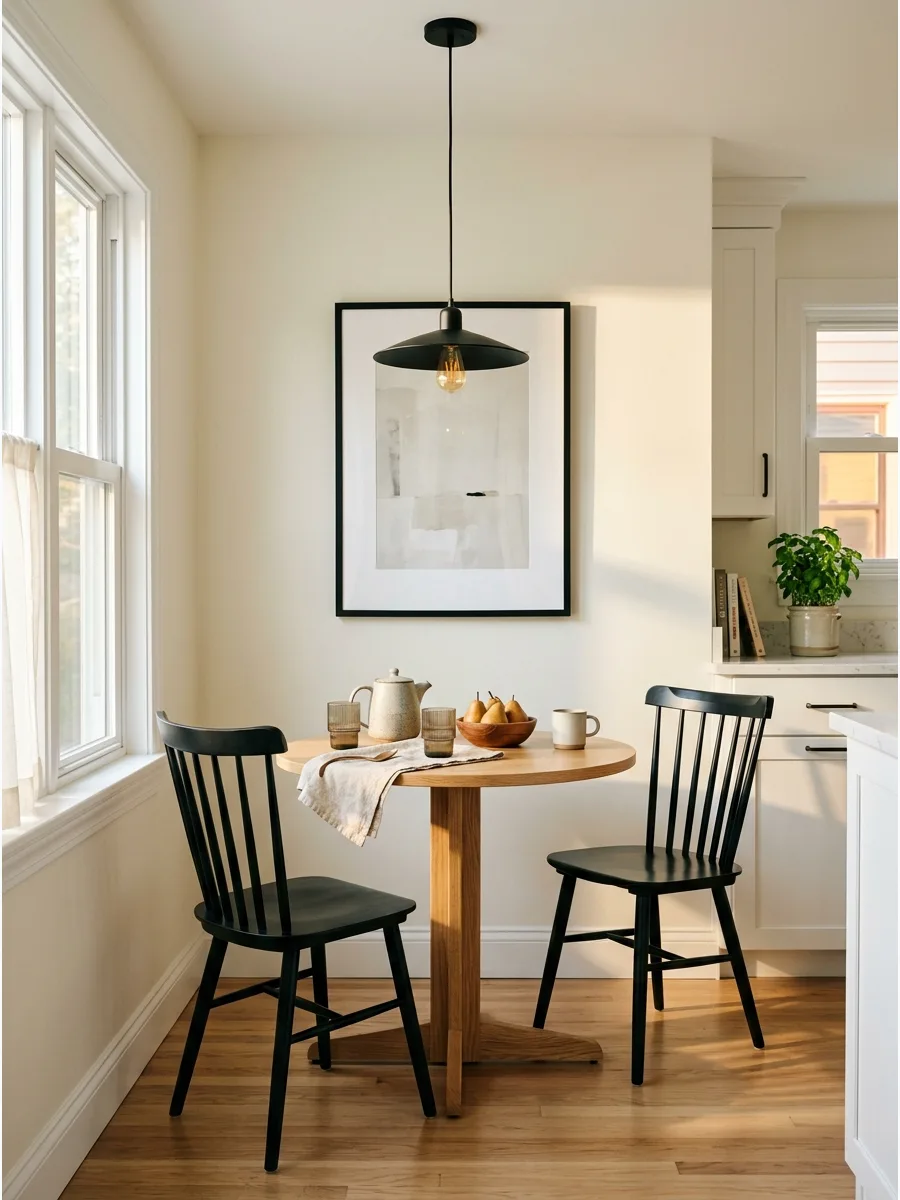
A simple round table paired with two chairs can turn any awkward kitchen corner into a functional breakfast spot. This setup doesn't require any construction and can be moved or changed easily.
Position the chairs at a 90-degree angle to each other to keep the walkway open and the corner accessible. It is the most flexible solution for adding a dining area to a finished kitchen without a remodel.
- Budget-friendly option using existing furniture or affordable retail pieces.
- Look for a table with a diameter of 30 to 36 inches for a tight corner.
- Place a small rug under the table to define the space as its own 'room'.
Best shortcut: Use a clear acrylic chair to make the small corner feel less crowded and more modern.
10. Apartment Breakfast Nook
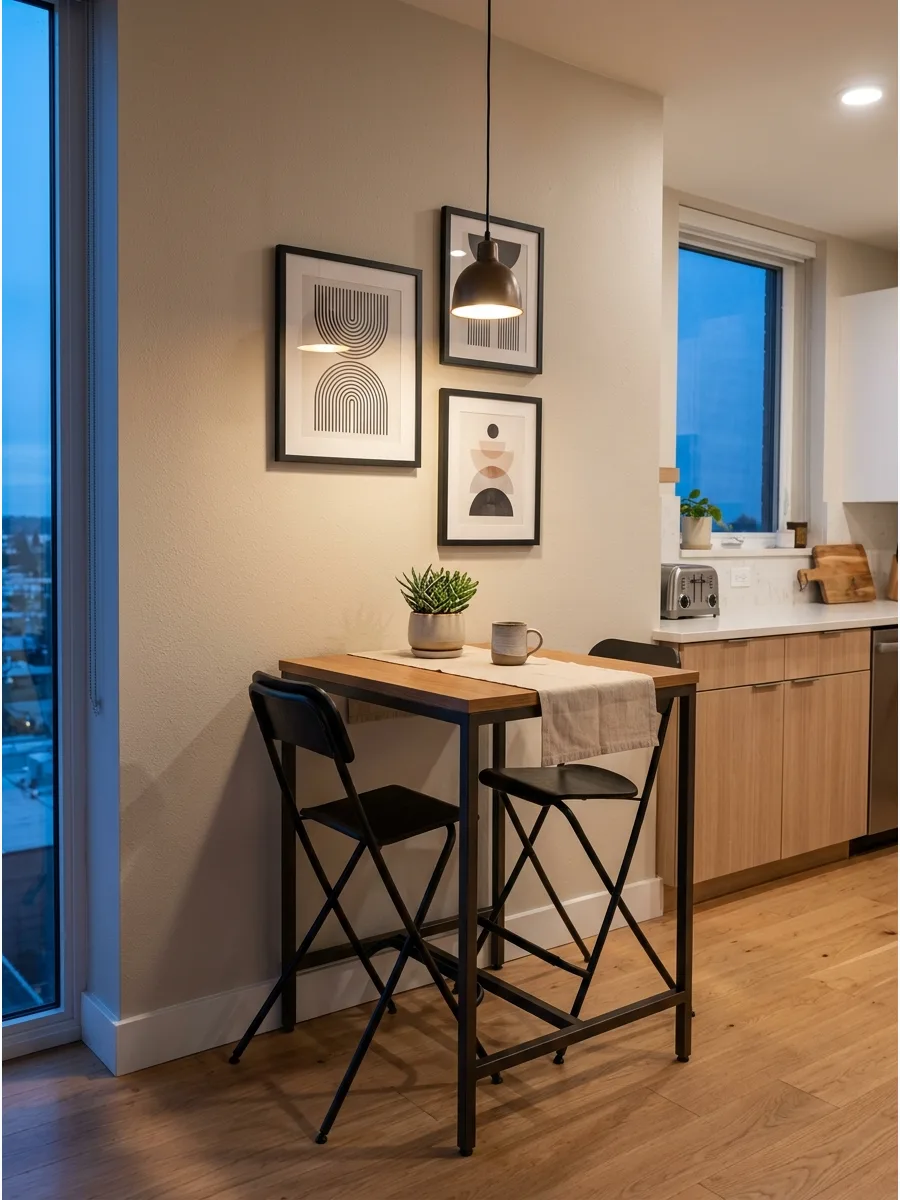
In a compact apartment, a slim table and lightweight chairs are essential for maintaining flow. Using wall art above the seating helps define the area as a dining zone without taking up floor space.
Opt for chairs that can tuck completely under the table when they are not being used. This approach keeps the kitchen functional for cooking while still providing a comfortable place to eat.
- Perfect for renters who cannot install built-in furniture.
- Choose a table with a thin metal frame to keep the visual weight low.
- Hang a mirror above the table to reflect light and make the apartment feel bigger.
Quick win: Use command hooks for the wall art so you don't lose your security deposit.
11. Tiny Kitchen Breakfast Nook
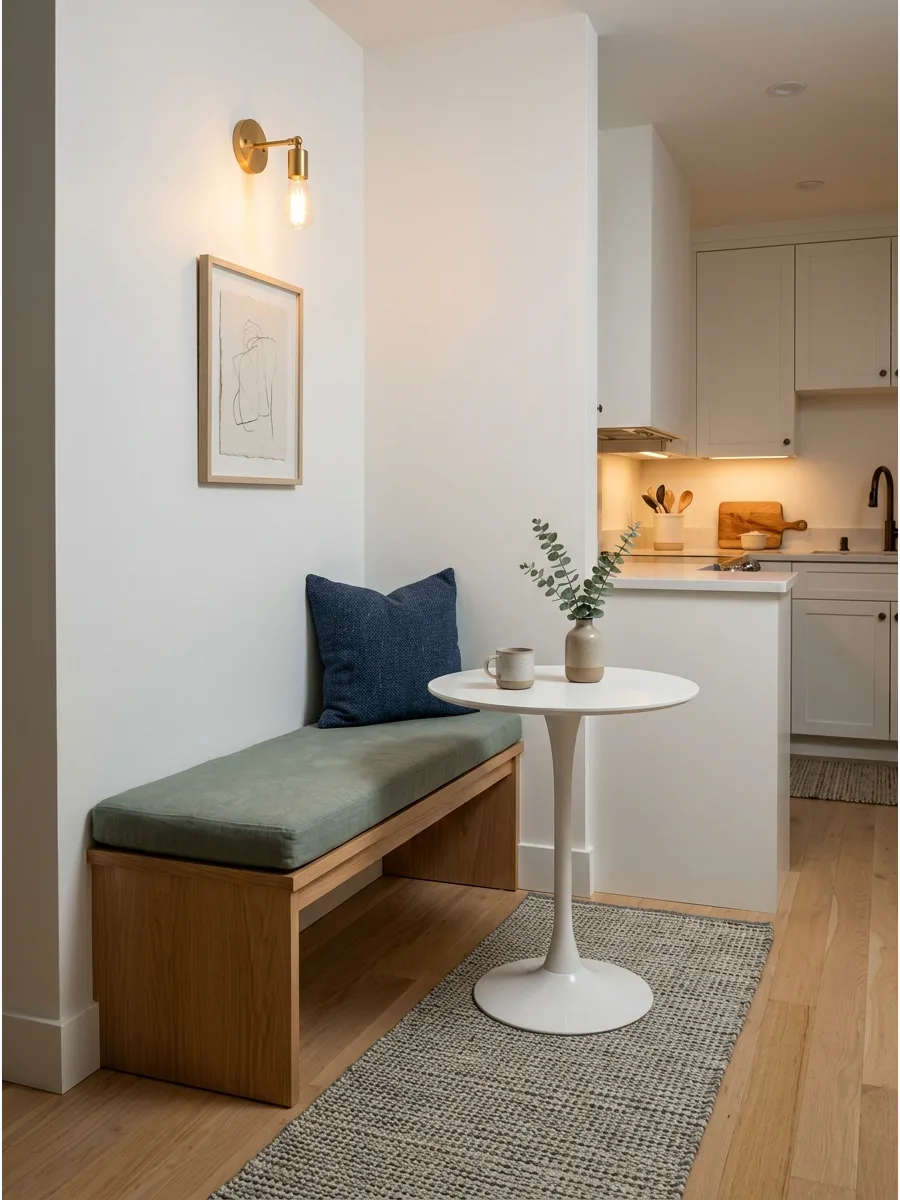
When floor space is at a premium, a narrow bench against the wall is the best way to squeeze in a dining area. Pair it with a small pedestal table that doesn't have bulky legs to trip over.
Install the bench directly against the wall to save the 24 inches usually required to pull out a chair. This layout works in even the smallest galley kitchens where a traditional table would block the path.
- Sourcing a narrow bench (12-15 inches deep) is key for tight walkways.
- Use a wall-mounted table for even more floor clearance if possible.
- Choose light-colored furniture to keep the tiny space from feeling cramped.
Most people skip this: A bench that is the same color as the wall will blend in and make the room feel less cluttered.
12. Two-Person Breakfast Nook
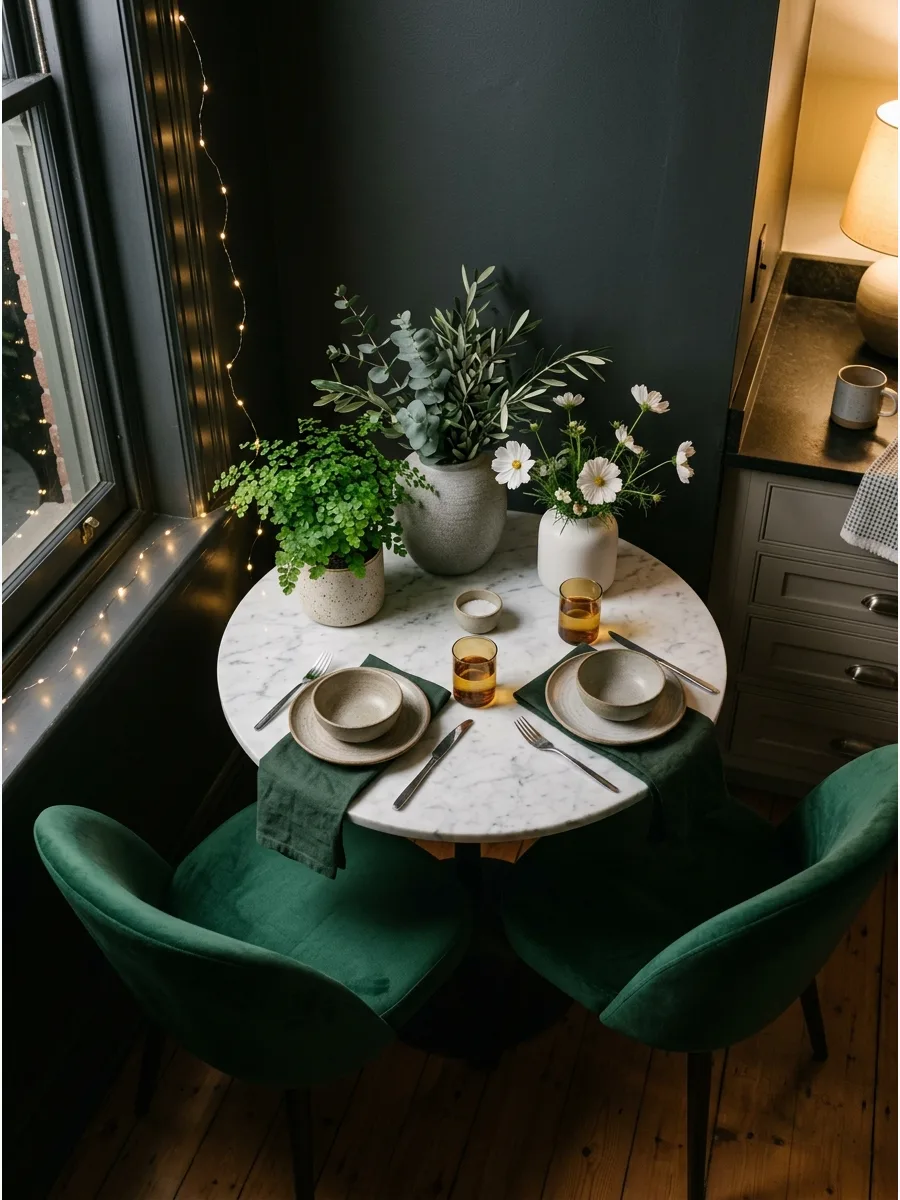
A dedicated setup for two people is often more practical than trying to cram a four-person table into a small kitchen.
This cozy arrangement is perfect for coffee, quick breakfasts, or evening drinks. Choose comfortable, upholstered chairs to encourage staying at the table longer than a quick meal. Keeping the scale small ensures the nook feels like a luxury rather than a cramped necessity.
- Takes up very little room, roughly 4 feet by 5 feet total.
- Ideal for empty nesters or couples living in urban areas.
- Place the set near a window or a bookshelf to create a multi-purpose reading nook.
Best shortcut: Buy a 'bistro set' rather than individual pieces to ensure the heights and styles match perfectly.
13. Half-Wall Breakfast Nook
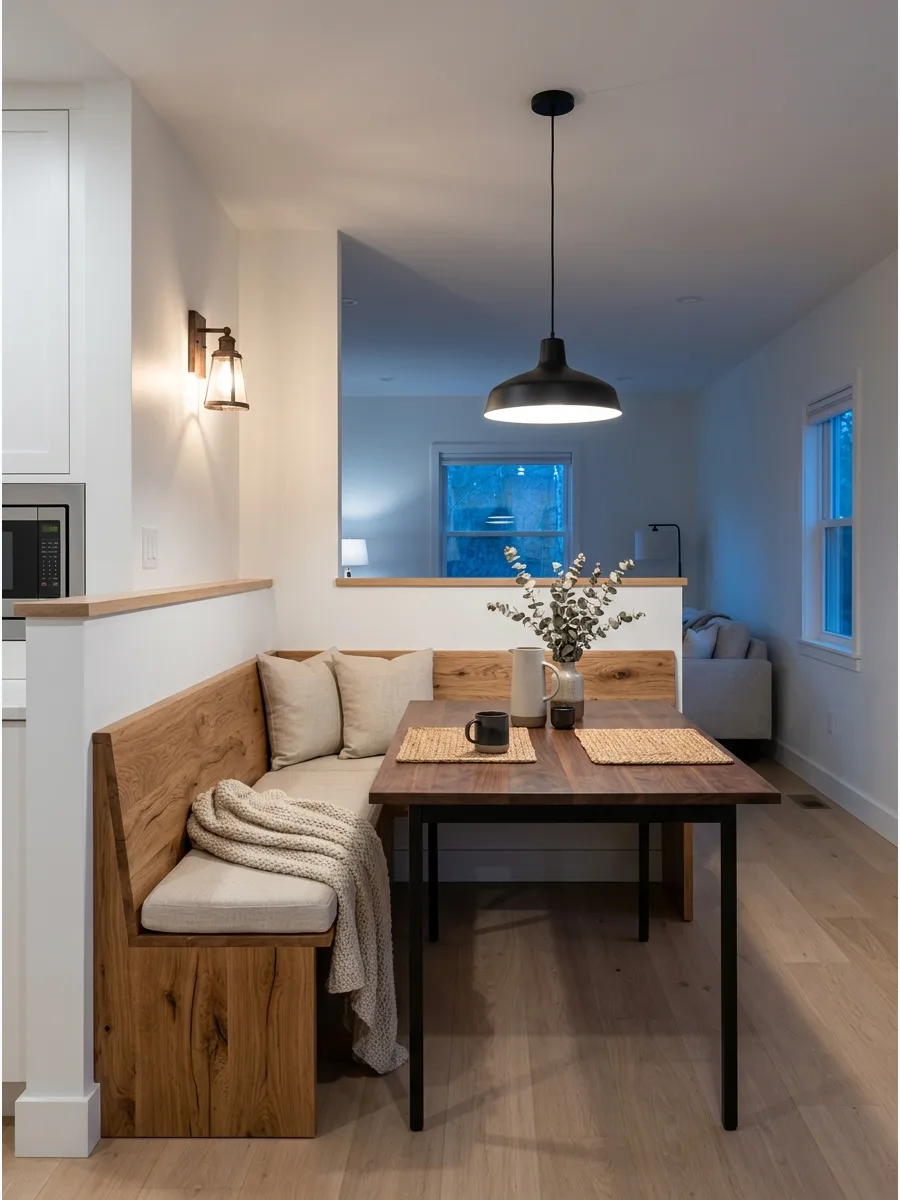
Placing a bench against a half-wall or a kitchen divider creates a defined dining zone without closing off the room. It uses the back of a peninsula or a room divider as a natural support for seating.
Make sure the bench back is lower than the top of the half-wall to keep the sightlines open between rooms. This is an excellent way to bridge the gap between a kitchen and a living area.
- Great for open-concept homes that need a clear dining boundary.
- Coordinate the bench material with the countertop on the other side of the wall.
- Add a thin cushion to the bench for comfort without adding too much height.
Quick win: Use the top of the half-wall as a ledge for coasters, napkins, or small decorative plants.
14. Narrow Breakfast Nook
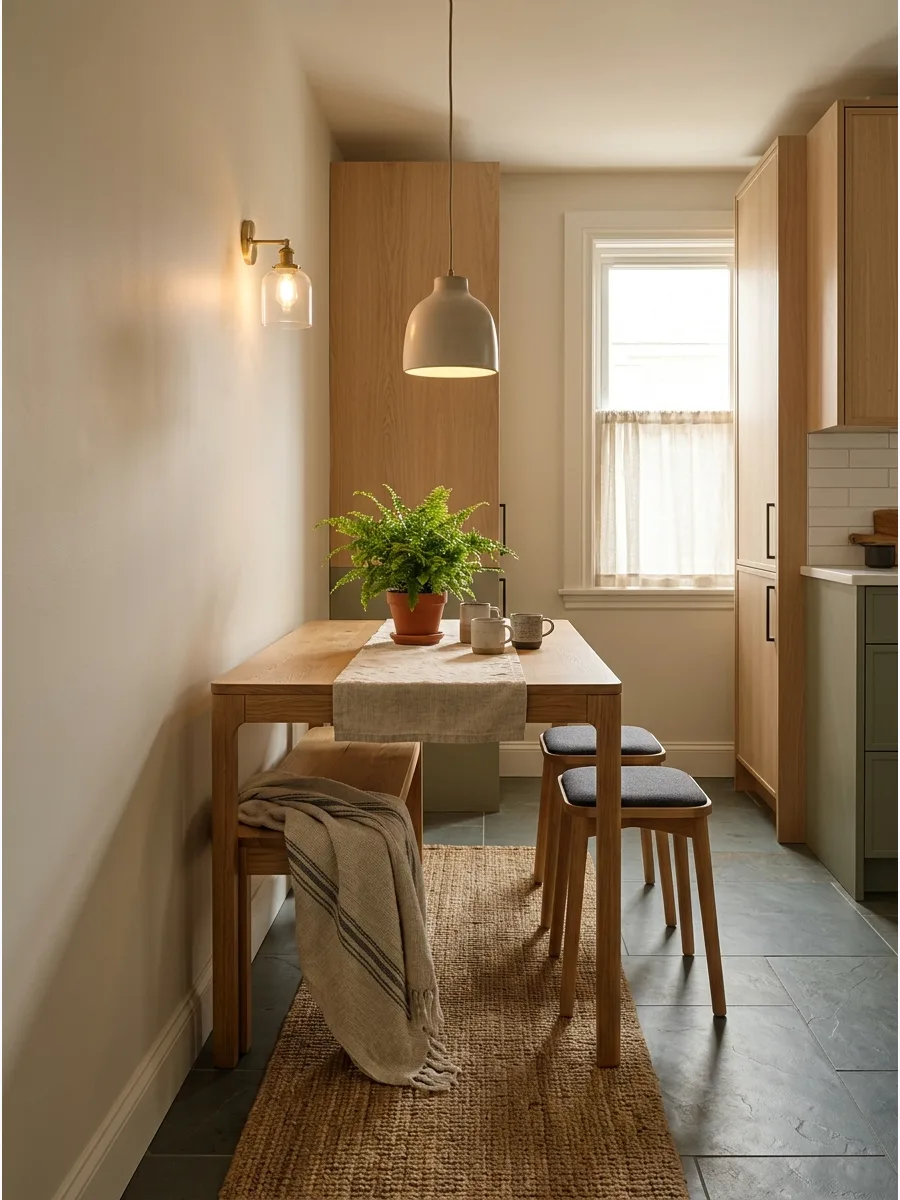
Long, narrow kitchens benefit from a slim rectangular table paired with a bench on one side. This arrangement provides plenty of seating while keeping the walkway clear for the cook.
Use a bench that can slide completely under the table when not in use to maximize floor space during the day. A narrow table provides just enough surface for plates without taking up the center of the room.
- Look for 'console-height' tables if you want to use the surface for extra prep space.
- Ensure the table is at least 18 inches wide to fit a standard dinner plate.
- Use a runner down the center of the table to make the narrow shape look intentional.
Most people skip this: A table with a trestle base instead of four legs makes it much easier for people to slide onto the bench.
15. Breakfast Nook With Foldable Table
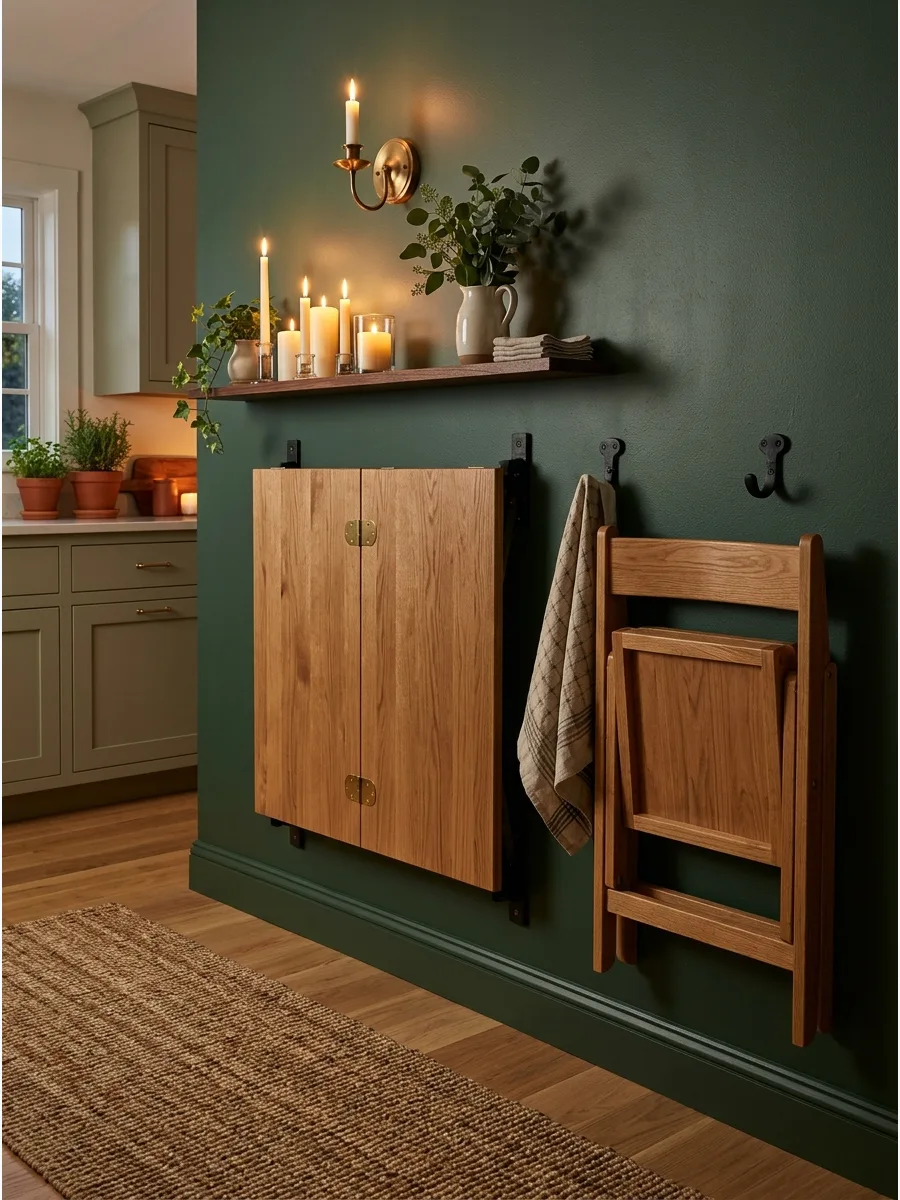
A drop-leaf or folding table offers the ultimate flexibility for small-space breakfast nooks. You can keep the leaves down for a small footprint and expand them when you have guests.
Mount a folding table directly to the wall to create a disappearing dining spot in extremely tight kitchens. This is the best solution for multipurpose rooms where you need the floor space for other activities.
- Very affordable and widely available for under $200.
- Perfect for studio apartments or tiny homes.
- Choose a sturdy wood model rather than plastic for a more permanent look.
Best shortcut: Hang folding chairs on the wall as 'art' when they aren't in use to save even more floor space.
16. Renter Friendly Corner Set
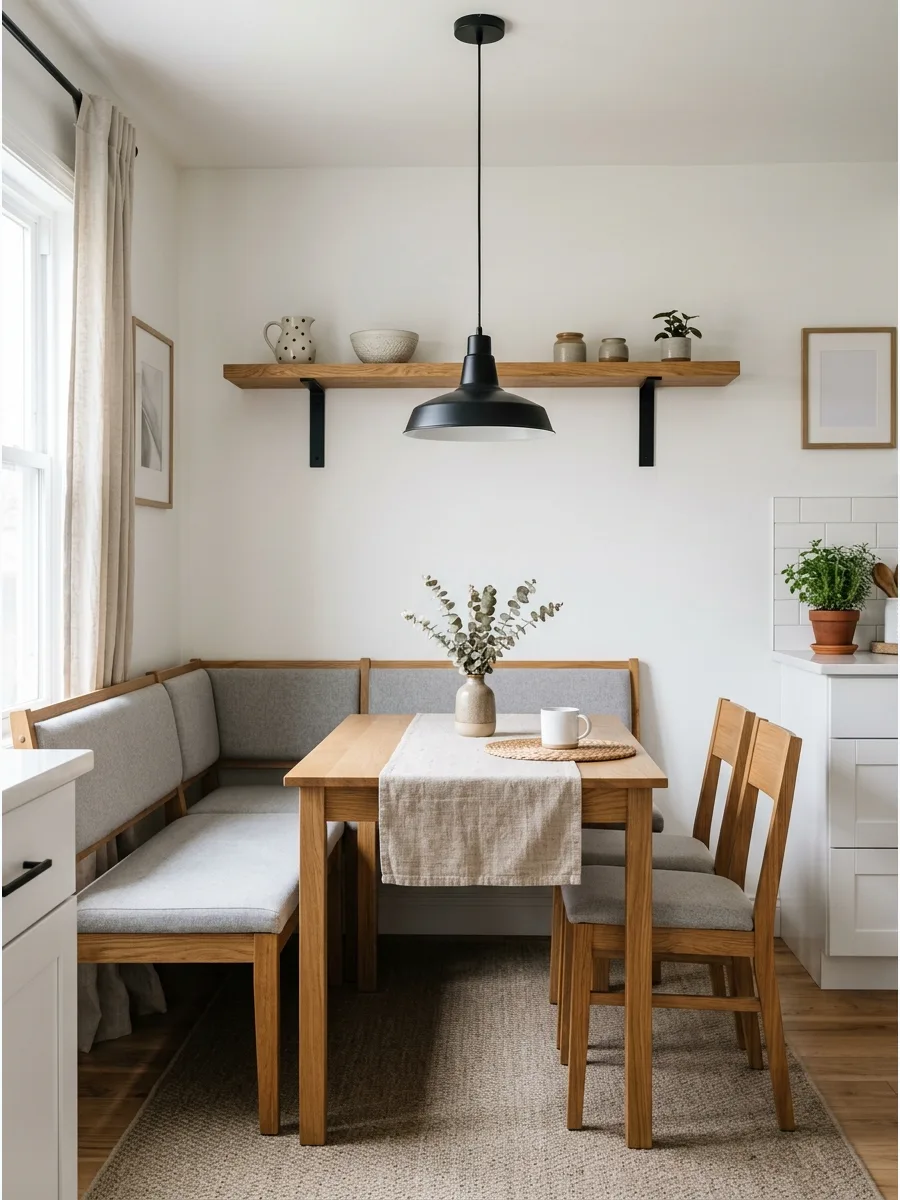
Use a freestanding corner dining set to get the built-in look without any permanent construction. This works perfectly for renters or anyone avoiding a major kitchen remodel.
Choose a set with a bench and matching table that fits snugly into your existing kitchen corner. It provides the same cozy feel as a custom banquette but leaves with you when you move.
- Typically costs between $400 and $800.
- Measure wall space carefully to ensure the bench does not block cabinet doors or drawers.
- Use felt pads on the bottom of the bench legs to prevent floor scratches in a rental.
Quick win: Use felt pads on the bottom of the bench legs to prevent floor scratches.
17. Warm Minimalist Dining Spot
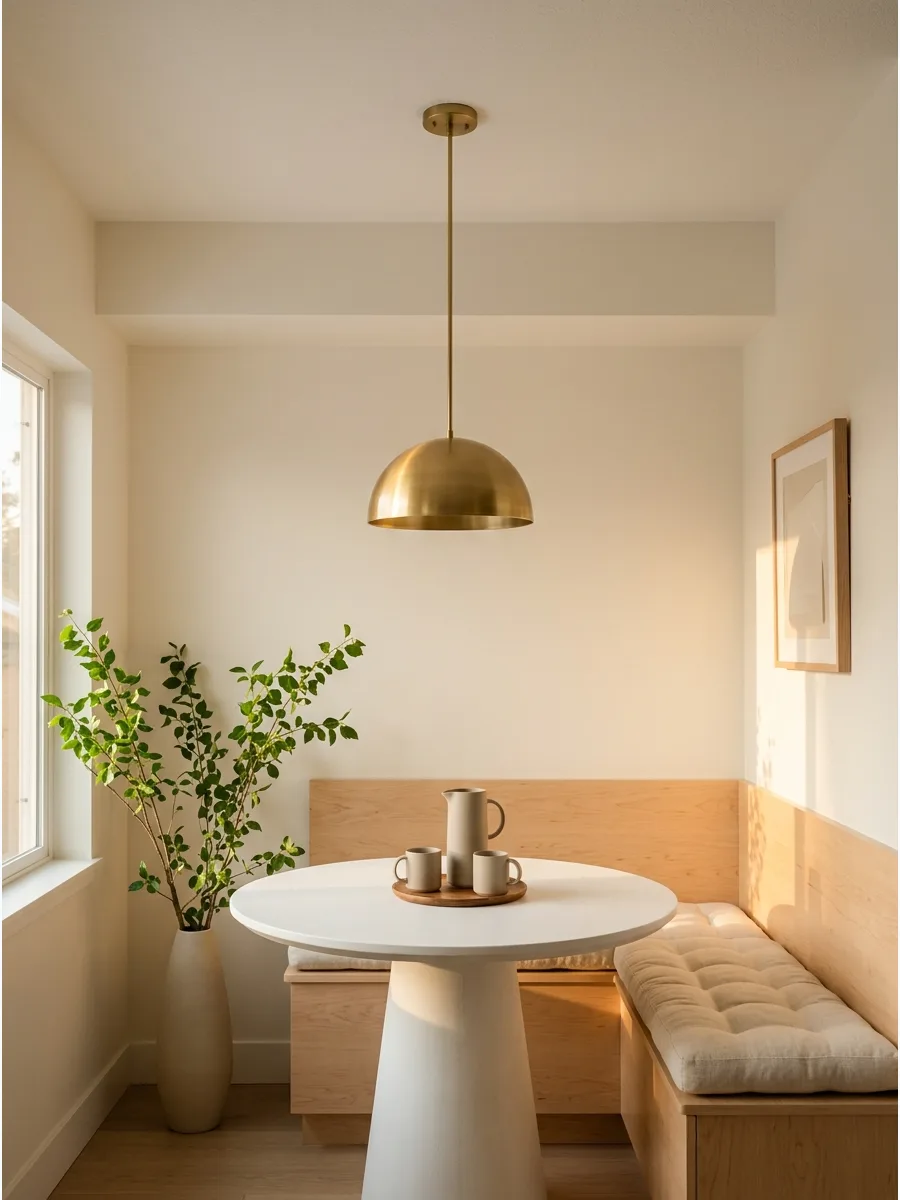
Use clean lines and warm wood to create a calm, modern look in a small footprint. Pair cream cushions with a simple pendant light to keep the space feeling open and airy.
Stick to a palette of beige, tan, and light wood to maintain a cohesive and peaceful environment. This style relies on high-quality materials rather than lots of extra decor.
- Budget $300 to $600 for furniture and lighting.
- Install the pendant light 30 inches above the tabletop for the best scale.
- Use high-density foam for cushions to keep the clean lines sharp.
Most people skip this: Install a dimmer switch for the pendant light to set the mood for early mornings.
18. Organic Modern Natural Nook
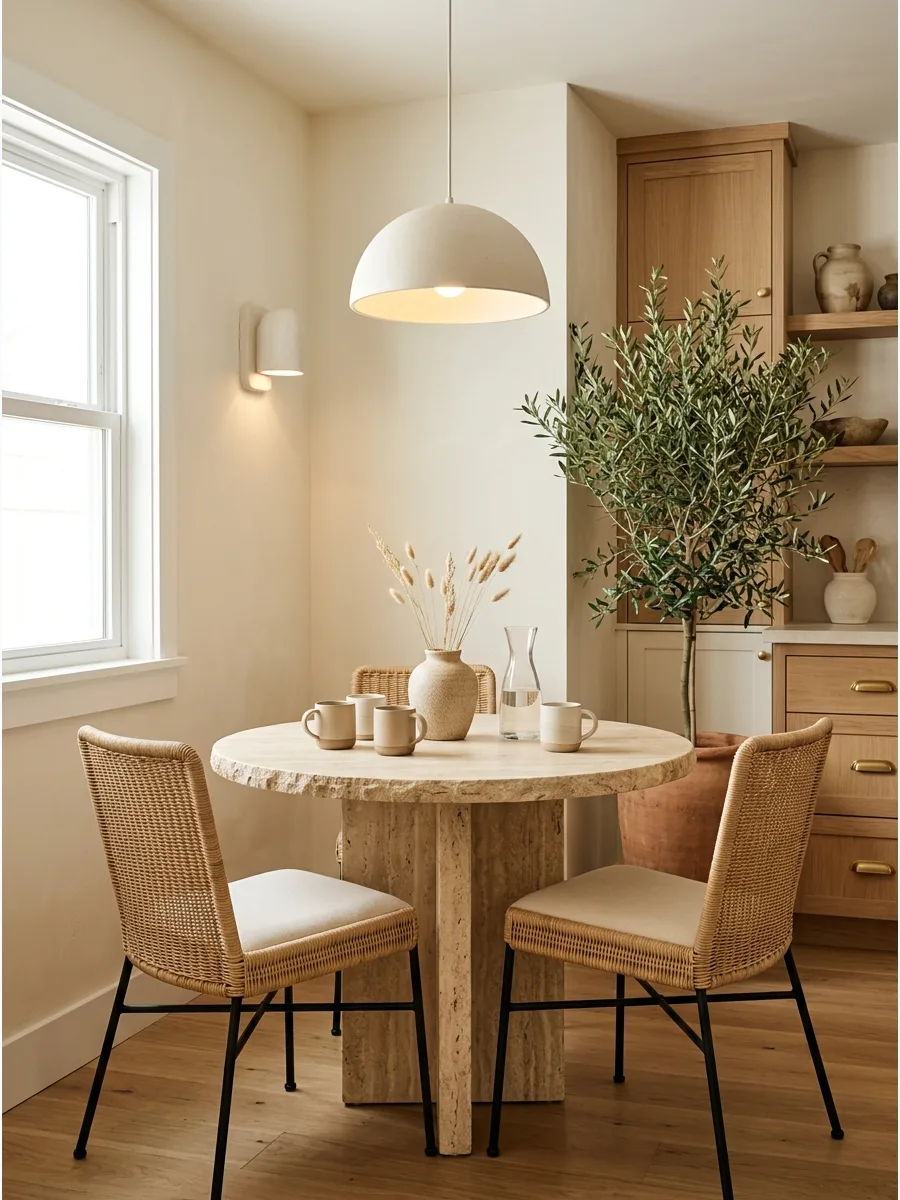
Mix natural wood and woven chairs with stone accents to bring an earthy feel to your kitchen. Soft neutral upholstery keeps the seating comfortable for long coffee breaks or reading.
Incorporate a stone-top table or a ceramic vase to add weight and texture to the space. It balances hard kitchen surfaces with softer, natural elements for a designer feel.
- Stone tables range from $500 to $1,200 depending on material.
- Place the rug first, then position the furniture to center the zone.
- Wipe stone surfaces with a pH-neutral cleaner to prevent etching.
Best shortcut: Use a faux olive tree if the corner does not get enough natural light for a real one.
19. Soft Curved Seating Area
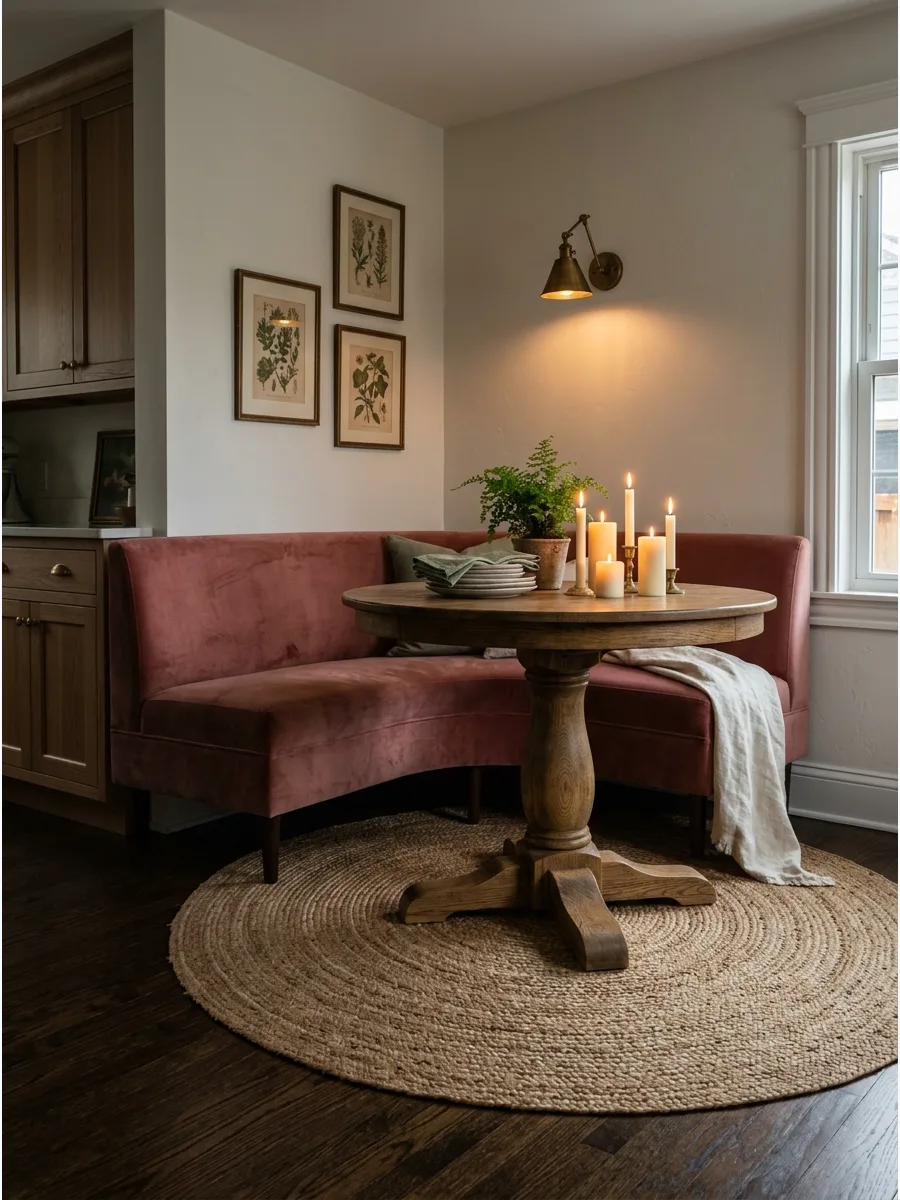
Use a curved bench or a round table to soften the sharp angles of a standard kitchen. This layout makes the space feel more relaxed and allows for easier conversation between guests.
Position a circular rug underneath to anchor the curved furniture and define the dining zone. It breaks up the boxy feeling of cabinets and walls in a small room.
- Custom upholstery typically takes 4 to 6 weeks to order.
- Ensure there are at least 36 inches of clearance around the curve for walking.
- Match the rug diameter to the widest part of the curved bench.
Quick win: A round table prevents bruised hips in tight kitchen walkways.
20. Round Pedestal Table Setup
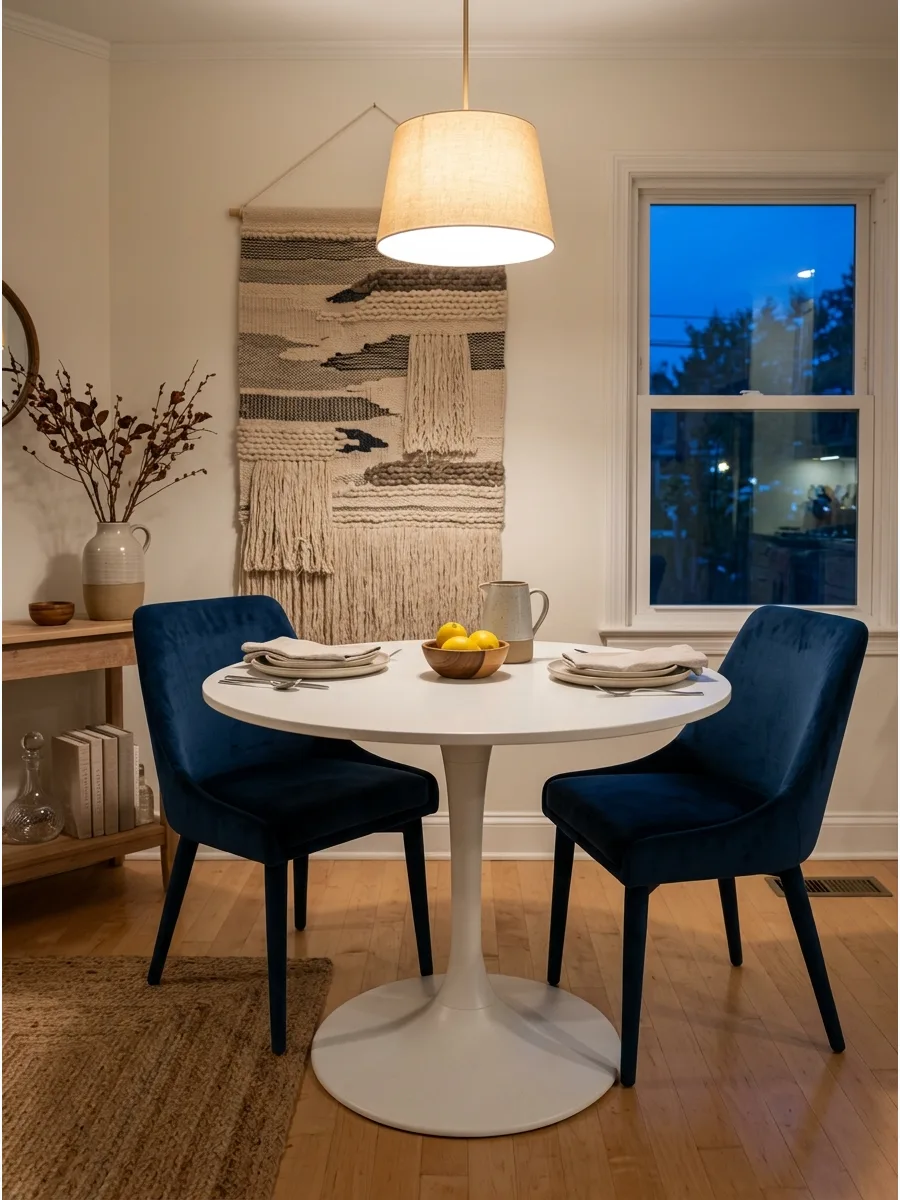
A round pedestal table is perfect for breakfast nooks because it keeps the seating area easy to move around. Without corner legs in the way, people can slide in and out of benches much more easily.
Opt for a heavy base to prevent the table from tipping when people lean on the edges. This is the most practical choice for high-traffic family kitchens.
- Budget $200 to $500 for a quality pedestal table.
- Assembly usually takes less than 15 minutes for most pedestal designs.
- This setup works best in spaces that are at least 5 feet by 5 feet.
Best shortcut: Choose a pedestal base with a diameter at least half the width of the tabletop for stability.
21. Oval Table Surface Space
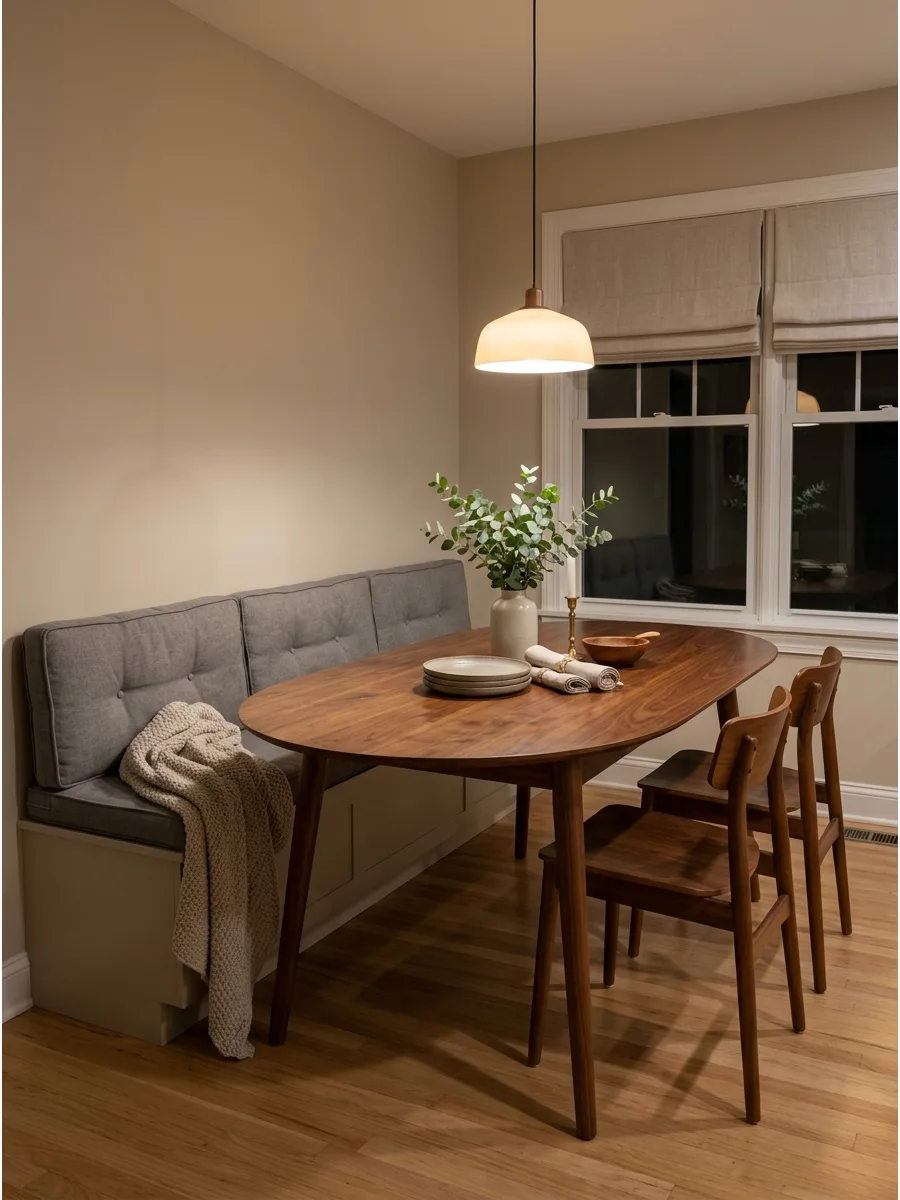
Use an oval table for a softer shape that still provides more surface space than a small round table. It fits beautifully in rectangular nooks where a round table might feel too small or out of place.
Align the long side of the table with your longest bench to maximize seating capacity. This shape allows for extra place settings without the harsh corners of a rectangle.
- Expect to spend $400 to $900 for solid wood oval tables.
- Requires at least a 4-foot by 6-foot footprint for comfortable use.
- Check for leg clearance if using a trestle-style oval base.
Most people skip this: Make sure the table overhangs the bench by at least two inches so guests do not have to lean forward.
22. Modern Black Accent Nook
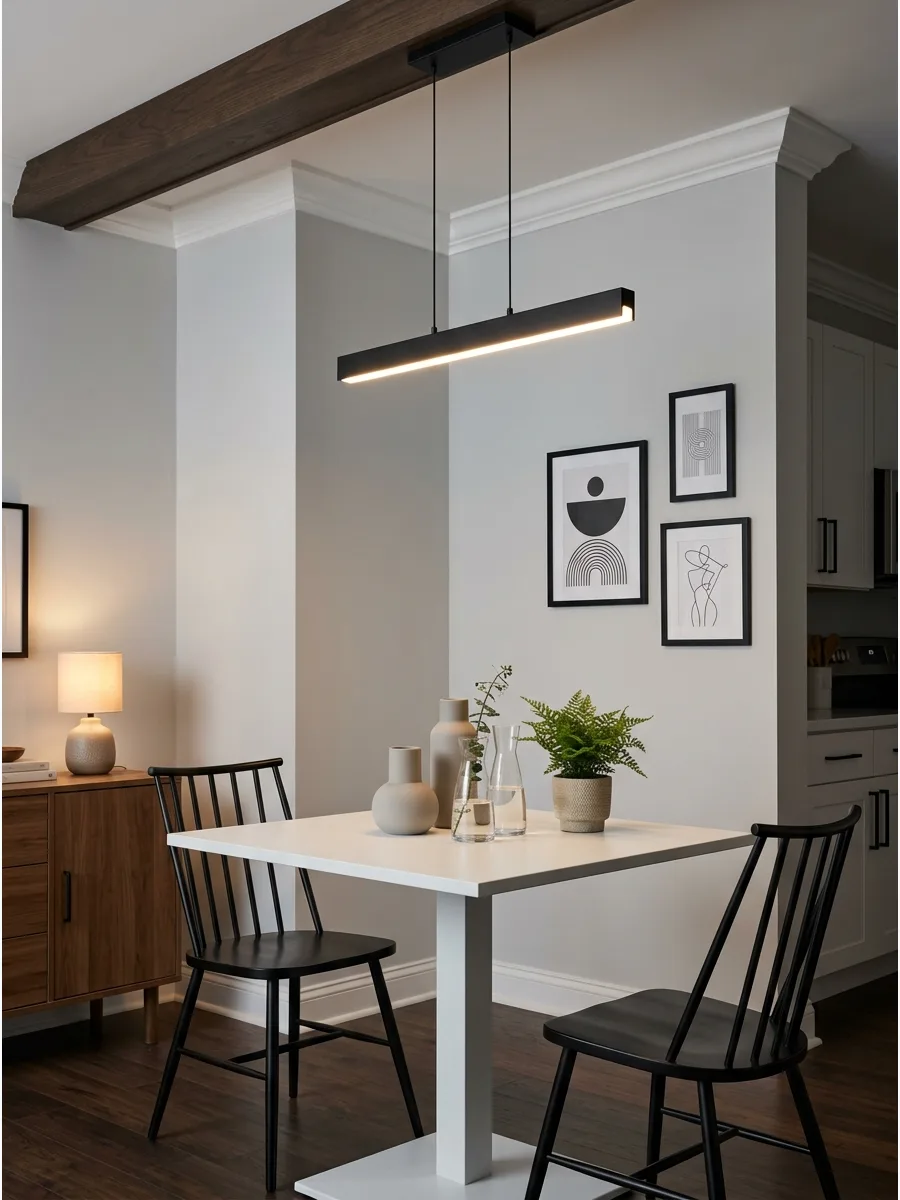
Add black chairs or a black pendant light to create a striking modern contrast against light kitchen walls. This look feels sophisticated and helps ground a bright, white room visually.
Repeat the black finish in small details like picture frames or cabinet hardware to tie the look together. It adds a designer touch without requiring a full kitchen remodel.
- A set of two chairs typically costs $150 to $400.
- This is an easy weekend swap that requires no professional help.
- Use matte black finishes to help hide fingerprints and smudges.
Quick win: Spray paint existing metal chair legs matte black for a budget-friendly update.
23. Two Tone Custom Color
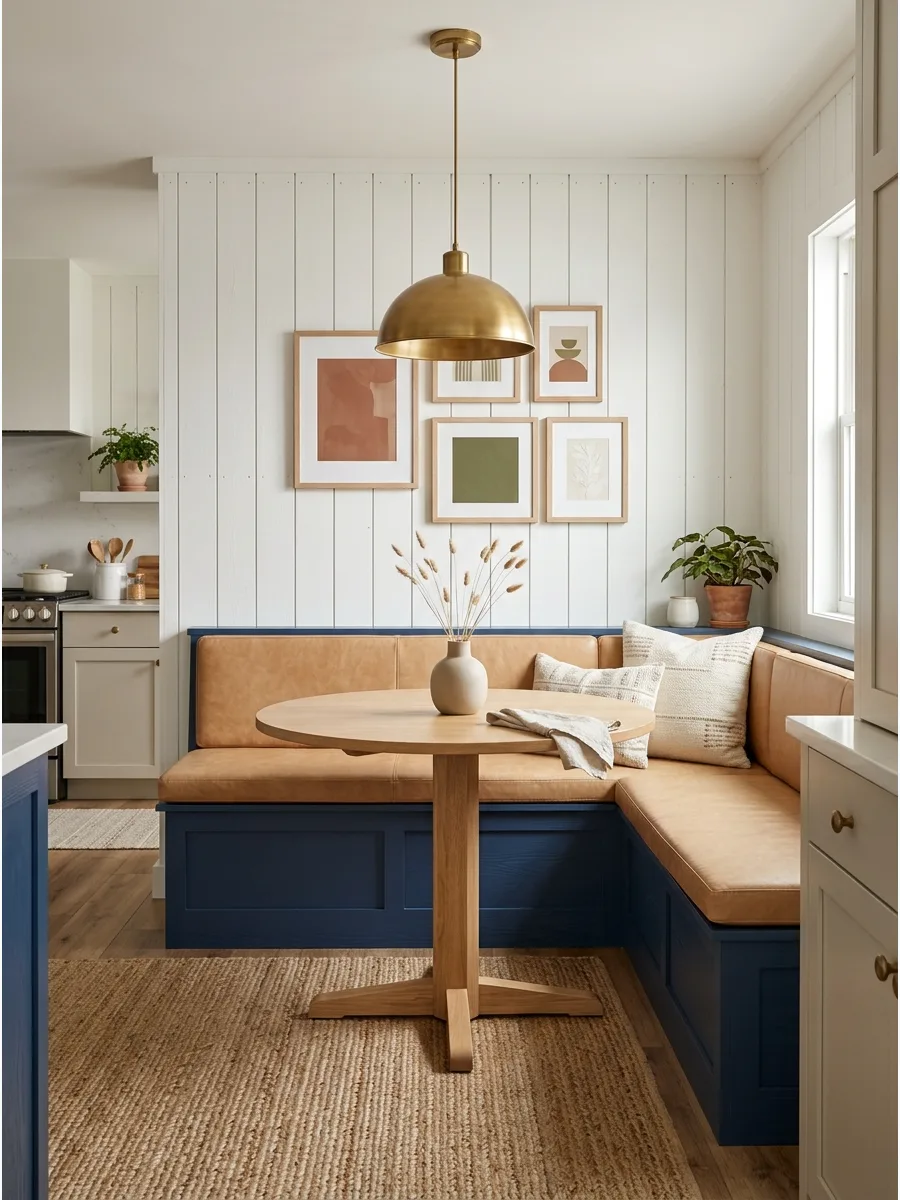
Use one color for the bench base and another for the cushions or wall paneling. This technique creates visual depth and makes the nook look like a custom architectural feature.
Contrast a dark painted base with light-colored upholstery to keep the corner from feeling too heavy. It is an easy way to introduce a favorite color into a neutral kitchen.
- A gallon of high-quality paint costs roughly $50.
- This is a 2-day DIY project including drying time.
- Use semi-gloss paint on the base for easy cleaning and durability.
Most people skip this: Paint the baseboard the same color as the bench base for a seamless built-in look.
24. Simple Minimal White Nook
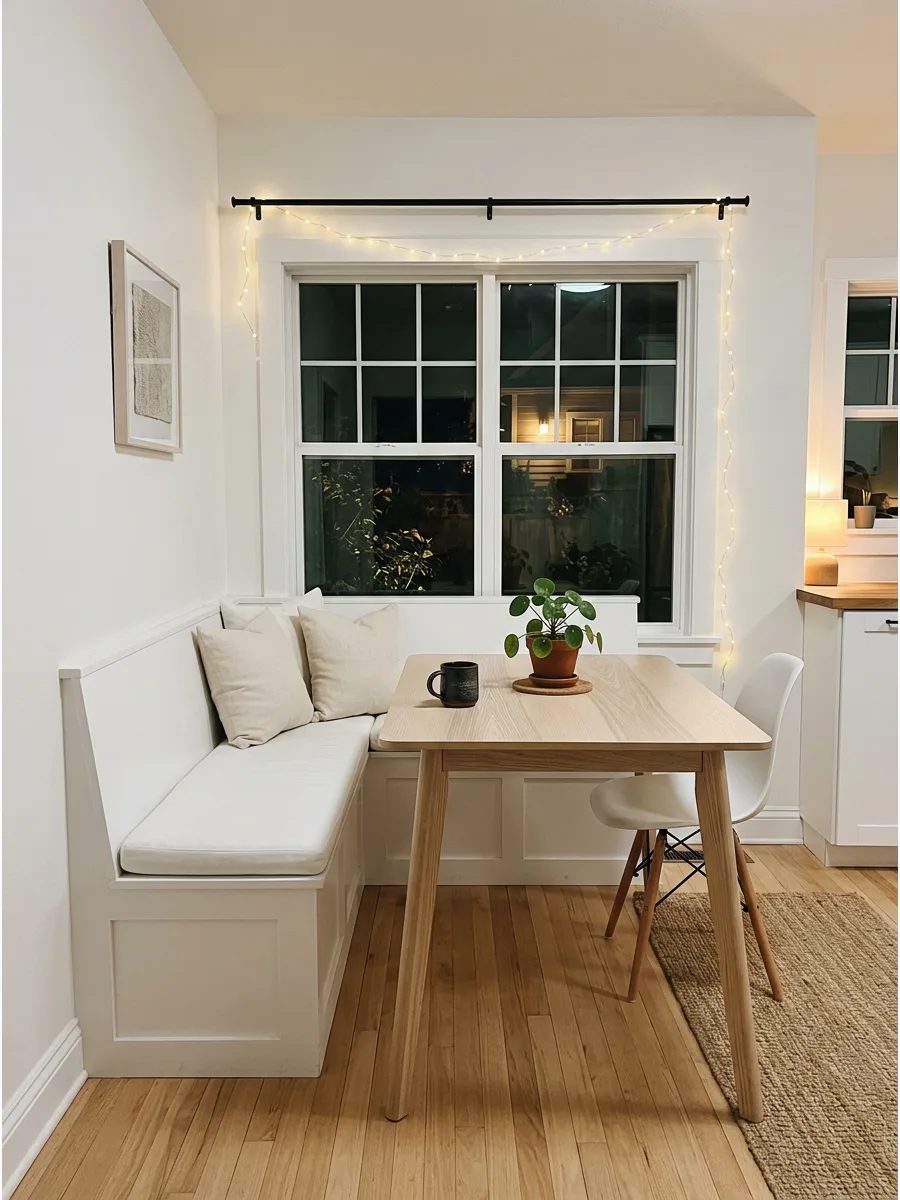
Keep the nook white, bright, and simple with light wood furniture and soft linen details. This style maximizes natural light and makes even the smallest kitchen feel larger and cleaner.
Layer different shades of white and cream to prevent the space from looking cold or sterile. It creates a clean blank slate feeling for your morning routine.
- Budget $200 to $500 for a basic minimal setup.
- Use bleach-safe fabrics or slipcovers for easy maintenance.
- Incorporate white oak or ash wood to add subtle warmth.
Best shortcut: Use outdoor-rated white fabrics for cushions to resist stains and fading from the sun.
25. Charming Cottage Style Nook
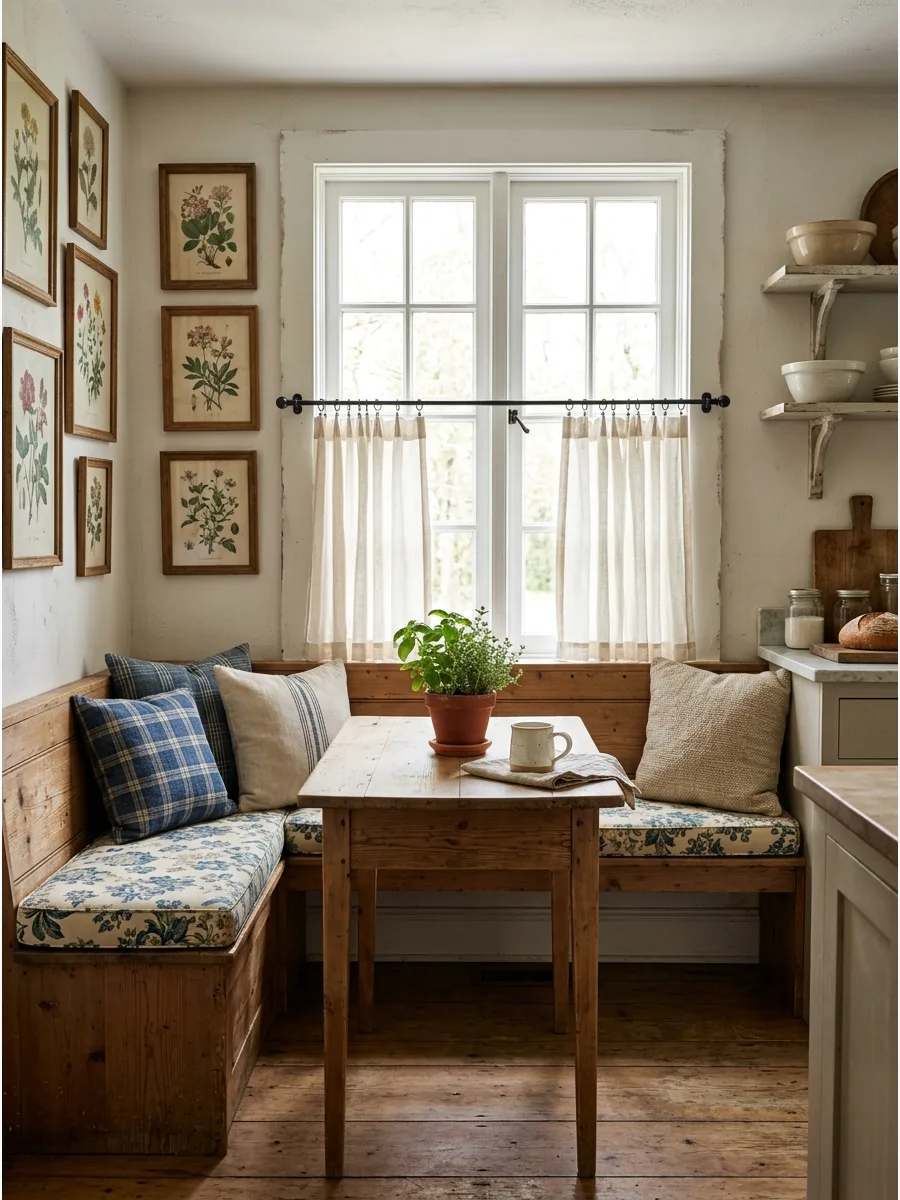
Use a wood table and patterned cushions to create a cozy, lived-in cottage atmosphere. Café curtains and vintage-style wall art add layers of charm that feel intentional and warm.
Mix floral or plaid fabrics to give the space a collected-over-time appearance. This look works best when it feels a little bit imperfect and very comfortable.
- Costs $100 to $300 using thrifted finds and new fabric.
- Install the curtain rod at mid-window height for privacy and light.
- Use iron-on hem tape for a quick no-sew curtain solution.
Quick win: Scour local thrift stores for mismatched wooden chairs to add to the cottage vibe.
26. English Cottage Floral Nook
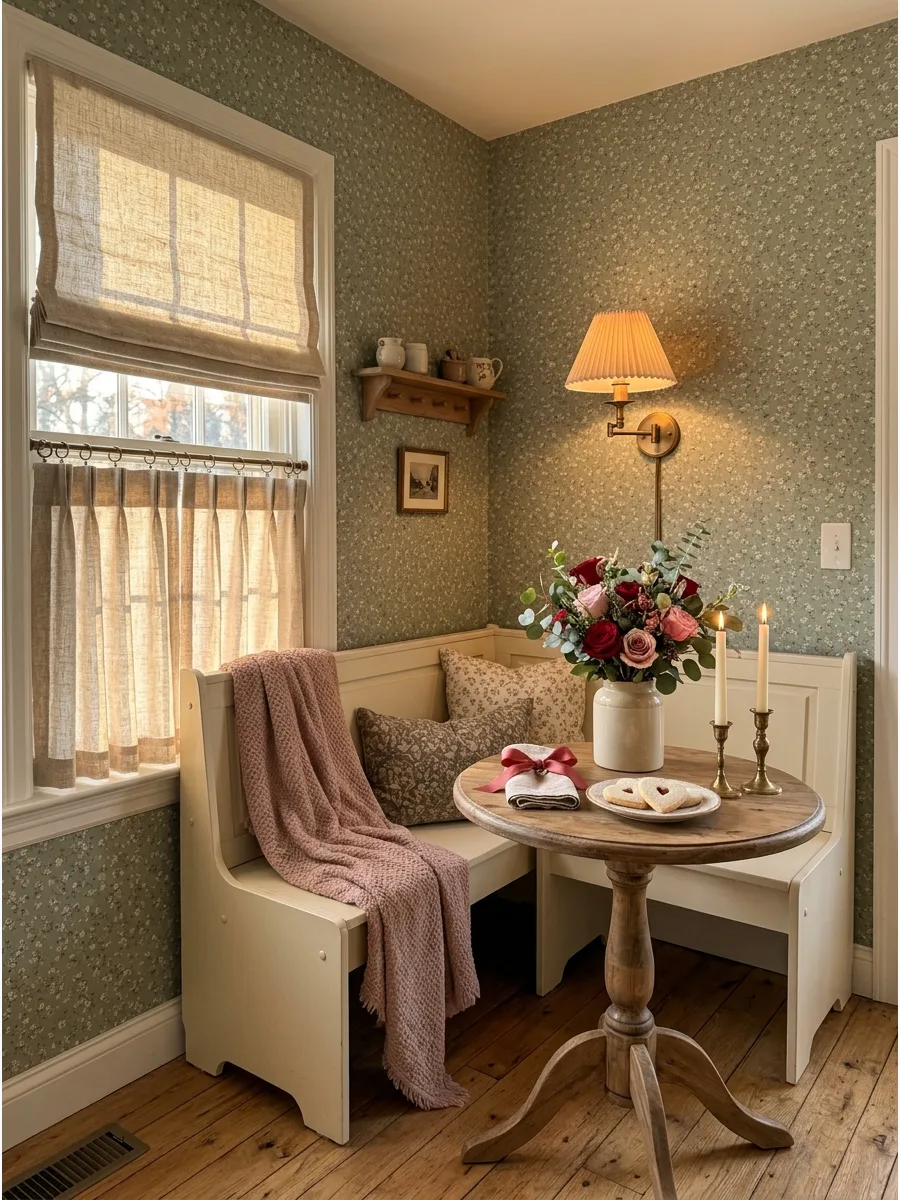
Add floral wallpaper and painted wood furniture for a classic, traditional English look. This style is all about comfort and heritage, making the kitchen feel like the heart of the home.
Choose a small-scale wallpaper pattern to keep the nook from feeling overwhelmed by the print. It creates a sophisticated yet cozy hidden corner.
- Wallpaper typically costs $100 to $250 per nook area.
- Use peel-and-stick wallpaper for an easy-to-remove renter option.
- Match your bench paint to a specific color found in the wallpaper pattern.
Most people skip this: Use a pleated lampshade on your wall sconce to lean into the traditional English aesthetic.
27. Vintage Lived In Corner
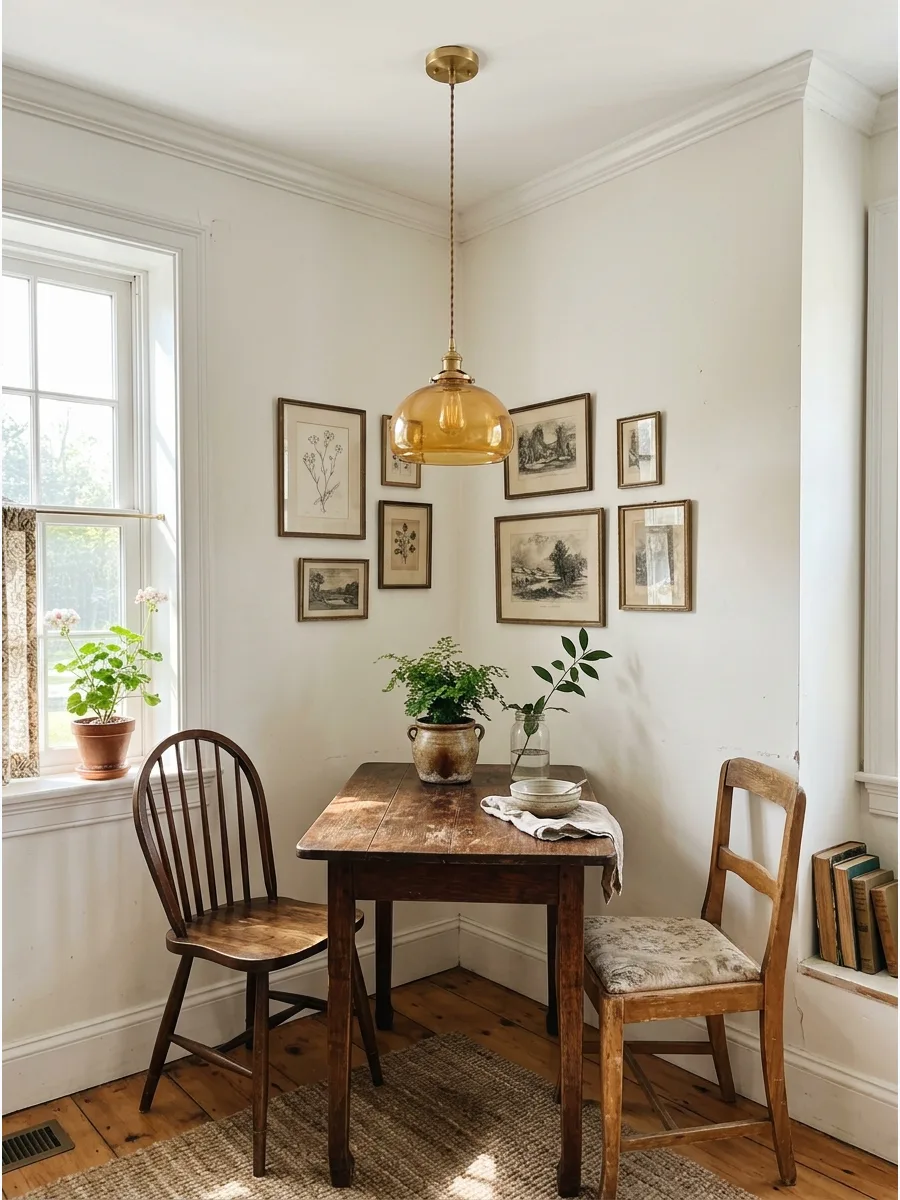
Use antique chairs and a secondhand table to give your kitchen instant character and history. Warm lighting and framed art make the space feel like it has a story to tell.
Look for furniture with good bones that can be refreshed with a light sanding or new upholstery. It is an eco-friendly way to style a space without buying everything new.
- Variable budget depending on thrift store or estate sale finds.
- Apply a fresh coat of furniture wax to protect and shine old wood.
- Check local online marketplaces for unique one-of-a-kind pieces.
Best shortcut: Use a vintage rug with a busy pattern to hide crumbs and spills effectively.
28. Warm Dark Wood Nook
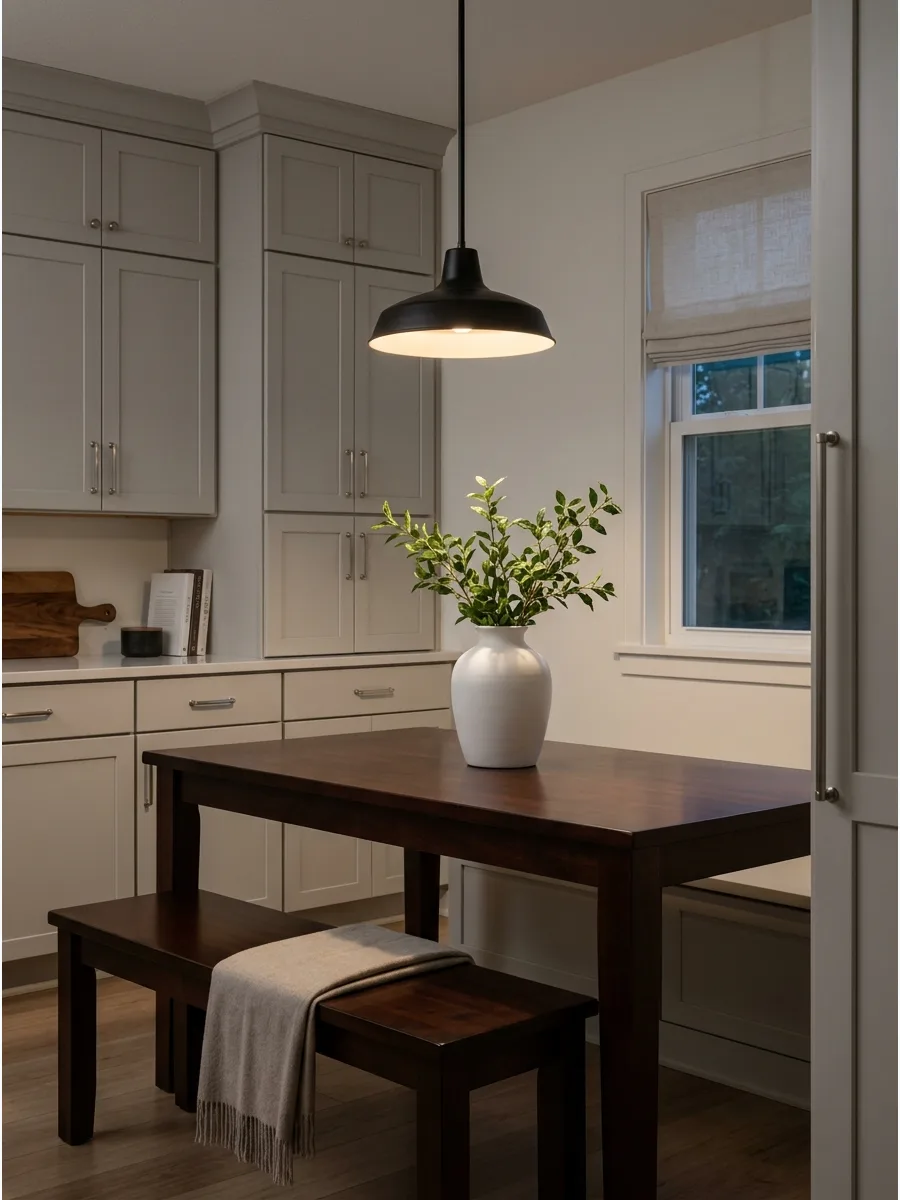
Use a dark wood table or bench to bring immediate warmth and character to a modern kitchen. The rich tones provide a beautiful contrast to white or light gray cabinets.
Balance the dark wood with light-colored walls or bright window treatments to keep the corner from feeling too dark. It adds a sense of timelessness and sturdiness to the room.
- Dark wood furniture sets usually range from $400 to $1,000.
- Dark surfaces require regular dusting as they show debris more easily.
- Use coasters consistently to prevent white heat rings on the dark finish.
Quick win: Use a wood touch-up marker to hide small scratches on dark furniture instantly.
29. Collected Mixed Chair Nook
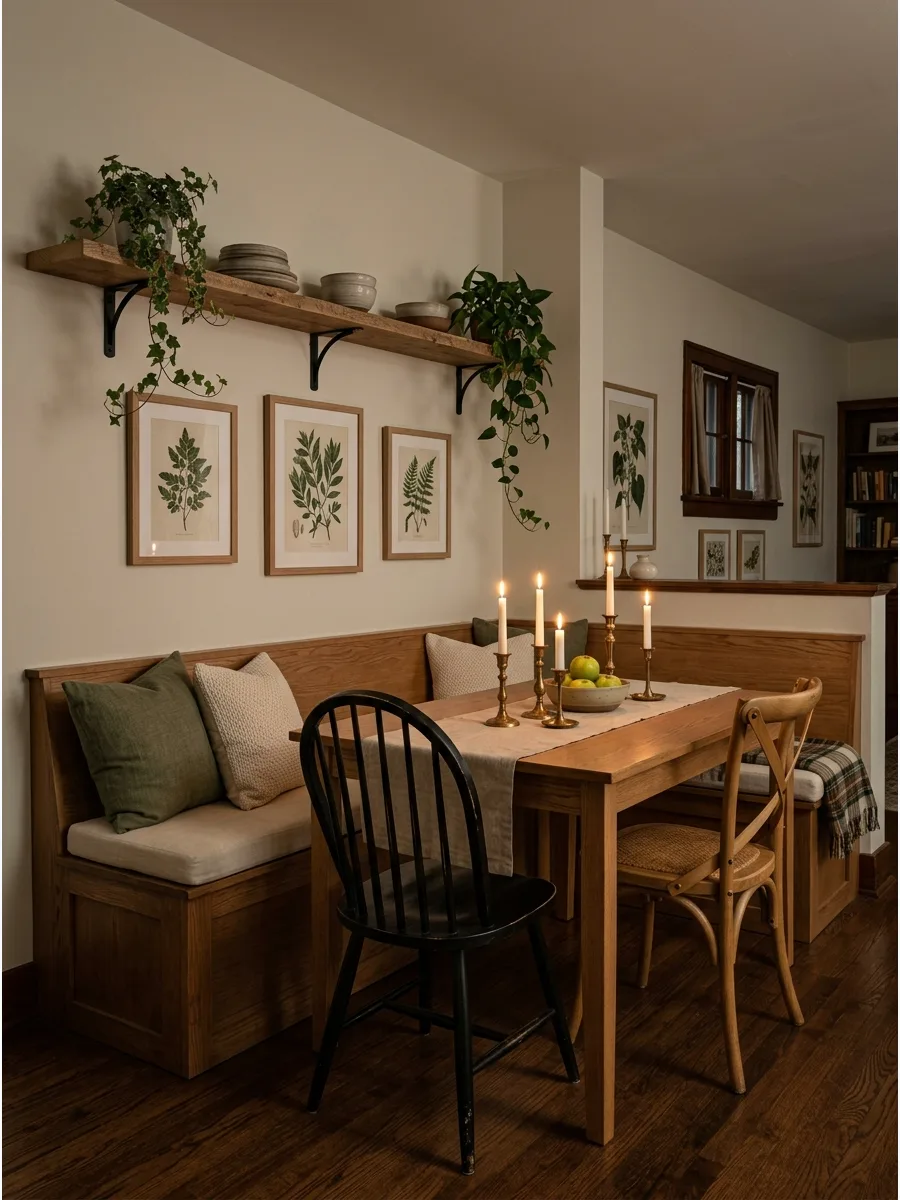
Pair a bench with two different chairs for a more relaxed and less perfect look. This approach is great for eclectic homes where matching sets feel too formal or stiff.
Keep the chairs in the same color family or material to make the mismatched look feel intentional. It allows you to use favorite pieces you already own while adding personality.
- Costs $0 to $200 depending on if you already own the chairs.
- Simply rearrange existing household furniture to test the look.
- Ensure chair seat heights are within one inch of each other for comfort.
Most people skip this: Ensure the highest chair back does not block the view or light from a nearby window.
30. Pillow Filled Cozy Nook
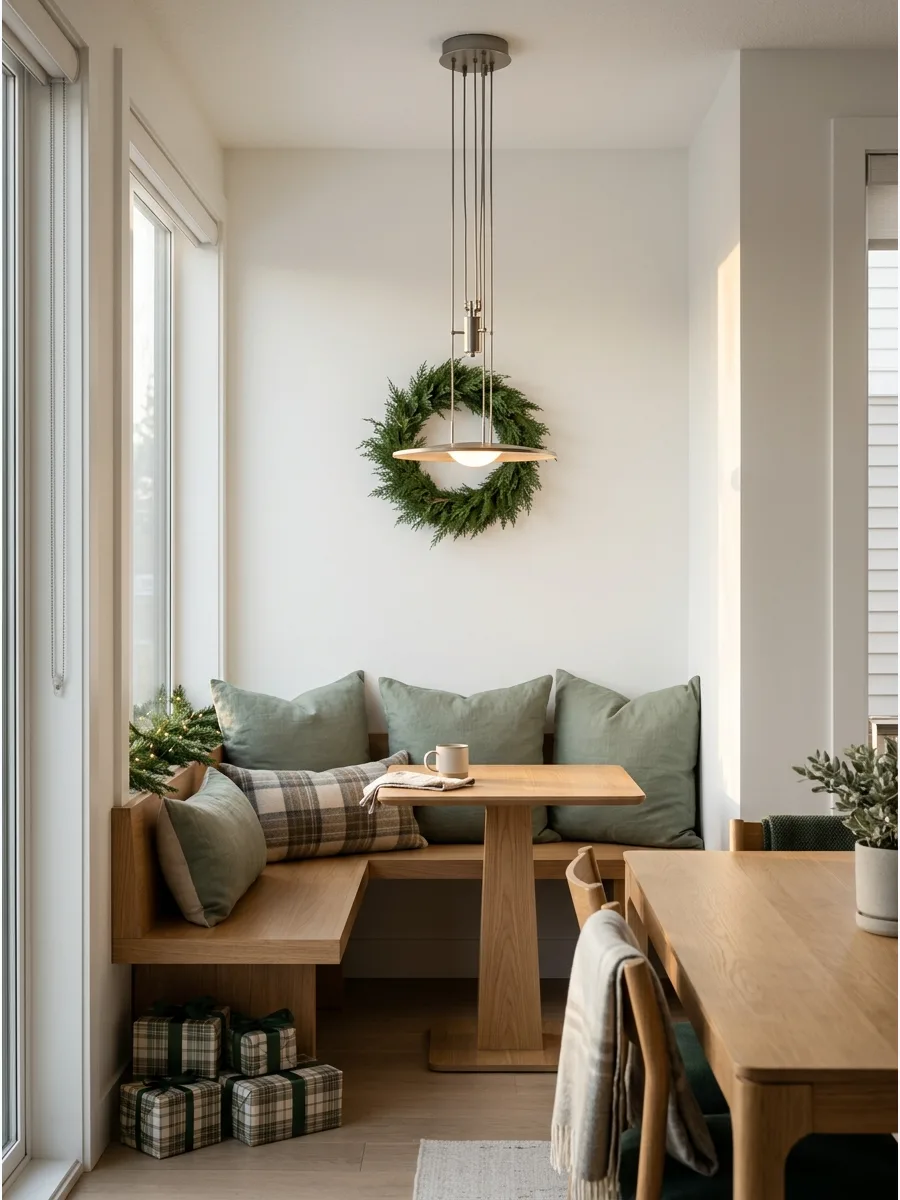
Add plenty of throw pillows to the bench to make the nook feel softer and more styled. This is the easiest way to change the look of the space for different seasons or holidays.
Use a mix of sizes and textures like velvet, linen, and wool to create a high-end look. It turns a hard wooden bench into a comfortable spot for lounging.
- A set of quality pillow covers costs $50 to $150.
- Setup takes less than 5 minutes once you have the inserts.
- Use machine-washable pillow covers for easy maintenance in a kitchen.
Best shortcut: Use feather inserts instead of polyester for a choppable look that stays in place.
31. Cozy Café Breakfast Nook
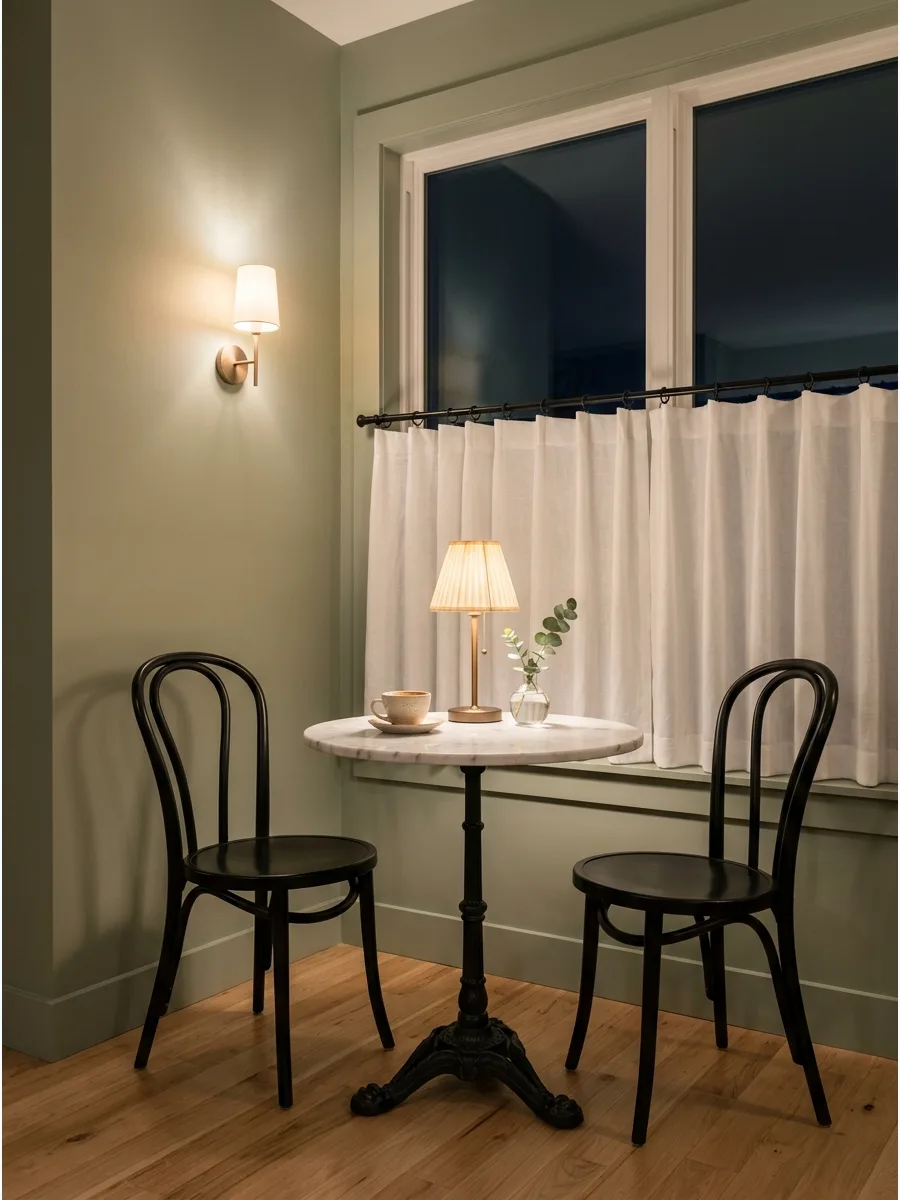
Recreate the feel of a neighborhood bistro by using a small marble-topped table and bentwood chairs. This setup focuses on high-contrast textures and a smaller footprint that fits almost anywhere.
Pair a bistro set with café curtains to block the view of the street while letting in plenty of morning light. It makes a standard kitchen corner feel like a destination for a first cup of coffee.
- A marble bistro set typically costs between $200 and $500 and takes 30 minutes to assemble.
- Position the table directly against a window to maximize natural light and street views.
- Swap marble for a wood-look laminate to save money while keeping the bistro silhouette.
Quick win: Use a small round rug to visually separate the café area from the rest of the kitchen floor.
32. Breakfast Nook With Bookshelves
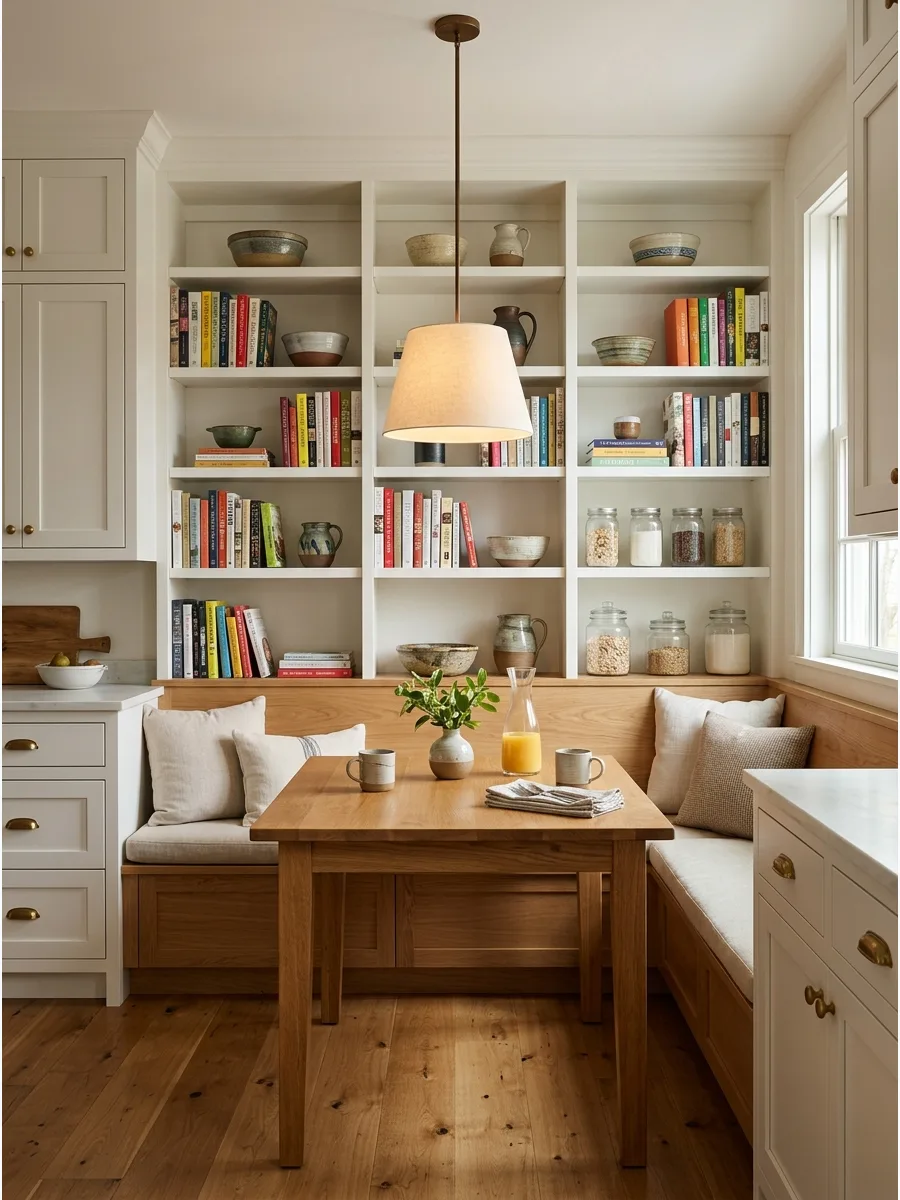
Surround a seating area with built-in shelving to keep favorite cookbooks and decorative bowls within arm's reach. This turns a simple dining spot into a library-inspired retreat that maximizes vertical wall space.
Install the lowest shelf at least 20 inches above the bench seat to ensure guests have plenty of head clearance. It is the smartest way to add storage to a kitchen without installing more heavy cabinets.
- Custom built-in shelves can take a weekend to install and cost $300 to $1,000 depending on materials.
- Place frequently used items on the middle shelves and decorative pieces on the top to reduce reaching.
- Use freestanding bookshelves instead of built-ins for a renter-friendly version that moves with you.
Most people skip this: Paint the back of the bookshelves a contrasting color to make the cookbooks and decor pop.
33. Wallpaper Breakfast Nook
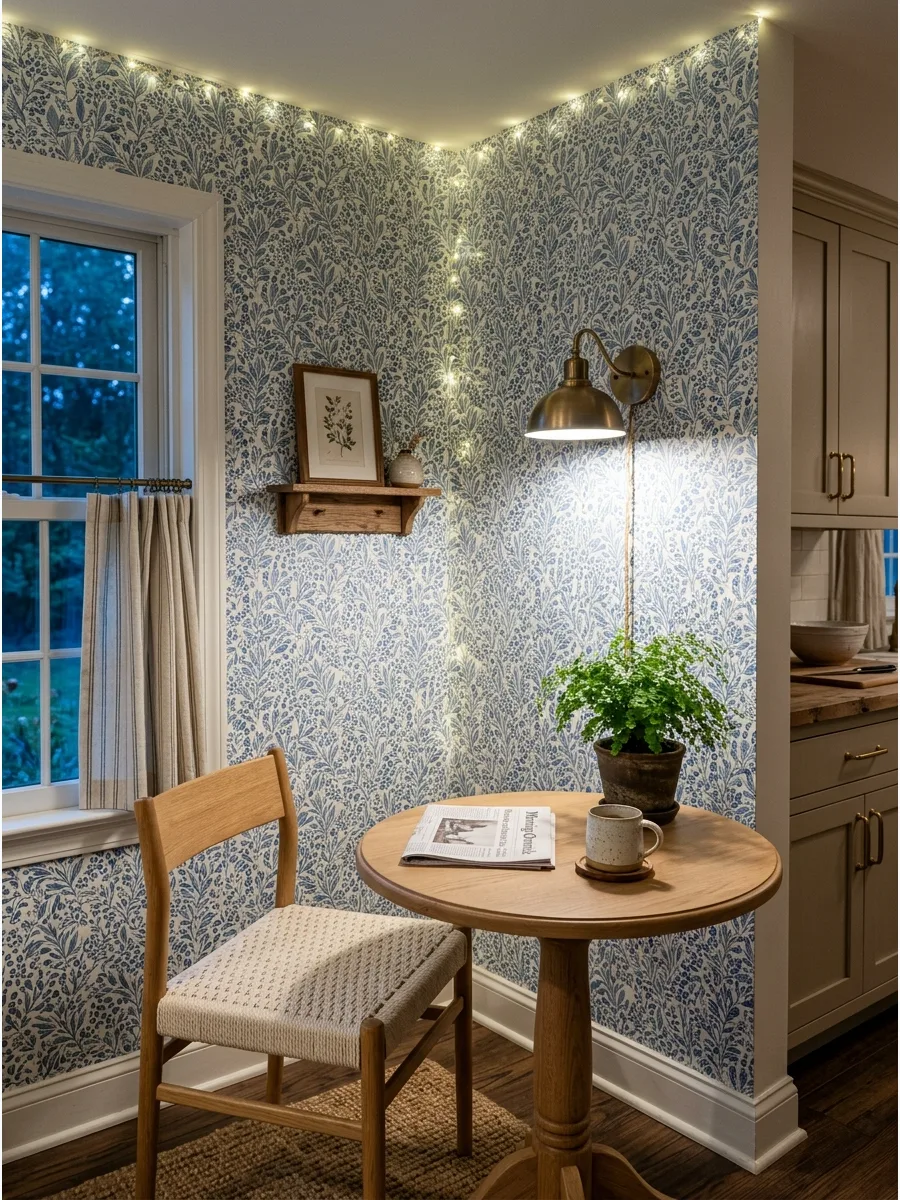
Use a bold pattern on the walls to define the dining area as its own separate room within the kitchen. A high-quality vinyl or wipeable wallpaper is best for spaces where food and drinks are served.
Select a pattern with a small scale to make a tight corner feel more expansive and detailed. Patterned walls hide scuffs from chair backs much better than plain paint ever will.
- One roll of high-quality wallpaper usually covers about 30 square feet and costs $50 to $150.
- Apply the wallpaper only to the two walls forming the corner to create a targeted focal point.
- Use peel-and-stick wallpaper if you are renting or want a temporary change for the season.
Best shortcut: Choose a pattern with a white background to keep the corner feeling bright even without a window.
34. Beadboard Breakfast Nook
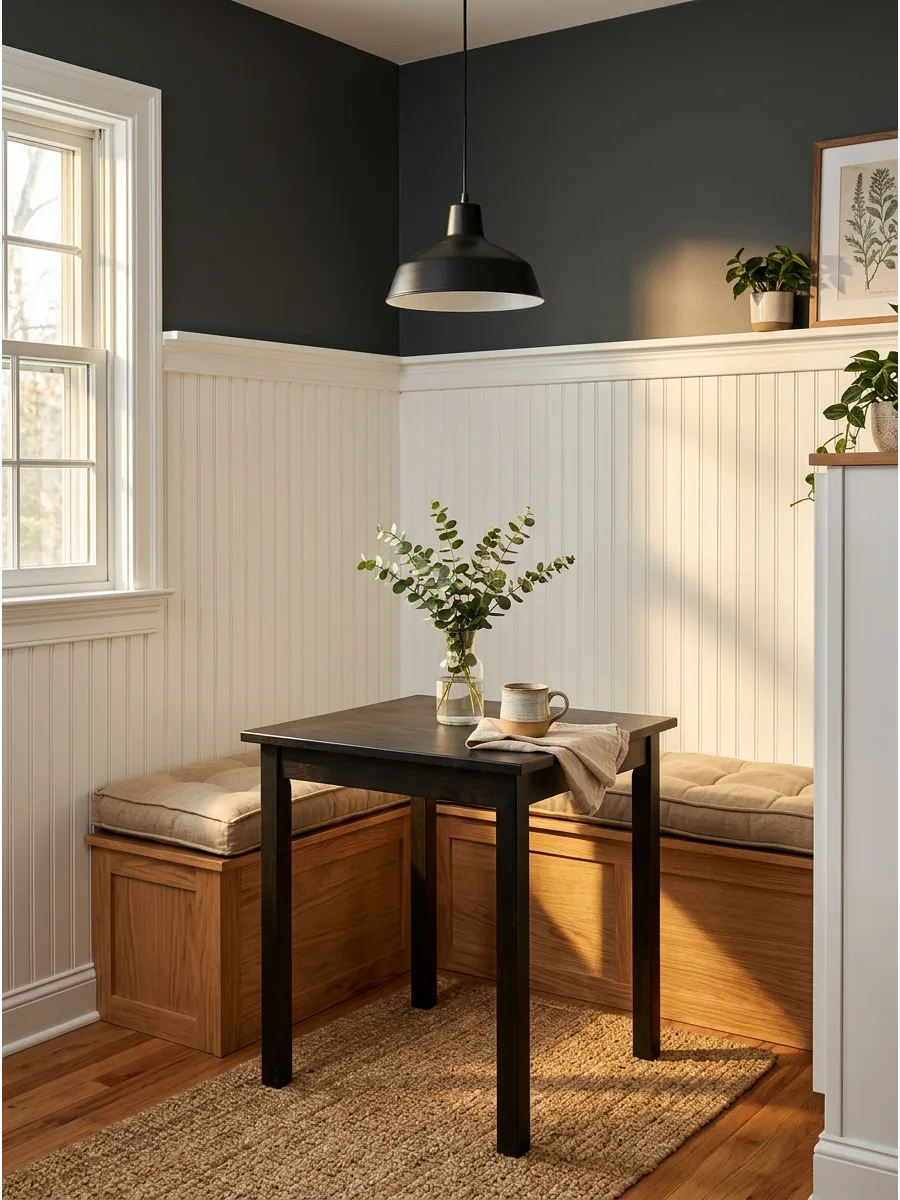
Adding beadboard paneling behind a bench provides a classic, durable surface that handles the wear and tear of daily use. It brings a sense of architectural history to a newer home without a massive price tag.
Paint the beadboard with a semi-gloss finish to make it easy to wipe down after messy family meals. This texture adds a layer of finished quality that flat drywall simply cannot provide.
- Beadboard panels are affordable at $20 to $40 per sheet and can be installed in a single afternoon.
- Cap the top of the beadboard with a small ledge to hold spice jars or small framed prints.
- Use lightweight PVC beadboard strips for a DIY project that costs less than real wood.
Quick win: Match the beadboard color to the kitchen cabinets for a seamless, custom-built appearance.
35. Vertical Paneling Breakfast Nook
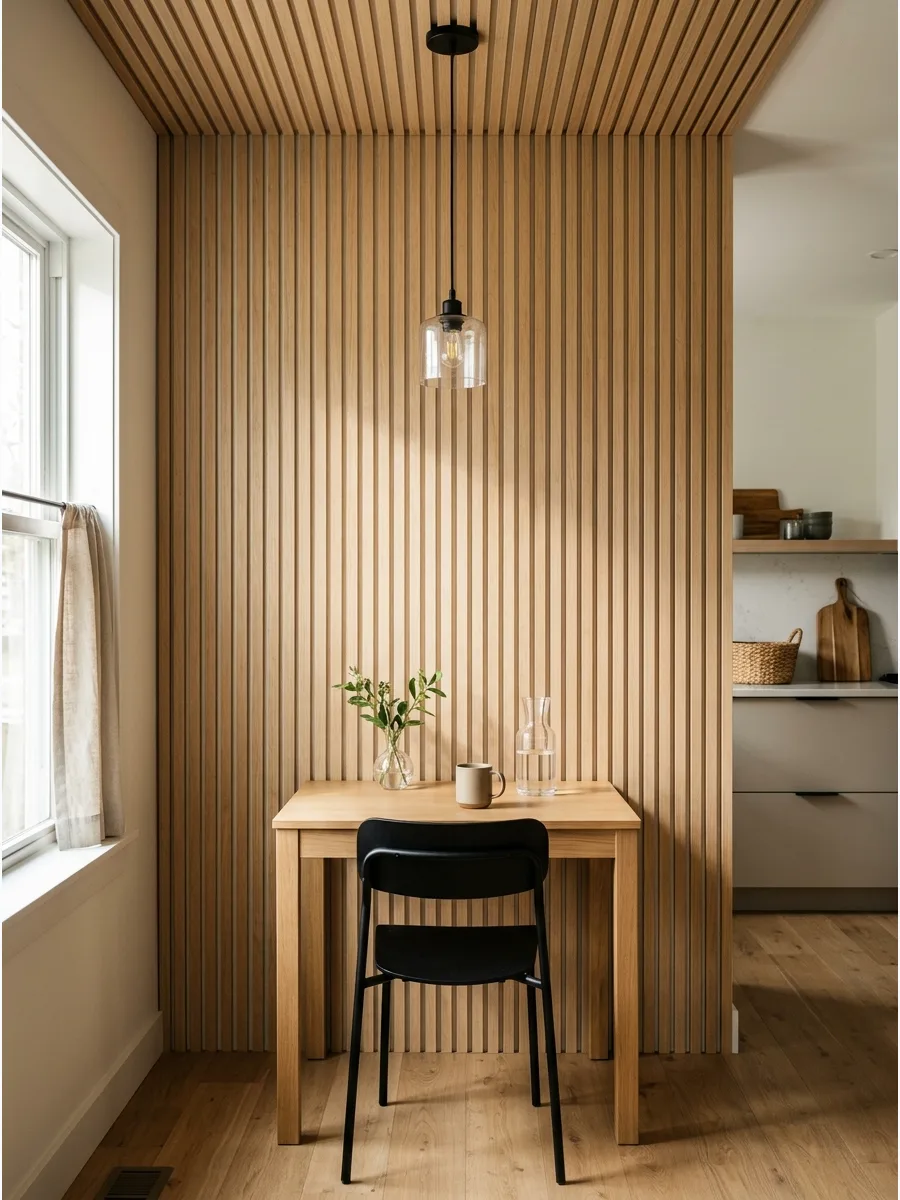
Tall, thin vertical slats or shiplap installed vertically can make a low ceiling feel much higher. This modern take on traditional paneling creates a clean, architectural backdrop for a simple table and chairs.
Run the paneling from the floor all the way to the ceiling to create a seamless, custom look. It is a great way to add visual interest without cluttering the walls with extra decor.
- Wood slat panels cost $100 to $300 per section and install quickly with construction adhesive and nails.
- Space the slats about half an inch apart to create deep shadows that add texture to the wall.
- Use peel-and-stick wood planks to get the look without using heavy power tools or saws.
Most people skip this: Use a dark stain on the slats to create a moody, restaurant-style atmosphere in the evening.
36. Painted Accent Wall Nook
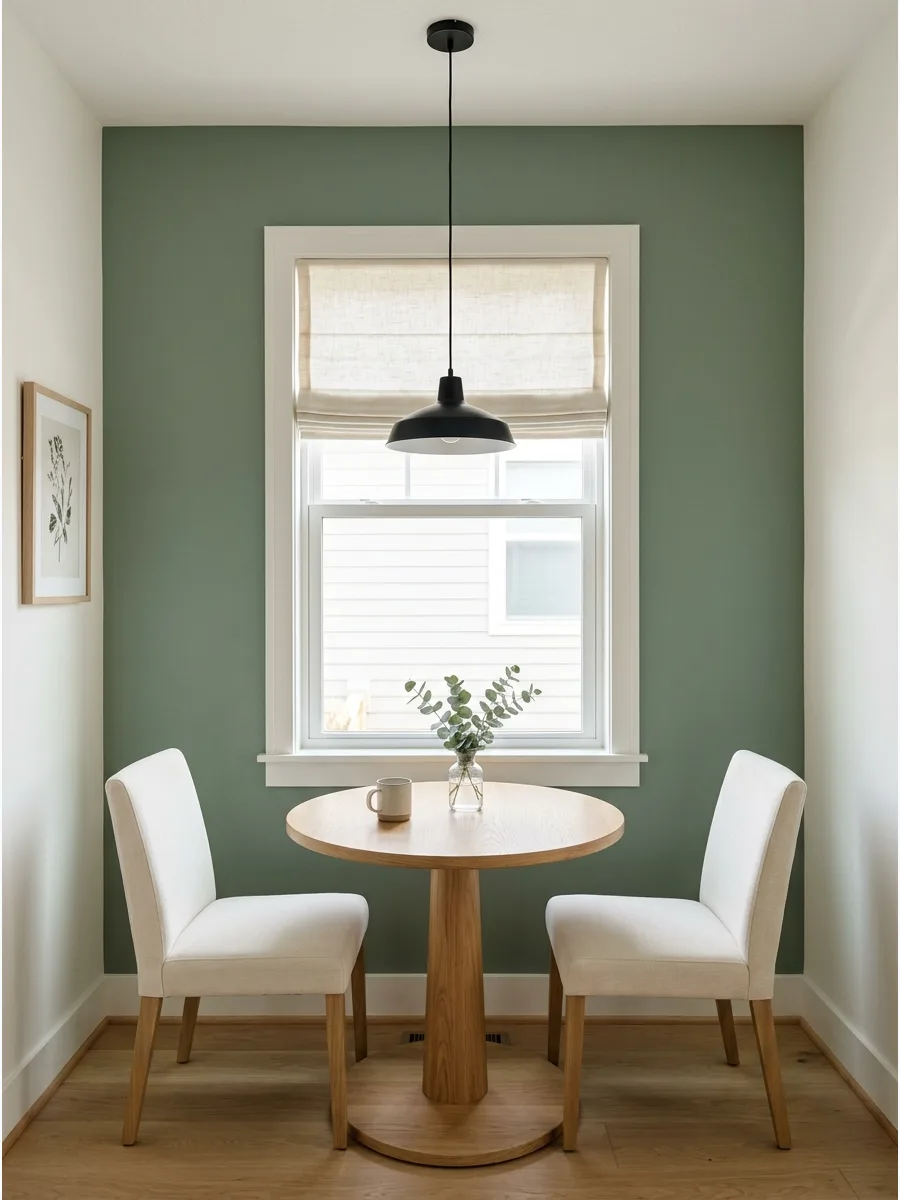
A single wall of color behind your seating helps ground the furniture and gives the nook a sense of purpose. Choose a warm, appetizing shade like sage green or terracotta to create a cozy atmosphere.
Use a matte or eggshell finish to keep the light soft and inviting during breakfast hours. A dark accent wall makes white or light wood furniture pop beautifully.
- A gallon of high-end paint costs $50 to $80 and is enough to cover a large breakfast corner.
- Extend the paint onto the ceiling above the table to create a more intimate, tucked-in feeling.
- Choose a removable wall decal in a solid color for a low-commitment accent if you are renting.
Best shortcut: Paint the wall two shades darker than the rest of the kitchen for subtle, sophisticated depth.
37. Color-Drenched Breakfast Nook
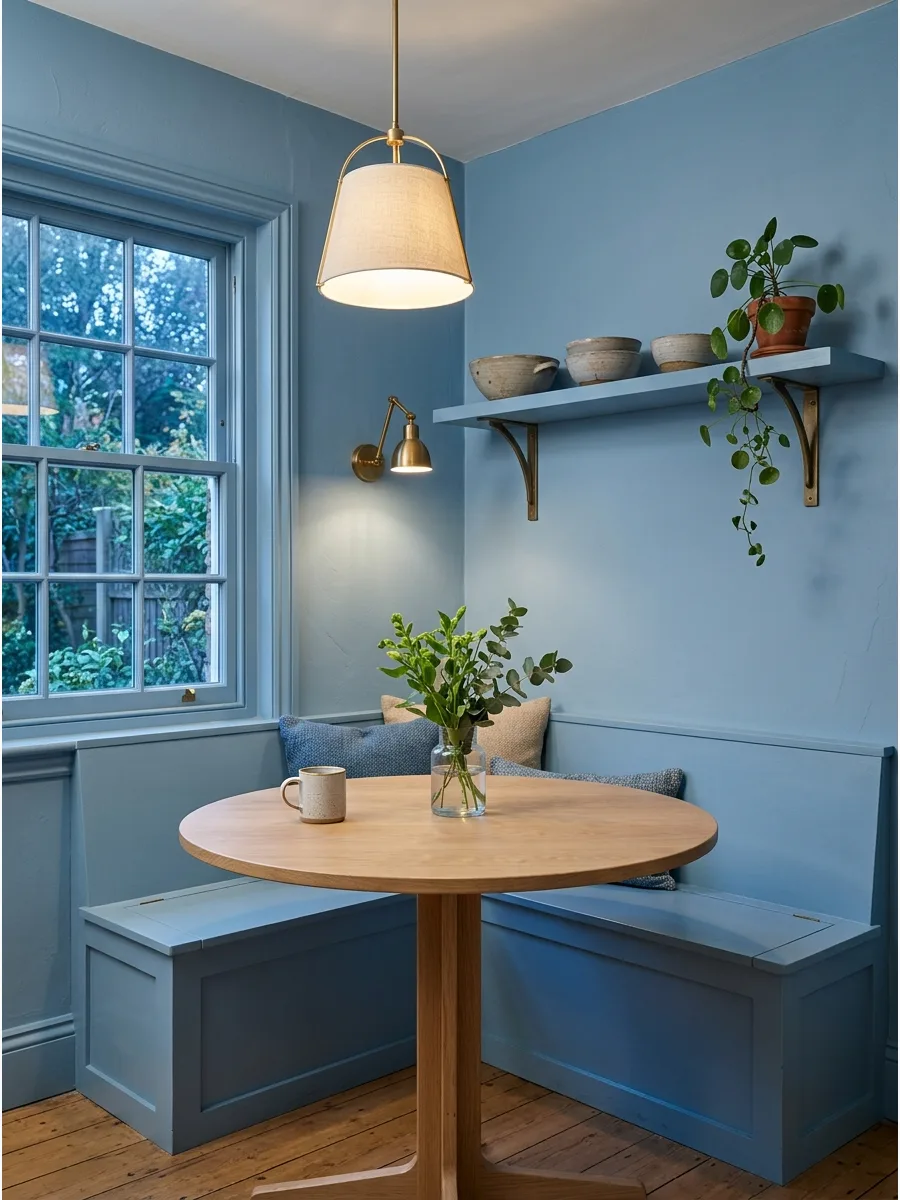
For a high-end designer look, paint the walls, the trim, and the built-in bench all the same color. This technique makes a small area feel more intentional and hides the visual clutter of different materials.
Opt for a mid-tone blue or warm taupe to keep the space from feeling too heavy or dark. It creates a cohesive envelope effect that makes the morning routine feel much more luxurious.
- Plan for two days of work to ensure the paint cures properly on the bench and the wall surfaces.
- Use a paint with a built-in primer to ensure even coverage across different materials like wood and drywall.
- Paint just the furniture if you are not allowed to change the color of the kitchen walls.
Most people skip this: Use a satin finish on the bench for durability and a matte finish on the walls for a modern contrast.
38. Arched Breakfast Nook Wall
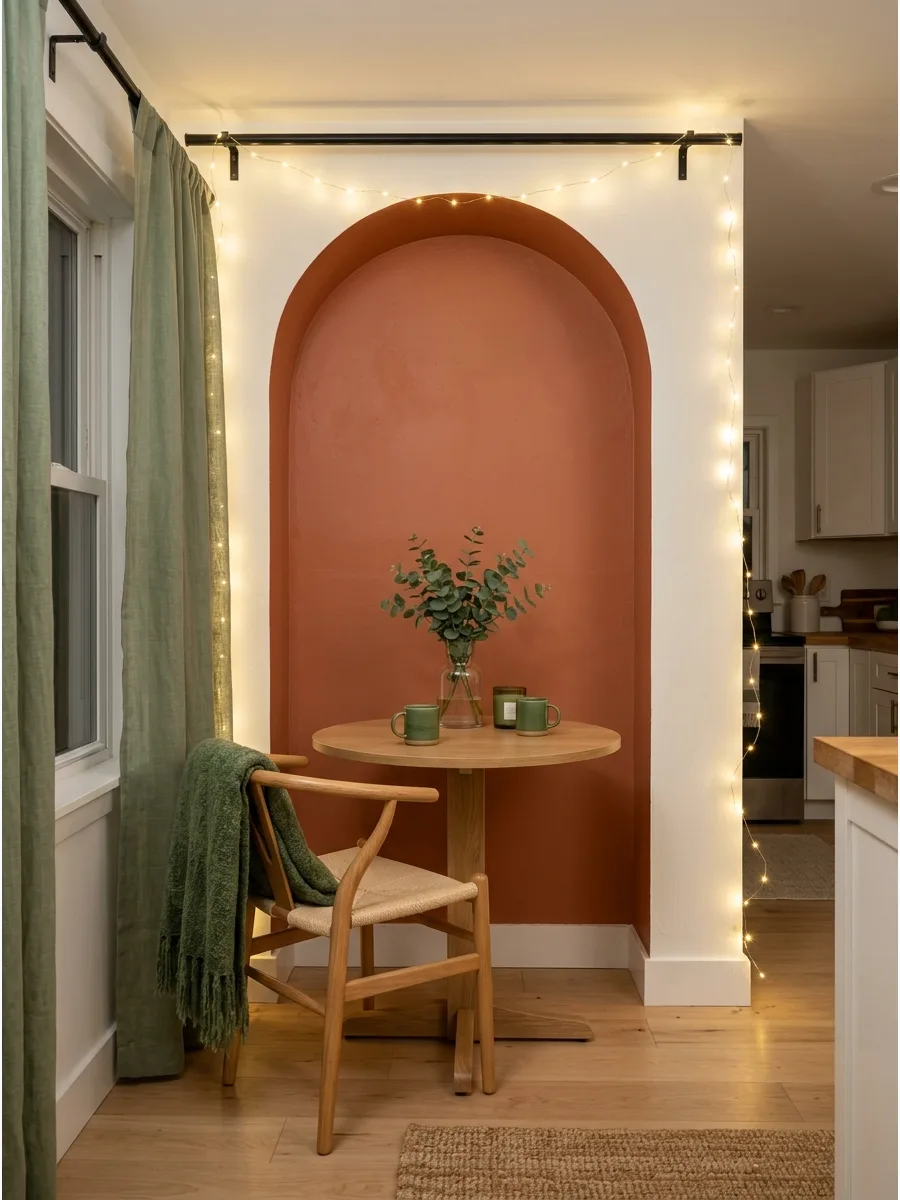
Painting or framing a shallow arch behind the table creates a soft, architectural focal point in a room full of hard edges. This shape mimics the cozy feeling of a restaurant booth and draws the eye upward.
Use a slightly darker shade of the wall color inside the arch to create a sense of depth and dimension. It is a simple weekend project that makes a standard kitchen look custom-built.
- A pint of paint and a steady hand are all you need for this project, costing less than $30.
- Use a string and a pencil to trace a perfect semi-circle on the wall before you start painting.
- Use a large arched mirror to get the same rounded shape without using any paint on the walls.
Quick win: Center your light fixture exactly with the peak of the arch for a perfectly balanced look.
39. Gallery Wall Breakfast Nook
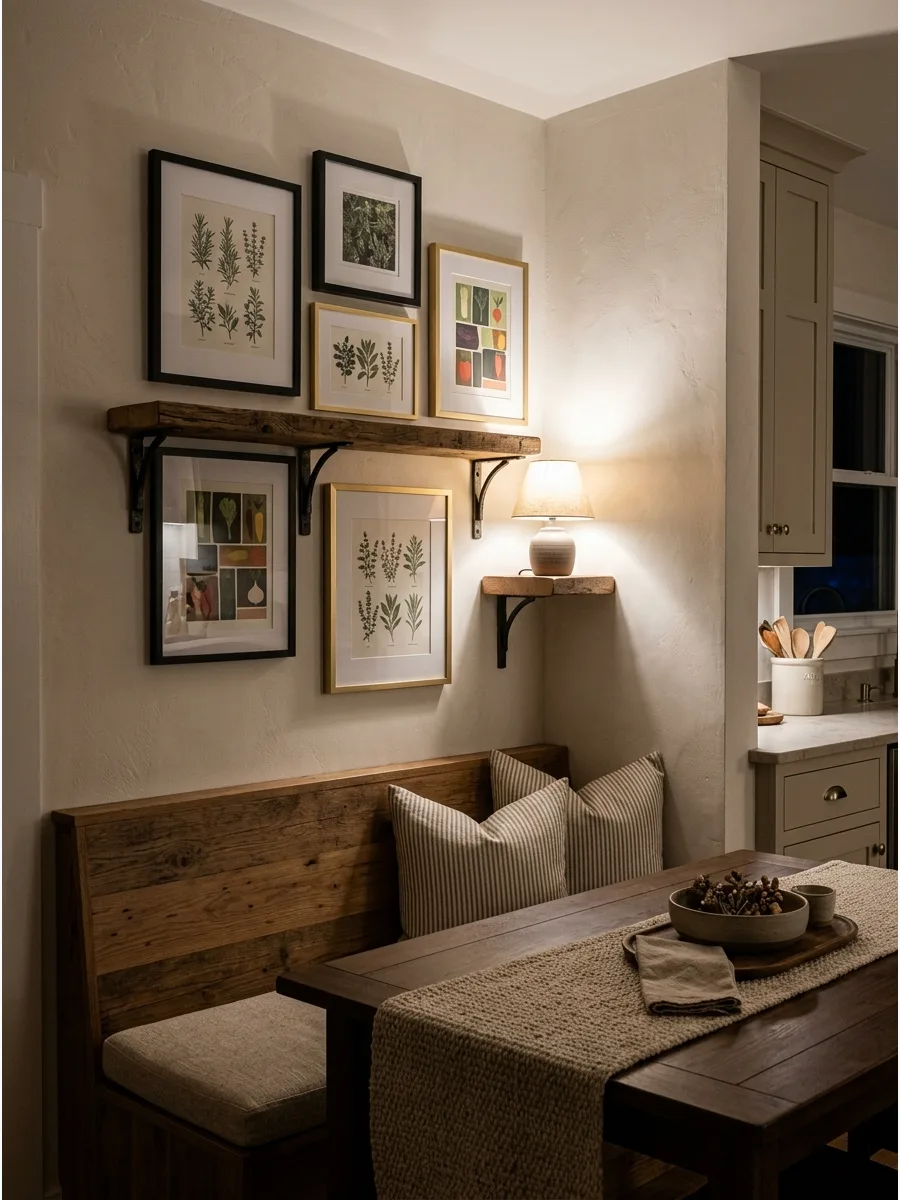
Personalize a dining spot by hanging a collection of framed art or family photos above the seating. A gallery wall adds character and makes the nook feel like a curated part of the home rather than an afterthought.
Keep the bottom row of frames at least 15 inches above the bench to prevent people from bumping them with their heads. Mixing different frame styles gives the space a relaxed, lived-in energy.
- Frame sets cost $40 to $100 and can be hung in under an hour with a basic level and hammer.
- Layout the frames on the floor first to find the best arrangement before driving nails into the wall.
- Use adhesive strips instead of nails to keep walls damage-free in a rental apartment.
Best shortcut: Use all-black frames with white mats for a clean, professional look that works with any decor style.
40. Picture Ledge Breakfast Nook
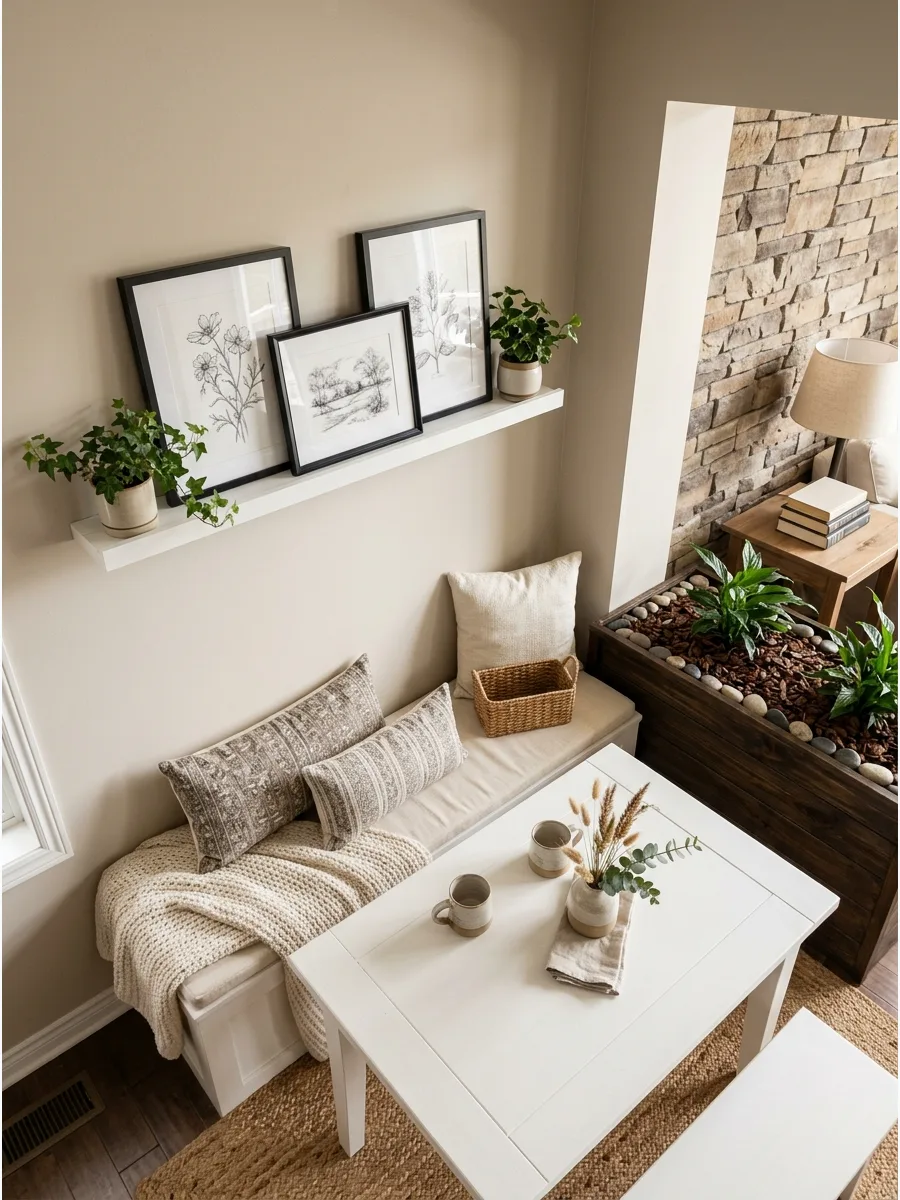
Install a shallow picture ledge above a bench for an easy way to rotate art and seasonal decor. This avoids the need for multiple nail holes and allows for leaning taller pieces for a layered look.
Choose a ledge that matches the finish of the dining table to create a cohesive design theme. It is the perfect solution for those who love to change their decor frequently.
- Picture ledges cost $20 to $50 and require only a few screws into wall studs for a secure hold.
- Overlap frames of different heights to create a casual, designer-approved layered effect.
- Use a narrow console table behind the bench if you cannot mount a ledge directly to the wall.
Most people skip this: Add a small trailing plant like a pothos to the ledge to bring life to the art display.
41. Statement Pendant Light Nook
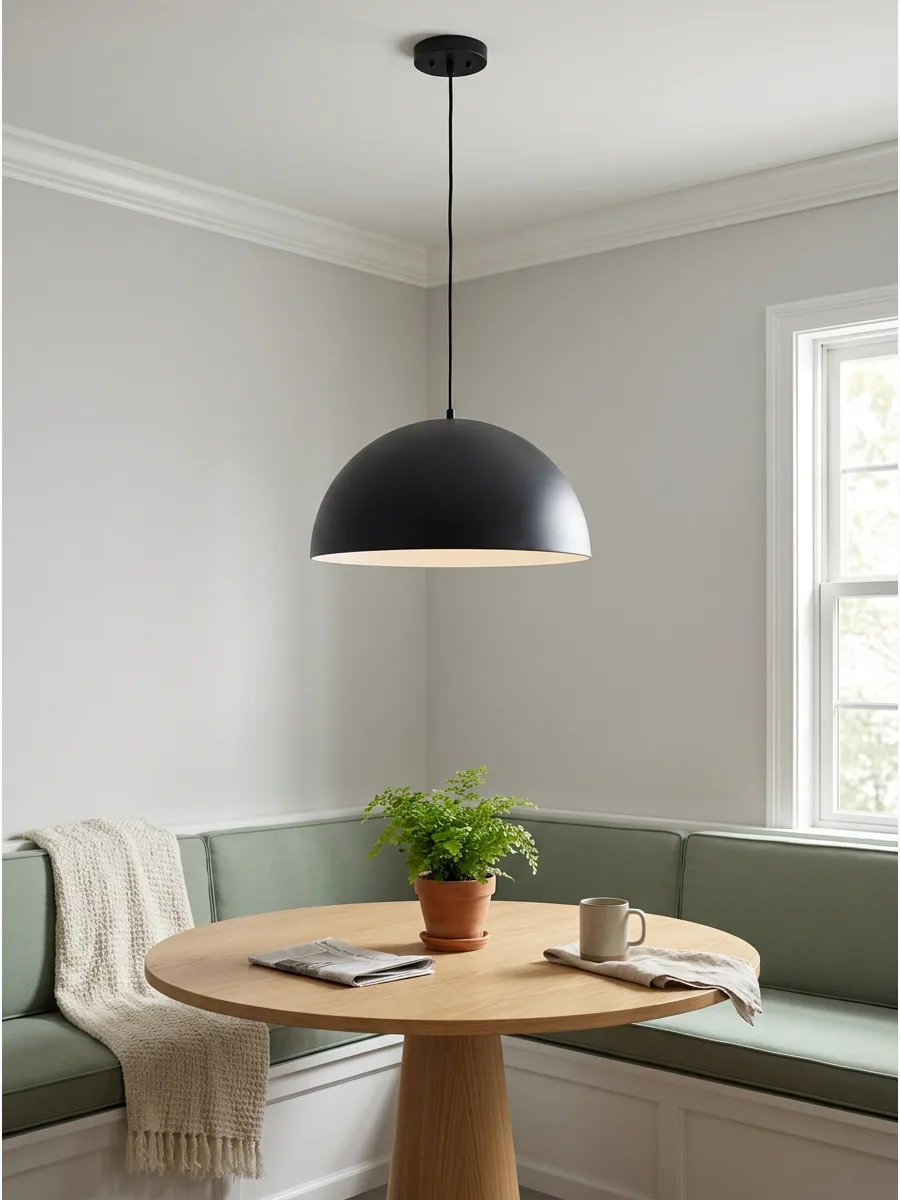
A large, eye-catching light fixture acts as an anchor for the entire nook, defining the space from above. It serves as the jewelry of the kitchen and provides essential task lighting for reading or eating.
Hang the bottom of the pendant roughly 30 to 36 inches above the table surface for the best visual balance. A bold light fixture can make even the most basic table look like a designer choice.
- Statement pendants range from $100 to $400 and usually require basic electrical knowledge to install.
- Choose a bulb with a warm color temperature (around 2700K) to create a cozy, inviting glow.
- Use a plug-in pendant light with a cord kit and ceiling hook to avoid expensive electrical work.
Quick win: Install a dimmer switch so you can adjust the light from bright morning sun to a soft dinner glow.
42. Wall Sconce Breakfast Nook
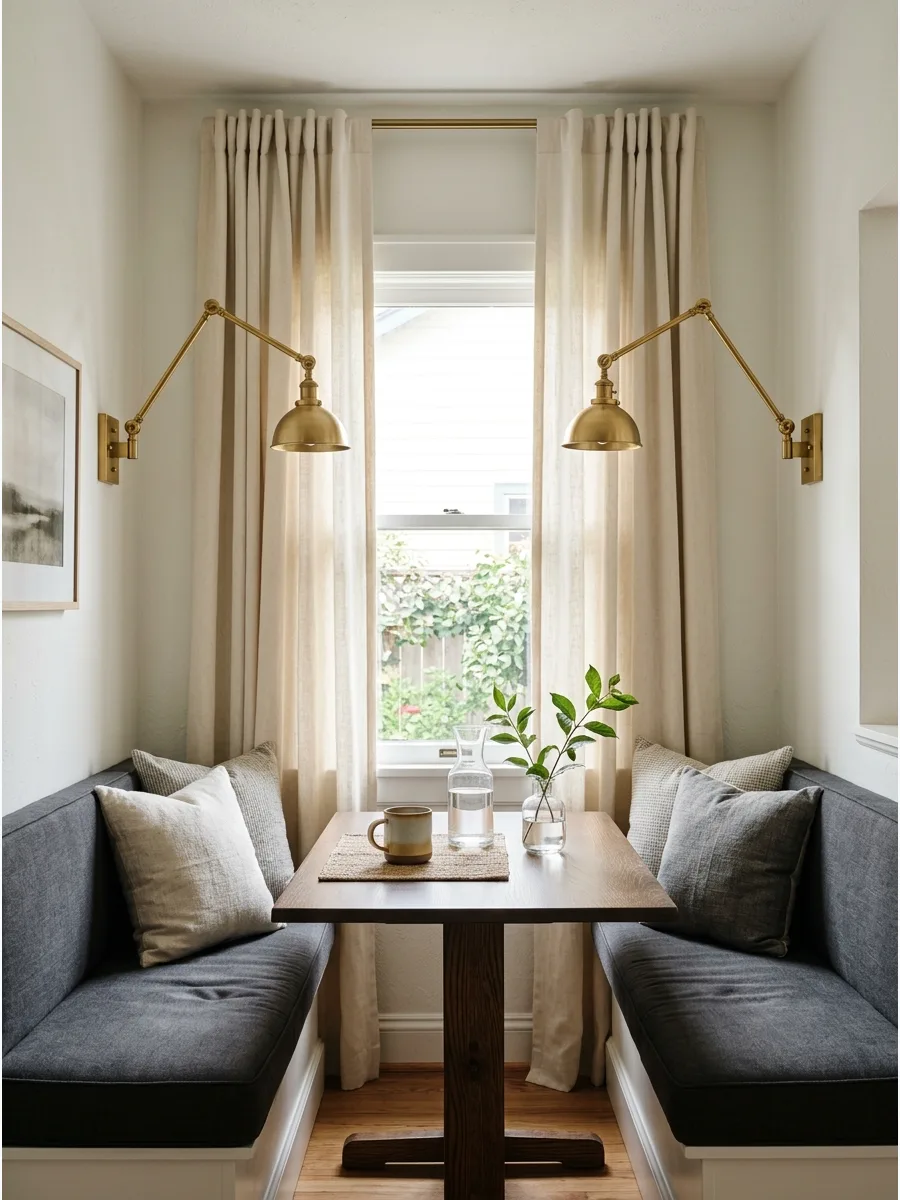
If you cannot hardwire a ceiling light, wall-mounted sconces are a brilliant way to add cozy, directional lighting. They free up table space and create a warm glow that is perfect for early morning coffee.
Position the sconces on either side of a window or centered over the bench for a symmetrical look. Swing-arm models are especially practical because the light can move exactly where it is needed.
- Battery-powered or plug-in sconces cost $50 to $150 and can be installed in 15 minutes.
- Mount the sconces at eye level when sitting to avoid harsh glare while you are eating.
- Look for battery-operated puck lights to put inside the sconces for a completely wire-free setup.
Best shortcut: Use sconces with fabric shades to diffuse the light and create a softer, more traditional look.
43. Woven Light Fixture Nook
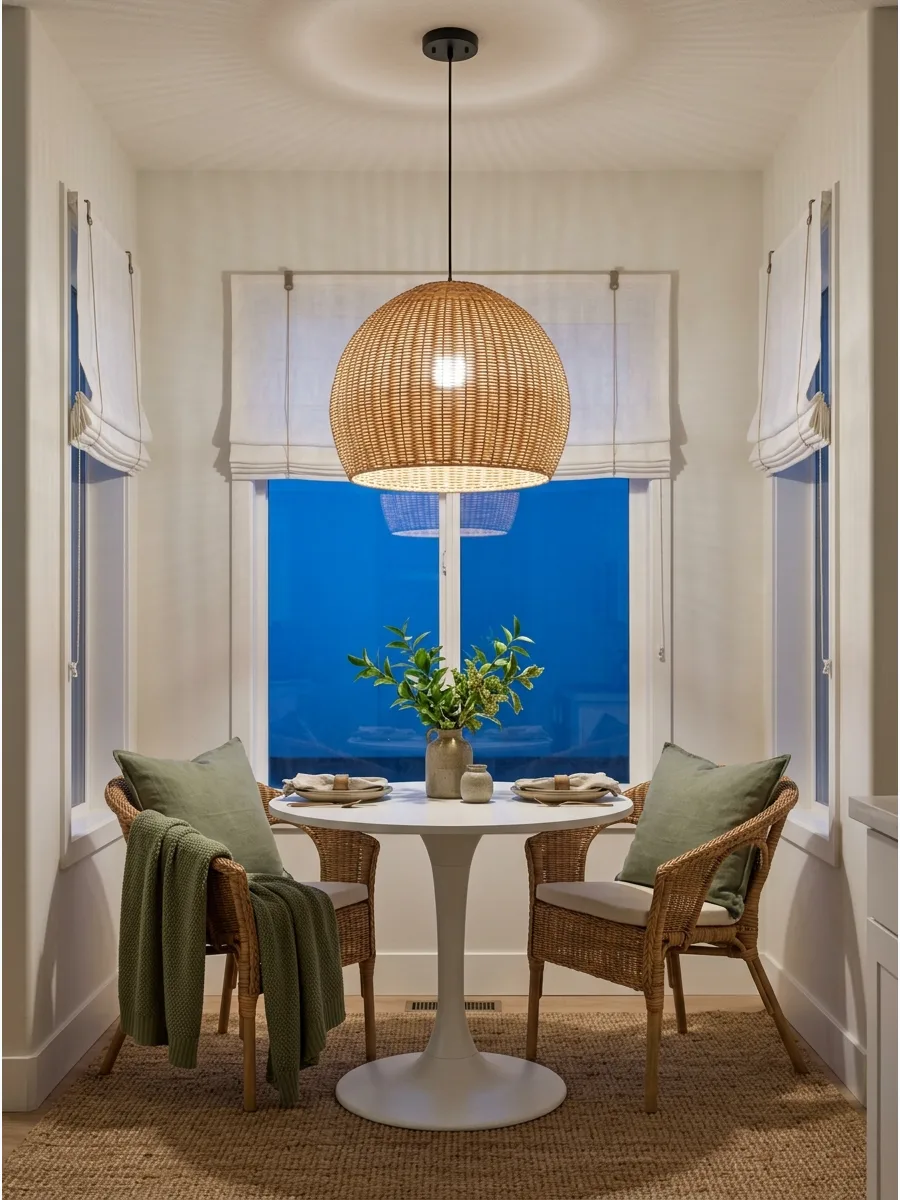
Bring natural texture into the kitchen with a rattan or wicker pendant light. These materials soften the look of hard counters and appliances while casting beautiful shadows on the walls.
Select a tightly woven shade if you want soft, diffused light rather than bright, direct glare. It adds an organic, relaxed vibe that makes any nook feel more like a vacation spot.
- Rattan pendants are widely available for $80 to $250 and are very lightweight for easy hanging.
- Pair the woven light with other natural materials like a jute rug or wooden bowls to complete the look.
- Choose a smaller woven shade if the kitchen has very low ceilings to avoid overwhelming the space.
Quick win: Use a clear Edison-style bulb inside a loose-weave pendant to create dramatic light patterns on the ceiling.
44. Café Curtain Breakfast Nook
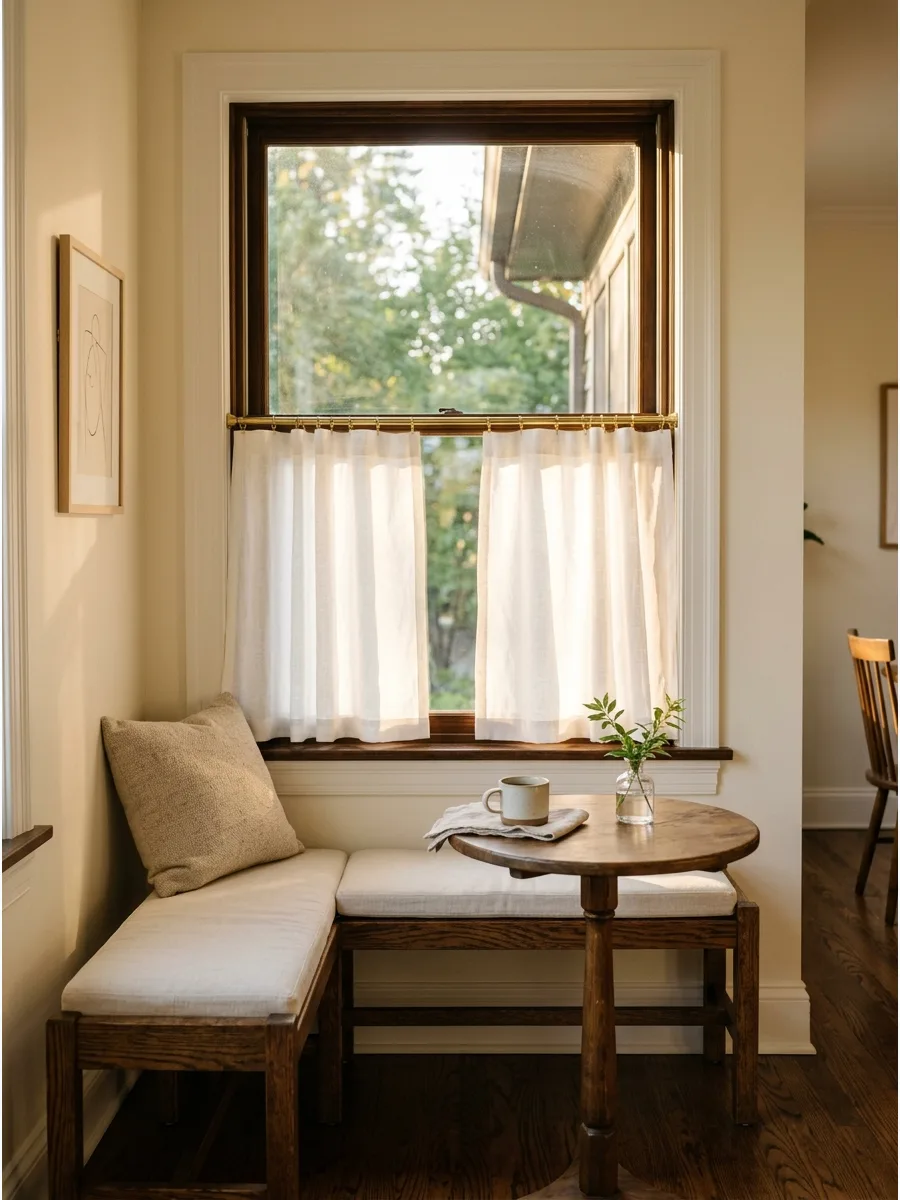
Café curtains cover only the bottom half of the window, providing privacy from neighbors while leaving the top open for sunlight. They add a soft, textile element that breaks up the hard surfaces of a kitchen.
Use a simple tension rod for an easy, no-drill installation that works perfectly for renters. Linen or cotton fabrics are the best choice for a light, airy feeling.
- Basic café curtains and a rod cost $30 to $60 and can be set up in under 10 minutes.
- Choose a fabric with a subtle stripe or floral pattern to add a touch of cottage charm to the nook.
- Use a clip-on curtain rod that attaches to the window frame for a tool-free install that leaves no marks.
Most people skip this: Hem the curtains so they sit exactly half an inch above the windowsill for a clean, tailored look.
45. Breakfast Nook With Rug
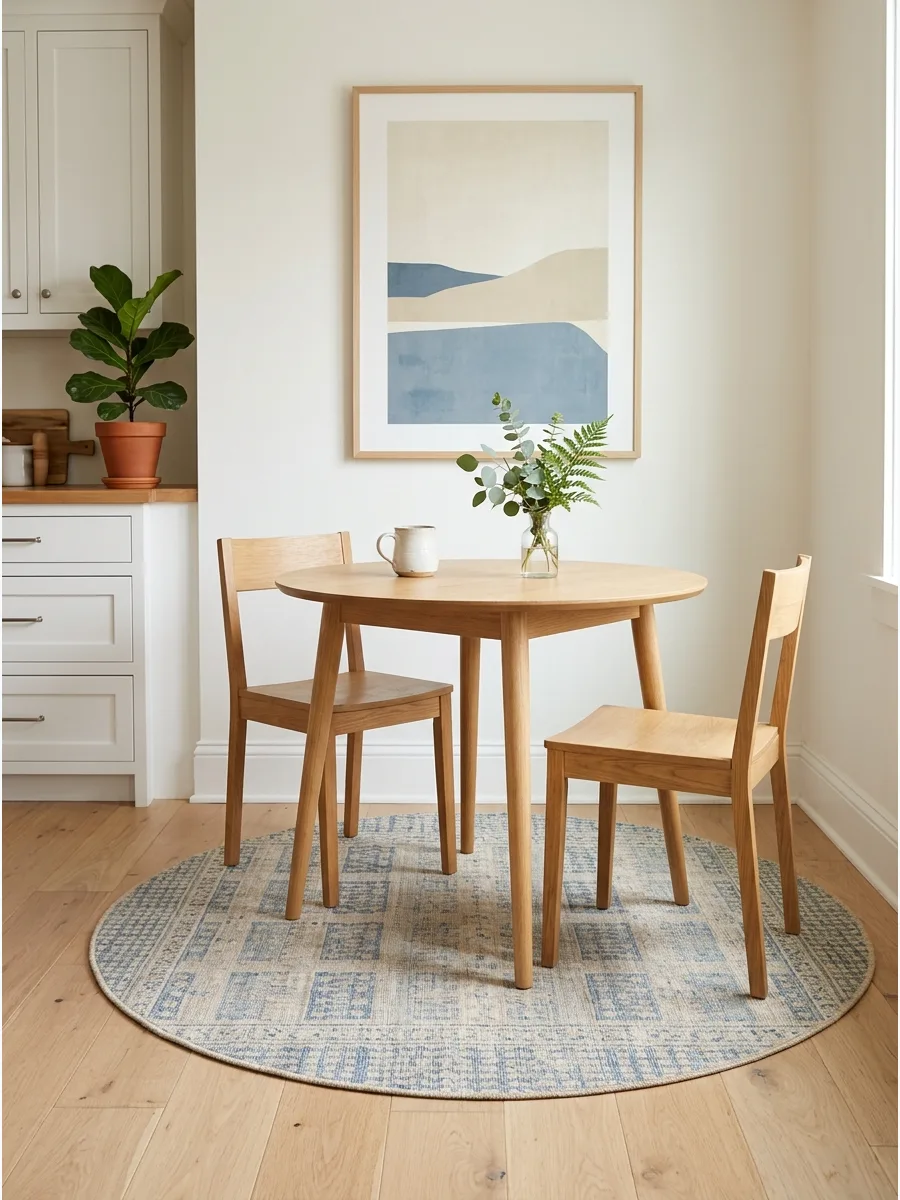
Placing a rug under a table and chairs helps define the dining zone and protects kitchen floors. A rug adds a layer of comfort underfoot and absorbs sound in a room that is often loud and echoey.
Choose a low-pile or washable rug to ensure that chairs can slide easily and spills are easy to clean. It is the fastest way to make a cold kitchen corner feel like a warm, finished room.
- Washable rugs in a dining size typically cost $100 to $250 and are worth the investment for high-traffic areas.
- Ensure the rug is large enough that all chair legs stay on the rug even when pulled out for sitting.
- Use an outdoor-rated rug for maximum durability and water resistance in a busy family kitchen.
Best shortcut: Use a rug pad underneath to prevent the rug from bunching up when people move their chairs.
46. Checkerboard Floor Breakfast Nook
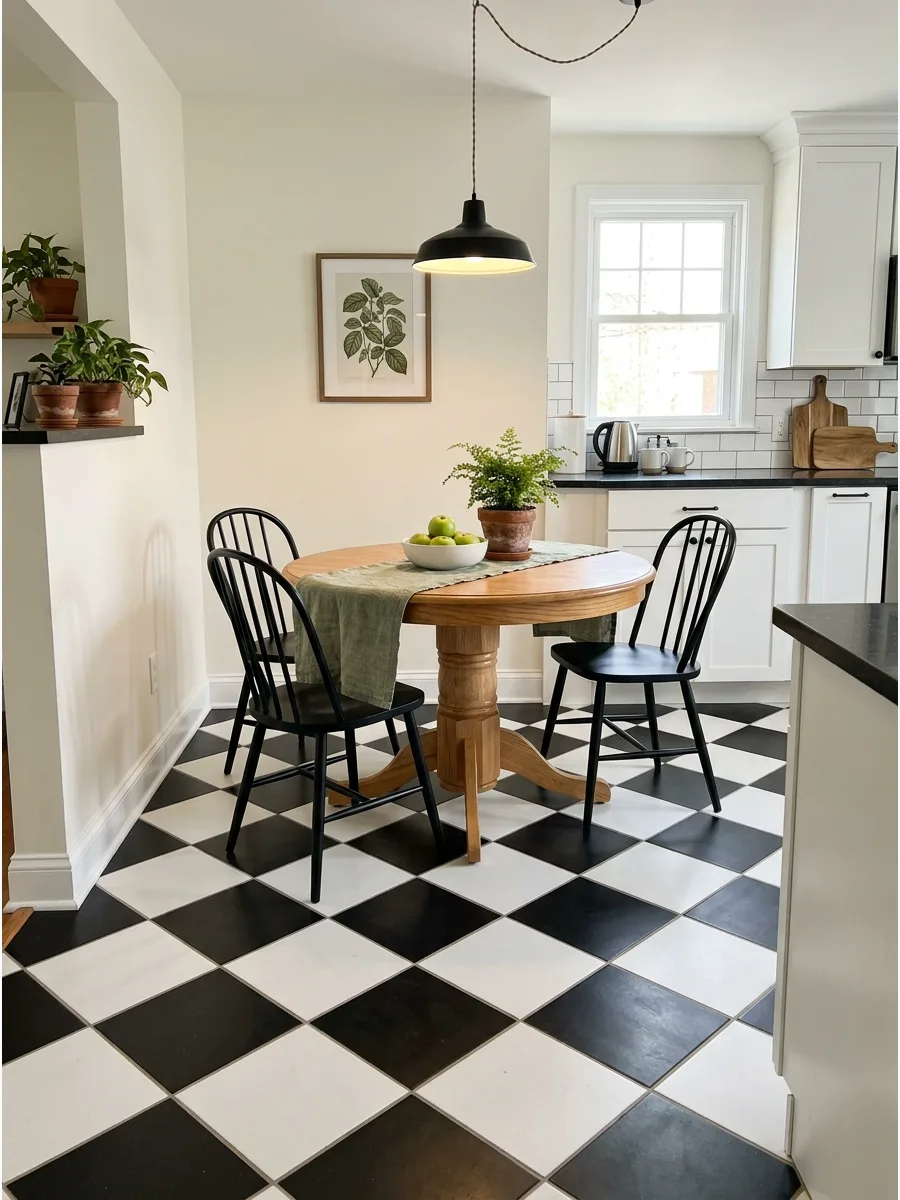
A classic checkerboard pattern on the floor instantly defines the dining zone without needing a bulky rug. This layout works best in a kitchen corner where the floor pattern acts as a visual boundary for the furniture.
Lay the tiles diagonally to make a small kitchen footprint feel wider and more intentional. Bold patterns on the floor require simple furniture to keep the room from feeling cluttered and busy.
- Expect to spend $100 to $500 and one weekend for a DIY peel-and-stick tile update.
- Align the center of the pattern with the center of the table for a balanced look.
- Use a checkerboard rug instead of permanent tile for a renter-friendly version of this style.
Quick win: Use peel-and-stick vinyl tiles for a low-cost weekend update that mimics the look of real marble or ceramic.
47. Plant-Filled Breakfast Nook
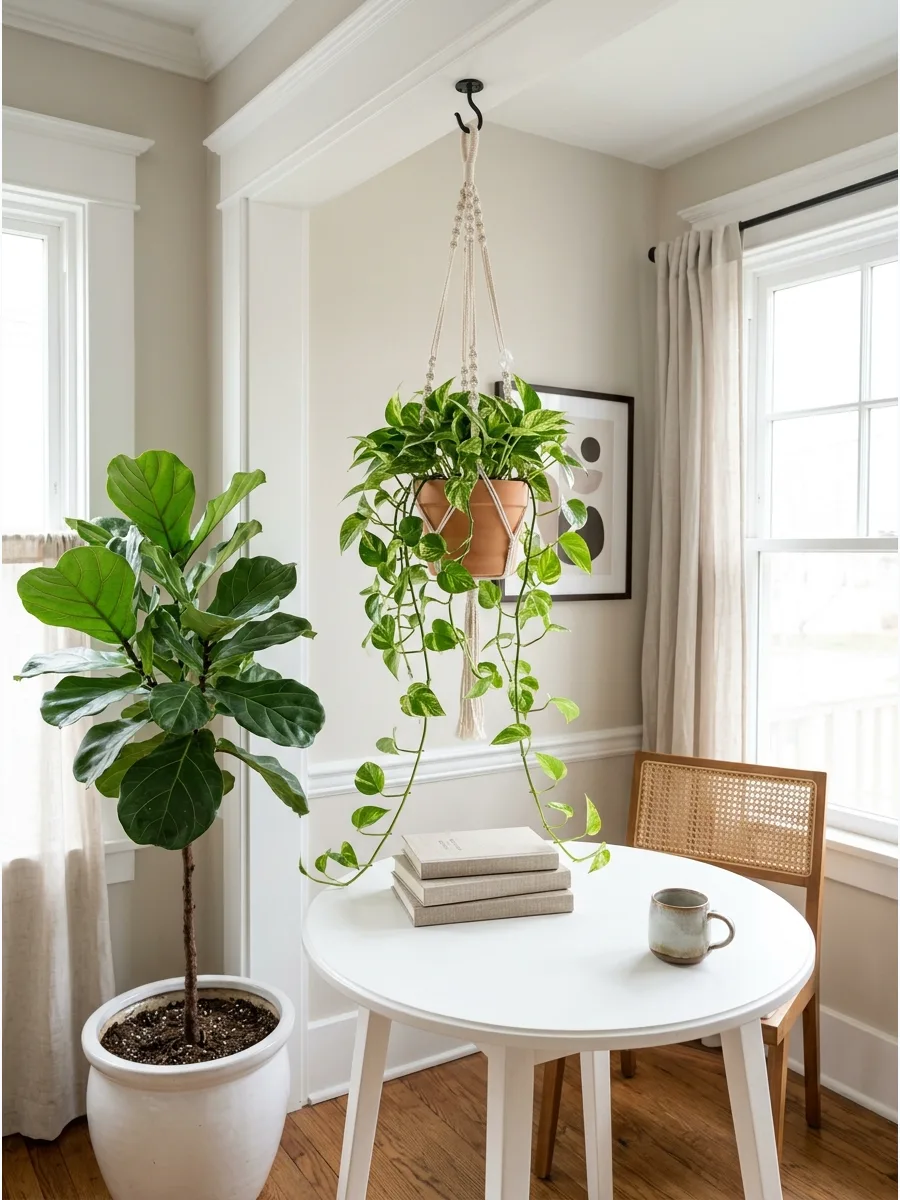
Bringing greenery into a dining corner makes the space feel fresh and energetic. Use a mix of floor plants and hanging vines to create a lush backdrop that frames the seating area beautifully.
Hang a trailing Pothos from a ceiling hook directly above the table to draw the eye upward and fill vertical space. Living decor provides a soft, organic contrast to hard kitchen surfaces like cabinets and countertops.
- Plan for $30 to $150 depending on the size and variety of the plants chosen.
- Place larger floor plants in the corner and smaller pots on the tabletop or nearby shelves.
- Swap real plants for high-quality silk versions if the nook is in a dark corner without windows.
Most people skip this: Choose low-light varieties like snake plants if your nook is tucked away from direct window sun.
48. Coffee Station Breakfast Nook
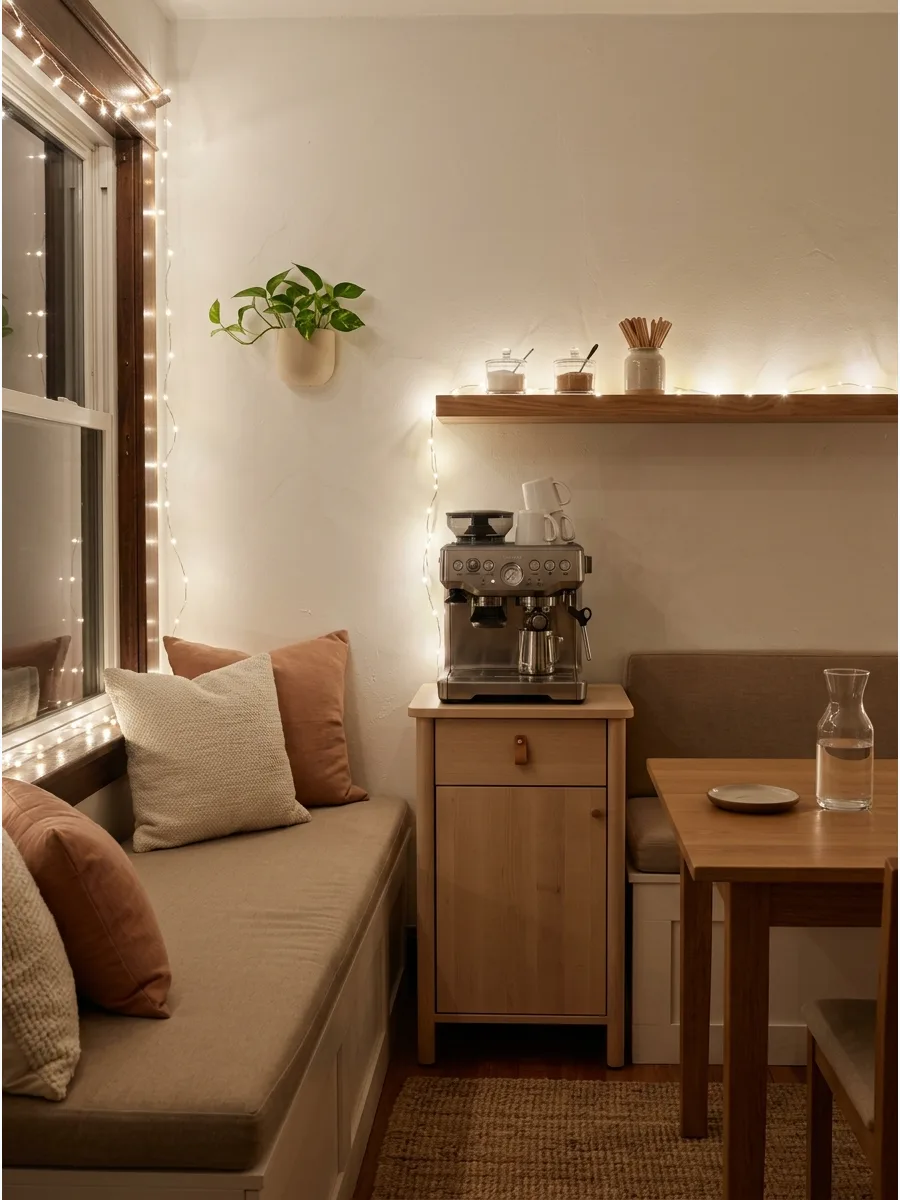
Combining your dining spot with a dedicated beverage center creates a highly functional morning routine hub. Place a small cabinet or narrow console table right next to the seating to hold your espresso machine and mugs.
Install a floating shelf above the coffee machine to keep sugar bowls and stirrers within arm's reach of the table. Keeping the coffee prep area separate from the main cooking zone prevents traffic jams during the morning rush.
- Budget $150 to $400 for a small storage cabinet and wall-mounted shelving.
- Position the station near an outlet to avoid running visible extension cords across the floor.
- Use a rolling bar cart for the coffee station if you need to move it for cleaning or hosting.
Best shortcut: Use a tiered tray on the tabletop to hold coffee essentials if you do not have floor space for a separate cabinet.
49. Kid-Friendly Breakfast Nook
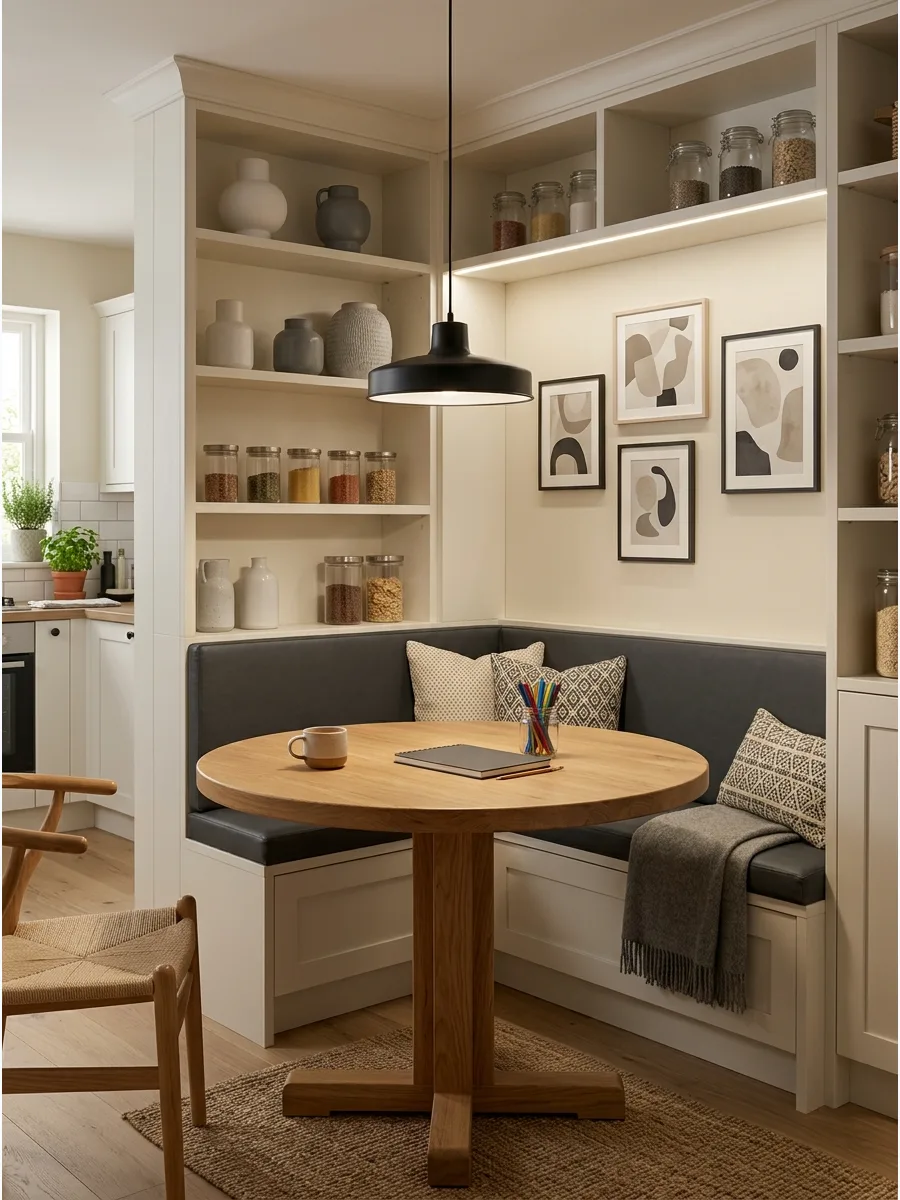
A family-focused nook needs to handle spills and high energy while still looking polished. Choose a table with rounded corners and benches upholstered in performance fabrics or wipeable faux leather.
Select a table with a heavy pedestal base instead of four legs to prevent kids from tripping as they slide in and out. Durable materials allow the space to transition easily from messy breakfasts to afternoon craft projects.
- Costs vary from $300 to $800 for durable, easy-to-clean furniture sets.
- Secure bench cushions with non-slip pads or ties so they stay in place during use.
- Add a clear acrylic sheet to the tabletop to protect wood finishes from markers and playdough.
Quick win: Apply a fabric protector spray to any non-vinyl cushions to make cleanup faster and prevent permanent stains.
50. Homework Breakfast Nook
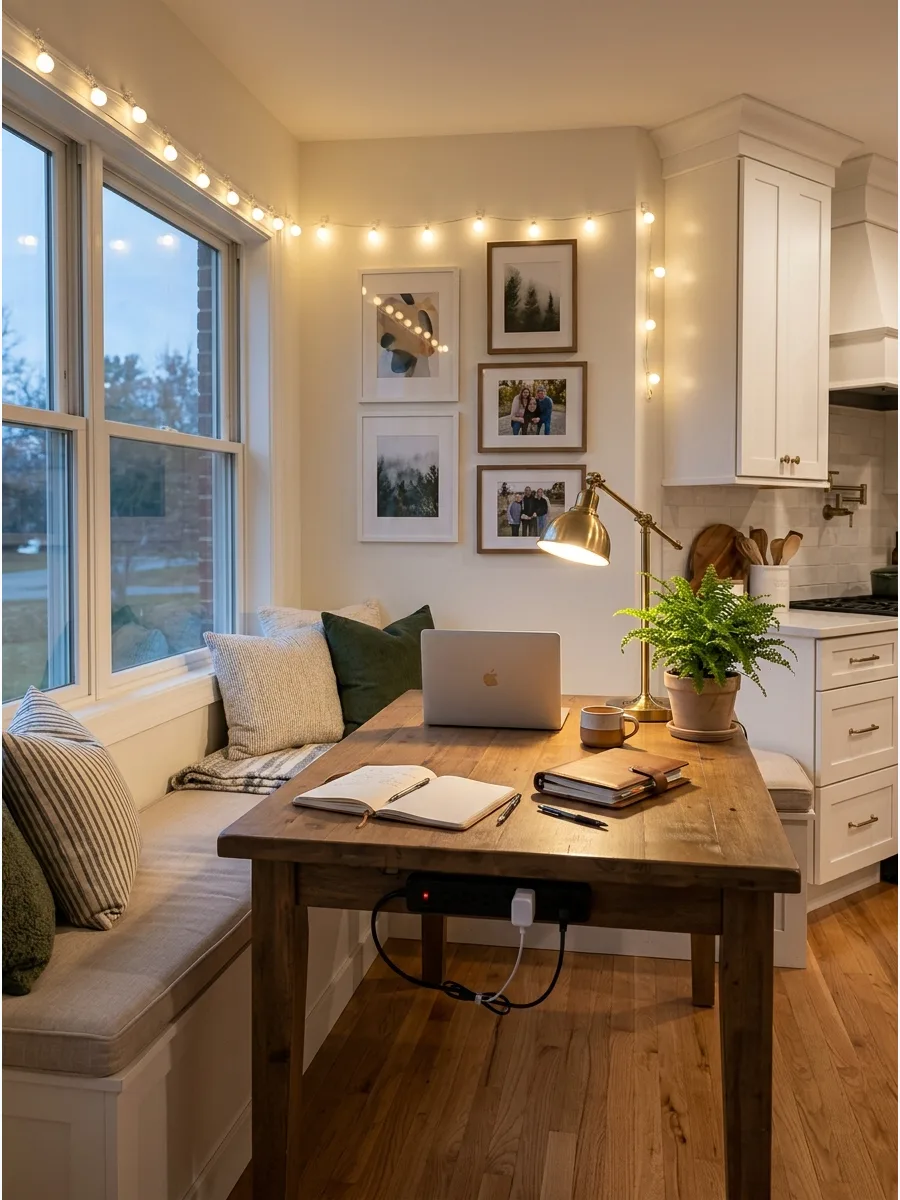
Turning a dining corner into a multi-use workspace requires smart lighting and accessible power. Ensure the table height is comfortable for both eating and typing or writing for long periods.
Mount a power strip to the underside of the table or the side of the bench to keep laptop chargers organized. A well-lit nook creates a focused environment that keeps the main kitchen island clear for meal prep.
- Spend $50 to $100 on lighting and cable management tools for the workspace.
- Place the table near a wall outlet and use cord clips to hide wires along the table legs.
- Choose a chair with lumbar support if the nook will be used for several hours of work each day.
Most people skip this: Use a dimmable light fixture so you can switch from bright work mode light to soft dinner mode light.
Frequently Asked Questions
What is the best table shape for a small breakfast nook?
A round or oval pedestal table is the ideal choice because it eliminates corner legs that often lead to 'knee-knocking' in tight spaces. This design allows guests to slide in and out of corner seating much more smoothly and comfortably.
How much space do you need for a comfortable breakfast nook?
Plan for a bench depth of at least 18 inches and ensure the table edge overlaps the seat by about 2 inches for a natural reach. You should also allow for 21 inches of width per person to ensure everyone has plenty of elbow room while eating.
Should I choose a built-in banquette or freestanding furniture?
Built-in banquettes are fantastic for maximizing small footprints and adding extra hidden storage, though they require a larger initial investment. Freestanding furniture offers more flexibility to change your layout later and is typically a more budget-friendly way to achieve a cozy look.
How do I make a breakfast nook feel like a separate 'zone' in an open kitchen?
Define the area by hanging a statement pendant light over the table and grounding the furniture with a stylish area rug. You can also use distinct wall decor or a soft accent paint color to visually separate the nook from the main cooking zone.
What are the best fabrics for nook cushions?
Performance fabrics like Sunbrella or treated polyesters are best because they resist stains and moisture in high-traffic eating areas. For an even lower-maintenance option, consider faux leather or vinyl, which can be wiped clean in seconds after spills.