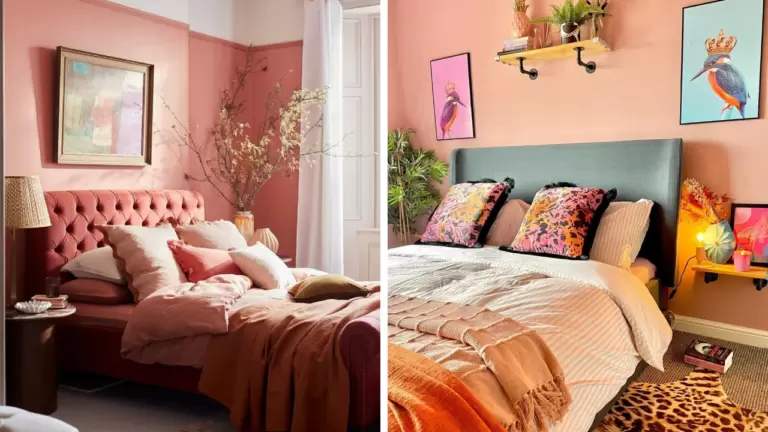
75 Clever Small Dressing Room Ideas
This post may contain affiliate links: full affiliate disclosure.
Small spaces do not have to feel cluttered or messy. A few smart layout changes can turn a cramped corner or a spare room into a high-end dressing area.
These practical strategies help maximize every inch of floor and wall space without sacrificing style.
Small Dressing Room Layout Ideas
1. Create a Single-Wall Dressing Room
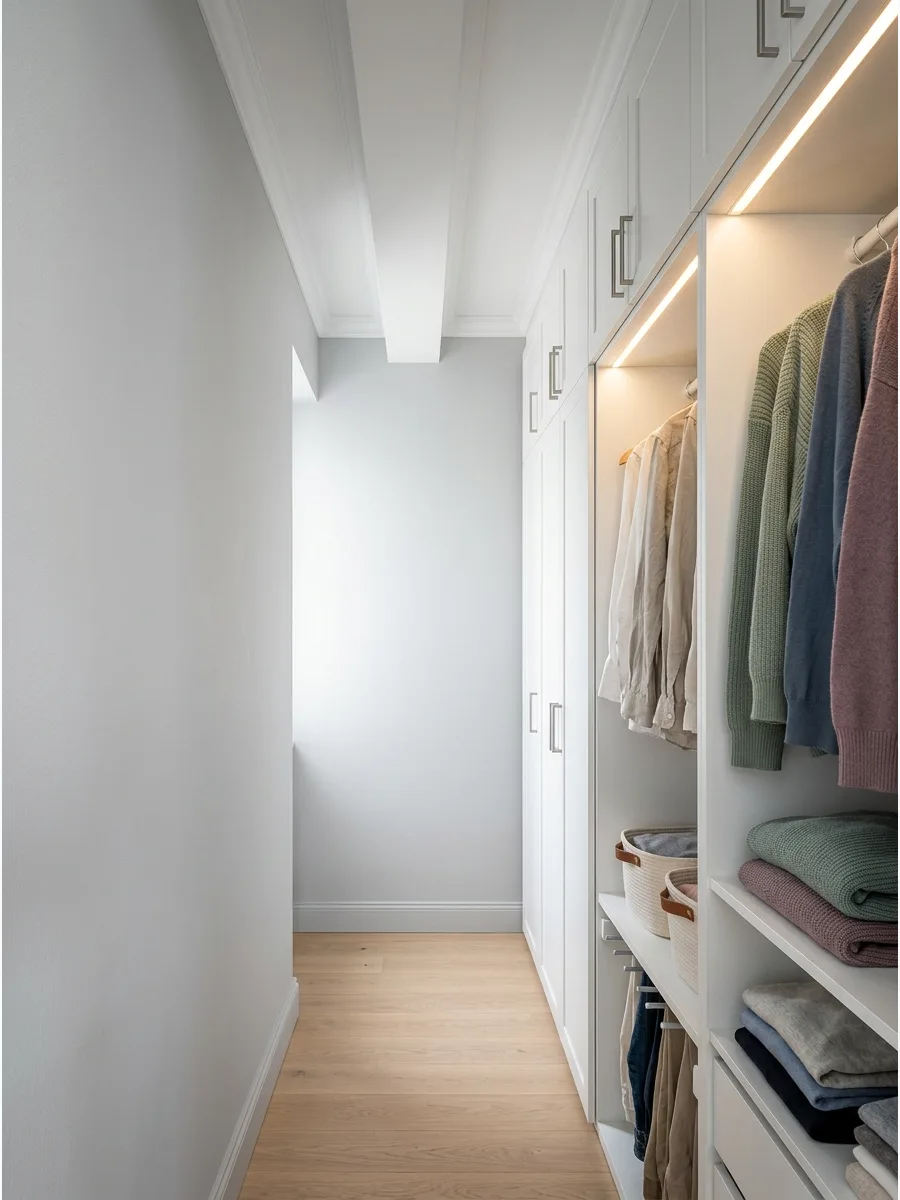
Focusing all storage on one side of a narrow room keeps the space from feeling like a tunnel. Install floor-to-ceiling wardrobes on the longest wall to maximize vertical storage without eating up floor space. Expert opinion: Leaving the opposite wall completely bare makes a narrow room feel twice as wide and much more airy.
- Budget: $500–$2,000 for standard flat-pack wardrobe units
- Placement: Mount units to the wall studs to ensure they remain stable and safe
- Adaptation: Use mirrored doors on the wardrobes to bounce light and visually expand the room
Most people skip this: Leave at least 36 inches of floor space in front of the cabinets so you can fully open doors and drawers.
2. Design a Galley-Style Dressing Room
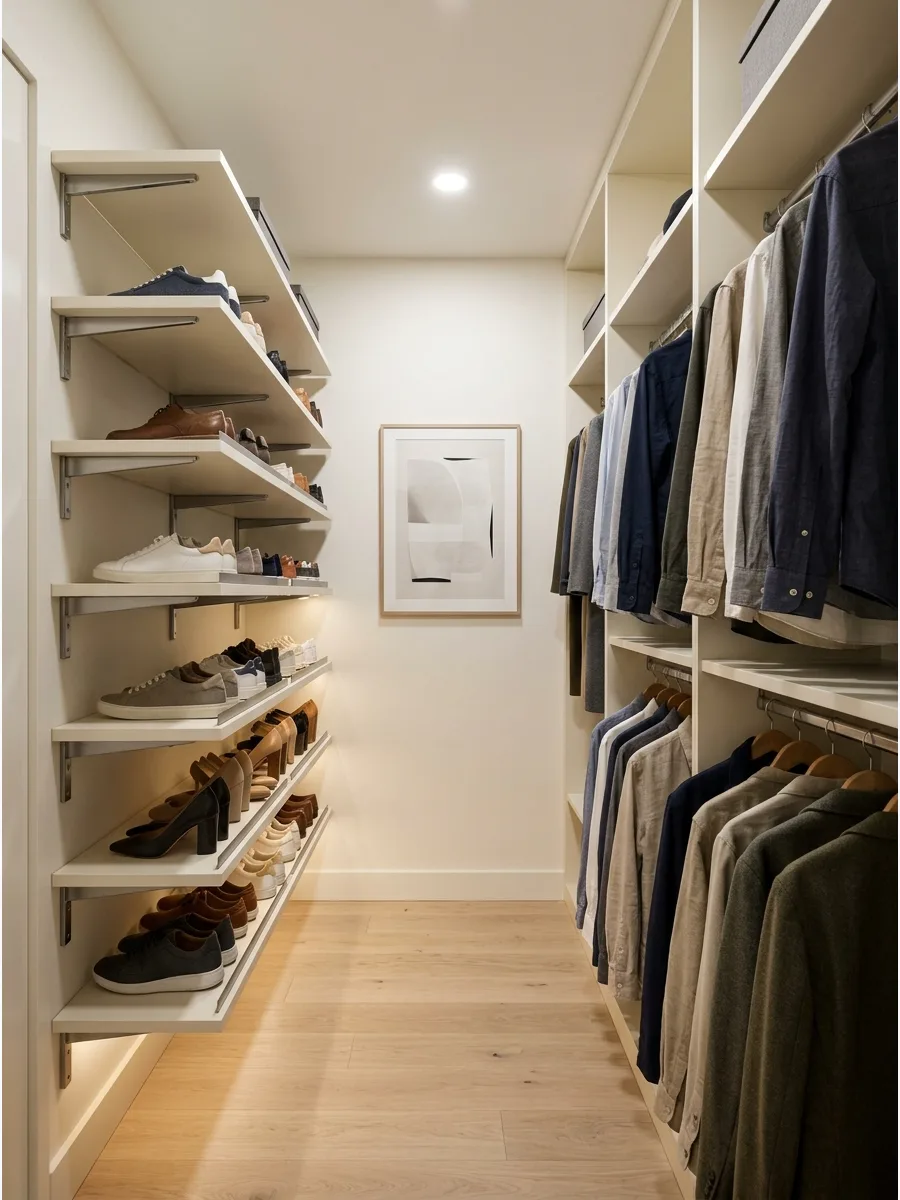
Parallel storage works best when you divide items by category to keep the workflow simple. Use shallow 15-inch deep cabinets on one side to keep the center aisle wide enough for dressing comfortably. Expert opinion: Splitting shoes and clothes onto opposite walls prevents a crowded feeling by creating distinct zones for different accessories.
- Timing: 4–6 hours for assembly and installation of basic rail systems
- Setup: Place the most frequently used items at eye level on both sides for easy access
- Style: Use matching bins on the shelves to hide smaller items and keep the look cohesive
Quick win: Use open rails on the 'clothing' side to save the depth that cabinet doors usually require.
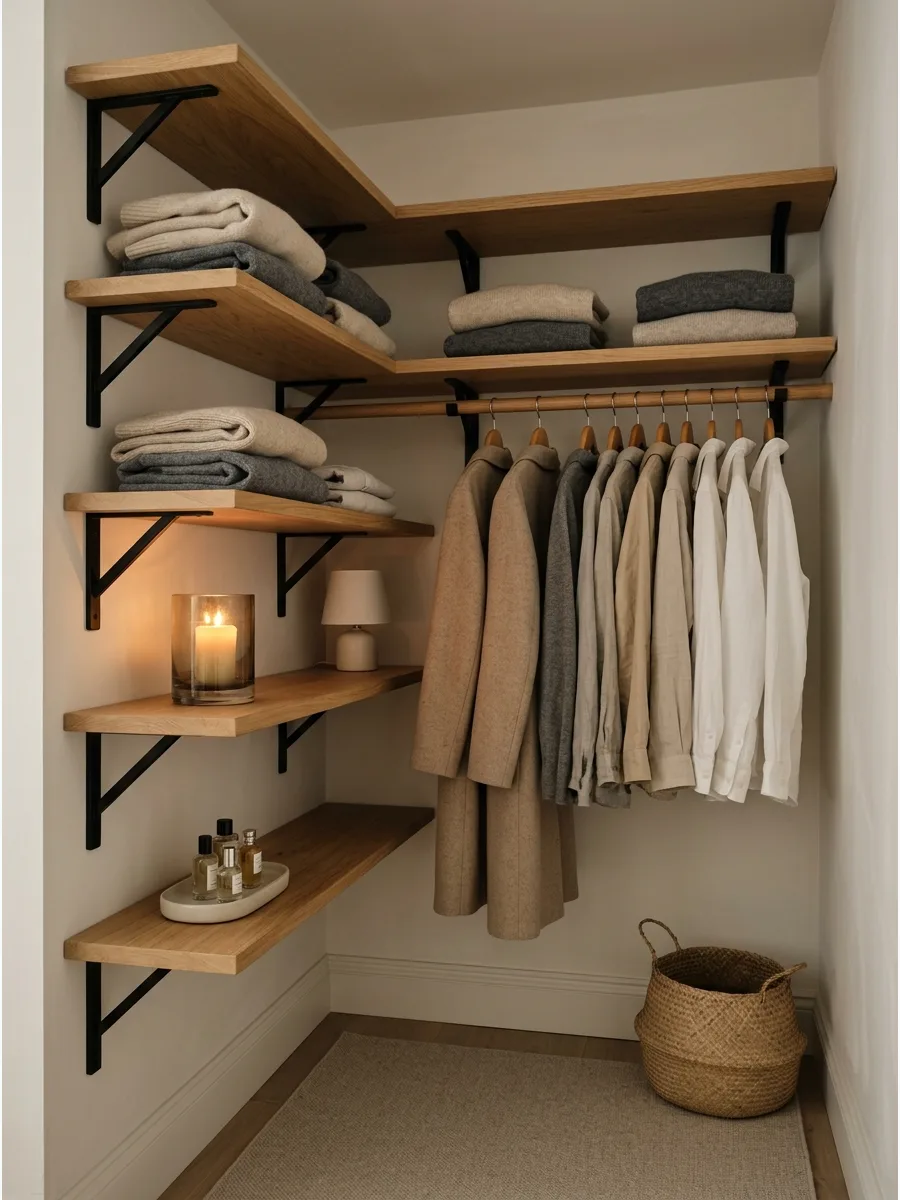
3. Build an L-Shaped Dressing Room
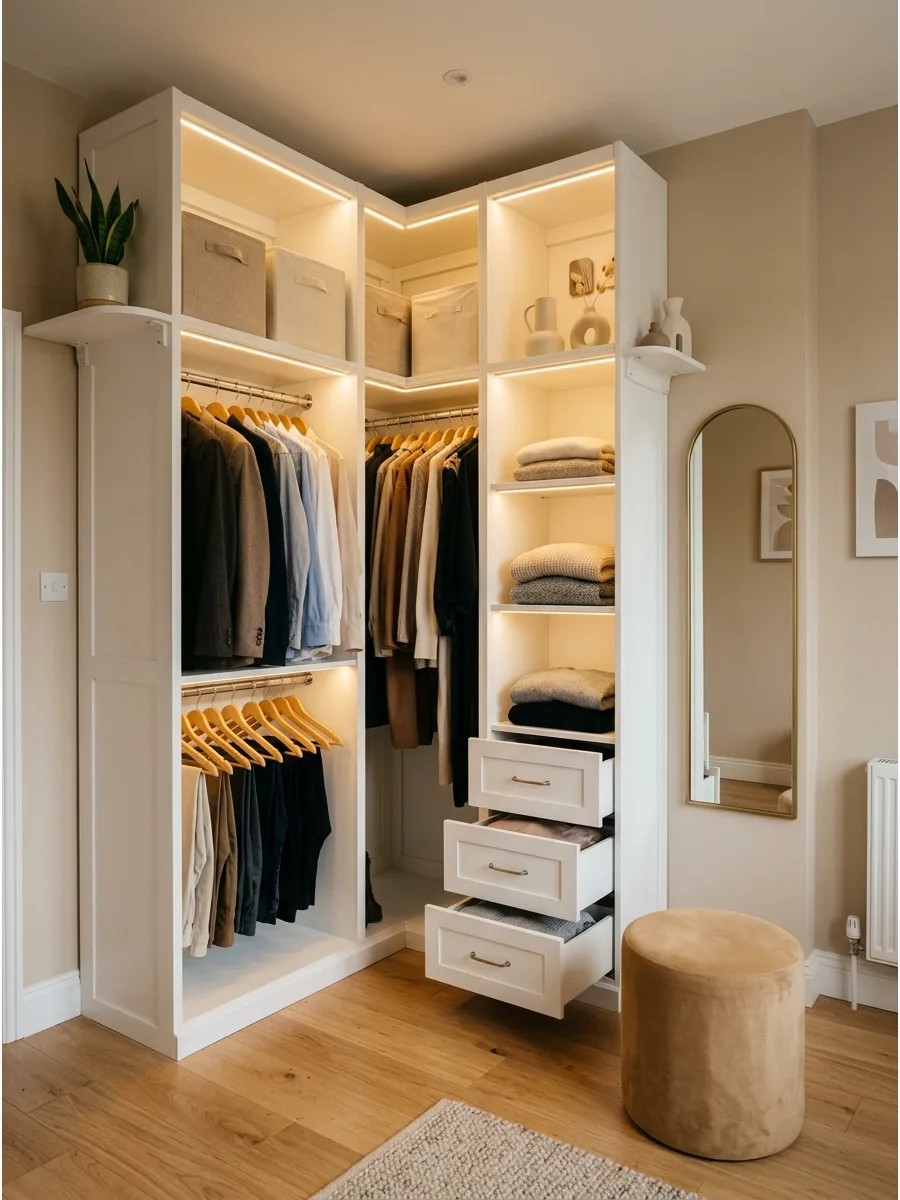
Utilizing a corner is the most efficient way to get a lot of hanging space in a small footprint. Fit a corner wardrobe unit with a wrap-around hanging rail to eliminate wasted dead space in the angle. Expert opinion: Leaving two walls open prevents the room from feeling like a box while still providing plenty of storage for a full wardrobe.
- Budget: $300–$1,200 depending on the complexity of the corner unit
- Logistics: Ensure the corner unit allows enough reach-in space so clothes do not get lost in the back
- Adaptation: Add a small vanity table at the end of one 'L' arm for a multi-use station
Best shortcut: Install a battery-powered motion light inside the corner unit so you can actually see into the deep angle.
4. Create a U-Shaped Walk-In Wardrobe
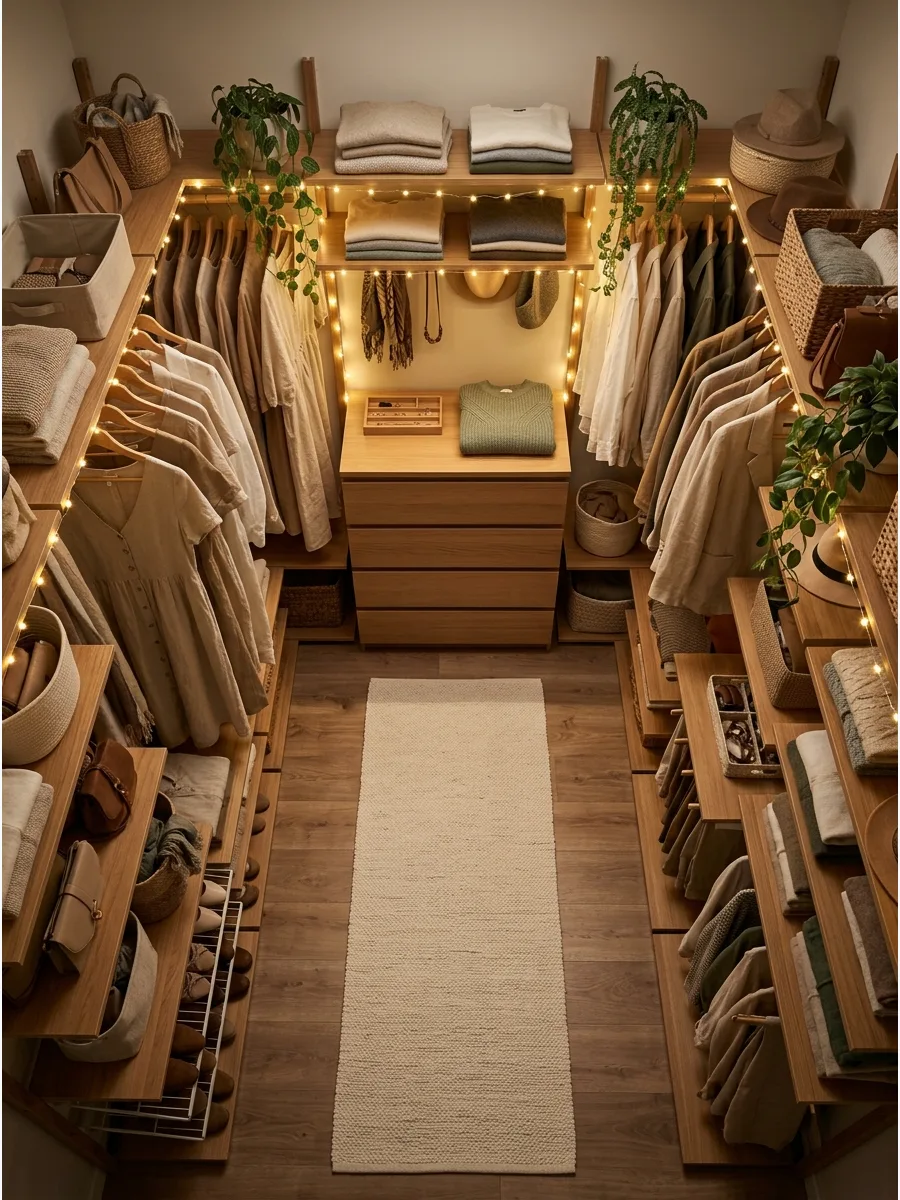
This layout provides the most storage possible by wrapping cabinets around three walls. Install lower drawers on the back wall to provide a flat surface for folding clothes or placing jewelry trays. Expert opinion: U-shaped layouts only work if you have at least 36 inches of central floor space to turn around without hitting your elbows.
- Setup: Use the shortest wall for drawers or shoe racks to keep the walkway clear
- Placement: Keep hanging rods on the two long side walls for maximum capacity
- Budget: $800–$3,000 for a full custom or semi-custom U-shaped system
Most people skip this: Use 'short-hang' rods on two levels to double your storage for shirts and folded pants.
5. Convert a Small Box Room
Turning an unused spare room into a closet creates a luxury feel in a small house. Swap a standard solid door for a glass-paneled one to let light in and make the small room feel like a high-end boutique. Expert opinion: Dedicated dressing rooms work best when every inch of wall height is used for seasonal items like heavy coats or luggage.
- Timing: 1–2 days for a full room conversion with pre-built furniture
- Sourcing: Look for 'reach-in' closet kits that can be adapted for a full room
- Adaptation: Renters can use freestanding racks and tension rods to avoid wall damage
Quick win: Paint the ceiling a light, reflective color to make the small room feel taller and brighter.
6. Transform a Bedroom Alcove
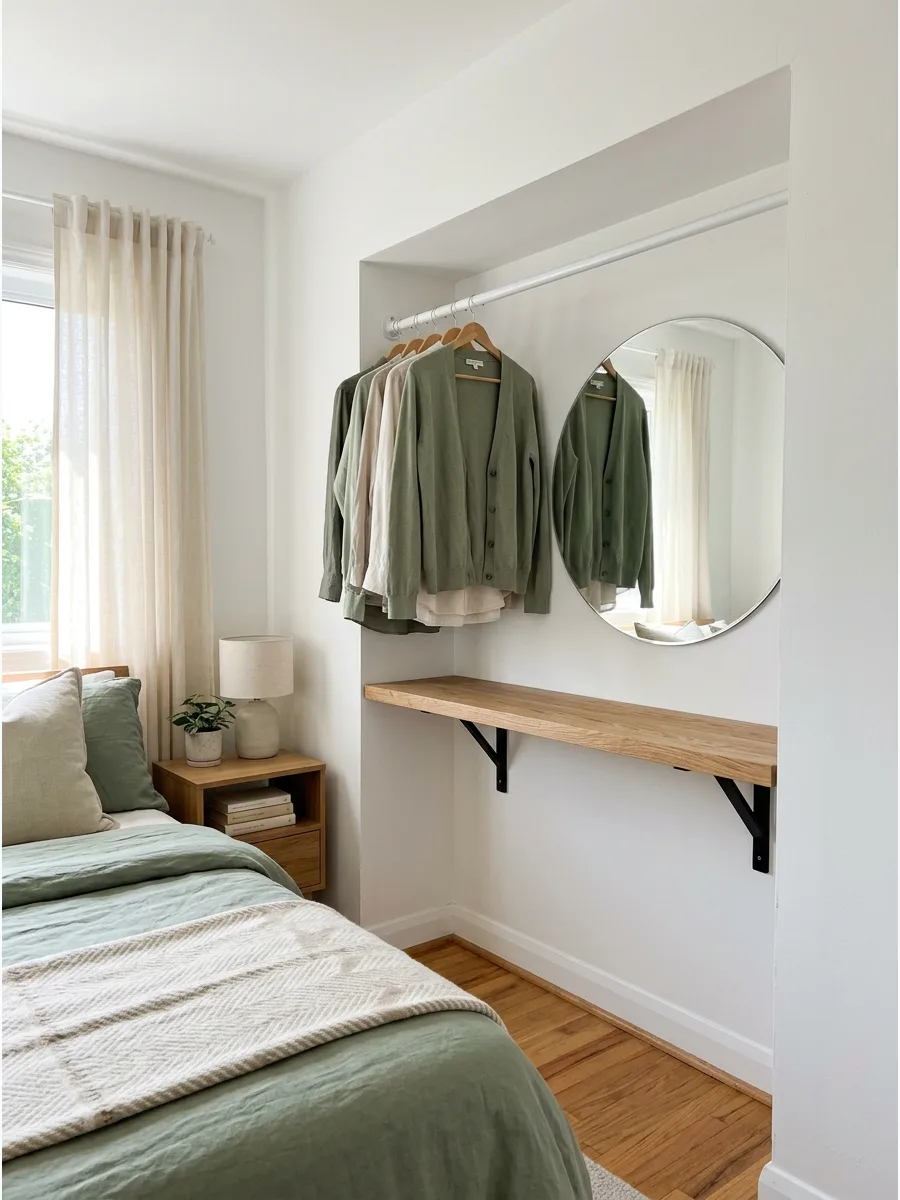
Nooks and alcoves are perfect for creating a mini-dressing zone without taking up the whole bedroom. Mount a floating vanity shelf at waist height inside the alcove to create a grooming station that takes up zero floor space. Expert opinion: Alcoves are the best place for daily-wear items because they keep the main bedroom floor clear of clutter.
- Budget: $50–$200 for a shelf, mirror, and basic hanging rod
- Assembly: Use heavy-duty wall anchors if you are mounting the rod directly into drywall
- Style: Paint the inside of the alcove a shade darker than the room to give it depth
Best shortcut: Use a tension rod for the clothing rail if you want to avoid drilling into the alcove walls.
7. Use the Space Behind the Bed
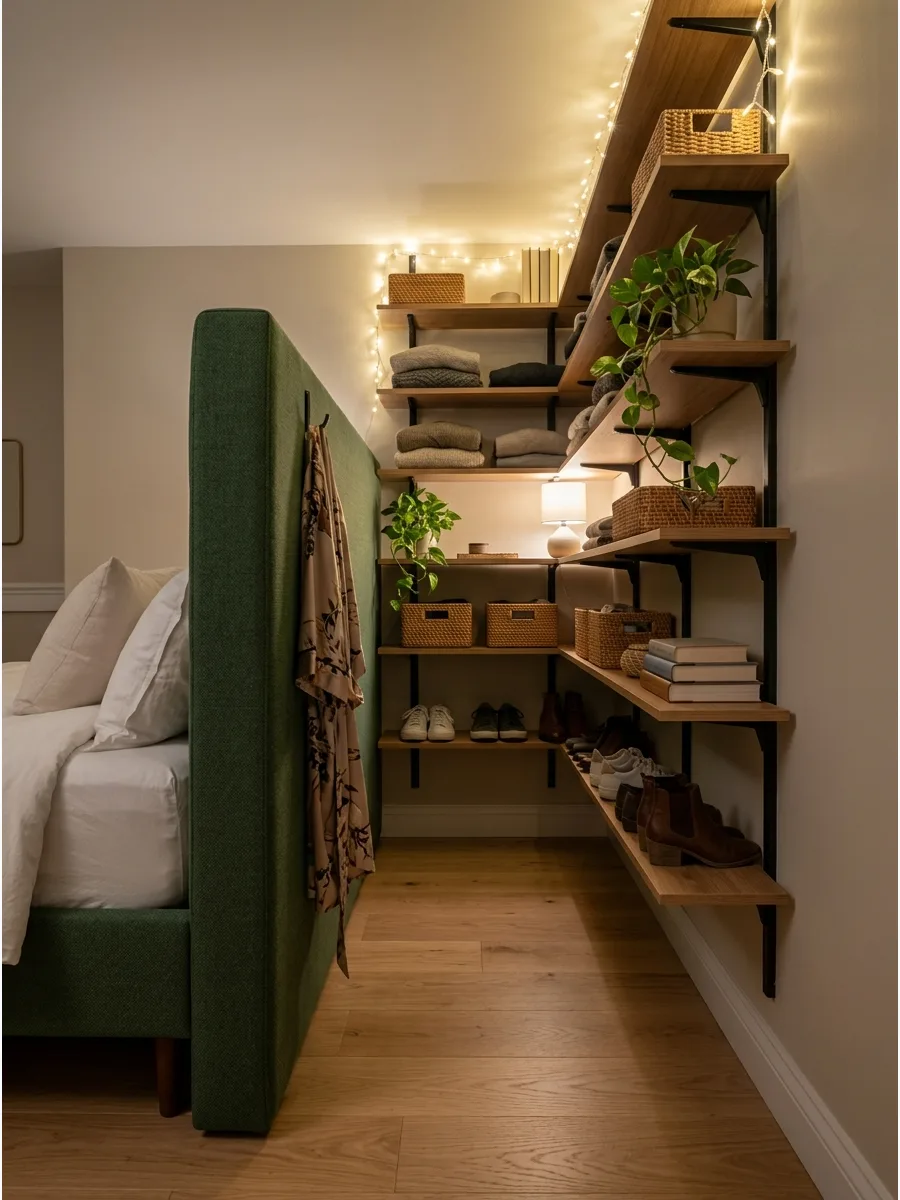
Placing storage behind the bed creates a hidden zone that feels private. Position a tall, open-backed bookshelf behind the headboard to act as both a room divider and a shoe rack. Expert opinion: Using the back of the bed creates a functional dressing nook without the high cost of building new permanent walls.
- Placement: Leave at least 2 feet of space between the bed and the storage for a walkway
- Setup: Secure the tall shelf to the floor or ceiling to prevent it from tipping
- Adaptation: Use a low dresser if you want to keep the room feeling more open and connected
Most people skip this: Bolt the headboard directly to the back of the storage unit for a seamless, built-in look.
8. Divide a Long Bedroom
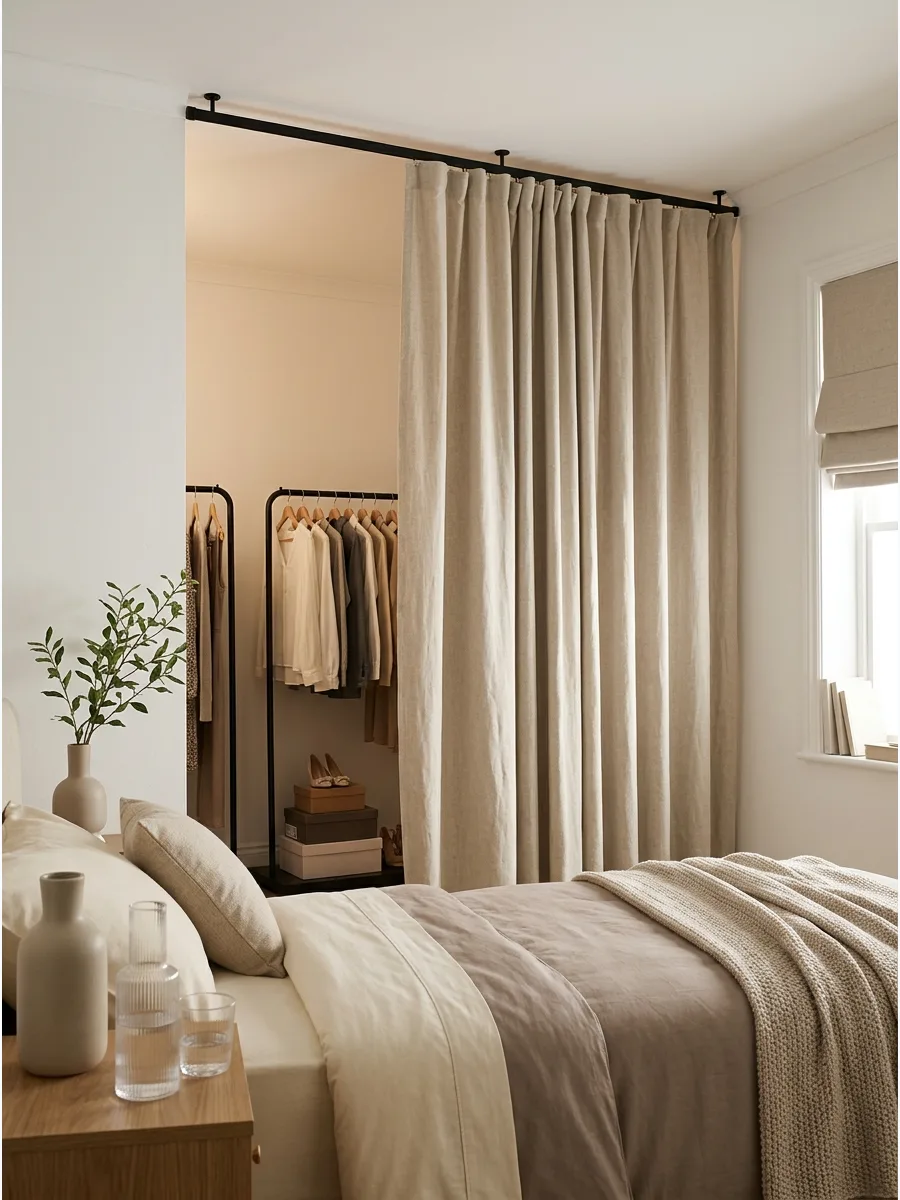
Separating a long room into two zones makes both the bedroom and the dressing area feel more purposeful. Hang a heavy ceiling-mounted curtain to hide the dressing area and keep the sleeping zone feeling tidy. Expert opinion: A floor-to-ceiling divider creates a 'room within a room' effect that feels more high-end than a simple folding screen.
- Budget: $100–$300 for a track system and high-quality curtains
- Timing: 2 hours to install a ceiling track and hang the fabric
- Adaptation: Choose a light-filtering fabric to keep the dressing area from feeling too dark
Quick win: Use a velvet curtain to dampen sound, making the sleeping area feel even more quiet and private.
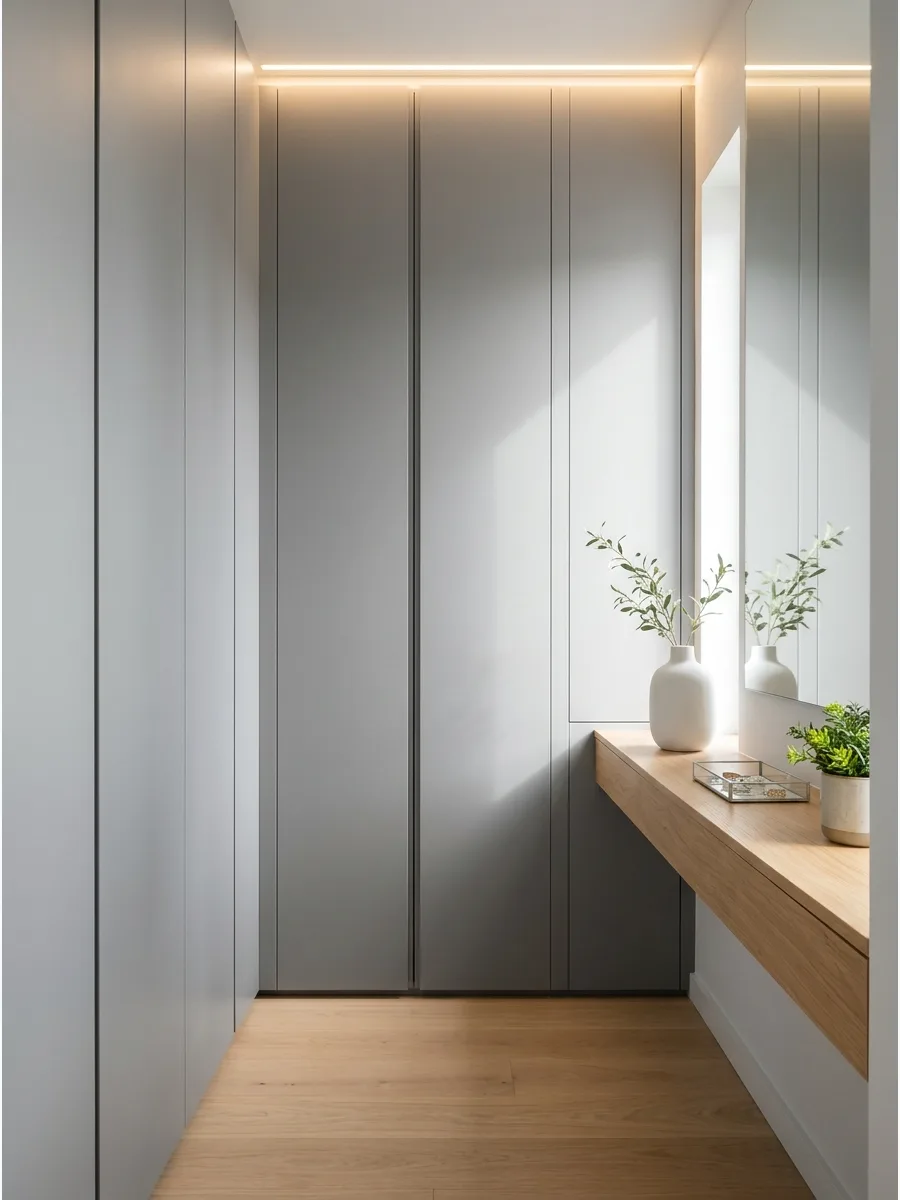
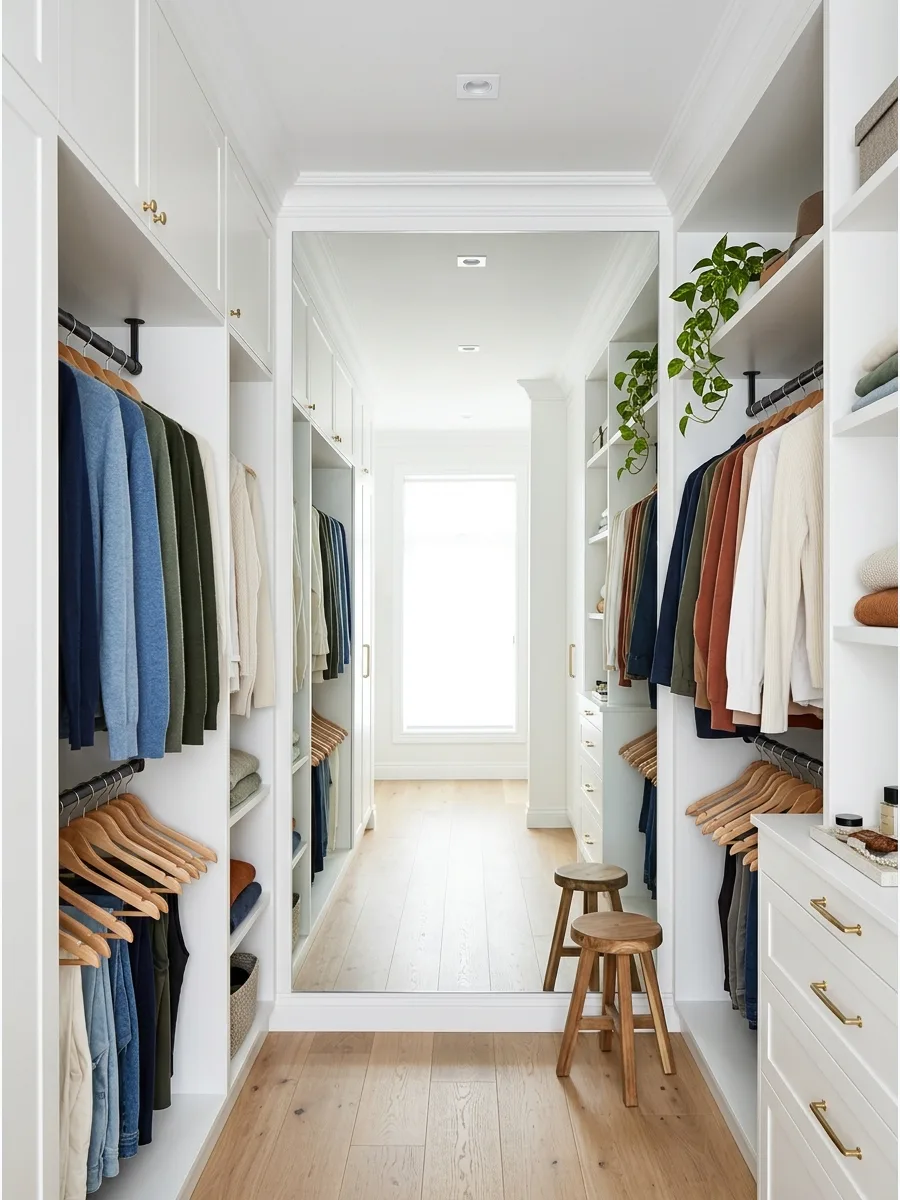
9. Convert a Walk-Through Space
The path between a bedroom and bathroom is often wasted space that can be used for storage. Install handle-less wardrobes with a push-to-open mechanism to keep the walkway smooth and snag-free. Expert opinion: Walk-through closets are most efficient when the storage finish matches the wall color exactly to blend into the architecture.
- Logistics: Ensure there is at least 32 inches of width for the walkway to meet standard building codes
- Sourcing: Use slim-depth cabinets (usually sold as pantry or hallway storage) to save space
- Setup: Place the most-used items on the side closest to the bedroom for convenience
Best shortcut: Replace traditional light switches with motion sensors so the lights turn on automatically as you walk through.
Small Dressing Room Ideas
10. Curved Corner Dressing Nook
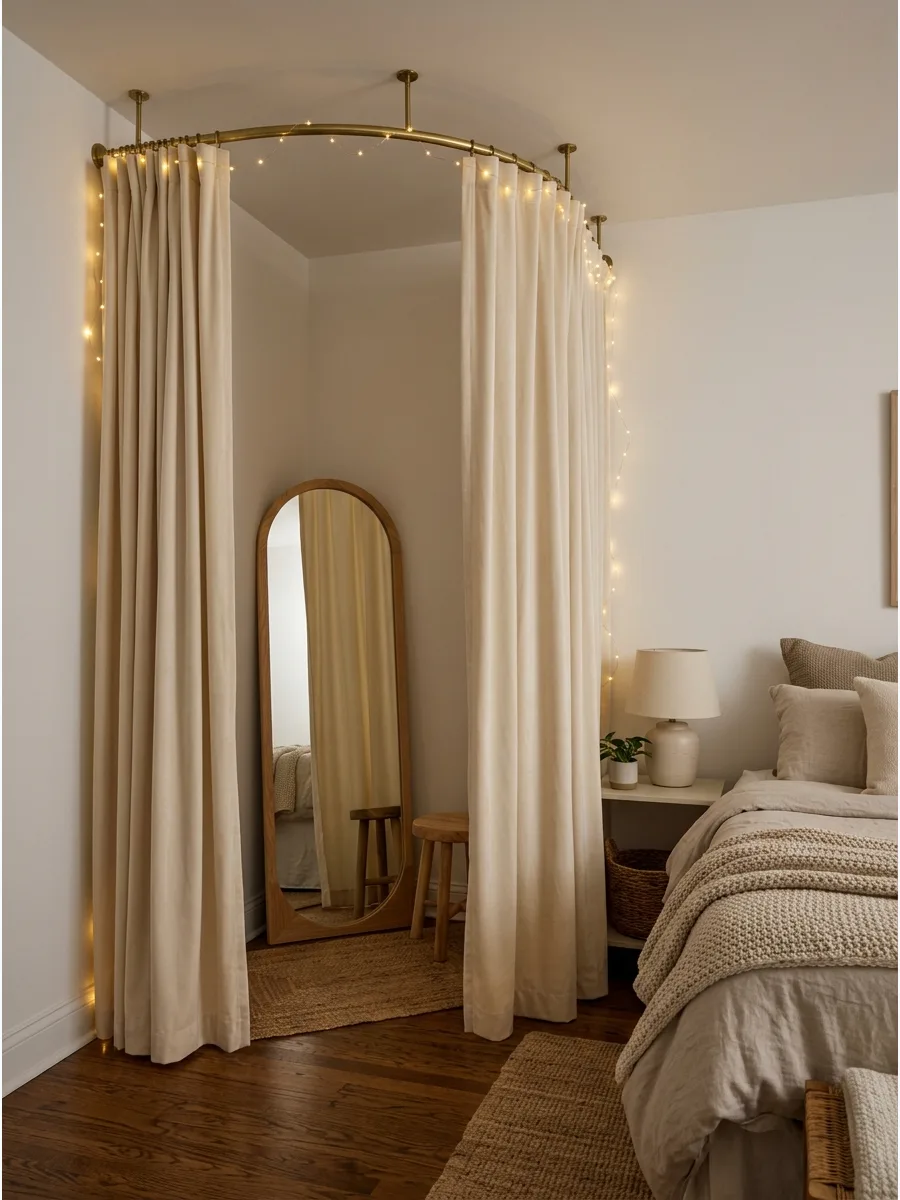
Transform an underutilized corner into a dedicated dressing area by installing a curved ceiling-mounted track or tension rod. This setup provides privacy and visual separation in a multi-use bedroom without the need for permanent walls.
Mount a full-length mirror behind the curtain to instantly turn the corner into a functional fitting room. Using a heavy velvet curtain is the best way to dampen sound and create a high-end boutique atmosphere on a budget.
- Source a flexible ceiling track and floor-to-ceiling blackout curtains for under $100.
- Install the track at least 36 inches from the corner point to ensure enough standing room.
- Swap the curtain fabric seasonally to refresh the room's color palette without painting.
Most people skip this: Install a small battery-operated LED puck light on the ceiling inside the nook to ensure clear visibility when the curtains are closed.
Small Dressing Room Layout Ideas
11. Place Wardrobes Around a Window
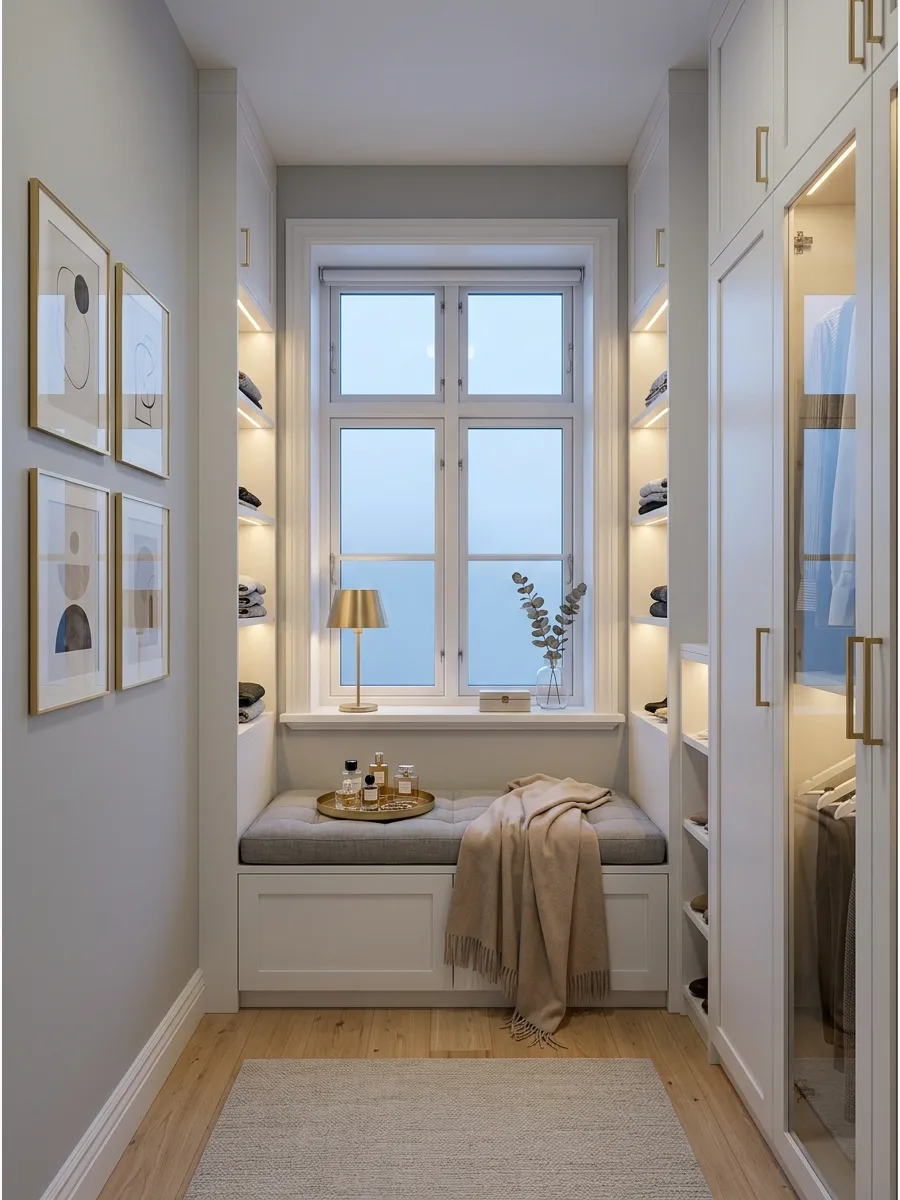
Using the wall around a window maximizes storage while keeping the room bright. Build twin wardrobe towers on either side of the window to frame the view and gain massive vertical storage. Expert opinion: Adding a bench under the window provides a spot to put on shoes while using space that usually sits empty.
- Sourcing: Use standard kitchen pantry cabinets for the towers to get a built-in look for less
- Setup: Ensure the wardrobes do not block the window trim to keep the architectural detail visible
- Adaptation: Place a small desk or vanity under the window instead of a bench if you need a workspace
Most people skip this: Use the top of the window bench as a 'staging' area for packing suitcases or folding laundry.
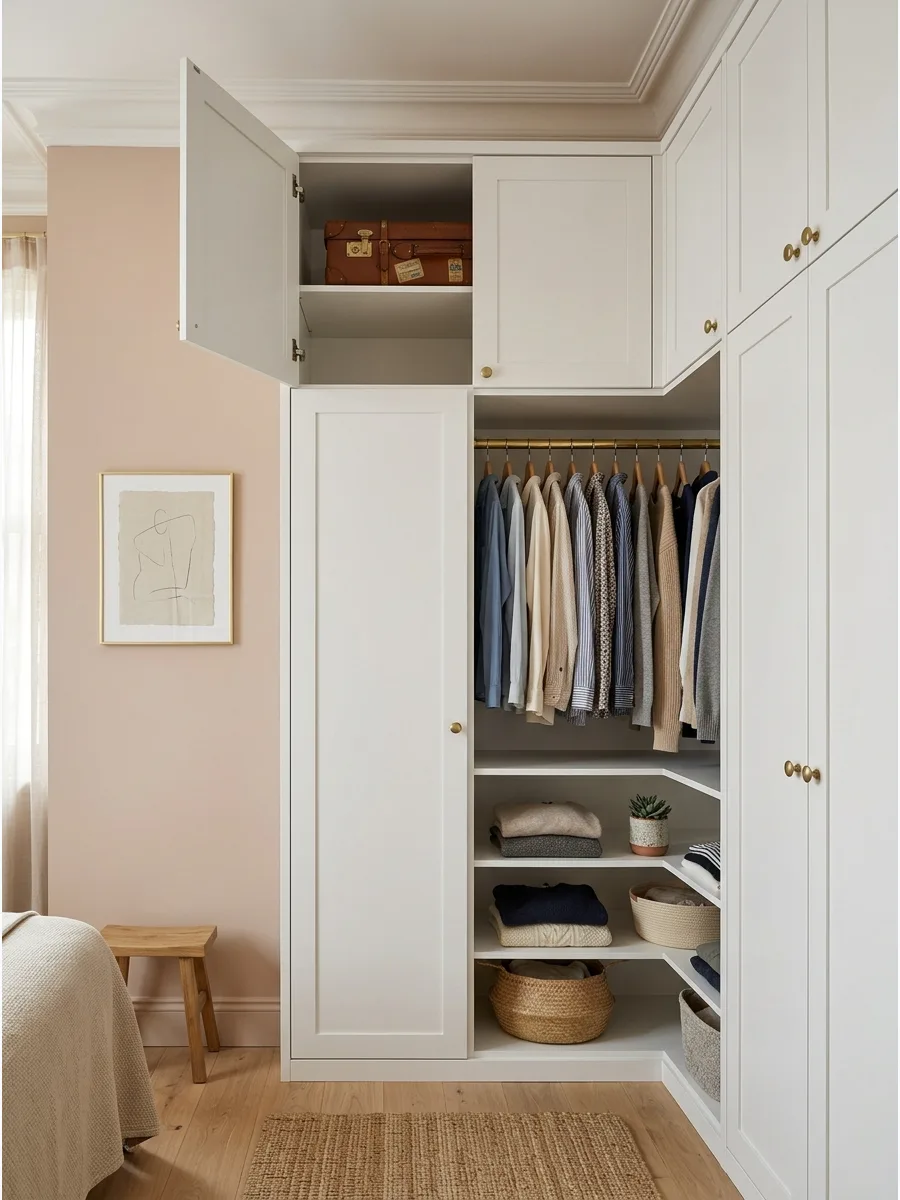
12. Build Storage Around the Doorway
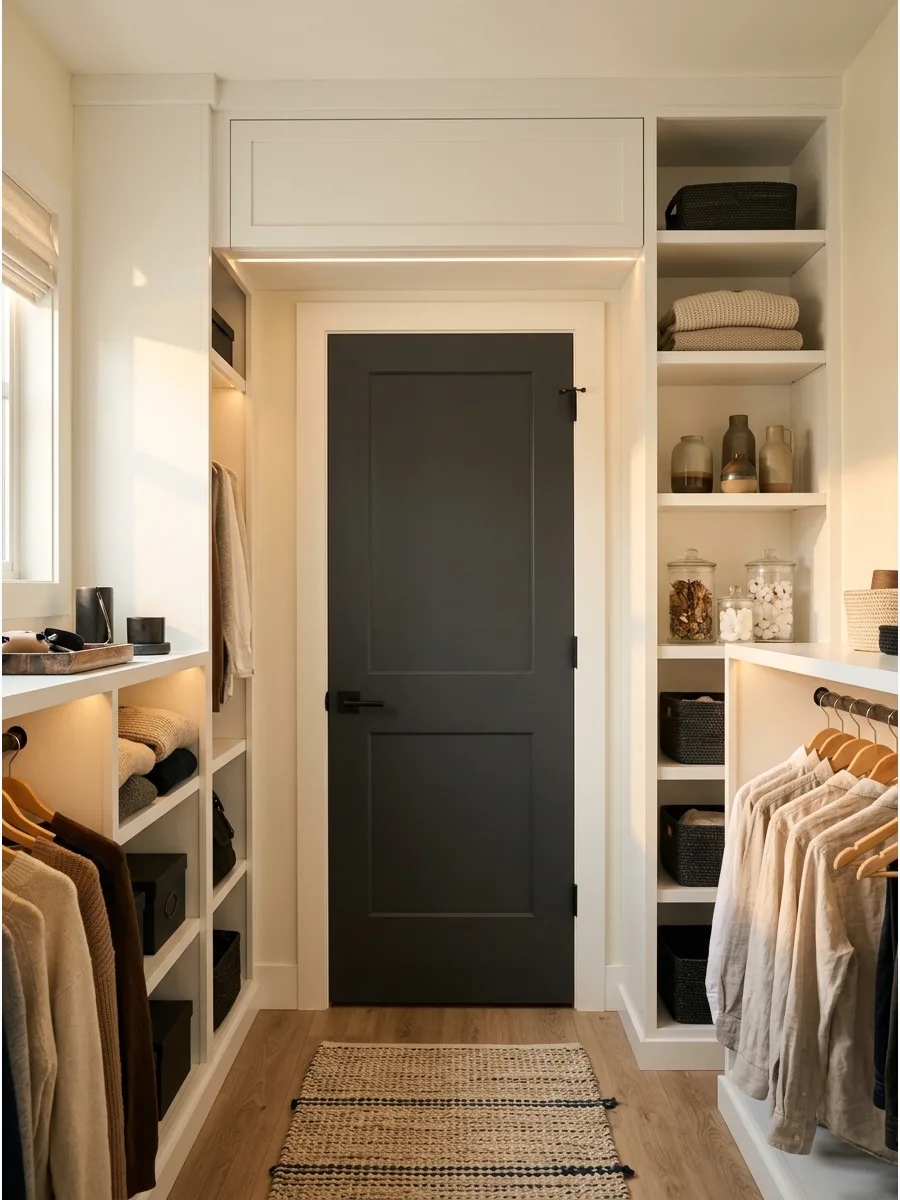
The space above and beside a door is often overlooked but can hold a lot of weight. Install a bridge cabinet over the door frame to store suitcases or out-of-season bedding. Expert opinion: Utilizing the space above the door is the smartest way to find hidden square footage in a tiny room.
- Logistics: Secure the bridge cabinet to the side units and the wall studs for maximum safety
- Timing: 3–5 hours for assembly and mounting of a three-piece surround system
- Style: Keep the cabinetry color the same as the door frame to make the unit feel less heavy
Best shortcut: Store a small folding step stool inside the lower cabinet so you can easily reach the top bridge shelf.
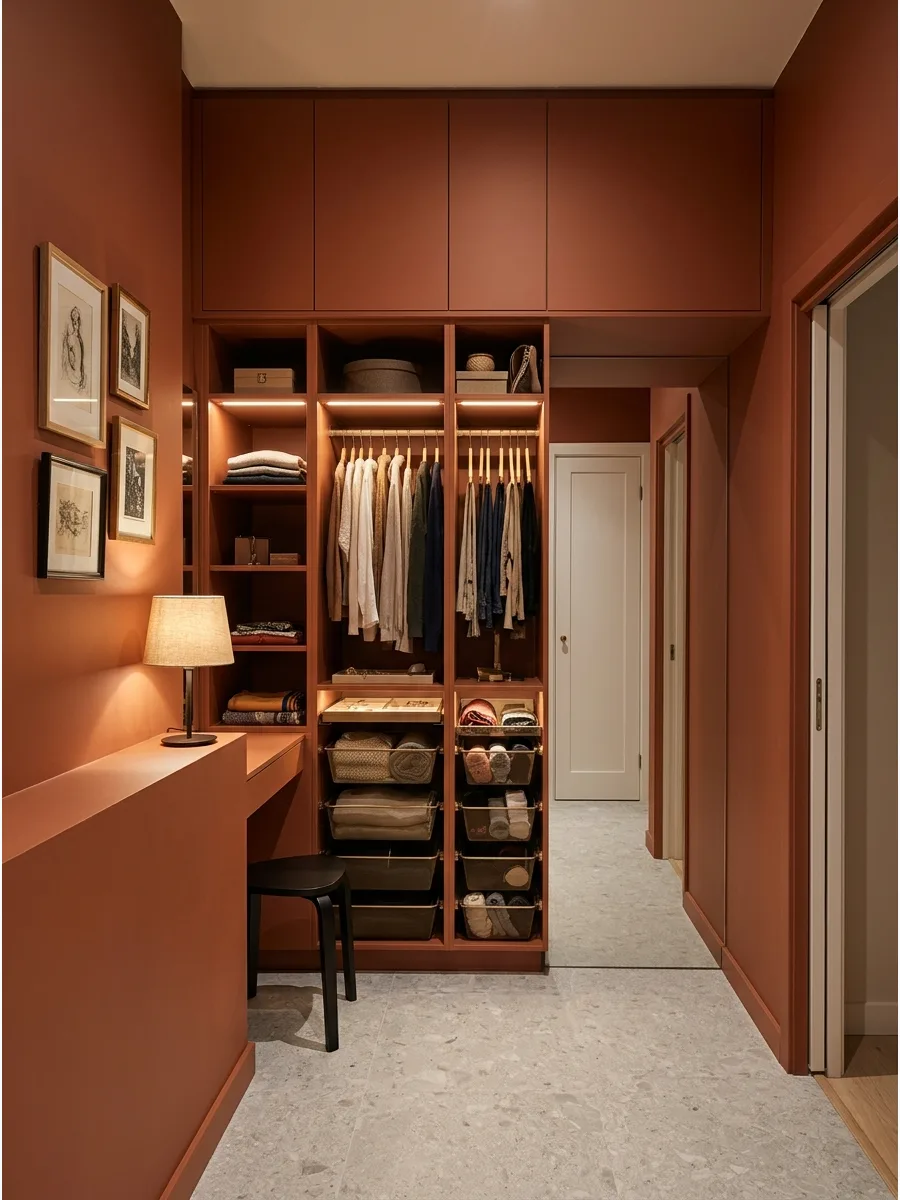
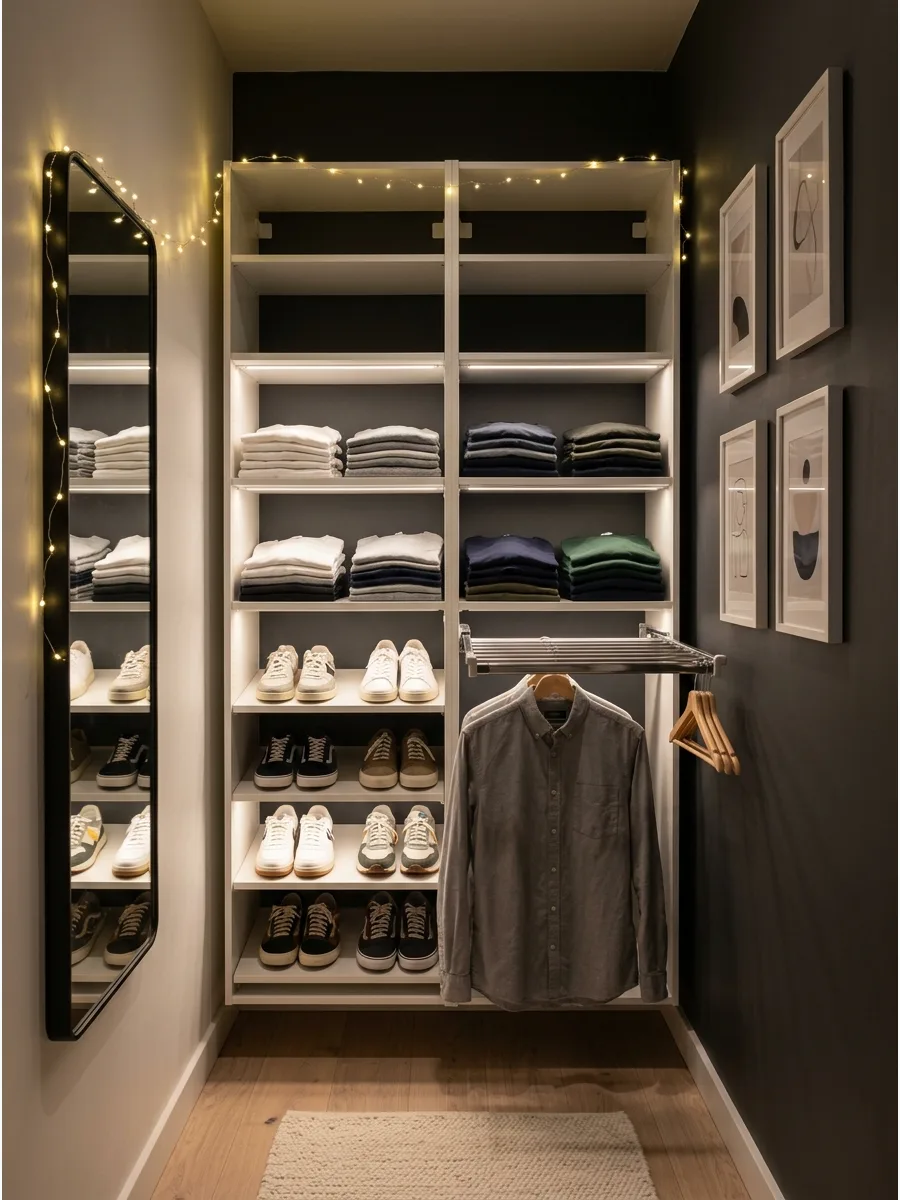
13. Use One End Wall as the Main Feature

In a long, narrow room, focusing all storage on the far wall creates a balanced look. Paint the back wall a dark, moody color behind open shelves to make the clothing look like a curated display. Expert opinion: Focusing all storage on the shortest wall keeps the rest of the room open and airy for moving around.
- Budget: $200–$600 for a wall-mounted shelving system and paint
- Setup: Install a mix of hanging rods and drawers to handle all types of clothing
- Adaptation: Use a large piece of art on the side walls to draw the eye toward the storage feature
Quick win: Use consistent lighting, like a single spotlight, to highlight the feature wall and make it feel like a boutique.
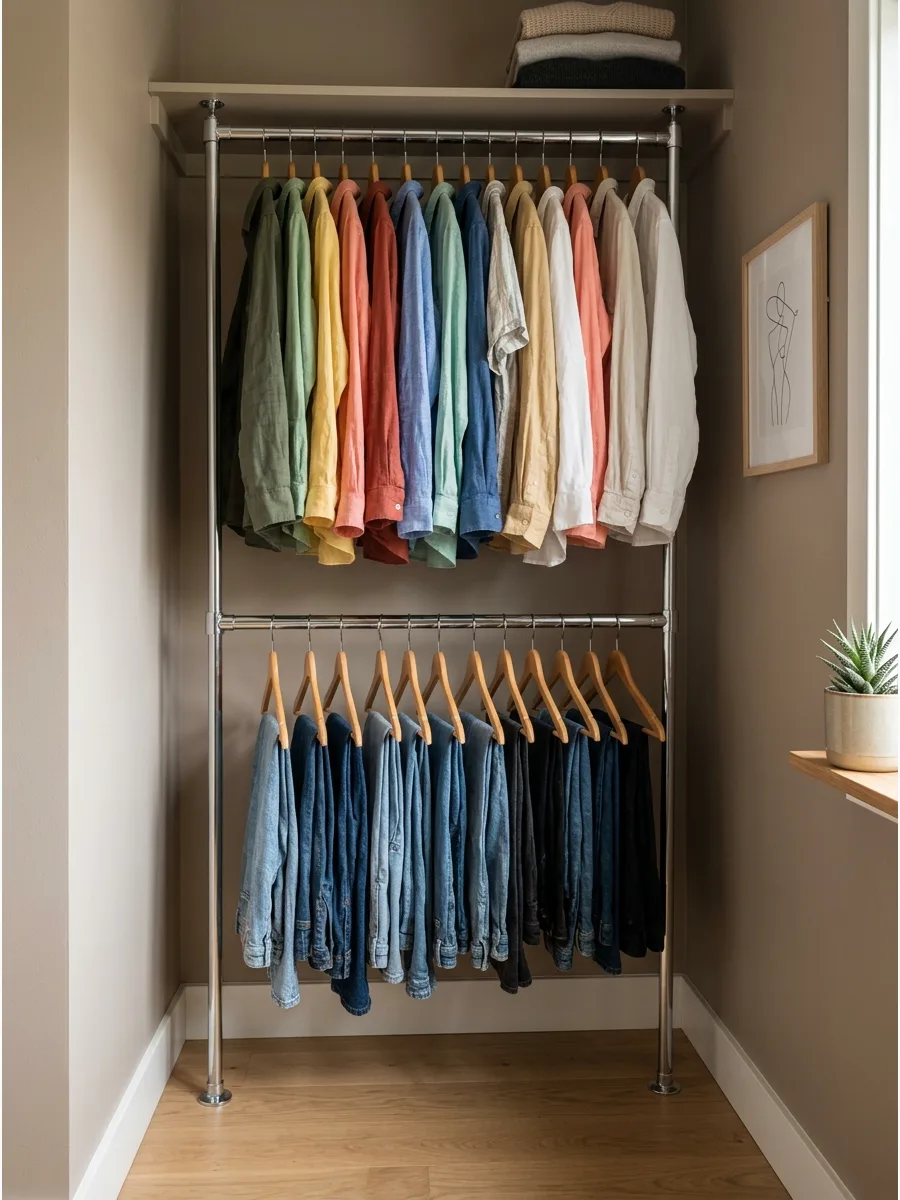
14. Create an Open Dressing Room Without Doors
Removing doors instantly gains you several inches of floor space and makes the room feel larger. Use matching wooden hangers to give an open wardrobe a cohesive and high-end boutique appearance. Expert opinion: Open storage forces you to stay organized because everything is always on display.
- Sourcing: Buy hangers in bulk to ensure every single one matches perfectly
- Maintenance: Dust the open shelves once a week to keep clothing and accessories looking fresh
- Adaptation: Use decorative baskets for items that are hard to fold neatly, like scarves or gym gear
Most people skip this: Color-code your hanging clothes from light to dark to make the open display look professionally styled.
Small Dressing Room Ideas
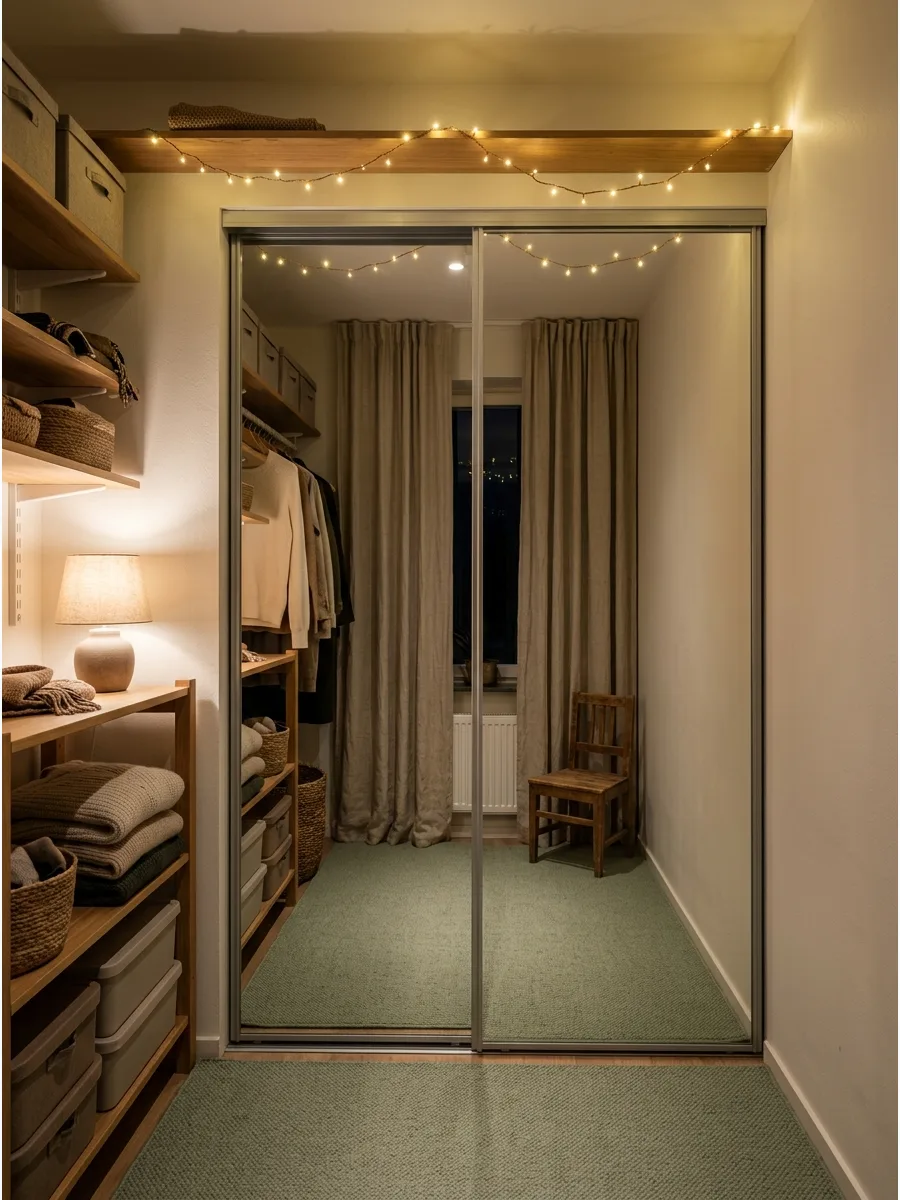
15. Sliding Doors Reclaim Floor Space
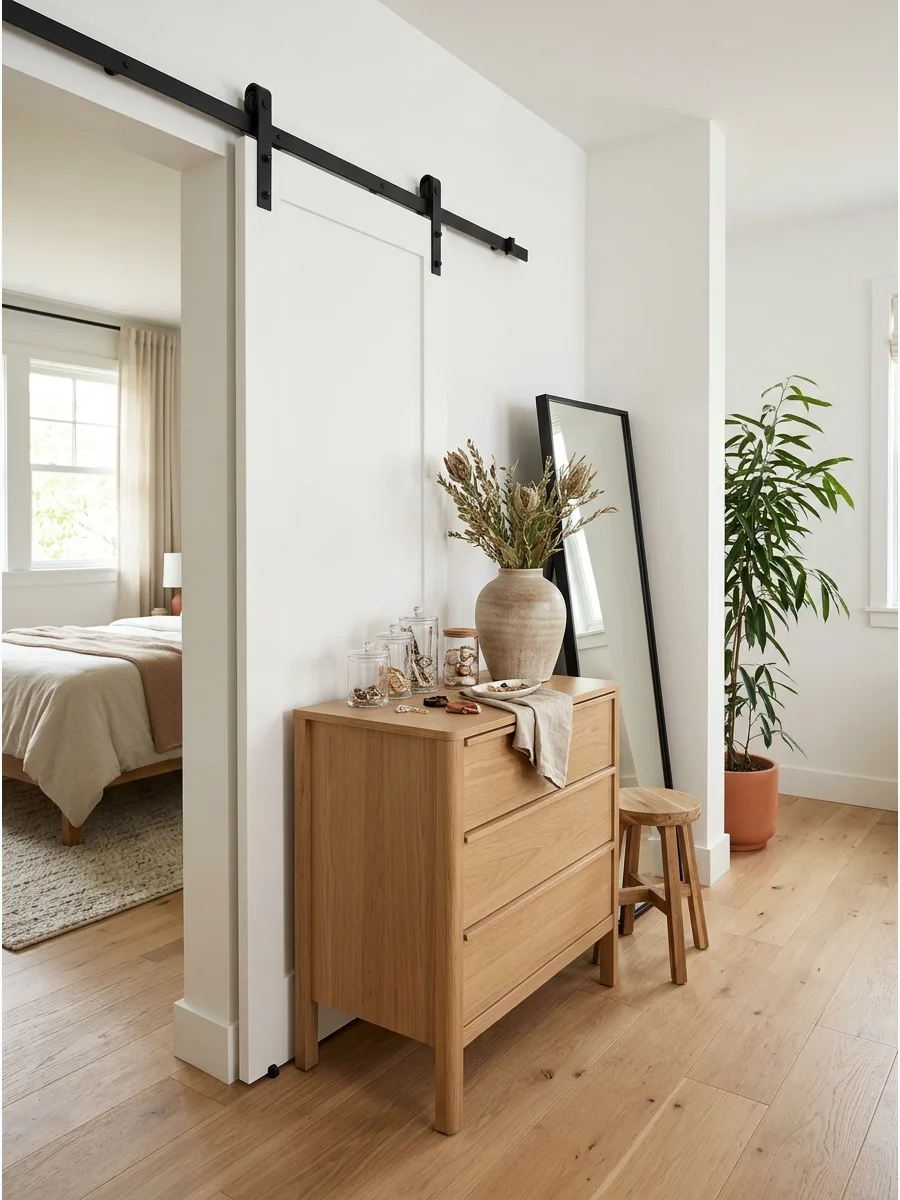
Standard swinging doors create dead zones that prevent furniture placement in tight dressing areas. Swap traditional hinges for a wall-mounted sliding track to utilize every square inch of floor space. This conversion allows for a full-length mirror or a narrow dresser to sit directly where the door used to swing.
Sliding doors are the most effective way to make a tiny walk-in feel like a full-sized suite.
- Budget $150–$400 for track hardware and a standard door slab.
- Ensure at least 30 inches of clear wall space next to the opening for the door to slide.
- Mount a full-length mirror on the door surface to add functionality without taking up wall space.
Quick win: Use a floor guide to prevent the door from swinging outward and damaging the baseboards.
Small Dressing Room Wardrobe Ideas
16. Install Floor-to-Ceiling Wardrobes
Use the vertical height to gain storage without losing floor area. High shelves work best for seasonal items like heavy coats or luggage.
Measure the ceiling height exactly to ensure the cabinets fit tightly against the crown molding or ceiling line. Custom-built units look more integrated than freestanding wardrobes in tight quarters.
- $500 – $2,000 for custom or modular units
- Secure the unit to wall studs for safety
- Use a step stool for easy access to the top tier
Quick win: Store off-season bedding in vacuum-sealed bags on the highest shelf to save even more space.
17. Add Double-Hanging Rails
Maximize a standard closet by splitting the vertical space into two levels. This setup is perfect for shirts, blouses, and folded trousers that do not need full-length hanging.
Position the top rail at least 80 inches high so the bottom items do not drag on the floor. Most people waste the bottom half of their closet, but this fix doubles capacity instantly.
- $20 – $50 for adjustable tension rods
- Install the lower rail at hip height for easy reach
- Use slim velvet hangers to prevent bulky overlaps
Best shortcut: Use an expandable closet rod if you are not ready to commit to a permanent screw-in installation.
18. Reserve One Section for Long Clothing
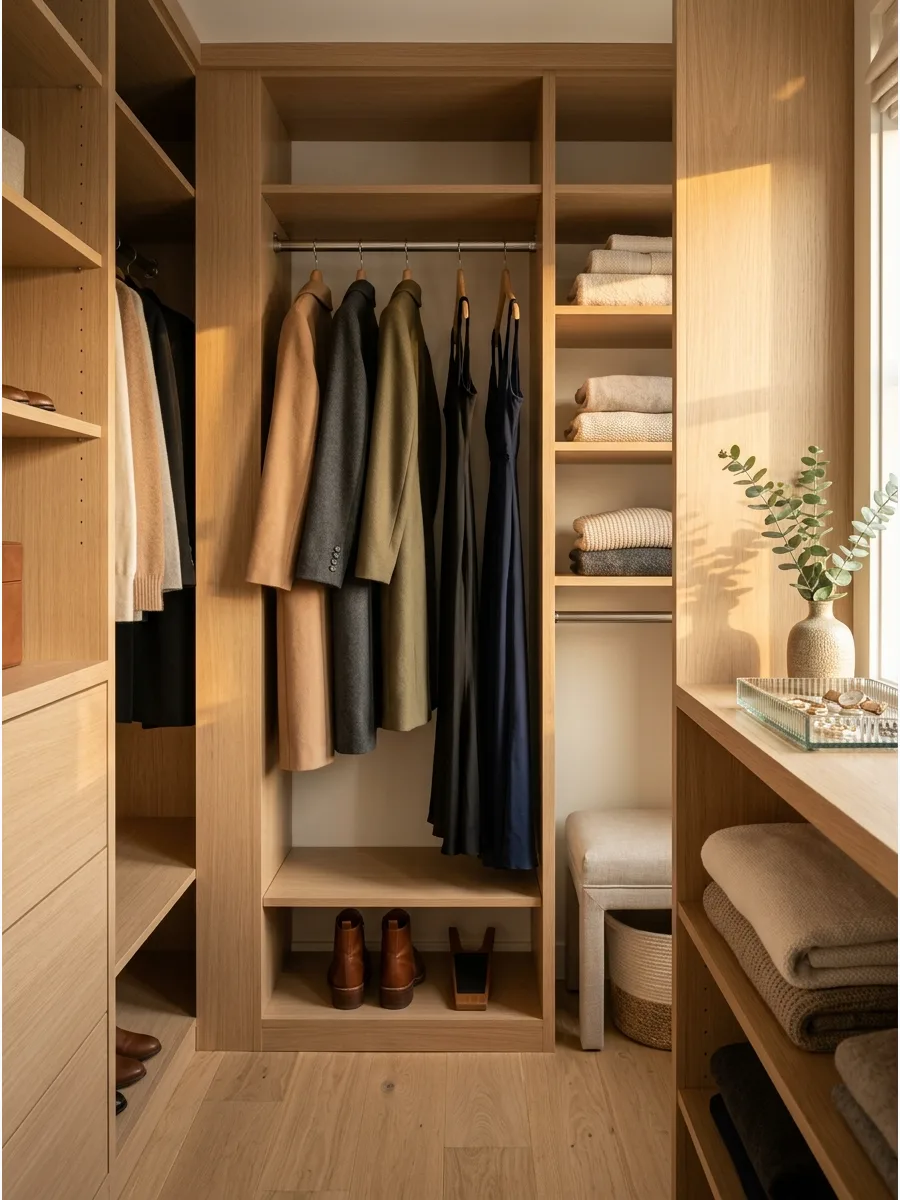
Every wardrobe needs a dedicated spot for dresses, long coats, and jumpsuits. Dedicate about 12 to 18 inches of width to a full-height section to keep these items from bunching at the bottom.
Check the length of your longest garment before setting the rail height to avoid hem wrinkles. Even a tiny sliver of full-length space prevents a messy, crammed appearance.
- $0 if rearranging existing shelves
- Place this section at the end of the wardrobe run
- Add a hook on the side wall for accessories
Most people skip this: Measure your floor-length gowns specifically, as they often require more height than standard long coats.
19. Use Adjustable Wardrobe Components
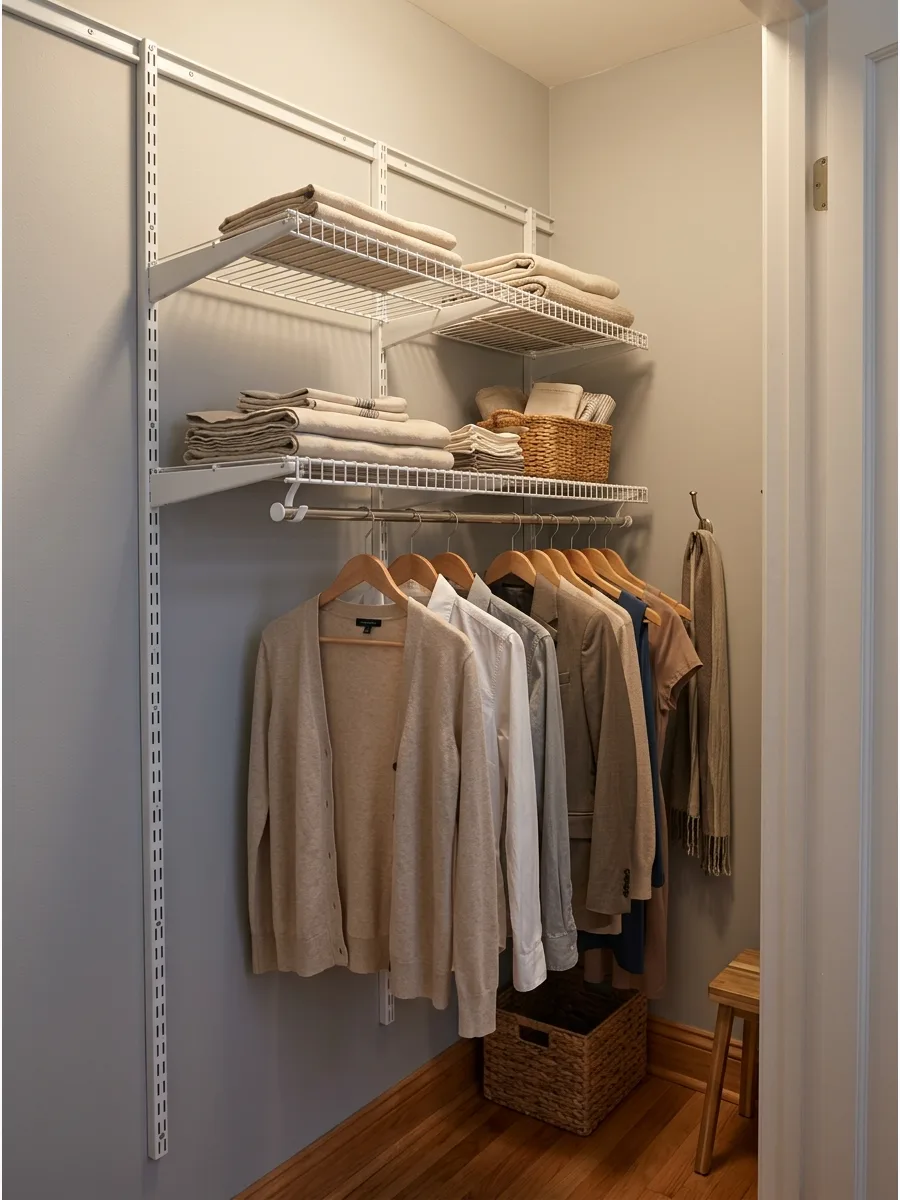
Wardrobe needs change over time as styles and seasons shift. Use a track system that allows you to move shelves and rails up or down without tools.
Opt for a wall-mounted rail system that lets you swap a hanging rod for shoe racks or drawers in minutes. Fixed shelving is a common mistake that limits your storage flexibility later on.
- $100 – $400 for a modular kit
- Level the top track perfectly before hanging the vertical standards
- Label the shelf positions for quick reassembly
Quick win: Keep extra shelf brackets in a small bin at the bottom of the closet so you can make changes on the fly.
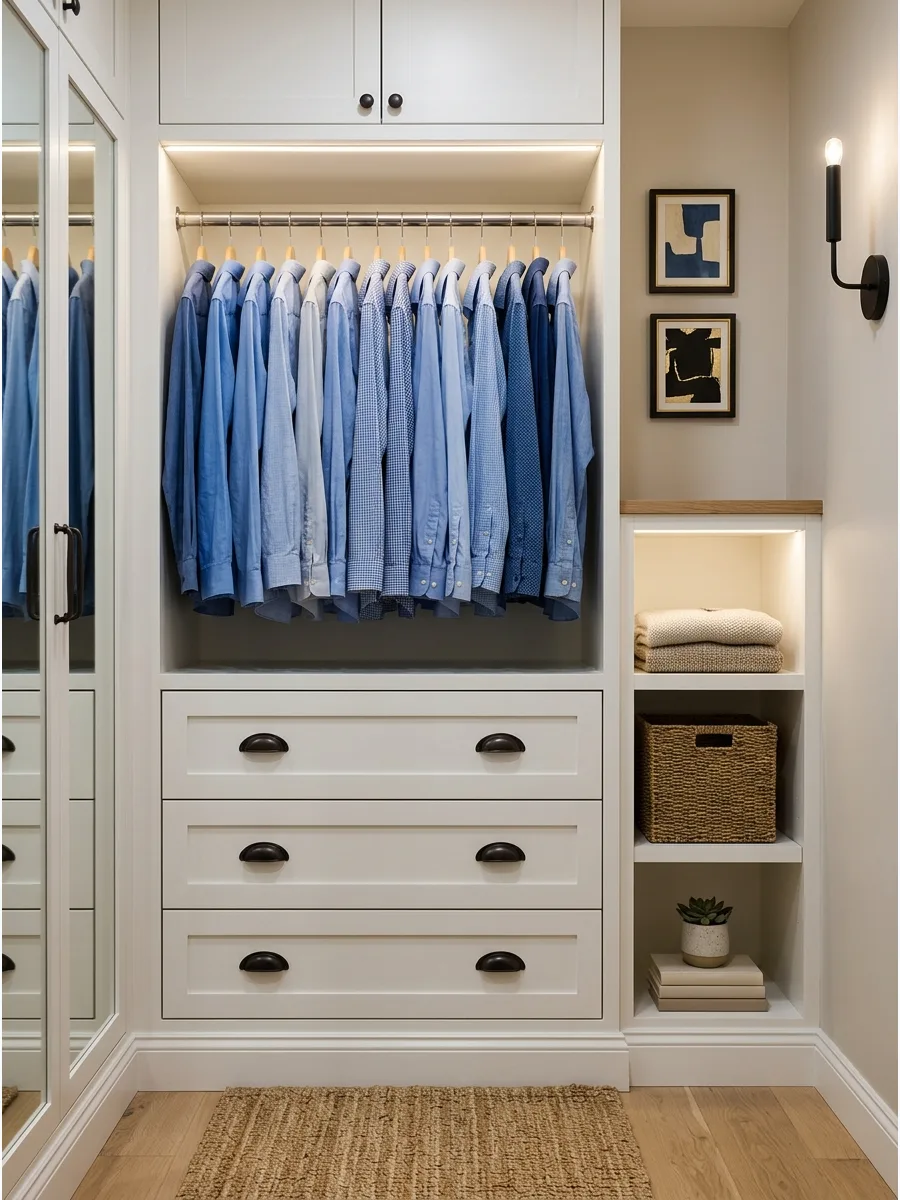
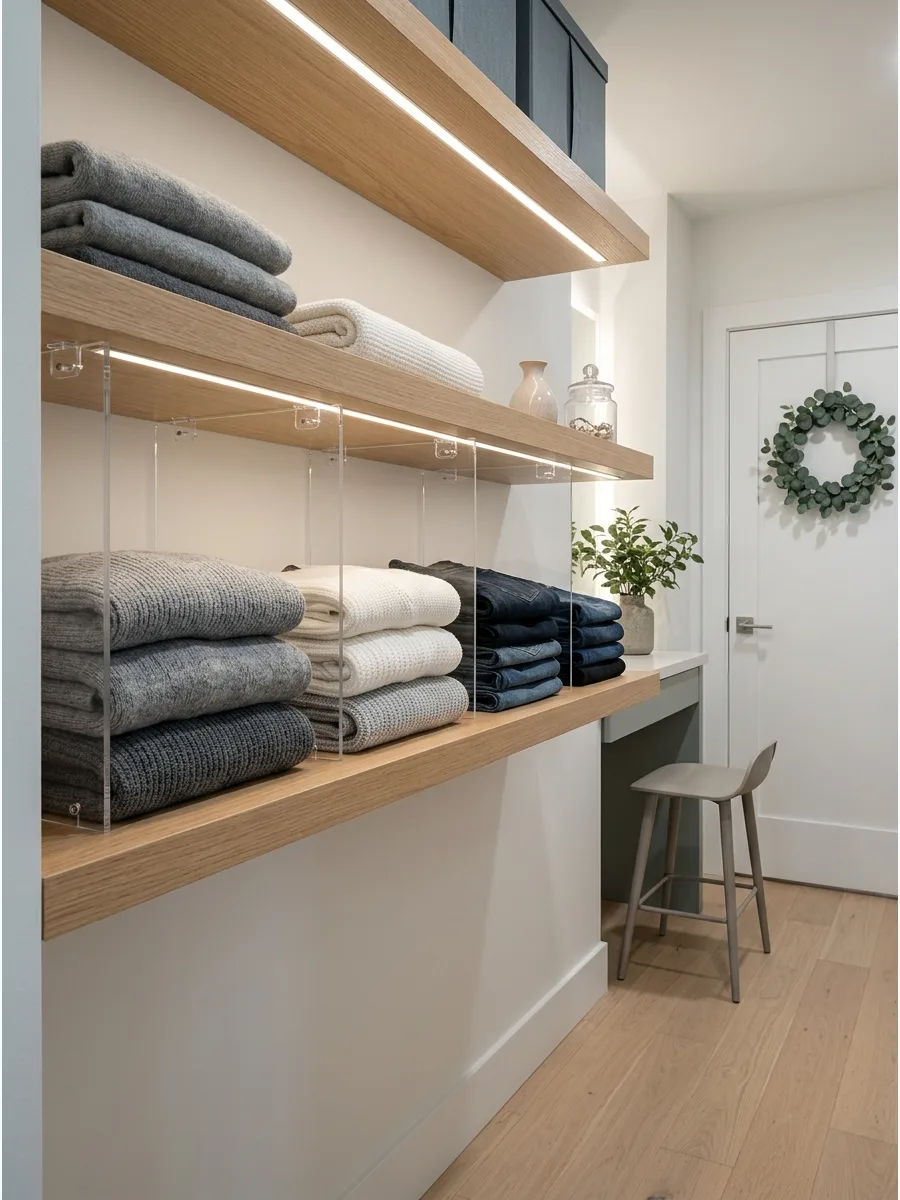
20. Combine Open and Closed Storage
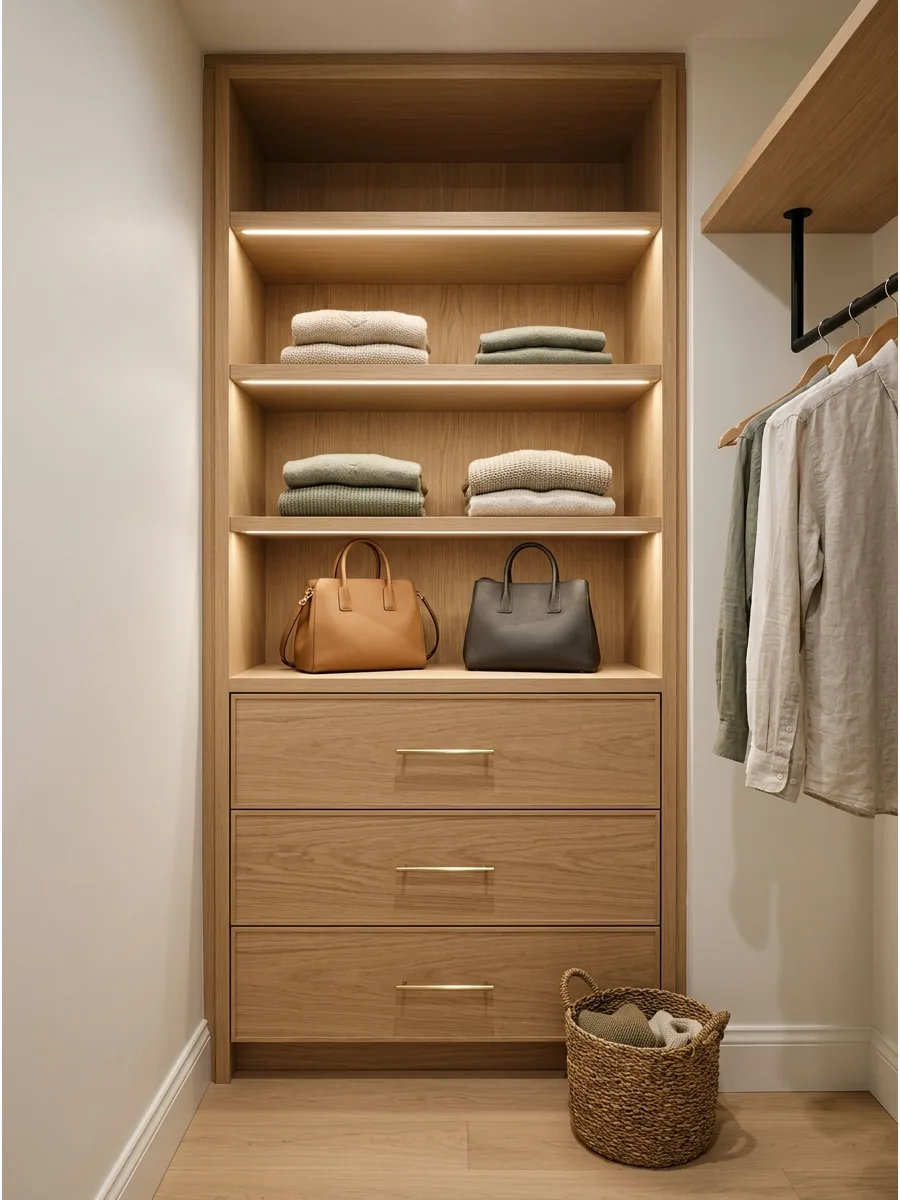
Keep the room looking tidy by hiding clutter while displaying your best pieces. Use drawers or doors for undergarments and basics, while open shelves can hold handbags or neatly folded sweaters.
Place the open sections at eye level to act as a visual focal point in the room. A mix of textures makes the space feel like a high-end boutique rather than just a storage locker.
- $150 – $600 for mixed units
- Use uniform bins on open shelves for a cleaner look
- Group items by color to maintain a cohesive aesthetic
Most people skip this: Use the closed sections for items that are hard to fold perfectly, like gym wear or socks.
21. Install Shallow Wardrobes
Standard wardrobes are often too deep for narrow walkways or small spare rooms. Use cabinets with a depth of 12 to 15 inches to keep the floor space clear.
Hang shirts facing forward on pull-out rails if the cabinet is not deep enough for side-to-side hanging. This approach works wonders for shoe storage and folded items that do not require much depth.
- $100 – $300 per unit
- Mount the unit to the wall to prevent tipping
- Use narrow hangers if trying to fit clothes sideways
Best shortcut: Shallow kitchen pantry cabinets often work perfectly as slim wardrobes for small spaces.
22. Choose Glass Wardrobe Doors
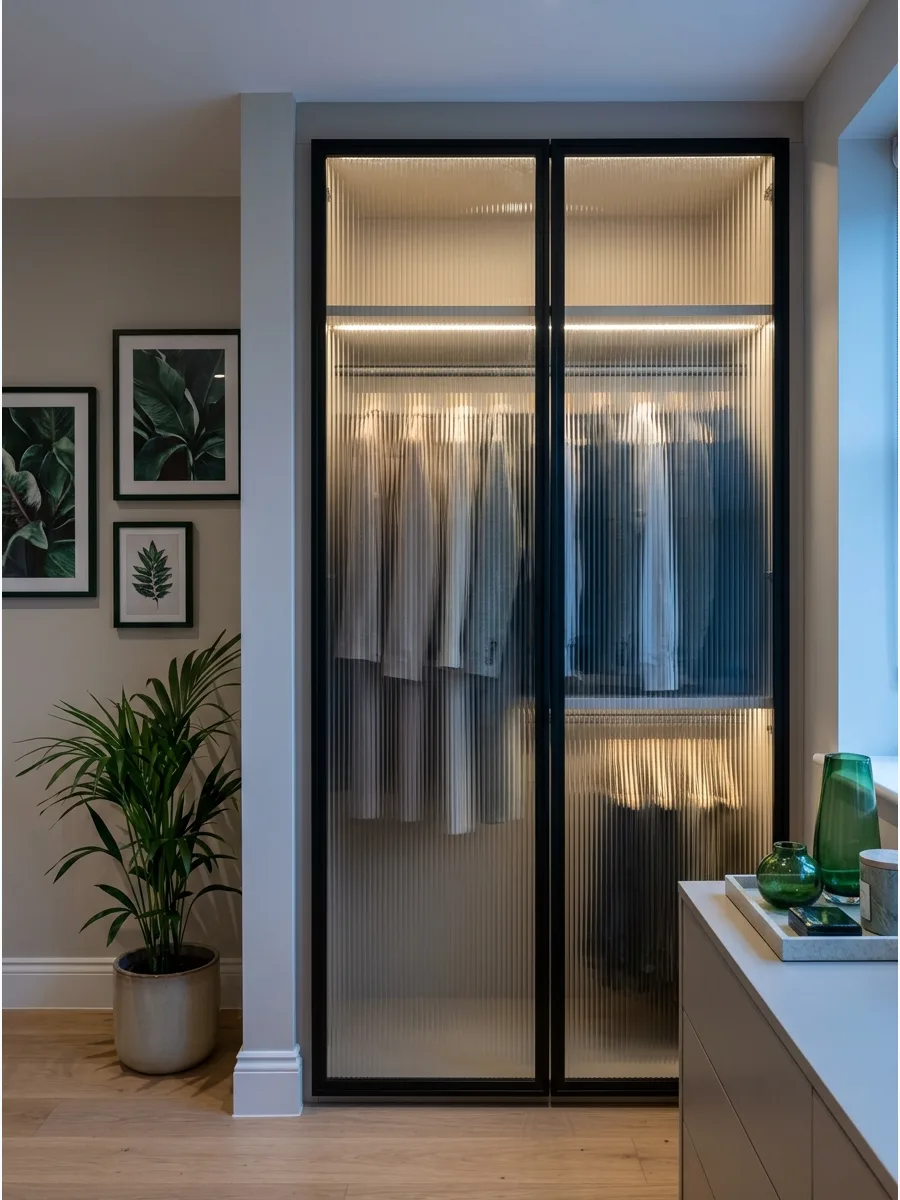
Solid doors can make a small room feel boxed in and heavy. Glass fronts create a sense of depth and allow you to see your collection without opening every door.
Select fluted or frosted glass if you want the airy feel without showing every messy detail inside. It adds a layer of sophistication that standard wood or laminate simply cannot match.
- $200 – $800 for glass door upgrades
- Clean the glass regularly with a microfiber cloth
- Install internal LED strips to light up the contents
Quick win: Use ribbed or fluted glass to hide the fact that your clothes are not perfectly color-coordinated.
23. Add Mirrored Wardrobe Doors
Mirrors are the oldest trick for making a tiny room feel twice as large. Installing mirrored fronts on your wardrobes eliminates the need for a separate floor mirror.
Choose full-length mirrors to ensure you can see your entire outfit from head to toe. The glass reflects light from windows, making a dark corner feel much brighter instantly.
- $150 – $500 for mirrored doors
- Opt for frameless mirrors for a modern, seamless look
- Ensure the door tracks are heavy-duty to support the weight
Most people skip this: Position the mirrored doors opposite a window to maximize the amount of natural light reflected into the room.
24. Match Wardrobes to the Wall Color
Help large furniture disappear by painting it the same shade as your walls. This creates a seamless built-in look that prevents the room from feeling cramped.
Use a satin or semi-gloss finish on the wardrobes for durability while keeping the walls matte. When the furniture blends in, your eyes focus on the open floor space instead of the bulky storage.
- $30 – $100 for paint and supplies
- Use a primer specifically made for laminate or wood furniture
- Lightly sand the surface before painting for better adhesion
Best shortcut: Buy paintable wallpaper for wardrobe ends to get a perfect texture match with your walls.
25. Use Handleless Wardrobe Fronts
In a narrow dressing area, even small handles can catch on sleeves or bump your hips. Push-to-open latches or finger-pull grooves create a sleek, flat surface.
Choose a high-gloss or smooth matte finish to emphasize the clean lines of the handleless design. This minimalist look makes the room feel much less cluttered and more modern.
- $10 – $50 for push-to-open hardware
- Check that the hinges are compatible with push-latches
- Keep a soft cloth nearby to wipe away fingerprints
Quick win: Use magnetic push latches for an easy DIY upgrade to existing cabinet doors.
26. Build Wardrobes Into a Sloped Ceiling
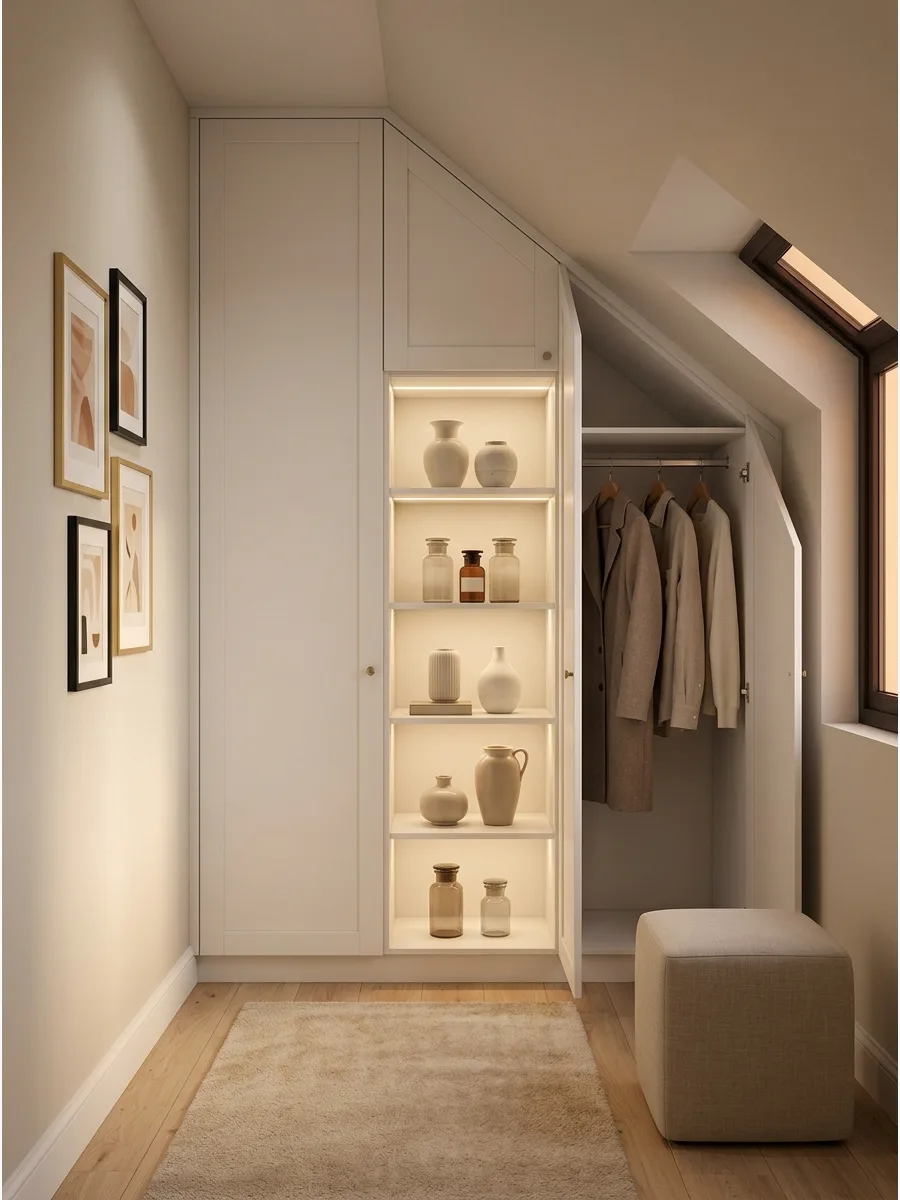
Do not let awkward attic angles go to waste in a small dressing room. Use the low eaves for shoe racks or short drawers and save the tall sections for hanging clothes.
Commission custom angled doors to follow the roofline perfectly for a high-end look. It turns a dead corner into the most functional part of the room.
- $500 – $3,000 for custom carpentry
- Measure the angle twice with a protractor before cutting
- Use pull-out drawers in the deepest, lowest parts of the slope
Most people skip this: Use the very back of deep, low eaves for long-term storage of holiday decorations or camping gear.
27. Add Wardrobes Around a Vanity
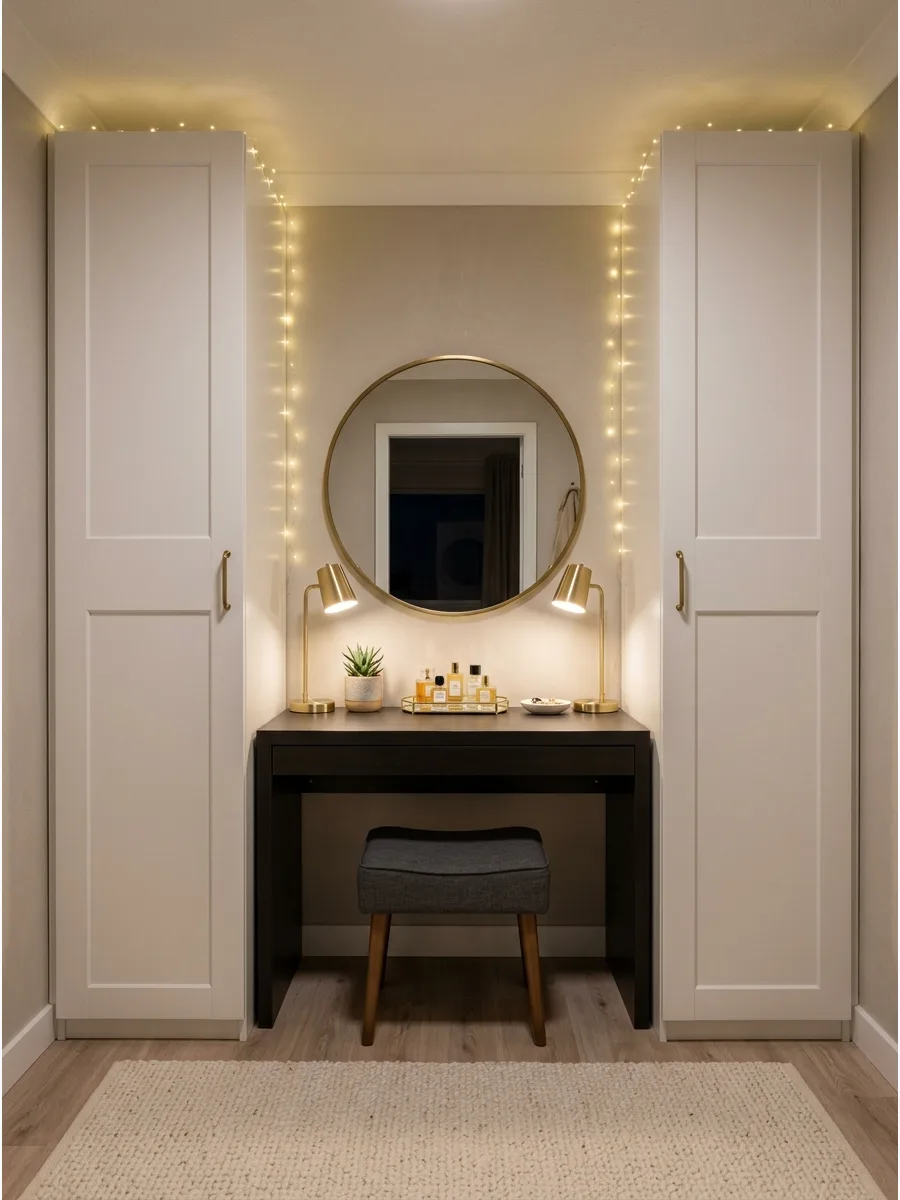
Frame your grooming station with storage to create a dedicated beauty hub. Placing a desk between two tall towers utilizes the wall space while keeping everything you need within arm's reach.
Install a large mirror and bright task lighting above the vanity to make the area feel open. This symmetrical layout provides a sense of balance in a busy room.
- $400 – $1,200 for the set
- Ensure the vanity height allows for comfortable seating
- Add a power strip inside one wardrobe for hair tools
Best shortcut: Use two identical bookcases and a floating shelf in the middle to mimic this look on a budget.
28. Create a Wardrobe Bridge Above the Vanity
Maximize the dead space above your head by connecting side wardrobes with a bridge of cabinets. This is the perfect spot for items you only use occasionally, like hats or extra linens.
Keep the bridge cabinets shallow so you do not feel closed in while sitting at the vanity. It creates a cozy, alcove-like feeling for your morning routine.
- $200 – $500 for additional upper cabinets
- Use heavy-duty wall anchors for the overhead bridge
- Install puck lights under the bridge for vanity lighting
Quick win: Store lightweight items like scarves or out-of-season hats in the overhead bridge to avoid heavy lifting.
29. Use Corner Wardrobe Shelves
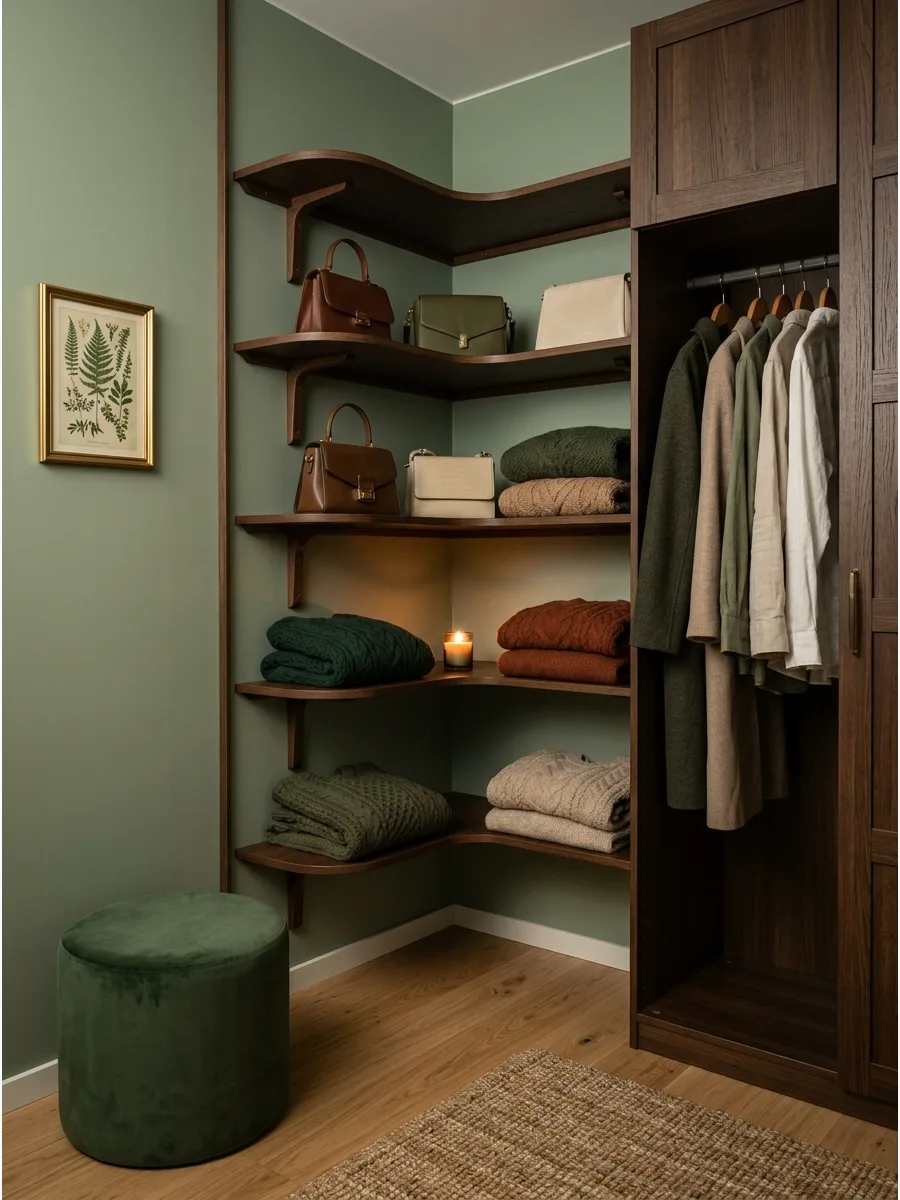
Corners are often the hardest part of a small room to use effectively. Curved or L-shaped shelves allow you to wrap your storage around the bend without losing items in the back.
Use the corner specifically for bulky items like handbags or folded sweaters that do not fit well on narrow shelves. It creates a smooth flow from one wall to the next.
- $50 – $150 for corner inserts
- Avoid hanging rails in tight corners as they make clothes hard to reach
- Use a lazy Susan for small accessories in the corner
Most people skip this: Install a vertical light strip in the corner to prevent it from becoming a dark, unusable black hole.
30. Include a Pull-Out Valet Rail
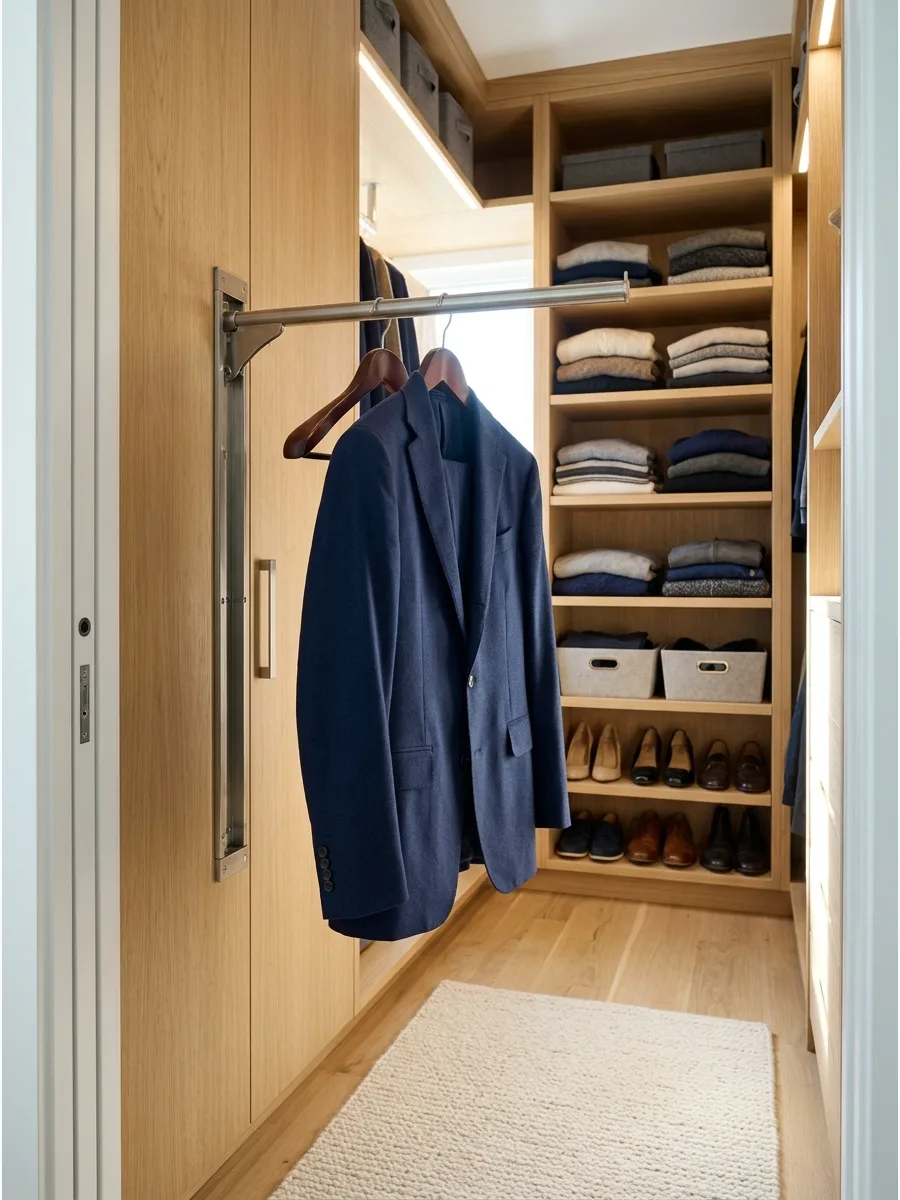
A valet rail is a tiny addition that offers huge convenience for planning outfits. It slides out when needed and tucks away completely when you are done.
Mount the rail on the outside of the wardrobe or just inside the door frame for easy access. It is the best way to air out a jacket or steam a shirt without needing a bulky floor rack.
- $15 – $40 for the hardware
- Check for clearance so the rail does not hit the door
- Install it at shoulder height for the best ergonomics
Best shortcut: A simple heavy-duty hook on the side of a cabinet can serve as a fixed valet spot if you lack the depth for a slide-out rail.
31. Conceal a Laundry Hamper

Build a pull-out or tilt-out hamper into the lower cabinetry. Keeping laundry hidden prevents the small dressing room from quickly looking untidy.
Installing a hamper right where clothes are removed stops the floor pile before it starts. A tilt-out door often feels more sturdy than a wire pull-out drawer.
- Sourcing/Timing: Prefab tilt-out kits cost $50-$150 and take an afternoon to install.
- Setup: Mount the hamper near the entry for quick drops as you enter the room.
- Adaptation: Use a wicker basket inside an open lower cubby for a cheaper, no-install fix.
Best shortcut: Buy a hamper with a washable liner so the bag stays fresh along with the clothes.
32. Add a Fold-Away Clothing Rack
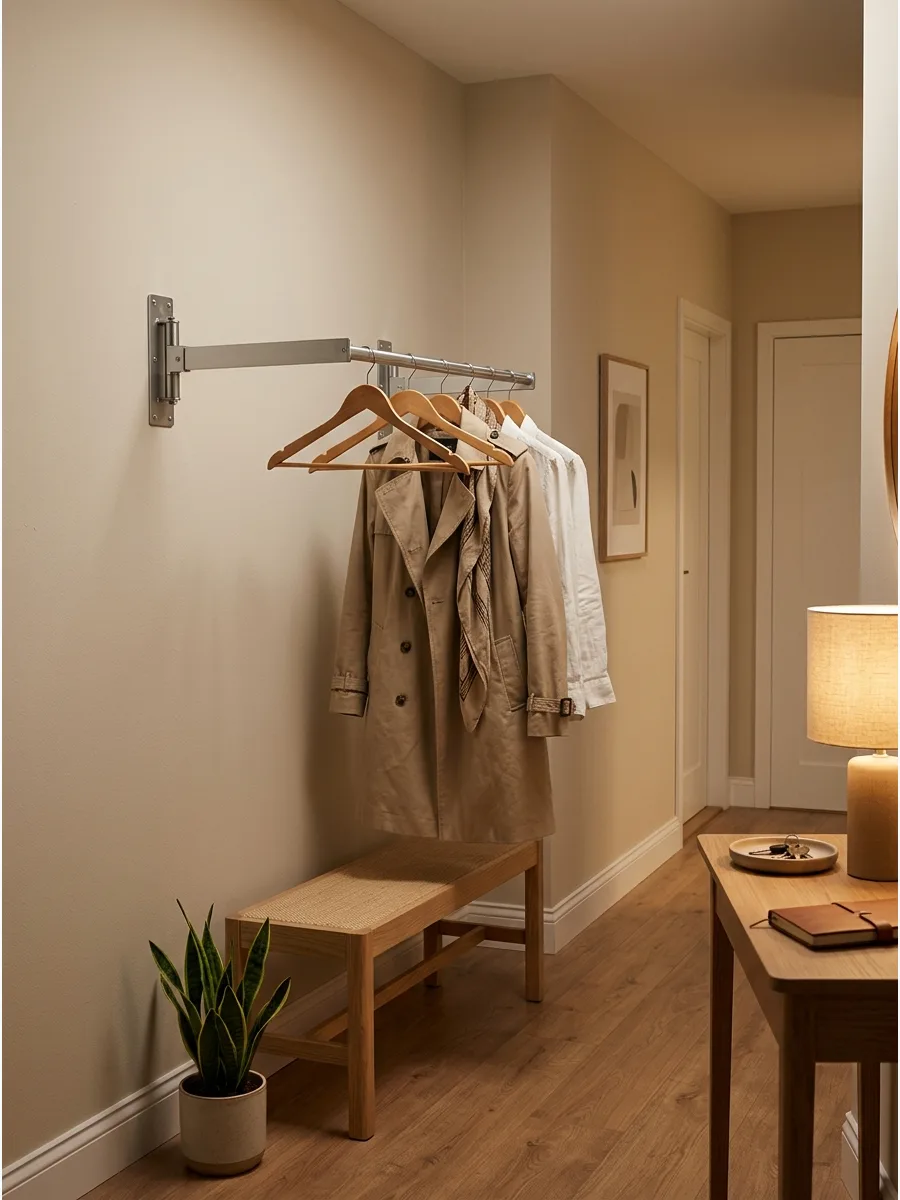
Use a collapsible or retractable rack when temporary hanging space is occasionally needed. It can hold planned outfits, delicate laundry, or guest coats and then be stored away.
Retractable wall-mounted bars disappear completely when they aren't holding tomorrow's outfit. Every small room needs a landing strip for clothes that aren't ready for the hamper or the hanger.
- Sourcing/Timing: Wall-mounted folding rods take 20 minutes to install with a drill.
- Setup: Screw directly into a wall stud to support the weight of heavy winter coats.
- Adaptation: Use an over-the-door folding hook if wall space is limited or for renters.
Quick win: Place this near the mirror to make outfit planning much faster in the morning.
Small Dressing Room Drawer and Shelf Ideas
33. Build Drawers Below Hanging Clothes
Install shallow drawers beneath shirts, jackets, or short garments. This uses the lower wardrobe area for underwear, accessories, folded clothing, and smaller items.
Utilizing the dead zone under hanging rods maximizes every inch of vertical wall space. Drawers are always better than floor stacks for keeping dust off your knits.
- Sourcing/Timing: Modular drawer units start around $40 per drawer and assemble quickly.
- Setup: Measure the height of your longest shirt to ensure drawers don't crush the fabric.
- Adaptation: Clear plastic bins work as a budget-friendly drawer alternative for open shelving.
Most people skip this: Leave a two-inch gap between the rod and the drawer top for easy hanger movement.
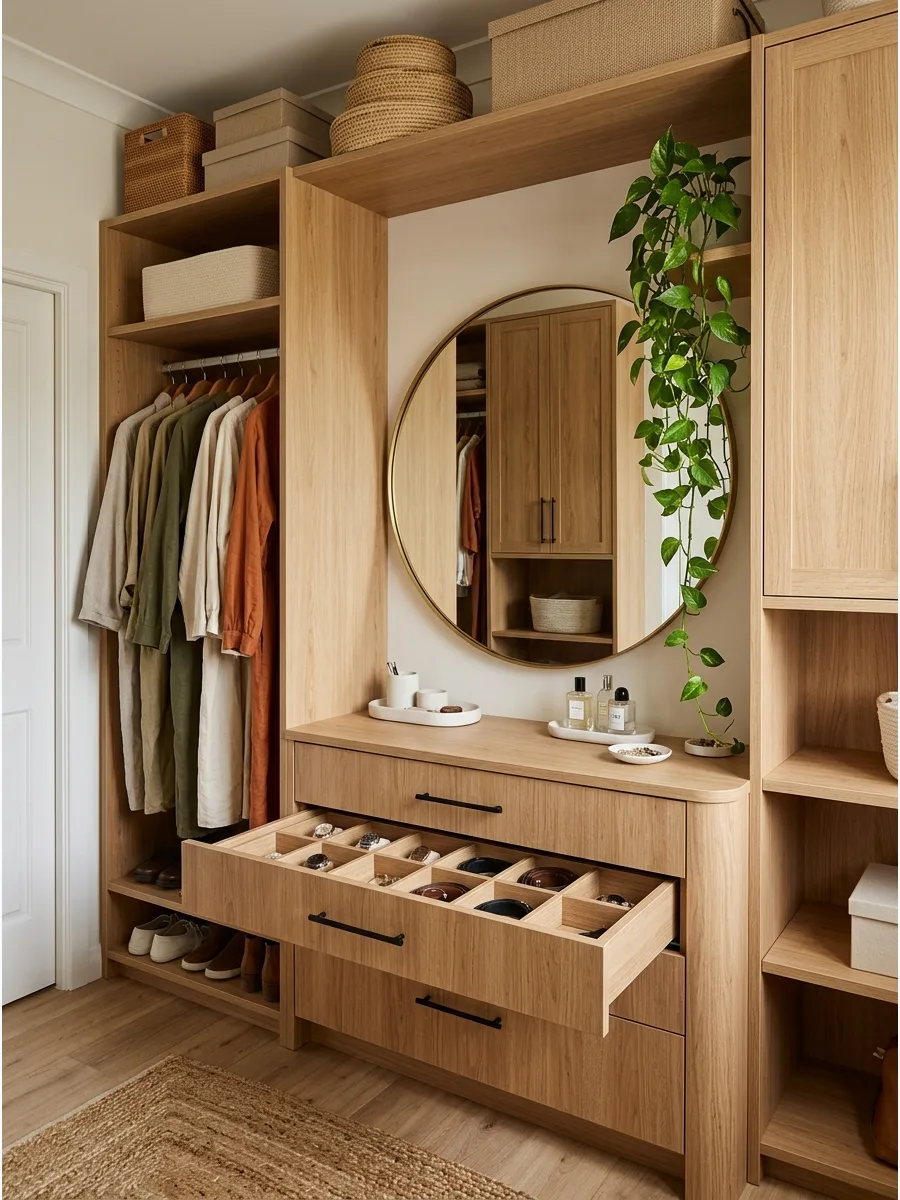
34. Use Shallow Accessory Drawers
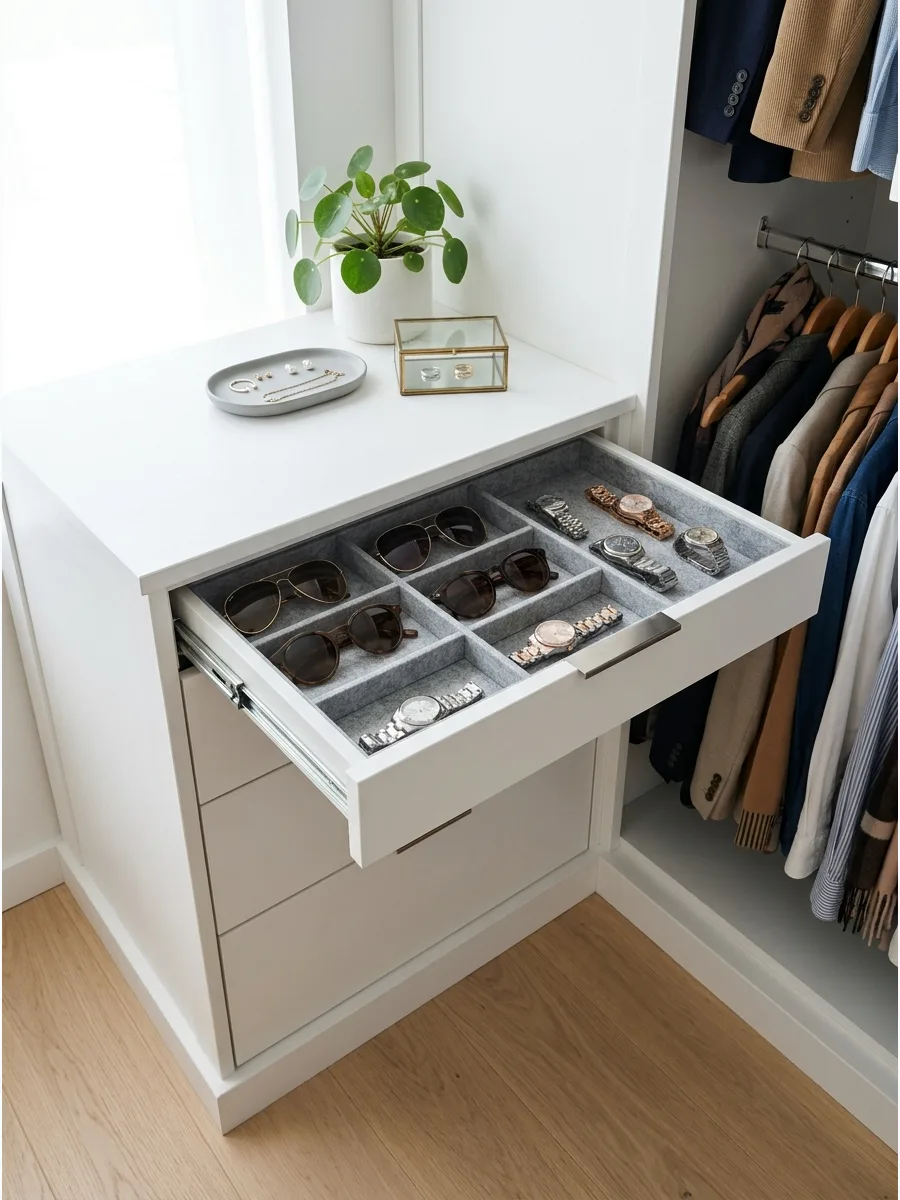
Add narrow drawers with divided interiors for jewelry, watches, belts, sunglasses, and hair accessories. Shallow storage keeps small items visible instead of allowing them to become buried.
Felt-lined dividers prevent delicate jewelry from tangling or scratching during the morning rush. A drawer that is only three inches deep is perfect for small-scale organization.
- Sourcing/Timing: Custom felt inserts take five minutes to drop into existing drawers.
- Setup: Place these drawers at chest height so you do not have to bend down to see small items.
- Adaptation: Use ice cube trays or small ceramic bowls inside a standard drawer for a DIY version.
Quick win: Group items by frequency of use so your daily watch is always in the front corner.
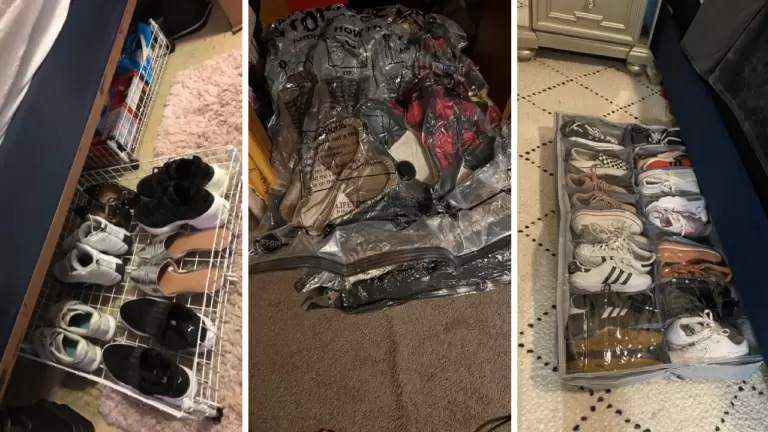
35. Install Pull-Out Shoe Shelves
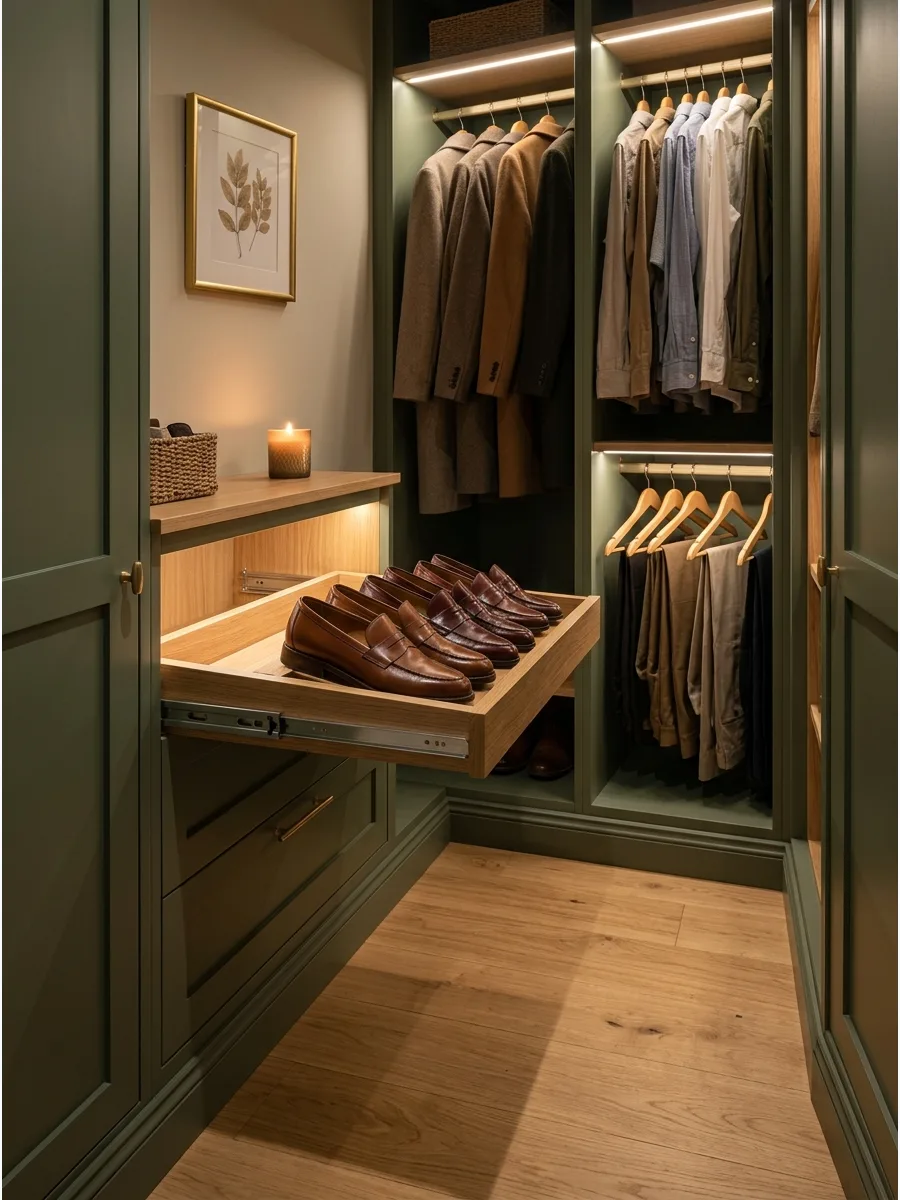
Use angled or flat shelves that slide forward from the wardrobe. Pull-out storage makes shoes at the back easier to see without requiring a deep open display.
Sliding shelves allow for double-row storage without losing track of the pairs in the back. Keeping shoes off the floor makes the entire room feel more high-end and spacious.
- Sourcing/Timing: Slide-out hardware kits cost about $30 per shelf and require basic tools.
- Setup: Space shelves 7 inches apart for flats and 10 inches for heels or boots.
- Adaptation: Use a simple plastic pull-out tray on a fixed shelf for a similar effect.
Best shortcut: Install the highest shoe shelf no higher than eye level so you can see the toes of every pair.
36. Create a Narrow Shoe Wall
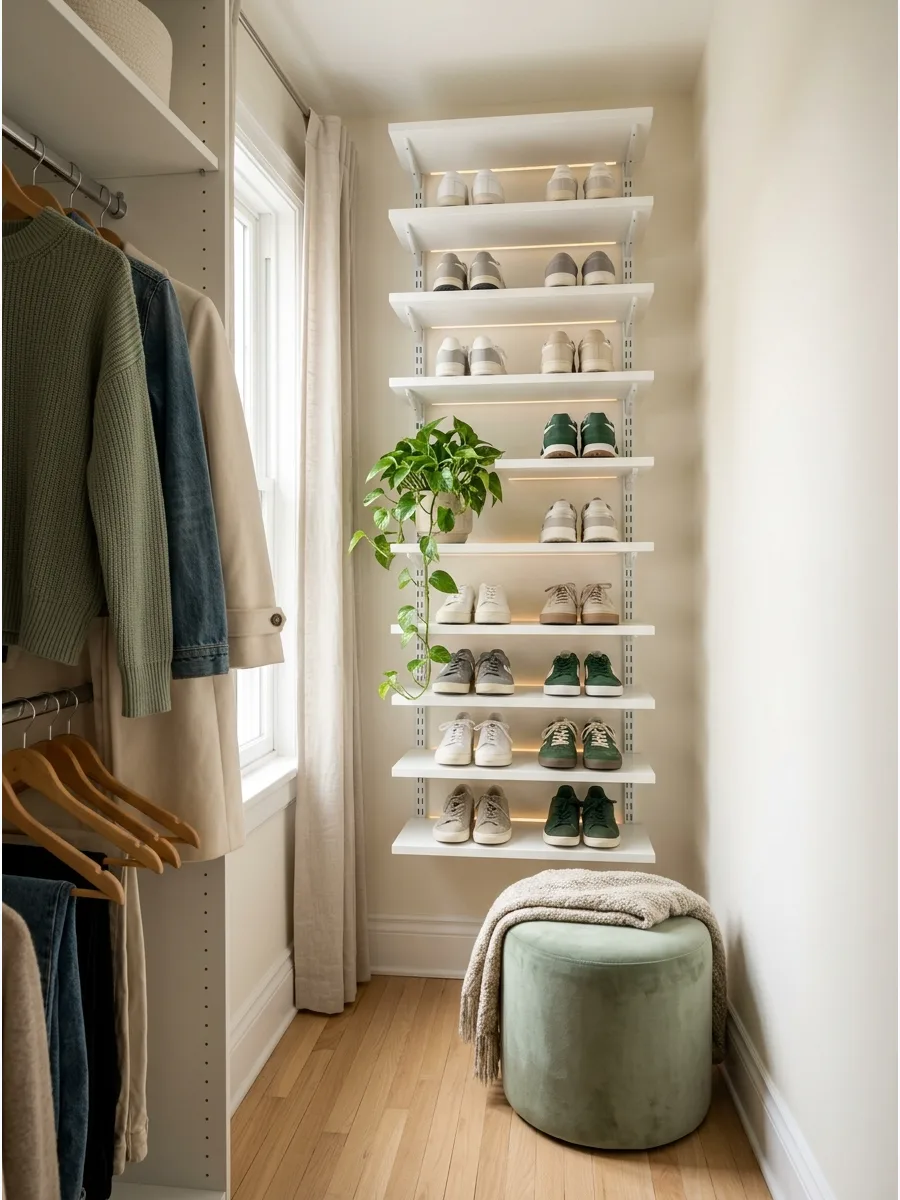
Dedicate one shallow wall to rows of adjustable shoe shelves. Keeping the shelves narrow preserves the walkway while giving every pair a defined location.
Shallow shelving units that are only six inches deep fit perfectly behind doors or in tight corridors. Seeing your full collection at once makes it easier to get dressed and stay organized.
- Sourcing/Timing: Wall-mounted track systems can be installed in under two hours.
- Setup: Use adjustable brackets so you can change the height for winter boots later.
- Adaptation: Picture ledge shelves are the perfect depth for displaying high-heeled shoes.
Most people skip this: Face one shoe forward and one backward to fit more pairs on a narrow shelf.
37. Display Handbags in Vertical Cubbyholes
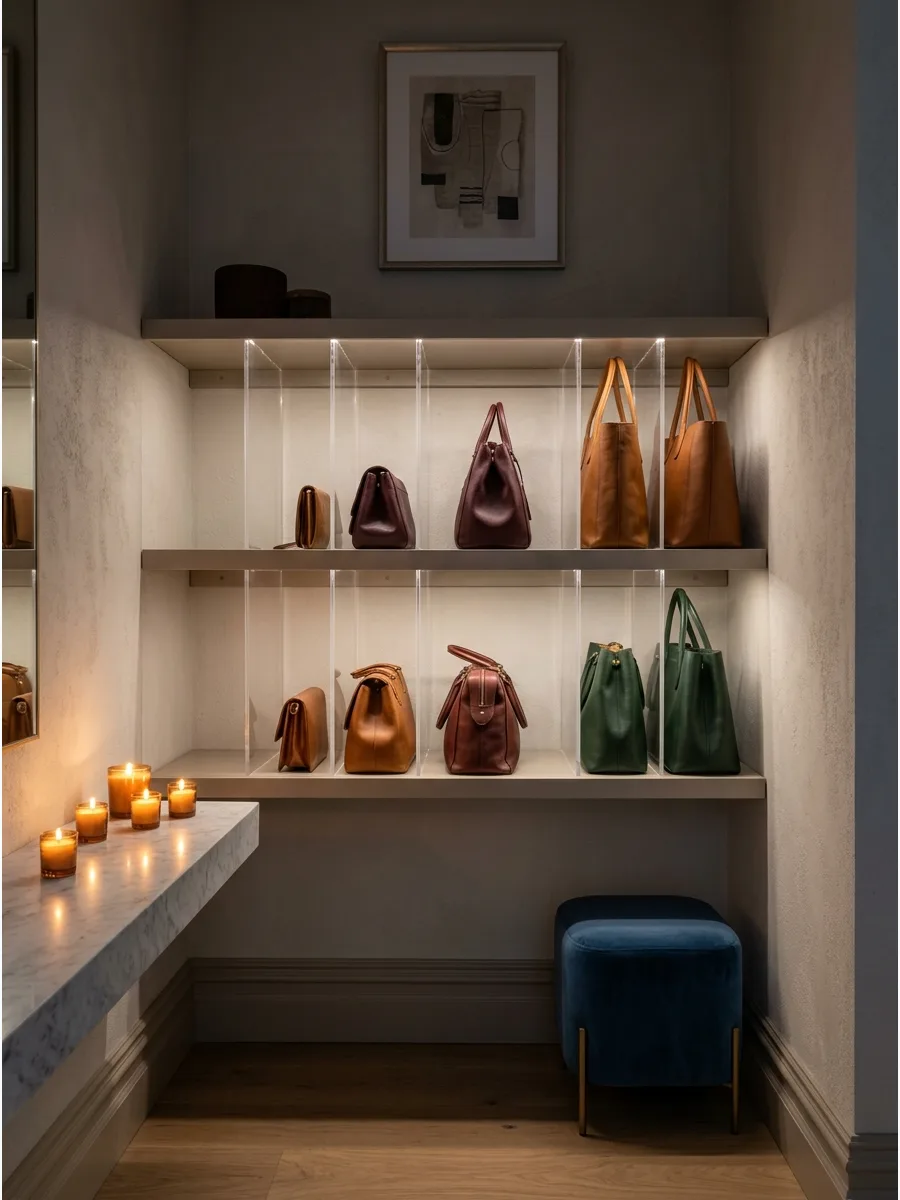
Create narrow compartments that hold bags upright instead of stacking them.
Vary the cubby heights to accommodate small purses, medium handbags, and taller totes. Vertical dividers stop soft-sided bags from flopping over and losing their shape over time. Organizing by size creates a clean, boutique-style look in even the smallest corner.
- Sourcing/Timing: Acrylic shelf dividers cost $15-$30 for a pack of four.
- Setup: Space dividers 4 to 6 inches apart depending on the thickness of your bags.
- Adaptation: Use large office file sorters to keep clutches and small bags upright on a shelf.
Quick win: Stuff empty bags with tissue paper so they stand tall and look great in their cubbies.
38. Add Shelf Dividers for Folded Clothing
Use dividers to separate sweaters, jeans, shirts, and bags. Defined sections help folded stacks remain upright and prevent one category from spreading across the shelf.
Dividers create the structure of a drawer without the cost or bulk of a heavy cabinet. Neat stacks make it much easier to pull one item out without toppling the rest.
- Sourcing/Timing: Tension-fit or clip-on dividers take seconds to install with no tools.
- Setup: Align dividers with the width of your folded clothes to maximize the shelf span.
- Adaptation: Use bookends to keep stacks of jeans from leaning over on open shelving.
Best shortcut: Fold clothes using a file method so you can see the edge of every shirt in the stack.
39. Use Matching Storage Boxes Above Wardrobes
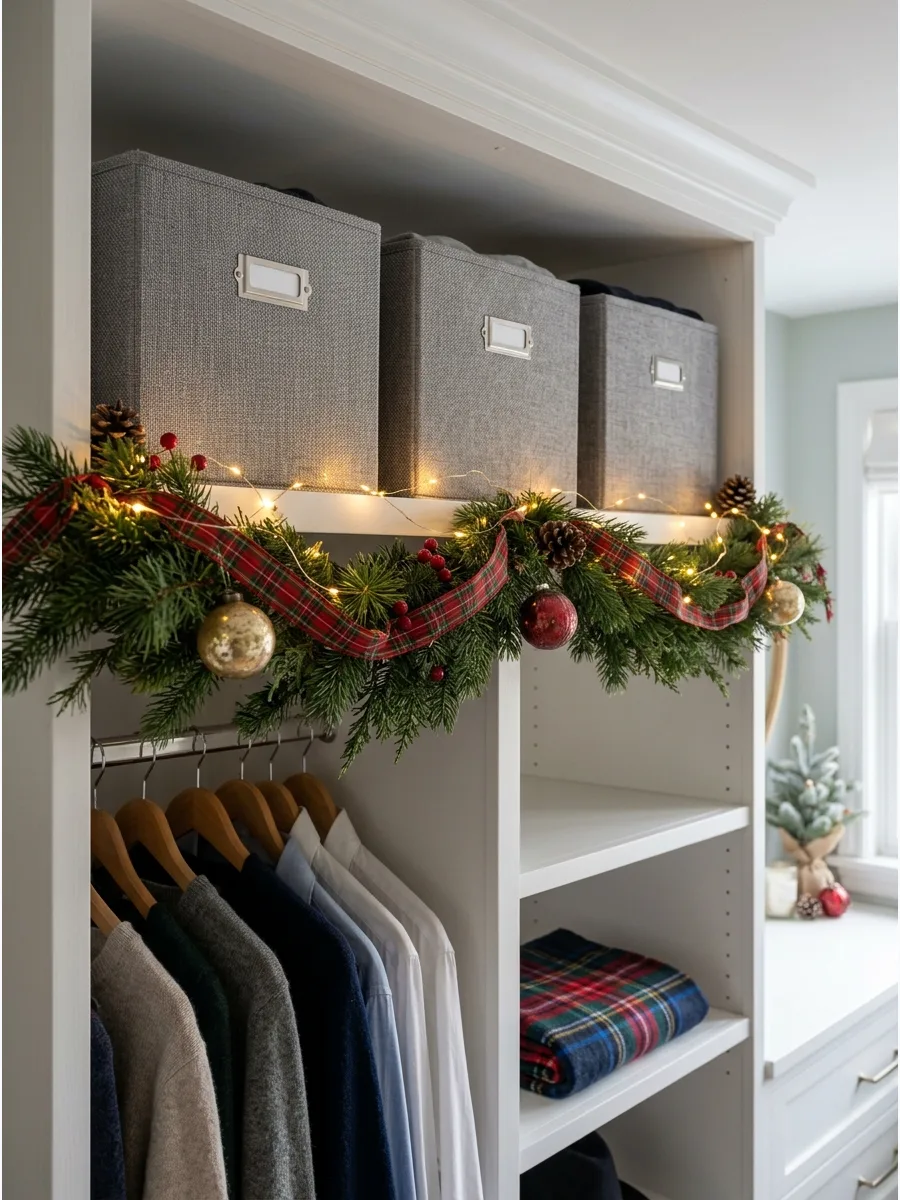
Place coordinated boxes on the highest shelves for seasonal accessories and rarely used items. Labels make the contents easier to identify without opening every container.
Uniform boxes hide visual clutter and make the top of a wardrobe look like a deliberate design choice. This is the best place to store heavy winter gear during the summer months.
- Sourcing/Timing: Matching bins cost $10-$20 each at most home stores.
- Setup: Measure the gap between the wardrobe top and the ceiling before buying boxes.
- Adaptation: Wrap old cardboard boxes in matching contact paper for a custom, low-cost look.
Most people skip this: Use clear labels even if you think you will remember what is inside; you won't in six months.
40. Install Vertical Hooks on a Narrow Wall
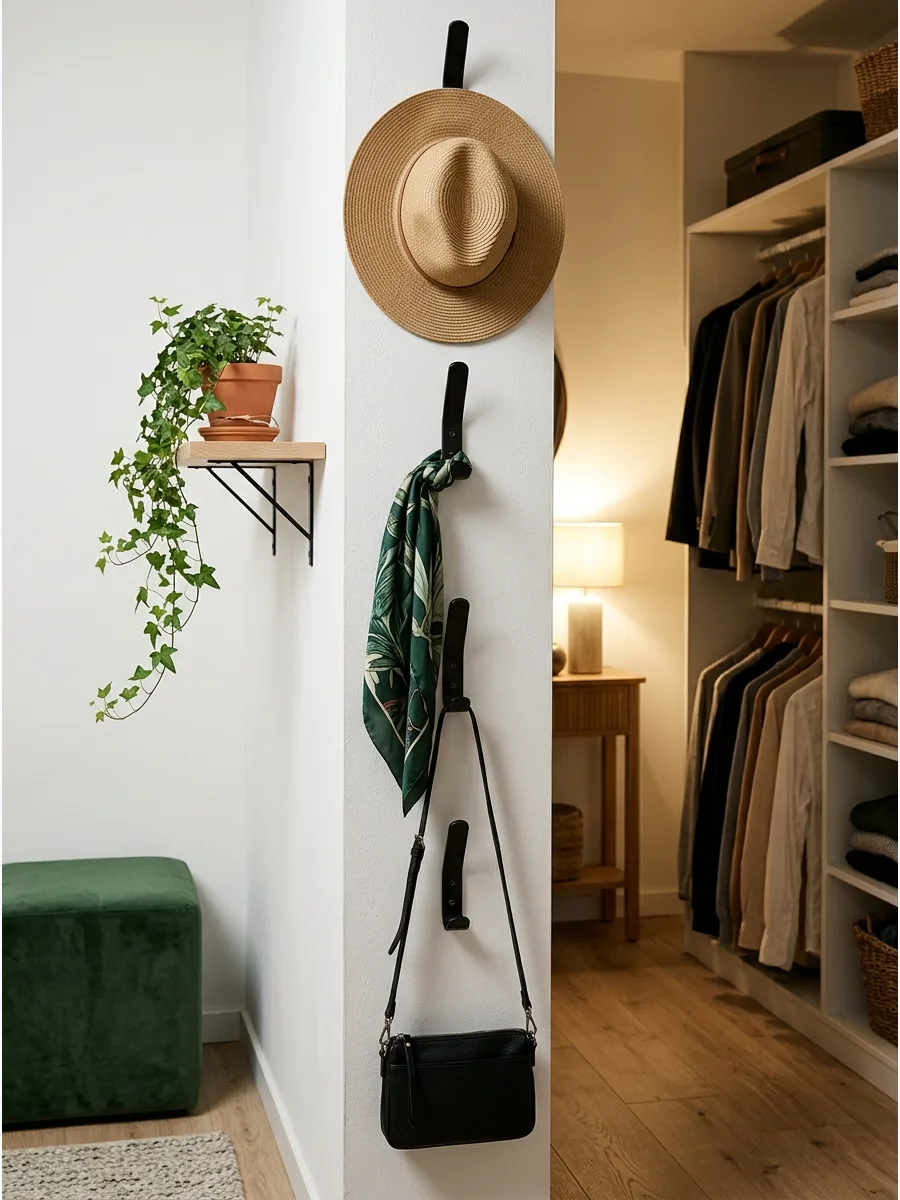
Arrange hooks above one another for belts, hats, scarves, or frequently used bags. Vertical placement uses a narrow wall section without requiring a wide shelf.
Staggering hooks vertically turns a useless sliver of wall into a high-capacity accessory station. Hooks are the fastest way to tidy up items that usually end up on a chair.
- Sourcing/Timing: A set of decorative hooks costs $20 and takes 15 minutes to screw in.
- Setup: Space hooks at least 12 inches apart so items do not overlap too much.
- Adaptation: Use a vertical coat rack if you cannot drill into the walls.
Quick win: Use the lowest hook for heavy bags to keep the weight closer to the floor for stability.
41. Use the Back of the Door
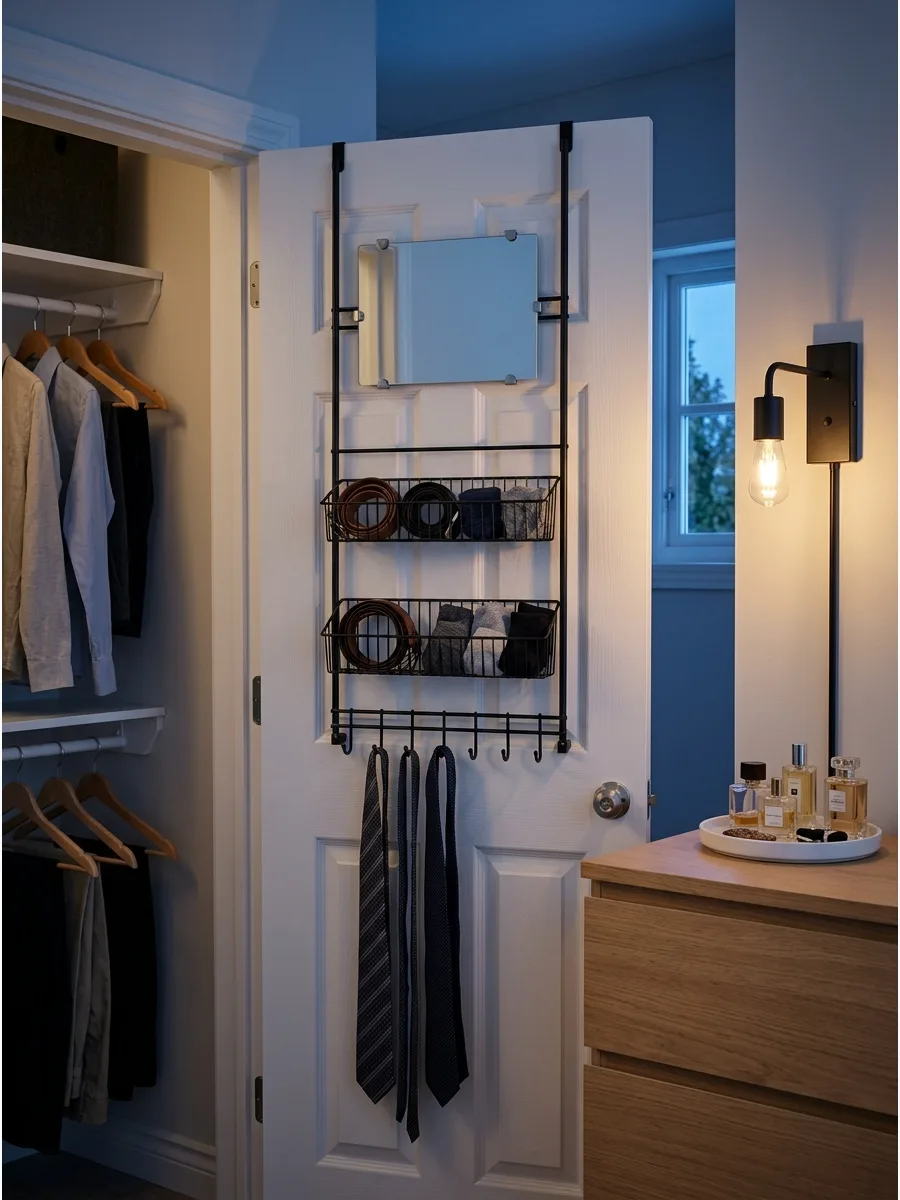
Add a slim organizer, mirror, hooks, or accessory rails to the inside of the dressing-room door. Keep the storage shallow enough that the door can still close comfortably.
The back of the door is prime real estate that most people leave completely empty. This is the perfect spot for long items like ties or belts that need to hang straight.
- Sourcing/Timing: Over-the-door organizers cost $20-$50 and require no assembly.
- Setup: Check the clearance between the door and the wall when open to ensure the organizer fits.
- Adaptation: Screw individual hooks directly into a solid wood door for a more permanent feel.
Best shortcut: Add small felt pads to the back of the organizer to prevent it from banging against the door.
42. Build a Jewelry Display Into a Cabinet Door
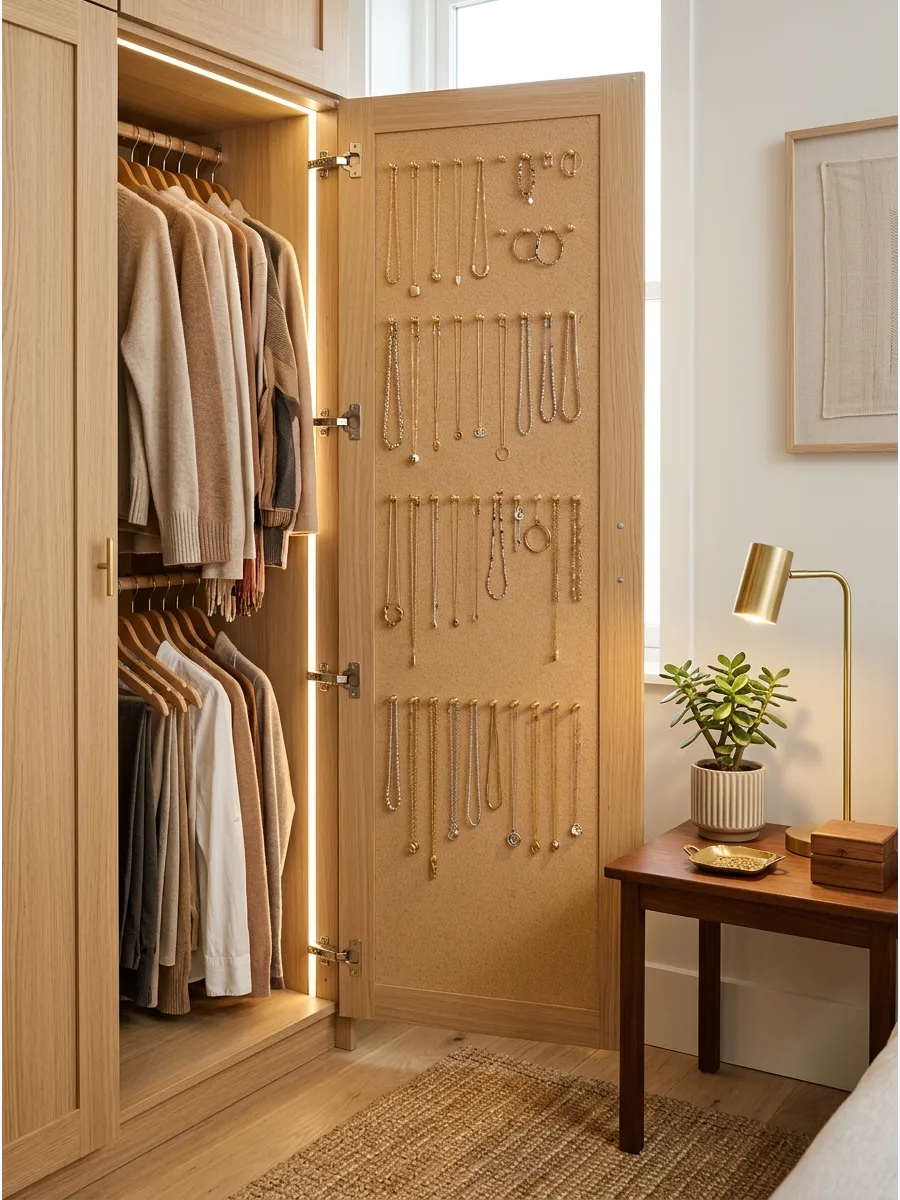
Line the interior of a wardrobe door with hooks, small trays, or a fabric-covered panel. Jewelry remains visible and organized without taking over the vanity surface.
Turning the inside of a door into a jewelry gallery keeps necklaces from tangling while saving drawer space. It makes the most of the vertical space that is otherwise hidden.
- Sourcing/Timing: Self-adhesive cork or felt panels cost under $20 and take 10 minutes to apply.
- Setup: Ensure jewelry is thin enough to clear the shelves inside when the door is shut.
- Adaptation: Use a magnetic strip for hairpins and small metal accessories.
Most people skip this: Group necklaces by length so the longest ones do not get caught in the door hinges.
43. Add a Pull-Out Mirror With Storage
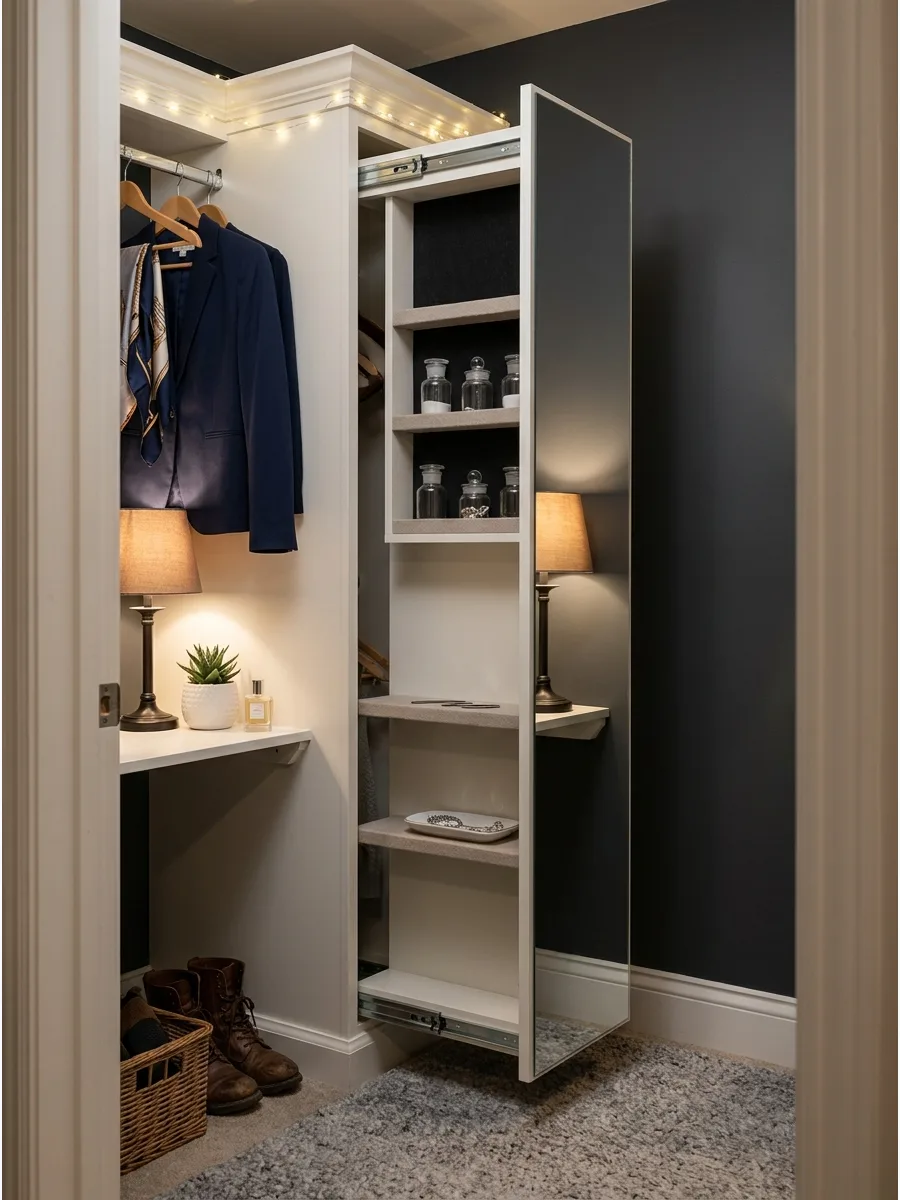
Install a narrow vertical unit that slides out to reveal a mirror and hidden accessory compartments. This combines two functions within the width of a small cabinet.
A sliding mirror saves you from needing a dedicated wall for a full-length glass. Hidden storage behind the glass is ideal for high-value items or daily skincare.
- Sourcing/Timing: Specialized pull-out mirror hardware costs $100-$300 and needs careful installation.
- Setup: Requires a gap of about 4-6 inches between the wardrobe and the wall.
- Adaptation: Mount a swivel mirror to the side of a cabinet if you don't have room for a track.
Quick win: Install the mirror near a light source or window so you get the best reflection when it is pulled out.
Small Dressing Room Ideas
44. Wall-Mounted Mirror Ironing Station
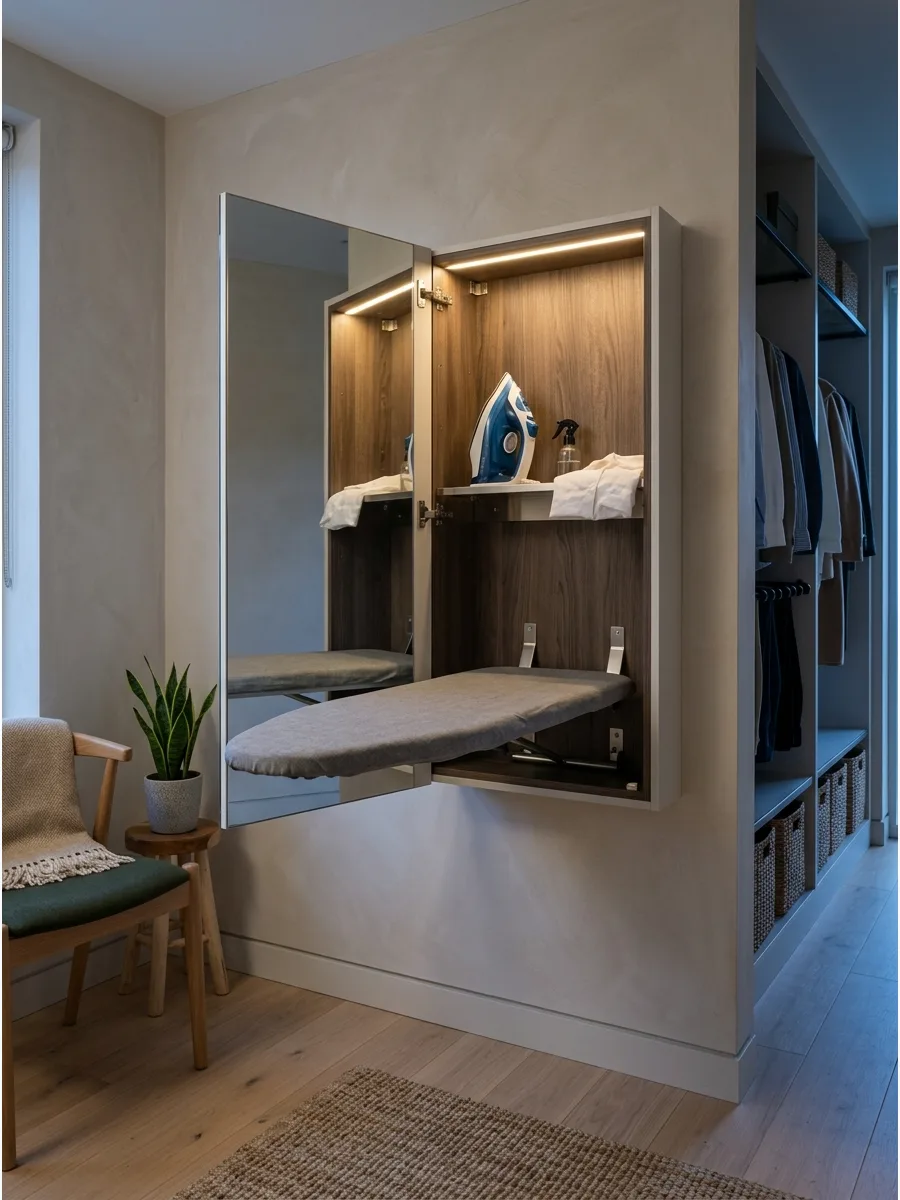
A wall-mounted cabinet hides a fold-down ironing board behind a full-length mirror, serving two purposes in a compact footprint. This setup eliminates the struggle of wrestling with heavy boards in tight quarters while providing a necessary dressing room reflection.
Mount the unit at elbow height to ensure ergonomic comfort while pressing garments. It is far more efficient to choose a model with built-in heat-resistant shelving for the iron to keep surfaces clear.
- Look for recessed models to save an extra three inches of depth if wall studs allow.
- Install near a grounded outlet to avoid using extension cords across the walking path.
- Replace the standard fabric cover with a high-heat metallic version for faster wrinkle removal.
Quick win: Place a small Command hook on the side of the cabinet to hold freshly pressed hangers before they go into the wardrobe.
Small Dressing Room Vanity Ideas
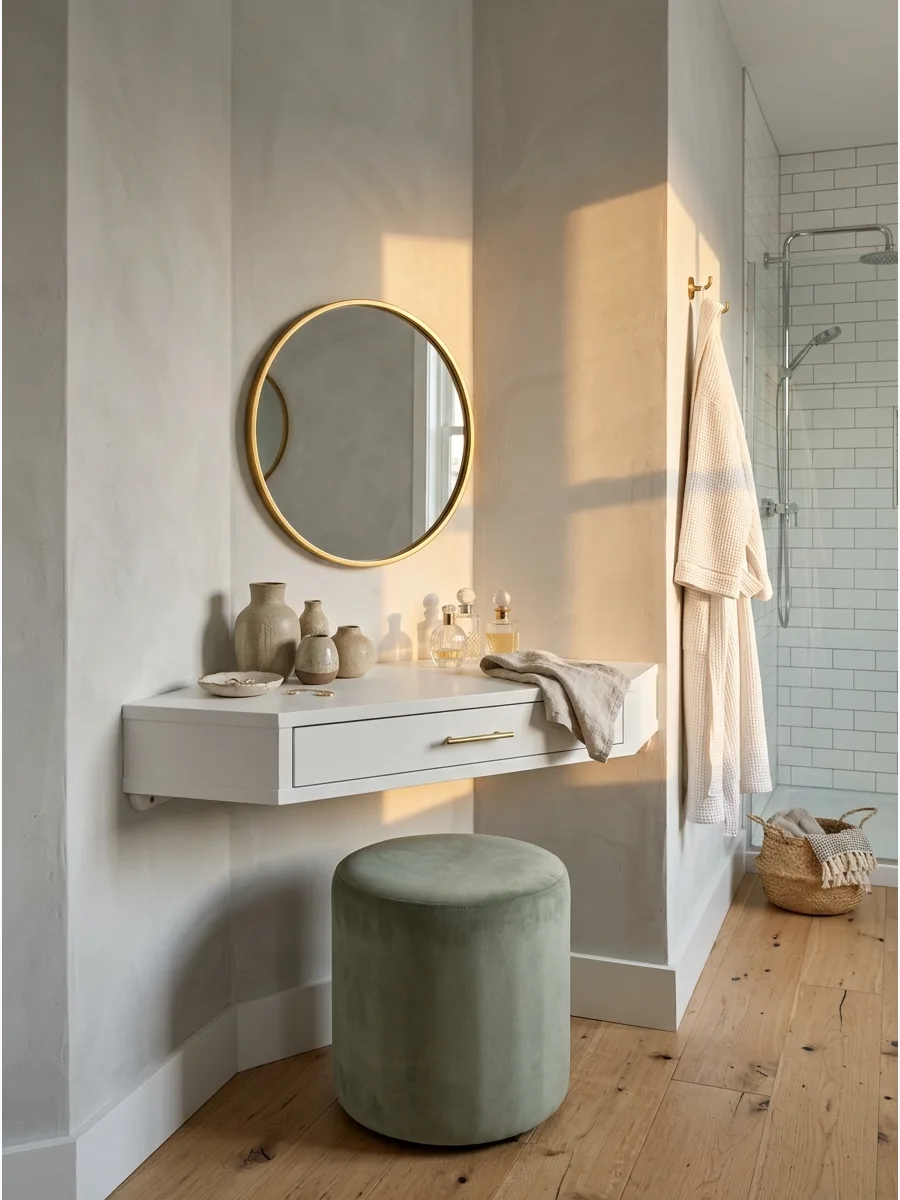
45. Install a Floating Dressing Table
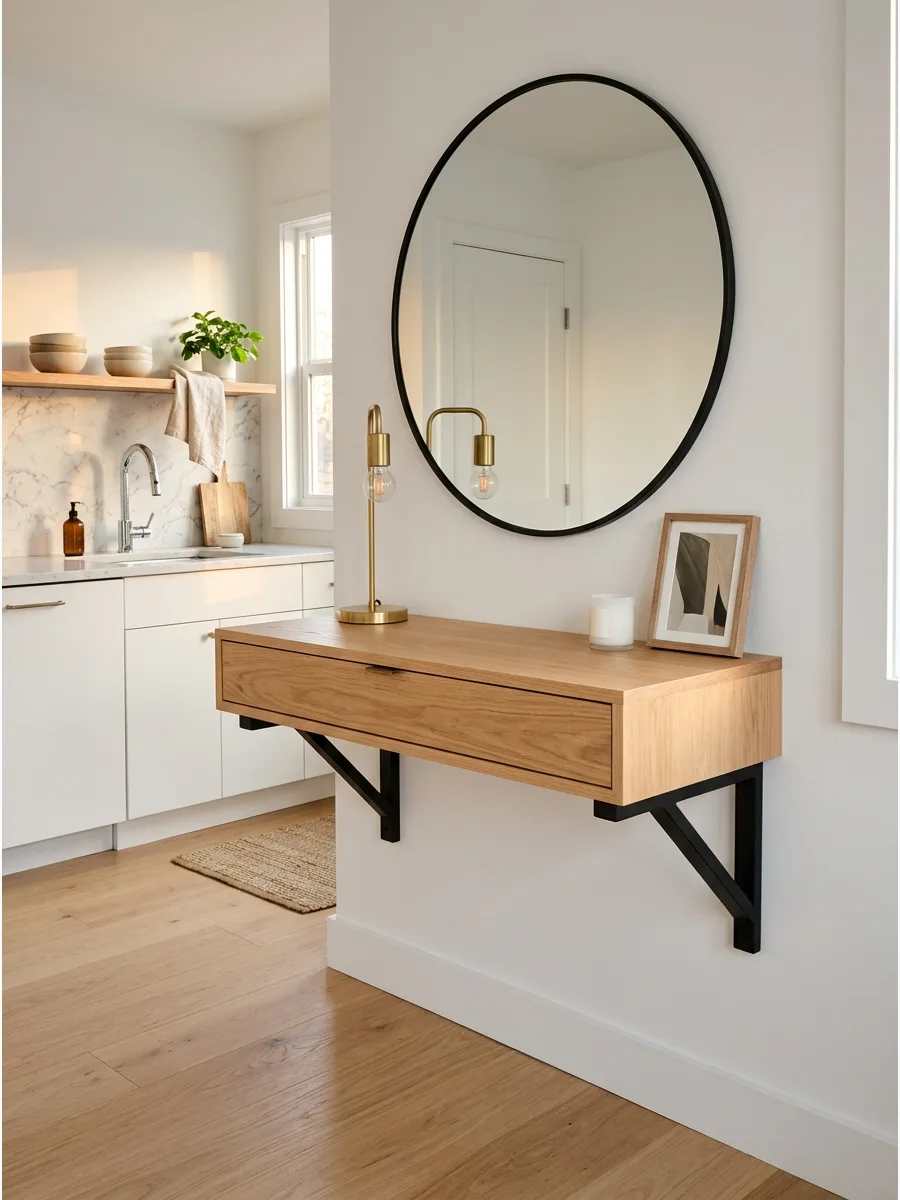
Mount a shallow drawer or countertop beneath a mirror. Keeping the floor visible beneath the vanity helps the small dressing room feel less crowded.
Floating furniture creates an illusion of more floor space while providing a dedicated spot for grooming. This setup works perfectly in a corner that is too small for a full-sized desk.
- Sourcing/Timing: Floating vanities take about an hour to mount securely to wall studs.
- Setup: Mount it at 28-30 inches high for comfortable use with a standard stool.
- Adaptation: Use two sturdy decorative brackets and a piece of finished lumber for a custom shelf.
Most people skip this: Choose a stool that tucks completely under the shelf to keep the walkway clear when not in use.
46. Build a Vanity Between Wardrobes
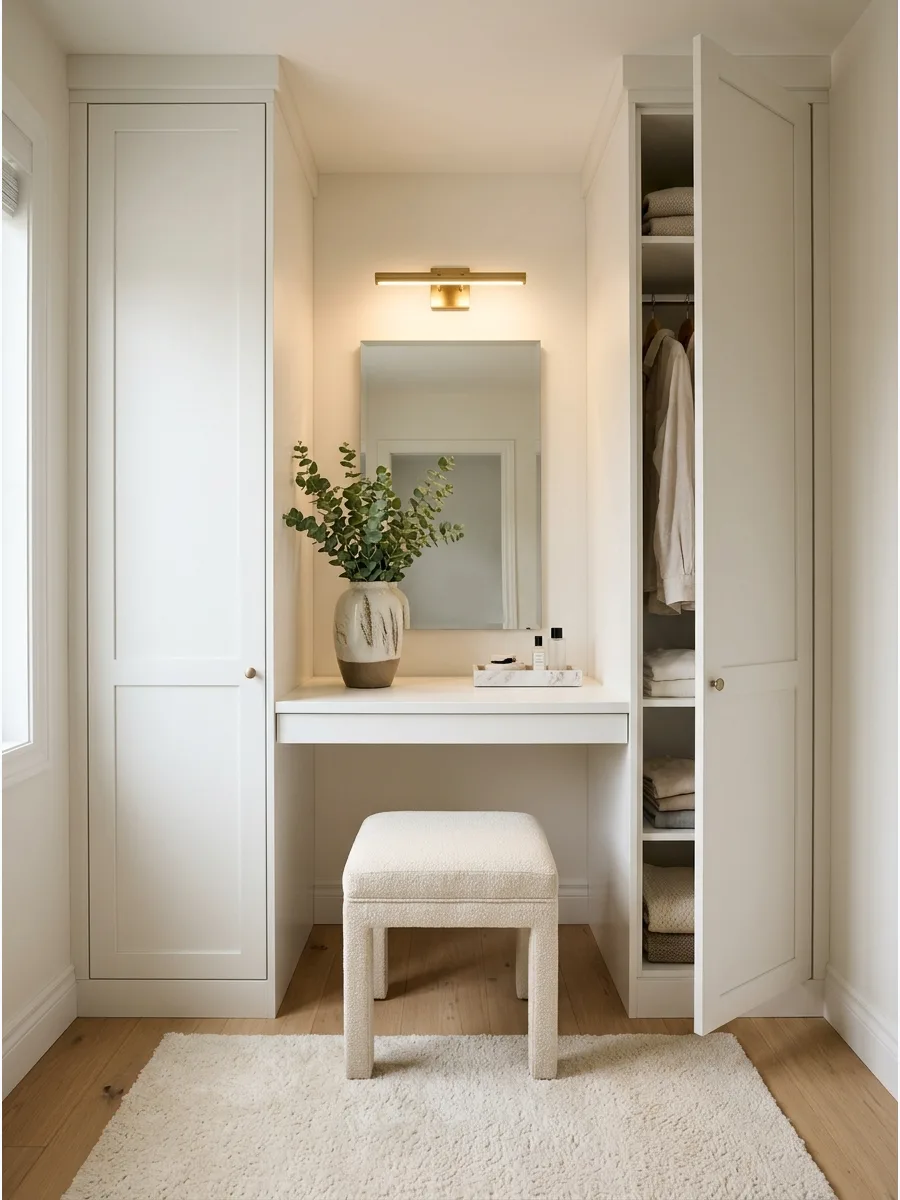
Building a vanity between two tall wardrobes creates a seamless look that feels custom. It uses the gap effectively without taking up extra floor space in the center of the room.
Measure the width between the cabinets carefully to ensure the countertop fits snugly against both sides. Recessed areas like this often feel dark, so adding a small light above the mirror is a smart move.
- Expect to spend $150 to $400 for a custom-cut countertop and mounting hardware.
- Secure the countertop to the side panels of the wardrobes using heavy-duty L-brackets.
- Paint the vanity area the same color as the wardrobes to make the unit look like a single piece of furniture.
Most people skip this: Install a power outlet inside the gap for hair tools and chargers before the countertop goes in.
47. Place a Vanity Beneath the Window
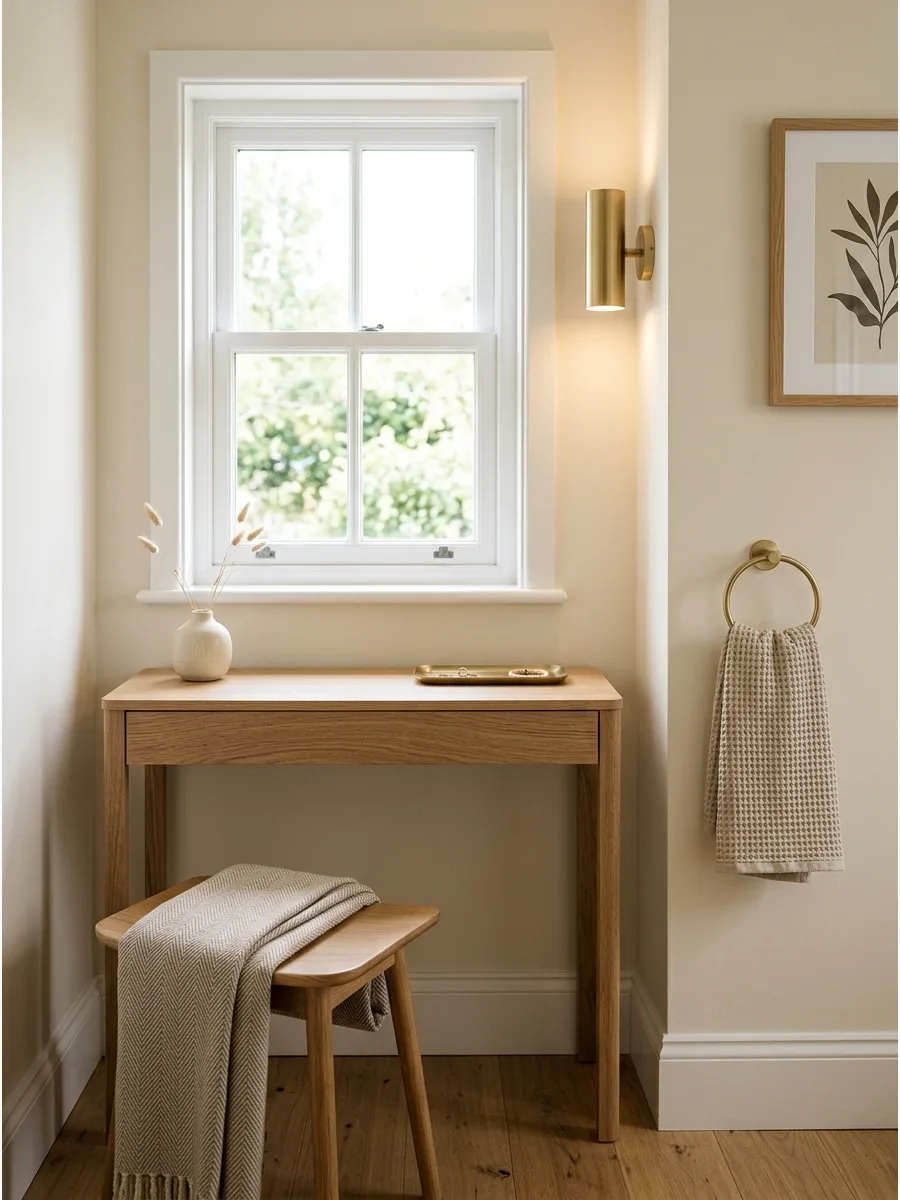
Placing a vanity beneath a window provides the best natural light for getting ready. This setup keeps the room feeling airy because the furniture does not block the view or the light.
Select a table with a slim profile so it does not stick out too far into the walking path. Natural light is always better than artificial bulbs, but make sure the table height does not interfere with the window handle.
- Budget $100 to $250 for a narrow console table that fits the window width.
- Position the table at least two inches away from the wall to allow for curtain or blind movement.
- Use a table with a glass top if the window is small to keep the area looking bright.
Quick win: Use a table with a glass top to prevent the furniture from looking heavy in front of the light source.
Small Dressing Room Ideas
48. Floating Corner Vanity Nook
Corner dressing tables maximize floor space by tucking into underutilized angles of a small dressing room. Install a floating wedge-shaped surface at elbow height to maintain a light, airy feel without bulky legs. This setup creates a cozy, enclosed zone that naturally focuses light toward the face.
Opting for a corner unit with an integrated drawer prevents surface clutter from overwhelming the small footprint.
- Source pre-cut corner shelves or triangular desks from home office retailers to fit standard 90-degree angles.
- Mount the surface using heavy-duty L-brackets into studs to ensure it supports the weight of mirrors and jewelry boxes.
- Replace a standard chair with a backless ottoman that slides completely underneath the table when not in use.
Quick win: Place a small lamp in the very back corner of the vanity to eliminate shadows and add depth to the room at night.
Small Dressing Room Vanity Ideas
49. Choose a Fold-Down Vanity
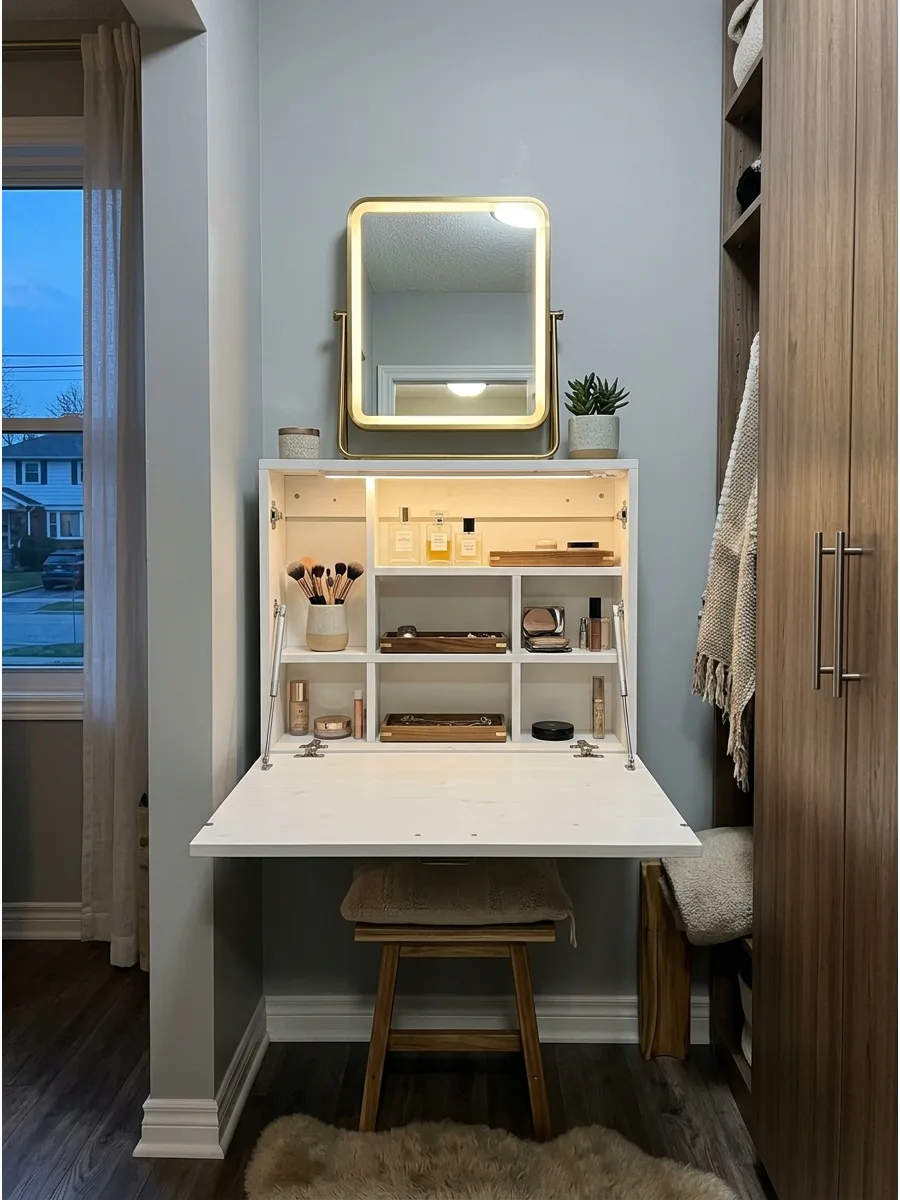
A wall-mounted fold-down vanity is a brilliant space-saver for tight walkways. It stays closed and flat against the wall until it is time to get ready.
Install the unit at a height that allows for comfortable seating with a standard stool. This is the best way to add a surface to a room that is too narrow for traditional furniture.
- These units usually cost $60 to $150 and take about an hour to install.
- Use heavy-duty wall anchors to ensure the surface can support the weight of your arms and products.
- Look for a model with built-in magnets to keep the door securely closed when not in use.
Most people skip this: Check the weight limit of the hinges before leaning on the surface during makeup application.
Small Dressing Room Ideas
50. Hidden Wardrobe Vanity Station
Converting a standard closet shelf into a dedicated beauty nook saves valuable floor space in compact rooms. Mount a slim floating shelf at elbow height and install a battery-operated motion sensor light directly above the workspace. This setup keeps daily clutter neatly tucked behind closed doors while maintaining a streamlined room aesthetic.
Using a swivel stool that slides completely under the shelf is far more efficient for movement than a bulky stationary chair.
- Budget $100-$300 for a high-quality shelf, mirror, and wireless LED lighting strips.
- Ensure the shelf is secured directly into wall studs to safely support the weight of leaning and heavy products.
- Swap the stool for a small storage ottoman to hide hair tools and cords when not in use.
Most people skip this: line the back of the wardrobe with peel-and-stick wallpaper to define the vanity zone and protect the interior paint from makeup spills.
51. Slim Floating Vanity Drawer
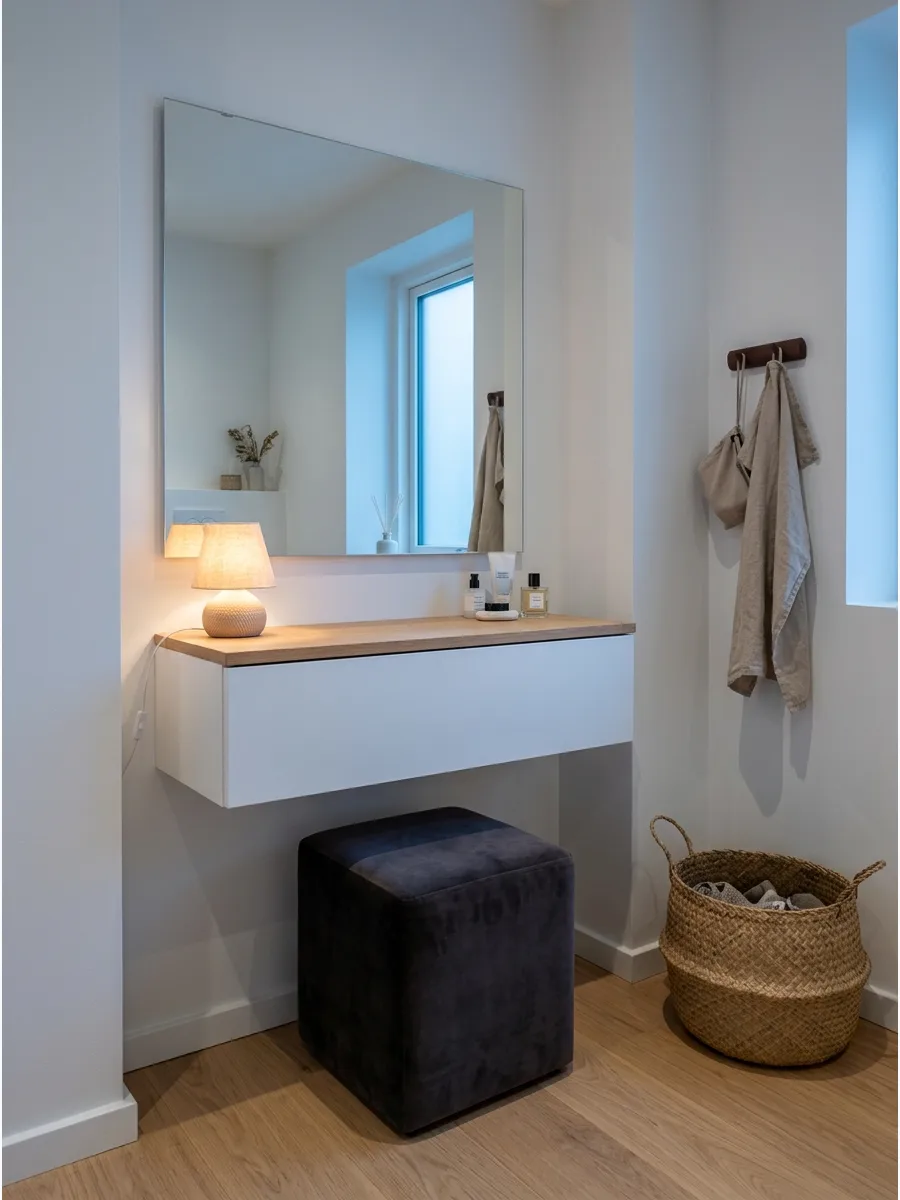
A continuous, wall-to-wall drawer unit provides seamless storage without the visual weight of heavy furniture. This design choice maintains a clear floor line, which helps a small dressing area feel significantly larger.
Mount a shallow, wide drawer directly beneath a wall-hung mirror to keep daily essentials at fingertips while hiding clutter. Deep drawers often become junk traps, so a height of three to four inches is the sweet spot for organizing cosmetics and jewelry efficiently.
- Search for pre-assembled floating shelf drawers or use custom-cut plywood for a budget-friendly DIY project under $150.
- Secure the unit into at least two wall studs using heavy-duty brackets to ensure it remains level under the weight of glass bottles.
- Paint the drawer the exact shade of the wall to create a minimalist, built-in look that visually recedes into the room.
Quick win: Line the interior with adhesive felt or velvet to prevent small items from sliding and rattling when the drawer is opened.
Small Dressing Room Vanity Ideas
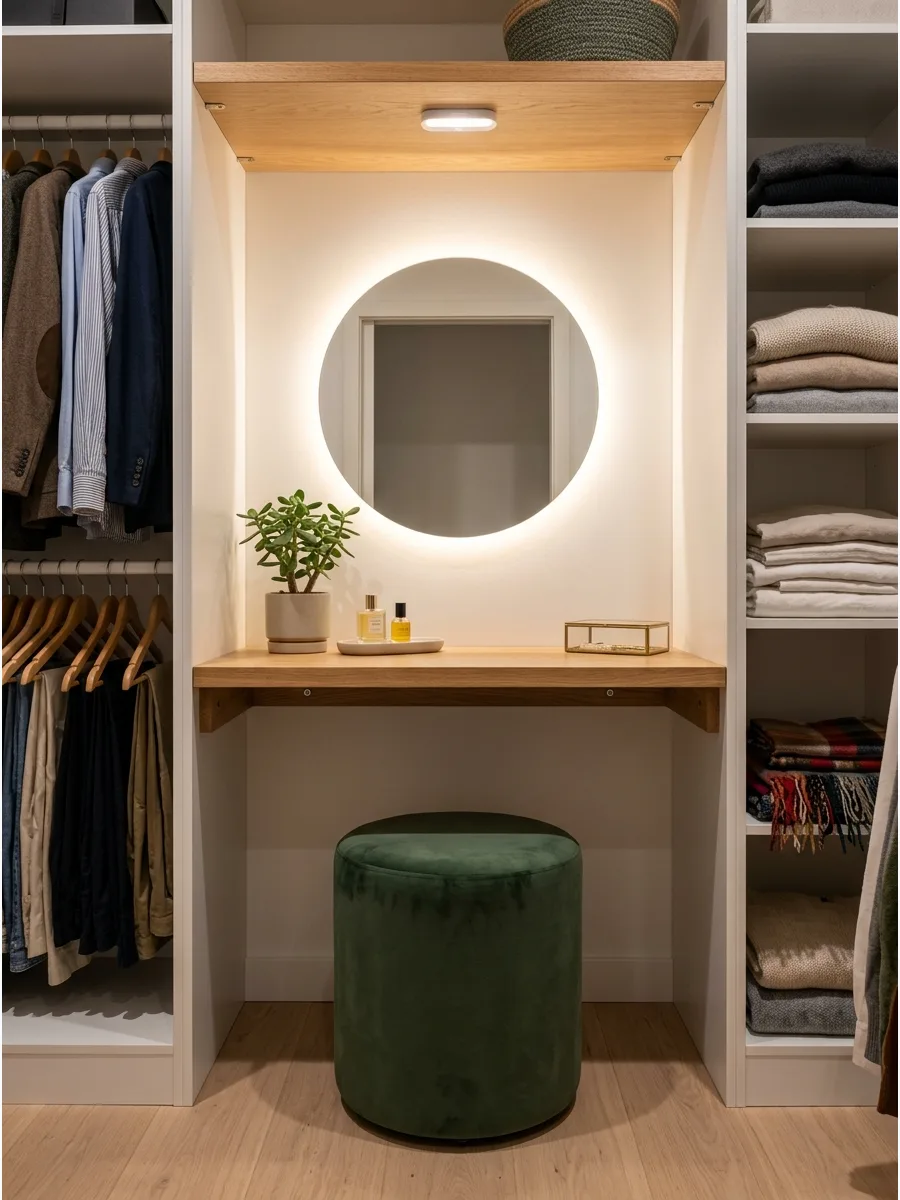
52. Choose a Backlit Mirror
A backlit mirror provides even, shadow-free lighting that is perfect for grooming. It eliminates the need for bulky lamps that take up valuable surface space on a small table.
Choose a mirror with adjustable brightness to transition from morning prep to evening routines. The soft glow also acts as a nightlight and adds a high-end feel to the room.
- High-quality LED mirrors range from $100 to $300 depending on the size.
- Hardwire the mirror into the wall for a clean look, or use a plug-in version for an easier DIY.
- Select a 'warm white' color temperature to avoid the harsh, blue look of cheap LEDs.
Most people skip this: Look for a mirror with a built-in defogger if your dressing room is connected to a bathroom.
53. Use a Round Mirror to Soften the Cabinetry
A round mirror breaks up the rigid, vertical lines of wardrobes and drawers. This curved shape makes a small, boxy room feel softer and more inviting.
Hang the mirror so the center is at eye level when you are standing or sitting. It is a simple design trick that adds visual interest without requiring extra square footage.
- A large round mirror usually costs between $50 and $180.
- Use a heavy-duty wall hook, as round mirrors can be surprisingly heavy due to the glass volume.
- Choose a frame finish that matches your drawer pulls for a coordinated look.
Quick win: A mirror that is at least 30 inches wide will make a small wall feel much larger and more expensive.
Small Dressing Room Ideas
54. Install a Tri-Fold Wall Mirror
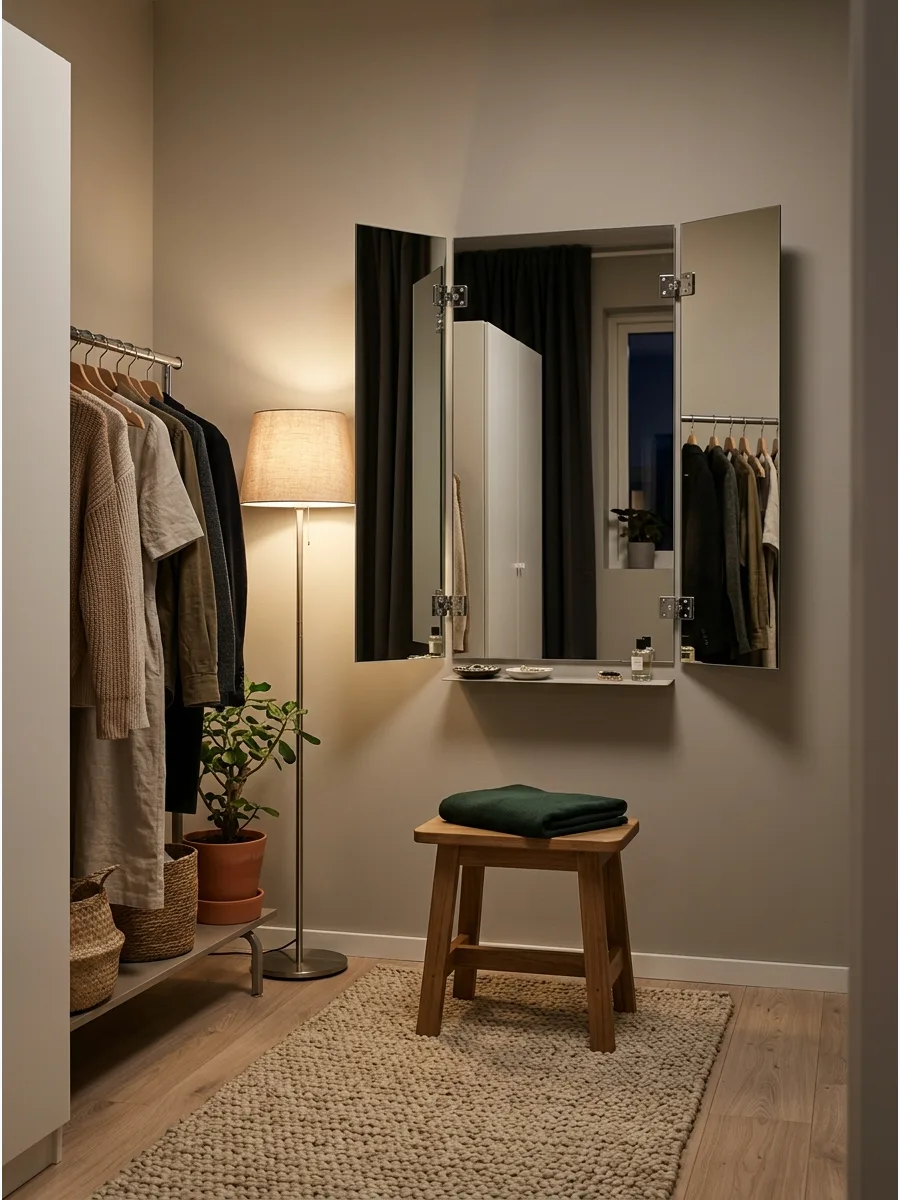
A three-way mirror provides a 360-degree view that is essential for checking hemlines and tailoring in a compact dressing area. This setup reflects light into dark corners, making a small room feel significantly more spacious and airy.
Mount a frameless tri-fold unit directly to the wall at eye level to save valuable floor space. Investing in a model with adjustable side panels ensures every angle is visible without needing to move around the room.
- Source a high-quality glass set for under $150 to ensure clarity without distortion.
- Use a level and heavy-duty wall anchors to secure the center panel firmly into studs.
- Angle the side panels inward at 45 degrees to create the most effective depth perception.
Quick win: Position the mirror opposite a window to double the natural light and eliminate shadows while getting dressed.
55. Tuck-Away Stools for Tight Spaces
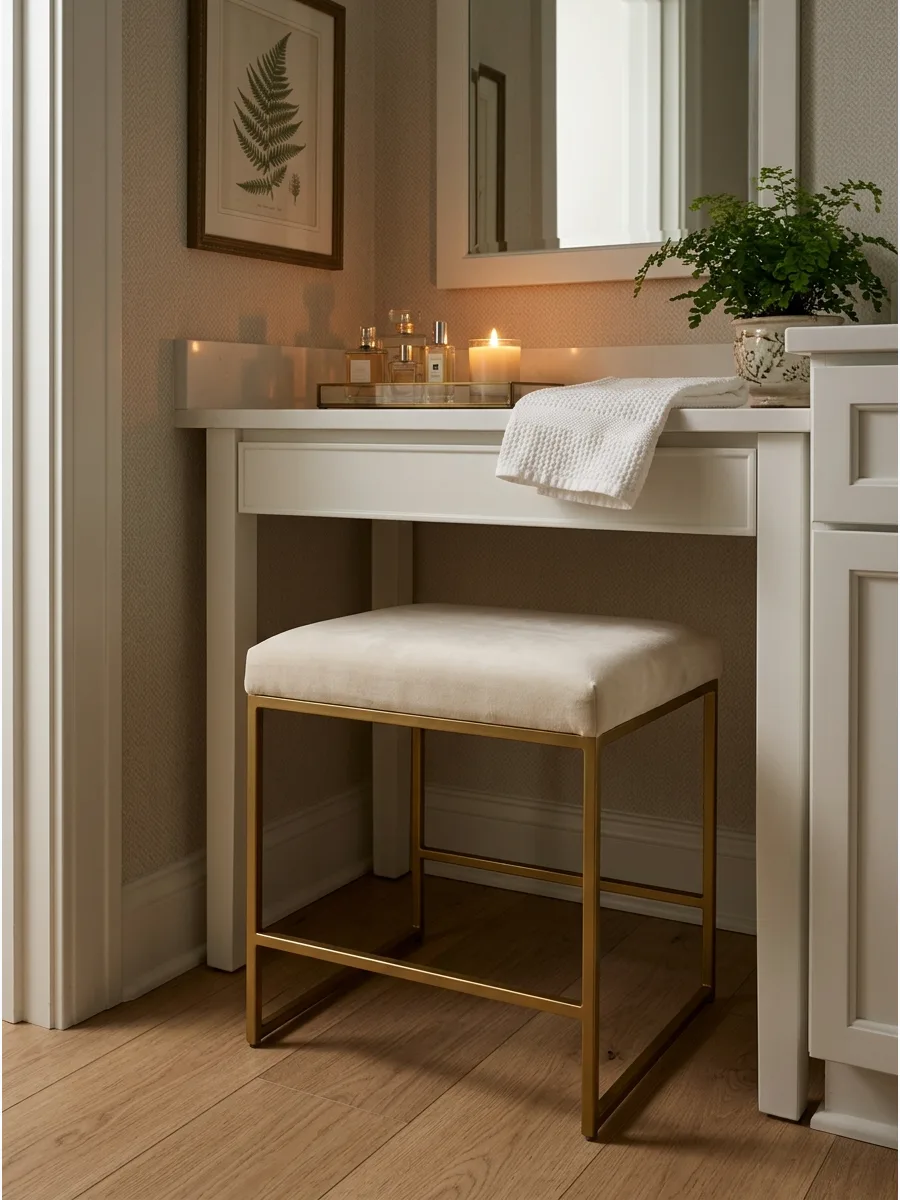
Backless vanity stools provide essential seating while maintaining an open floor plan in small dressing rooms. Choosing a height that clears the underside of the vanity allows the piece to disappear when not in use.
Measure the clearance between the floor and the desk apron before purchasing to ensure a flush fit. A stool with a slim metal frame prevents the dressing area from feeling visually heavy. Velvet upholstery adds a touch of luxury without requiring the footprint of a traditional chair.
- Sourcing: Look for stools under 18 inches tall at home decor outlets for $60–$120.
- Logistics: Position the stool centrally under the vanity to keep high-traffic walkways unobstructed.
- Adaptation: Use a storage ottoman instead if extra space is needed for hair tools or clutches.
Quick win: Attach heavy-duty felt sliders to the legs so the stool glides effortlessly across the floor without snagging rugs.
Small Dressing Room Seating Ideas
56. Add a Storage Ottoman
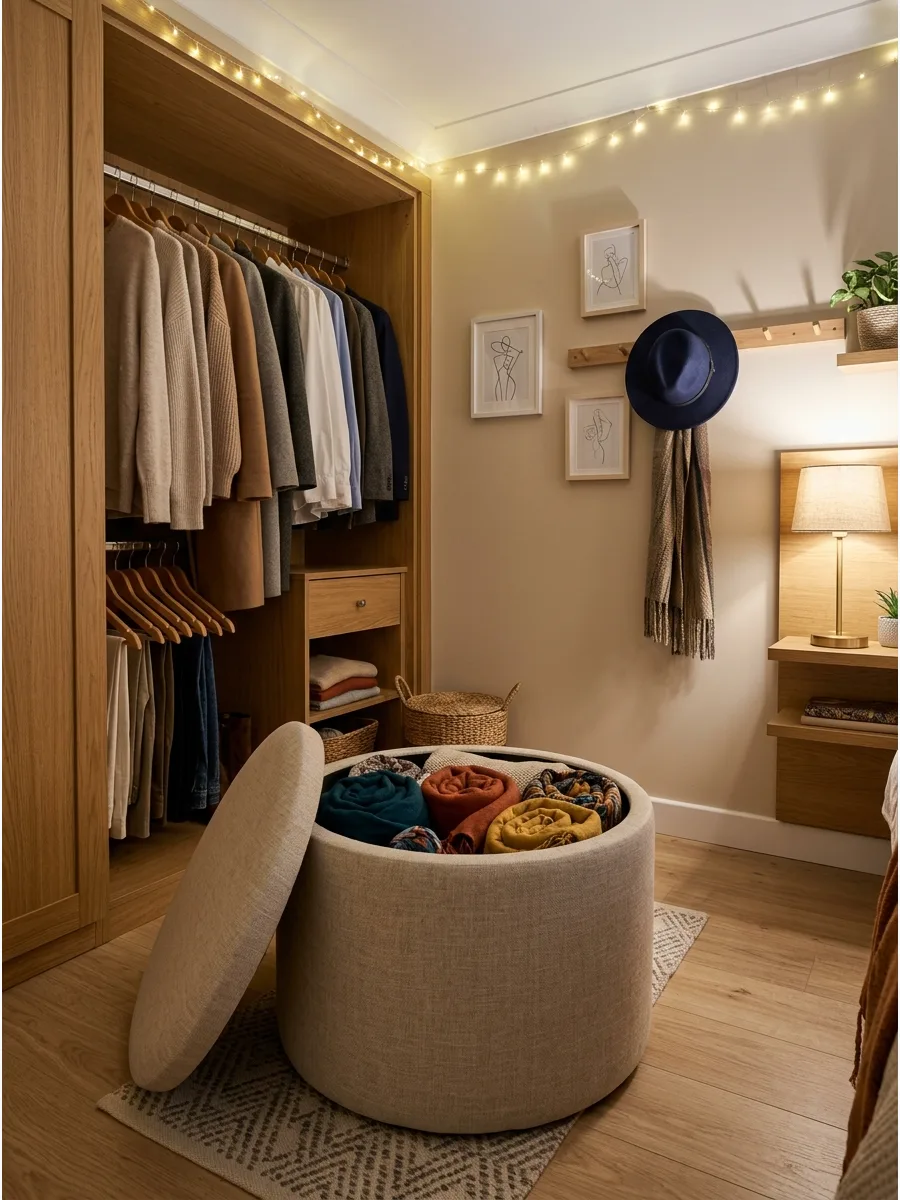
A storage ottoman provides a place to sit while also hiding bulky items like handbags or seasonal linens. This dual-purpose furniture is a must-have for rooms where every inch counts.
Place the ottoman in a corner or at the end of a wardrobe run to keep it out of the main path. It is a practical way to add a pop of color or texture to the room.
- Budget $50 to $150 for a sturdy ottoman with a removable or hinged lid.
- Check the weight capacity to ensure it is safe for daily seating.
- Use it to store items you only need once a week, like gym bags or extra shoes.
Most people skip this: Measure the height of the ottoman to ensure it is comfortable for putting on shoes.
Small Dressing Room Ideas
57. Drawer-Base Window Seat Storage
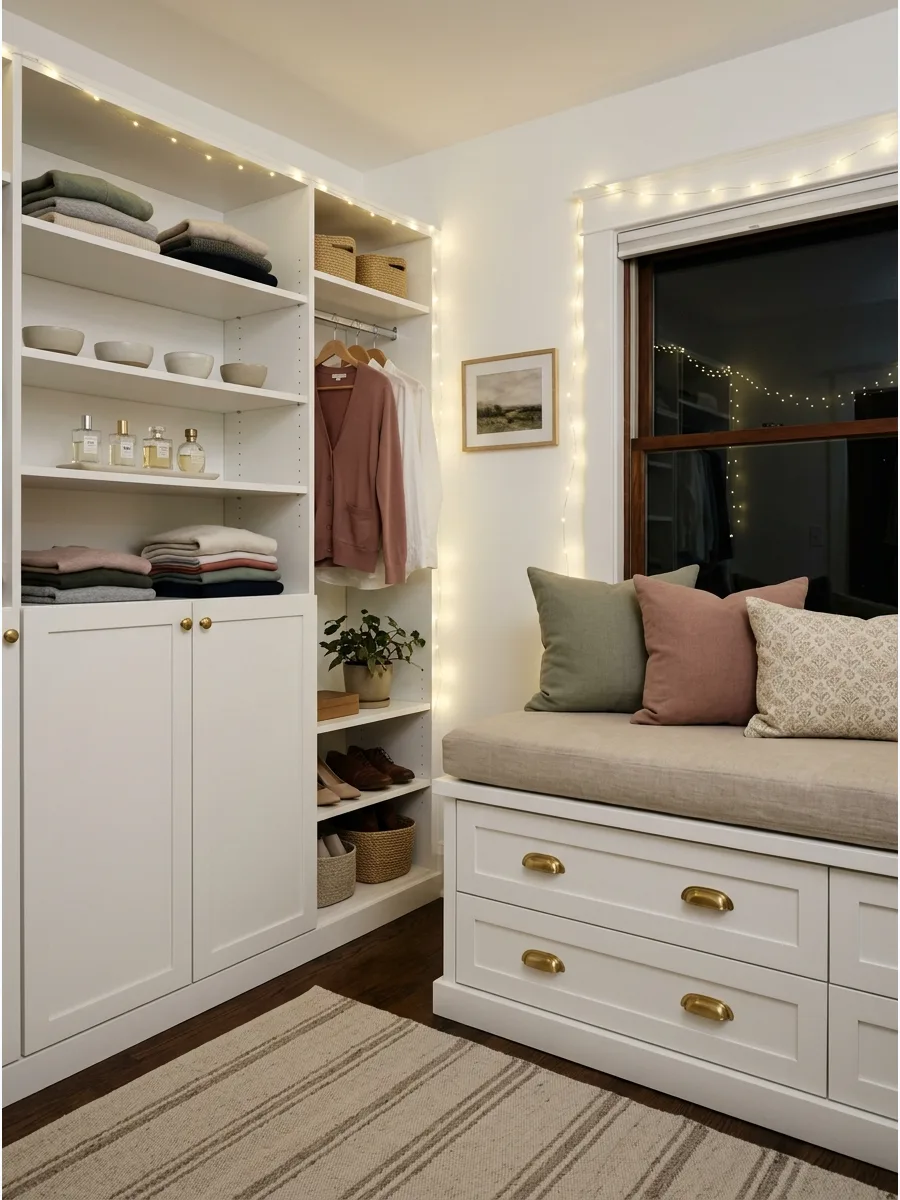
A built-in window seat transforms the dead space beneath a dressing room window into a functional hub for folded garments. Using deep, soft-close drawers provides more accessible organization than a traditional flip-top bench that requires clearing the cushion to reach items.
Measure the window height first to ensure the seat height remains 18 to 20 inches for optimal comfort. Integrated storage is the most efficient way to maintain a clutter-free dressing area while adding a cozy spot to put on shoes.
- Source pre-assembled kitchen base cabinets or drawer units to save time and ensure structural stability.
- Secure the cabinet frame directly into the wall studs and floor joists for a flush, built-in look.
- Swap standard hardware for oversized pulls to make opening drawers easier while holding clothing.
Most people skip this: Install a recessed toe kick at the bottom of the seat to prevent scuffing the wood with shoes while sitting.
Small Dressing Room Seating Ideas
58. Use a Slim Upholstered Bench
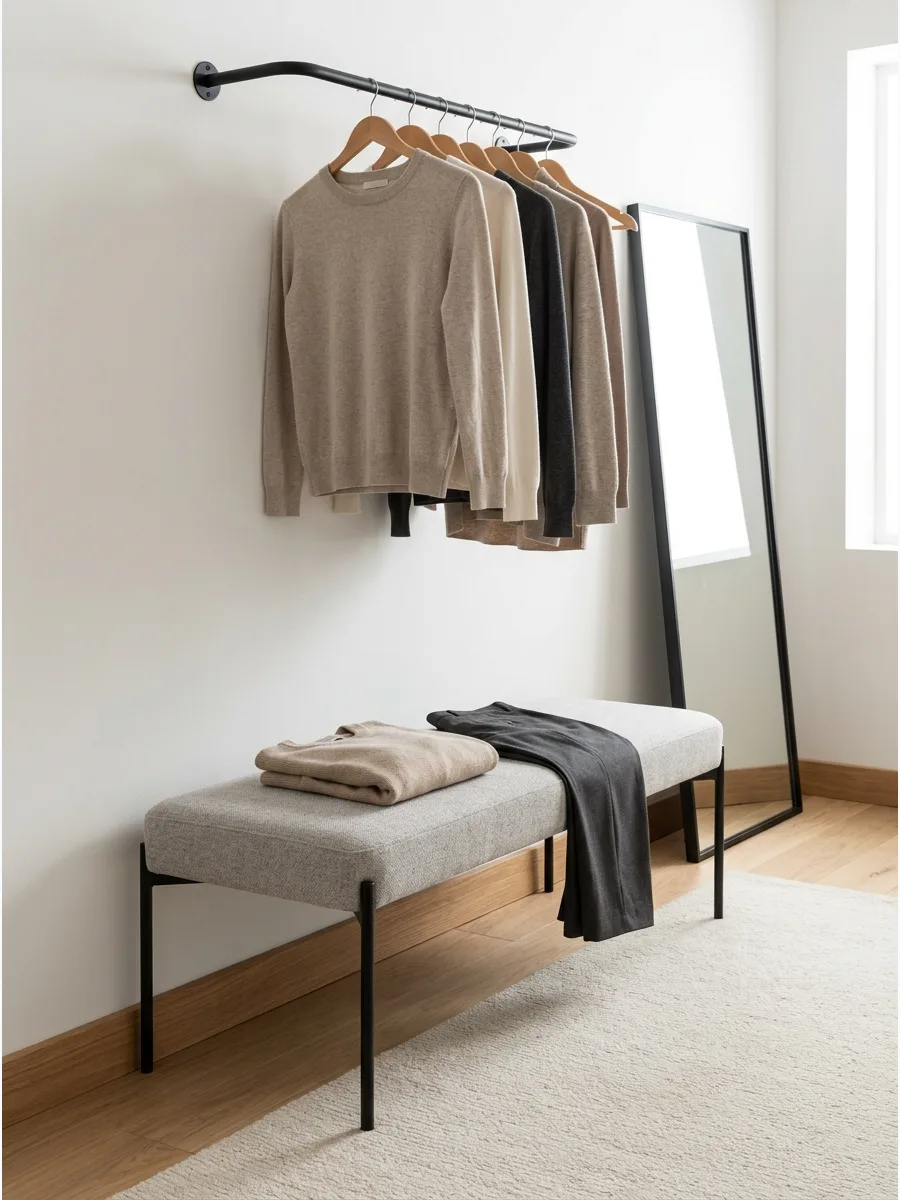
A narrow upholstered bench provides a soft place to sit without blocking the center of the room. It fits perfectly against a blank wall or under a row of hanging clothes.
Choose a bench with open legs to make the floor space appear larger. Benches are often more versatile than chairs because they can hold laid-out outfits for the next day.
- Expect to spend $70 to $200 for a high-quality narrow bench.
- Look for a depth of 12 to 14 inches to ensure it doesn't obstruct the walkway.
- Select a neutral color so the bench blends into the wall and doesn't feel like an obstacle.
Quick win: Place the bench directly under shorter hanging items like shirts to utilize that empty floor space.
59. Add a Folding Seat
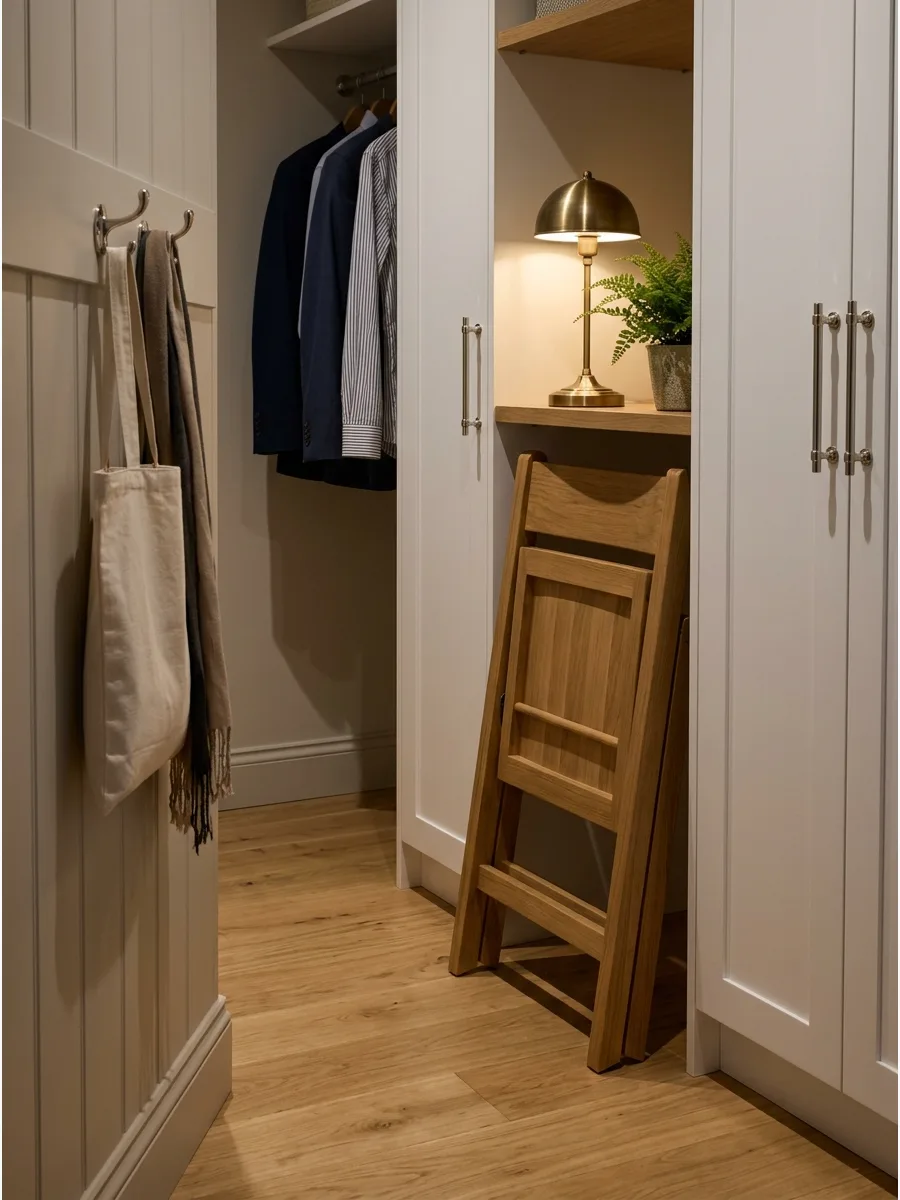
A folding seat is the ultimate solution for rooms that are too small for any permanent furniture. It can be tucked into a narrow gap between wardrobes or hung on a wall hook when not in use.
Pick a high-quality wooden or metal design that feels stable when unfolded. This provides on-demand comfort without sacrificing a single inch of permanent floor space.
- Folding chairs range from $30 for basic metal to $100 for designer wood versions.
- Mount a sturdy hook on the back of the door to store the chair completely out of sight.
- Add a small tie-on cushion for extra comfort during longer grooming sessions.
Most people skip this: Check the feet of the folding chair for rubber caps to prevent it from sliding on hard floors.
Small Dressing Room Mirror and Lighting Ideas
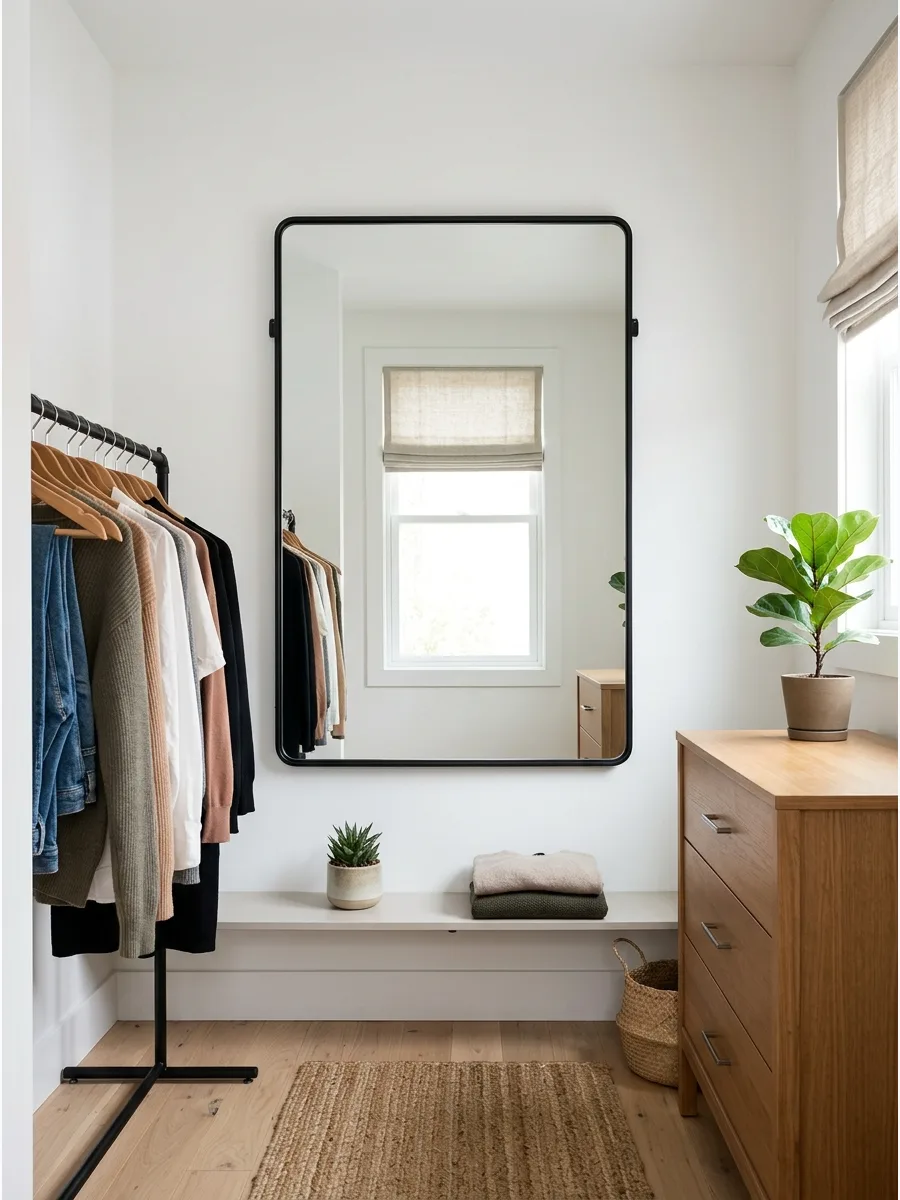
60. Install a Floor-to-Ceiling Mirror
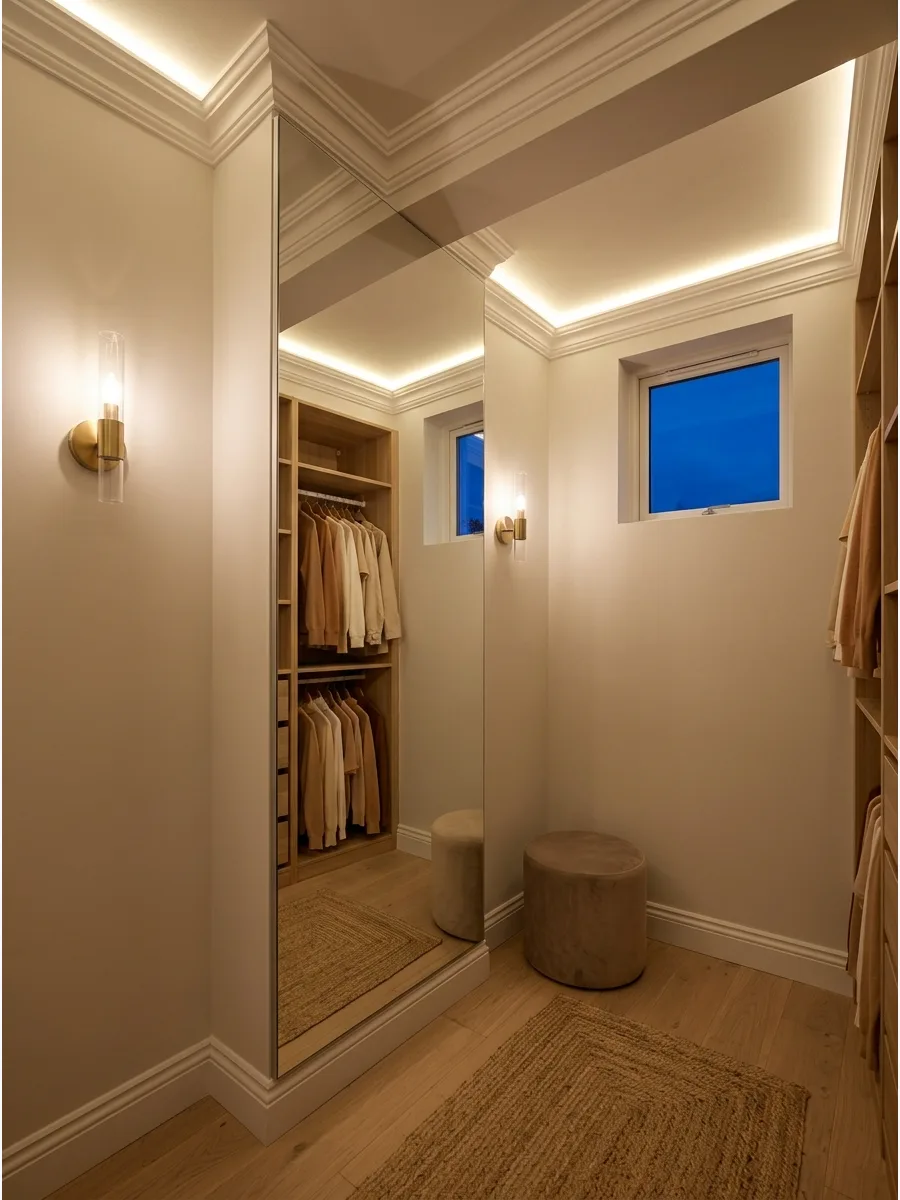
A floor-to-ceiling mirror makes a small dressing room feel twice as large by reflecting the entire space. It is the most practical choice for checking a full outfit from head to toe.
Secure the mirror directly to the wall or a door to save floor space compared to a leaning mirror. This vertical element draws the eye upward, making low ceilings feel much higher.
- Full-length wall mirrors cost $80 to $250 depending on the frame and quality.
- Use specialized mirror mastic or heavy-duty Z-clips for a secure, flush-to-wall mount.
- Position the mirror opposite a window to bounce natural light into the darkest corners of the room.
Best shortcut: Use frameless mirror tiles to create a custom-sized floor-to-ceiling look on a budget.
61. Position a Mirror Opposite the Window
Placing a mirror directly across from a window helps bounce light into the darkest corners of the room. This makes the space feel larger and more open during the day without adding extra lamps.
Hang a tall mirror on the wall facing your main light source to double the brightness and make the room feel airy. Natural light is the most accurate for checking outfit colors before you head out.
- Sourcing: 20-minute installation for a wall-mounted mirror.
- Setup: Center the mirror on the wall directly parallel to the window pane.
- Adaptation: Use a leaning floor mirror if you are renting and cannot drill into walls.
Quick win: Tilt the mirror slightly upward to reflect more ceiling light and make the room feel taller.
Small Dressing Room Ideas
62. Floor-to-Ceiling End Wall Mirror
Narrow dressing rooms often feel like tunnels, but a full-width mirror on the far wall creates an immediate illusion of infinite depth.
This technique reflects the entire length of the room, doubling the perceived floor space and pulling light into the darkest corners. Install a single, oversized panel that reaches from baseboard to ceiling for the most seamless architectural look. Frameless edges are superior here because they allow the reflection to blend perfectly with the side walls without visual breaks.
- Custom-cut glass mirrors are a premium investment, but standard 72-inch tall leaner mirrors work for tighter budgets.
- Mount the glass using heavy-duty construction adhesive or Z-clips to keep the profile as slim as possible.
- For rental spaces, use a large leaning mirror secured with anti-tip kits instead of permanent wall-mounted glass.
Most people skip this: Placing the mirror directly opposite the doorway maximizes the 'infinite' effect the moment someone enters the room.
Small Dressing Room Mirror and Lighting Ideas
63. Install LED Strips Inside Wardrobes
Dark cabinets make it hard to tell black from navy blue garments. Thin LED strips tucked under shelves or along the side panels solve this problem instantly while adding a high-end feel.
Stick battery-powered or plug-in LED tape along the inner front edge of the wardrobe to light up every garment. This small upgrade gives basic cabinets a custom look without a major renovation.
- Sourcing: Inexpensive LED tape kits are available for under $20.
- Setup: Clean the surface thoroughly before sticking the adhesive backing to the wood.
- Adaptation: Choose rechargeable motion-sensor strips to avoid needing a nearby outlet.
Best shortcut: Place the strips behind a small trim piece or the wardrobe frame so you see the light but not the actual bulbs.
64. Use Motion-Sensor Cabinet Lighting
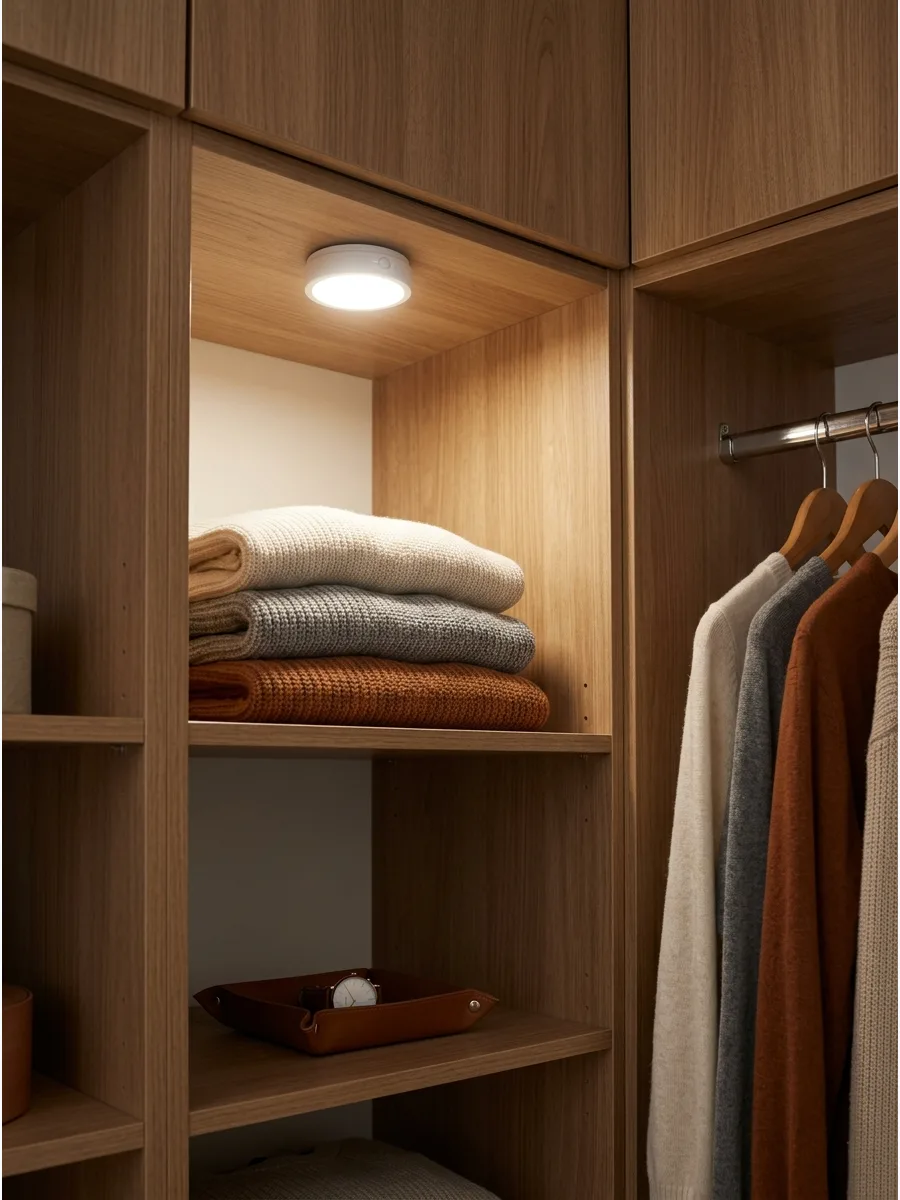
Motion-sensor lights turn on the moment you open the door or walk into the space. This is a game-changer for early mornings when you do not want to fumble for a switch in the dark.
Mount small puck lights with motion sensors to the ceiling of the wardrobe for hands-free illumination. They turn off automatically after a few seconds, which helps save battery life.
- Sourcing: Battery-operated puck lights usually come in packs of three or six.
- Setup: Use the provided magnetic mounts for easy removal when it is time to change batteries.
- Adaptation: Use these in deep corner cabinets where standard room lighting cannot reach.
Quick win: Choose lights with a 'warm white' setting to avoid a harsh, blue-toned hospital feel in the morning.
65. Add Vertical Lights Beside the Mirror
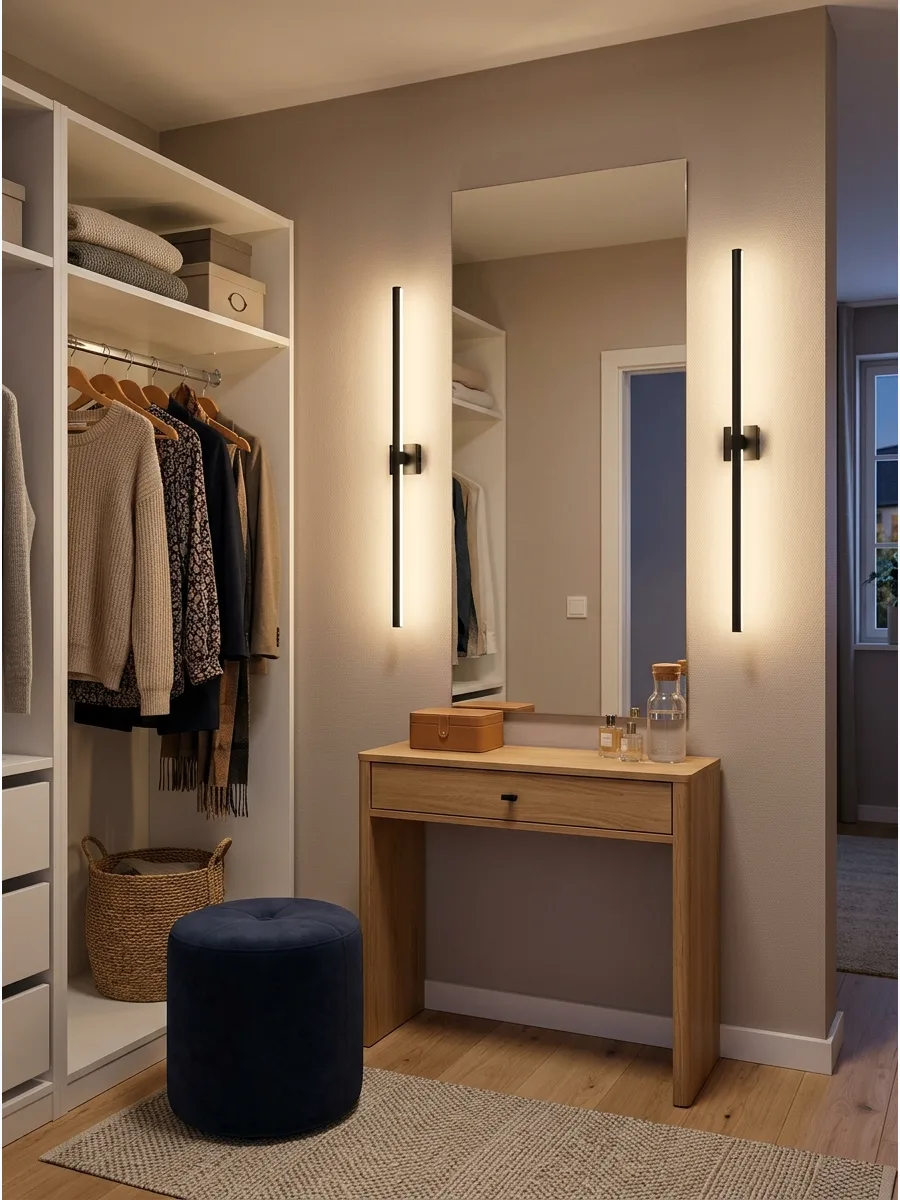
Overhead lights often cast unflattering shadows on the face when you are looking in the mirror. Side lighting provides a clear, even glow that is much better for grooming and outfit checks.
Install two slim sconces or vertical LED bars at eye level on either side of your dressing mirror. This setup mimics professional dressing rooms and makes the space feel more intentional.
- Sourcing: Look for 'slim vanity sconces' or 'picture lights' for a similar effect.
- Setup: Mount the lights approximately 60 inches from the floor for the best facial lighting.
- Adaptation: Use plug-in sconces with cord covers if you cannot hire an electrician.
Most people skip this: Ensure the bulbs are frosted rather than clear to prevent glare and hot spots in your reflection.
66. Choose a Compact Flush-Mount Ceiling Light
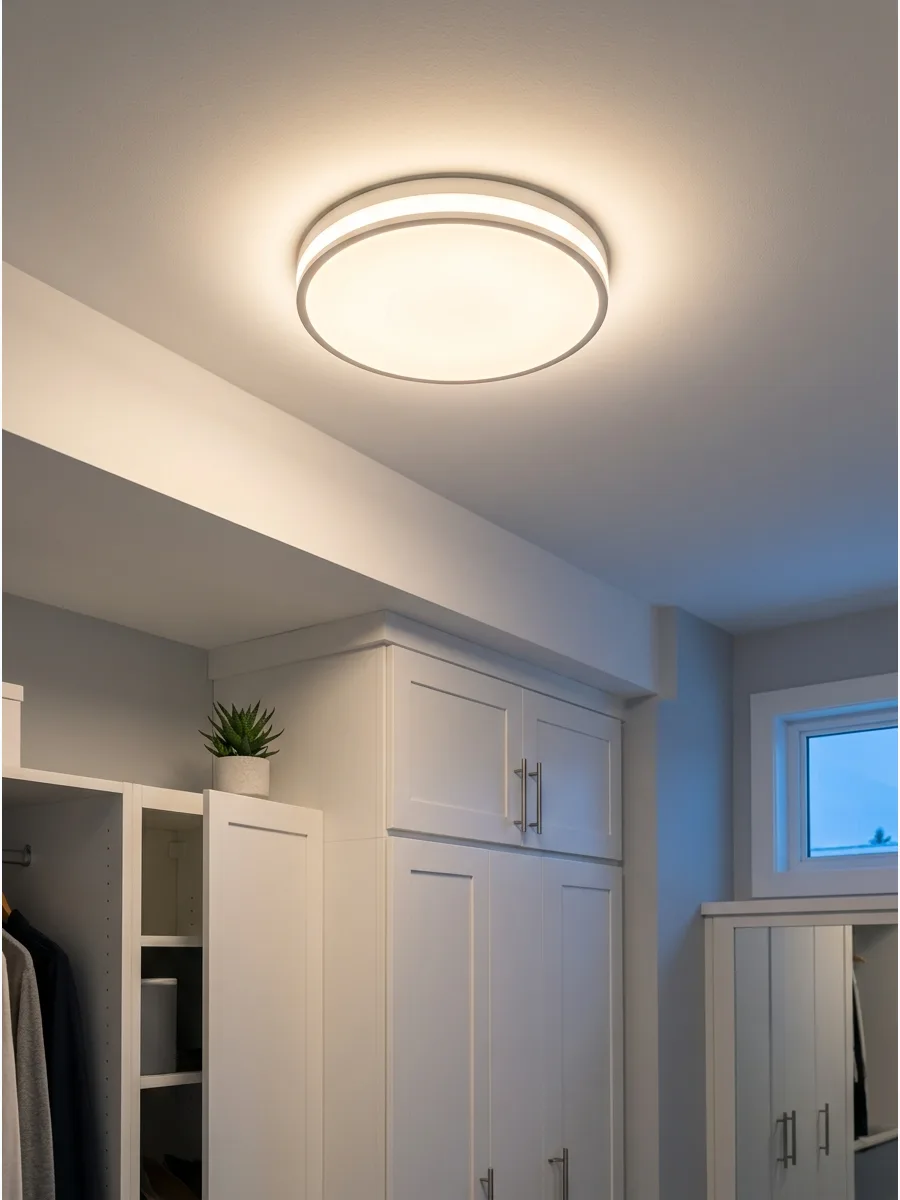
In a small room, a hanging chandelier can make the ceiling feel lower and get in the way of tall cabinet doors. A flush-mount fixture sits tight against the ceiling to keep the sightlines clear and open.
Choose a low-profile LED flush-mount light that spreads light wide across the entire room. This provides plenty of brightness without taking up any physical or visual space.
- Sourcing: Standard hardware store item, takes about 30 minutes to swap out.
- Setup: Ensure the fixture is centered to avoid creating dark corners near the wardrobes.
- Adaptation: Select a fixture with a fabric shade for a softer, more traditional look.
Best shortcut: Look for a fixture with a high CRI (Color Rendering Index) so your clothes look the same inside as they do outside.
67. Light the Shoe and Bag Shelves
Lighting your accessories makes them easier to find and creates a beautiful display that feels like a boutique. Small recessed lights or thin strips on each shelf highlight the textures of leather and fabric.
Add accent lighting to the back of shoe cubbies to make your collection pop against the shelves. It turns basic storage into a decorative feature that elevates the entire room.
- Sourcing: Use micro-LED kits designed for bookshelves or cabinets.
- Setup: Run the wiring down the back of the shelf or behind a false back panel.
- Adaptation: Battery-powered spotlight tape is a great renter-friendly alternative.
Quick win: Use a dimmer switch for these accent lights so you can leave them on low as mood lighting in the evening.
Small Dressing Room Color and Style Ideas
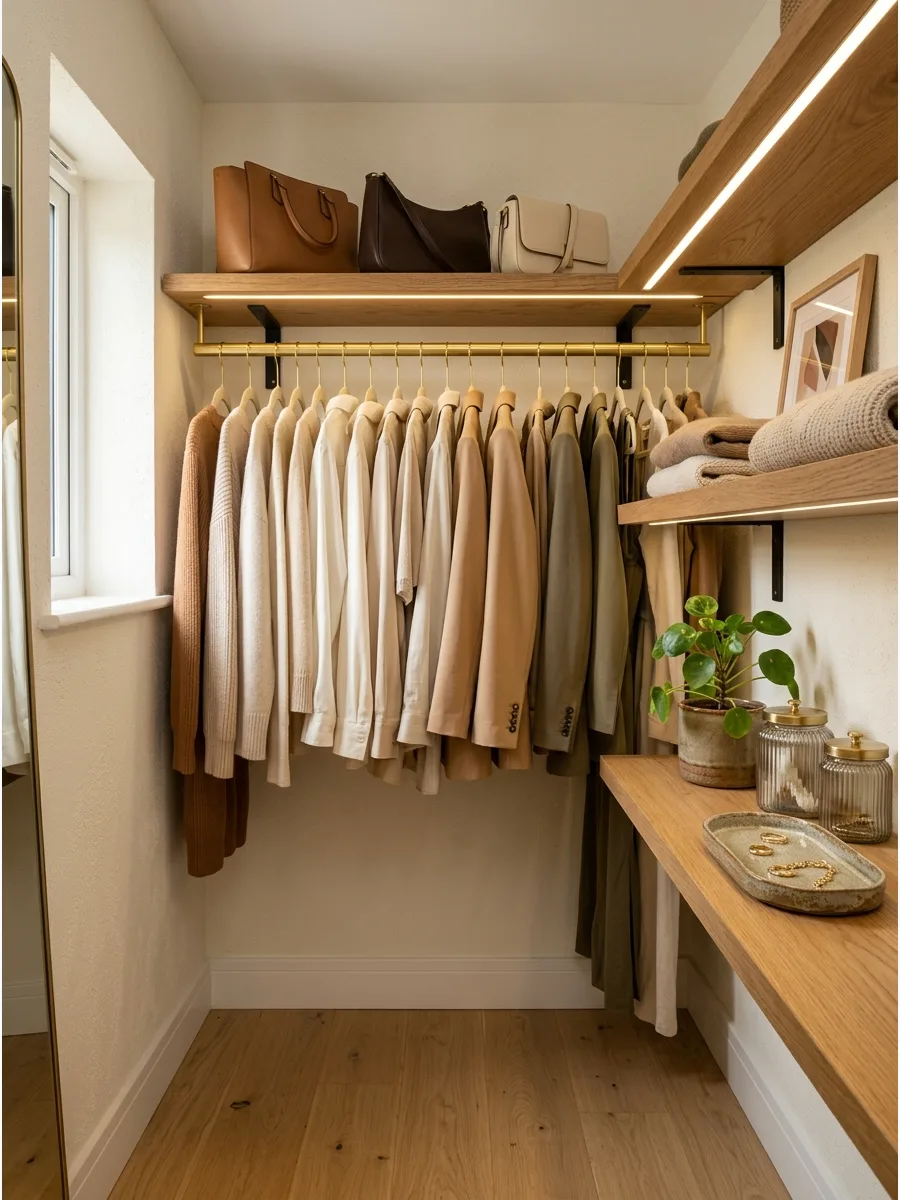
68. Create a Warm-Neutral Dressing Room
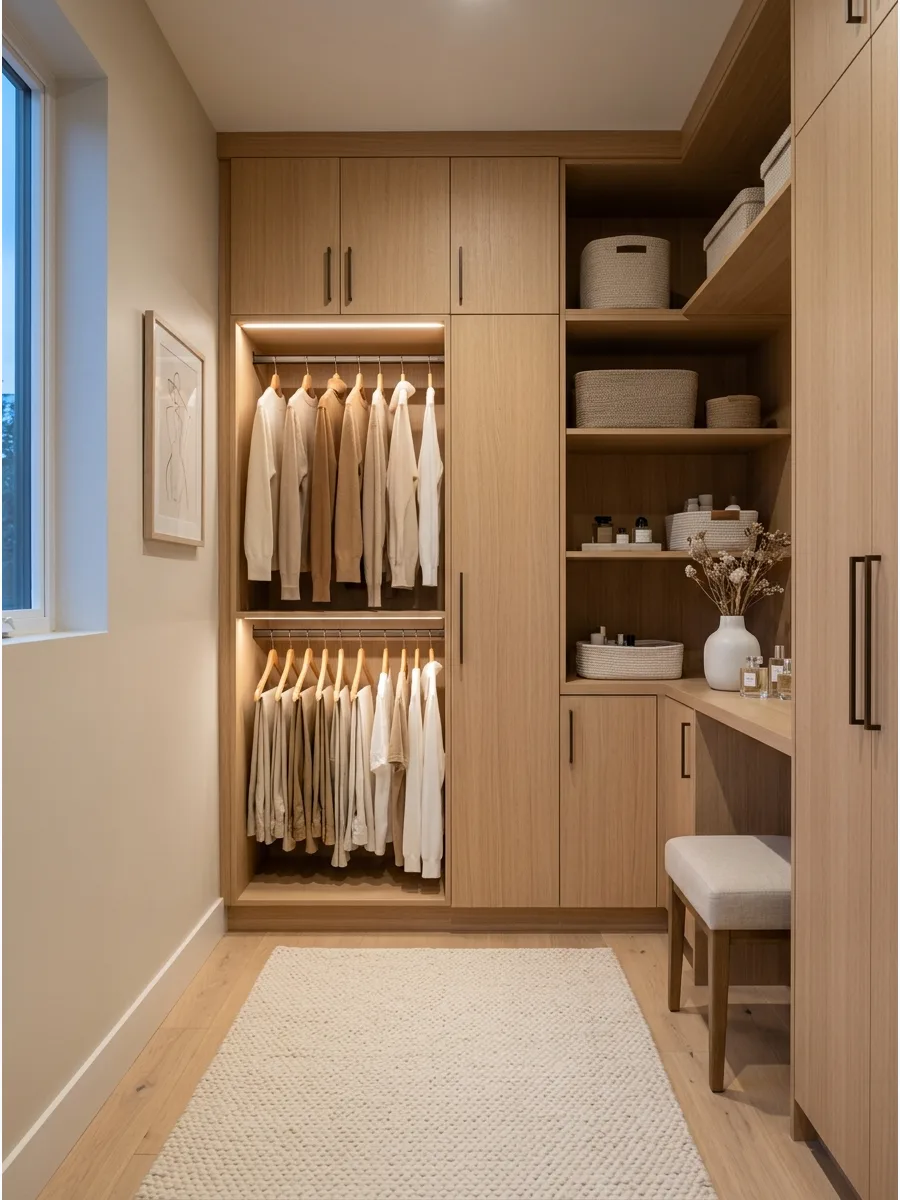
A palette of cream, tan, and light wood makes a tiny room feel soft and airy rather than cramped. Using similar tones for the walls and the cabinets prevents the furniture from looking bulky.
Stick to a monochromatic neutral theme to create a seamless environment that feels larger than it is. Texture from a rug or a linen stool adds interest without needing bright colors.
- Sourcing: Common paint colors like 'Swiss Coffee' or 'Pale Oak' work well.
- Setup: Paint the ceiling the same color as the walls to blur the boundaries of the room.
- Adaptation: Add gold or brass hardware to warm up the neutral tones even further.
Most people skip this: Match your hangers to the wall color to make the clothing collection look organized and part of the design.
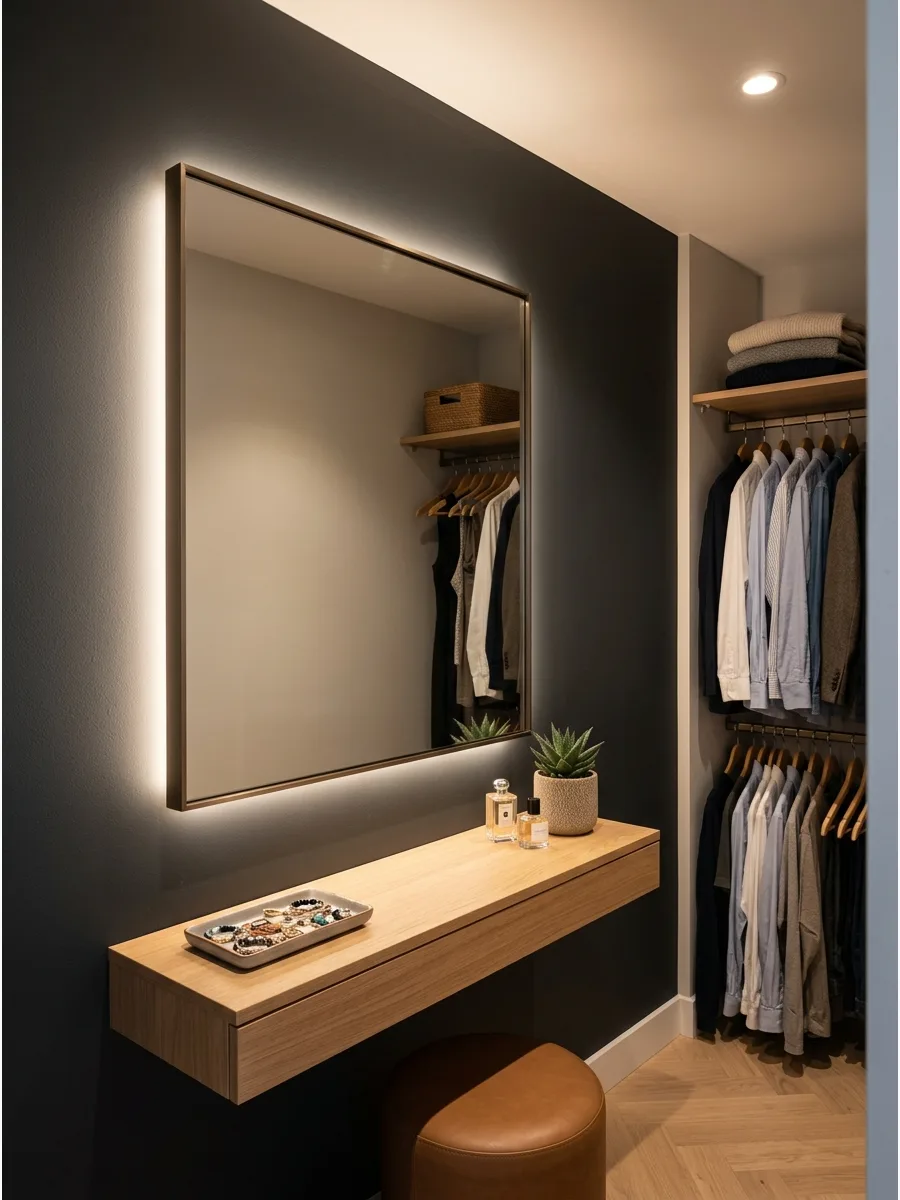
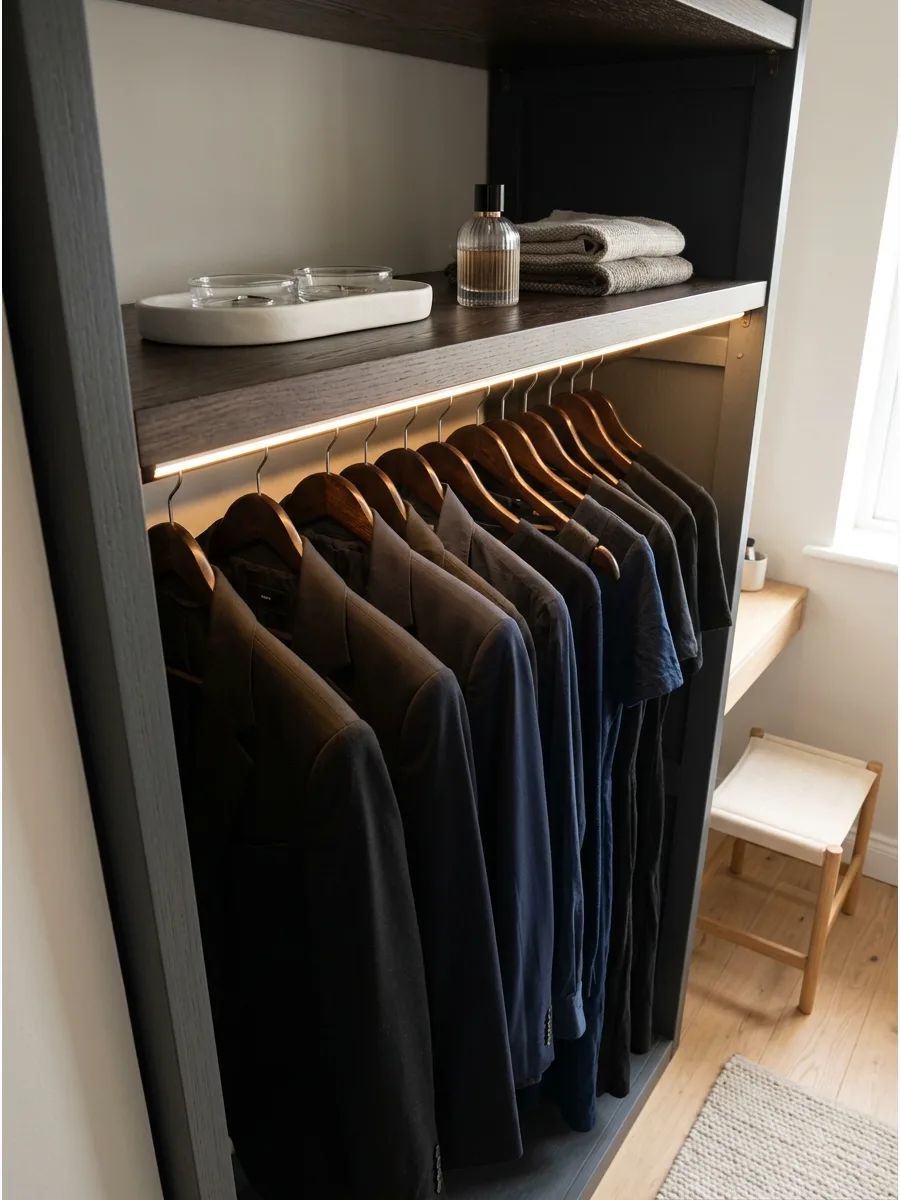
69. Design a Dark and Light Dressing Room
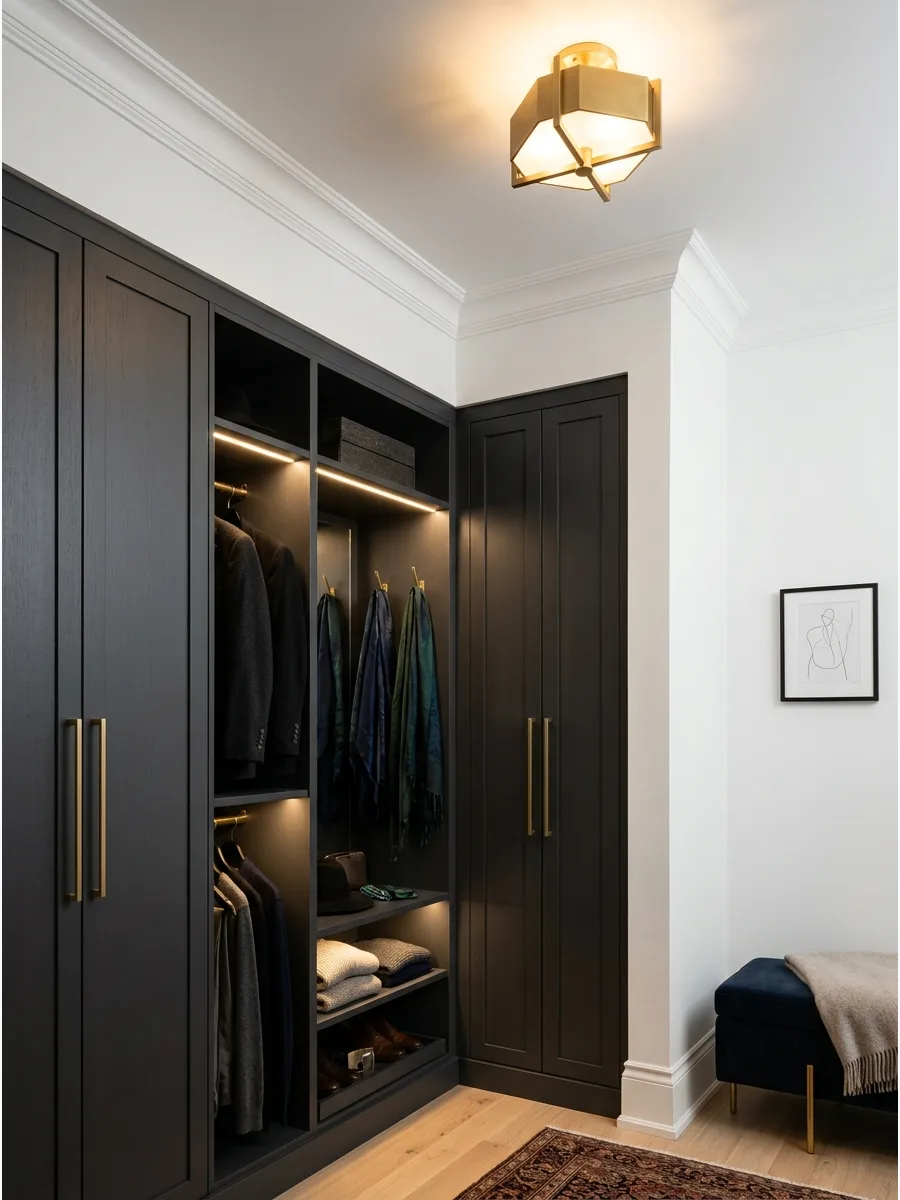
High contrast creates a sophisticated look that does not feel cramped if handled correctly. Using dark cabinetry against pale walls gives the room depth and a sense of luxury.
Pair charcoal or navy wardrobes with crisp white walls to create a bold, high-end aesthetic. The light flooring and ceiling keep the dark furniture from making the space feel like a cave.
- Sourcing: Use a high-quality furniture paint for a smooth finish on cabinets.
- Setup: Keep the darkest color on the largest furniture pieces and the lightest on the walls.
- Adaptation: If dark cabinets are too much, use a dark rug and dark hardware against light cabinets.
Best shortcut: Use a satin or semi-gloss finish on dark cabinets so they reflect a little light rather than absorbing it all.
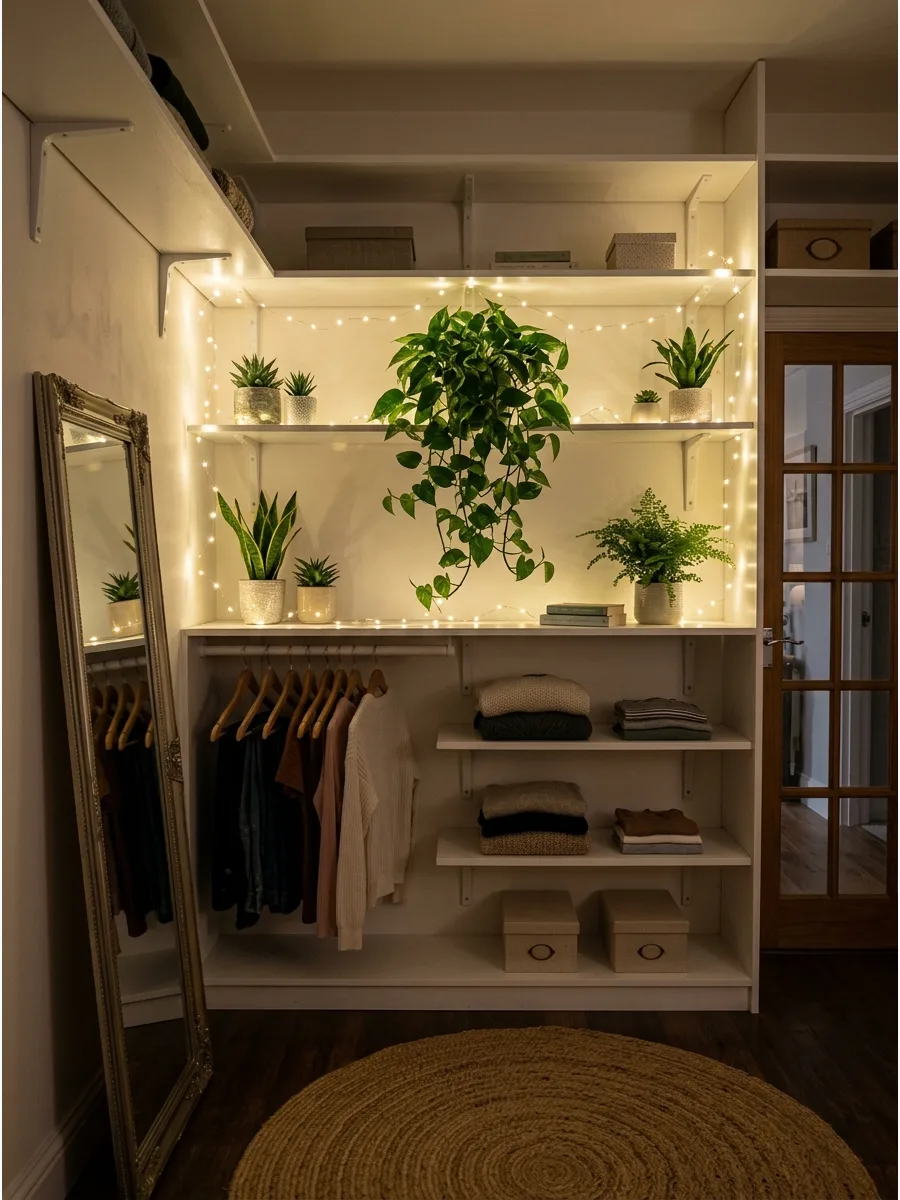
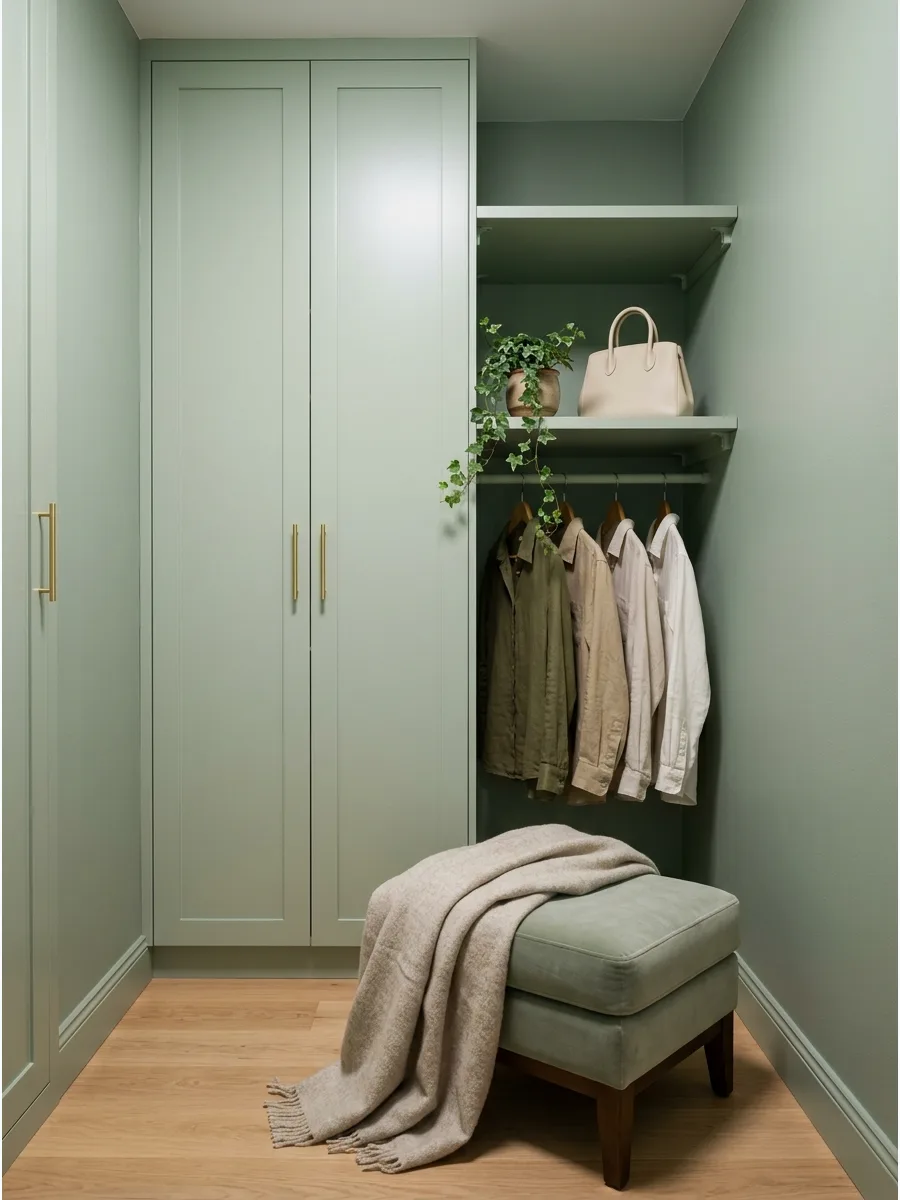
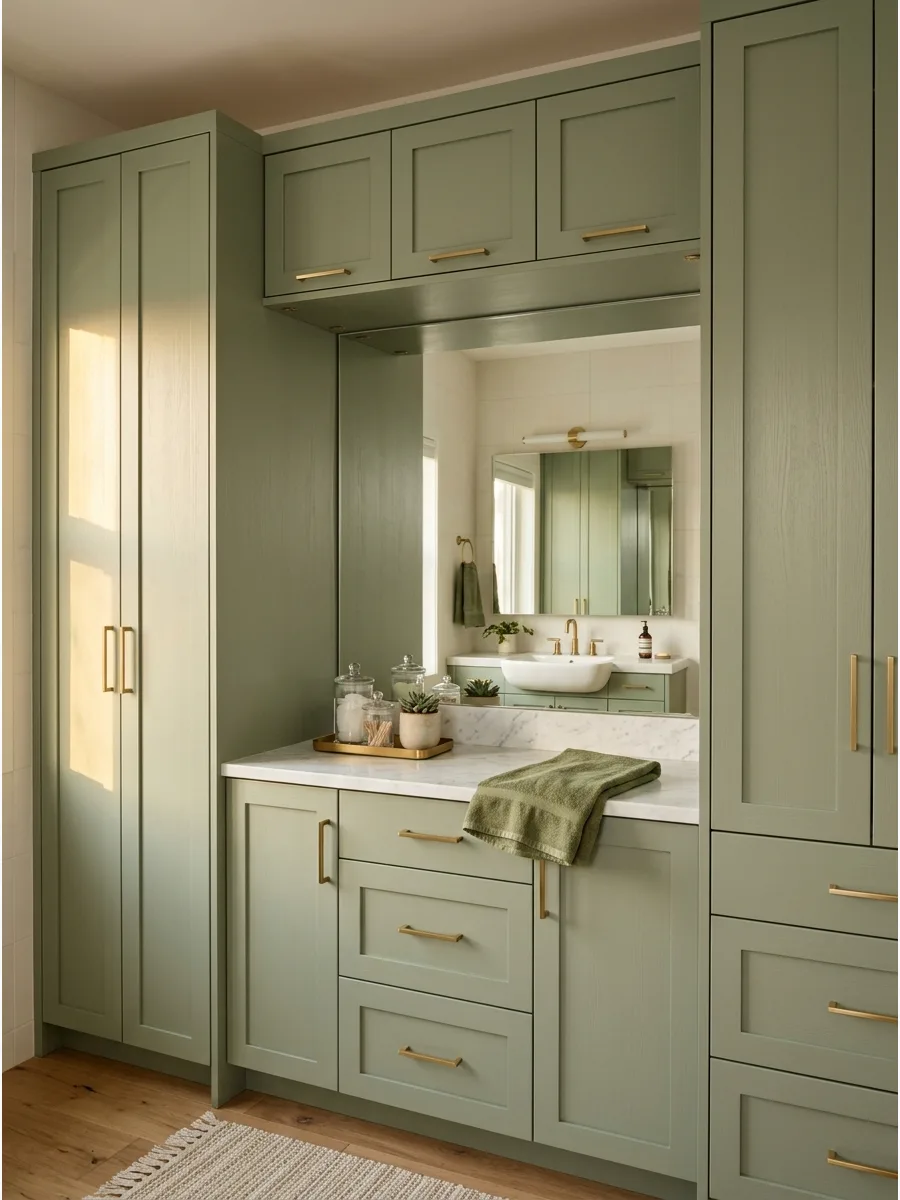
70. Use Soft Sage Green Cabinetry
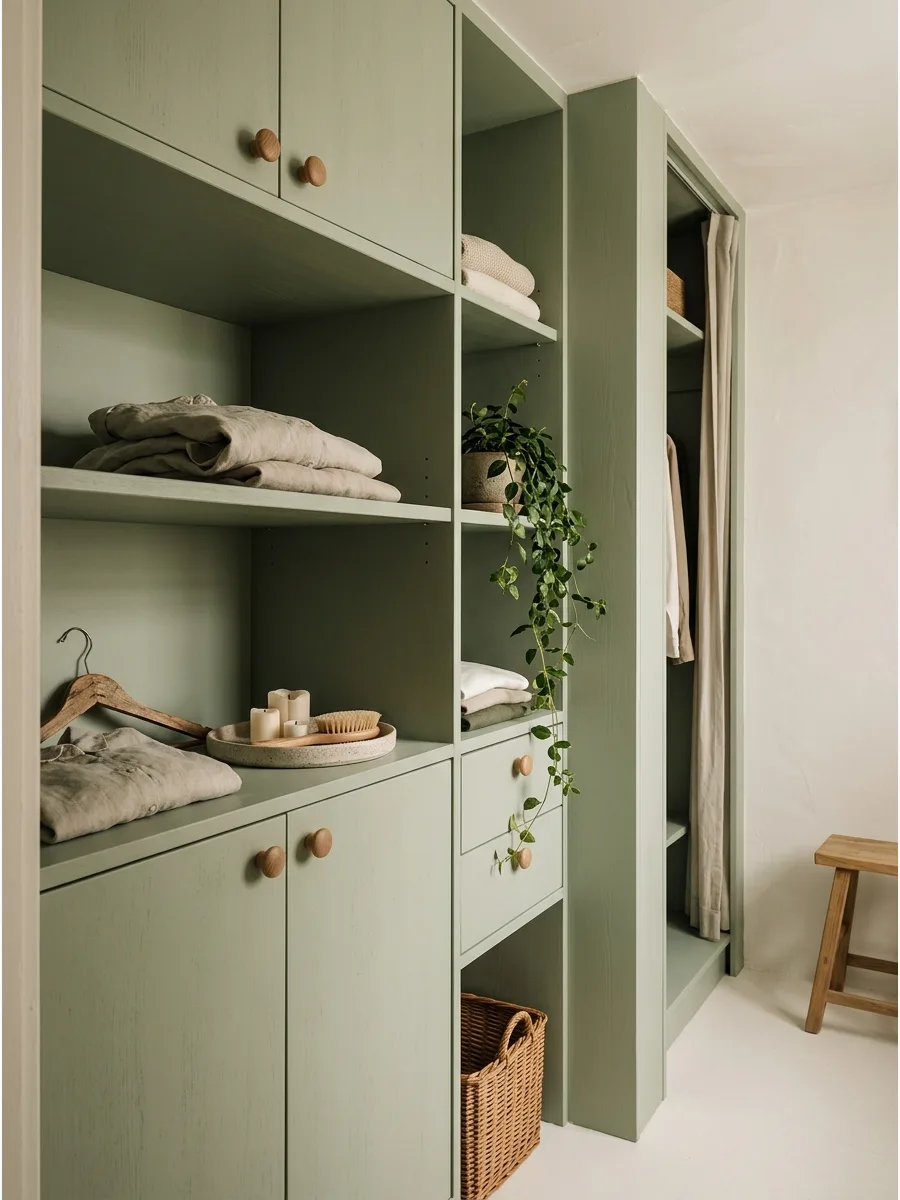
Sage green is a calming color that brings a bit of nature indoors without being overwhelming. It works perfectly with wood tones and white accents for a fresh, updated look.
Paint your wardrobes a muted sage green to add a pop of color that still feels neutral and timeless. This shade is gentle on the eyes and helps the room feel peaceful while you get ready.
- Sourcing: Look for 'muted sage' or 'eucalyptus' paint shades.
- Setup: Use a foam roller for a factory-smooth finish on the cabinet doors.
- Adaptation: Pair with natural wicker baskets for a cozy, organic feel.
Quick win: Add a small potted plant on a shelf to echo the green cabinets and breathe life into the room.
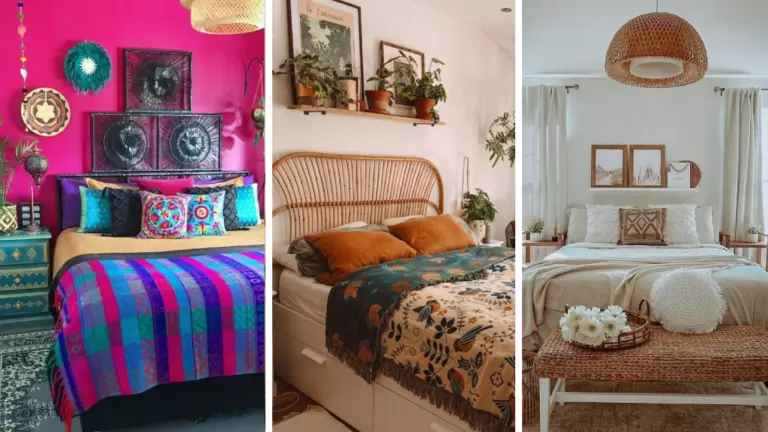
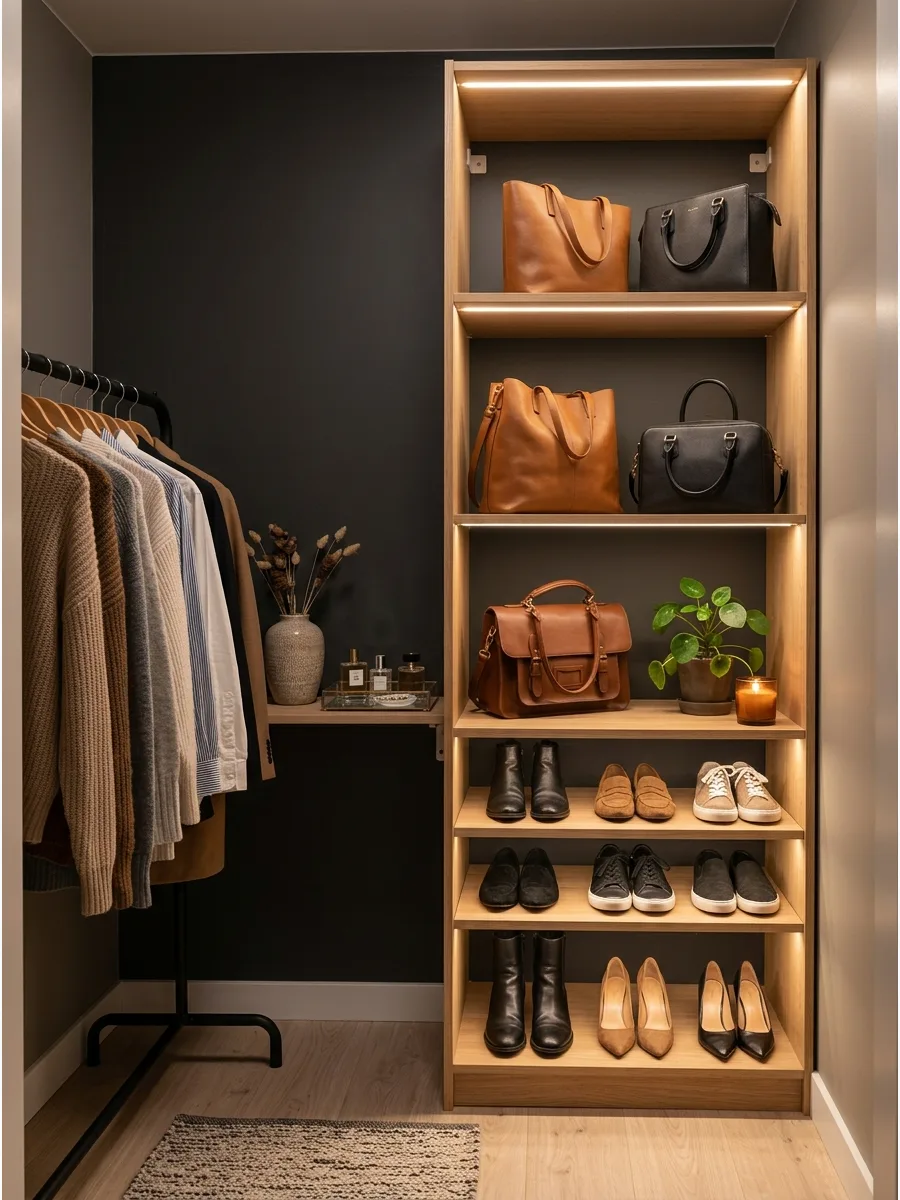
71. Create a Boutique-Style Dressing Room
A boutique-style room focuses on presentation as much as storage to create a luxury experience. Use open shelving to show off your favorite pieces while keeping everything perfectly aligned.
Organize your clothing by color and use matching hangers to give your small room a professional shop-floor feel. This approach encourages you to keep only what you truly love and wear.
- Sourcing: Purchase hangers in bulk to ensure they all match exactly.
- Setup: Leave a two-inch gap between every garment to maintain the boutique look.
- Adaptation: Use clear acrylic dividers to keep handbags standing upright on shelves.
Most people skip this: Leave a little 'breathing room' between hangers so the rack doesn't look overstuffed and messy.
Home Decor
72. Minimalist Small Dressing Nook
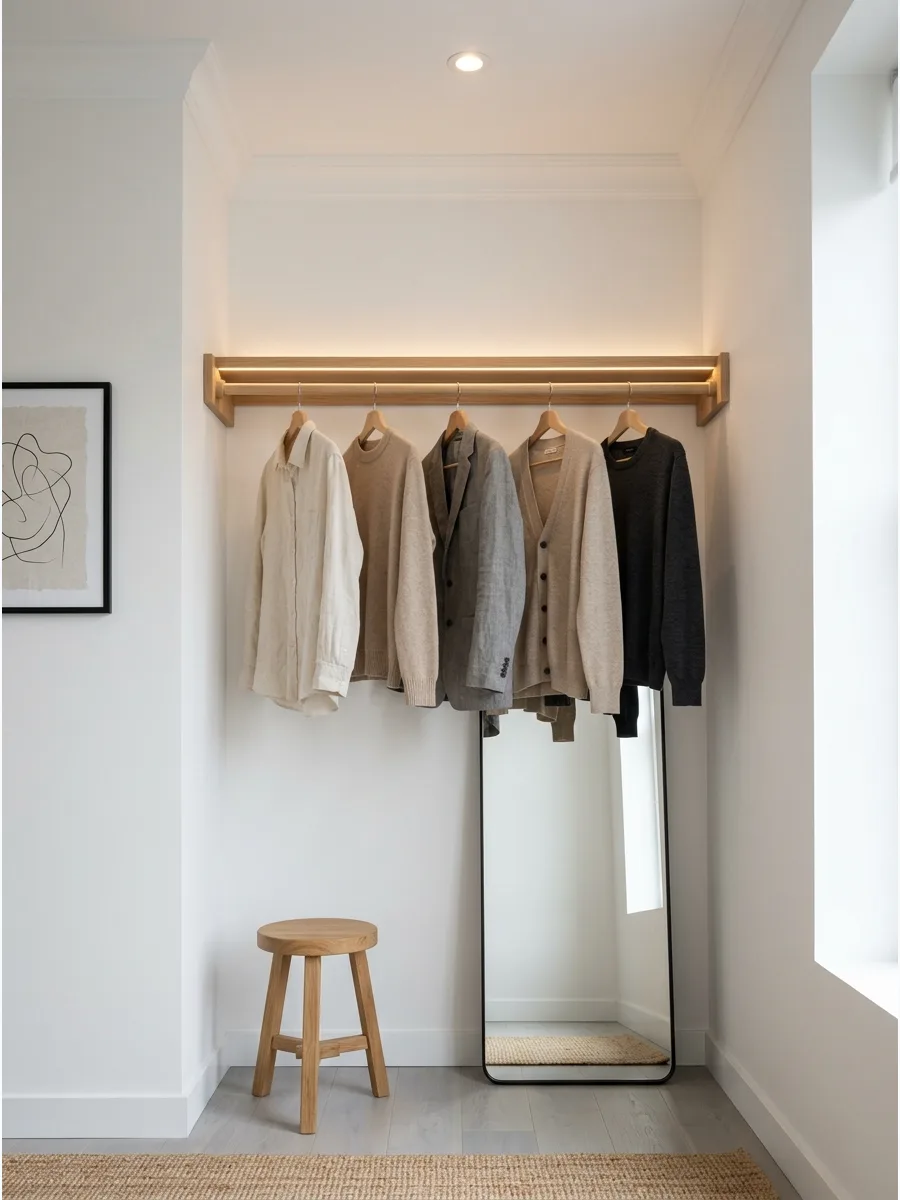
A minimalist approach transforms a cramped corner into a functional dressing space by focusing on high-quality basics and open storage. Neutral tones and hidden lighting create the illusion of more square footage while keeping essentials within reach.
Install a floor-to-ceiling mirror opposite the main light source to instantly double the visual depth of the room. Clean lines prevent visual clutter, which is the primary enemy of small areas. Selecting a monochromatic color palette ensures the space feels intentional rather than unfinished.
- Budget $200-$500 for a modular rail system and a full-length mirror, achievable in a single weekend.
- Mount the hanging rod at eye level to keep the floor clear for shoes or a small storage bench.
- Swap the open rail for a slim, handle-less wardrobe if dust protection is a higher priority than the open aesthetic.
Most people skip this: painting the ceiling the same soft white as the walls removes harsh transition lines, making the small dressing area feel significantly taller.
Small Dressing Room Color and Style Ideas
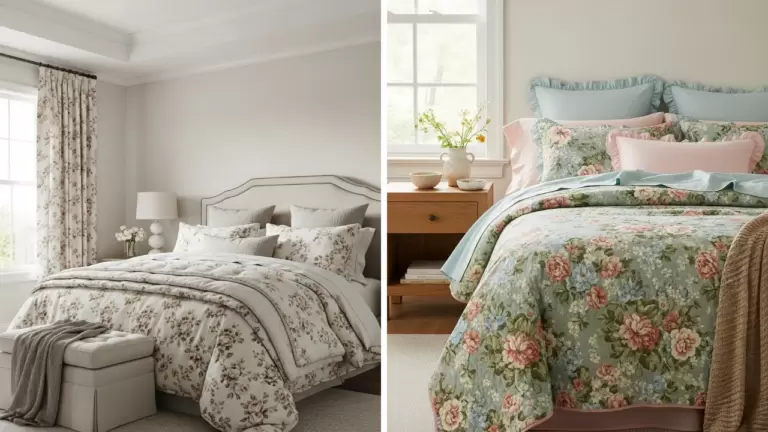
73. Create a Soft Traditional Dressing Room

Traditional details like shaker-style doors and brass handles add warmth and timeless character. These elements make a small room feel cozy and high-end rather than just functional.
Install paneled wardrobe doors and classic hardware to create a look that feels like part of the original home. A soft upholstered stool adds a final touch of comfort and elegance.
- Sourcing: Shaker doors are a standard option for most built-in wardrobe companies.
- Setup: Match the hardware finish to other metal elements in the room, like the mirror frame.
- Adaptation: Use a light-colored wood for the cabinet tops to add a farmhouse touch.
Quick win: Choose a 'warm' metallic like brass or copper for the hardware to make the small space feel more inviting.
Small Dressing Room Ideas
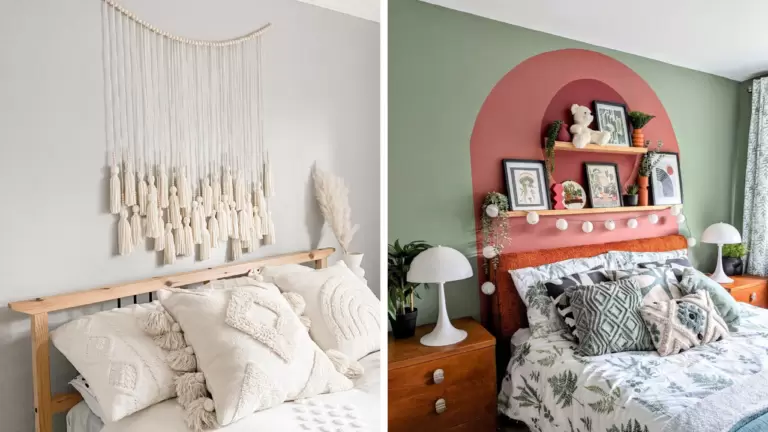
74. Wallpaper One Statement Wall
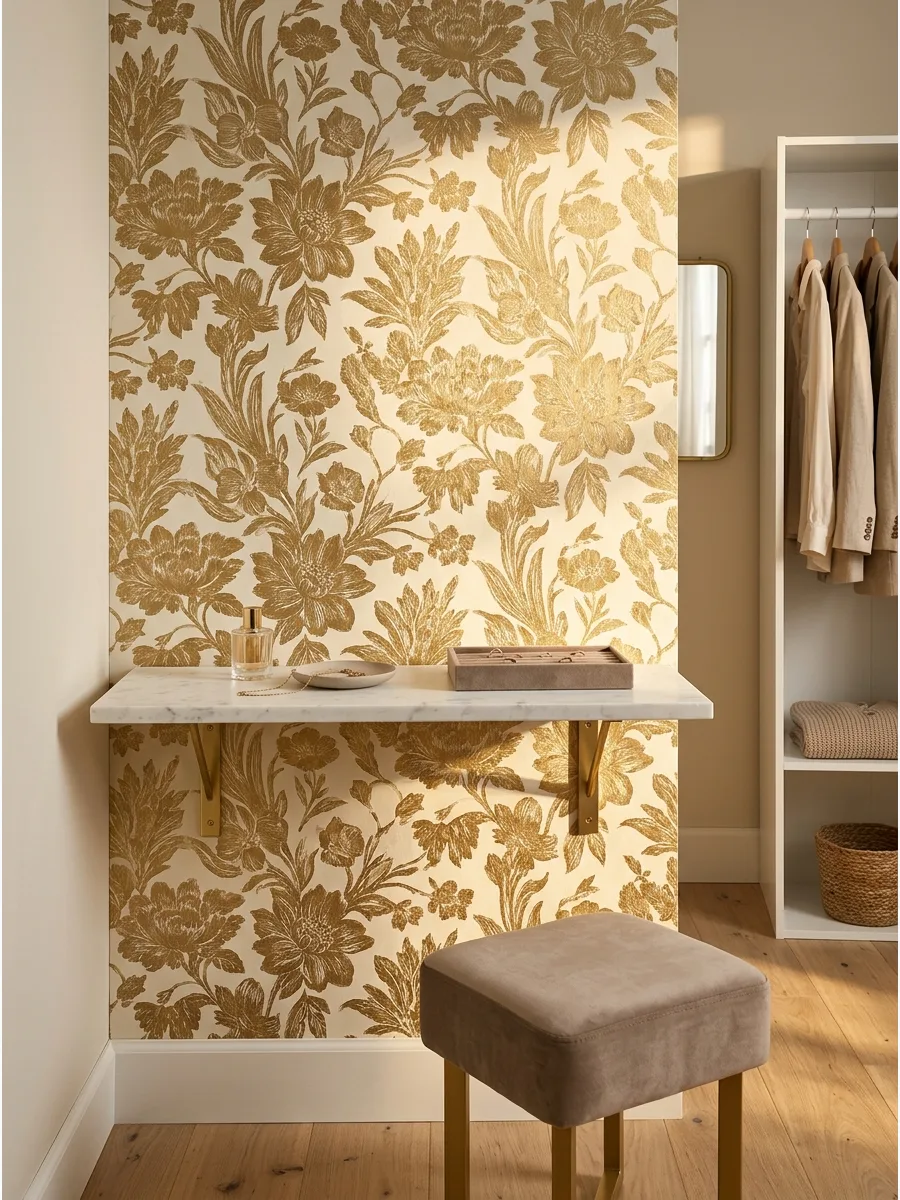
A small dressing room gains depth and personality when a single wall features a bold, high-contrast pattern. This technique defines the space without overwhelming the limited square footage or clashing with open shelving.
Apply a peel-and-stick mural behind the main vanity or mirror to create an instant focal point. Using a metallic or silk-textured finish reflects light better than flat matte options in windowless rooms.
- Source two rolls of high-quality removable wallpaper for a $50-$150 project.
- Wipe the wall with a damp cloth and allow it to dry completely before smoothing the paper on.
- Select a vertical pattern to create the illusion of higher ceilings in a compact space.
Quick win: Use a plastic smoothing tool to push air bubbles toward the edges for a professional, seamless finish.
Small Dressing Room Color and Style Ideas
75. Build a Flexible Renter-Friendly Dressing Zone

You do not need built-ins to create a functional and stylish dressing room. Freestanding pieces like clothing racks and leaning mirrors can be moved or taken with you when you leave.
Combine a heavy-duty rolling rack with a tall leaning mirror to create a dressing area that requires zero power tools. Coordinating the colors of these pieces makes them look like a matched set.
- Sourcing: Industrial-style racks are very sturdy and hold a full wardrobe.
- Setup: Place the rack in a corner to keep the center of the room clear for walking.
- Adaptation: Use a decorative screen to hide the rack if you prefer a cleaner look.
Best shortcut: Use a matching set of storage bins on the bottom shelf of your clothing rack to hide shoes or bulky items.
Frequently Asked Questions
How do I make a small dressing room feel bigger?
To create the illusion of depth, install floor-to-ceiling mirrors and stick to a monochromatic color palette. Adding elevated lighting, like a sleek chandelier or recessed lights, draws the eye upward and makes the space feel much more open.
What is the best layout for a narrow dressing room?
A galley-style layout with parallel shelving works best for very narrow rooms to keep the center walkway clear. If you have a bit more width at one end, an L-shaped configuration provides extra storage while still allowing for easy movement.
Can I turn a small reach-in closet into a dressing room?
Absolutely, you can transform a reach-in closet by removing the doors to create an open dressing nook. This space is perfect for a compact vanity or specialized floor-to-ceiling shelving that maximizes every inch of vertical space.
How do I manage lighting in a dressing room with no windows?
Use LED strip lighting along shelves to eliminate shadows and highlight your wardrobe clearly. It is also crucial to use 'daylight' balanced bulbs to ensure your makeup and outfit colors look accurate and vibrant.
What are the best renter-friendly small dressing room ideas?
Opt for freestanding garment racks and tension rods to add hanging space without drilling into the walls. Over-the-door organizers are also fantastic for shoes and accessories, keeping your floor clear and your security deposit safe.