50 Halloween Door Decorating Ideas
This post may contain affiliate links: full affiliate disclosure.
A well-decorated front door sets the tone for the entire Halloween season. These ideas focus on creating a festive entrance that looks professional and keeps the doorway fully functional for guests and trick-or-treaters.
Use high-contrast colors and durable materials to ensure the decor stands up to the outdoor elements.
1. Create a Classic Black-and-Orange Halloween Wreath
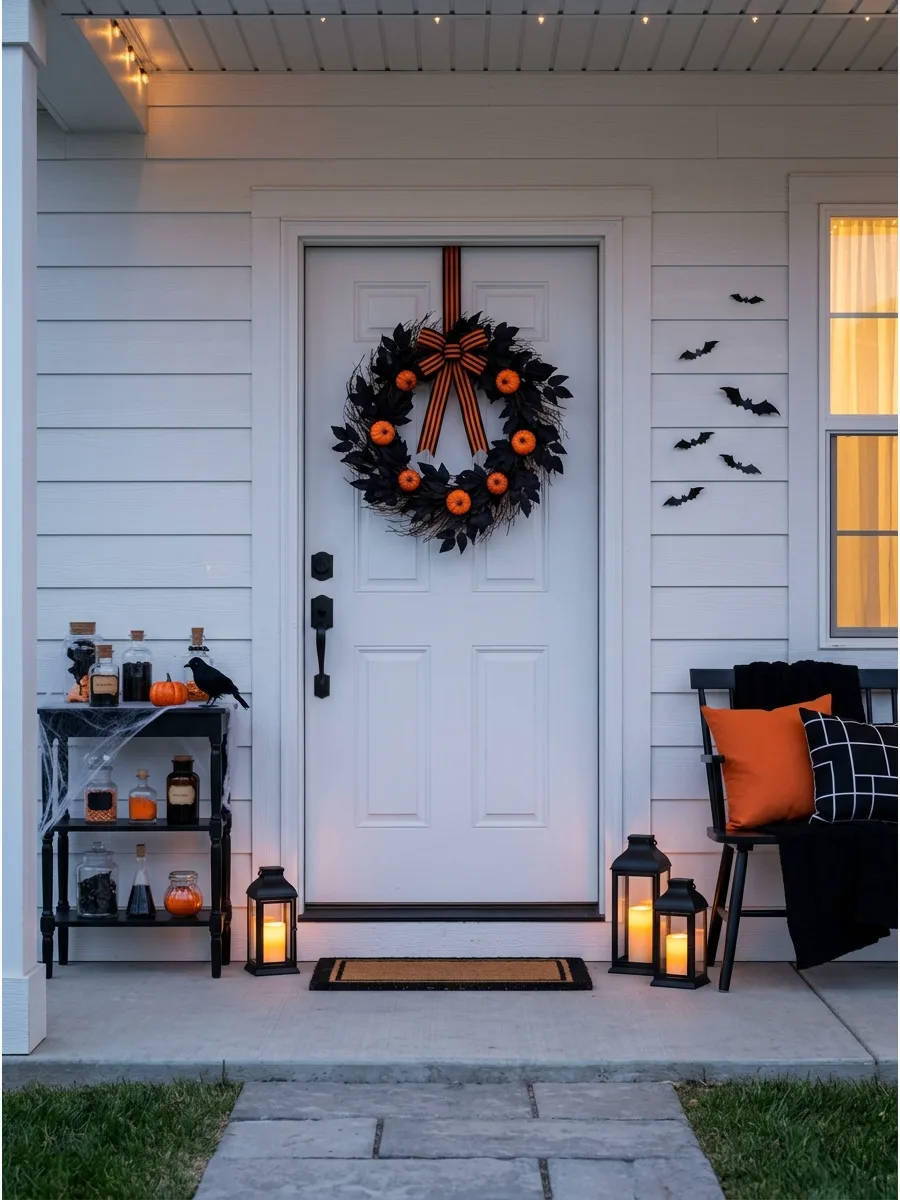
Use a grapevine wreath as a sturdy base for orange pumpkins and black leaves. The contrast between bright orange and deep black creates a high-impact look that stands out from the street.
Loop a wide striped ribbon through the top to give the arrangement a professional, finished appearance. A dark wreath base hides the wire or glue used to attach the accents.
- Buy a pre-made grapevine base for under twenty dollars.
- Use floral wire to secure heavy pumpkins so they do not fall when the door slams.
- Swap the ribbon colors next year to refresh the style for a different holiday.
Quick win: Use wire instead of hot glue for the pumpkins so you can reuse the wreath base for other seasons.
Halloween Door Decoration Ideas
2. Mid-Century Paper Pulp Wreath
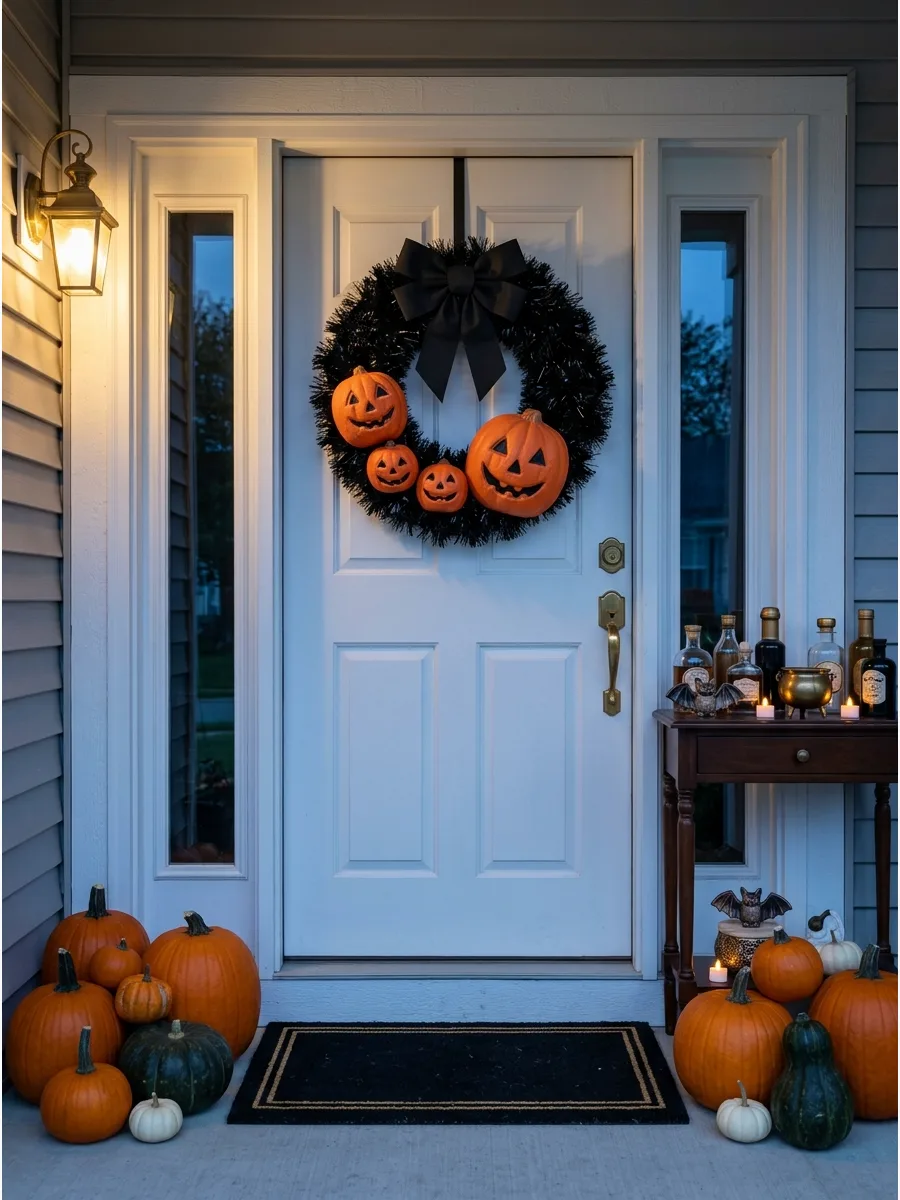
This design uses reproduction vintage paper pulp masks to create a nostalgic mid-century aesthetic on the front door. Secure three varying sizes of jack-o'-lantern faces to a black tinsel wreath form using floral wire threaded through the mask eyelets. The contrast between the matte orange pulp and the shiny black fringe creates a high-impact visual that feels more curated than standard plastic decor.
While traditional wreaths often use one focal point, clustering multiple vintage faces provides a more authentic retro-kitsch feel.
- Sourcing vintage-style pulp masks online or at craft stores usually costs under $30 for a set.
- Use 22-gauge floral wire to anchor the masks through existing string holes to prevent wind damage.
- Swap the black tinsel for a natural grapevine base if a more rustic, farmhouse look is preferred.
Quick win: Spray the finished wreath with a clear matte sealant to protect the paper pulp from evening humidity and prevent warping.
3. Design a Gothic Black Floral Wreath
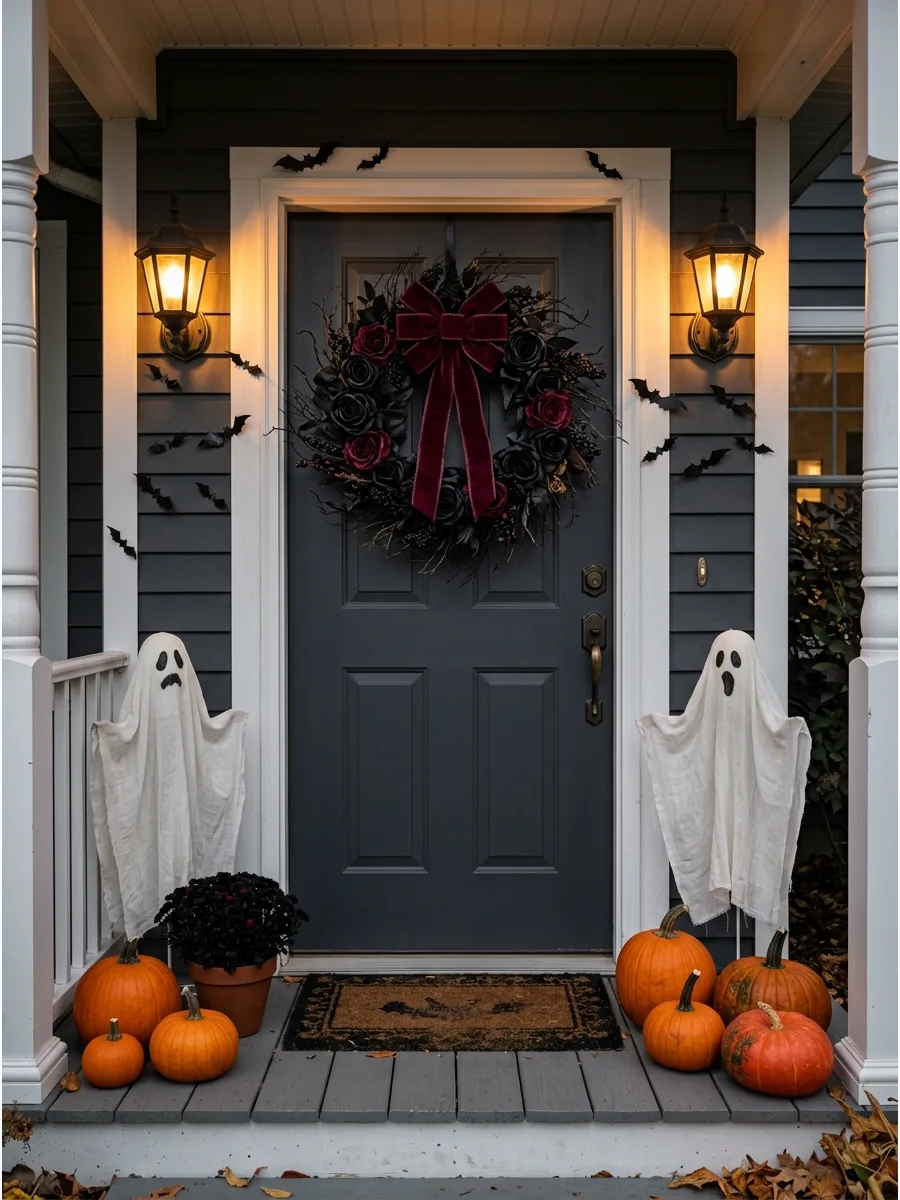
Mix black silk flowers with burgundy roses and bare twigs for a sophisticated, moody entrance. The velvet ribbon adds a heavy texture that feels expensive and intentional.
Tuck the burgundy roses deep into the black foliage to create a subtle sense of depth. This style works best for those who want a spooky vibe without using typical characters.
- Budget about thirty dollars for high-quality silk florals.
- Use a black wire wreath frame to keep the structure hidden.
- Store in a plastic bin to prevent the velvet ribbon from attracting dust.
Best shortcut: Spray paint cheap colorful silk flowers with matte black paint to get the exact Gothic look you want.
4. Hang a Crescent-Moon Halloween Wreath
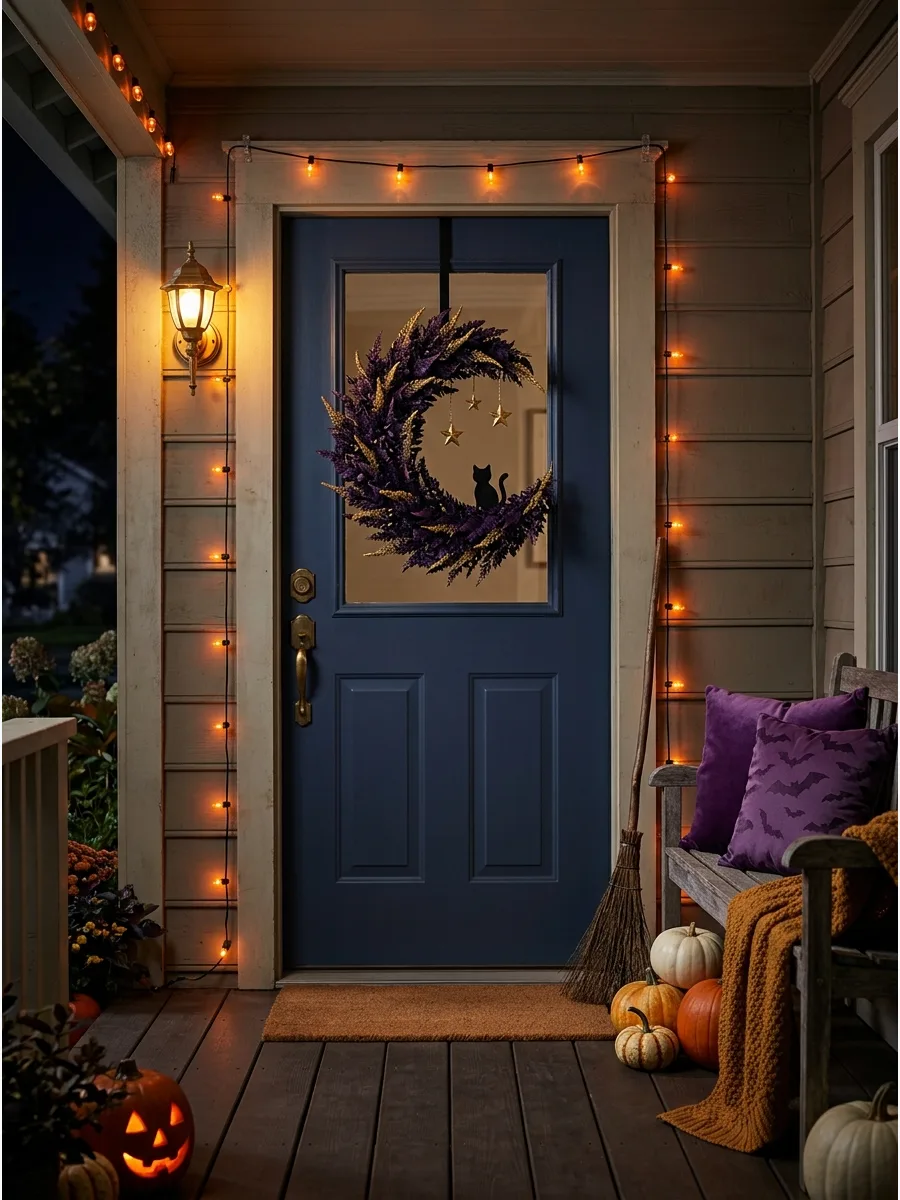
Build a moon shape using dark foliage and accent it with miniature stars and a small black cat. The asymmetrical shape offers a refreshing break from standard round wreaths.
Add a touch of gold or purple to the tips of the leaves to suggest a magical night sky. Hanging this at eye level ensures the small details like the stars are visible.
- Purchase a crescent-shaped wire frame or cut a round grapevine wreath in half.
- Use thin florist wire to attach the small cat silhouette securely.
- Add a battery-operated fairy light string for a glowing effect.
Quick win: Use a fishing line to hang the cat in the center of the crescent so it appears to be floating.
5. Create a Witch-Hat Door Wreath
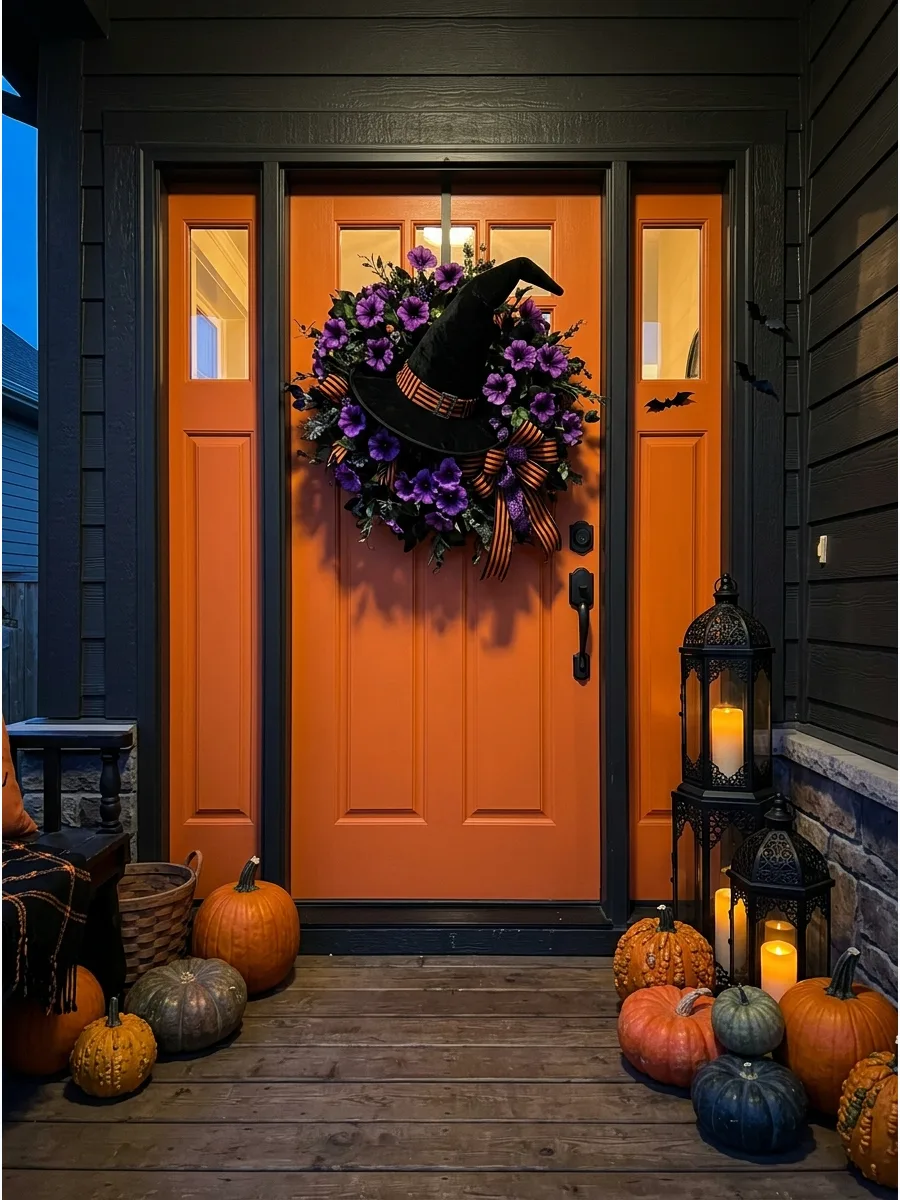
Center a large decorative witch hat on a wreath base and surround it with striped ribbon and purple flowers. Placing the hat at a slight angle gives the door a whimsical, storytelling feel.
Ensure the tip of the hat does not stick out so far that it gets caught in the screen door. The bright purple accents provide a punchy contrast to the black hat.
- Stuff the inside of the hat with newspaper so it keeps its shape outdoors.
- Use a heavy-duty wreath hanger to support the extra weight of the hat.
- Choose weather-resistant fabric for the ribbon to prevent sagging.
Most people skip this: Attach the hat to the wreath base in three places to keep it from flopping forward when the door opens.
6. Make a Black Cat Halloween Wreath
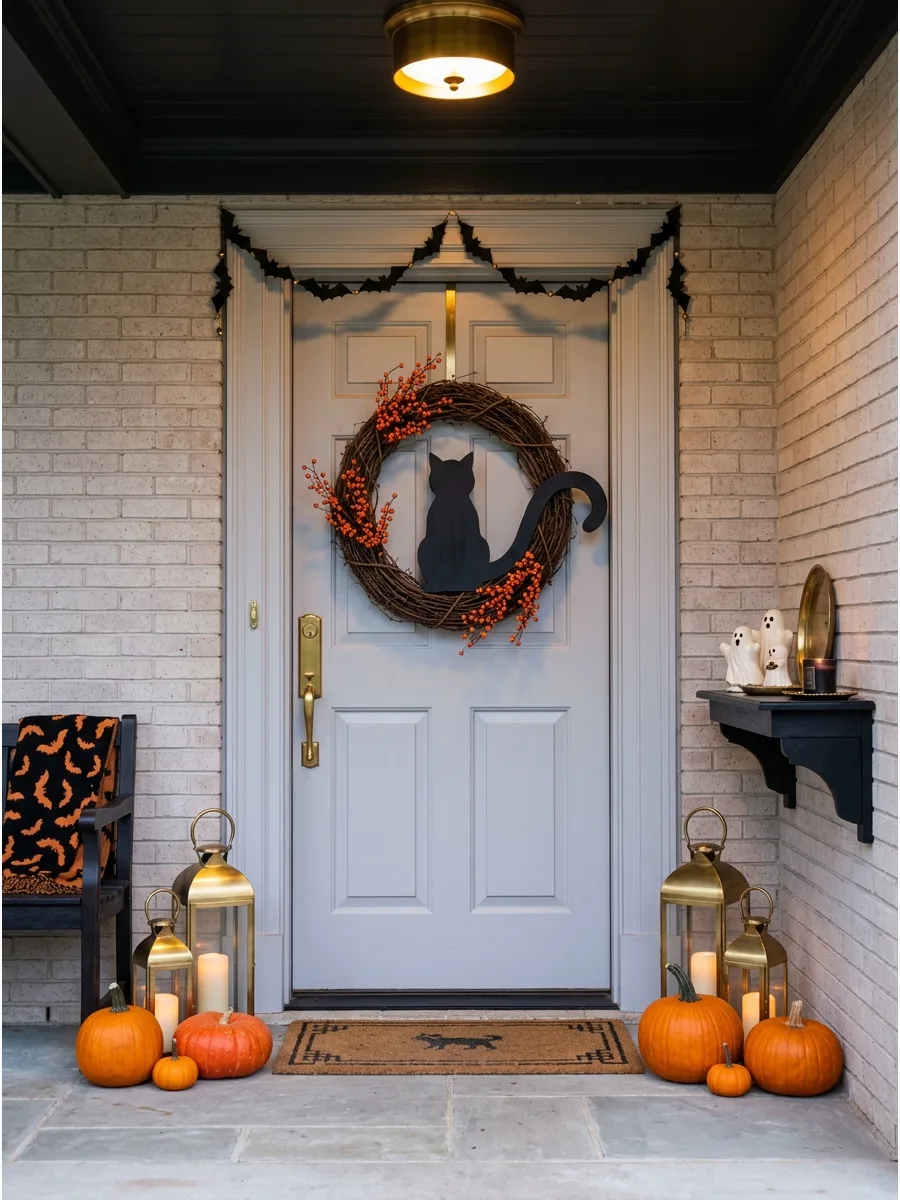
Mount a black cat silhouette in the middle of a simple twig wreath decorated with orange berries. This classic motif is highly recognizable and provides a clean, graphic look from the street.
Position the cat so its tail overlaps the edge of the wreath to create a sense of movement. A few sprigs of orange berries add just enough color to make the black silhouette pop.
- Use a lightweight wood or plastic silhouette to keep the wreath balanced.
- Secure the berries with green floral tape for a seamless look.
- Opt for a grapevine base for a more rustic, textured appearance.
Best shortcut: Use a pre-cut wooden cat from a craft store and paint it with chalkboard paint for a flat, matte finish.
7. Decorate With a Ceramic Ghost Wreath
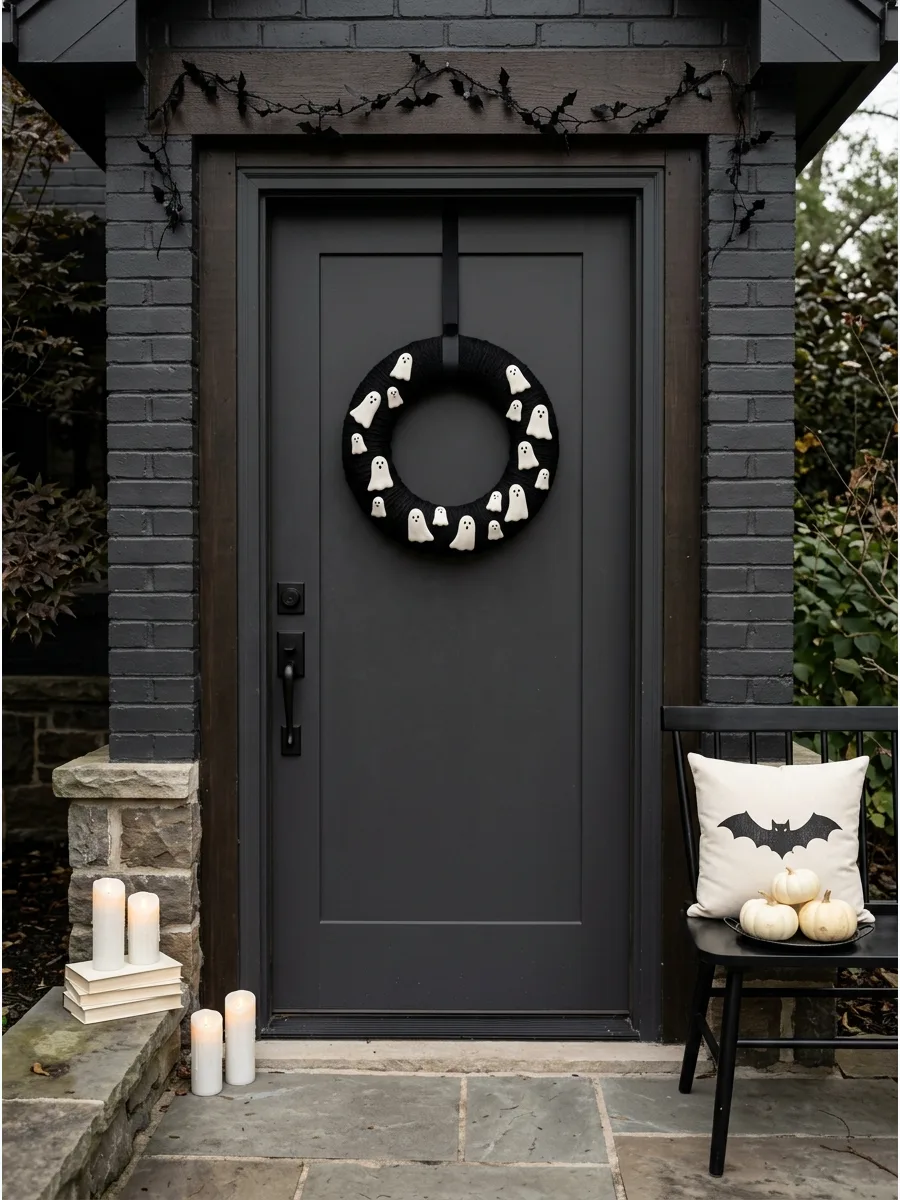
Attach several small white ghost figures to a dark wreath base for a playful and modern display. Mixing different ghost sizes makes the arrangement feel more dynamic and custom.
Leave enough space between the ghosts so the dark background helps define their shapes. This design is bright enough to be seen clearly from the sidewalk.
- Use industrial-strength adhesive or wire loops to secure ceramic pieces.
- Choose a foam wreath base wrapped in black yarn for a soft, clean look.
- Store the wreath in a padded box to protect the ceramic elements.
Quick win: If ceramic is too heavy, use painted white salt dough or lightweight clay ghosts instead.
8. Create a Spiderweb Door Wreath
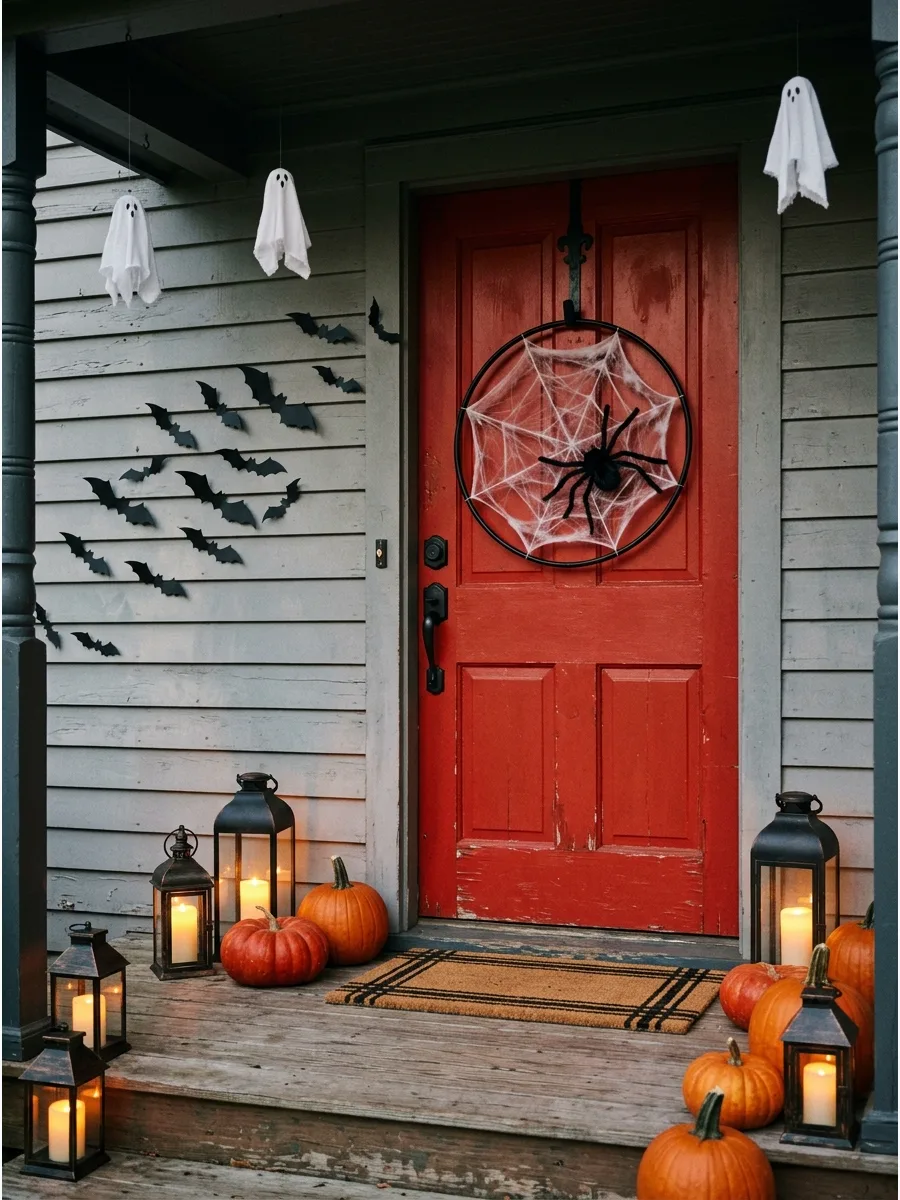
Stretch white decorative webbing across a black hoop and add one large spider for a bold, creepy effect. Keeping the design minimal ensures that the intricate web pattern is the star of the show.
Place the spider off-center to make the web look more natural and less like a target. This wreath is incredibly lightweight and easy to hang with a simple hook.
- Use a metal embroidery hoop painted black for a thin, modern frame.
- Pull the webbing tight to prevent it from looking like a messy cotton ball.
- Replace the webbing every year as it tends to catch outdoor debris.
Most people skip this: Spray the webbing with hairspray once it is in place to help it hold its shape against the wind.
9. Make an Elegant Pumpkin-and-Brass Wreath
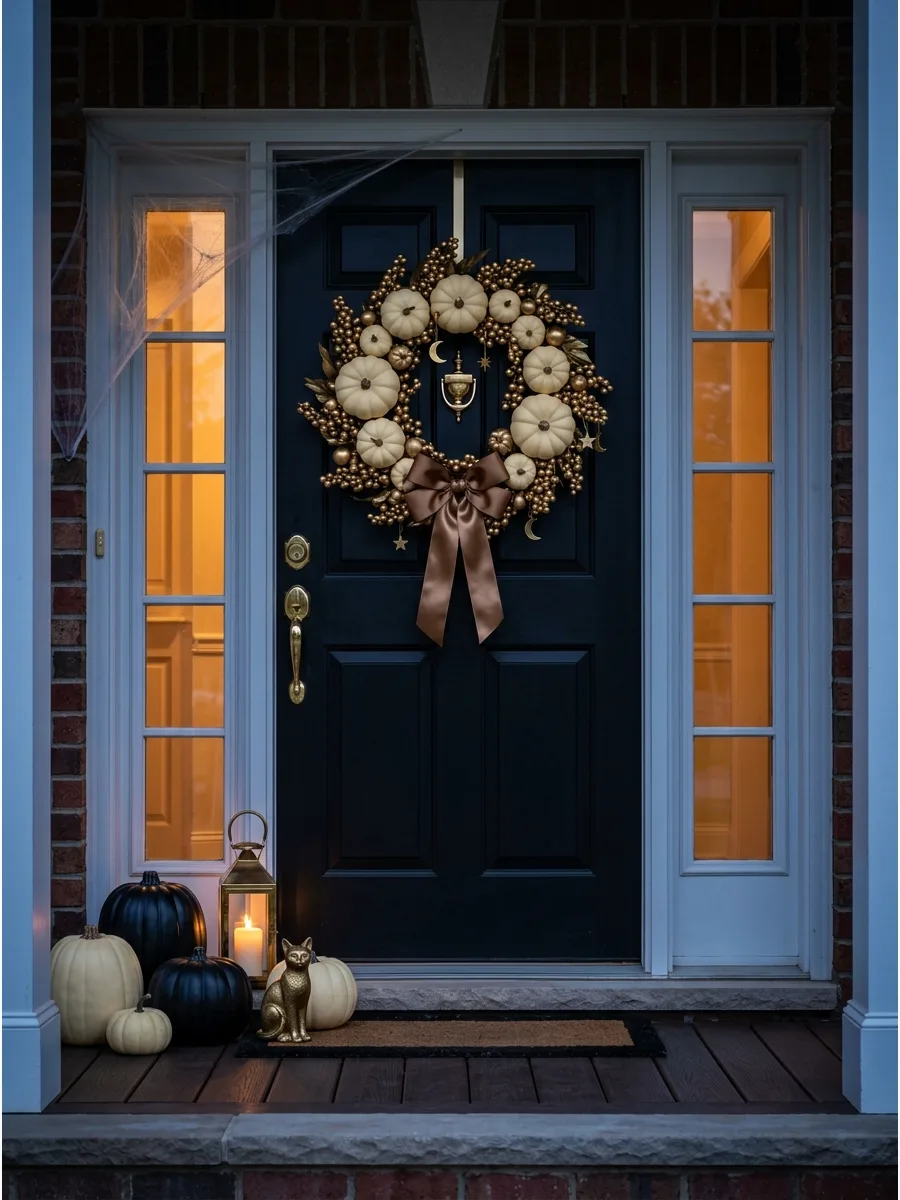
Combine cream-colored pumpkins with gold berries and bronze ribbon for a high-end, sophisticated look. This palette feels festive without the loud colors usually associated with the holiday.
Use a mix of matte and metallic finishes to catch the light and add visual interest. It is a perfect choice for a home with a dark-colored door or traditional architecture.
- Source velvet pumpkins for a softer, more luxurious texture.
- Use a brass wreath hanger to match the metallic accents in the design.
- Tuck in a few dried magnolia leaves for a natural, earthy touch.
Best shortcut: Paint cheap orange pumpkins with cream-colored chalk paint for an instant designer upgrade.
10. Build a Pastel Halloween Wreath
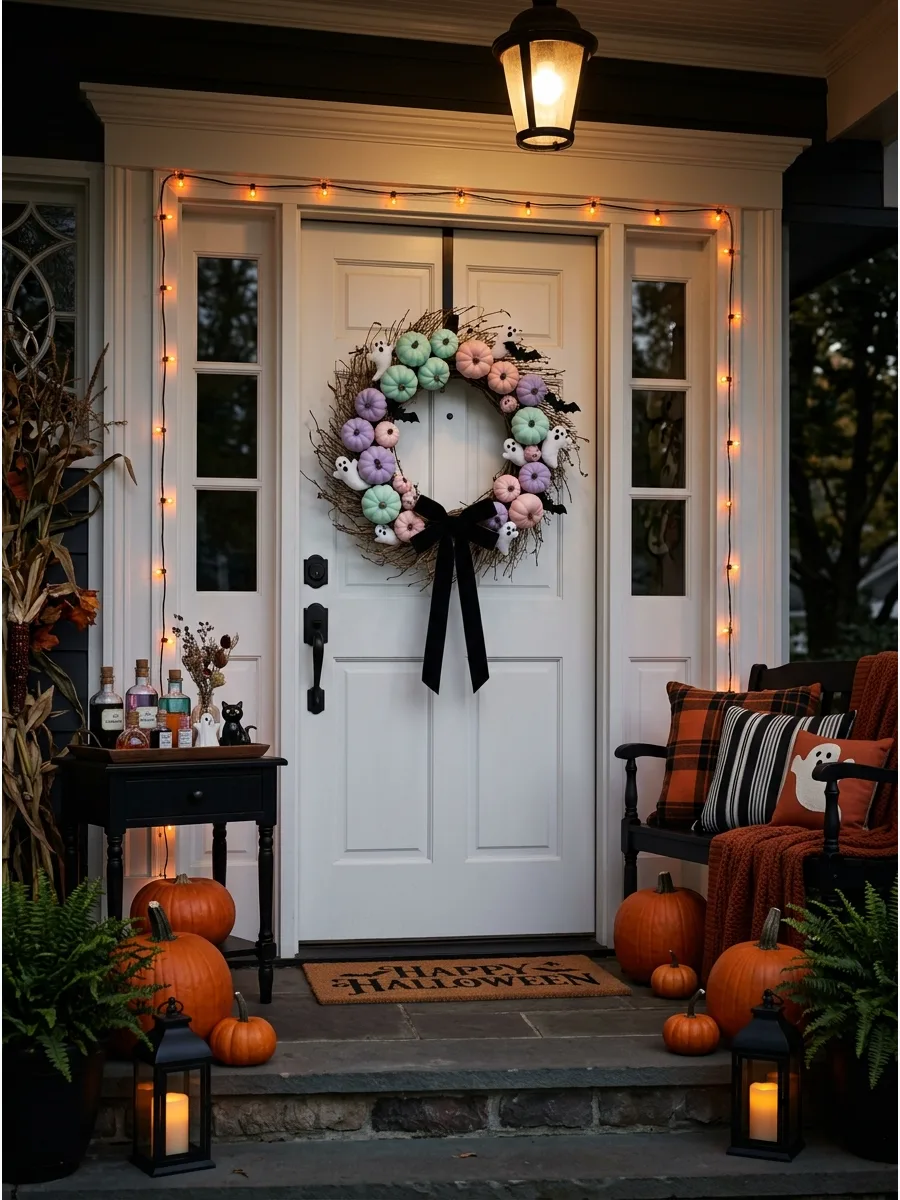
Use lavender, blush, and mint-colored pumpkins paired with white ghosts for a trendy pastel aesthetic. Adding small black bats or black ribbon keeps the design grounded in the theme.
Group the different colors of pumpkins together in small clusters for a more curated look. This style is ideal for light-colored homes or those who prefer a softer holiday palette.
- Look for fairytale pumpkin shapes which often come in naturally muted colors.
- Use white floral wire to keep the connections invisible against the light pumpkins.
- Pair with a white or light wood door for the best color payoff.
Quick win: Use black glitter on the bats to add a bit of sparkle that contrasts with the soft pastel tones.
11. Hang a Large Ghost Door Hanger
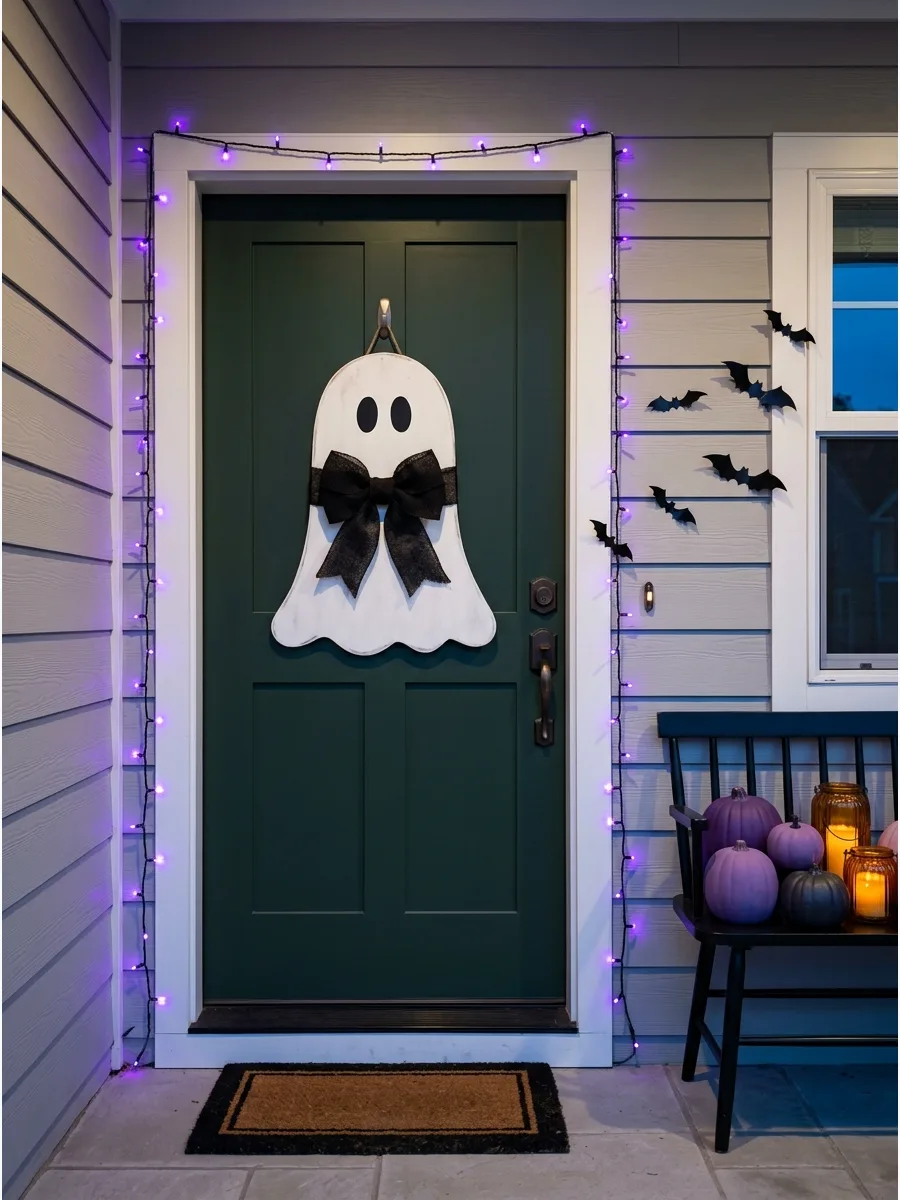
Use a single, oversized ghost shape as a minimalist alternative to a traditional wreath. A simple white figure with a friendly face creates a welcoming entrance for trick-or-treaters.
Attach a large black bow at the neck of the ghost to add a touch of classic Halloween style. This lightweight decoration is easy to move and will not scratch the door's paint.
- Choose a hanger made of corrugated plastic or treated wood for outdoor durability.
- Use a suction cup hook if you have a glass storm door.
- Add a welcome message in vinyl lettering across the ghost's belly.
Most people skip this: Add a small weight to the bottom of the hanger to keep it from banging against the door in high winds.
12. Display a Vintage Halloween Door Sign
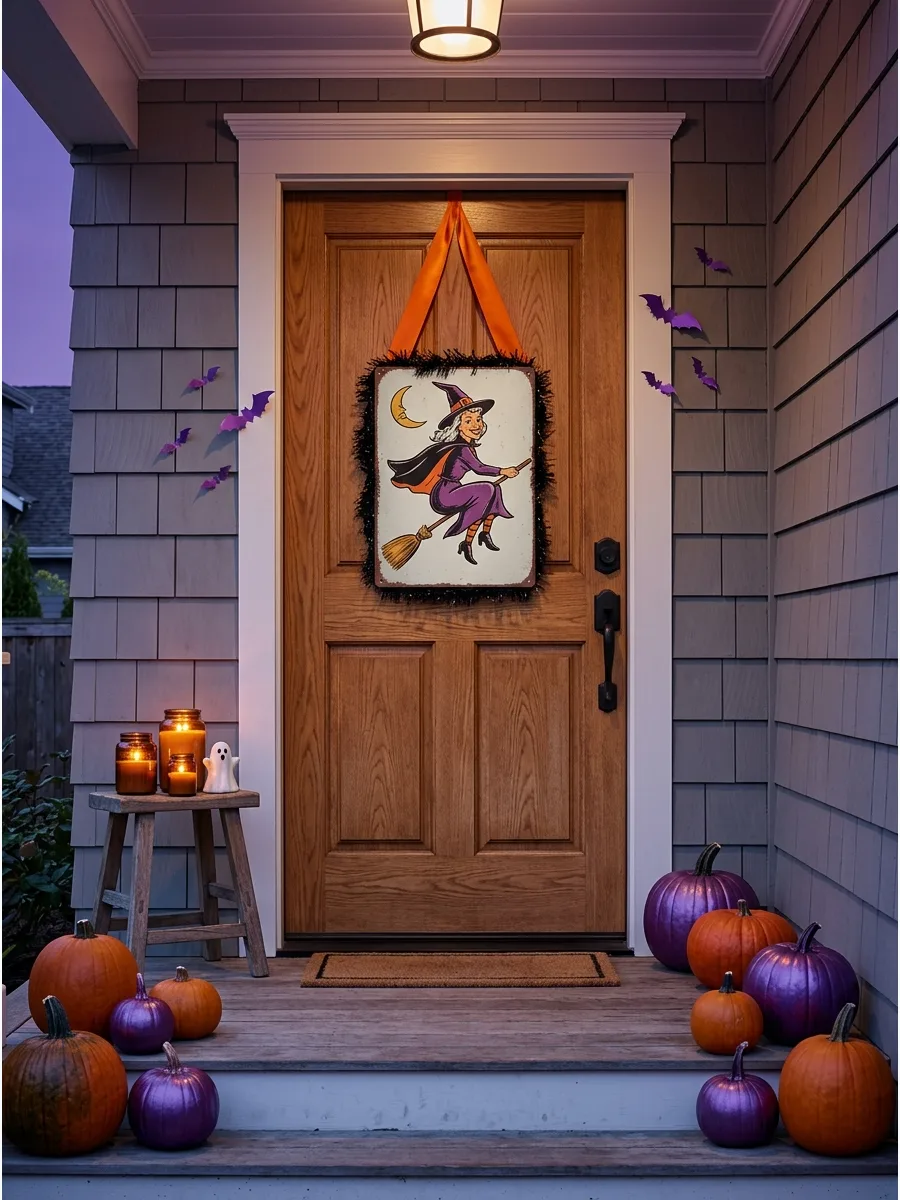
Hang a retro-style sign featuring classic icons like a smiling pumpkin or a witch on a broomstick. These signs bring a sense of history and charm to the front porch.
Frame the sign with a small amount of autumn leaves or ribbon to make it feel like a complete installation. It is a great way to add character without the bulk of a full wreath.
- Check antique malls or online shops for authentic mid-century tin signs.
- Use a ribbon that matches one of the colors in the sign for a cohesive look.
- Ensure the sign is flat so it does not interfere with the door handle.
Best shortcut: Print a high-resolution vintage image and mod-podge it onto a thin wooden board for a DIY version.
13. Add a Wooden Black Cat Door Hanger
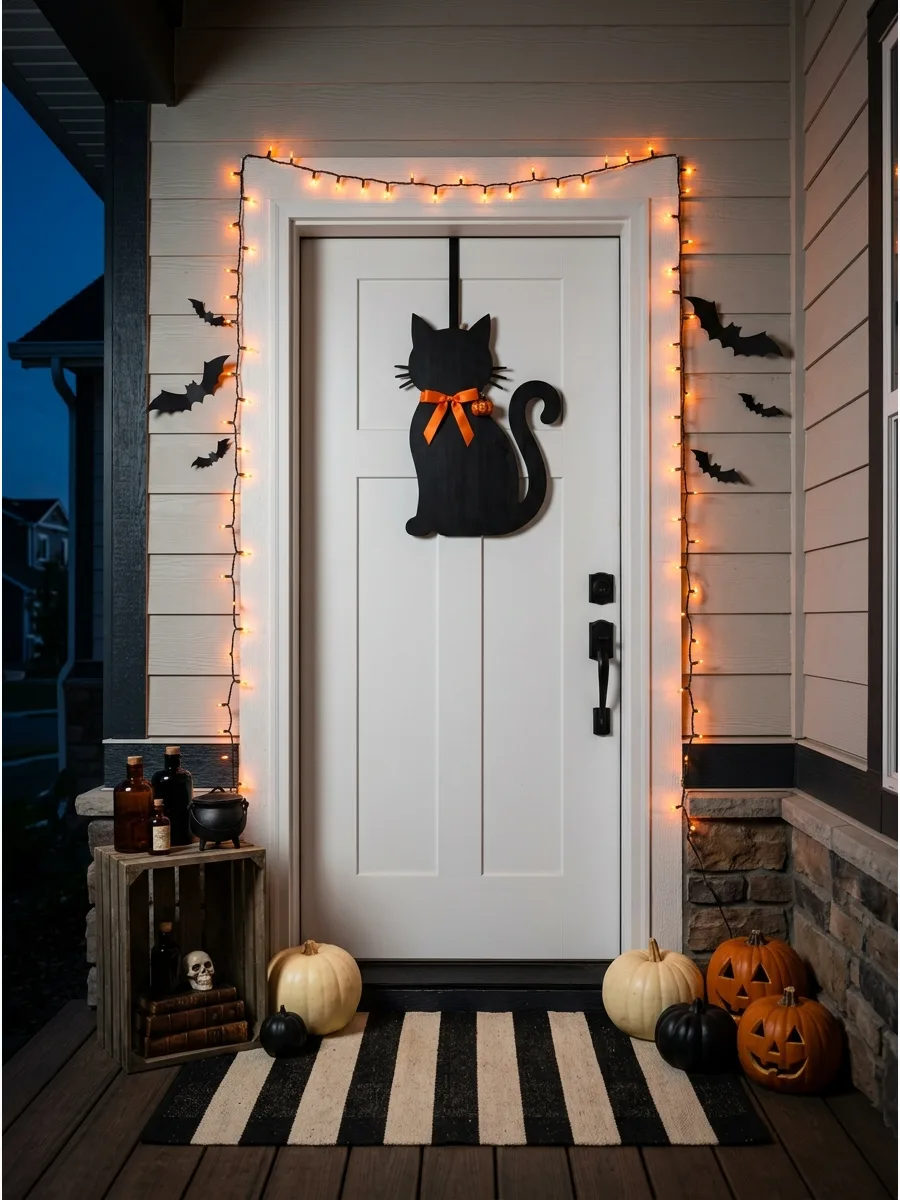
A flat black cat silhouette makes a bold statement against a light-colored door. Adding a small orange collar or a miniature pumpkin detail provides a necessary pop of color.
Hang the cat slightly higher than the midpoint of the door to maximize its visibility from the street. The simple shape is modern and fits perfectly with a minimalist decor style.
- Apply a clear outdoor sealant to the wood to prevent warping from moisture.
- Use a wide orange ribbon to hang the cat for extra color impact.
- Store flat between pieces of cardboard to prevent the tail or ears from snapping.
Quick win: Use double-sided outdoor mounting tape on the back of the hanger to keep it perfectly still.
14. Create a Trick-or-Treat Door Sign
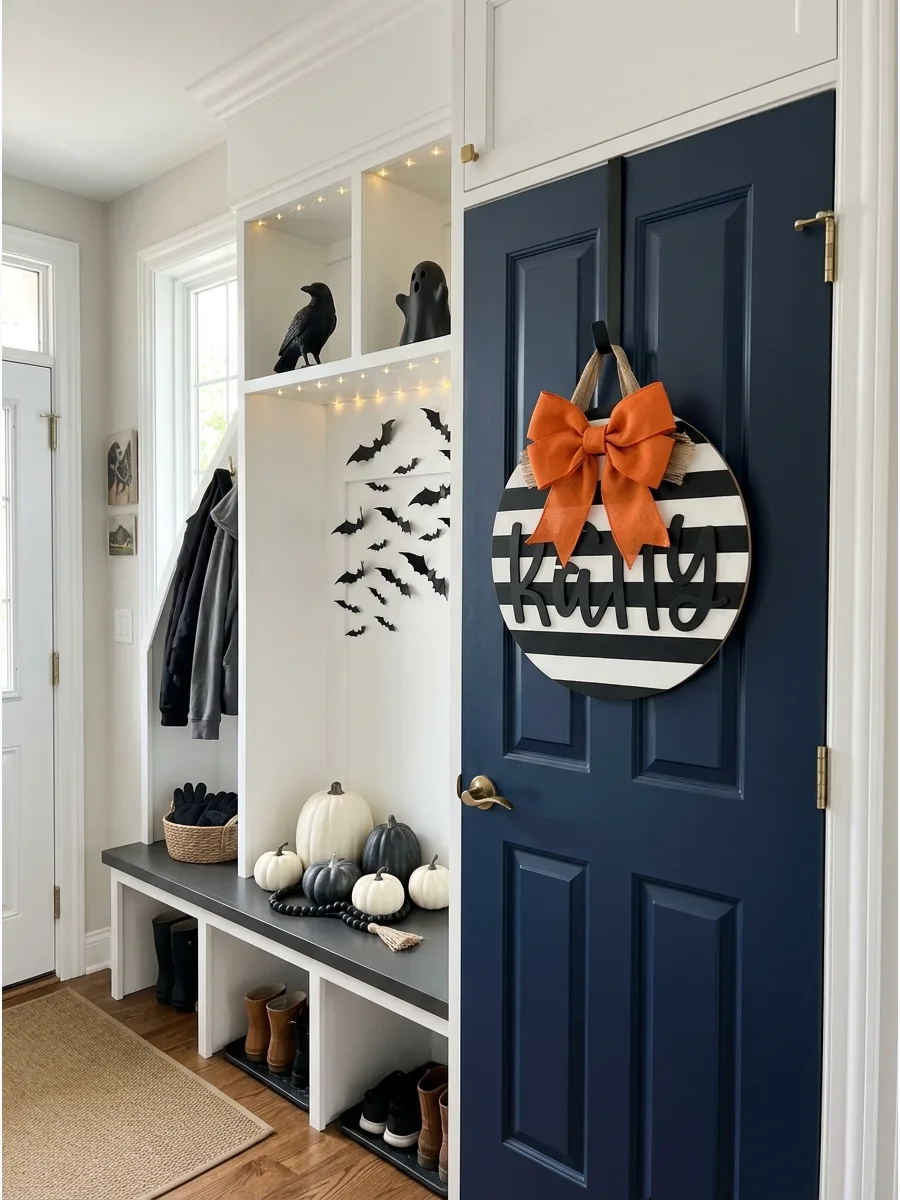
Use a large vertical or round sign with a bold message to greet guests. Combining the text with black-and-white stripes or orange ribbon makes the sign feel festive and energetic.
Choose a font that is thick and easy to read from a distance so the message is clear. This is a functional choice that sets a friendly tone for the holiday.
- Look for signs made of PVC or treated plywood for the best weather resistance.
- Hang the sign using a sturdy over-the-door hook to avoid drilling holes.
- Pair with a matching doormat to pull the entire entryway together.
Most people skip this: Check the sign's visibility at night under your porch light to ensure the text does not disappear in the shadows.
15. Hang a Decorative Witch’s Broom
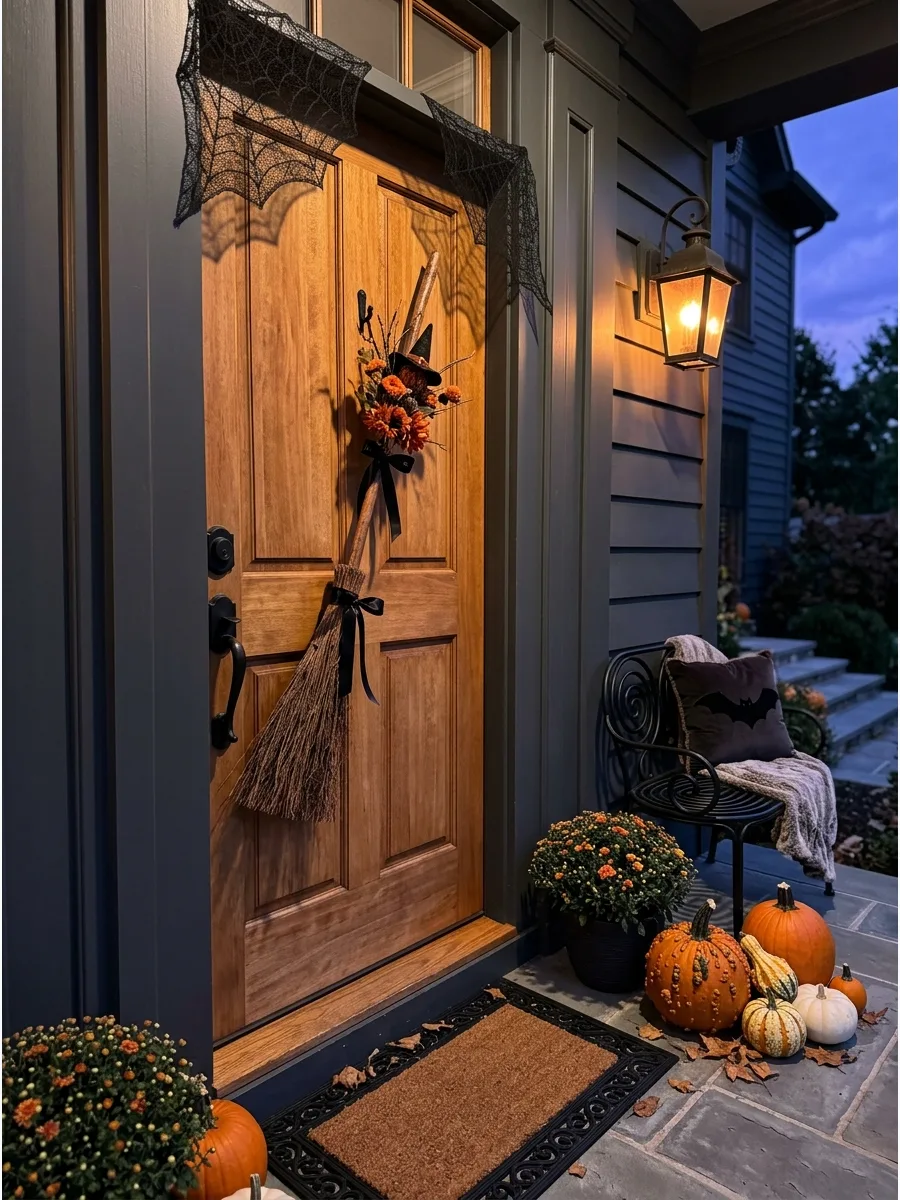
Position a decorative broom diagonally across the door for a unique and magical look. Accenting the handle with ribbon and dried flowers makes the broom feel like a curated piece of decor.
Secure the broom at two points to ensure it stays at the correct angle when the door is used. This idea adds height and a rustic texture to the doorway.
- Use a lightweight cinnamon broom to add a pleasant fall scent to the entryway.
- Ensure the bristles are soft or trimmed so they do not scratch the door surface.
- Keep the broom clear of the lock and handle for safety.
Best shortcut: Use zip ties hidden under the ribbon to attach the broom to a standard wreath hanger.
16. Make a Haunted-House Door Hanger
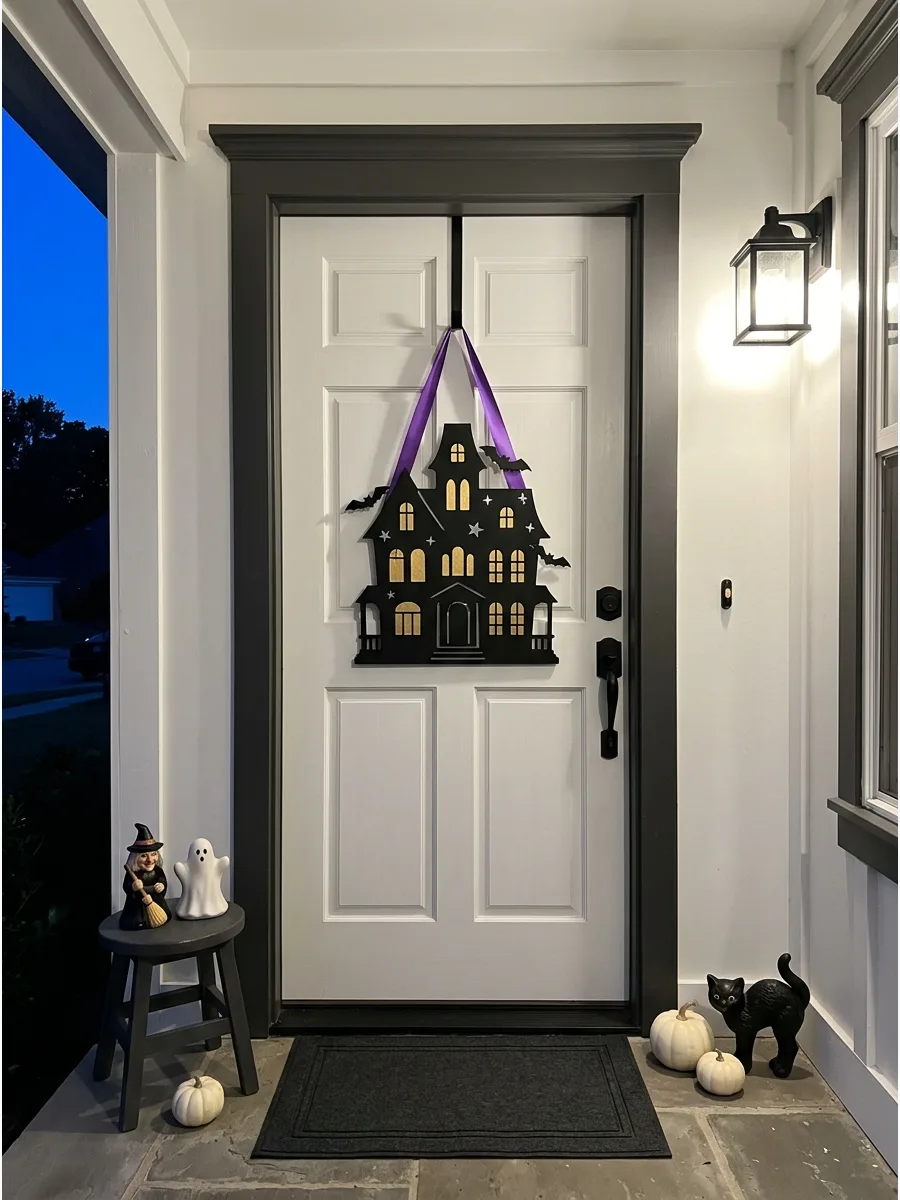
A flat silhouette of a haunted house creates a striking focal point without the bulk of a traditional wreath. Use a black-and-gold palette to highlight the small window and bat details against the door.
Secure the hanger with a heavy-duty suction cup or over-the-door hook to prevent it from banging when the door opens. This flat design is perfect for storm doors where space is limited.
- $15-$30 for materials; 30-minute assembly.
- Hangs flat against the door to allow for storm door clearance.
- Swap gold paint for glow-in-the-dark paint for a nighttime effect.
Quick win: Use a piece of adhesive foam on the back of the hanger to protect the door's paint from scratches.
17. Create a Stacked Pumpkin Door Hanger
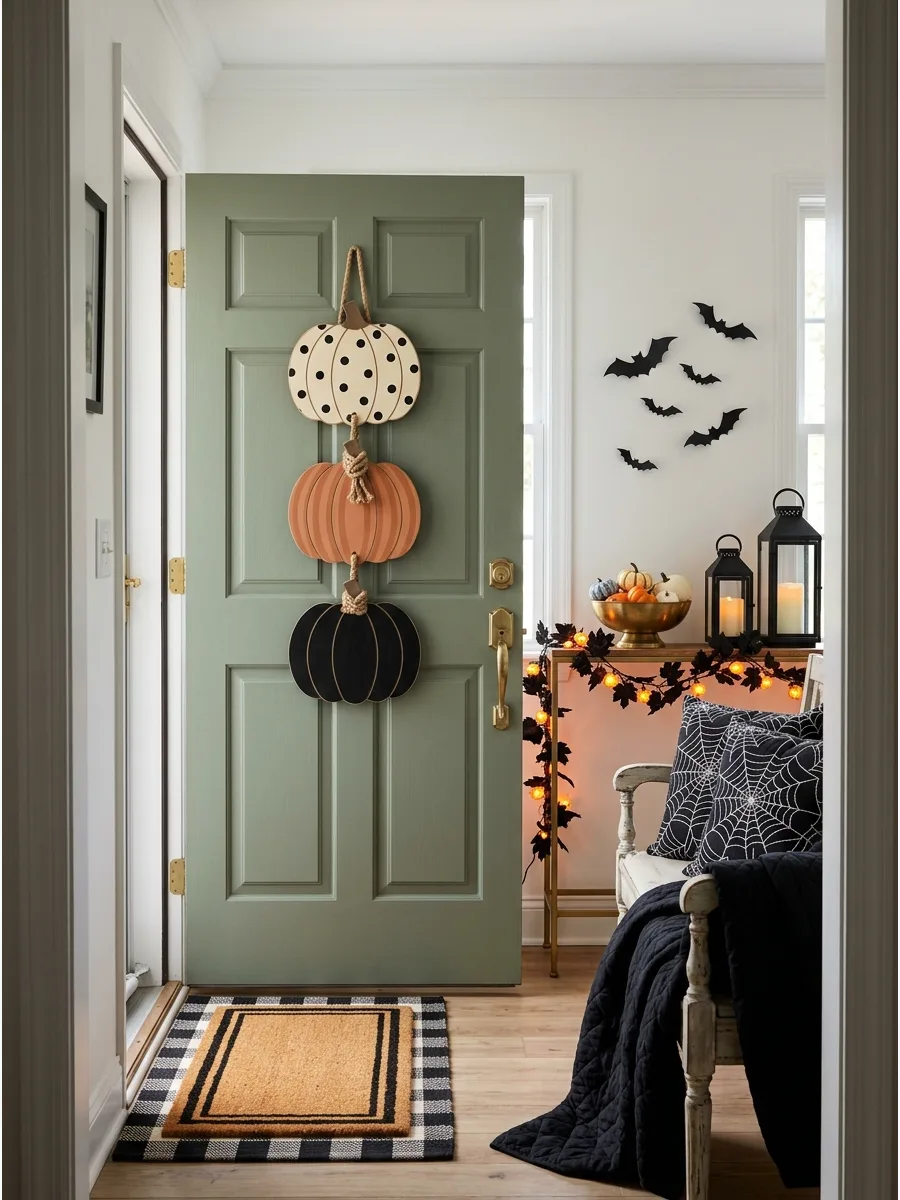
Vertical decor draws the eye upward and makes a small entryway feel more grand. Choose three flat pumpkin shapes in muted orange, cream, and black for a sophisticated look.
Connect the pumpkins with sturdy wire or thick twine to ensure the stack stays aligned in the wind. Mixing patterns like dots or stripes on one pumpkin adds visual interest without clutter.
- $20-$40; available at most craft stores in October.
- Use a single hook at the top for easy installation and removal.
- Choose galvanized metal pumpkins for a more industrial or rustic appearance.
Best shortcut: Buy pre-painted wooden rounds and use stencils to create the pumpkin faces quickly.
18. Hang a Gothic Oval Portrait
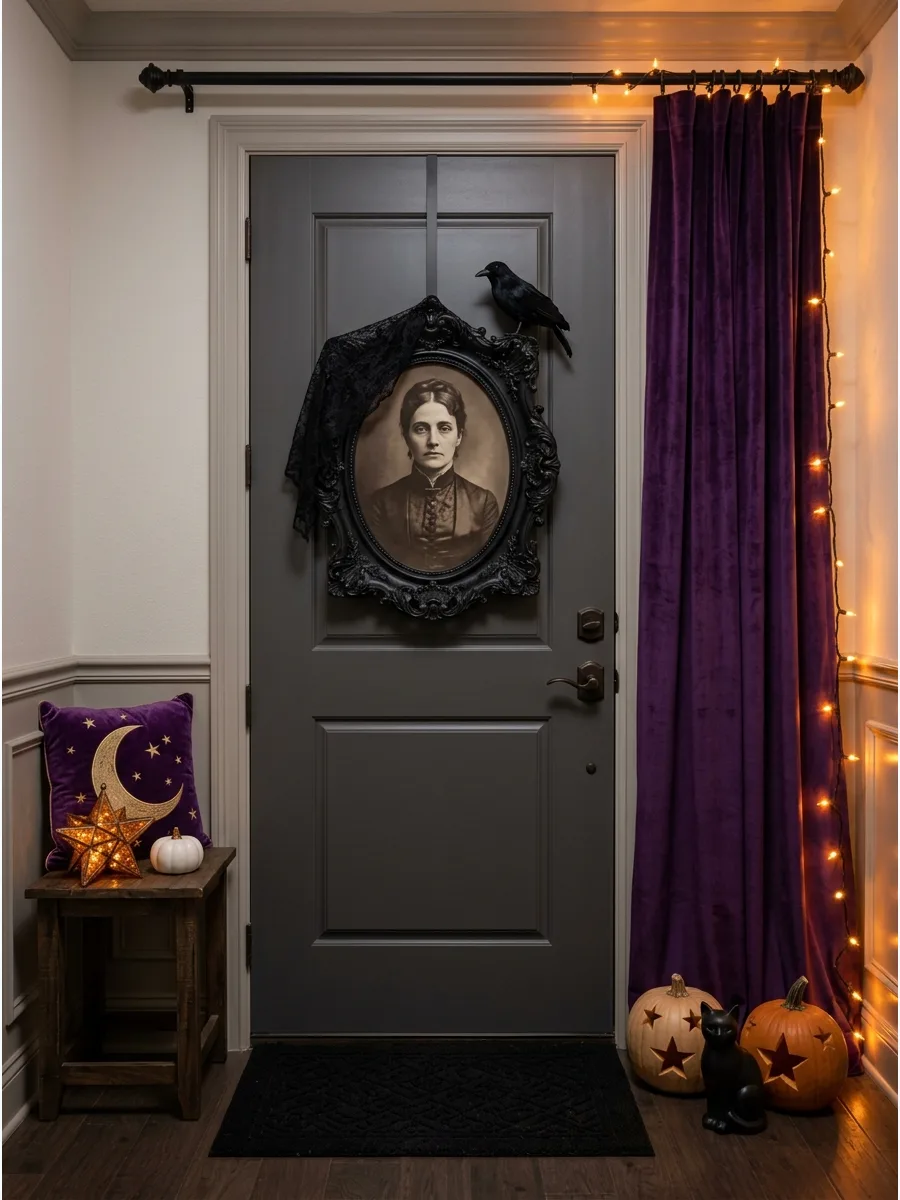
An antique-style portrait adds an eerie, curated feel to a dark-colored door. Look for lightweight plastic or foam frames that mimic heavy carved wood to keep the weight manageable.
Drape a small piece of black lace or a miniature raven over the corner of the frame to break up the hard lines. This style works best when the frame color contrasts sharply with the door.
- $10-$25; find frames at thrift stores or discount retailers.
- Use Command strips to keep the bottom of the frame from swinging.
- Replace the portrait with a mirror for a haunted hallway look.
Most people skip this: Lightly sand the edges of a new plastic frame to make it look like authentic aged wood.
19. Create a Celestial Witch Door Sign
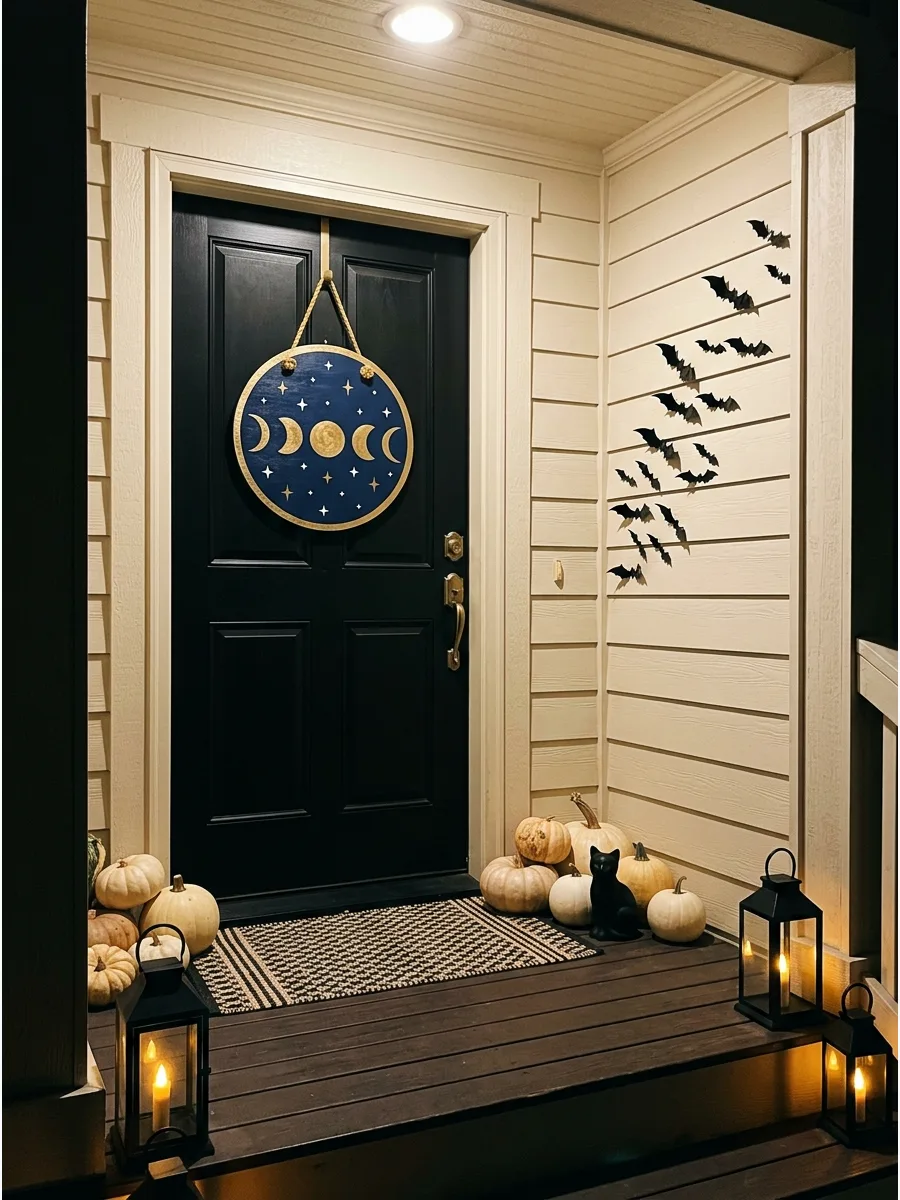
Move away from bright oranges by using a dark blue and gold celestial theme. A round sign featuring moon phases and stars offers a magical vibe that feels more witchy than scary.
Paint the outer edge of the sign in a metallic gold to catch the porch light at night. This theme transitions beautifully into the late autumn months.
- $20-$35; 1-hour DIY project.
- Hang at eye level to ensure the detailed moon phases are visible.
- Use silver accents instead of gold for a cooler, winter-leaning aesthetic.
Quick win: Use a metallic paint pen for the stars to get clean, sharp points that look professional.
20. Display a Retro Carnival Halloween Sign
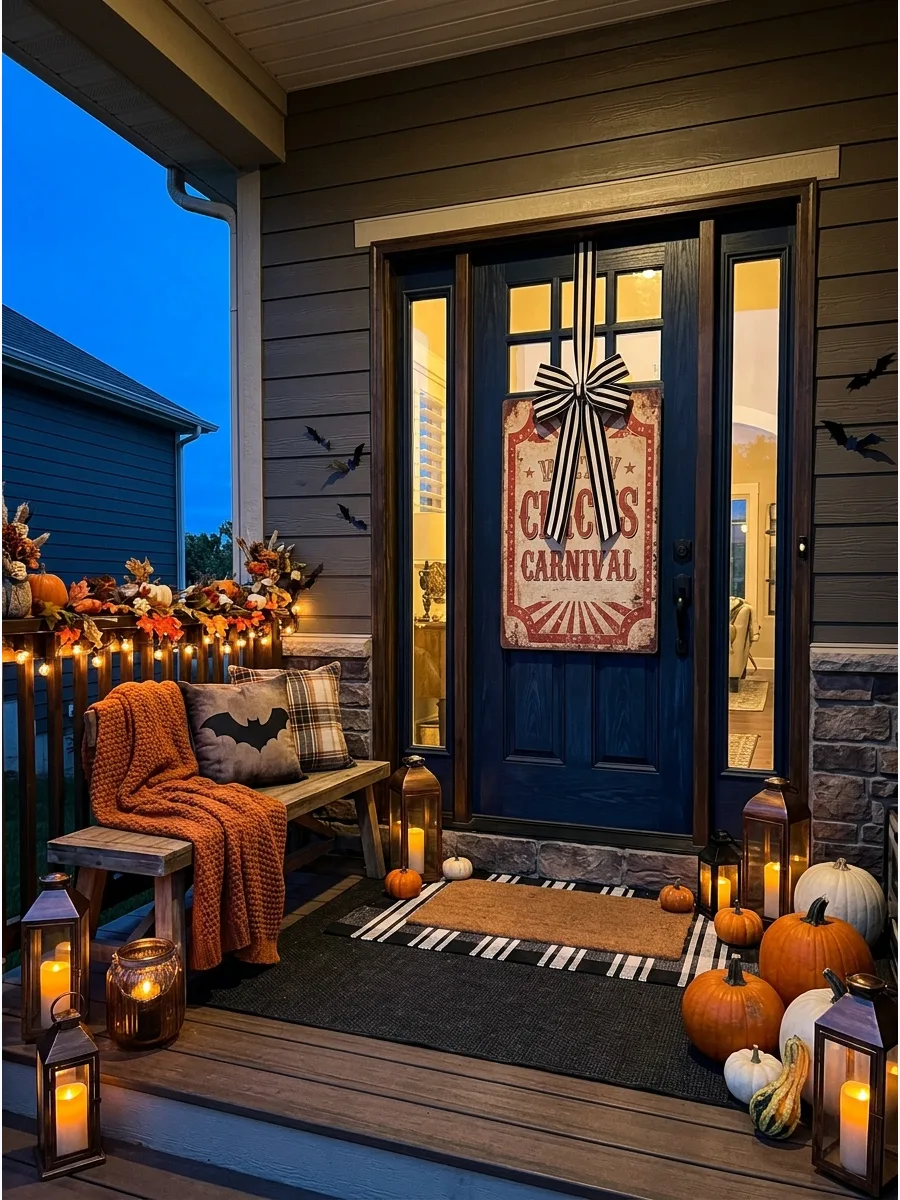
Faded reds and creams bring a nostalgic, circus-inspired feel to the front porch. This style relies on bold typography and weathered textures to look authentic.
Attach a wide black-and-white striped ribbon to the top to mimic a vintage tent pattern. It is a great way to add color without using traditional neon Halloween shades.
- $15-$30; look for retro or vintage styles online.
- Ensure the sign is weather-treated if your porch is not fully covered.
- Pair with a bowl of popcorn or peanuts on a side table to complete the theme.
Best shortcut: Scrape the edges of a new sign with a screwdriver to create instant vintage wear and tear.
21. Frame the Door With a Black Leaf Garland
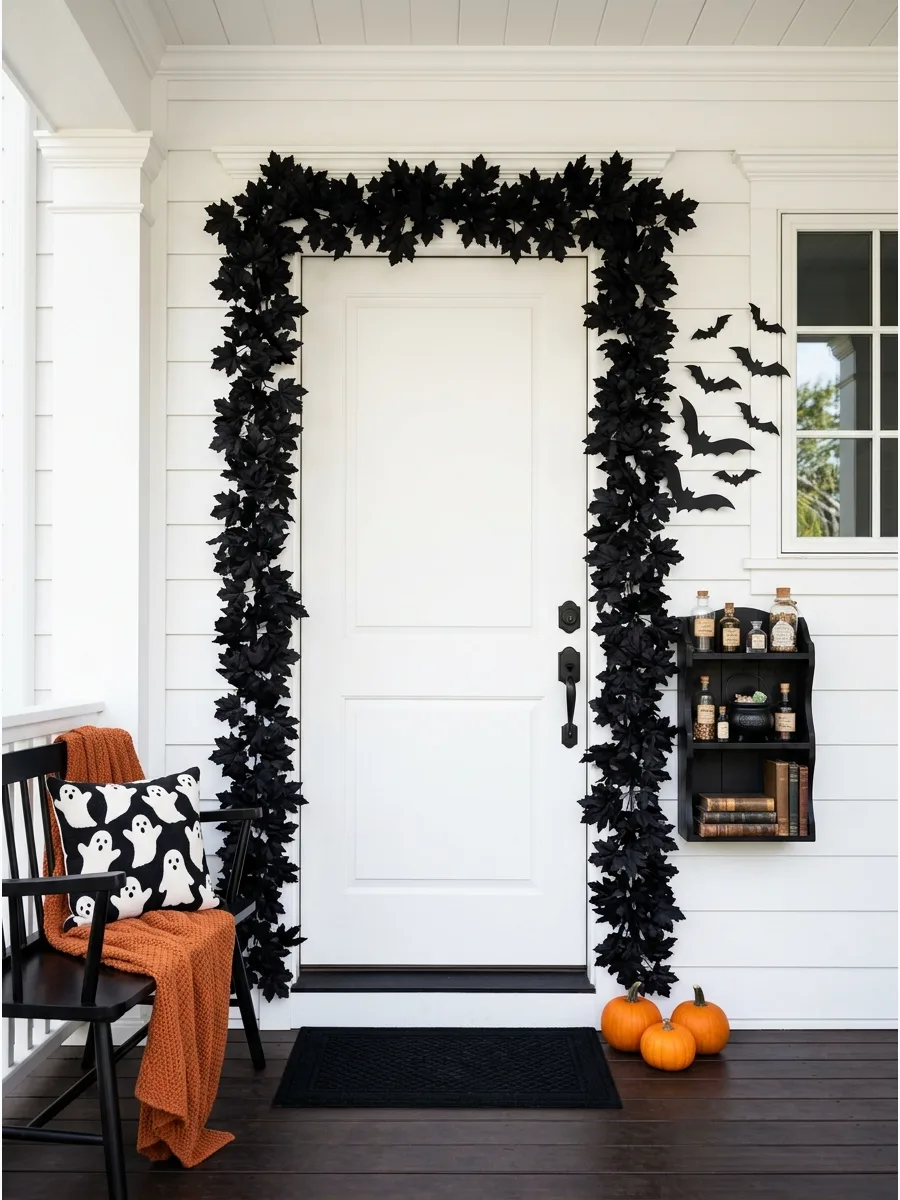
A garland of dark foliage creates a sharp, dramatic silhouette around the entrance. Use artificial black maple or eucalyptus leaves for a dense, high-end look.
Secure the garland tightly to the door trim using clear adhesive hooks spaced every twelve inches. Keeping the rest of the porch simple allows the dark outline to be the main statement.
- $30-$60; buy multiple strands for a fuller appearance.
- Use outdoor-rated zip ties to attach the garland to existing porch railings.
- Add a few purple LED clips to make the black leaves pop after dark.
Most people skip this: Fluff the individual leaves outward and forward so the plastic vine stays hidden against the trim.
22. Create an Orange Marigold Door Garland
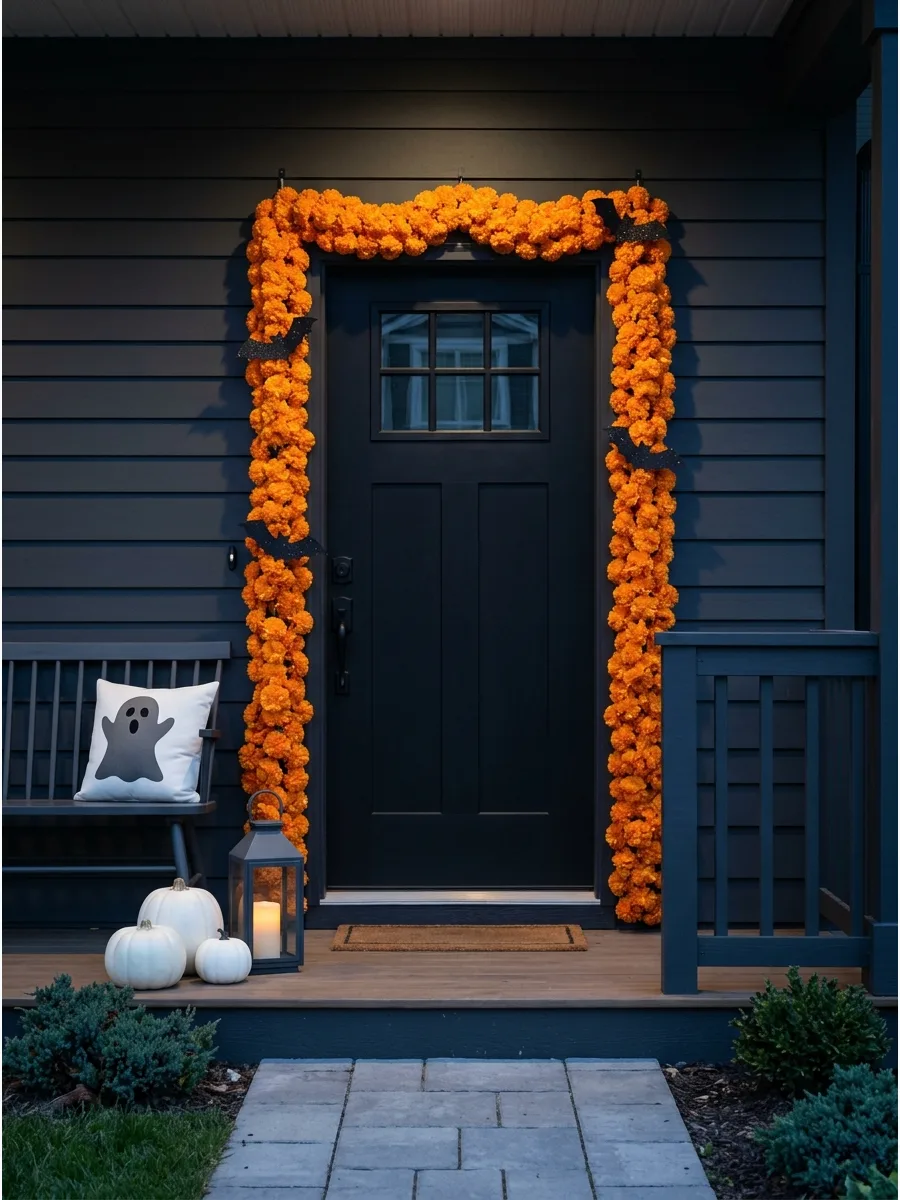
Orange marigolds offer a vibrant, floral take on Halloween decor that feels fresh and energetic. Surround the doorframe with thick strands of these flowers to create a warm glow.
Tuck a few black glitter bat silhouettes into the petals to tie the floral look into the Halloween season. This setup looks stunning against dark-colored homes or black front doors.
- $25-$50; faux marigolds are durable for the entire month.
- Use floral wire to bundle multiple strands together for a thicker look.
- Mix in yellow marigolds to add depth and dimension to the garland.
Quick win: Use a scented outdoor spray to give the faux flowers a pleasant, seasonal floral aroma.
23. Build a Bat Garland Around the Door
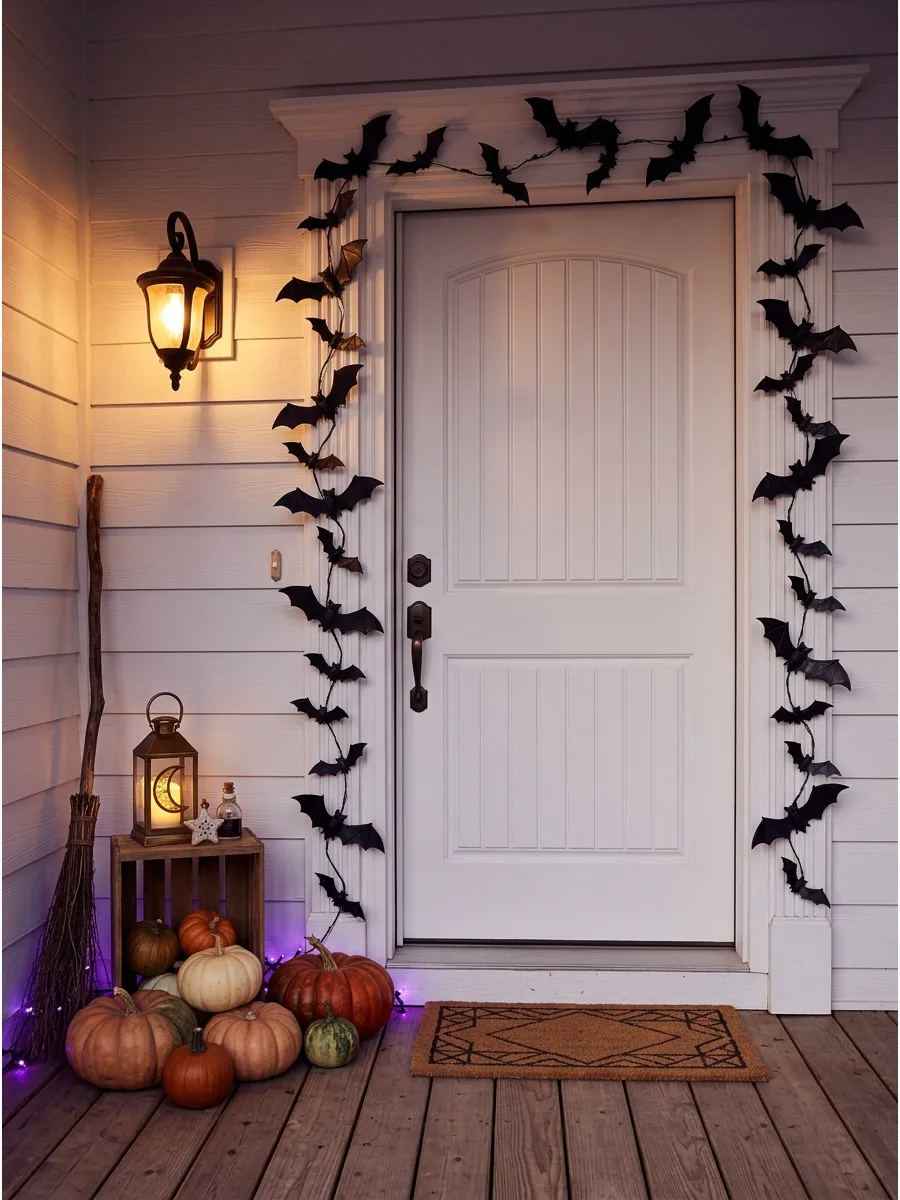
Create the illusion of movement by attaching bats of various sizes to a thin garland. Point the bats in different directions to make them look like they are flying out of the house.
Bend the wings of the bats slightly forward to create realistic shadows against the doorframe. A thin black vine or wire works best as the base to keep the focus on the bats.
- $10-$25; very budget-friendly using cardstock or plastic bats.
- Ensure bats are made of waterproof material if they are exposed to rain.
- Use a variety of wing shapes to make the swarm look more natural.
Best shortcut: Use pre-scored plastic bats that already have a crease in the middle for easy wing-bending.
24. Use Burgundy Flowers Around the Doorframe
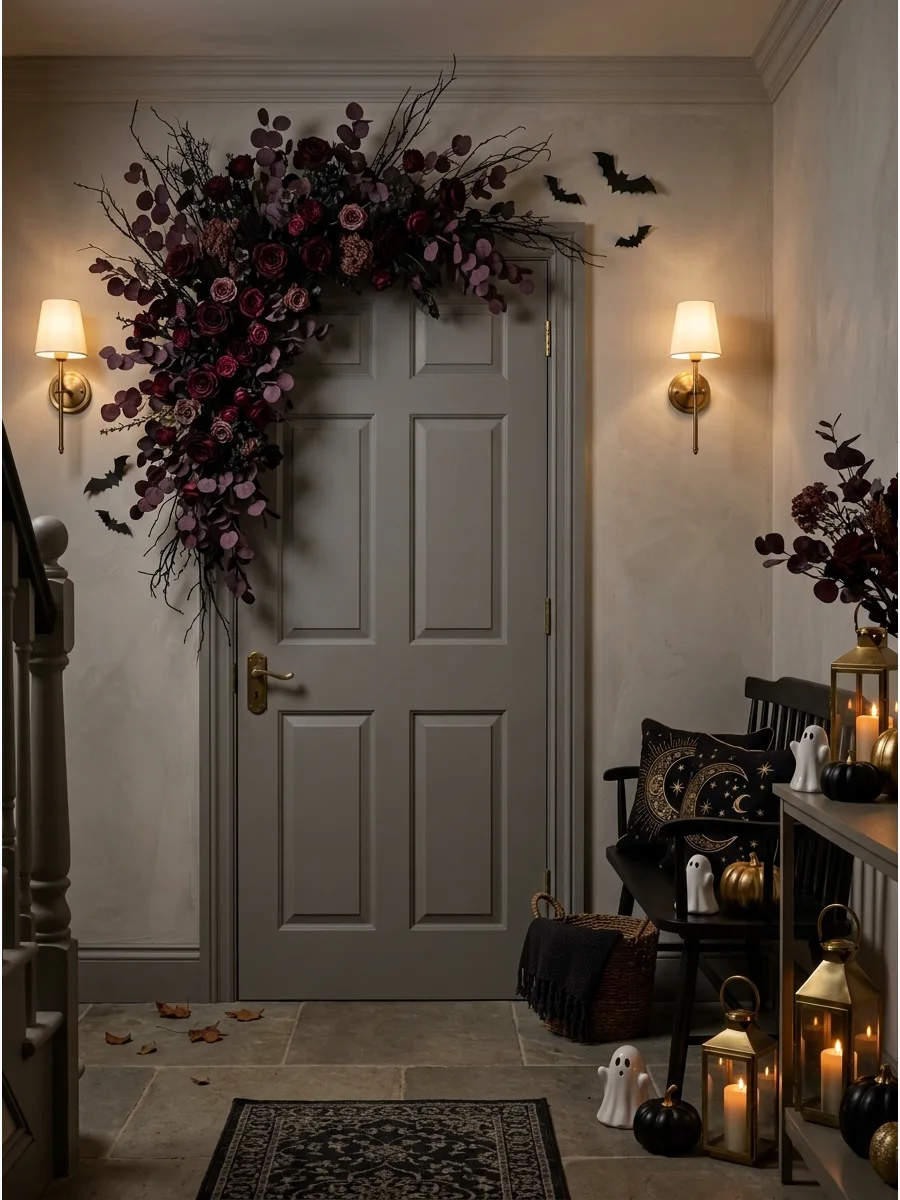
Deep reds and plums create a sophisticated, moody atmosphere that isn't overly kiddie. Focus the bulk of the flowers and branches on one upper corner of the doorframe for a modern, asymmetrical look.
Incorporate bare, spindly branches among the flowers to add a creepy, forest-like texture. This style works perfectly for a more grown-up Halloween party.
- $40-$80; high-quality silk flowers look best for this style.
- Use heavy-duty wire hooks to support the weight of the dense corner section.
- Add a single raven or owl in the floral cluster for a hidden surprise.
Most people skip this: Use flowers with different textures—like velvety roses and papery leaves—to make the monochrome palette look expensive.
25. Create a Pumpkin-and-Leaf Door Garland
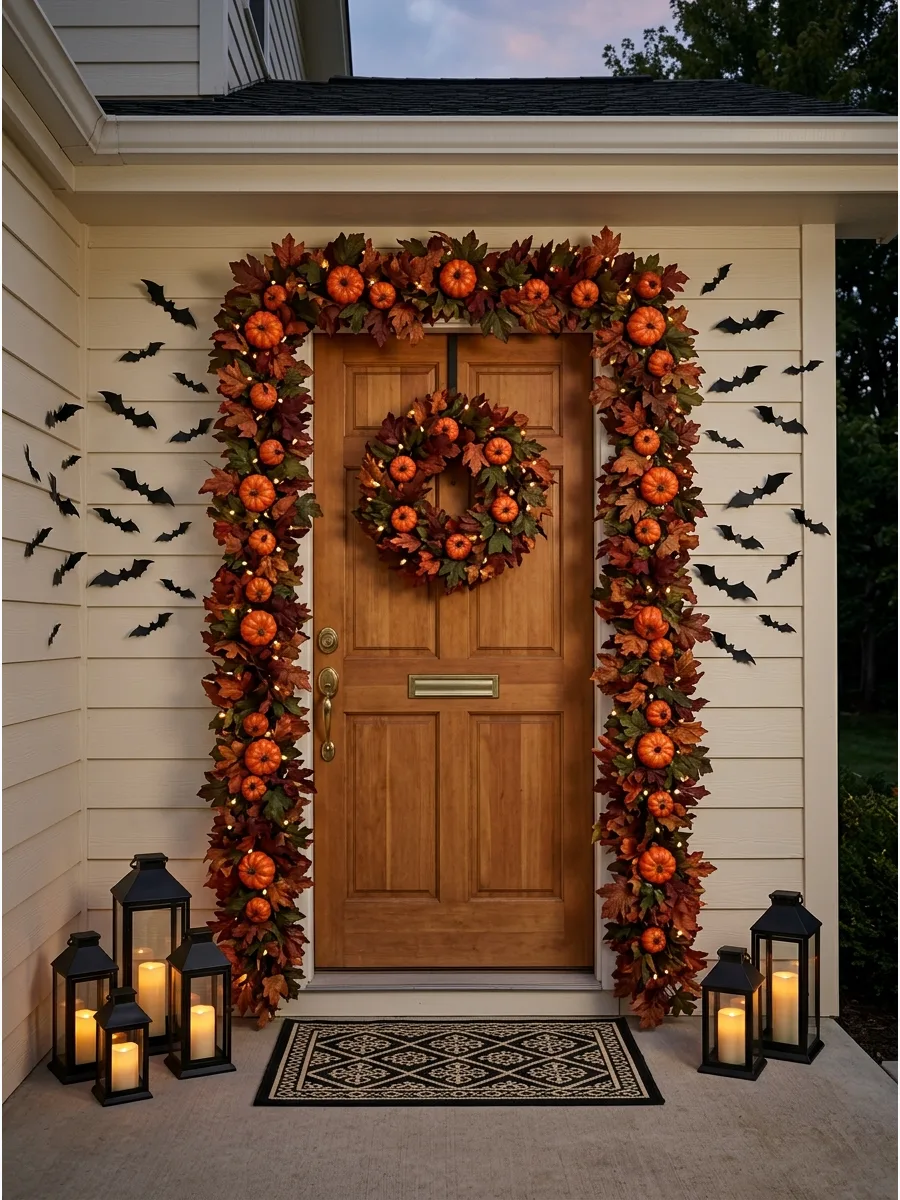
Mixing small pumpkins into a leaf garland provides a classic, bountiful look for the front entrance. Use a mix of rust, burgundy, and dark green leaves to ground the bright orange of the pumpkins.
Repeat the specific colors of the pumpkins from your door wreath in the garland to create a cohesive design. This traditional style is very welcoming for trick-or-treaters.
- $35-$70; foam pumpkins are lightweight and easy to secure.
- Use brown floral tape to hide any visible wires or plastic stems.
- Swap orange pumpkins for white ones for a more neutral, modern farmhouse look.
Quick win: Use a hot glue gun to secure the pumpkins to the vine so they don't slide down the sides of the door.
26. Add a Black-and-White Striped Garland

High-contrast patterns like stripes create a bold, modern look that stands out from the street. Use black-and-white striped ribbon woven through a garland of black leaves and white mini pumpkins.
Incorporate small, simple ghost shapes to emphasize the playful Halloween theme. This graphic style is excellent for homes with bright, colorful front doors.
- $20-$45; ribbon is an affordable way to add volume.
- Secure the ribbon at the corners first to ensure the loops are even on both sides.
- Use checkered ribbon instead of stripes for a slightly more rustic feel.
Best shortcut: Buy a pre-made black leaf garland and simply weave the ribbon through it to save time.
27. Frame the Door With Bare Branches
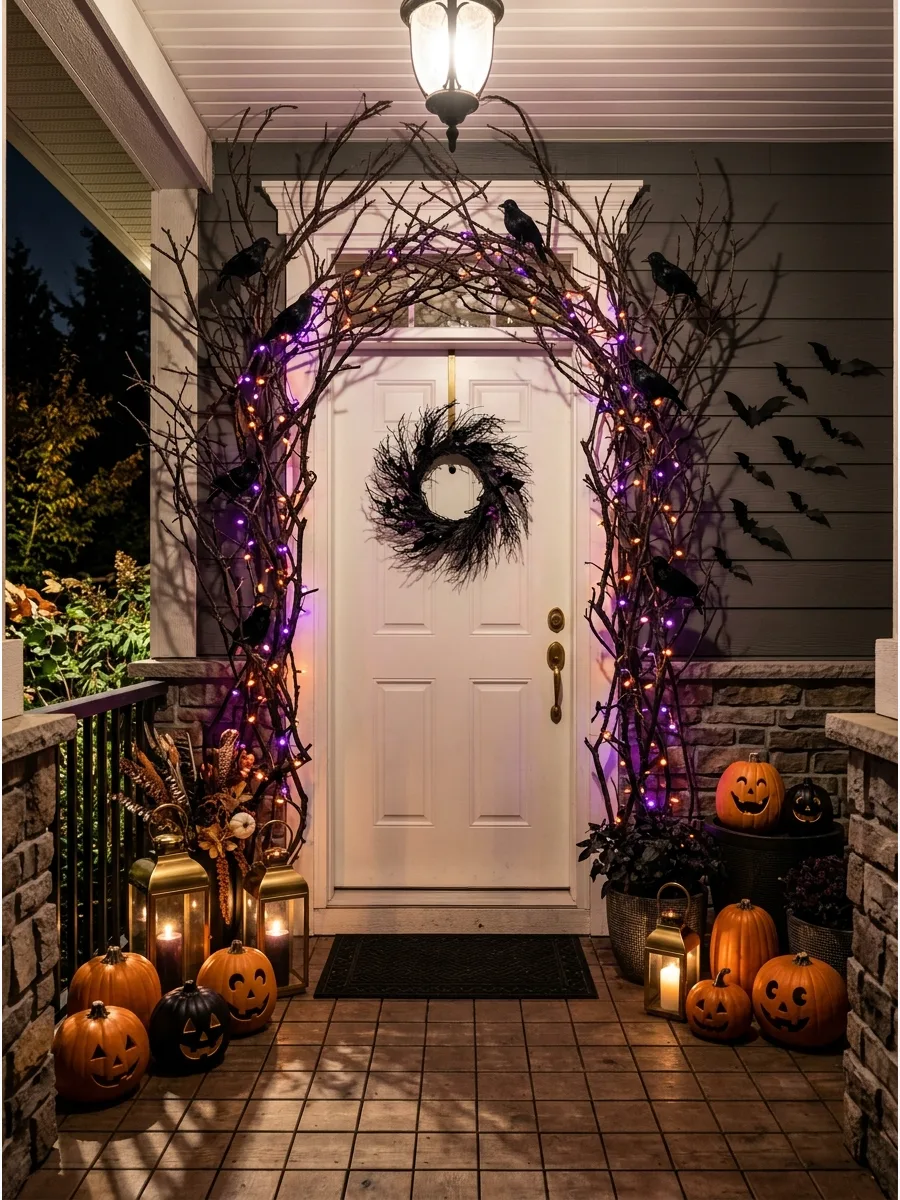
Artificial bare branches give the entrance a haunted, skeletal appearance that is very effective. Arrange the branches so they reach across the top of the door like a dark canopy.
Weave a string of battery-operated purple or orange lights through the twigs to add a subtle glow. This setup creates great shadows on the porch floor at night.
- $30-$55; look for lightweight plastic branches for easier hanging.
- Use clear zip ties to bundle branches together for a fuller look.
- Add some faux spiderwebs to the branches for an even spookier effect.
Most people skip this: Paint the tips of the branches with a little white paint to make them look like they are dead or frosted.
28. Create a Dark-Romance Floral Garland
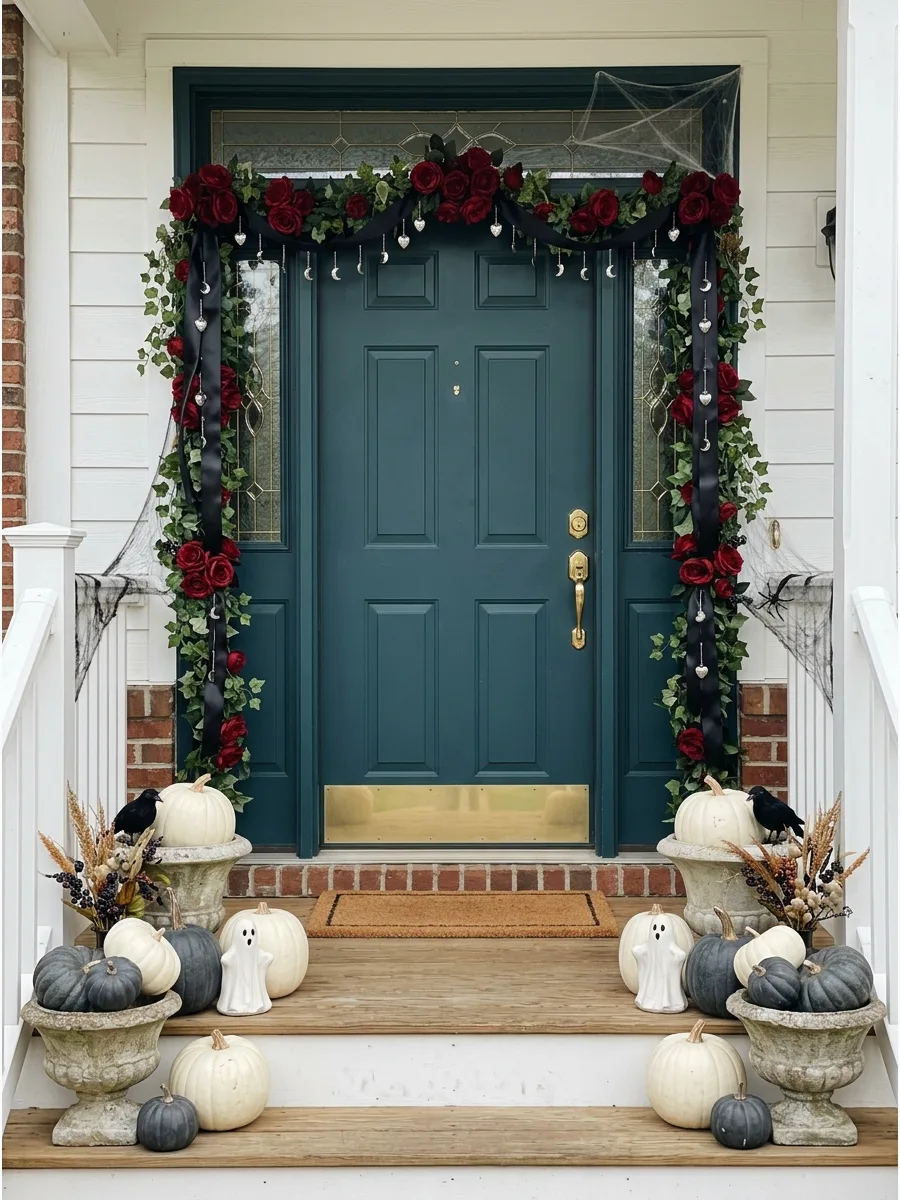
Combine deep-red roses with trailing ivy and black ribbon for a dramatic, vampire-chic entrance. This style looks best when the flowers are clustered and the ivy is allowed to hang naturally.
Add small metallic heart or moon charms to the ribbon for a touch of unexpected detail. It is a sophisticated way to do Halloween without using traditional motifs.
- $40-$75; high-quality ivy looks much better than cheap plastic versions.
- Use floral wire to create drips of ivy that hang down the sides.
- Replace red roses with black ones for an even moodier, gothic appearance.
Quick win: Use velvet ribbon instead of satin to add a luxurious, heavy texture that suits the theme.
29. Build a Purple Witchy Door Garland
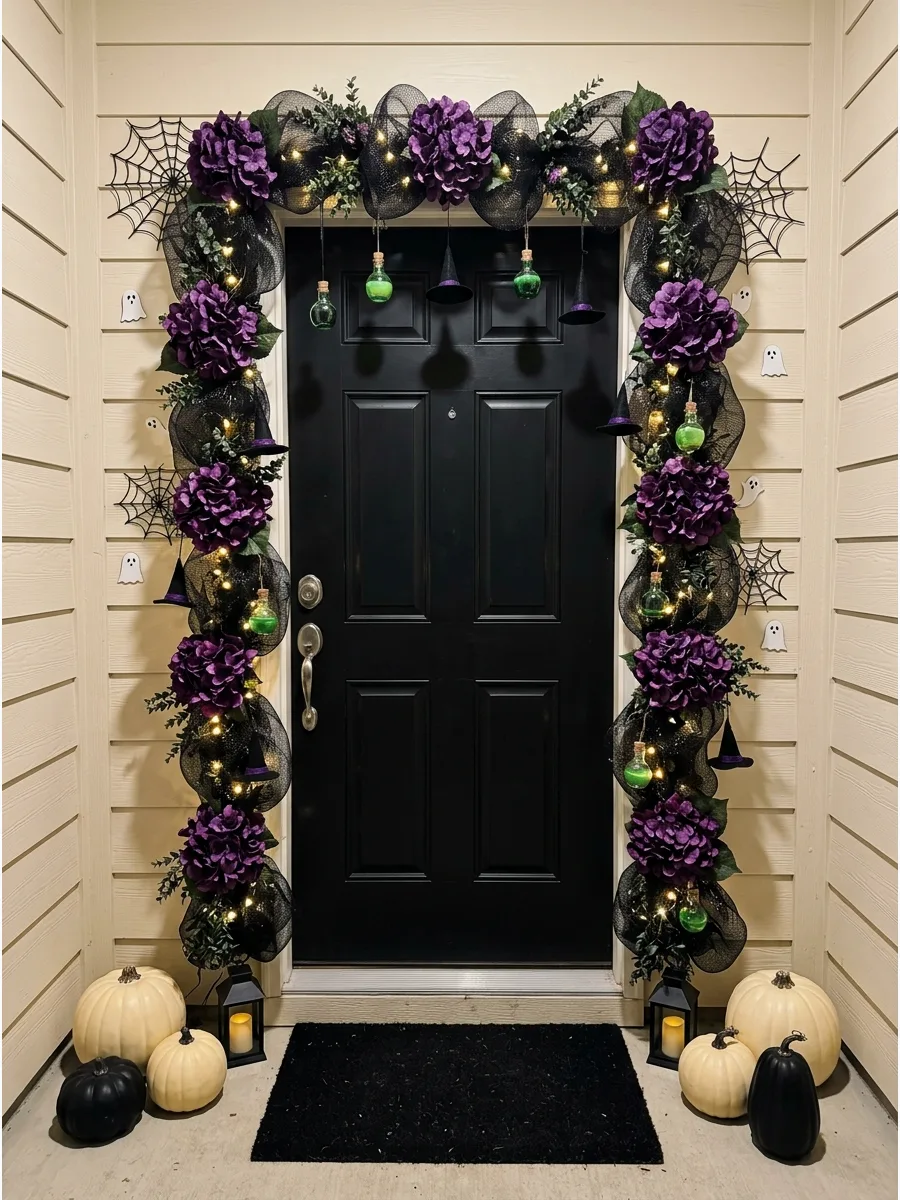
Purple and black create a magical, potion-shop vibe that is fun and festive. Mix purple flowers with black mesh and green foliage to build a base, then add small witch-themed ornaments.
Hang miniature potion bottles or tiny witch hats from the garland to create layers of interest. Keeping the decor on the frame ensures your door handle stays accessible.
- $30-$60; mesh adds a lot of volume for very little cost.
- Use wire to secure the small ornaments so they don't blow away.
- Add some neon green accents to mimic a bubbling cauldron effect.
Best shortcut: Use a purple tinsel garland as the base layer to add instant color and sparkle.
30. Add a Lighted Halloween Door Garland
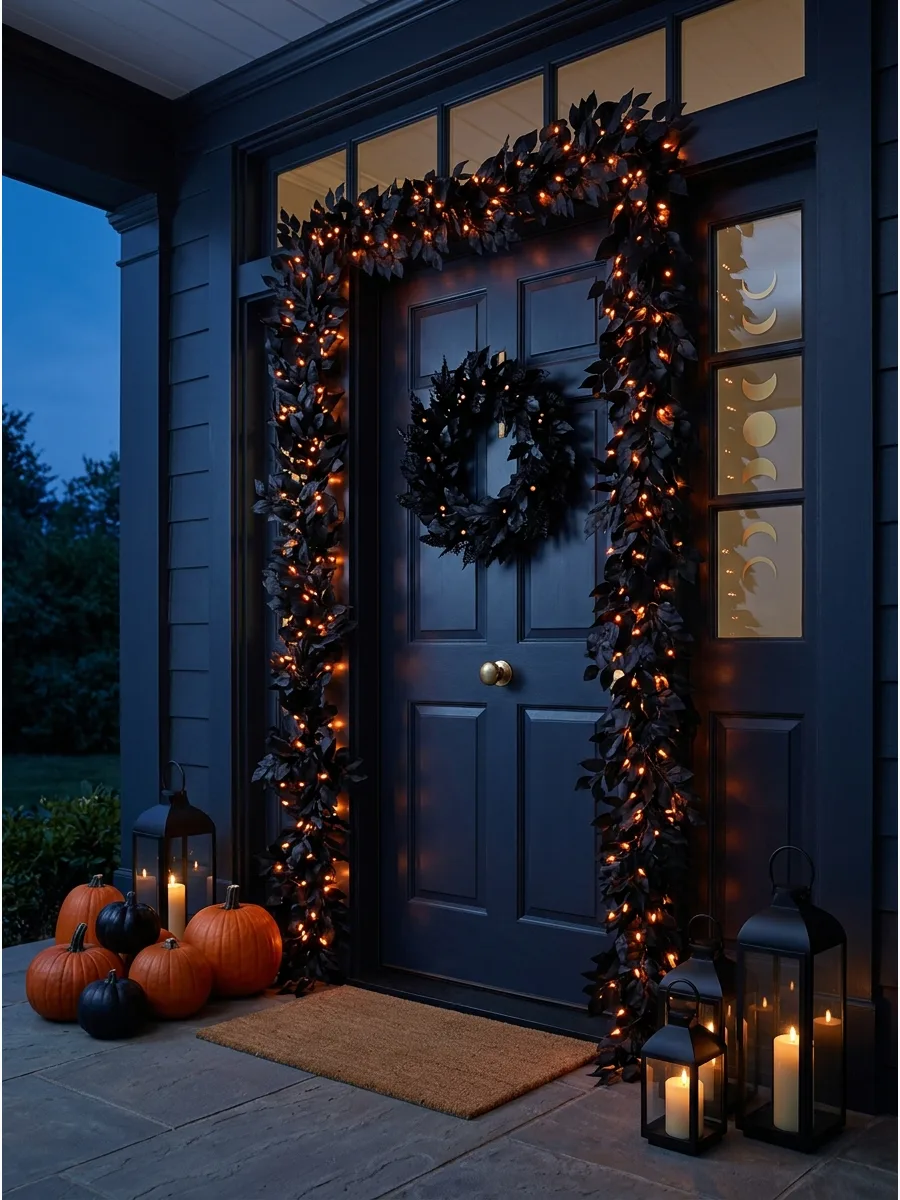
Lighting is the best way to make your door stand out after the sun goes down. Wrap outdoor-safe orange or purple lights through a garland of black leaves or orange berries.
Position the lights so they face the doorframe to create a soft halo effect behind the decor. This ensures the details of your garland are visible without being washed out by bright porch lights.
- $25-$50; always check that lights are rated for outdoor use.
- Use a timer so the lights automatically turn on at sunset.
- Opt for battery-powered lights if you don't have a nearby outlet.
Most people skip this: Hide the battery pack or wire behind a pumpkin at the base of the door for a cleaner look.
31. Turn the Door Into a Friendly Ghost
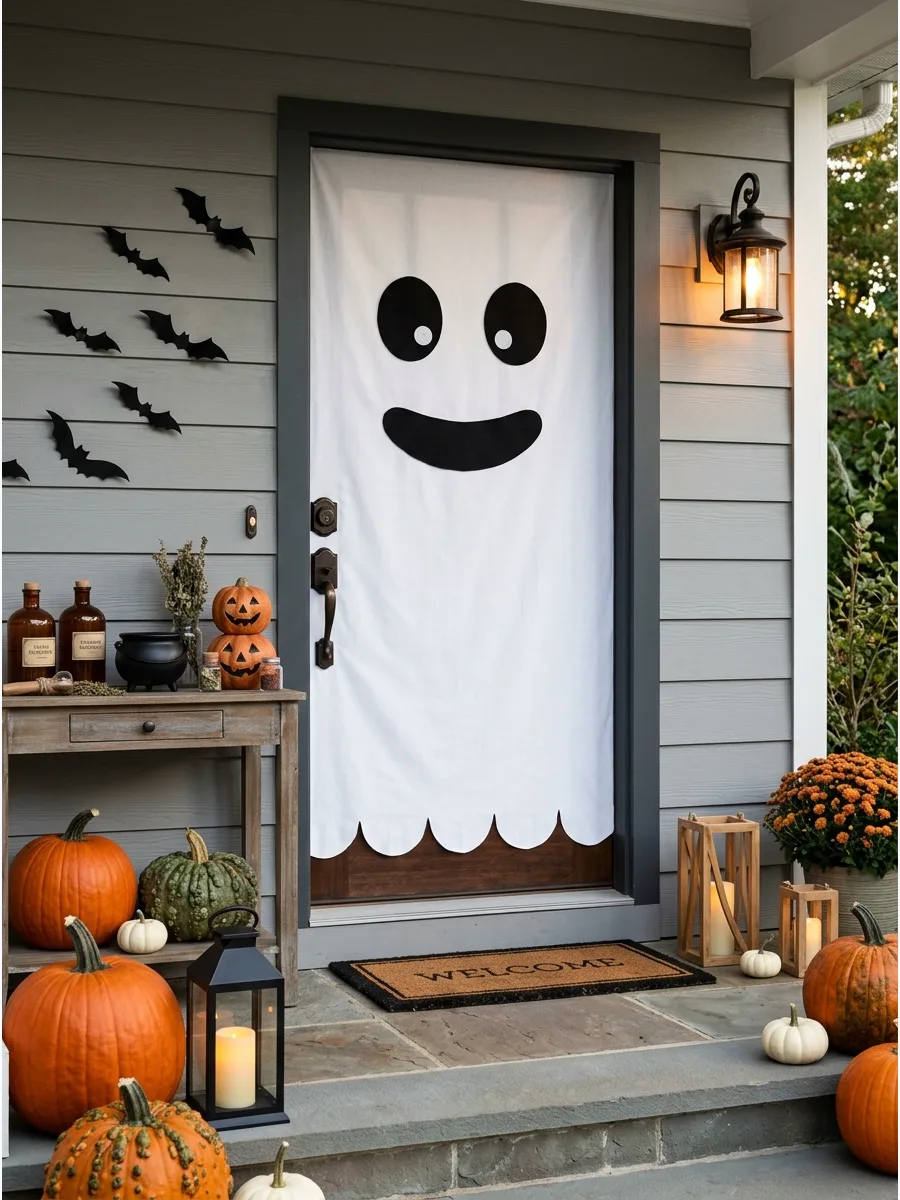
Use a large white fabric or vinyl sheet to cover the door surface. Cut out large black circles for eyes and a long oval for a mouth to create a classic ghost face.
Ensure the fabric is cut precisely around the door handle and lock to maintain full access. This simple transformation makes a huge visual impact without needing many supplies.
- Sourcing: White outdoor-grade vinyl or felt.
- Setup: Use painter's tape or non-permanent adhesive.
- Adaptation: Add a small orange bow for a girl ghost look.
Quick win: Use a white fitted bedsheet for a fast, no-sew ghost skin that stretches over the door.
32. Transform the Door Into a Jack-o’-Lantern
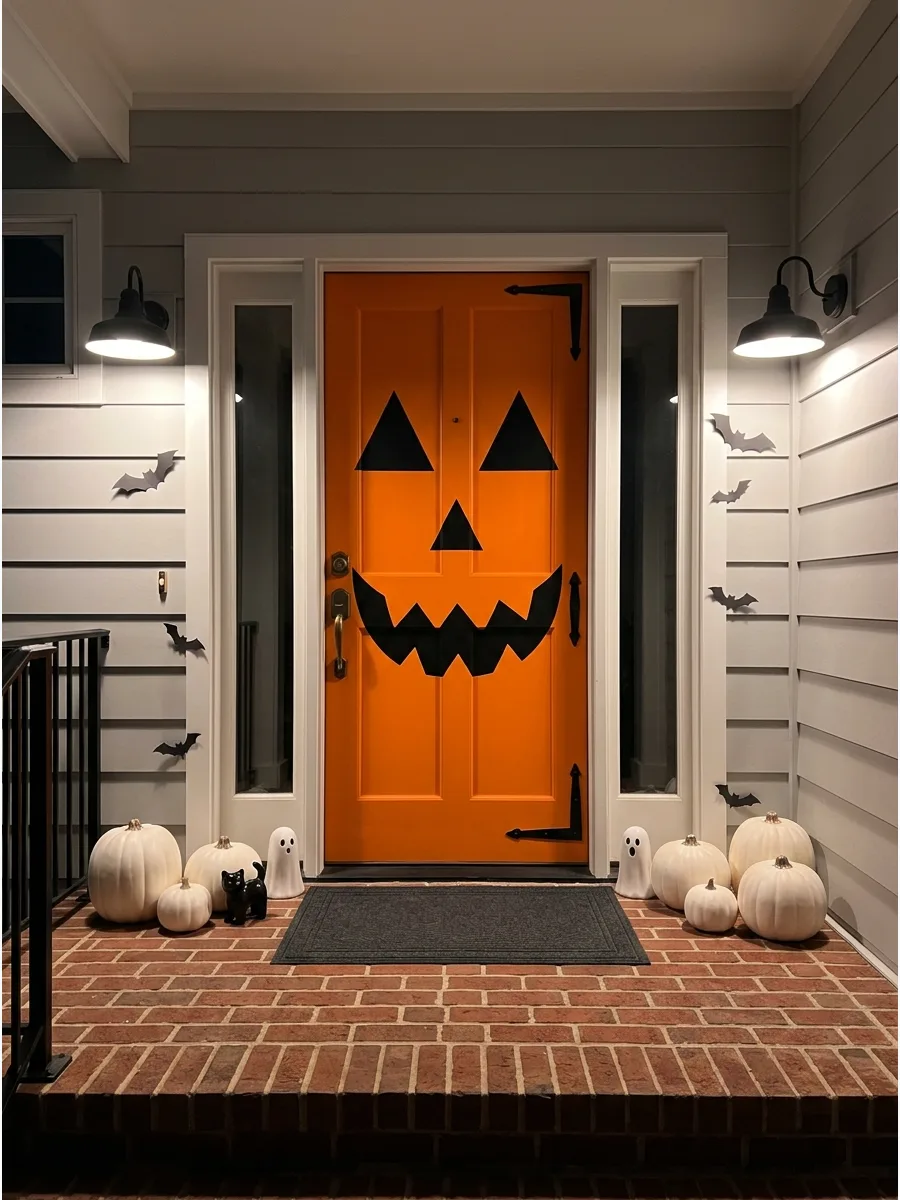
Apply black vinyl triangles for eyes and a jagged mouth to an orange door. If the door is not orange, use a removable orange wrap or large poster board panels first.
Scale the facial features to be at least twelve inches wide so they are visible from the street. This turns the entire entryway into a giant pumpkin.
- Sourcing: Black removable adhesive vinyl.
- Setup: Clean the door surface with rubbing alcohol first for better grip.
- Adaptation: Swap black for gold glitter vinyl for a glam pumpkin.
Most people skip this: Cut the mouth into sections so it does not peel when the door panels expand and contract in the heat.
33. Create a Mummy-Wrapped Door
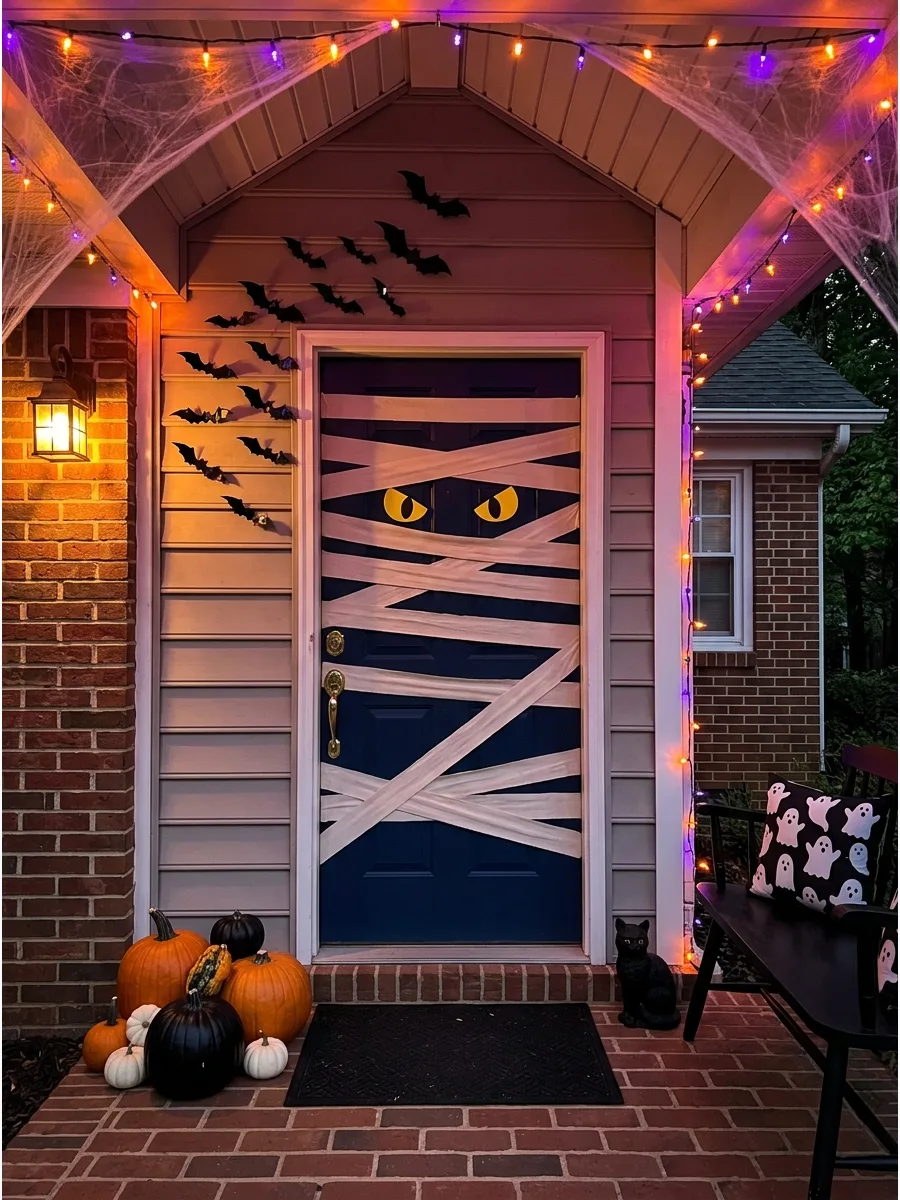
Crisscross wide white streamers or strips of white fabric across the door face. Leave a small gap at eye level to tuck in two large yellow or glow-in-the-dark eyes.
Secure the ends of the strips on the side edges of the door so they do not interfere with the door frame or hinges. It creates a textured, 3D effect that looks great under porch lights.
- Sourcing: White crepe paper or old bedsheets.
- Setup: Use double-sided tape on the door side edges.
- Adaptation: Use medical gauze for a more aged, tattered look.
Best shortcut: Use white Caution tape for a mummy look that is weather-resistant and will not sag in the rain.
34. Design a Monster-Face Door
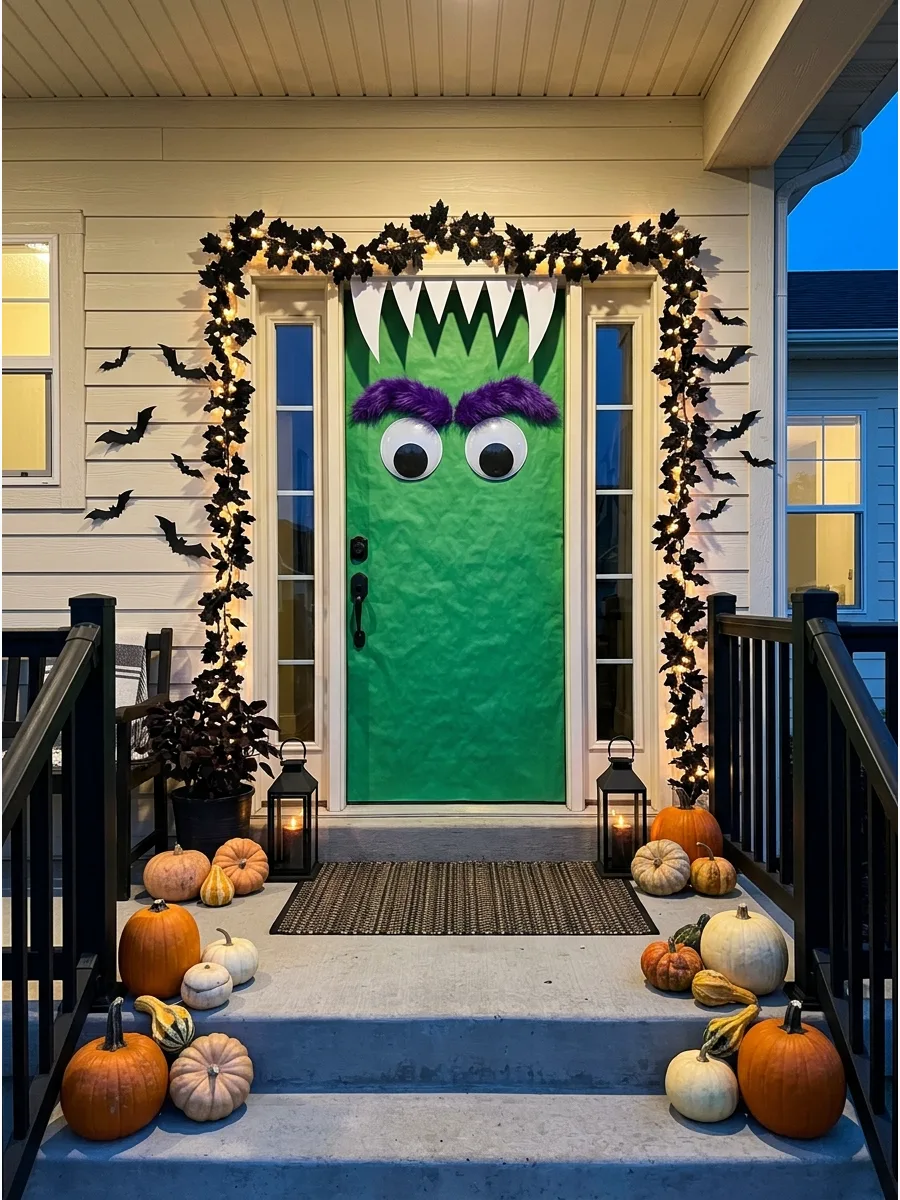
Use bright green or purple paper to create a base if the door color does not fit a monster theme. Add giant googly eyes and sharp white teeth along the top or bottom of the door.
Position the teeth so they do not hang over the threshold where they could be stepped on. This is a fun, whimsical way to welcome trick-or-treaters.
- Sourcing: Large butcher paper or vinyl rolls.
- Setup: Tape eyes at the top third of the door for the best perspective.
- Adaptation: Add bolts made of painted soda bottles to the side trim for a Frankenstein vibe.
Quick win: Use giant 12-inch googly eyes to instantly give any door a monster personality with zero effort.
35. Make a Black Cat Face Door

Attach two large black triangles to the top of the door frame for ears. Place large yellow or green almond-shaped eyes in the center of the door with long white pipe cleaner whiskers.
Keep the whiskers short enough that they do not get caught in the door jamb when closing. This design is sleek and works perfectly on black or dark gray doors.
- Sourcing: Black foam board and yellow cardstock.
- Setup: Use heavy-duty outdoor mounting tape for the ears.
- Adaptation: Use reflective tape for the eyes so they glow when car headlights pass.
Best shortcut: Use white electrical tape for the whiskers; it stays flat and will not bend like wire or pipe cleaners.
36. Create a Giant Spiderweb Door
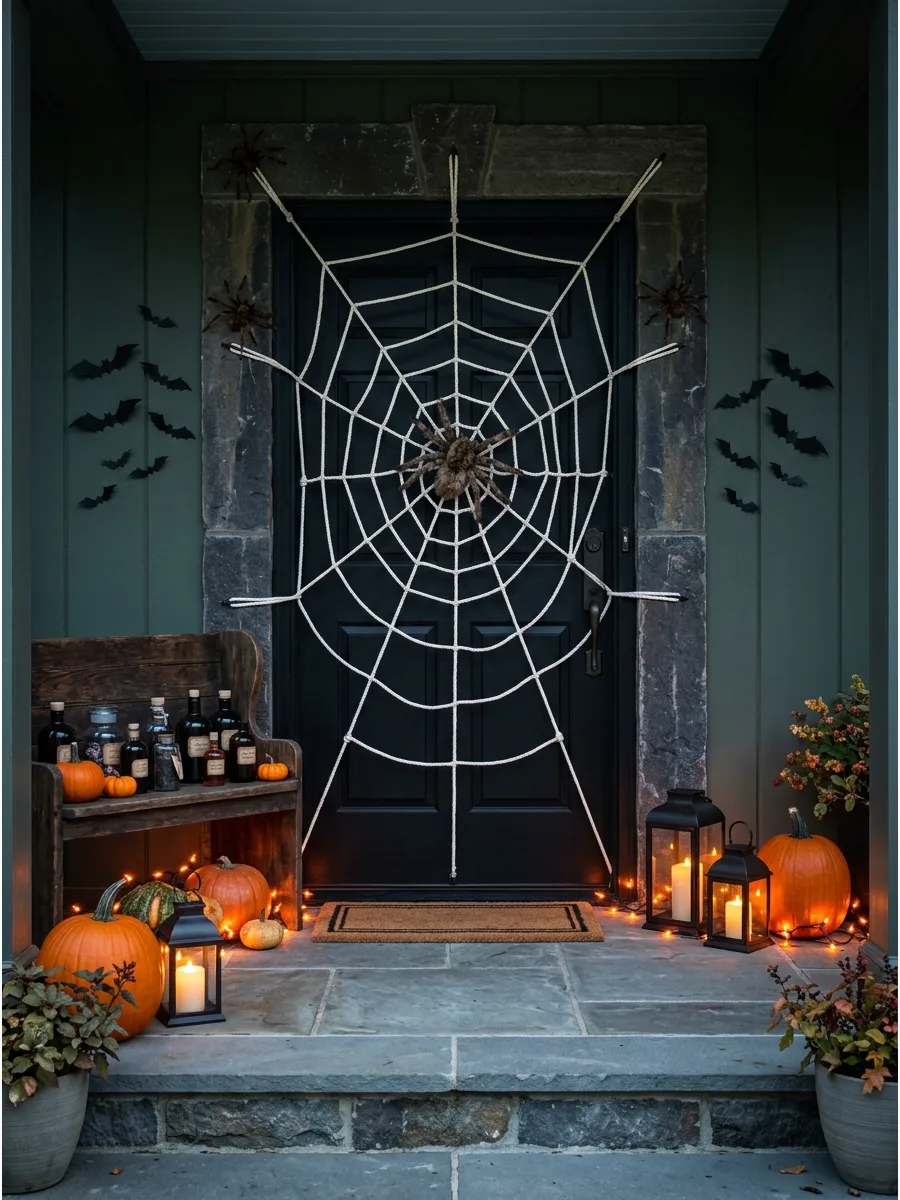
Use white rope or thick yarn to create a web pattern that starts from one corner and spreads across the door. Secure the main anchor lines to the door frame and the secondary lines to the door itself.
Leave enough slack in the lines crossing the hinge side so the door can open fully without tension. Add a few oversized plastic spiders to complete the look.
- Sourcing: White clothesline or thick cotton yarn.
- Setup: Use clear command hooks to anchor the rope points.
- Adaptation: Use neon orange rope and a blacklight for a glowing toxic web.
Most people skip this: Use beef netting instead of cheap cotton webbing; it looks more realistic and does not get messy in the wind.
37. Design a Haunted Library Door
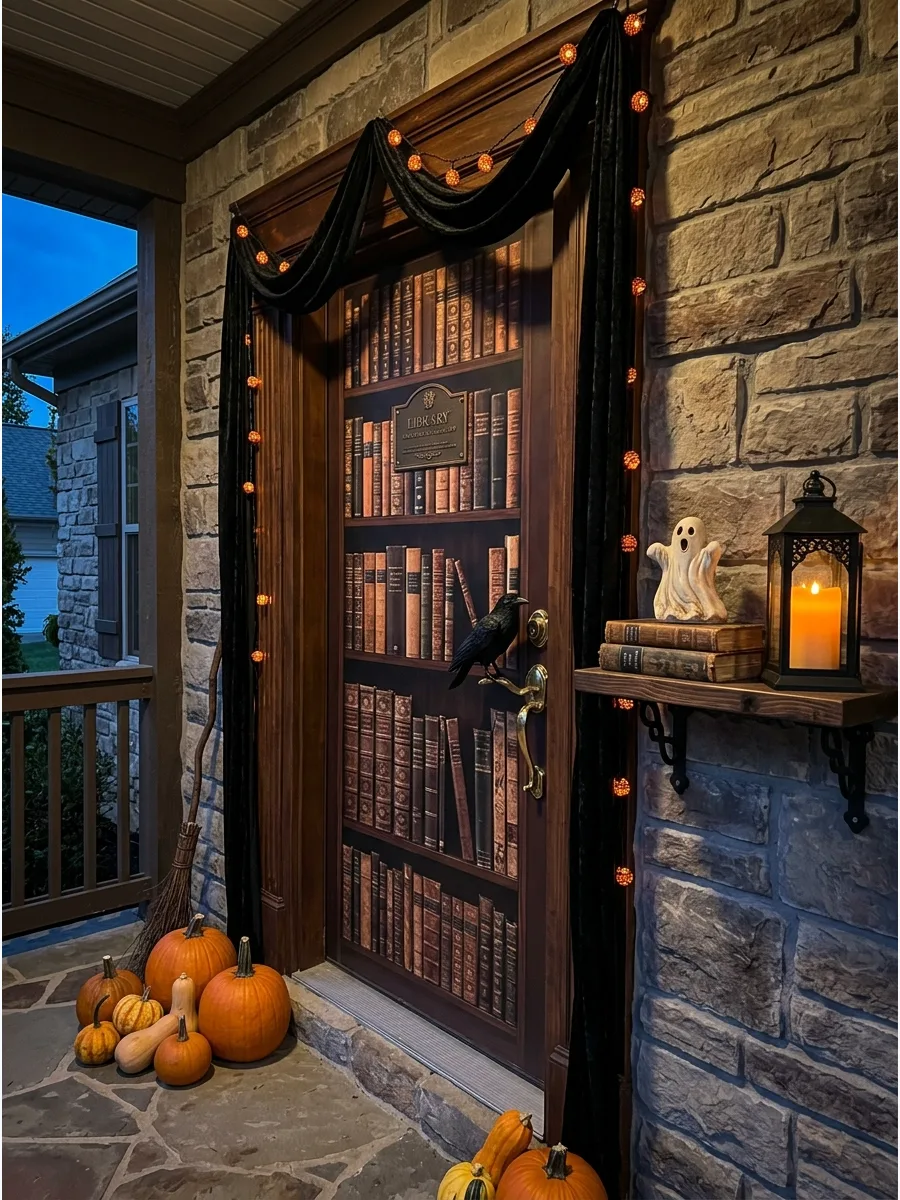
Apply removable wallpaper or posters that look like old, leather-bound books. Add a small Restricted Section sign or a faux-bronze plaque for extra detail.
Ensure the wallpaper is rated for outdoor use or protected by a storm door to prevent peeling. This creates a sophisticated, scholarly atmosphere for a spooky entryway.
- Sourcing: Book-print contact paper or vinyl.
- Setup: Apply in vertical strips to avoid air bubbles.
- Adaptation: Add a floating candle sticker for a magical touch.
Quick win: Print out high-resolution book spines and tape them to the door panels for a 3D library effect.
38. Turn the Door Into a Witch’s Potion Cabinet
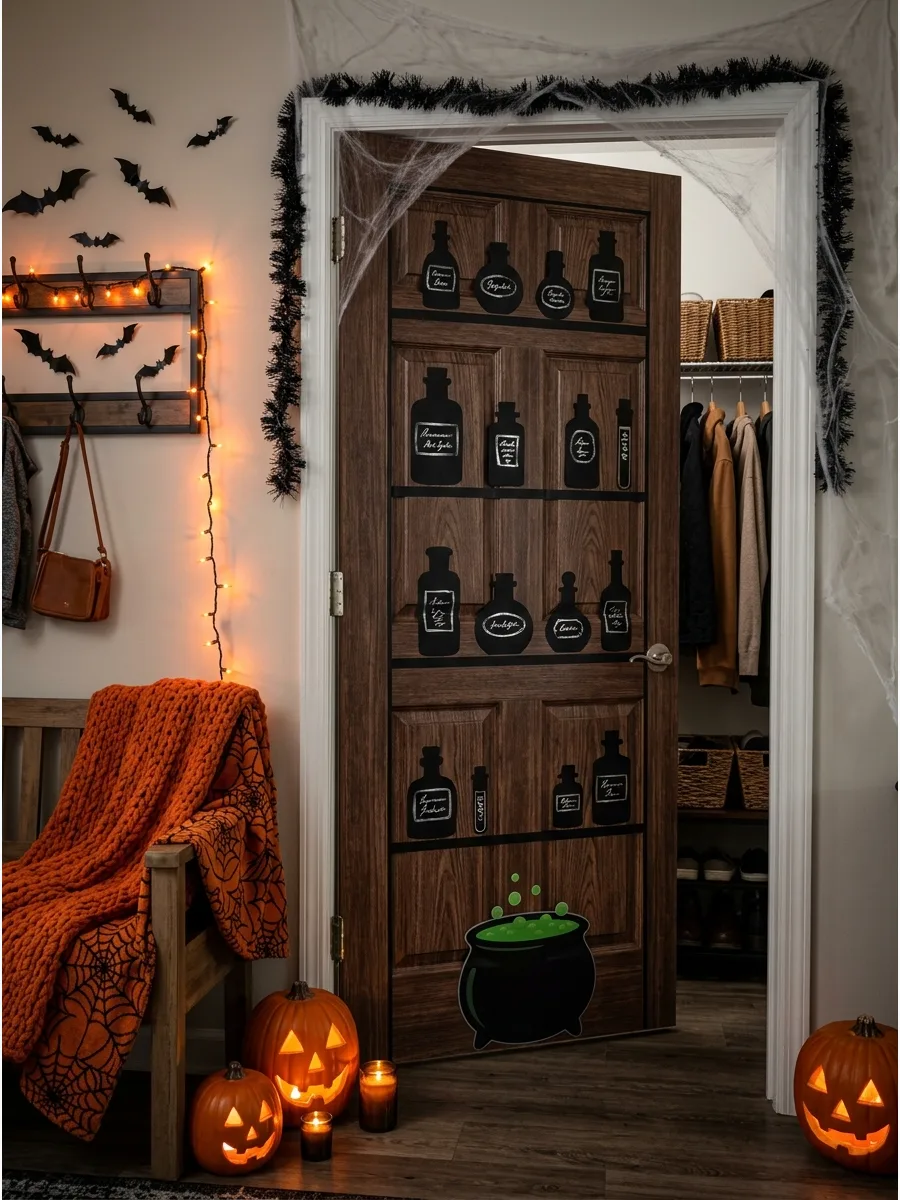
Use dark wood-grain vinyl as a base and add silhouettes of antique bottles and jars. Label the bottles with names like Eye of Newt or Dragon Scales using a metallic marker.
Place the most intricate bottles at eye level where guests can read the funny labels. This transforms a standard door into a magical storage space.
- Sourcing: Apothecary label stickers and black vinyl.
- Setup: Use a chalk marker to write custom potion names.
- Adaptation: Add a few 3D plastic spiders crawling over the bottles.
Best shortcut: Use pre-made apothecary wall decals to save time on cutting out bottle shapes by hand.
39. Create an Enchanted Night-Sky Door
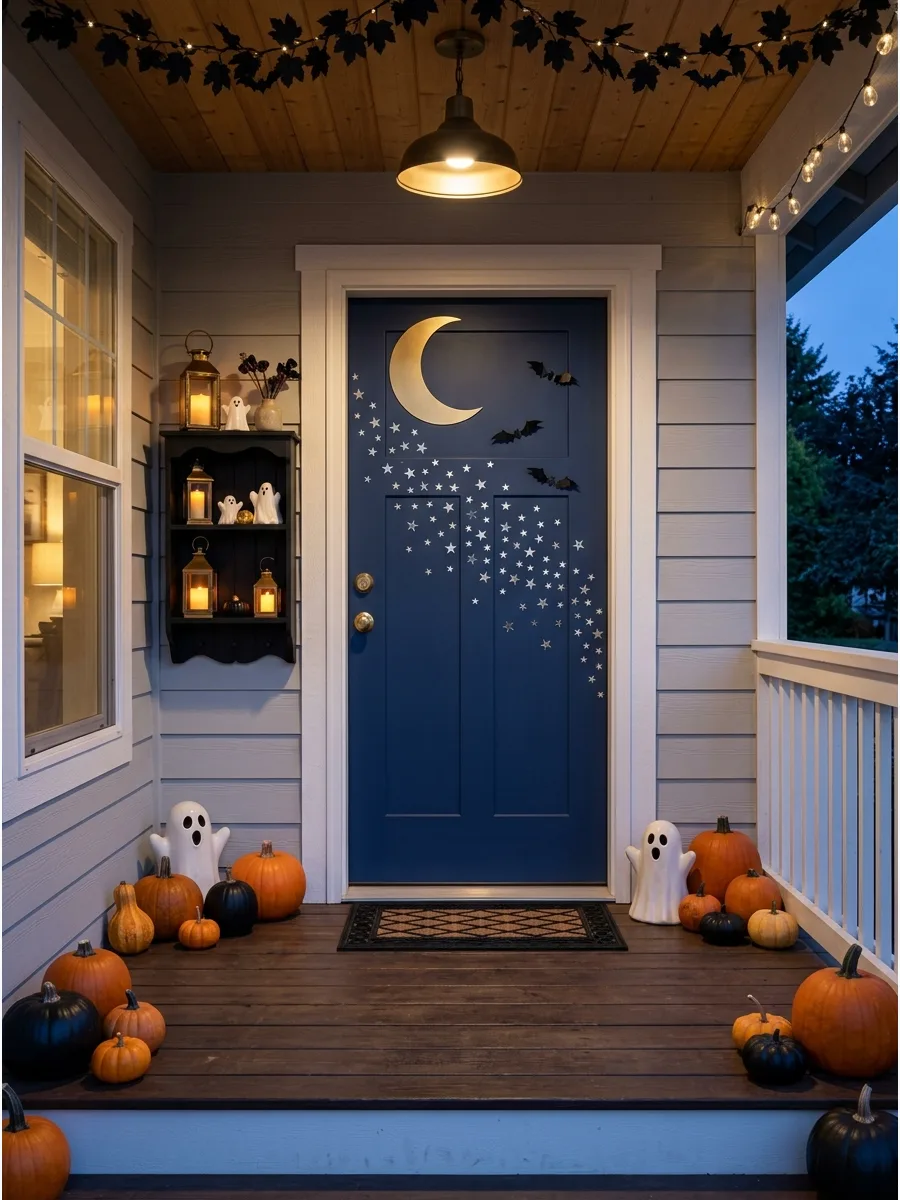
Start with a dark navy or black door and apply a large gold crescent moon near the top corner. Scatter various sizes of metallic stars across the surface to mimic a galaxy.
Group the stars in clusters to create a natural flow that leads the eye toward the door handle. It is a beautiful, celestial take on Halloween decor.
- Sourcing: Gold and silver foil star stickers.
- Setup: Use a mix of 1-inch and 3-inch stars for depth.
- Adaptation: Add a thin layer of glitter spray for a shimmering milky way effect.
Most people skip this: Use glow-in-the-dark stars so the night sky remains visible even when the porch lights are off.
40. Design a Vintage Halloween Collage Door
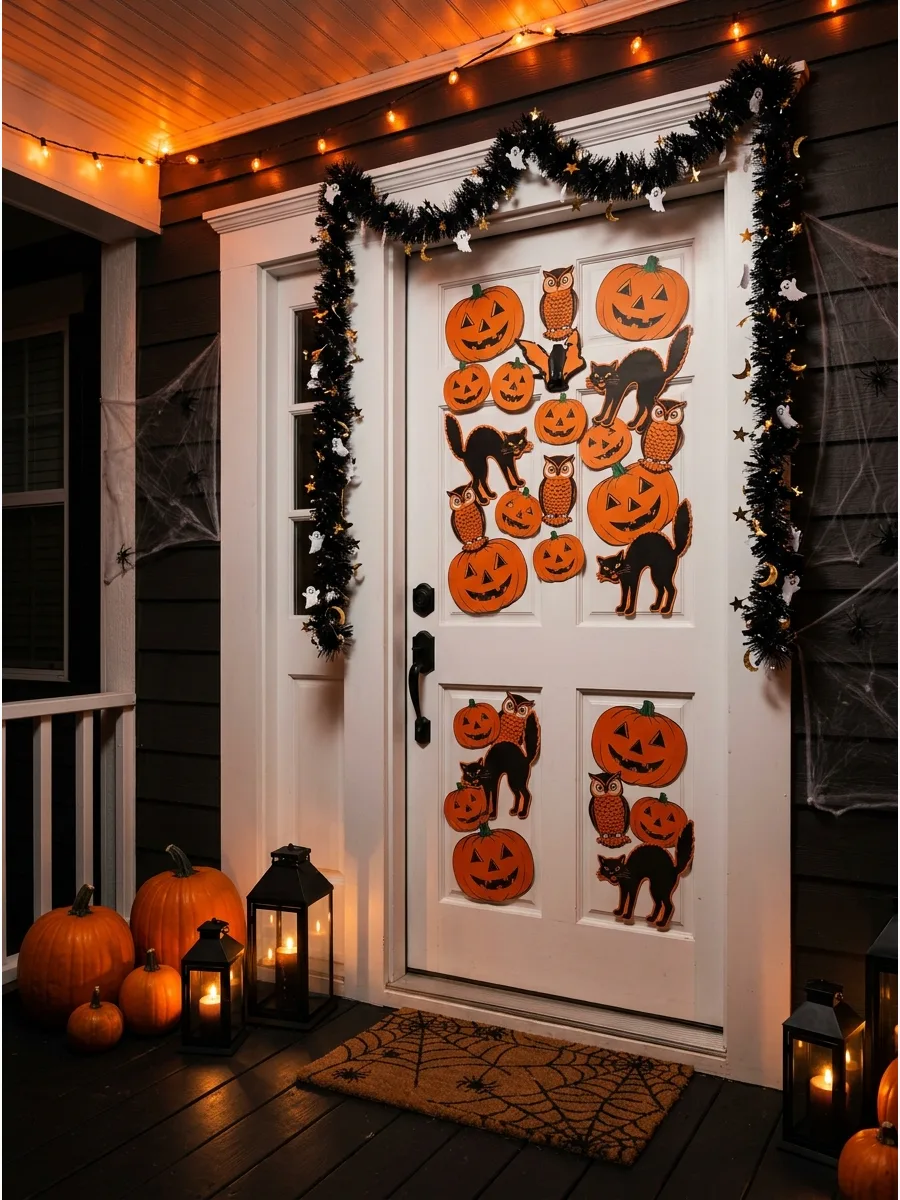
Print out classic Halloween images like retro pumpkins, black cats, and owls from the 1950s. Arrange them in an overlapping pattern across the door panels for a nostalgic feel.
Apply a clear removable adhesive to the back of each image to keep them flat against the door. This style works well for those who love an antique holiday look.
- Sourcing: Digital vintage clip art or old-school paper decorations.
- Setup: Lay the collage out on the floor first to plan the overlap.
- Adaptation: Tea-stain the paper before hanging to make it look authentically aged.
Quick win: Use a Beistle style decoration kit to get all the classic retro shapes in one coordinated package.
41. Add Removable Bats to an Apartment Door
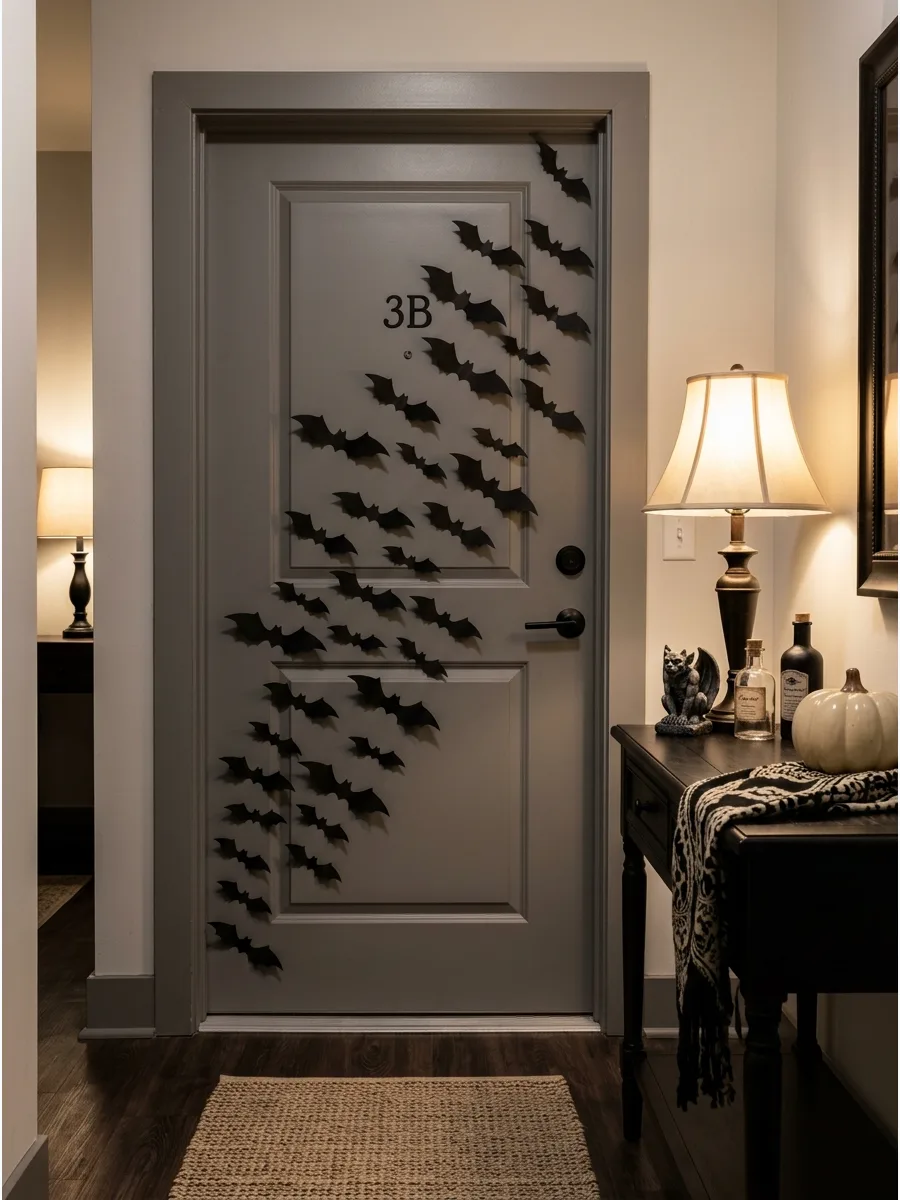
Use plastic or cardstock bats in three different sizes to create a flying effect. Start with a dense cluster in one corner and spread them out as they move across the door.
Use painter's tape or poster putty to ensure the bats stay secure without damaging the apartment paint. This is a high-impact, low-effort solution for small spaces.
- Sourcing: 3D plastic bat sets.
- Setup: Fold the wings of the bats upward to create a realistic 3D shadow.
- Adaptation: Use white bats on a dark door for a ghost bat look.
Best shortcut: Buy bats that come with pre-cut adhesive dots to make the installation take less than five minutes.
42. Hang a Lightweight Apartment-Door Wreath
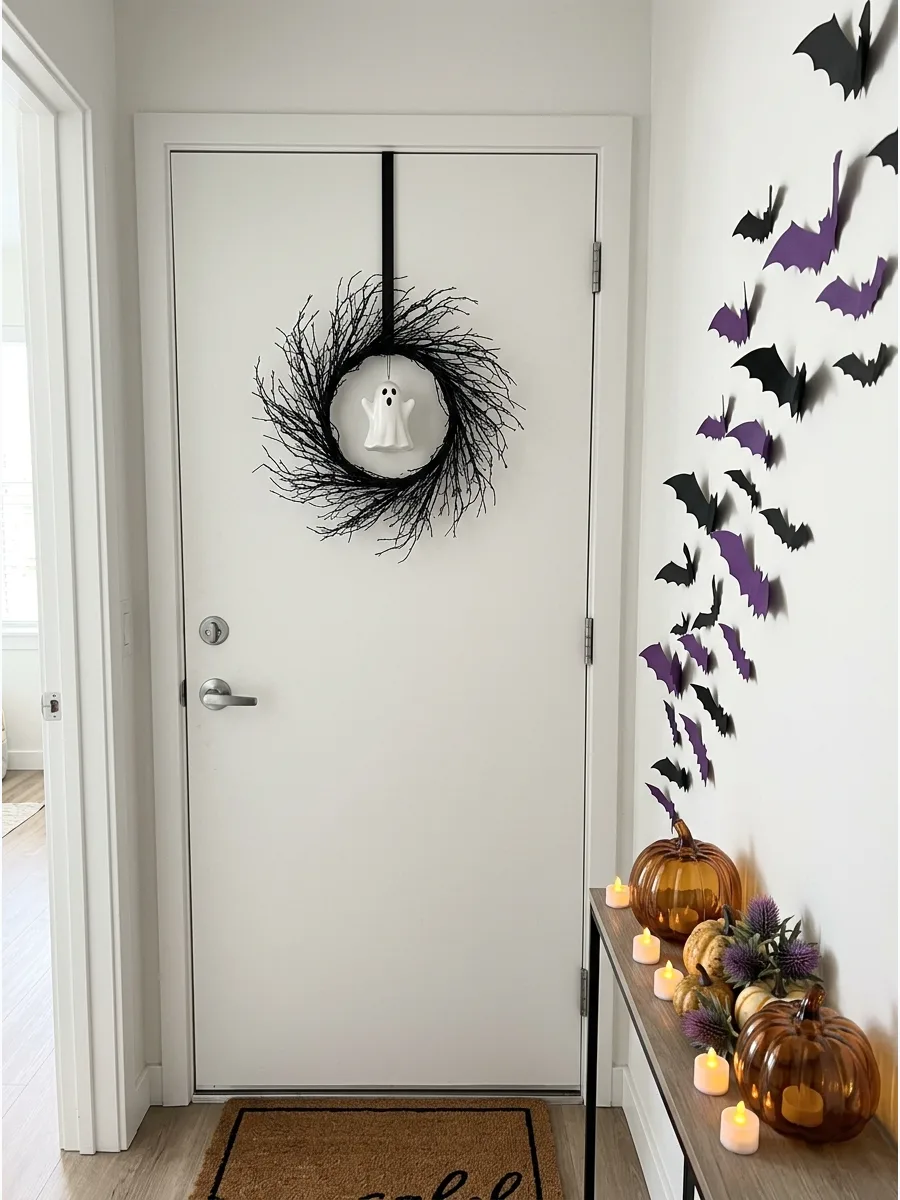
Select a wreath made of foam, thin wire, or lightweight plastic to prevent it from banging against the door. A simple design with a few black twigs or a single ghost keeps the look clean and professional.
Use an over-the-door hanger that is thin enough to allow the door to latch securely in the frame. This adds festive cheer without crowding a shared hallway.
- Sourcing: Foam or grapevine-based wreaths.
- Setup: Add a small piece of felt to the back of the wreath to prevent scratching.
- Adaptation: Wrap battery-operated fairy lights around it for a soft glow.
Most people skip this: Measure the distance between your door and the hallway wall to ensure a thick wreath will not get crushed when the door opens.
43. Decorate With a Removable Ghost Garland
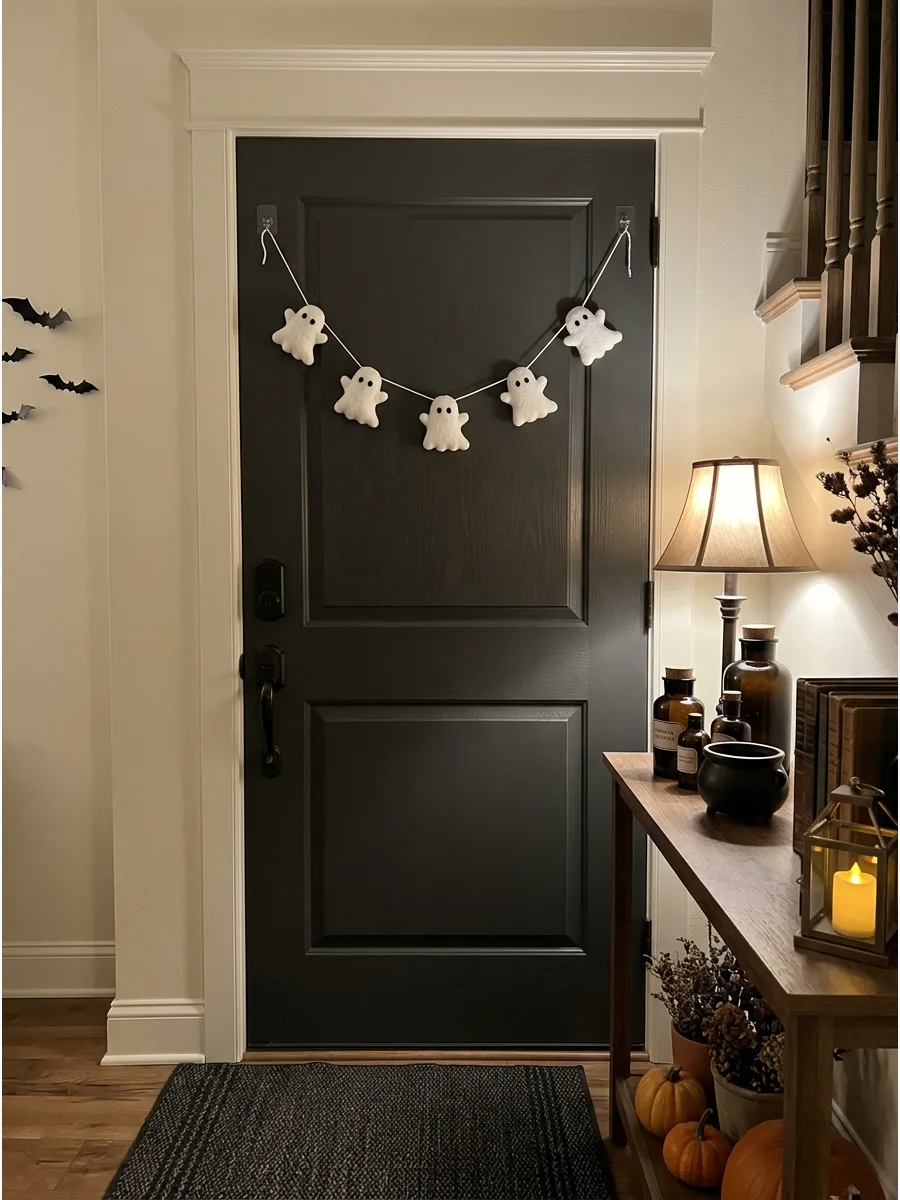
Drape a string of small white ghosts across the top of the door frame or just below the peephole. Choose ghosts made of felt or stiffened fabric so they do not tangle easily.
Loop the ends of the garland over small, clear adhesive hooks placed on the door surface. This adds a playful, moving element to the entrance.
- Sourcing: Felt or paper ghost garlands.
- Setup: Keep the swag of the garland shallow so it does not get caught in the handle.
- Adaptation: Use a light-up ghost garland for extra visibility at night.
Quick win: Make your own by tying white tissues over cotton balls and stringing them together with fishing line.
44. Create a Small-Door Pumpkin Cluster
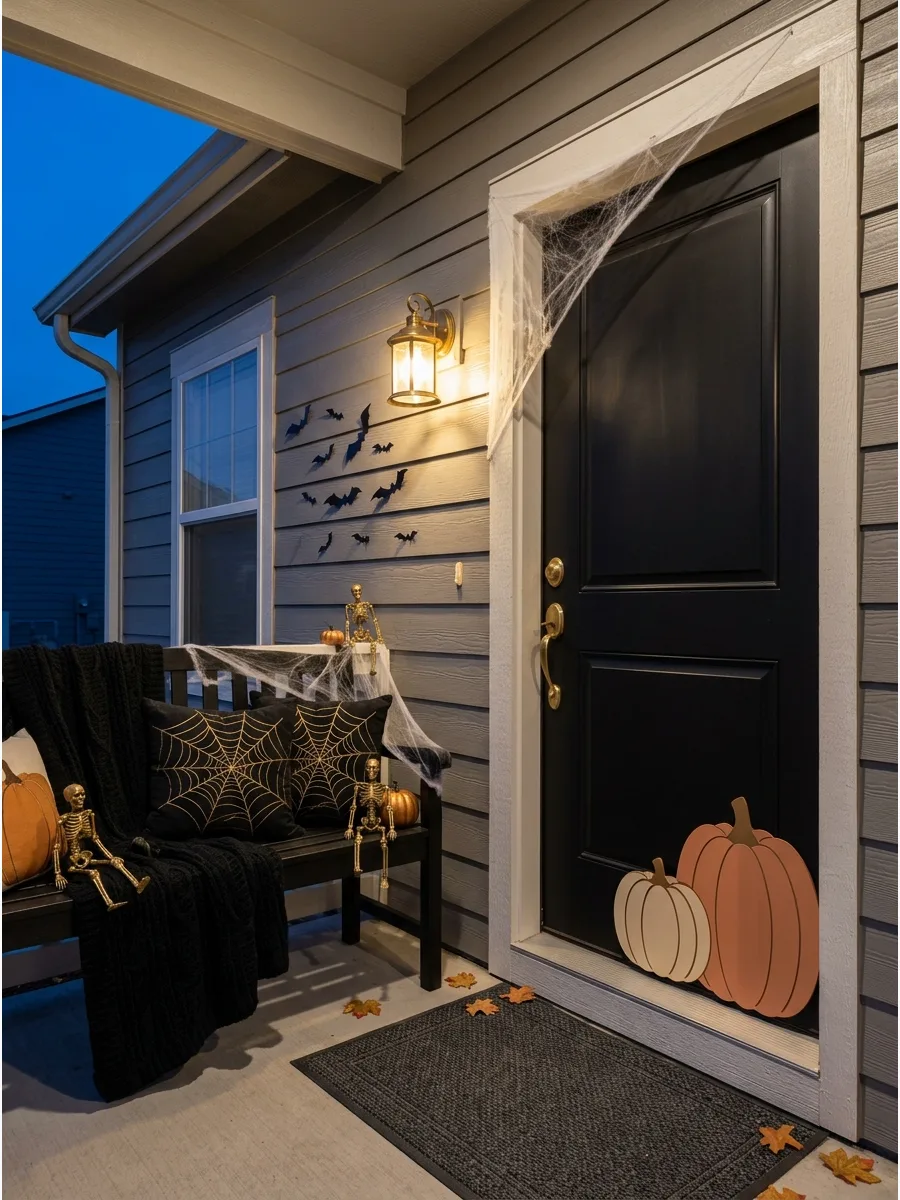
Use flat, weather-resistant pumpkin cutouts or thin wooden plaques instead of bulky 3D pumpkins.
Group them in a cluster at the bottom corner of the door to ground the design. Mount them with outdoor-rated adhesive strips to keep them from shifting when the door is opened and closed. This leaves the rest of the door clean and functional.
- Sourcing: Flat wooden pumpkin blanks or vinyl decals.
- Setup: Overlap the pumpkins slightly to create a sense of depth.
- Adaptation: Paint the pumpkins in metallic shades for a modern look.
Best shortcut: Use door magnets if you have a metal door; they are the fastest way to apply and remove decor.
45. Use a Halloween Door Bow
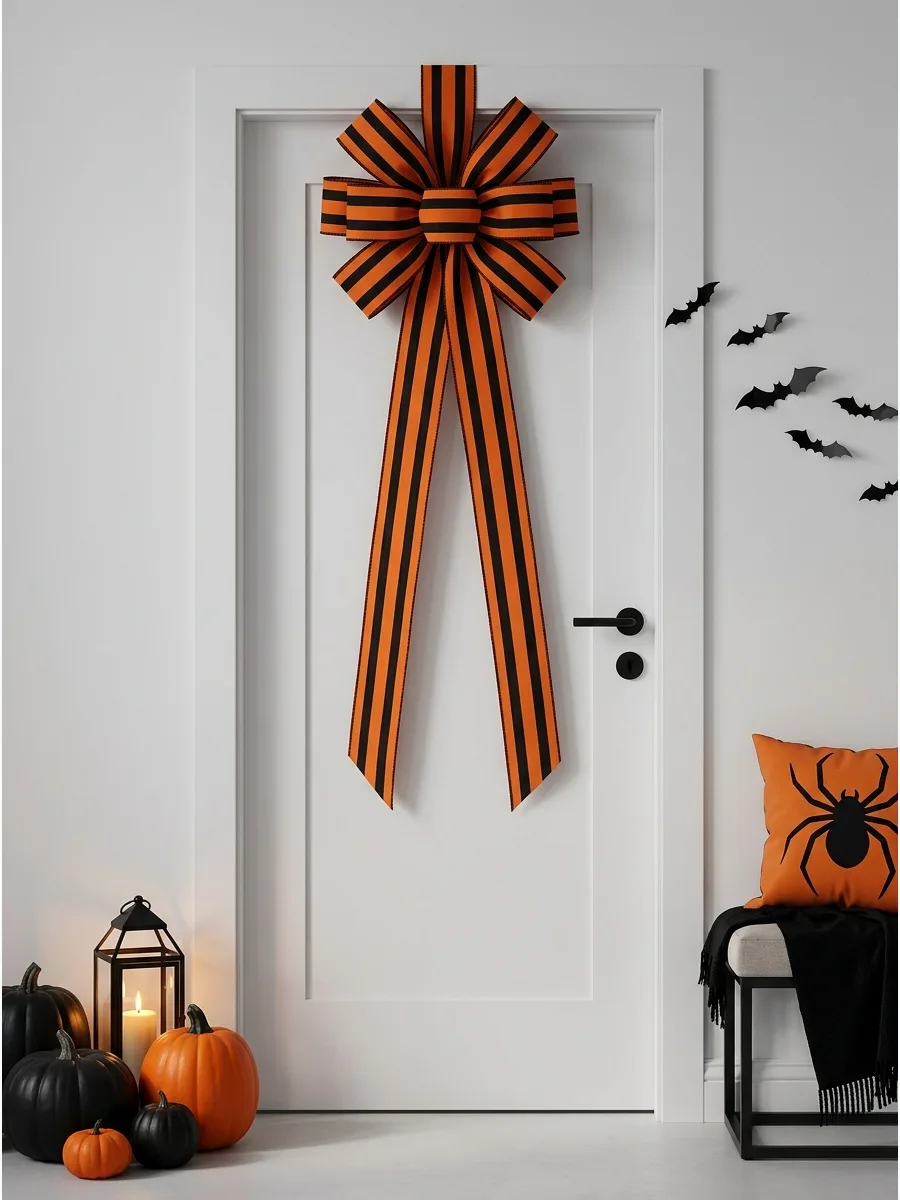
Select a wide ribbon with a wire edge to help the bow hold its shape against the wind.
Tie a large, multi-loop bow and secure it to the top center of the door. Choose a pattern like orange-and-black stripes or purple velvet to make the door stand out from the street. It is a simple, elegant way to decorate without covering the whole surface.
- Sourcing: 4-inch wide wired ribbon.
- Setup: Use a long piece of florist wire to hang the bow from the top of the door.
- Adaptation: Add a small plastic skull or spider to the center of the knot.
Most people skip this: Spray the ribbon with a fabric water-proofer to prevent it from drooping or bleeding color when it gets wet.
46. Add a Simple Black Ribbon Wreath
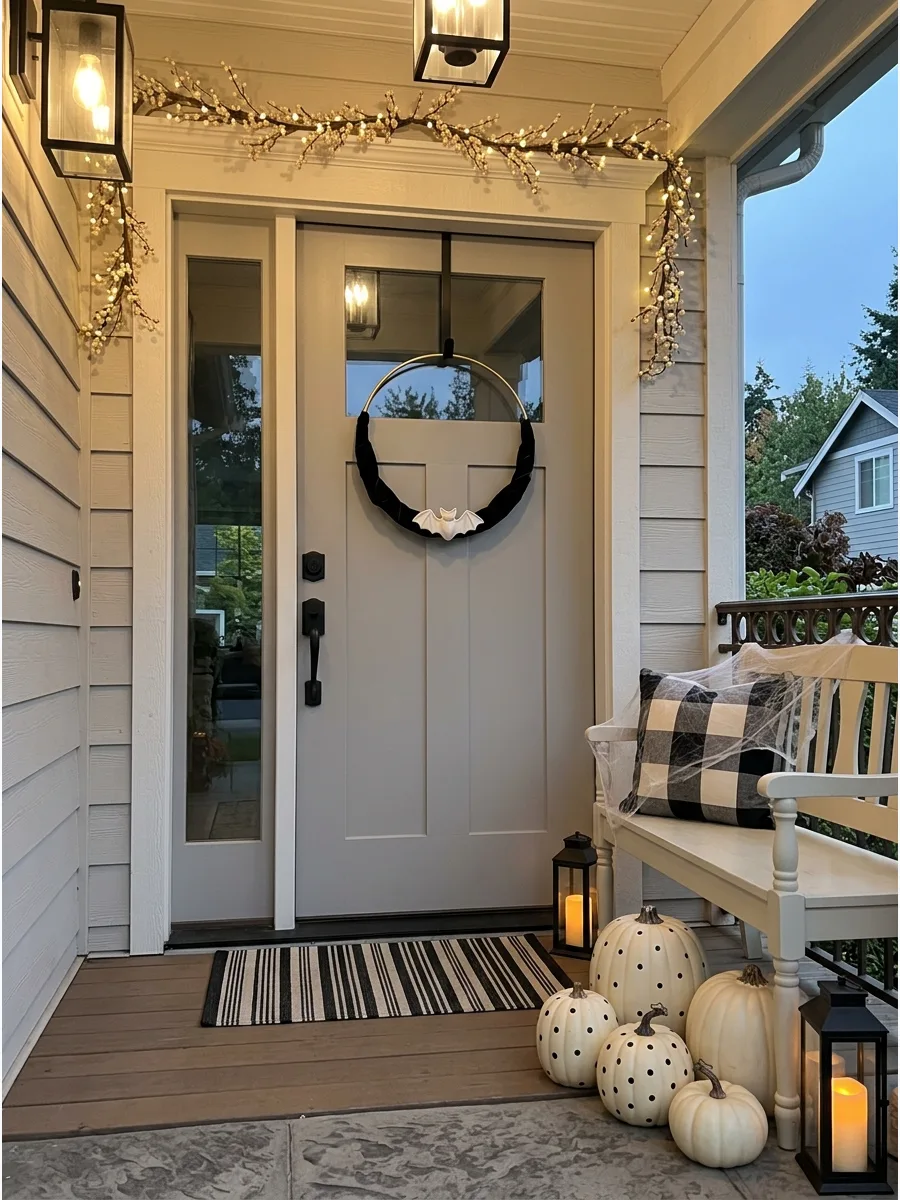
Wrap a basic metal or wooden hoop with black velvet ribbon for a sleek, tailored look. Attach a single small accent like a gold moon or a white ceramic bat to the bottom center to create a focal point.
Secure the ribbon ends with hot glue on the back of the frame to keep the front perfectly smooth. This minimalist approach works beautifully for modern homes where a bulky, traditional wreath would feel overwhelming.
- Buy velvet ribbon and a 12-inch hoop at a craft store.
- Use a thin over-the-door hook to keep the wreath flush against the door surface.
- Swap the accent piece for a small skeleton hand or a glittery spider to change the vibe.
Quick win: Use a wider ribbon, around two inches, to cover the hoop faster and create a more luxurious texture.
47. Coordinate the Door With a Layered Doormat
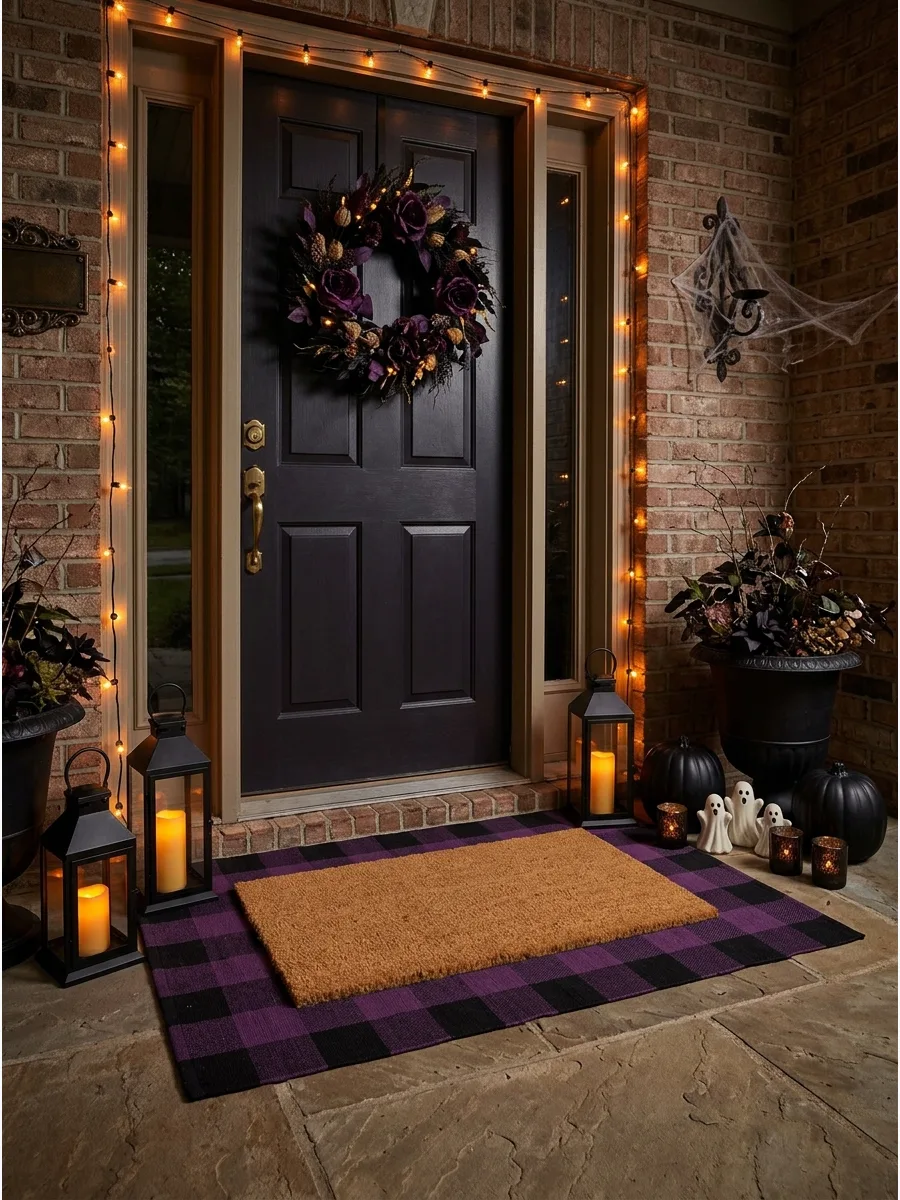
Place a larger patterned rug, like a black-and-white buffalo check, underneath a standard coir mat with a Halloween greeting. Pull one specific color from the door wreath into the pattern of the base rug to tie the porch together.
Ensure the bottom rug is at least six inches wider than the top mat on all sides for a balanced look. Layering adds instant height and texture to an entryway without requiring expensive permanent changes.
- Look for outdoor-rated rugs that can withstand moisture and heavy foot traffic.
- Center the smaller mat perfectly on top of the larger rug to prevent a messy appearance.
- Use a rubber mat gripper between the layers to keep the rugs from sliding apart.
Most people skip this: Check the door's clearance height before buying a thick base rug to ensure the door can still swing open freely.
48. Decorate a Glass Door With Silhouettes
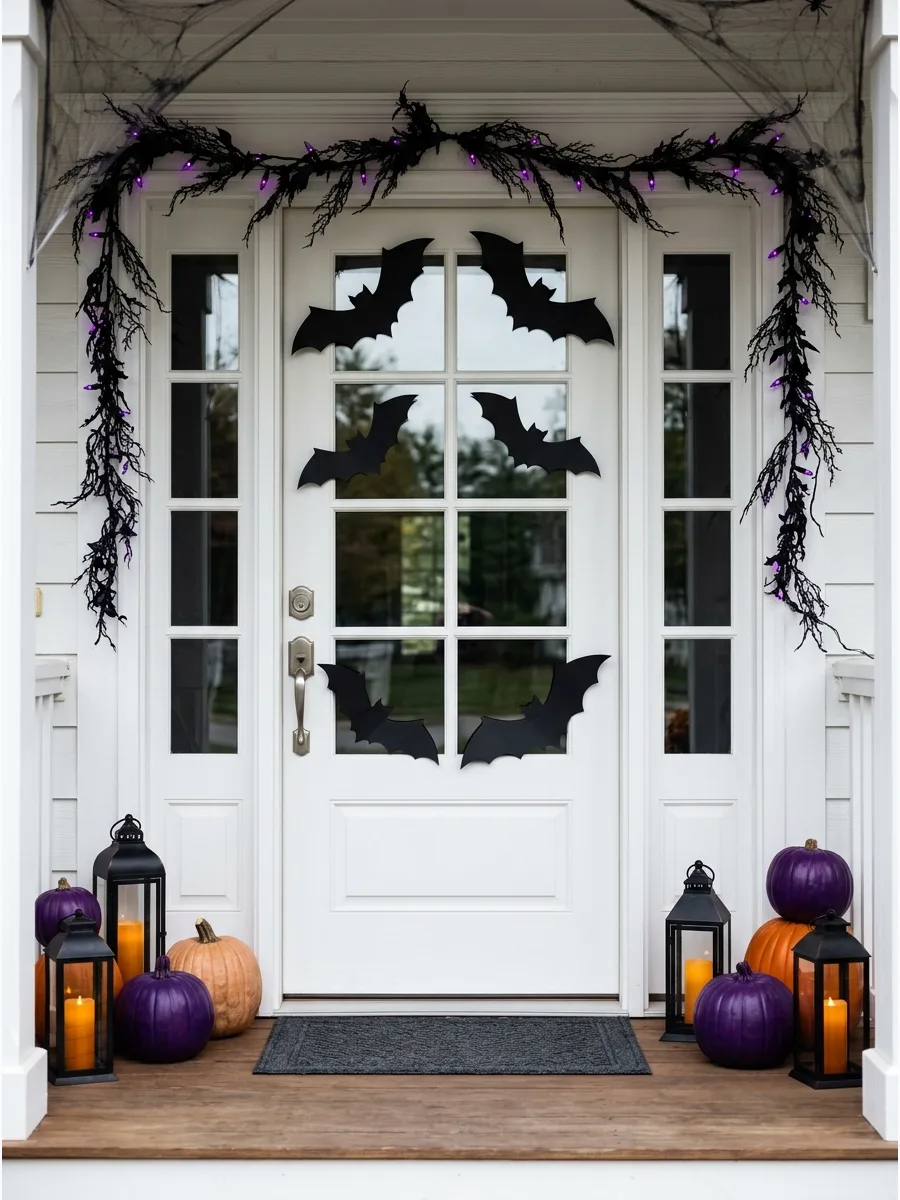
Use removable vinyl or heavy cardstock to create spooky shapes like bats or ghosts on glass panels. Position the silhouettes in the corners or along the edges to keep the center of the glass clear for visibility.
Apply double-sided clear tape to the front of cardstock cutouts so they appear seamless from the outside. This technique is ideal for storm doors or French doors where you want to decorate without blocking natural light.
- Download printable templates online or use a craft cutting machine for precise shapes.
- Clean the glass with rubbing alcohol before applying stickers to ensure a strong bond.
- Place some shapes on the inside and some on the outside to create a sense of depth.
Best shortcut: Use static-cling decals instead of adhesive stickers for the easiest removal and zero leftover residue on the glass.
49. Create an Asymmetrical Doorway Display
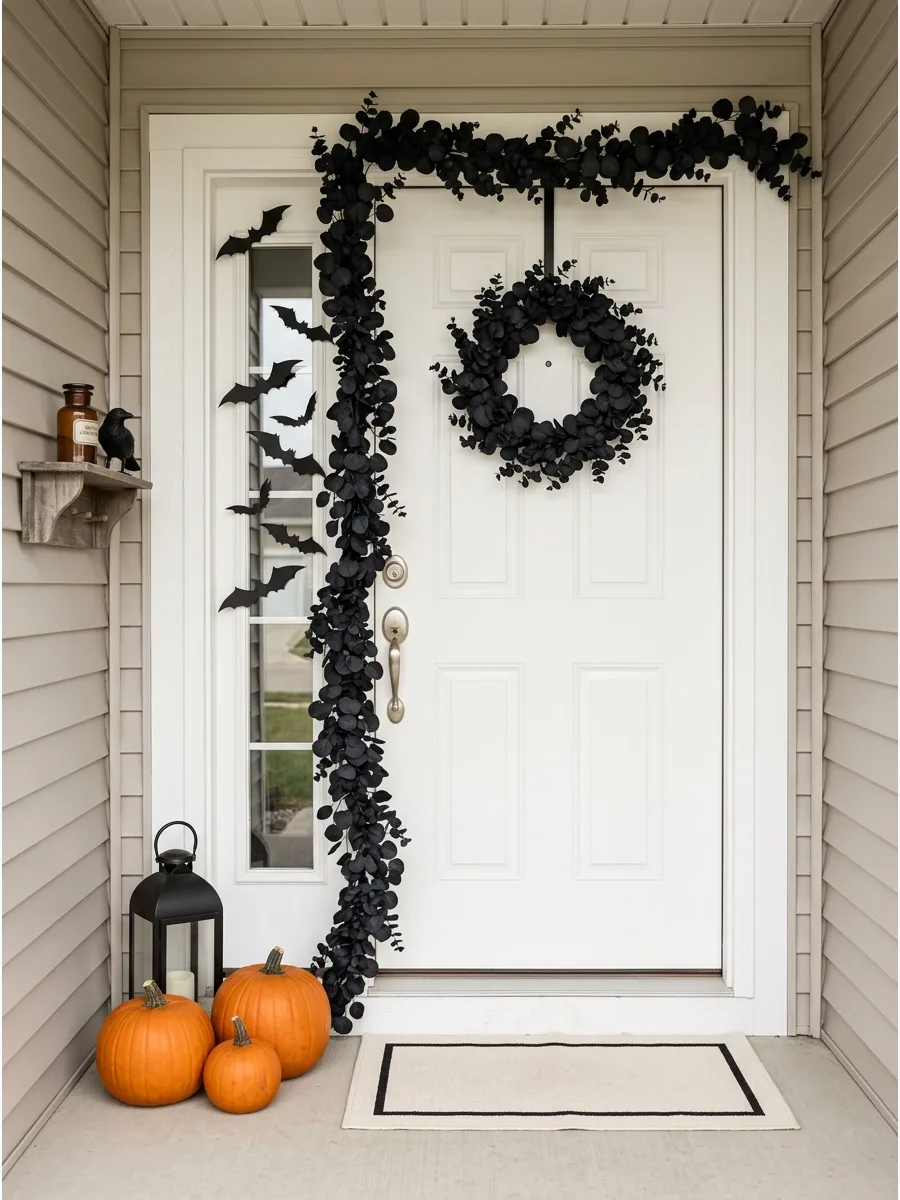
Hang a wreath slightly off-center and drape a garland down only one side of the doorframe to create a modern, artistic look. Balance the empty side by placing a cluster of pumpkins or a tall lantern on the porch floor near the decorated side.
Use adhesive outdoor hooks hidden behind the garland to secure it tightly against the door trim. Breaking symmetry makes a standard entrance feel more custom and high-end.
- Select a garland with wire stems to easily shape it around the corner of the door.
- Place the largest pumpkin at the base of the garland to anchor the entire visual line.
- Use odd numbers of floor items like three pumpkins or five lanterns for a natural feel.
Quick win: Extend the garland slightly onto the floor to bridge the gap between the doorframe and the porch decor.
50. Coordinate the Entire Halloween Entrance
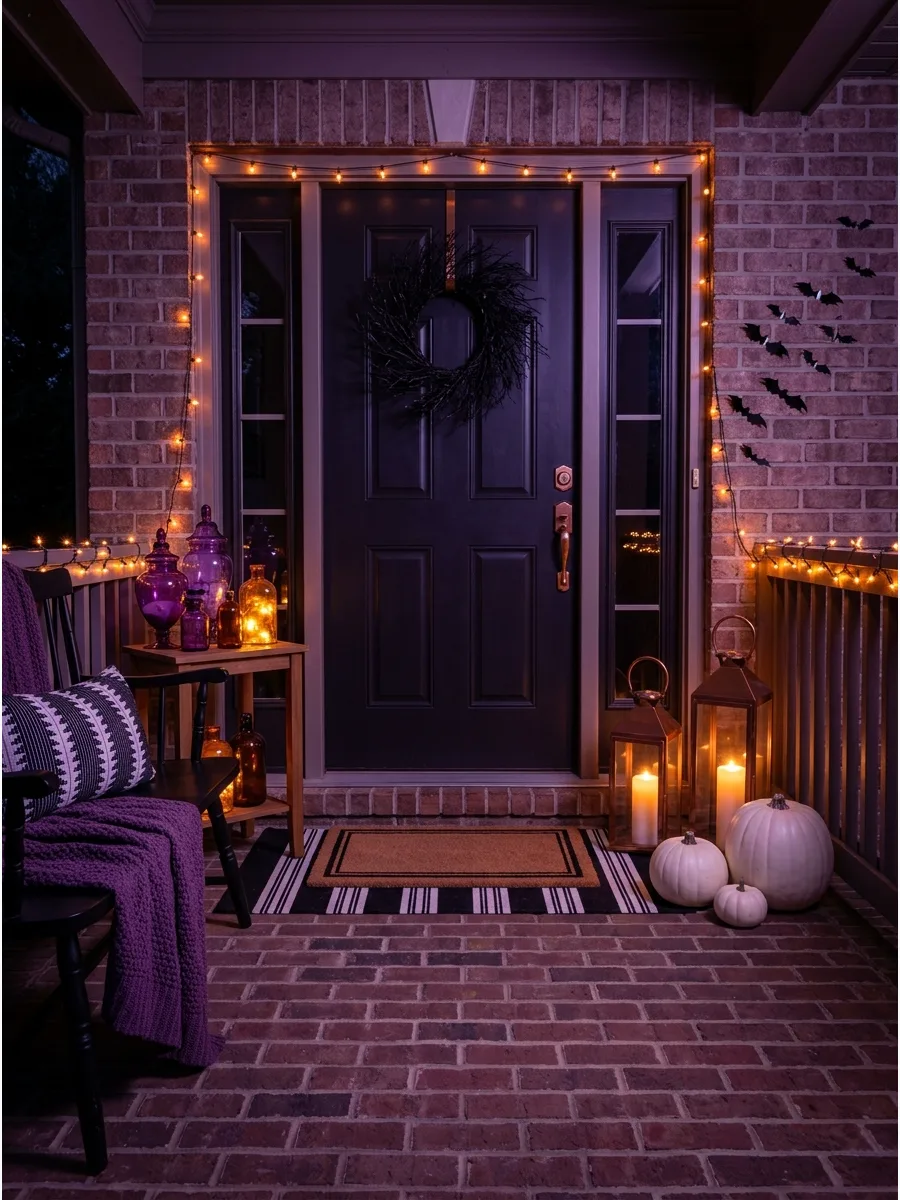
Select a tight color palette, such as black, white, and copper, and repeat these tones across every element on the porch. Use copper lanterns, white pumpkins, and a black wreath to create a sophisticated and intentional atmosphere.
Stick to three main colors to keep the display from looking cluttered or disorganized. A unified theme makes even inexpensive decorations look like a professional installation.
- Pick one hero item like a large wreath and buy smaller accessories that match its style.
- Place identical planters on both sides of the door to create a sense of order.
- Use different textures like matte metal and glossy ceramic to add interest within the color scheme.
Most people skip this: Repeat the same ribbon or fabric from the wreath on porch chair pillows or around the base of the planters.
Frequently Asked Questions
How do I hang a heavy Halloween wreath without damaging my door?
Use a sturdy over-the-door hook or a heavy-duty magnetic hanger if you have a metal door. These options support significant weight without the need for nails or screws that leave permanent marks.
What are some renter-friendly Halloween door ideas?
Opt for removable vinyl decals and Command hooks that won’t leave sticky residue or damage the paint. Tension rods are also great for hanging spooky curtains or fabric banners within the door frame without drilling.
How can I make my door decor look spooky at night?
Swap your standard porch light for an orange or purple bulb and place battery-operated LED spotlights to highlight specific decorations. Adding glowing lanterns or flickering tea lights creates an eerie ambiance that makes your display pop after dark.
How do I keep my porch decor from blowing away in October wind?
Secure your garlands with heavy-duty zip ties or floral wire to keep them firmly attached to railings and door frames. For pumpkins and planters, consider adding a bit of sand or gravel to the bottom to provide extra weight against autumn gusts.
How do I transition my fall porch to Halloween without starting over?
Keep your base of autumn mums and pumpkins, then simply layer in spooky elements like faux spiderwebs or black crows. This allows you to maintain a festive harvest look while easily pivoting to a haunted theme for the holiday.