50 Creative Laundry Room Storage Ideas
This post may contain affiliate links: full affiliate disclosure.
An efficient laundry room relies on smart vertical storage and clear zones for every step of the process. Maximizing narrow gaps and wall space prevents clutter from taking over the floor.
These practical solutions turn a chaotic utility area into a streamlined workspace.
1. Floor to Ceiling Laundry Cabinets
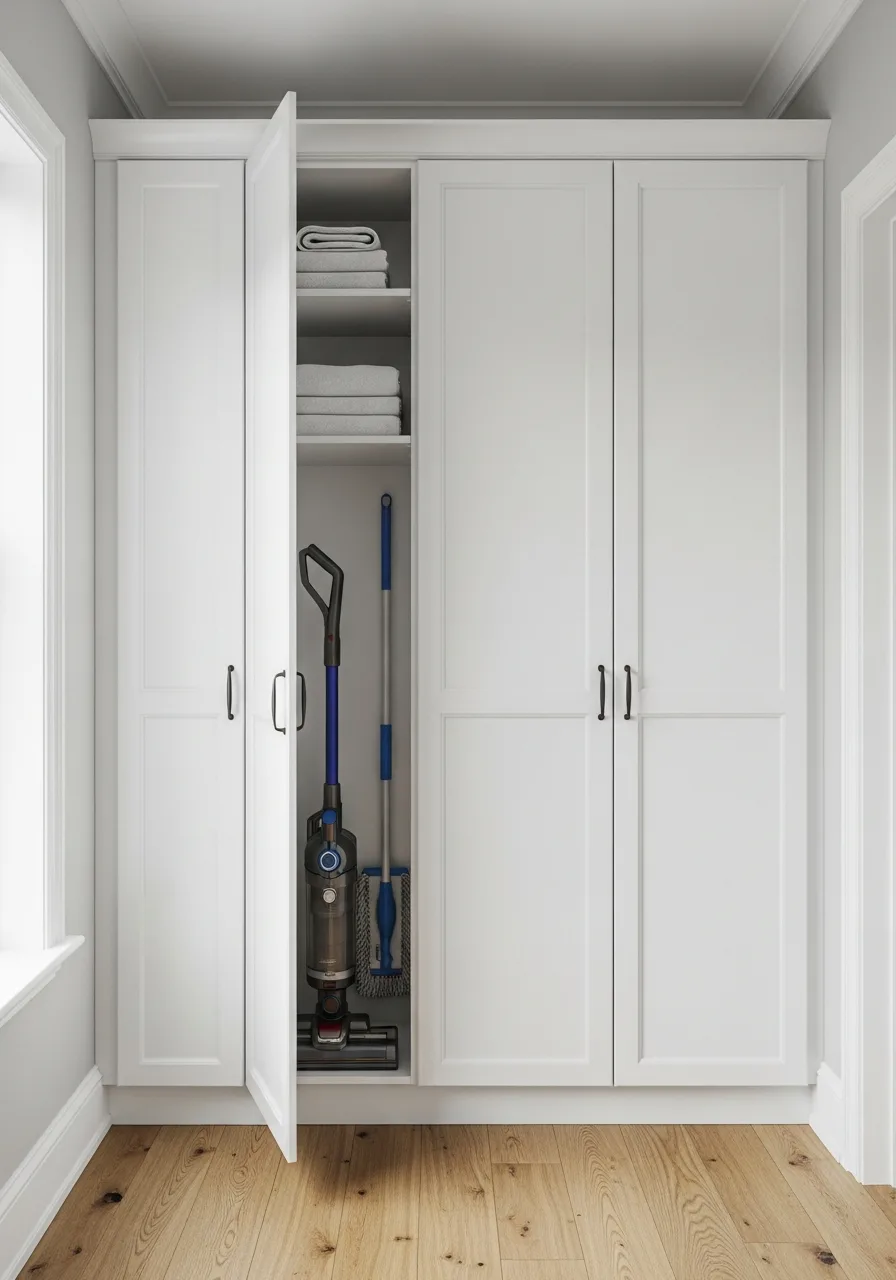
Install tall cabinets that extend all the way to the ceiling to capture every inch of vertical space. Use the highest shelves for seasonal items or bulk paper goods that are rarely needed.
Measure the exact height of the room to ensure a seamless built-in look that leaves no gaps for dust. Tall cabinets provide the best way to hide bulky appliances like vacuums and steam mops.
- Expect a full weekend for assembly and installation of pre-built pantry units.
- Secure the units to wall studs using heavy-duty L-brackets for safety.
- Add crown molding at the top to make budget-friendly cabinets look custom.
Most people skip this: Install a motion-sensor light inside deep cabinets so you can find supplies without fumbling for a switch.
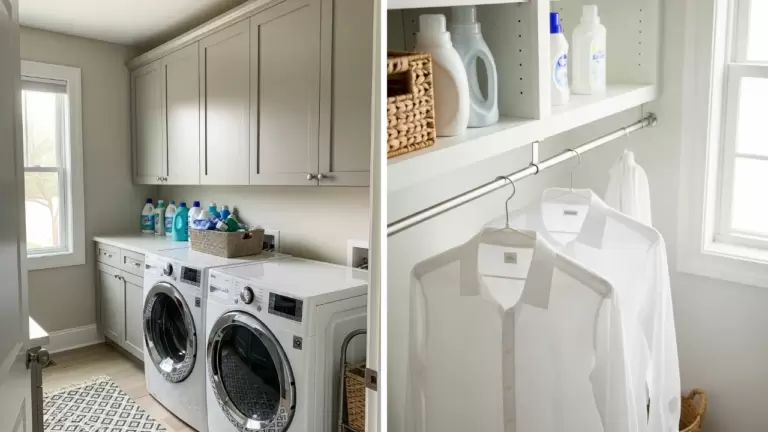
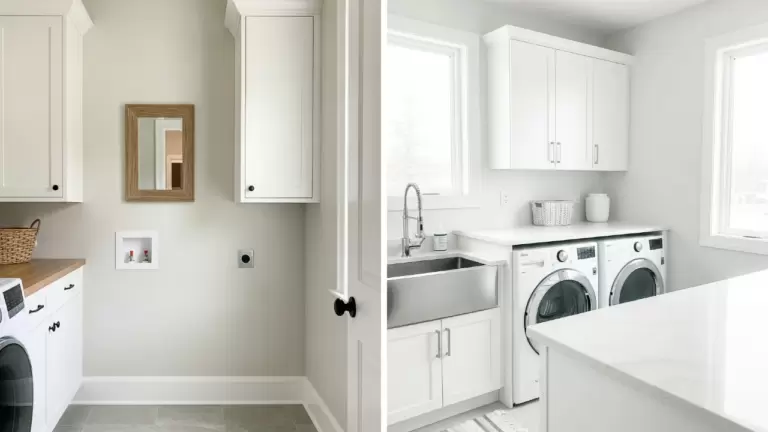
2. Cabinets Above Washer and Dryer
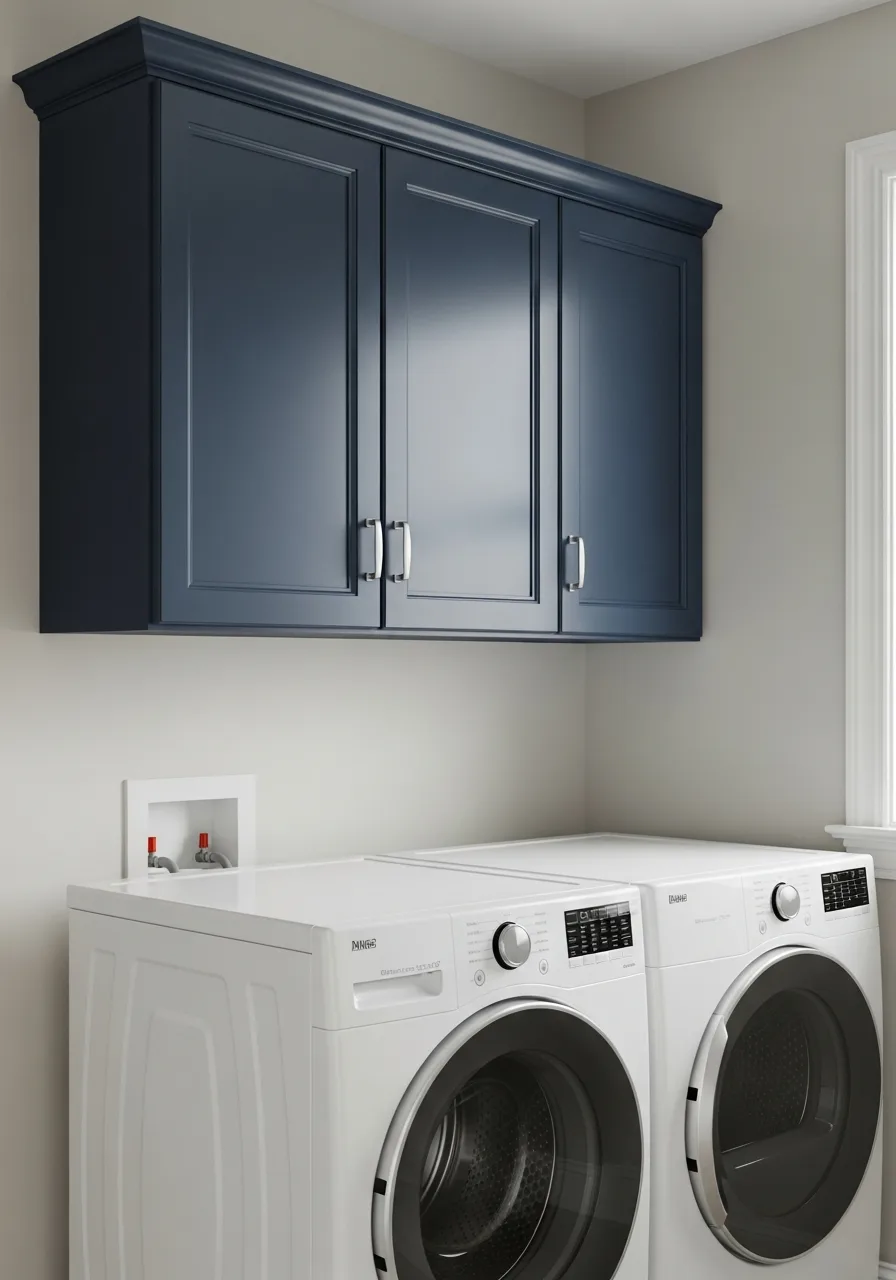
Mounting enclosed cabinets directly over side-by-side appliances keeps detergent and stain removers within arm's reach. This setup hides the visual mess of mismatched bottles and cleaning supplies.
Install these cabinets at a height that allows for easy reach without needing a step stool. Closed doors create a much calmer environment than open shelving.
- Professional installation takes about three hours including leveling.
- Leave at least six inches of clearance above the appliances for maintenance access.
- Use magnetic latches to keep doors shut during high-vibration spin cycles.
Quick win: Line the bottom shelf with a plastic tray to catch accidental detergent drips and protect the cabinet finish.
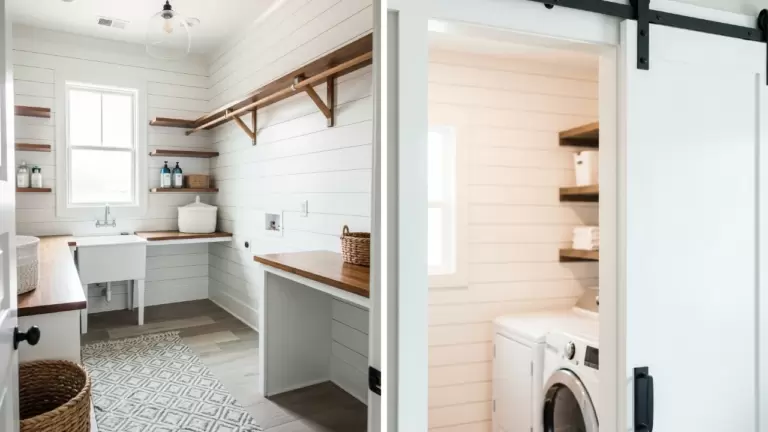
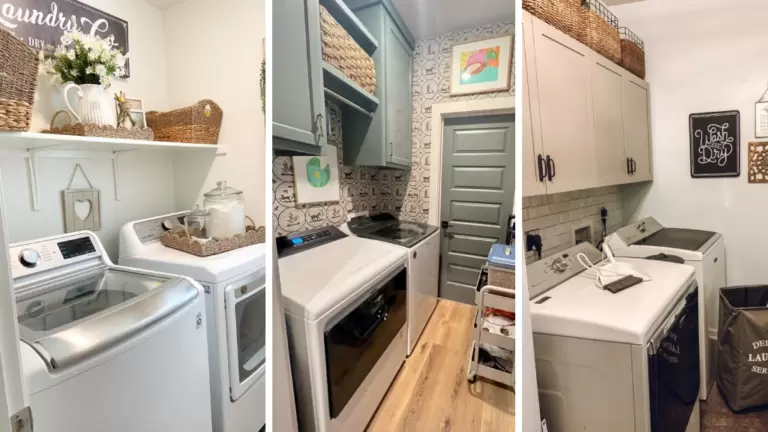
3. Floating Shelves Above Appliances
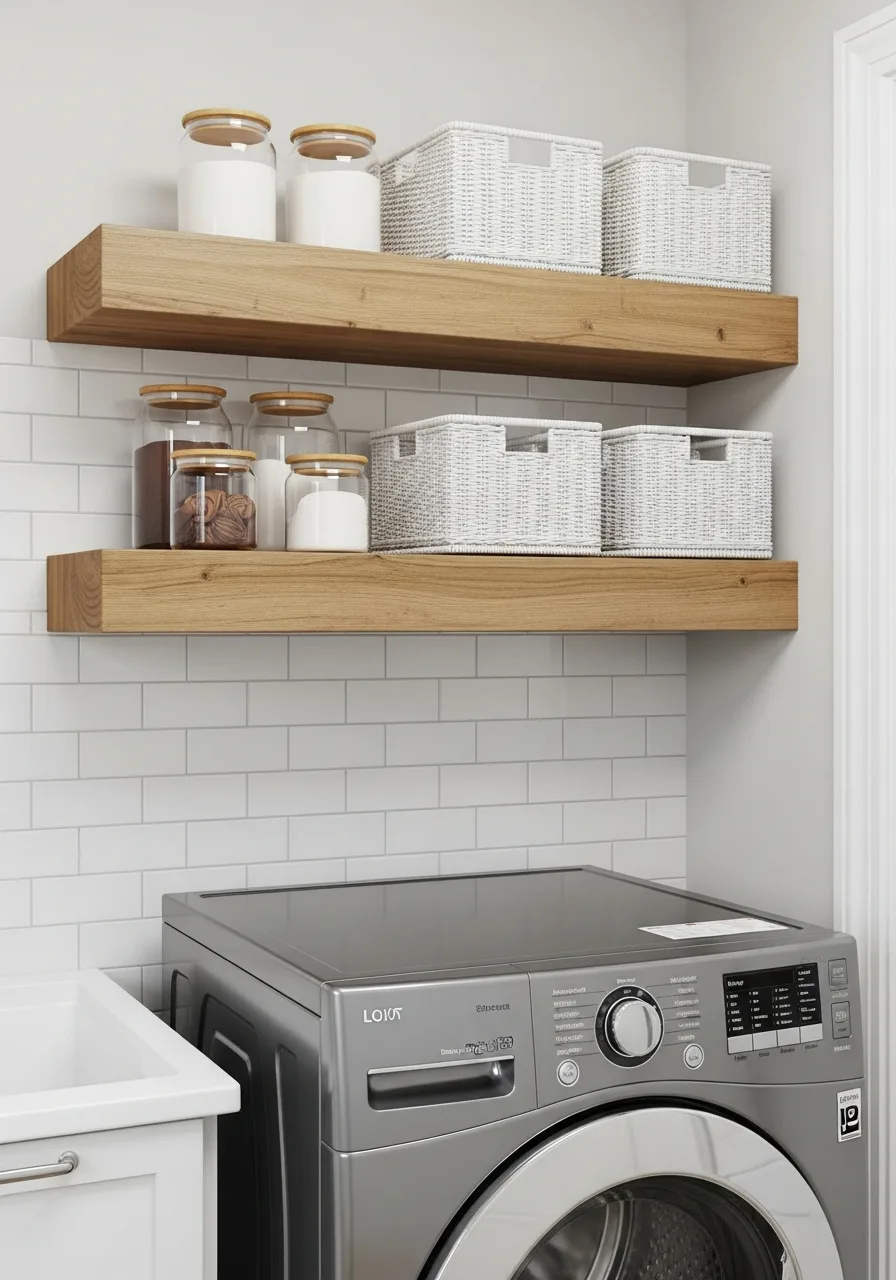
Floating shelves provide a modern look and keep everyday essentials ready for immediate use. Use matching baskets or glass jars to hold pods and clothespins so the shelves stay organized.
Group smaller items into wire baskets to keep the overall look tidy and intentional. Open shelving is the fastest way to access frequently used spray bottles.
- Budget around fifty dollars for high-quality wood shelving and brackets.
- Use a level during installation to ensure bottles do not slide off the edge.
- Swap plastic packaging for uniform containers to reduce visual clutter.
Best shortcut: Place a small dish on the lowest shelf for loose change and items found in pockets during sorting.
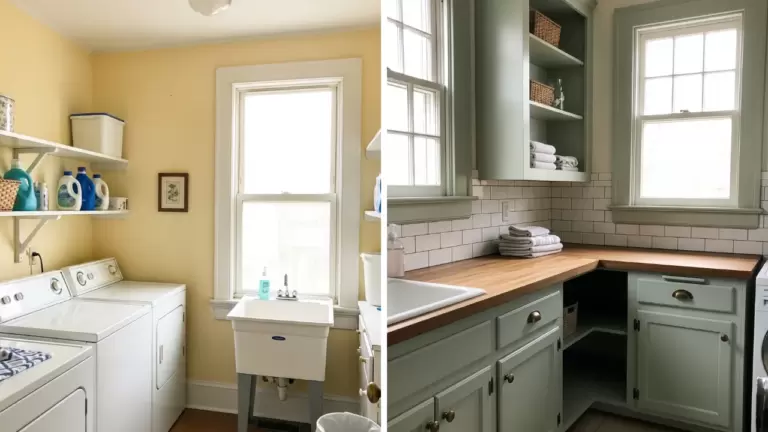
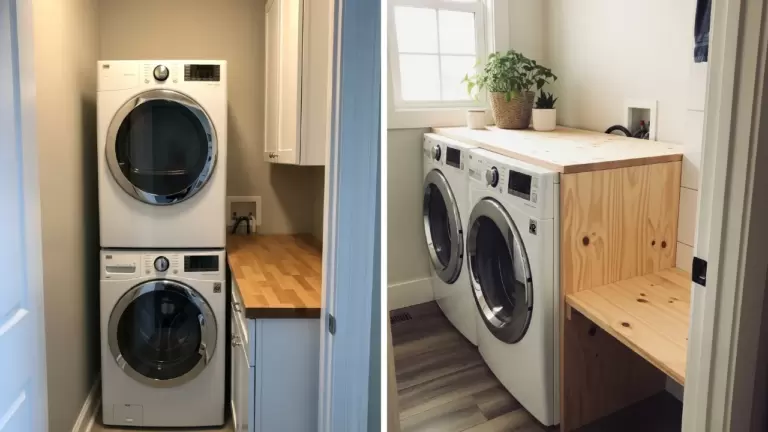
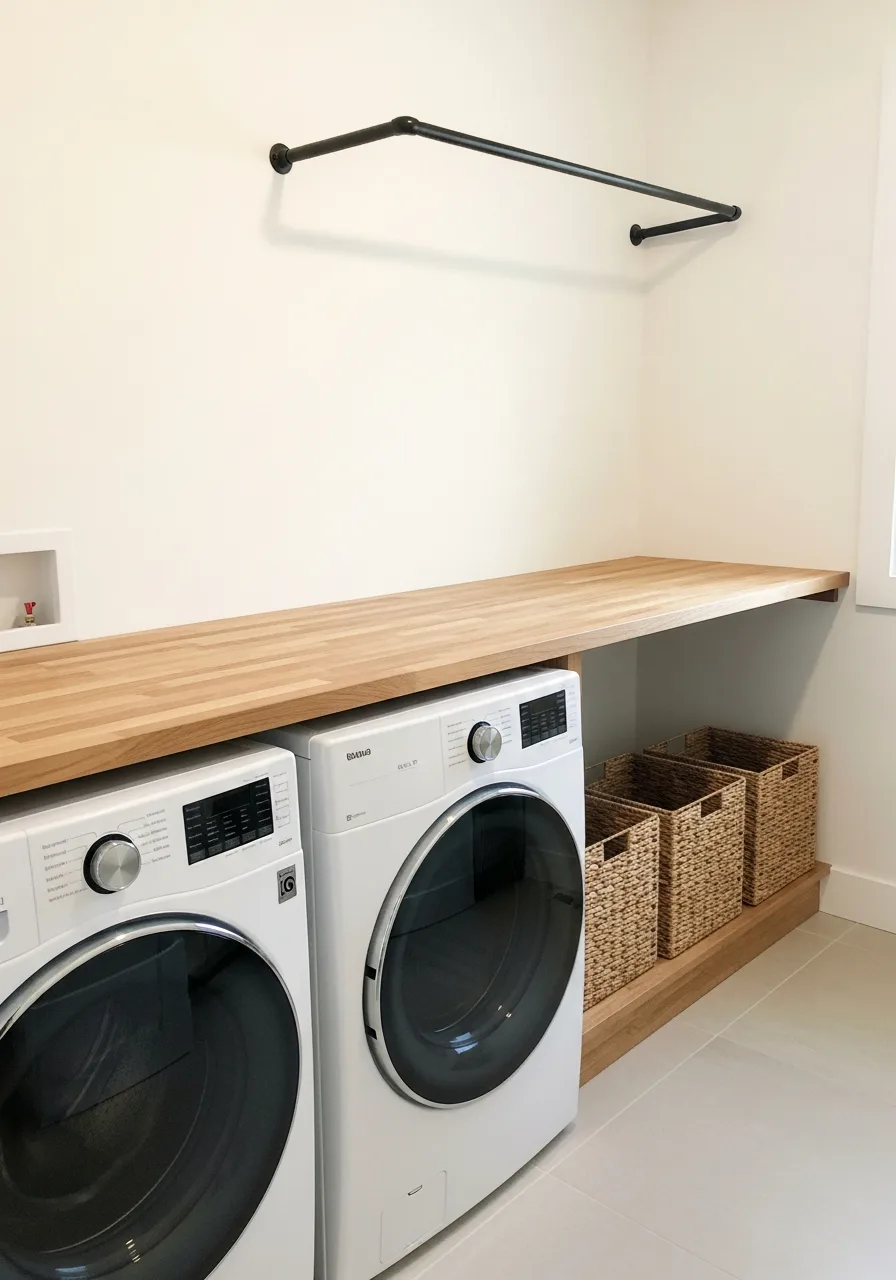
4. Countertop Over Washer and Dryer
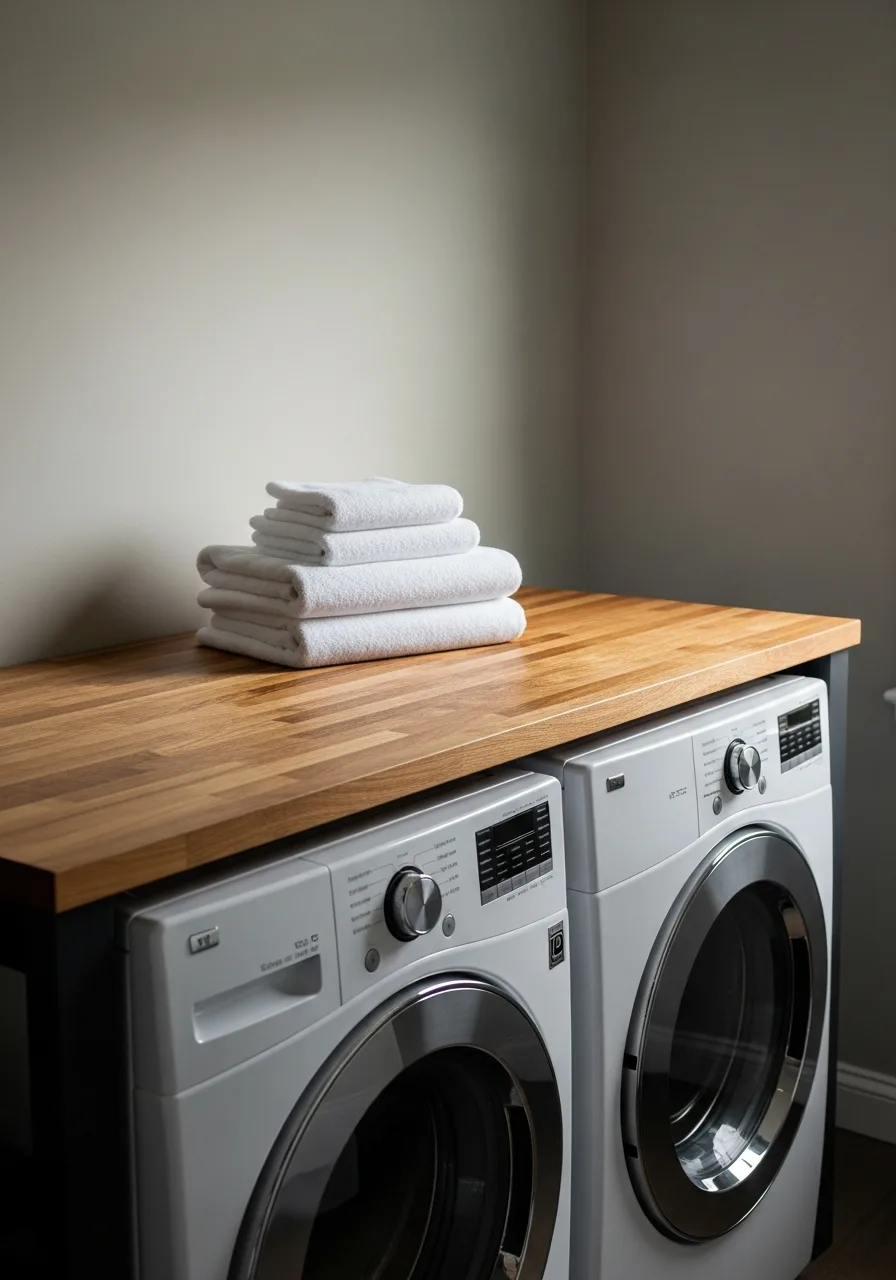
A continuous countertop placed over front-loading machines creates an instant folding station. This surface prevents small items like socks from falling behind or between the appliances.
Choose a water-resistant material like laminate or treated wood to handle the occasional laundry drip. Having a flat surface right at the source makes sorting much faster.
- Standard laminate countertops can be cut to size at most home improvement stores.
- Use rubber spacers between the machines and the counter to dampen noise.
- Apply a waterproof sealant to wood tops every year to prevent warping.
Most people skip this: Leave a two-inch gap between the back of the counter and the wall to allow for hoses and cords.
5. Pull Out Laundry Hamper Cabinet
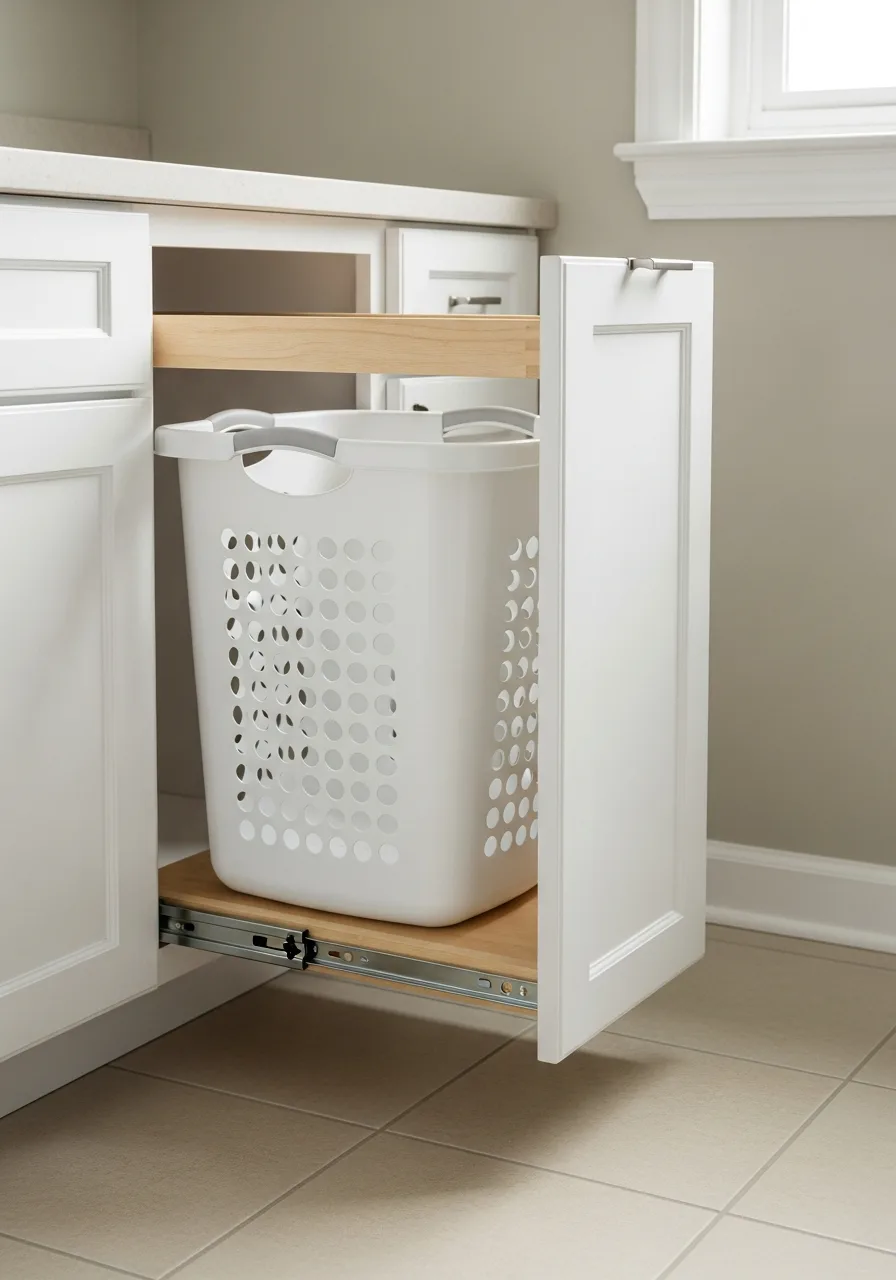
Hide dirty laundry inside a lower cabinet equipped with a heavy-duty sliding mechanism. This keeps messy piles off the floor and maintains a clean look in the room.
Select a slide mechanism rated for at least 100 pounds to support the weight of full loads. Tucking hampers away is the most effective way to make a small laundry room feel larger.
- Installation requires basic drill skills and takes about one hour.
- Choose a tilt-out or pull-out style based on your available floor clearance.
- Use a breathable basket insert to prevent moisture buildup in damp clothes.
Quick win: Attach a handle to the front of the cabinet that matches your other hardware for a high-end look.
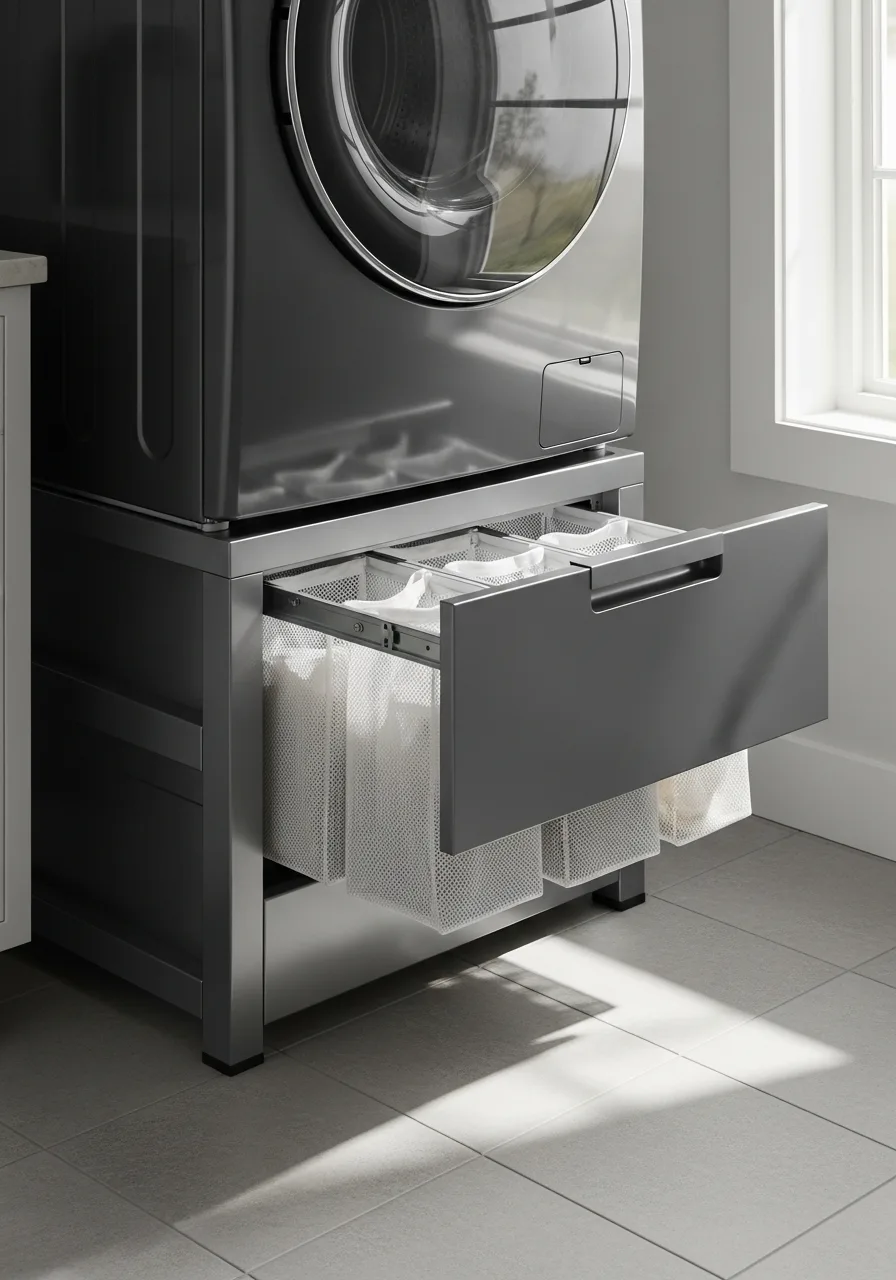
6. Double Pull Out Hamper
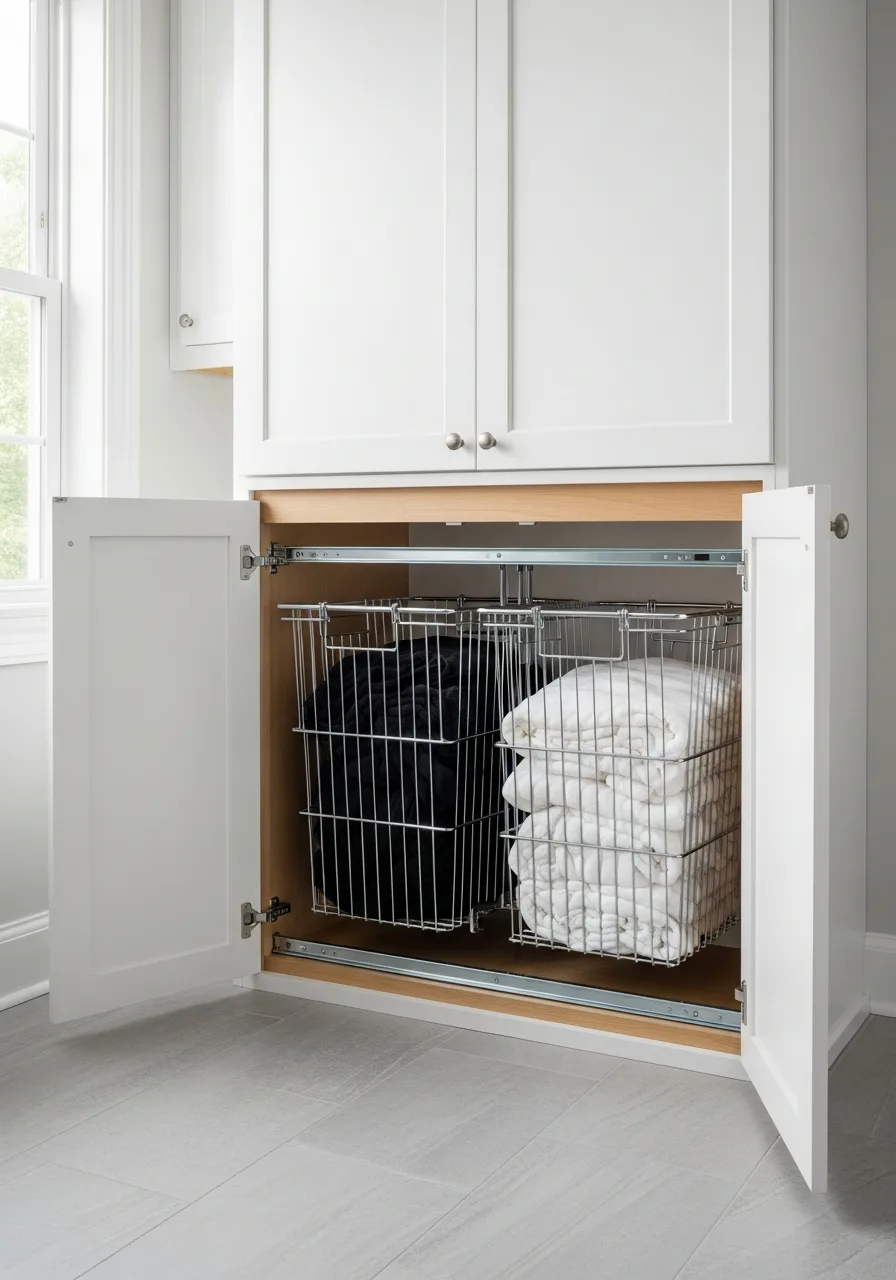
Install two separate baskets in one wide cabinet to sort lights and darks as you go. This eliminates the need for a pre-wash sorting session on the floor.
Use one bin for whites and the other for darks to streamline the entire washing process. Sorting immediately keeps the laundry workflow moving without extra steps.
- Pre-assembled double units are available for standard eighteen-inch cabinets.
- Labels on the cabinet door help guests and children sort correctly.
- Removable fabric liners make it easy to carry the whole load to the machine.
Best shortcut: Add a third smaller bin for delicates or heavily soiled rags to prevent them from getting lost in the main loads.
7. Built In Sorting Station
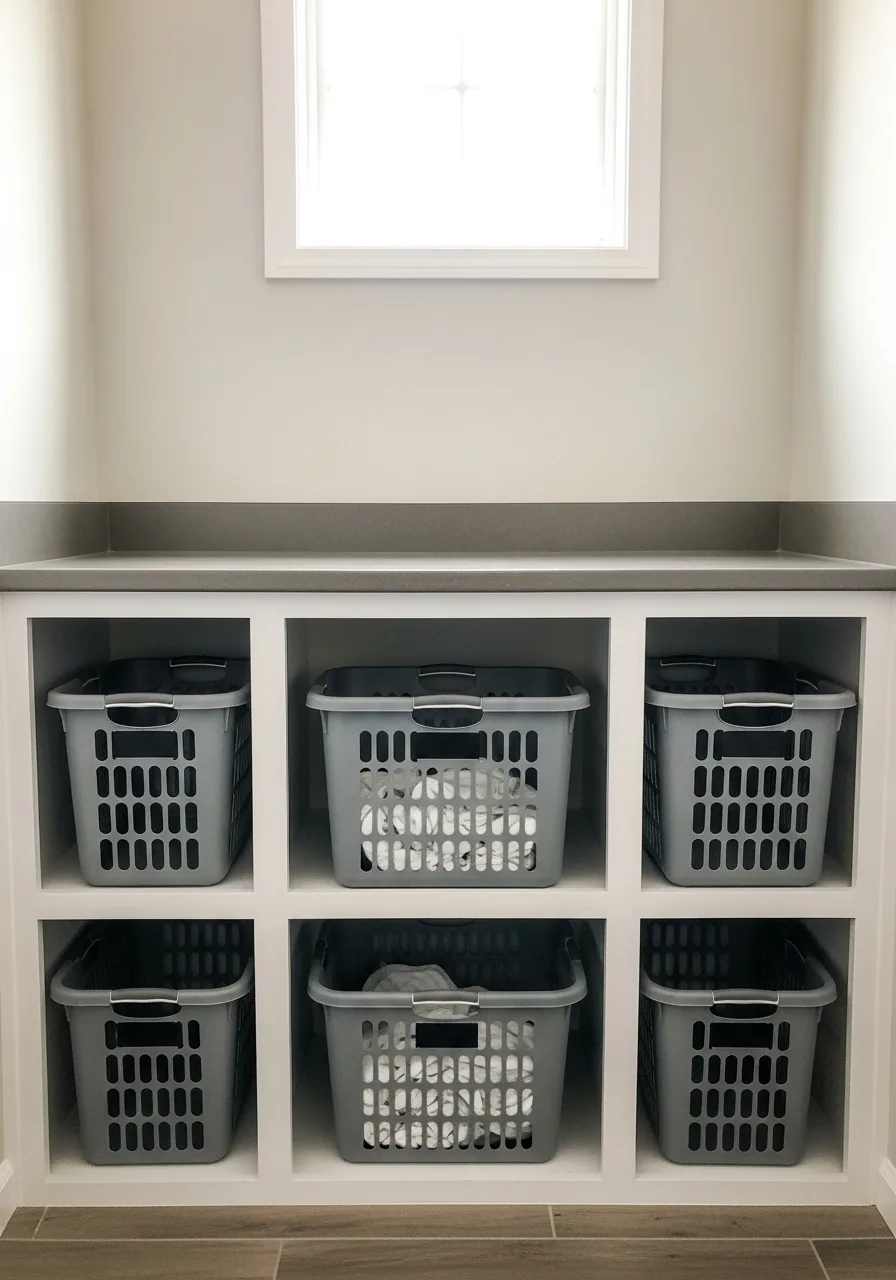
Create open cubbies beneath a countertop to hold individual laundry baskets for different categories. This allows every family member to have a designated spot for their clean or dirty clothes.
Label each cubby with a name or color category for fast and organized sorting. Open cubbies are more durable than drawers for heavy-duty daily use.
- Standard laundry baskets usually require cubbies at least twenty inches wide.
- Paint the interior of the cubbies a high-gloss white for easy cleaning.
- Build the unit on a recessed toe-kick to prevent stubbing your toes while folding.
Most people skip this: Size the cubbies to fit the specific baskets you already own to avoid buying new ones.
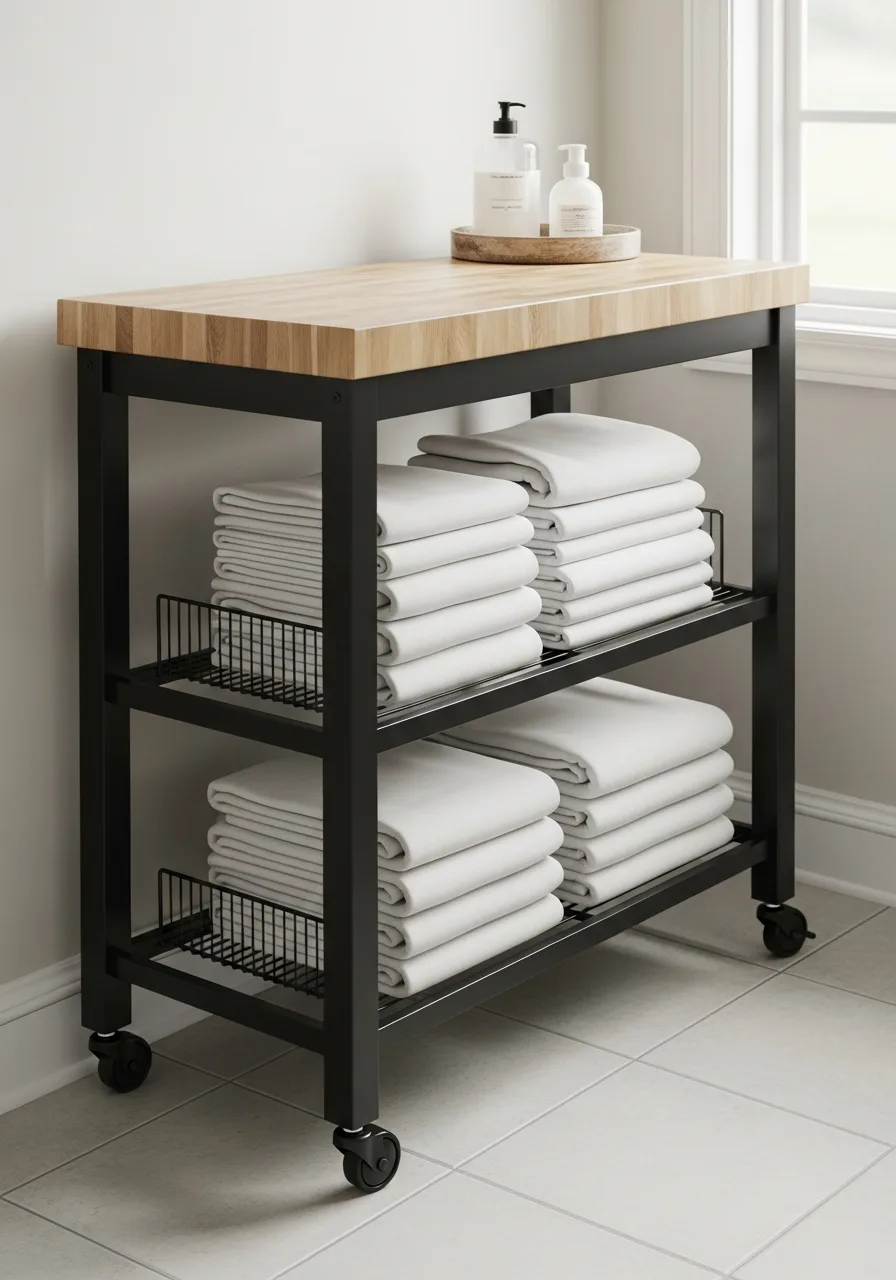
8. Slim Rolling Supply Cart

Utilize the narrow gap between the washer and dryer with a slim tiered rolling cart. This is the perfect spot for detergent bottles, dryer sheets, and small cleaning brushes.
Pick a cart with wheels that lock to prevent it from moving during the machine's spin cycle. This mobile storage keeps floors clear while keeping products exactly where they are needed.
- Look for carts less than six inches wide for standard appliance gaps.
- Assembly typically takes fifteen minutes with no tools required.
- Metal carts are more durable than plastic ones for holding heavy liquid jugs.
Quick win: Place a small magnetic hook on the side of the cart to hold a lint brush or measuring scoop.
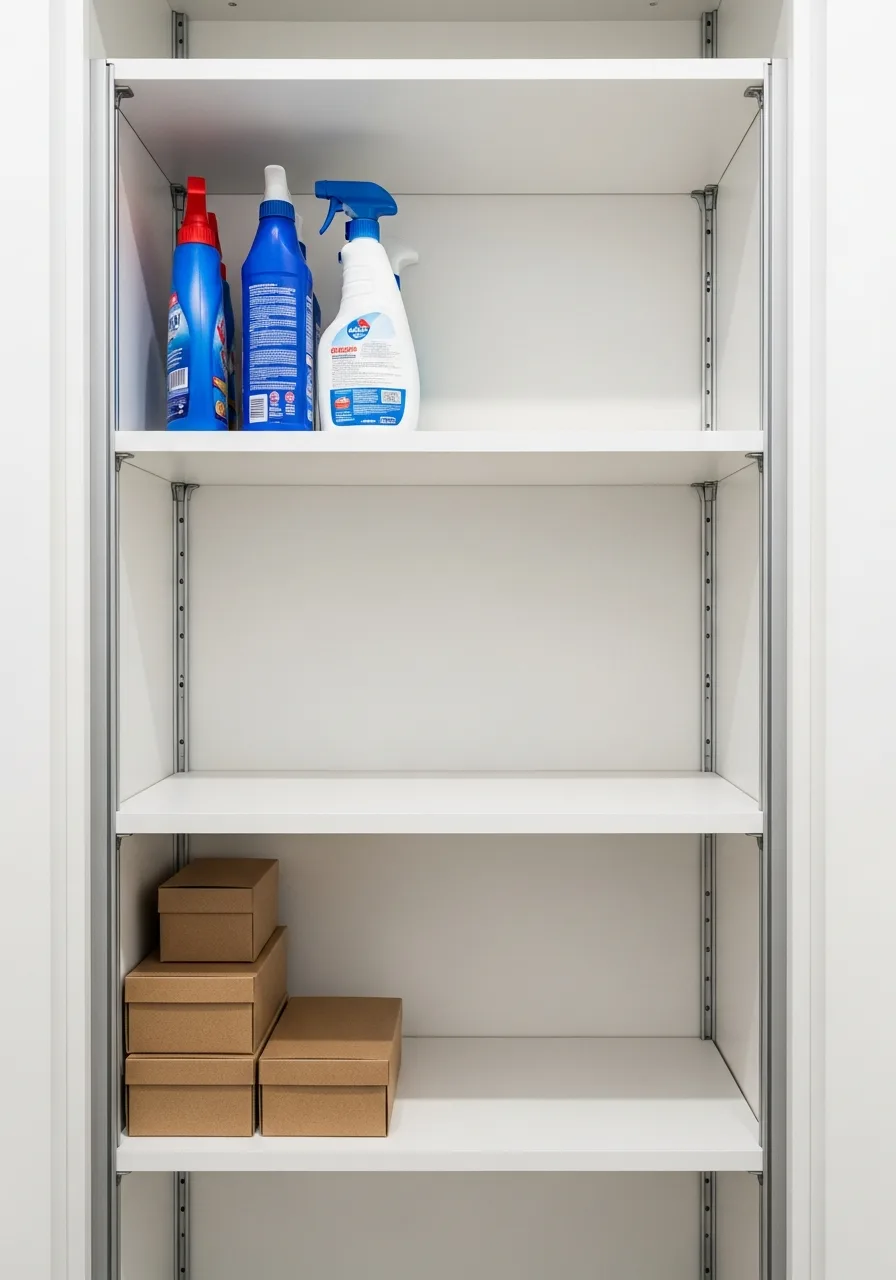
9. Narrow Pull Out Supply Cabinet
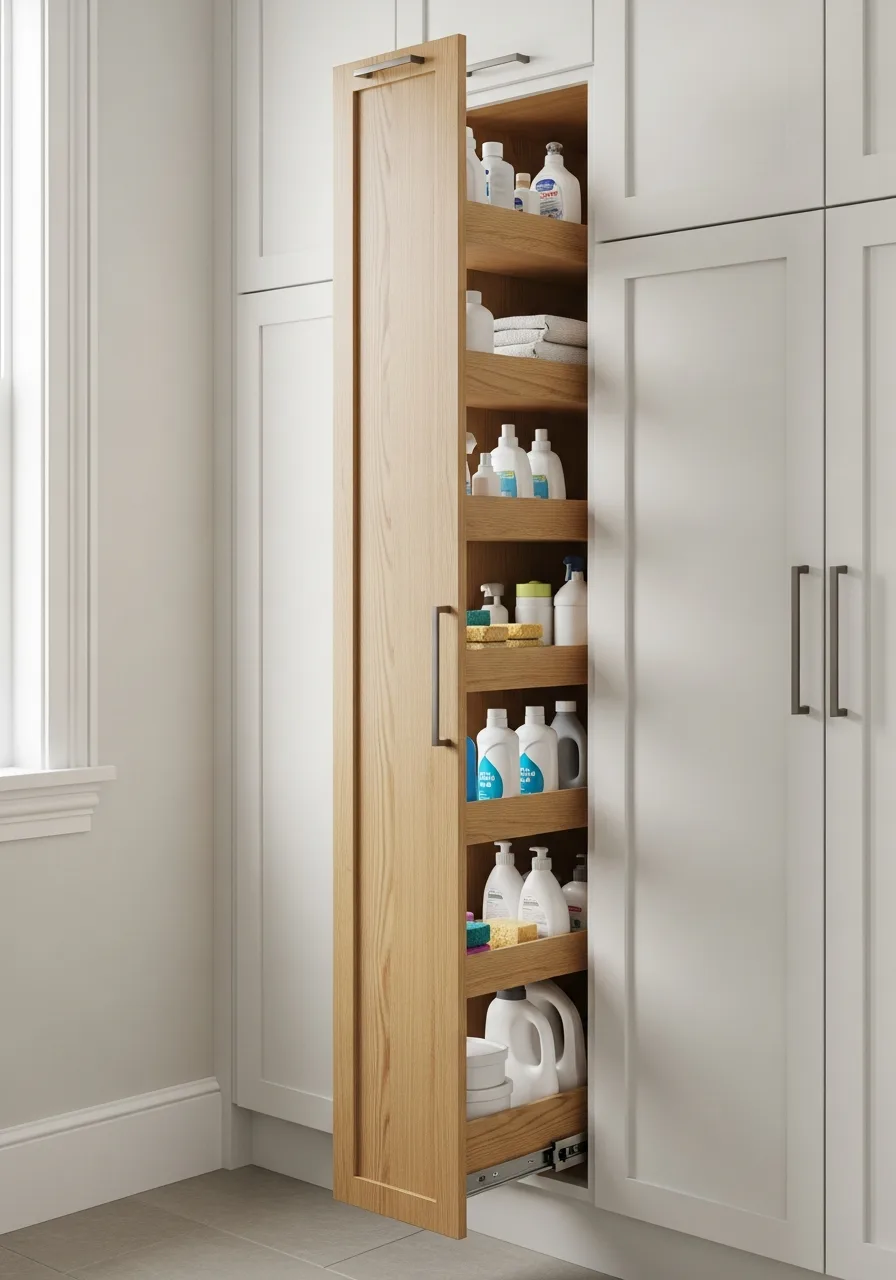
A custom vertical pull-out cabinet fits into tiny unused spaces and provides deep storage for tall bottles. The shallow shelves ensure that every product is visible and nothing gets pushed to the back.
Install shallow lipped shelves to keep tall bottles from tipping over when the cabinet is opened. This is the most efficient way to store a large collection of specialty cleaners.
- Custom pull-outs are best installed during a room renovation for a flush look.
- Use full-extension drawer slides so you can reach the very back items.
- Clear acrylic bins on the shelves can help group small items like sponges.
Best shortcut: Adjust the shelf heights specifically to fit your tallest gallon-sized detergent bottles.
10. Wall Mounted Drying Rack
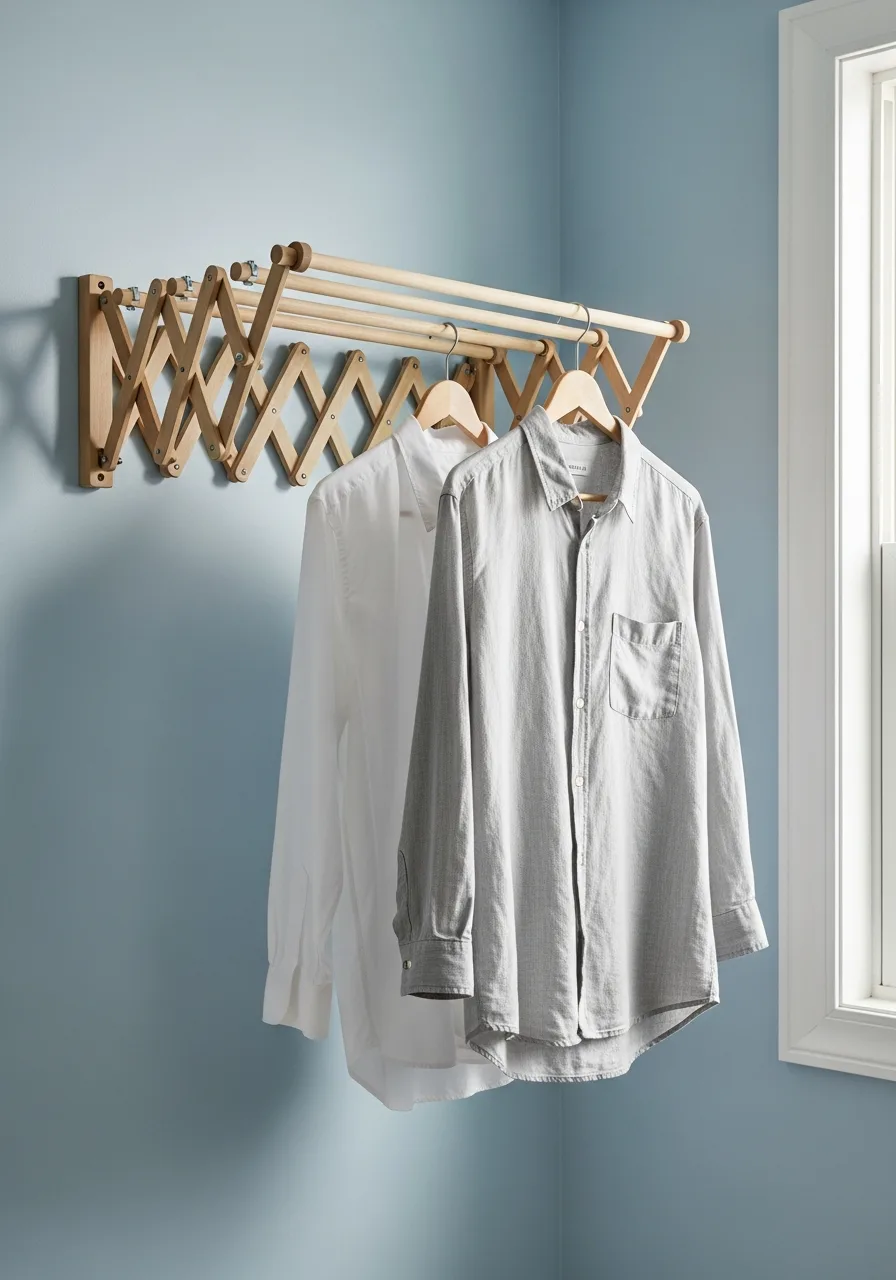
Folding drying racks save valuable floor space and can be tucked against the wall when not in use. They are essential for air-drying delicates and prevent clothes from shrinking in the dryer.
Mount the rack near a window or air vent to speed up the natural drying process. A sturdy wall-mounted unit can hold several heavy wet garments at once.
- Mount directly into wall studs to support the weight of wet clothing.
- Stainless steel or moisture-sealed wood finishes prevent rust and rot.
- Place the rack at chest height for the most comfortable loading and unloading.
Most people skip this: Install the rack high enough that long dresses or pants won't touch the floor when hanging.
Laundry Room Storage Ideas
11. Hidden Pull-Out Drying Grids
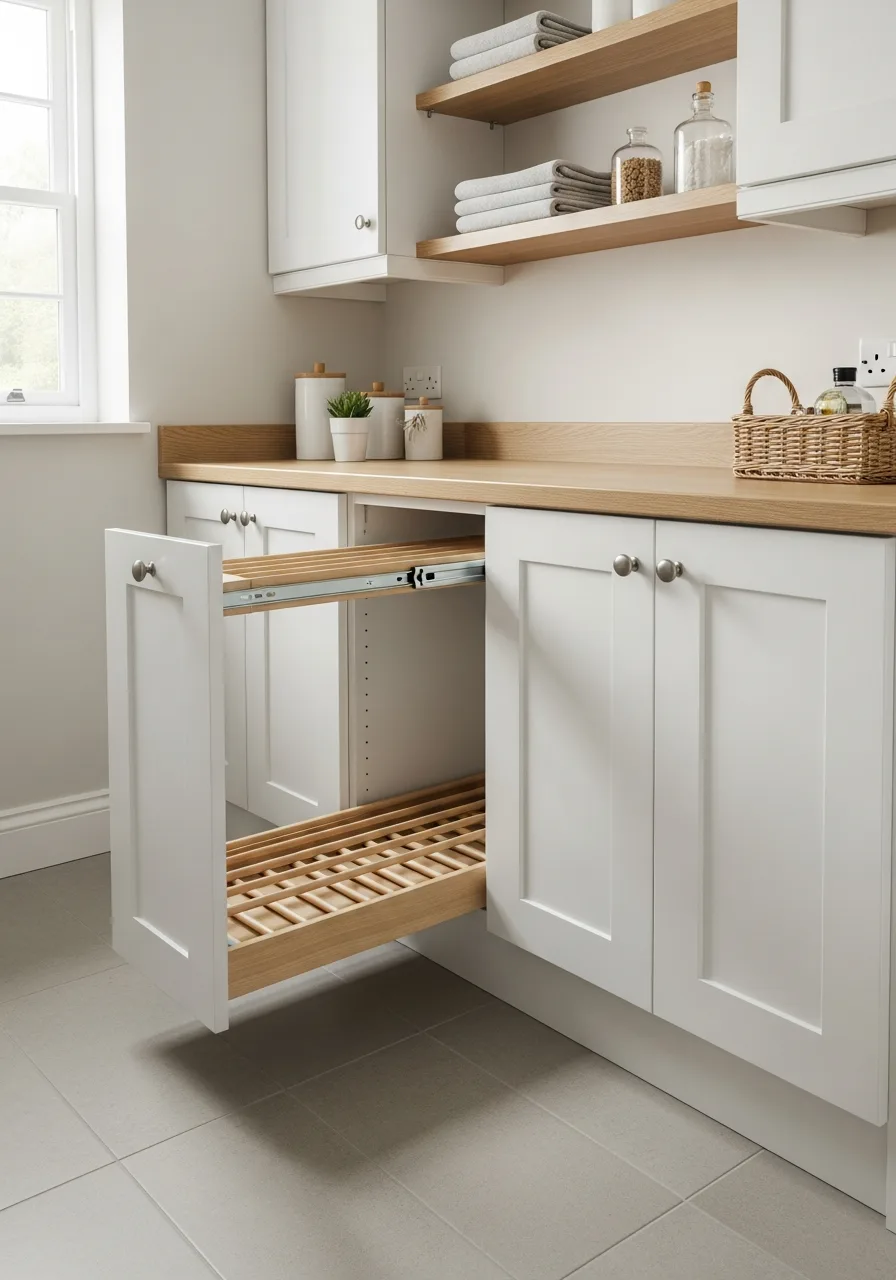
High-efficiency laundry rooms benefit from vertical storage, but delicate items often need flat surfaces that clutter countertops.
Install a slim pull-out drawer fitted with mesh or dowel inserts directly beneath the folding station. This setup allows air to circulate around damp garments while keeping the floor clear of bulky folding racks.
Placing these drawers near a HVAC vent or heat source is the most effective way to speed up the evaporation process naturally.
- Measure existing cabinet depth to ensure the slide hardware accommodates a full-extension drawer for maximum drying area.
- Mount the drawer slides at waist height to minimize bending while laying out heavy, wet sweaters or delicates.
- Replace solid drawer bottoms with stainless steel rods or moisture-resistant mesh to prevent water damage to the cabinetry over time.
Quick win: Add a small battery-operated fan inside the cabinet carcass to significantly reduce drying time for thick fabrics.
12. Hidden Ventilated Drying Cabinet
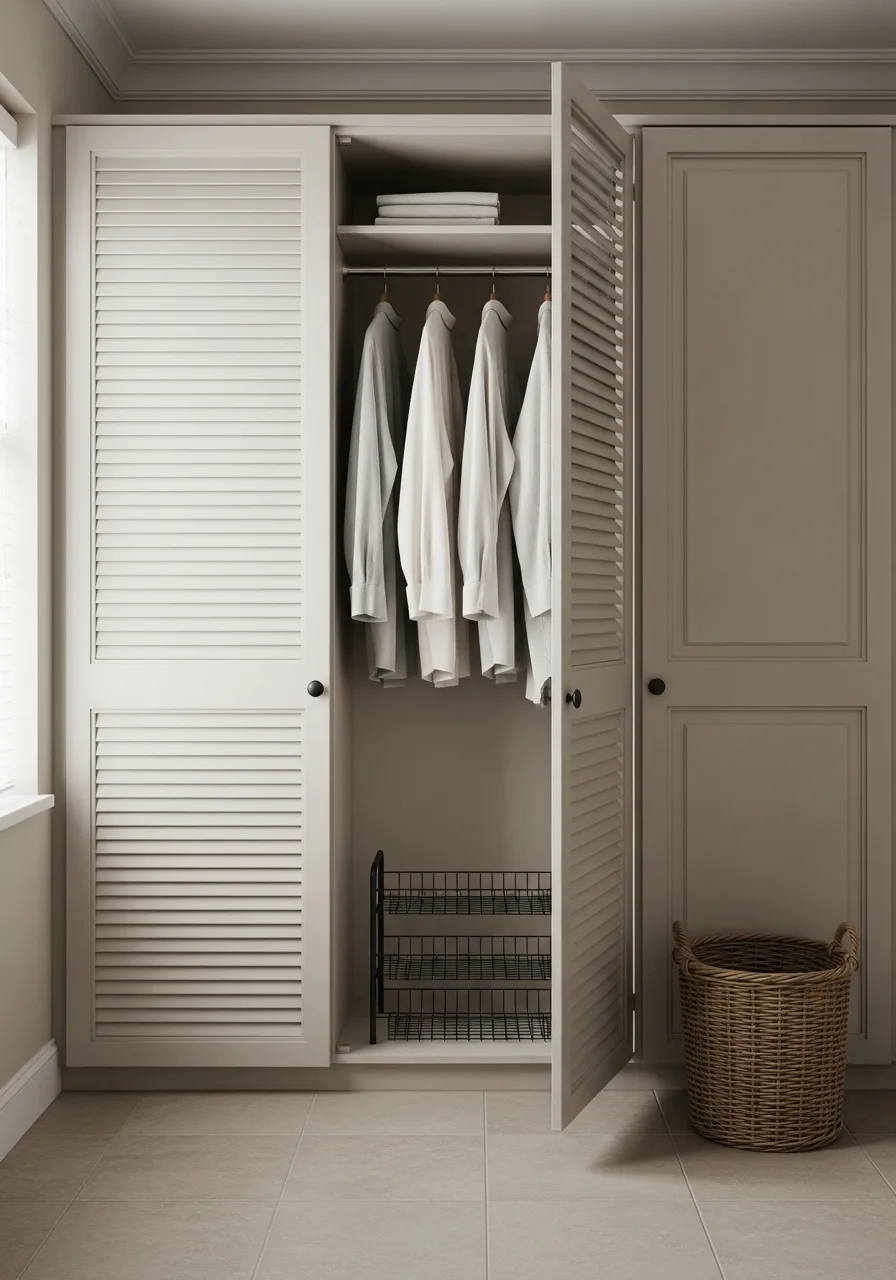
Dedicate a tall, narrow cabinet to air-drying clothes to keep the laundry room looking tidy. Include a hanging rail and removable mesh shelves for items that need to lay flat.
Include a drip tray at the bottom to protect the cabinet floor from moisture runoff. A ventilated door allows air to circulate so clothes dry quickly without odors.
- Louvered doors are the best choice to provide constant passive airflow.
- Add a small battery-operated fan inside to significantly decrease drying time.
- Paint the interior with moisture-resistant bathroom paint to prevent mold.
Best shortcut: Use plastic or velvet hangers inside the cabinet to prevent wood hangers from warping in the humidity.
13. Ceiling Mounted Drying Rack
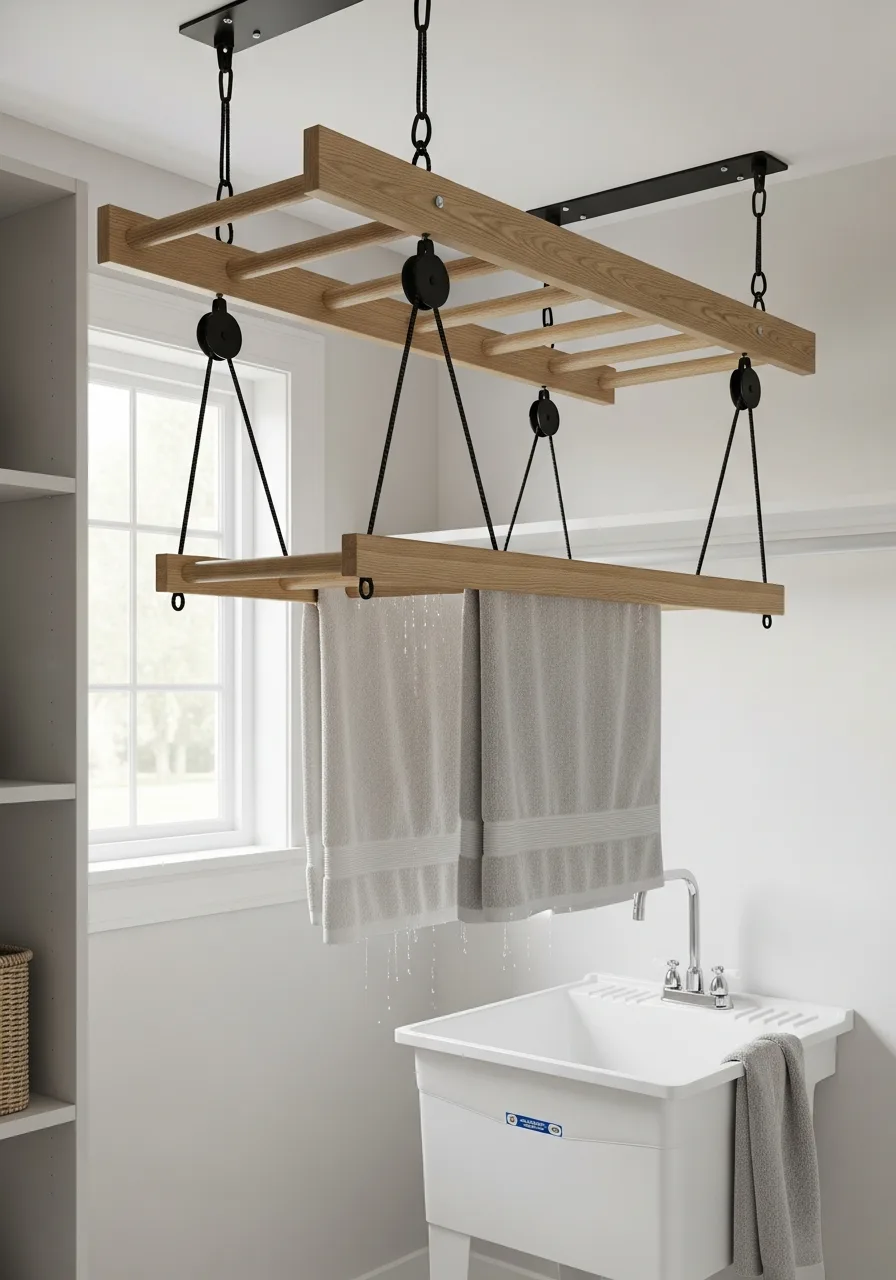
Suspend an adjustable drying rack from the ceiling to utilize the warmest air in the room. A pulley system makes it simple to lower the rack for loading and raise it out of the way.
Position the pulley system away from light fixtures to avoid casting large shadows while you work. This is the ultimate space-saver for small laundry rooms with high ceilings.
- Requires a solid ceiling joist for safe mounting of the pulley hooks.
- Pulleys should be oiled once a year to ensure smooth and quiet operation.
- Choose a rack with at least six rungs to handle a full load of laundry.
Most people skip this: Install the pull-rope cleat at a height that is out of reach for children but easy for adults.
14. Hanging Rod Between Cabinets
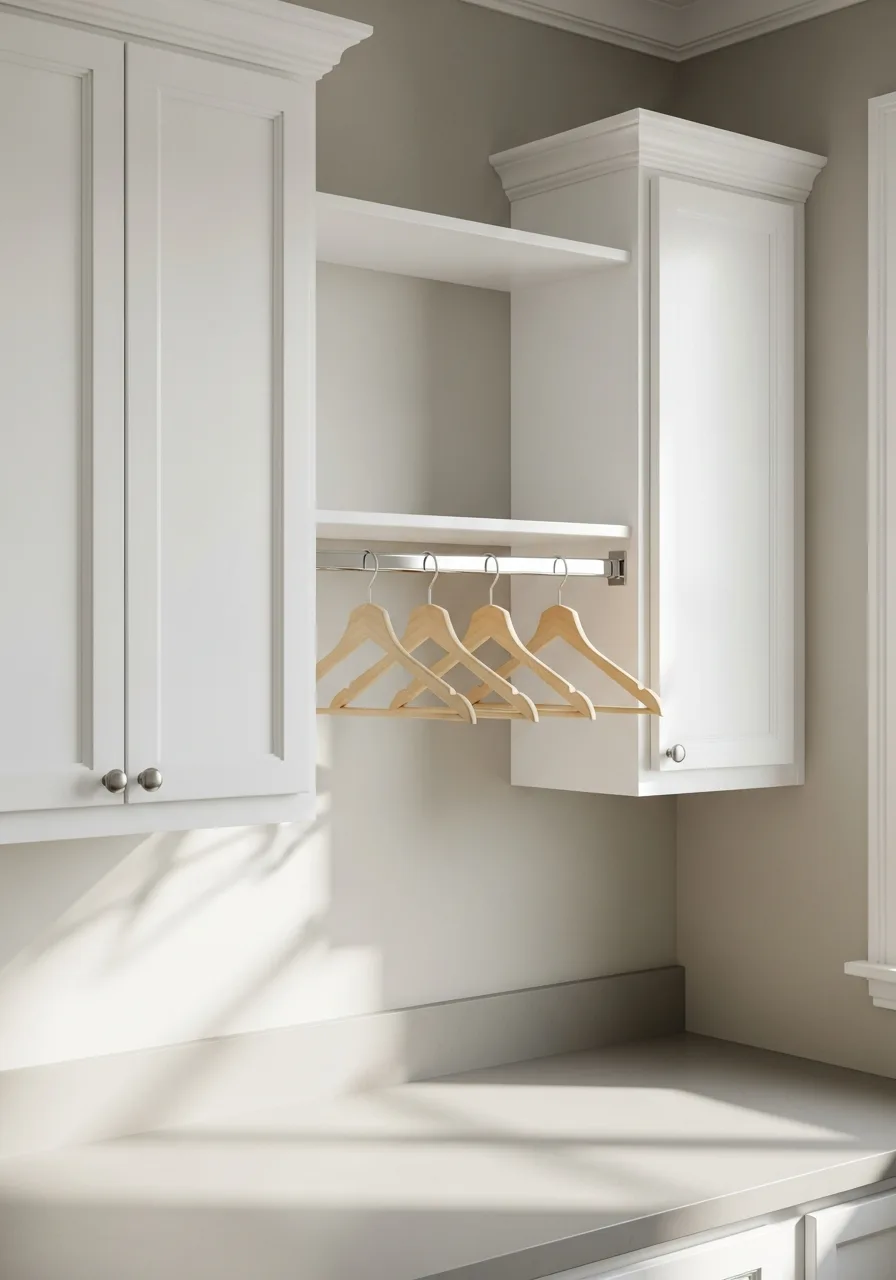
Install a simple clothing rod in the open space between two upper cabinets. This creates an immediate spot for hanging freshly ironed clothes or damp garments.
Secure the rod into the sides of the cabinets using heavy-duty flange brackets for maximum stability. It keeps clothes organized and wrinkle-free until they can be moved back to closets.
- Standard closet rods can be cut to fit any custom width between cabinets.
- Metal rods are better than wood for hanging damp items as they won't warp.
- Installation takes less than twenty minutes with a drill and four screws.
Quick win: Use the space above the rod for a small shelf to hold extra hangers or lightweight baskets.
15. Hanging Rail Under Shelf
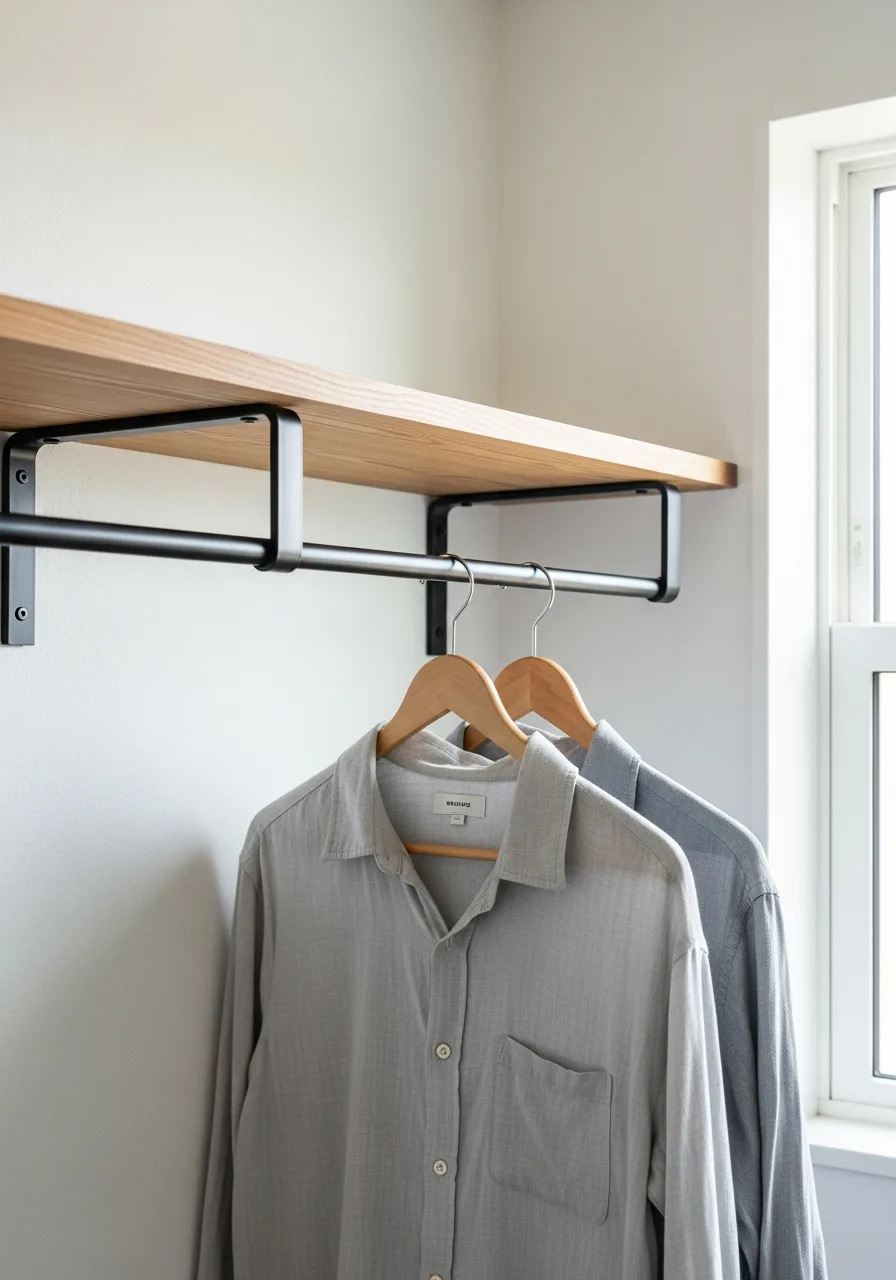
Attach a short rail beneath a floating shelf to combine hanging space with storage above. This is a great way to maximize wall space when you don't have room for full cabinets.
Place the rail high enough so that long shirts do not touch the countertop or machines below. It provides a dedicated zone for air-drying or temporary storage.
- Ensure the shelf brackets are rated for the extra weight of hanging clothes.
- Use a rail that matches your room's hardware finish for a cohesive look.
- The shelf above can hold detergent jars or decorative bins for a finished appearance.
Best shortcut: Choose a rail with 'S' hooks to hang smaller items like hats, bags, or cleaning brushes.
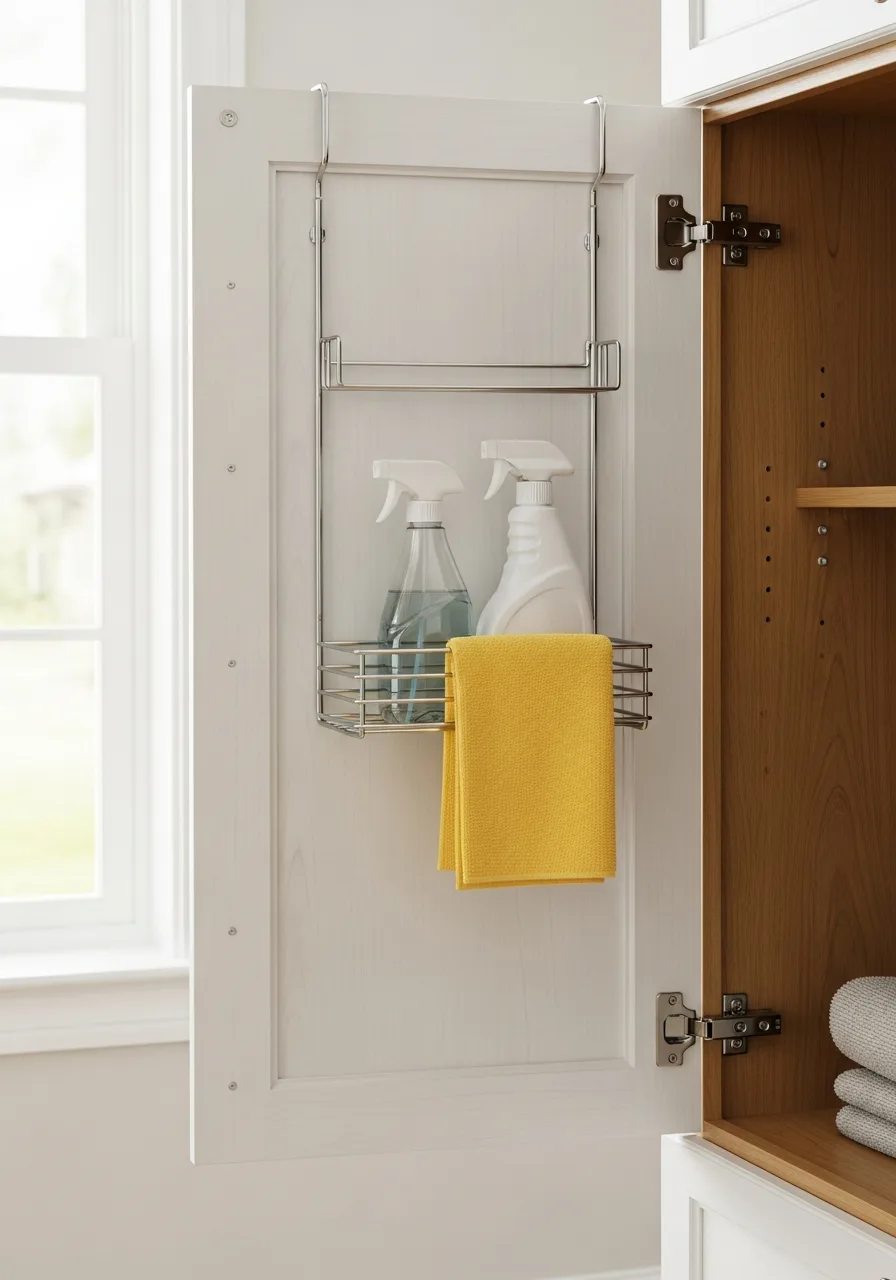
16. Over the Door Organizer
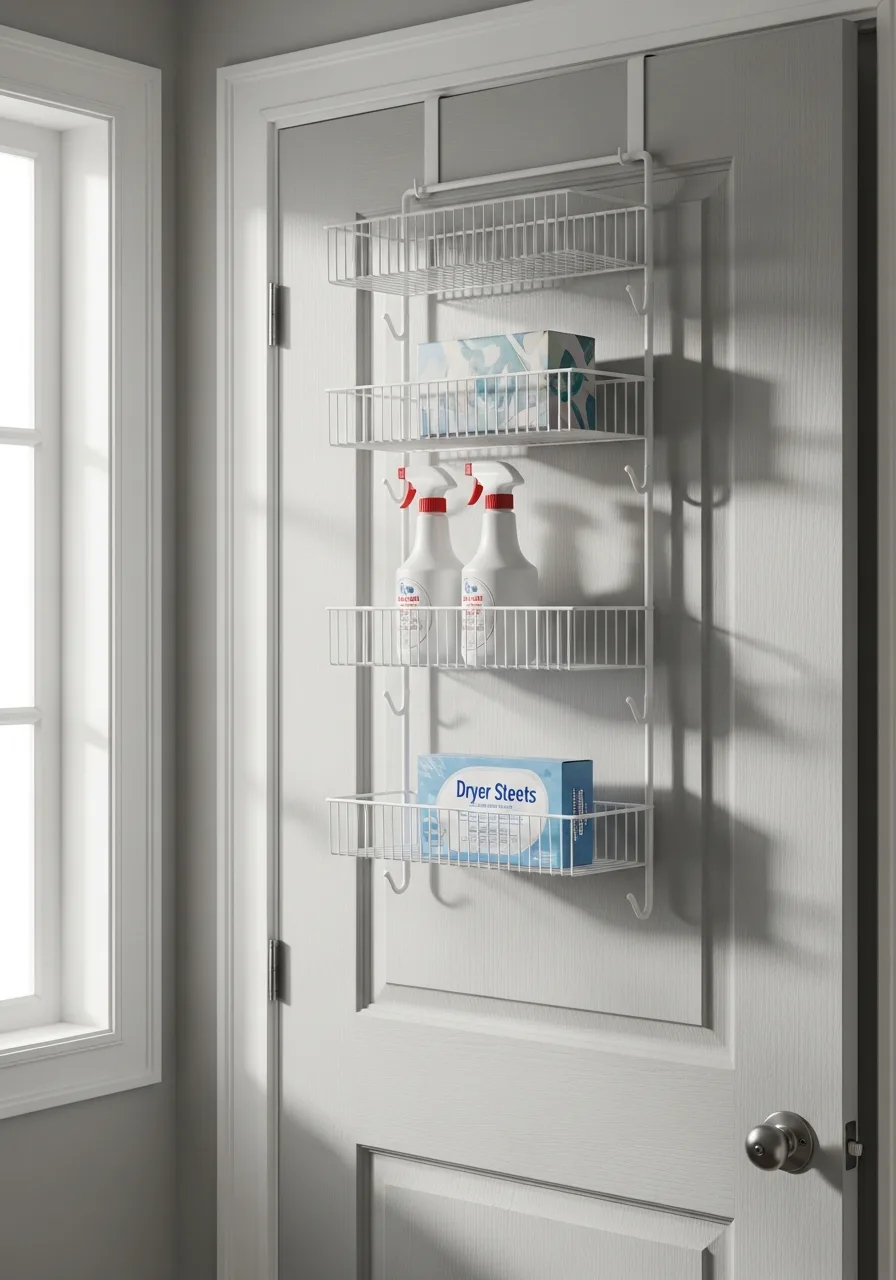
Use the back of the door to gain storage without taking up any floor space. These racks are perfect for holding clothespins, small bottles, and cleaning cloths.
Hang a multi-pocket wire rack to keep daily cleaners at eye level for quick access. This setup is the best way to keep a small room feeling open and tidy.
- Budget-friendly wire or fabric organizers cost under thirty dollars.
- Hook the unit over the top of the door and use adhesive strips at the bottom to prevent swinging.
- Choose clear pockets for fabric versions so you can identify small items like sewing kits instantly.
Quick win: Use the bottom pockets for heavy spray bottles to keep the rack stable when the door moves.
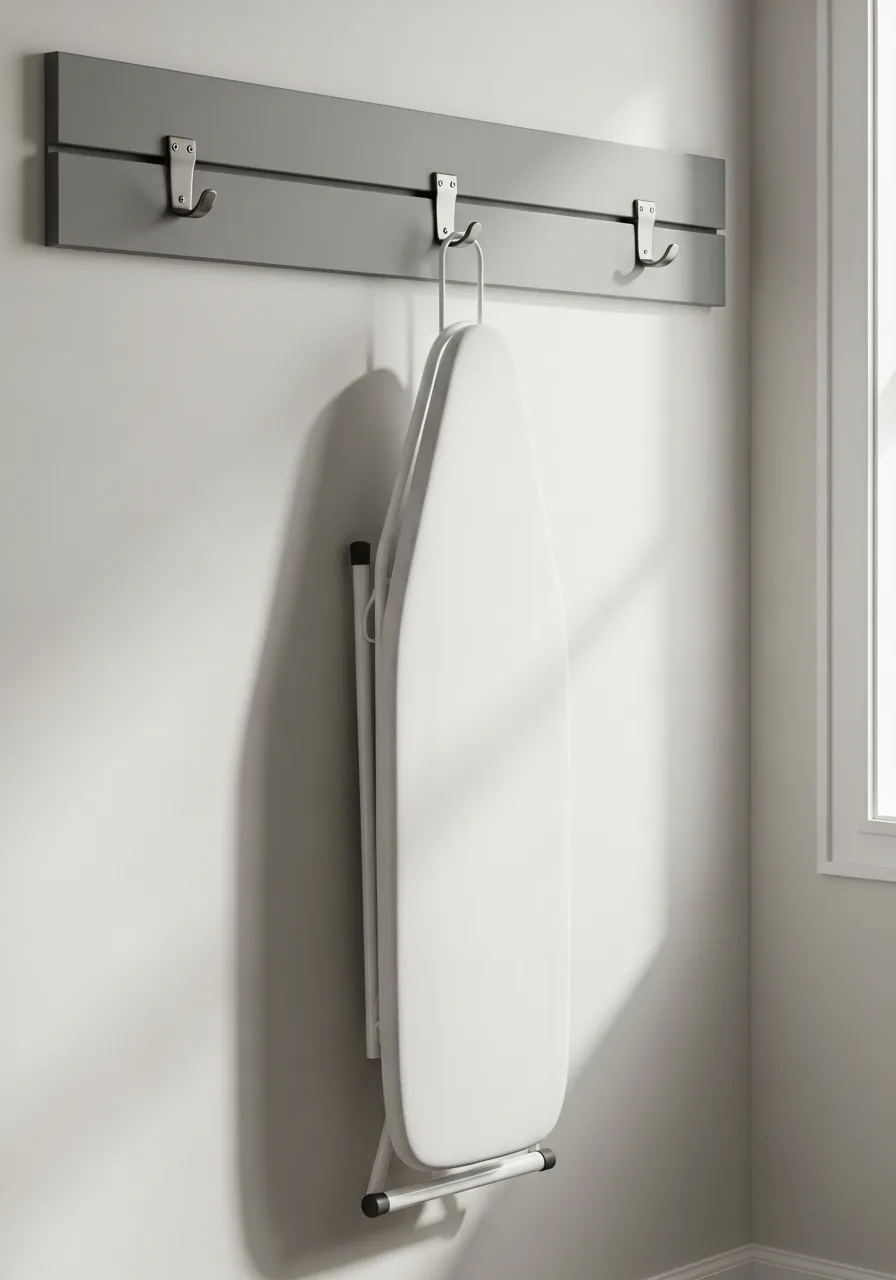
17. Door Mounted Ironing Board
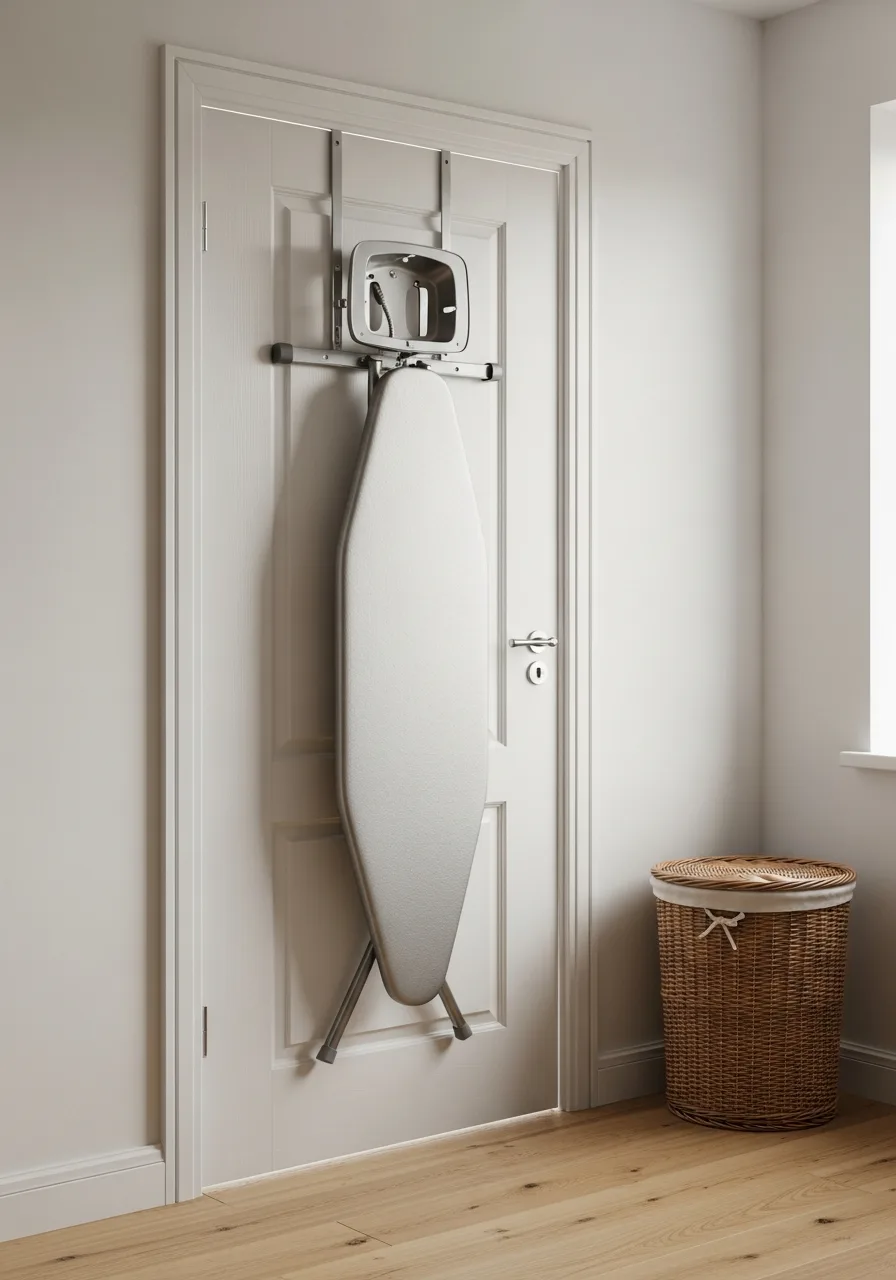
A fold-down ironing board attached to a door stays hidden until you need it. It eliminates the struggle of unfolding a heavy, standalone board every time a shirt needs a quick press.
Mount the unit securely to the door frame so it does not rattle or shift during use. This is a top-tier solution for apartments or tight utility closets.
- Installation takes about twenty minutes with a basic power drill.
- Ensure the door has enough clearance to swing fully open with the board attached.
- Look for models with a built-in iron holder to keep all pressing tools in one spot.
Best shortcut: Buy a board with a pre-installed scorch-resistant cover to save time on maintenance.
18. Hidden Slide-Out Ironing Station
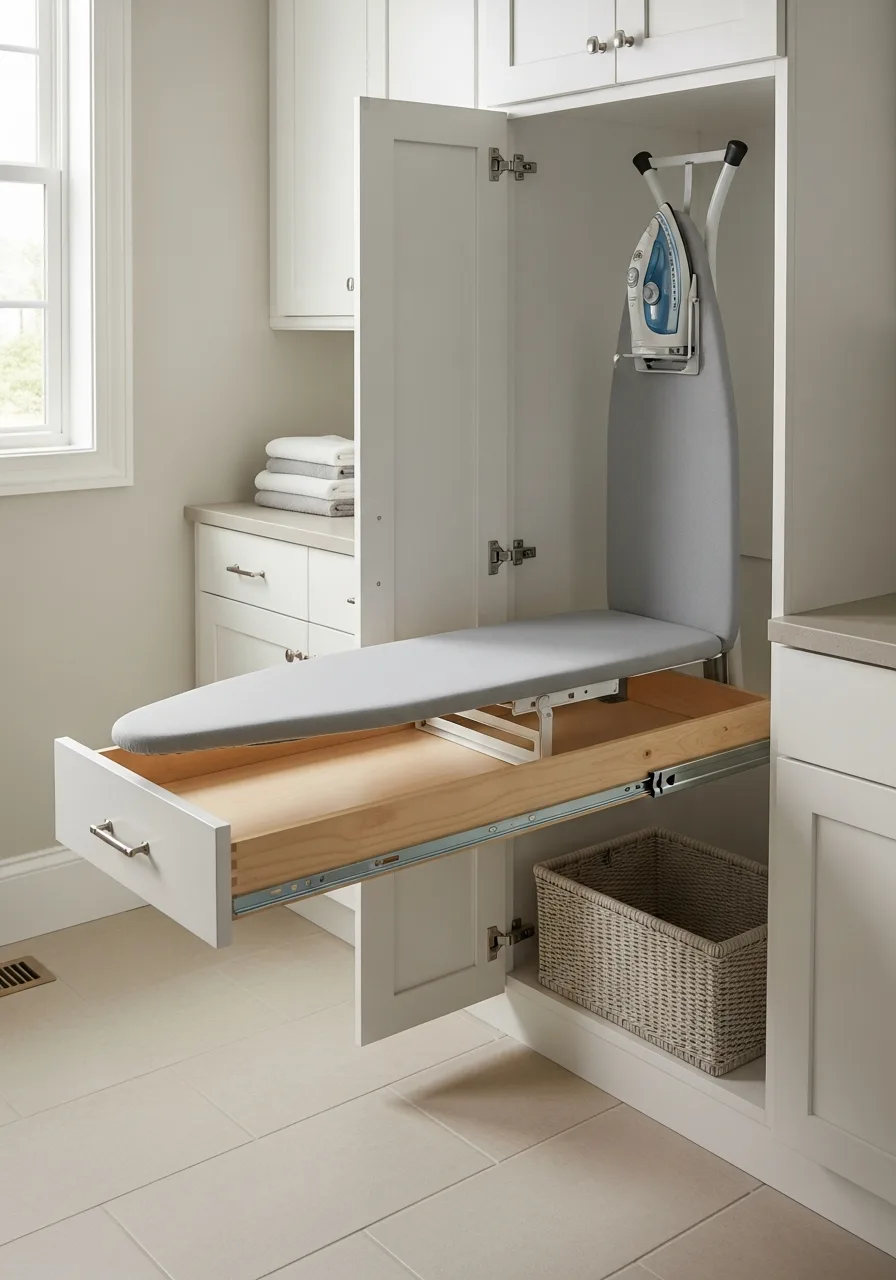
A pull-out ironing board integrates directly into cabinetry to eliminate the bulk of traditional freestanding boards. This specialized hardware replaces a standard drawer front, allowing for a full-size pressing surface that tucks away in seconds.
Install the unit at waist height to ensure ergonomic comfort during long sessions. High-quality ball-bearing slides are essential for stability, as flimsy tracks will cause the board to wobble under pressure.
- Hardware kits generally cost between $150 and $350 depending on the weight rating and swivel features.
- Mount the track system inside a standard 24-inch deep base cabinet to ensure the board has enough clearance to fully extend.
- Replace the standard cotton cover with a heat-reflective metallic version to decrease pressing time by retaining more heat.
Best shortcut: Choose a swivel-mount model to allow for ironing at multiple angles, which is especially helpful in narrow galley-style laundry rooms.
19. Tall Utility Cabinet
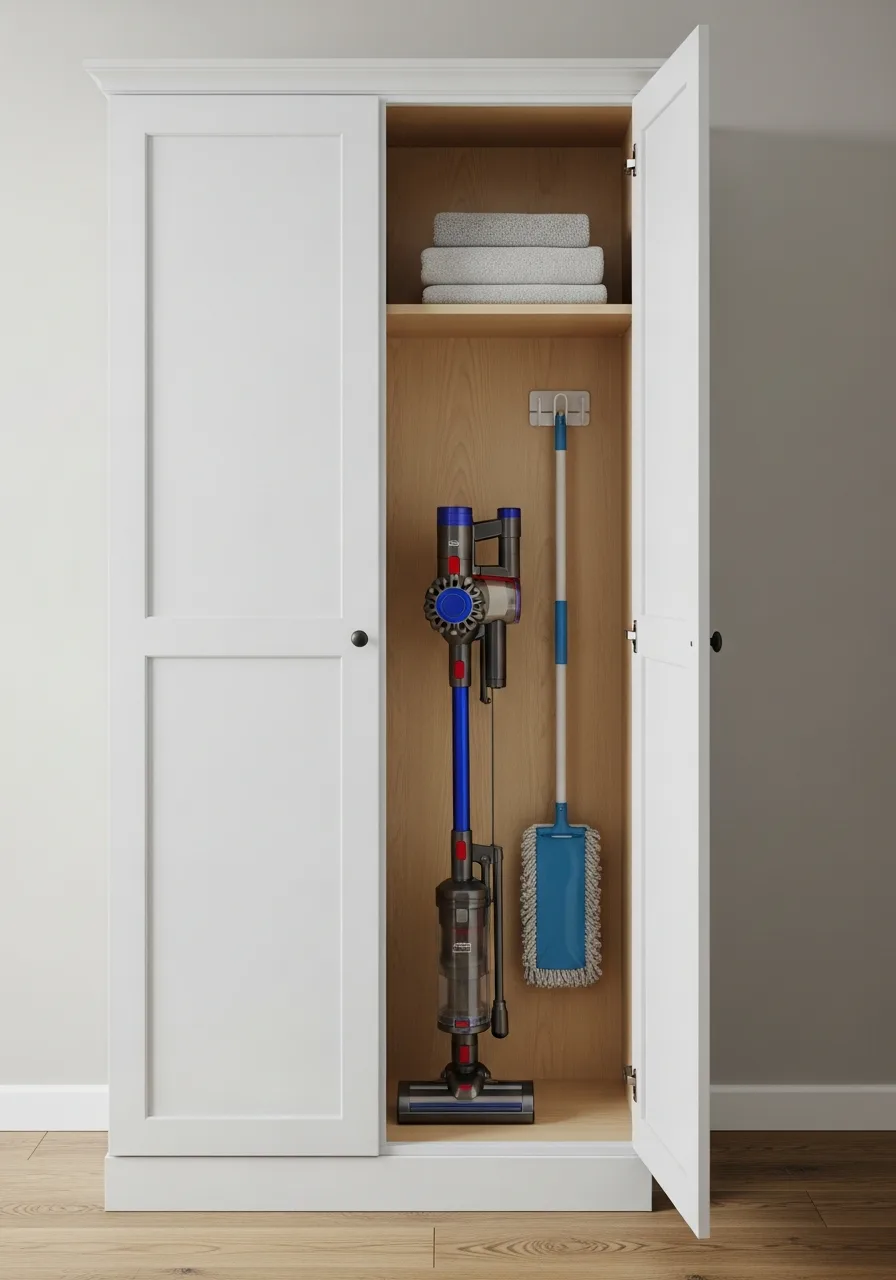
Use a full-height cabinet to store long items like mops, brooms, and vacuum attachments. This keeps bulky cleaning tools from leaning against the walls or falling over.
Install adjustable shelves above the tall tool section for vacuum filters and floor cleaners. A dedicated tall space is the only way to truly hide the mess of cleaning equipment.
- Stock cabinets are available at most home centers for a quick weekend upgrade.
- Line the bottom with a waterproof mat to protect the wood from damp mop heads.
- Add a battery-powered light inside the top so you can see into the deep corners.
Quick win: Use a command hook on the inside of the door to hold the vacuum cord or a dustpan.
20. Custom Broom Closet
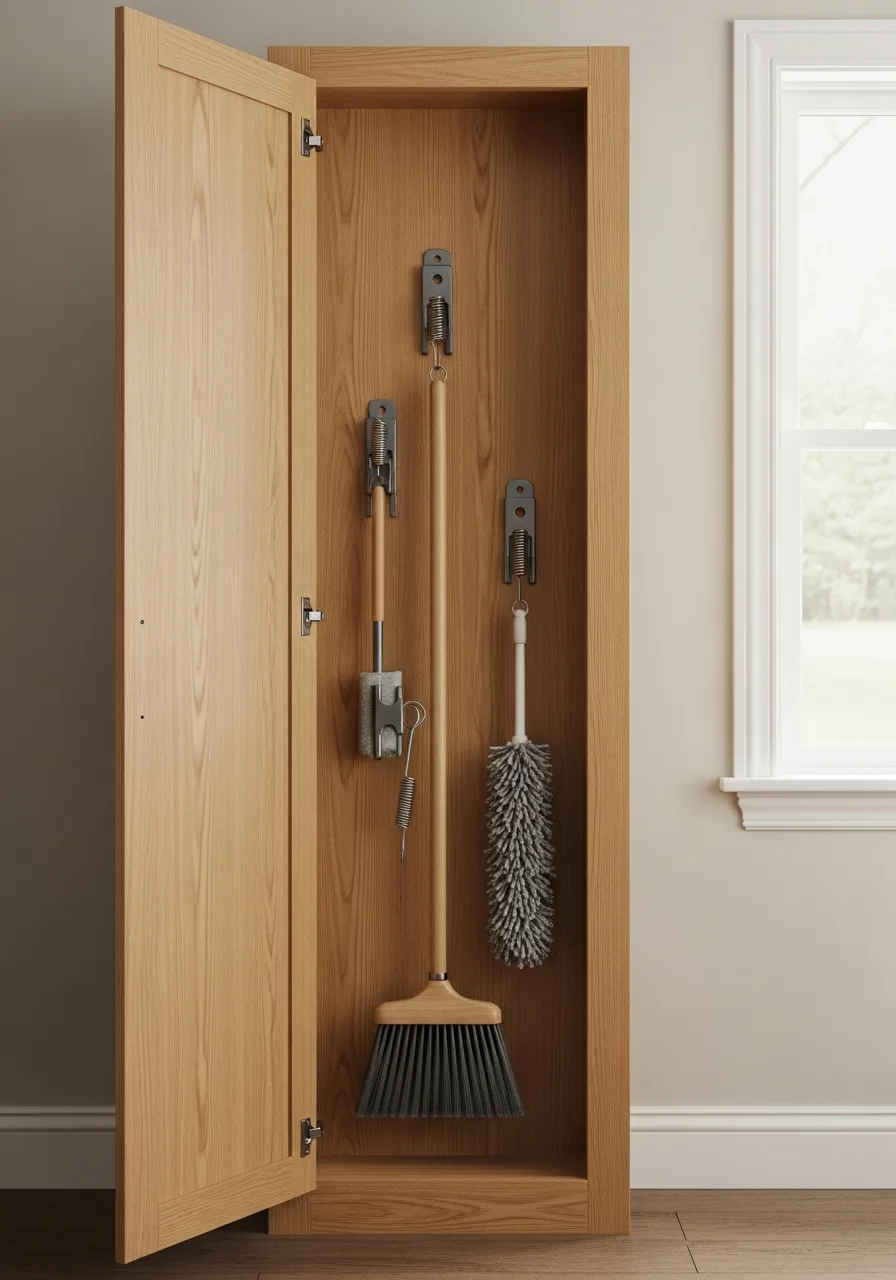
Create a narrow cabinet specifically for your cleaning tools to keep them upright and organized. Include specialized clips for handles and a small shelf for the dustpan.
Add a small motion-sensor light inside the closet so you can find tools quickly in a dark corner. Narrow closets are great for using up those odd six-inch gaps in a room layout.
- Custom builds can be sized to fit the exact width of your vacuum cleaner.
- Mount handle clips at different heights so broom heads do not overlap and take up extra width.
- Use a pegboard backing inside the closet for maximum flexibility with hook placement.
Best shortcut: Use spring-loaded tension clips instead of hooks so you can grab tools with one hand.
21. Open Basket Cubbies
Build square cubbies to create flexible storage for towels and cleaning supplies. Using matching baskets hides the visual noise of mismatched bottles and rags.
Measure your baskets before building the cubbies to ensure a snug and clean fit. This creates a high-end, custom look without the high cost of cabinet doors.
- Standard cubby inserts can be assembled in less than an hour.
- Place heavier items like gallon jugs in the bottom row for better stability.
- Swap out baskets seasonally to change the look of the room without painting.
Most people skip this: Leave a half-inch of wiggle room on the sides of the basket so they slide out easily without scratching the wood.
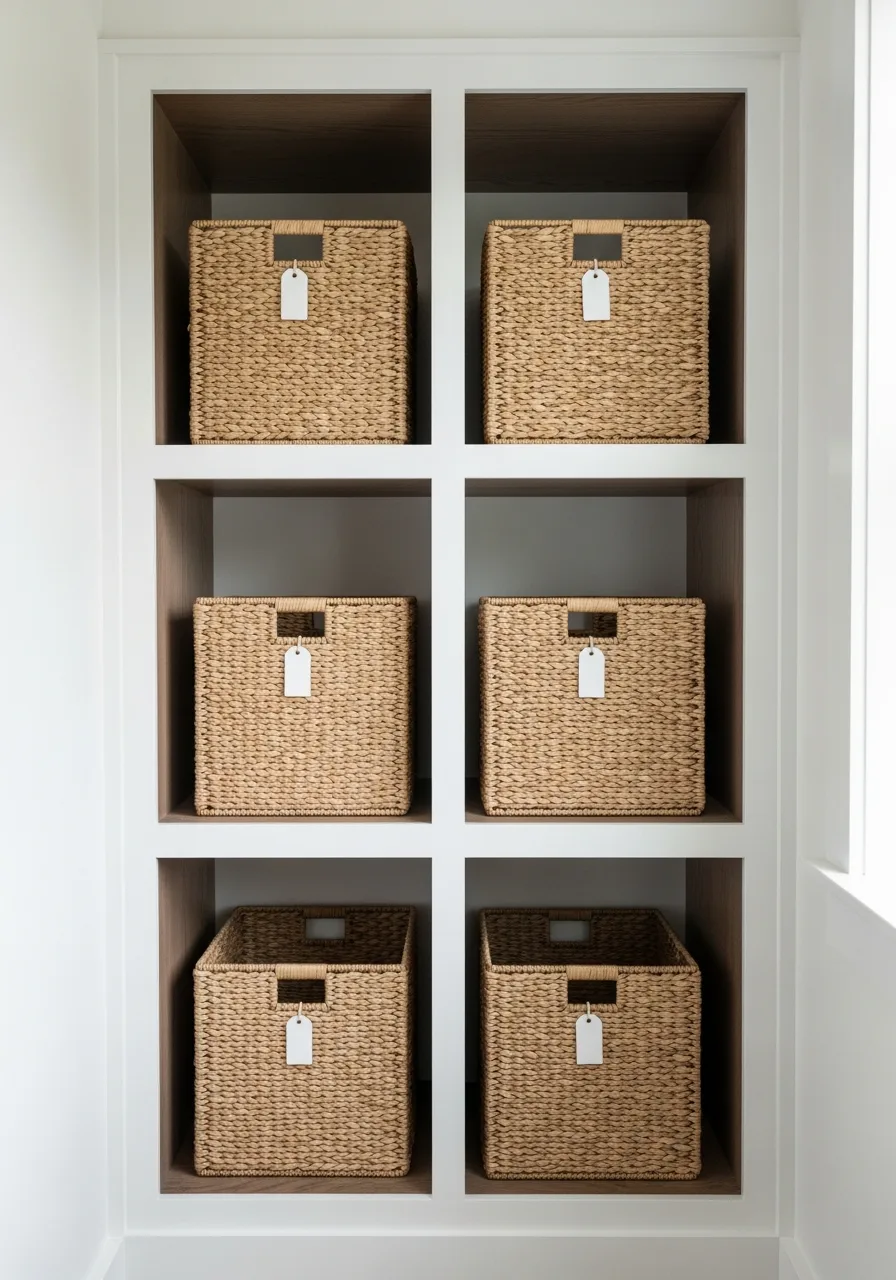
22. Labeled Storage Baskets

Group your supplies by how you use them to save time during chores. Categories like stain treatment or pet laundry keep everyone in the house on the same page.
Use clip-on metal labels so you can change the category as your household needs evolve. Baskets prevent small bottles from getting lost in the back of deep shelves.
- Canvas or plastic bins are durable and easy to wipe down if a bottle leaks.
- Keep the most-used basket at waist height for better ergonomics.
- Use a separate basket for 'to be repaired' items like loose buttons or fallen hems.
Quick win: Use a chalk marker on metal labels for a clean look that is easy to erase and rewrite.
23. Clear Containers for Products
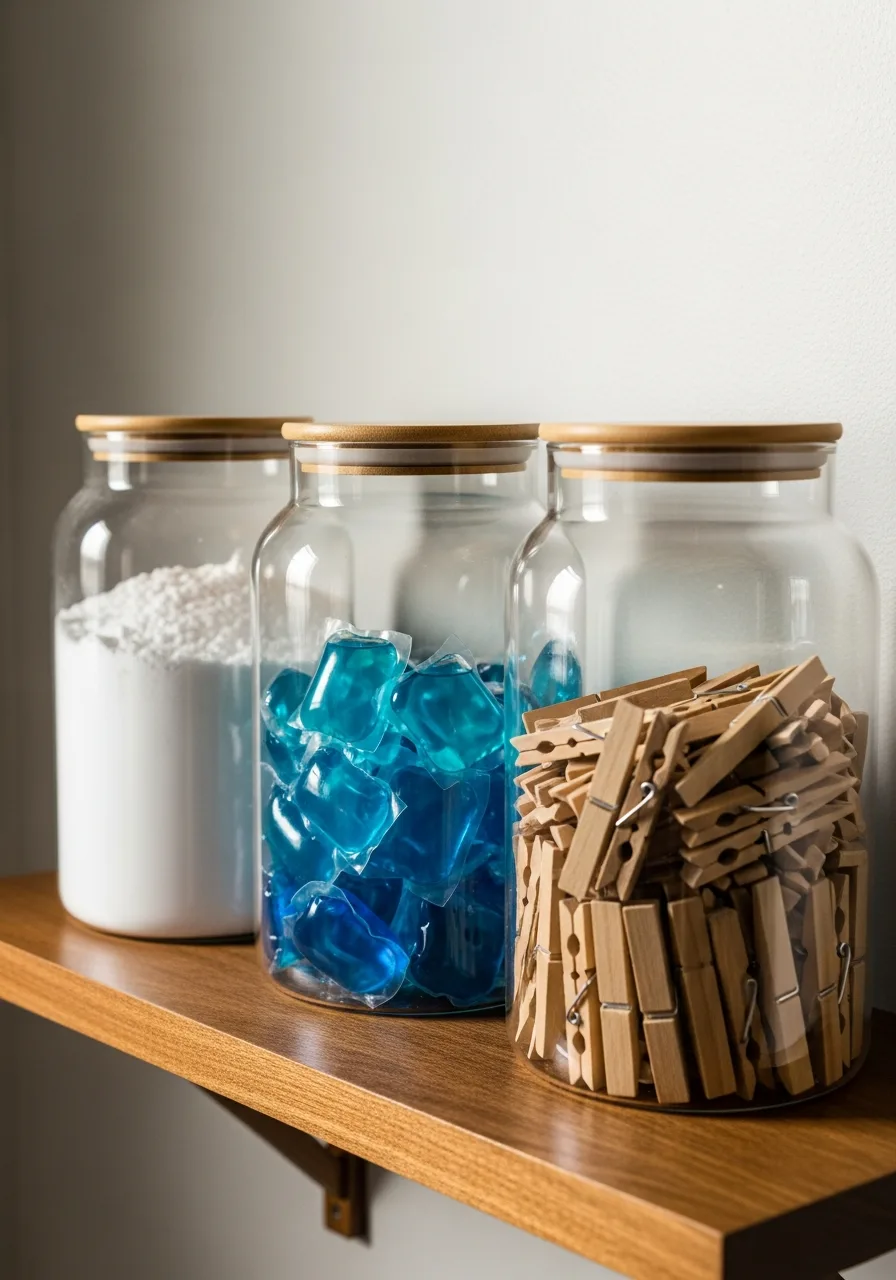
Move powdered detergents and laundry pods into clear glass or plastic jars. This allows you to see exactly when you are running low before you start a load.
Select containers with airtight gaskets to keep laundry pods from drying out or clumping in humid weather. It turns basic supplies into a clean and intentional design element.
- Glass jars offer a classic look, while acrylic is safer for homes with children.
- Include a stainless steel or wooden scoop inside each jar for easy measuring.
- Wipe the rims of the jars weekly to prevent powder buildup from breaking the seal.
Best shortcut: Keep the original product labels or instructions taped to the bottom of the jar for safety and reference.
24. Drawer Dividers for Supplies
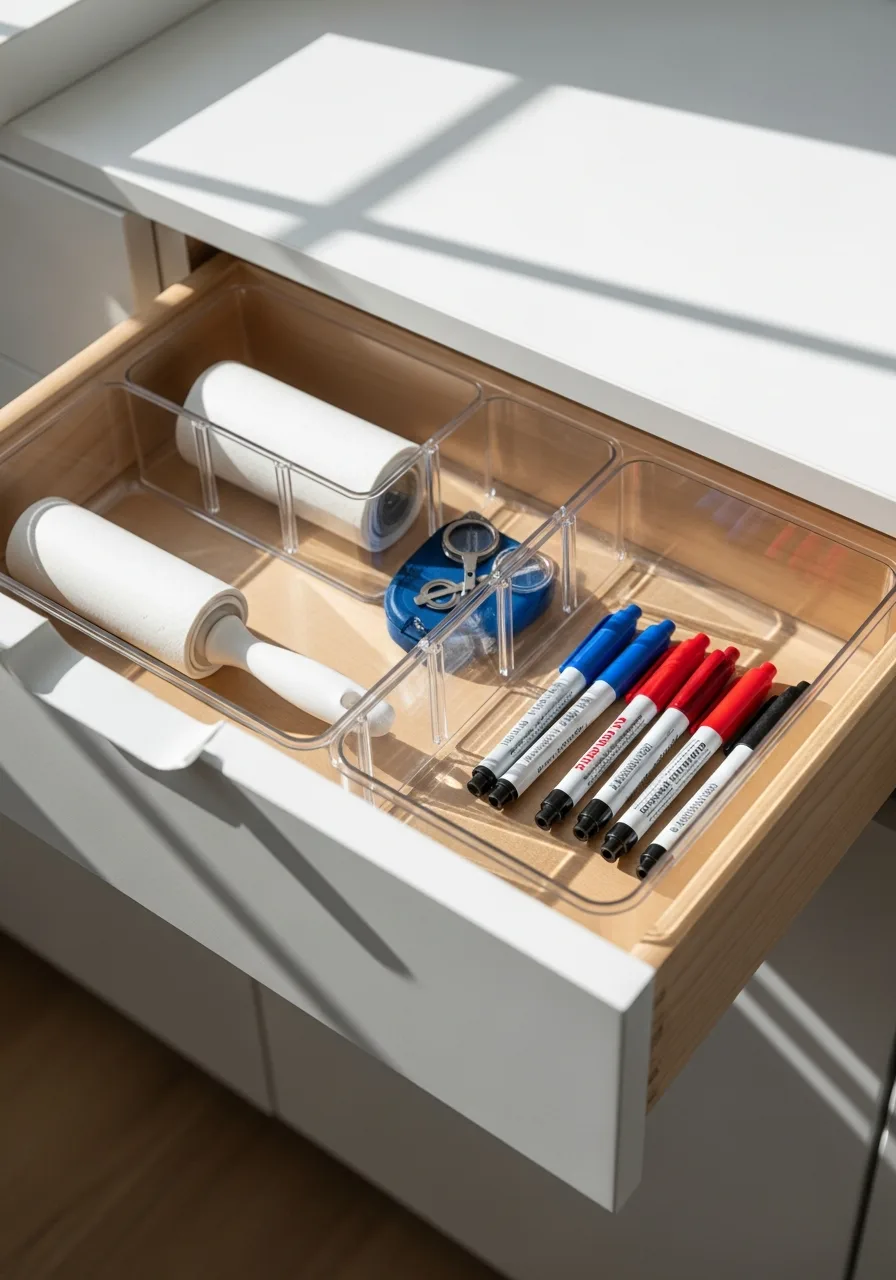
Keep lint rollers, stain sticks, and sewing kits from sliding into a messy pile. Dividers create a permanent home for every small tool you own.
Use adjustable tension dividers to customize the layout for different bottle heights and tool lengths. Organized drawers save minutes every day because you never have to dig for a spare button.
- Bamboo or plastic dividers can be installed in seconds with no tools required.
- Line the drawer with a non-slip grip mat before adding dividers to keep everything silent.
- Dedicate one section specifically for 'found' items like coins or pocket scraps.
Quick win: Group items by frequency of use, putting the lint roller right at the front.
25. Under Sink Pull Out Storage
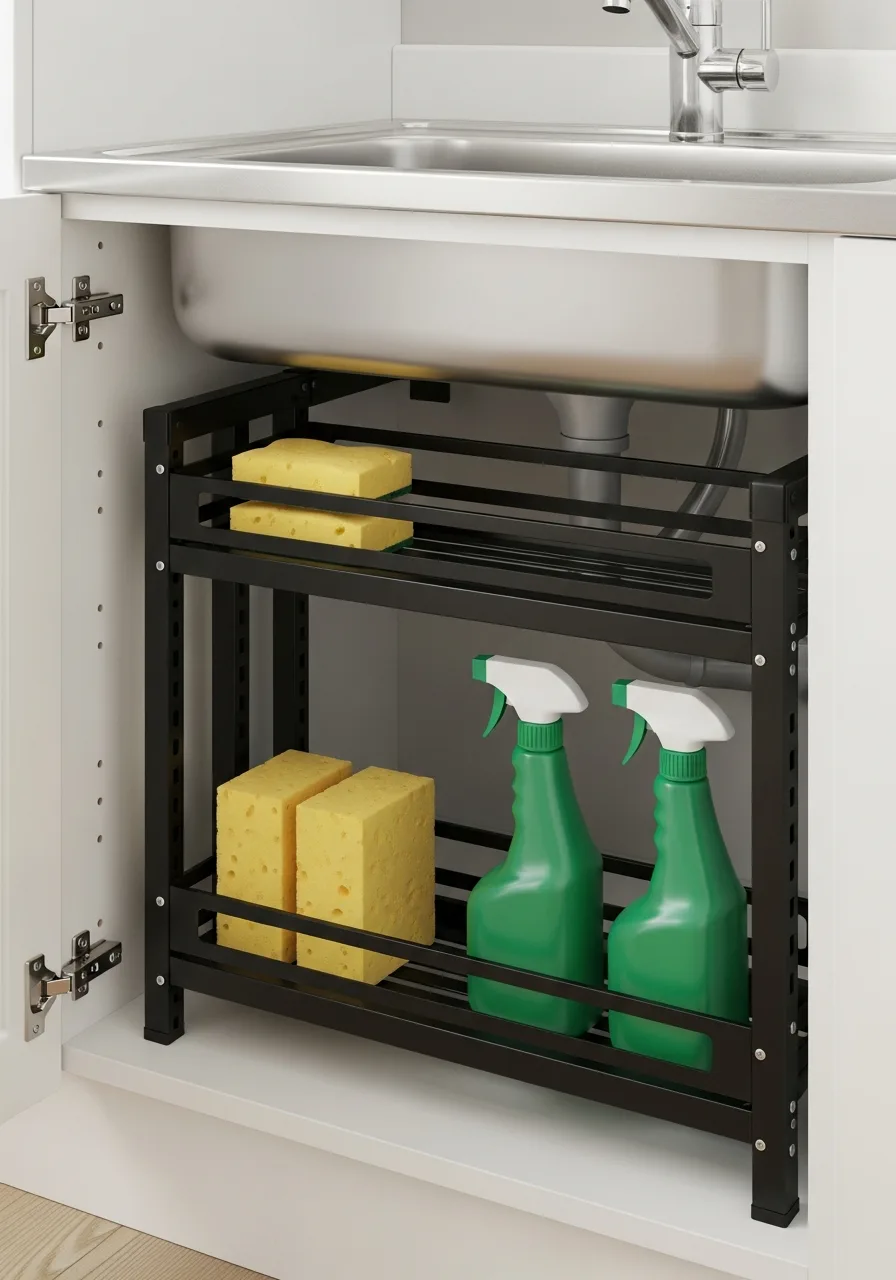
The space under a laundry sink is often wasted because of awkward plumbing. Sliding organizers fit around the pipes to help you reach items stored at the very back.
Opt for a two-tier sliding unit to double the usable area in a deep base cabinet. It prevents you from buying duplicates of cleaners you forgot you had.
- Measure the height of your plumbing trap before buying a two-tier unit.
- Use heavy-duty plastic trays that catch drips to protect the cabinet floor.
- Store bulk refill bottles on the bottom and daily sponges on the top.
Most people skip this: Check that the slider clears the cabinet door hinges when it is fully extended.
26. Sink Cabinet Door Racks
Use the back of the cabinet door to hold your most-used spray bottles. This keeps them right at your fingertips without cluttering the main shelf.
Check the clearance inside the cabinet to make sure the rack does not hit internal shelves when the door closes. Small racks are also perfect for drying out damp sponges or gloves.
- Screw-in racks offer the most stability for heavy liquid bottles.
- Adhesive versions are great for renters who cannot drill into the cabinetry.
- Mount the rack high enough that bottles do not hit items on the cabinet floor.
Best shortcut: Use a rack with a built-in towel bar to hang your dishcloths or rubber gloves.
27. Pegboard Storage Wall
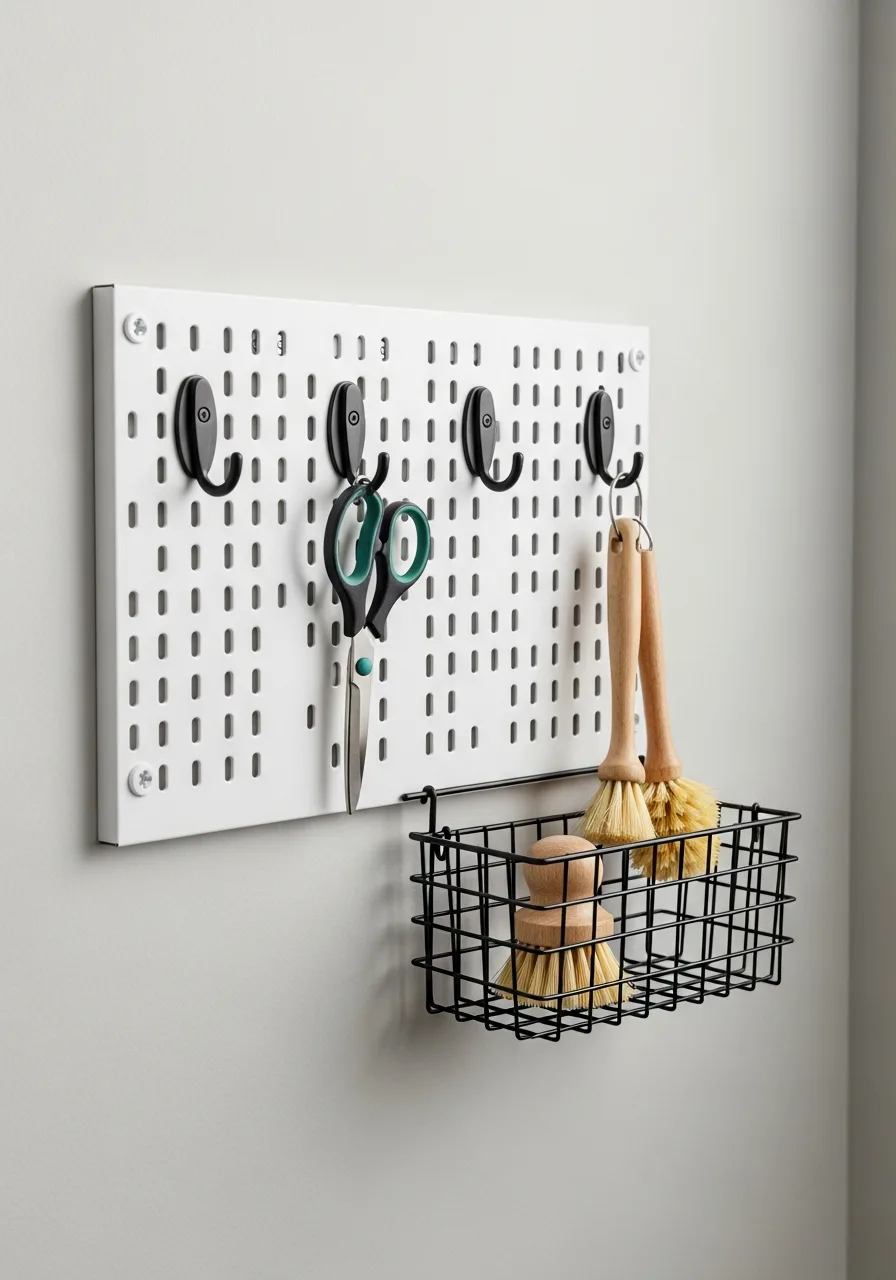
Mount a pegboard to turn a blank wall into a customizable tool station. You can move the hooks and baskets around as your laundry routine changes over time.
Paint the pegboard the same color as your wall for a seamless, built-in appearance that feels modern. It is the most versatile way to store odd-shaped items like scissors and brushes.
- Metal pegboards are more durable than traditional fiberboard and easier to clean.
- Use 'peg locks' to keep the hooks from falling out every time you grab a tool.
- Mix hooks with small shelves to hold light items like lint rollers or tape.
Quick win: Outline your tools with a marker on the board so you always know exactly where they go back.
28. Slatwall Organization System
A slatwall system provides heavy-duty support for larger items like ironing boards and heavy baskets. The horizontal grooves allow you to slide accessories into any position along the wall.
Install the panels from floor to ceiling to make the most of a narrow wall in a tight room. This system is much stronger than standard drywall hooks for heavy equipment.
- PVC slatwalls are waterproof and hold up well in humid laundry environments.
- Look for 'garage-grade' accessories for the strongest hold on heavy items.
- Use wide baskets on the slatwall to hold bulk paper towels or extra linens.
Most people skip this: Locate your wall studs and screw the panels directly into them for maximum weight capacity.
29. Magnetic Storage Beside Washer
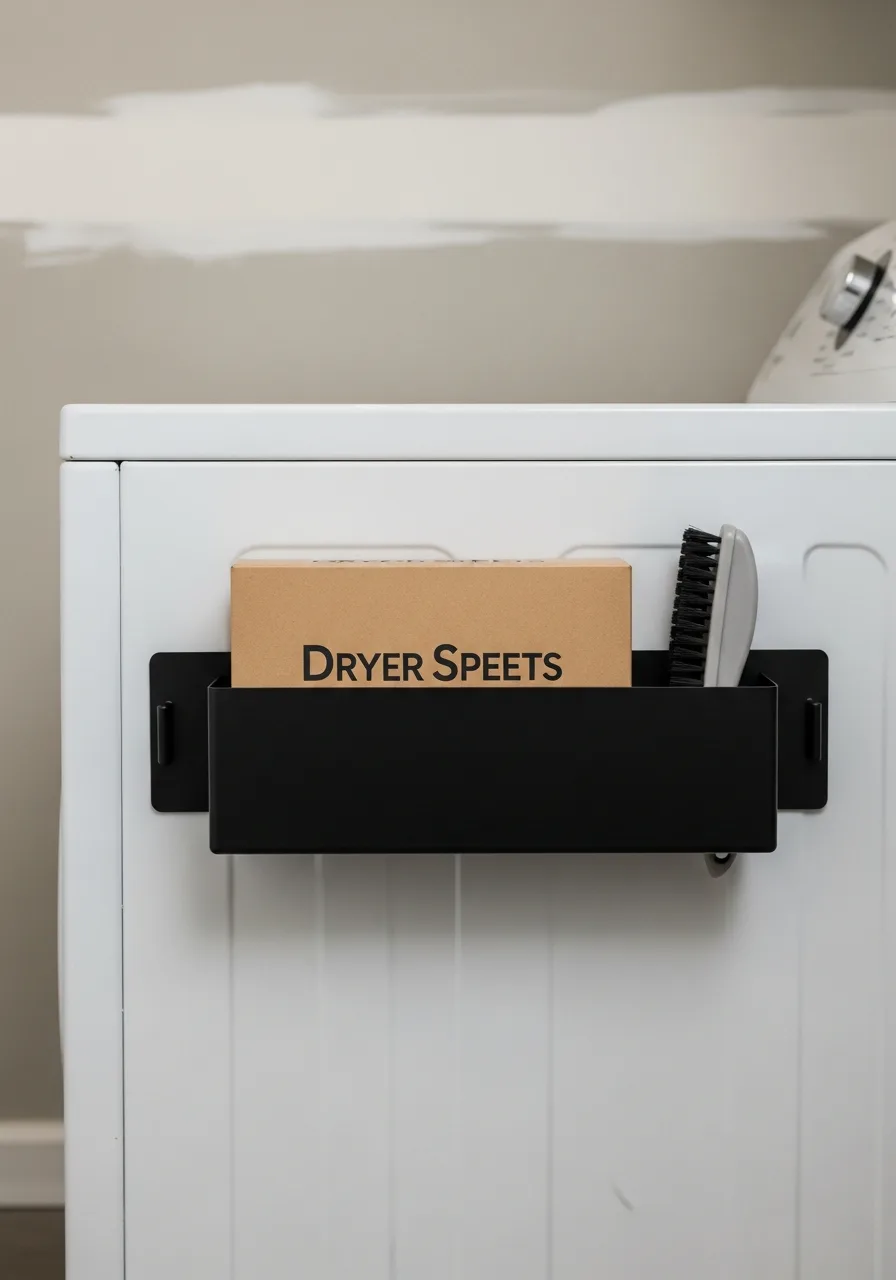
The metal side of your washing machine is an untapped storage zone. Magnetic bins and hooks can hold dryer sheets, lint brushes, or even lost socks.
Choose magnets with a rubber coating to prevent scratching the white finish on your expensive appliances. It is the best way to utilize the tiny four-inch gap often found between machines.
- No installation or tools are required; just stick the bin to the metal surface.
- Check that the magnet is strong enough to stay in place during the spin cycle.
- Use a magnetic hook to hang a small mesh bag for delicate items waiting to be washed.
Best shortcut: Place a magnetic cup near the dryer to collect loose change or hair ties found in pockets.
30. Lost Sock Storage Basket
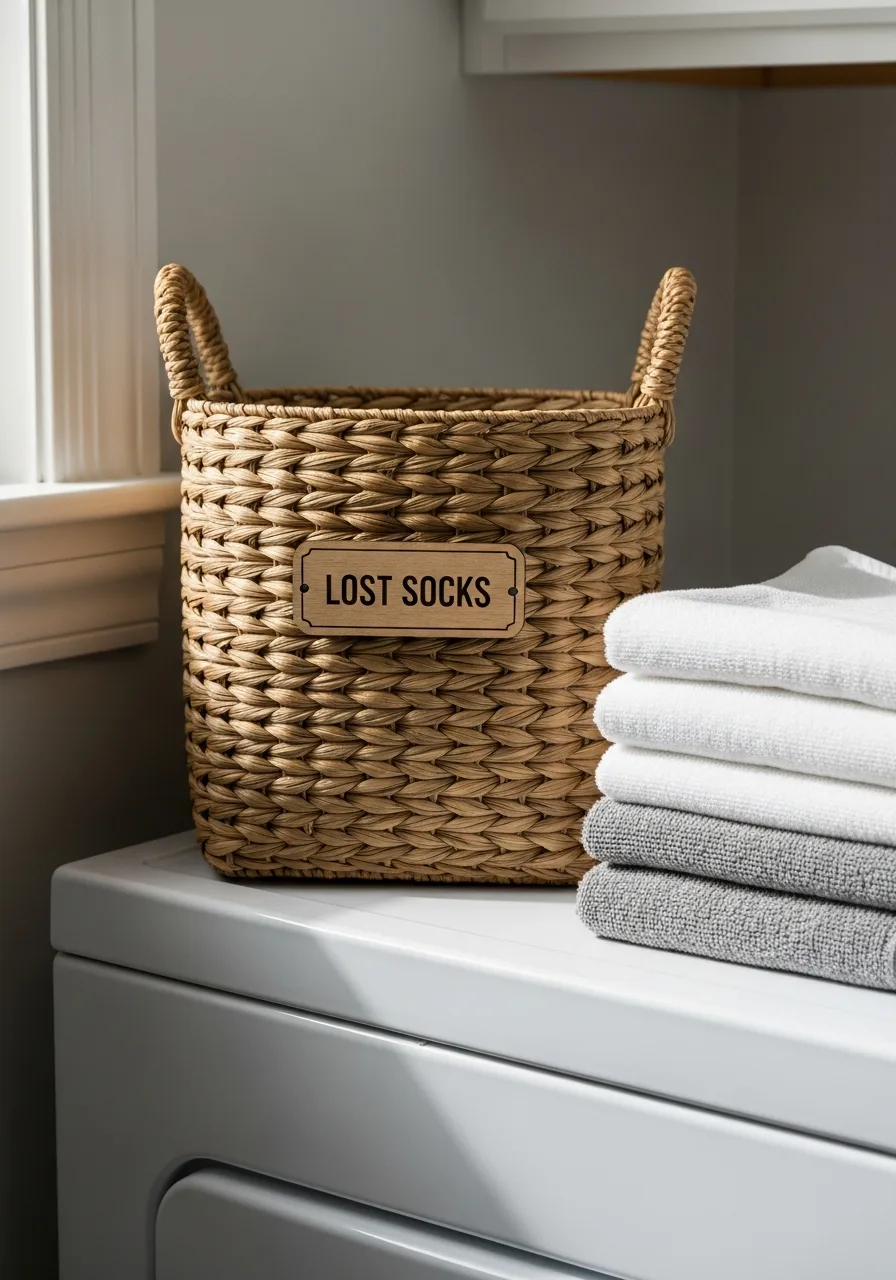
Give single socks a designated home while they wait for their missing partners to show up. A small basket or wall bin keeps them from cluttering up the clean folding surface.
Place the basket directly on top of the dryer so it is easy to toss in lone items as you fold. It ends the mystery of the growing sock pile on the floor.
- A small wicker or fabric basket takes up very little space on a countertop.
- Empty the basket once a month to donate any items that are still missing a match.
- Use a wall-mounted bin if you have no counter space above your machines.
Quick win: Clip a few clothespins to the side of the basket to hang very small items like baby socks or mittens.
31. Dedicated Linen Cabinet
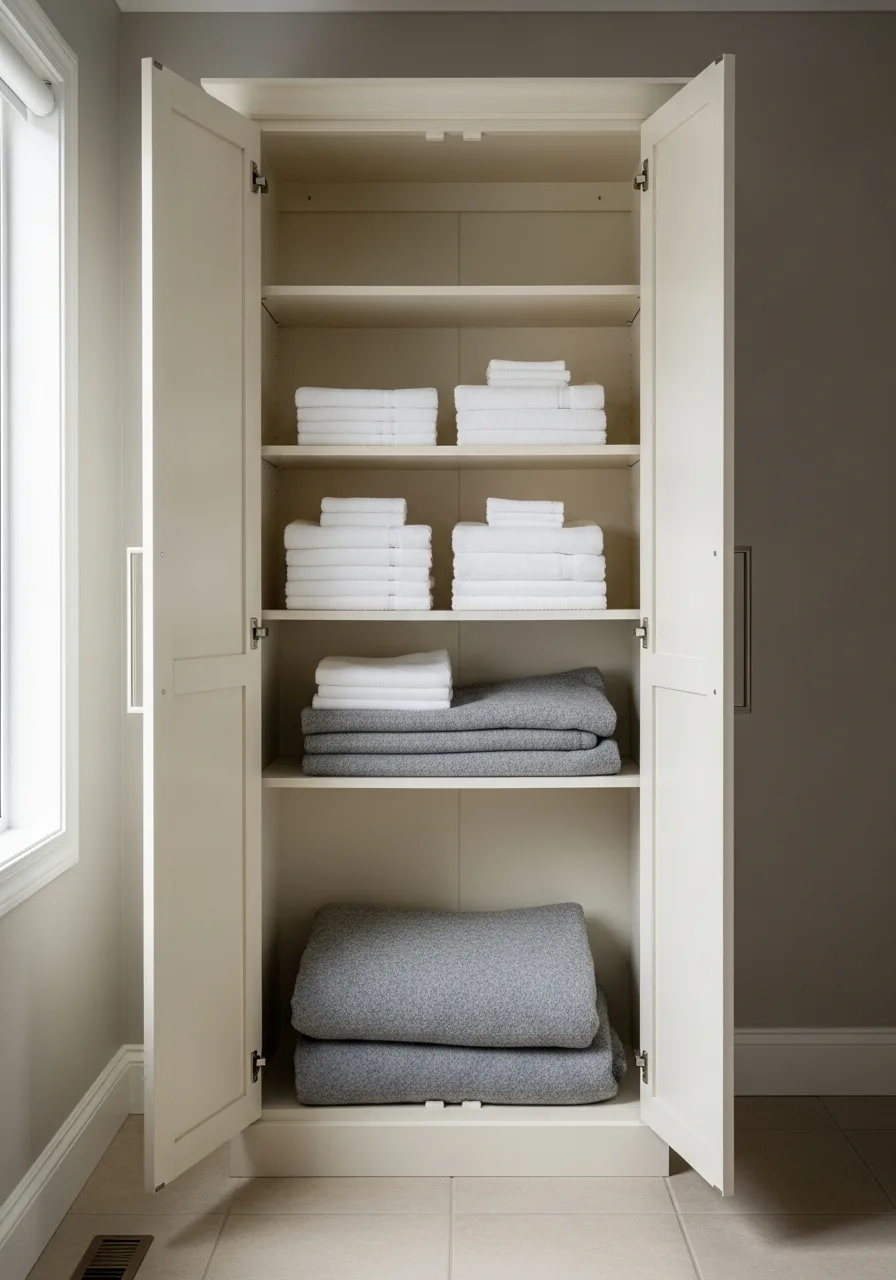
Reserve one tall cabinet for towels, sheets, and household linens. Separate categories with shelves or baskets so stacks remain easy to manage.
Store heavy quilts on the lowest shelves to keep the unit stable and make them easier to pull out. It is best to fold everything to a uniform width so the cabinet looks tidy even when full.
- 15-minute organization task
- Group by room or fabric type
- Use shelf risers for short stacks
Best shortcut: Fold sheets inside their matching pillowcases to keep sets together.
32. Roll-Out Linen Drawers
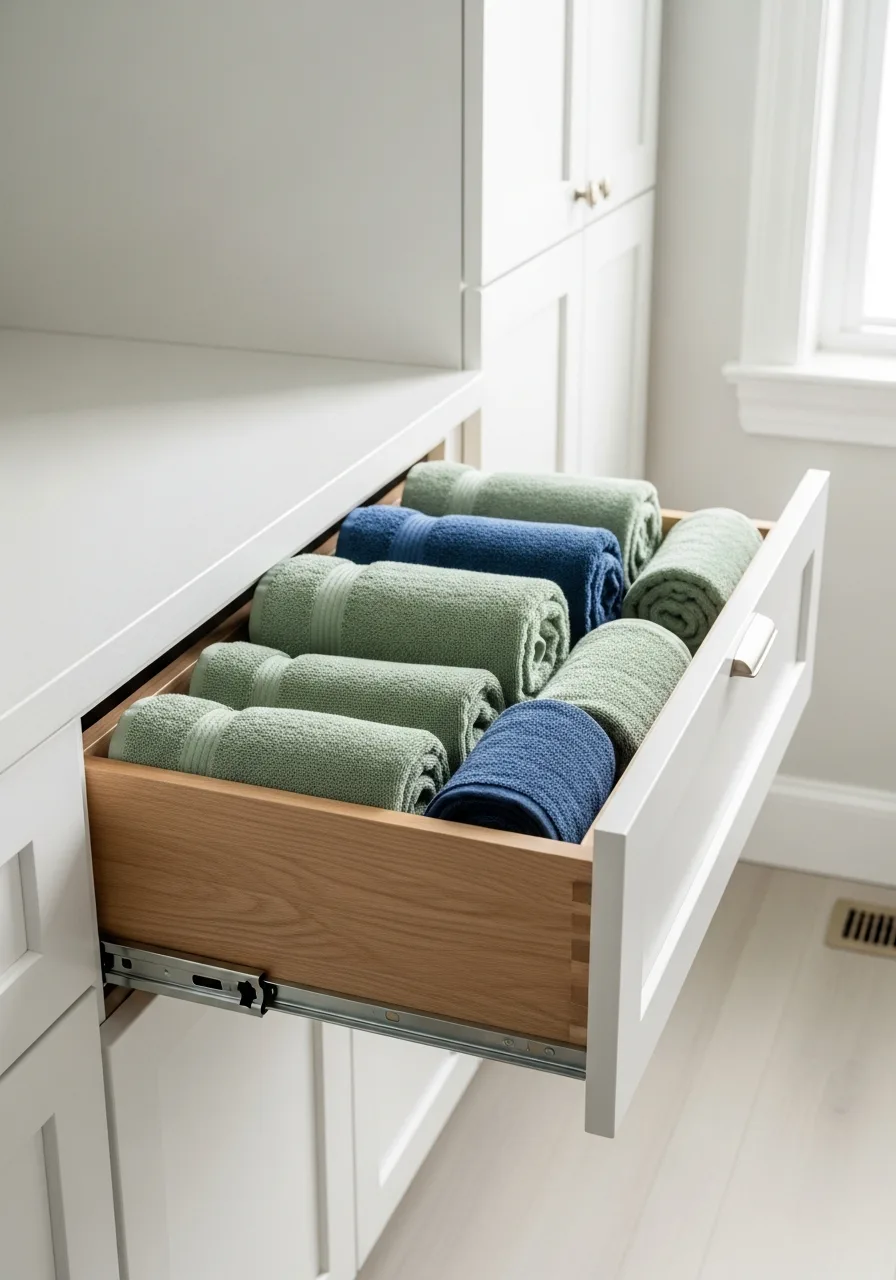
Use deep pull-out drawers for folded towels and bedding. Drawers make it easier to reach items stored at the back than fixed lower shelves.
Line the bottom of each drawer with an unscented liner to protect delicate fabrics from wood snags. Drawers are much better than deep shelves because nothing gets lost in the dark corners.
- DIY-friendly slide installation
- Best for deep base cabinets
- Label drawer fronts for quick ID
Quick win: Roll towels instead of folding them to fit more in a single drawer.
33. Adjustable Cabinet Shelving
Install shelves that can be moved as containers and storage needs change. This prevents large bottles from wasting space beneath fixed shelves.
Use a level during installation to ensure every shelf sits perfectly flat for heavy detergent jugs. Standard fixed heights often leave too much empty air that could be used for extra supplies.
- Buy extra shelf pins
- Measure your tallest bottle first
- Use plywood for heavy-duty support
Most people skip this: Leave two inches of clearance above bottles so they are easy to grab.
34. Appliance Pedestal Drawers
Choose appliance pedestals with built-in drawers beneath the washer and dryer. They provide storage for products, cleaning cloths, and laundry accessories while raising the machines.
Check the weight capacity of the drawers before storing heavy bulk-sized detergent containers. Raising the machines makes loading and unloading much easier on the back.
- Purchase with the appliances
- Great for small accessories
- Wipe tracks monthly to prevent grit
Quick win: Store a small trash can in one pedestal drawer to catch lint immediately.
35. Toe-Kick Storage Drawers
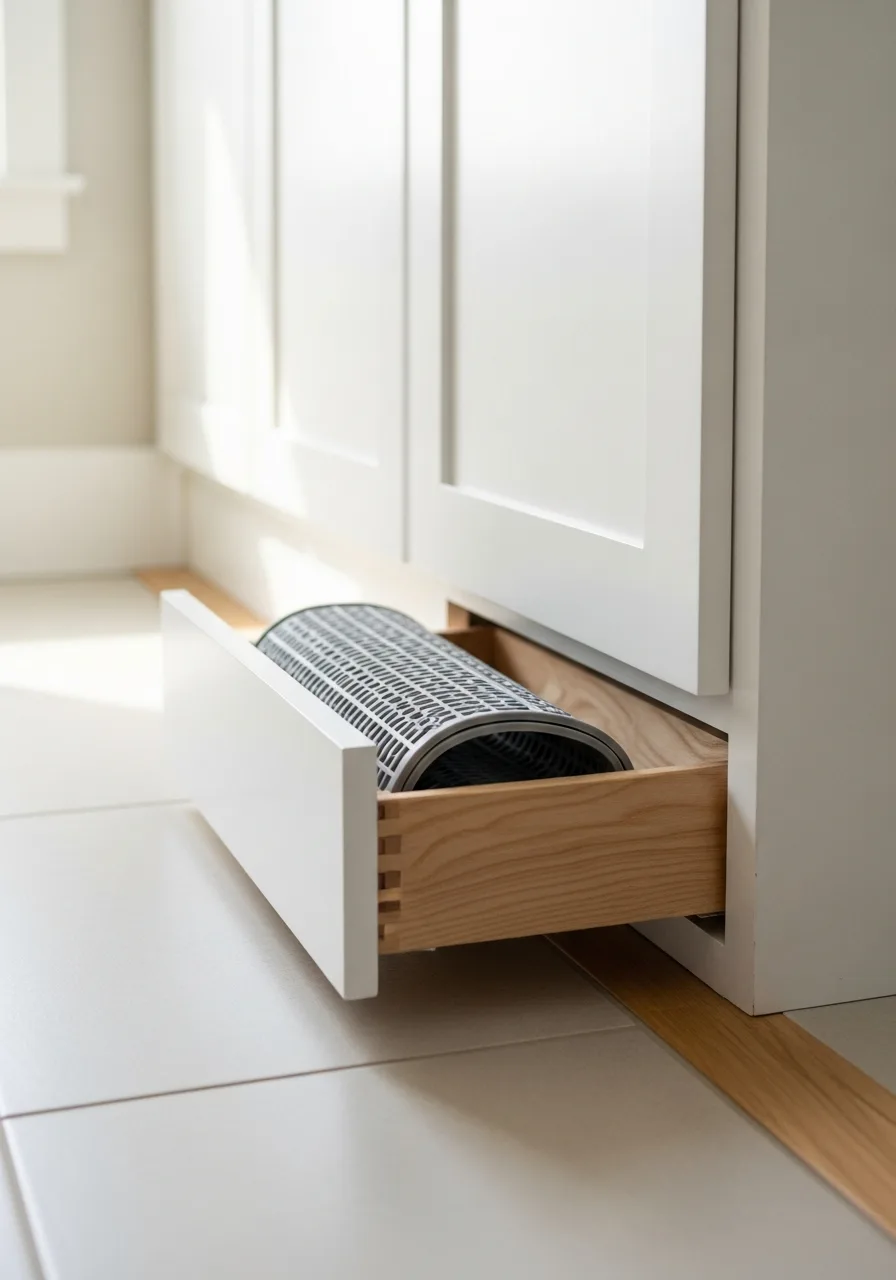
Use the shallow space beneath base cabinets for slim pull-out drawers. Store flat items such as drying mats, instruction manuals, spare cloths, or garment bags.
Install a touch-release latch so the drawer can be opened with a foot when hands are full of laundry. This is the best way to use the four inches of dead space found in almost every kitchen or laundry room.
- Requires custom carpentry
- Best for flat objects
- Keeps floors clear of clutter
Most people skip this: Use these for seasonal items like swimsuits or winter scarves.
36. Corner Cabinet Storage
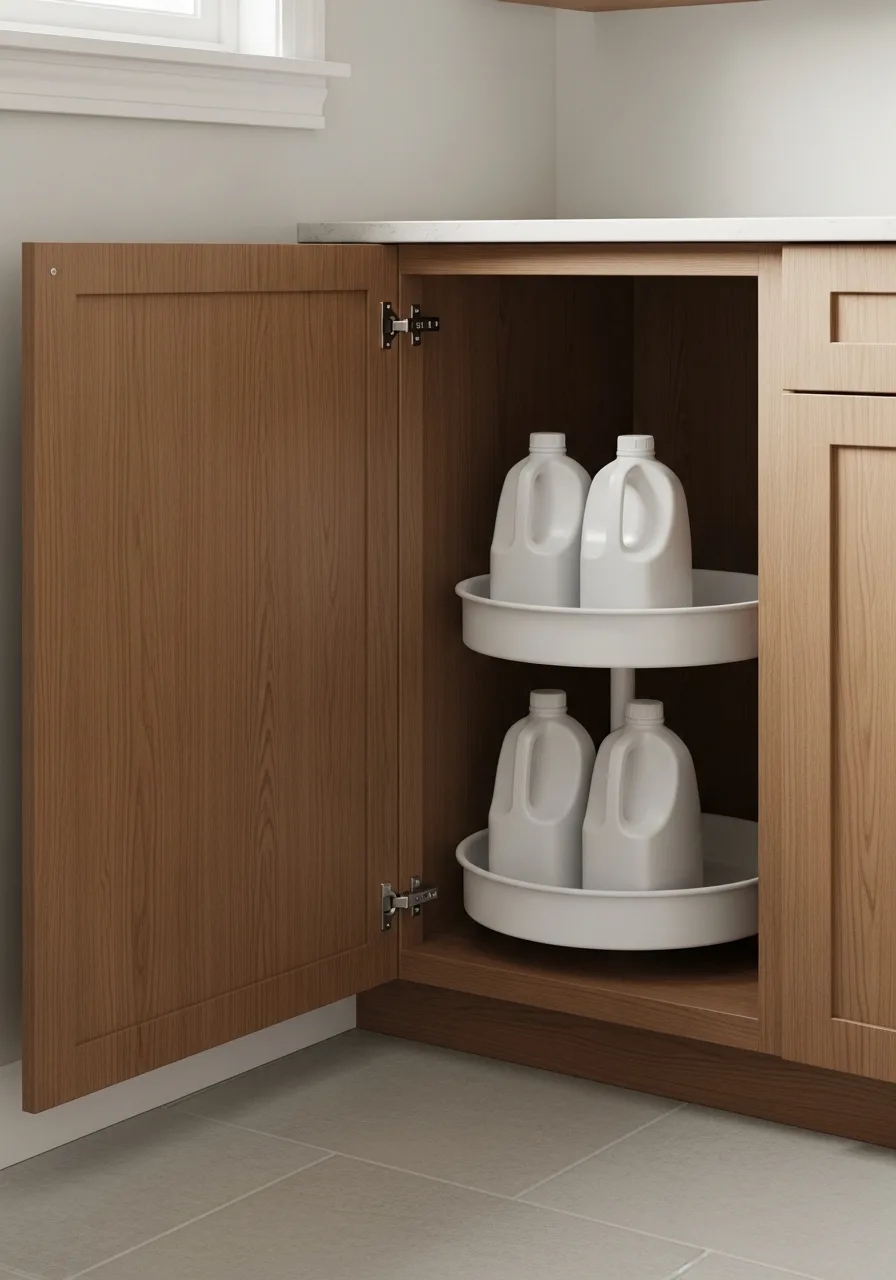
Install a corner cabinet with rotating shelves or pull-out trays. This makes an awkward part of the room useful for bulk products and less frequently used supplies.
Choose a heavy-duty carousel that can support the weight of multiple gallon-sized bottles without sagging. A kidney-shaped pull-out is usually easier to clean than a full circle tray.
- Retrofit kits available
- Maximizes dead corners
- Good for bulk paper towels
Best shortcut: Place the items you use least in the very center of the rotating tray.
37. Integrated Laundry Bench Seating
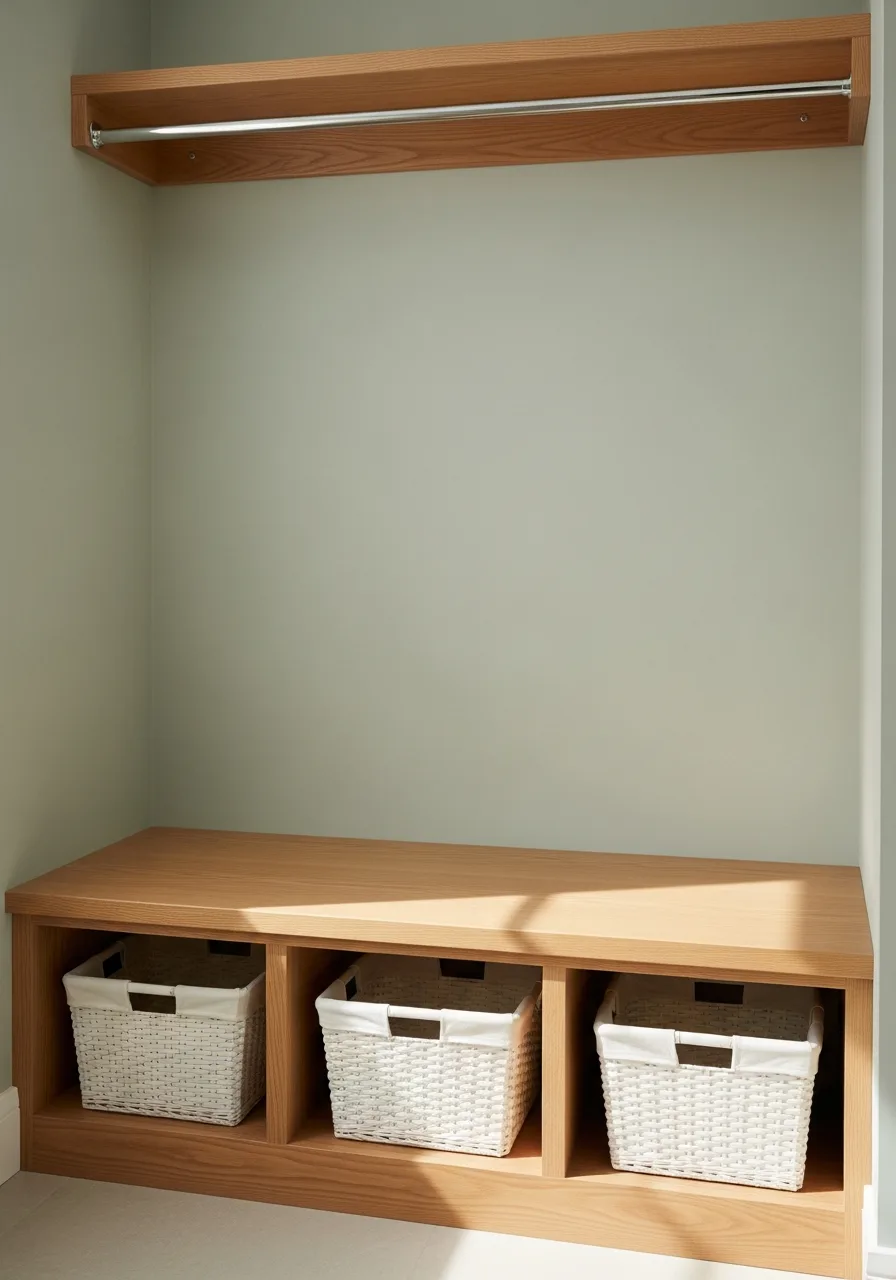
A built-in bench provides a dedicated spot for sorting clothes without cluttering the floor. Install a sturdy wooden bench top over open cubbies to house standard-sized laundry baskets. This setup utilizes vertical wall space and keeps heavy loads at a comfortable lifting height.
A solid butcher block surface is the most durable choice for handling damp garments and heavy detergent bottles.
- Allow a full weekend for construction and approximately $200 for lumber and hardware.
- Secure the bench frame directly into wall studs to ensure it can support the weight of a person and heavy laundry loads.
- Paint the base of the bench to match existing cabinetry for a seamless, high-end custom look.
Most people skip this: Measure the specific laundry baskets intended for use before building the cubbies to ensure a perfect, snug fit without wasted space.
38. Ventilated Metal Locker Storage
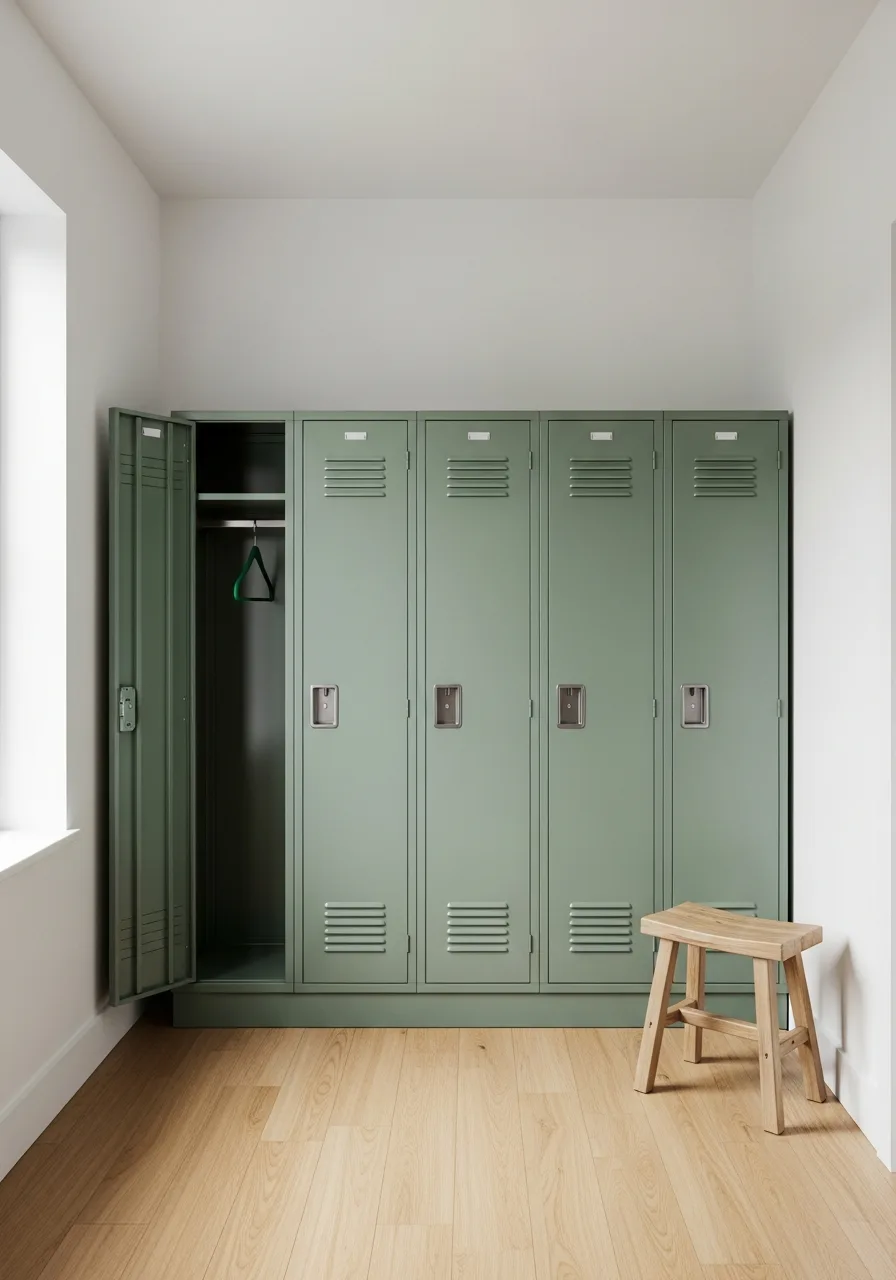
Utilizing metal lockers in a laundry zone creates a designated spot for damp outerwear and sports equipment that needs to breathe. The narrow footprint maximizes vertical space in small rooms while keeping visual clutter hidden.
Install a bench directly in front of the lockers to create a multi-functional landing zone for folding clothes. Metal is an ideal choice here because it resists the humidity that often warps standard particle-board cabinetry.
- Look for slim-line lockers at industrial supply stores to fit narrow hallways or tight laundry corners.
- Secure the units to wall studs using heavy-duty L-brackets for safety and stability.
- Remove the bottom shelf of one locker to create a tall niche for brooms, mops, and vacuum attachments.
Most people skip this: Line the bottom of each locker with a silicone boot tray to catch drips and prevent metal-on-metal noise.
39. Individual Laundry Basket Shelves
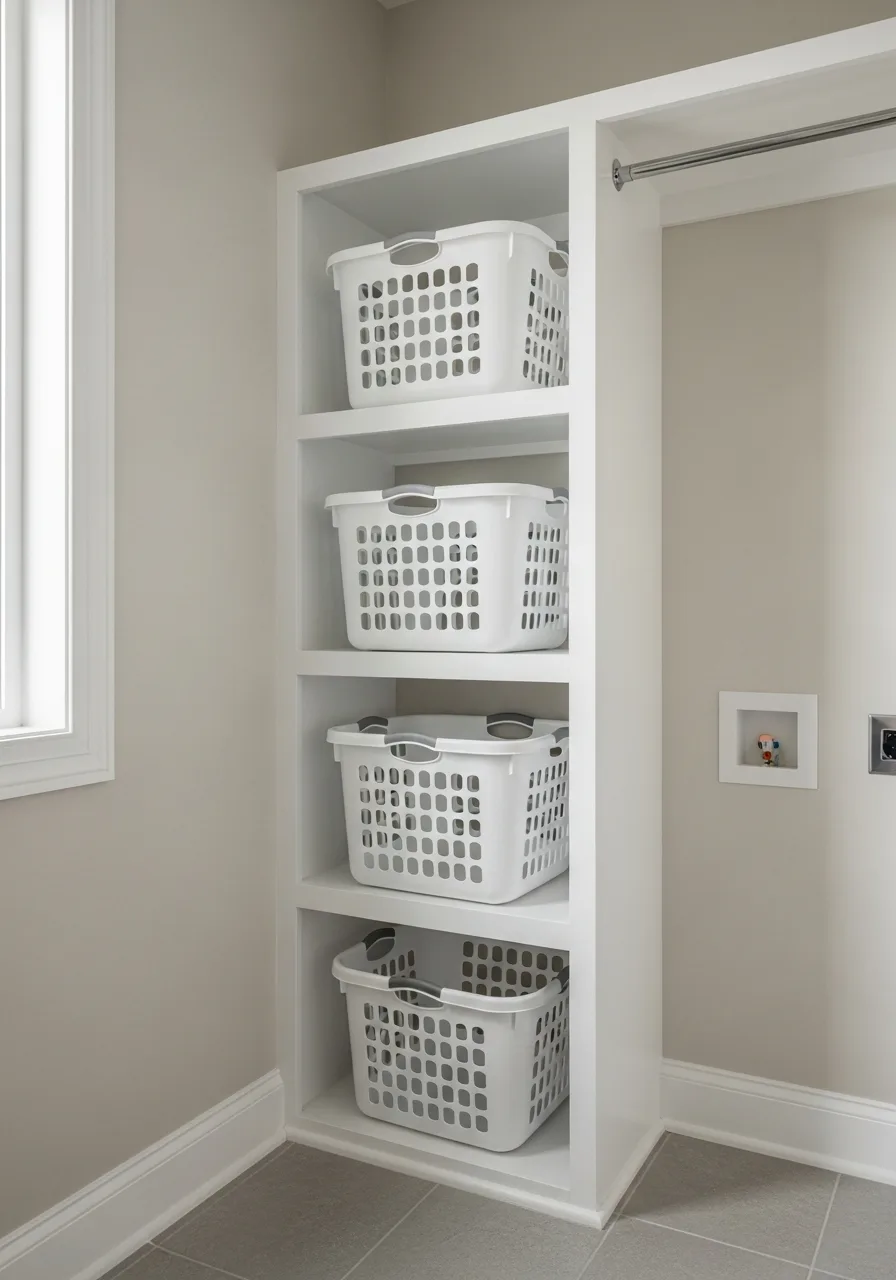
Create one open basket space for every household member. Clean clothes can be placed directly into the correct basket after folding.
Measure your specific laundry baskets before building the shelves to ensure a perfect slide-in fit. Vertical sorting saves a massive amount of floor space compared to lining baskets up in a row.
- Simplifies the folding process
- Uses vertical wall space
- Keeps clean clothes off the floor
Best shortcut: Color-code the baskets so every family member knows which one is theirs at a glance.
40. Fold-Away Laundry Counter
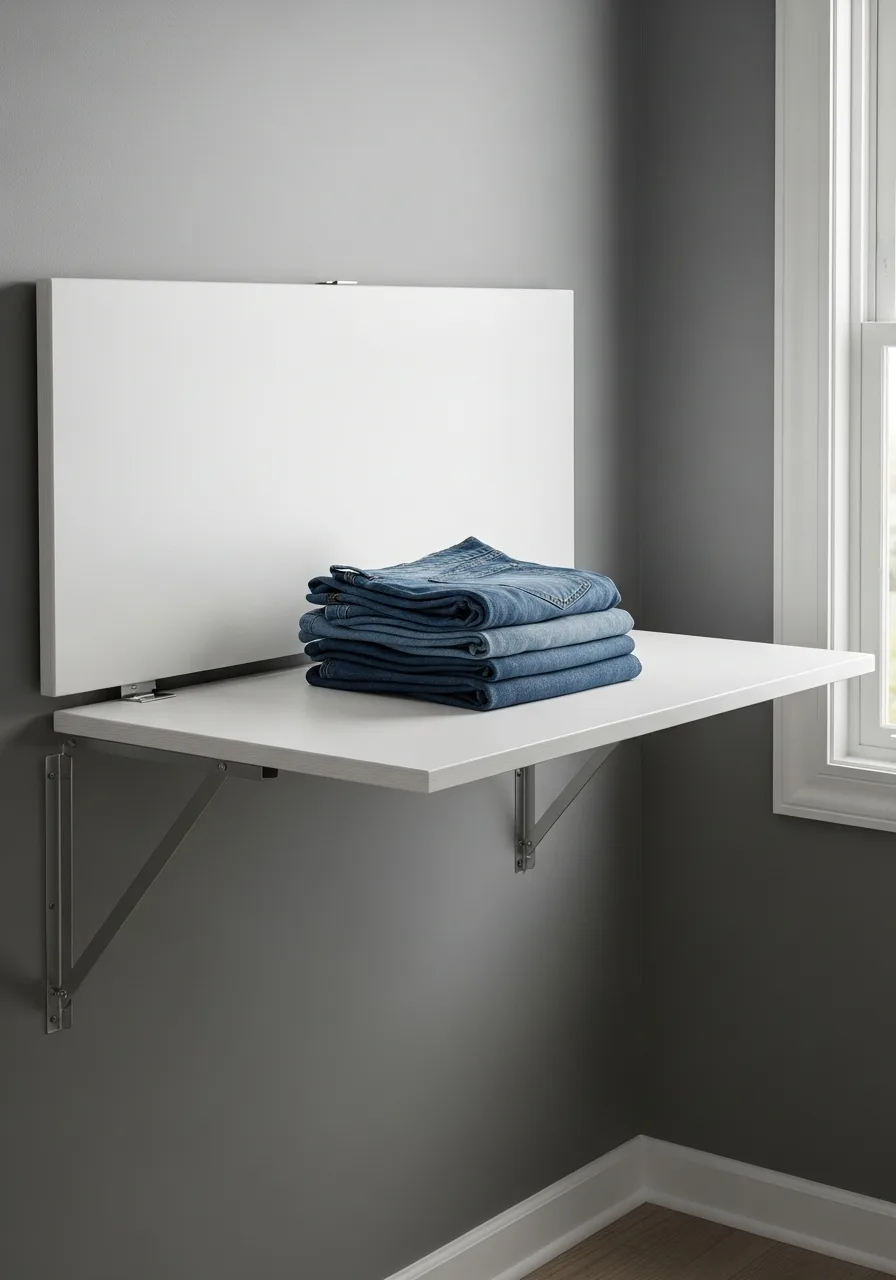
Install a wall-mounted counter that folds down when needed. It provides a temporary surface for sorting and folding without permanently reducing walking space.
Mount the hinges into wall studs to ensure the counter can handle the weight of a full laundry basket. This is a lifesaver in narrow galley-style laundry rooms where a permanent island won't fit.
- Great for tight hallways
- Use heavy-duty locking hinges
- Mount at waist height
Quick win: Use a melamine surface for the counter because it is easy to wipe clean.
41. Rolling Laundry Island
Add a small island on wheels with a folding surface and storage underneath. It can be moved around the room or pushed aside when more floor space is required.
Select locking casters so the island stays perfectly still while you are folding heavy towels. A mobile station allows you to bring the folding surface right to the dryer door.
- Multipurpose work surface
- Store detergent on lower shelves
- Easy to move for cleaning
Most people skip this: Choose a cart that is the same height as your washer for a continuous look.
42. Hide Machines With Pocket Doors
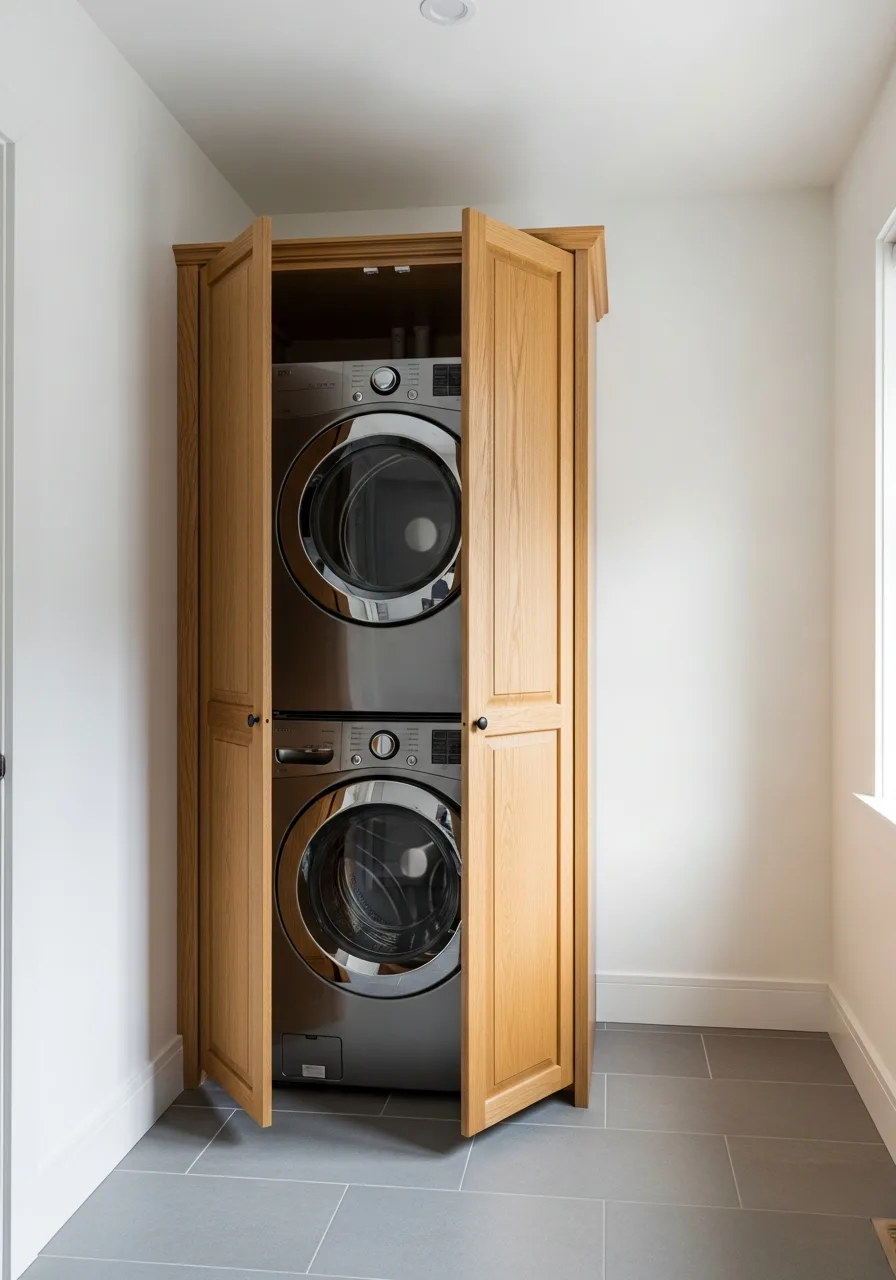
Integrating cabinetry with pocket doors allows bulky appliances to vanish when the laundry is finished, maintaining a streamlined look in multipurpose spaces. This setup prevents the visual clutter of open doors blocking narrow hallways or small rooms.
Measure the appliance depth carefully to ensure the doors can tuck away fully without hitting the back wall. Standard swinging doors often get in the way, making pocket hardware a superior choice for high-traffic zones.
- Sourcing: Budget for heavy-duty slide hardware that supports the weight of solid cabinet doors.
- Setup: Leave a two-inch clearance on all sides of the machines to account for vibration and airflow.
- Adaptation: Use perforated door panels if the machines require extra ventilation while running behind closed doors.
Most people skip this: check that the floor is perfectly level before installing the tracks, or the doors will drift open on their own.
43. Built-In Laundry Pocket Door Cabinets
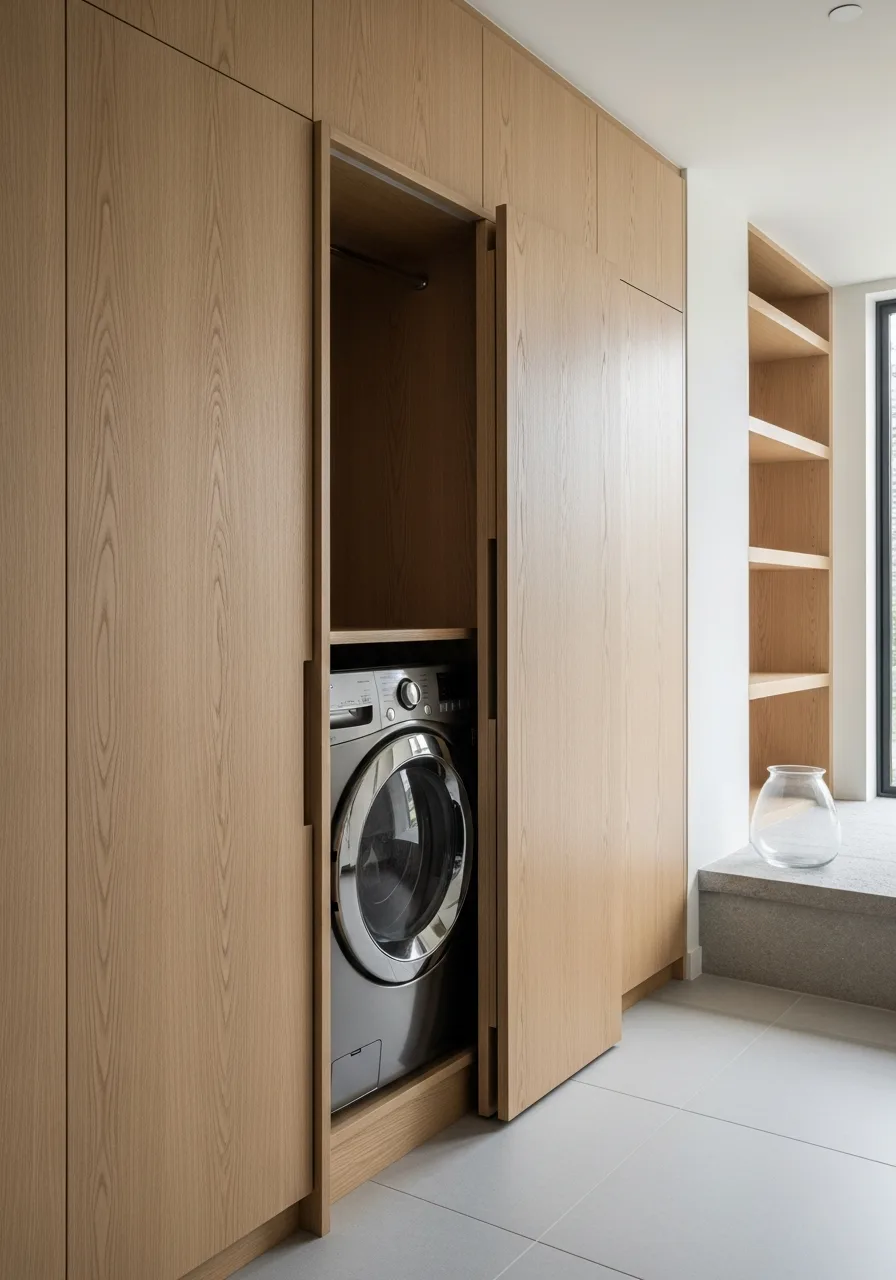
Laundry appliances often disrupt the visual flow of a hallway or multi-purpose mudroom. Install custom deep-set cabinetry with pocket doors to tuck the machines away when not in use. This approach creates a seamless wall of storage that conceals the industrial look of metal appliances.
Using pocket doors is the superior choice here because swinging doors block high-traffic walkways during the wash cycle.
- Budget $1,200–$3,500 depending on custom millwork and hardware quality.
- Ensure the cabinet depth accounts for rear hose clearance and door retraction space.
- Match the cabinet hardware to existing kitchen or hallway pulls for a cohesive look.
Most people skip this: check that the floor inside the cabinet is reinforced and leveled to prevent vibration noise against the cabinet walls.
44. Recessed Wall Shelves
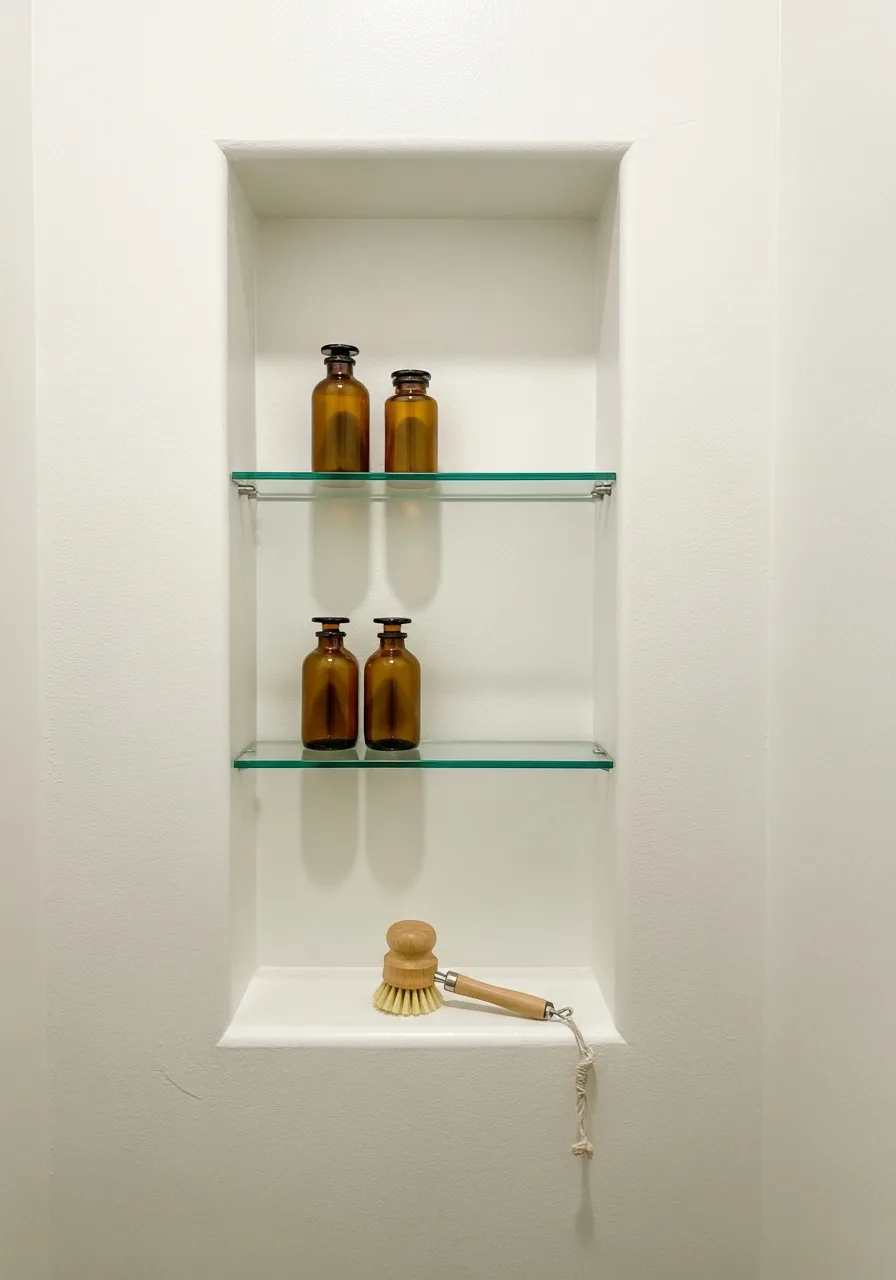
Build shallow shelves into an available wall cavity. Use them for compact containers and frequently used products without reducing the room’s walking space.
Check for electrical wires and plumbing pipes behind the drywall before cutting your opening. These between the studs shelves are perfect for holding small items like stain sticks and lint rollers.
- Uses wasted wall depth
- Ideal for small bottles
- Can be tiled for a custom look
Most people skip this: Line the back of the niche with wallpaper for a small pop of color.
45. Above-Door Storage Shelf
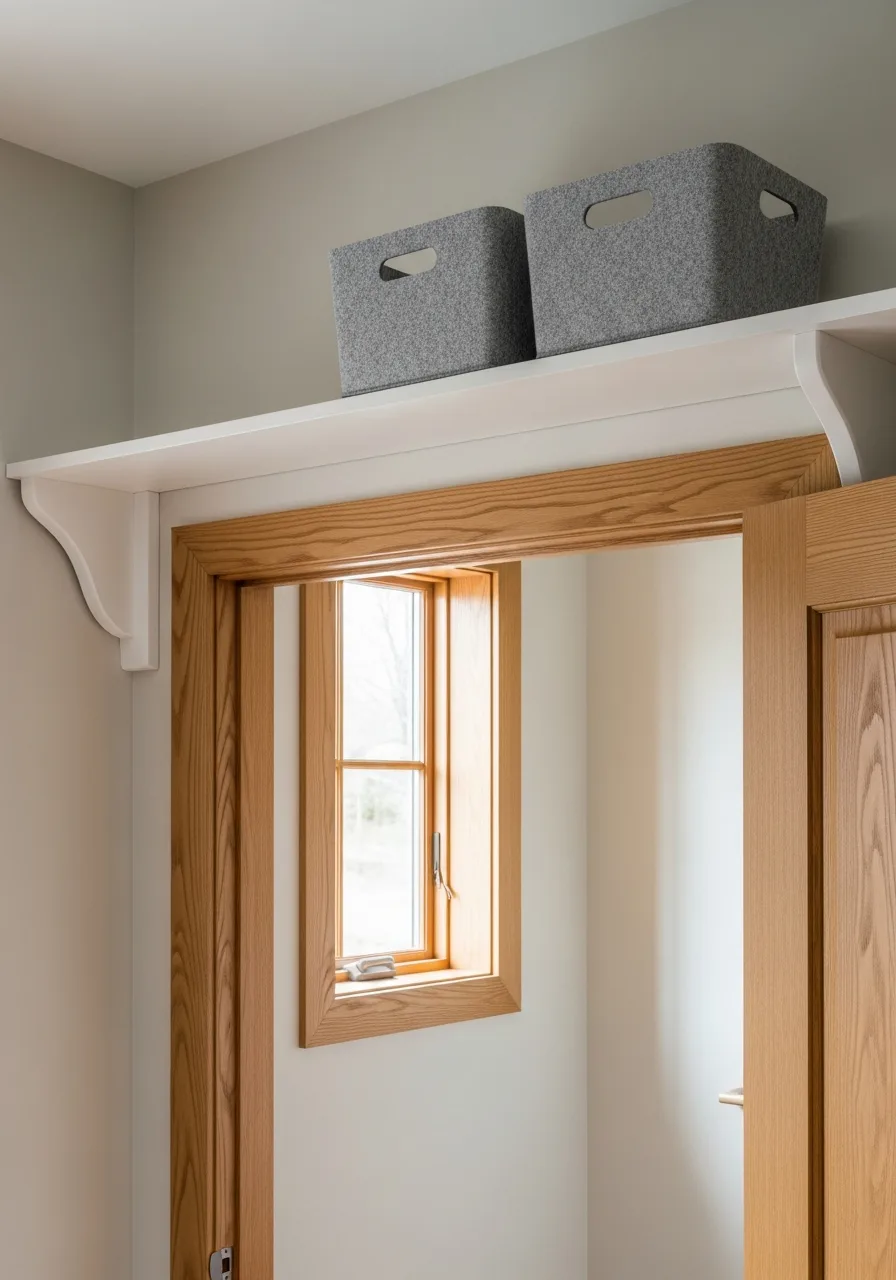
Install a shelf over the doorway for lightweight, rarely used items. Matching baskets can keep seasonal supplies and extra linens protected from dust.
Secure the shelf with sturdy brackets that are anchored into the door header for maximum support. This often-overlooked space is the perfect spot for bulk supplies or holiday-specific cleaning rags.
- Easy afternoon DIY project
- Keeps items out of reach
- Use baskets to hide clutter
Best shortcut: Keep a small step stool nearby so you can actually reach the shelf when needed.
46. Laundry Closet Side Shelves
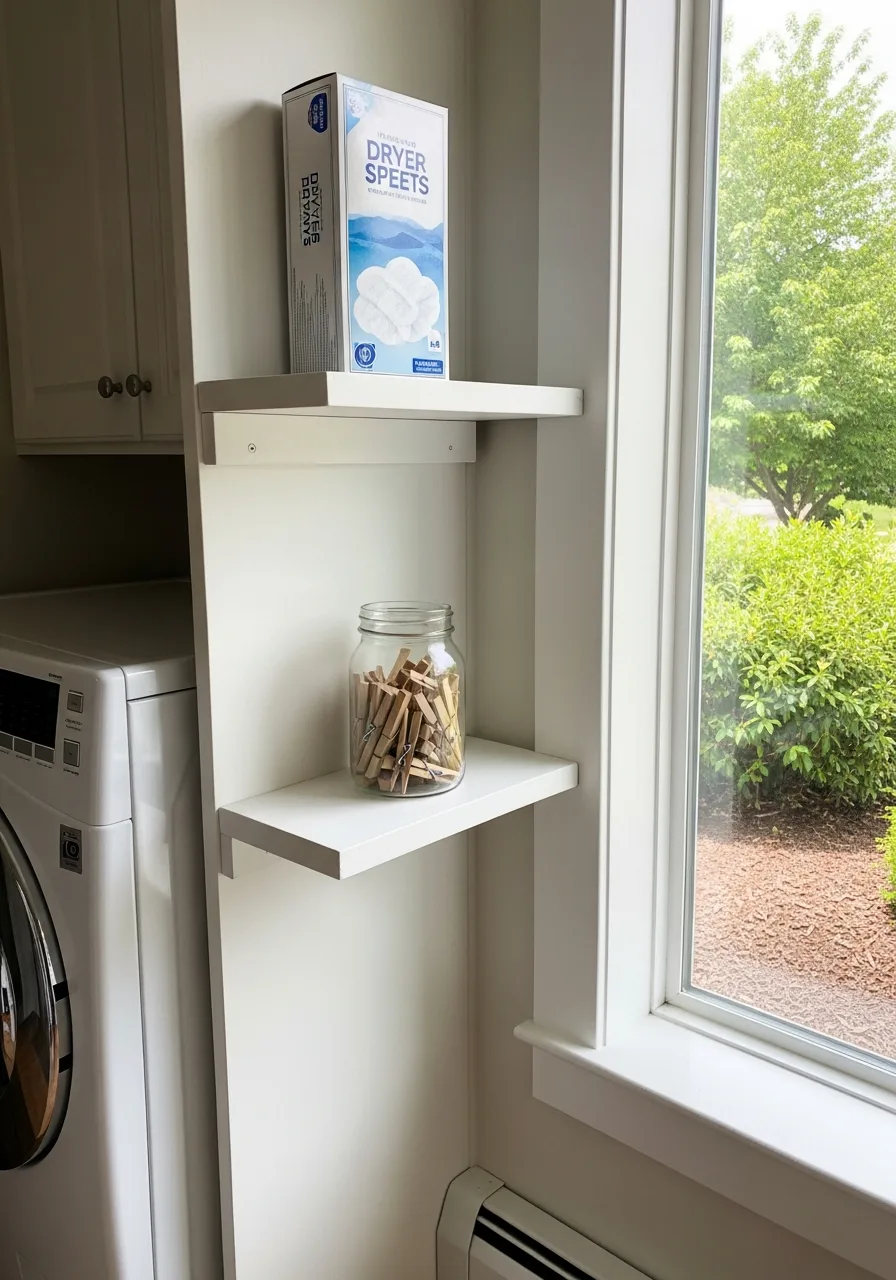
Use the narrow gaps on the side walls of a laundry closet to add shallow shelving for small items. These shelves are perfect for dryer sheets, stain sticks, and jars of clothespins that usually get lost in deep cabinets.
Mounting simple brackets into the wall studs allows for sturdy storage in a space that usually stays empty and wasted. Shallow shelves are often better than deep ones because they prevent the back-of-the-shelf graveyard where products go to be forgotten.
- $20 to $40 for basic brackets and wood planks.
- Secure brackets directly into wall studs to handle the weight of glass jars.
- Adjust the height between shelves to fit your tallest spray bottles or detergent jugs.
Quick win: Use a small level during installation to ensure bottles don't slowly slide toward the front edge.
47. Curtain-Concealed Lower Storage
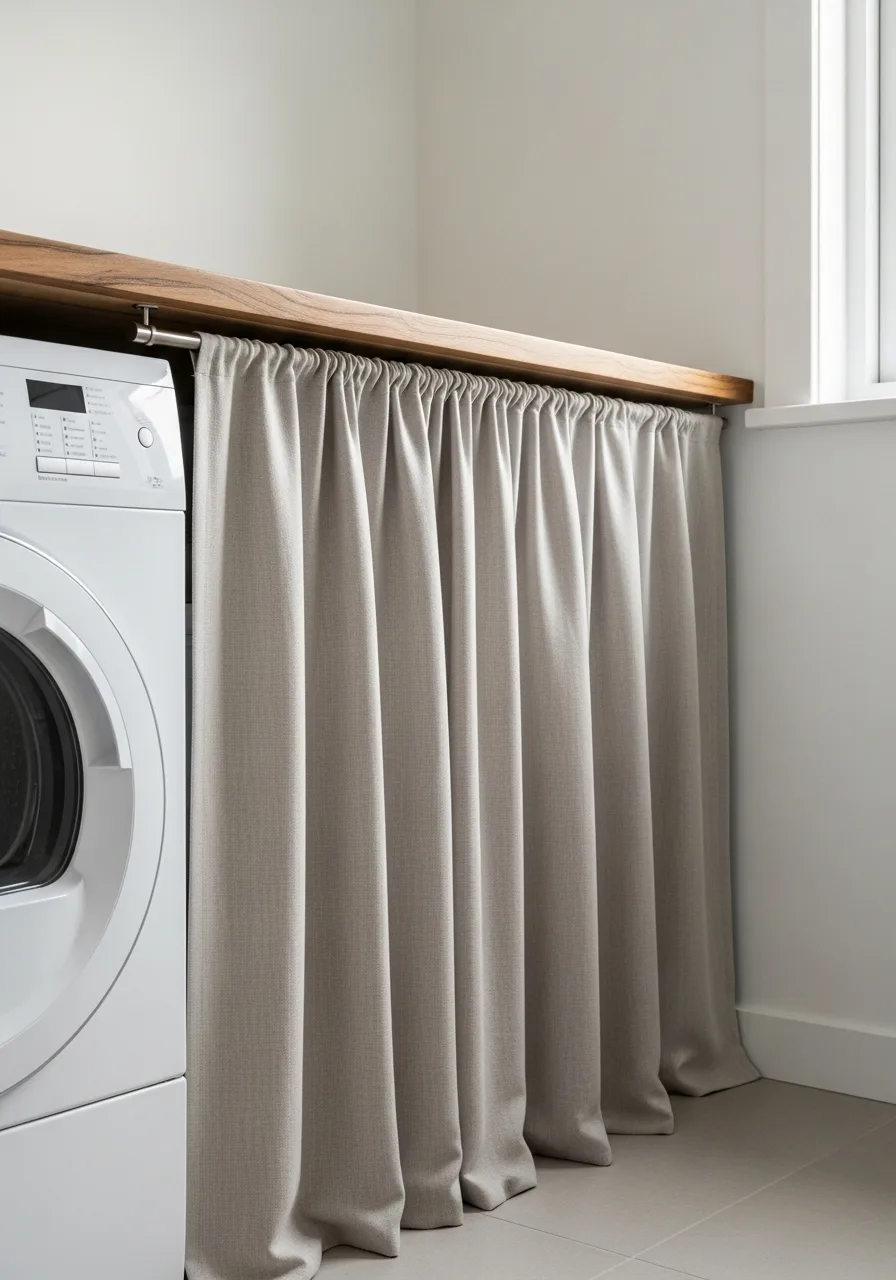
Hide open shelving or messy utility zones beneath a counter using a washable fabric curtain. This is a smart, budget-friendly way to cover plumbing lines or bulky buckets without the high cost of custom cabinetry.
Install a simple tension rod between two walls or cabinets to hang the fabric in seconds without using a drill. Fabric curtains are a superior choice for laundry rooms because they can be tossed in the wash whenever they get dusty or splashed with detergent.
- Under $30 for a tension rod and a yard of durable fabric.
- Measure from the underside of the counter to the floor for a perfect hem length.
- Choose a heavy linen or outdoor fabric to better resist moisture and stains.
Best shortcut: Use clip-on curtain rings so the fabric slides easily for quick access to the items behind it.
48. Pet-Care Storage Cabinet
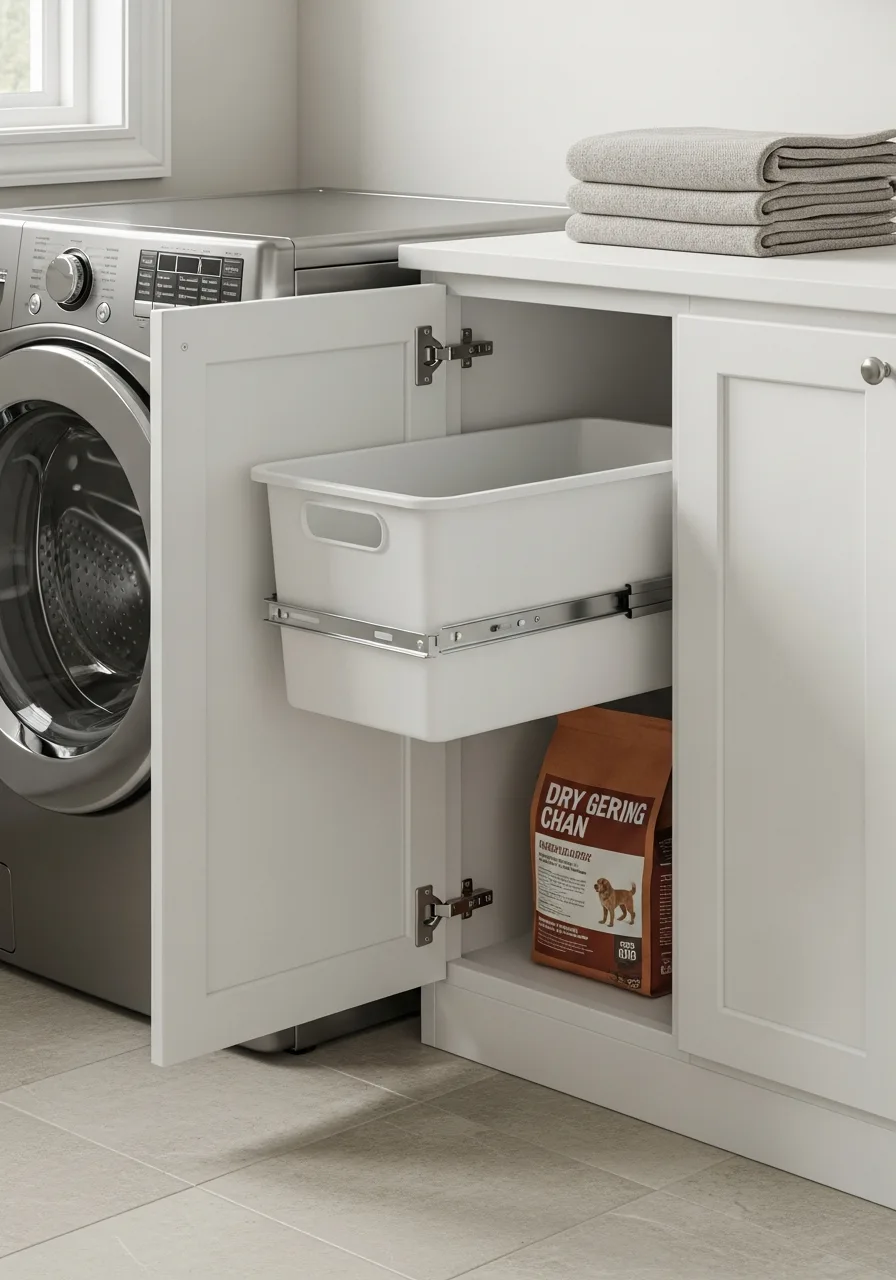
Create a dedicated zone for pet towels, grooming tools, and food containers near the laundry sink for easy cleanup.
Keeping these items in the laundry room stops pet clutter from migrating into the kitchen or mudroom. Use pull-out bins or deep drawers to keep heavy bags of kibble off the floor and out of sight behind closed doors. The laundry room is the most practical spot for pet gear because the surfaces are usually the most durable and water-resistant in the house.
- $50 to $100 for heavy-duty pull-out drawer hardware.
- Measure your largest food container or bag before deciding on the drawer height.
- Add small adhesive hooks to the inside of the cabinet door for leashes and grooming brushes.
Most people skip this: Line the bottom of the pet cabinet with a waterproof silicone mat to catch any food crumbs or water drips.
49. Laundry and Pantry Storage Wall
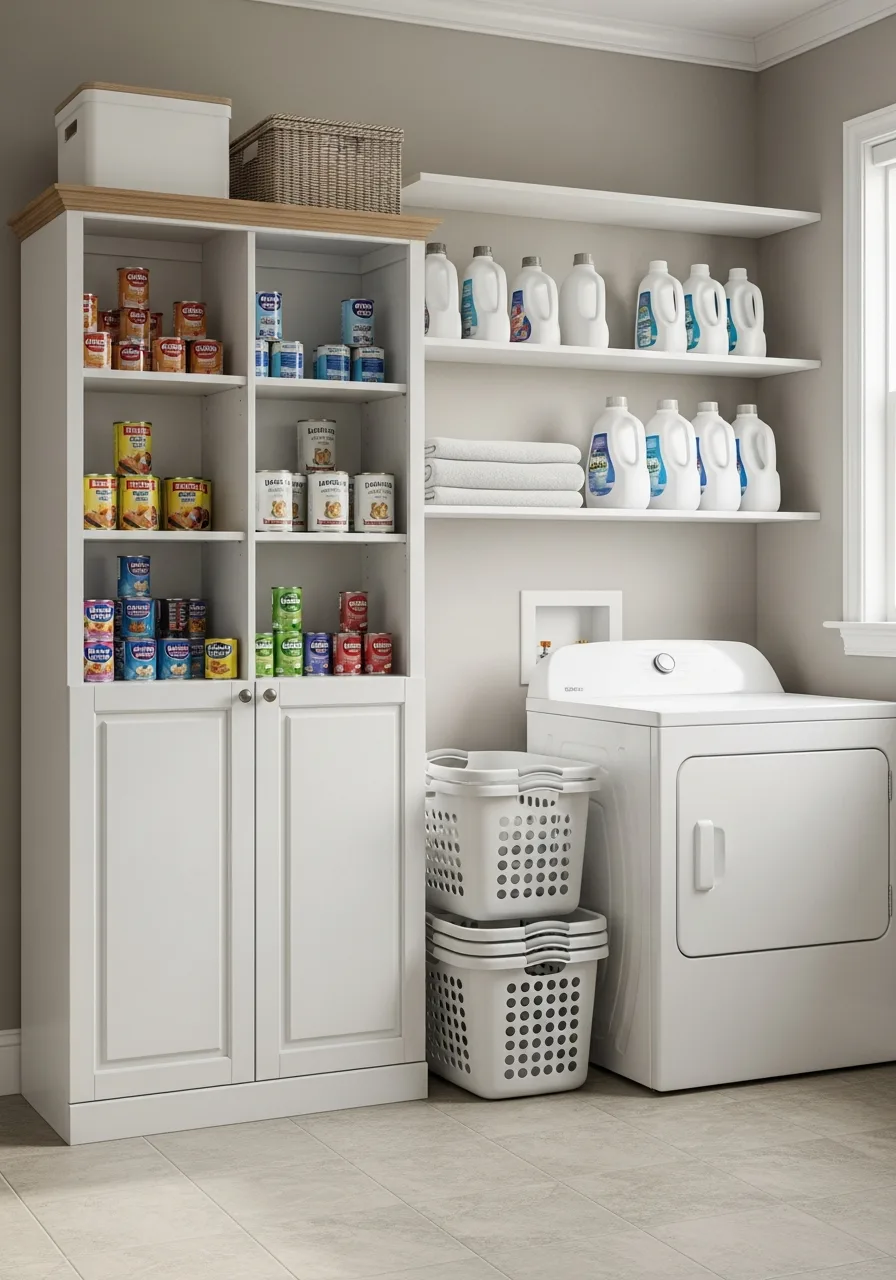
Divide a large utility wall into two distinct zones to handle both laundry supplies and pantry overflow. Use separate labels and containers so household cleaners and food-related items remain clearly divided for safety.
Install a tall vertical divider or a set of floor-to-ceiling cabinets to create a physical boundary between the two types of storage. Mixing food and chemicals is a major risk, so using high-contrast labeling or different colored bins is a must in a shared space.
- One weekend for assembly and organization of the shared wall.
- Use airtight clear containers for pantry items to keep them fresh and visible.
- Always place heavy laundry chemicals on lower shelves to prevent leaks from dripping onto food.
Quick win: Use distinct label styles, like chalkboard for the pantry and white plastic for laundry, to prevent any mix-ups.
50. Complete Laundry Workflow Wall
Design a single wall that follows the natural path of laundry from sorting and washing to folding and hanging. Include a countertop for folding, a rod for hanging damp clothes, and lower cubbies for sorting baskets.
Arrange the stations from left to right to match the direction your washer and dryer doors naturally open for the smoothest movement. A workflow only works if it is intuitive; if you have to walk across the room to hang a shirt, the piles will just stay on the counter.
- Professional installation recommended for heavy countertops and wall-mounted rods.
- Ensure the counter is at a comfortable waist height to prevent back strain during folding.
- Leave at least 2 inches of clearance behind the appliances for plumbing hoses and dryer vents.
Most people skip this: Leave space for a small, dedicated trash can right next to the dryer specifically for lint and used dryer sheets.
Frequently Asked Questions
How can I add storage to a laundry room with no cabinets?
You can maximize vertical space by installing floating shelves or a wall-mounted pegboard for frequently used tools. Adding an over-the-appliance rack is another great way to gain storage without needing built-in cabinetry.
What is the best way to store an ironing board in a small space?
To save floor space, try using a wall-mounted holder or over-the-door hooks to keep your board tucked away. If you are remodeling, a fold-out drawer insert is a sleek, hidden option for easy access.
How do I organize laundry detergent and cleaning supplies?
Transfer powders into clear dispensers to keep your workspace looking tidy and organized. For bottles, use a tiered turntable or Lazy Susan to make every item easy to reach without digging through the back of a shelf.
Where can I put a drying rack if I have zero floor space?
Consider installing a retractable wall-mounted rack that folds flat when it is not in use. For even more efficiency, a ceiling-mounted pulley system keeps your clothes drying high up and completely out of the way.
How do I manage the gap between my washer and dryer?
A slim rolling cart is perfect for utilizing that narrow gap to store detergent and dryer sheets. You can also install a custom "bridge" shelf over both units to create a seamless, continuous surface for folding clothes.