50 Space Above Kitchen Cabinets Ideas
This post may contain affiliate links: full affiliate disclosure.
That empty gap above the cabinets often feels like a design mistake.
Filling it with intentional items makes the kitchen look taller and more finished. Use these strategies to turn a dust-trap into a beautiful display or extra storage.
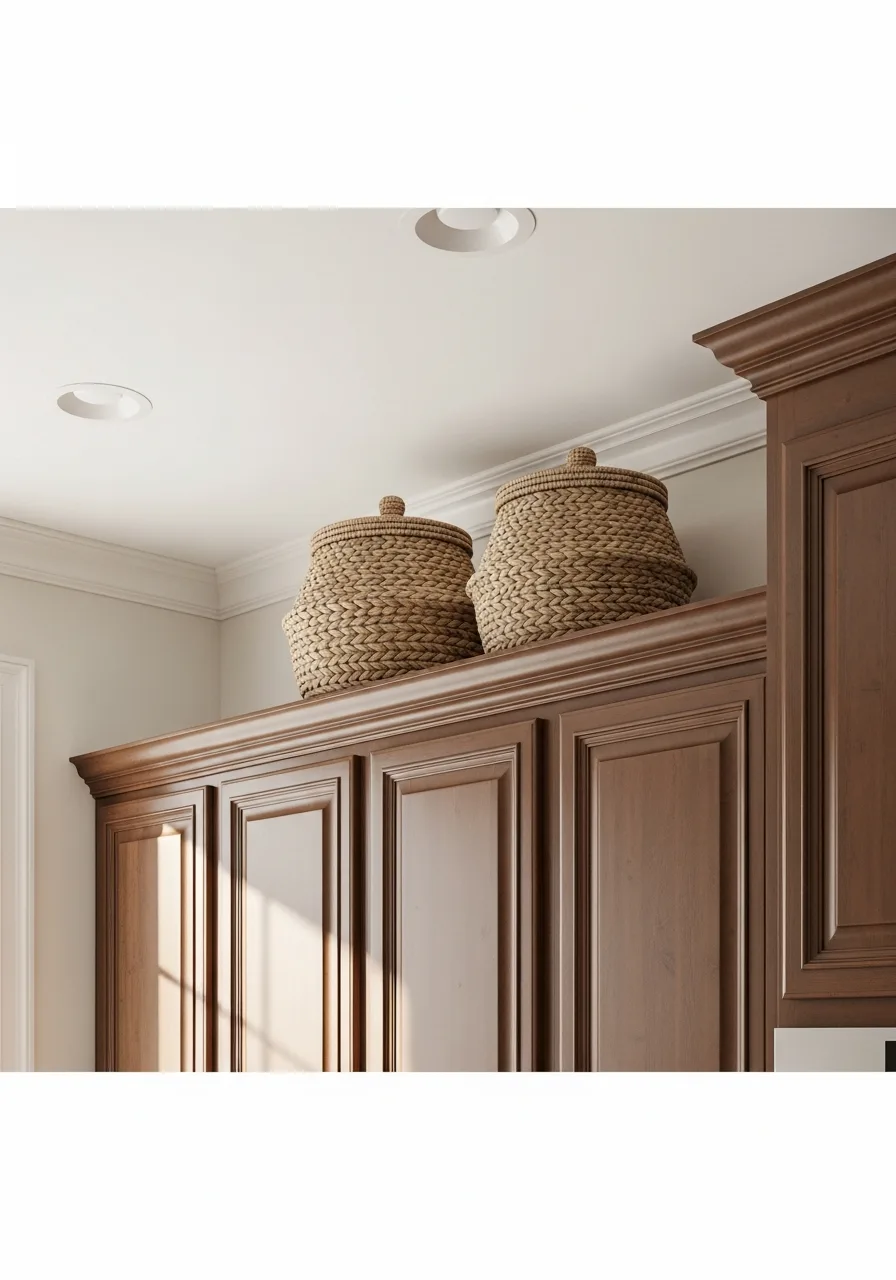
1. Uniform Woven Baskets
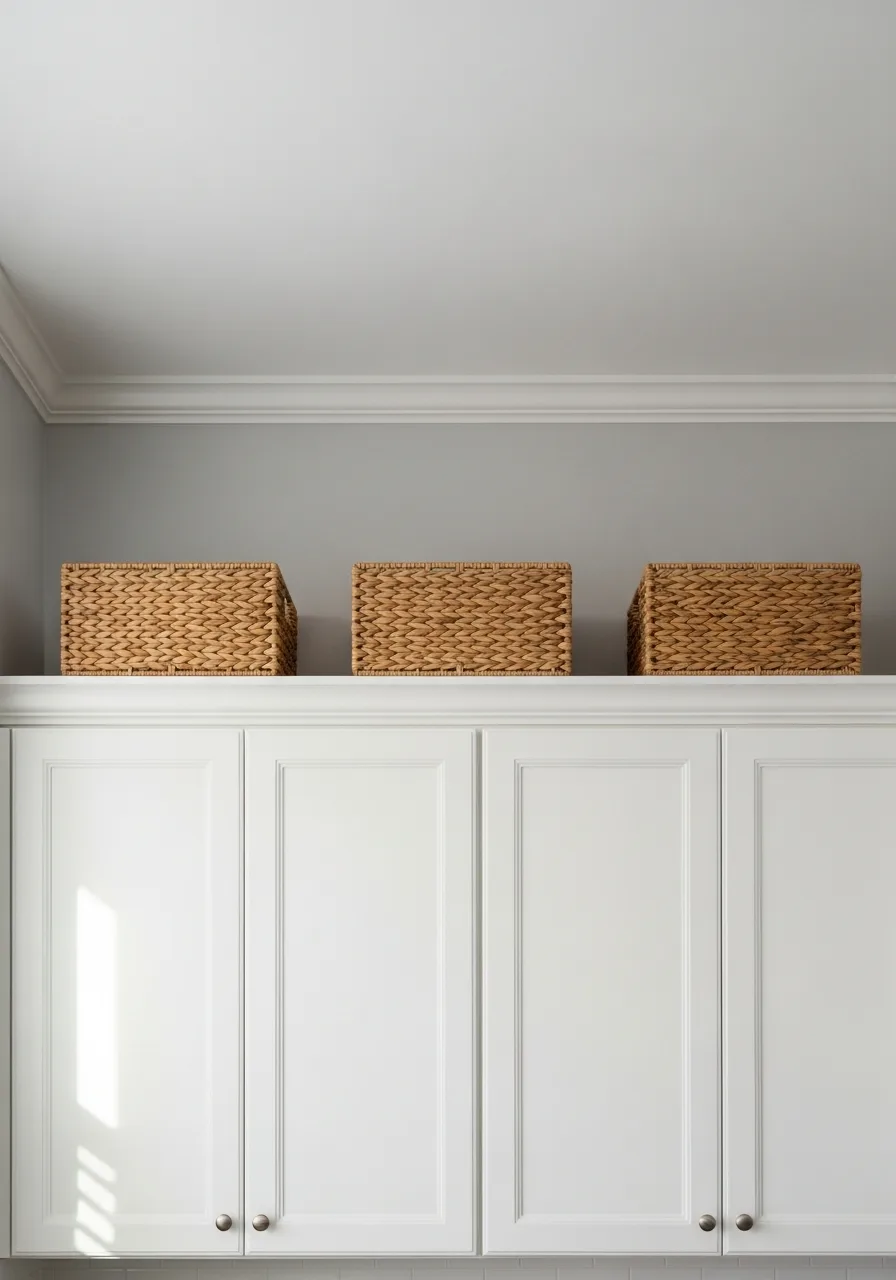
Use matching baskets to hide rarely used items like holiday linens or extra light bulbs. Group identical baskets together to create a clean, continuous line across the top of the kitchen. Measure the height of the gap before buying to ensure a snug fit that looks custom.
This hides clutter while adding natural texture to a flat wall.
- Find baskets at home goods stores for under twenty dollars each.
- Align the front edges with the cabinet face for a flush look.
- Label the back of the baskets to remember what is inside.
Most people skip this: Line the tops with paper to catch grease and dust for easier cleaning.
2. Vintage Stoneware Pitchers
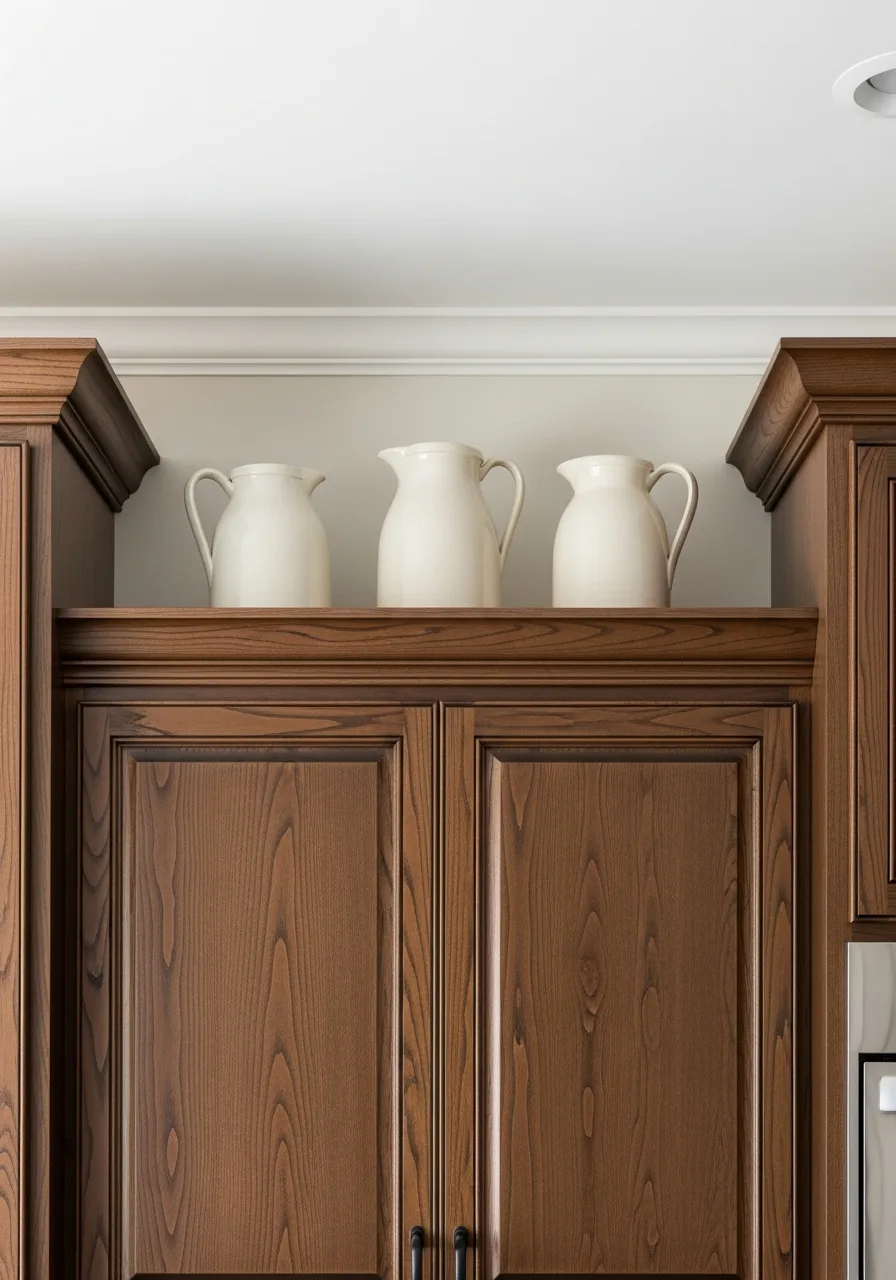
Earthy tones bring warmth to a modern kitchen without feeling cluttered. Arrange pitchers in small clusters of three with varying heights to create visual interest. Choose a single color palette like creams or blues to keep the collection looking intentional.
Old pottery adds a sense of history without taking up valuable counter space.
- Source unique pieces from local thrift shops or antique markets.
- Place the tallest item in the back to create depth.
- Use museum putty on the bottom to keep them from sliding.
Quick win: Stick to one material like stoneware or glass to make the collection look curated.
3. Trailing Faux Greenery
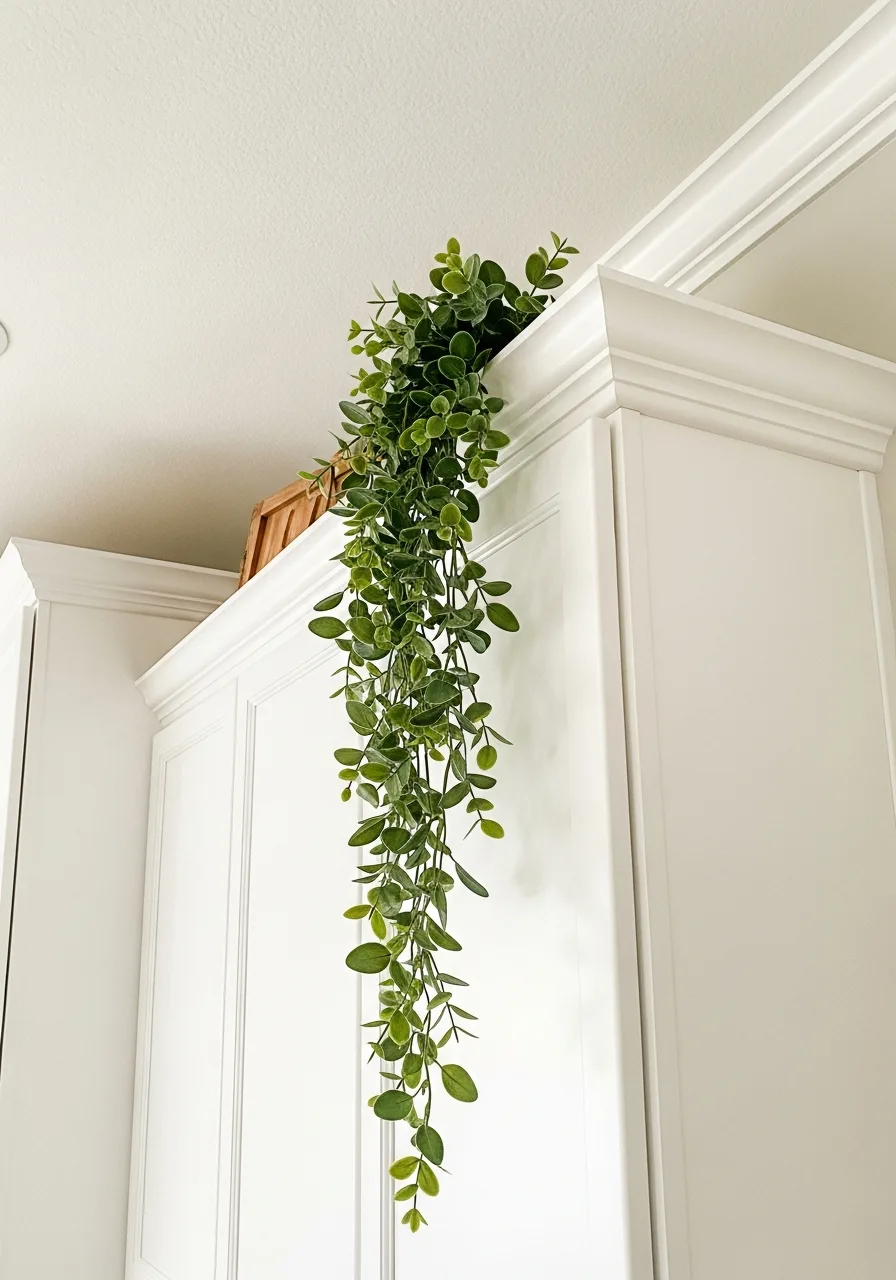
Plants soften the hard lines of cabinetry and bring life to the room. Drape silk ivy or eucalyptus over the edge of the cabinets to add a pop of color. High-quality faux plants won't need water or sunlight in a dark corner.
This is the fastest way to make a kitchen feel lived-in and cozy.
- Buy UV-resistant faux plants to prevent fading from window light.
- Use small Command hooks to guide the vines along the cabinet top.
- Dust the leaves once a month with a damp cloth.
Best shortcut: Mix two different types of faux greenery for a more realistic, layered look.
4. Cookbook Library Display
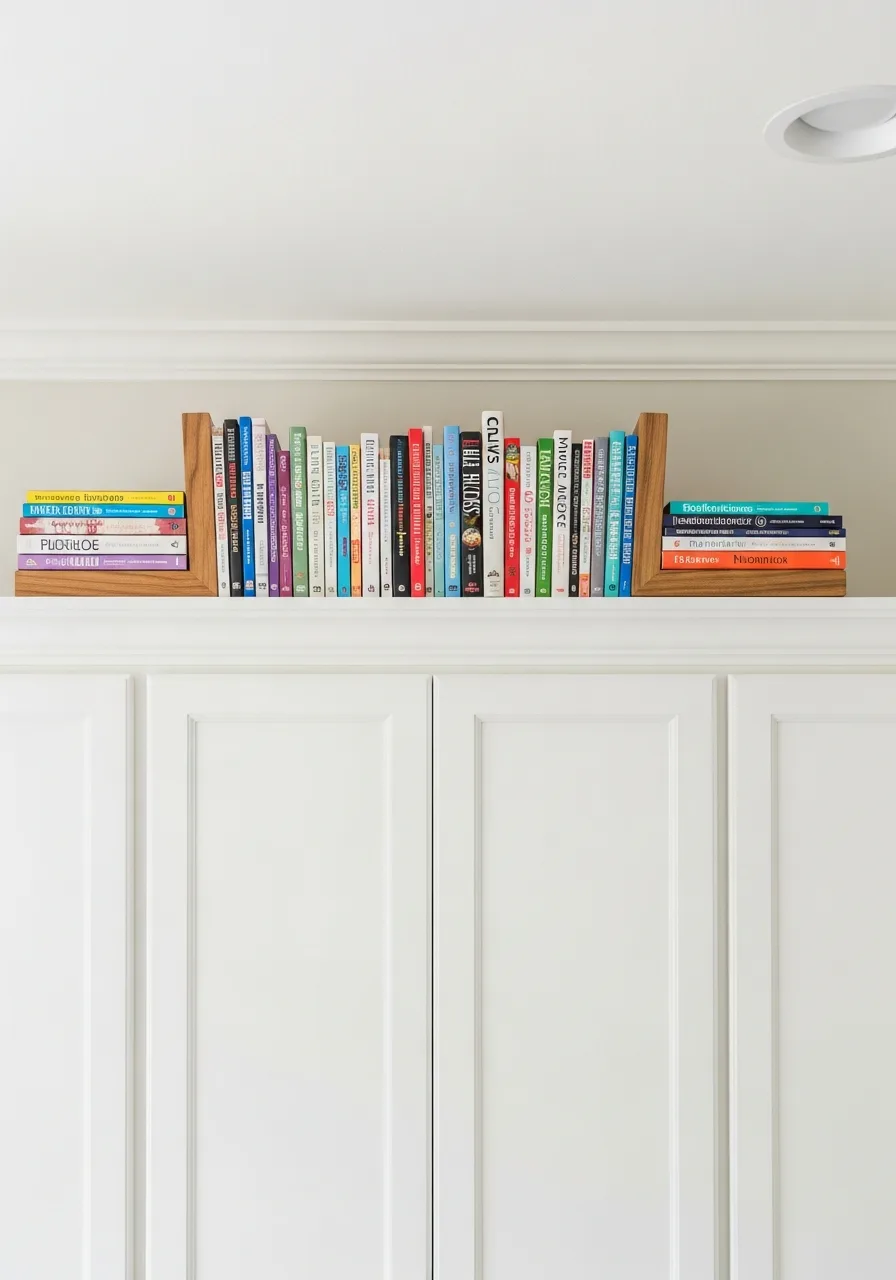
Store heavy books where they stay out of the way but remain visible.
Lean cookbooks against each other or use sturdy bookends to keep them upright. Keeping them high up protects them from spills and flour on the lower counters. It turns a collection of recipes into a colorful design element.
- Sort books by spine color for a more organized appearance.
- Keep the most-used books on the bottom shelf for easier access.
- Use a sturdy step stool to reach them safely.
Most people skip this: Face the spines outward so you can actually read the titles from the floor.
5. Glass Bottle Collection
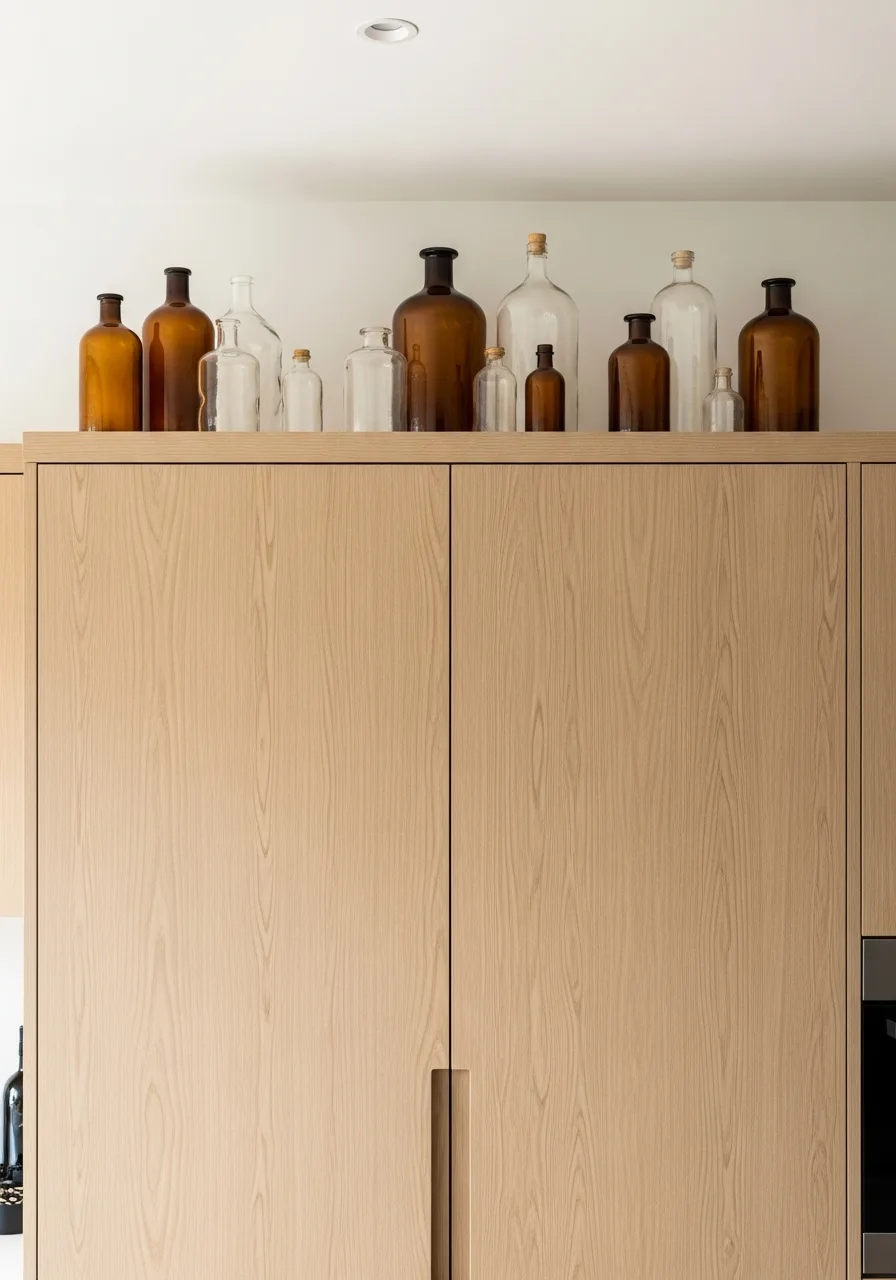
Clear items keep the space feeling light and airy in small kitchens. Mix clear and tinted glass bottles to catch the light coming through kitchen windows. Vary the shapes and sizes to prevent the display from looking like a store shelf.
Glass is easy to wash and doesn't feel heavy against the ceiling.
- Collect bottles from specialty sodas or vintage glass shops.
- Group them in odd numbers like three or five for better balance.
- Clean them with vinegar and water for a streak-free shine.
Quick win: Add a few drops of food coloring to water in clear bottles for a custom color theme.
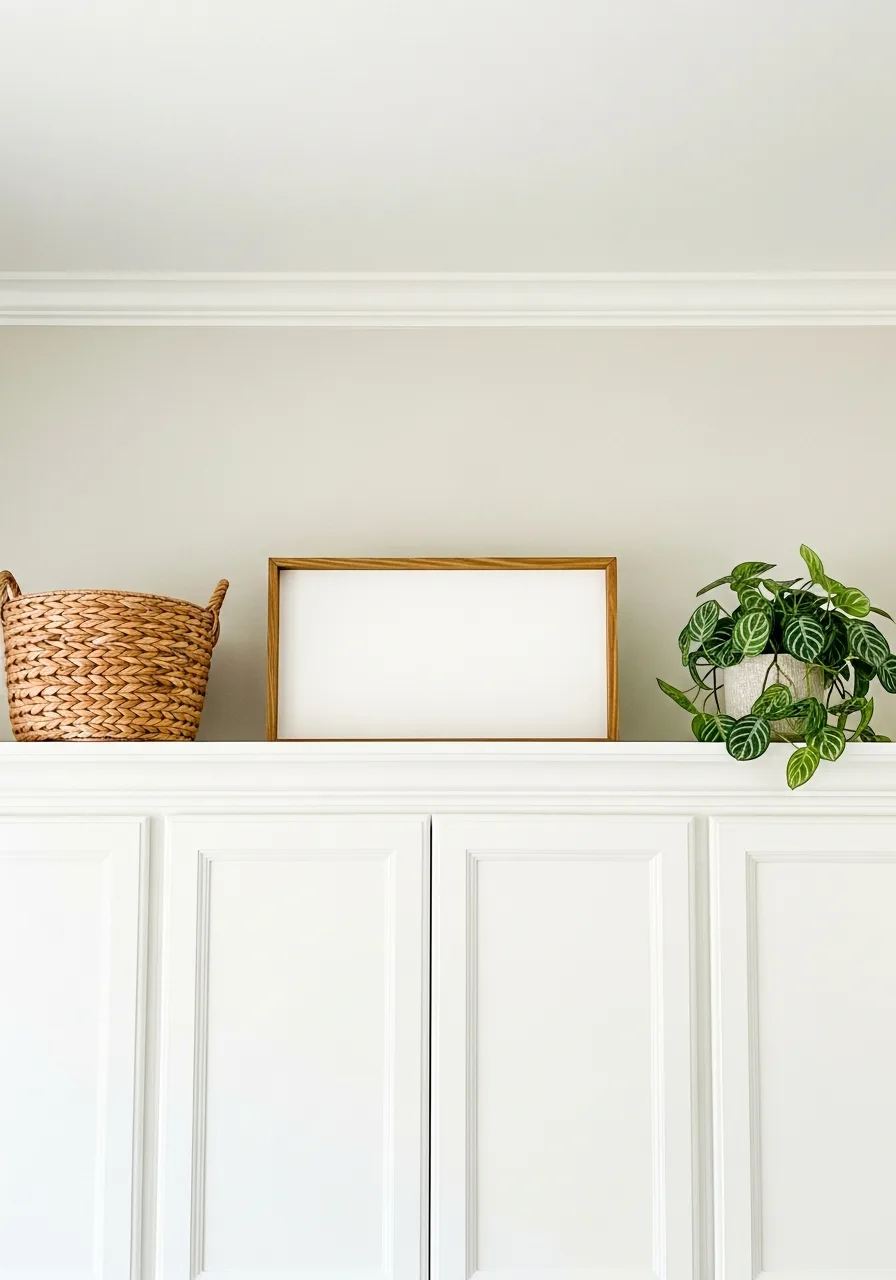
6. Framed Landscape Art
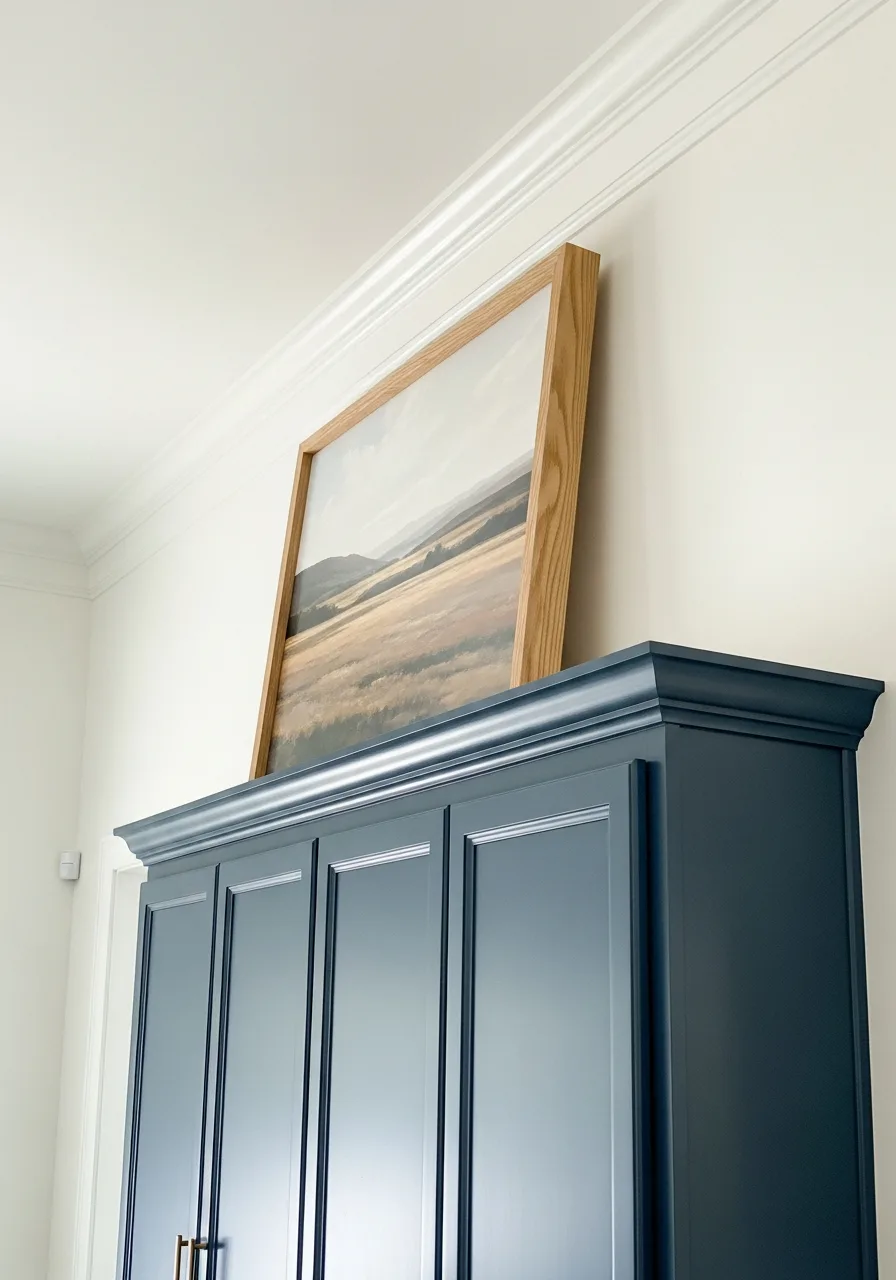
Large frames can bridge the gap to the ceiling and add sophistication. Lean wide landscape paintings against the wall to fill the vertical void. This draws the eye upward and makes the ceiling feel much higher.
Choosing simple frames keeps the focus on the art rather than the hardware.
- Select frames that are at least half the height of the gap.
- Use non-slip pads on the bottom of the frames to prevent sliding.
- Choose art with colors that match your kitchen rug or towels.
Best shortcut: Use lightweight canvas prints if you are worried about the weight on the cabinet.
7. Galvanized Metal Bins
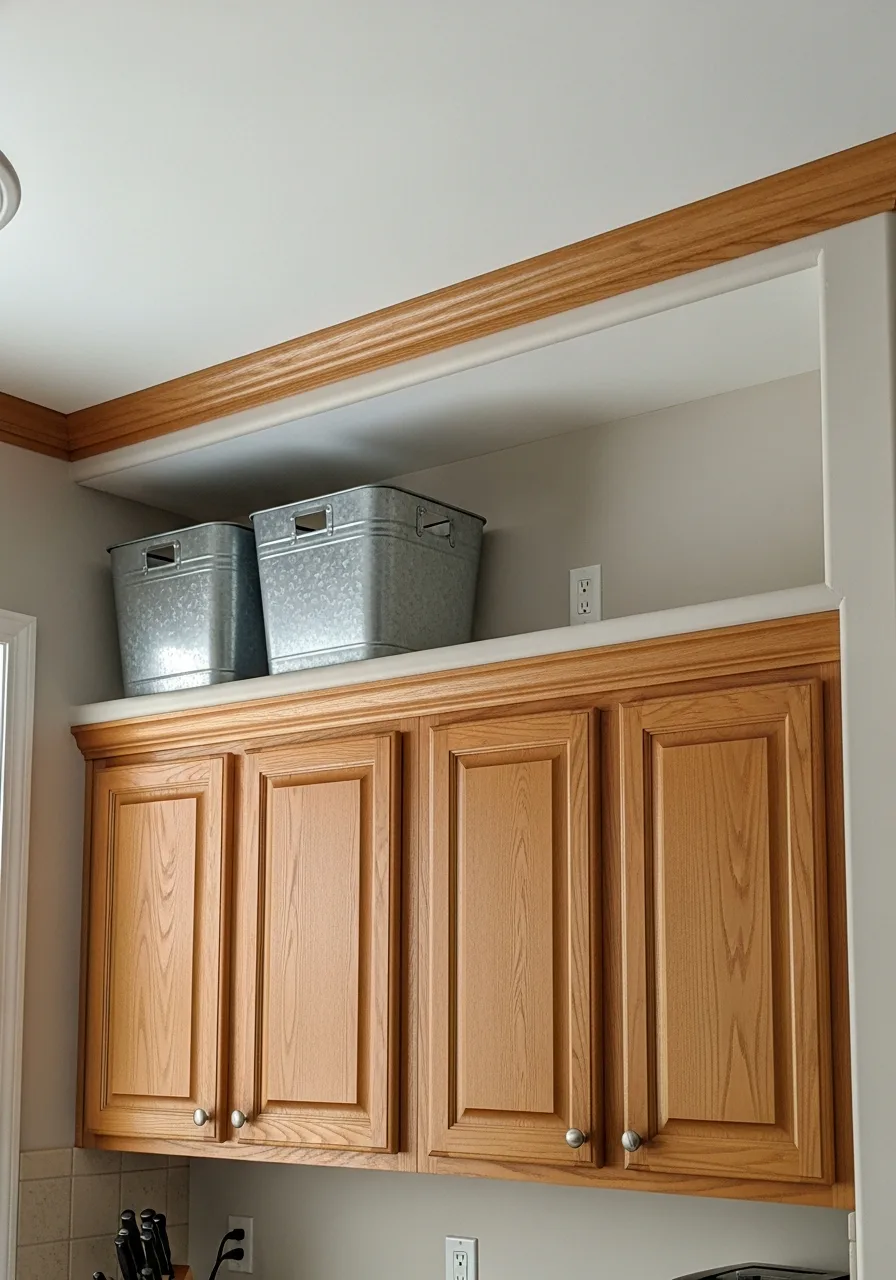
Metal adds a touch of industrial style and durability to the kitchen. Use metal bins with handles to store seasonal items like holiday cookie cutters. The reflective surface helps bounce light around a darker kitchen.
These are durable and can survive the heat and grease found near the stove.
- Purchase bins in a set to ensure the metal finish matches perfectly.
- Leave a few inches of space between bins so they don't look crowded.
- Wipe them down with a microfiber cloth to remove fingerprints.
Most people skip this: Add felt pads to the bottom of metal bins to prevent scratching the cabinet finish.
8. Large Woven Trays
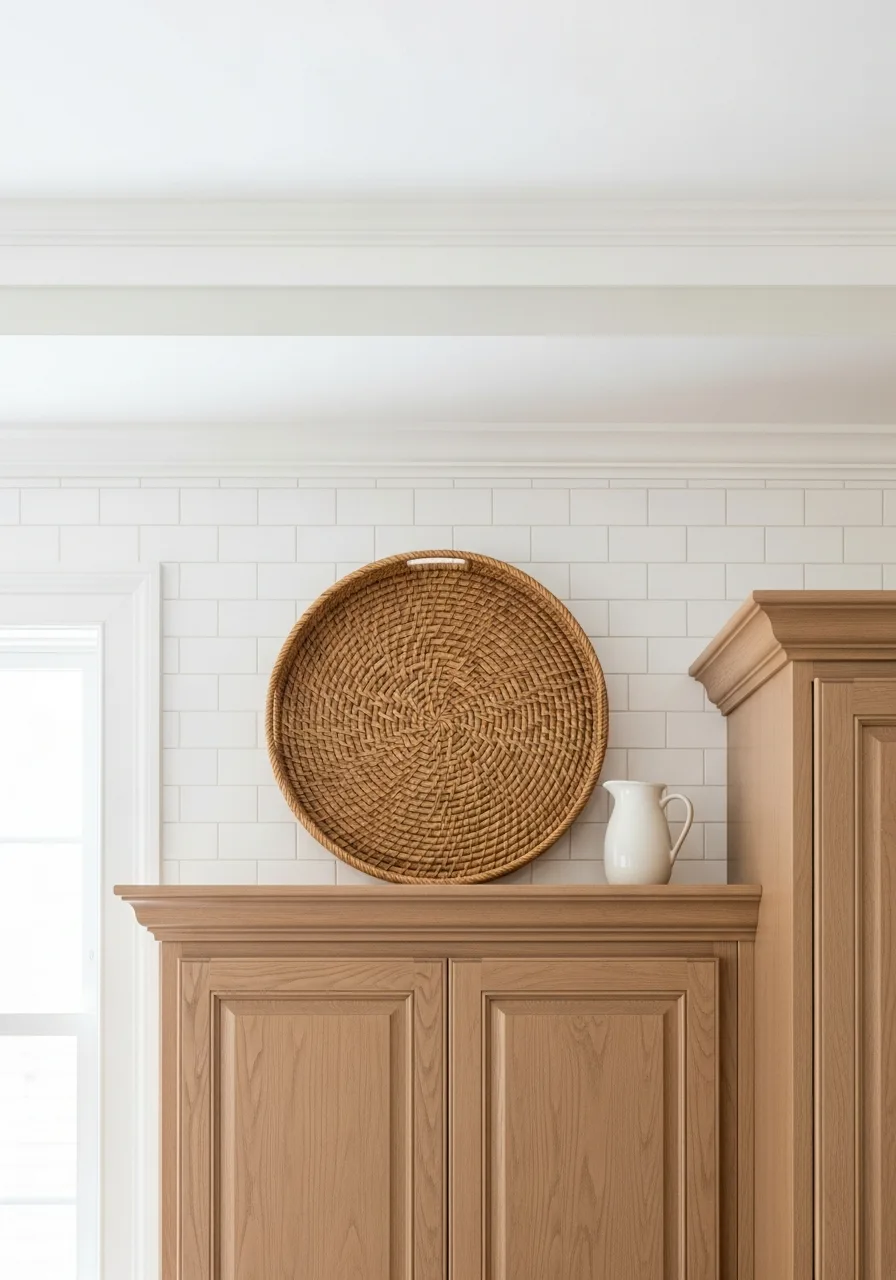
Round shapes break up the square lines of standard cabinetry. Prop a large round woven tray against the wall for a textured backdrop. It fills a lot of space without requiring many individual items.
This works well in kitchens with a coastal or bohemian vibe.
- Look for trays with a diameter that is slightly shorter than the gap.
- Secure the tray with a small piece of double-sided tape at the top.
- Layer a smaller plate in front of the tray for more depth.
Quick win: Use a tray with a handle to make it easier to pull down when you need it for hosting.
9. White Ceramic Serving Bowls
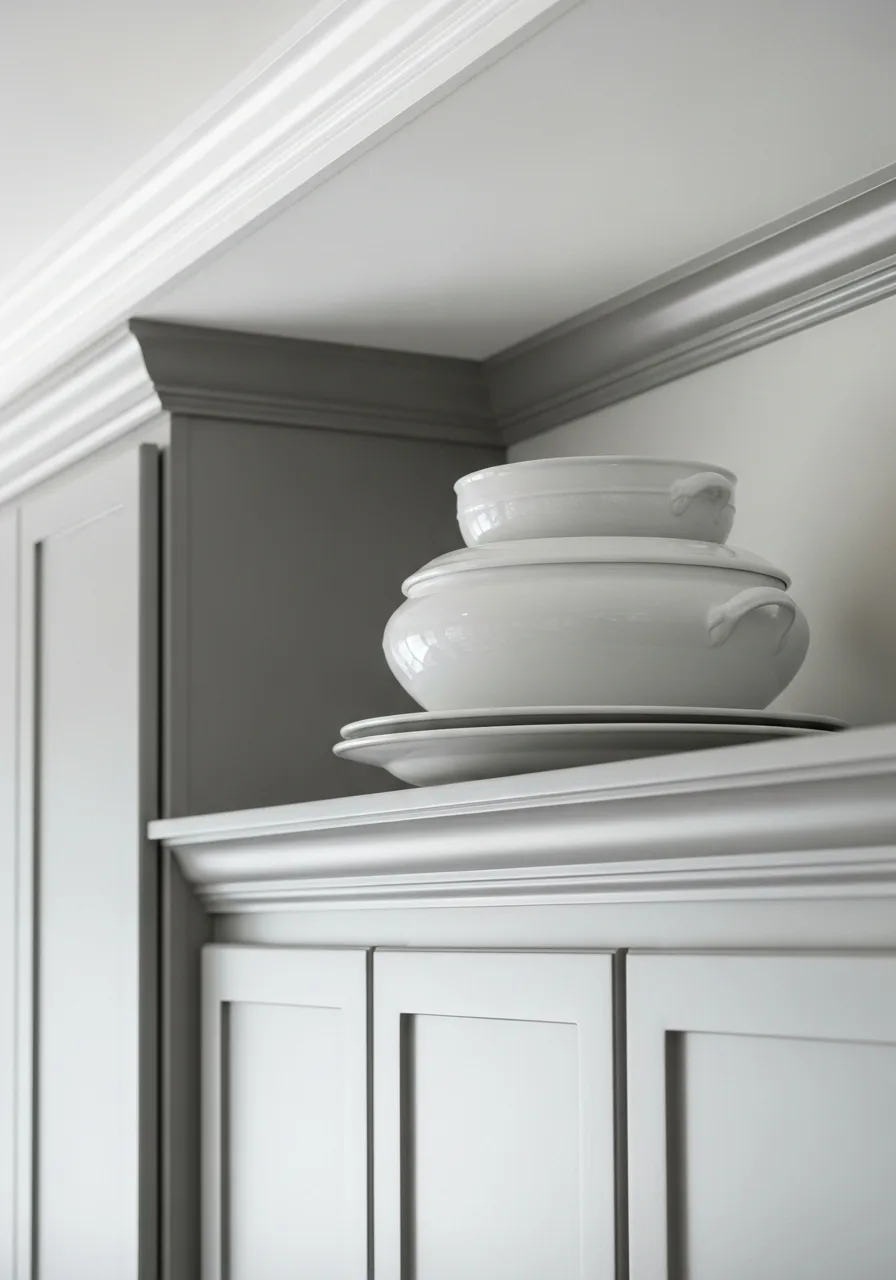
Neutral colors keep the kitchen looking bright and clean. Stack two or three white bowls of different sizes to create a tiered display. Storing them high up saves precious lower cabinet space for daily plates.
This look is timeless and fits almost any kitchen style.
- Use bowls you already own to save money on decor.
- Place a small piece of shelf liner between bowls to prevent chips.
- Keep them away from the very edge to prevent accidental falls.
Best shortcut: Use museum wax on the bottom bowl to keep the whole stack stable.
10. Antique Wooden Crates
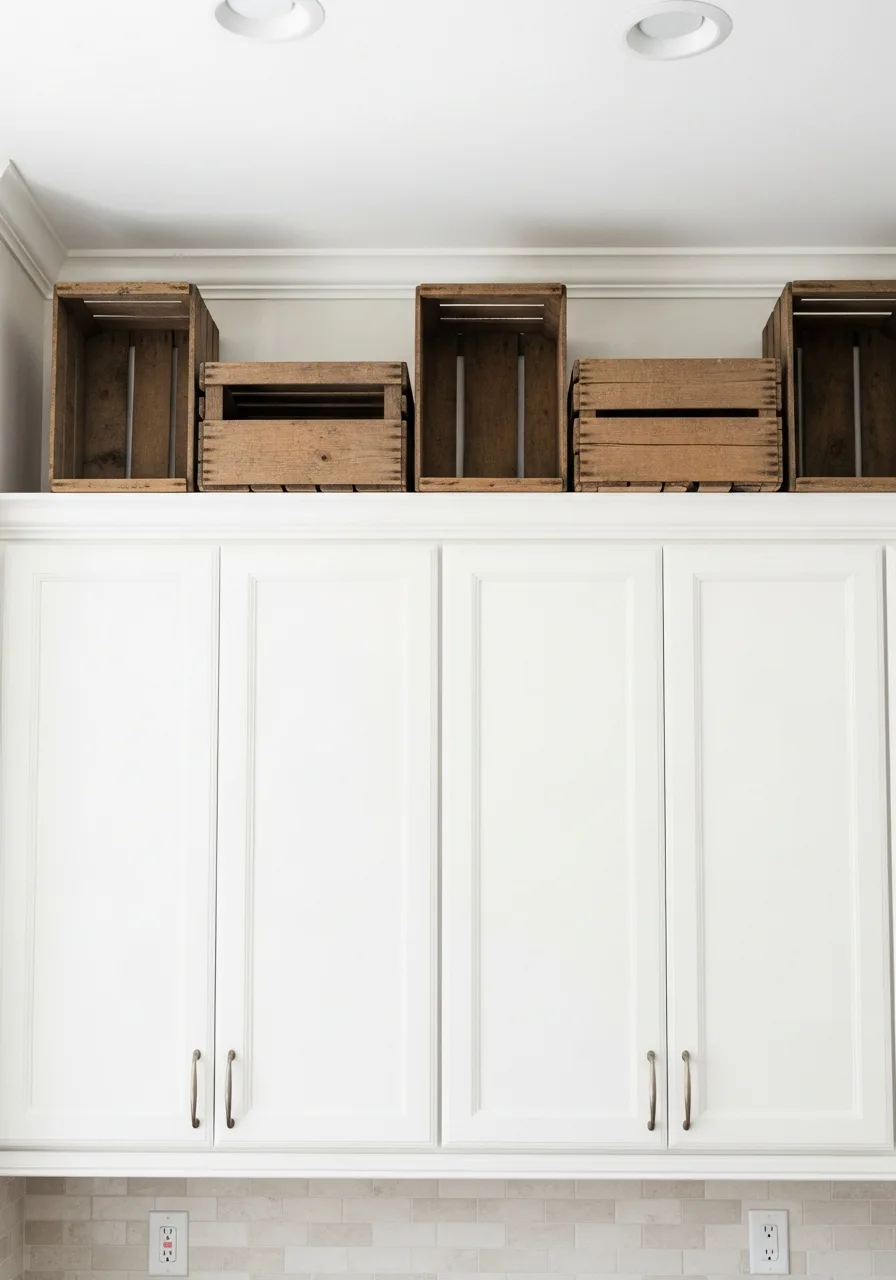
Wood adds warmth and a rustic feel to a white kitchen. Turn wooden crates on their side to create small cubbies for decor. This adds a second level of storage or display space.
Crates balance out the cold look of stainless steel appliances.
- Sand down any rough edges to avoid splinters when handling.
- Check for pests or rot if buying authentic vintage crates.
- Use a wood conditioner to bring back the shine of old timber.
Most people skip this: Only use one or two crates to avoid making the kitchen look like a warehouse.
11. Copper Colander Display
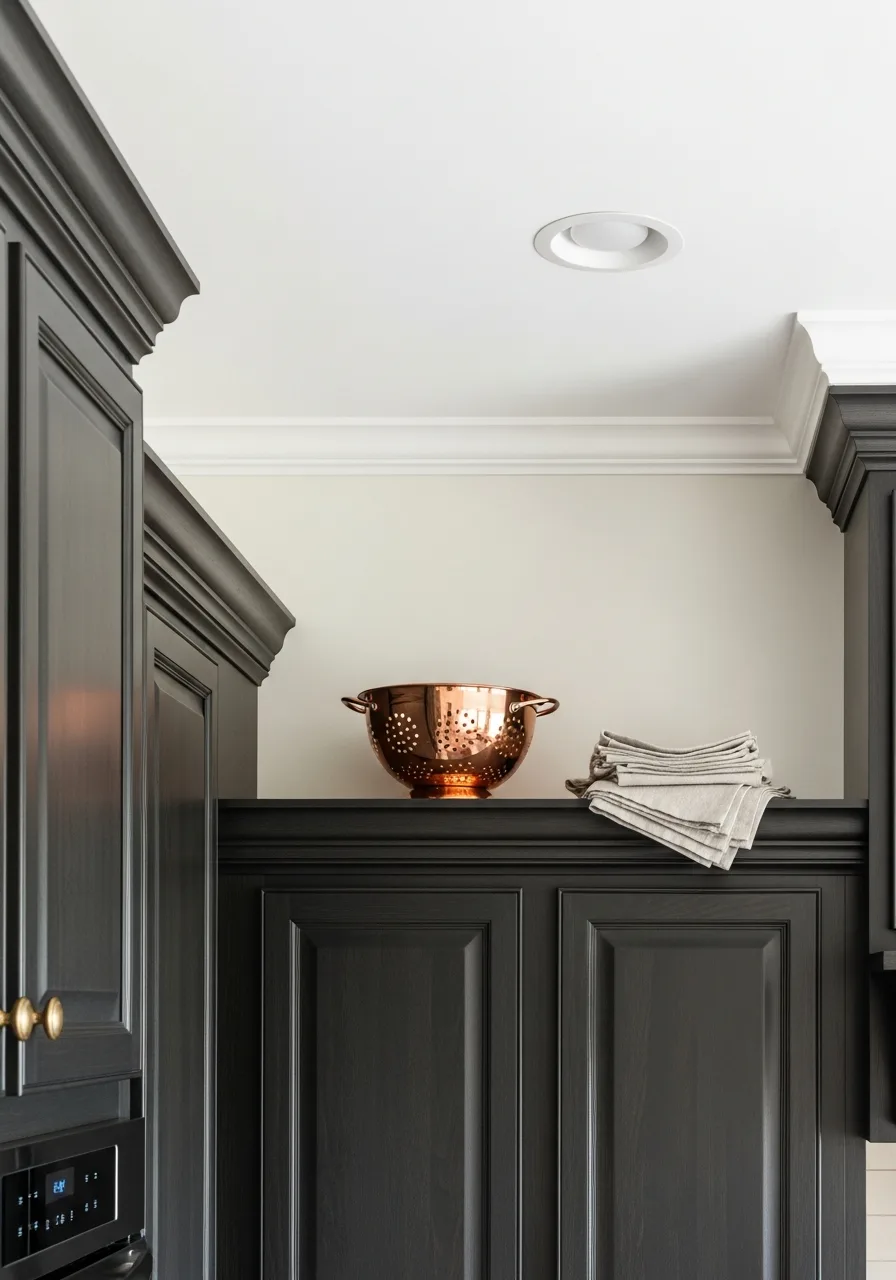
Shiny metals feel high-end and professional in a culinary space. Place a vintage copper colander or pot in an empty corner for a metallic accent. Copper develops a beautiful patina over time that adds character to the room.
It reflects light, which helps brighten up the space under the ceiling.
- Polish the copper once a year if you prefer a bright, shiny look.
- Look for pieces with brass handles for an extra layer of detail.
- Pair copper with dark cabinets for a high-contrast appearance.
Quick win: Hang a small copper measuring cup set nearby to tie the look together.
12. Clear Acrylic Organizers
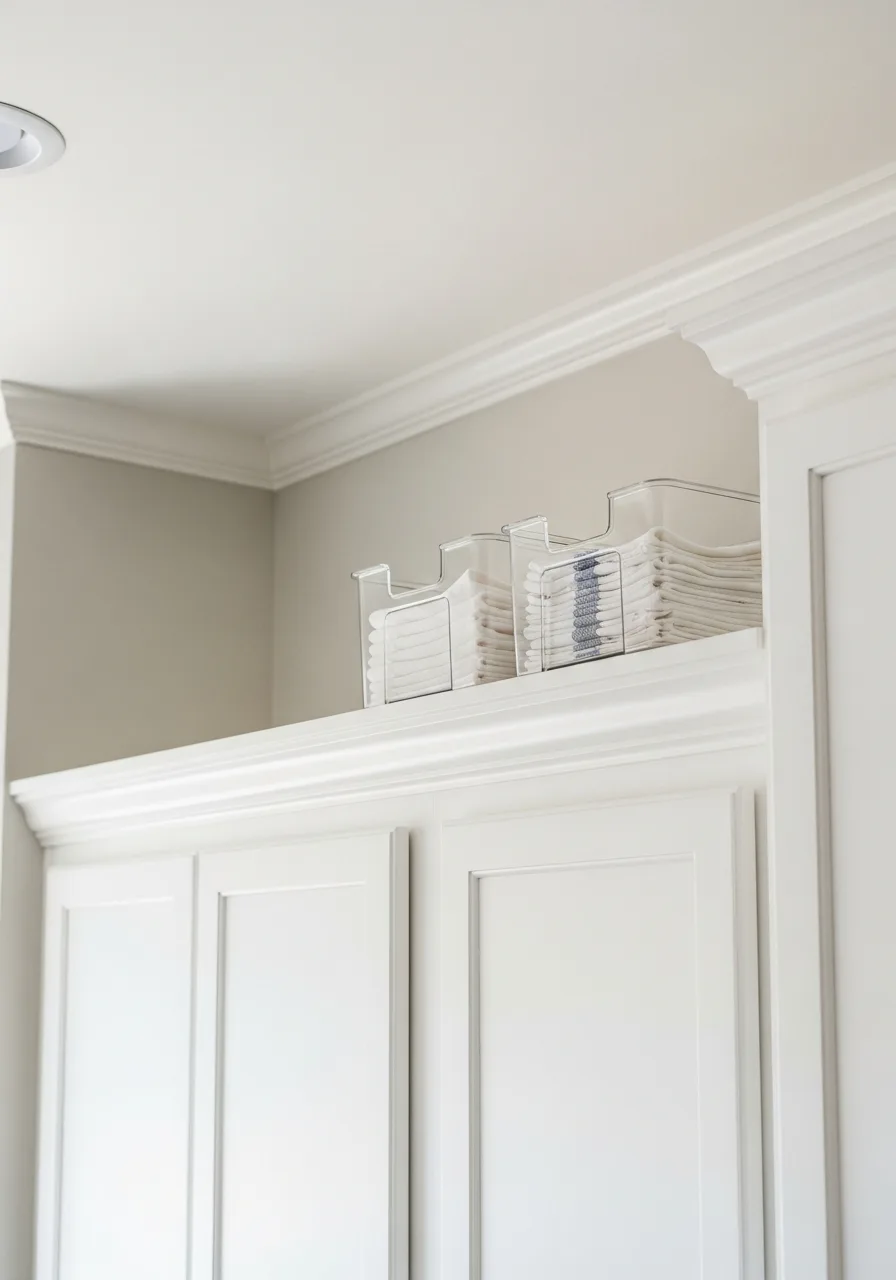
Modern kitchens benefit from storage that stays out of sight. Fill clear acrylic bins with lightweight items like extra paper towels or napkins. Because they are see-through, they don't add visual weight to the top of the room.
This keeps the kitchen looking organized and airy.
- Choose bins with built-in handles for easy gripping from a stool.
- Group similar items together so the contents look uniform.
- Wash the bins with soap and water to keep them crystal clear.
Best shortcut: Use these for items you only need once a month to minimize climbing.
13. Wine Bottle Rack
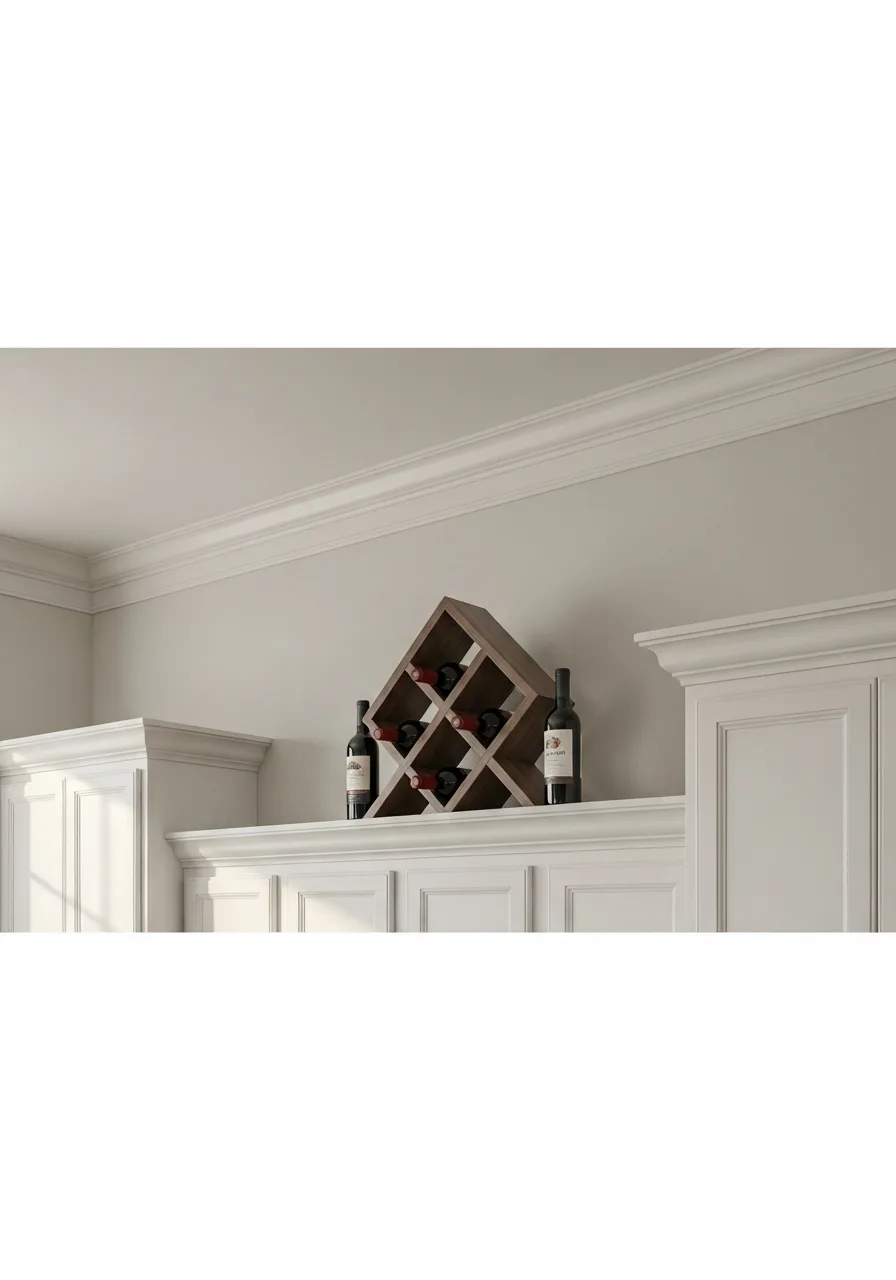
Horizontal storage uses the width of the cabinet efficiently. Install a simple wooden wine rack to store bottles away from the heat of the stove. Keeping wine high up keeps it out of the way of daily meal prep.
It turns a functional storage need into a sophisticated display.
- Ensure the cabinet top is level before placing a wine rack.
- Choose a rack that holds at least four to six bottles for a full look.
- Keep the rack away from direct sunlight to protect the wine.
Most people skip this: Only store everyday wines here, as the temperature near the ceiling can fluctuate.
14. Decorative Signage
Words can add a personal touch and fill space quickly. Lean a wooden or metal sign with a simple kitchen-themed word against the wall. Keep the font simple so it is easy to read from across the room.
This works best in a farmhouse or traditional style kitchen.
- Choose a sign that takes up about two-thirds of the vertical space.
- Make sure the sign is heavy enough that it won't be moved by a breeze.
- Avoid signs with too many words, which can look cluttered.
Quick win: Match the color of the letters to your cabinet hardware for a cohesive look.
15. Large Glass Jars
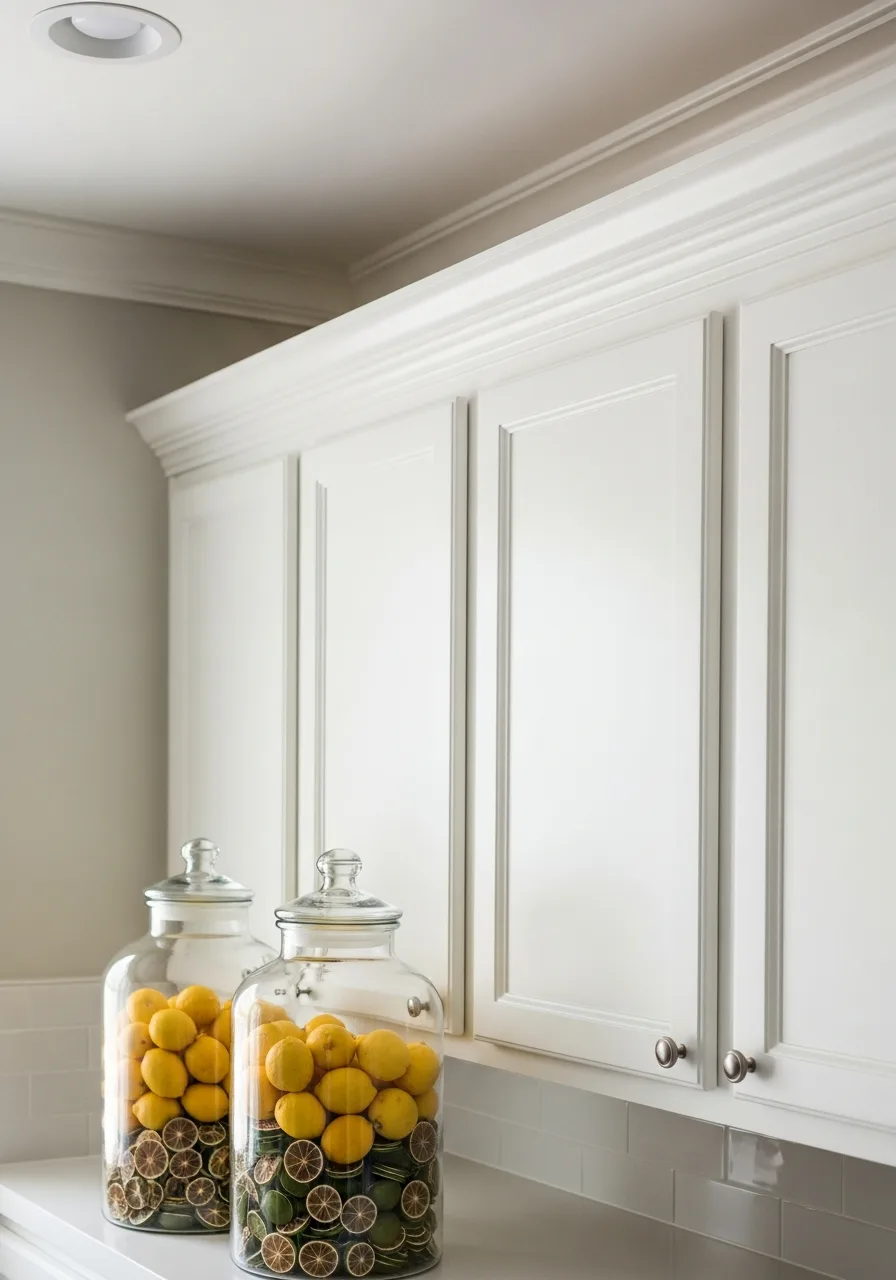
Scale is important for high spaces where small items get lost. Fill oversized glass apothecary jars with dried pasta or colorful faux fruit. The large size makes them visible from the floor and adds a pop of natural color.
It is a classic look that bridges the gap between decor and storage.
- Use lightweight filler like faux fruit if the jars are too heavy when full.
- Tight-fitting lids will keep dust from getting inside the jars.
- Space them out evenly across the cabinet run for balance.
Best shortcut: Fill the bottom half with paper or foam to save money on filler items.
16. Tiered Glass Cake Stands

Tiered stands create immediate visual height and a sense of elegance in an empty corner. Stagger stands of varying heights to create a mountain-like silhouette that draws the eye upward and balances the room. Clear glass keeps the arrangement feeling light and airy instead of heavy.
Expert opinion: Glass stands are the perfect choice for small kitchens because they don't block the light or make the ceiling feel lower.
- Pick up mismatched glass stands at thrift stores for under ten dollars each.
- Place the tallest stand in the back corner and the shortest one toward the front edge.
- Stick small adhesive museum wax dots on the bottom of the stands to prevent sliding.
Quick win: Use clear glass stands to keep the space feeling light rather than cluttered.
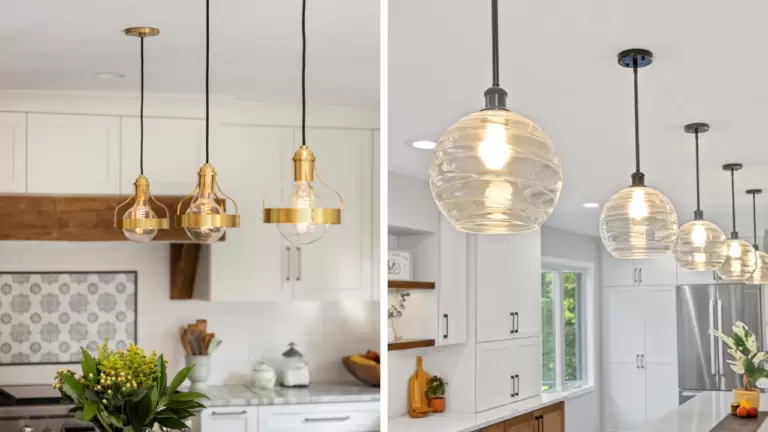
17. Matte Black Iron Lanterns
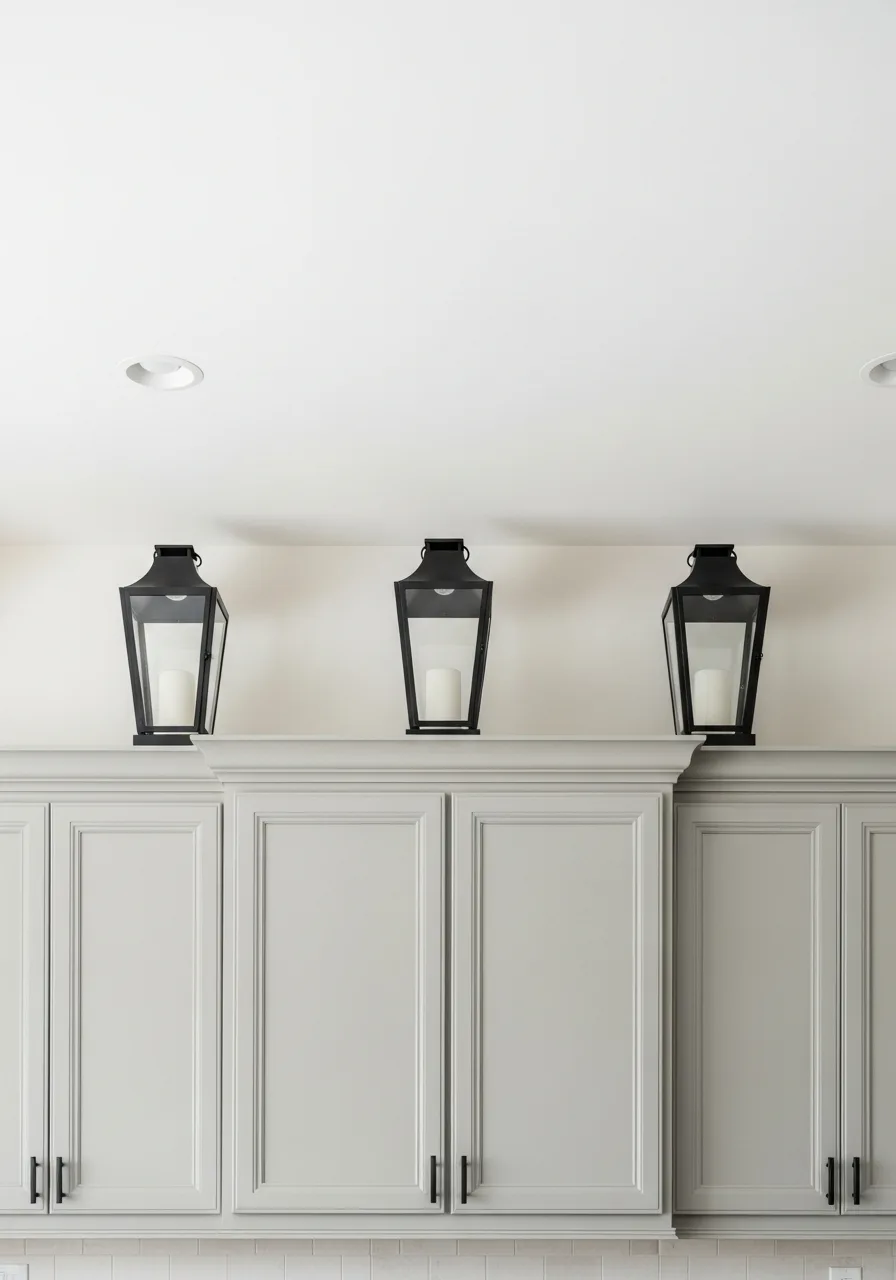
Lanterns provide a strong vertical element that bridges the gap to high ceilings effectively. Place three identical lanterns in a row to establish a clean rhythmic pattern that anchors the kitchen design. The dark metal offers a sharp contrast against light-colored walls or white cabinetry.
Expert opinion: Choosing lanterns with glass panes helps reflect any nearby light, preventing the cabinet tops from looking like a dark void.
- Buy lanterns in a set of three to ensure they match perfectly in size and finish.
- Space them exactly twelve inches apart to create a professional, symmetrical look.
- Opt for lanterns that are at least half the height of the gap for the best scale.
Most people skip this: Use battery-operated candles with timers inside the lanterns for effortless evening ambiance.
18. Chunky Reclaimed Wood Risers
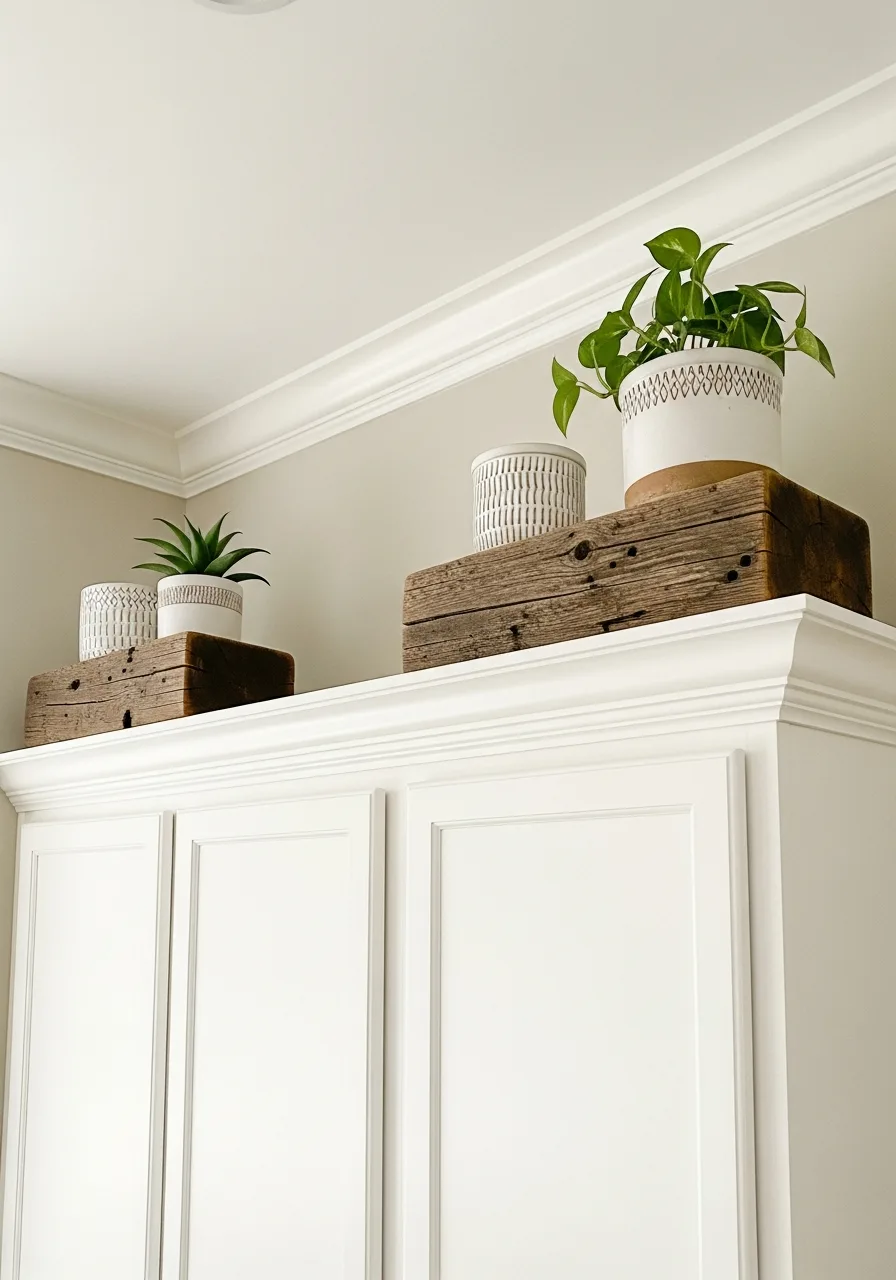
Risers are the secret to making short decor look intentional in a deep space. Use thick wood blocks to lift smaller items so they do not get lost behind the cabinet crown molding. The natural grain adds warmth to a room filled with cold surfaces like tile and stone.
Expert opinion: Wood risers allow you to use items you already own that would otherwise be too small for the space.
- Cut scrap 4×4 lumber into varying lengths for an easy afternoon project.
- Position the risers at different angles to create a more organic and less stiff display.
- Apply a clear matte sealant to the wood to prevent dust from sticking to the raw grain.
Best shortcut: Use old hardcover books wrapped in neutral paper as budget-friendly risers.
19. Large Seagrass Hamper Baskets
Large-scale items are easier to clean because there are fewer individual surfaces to dust. Choose oversized baskets that fill at least two-thirds of the vertical gap to prevent the decor from looking dinky. The woven texture introduces a soft, natural element to the kitchen.
Expert opinion: Lidded baskets are the smartest way to hide ugly items like paper towels or extra light bulbs.
- Measure the height from the cabinet top to the ceiling before buying to ensure a snug fit.
- Select baskets with a tight weave so they hold their shape over time without sagging.
- Wipe the baskets with a damp cloth once a month to keep the fibers from becoming brittle.
Quick win: Label the baskets with small wooden tags so you know what is stored high up.
20. Antique Blue Seltzer Bottles
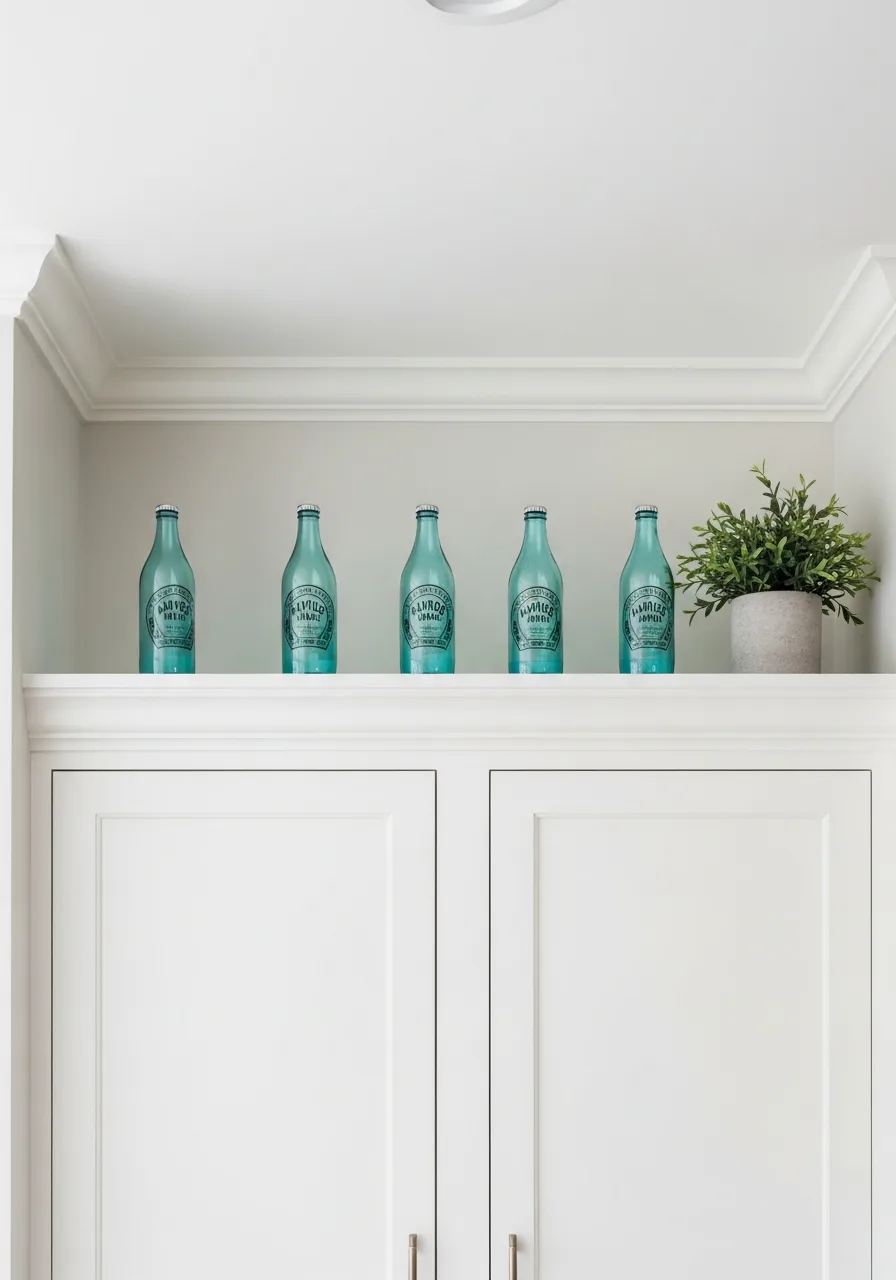
Colored glass adds a pop of personality without the visual weight of solid objects. Group blue and green glass bottles together to catch natural light from nearby windows and brighten the corner. The vintage shapes offer a nostalgic feel that works well in farmhouse or coastal kitchens.
Expert opinion: Glass is one of the best materials for high spaces because it is easy to wash in the dishwasher when it gets greasy.
- Search for 'seltzer bottles' at antique malls or online auction sites for authentic pieces.
- Vary the shades of blue from turquoise to cobalt to create more visual depth.
- Place the bottles directly in front of a light-colored wall to make the colors pop.
Most people skip this: Check that the bottle bottoms are flat so they don't wobble when you open the cabinet doors.
21. Hand-Carved Wooden Dough Bowls
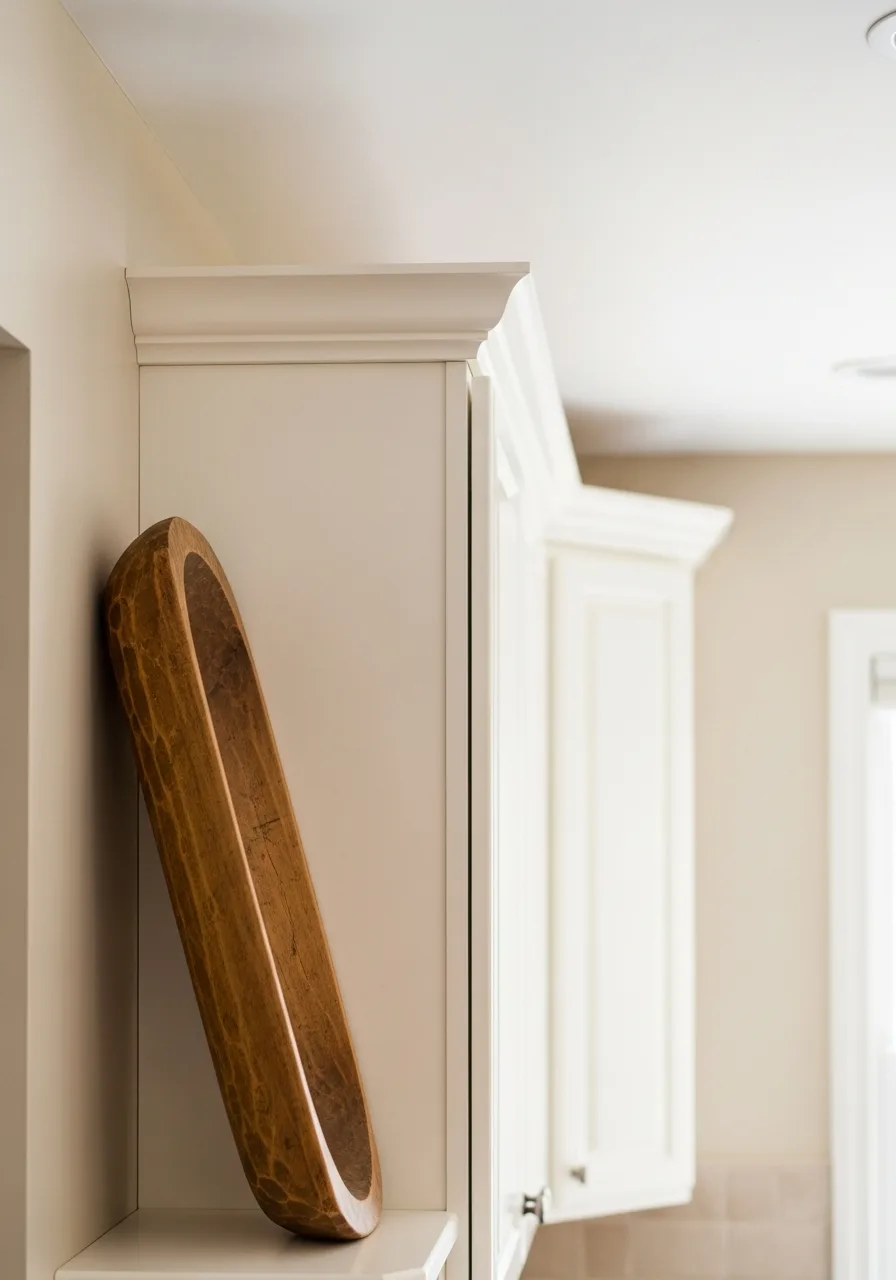
The raw wood texture provides a necessary break from the smooth surfaces of paint and tile. Lean a long wooden dough bowl against the wall to add a horizontal organic element that softens sharp cabinet lines. This orientation shows off the unique carving marks and wood grain.
Expert opinion: Leaning items instead of laying them flat fills more of the vertical wall space.
- Look for bowls with a flat bottom or edge so they lean securely against the wall.
- Condition the wood with food-grade mineral oil twice a year to keep it looking rich.
- Pair the bowl with a small potted ivy to add a touch of life to the wood tones.
Best shortcut: Use a small piece of poster putty on the back of the bowl to keep it from sliding.
22. Clustered Brass Candlesticks
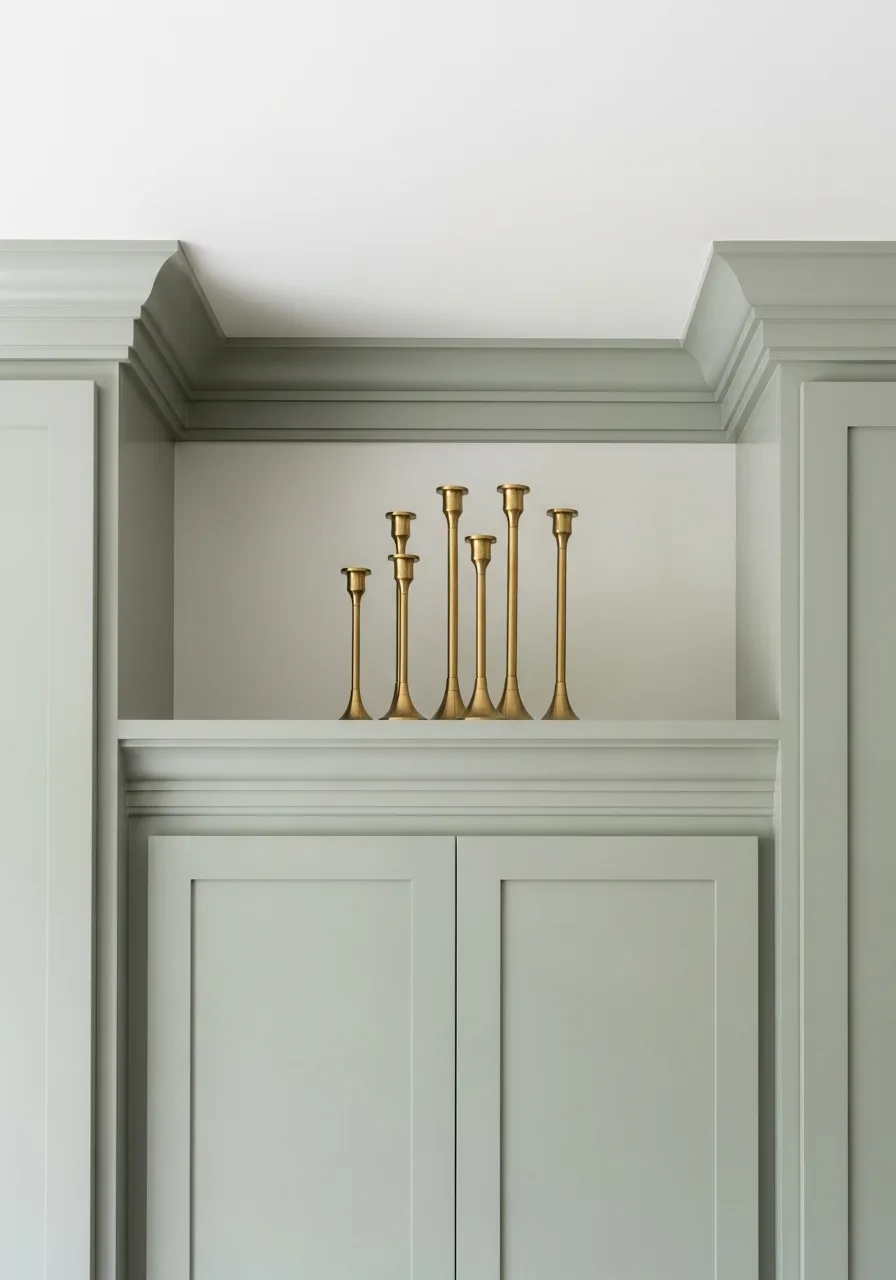
Metal finishes reflect light back into the room, making a dark kitchen corner feel much brighter. Arrange a cluster of brass sticks in varying heights to add a touch of warmth and classic elegance. Brass pairs beautifully with almost any cabinet color, from navy to white.
Expert opinion: Using an odd number of items, like five or seven, creates a more natural look than an even number.
- Mix different styles of brass sticks, such as modern and ornate, for a curated look.
- Use dripless candles or faux LED tapers to avoid messy wax spills on your cabinets.
- Clean the brass with a microfiber cloth to maintain the shine without using harsh chemicals.
Quick win: Stick with a single metal finish to keep the display looking high-end and cohesive.
23. Fabric-Lined Wire Baskets
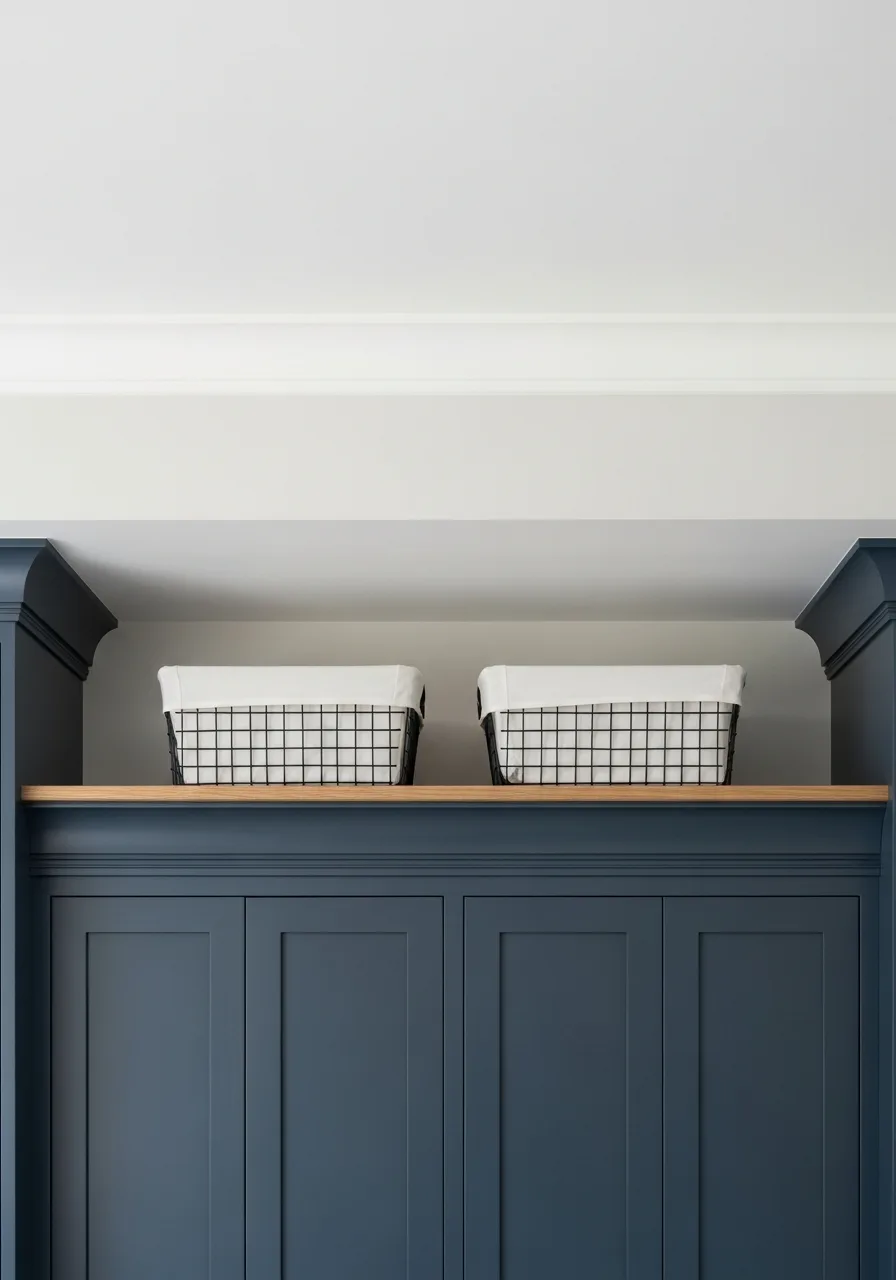
Wire allows air to circulate, which is better for the cabinet finish than solid plastic storage bins. Line wire baskets with linen fabric to hide less attractive storage items while maintaining a tidy and uniform look. This setup turns wasted space into a functional pantry extension.
Expert opinion: The fabric liners can be tossed in the wash, making this one of the cleanest storage solutions.
- Choose a neutral fabric like linen or cotton to keep the look timeless and clean.
- Use these for lightweight items like extra bags of chips or boxes of cereal.
- Ensure the basket handles face forward for easy access when you need to pull them down.
Most people skip this: Iron the liners before putting them in the baskets for a crisp, professional look.
24. Classic White Soup Tureens
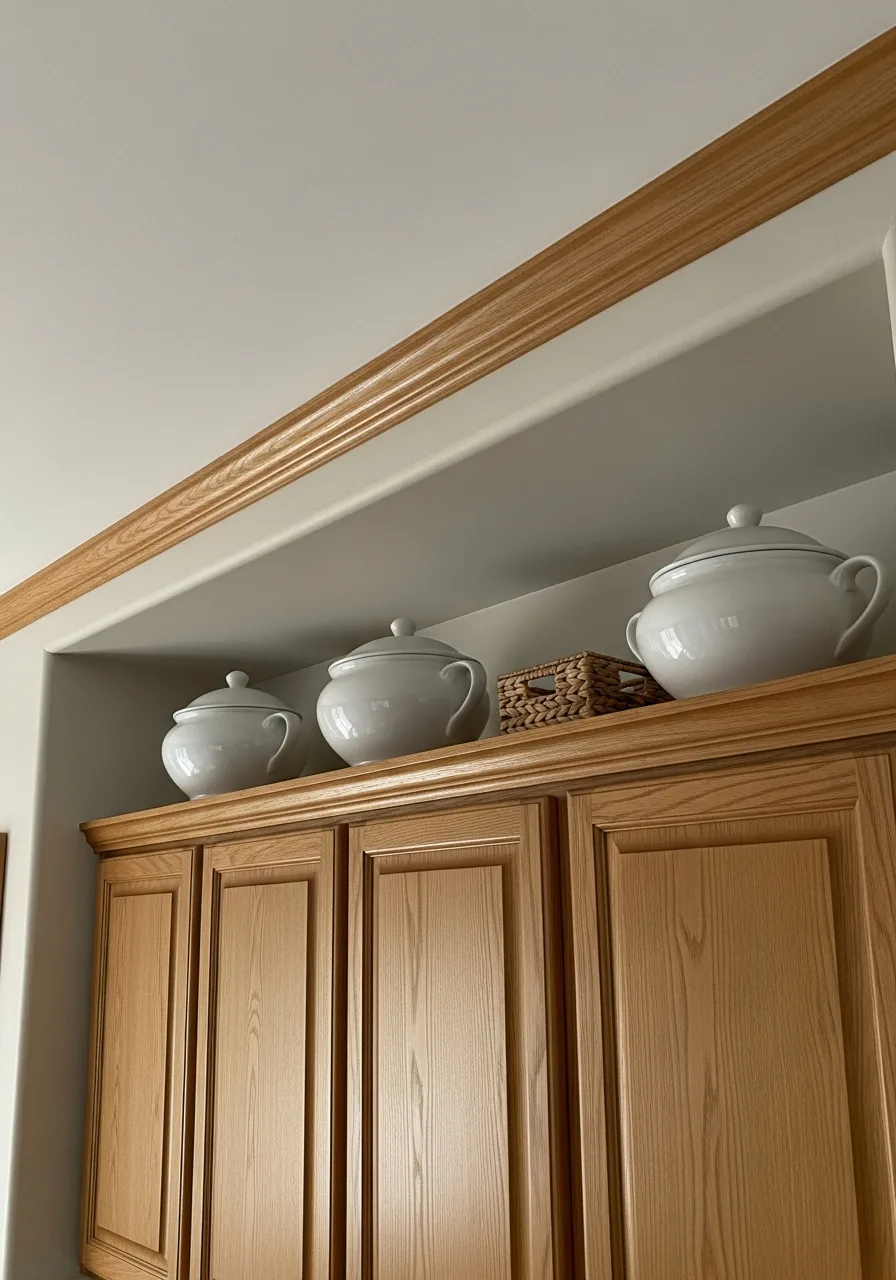
Monochromatic white decor always looks high-end regardless of the brand or price point. Display a single large white tureen as a focal point to give the kitchen a sophisticated and curated feel. The rounded shape of the tureen balances the harsh right angles found in most cabinetry.
Expert opinion: Large ceramic pieces fill the space effectively without requiring dozens of smaller, dust-collecting knick-knacks.
- Search for tureens with interesting lid handles, like lemons or pineapples, for extra detail.
- Place the tureen alone on a smaller cabinet section to let it stand out as a piece of art.
- Check that the tureen is heavy enough that it won't move when the cabinet door is slammed.
Best shortcut: If you can't find a tureen, a large white ceramic Dutch oven works just as well.
25. Sculptural Dried Branches
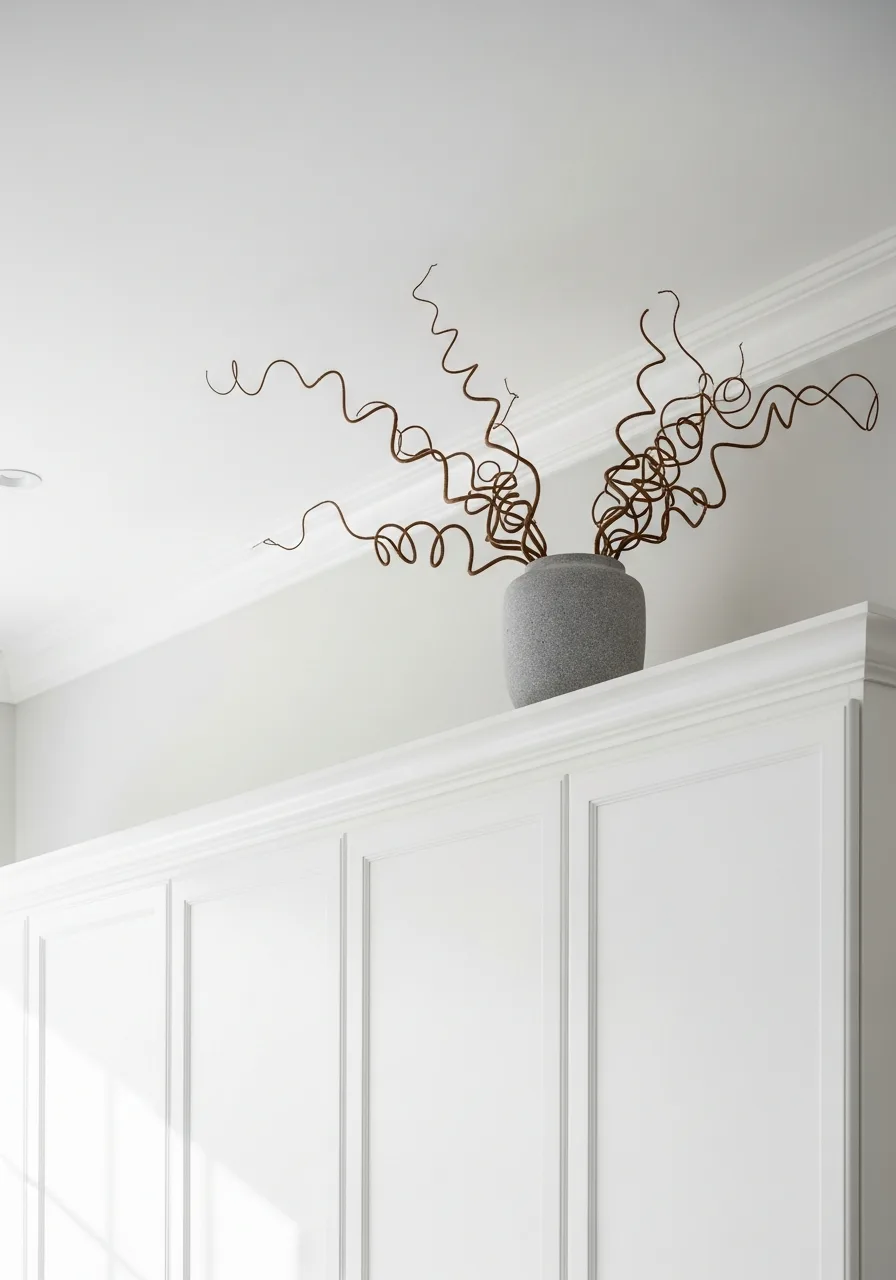
Natural elements like branches provide height without the maintenance or light requirements of real plants. Place a few tall structural branches in a heavy vase to reach toward the ceiling and fill awkward vertical voids. This adds a modern, organic touch that feels very intentional.
Expert opinion: Dried branches are a one-time investment that never needs watering or replacing.
- Use curly willow or manzanita branches for the most interesting and architectural shapes.
- Pick a heavy vase made of stone or thick ceramic so the weight of the branches doesn't tip it over.
- Lightly mist the branches with hairspray to prevent them from becoming brittle and shedding.
Quick win: Match the vase color to your backsplash to make the branches the main focus.
26. Vintage Metal Lunch Boxes
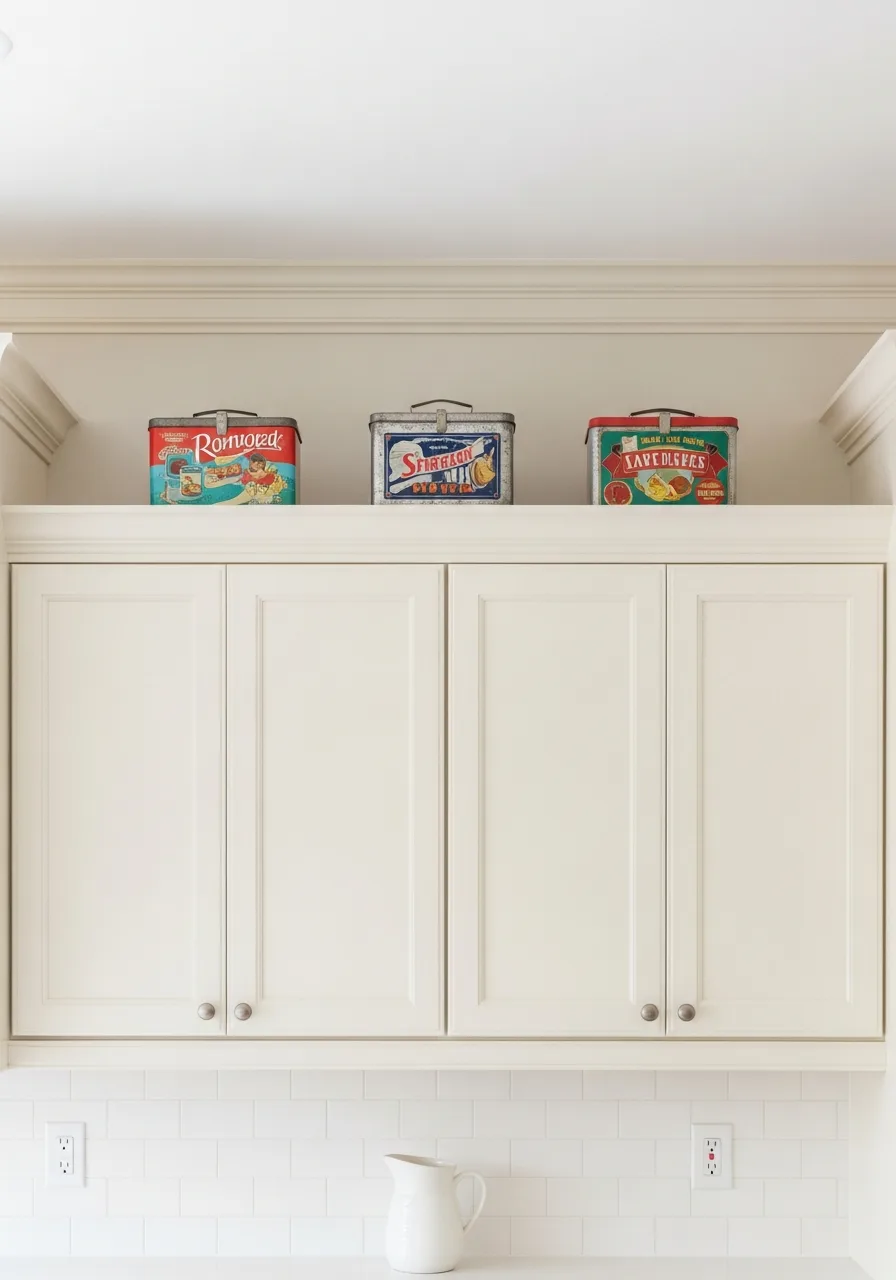
Collections work best when they share a common material like tin or steel. Line up a series of metal lunch boxes for a playful touch of color that fits a casual or farmhouse style. They provide a unique way to display personality in a room that is usually strictly functional.
Expert opinion: Metal boxes are durable and can survive the heat and humidity that often rises to the top of a kitchen.
- Group lunch boxes by color or era to keep the collection from looking like a random mess.
- Use the inside of the boxes to store small, rarely used items like birthday candles.
- Clean the metal with a gentle glass cleaner to remove grease without damaging the vintage paint.
Most people skip this: Place the lunch boxes slightly forward so the handles are visible and add to the silhouette.
27. Large Woven Lidded Trunks

Lidded storage is the only way to utilize this space for actual utility without it looking messy or cluttered. Store bulky seasonal items like holiday tablecloths in lidded trunks to keep them dust-free and out of sight. The chunky texture of the weave adds a cozy, grounded feel to the room.
Expert opinion: Trunks are perfect for bridging large gaps of twelve inches or more.
- Choose a trunk with a flat top so you can stack a smaller item on top if needed.
- Opt for synthetic wicker if your kitchen gets very steamy, as it resists mold better than natural fibers.
- Ensure the trunk is not so deep that it hangs over the front edge of the cabinet.
Best shortcut: Measure your cabinet depth first; most trunks are wider than they are deep.
28. Ceramic Ginger Jars
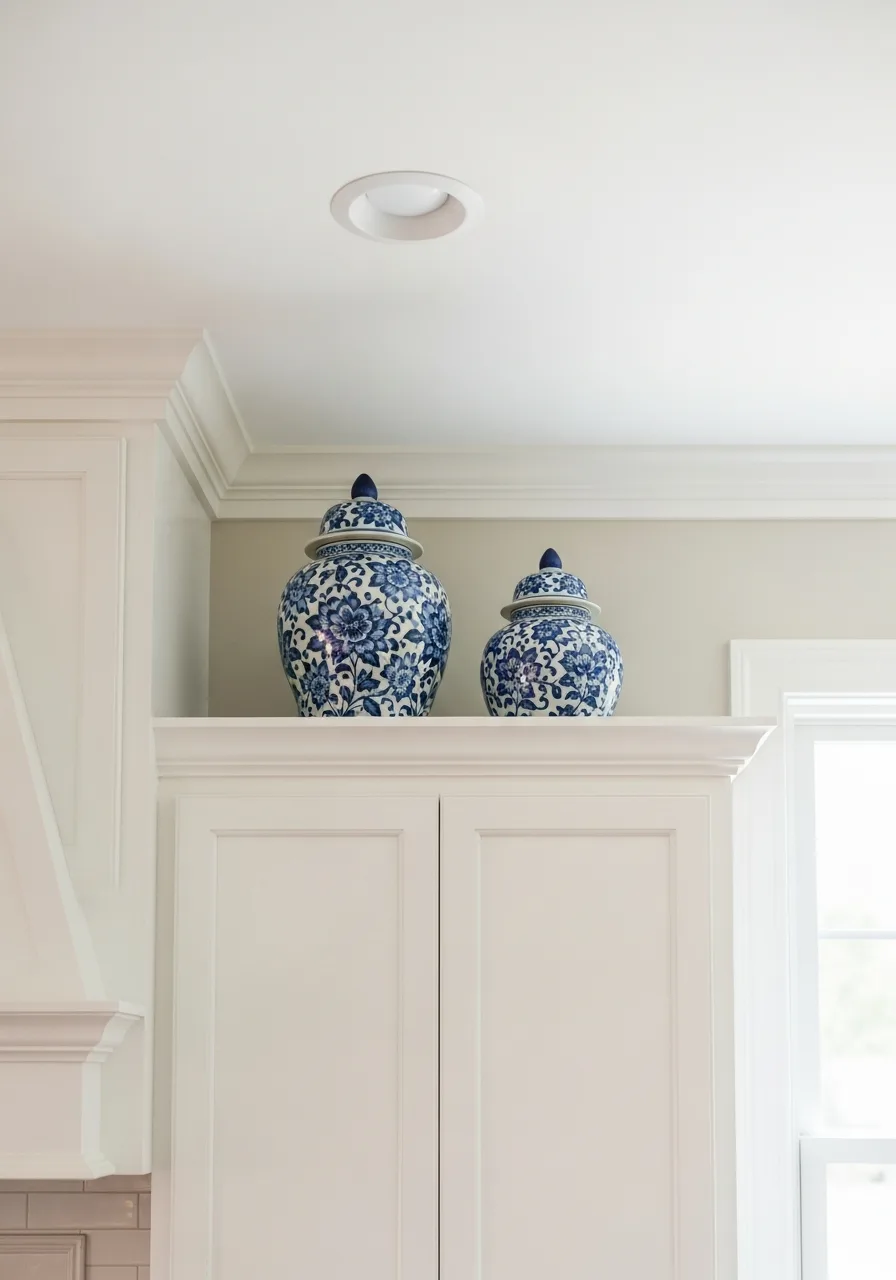
Blue and white ginger jars introduce a classic pattern that elevates a basic kitchen into something more formal. Use jars of different sizes to create a layered look that adds sophistication to white or gray cabinetry. The glossy finish of the ceramic reflects light and adds a high-end touch.
Expert opinion: Ginger jars are a timeless decor staple that will never go out of style.
- Mix patterns like florals and geometric prints as long as the colors stay the same.
- Place jars in pairs of two for a balanced look on shorter cabinet runs.
- Wipe the jars down with a damp cloth every few weeks to keep the porcelain shining.
Quick win: Remove the lids and use the jars as vases for silk flowers to add more height.
29. Heavy Stoneware Crocks
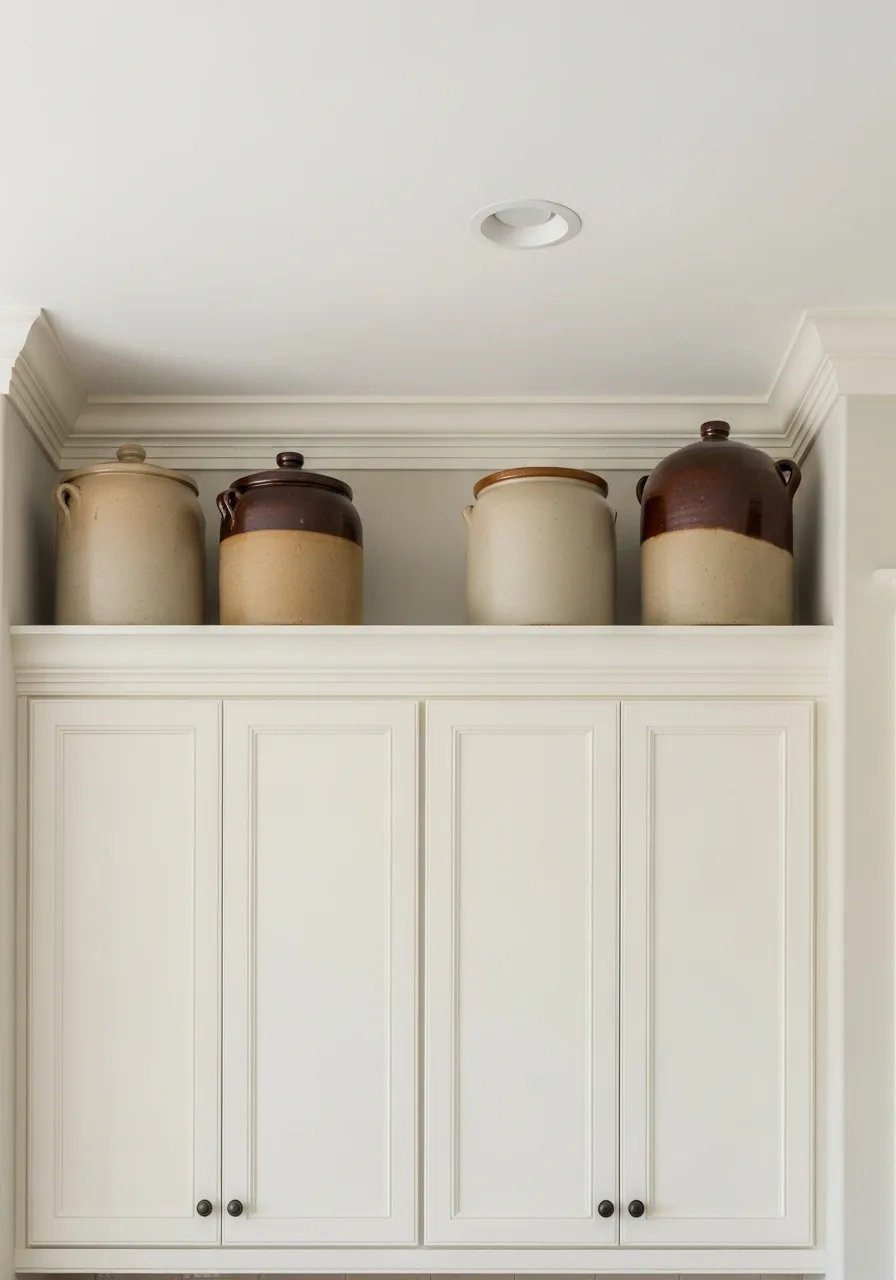
Neutral crocks are versatile enough to stay out year-round even if you change your other decor. Tuck heavy stoneware crocks into corners to ground the space and provide a sturdy and timeless look. They are excellent for filling deep corners where lighter items might look lost.
Expert opinion: The weight of stoneware makes it very stable, so it won't shift when you use the cabinets below.
- Look for crocks with embossed numbers or simple blue stripes for a classic look.
- Use these to store heavy kitchen tools like marble rolling pins or large wooden spoons.
- Stick felt pads on the bottom of the crocks to protect your cabinet tops from scratches.
Most people skip this: Turn the crock so any chips or cracks are facing the wall for a perfect appearance.
30. Minimalist Wooden Birdhouses
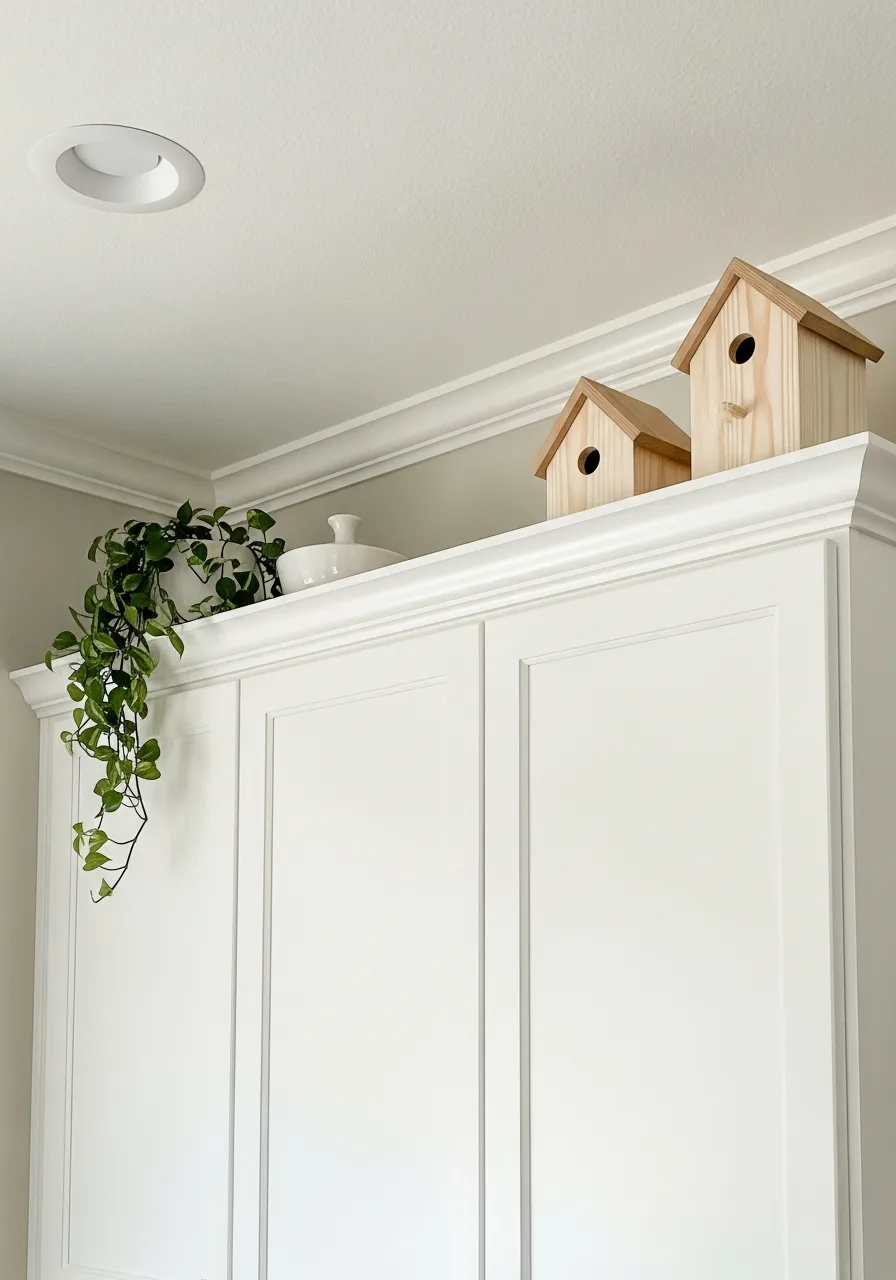
Birdhouses add a touch of outdoor charm and whimsy to a cottage-style kitchen without feeling too busy. Choose simple unpainted wooden birdhouses to add a touch of nature that feels clean and modern. Keeping the shapes simple avoids a cluttered or overly crafty appearance.
Expert opinion: Wood tones help to break up a monochromatic kitchen and add a layer of warmth.
- Select birdhouses with clean lines and no extra glue-on decorations for a modern look.
- Group them in a small 'neighborhood' of three to create a cohesive story.
- Paint the roofs of the birdhouses to match your kitchen accent color for a custom touch.
Best shortcut: Use birdhouses of different heights to keep the eye moving across the display.
31. Large Matte Ceramic Vases
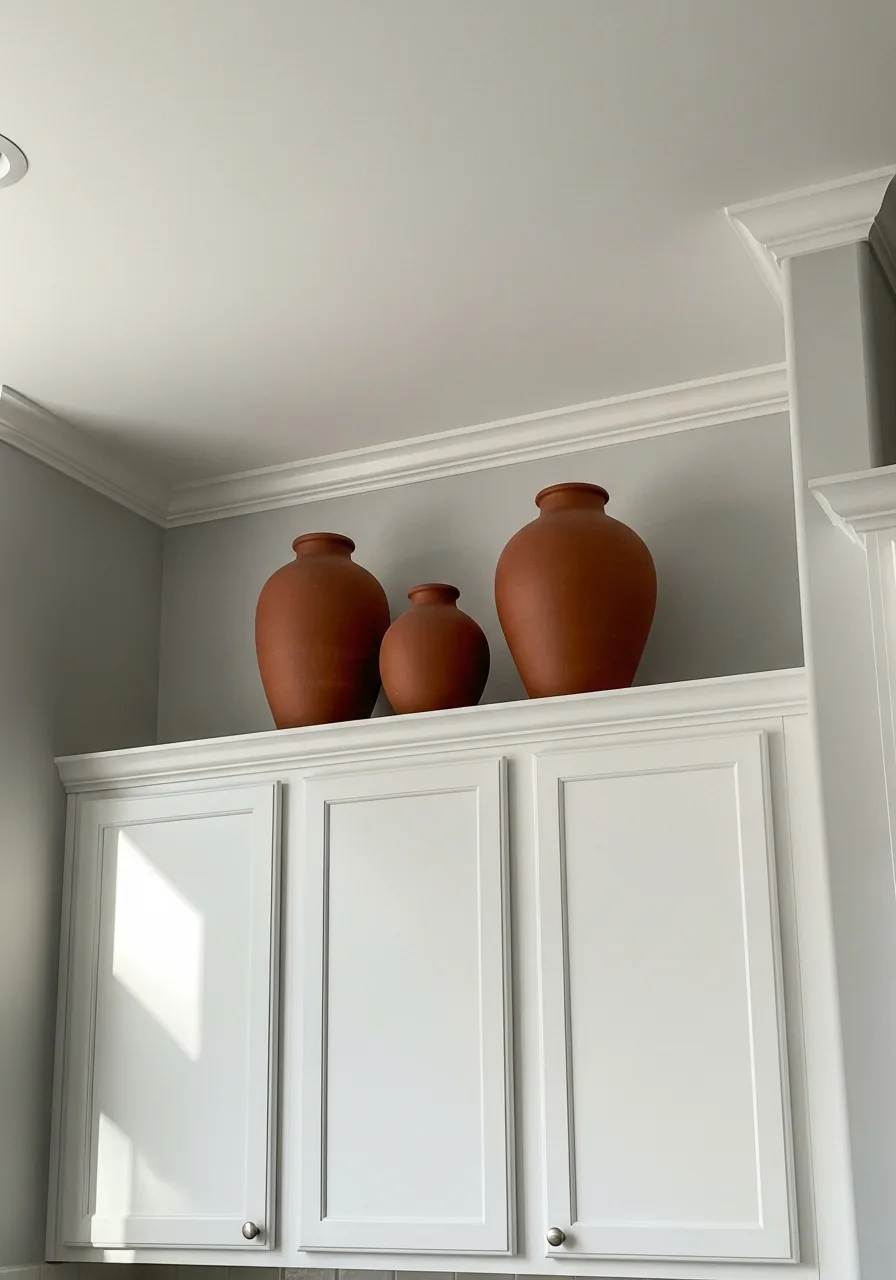
Large vases fill the vertical gap without looking cluttered. Choose three different heights to create a natural visual flow.
Group the vases in odd numbers to make the arrangement look intentional rather than accidental. Matte finishes are better because they do not bounce glare from ceiling lights back at the viewer.
- Search local pottery shops or home goods stores for heavy pieces.
- Space the vases about two inches apart to allow for visual breathing room.
- Use museum putty on the bottom of each vase to prevent movement in earthquake-prone areas.
Quick win: Use a piece of cardboard to lift the shortest vase so it is visible over the cabinet lip.
32. Retro Transistor Radios
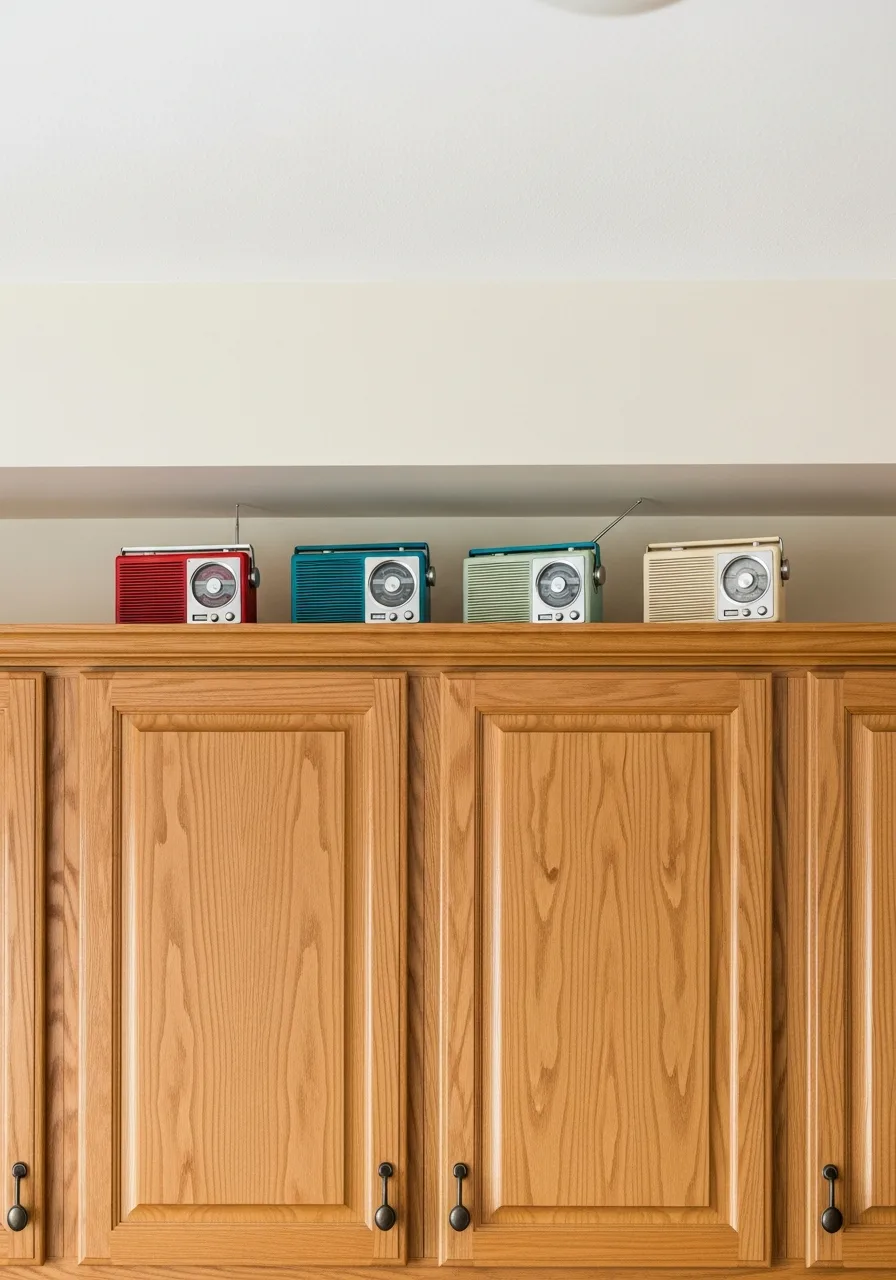
Old-fashioned radios add a sense of history and personality to a modern kitchen. Look for models with interesting dials and colorful plastic or wood cases.
Line up three or four radios of similar sizes to create a cohesive collection along the cabinet edge. A collection of mechanical items looks much more sophisticated than random plastic knick-knacks.
- Find these at thrift stores, antique malls, or online auction sites.
- Wipe down the cases with a damp cloth to remove dust before placing them high up.
- Group by color for a modern look or mix materials for a more eclectic feel.
Most people skip this: Remove old batteries from vintage electronics to prevent acid leaks from damaging your cabinets.
33. Heavy Ironstone Platters
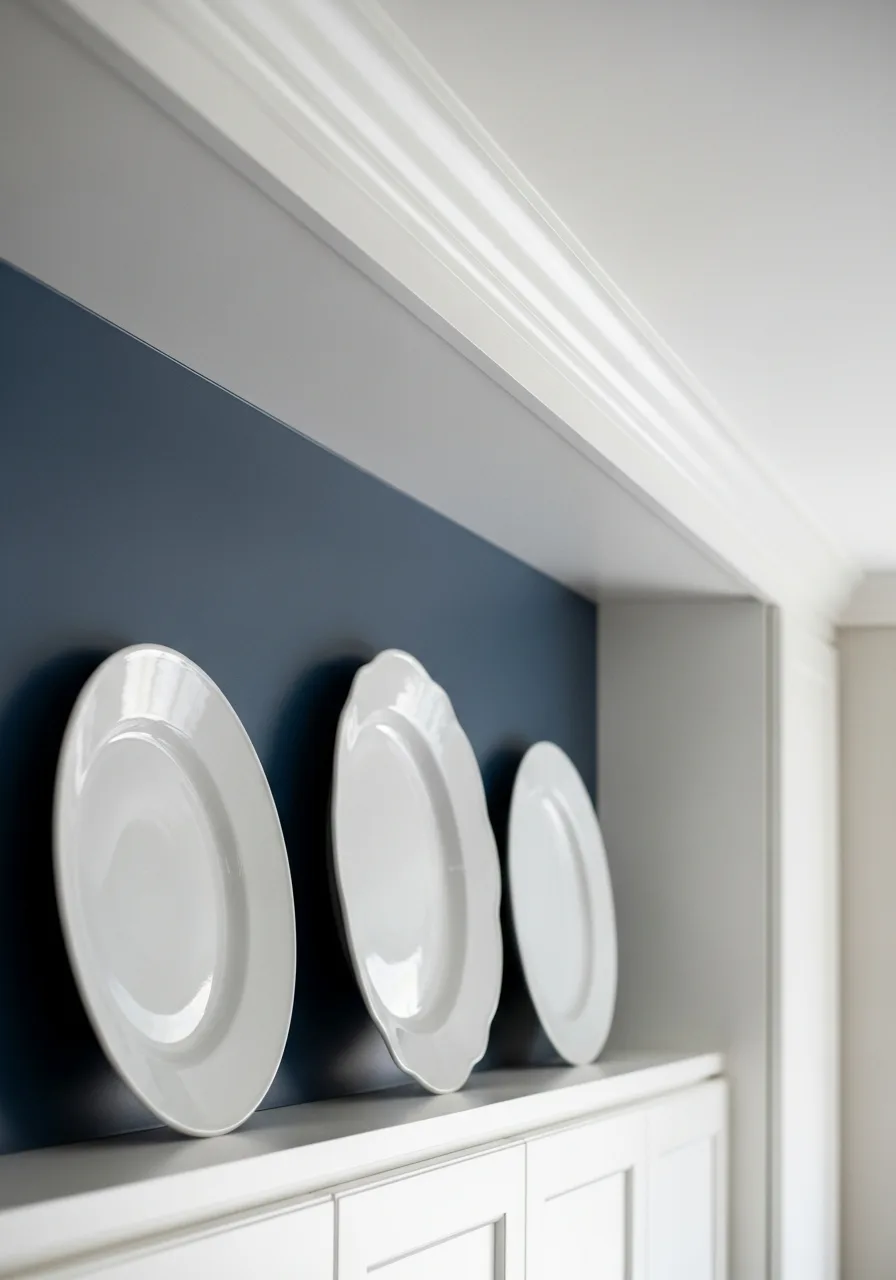
Ironstone is durable and features a clean, creamy white color that matches almost any kitchen. Lean these platters against the wall to fill the height of the gap.
Place the largest platter in the center and overlap smaller ones on the sides for a layered effect. Leaning items vertically makes a low ceiling feel much higher than it actually is.
- Look for heavy, thick platters that can stand up without sliding.
- Use rubber cabinet liners underneath the platters to keep them from slipping forward.
- Mix round and oval shapes to break up the straight lines of the cabinetry.
Best shortcut: Use adhesive plate hangers if you are worried about the platters falling forward.
34. Oversized Circular Clock
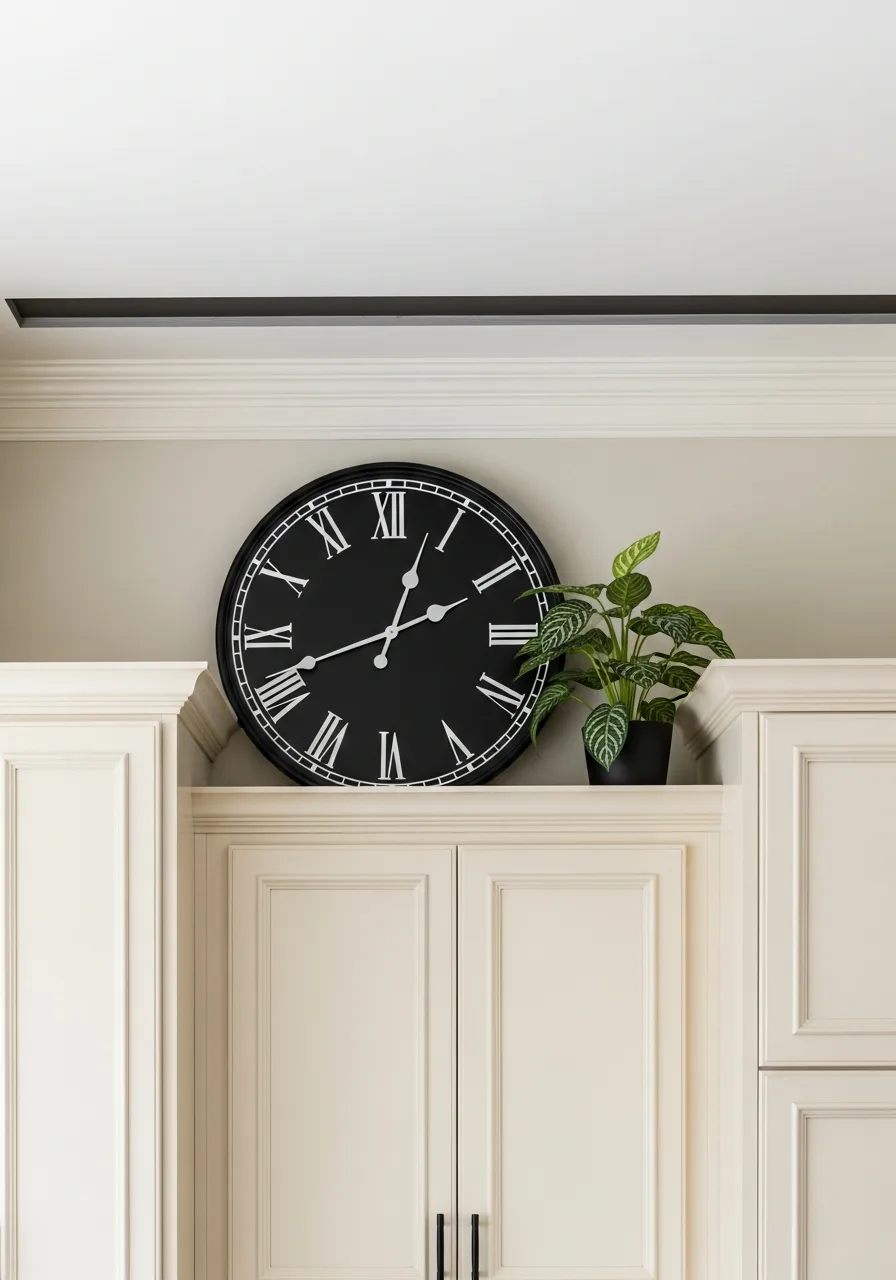
A single large clock acts as a focal point and serves a practical purpose. Choose a clock with a high-contrast face so it is easy to read from across the room.
Lean the clock against the wall in the center of a long cabinet run to anchor the space. Using one large item is often more effective than many small items which can look like clutter from a distance.
- Select a clock that is at least two-thirds the height of the gap for proper scale.
- Choose a battery-operated model to avoid dealing with unsightly hanging cords.
- Pick a frame material that matches your cabinet hardware for a custom look.
Quick win: Dust the top of the clock once a month with a long-reach microfiber duster.
35. Galvanized Steel Milk Cans
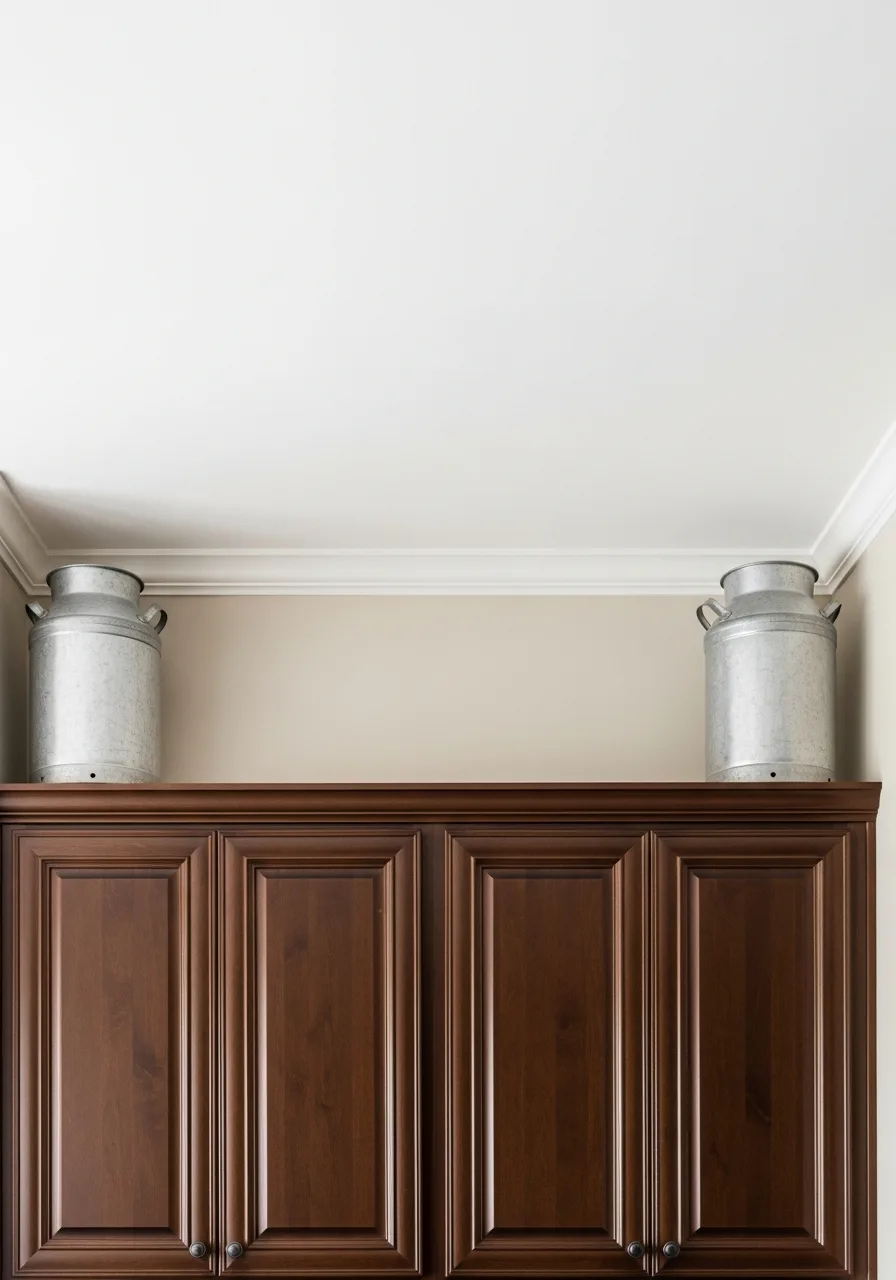
Milk cans offer a rustic look and provide significant height for tall gaps. The silver metal finish reflects light, which helps brighten a dark corner.
Set two milk cans at opposite ends of the cabinet to frame the kitchen space. Metal items are much easier to clean than woven materials because grease and dust do not get trapped in the fibers.
- Check flea markets or garden centers for authentic or reproduction cans.
- Ensure the cans have flat bottoms so they remain stable on the cabinet surface.
- Leave the cans empty to keep the weight light on your upper cabinetry.
Most people skip this: Apply a thin coat of car wax to the metal to make future dusting much faster.
36. Woven Straw Sun Hats
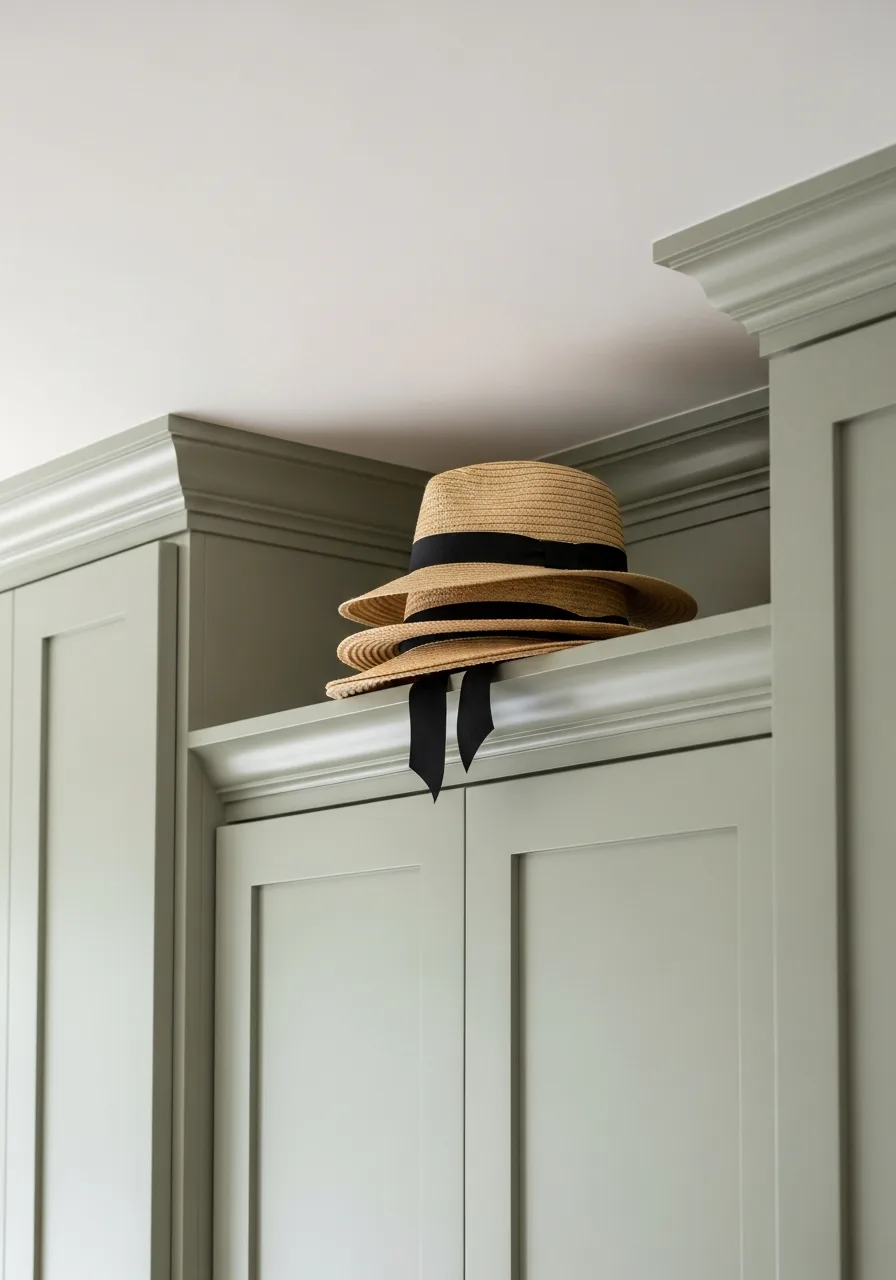
Sun hats bring a relaxed, organic texture to the kitchen. They are lightweight and easy to move if you need to access the space.
Stack three hats at a slight angle to create a sculptural shape that fills the corner. Neutral straw tones work well to soften the look of hard cabinet edges and stone countertops.
- Use hats with different brim widths to add variety to the stack.
- Stuff the inside of the hats with tissue paper to help them hold their shape.
- Switch to felt hats in the winter for a cozy, seasonal decor change.
Best shortcut: Use a small piece of double-sided tape to keep the hats from sliding off each other.
37. Glass Hurricane Pillar Holders

Glass cylinders add a clean and sophisticated touch to the top of a cabinet. Fill them with candles or leave them empty for a minimalist look.
Vary the heights of the glass holders to keep the eye moving across the top of the kitchen. Transparent glass is the best choice for small kitchens because it fills the space without making the room feel smaller.
- Buy glass holders in sets of three to ensure the styles match perfectly.
- Use battery-operated candles with timers so you do not have to climb up to turn them on.
- Clean the glass with a vinegar solution to prevent a foggy appearance over time.
Quick win: Fill the bottom of the glass with white sand or pebbles to steady the candles.
38. Oversized Porcelain Teapots
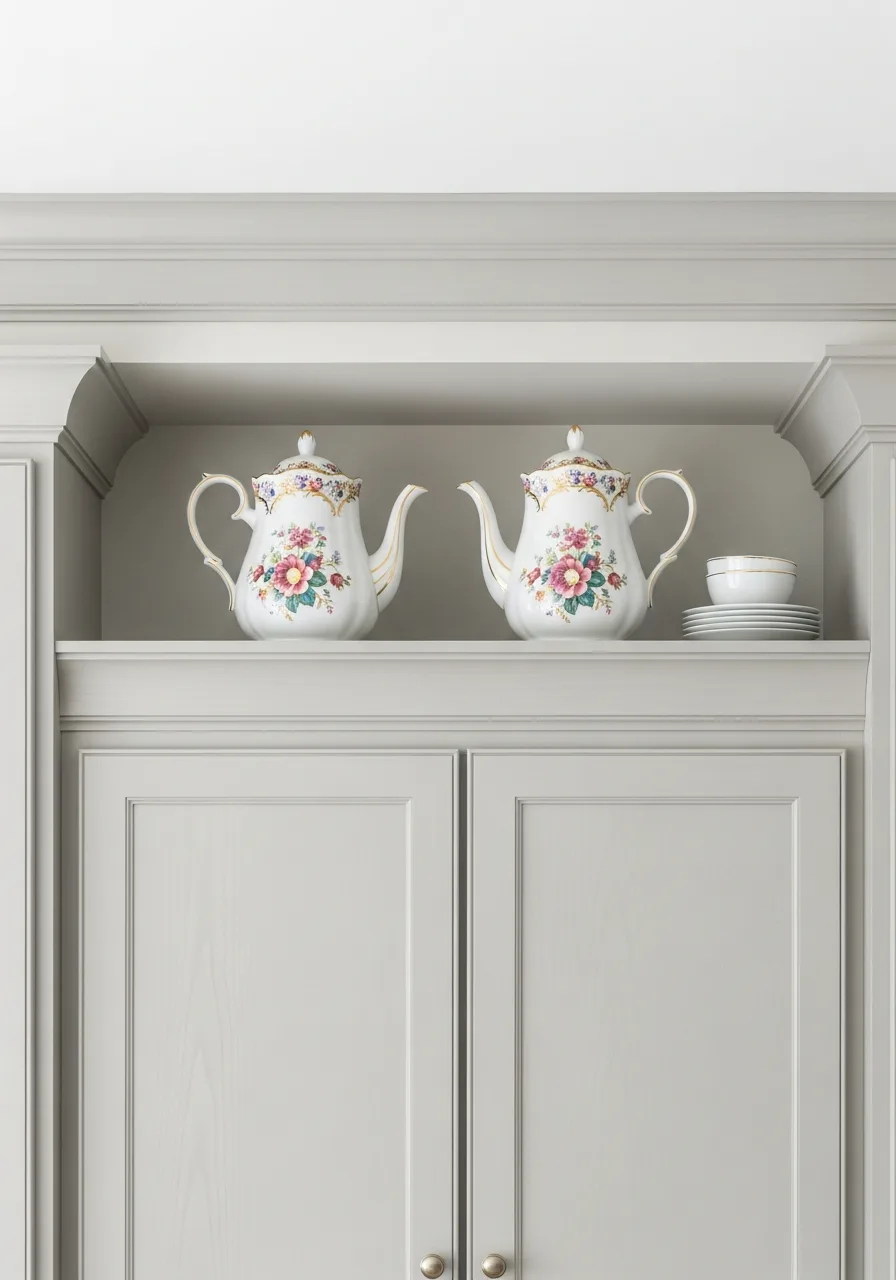
Large teapots have interesting curves and handles that add visual interest. Look for bold patterns or solid bright colors to create a pop of interest against the wall.
Arrange teapots with their spouts facing the same direction for a tidy and organized appearance. Porcelain is a smart choice for kitchens because it is non-porous and resists absorbing cooking odors.
- Select teapots that are at least 8 inches tall so they do not disappear in the gap.
- Check local estate sales for unique vintage patterns that you cannot find in stores.
- Wipe the teapots with a damp cloth every few weeks to maintain their shine.
Most people skip this: Secure the lids to the teapots with a tiny dot of clear museum gel so they do not vibrate off.
39. Polished Brass Serving Platters
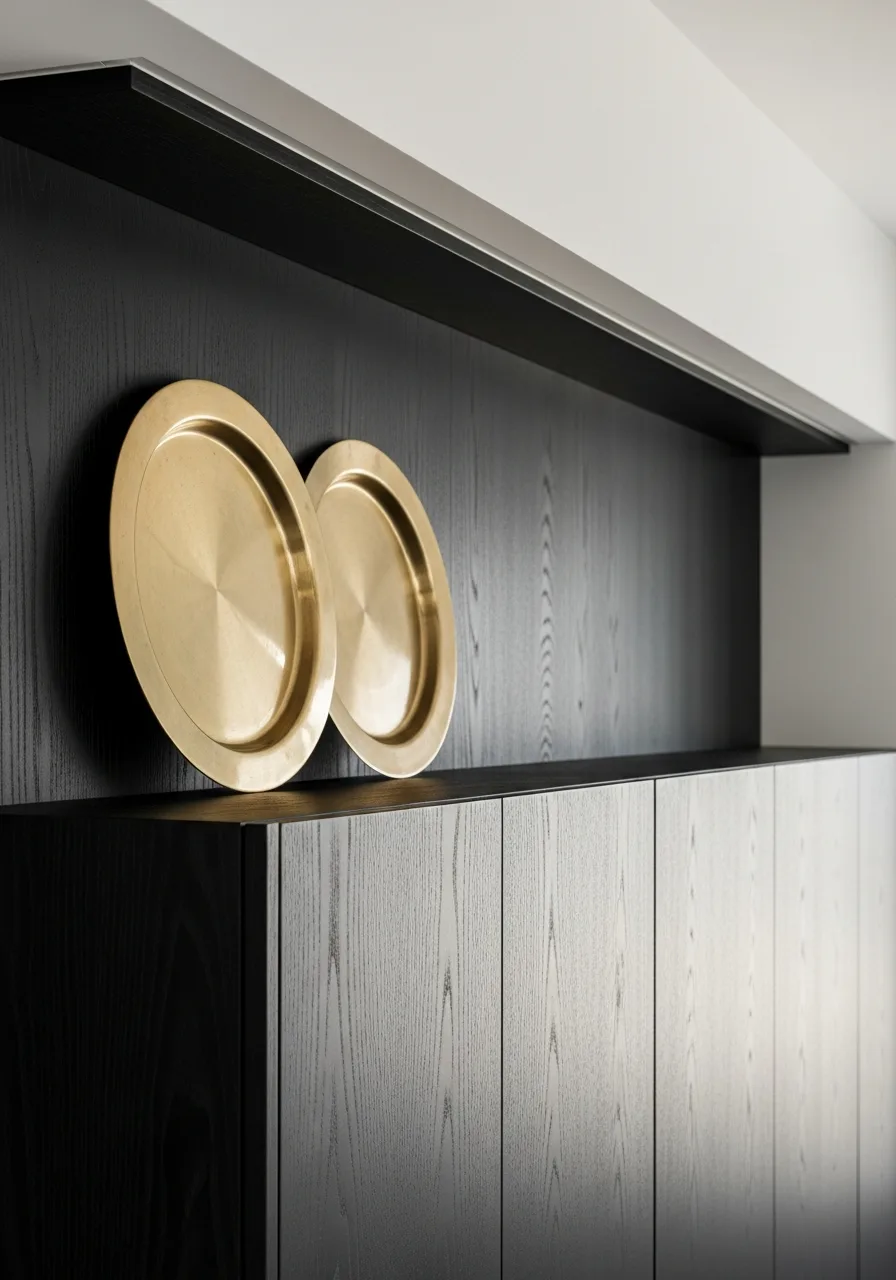
Brass platters bring warmth and a touch of luxury to the kitchen ceiling line. The reflective surface helps bounce light around a room that might not have many windows.
Stand the platters upright against the wall using small plate stands for stability. Using metal accents is the fastest way to make a builder-grade kitchen look like a custom design.
- Search for solid brass rather than plated metal for a richer color and better weight.
- Use a lacquer spray if you want to keep the brass shiny without regular polishing.
- Mix in one or two silver pieces if you prefer a more modern, mixed-metal look.
Best shortcut: Use a small piece of foam wrap behind the platter to prevent it from scratching the wall.
40. Woven Palm Leaf Fans
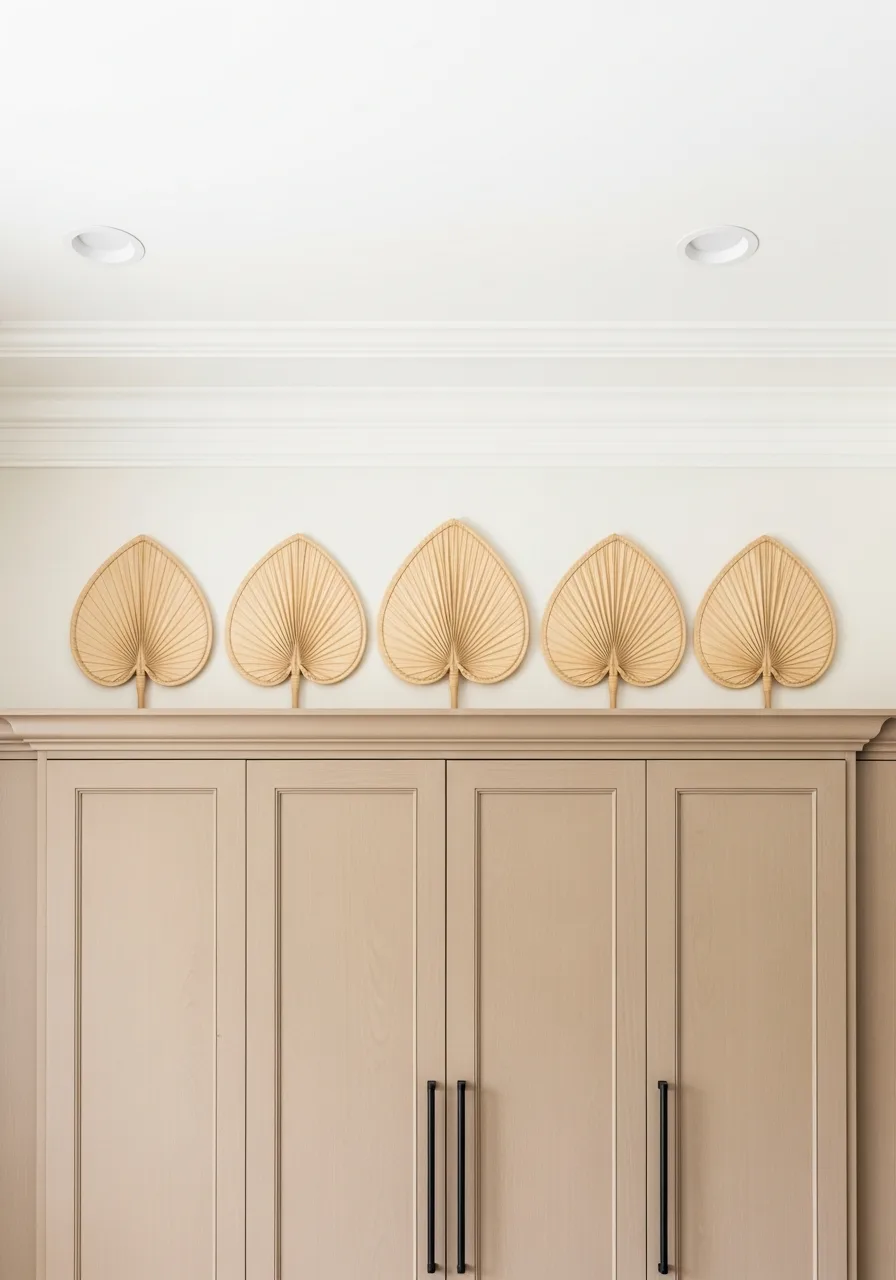
Handheld fans made of palm leaves offer a unique shape that is different from standard round decor. They add a global, handcrafted feel to the kitchen.
Tuck the handles of the fans behind the cabinet lip so only the wide textured tops are visible. These are perfect for low-clearance spaces where a traditional vase or basket would be too tall.
- Buy fans in bulk online to get a consistent color and texture.
- Layer the fans so they slightly overlap to cover more horizontal space.
- Use these in a kitchen with a lot of wood to emphasize a natural theme.
Quick win: Use a hairdryer on a cool setting to blow dust off the woven fibers once a month.
41. Antique Wood Butter Churns
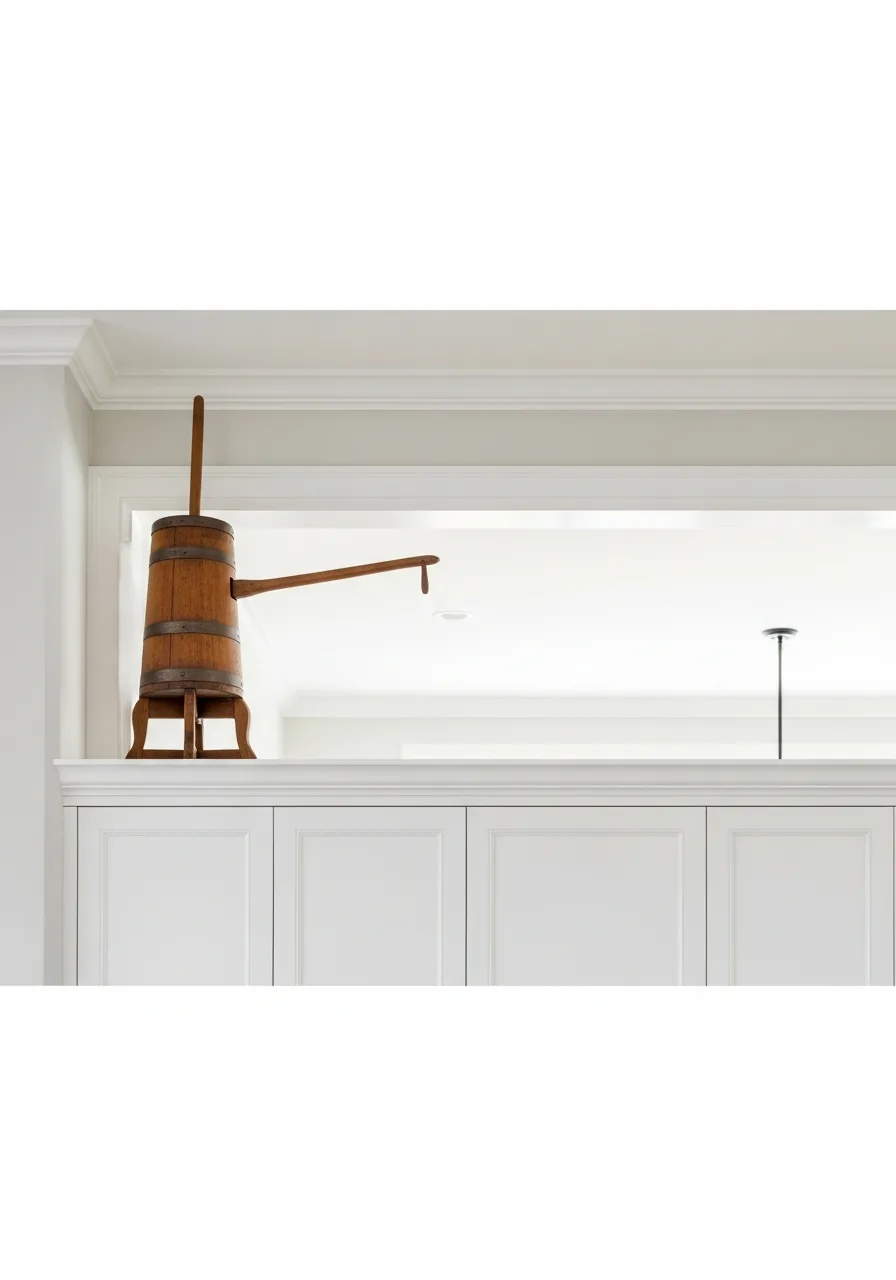
Butter churns are tall and narrow, making them ideal for the ends of cabinet runs. The aged wood adds a sense of warmth and history to the room.
Place a single tall churn in a corner to draw the eye upward and emphasize the ceiling height. Authentic wooden antiques provide a texture that modern manufactured items simply cannot replicate.
- Look for churns with original metal bands for added industrial detail.
- Apply a coat of furniture wax to the wood to protect it from kitchen humidity.
- Ensure the churn is heavy enough that it will not tip over if the cabinet is bumped.
Most people skip this: If the churn handle is too tall for the ceiling, you can often pull it out and store it inside the churn.
42. Vintage Enamel Bread Boxes
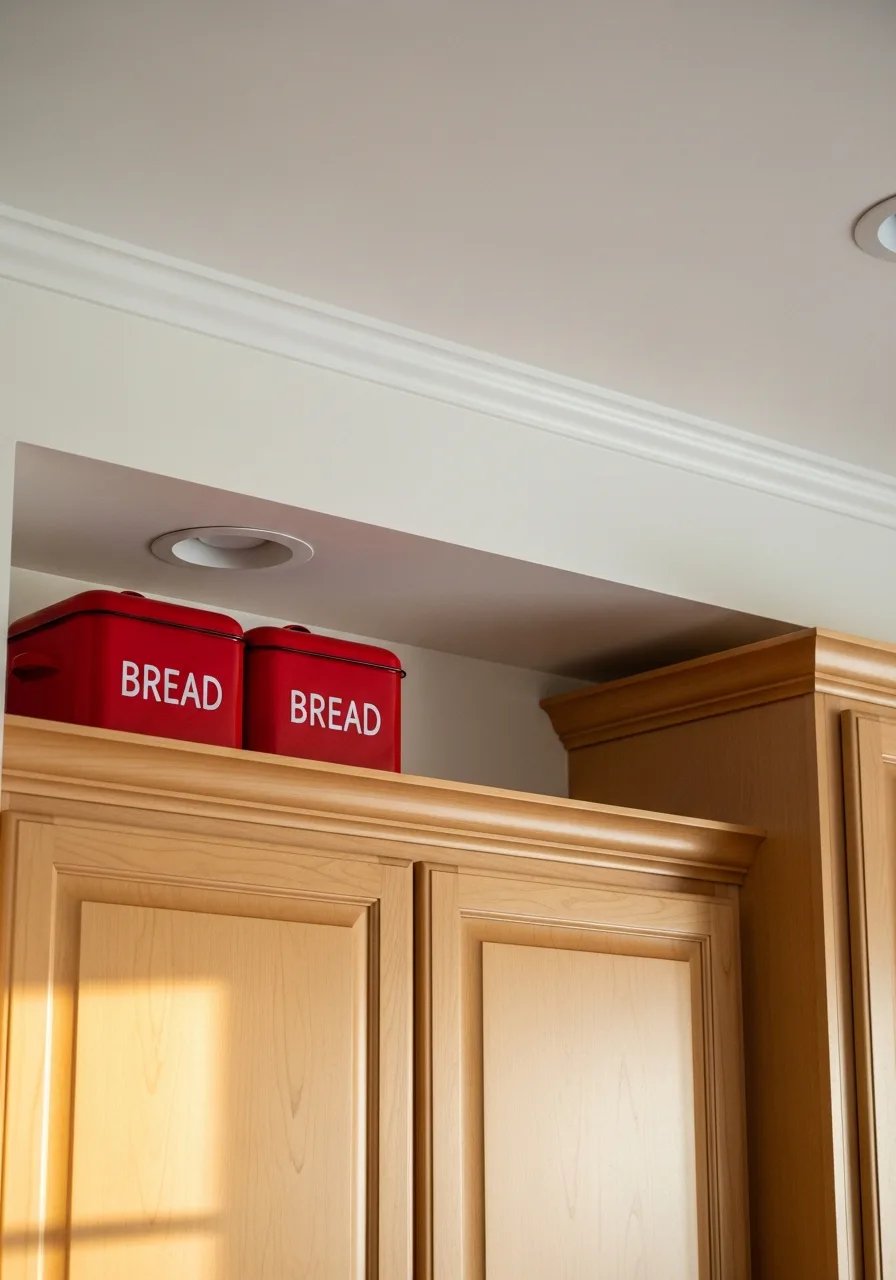
Bread boxes are large enough to fill a significant amount of space and can hide extra kitchen clutter. They come in bright colors like red or blue, which can liven up a neutral kitchen.
Line up two bread boxes side-by-side to create a long, solid block of color above the cabinets. Using storage containers as decor is the best way to maximize space in a very small kitchen.
- Use the boxes to store items you only use once a year, like holiday cookie cutters.
- Check that the lids open easily if you plan on using them for actual storage.
- Choose boxes with a flat top so you can stack smaller items on top of them if needed.
Best shortcut: Label the back of the box with its contents so you don't have to guess when you take it down.
43. Wicker Wrapped Demijohns
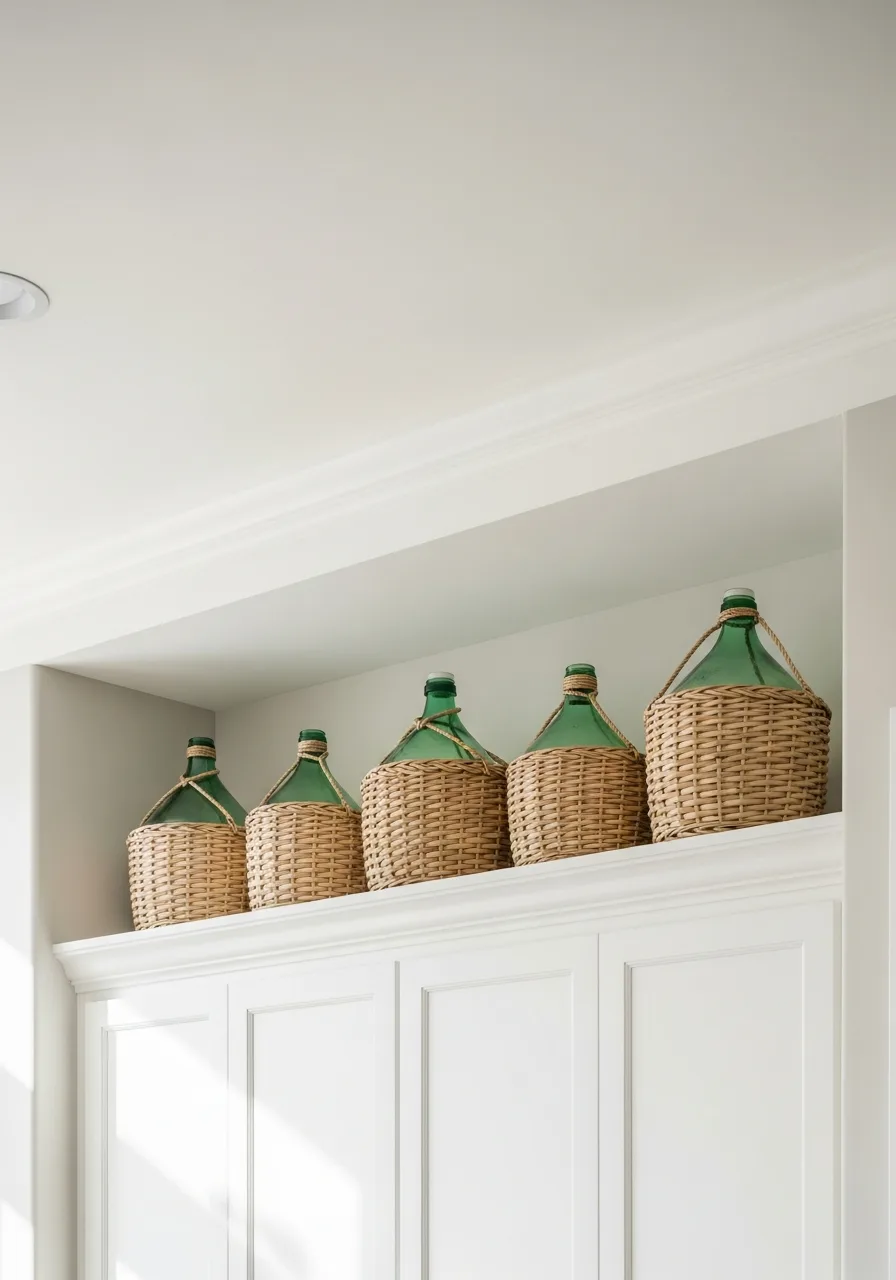
Demijohns are large glass jugs often encased in protective wicker. The combination of glass and weaving provides two different textures in one object.
Place one large demijohn in the center of a cabinet to create a bold, Mediterranean-inspired look. These large-scale bottles are excellent for filling wide gaps where small items would look lost.
- Look for bottles with a slight tint in the glass, such as green or amber, for more color.
- Make sure the wicker is tight and not unraveling before you buy.
- Pair a wicker-wrapped bottle with a plain glass one for a balanced look.
Quick win: If the glass is dusty inside, drop in some rice and soapy water and swirl it around to scrub the interior.
44. Architectural Wire Bird Cages
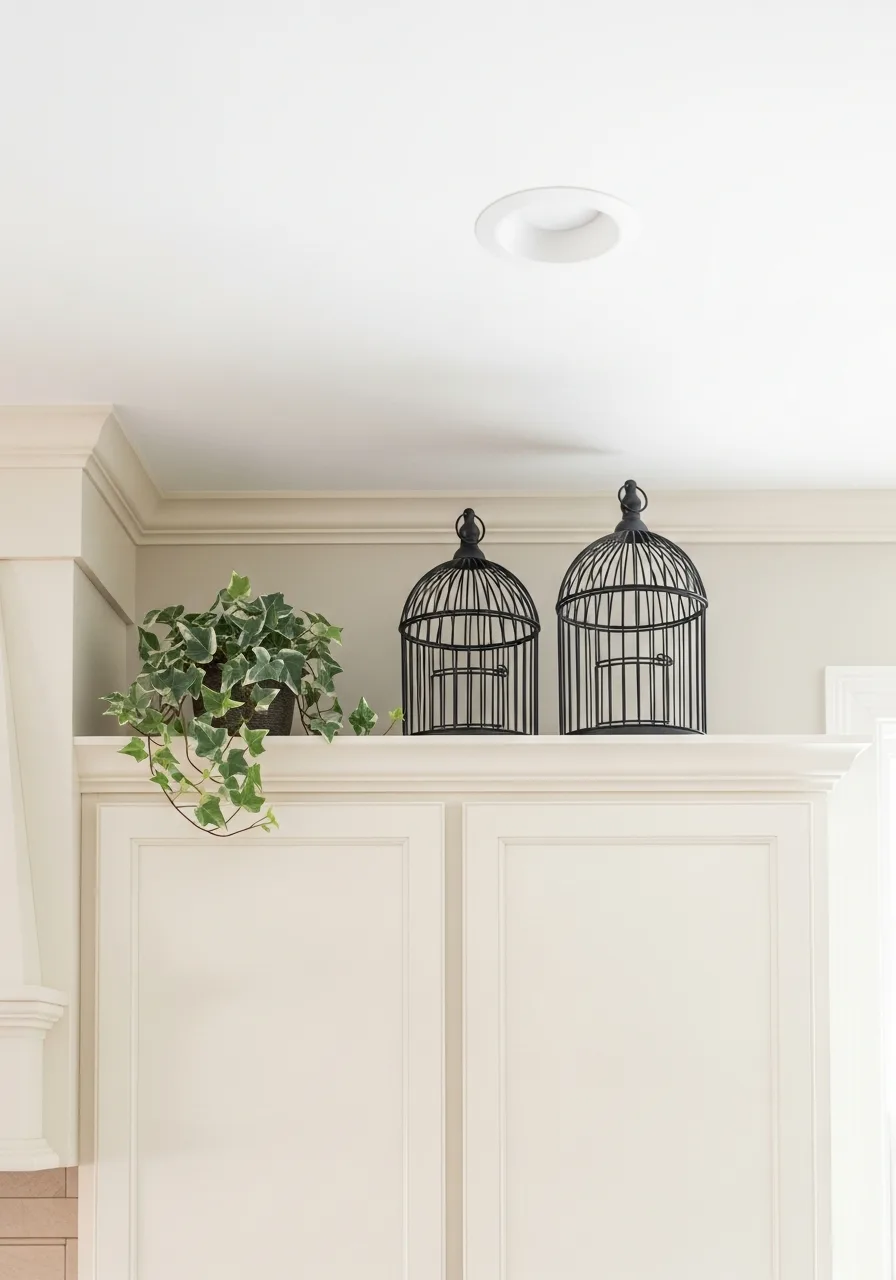
Wire bird cages have an airy, open feel that fills space without blocking light. They add a vintage, garden-like charm to the kitchen area.
Choose cages with intricate wire patterns to add a fine-detail element to the room. Open-wire decor is a great choice because it doesn't collect as much visible dust as solid flat surfaces.
- Select cages with a flat base so they sit securely on the cabinet top.
- Keep the cages empty to maintain a clean, architectural look.
- Paint the cages a bold color like gold or navy to make them stand out against a light wall.
Most people skip this: Place a small piece of felt under the wire feet to prevent the metal from scratching your cabinet finish.
45. Patterned Vintage Picnic Tins
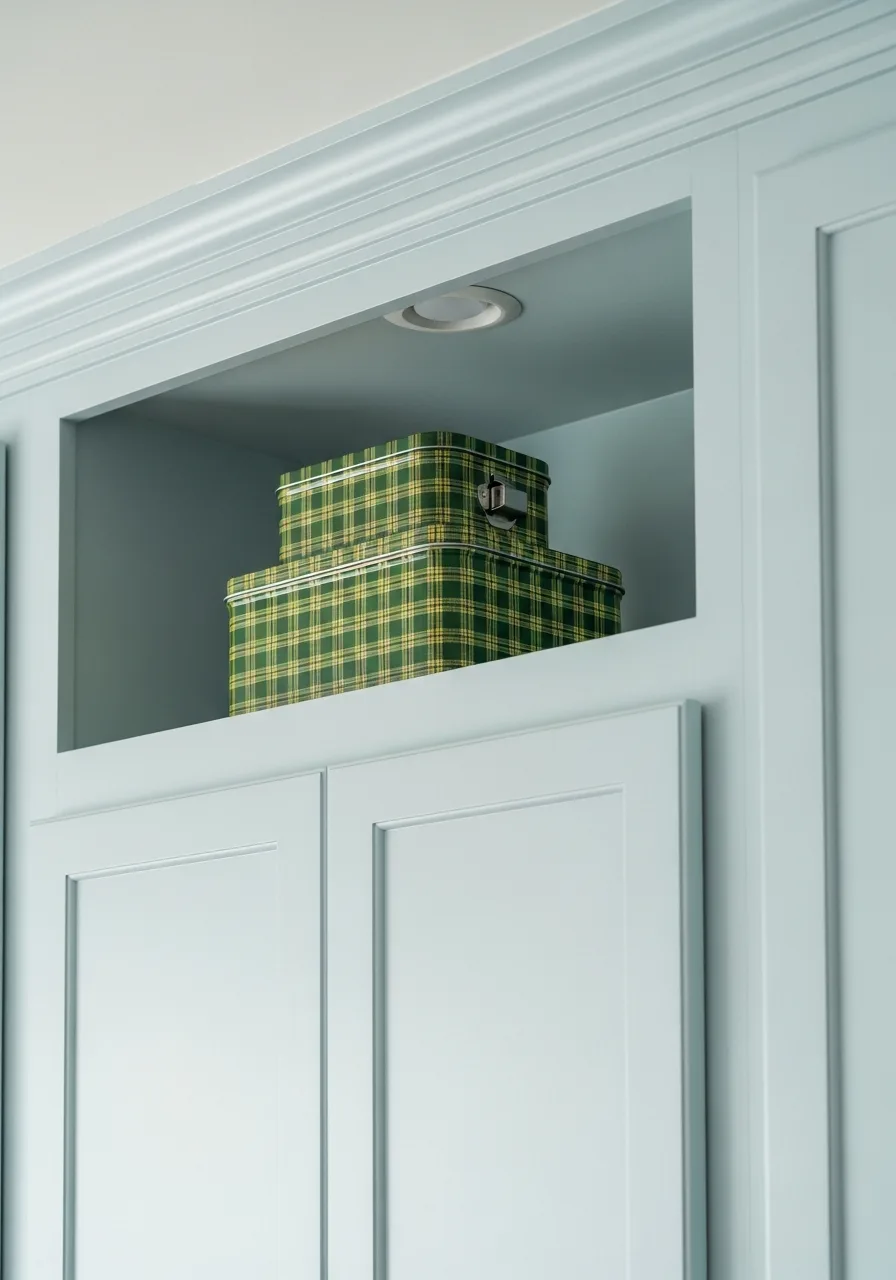
Metal picnic tins often feature colorful plaid or floral patterns from the mid-century. They are lightweight and bring a sense of nostalgia to the home.
Stack two tins of different sizes to create a colorful pyramid shape on the cabinet. Metal tins are much more durable than cardboard boxes and will not warp in a humid kitchen environment.
- Wipe the tins with a dry cloth to prevent rust from forming on the edges.
- Use the tins to store lightweight items like plastic party cups or napkins.
- Choose patterns that share at least one color with your kitchen towels or rugs.
Best shortcut: If the tins have handles, turn them to the side so they don't block the pattern on the front.
46. Vintage Tea Tins
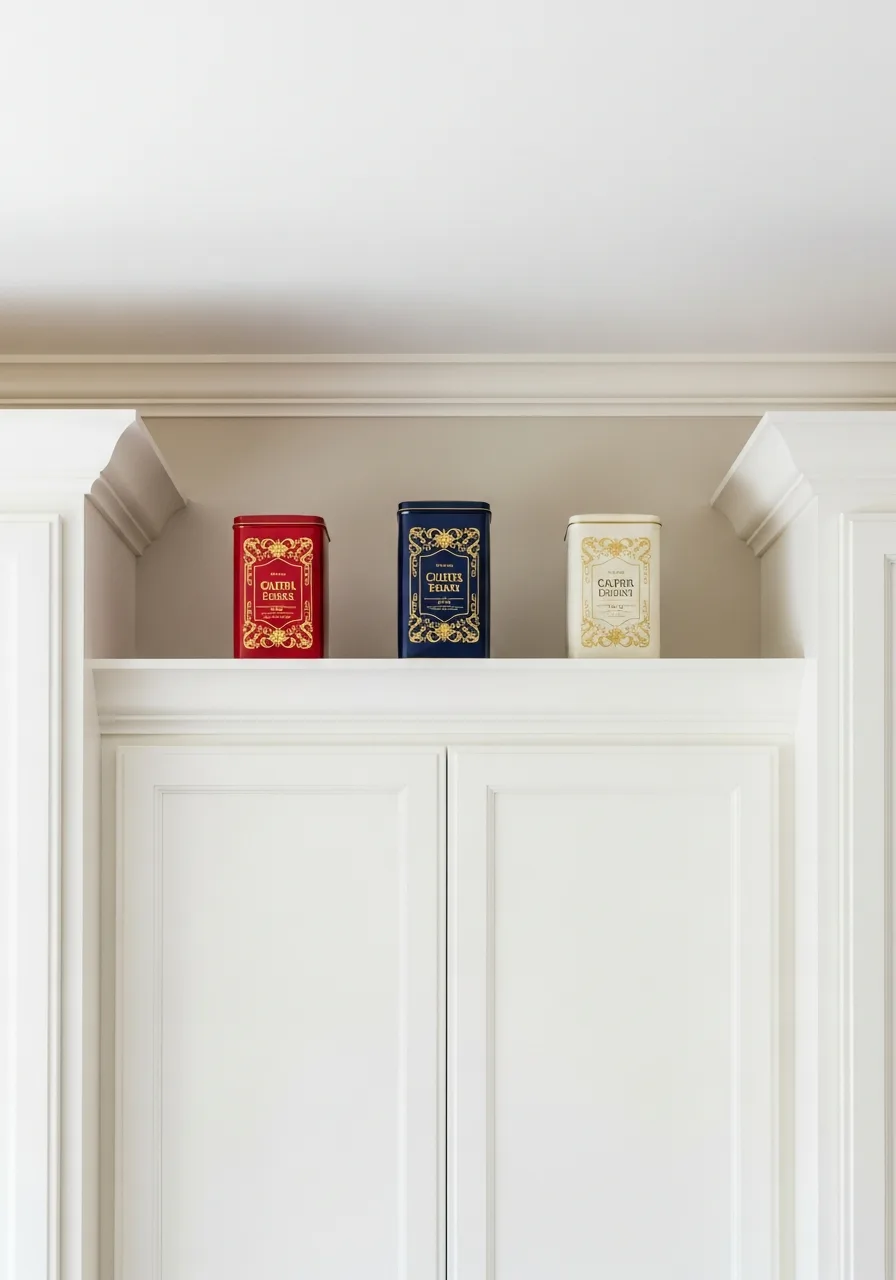
These tins add a pop of color and vintage charm to a dead space. Look for tins with distinct typography or patterns to keep the eye moving across the top of the cabinets.
Group three or five tins of varying heights to create a visual rhythm that doesn't feel cluttered. This setup works best when the tins share one common color to tie the look together.
A single tin looks like an accident, but a group looks like a collection.
- Sourced from thrift stores or online auctions.
- Space them 4 inches apart for a balanced look.
- Use smaller tins for low-clearance ceilings.
Best shortcut: Use museum putty on the bottom of lightweight tins to keep them from shifting when you open cabinet doors.
47. Heavy Copper Stockpots

Copper brings a warm, high-end feel to the kitchen while filling large vertical gaps perfectly. The metallic surface reflects light back into the room, which helps brighten a dark ceiling line.
Turn the pots so the handles face outward to add architectural interest and a sense of depth. This is a practical way to store bulky cookware that takes up too much room in lower drawers. Shiny copper creates a focal point that draws the eye upward and makes the ceiling feel higher.
- Sourced from estate sales or high-end kitchen shops.
- Polish once a year to maintain the shine.
- Mix sizes to avoid a showroom look.
Most people skip this: Line the top of the cabinets with paper towels before placing the pots to catch grease and dust for easier cleanup.
48. Yellowware Mixing Bowls
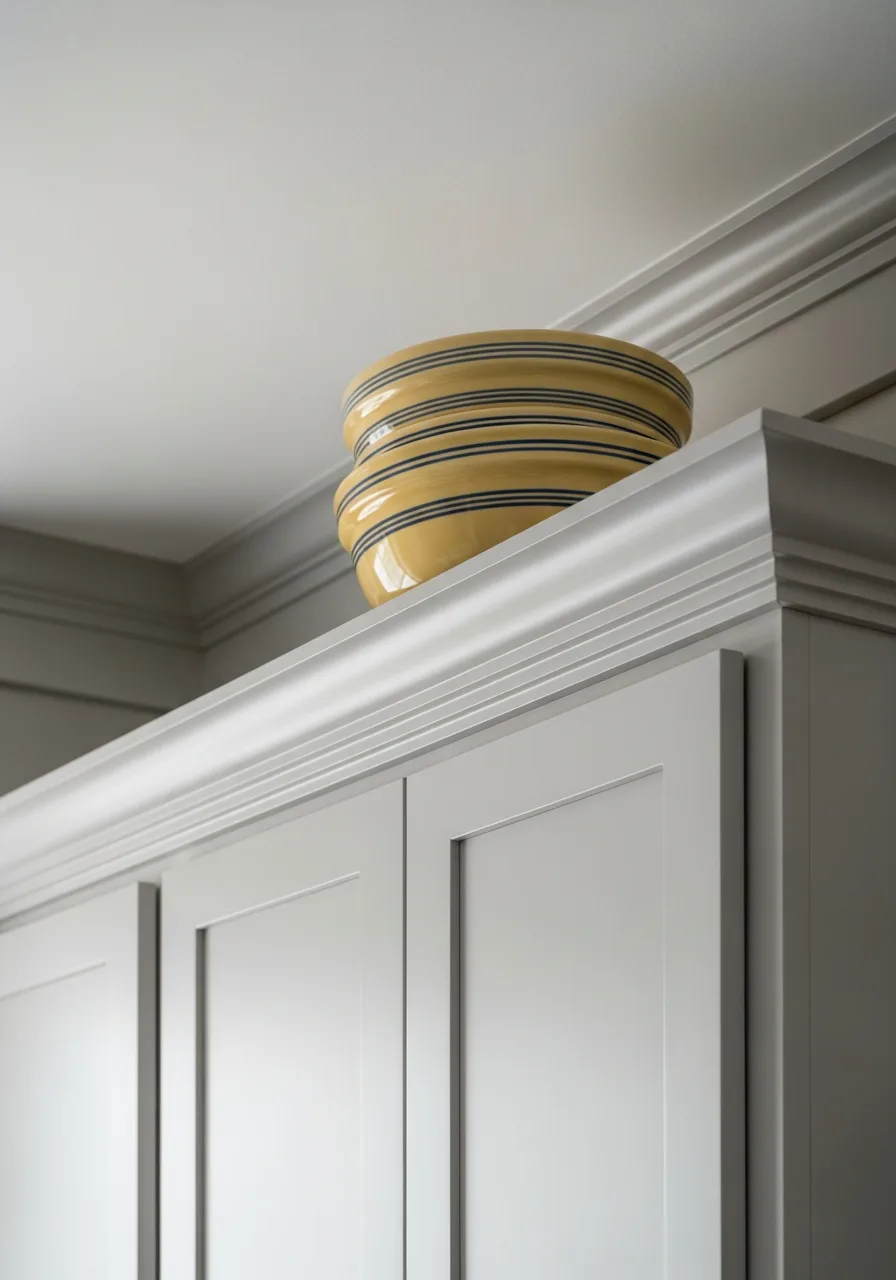
Yellowware bowls have a thick, sturdy look that feels grounded and intentional above a cabinet. The earthy yellow tones pair beautifully with both modern white kitchens and traditional wood finishes.
Stack two or three bowls of different sizes to add height and fill the vertical space without using multiple items. This creates a focal point that feels like a curated collection rather than random storage. Avoid stacking them too high or they will look top-heavy and unstable.
- Found at antique malls or specialty pottery shops.
- Center the stack over a cabinet seam for stability.
- Use a single large bowl for narrow gaps.
Quick win: Place a small piece of non-slip shelf liner between stacked bowls to prevent them from scratching or sliding.
49. Glass Cloches with Bases

Glass cloches add a layer of sophistication and keep decorative items underneath dust-free. They work well for displaying delicate items that might otherwise get lost in a large space.
Use wooden or stone bases to add texture and break up the transparency of the glass. This look stays clean and airy even in smaller kitchens with limited light. Glass adds height without adding visual weight, which keeps the kitchen from feeling cramped.
- Available at home decor stores or craft shops.
- Place near a window to catch natural light.
- Swap the items inside for different holidays.
Most people skip this: Clean the inside of the glass thoroughly before placing it up high, as fingerprints become very visible in sunlight.
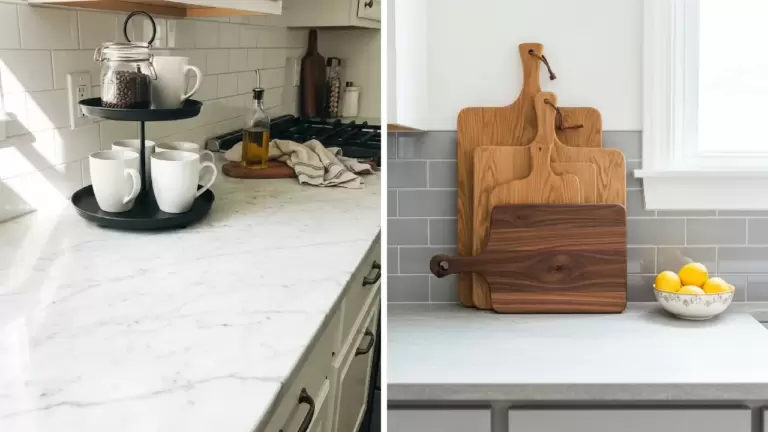
50. Large Wooden Cutting Boards
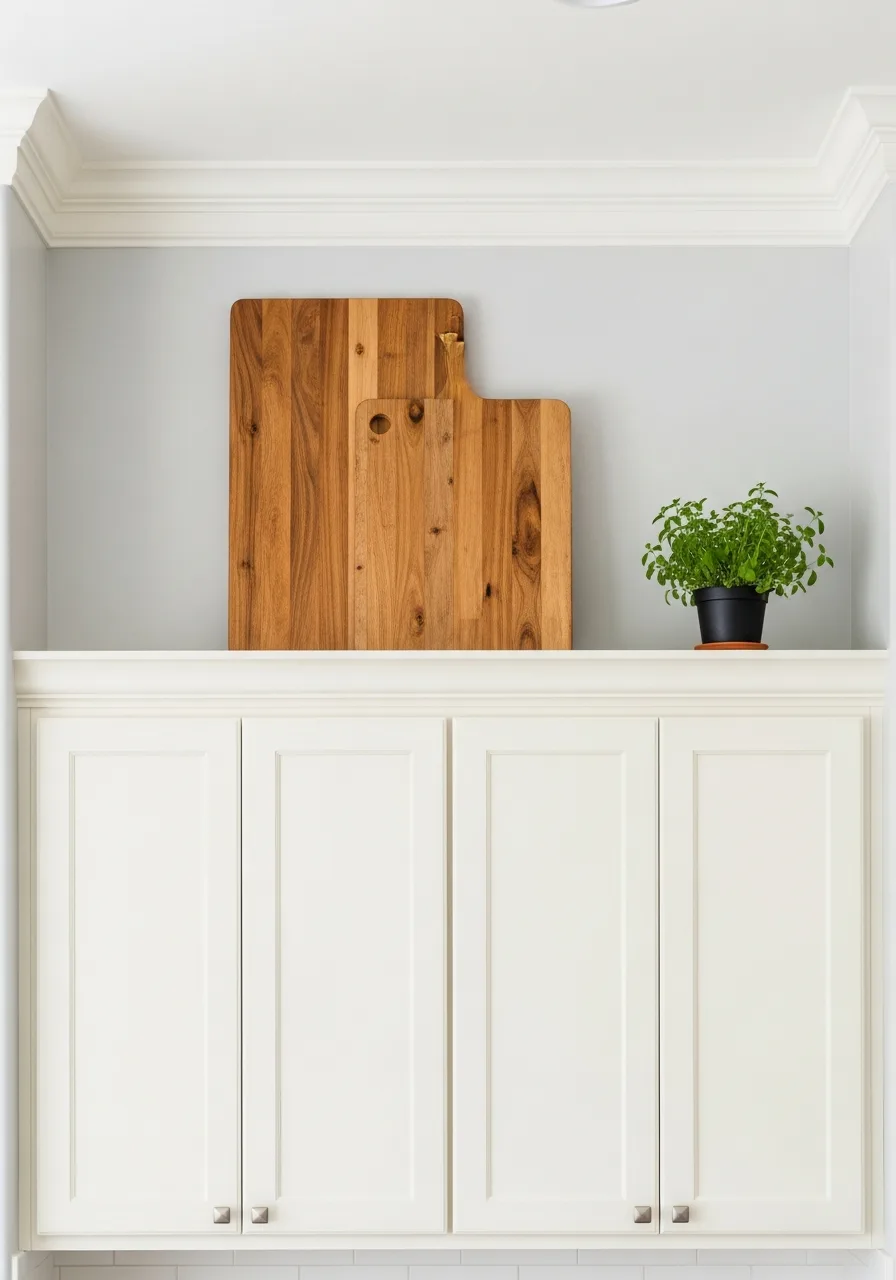
Leaning boards against the wall creates a layered, lived-in look that fills the gap horizontally. Mix different wood species like walnut and maple to add variety in color and grain patterns.
Overlap two boards of different shapes to create a sense of depth and hide any unsightly outlets or wires. This is a practical way to keep heavy boards accessible but out of the way.
It turns a functional tool into a design element that softens the hard lines of the cabinets.
- Sourced from custom woodshops or kitchen stores.
- Lean at a 75-degree angle to prevent slipping.
- Use round boards to soften sharp cabinet corners.
Quick win: Apply a fresh coat of mineral oil to the boards before displaying them to make the wood grain pop.
Frequently Asked Questions
How do I prevent dust from collecting on items above my cabinets?
To keep this area clean, line the tops of your cabinets with sheets of wax paper to trap grease and dust. Simply swap the paper out every few months for a quick, hassle-free cleanup without the need for heavy scrubbing.
What is the 'rule of three' for decorating high ledges?
The rule of three suggests grouping decor in odd numbers to create a balanced, visually appealing arrangement. Use items of varying heights and textures to draw the eye upward and add depth to the space.
Should I use real or faux plants in the space above cabinets?
High-quality faux plants are often best here because they handle the kitchen's heat and low light without needing difficult-to-reach watering. If you prefer real greenery, choose hardy, low-light varieties like Pothos that can tolerate the warmth near the ceiling.
How tall should decor be in the cabinet gap?
Aim for decor that fills about two-thirds of the vertical gap to ensure the scale looks intentional and balanced. Avoid tiny items that disappear from view or oversized pieces that look cramped against the ceiling.
Is it okay to leave the space above kitchen cabinets empty?
Leaving the space empty is a great choice if you prefer a clean, minimalist aesthetic or have a busy backsplash. It allows the architecture of your cabinetry to stand out and keeps the kitchen feeling airy and uncluttered.