30 Genius Nursery Closet Ideas
This post may contain affiliate links: full affiliate disclosure.
Does your baby’s closet feel more like a messy storage unit than a cute, organized space? You are not alone!
Tiny clothes and endless supplies can feel overwhelming, but they don’t have to.
I’m sharing simple, budget-friendly nursery closet ideas guaranteed to give you back your sanity and create a Pinterest-worthy space.
1. Cube Storage System
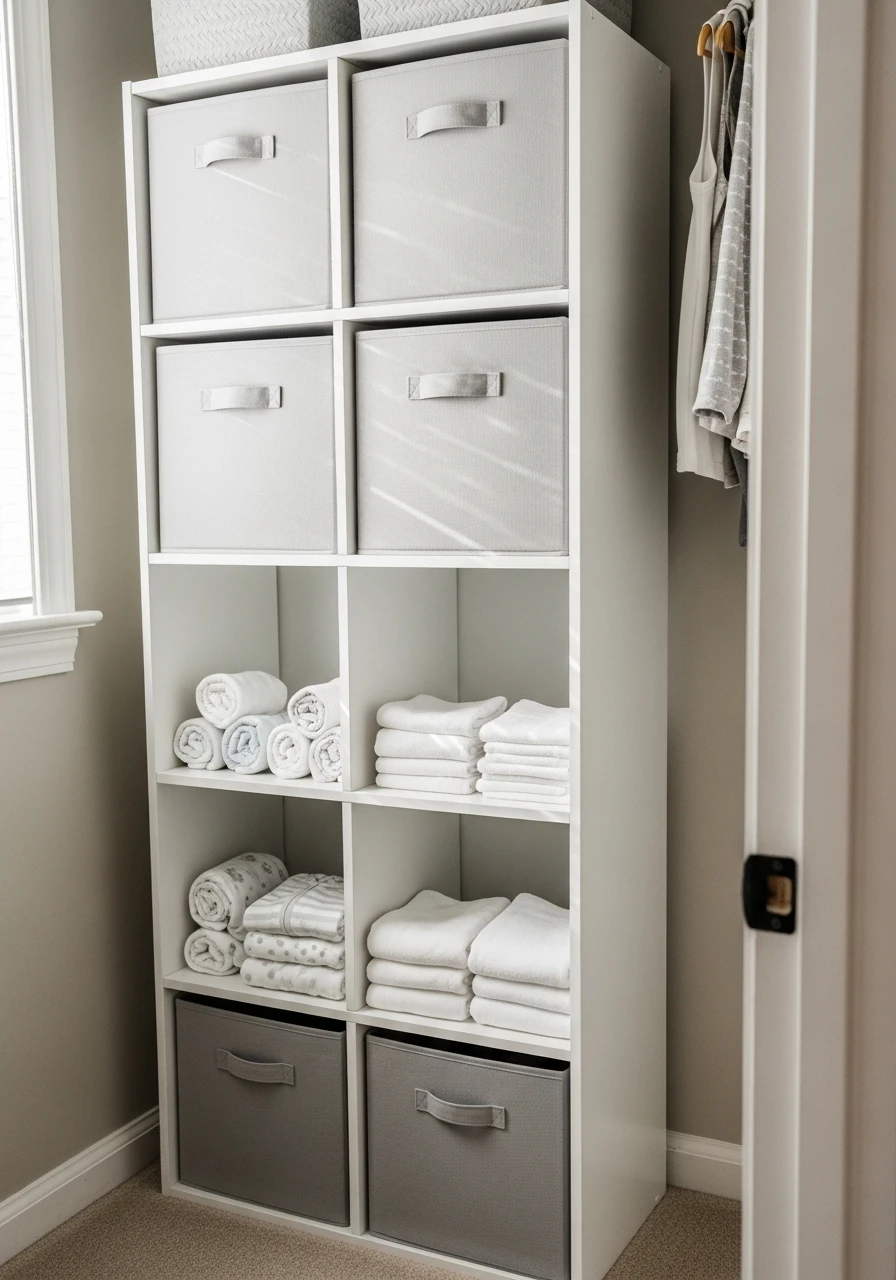
Cube organizers are the backbone of a functional nursery closet. They let you hide clutter while providing easy access to frequently used items like burp cloths and pajamas. Look for systems that stack vertically to use every inch of height.
- Use 13-inch fabric bins that fit perfectly.
- Label the outside of each bin clearly.
- Place heavier items on the bottom shelves.
Pro Tip: Mix open cubes for books with closed bins for diapers to add visual interest.
2. Slim Velvet Hangers

Ditch those chunky plastic hangers. Switching to slim velvet hangers instantly creates more hanging space and makes the closet look cohesive and expensive. Plus, baby clothes won’t slip off the shoulders.
- Choose a neutral color like gray or cream.
- Buy hangers in bulk for the best deal.
- Use the clips for hanging tiny pants and skirts.
Pro Tip: Hang all items facing the same direction for a neat, boutique feel.
3. Keep Drawers Tidy
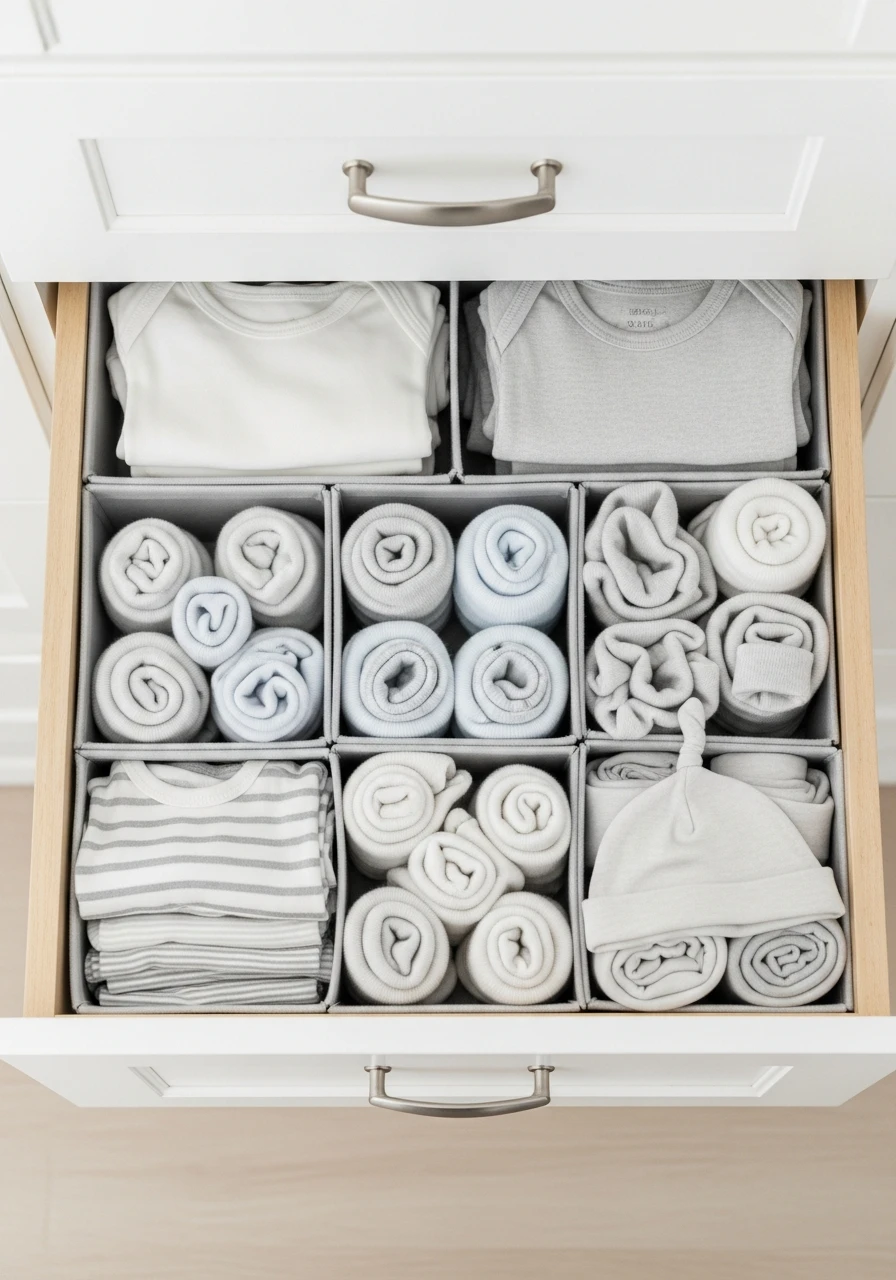
Even if your closet has built-in drawers, they need structure. Use simple drawer dividers to separate socks, hats, mittens, and onesies. This stops the dreaded ‘drawer explosion’ when you pull out one item.
- Use honeycomb dividers for socks.
- Roll onesies instead of folding them flat.
- Assign one specific divider space for each type of item.
Pro Tip: Start with empty drawers and only put back what you actually use and need right now.
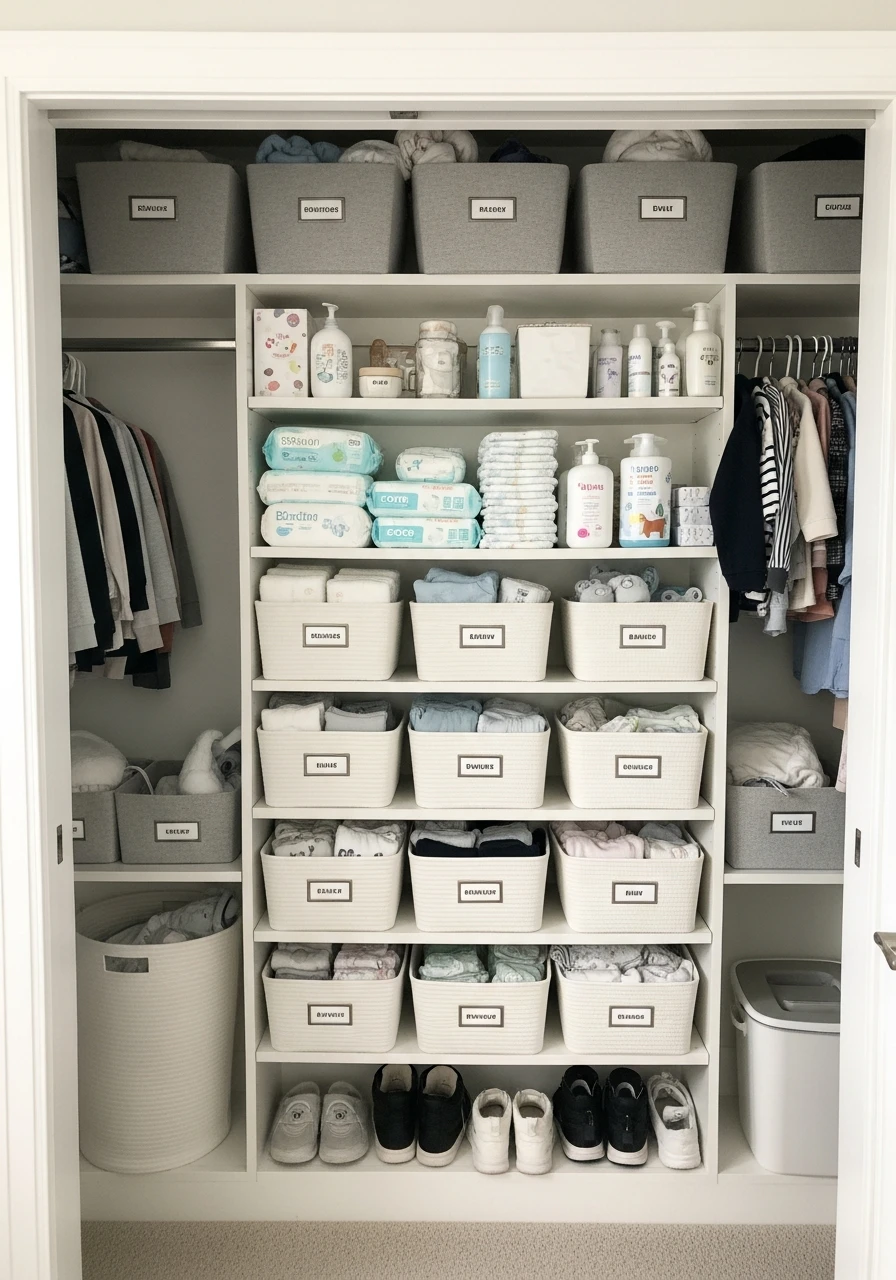
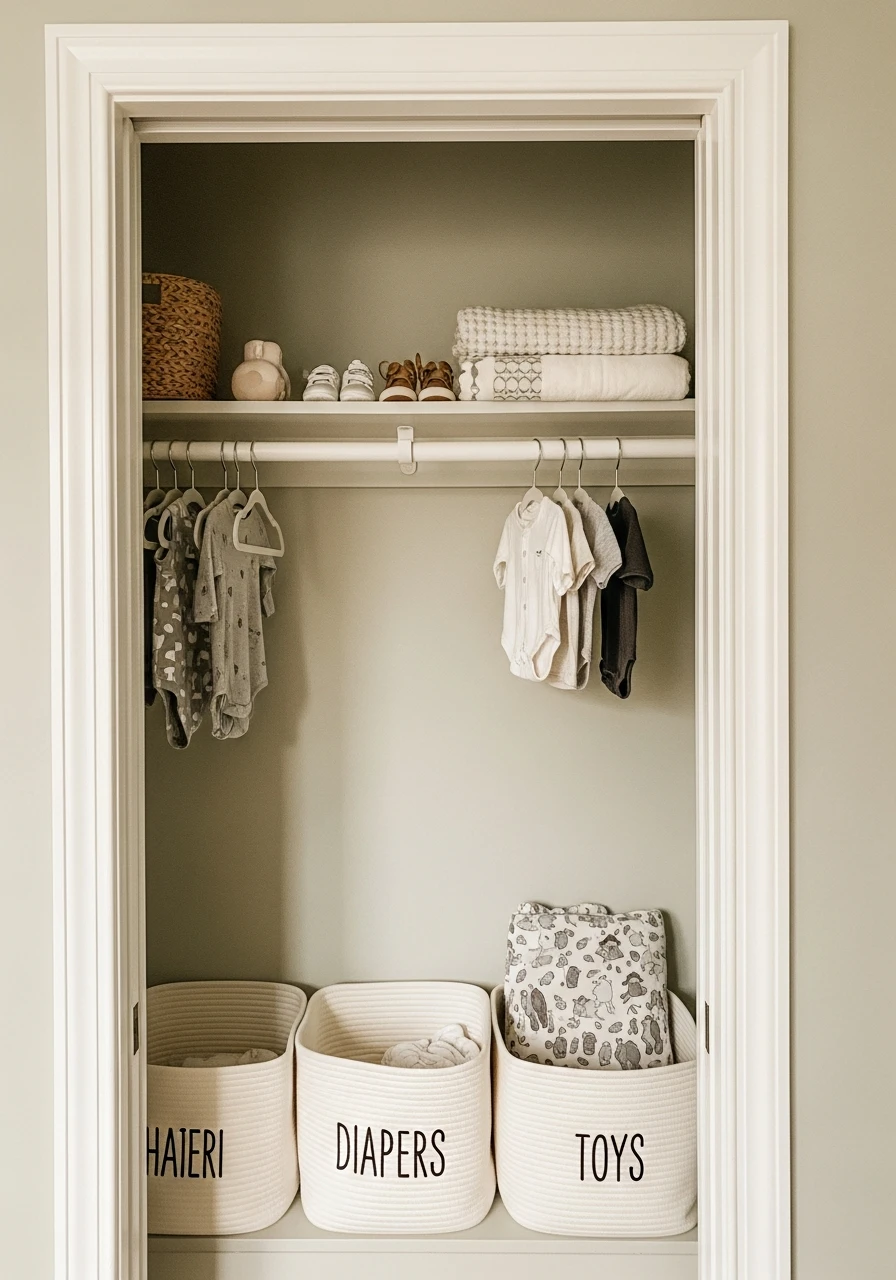
4. Easy Labeling System
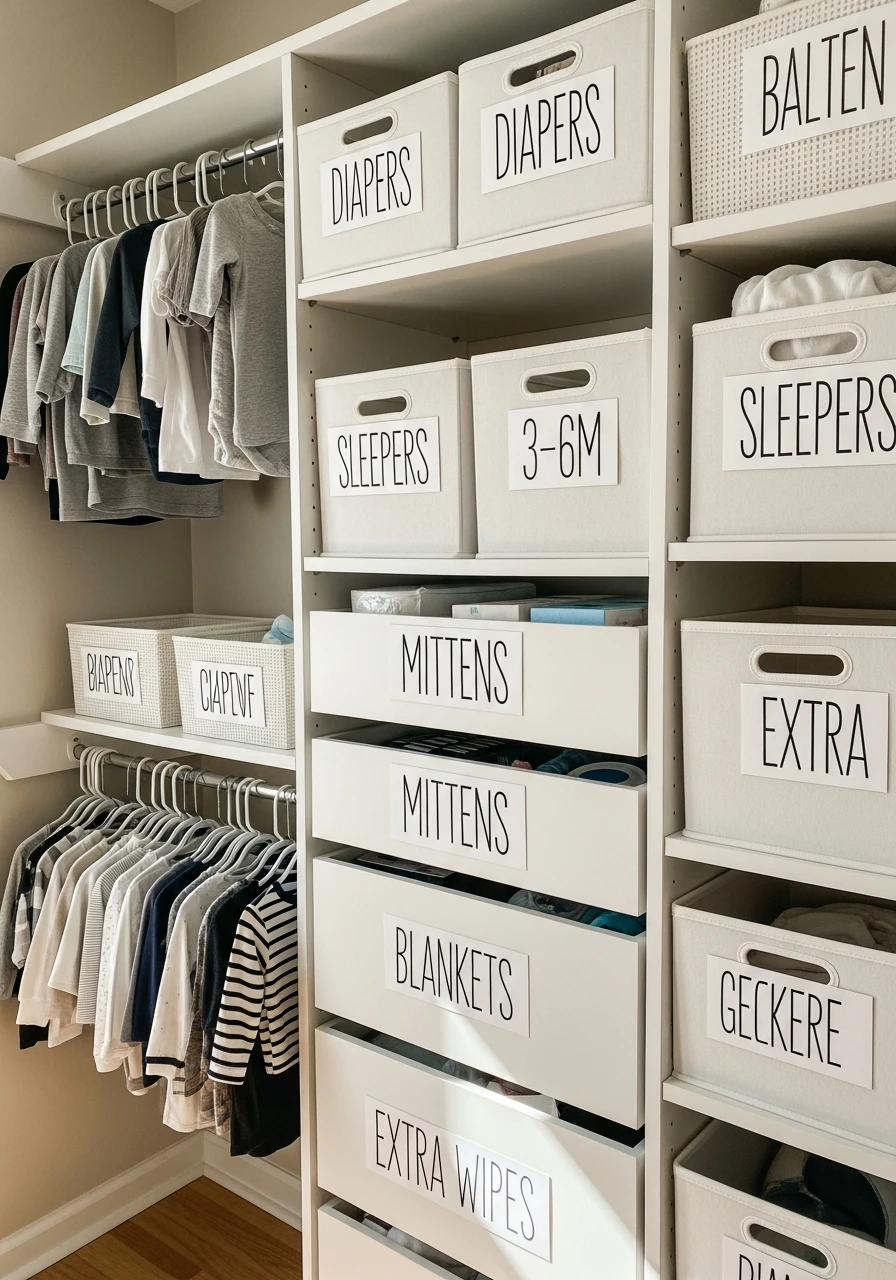
Labels are the key to maintaining organization, especially when two parents are involved. Use simple, readable labels so everyone knows exactly where items belong. This saves time and stops mess before it starts.
- Use a simple label maker or chalk tags.
- Label bins with general categories (e.g., ‘Bedding’, ‘Size 6-9M’).
- Keep the font simple and large enough to read easily.
Pro Tip: Place the labels on the front edge of the shelf or bin handle, not the top.
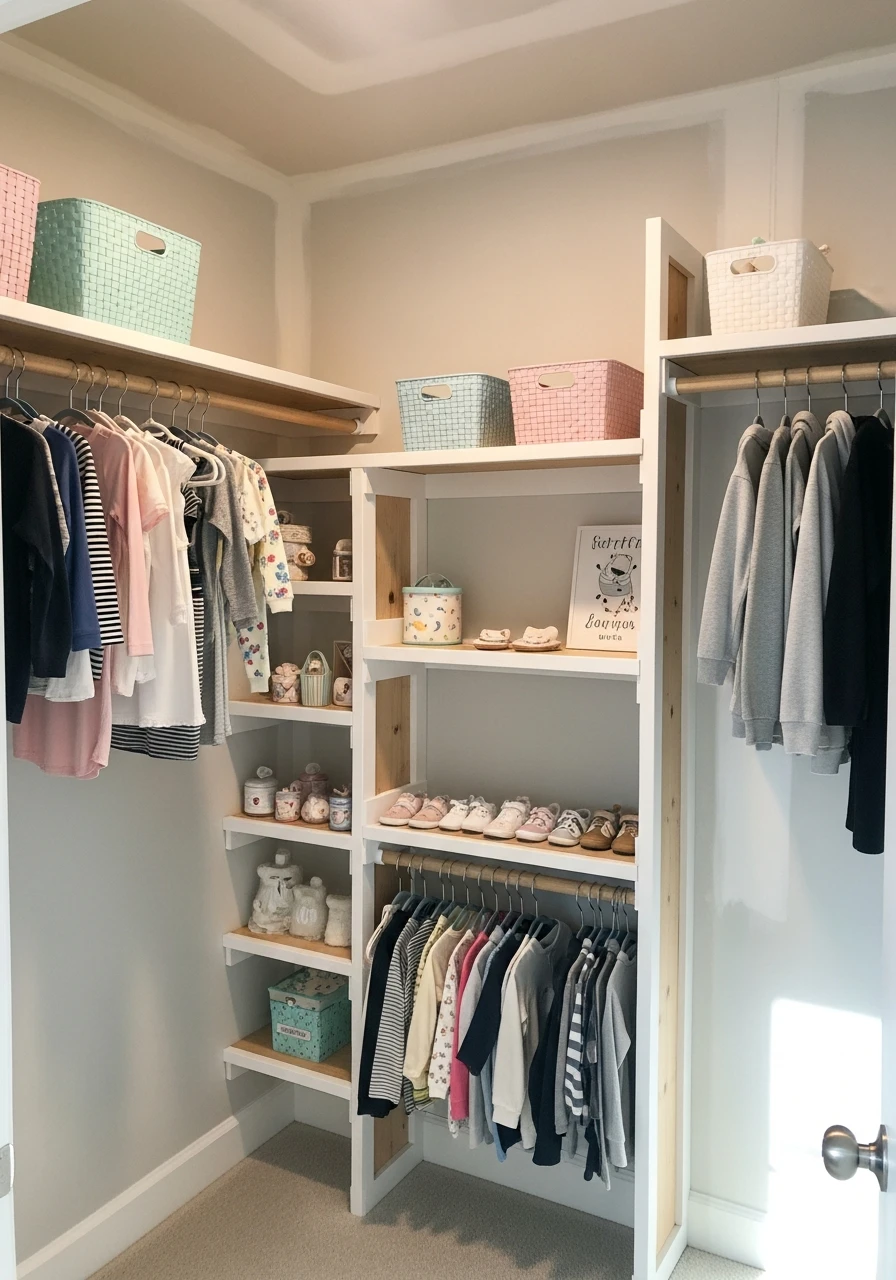
5. Maximize Vertical Space
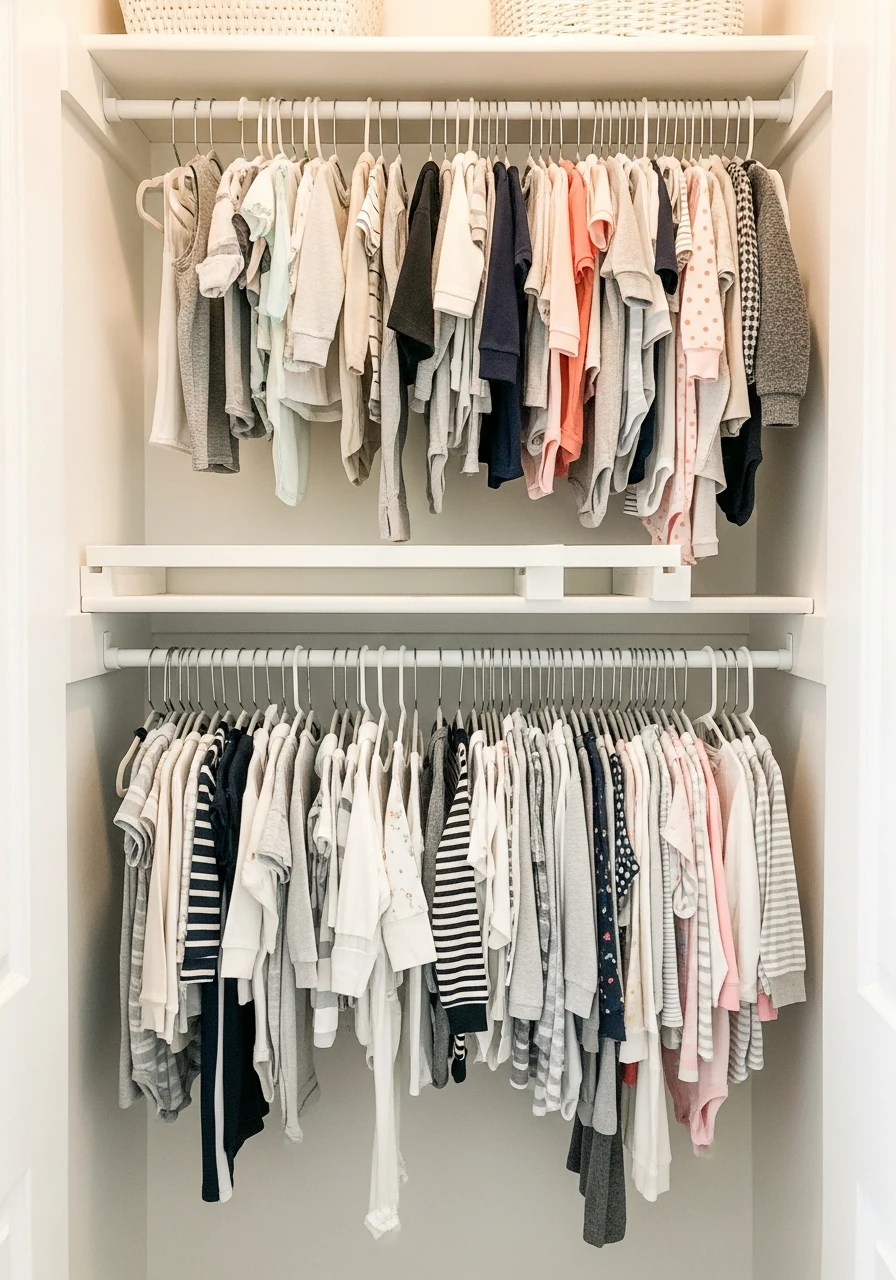
Most closets waste space between the floor and the rod. Install a second, lower hanging rod to double your hanging capacity instantly. This is crucial for tiny baby clothes that don’t need much drop space.
- Use an adjustable tension rod for a quick fix.
- Place the lower rod at a comfortable height for you.
- Use the top rod for clothes the baby will grow into later.
Pro Tip: Measure the length of your longest hanging item (like a dress) before installing the second rod.
6. Pretty Woven Baskets
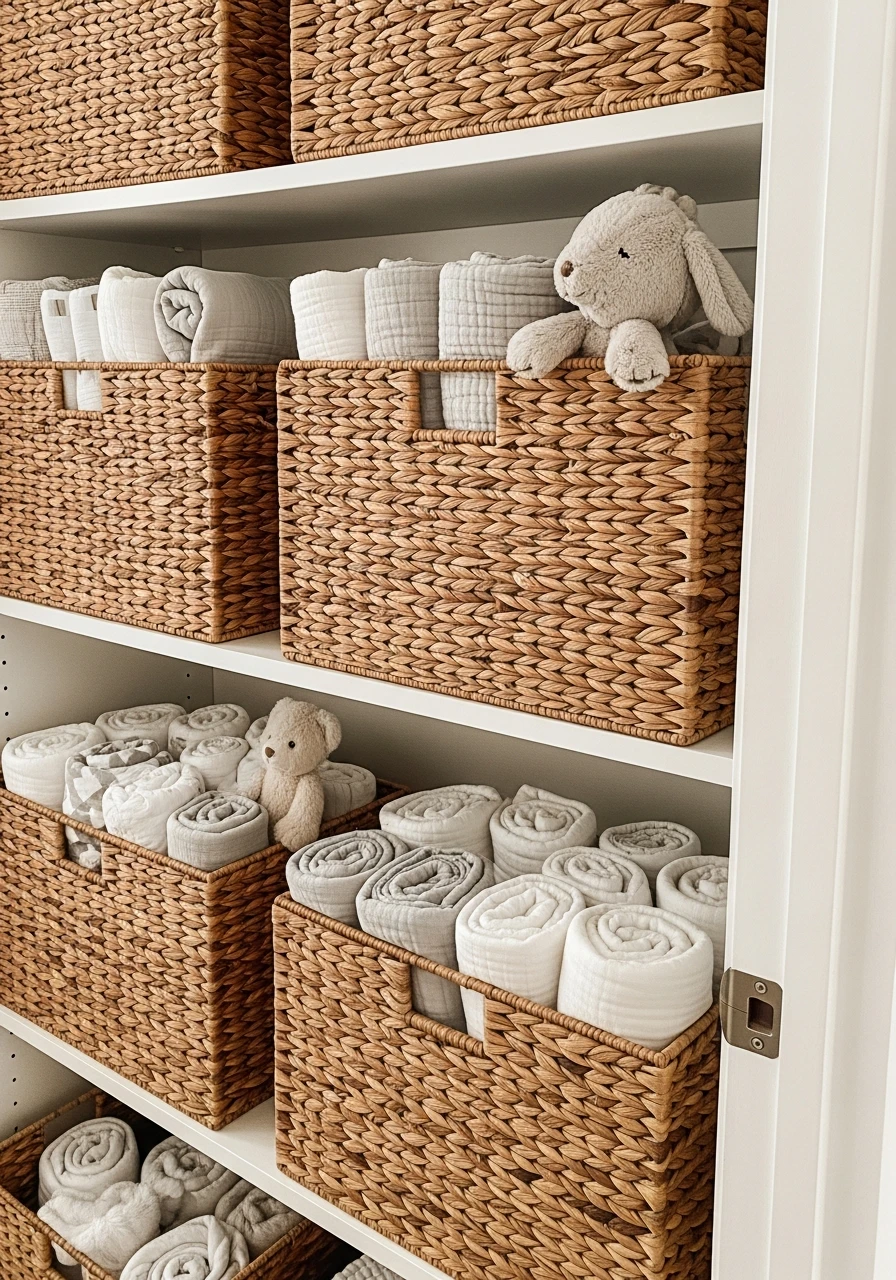
Woven baskets bring texture and warmth, giving the closet that desirable high-end look without a huge cost. They are perfect for storing blankets, swaddles, or soft toys you want to keep handy.
- Choose baskets made of natural materials like seagrass.
- Use one large basket for bulky items like spare pillows.
- Place them on the floor or on wide, deep shelves.
Pro Tip: The texture of the basket hides any mess inside, making the room look instantly tidier.
7. Back-of-Door Storage
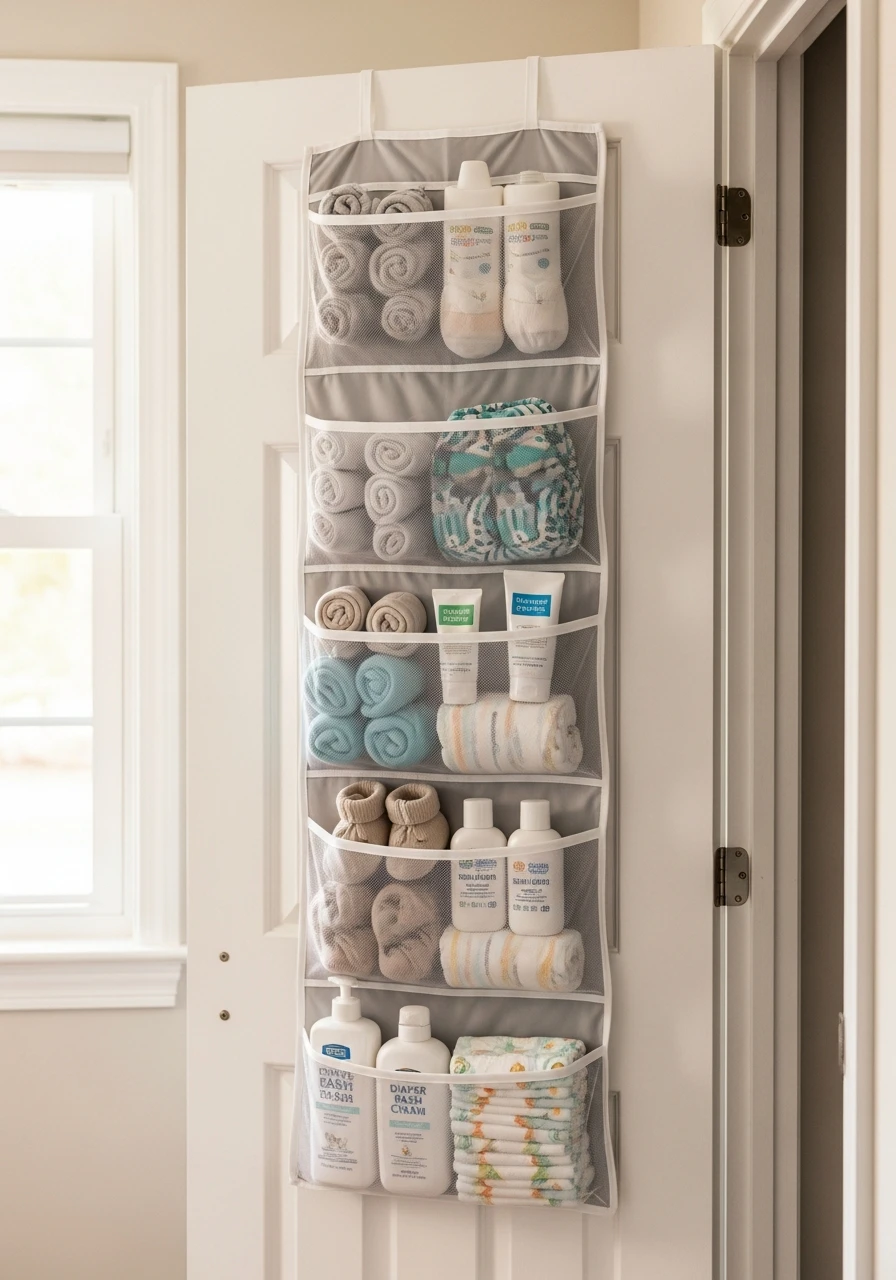
Don’t ignore the back of the closet door. This is prime real estate for organizing smaller, fiddly items like shoes, socks, or even diaper creams. It keeps them off the shelves and easily visible.
- Use a clear vinyl organizer for small shoes.
- Hang a pocket organizer for quick access to pacifiers.
- Ensure the organizer clears the shelves when the door closes.
Pro Tip: Use an over-the-door system that doesn’t require drilling, perfect for renters.
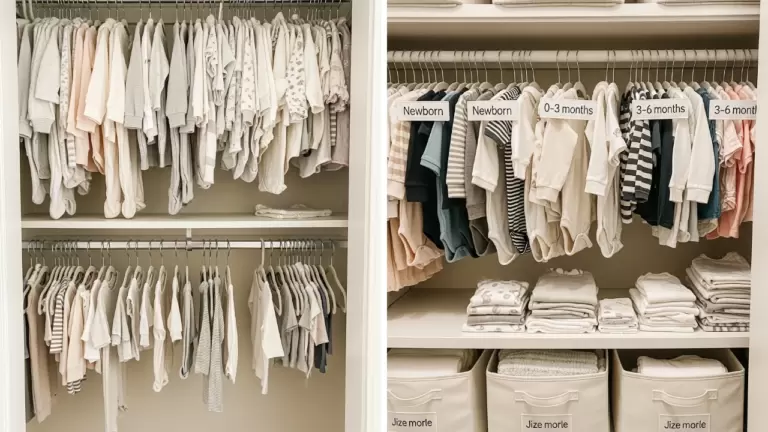
8. Clothes Size Dividers
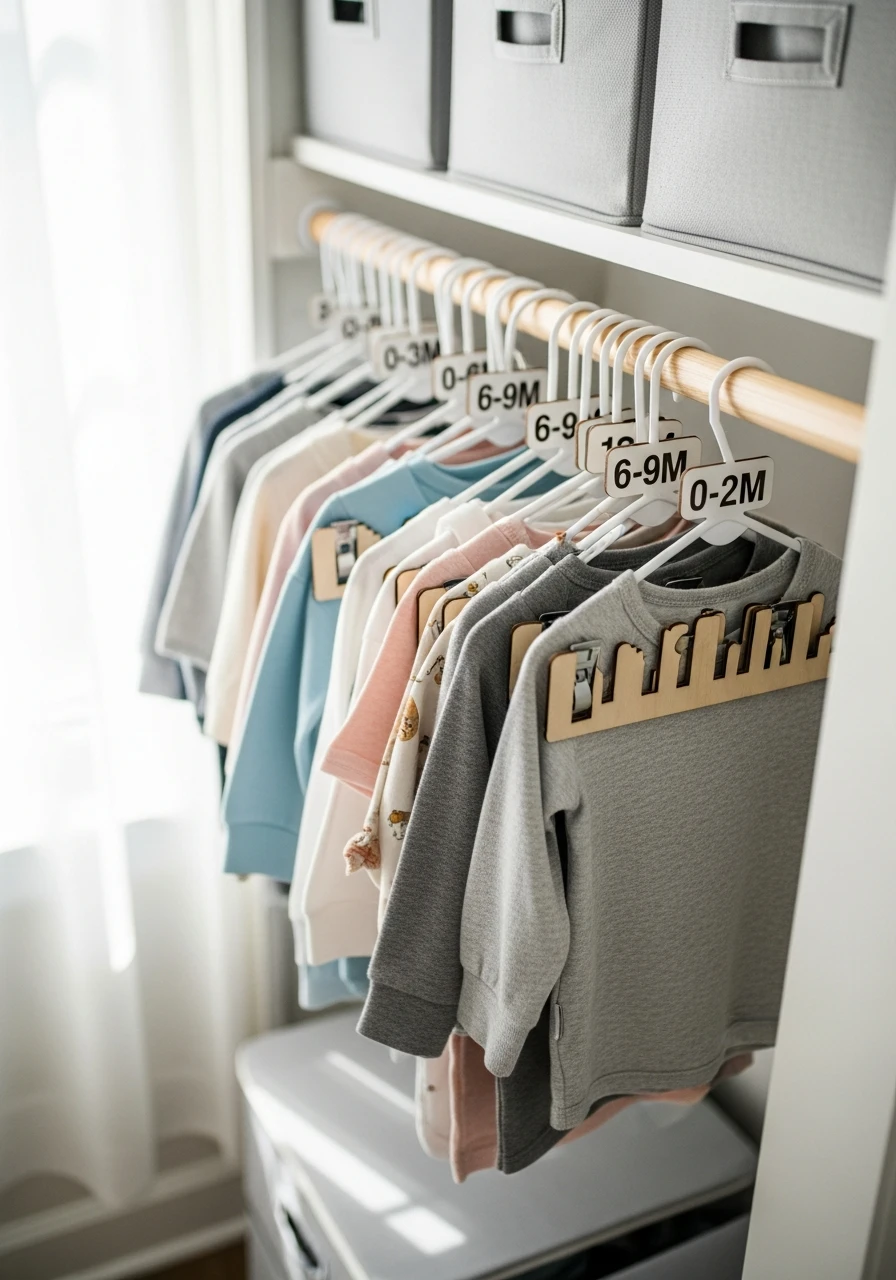
Babies grow fast, so having clothes in multiple sizes is standard. Size dividers keep your closet organized and prevent you from accidentally hanging 12-month clothes with 3-month outfits. They save so much time.
- Label dividers clearly (Newborn, 0-3M, 3-6M, etc.).
- Keep the next size up pushed to the back of the rod.
- Use cute wooden or plastic dividers for consistency.
Pro Tip: Once the baby moves to the next size, use the empty divider slot to hold the clothes that are too small and need to be stored away.
9. Wallpaper The Closet Walls
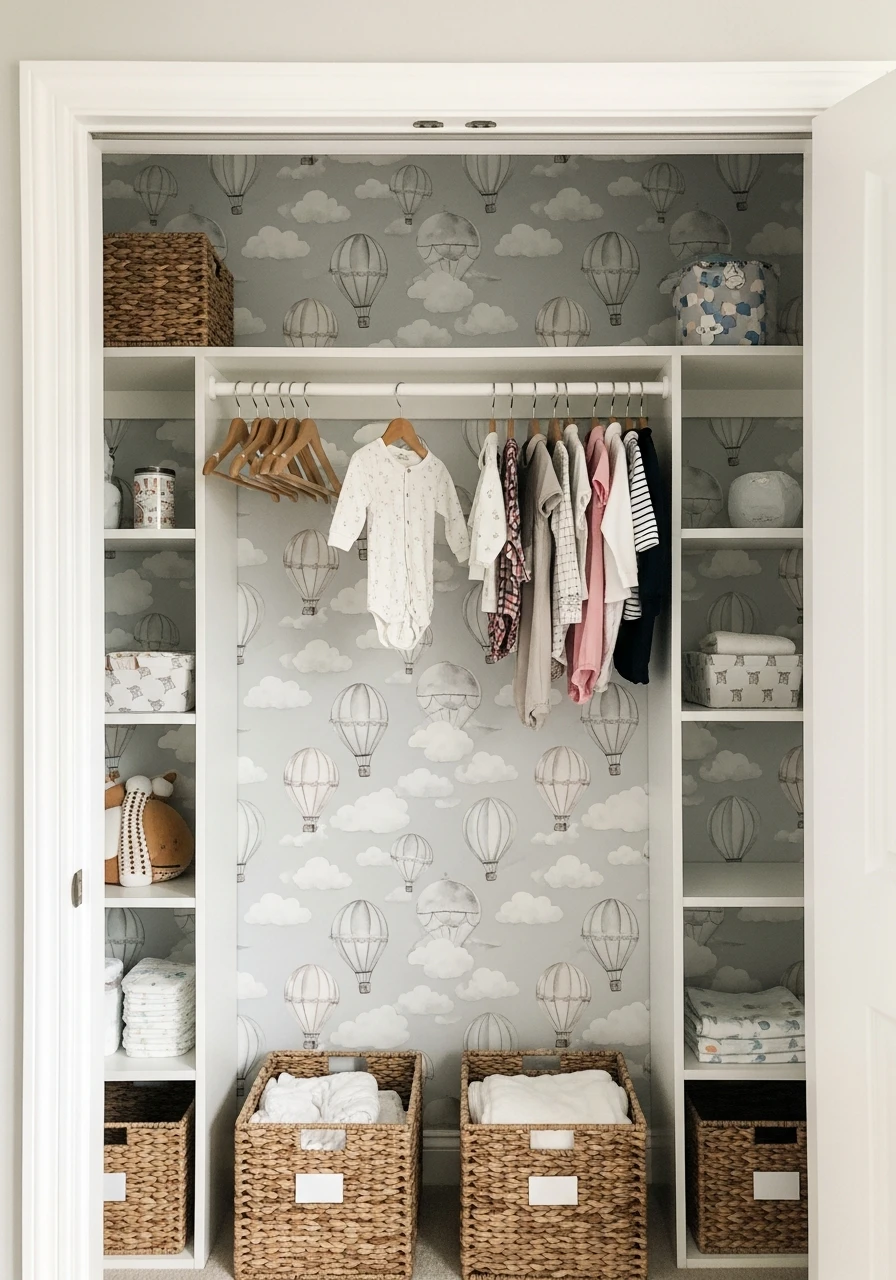
If you want a truly custom look, add peel-and-stick wallpaper inside the closet. Since the space is small, you don’t need much wallpaper, making this a budget-friendly way to add a pop of color or pattern. It feels like a surprise when you open the doors.
- Choose a removable wallpaper pattern.
- A subtle stripe or polka dot works well.
- Match a color from the wallpaper to your storage bins.
Pro Tip: Darker colors inside the closet can make the white shelving stand out beautifully.
10. Hooks For Accessories

Small, decorative hooks are perfect for hanging little accessories like hats, headbands, or even cute outfits you want to display. Place them on the back wall or the side panel of the closet for easy access.
- Use adhesive hooks for easy placement.
- Hang seasonal items near the door.
- Group similar items onto one hook (like a set of bibs).
Pro Tip: Install a row of hooks low enough for older siblings to help put away their own coats or backpacks later on.
11. High Shelf Storage
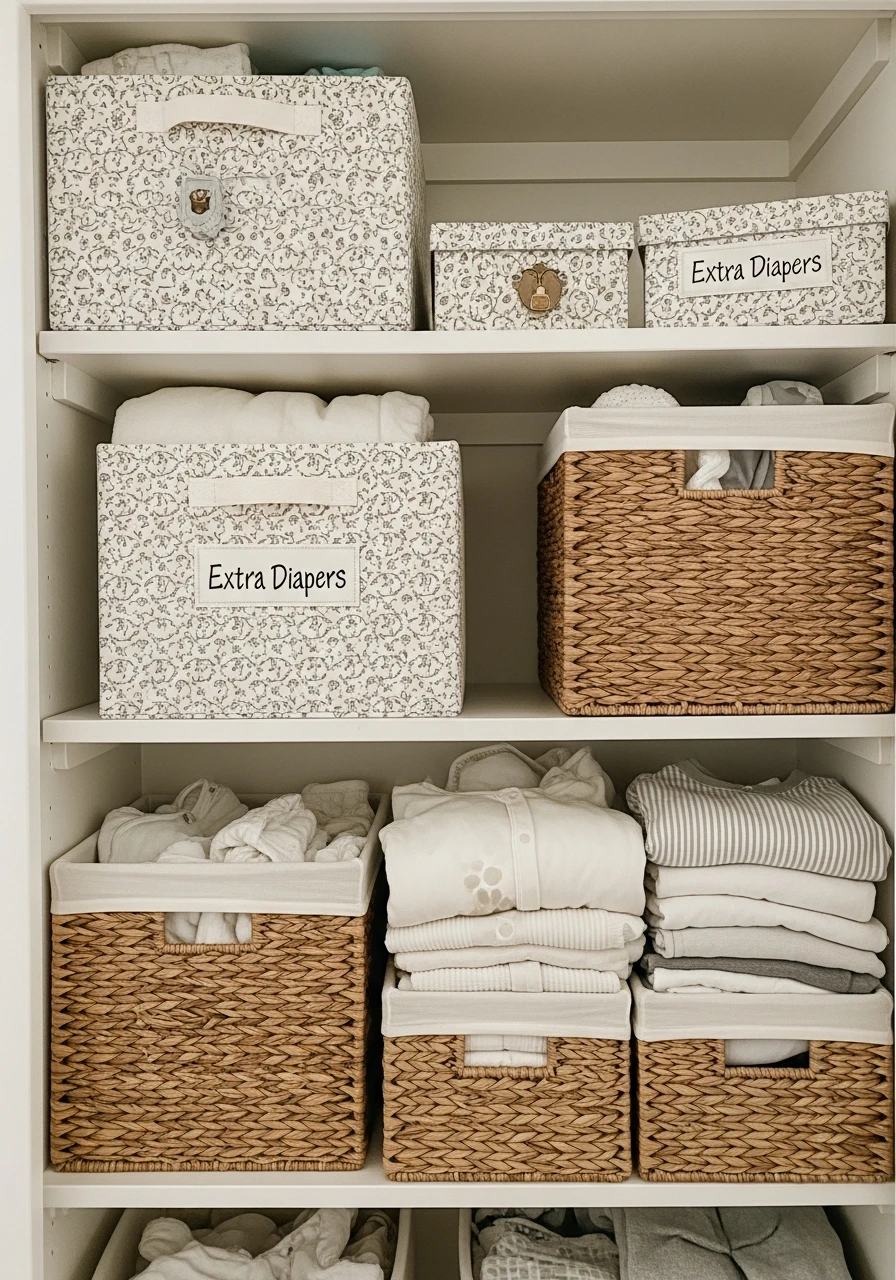
The top shelf of your closet is perfect for long-term storage or items you don’t need daily. Think about storing extra diapers, seasonal clothes, or sentimental items in attractive boxes up high. This keeps them out of the way but accessible.
- Use matching lidded boxes for a tidy look.
- Clearly label the boxes for future reference.
- Only store lightweight items up high for safety.
Pro Tip: Rotate seasonal clothes (like heavy winter coats) to the top shelf when summer hits, freeing up prime hanging space.
12. Keep Piles Neat
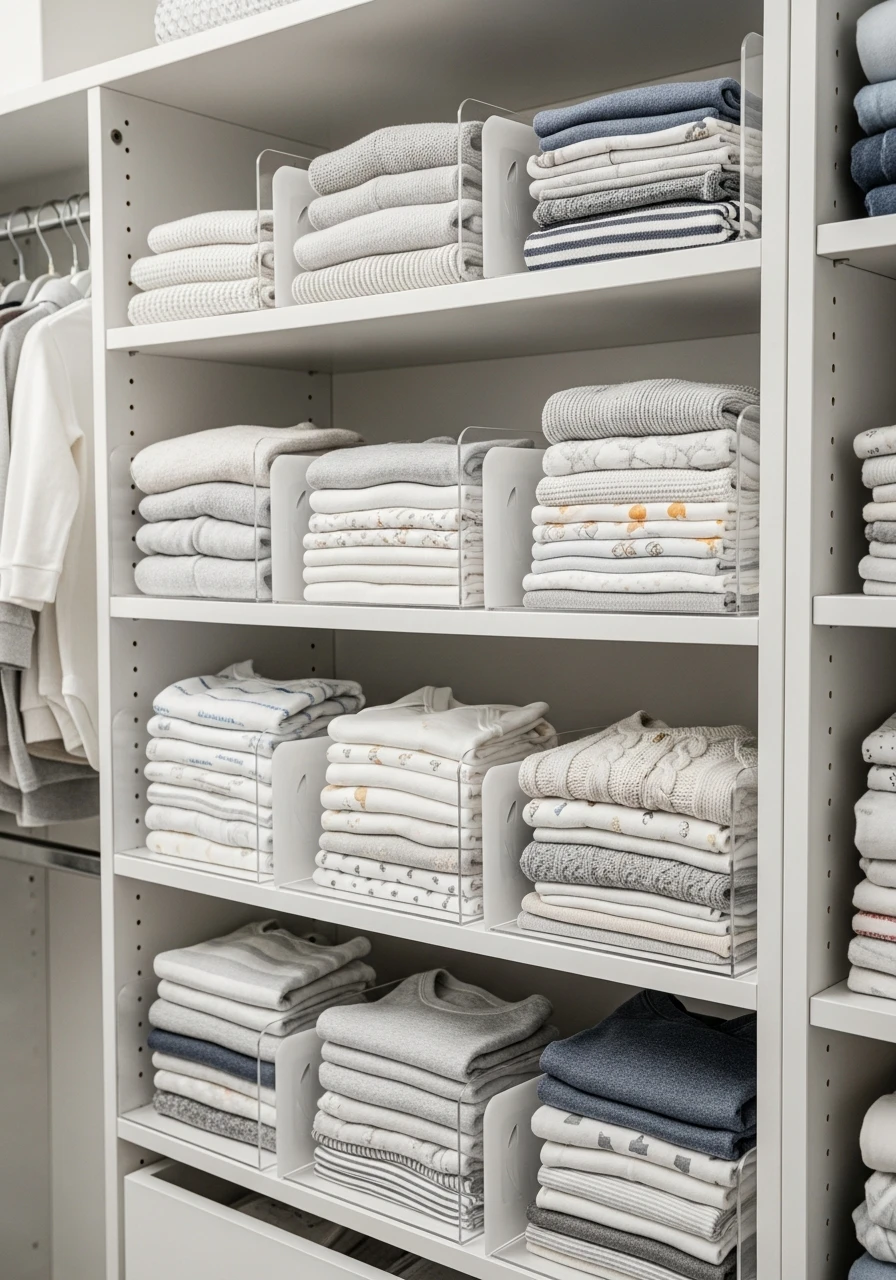
If you fold clothes and stack them on shelves, they inevitably fall over. Clear acrylic shelf dividers slide onto shelves and keep stacks of sweaters or folded pants contained and neat. They instantly upgrade the look of your shelving.
- Use them to separate different categories of clothing.
- Ensure the dividers fit your specific shelf thickness.
- Place the heaviest stack of clothing against the divider for support.
Pro Tip: Use these dividers on the top shelf to keep stacked blankets from toppling over.
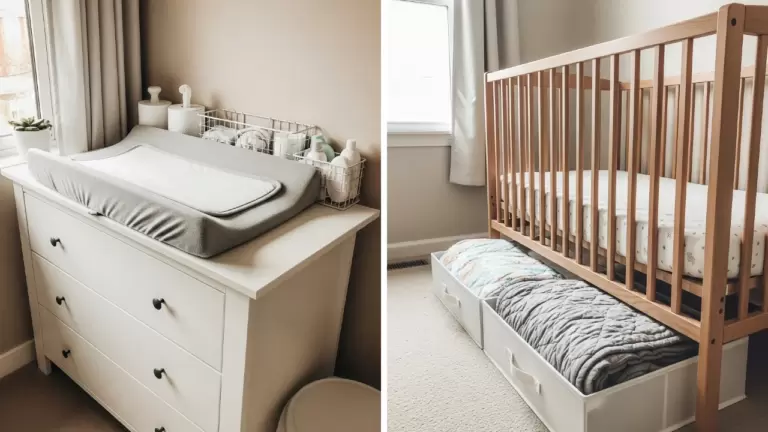
13. Hidden Laundry Hamper
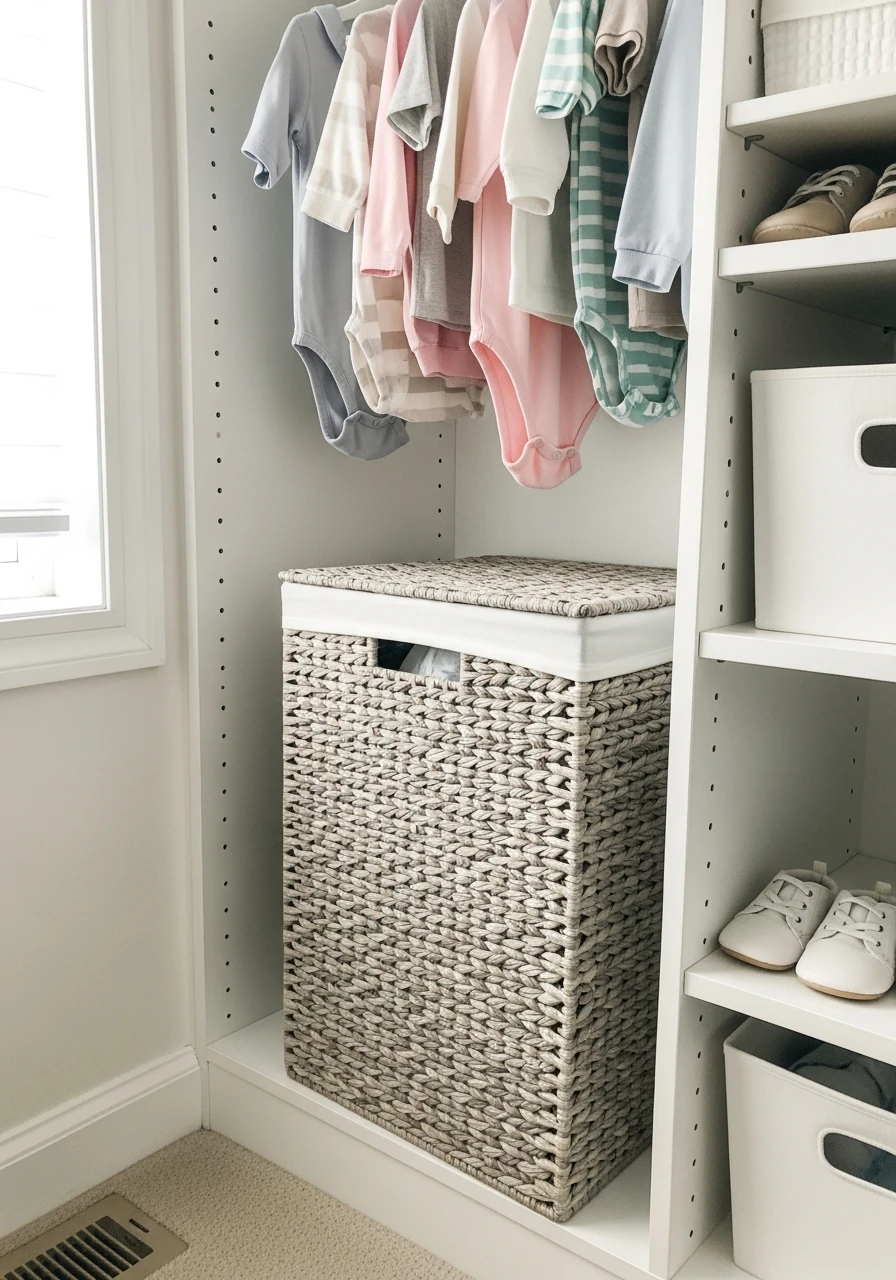
A dedicated spot for dirty clothes is essential. Tucking a small, stylish hamper inside the closet keeps laundry out of sight and off the floor. Look for one that fits perfectly underneath the hanging clothes.
- Choose a hamper with a removable liner for easy washing.
- Look for a slim, tall hamper if space is tight.
- Use a lidded hamper to hide contents completely.
Pro Tip: If you have space, use a divided hamper for lights and darks to make laundry day easier later on.
14. Add Floating Shelves
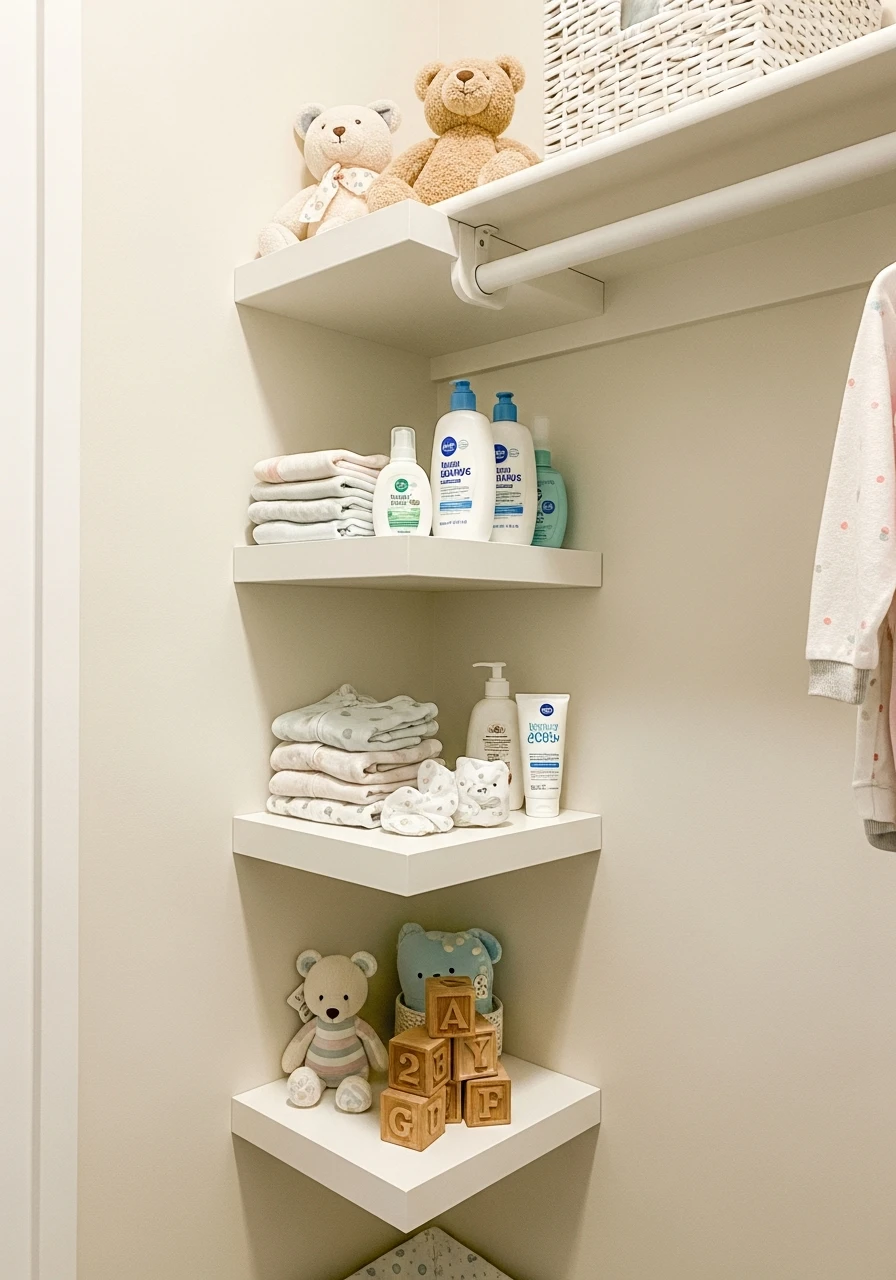
If your closet only has a single rod, install a few floating shelves on the side walls. These are great for displaying cute toys, storing essential lotions, or stacking small piles of folded clothes. They add custom storage without needing a full system.
- Choose white or wood shelves for a clean look.
- Ensure they are securely anchored to the wall.
- Use the lowest shelf for items the baby might play with later.
Pro Tip: Place a small lamp or nightlight on a floating shelf for soft illumination inside the closet.
15. Color Code Your Bins
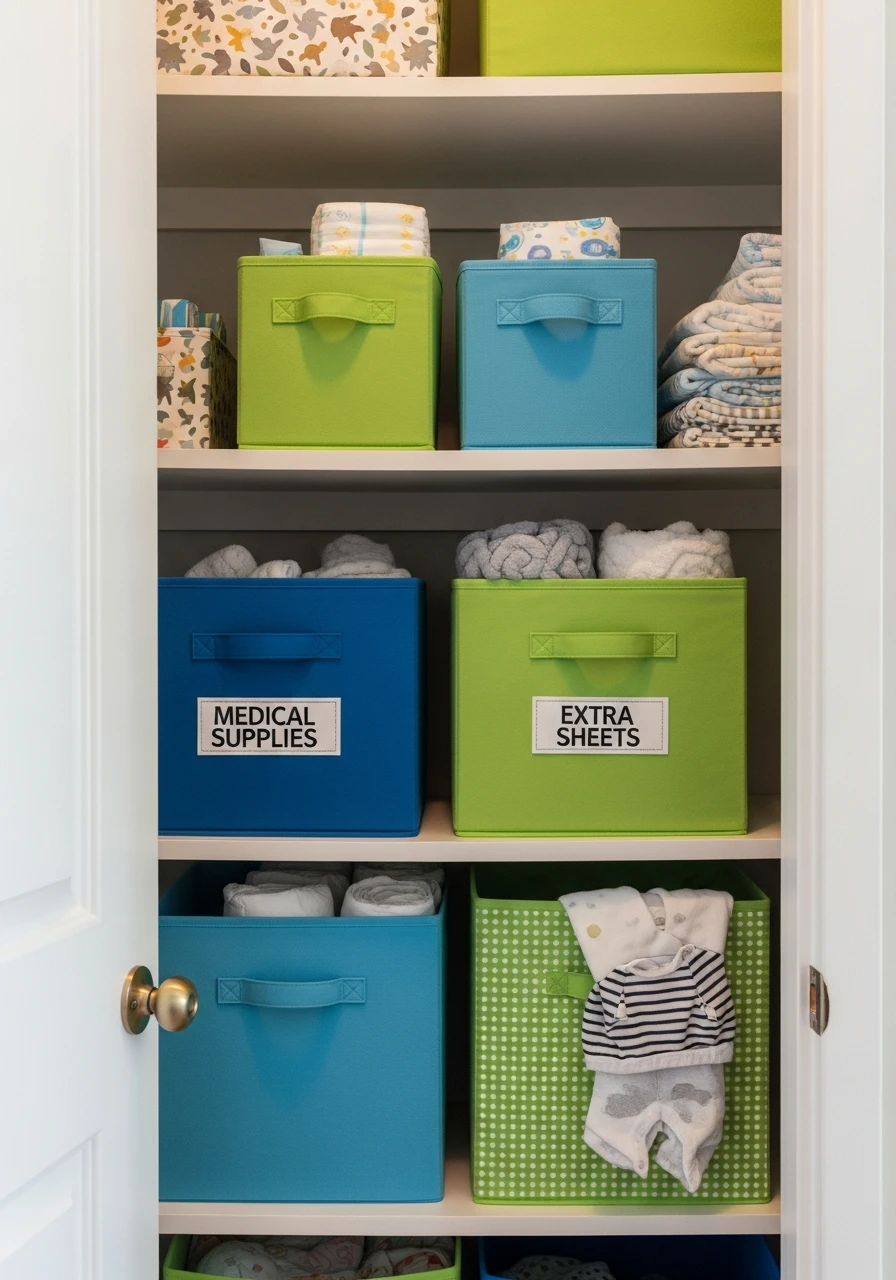
Assigning a specific color to a category makes finding things simple and fun. For example, all medical supplies go in the blue bin, and all extra sheets go in the green bin. This is a visual system that works well for quick clean-up.
- Use different colored storage baskets.
- Keep the rest of the closet neutral for the colors to pop.
- Use the colors consistently across all storage areas.
Pro Tip: If you prefer a neutral closet, use different shades of one color (like light gray, medium gray, and dark gray) for the coding system.
16. Add Soft Lighting
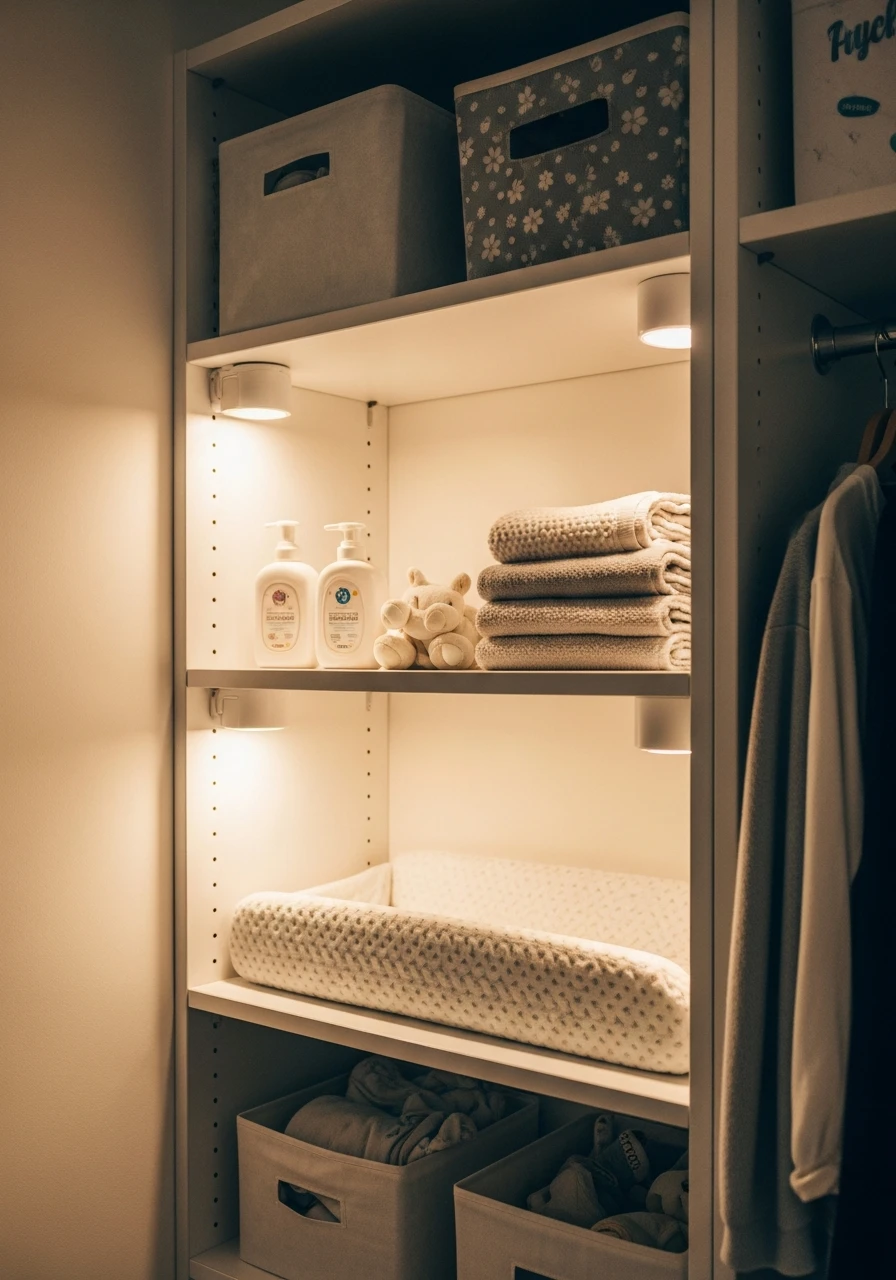
Closets are often dark, making it hard to see what you’re looking for. Installing battery-operated puck lights or small LED strips provides gentle, soft lighting. This is especially helpful during middle-of-the-night changes.
- Use stick-on lights that are easy to install.
- Place lights under shelves or above the rod.
- Choose a warm white light color, not harsh blue.
Pro Tip: Look for lights with a remote control or motion sensors for hands-free operation.
17. See-Through Storage Bins
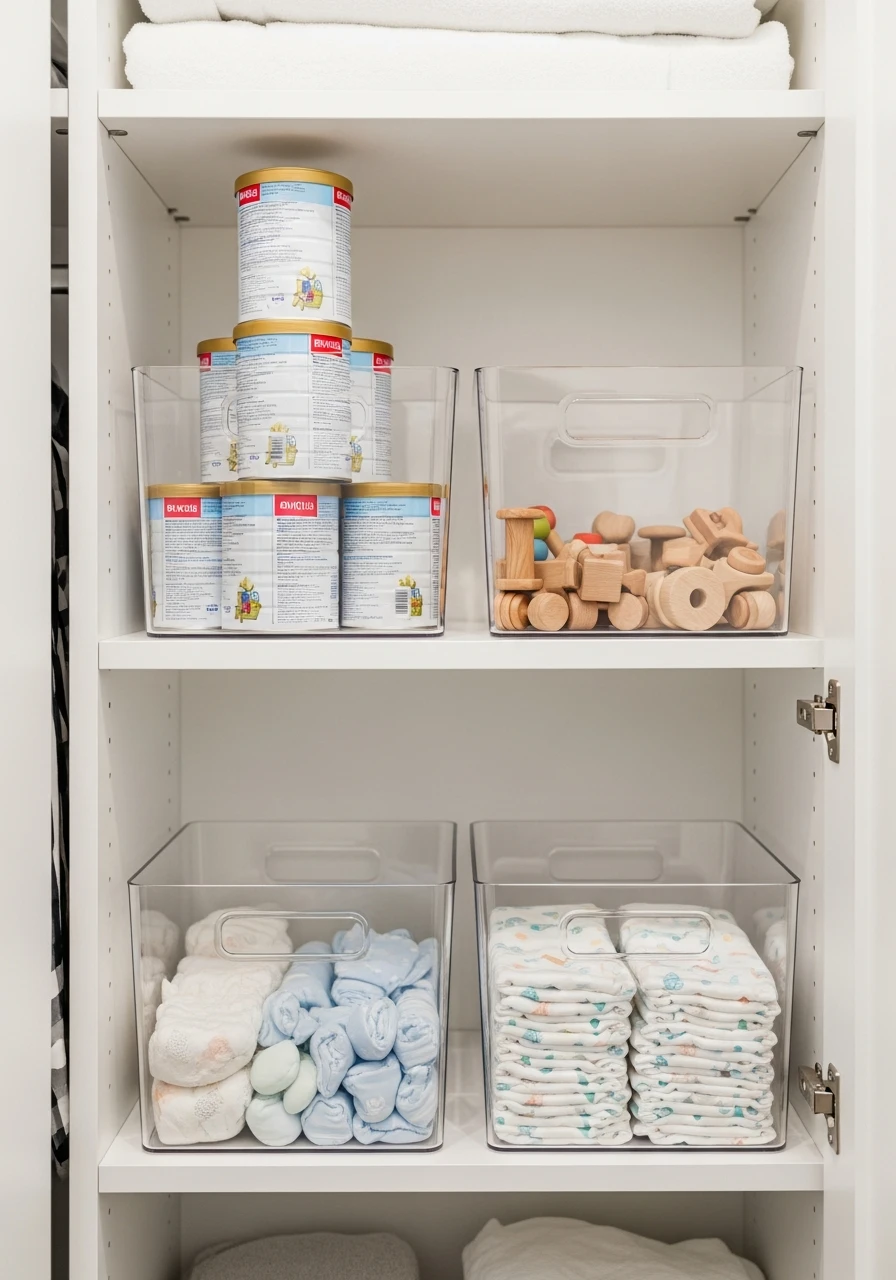
For items you need to see instantly, like extra formula cans or specific toys, clear acrylic containers are perfect. They look modern and clean, giving that high-end organizational feel without the hefty price tag.
- Use them primarily for smaller, frequently needed items.
- Stack identical bins for a uniform look.
- Wipe them down regularly to keep them dust-free.
Pro Tip: These work great for storing craft supplies or small parts that come with baby gear.
18. Mirror on the Closet Door
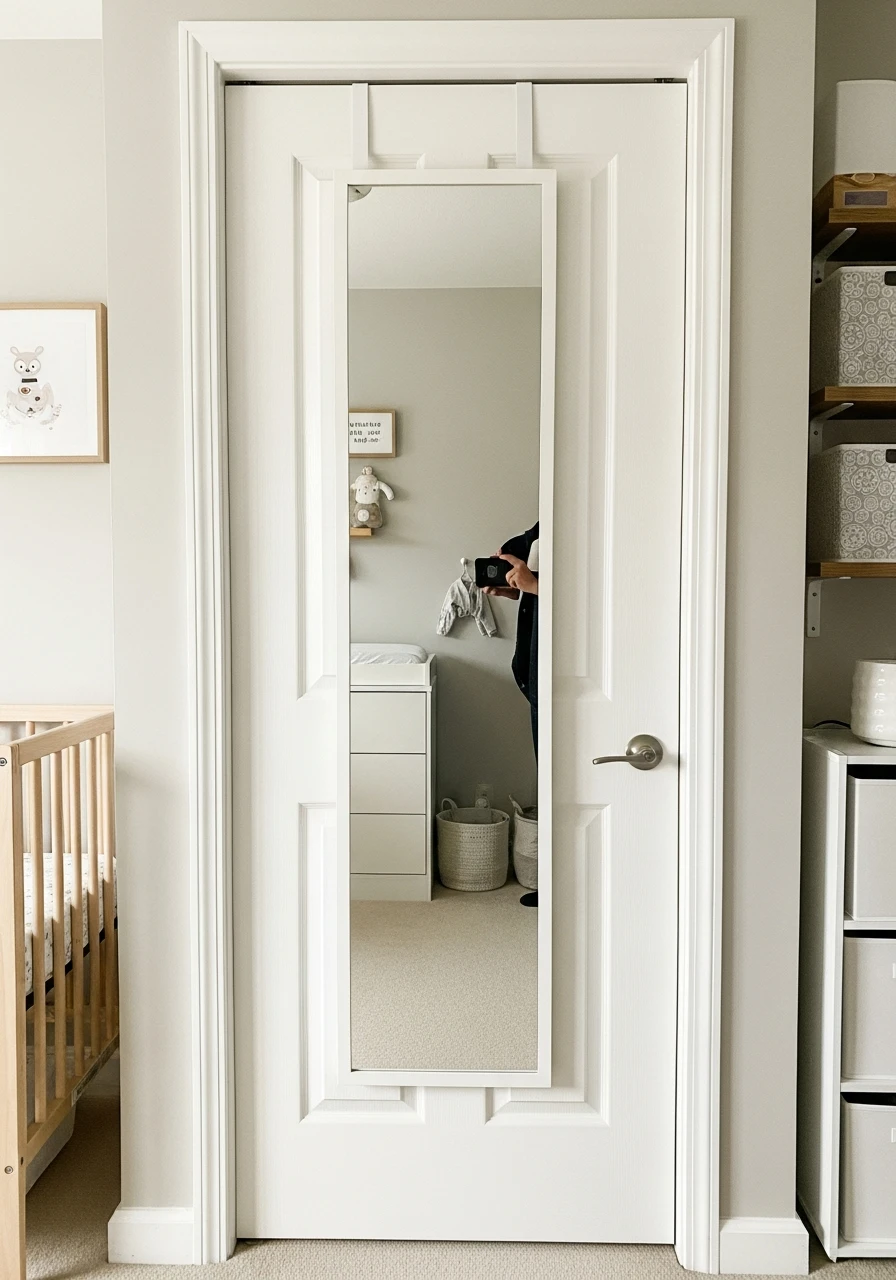
Even if your little one can’t use a mirror yet, you can! A full-length mirror makes the small nursery feel much bigger and gives you a chance to check your outfit before you leave. It’s an easy, budget-friendly way to upgrade the closet door.
- Instantly boosts perceived room size.
- Perfect for quick Mom outfit checks.
- Use the back for over-the-door storage hooks.
- Look for shatterproof or acrylic options.
Pro Tip: Always choose a mirror that is properly secured to the door or wall. For extra peace of mind in a nursery, look specifically for shatterproof or acrylic options.
19. Diaper Changing Station
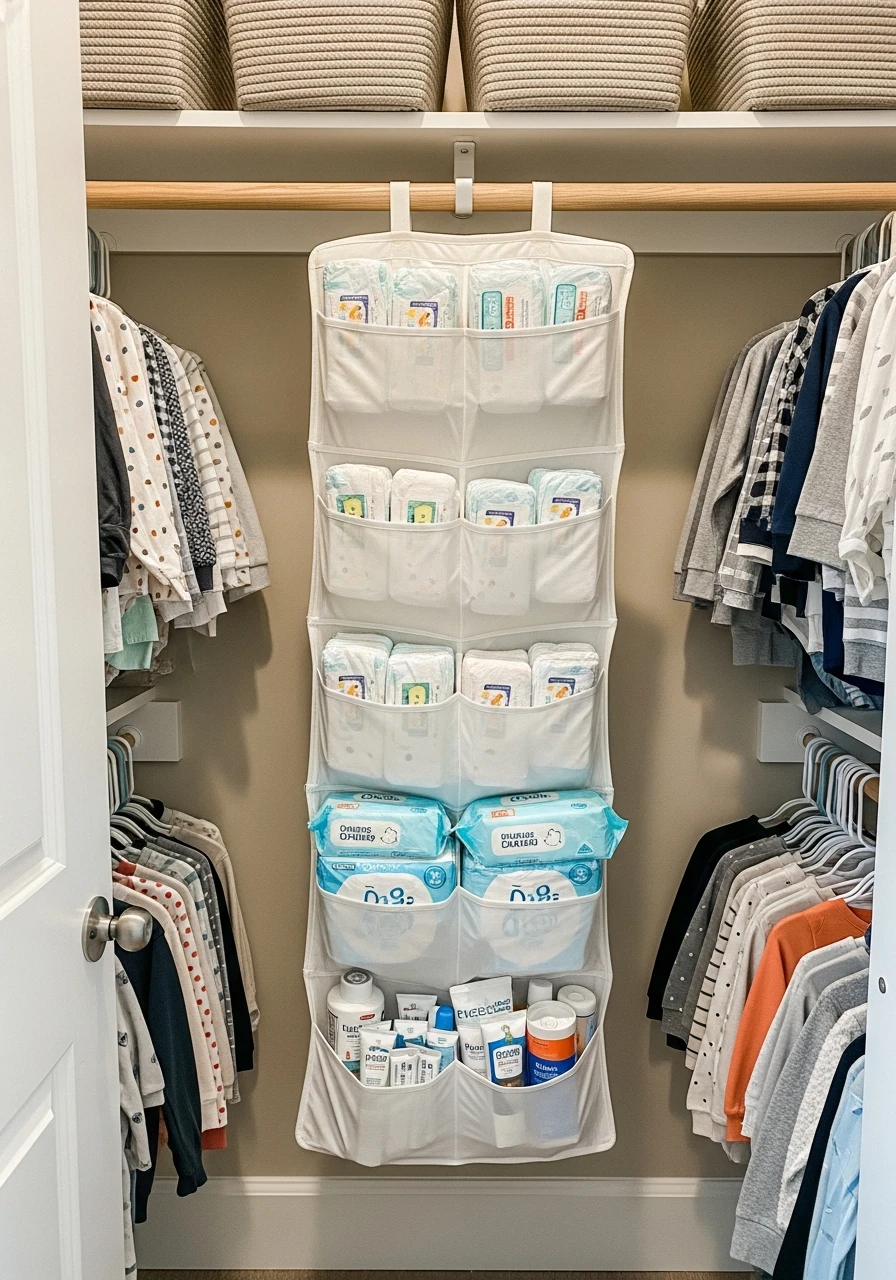
Keep all diaper supplies consolidated in one area of the closet, ideally near the changing table outside. A hanging shoe organizer or a small caddy can hold diapers, wipes, and creams, making restocking simple.
- Use a hanging organizer pocket for each item.
- Keep the current size of diapers at the top.
- Place the caddy on a low shelf for easy grab-and-go access.
Pro Tip: Use a vertical stacker to store extra packages of diapers neatly on the floor.
20. Fake A Custom Nursery Closet
If your nursery closet has those standard wire shelves, don’t worry—we can fix that easily! Adding simple wood trim and a fresh coat of paint makes cheap storage look like expensive, custom built-ins. This simple trick adds so much cozy style for almost no money.
- Use inexpensive MDF wood for all the trim pieces to keep costs low.
- Paint the trim the exact same color as the closet walls for a cohesive look.
- Caulk all seams before painting—this is the secret to a seamless, high-end finish.
Pro Tip: Adding baseboard trim where the closet walls meet the floor instantly makes the space look finished and custom-made.
21. Rolling Utility Cart
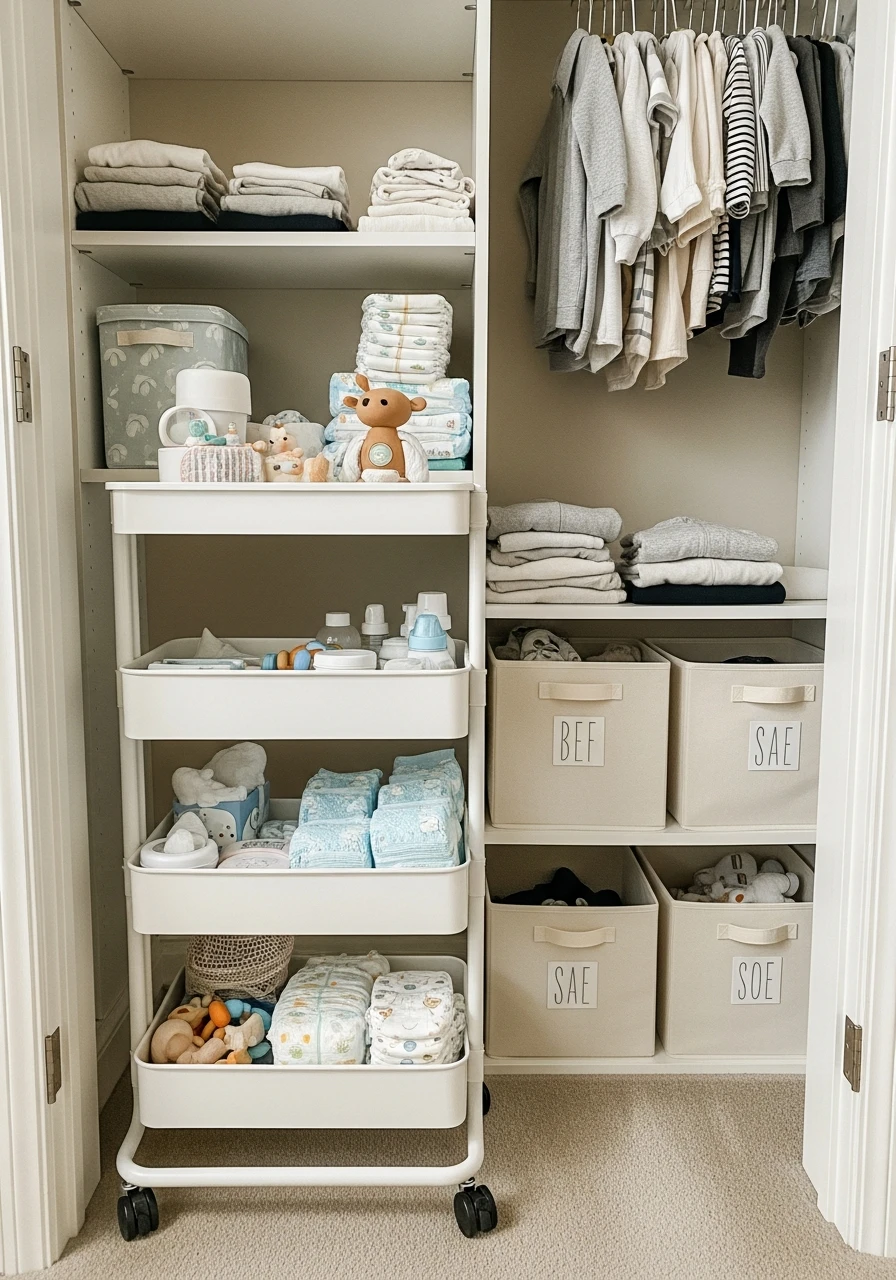
A narrow rolling cart is a flexible piece of storage that can be pulled in and out of the closet as needed. Use it for items that shift location, like craft supplies or toys the baby is currently playing with. It’s highly functional and budget-friendly.
- Choose a slim cart that fits easily beside the hanging clothes.
- Use the top tier for items you grab most often.
- Look for carts with locking wheels for stability.
Pro Tip: This cart can easily move from the nursery to the living room when you need a portable toy station.
22. Functional Zones Setup
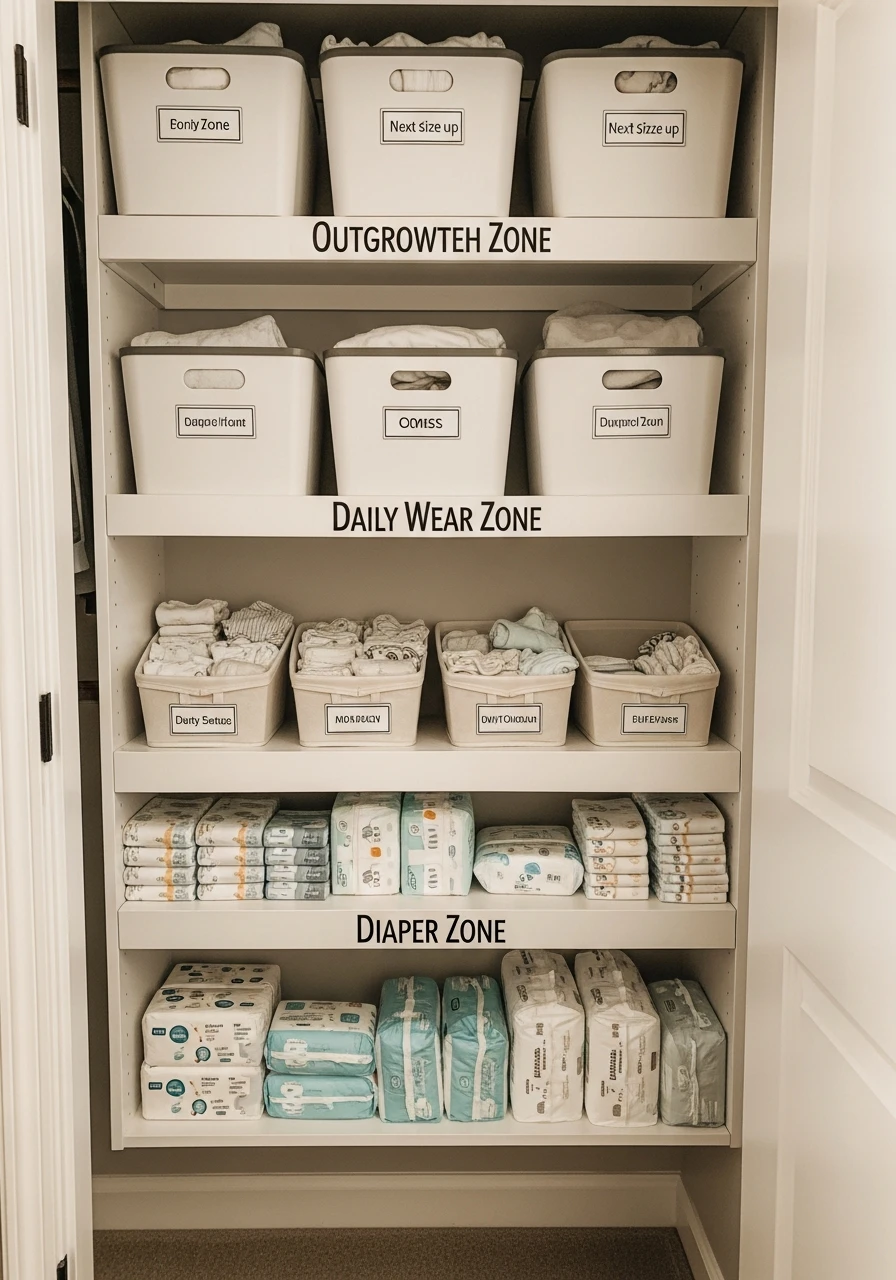
Think of your closet in zones: the ‘Diaper Zone,’ the ‘Outgrowth Zone,’ and the ‘Daily Wear Zone.’ Organizing by function rather than just size helps you quickly assess inventory and restock supplies efficiently. Keep daily items front and center.
- Keep the daily wear zone between waist and eye level.
- Place the long-term storage zone up high.
- Use clear signage for each zone.
Pro Tip: Try to keep all medical supplies in one small, clearly labeled zone to minimize searching when you need them fast.
23. Swap Out Hardware
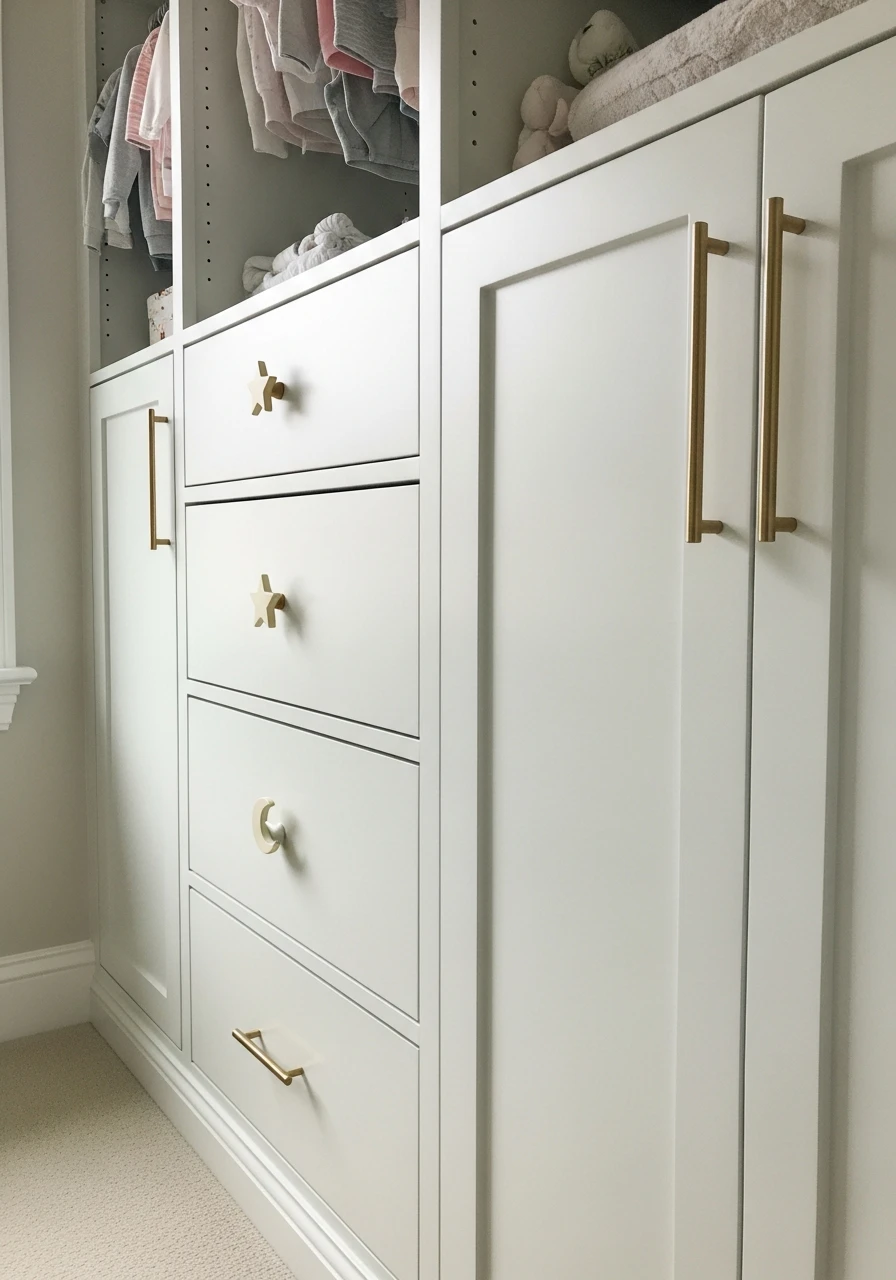
If your closet has drawers or cabinets, changing the knobs or pull handles is the fastest way to get a custom look. Choose playful shapes like stars or moons, or stick with elegant brushed brass for a classic touch. It’s a tiny change with big impact.
- Measure the existing hole size before buying new pulls.
- Choose hardware that matches the nursery decor.
- Use ceramic or wood knobs for a soft, tactile feel.
Pro Tip: You only need a few knobs for the closet, so splurge slightly on something unique here.
24. Box Up Keepsakes
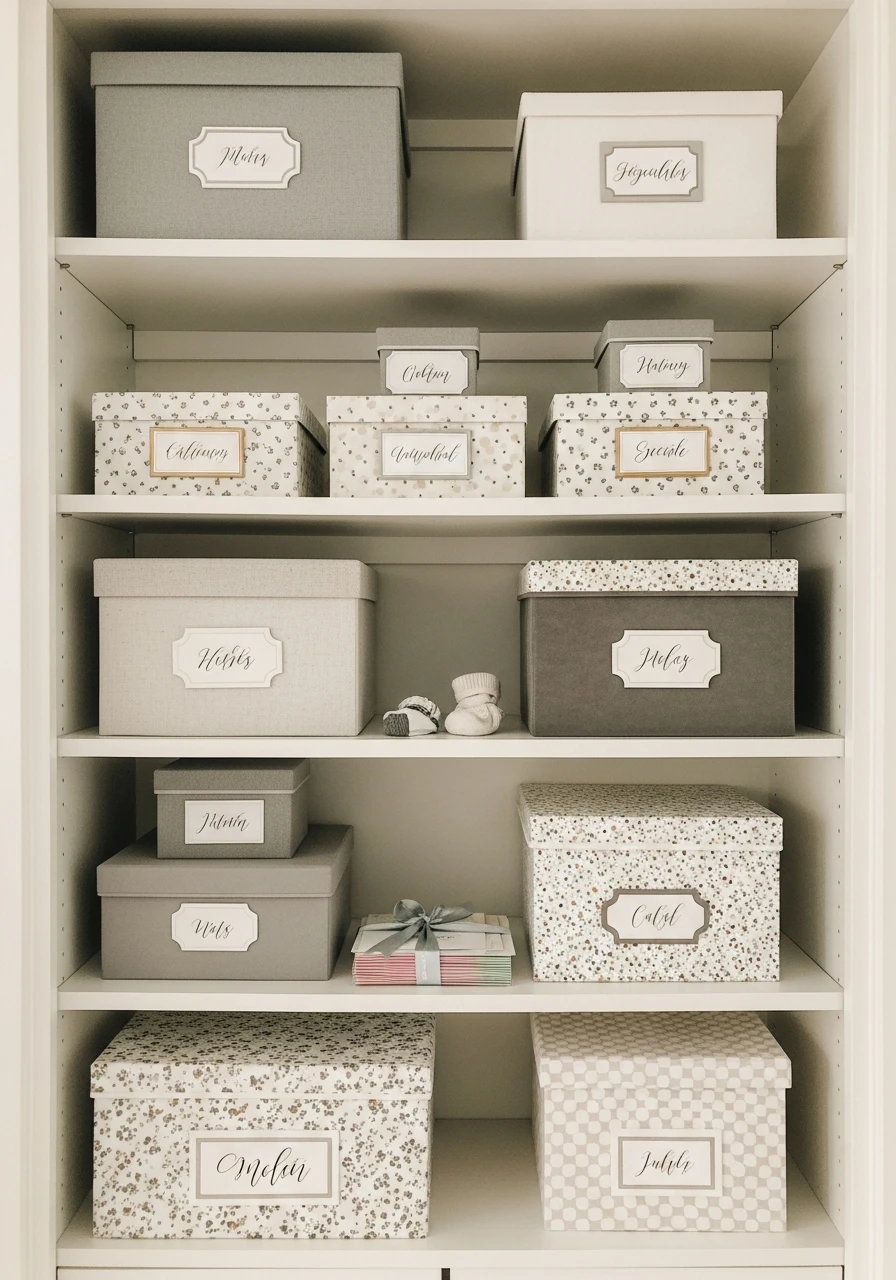
Baby items quickly become sentimental, but you can’t keep them all in the daily rotation. Use decorative boxes to store first outfits, special cards, or favorite small toys. Storing them neatly keeps them safe and keeps the closet clutter-free.
- Use archival, acid-free boxes if storing photographs.
- Choose boxes that match your fabric bins for unity.
- Label the outside with the contents (e.g., ‘First Year Memories’).
Pro Tip: Place these special boxes on the top shelf, where they are protected but still visible.
25. Protect Your Shelves
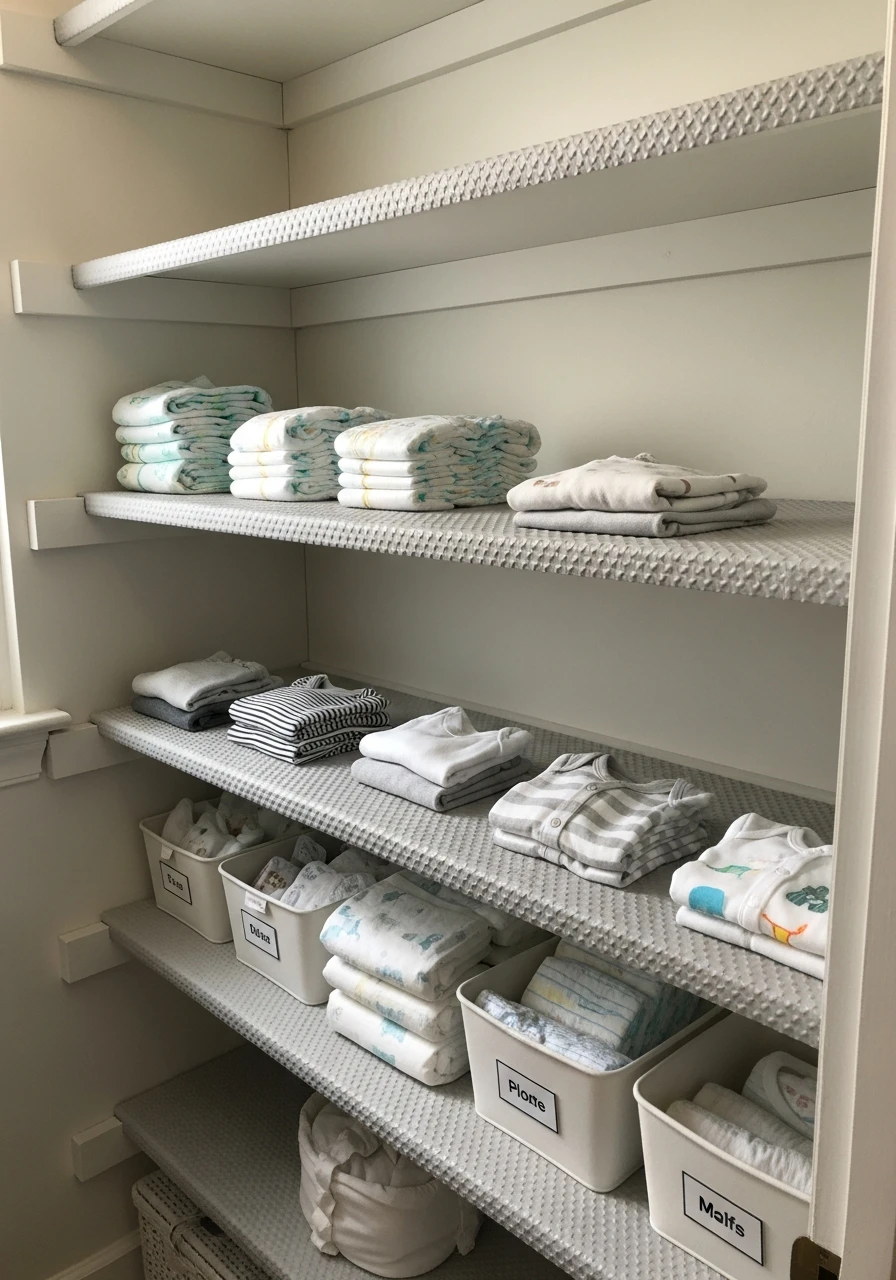
Shelf liners are a simple, inexpensive way to protect your shelves from spills and scuffs. They also add a finished, neat appearance, especially if your shelves are older or made of wire. Choose a non-adhesive, textured liner for easy cleaning.
- Use a subtle pattern or a solid neutral color.
- Measure and cut the liner precisely for a tailored fit.
- Liners help prevent items from slipping on wire shelves.
Pro Tip: Lining the shelves with contact paper that mimics wood grain can instantly make cheap shelves look like custom wood.
26. Store Baby Books Neatly
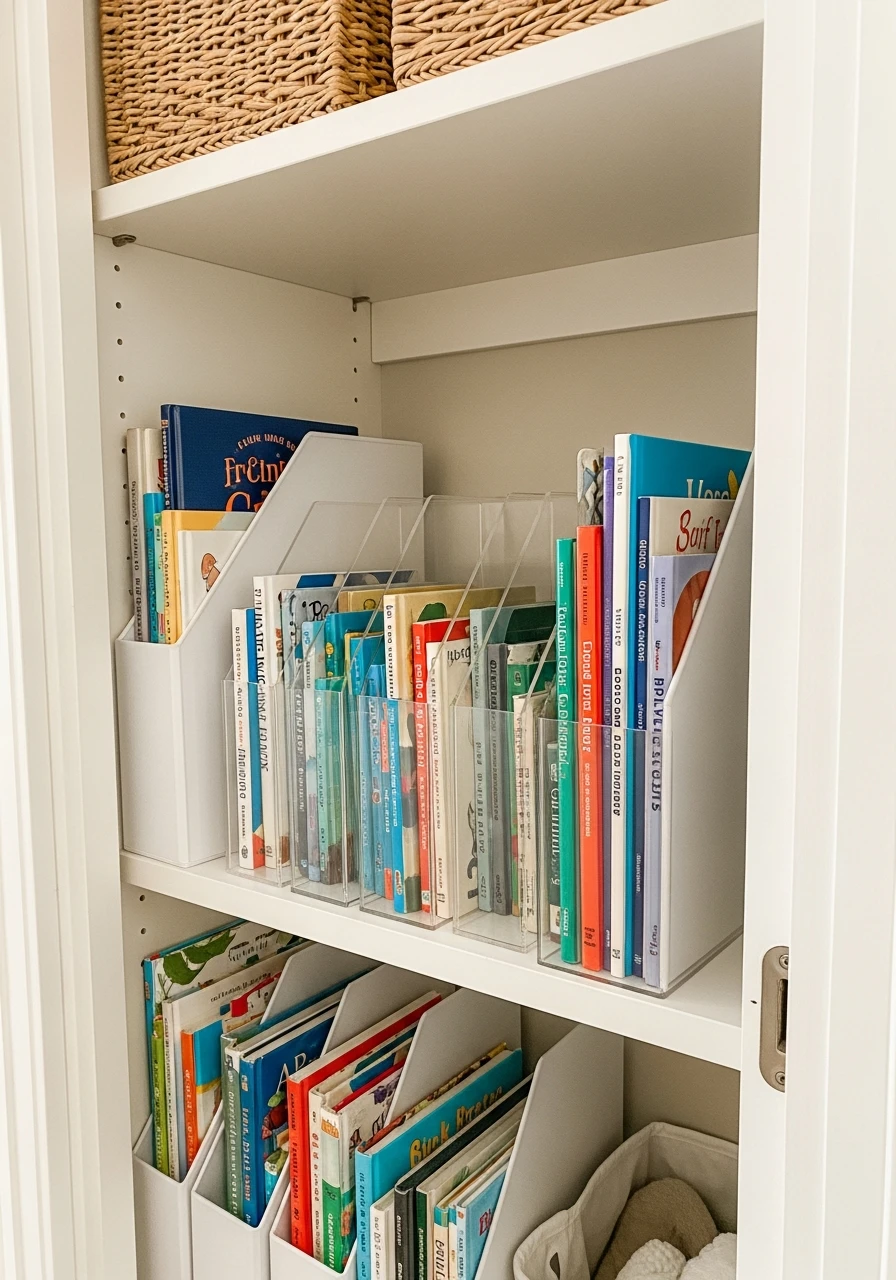
If your baby’s book collection is growing, use clear vertical file holders or magazine holders to keep them organized on a shelf. This stops books from falling over and makes it easy for you to grab a bedtime story quickly.
- Use clear acrylic holders for a modern look.
- Group books by size or reading level.
- Place the holders next to the changing station for distraction during changes.
Pro Tip: Keep the majority of the books in the closet and only display a few on the dresser to prevent clutter in the main room.
27. Eye Level Essentials
The most ergonomic way to organize is to put the things you use every single day at eye level. This prevents unnecessary bending or reaching, which is crucial when you are holding a wiggly baby. Prioritize the middle shelves for daily items.
- Place daily lotion, wipes, and backup pacifiers here.
- Keep daily outfits hanging on the middle rod.
- Rotate seasonal clothes down to this level when needed.
Pro Tip: If you have a wire shelf system, use a basket here to ensure small items don’t fall through the gaps.
28. Consistent Fabric Bins
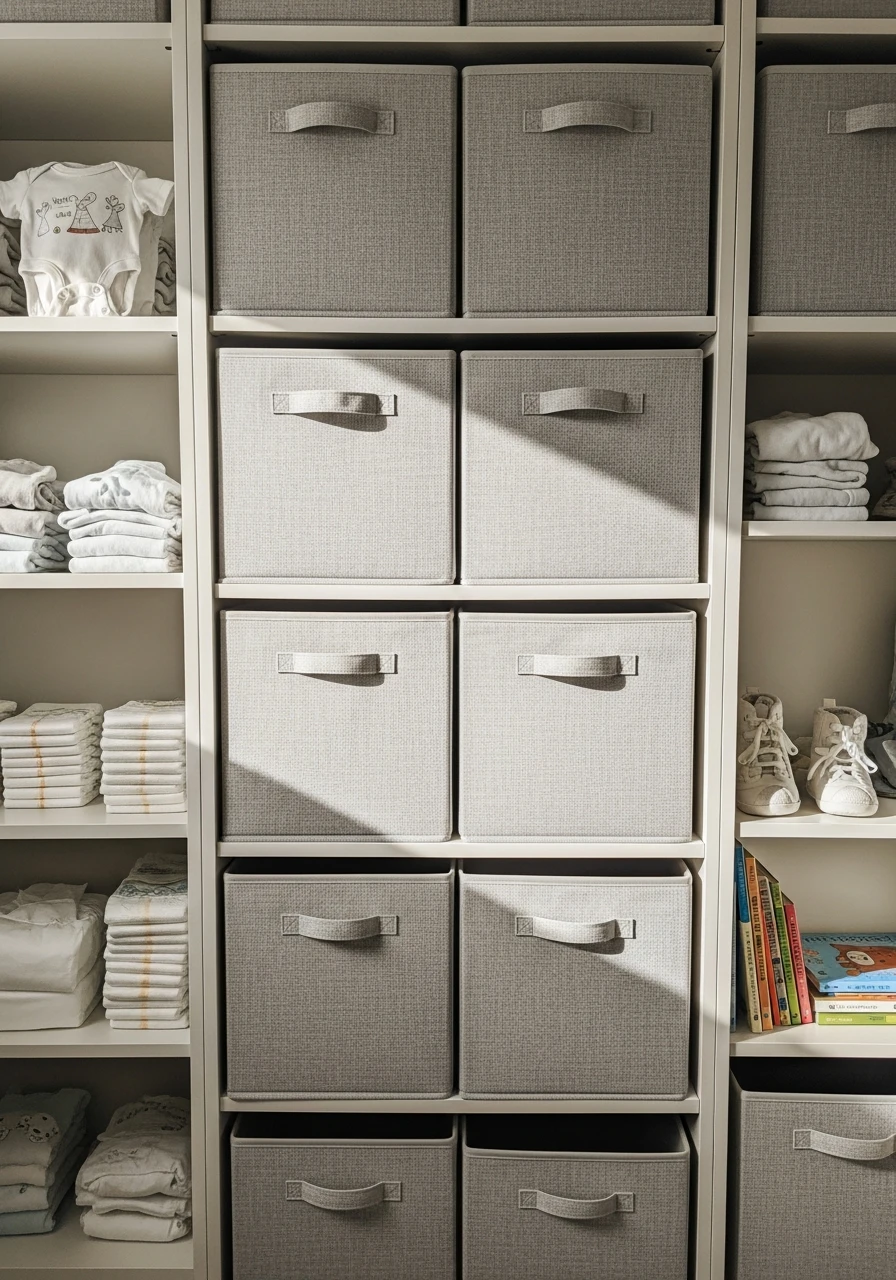
Nothing screams ‘high-end organization’ like consistency. Buy all your fabric storage bins in the same color and texture. Even if the contents are messy, the outside of the closet system will look neat and planned.
- Choose a material like linen or canvas.
- Stick to a neutral color like white, gray, or soft beige.
- Measure the shelf depth exactly before purchasing.
Pro Tip: If you are on a tight budget, look for affordable bins during back-to-school sales, as they often come in uniform sets.
29. Showcase Tiny Shoes
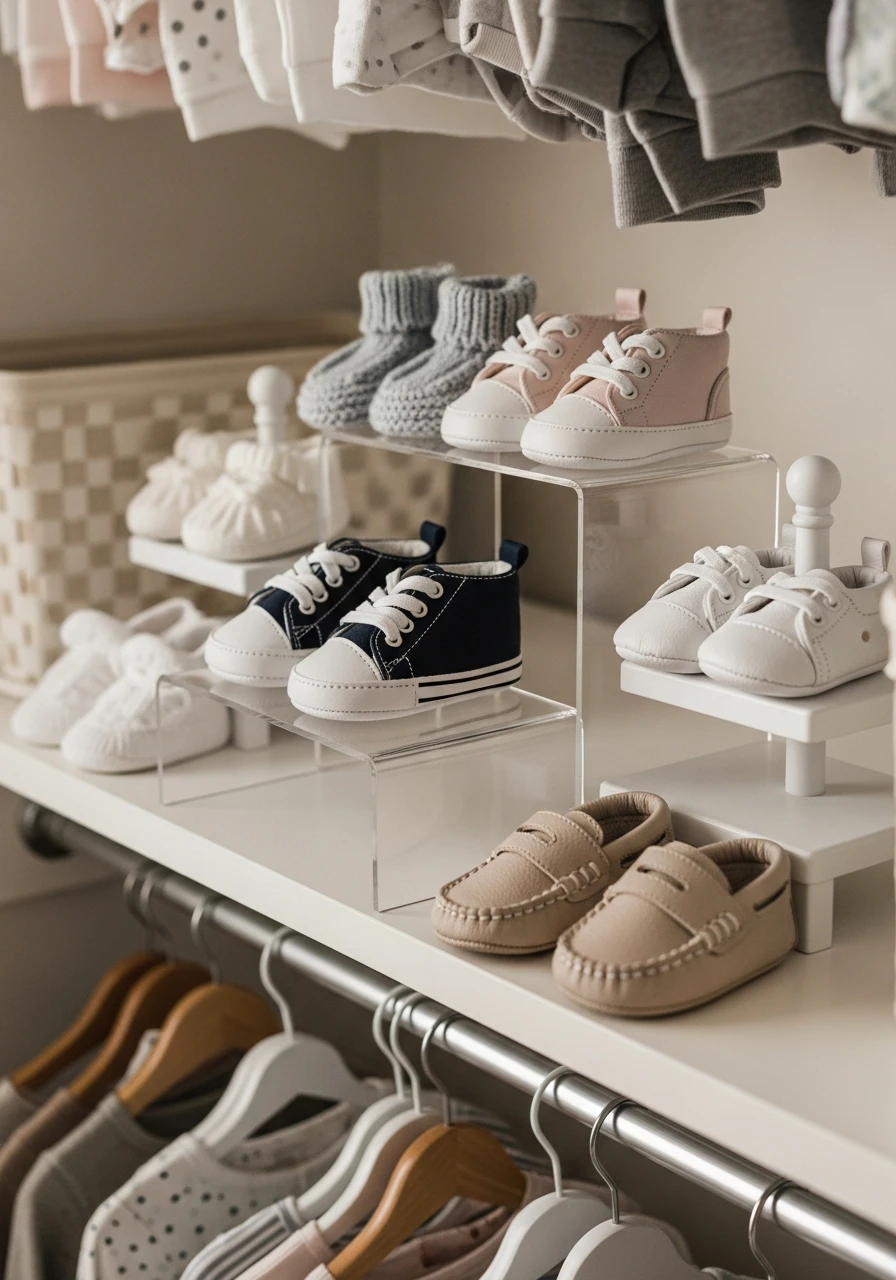
Baby shoes are adorable, so don’t hide them! Use clear acrylic risers or small tiered racks to display tiny booties and sneakers on a shelf. This turns functional storage into a delightful decorative element.
- Place the cutest pairs at the front.
- Use a small tray underneath to catch dirt.
- Keep the shoes sorted by size on different tiers.
Pro Tip: If you have room, place a decorative item like a small stuffed animal next to the shoe display for extra charm.
30. Paint A Warm Backdrop
If your closet is plain white, painting the interior a soft, warm color can make the space feel inviting and less institutional. A subtle sage green or soft beige instantly makes the closet feel like a planned part of the room design. Since the area is small, a sample pot of paint is often enough.
- Choose a color slightly darker than the nursery walls.
- Use low-VOC paint for the baby’s safety.
- Ensure the paint is fully cured before putting clothes back.
Pro Tip: Painting the inside of the closet doors the same color as the walls gives a seamless, elegant look when closed.
Creating an organized nursery closet doesn’t require a custom contractor or a massive budget.
By using vertical space, consistent bins, and smart labeling, you can easily create a beautiful system that grows with your child.
Time to grab those bins and start sorting!