50 Kitchen Window Plant Ideas
This post may contain affiliate links: full affiliate disclosure.
A kitchen window is the perfect spot to grow greenery while keeping your counters clear for cooking. These ideas show how to mix style and function by choosing the right pots and plants for a bright, airy space.
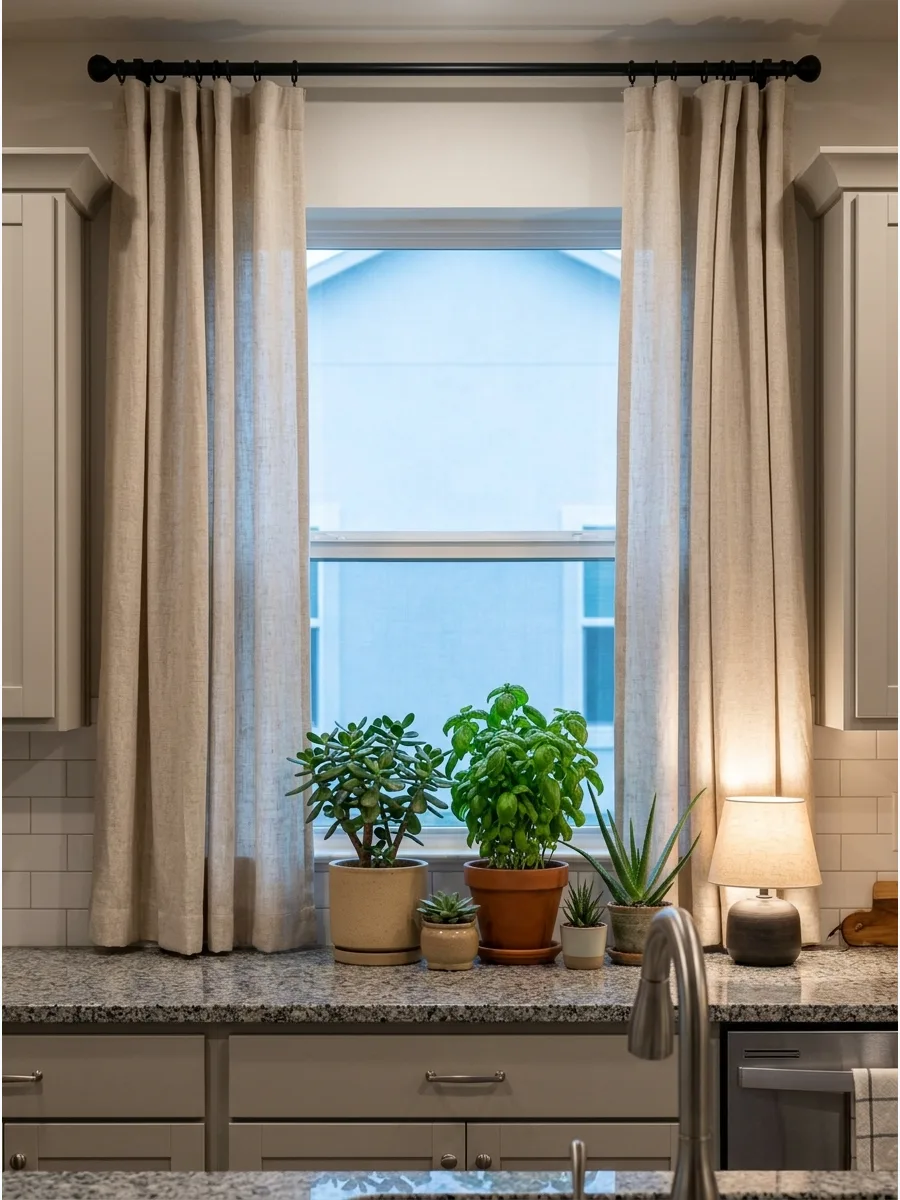
1. Create a Kitchen Window Display With Basil Pots
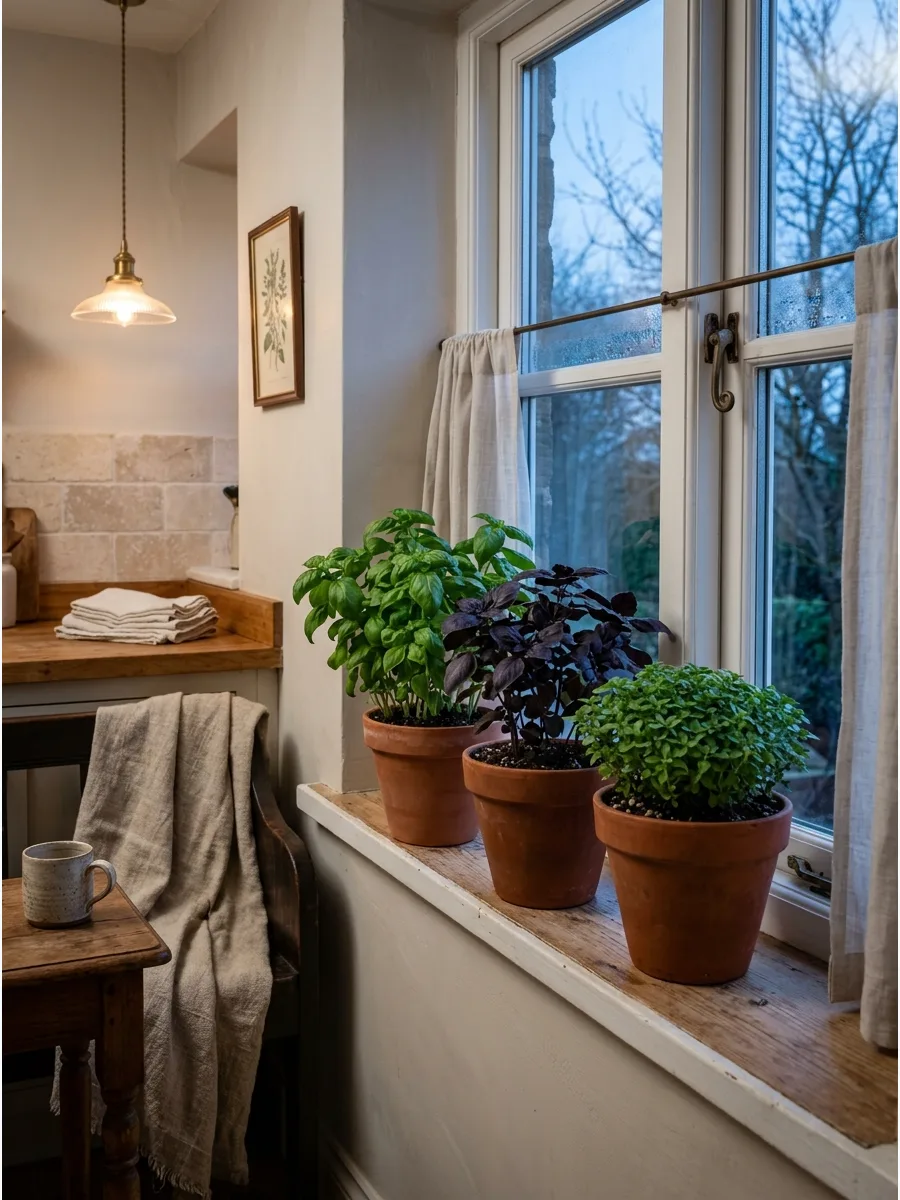
Arrange several small basil plants across a bright kitchen windowsill to create a useful and attractive herb display. Use different varieties, such as sweet basil, purple basil, and compact Greek basil, to add variation.
Line them up across a sunny windowsill to keep fresh leaves within arm's reach of the stove. This setup makes the most of natural light while providing a pop of green.
- Buy 4-inch starter plants from a local nursery for an instant look.
- Space the pots two inches apart to allow for proper air circulation.
- Use a matching set of pots to make a group of different plants look cohesive.
Quick win: Pinch off the top set of leaves every week to encourage the basil to grow wider rather than taller.
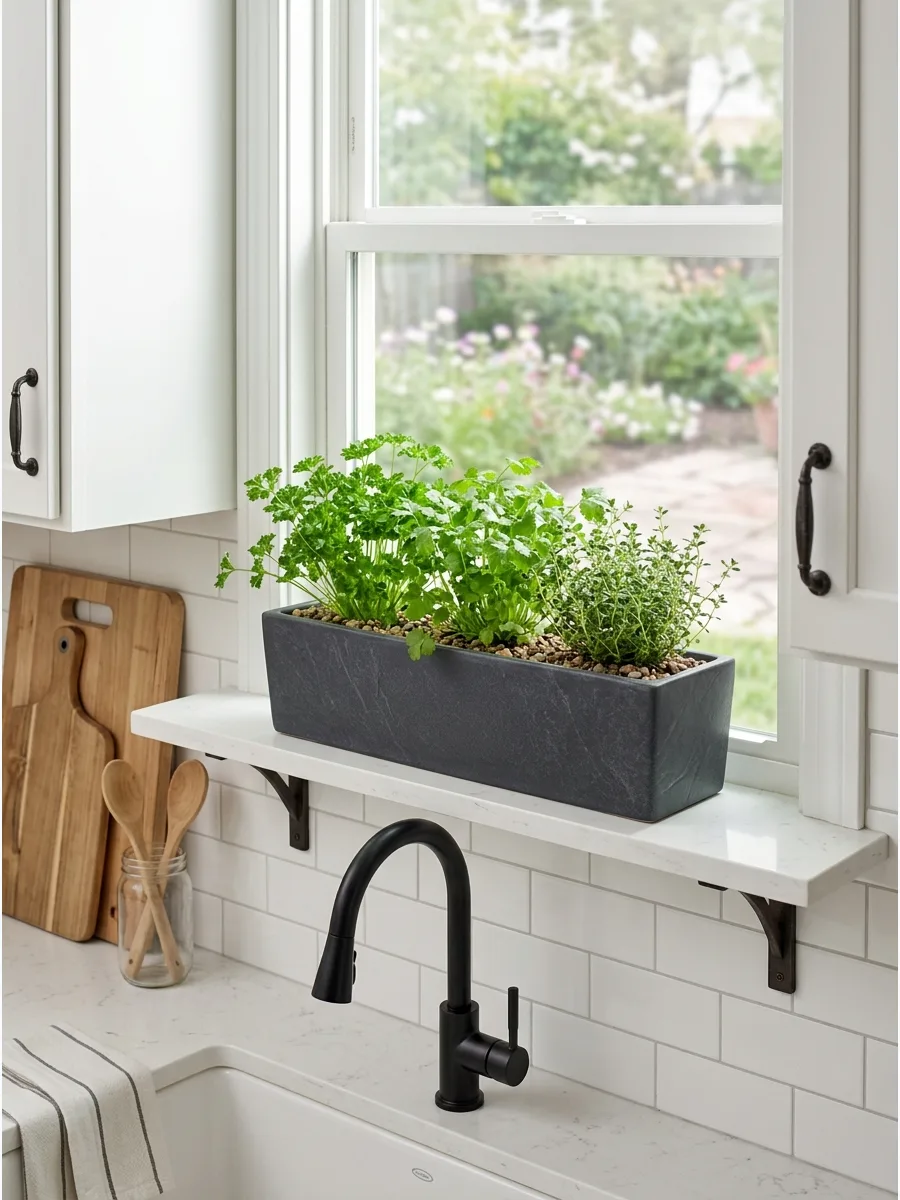
2. Grow Parsley and Chives in a Window Box
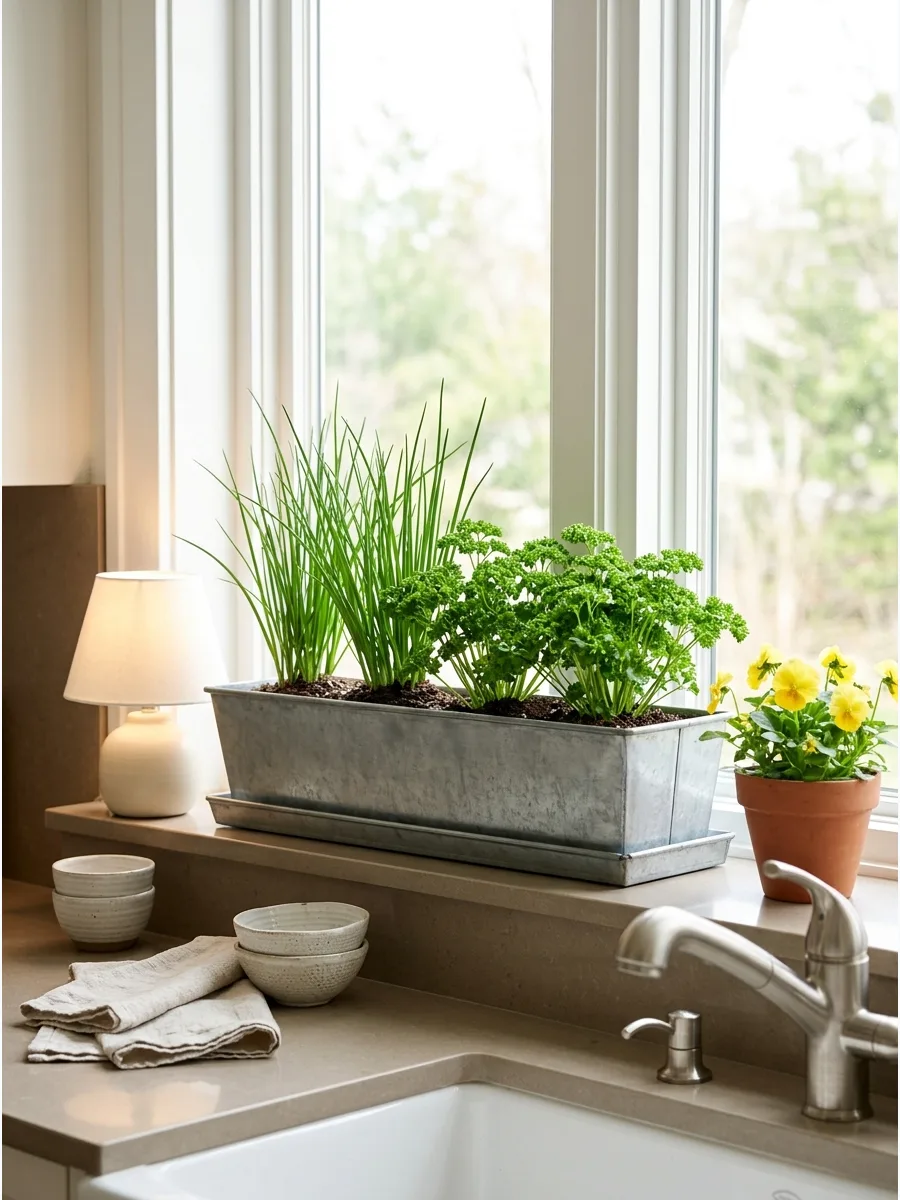
Plant parsley and chives together in a long, narrow planter that fits neatly along the kitchen window. Their upright growth keeps the display tidy and prevents the plants from looking messy.
Choose a planter with a built-in drainage tray to protect your window casing from water damage. Both herbs are hardy and can be harvested regularly for daily meals.
- Select a planter that is at least six inches deep for healthy root growth.
- Place the box directly on the sill or a sturdy countertop near the glass.
- Rotate the box 180 degrees every few days so the plants grow straight.
Most people skip this: Snip chives from the outside of the clump to keep the center of the plant productive.
3. Place Mint in Its Own Kitchen Window Pot
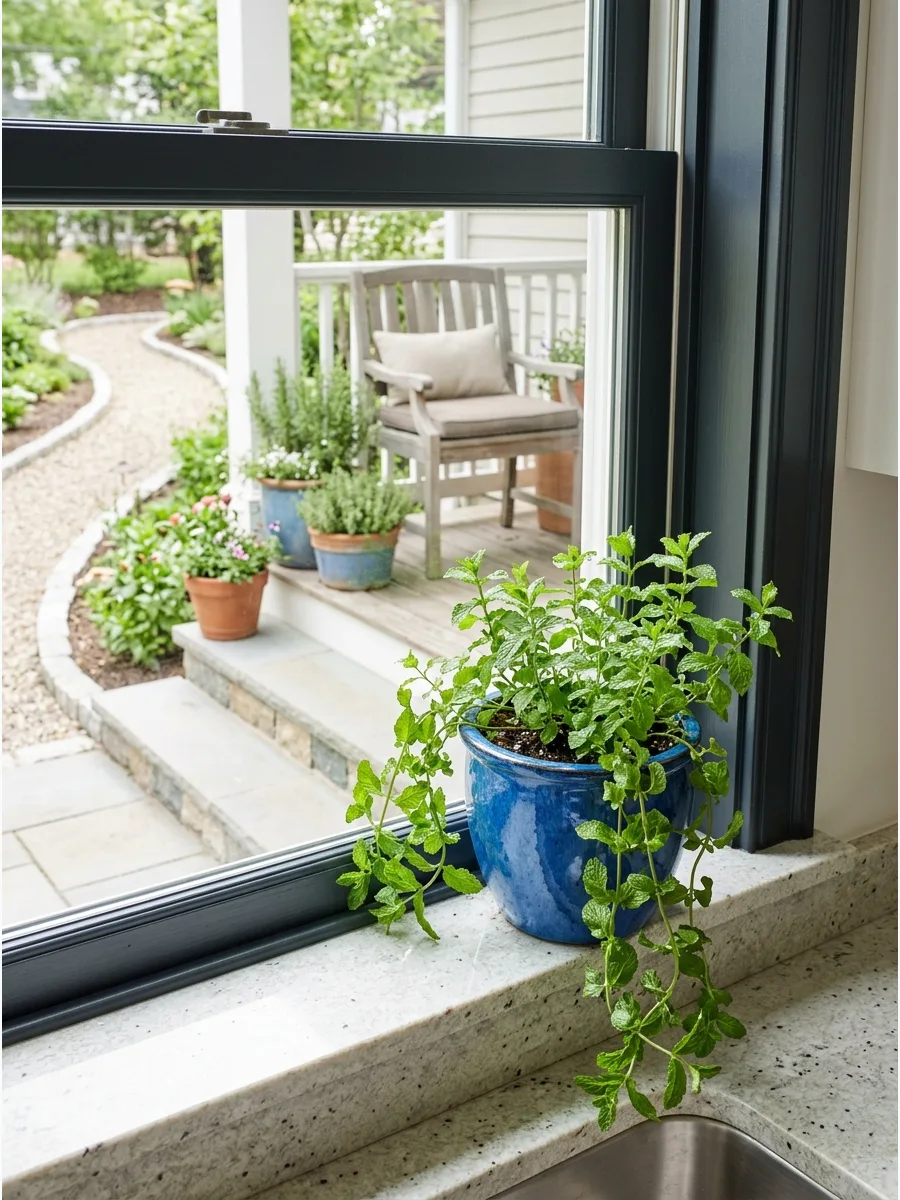
Grow mint in a separate container because it spreads quickly and can overwhelm other herbs. Position the pot near one end of the kitchen window so the trailing stems have space to grow freely.
Let the stems trail naturally toward the sink to create a lush, green focal point. This keeps the roots contained while adding a fresh scent to the room.
- Find a heavy ceramic pot that won't tip over as the mint trails downward.
- Set the pot on the far left or right side of the window frame.
- Trim the longest stems once a month to keep the plant from looking leggy.
Best shortcut: If the mint starts to look thin, cut it back to two inches above the soil to trigger a fresh flush of leaves.
4. Pair Thyme and Oregano on the Windowsill
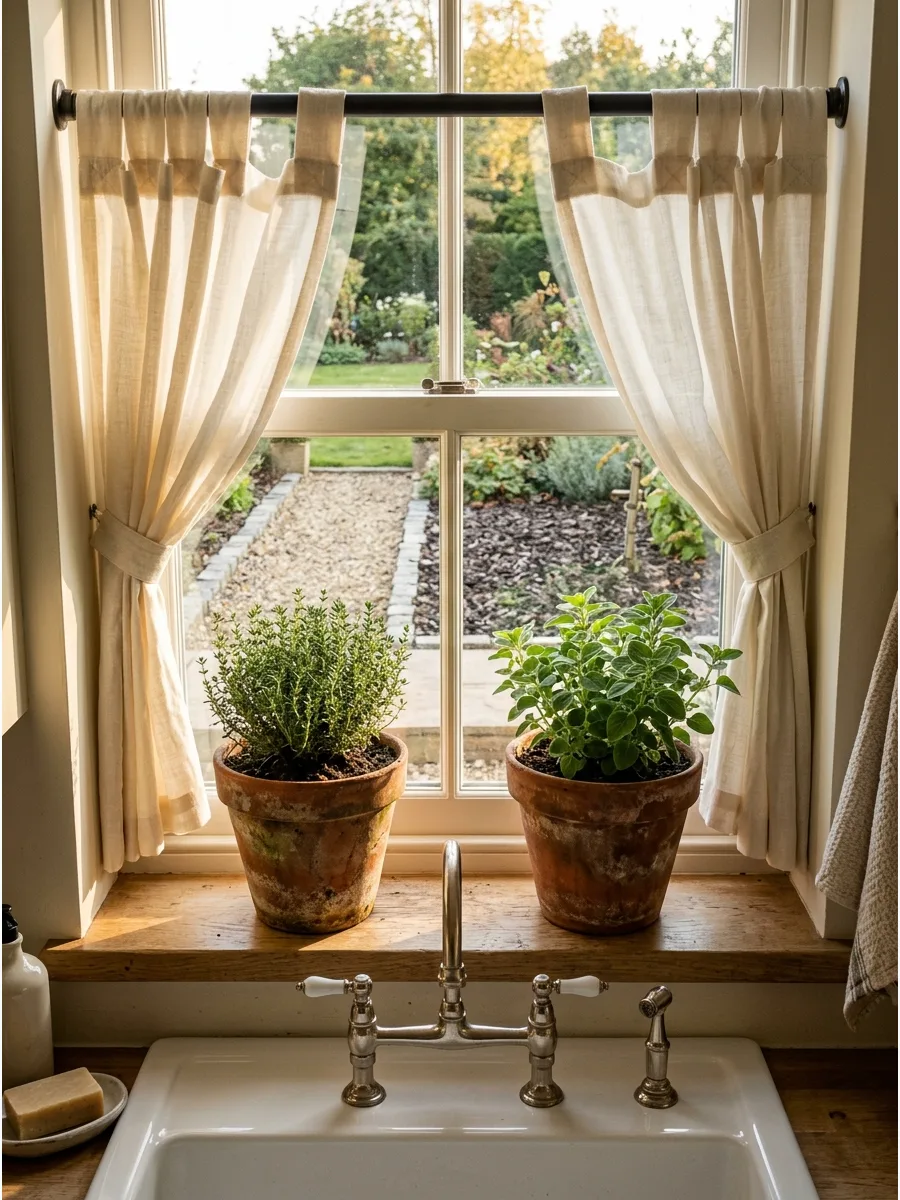
Place thyme and oregano in separate terracotta pots beside each other on a sunny kitchen windowsill. Their small leaves and compact growth create a simple Mediterranean-style display.
Place them side-by-side to create a cohesive texture contrast between the tiny thyme leaves and broader oregano foliage. These plants prefer drier soil, making them perfect for a warm kitchen environment.
- Pick up organic potting soil designed for herbs to ensure good drainage.
- Group the pots in a pair to fill a small window space effectively.
- Use a small saucer under each pot to catch excess water.
Quick win: Move these plants to the sunniest part of the window, as they need at least six hours of light to stay flavorful.
5. Use Rosemary as a Kitchen Window Centerpiece
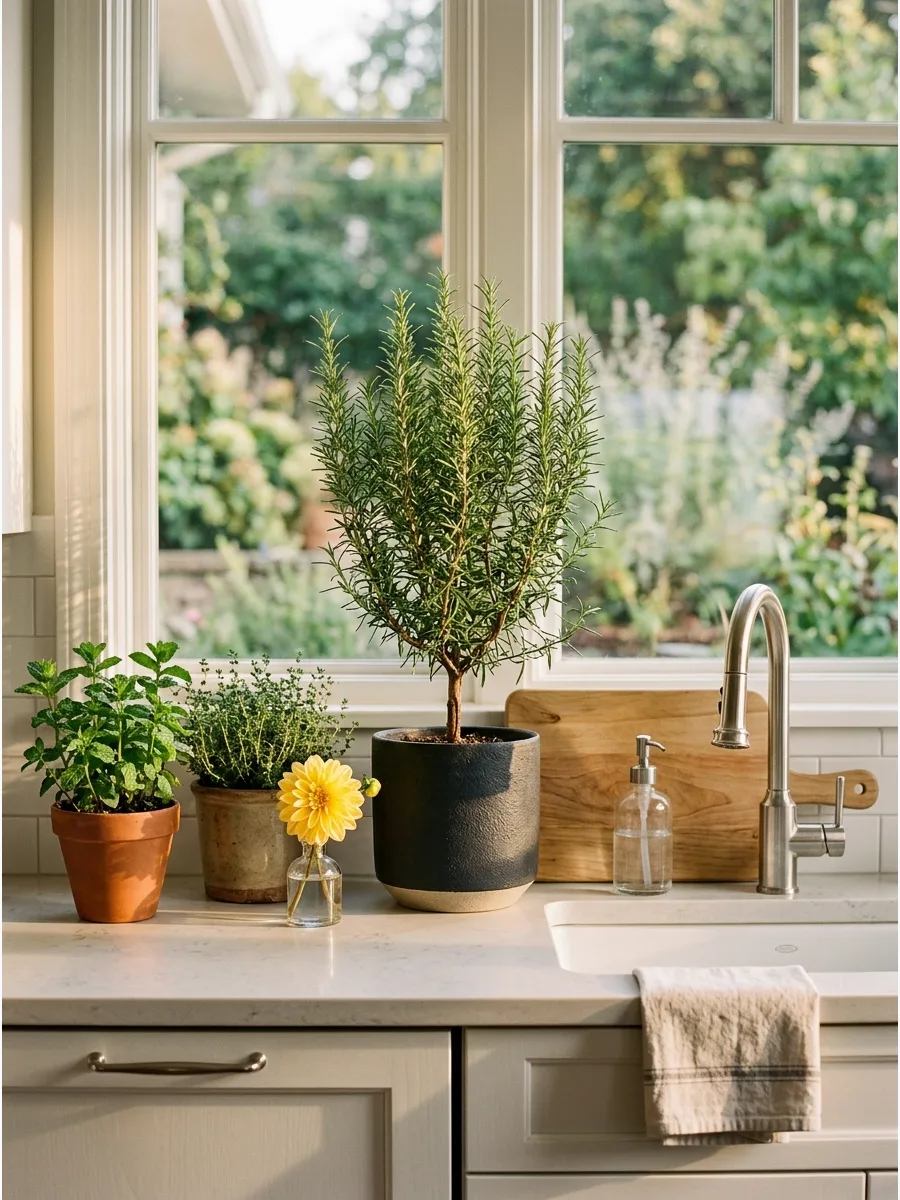
Place one upright rosemary plant in the center of the kitchen window to create height and structure. Its narrow leaves and sculptural shape make it decorative enough to serve as a natural centerpiece.
Center the pot directly behind the kitchen faucet to draw the eye upward and add structure to the area. It stays green all year and provides a woodsy aroma.
- Look for 'Blue Boy' or 'Arp' varieties for a compact, upright shape.
- Place the pot on a decorative stone trivet to elevate it slightly.
- Prune the top occasionally to maintain a rounded, shrub-like appearance.
Most people skip this: Rosemary hates wet feet, so only water it when the top inch of soil feels completely dry.
6. Grow Cilantro in Staggered Kitchen Window Pots
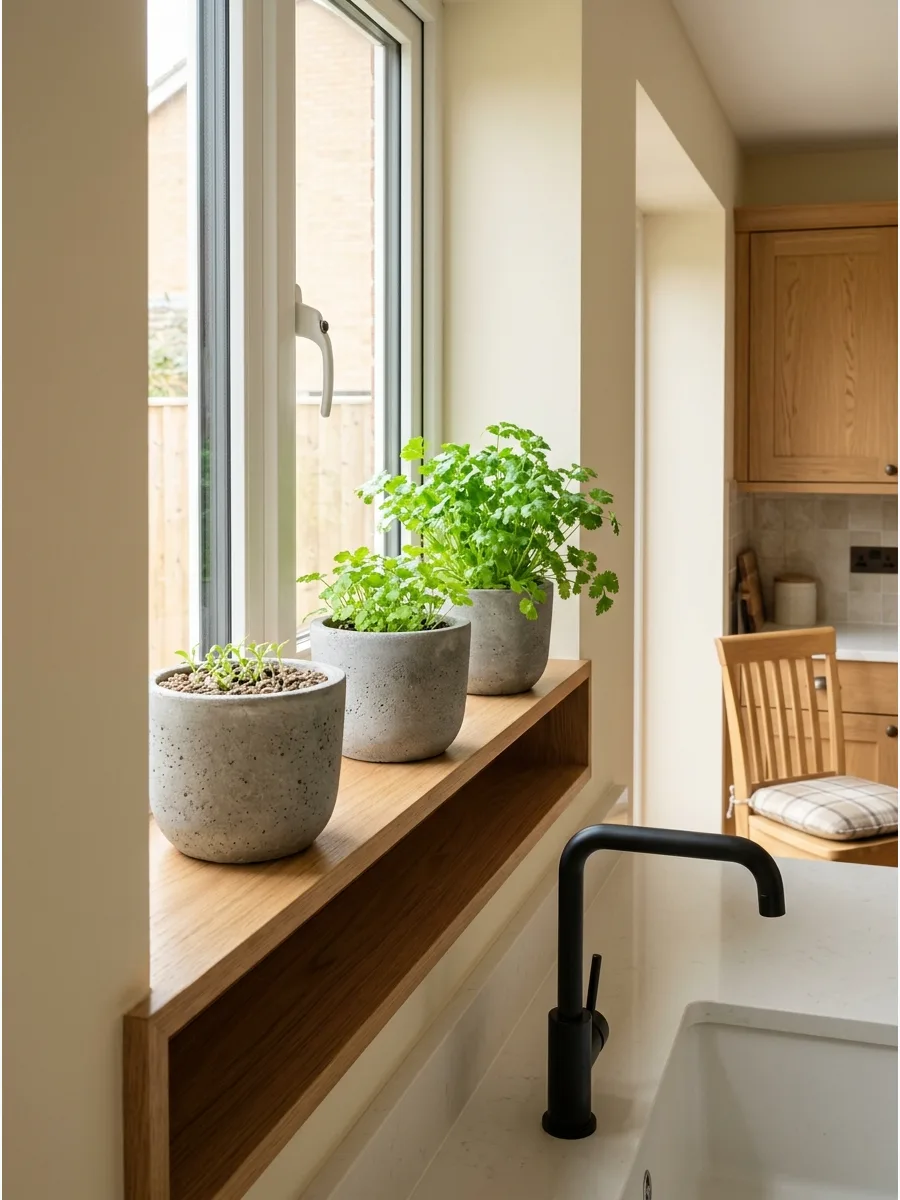
Plant cilantro in two or three small containers at different times instead of growing it all at once.
This creates a layered kitchen window display and ensures a steady supply of fresh leaves. Use three small containers to ensure you always have young, tender leaves ready for harvesting. This prevents the plants from maturing and going to seed too quickly.
- Buy a packet of cilantro seeds and plant a new pot every two weeks.
- Use pots that are about four inches wide to save space.
- Label each pot with the date it was planted using a small garden marker.
Best shortcut: Harvest cilantro starting from the top to keep the plant from falling over as it grows.
7. Combine Sage and Thyme in Coordinated Pots
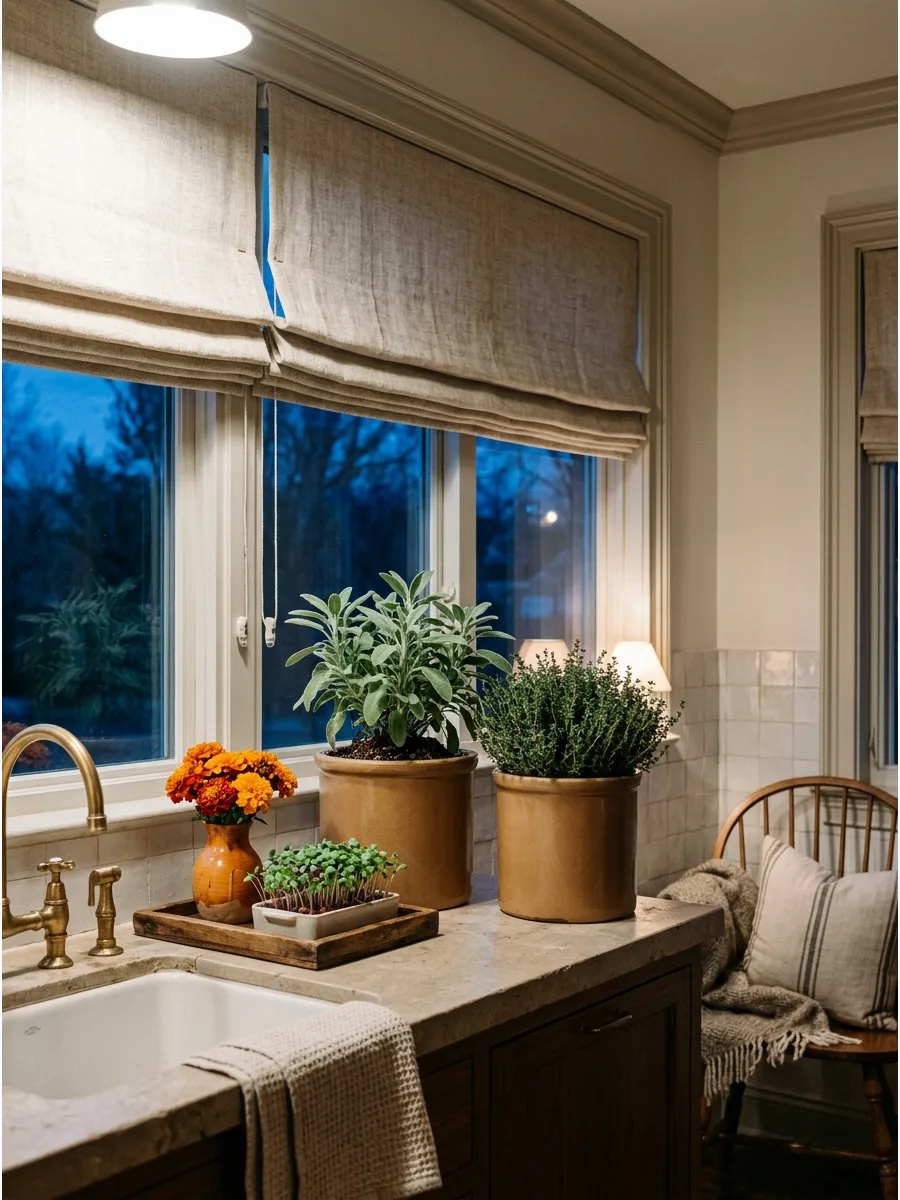
Display sage and thyme together in warm stoneware or aged terracotta containers. The soft gray-green sage leaves contrast nicely with the fine texture of thyme.
Mix different shades of green to make a simple window setup feel more intentional and designed. These herbs are low-maintenance and thrive in the same bright light conditions.
- Source vintage-style stoneware crocks for a timeless kitchen look.
- Arrange the sage behind the thyme since it grows slightly taller.
- Keep these herbs away from the direct spray of the sink.
Quick win: Rub a sage leaf between your fingers before cooking to release the oils and check the plant's health.
8. Arrange a Compact Trio of Culinary Herbs
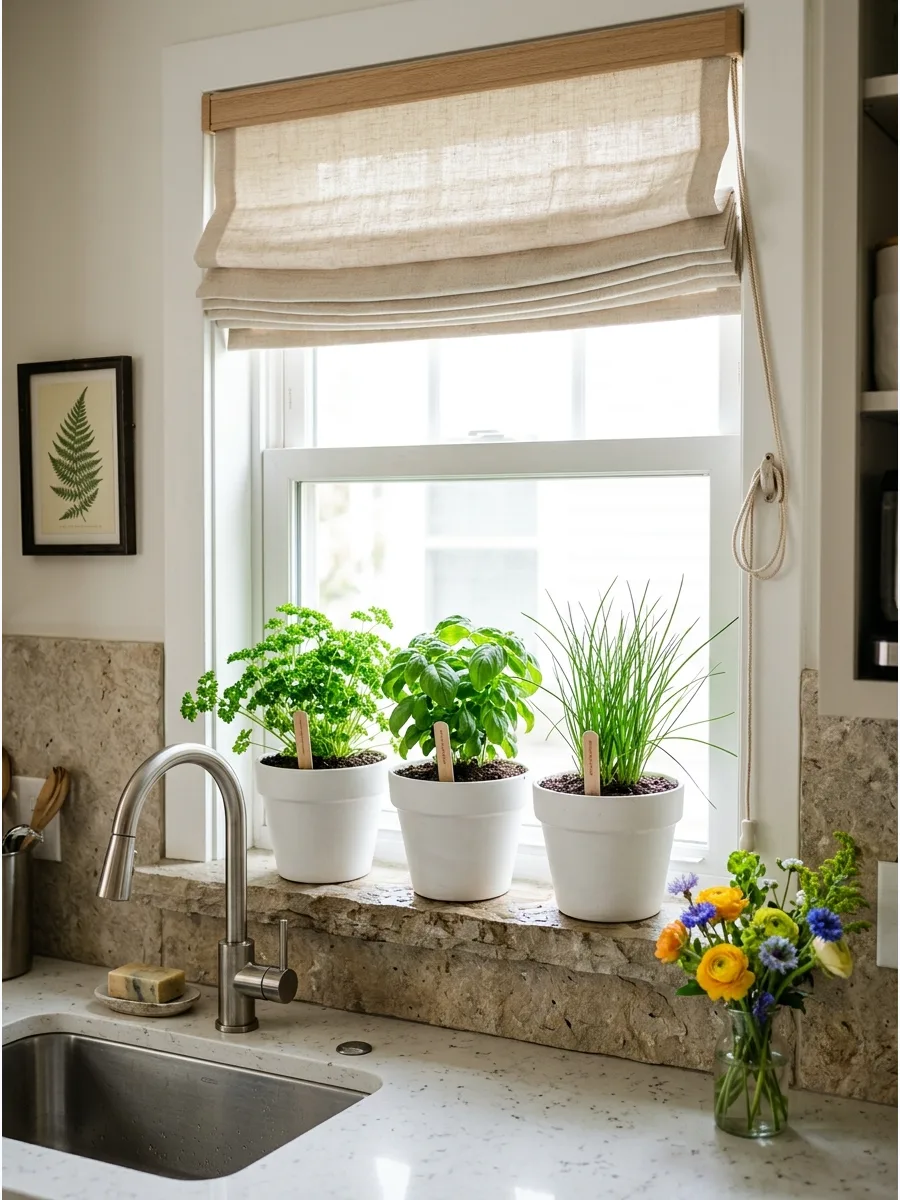
Place basil, parsley, and chives in three matching pots across the kitchen windowsill. This creates a clean, organized look that fits perfectly in small kitchens.
Stick simple wooden labels into the soil so everyone in the house knows what to pick. Using identical pots makes the collection feel like a deliberate part of the decor.
- Choose pots with a diameter of five inches for the best balance of size and space.
- Line the pots up perfectly straight for a modern, tidy aesthetic.
- Select white or neutral pots to keep the focus on the vibrant green leaves.
Most people skip this: Use a dedicated pair of herb snips to harvest leaves without tearing the stems.
9. Add a Microgreens Tray to the Kitchen Window
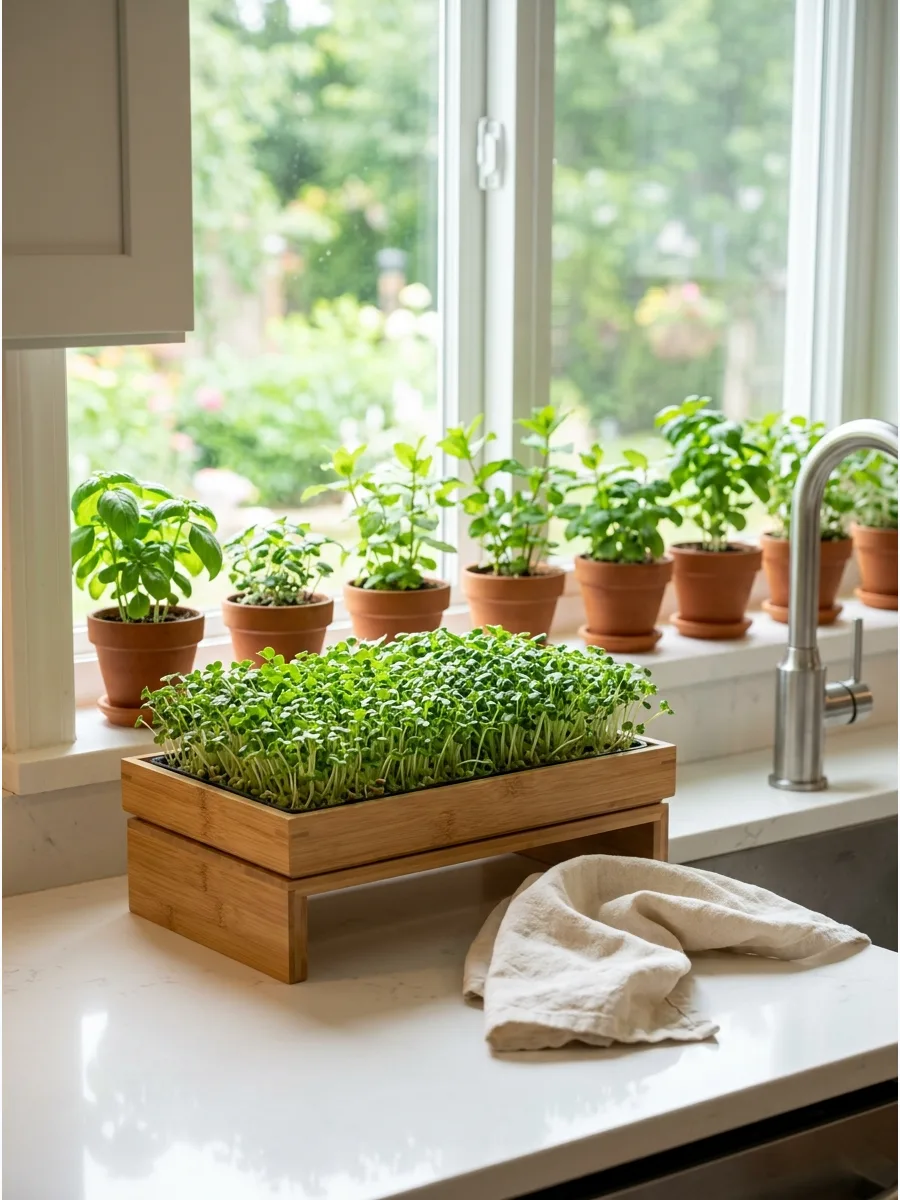
Use a shallow tray to grow microgreens such as radish, broccoli, or mustard near a bright window. Choose a container with a waterproof base to protect the windowsill and keep the setup neat.
Keep the tray on a raised stand to allow air to circulate underneath and prevent mold. These grow incredibly fast and are ready to eat in a few days.
- Purchase a microgreens starter kit for the easiest setup.
- Place the tray in the spot that gets the most direct afternoon sun.
- Mist the greens with water once a day instead of heavy pouring.
Best shortcut: Harvest the entire tray at once with kitchen scissors when the first set of true leaves appears.
10. Regrow Green Onions in Kitchen Window Jars
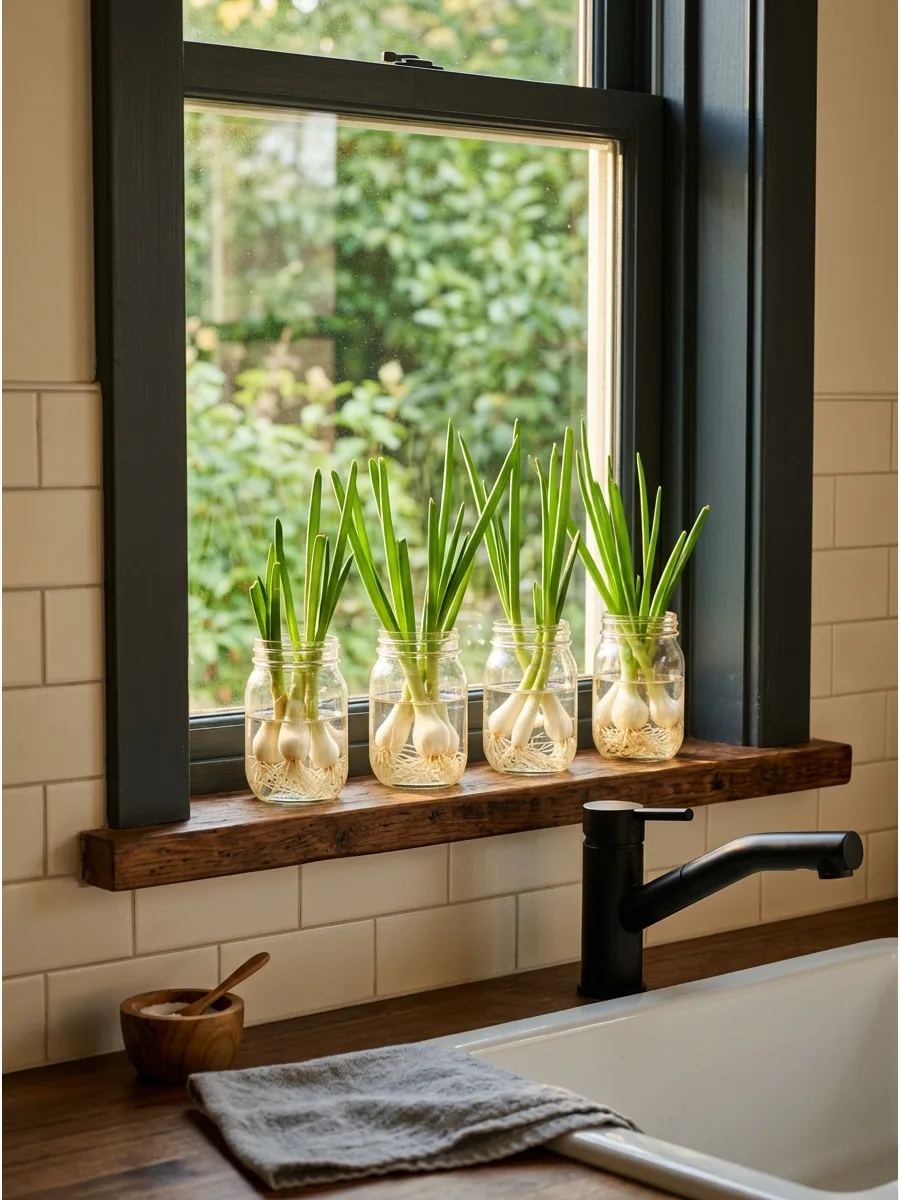
Place green onion ends in small glass jars filled with a little water and arrange them along the kitchen window. The fresh green shoots create a simple growing display and provide free garnishes.
Change the water every day to keep the display smelling fresh and the water clear. It is a zero-waste way to add life to the kitchen.
- Save the bottom two inches of store-bought green onions for regrowing.
- Use recycled spice jars or small jelly jars for a varied look.
- Keep the water level just high enough to cover the white roots.
Quick win: If the onions grow too tall and flop over, trim them back and they will continue to grow from the center.
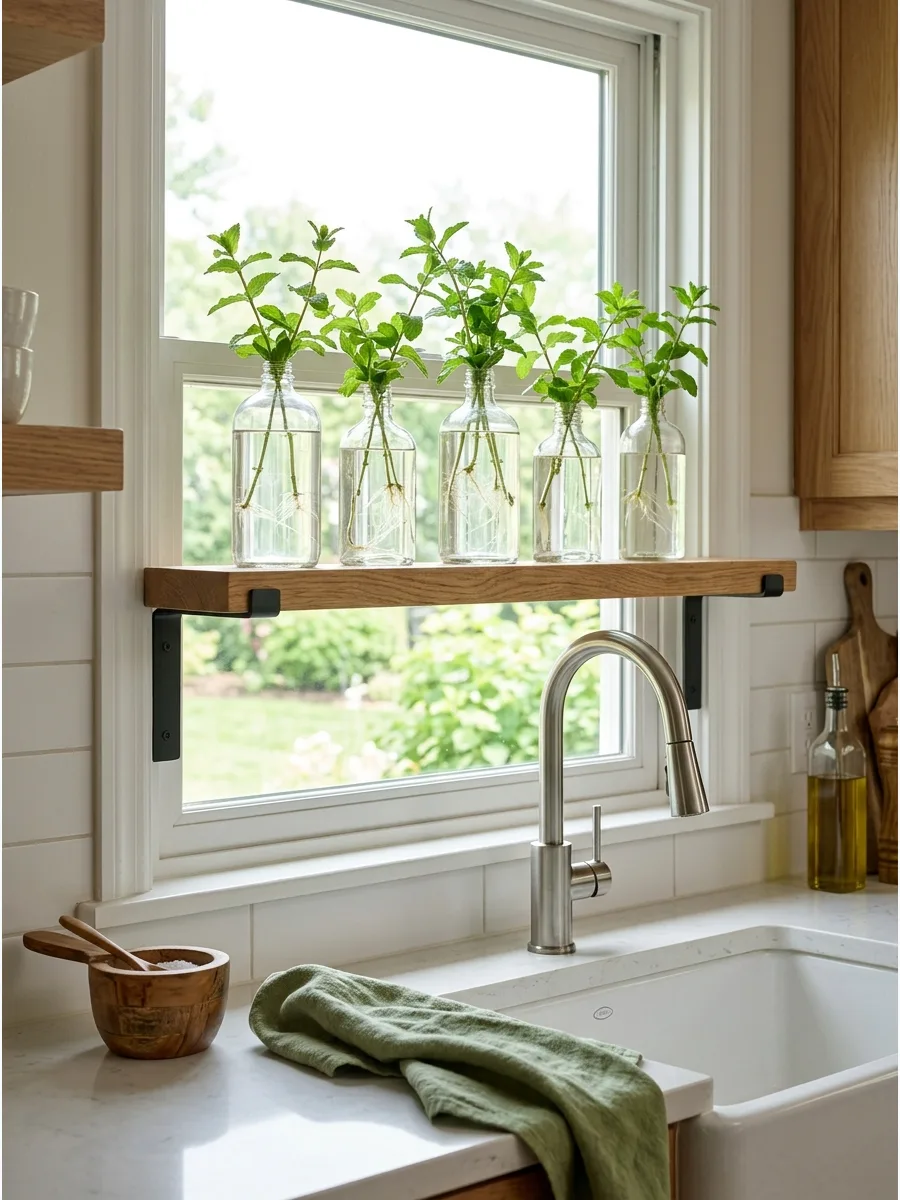
11. Create a Basil and Mint Propagation Station
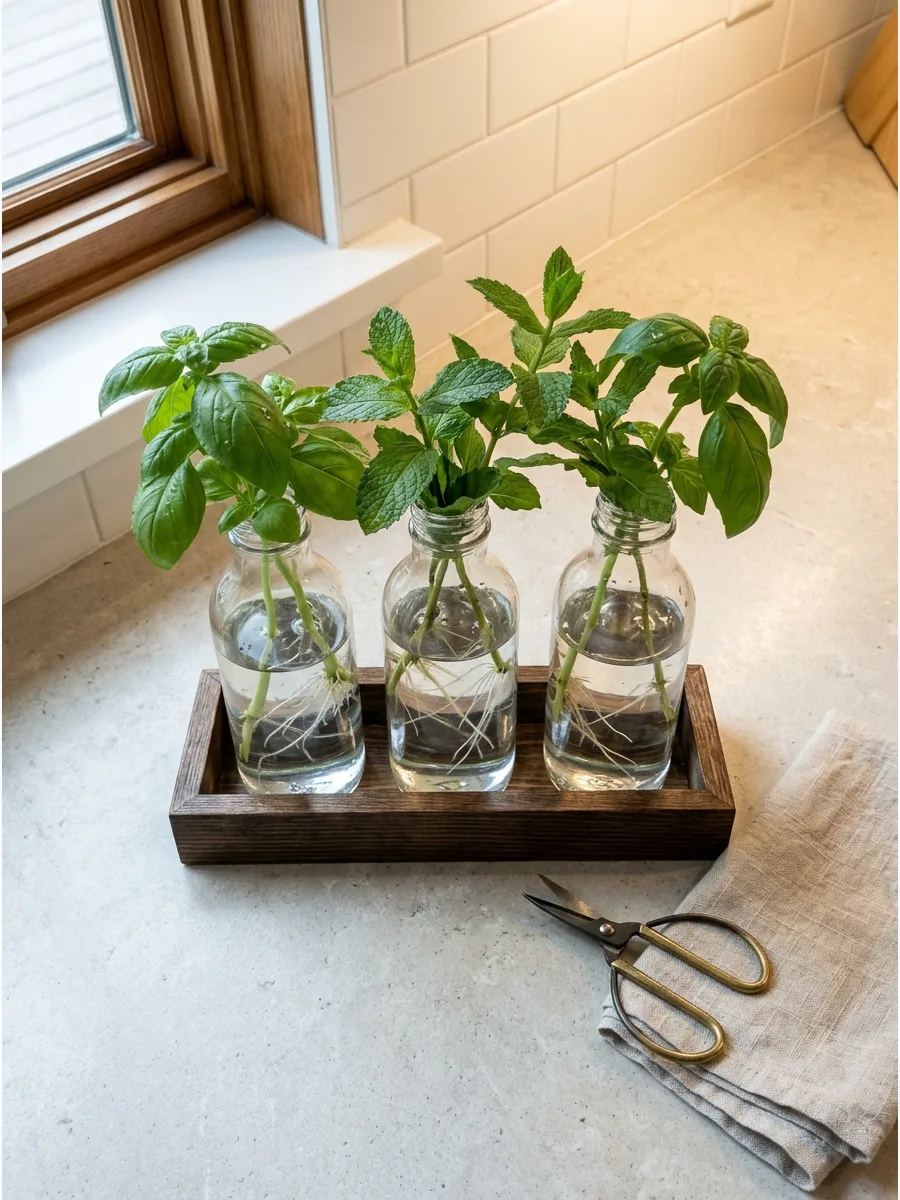
Place basil and mint cuttings in clear glass bottles filled with water. Arrange the bottles on a narrow tray so the growing roots become part of the kitchen window display.
Group three or four bottles on a narrow wooden tray to prevent them from tipping over. It is a fascinating way to watch nature work while decorating the window.
- Pick bottles with narrow necks to hold the herb stems upright.
- Use room-temperature water to avoid shocking the new cuttings.
- Move the tray to a spot with bright but indirect light to prevent algae growth.
Most people skip this: Remove any leaves that would be submerged in water to prevent them from rotting.
12. Build a Kitchen Window Tea-Herb Garden
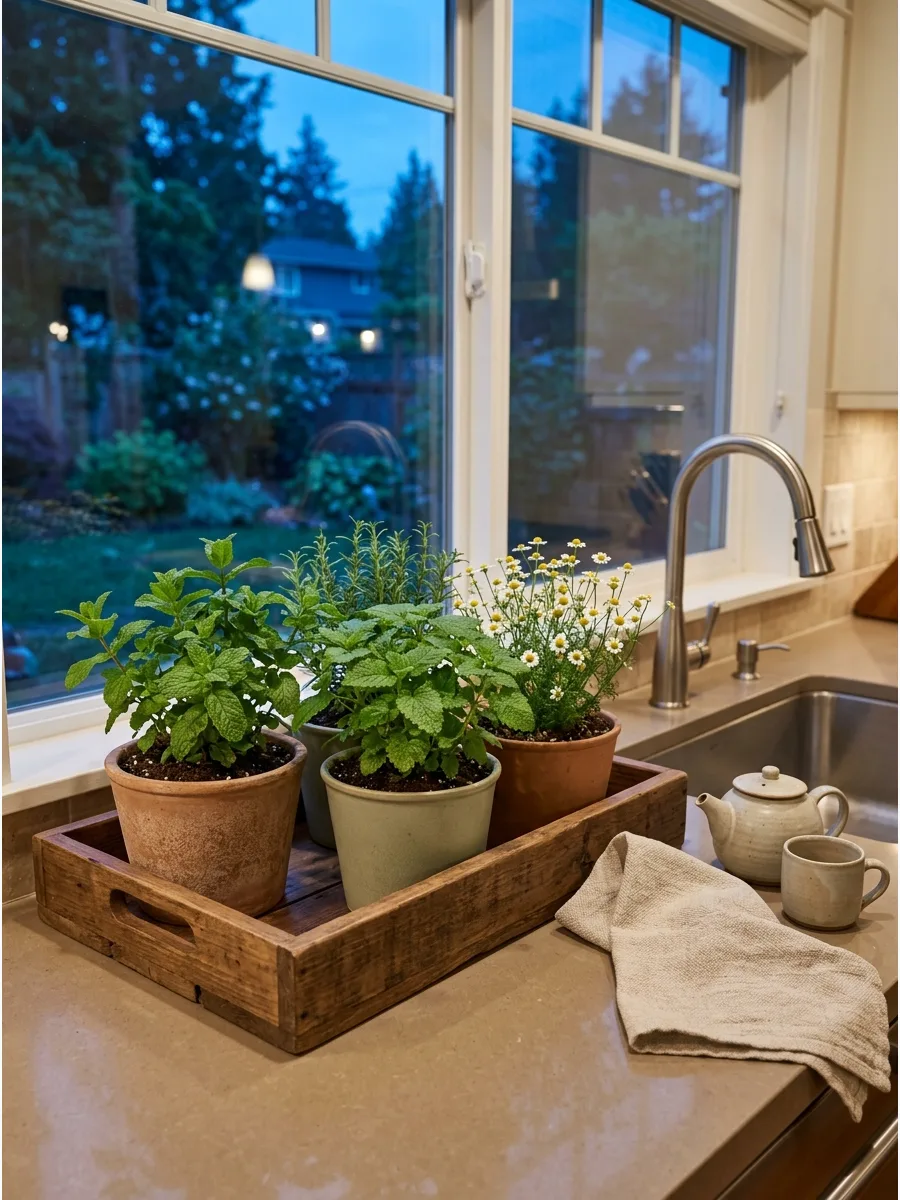
Grow mint, lemon balm, and chamomile in separate pots near the kitchen window. Group the containers on a wooden tray so they can be moved easily when watering or cleaning.
Select a tray with high sides to catch any stray soil or water drips. Having these herbs nearby makes it easy to add fresh flavor to a hot cup of tea.
- Choose pots in different colors that complement your kitchen's palette.
- Use a tray made of water-resistant material like teak or treated bamboo.
- Harvest only a few leaves at a time to keep the plants full and bushy.
Best shortcut: Muddle the fresh leaves at the bottom of your mug before pouring water to maximize the flavor.
13. Grow Compact Salad Greens by the Window
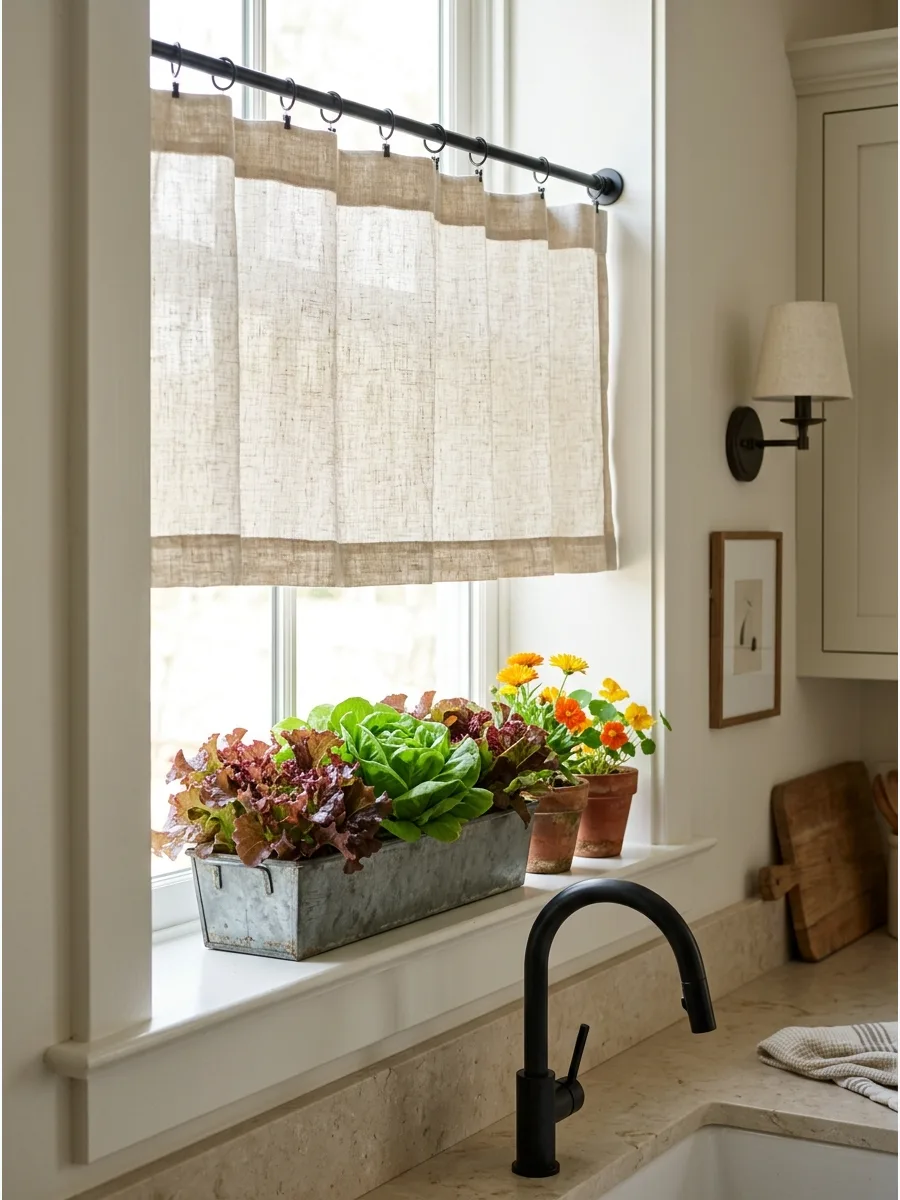
Plant baby lettuce or other compact leafy greens in a narrow rectangular planter. Place the planter in a bright kitchen window where the greens can be harvested in small amounts.
Position the planter in the brightest part of the window to prevent the leaves from getting leggy. This provides a constant supply of fresh greens for sandwiches and salads.
- Look for 'cut and come again' lettuce seeds for multiple harvests.
- Ensure the planter has drainage holes and a tray to avoid messy spills.
- Keep the soil consistently moist but not soggy for the best leaf quality.
Quick win: Harvest the outer leaves first, leaving the center of the plant to continue growing.
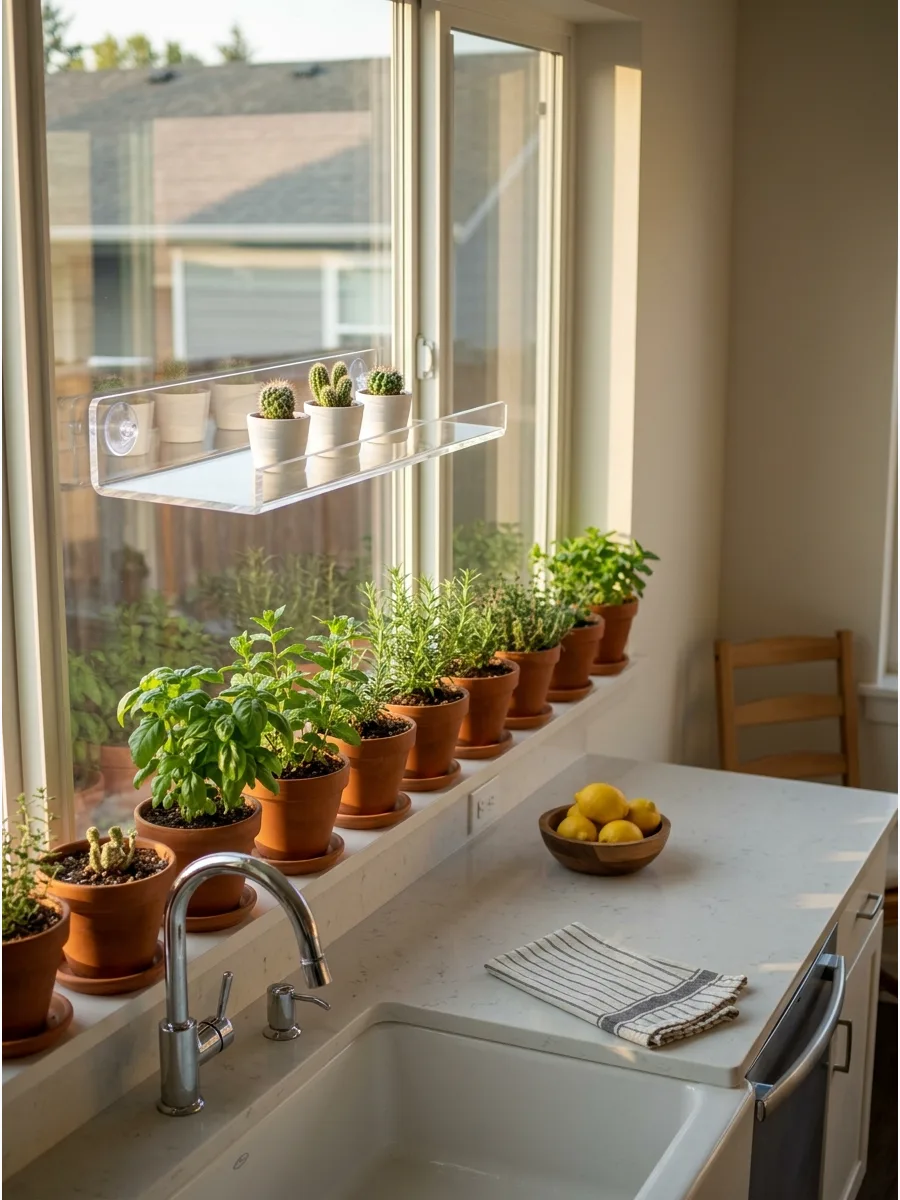
14. Install a Kitchen Window Herb Shelf
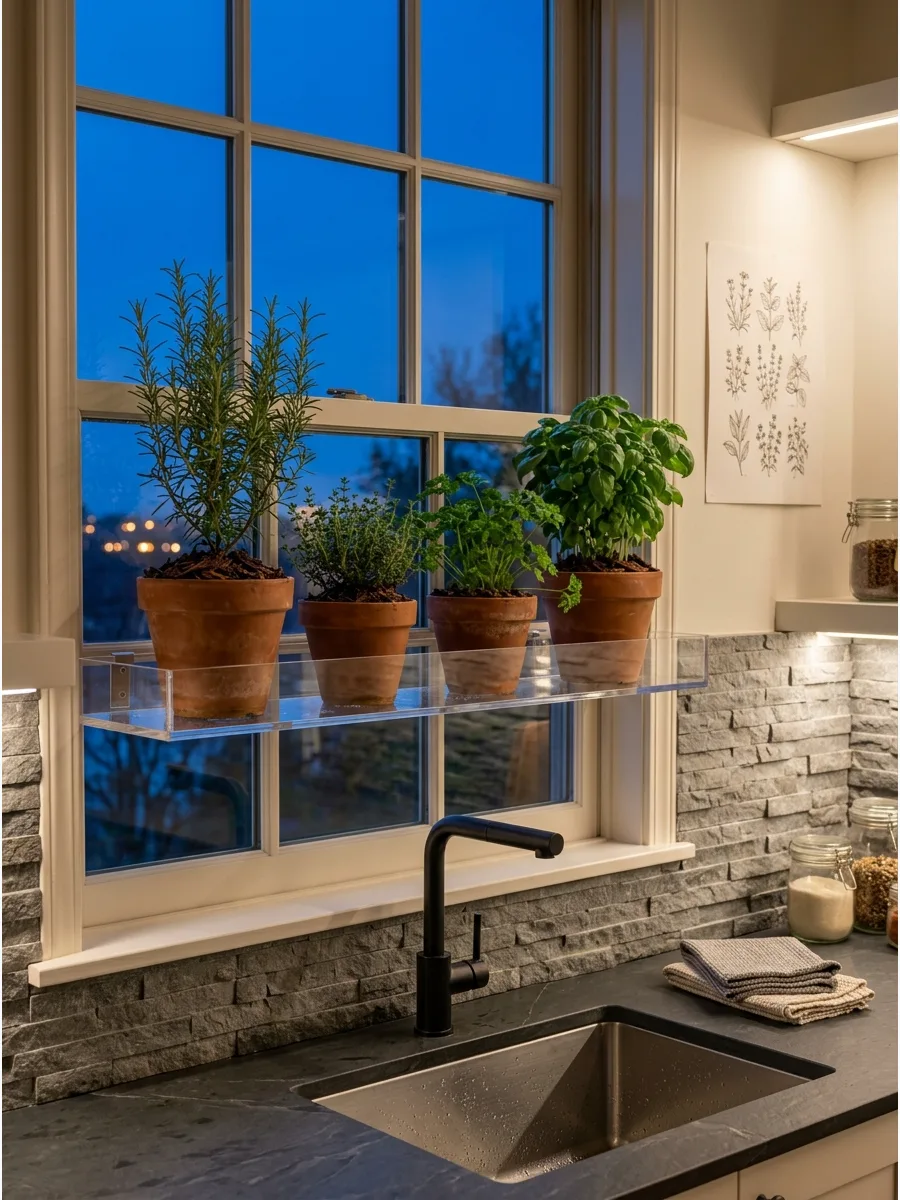
Install a narrow shelf across a large sunny kitchen window and fill it with small culinary herbs. This doubles your growing space without using valuable countertop or windowsill room.
Place taller herbs on the ends of the shelf so they do not block the view or the light. It creates a beautiful vertical garden effect that feels professional.
- Use a clear acrylic shelf to allow maximum light to reach the plants below.
- Check that the window frame can support the weight of the shelf and pots.
- Choose lightweight plastic or thin ceramic pots for this elevated display.
Most people skip this: Use suction-cup shelves only for very small, light plants to avoid accidental falls.
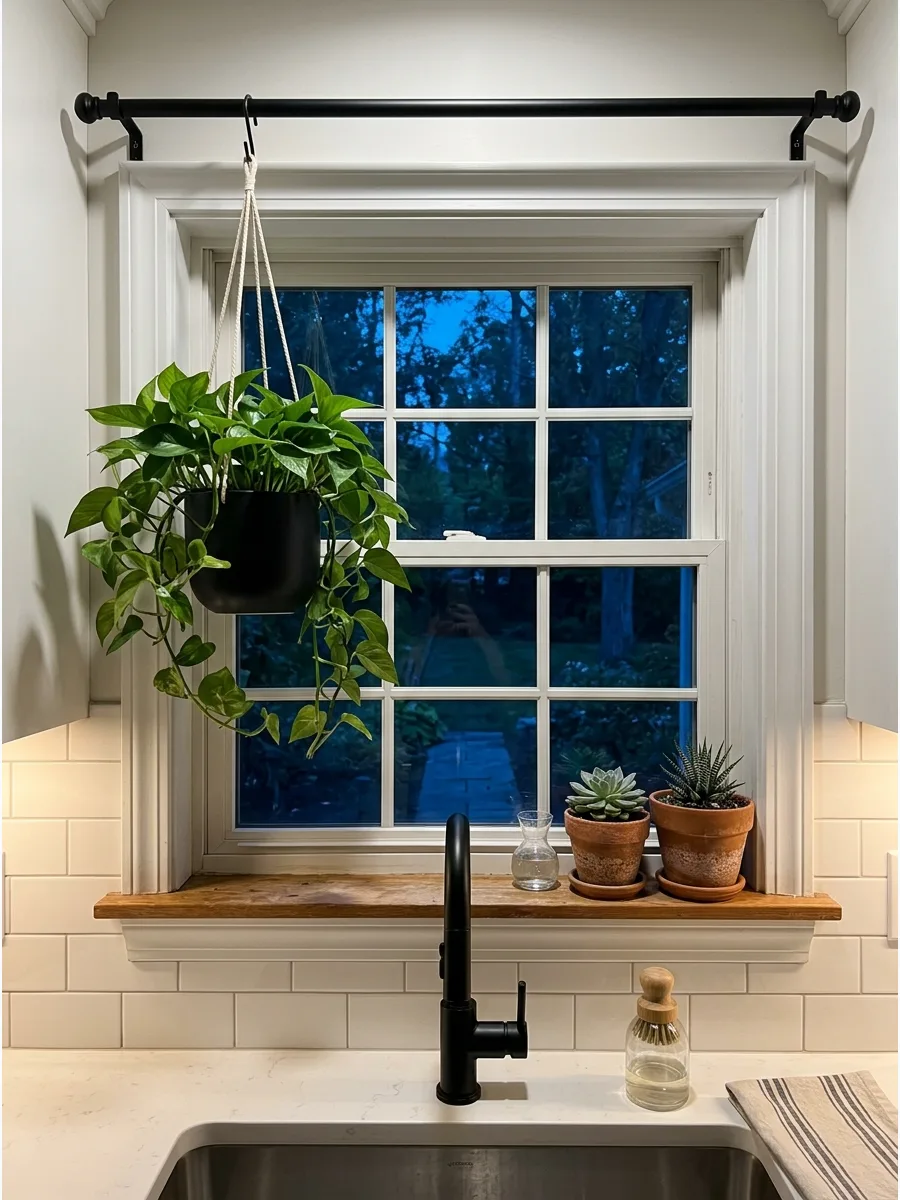
15. Hang Golden Pothos Beside the Kitchen Window
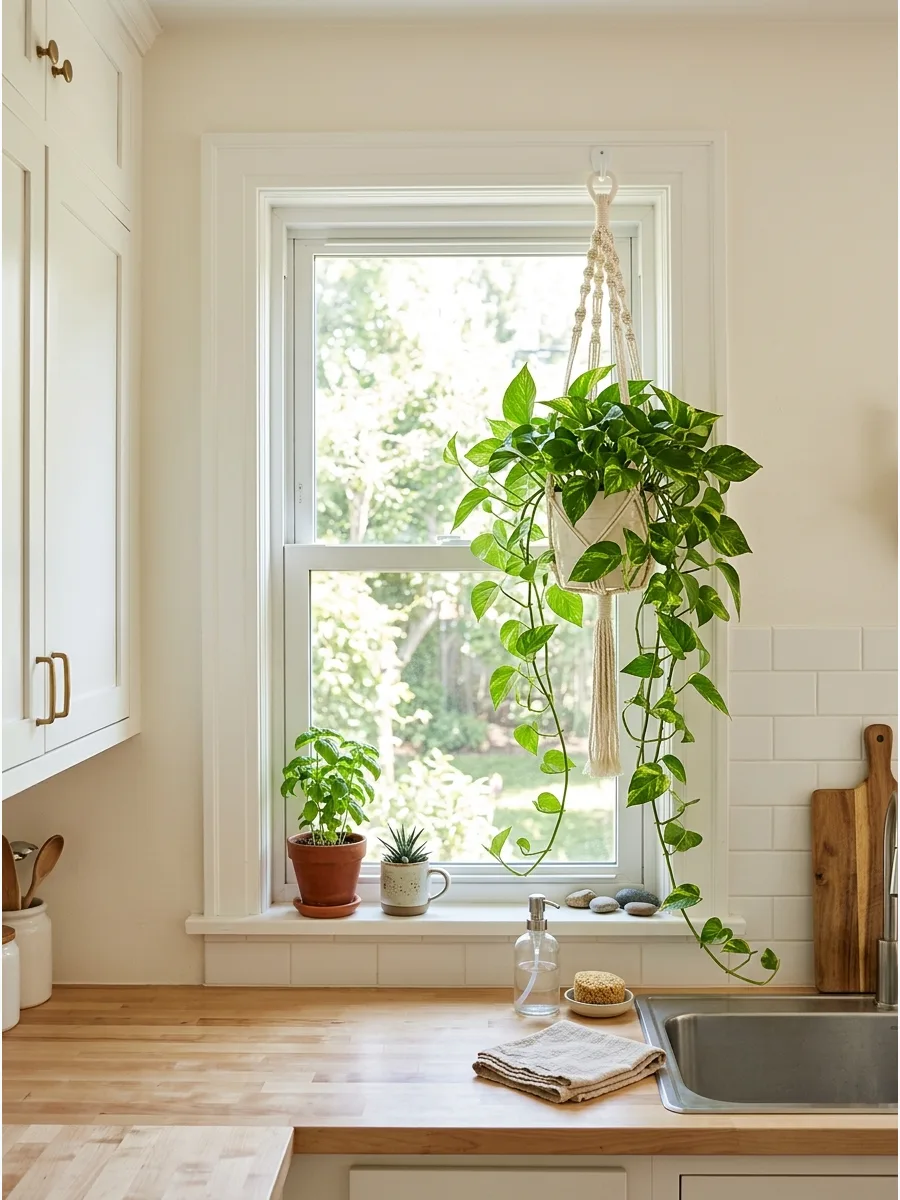
Suspend a golden pothos from one upper corner of the kitchen window and allow the vines to trail. This creates a soft green border without using valuable countertop or windowsill space.
Train the vines to frame the window glass for a natural, leafy look. Pothos is very durable and handles the humidity of a kitchen perfectly.
- Use a sturdy ceiling hook or a bracket mounted to the window trim.
- Pick a variegated golden pothos to add highlights of yellow and white.
- Water the plant when the top two inches of soil are dry to the touch.
Best shortcut: Use small, clear adhesive hooks to guide the vines along the window frame without damaging the wood.
Kitchen Decor
16. Living Philodendron Window Frame
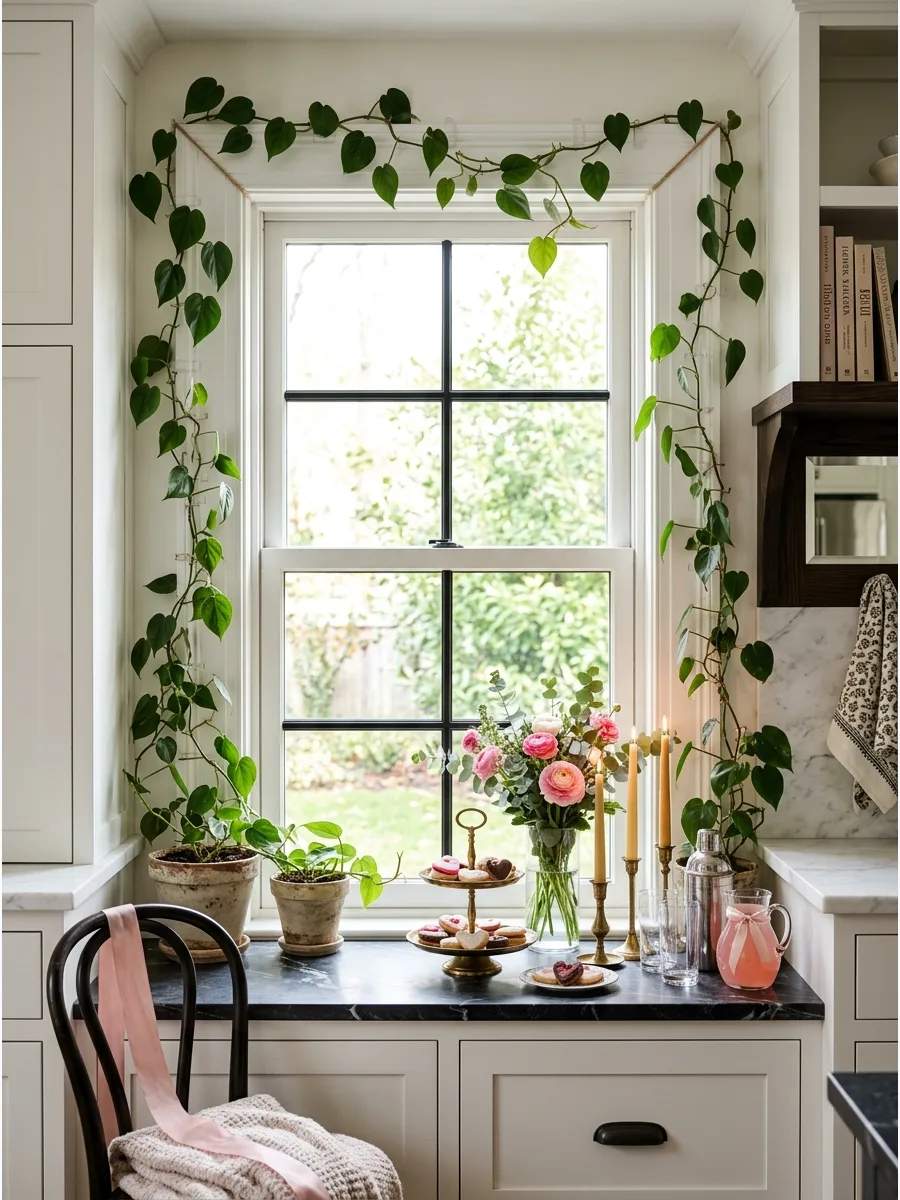
Heartleaf Philodendrons thrive in kitchen humidity and provide a lush, organic border for natural light. Using clear adhesive clips allows the vines to trace the window casing without damaging the paint or obstructing the view.
Secure the longest vines along the top edge first to create an immediate visual canopy. It is often more effective to use multiple small plants in the corners rather than waiting for one single plant to grow several feet.
- Sourcing: Buy 4-inch starter plants for $10-$15 to ensure flexible, young stems.
- Setup: Place pots on the windowsill or in hanging macrame holders at the upper corners.
- Adaptation: Use command hooks or floral wire to guide growth toward specific light sources.
Quick win: Wipe the leaves with a damp cloth monthly to ensure the plant absorbs maximum light in the busy kitchen environment.
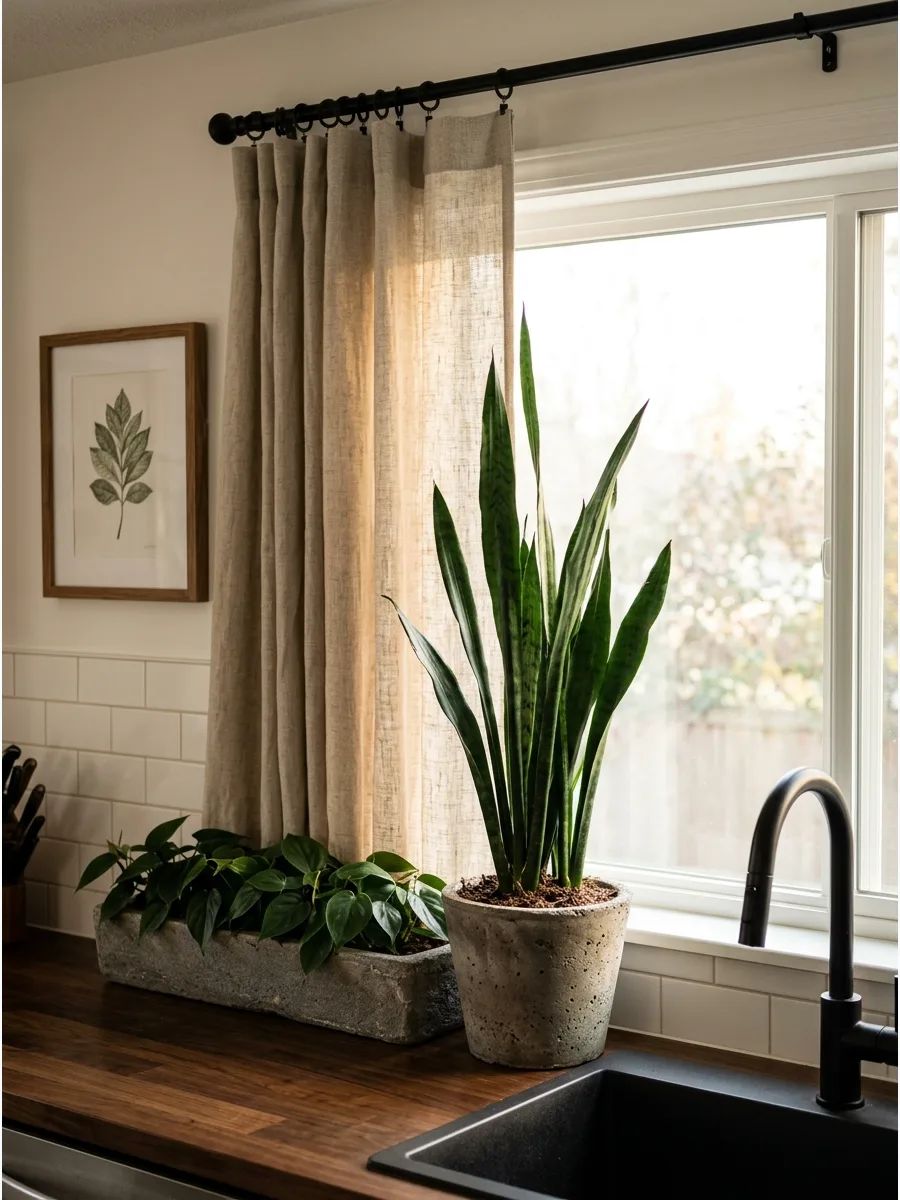
17. Use a Compact Snake Plant on a Narrow Sill
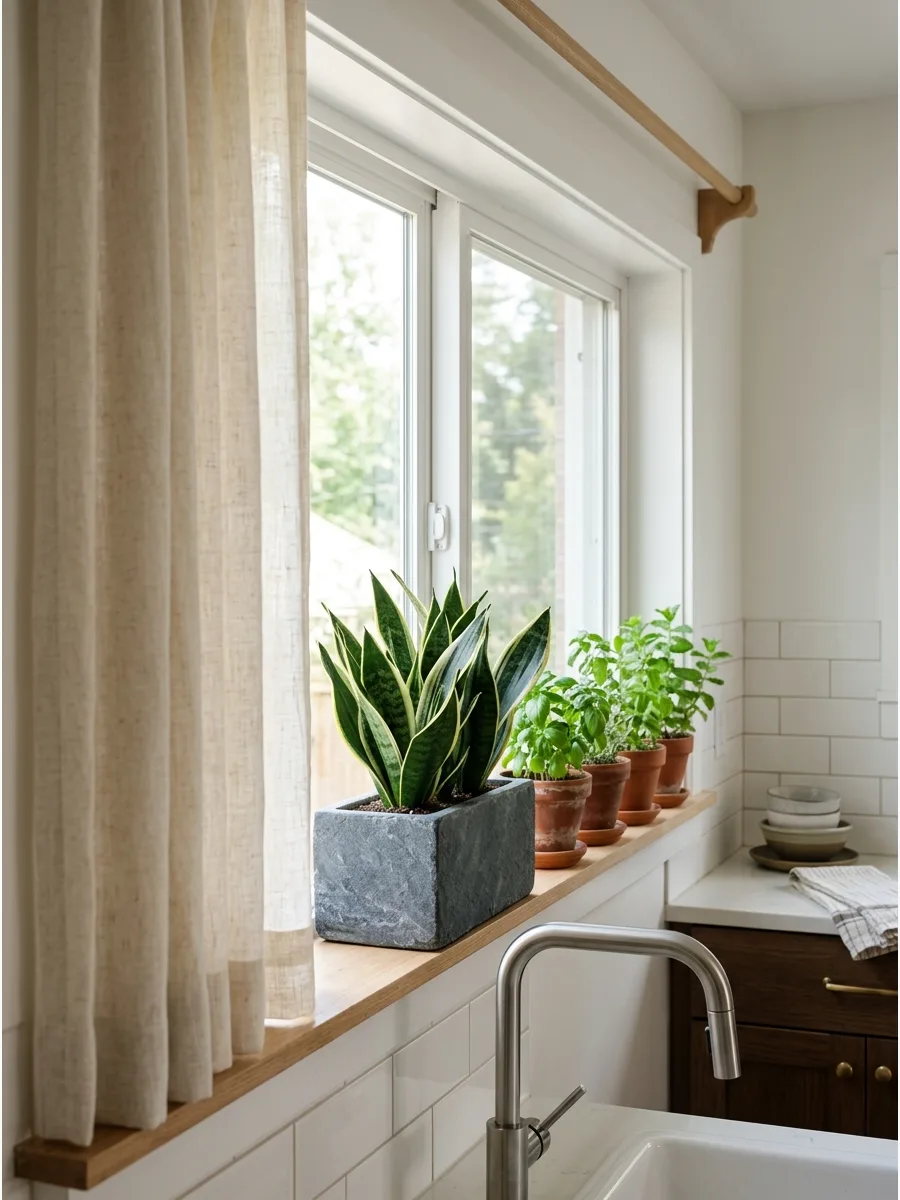
Place a small snake plant in a narrow container when the kitchen windowsill has limited depth. Its upright leaves provide height and structure while taking up very little horizontal space.
Choose a heavy stone or ceramic pot to prevent the tall leaves from tipping the plant over. Snake plants are the best choice for busy kitchens because they handle fluctuating temperatures and steam without dropping leaves.
- Measure the sill depth before buying a pot to ensure it sits completely flat.
- Select a dwarf variety like 'Hahnii' to keep the height under ten inches.
- Water only when the soil is completely dry to the touch.
Most people skip this: Wipe the leaves with a damp cloth monthly to remove kitchen grease and dust so the plant can breathe.
18. Add a Small ZZ Plant to a Shaded Kitchen Window
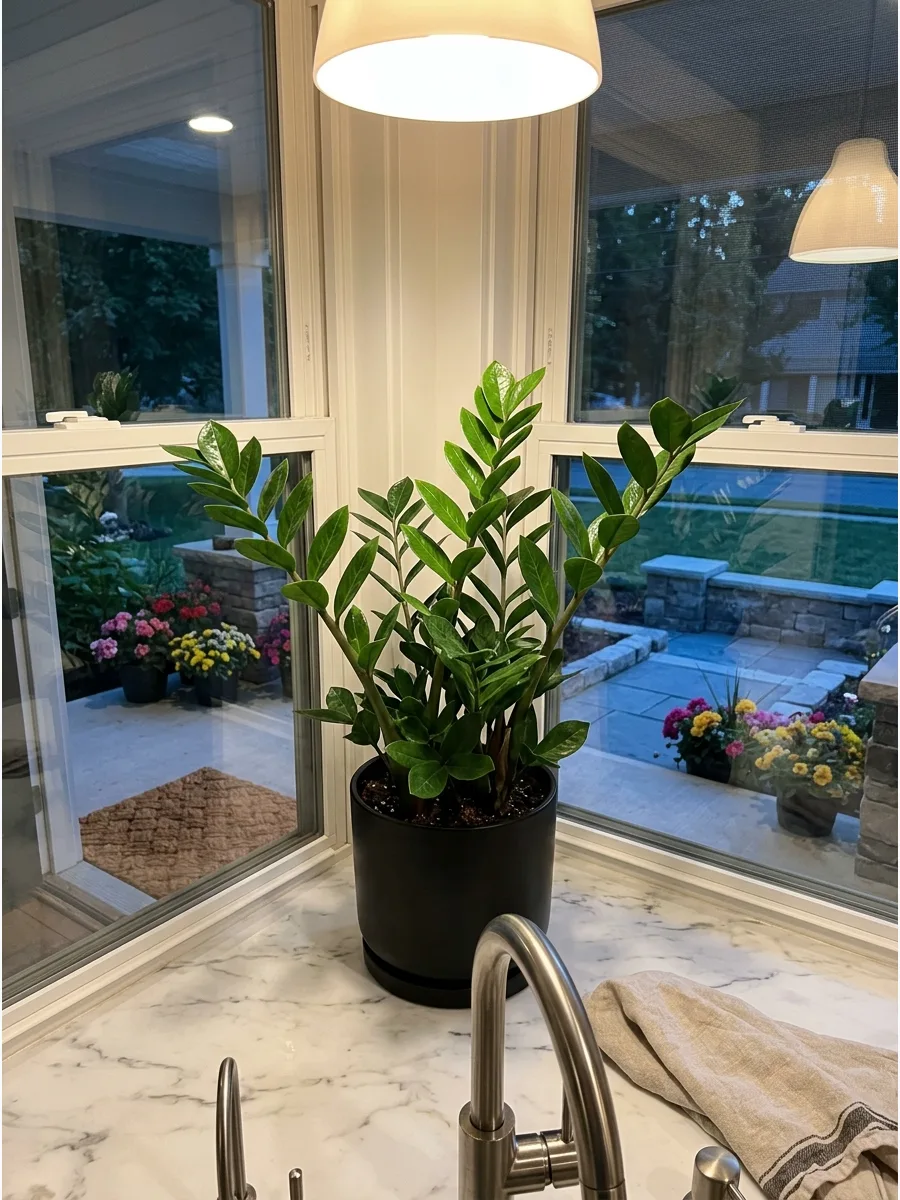
Use a young ZZ plant in a kitchen window that receives lower or indirect light. Its glossy, structured leaves add a clean decorative touch without requiring a large or crowded arrangement.
Position the pot in a corner where it won't be splashed by soapy dishwater. ZZ plants are nearly indestructible and can thrive even if the kitchen window is blocked by a porch or nearby building.
- Use a well-draining potting mix designed for succulents.
- Place the plant in a spot that stays between 60 and 75 degrees Fahrenheit.
- Repot every two years to give the underground tubers room to expand.
Best shortcut: If the leaves look dull, move the plant slightly closer to the light source for a few days to boost its shine.
19. Display a Collection of Peperomia Plants
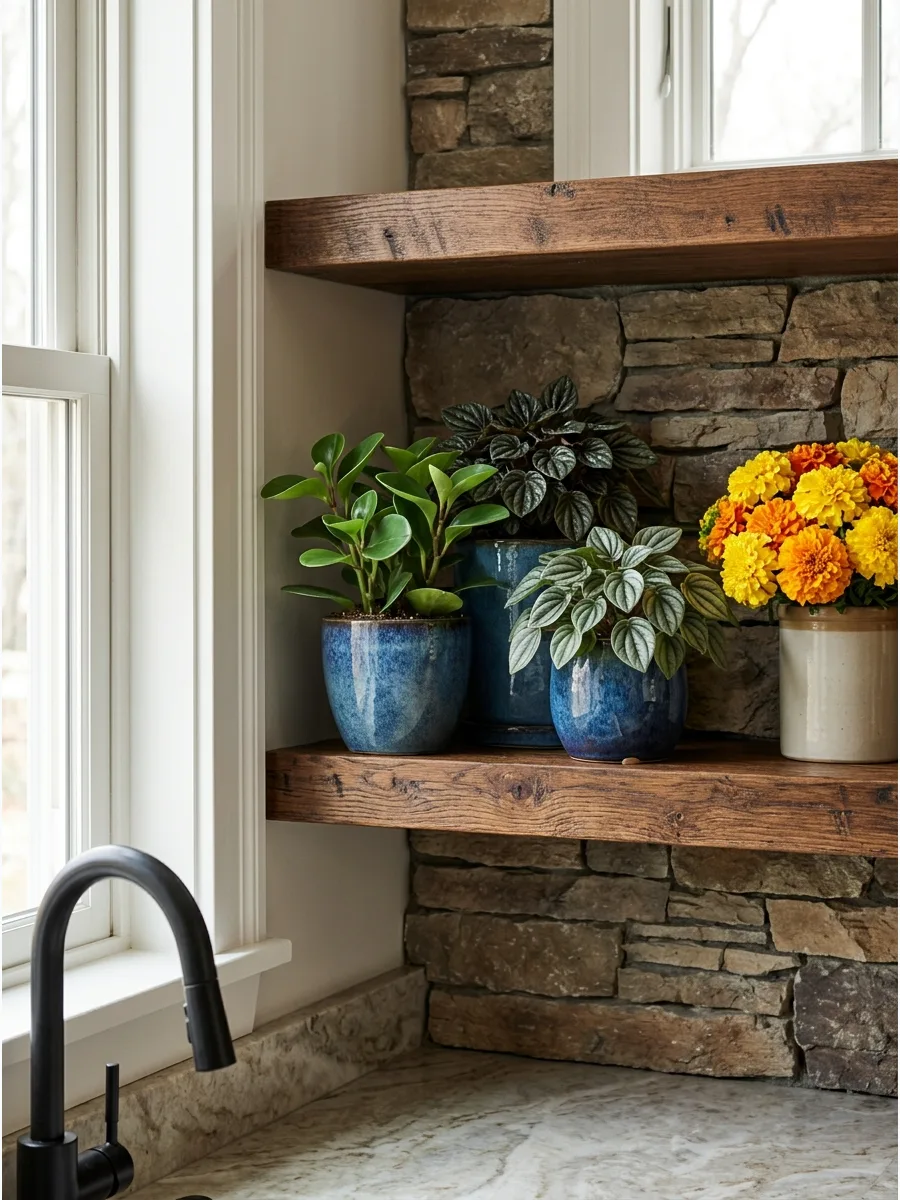
Group two or three compact peperomia varieties together on the kitchen windowsill. Choose plants with different leaf shapes, markings, and textures to create visual interest while keeping the display small and manageable.
Stick to odd-numbered groupings like three or five to make the arrangement look more natural. Mixing textures like waxy leaves with rippled ones is more effective than trying to match leaf colors.
- Select varieties like 'Watermelon' or 'Hope' for distinct visual contrast.
- Ensure all pots have drainage holes to prevent root rot in these sensitive plants.
- Rotate the pots 90 degrees every week so they grow evenly toward the light.
Quick win: Use a small decorative tray to hold the group of pots, making it easier to move them for window cleaning.
20. Hang a Spider Plant Above the Kitchen Sink
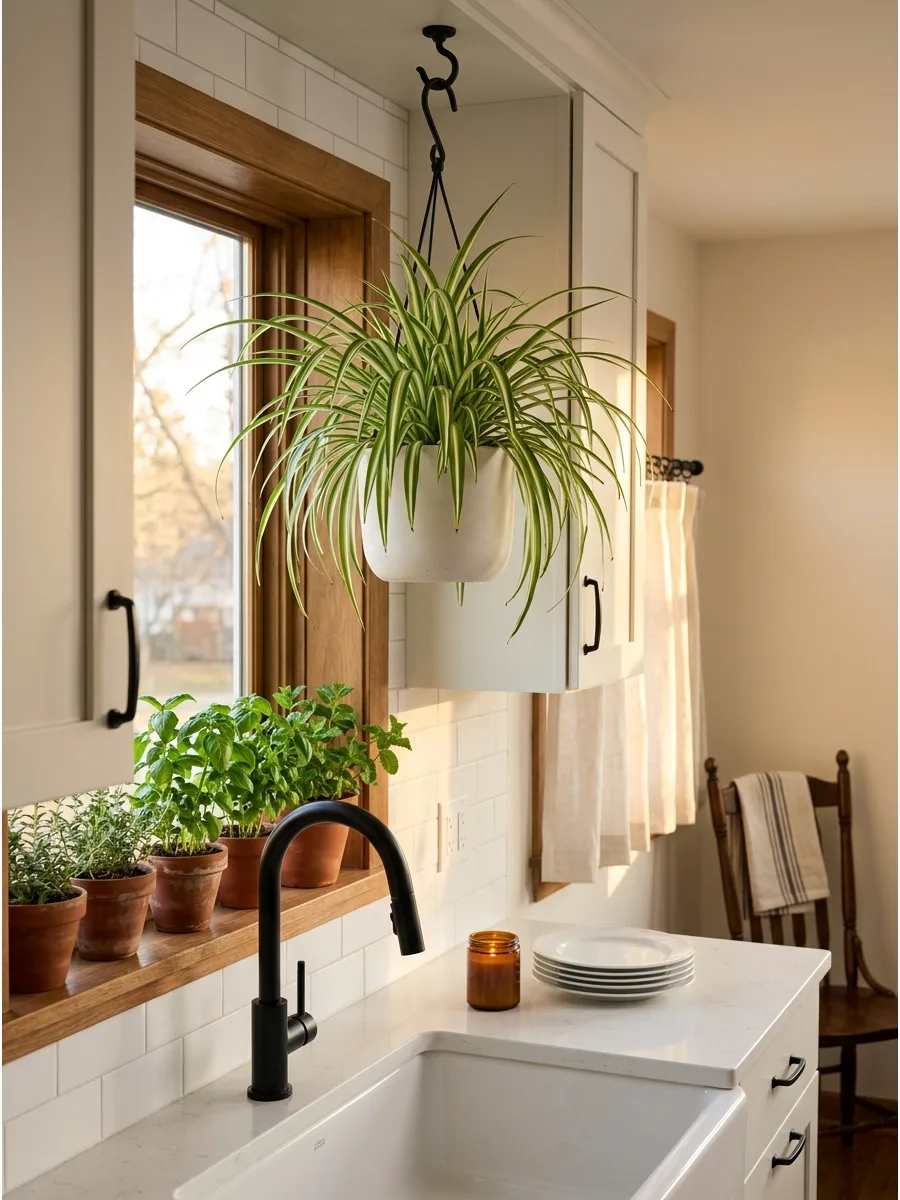
Suspend a spider plant above or beside the kitchen sink so its arching leaves can spread freely. This arrangement adds movement and greenery while keeping the countertop and windowsill clear.
Install a sturdy ceiling hook that can support the weight of the plant after a heavy watering. Elevated plants stay cleaner and are less likely to be knocked over during meal prep.
- Locate a ceiling joist before drilling to ensure the hook is secure.
- Choose a planter with a built-in saucer to catch drips after watering.
- Trim the small 'babies' that grow on the stems to keep the plant's energy focused on the main foliage.
Most people skip this: Use distilled water or let tap water sit out overnight to prevent the leaf tips from turning brown.
21. Train a Small Hoya on a Window Trellis
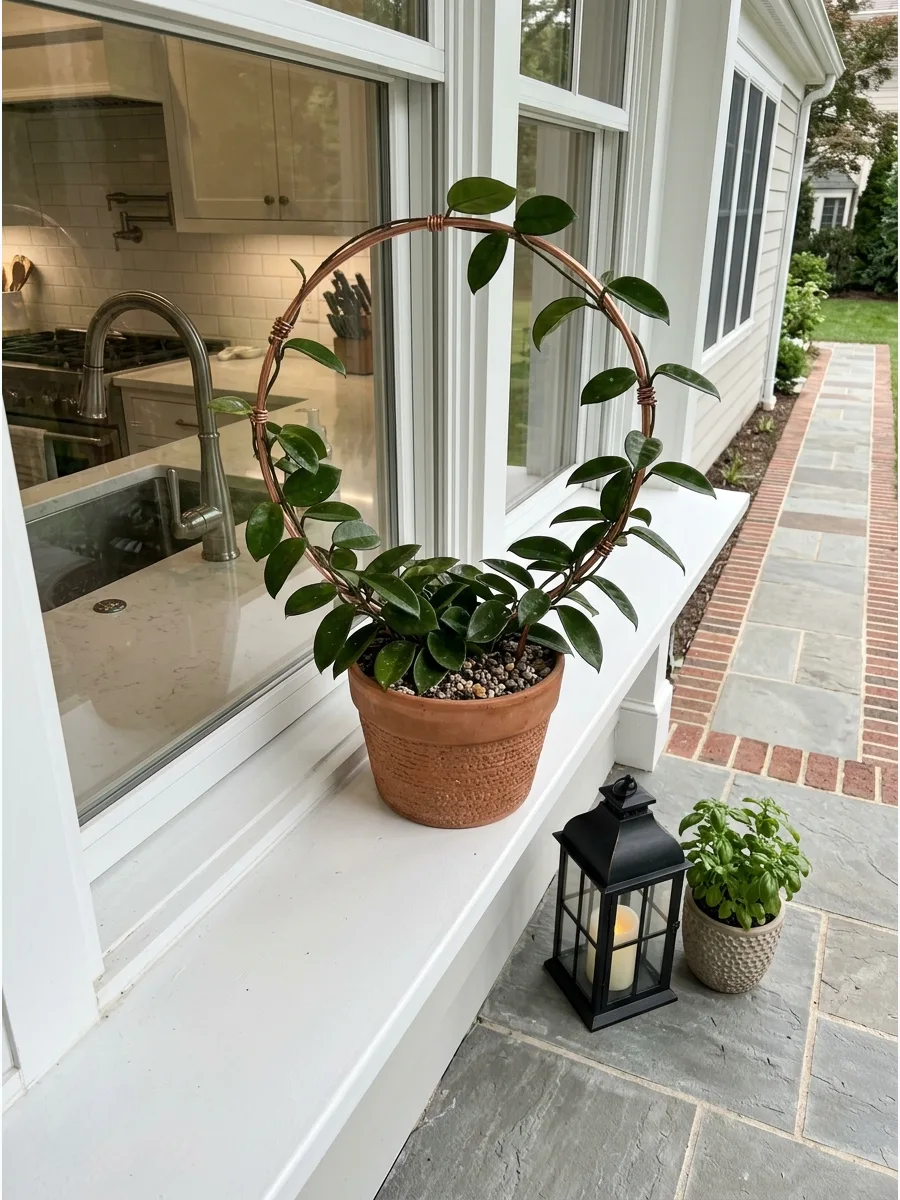
Place a compact hoya in a small pot and train its vines around a circular or arched trellis. The support keeps the plant controlled and creates a sculptural kitchen window feature.
Wrap the vines gently around the trellis every few weeks as they grow to maintain the shape. Trellises are the best way to prevent trailing plants from becoming a tangled mess on the counter.
- Insert the trellis into the pot when the plant is young to avoid damaging established roots.
- Use soft garden ties or twine if the vines need extra help staying in place.
- Place the plant in a bright window to encourage the hoya to produce its signature waxy flowers.
Best shortcut: Use a copper or brass trellis to add a metallic accent that matches kitchen hardware like faucets or drawer pulls.
22. Display a Pilea in a Rounded Ceramic Pot
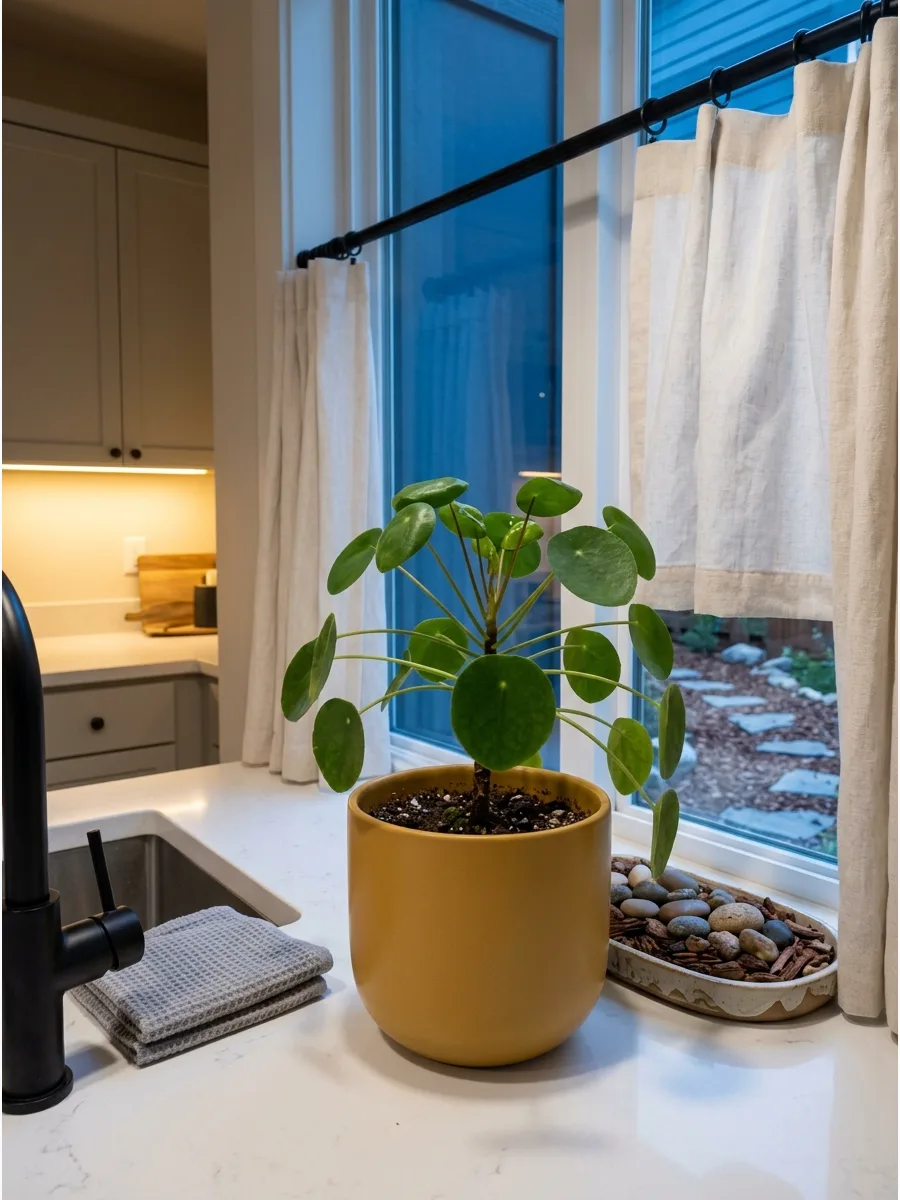
Place a pilea plant in a rounded planter that repeats the shape of its circular leaves. Position it near a bright kitchen window to create a cheerful, compact focal point.
Check the soil moisture every three days as these plants prefer to stay slightly damp but not soggy. Pilea plants require a weekly turn to prevent them from leaning too far toward the glass.
- Choose a pot that is only one inch wider than the plant's root ball.
- Use a liquid fertilizer once a month during the spring and summer.
- Snip off any yellowing bottom leaves to keep the plant looking tidy.
Quick win: If the plant produces small 'pups' in the soil, leave them for a fuller look or pot them separately as gifts.
23. Hang Rhipsalis Near a Filtered-Light Window
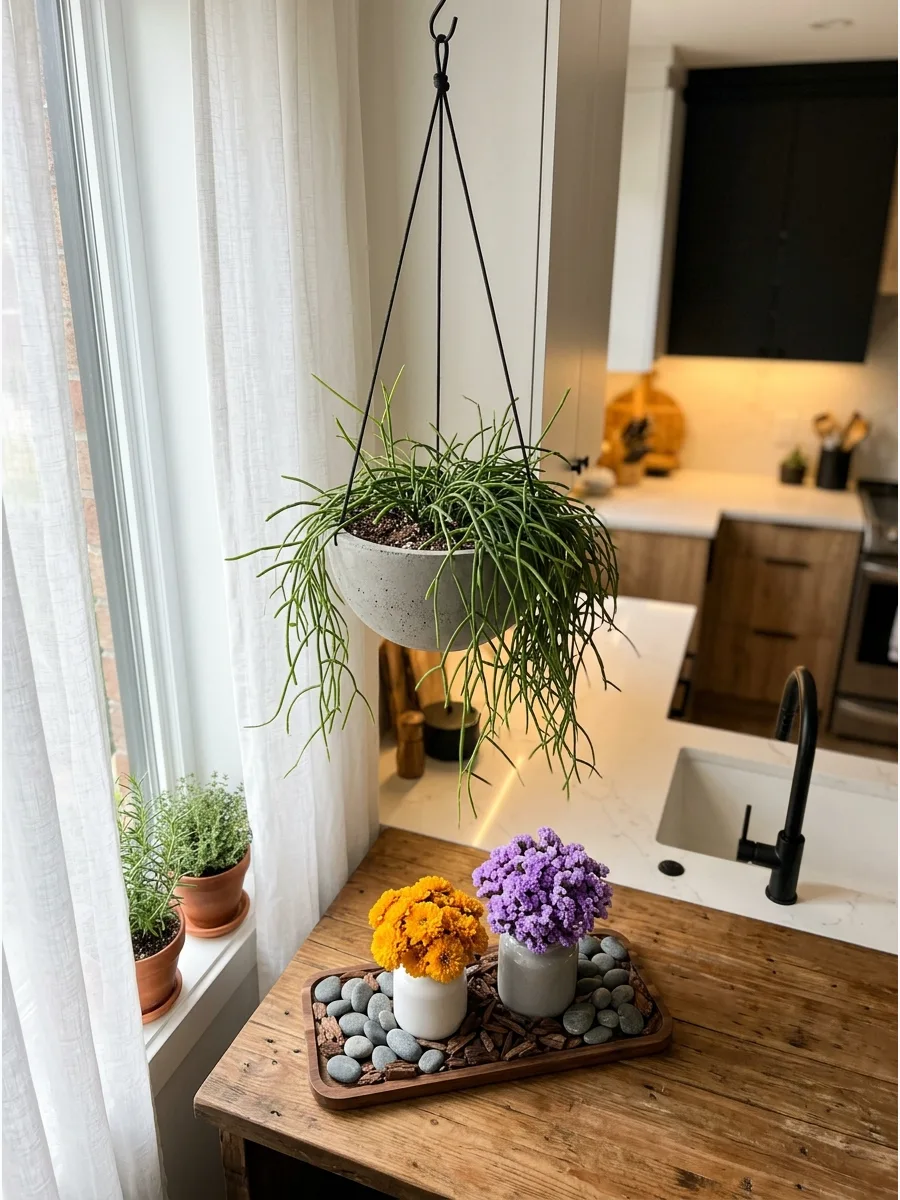
Suspend a rhipsalis plant close to a kitchen window with bright, indirect light. Its narrow cascading stems add a softer, more relaxed look than traditional upright succulents or cacti.
Mist the stems occasionally if your kitchen air is very dry from heating or cooling. Rhipsalis adds a modern, architectural feel to the window area without the hazard of sharp thorns.
- Use a lightweight hanging pot to avoid putting stress on the window frame.
- Place the plant in a spot that gets bright morning light but avoids harsh afternoon sun.
- Ensure the pot has a drainage hole to prevent water from sitting at the bottom.
Most people skip this: Rhipsalis is a jungle cactus, so it needs more frequent watering than desert-style cacti.
24. Place a Bird’s-Nest Fern Near the Sink
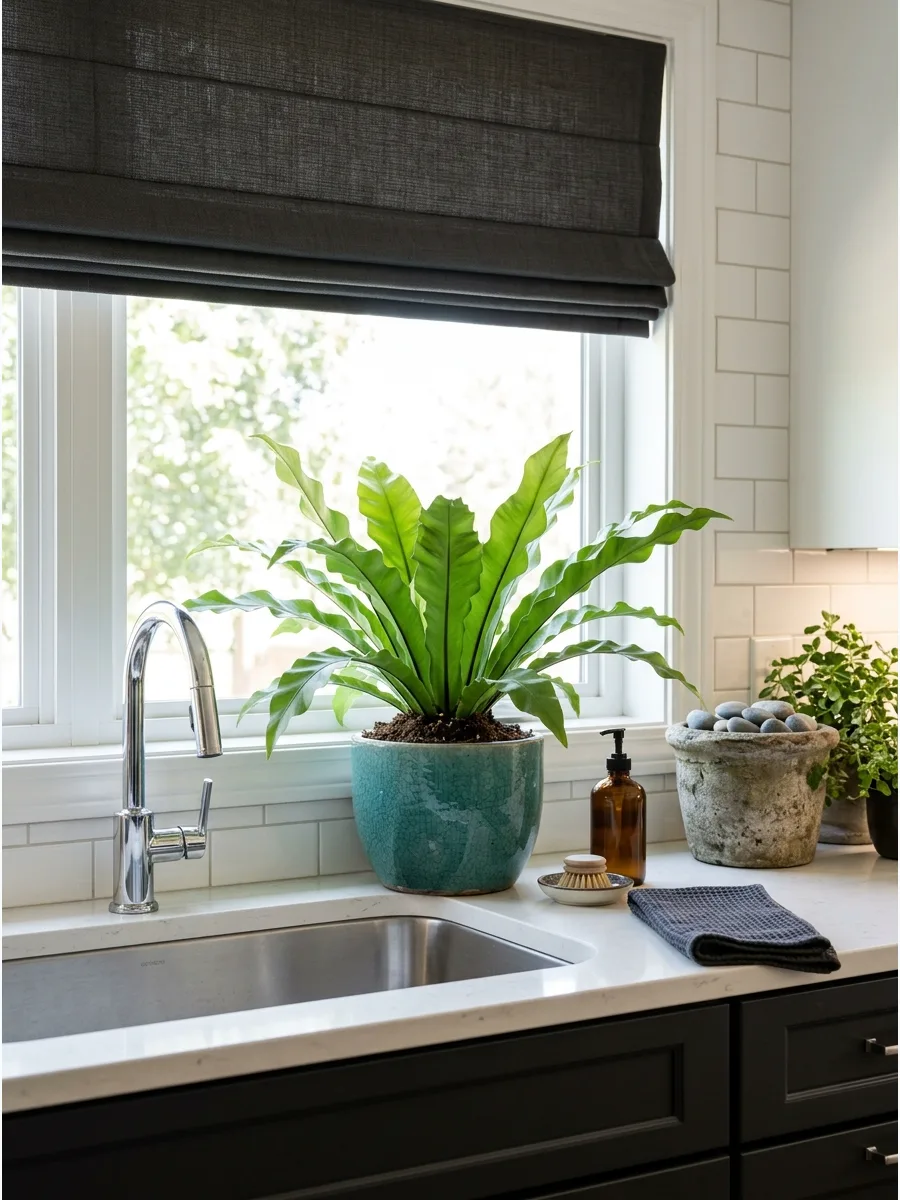
Set a bird’s-nest fern beside the kitchen sink where it can receive bright, indirect light. Its broad, wavy fronds bring fullness and texture to the window area without needing flowers.
Avoid pouring water directly into the center 'nest' of the plant to prevent rot. Ferns are the best choice for high-moisture areas because they love the humidity generated by a busy kitchen sink.
- Select a glazed ceramic pot to help the soil retain moisture longer.
- Keep the plant away from drafty windows or air conditioning vents.
- Use a pebble tray under the pot if your kitchen humidity is low.
Best shortcut: If the leaves start to look pale, move the plant a few feet away from the window to reduce light intensity.
25. Add a Prayer Plant to an East-Facing Window
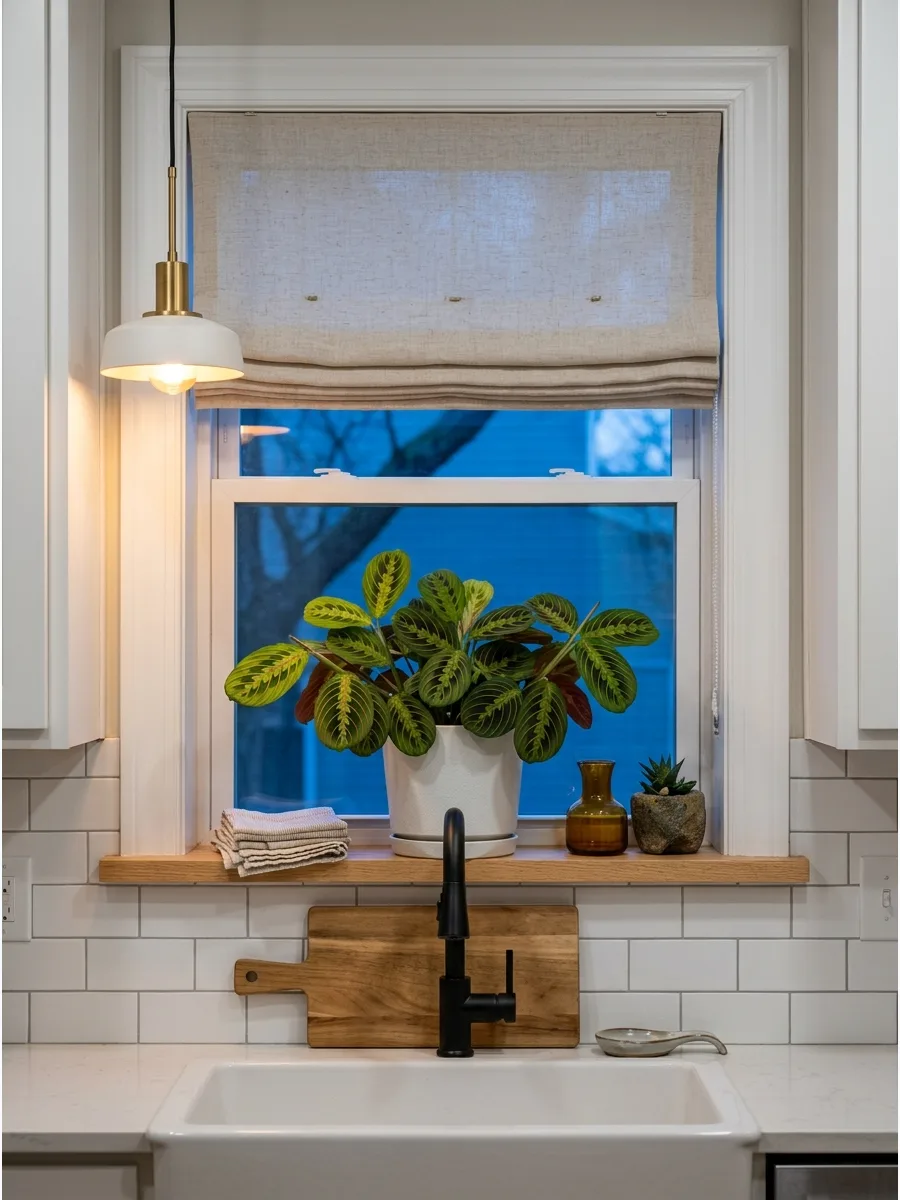
Place a compact prayer plant in an east-facing kitchen window or another location with gentle morning light. Its patterned leaves introduce color and detail while keeping the display focused on foliage.
Watch the leaves fold up at night, which is a natural sign the plant is healthy. Prayer plants are the best way to add natural, intricate patterns to a neutral or minimalist kitchen.
- Keep the soil consistently moist but never waterlogged.
- Use lukewarm water to avoid shocking the plant's roots.
- Place the plant where its leaves have room to spread horizontally.
Quick win: If the leaf edges turn brown, it usually means the air is too dry or the tap water has too many minerals.
26. Use a Compact Begonia for Colorful Foliage
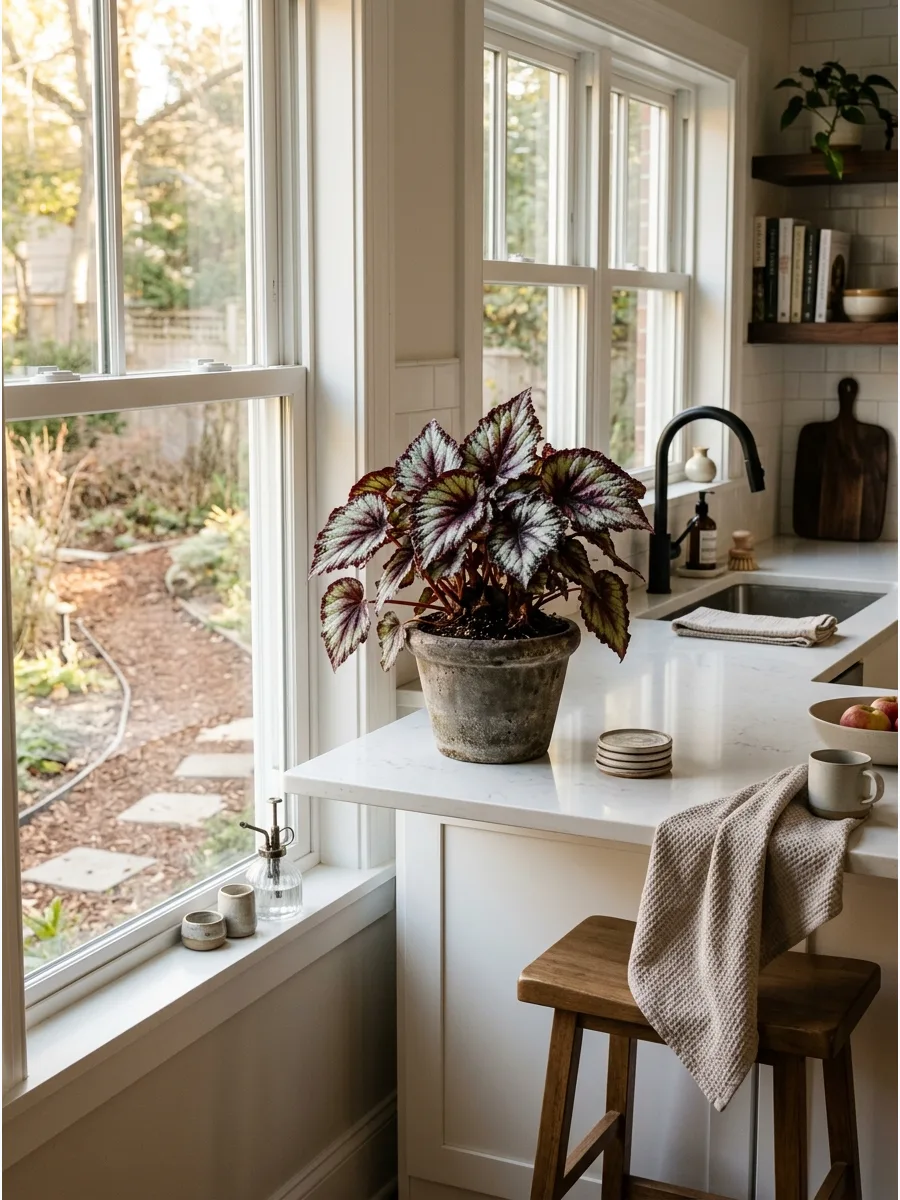
Add a small foliage begonia to a bright kitchen window protected from harsh direct sun. Its patterned or colored leaves can provide visual interest without relying on a large floral arrangement.
Rotate the plant often to ensure the colorful patterns develop evenly on all sides. Rex begonias provide more consistent color than flowering plants that only bloom for a few weeks.
- Water the soil directly and avoid getting the leaves wet to prevent mildew.
- Use a pot with a wide base to accommodate the begonia's shallow root system.
- Check for pests like mealybugs under the large leaves once a week.
Most people skip this: Begonias prefer to be slightly root-bound, so don't rush to move them into a larger pot.
27. Place a Jade Plant in a Sunny Kitchen Window
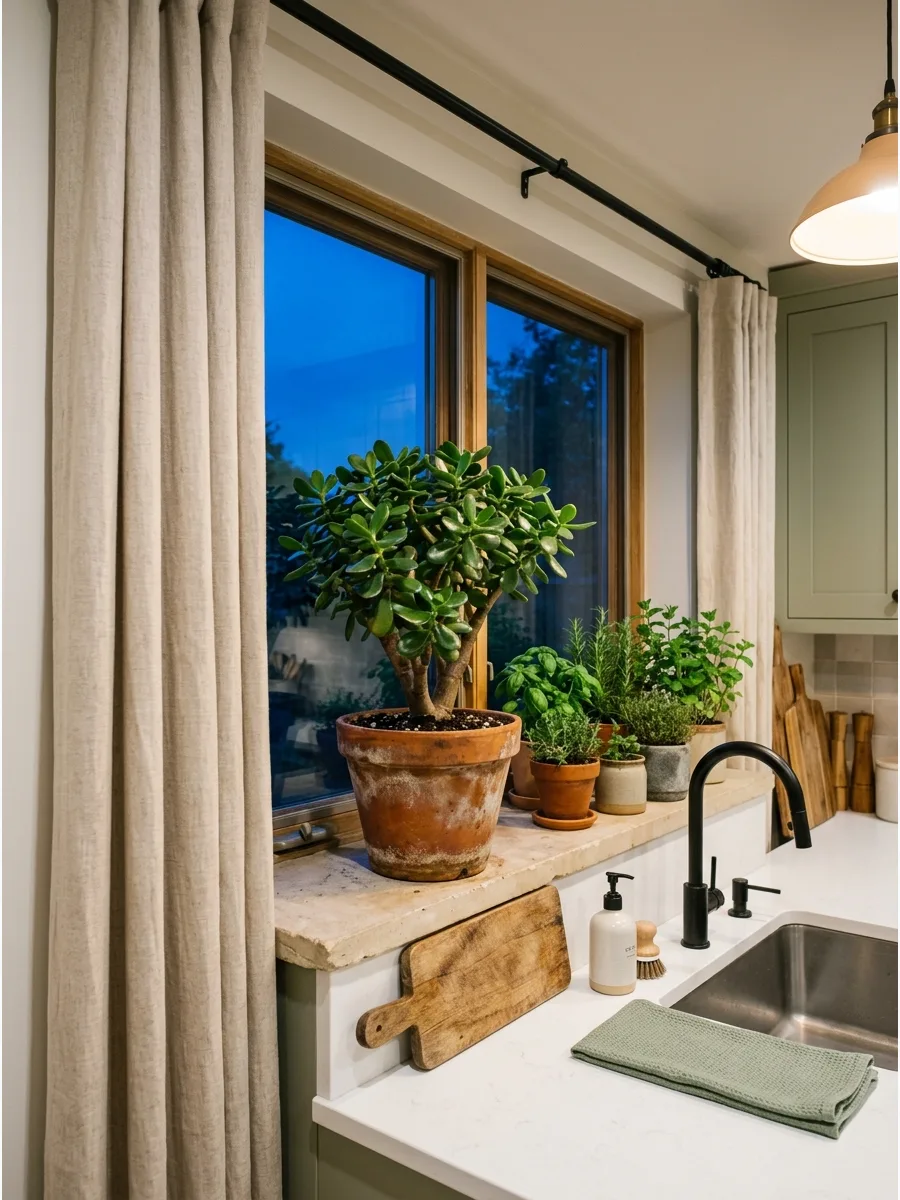
Use a compact jade plant in a bright window with good sunlight. Its thick leaves and sturdy form work especially well with terracotta, stone, concrete, or simple ceramic planters.
Let the soil dry out completely between waterings to mimic the plant's natural dry environment. Jade plants are the perfect 'set it and forget it' kitchen plant because they are extremely resilient.
- Use a cactus or succulent potting mix for better drainage.
- Prune the top leaves if the plant starts to look leggy or too tall for the window.
- Avoid fertilizing in the winter when the plant's growth slows down.
Best shortcut: If the leaves start to wrinkle, it is a clear signal that the plant needs a deep watering.
28. Add an Aloe Plant to the Windowsill
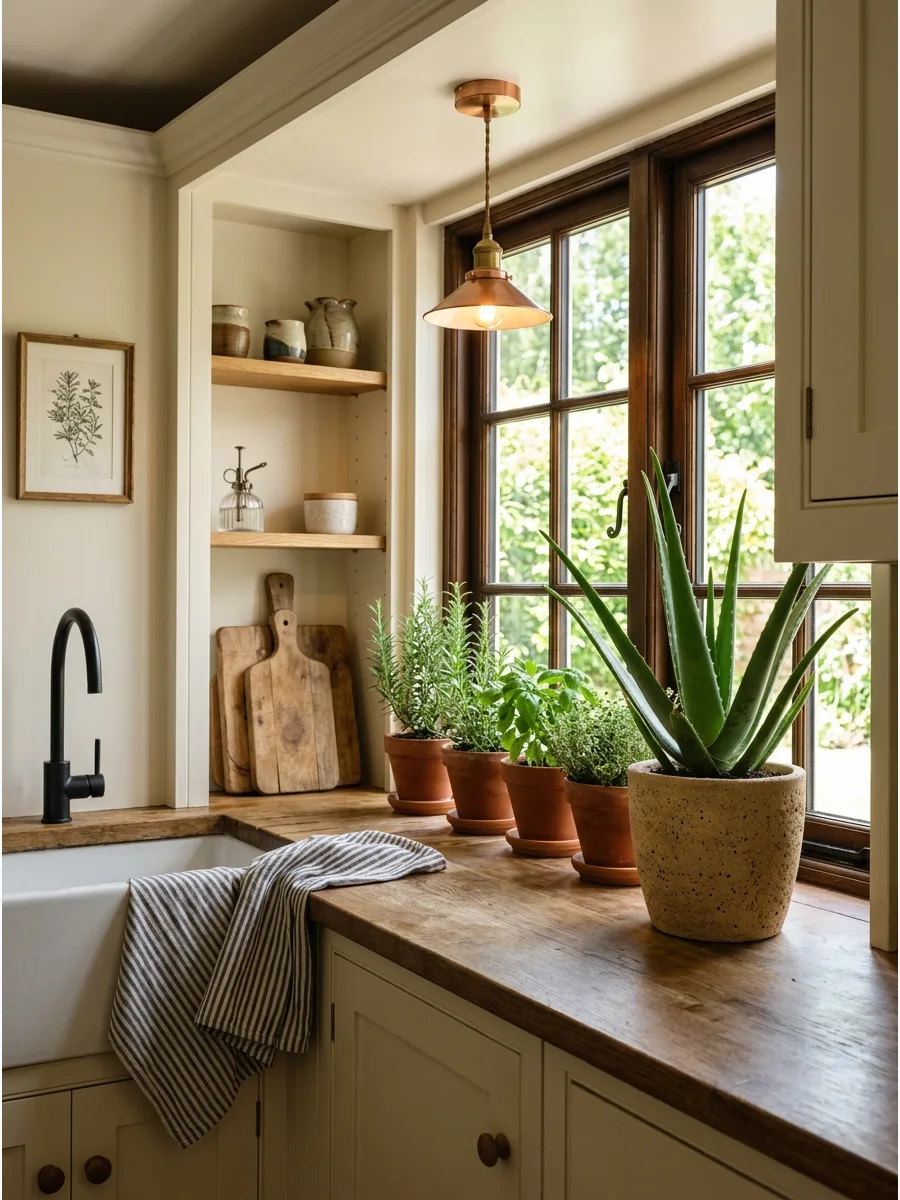
Place a small aloe plant in a well-draining pot on a sunny kitchen windowsill. Position it near one side so the pointed leaves do not interfere with opening the window or reaching nearby items.
Choose a porous clay pot that allows excess moisture to evaporate quickly. Keeping an aloe plant near the stove is a classic move because the gel inside the leaves can soothe minor kitchen burns.
- Place the aloe in the sunniest spot available in the kitchen.
- Wait for the bottom leaves to feel slightly soft before watering again.
- Remove any dried-out lower leaves with clean scissors to maintain a tidy shape.
Quick win: If the plant turns brown or orange, it is likely getting too much direct heat and needs to be moved back a few inches.
29. Group Small Succulents in Matching Pots
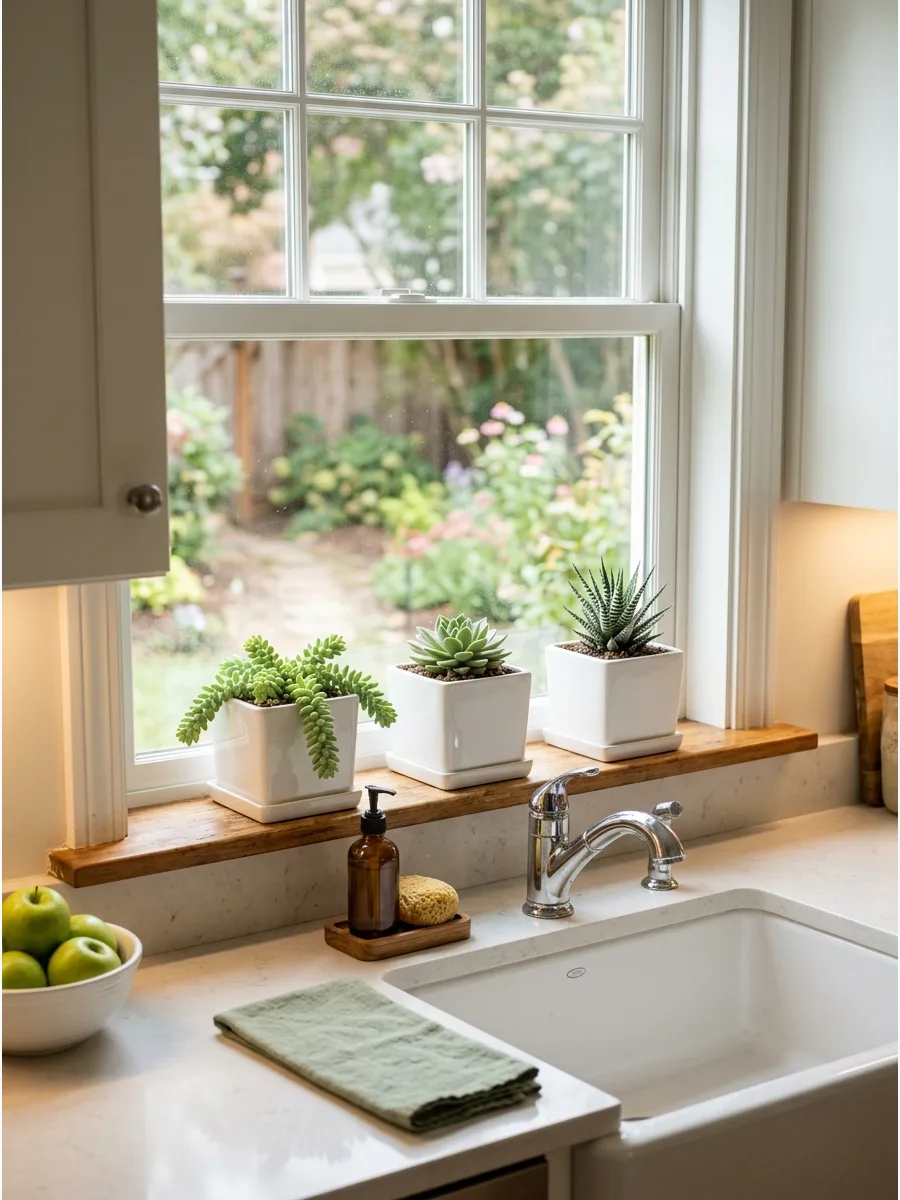
Arrange three small succulents in separate containers across a sunny kitchen window. Use pots made from the same material to keep the collection coordinated while allowing the plants’ different shapes to stand out.
Pick succulents with different growth habits, like one trailing, one rosette-shaped, and one upright. Matching pots make a random collection of plants look like a professional, intentional decor choice.
- Select pots that are roughly the same size to maintain a balanced look.
- Top the soil with small decorative pebbles to keep the area clean and prevent soil splash.
- Ensure the window receives at least six hours of bright light daily.
Most people skip this: Succulents often need more light than other houseplants, so use a south-facing window if possible.
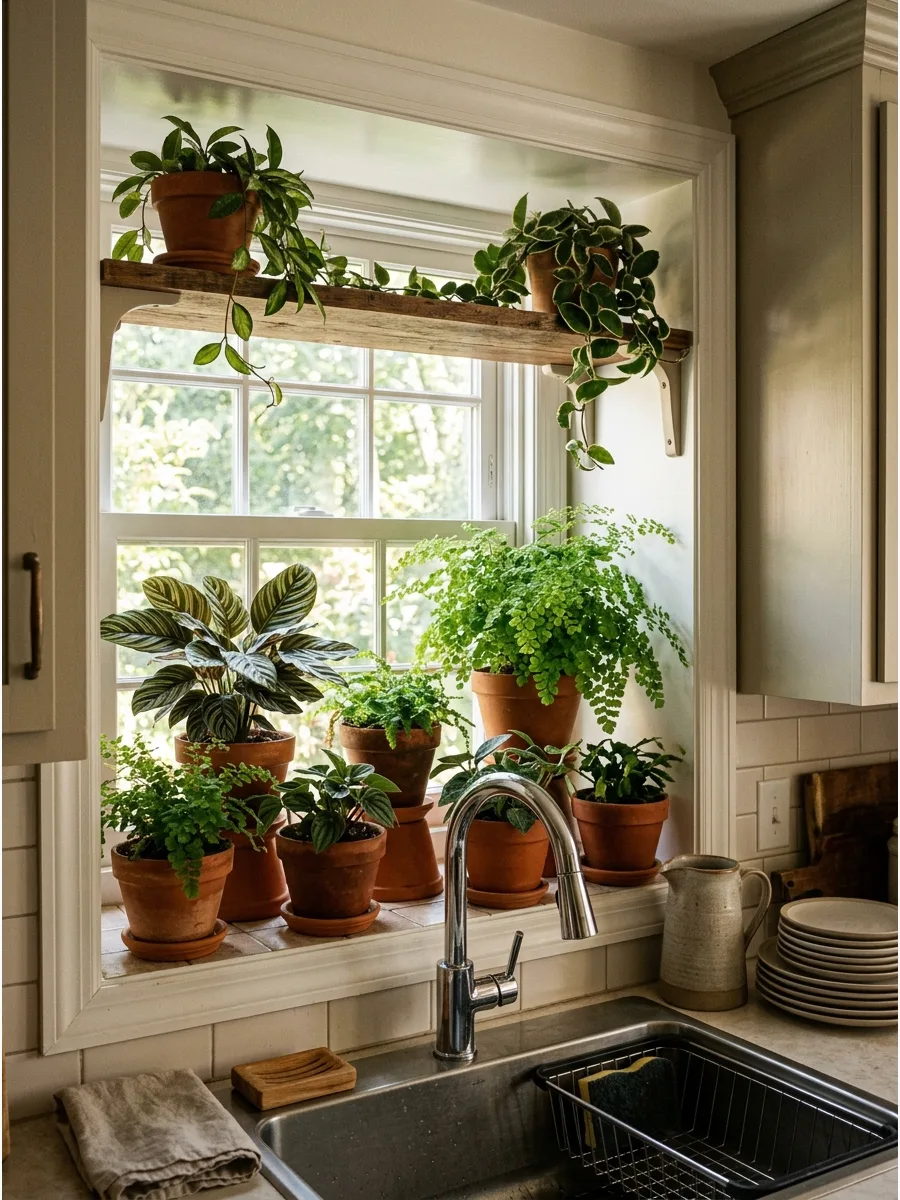
30. Line the Window With Matching Terracotta Herb Pots
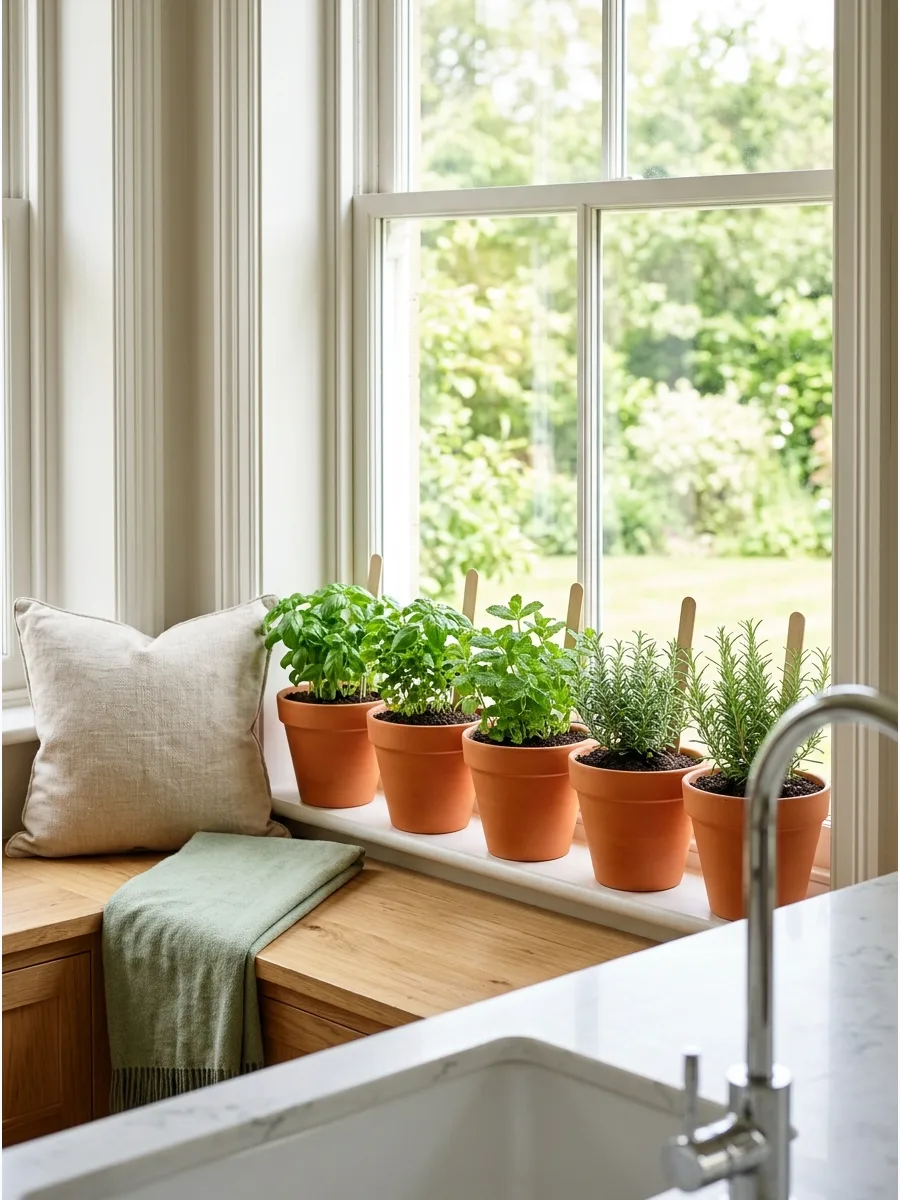
Use identical terracotta pots to hold different culinary herbs along the kitchen windowsill. The repeated containers create a clean, organized look while the varied plants prevent the arrangement from feeling too uniform.
Label each pot with a simple wooden stake or paint the herb name directly on the rim. Terracotta is the best choice for herbs because the breathable clay prevents the roots from sitting in too much water.
- Soak new terracotta pots in water for an hour before planting to prevent them from sucking moisture out of the soil.
- Space the pots at least two inches apart to allow for proper air circulation.
- Place a saucer under each pot to protect the windowsill from water stains.
Best shortcut: Use a large rectangular tray to hold all the terracotta pots, making it easy to carry them to the sink for watering.
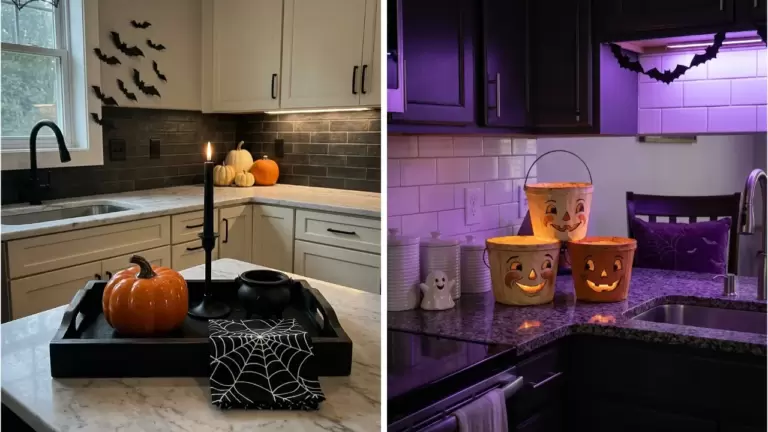
31. Use Vintage Containers as Decorative Plant Covers
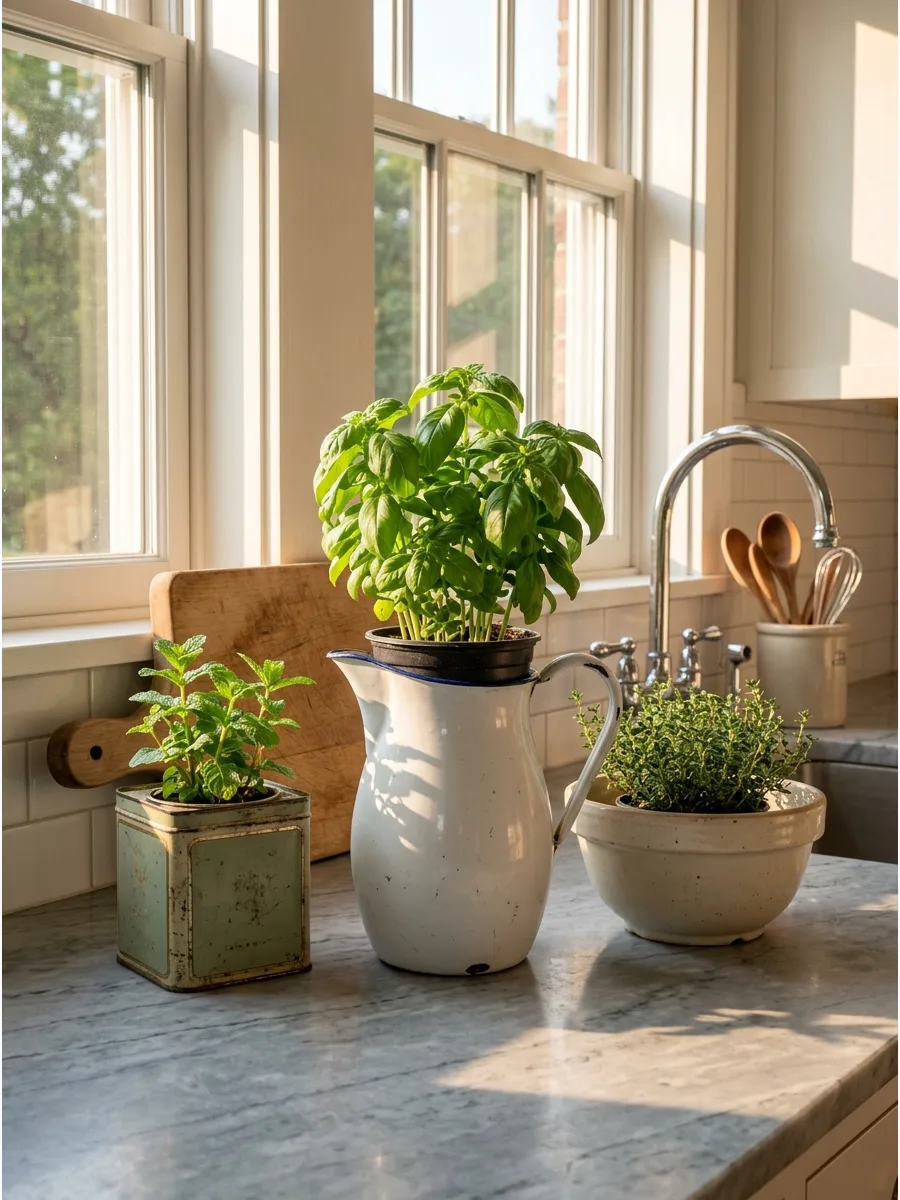
Old kitchen items like tea tins, enamel pitchers, or stoneware bowls make excellent outer covers for boring plastic pots. Using these pieces adds instant character to the sink area while keeping the plants easy to swap out.
Always keep the plant in its original plastic nursery pot so you can lift it out for watering and prevent the vintage metal or stone from rusting or staining. This method protects your counters from leaks while showing off unique flea market finds.
- Check local thrift stores or antique malls for affordable stoneware bowls and metal tins.
- Ensure the inner nursery pot fits snugly inside the vintage vessel without being forced.
- Renter-friendly because it uses existing counter space without any permanent hardware installation.
Quick win: Place a few pebbles at the bottom of the vintage container to keep the inner pot from sitting in excess drainage water.
32. Untitled Idea
Choose the one action that makes this idea work before buying anything else.
33. Add a Slim Floating Shelf Across the Window
A narrow shelf mounted directly across the window glass maximizes sunlight for small plants. Clear acrylic or glass materials are best because they allow light to pass through to the rest of the kitchen.
Secure the shelf at eye level to keep small succulents or cacti in a prime sunny spot away from the splash zone. This is a great way to use vertical space that usually goes to waste.
- Purchase suction-cup window shelves for a tool-free installation that works for renters.
- Wipe the glass with rubbing alcohol before attaching suction cups to ensure a strong, long-lasting hold.
- Adjust the height based on the reach of the shortest person in the house for easy watering.
Best shortcut: Use a level during installation to make sure your pots don't slowly slide toward one end of the shelf.
34. Hang Herb Pots From a Window Rail
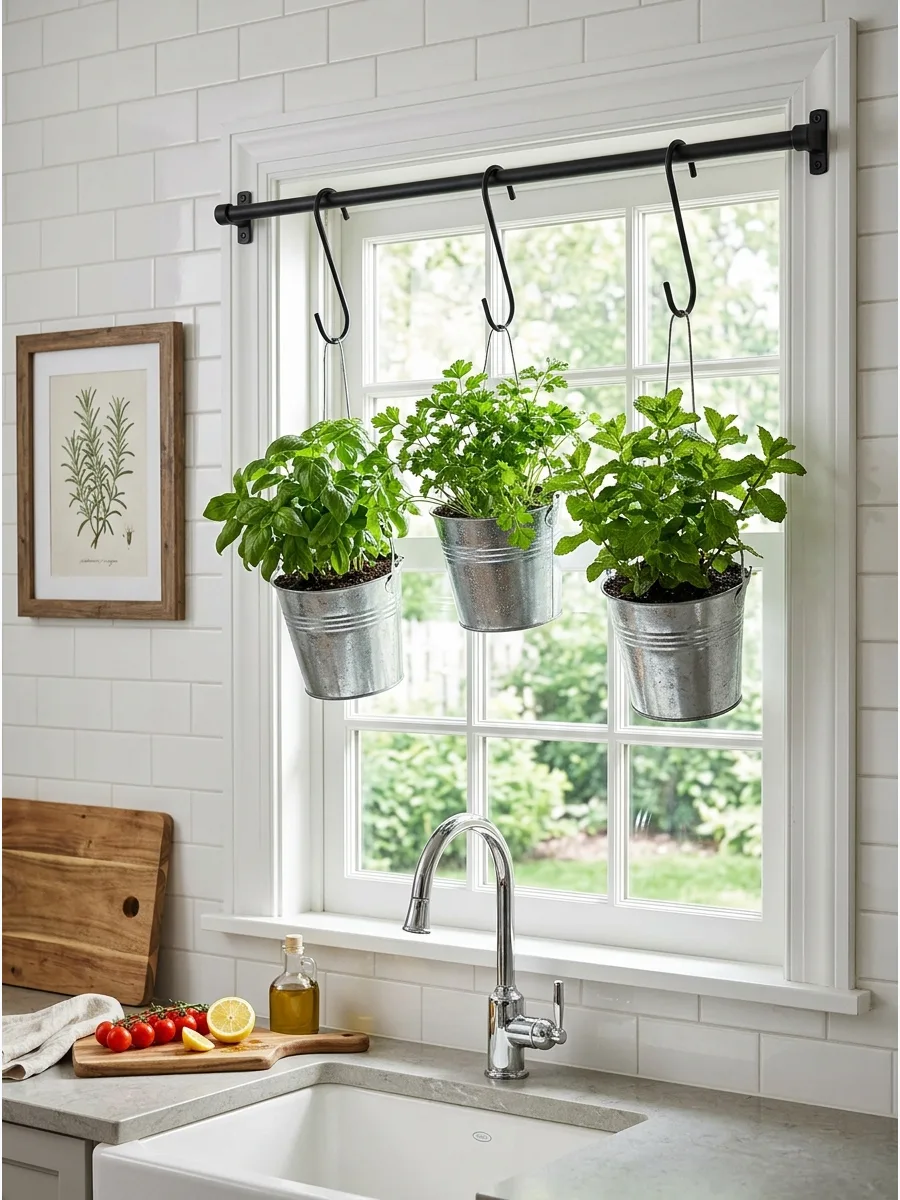
Installing a metal rail above the window casing allows you to hang herbs in a way that feels organized and professional. This keeps the windowsill clear for cleaning and prevents pots from getting knocked over into the sink.
Use S-hooks to hang lightweight galvanized or plastic pots at different heights for a staggered, natural look. It makes harvesting fresh basil or parsley during cooking very convenient.
- Standard curtain rods or kitchen utensil rails work perfectly for this hanging setup.
- Check that the wall anchors can support the weight of wet soil and ceramic pots.
- Paint the pots to match your cabinet hardware for a custom, high-end look.
Quick win: Use lightweight plastic pots inside the hanging buckets to reduce the total weight pulling on the rail.
35. Create a Glass Bottle Propagation Shelf
Clear glass bottles filled with water allow you to grow new plants from cuttings while adding a clean, airy look to the window. You can see the roots growing, which adds an interesting scientific element to the decor.
Line up a row of mismatched clear glass bottles on the sill to turn simple herb cuttings into a bright focal point. This is one of the most affordable ways to fill a window with life.
- Clean out old glass soda or spice bottles to use as free propagation vessels.
- Change the water once a week to keep it clear and prevent algae from growing in the sun.
- Group bottles in odd numbers like three or five to create a more balanced visual arrangement.
Most people skip this: Use filtered water to prevent mineral crust from forming around the rim of the glass bottles.
36. Use One Long Planter for Several Herbs
A single long trough provides a streamlined look that makes a small windowsill feel wider and more organized. Instead of managing several small pots, you only have one container to move when cleaning the area.
Select a rectangular ceramic or stone trough that matches the width of your window for a custom, built-in appearance. It creates a mini indoor garden bed that stays neatly in place.
- Measure your windowsill depth carefully to ensure the planter doesn't overhang the edge.
- Choose herbs with similar watering needs, like rosemary and thyme, to plant together in the same soil.
- Opt for a planter with a matching drainage tray to protect your window casing from rot.
Best shortcut: Buy a planter with a self-watering insert to keep herbs from wilting during hot summer afternoons.
37. Place Plants on a Stepped Window Riser
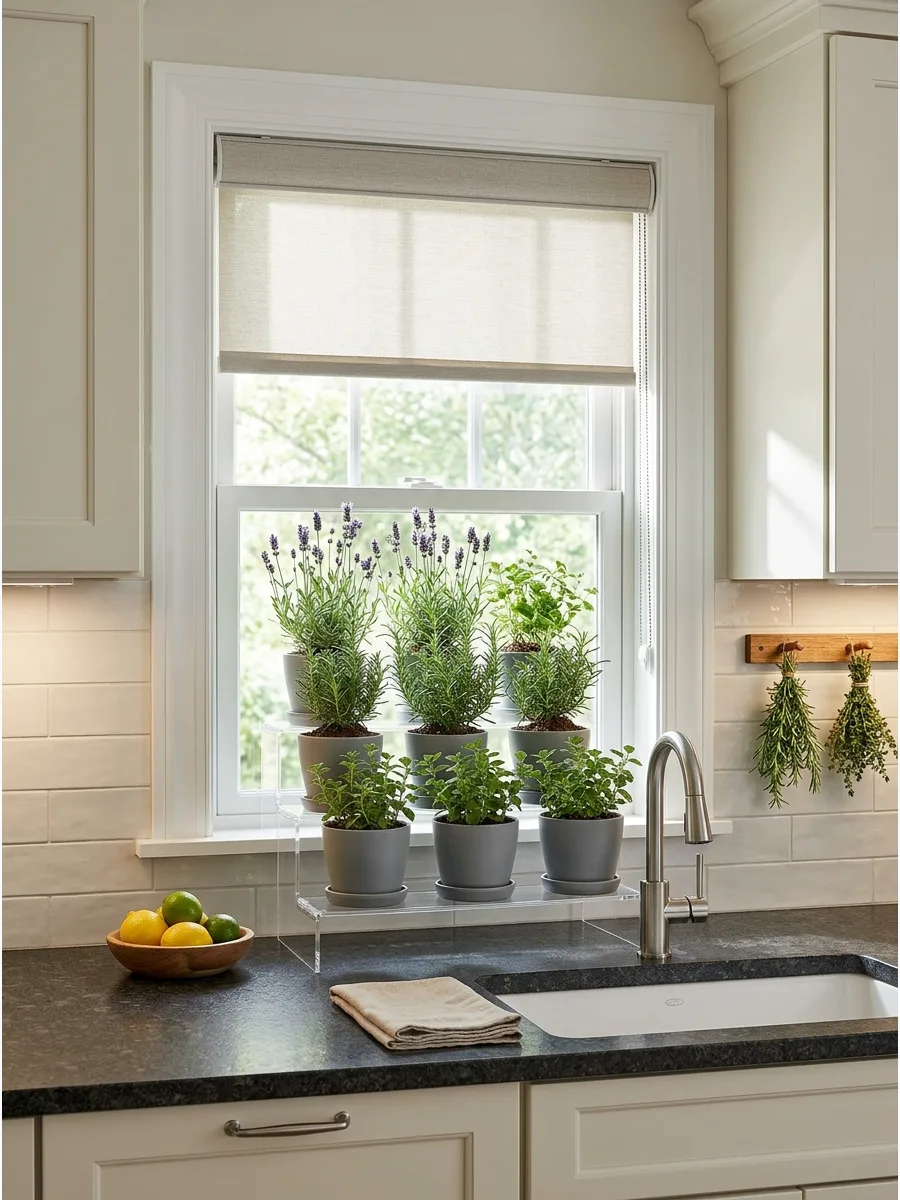
Using a stepped riser is a smart way to display a variety of plant sizes without the ones in the back getting lost. This works especially well on deep countertops next to a window where you have extra room to play with.
Set shorter herbs on the front step and taller foliage on the back step so every plant gets its share of the sun. It turns a flat collection of pots into an intentional display.
- Acrylic risers disappear into the background, making the plants look like they are floating.
- Wipe the riser down weekly to remove any water spots or soil crumbs that fall during maintenance.
- Use this for a collection of small succulents if your kitchen window gets direct, hot light.
Quick win: Use a wooden spice riser to add a warm, rustic texture that complements terracotta pots.
Kitchen Window Decor
38. Symmetrical Hanging Herb Frames
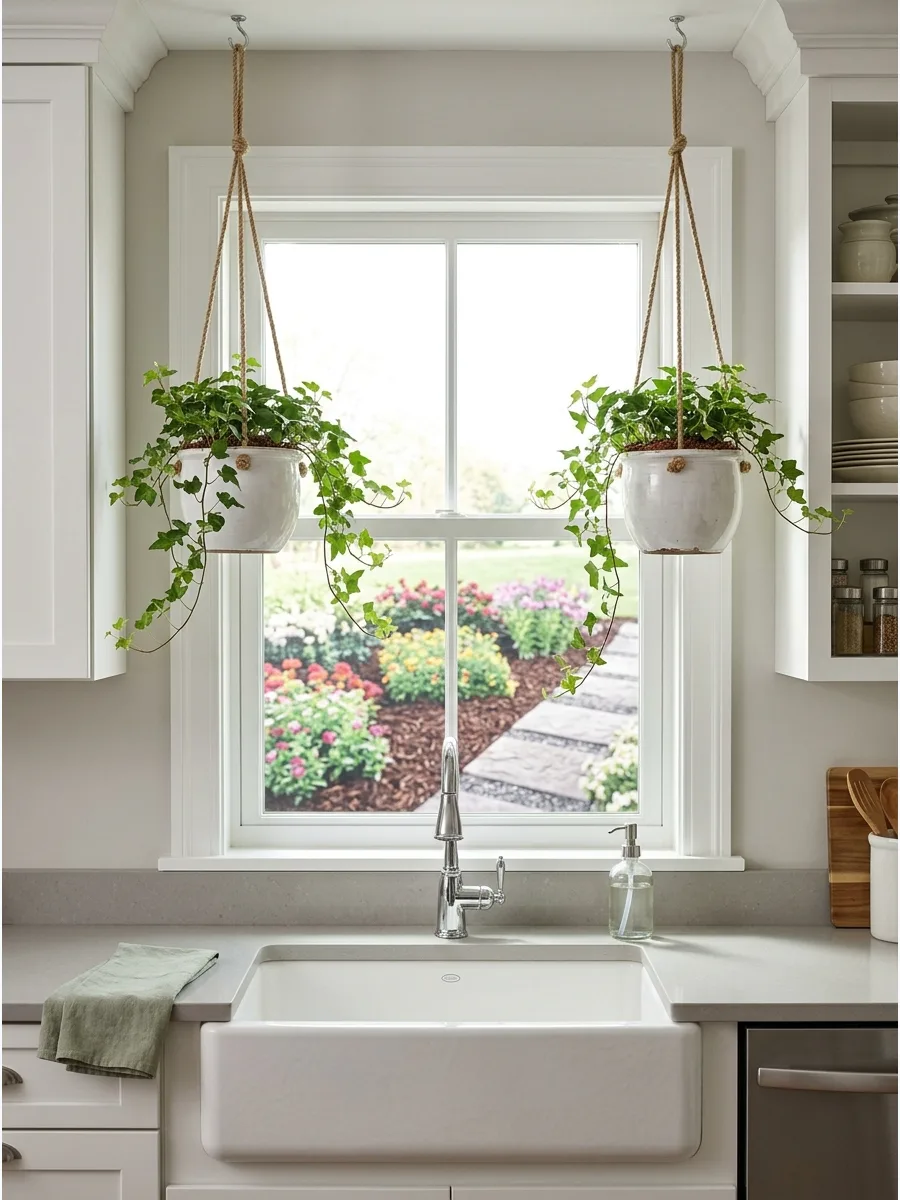
Symmetrical hanging planters flank the kitchen sink to provide instant greenery without sacrificing valuable counter space. This setup draws the eye upward, making a standard window feel like a deliberate focal point.
Install two ceiling hooks or a sturdy tension rod to suspend identical terracotta or ceramic pots at eye level. Spacing the pots exactly three inches from the window trim ensures the foliage doesn't block the natural light or the view.
- Source 6-inch lightweight planters and wall-mount brackets for under $40.
- Drill pilot holes into the wall studs or use heavy-duty toggle bolts for ceiling mounts to ensure stability.
- Swap edible herbs like mint or basil for low-maintenance pothos if the window receives mostly indirect sun.
Quick win: Use macrame hangers with adjustable knots to ensure both planters hang at the exact same height for a polished, professional look.
39. Create an Asymmetrical Kitchen Window Display
An asymmetrical layout feels more relaxed and modern than a perfectly centered row of pots. By grouping plants of different heights and types on one side, you create a point of interest that doesn't feel forced.
Hang one bushy plant high on the left and place a cluster of small pots on the right-hand sill to create a balanced but uneven look. It is a great way to mix different plant species together.
- Balance a large, heavy plant on one side with two or three smaller items on the other.
- Use pots of the same color but different shapes to keep the look cohesive.
- Vary the heights of the plants on the sill using small blocks or books.
Best shortcut: Take a photo of the arrangement from across the room to see if the visual weight feels balanced.
40. Hang a Small Kokedama Garden
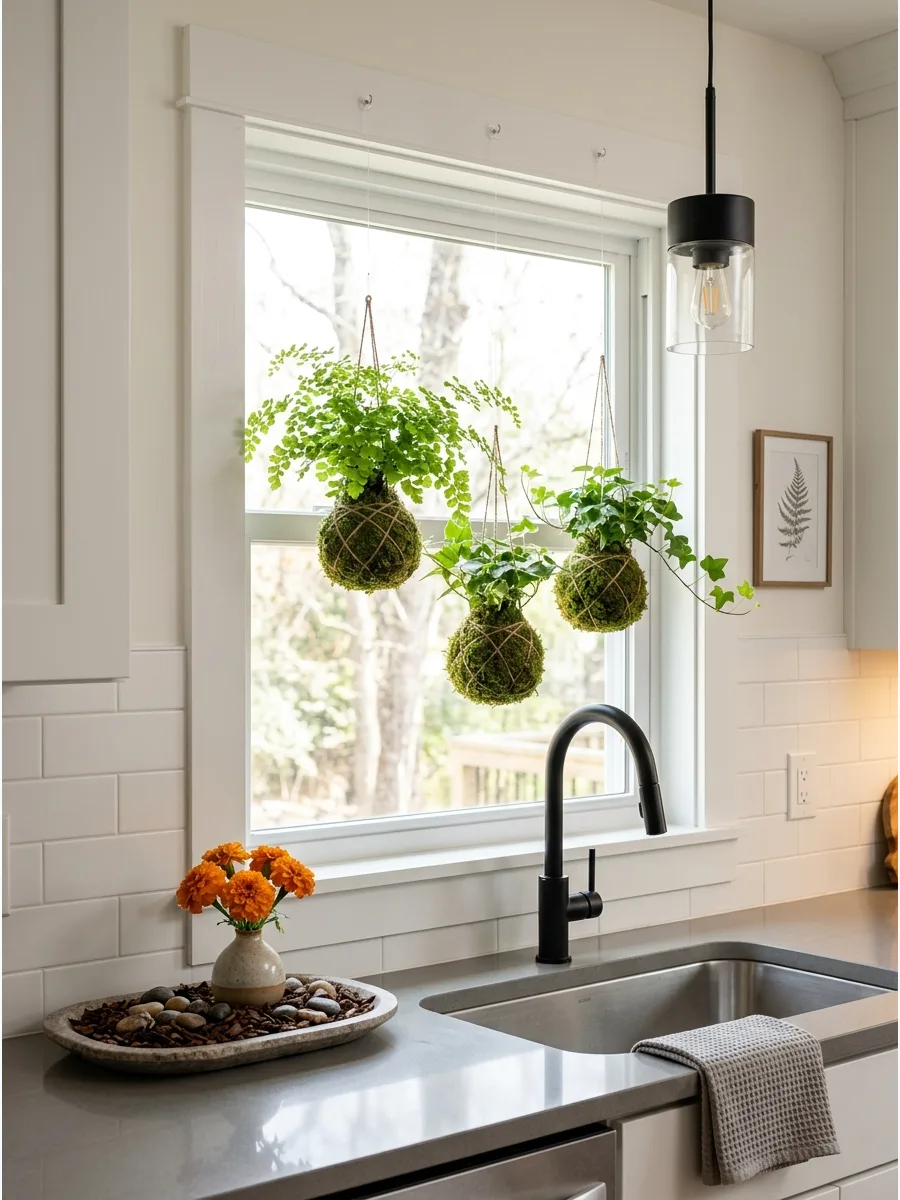
Kokedama, or Japanese moss balls, are plants grown in a ball of soil covered in moss and wrapped in string. They don't need traditional pots, which gives them a very light and airy appearance in front of a window.
Suspend two or three small kokedama from thin fishing line at different heights for a floating garden effect. This style is perfect for minimalist kitchens where you want to avoid clutter on the counters.
- Water kokedama by soaking the entire moss ball in a bowl of water for a few minutes once a week.
- Use fishing line for a floating look or thick twine for a more organic, rustic vibe.
- Choose shade-tolerant plants like ferns if your kitchen window doesn't get a lot of direct sun.
Quick win: Squeeze the moss ball gently after soaking to remove excess water before hanging it back up over the sink.
41. Use Amber Glass Around Kitchen Window Plants
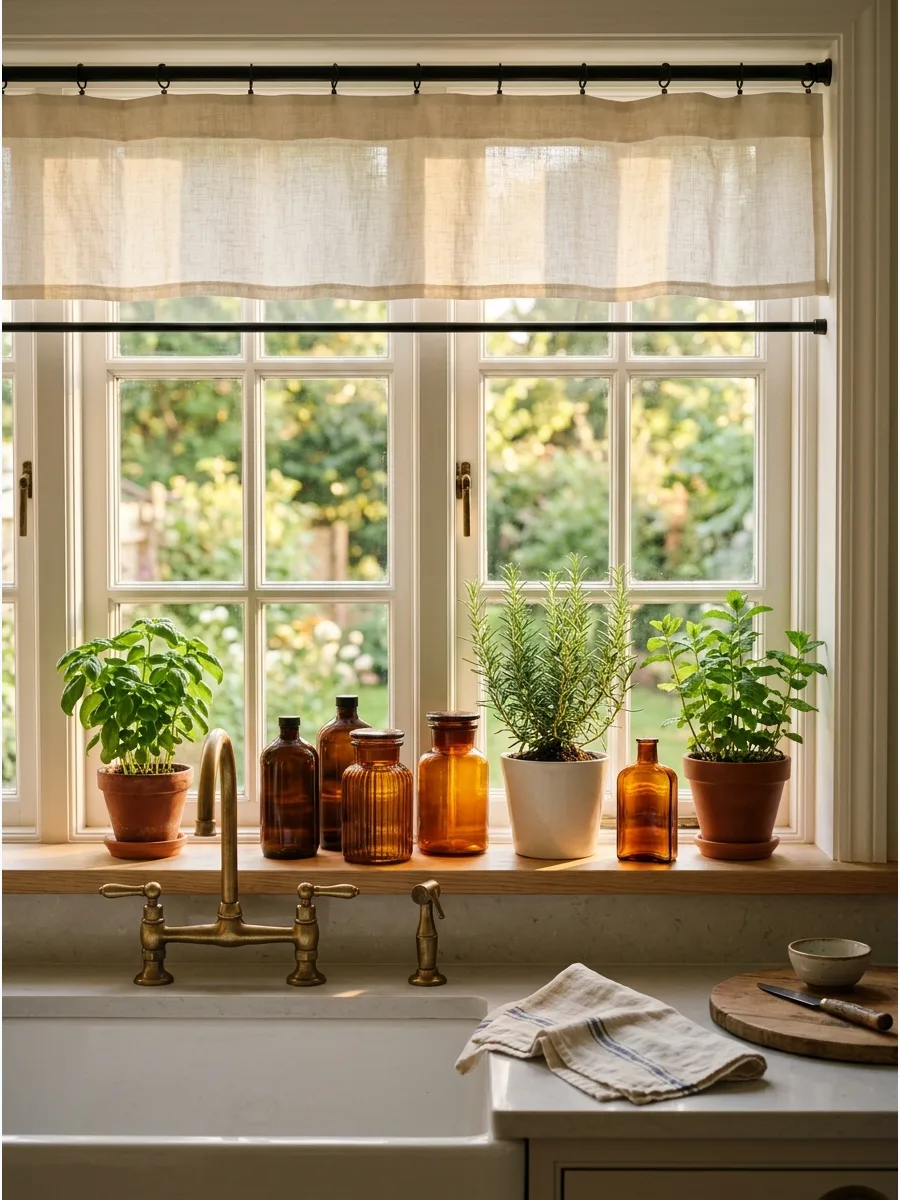
Amber glass bottles add a vintage, warm glow to the window area, especially when the sun shines through them. They pair beautifully with the deep green of herb leaves and help fill gaps between potted plants.
Intersperse amber glass jars or bottles between your standard pots to add a pop of color that doesn't overwhelm the greenery. The brown tones ground the display and make it feel more intentional.
- Collect empty amber glass bottles from soaps, oils, or supplements to reuse as decor.
- Group the glass in clusters of three to create a more impactful color statement.
- Use the bottles to hold single stems of fresh-cut flowers from the garden.
Most people skip this: Clean the glass bottles regularly with vinegar to remove the white film that builds up from hard water.
42. Create Contrast With Matte-Black Planters
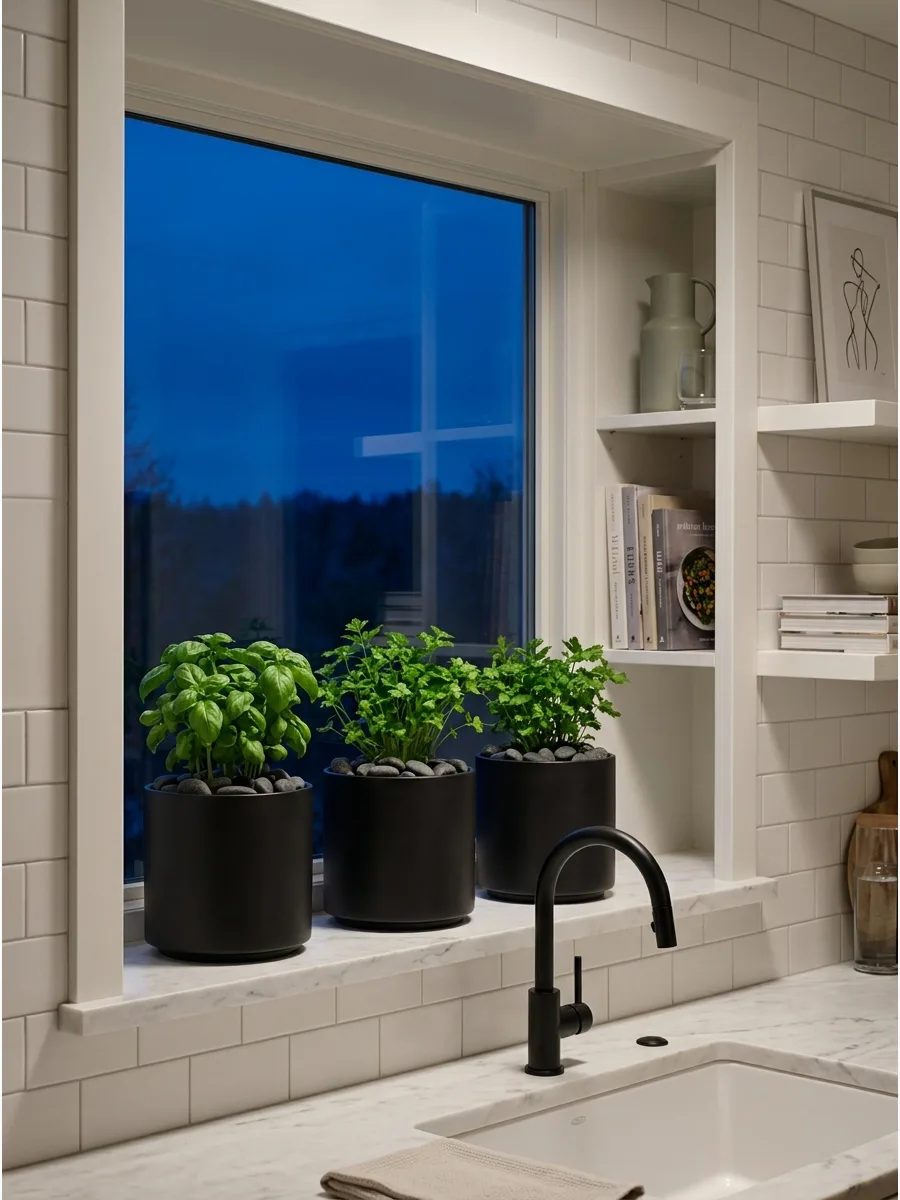
Matte-black pots provide a sharp, modern contrast against the bright greens of kitchen herbs. They look particularly striking in kitchens with white tiles, light countertops, or pale wood accents.
Use uniform matte-black cylindrical pots to create a sophisticated and cohesive look that makes the plant foliage stand out. This simple color choice can make a basic herb collection look like a high-end design feature.
- Look for pots with a smooth, non-reflective finish for the most modern appearance.
- Mix different plant textures, like the broad leaves of basil and the fine needles of rosemary, to add variety.
- Wipe the pots with a damp cloth to remove any white salt buildup from the soil.
Best shortcut: If you have old pots, a quick coat of matte-black spray paint can give them a whole new look for very little money.
43. Use Warm-White Ceramic Plant Pots
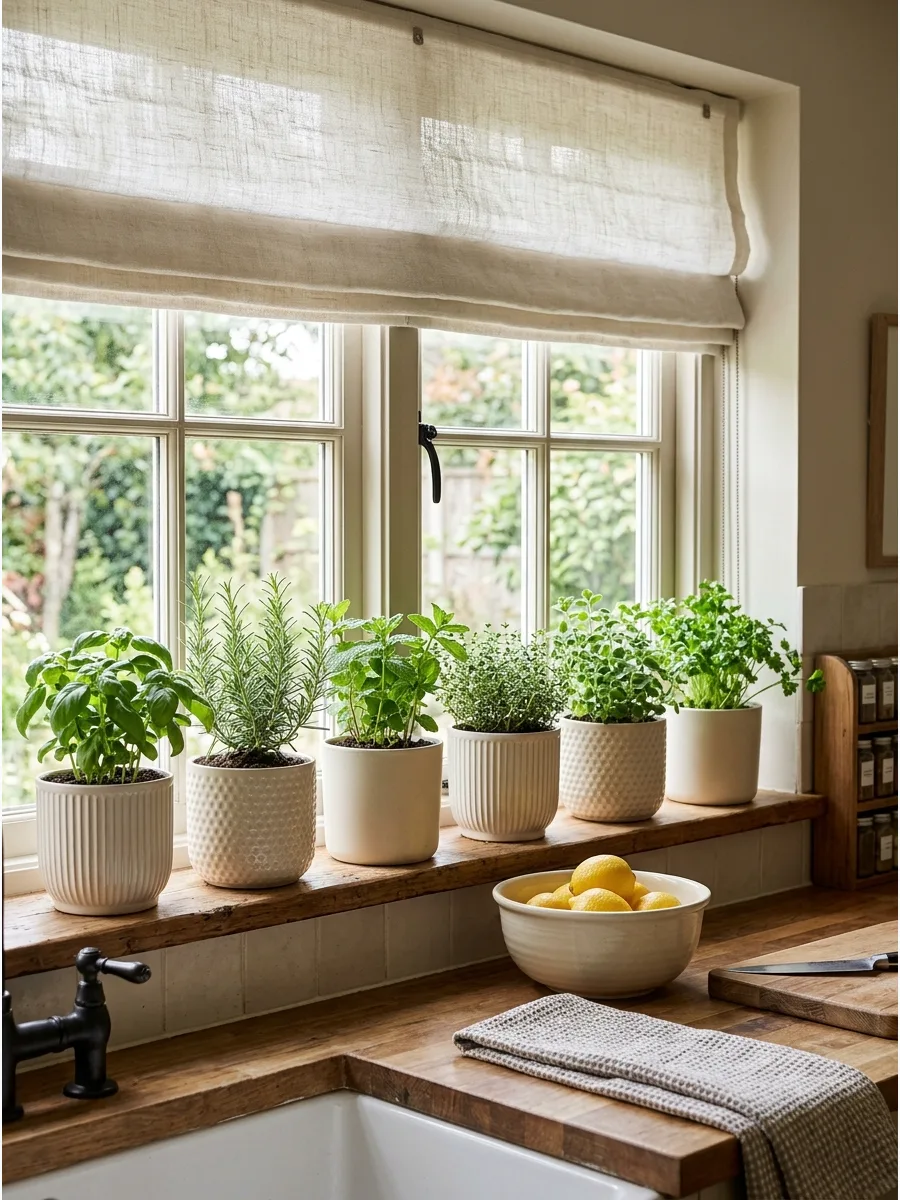
Warm-white or cream-colored pots offer a soft, clean look that blends into almost any kitchen style. They reflect light, helping to brighten up the window area and making the space feel larger.
Collect white ceramic pots in different textures and shapes to keep the display interesting without looking messy. This monochrome approach is very forgiving and always looks polished.
- Mix ribbed, hammered, and smooth finishes to add depth to a single-color collection.
- Choose pots with built-in saucers to keep the white ceramic looking tidy and leak-free.
- Pair these with light wood or marble surfaces for a classic, airy kitchen aesthetic.
Quick win: Use warm-white instead of bright stark white to avoid a clinical or cold feeling in the kitchen.
44. Combine Wood Shelves With Terracotta Pots
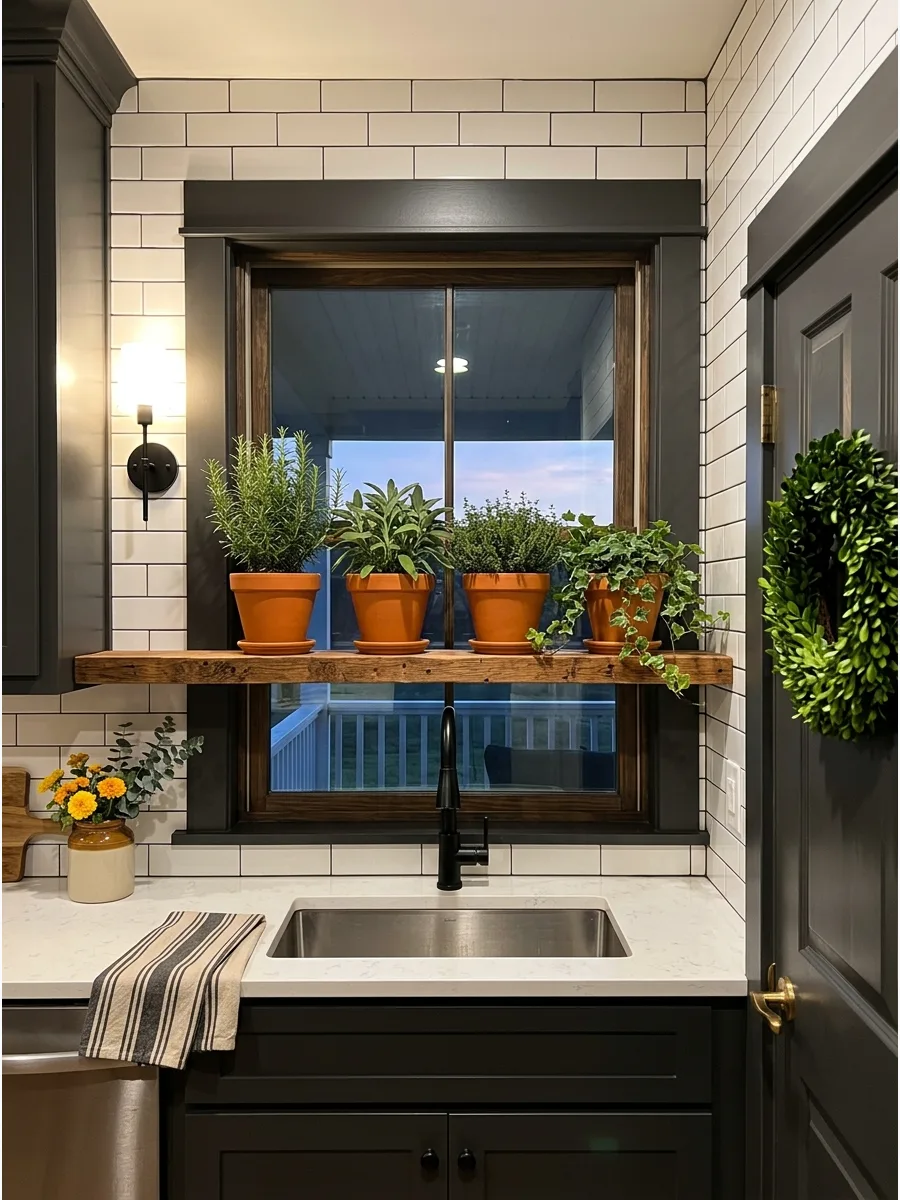
The combination of natural wood and orange clay terracotta is a classic choice for a cozy, functional kitchen. It brings an earthy, organic feel to the window that complements traditional and farmhouse styles.
Install a single reclaimed wood shelf across the window to hold a row of classic terracotta herb pots for an instant garden vibe. The porous clay is also excellent for the health of herbs like rosemary and sage.
- Seal the wood shelf with a water-resistant finish to prevent staining from damp terracotta.
- Soak new terracotta pots in water for an hour before planting to prevent them from sucking moisture out of the soil.
- Use different sizes of terracotta to break up the horizontal line of the shelf.
Most people skip this: Terracotta pots dry out faster than plastic or glazed ceramic, so check your herbs for water more frequently.
45. Create a Modern Glass-and-Metal Plant Shelf
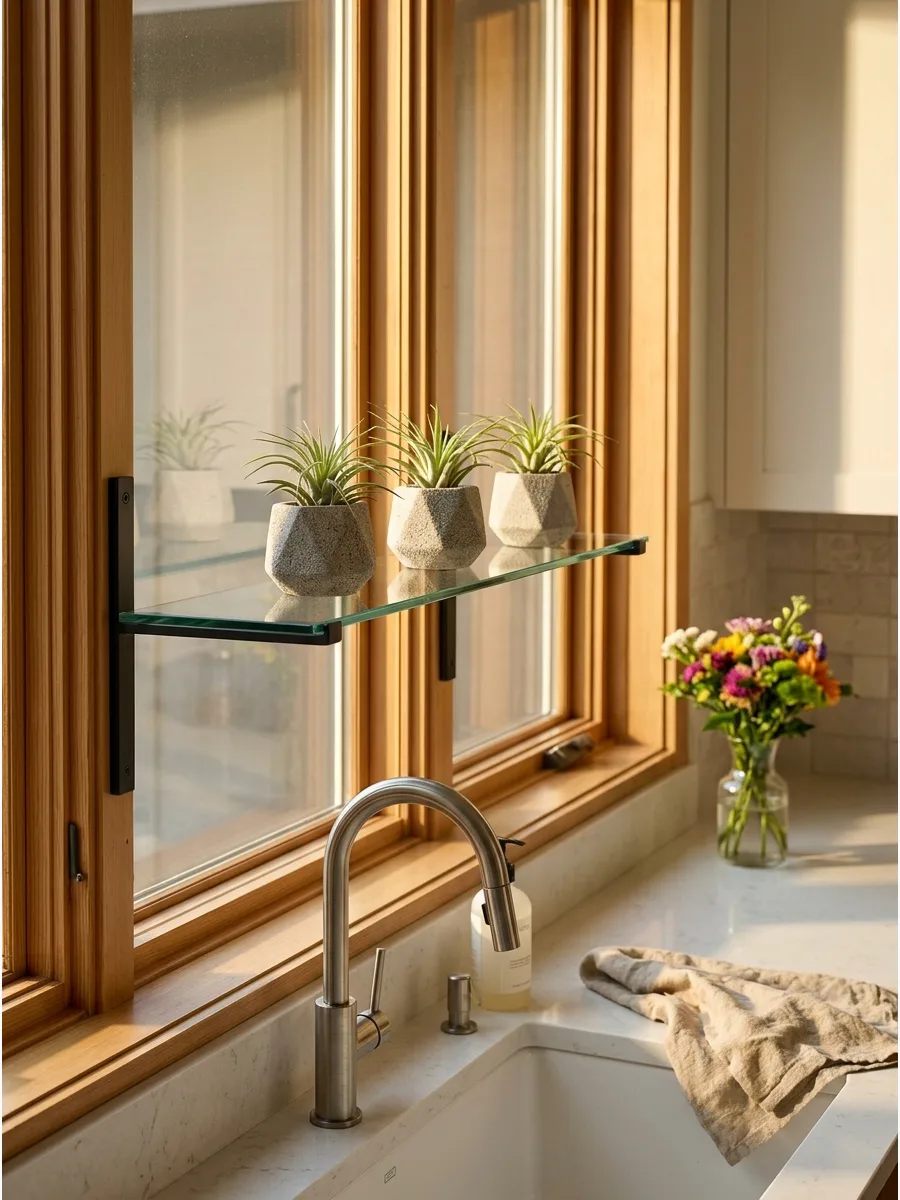
A glass shelf with slim metal brackets offers a high-end, modern look that doesn't block any light from entering the kitchen. It is an ideal solution for small kitchens where heavy wooden shelves might feel too bulky.
Opt for a thin glass shelf mounted at the midpoint of the window to hold lightweight plants like air plants or small succulents. This keeps the view through the window open while adding a layer of greenery.
- Ensure the brackets are securely anchored into the wall studs or window frame.
- Choose tempered glass for safety and durability in a high-traffic area like the kitchen.
- Keep the plant selection minimal to maintain the clean, modern lines of the glass.
Best shortcut: Use a glass cleaner once a week to keep the shelf sparkling, as dust and water spots show up quickly on clear surfaces.
46. Place All the Plants on a Waterproof Tray
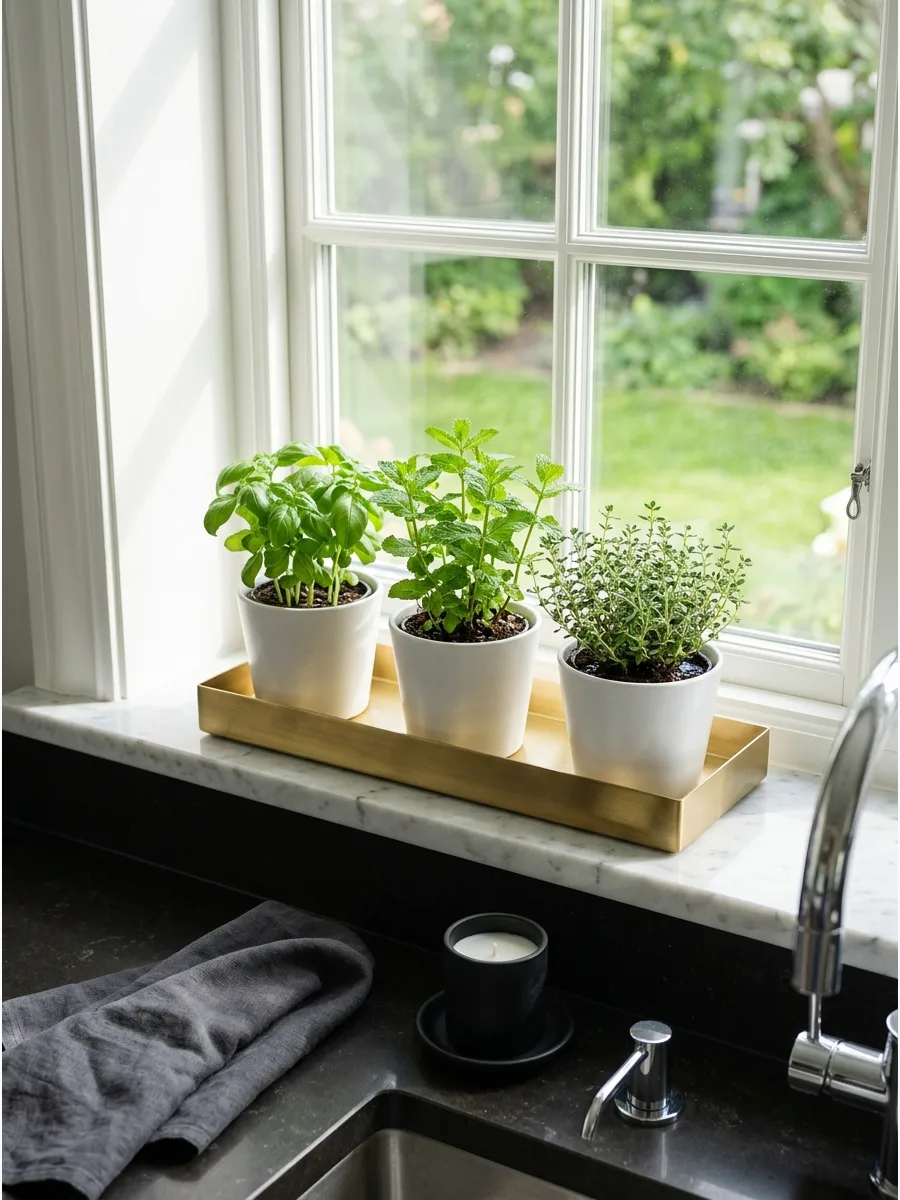
Arrange the kitchen window plants on one shallow waterproof tray. This protects the sill from water and allows the entire collection to be moved together when cleaning or rotating the plants.
Using a tray with a raised lip catches every stray drop of water before it ruins the window trim. Wood sills are prone to rot, so a barrier is non-negotiable for long-term maintenance.
- Trays cost under twenty dollars and last for years.
- Set the tray directly on the sill or a nearby counter.
- Choose a metal or plastic tray that matches the kitchen hardware.
Quick win: Add a layer of decorative river stones to the tray to keep pot bottoms out of standing water.
47. Choose Low-Light Plants for a North-Facing Window
Use pothos, snake plants, small philodendrons, or ZZ plants when the kitchen window receives limited natural light. Keep the arrangement simple and allow the soil to dry properly because plants often use water more slowly in lower light.
Stick to dark green varieties because they typically handle deep shade better than variegated types. Overwatering is the biggest risk in a north-facing spot, so feel the soil before grabbing the watering can.
- Pick up starter plants at any local nursery or hardware store.
- Place pots on the corners of the window frame where light is steadiest.
- Swap these for silk plants if the window is in a truly dark corner.
Most people skip this: Rotate the pots every week so the leaves don't all lean toward the glass.
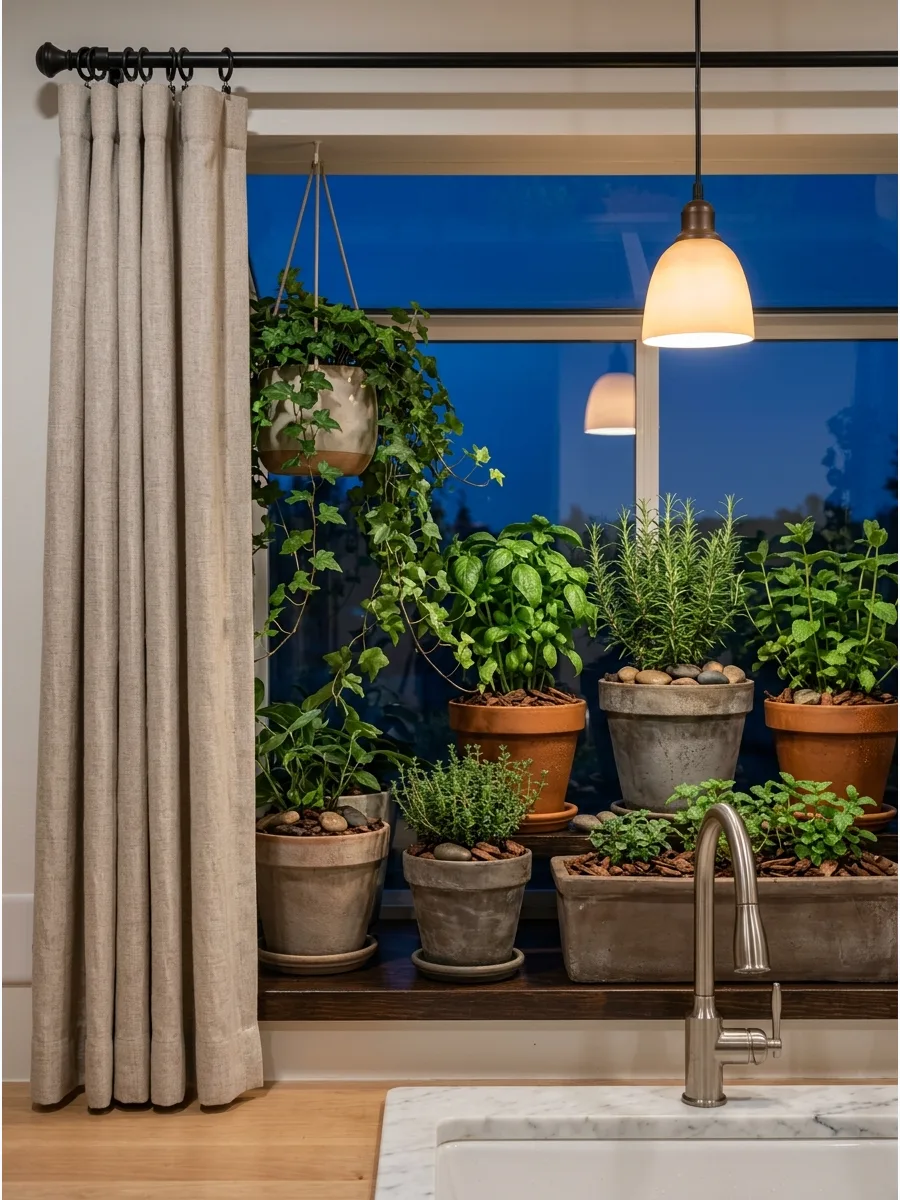
48. Build an East-Facing Foliage Garden
Fill an east-facing kitchen window with plants that enjoy gentle morning light, such as peperomia, spider plants, hoya, prayer plants, or small ferns. Mix leaf patterns and plant shapes to create a layered foliage display.
Group plants with different heights to mimic a natural garden and keep the view interesting. Morning sun is less likely to scorch delicate leaves, making this the best spot for thin-leaved varieties.
- Spend about an hour arranging the heights for the best look.
- Cluster three to five plants together for a lush, full appearance.
- Use a mix of hanging and tabletop pots to fill the vertical space.
Best shortcut: Use a small stack of cookbooks to boost a shorter plant so it catches more light.
49. Combine Herbs and Succulents in a South-Facing Window
Use a bright south-facing kitchen window for herbs, jade plants, aloe, and small succulents. Group plants with similar sunlight needs together and monitor the soil because containers may dry more quickly in strong light.
Check the soil moisture daily during summer months to prevent the herbs from wilting in the heat. Succulents can handle the dry air better, so place them closest to the glass.
- Budget about thirty dollars for a diverse mix of sun-loving plants.
- Line them up along the sunniest part of the kitchen counter.
- Keep the aloe plant near the stove for quick access to its soothing gel.
Quick win: Use unglazed clay pots for these plants to help the soil breathe in the high heat.
50. Add a Grow Light to a Kitchen Window Shelf
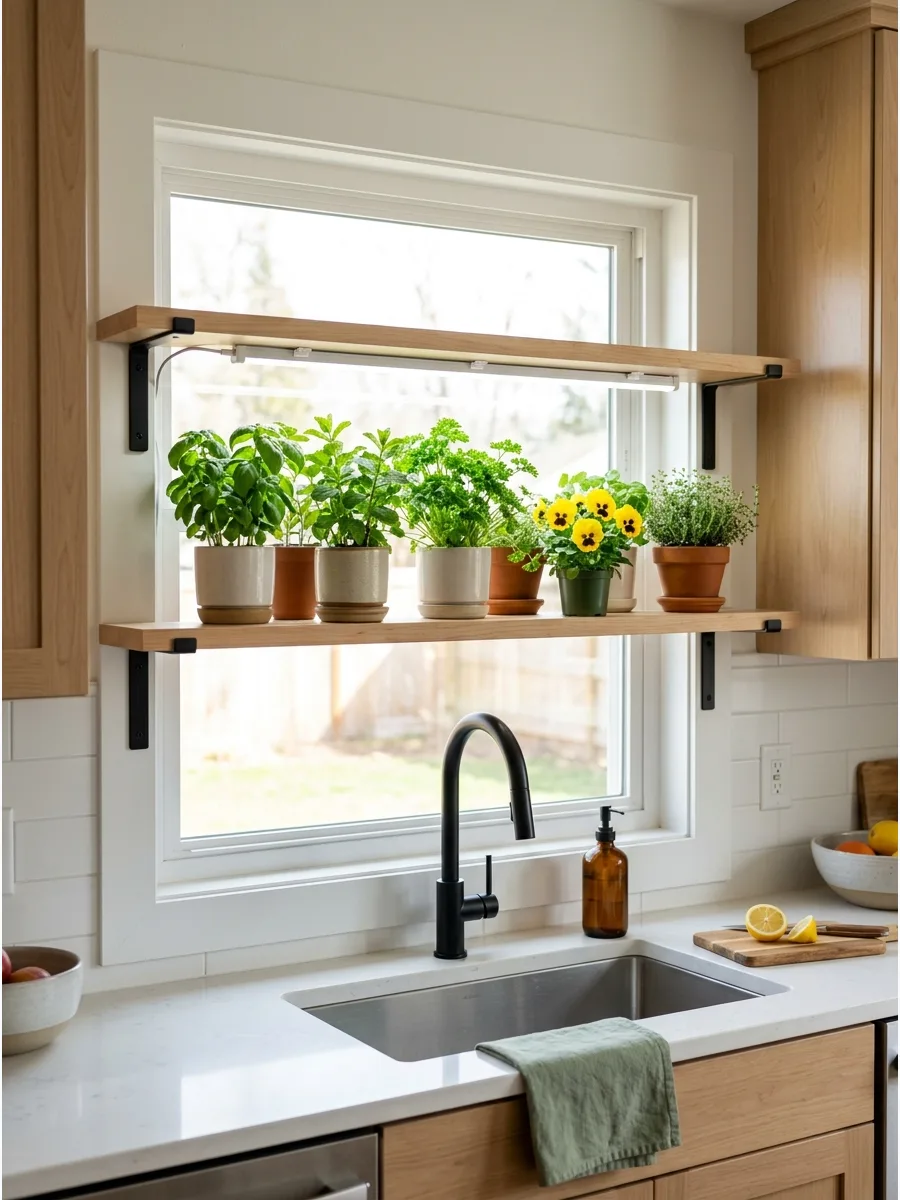
Install a small grow light above or under a kitchen window shelf to support plant health in dark seasons. This ensures your herbs stay productive even when the days are short or the sky is cloudy.
Mount the light on a timer so the plants get exactly twelve hours of brightness without any manual effort. Modern LED strips are thin enough to hide under the shelf lip, keeping the look clean.
- Installation takes about twenty minutes with adhesive strips.
- Attach the light to the underside of the cabinet or a floating shelf.
- Adjust the light height as the plants grow to prevent leaf burn.
Best shortcut: Choose a full spectrum bulb to avoid the harsh purple glow of older grow lights.
Frequently Asked Questions
What are the best low-maintenance plants for a kitchen window?
Pothos, Spider Plants, and Aloe Vera are excellent choices because they thrive in kitchen humidity and require minimal daily care. These hardy varieties handle varying light levels well and stay vibrant even with a busy cooking schedule.
Can I grow herbs in my kitchen window year-round?
You can definitely grow herbs like basil, mint, and rosemary year-round if they get plenty of bright light. For north-facing windows that lack sun, simply supplement with a small LED grow light to ensure your harvest stays healthy and productive.
How do I prevent fruit flies and gnats around my kitchen plants?
Prevent pests by ensuring your pots have great drainage and avoiding overwatering, which keeps the soil too damp. You can also use natural deterrents like a sprinkle of cinnamon on the soil or a light misting of neem oil.
What are some renter-friendly ways to hang plants in a window?
Tension rods are a fantastic drill-free way to hang plants using S-hooks inside the window frame. You can also use suction-cup shelves to maximize your vertical space and keep your countertops clear without leaving permanent marks.
How do I style plants so they don't look cluttered on the counter?
Try the 'rule of three' by grouping plants in odd numbers and using small pedestals to create varying heights. Stick to a cohesive color palette for your pots to give your kitchen a polished, intentional look.