30 Easy DIY Playground Ideas for Kids
This post may contain affiliate links: full affiliate disclosure.
Turning a backyard into a custom play zone is simpler than buying a massive commercial set. These projects use basic materials like wood, rope, and mulch to encourage movement and imagination.
Focus on sturdy builds and soft landing spots to keep the space safe and functional for years.
1. DIY Backyard Sandbox
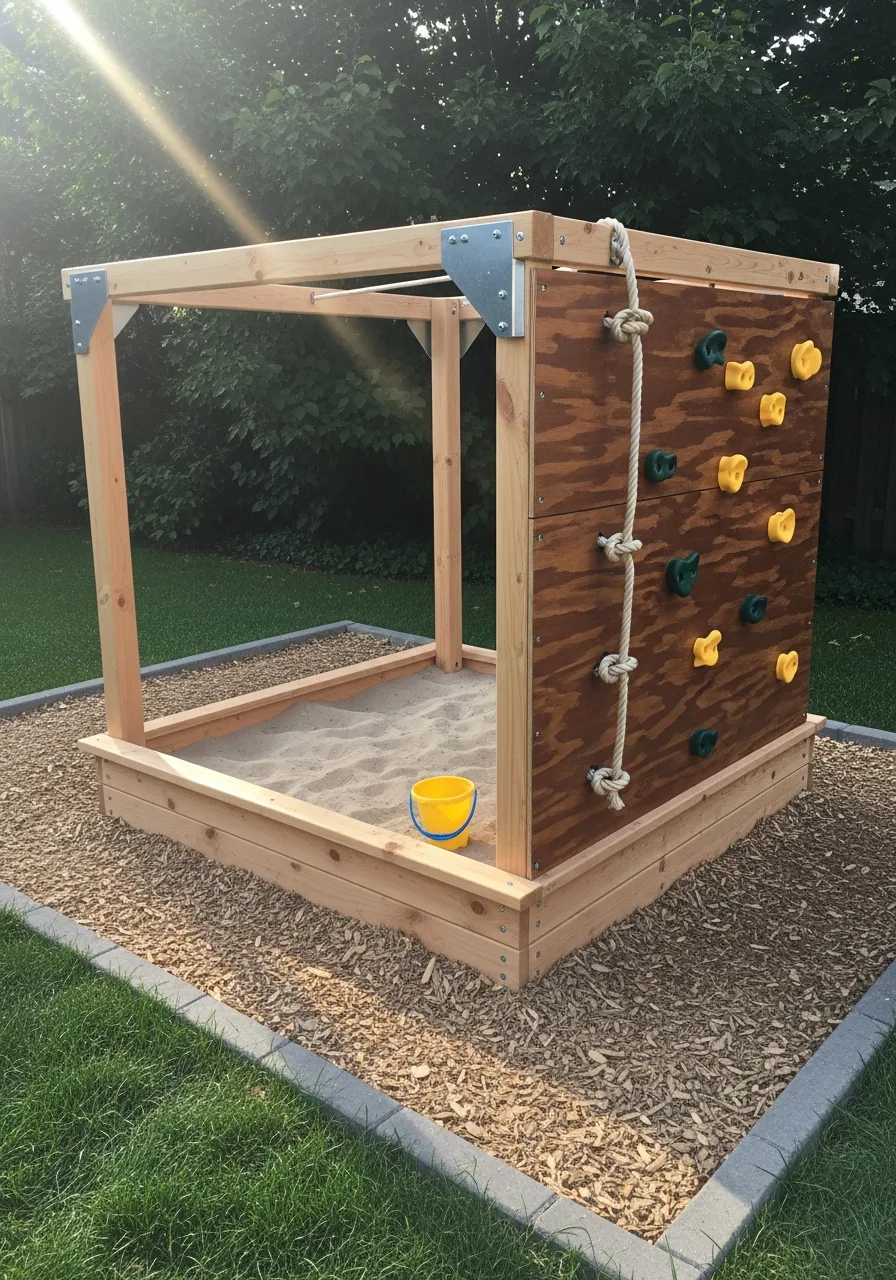
Build a rectangular frame using pressure-treated lumber and fill it with bags of play sand. Install a heavy-duty mesh or wooden cover to keep neighborhood cats and debris out of the sand when it is not in use. This setup encourages digging and sensory play for younger children.
Sandboxes work best in partially shaded areas to prevent the sand from getting too hot on summer days.
- Budget: $60-$100 for lumber and play sand
- Line the bottom with landscape fabric to prevent weeds while allowing drainage
- Add wide top boards to create a built-in bench for kids to sit on while playing
Quick win: Use cedar wood because it naturally resists rot and insects without needing harsh chemical treatments.
2. Tire Swing Play Area
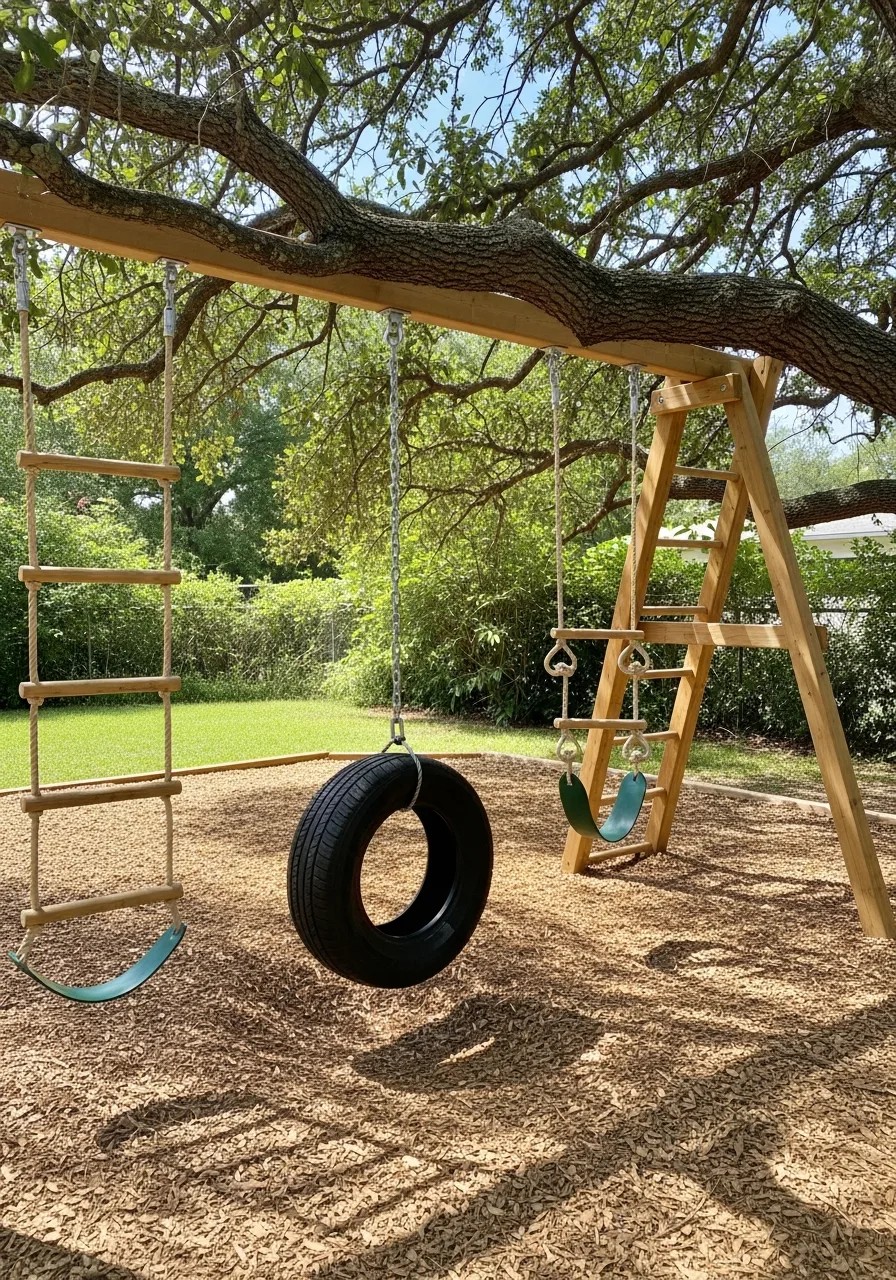
Hang a sturdy tire swing from a thick, healthy tree branch or a dedicated wooden swing frame. Place a thick layer of rubber mulch or wood chips underneath to cushion any accidental falls. This classic feature provides hours of movement and fits easily into a corner of the yard.
A horizontal tire mount is often more stable for multiple kids than a vertical one.
- Sourcing: Check local auto shops for used tires that can be cleaned and repurposed
- Use a swivel hanger to prevent the chain from twisting and wearing down the branch
- Drill small holes in the bottom of the tire to prevent rainwater from pooling inside
Most people skip this: Check the health of the tree branch every season to ensure it remains strong enough for the weight.
3. Wooden Balance Beam
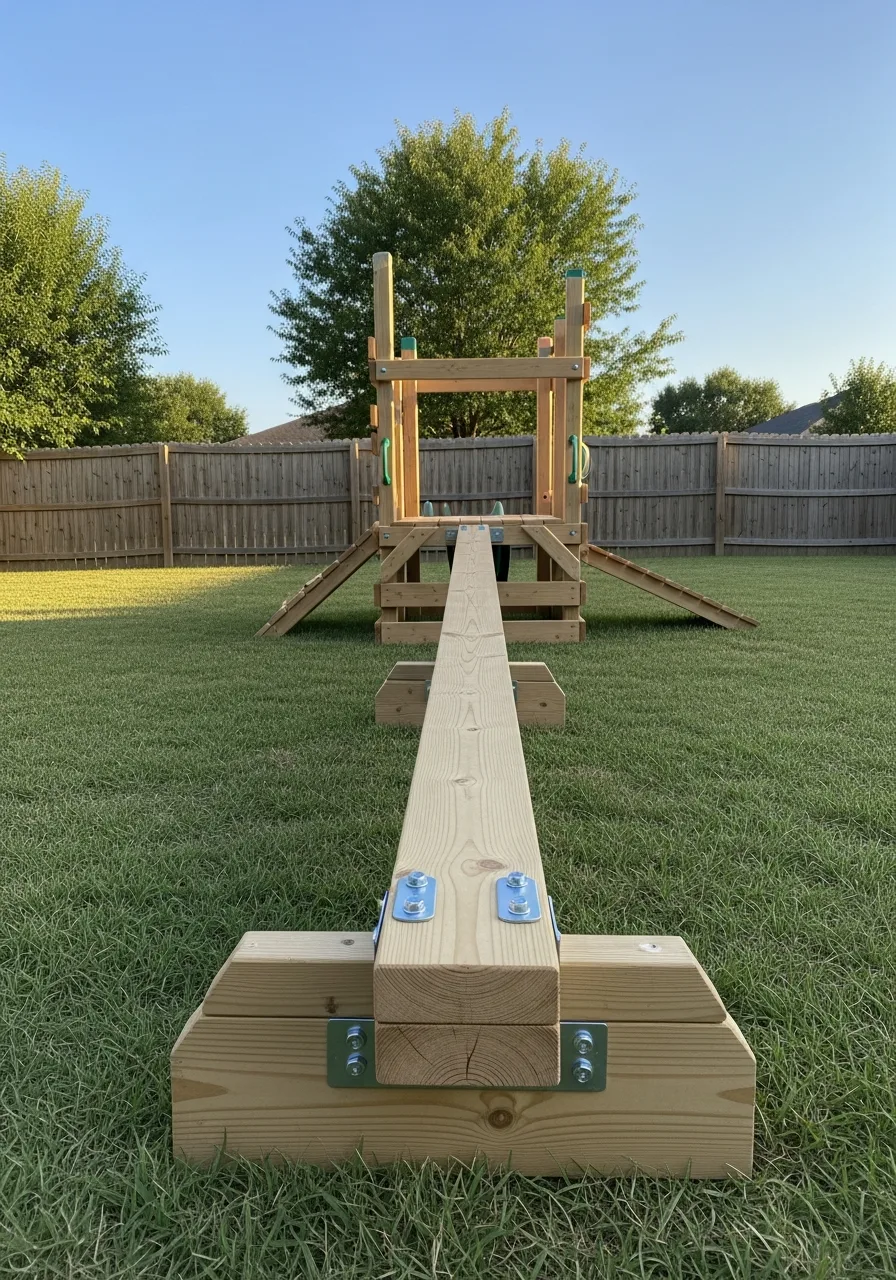
Place a smooth 4×4 wooden beam across two low blocks to create a simple balancing game. Keep the beam no more than six inches off the ground to ensure safety for toddlers and young children. This project is budget-friendly and helps develop coordination and motor skills.
Sand the wood thoroughly to prevent splinters before kids start using it.
- Budget: Under $30 for a single beam and support scraps
- Secure the beam to the supports with long wood screws for stability
- Paint the beam in bright, weather-resistant colors to make it a focal point
Best shortcut: Use a pressure-treated 4×4 post to ensure the beam lasts through rain and snow without warping.
4. DIY Mud Kitchen
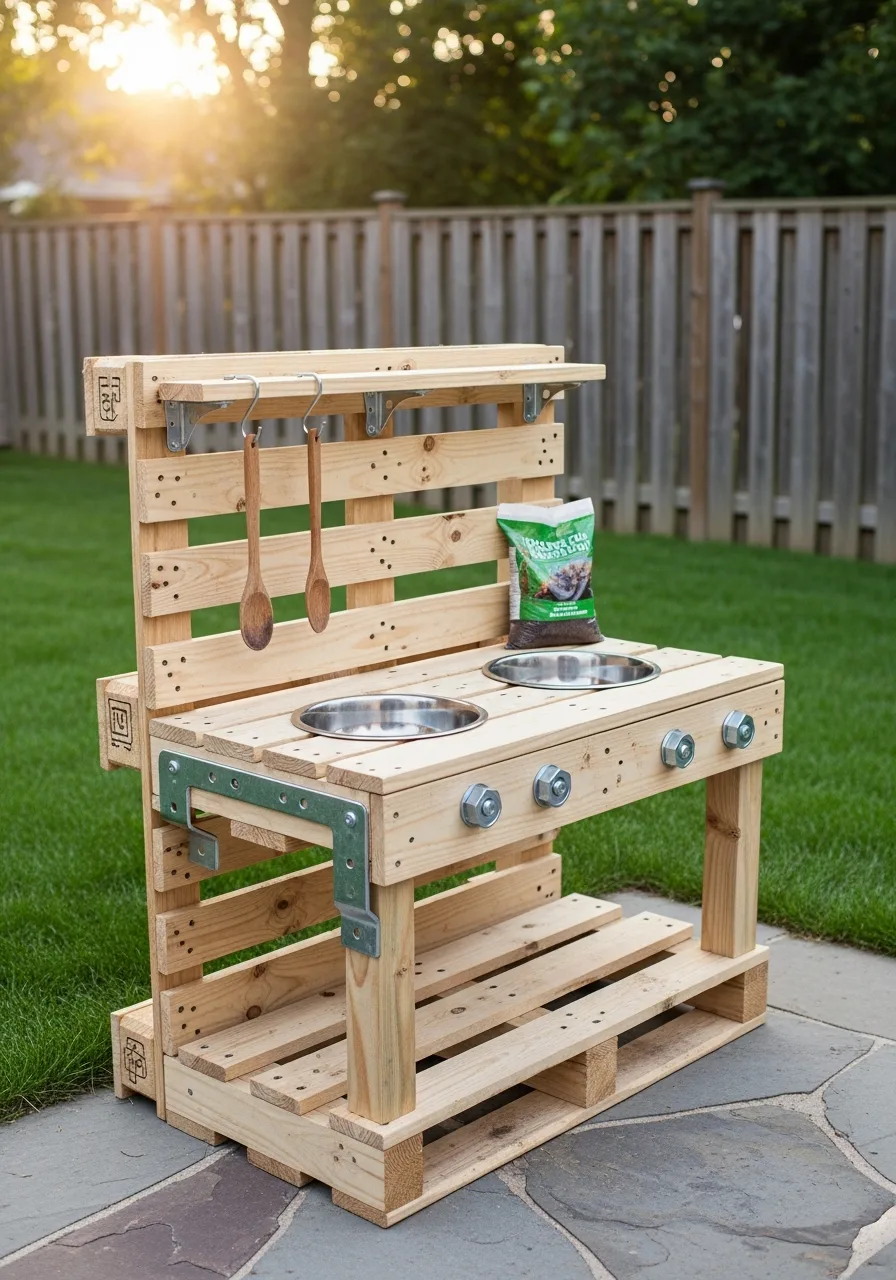
Build a small outdoor kitchen using old pallets, stainless steel bowls, and wooden spoons. Mount a small water bucket with a spigot nearby so kids can easily mix water with dirt for 'cooking'. This station encourages messy, creative play that stays outside of the house.
Pallets are often free, making this one of the most affordable playground additions.
- Timing: 3-4 hours to assemble and sand
- Add a small shelf above the 'stove' to store old pots and pans
- Seal the wood with a clear outdoor finish to prevent water damage from spills
Quick win: Use real kitchen utensils from a thrift store instead of plastic toys for a more engaging experience.
5. Backyard Climbing Wall
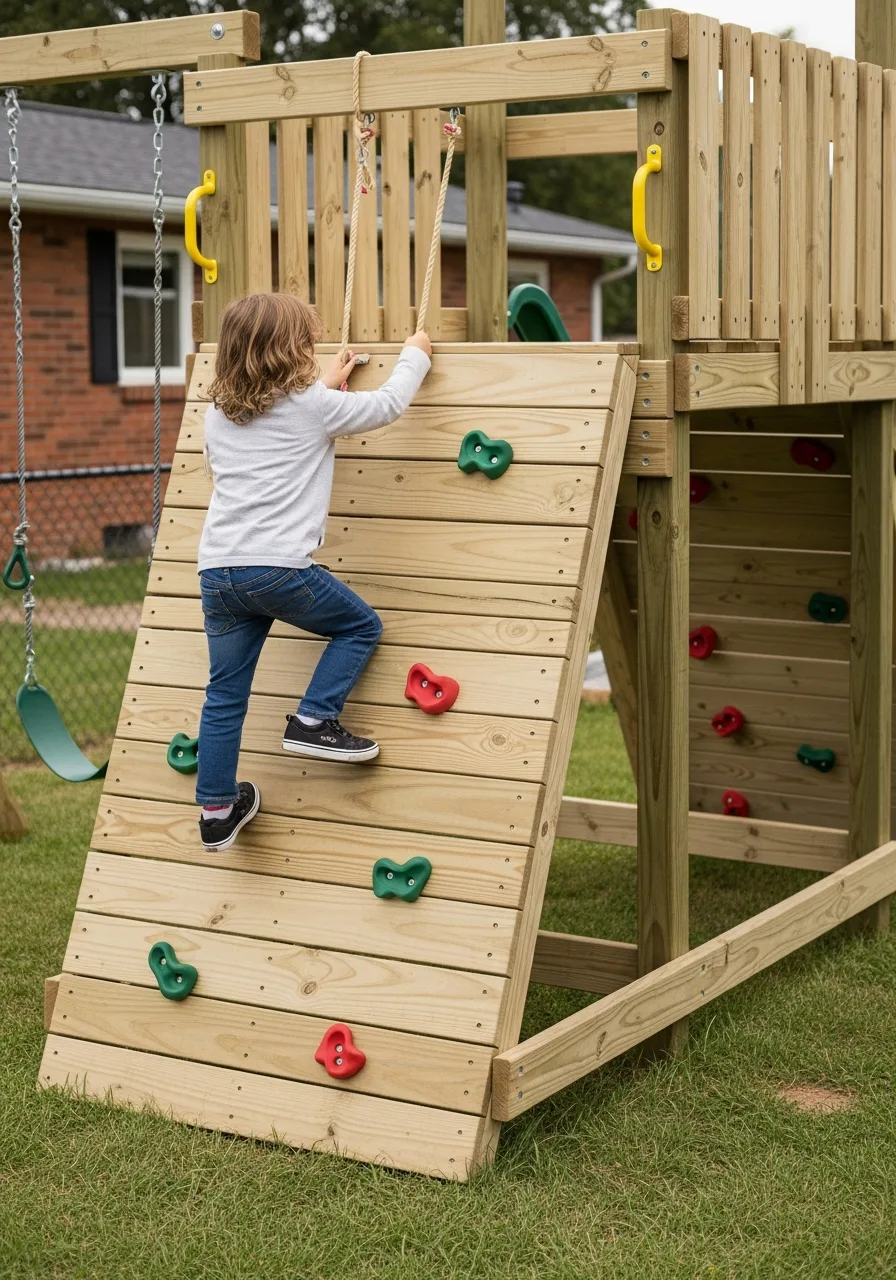
Attach colorful climbing holds to a sturdy wooden panel or the side of an existing play structure. Keep the wall short enough that kids can reach the top without needing a harness, and place a thick mat at the base. This builds upper body strength and confidence in a controlled environment.
Ensure the panel is securely anchored to a fence or frame to handle the weight.
- Budget: $100-$150 depending on the number of holds
- Space the holds about 12 inches apart for younger children to reach easily
- Use 3/4-inch exterior grade plywood for the wall to ensure it doesn't flex
Most people skip this: Tighten the bolts on the climbing holds once a month as they can loosen with frequent use.
6. Tree Stump Stepping Path
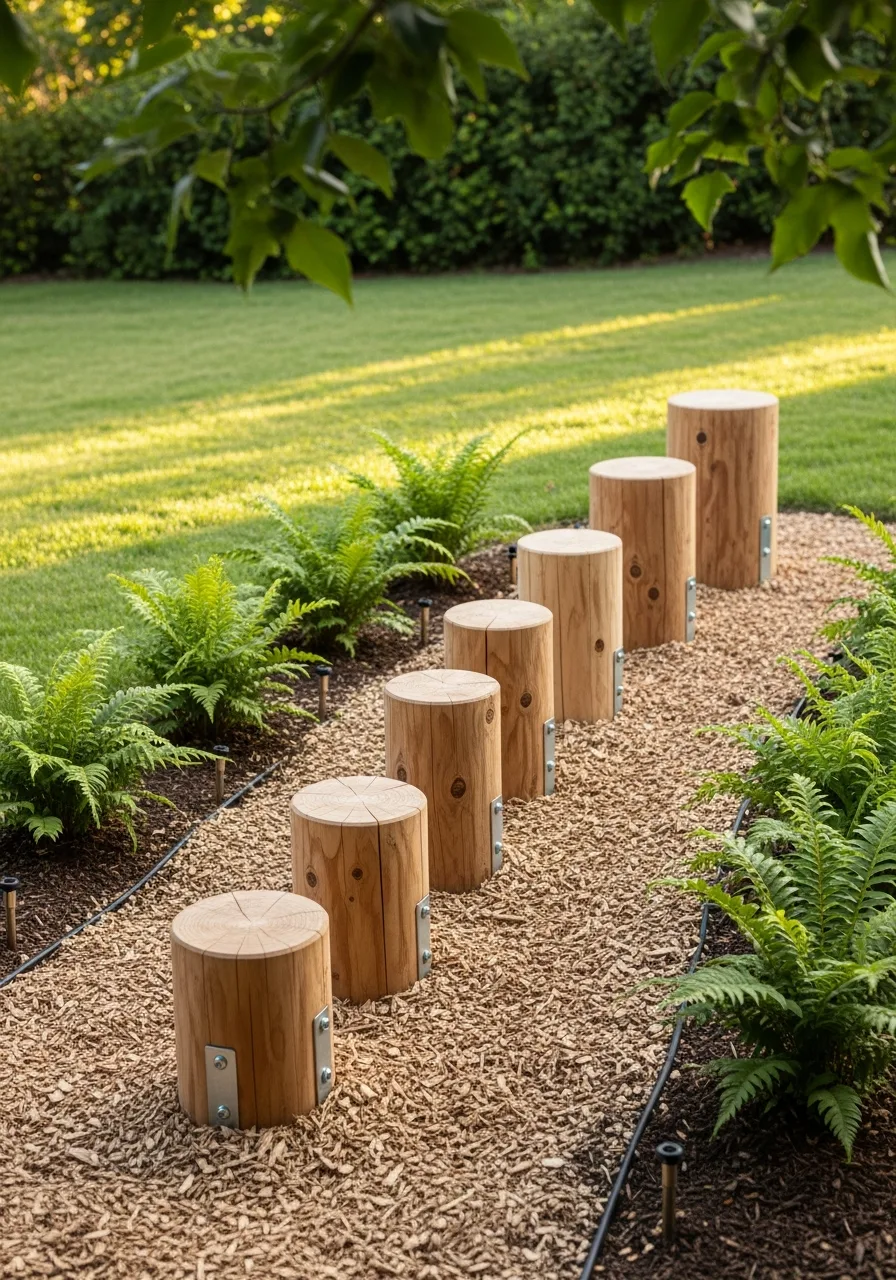
Arrange tree stumps of varying heights in a winding path across a section of the yard. Dig shallow holes for each stump and pack the dirt tightly around the base to keep them from tipping over. This creates a natural obstacle course that blends perfectly into the landscape.
It is an excellent way to use logs from a fallen tree or a local tree service.
- Sourcing: Contact local arborists who often have stump sections available for free
- Strip the bark off the stumps to prevent them from becoming slippery when wet
- Place them close enough for a child to step from one to the next comfortably
Best shortcut: Apply a wood sealer to the top grain of the stumps to prevent them from cracking over time.
7. DIY Water Play Station
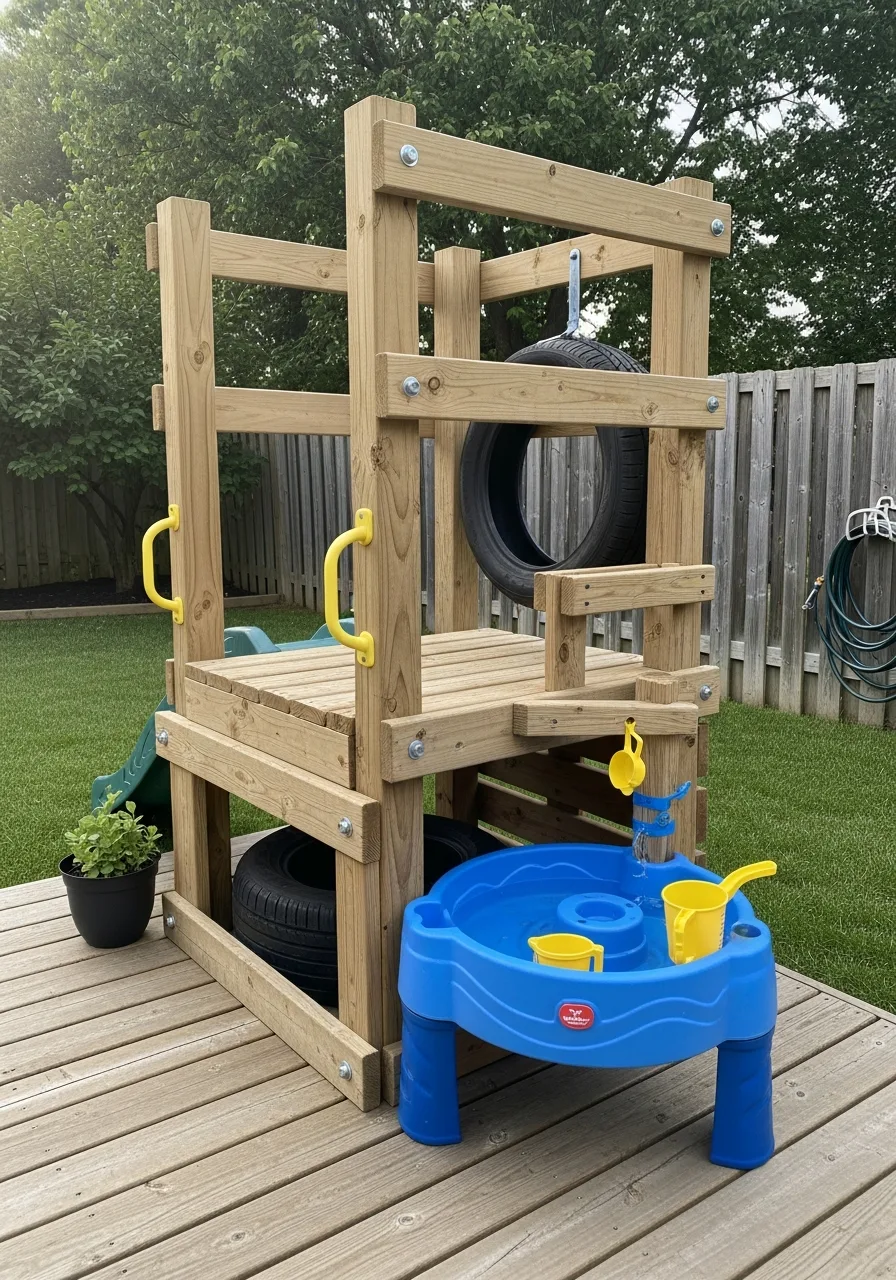
Set up a sensory station with a low table, plastic buckets, funnels, and measuring cups. Connect a simple PVC pipe system to the side of a fence to let kids pour water through a series of tubes. This is a perfect summer activity that keeps children cool and engaged with liquid physics.
It works best on a deck or patio where the water can drain away safely.
- Budget: $40-$80 for a table and accessories
- Store the accessories in a mesh bag so they can air dry and prevent mold
- Use a shallow plastic bin as a table if you are working with a very small space
Quick win: Add a few drops of food coloring to the water to make the pouring experiments more visually exciting.
8. Outdoor Chalkboard Wall
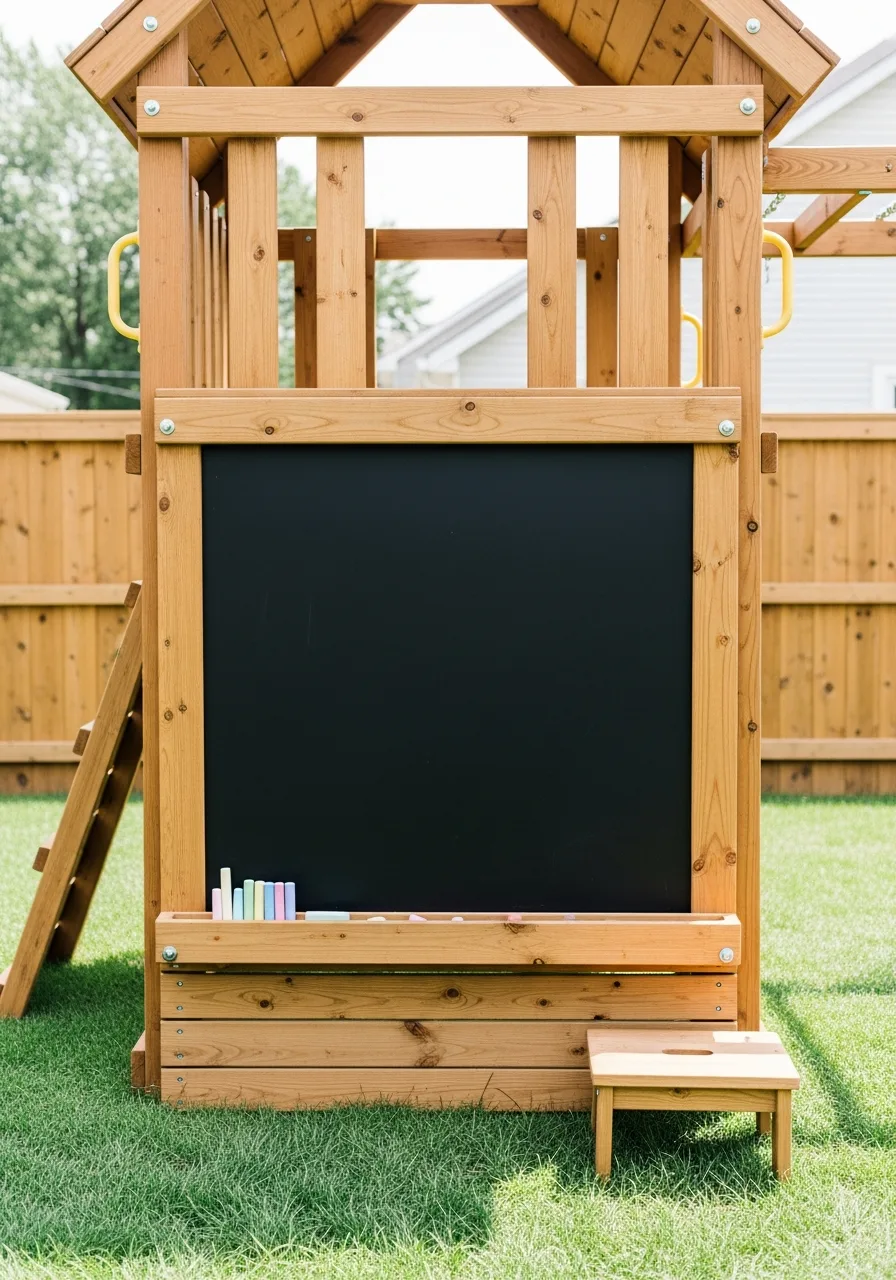
Mount a large piece of weather-treated plywood painted with chalkboard paint onto a fence or exterior wall.
Include a small gutter or shelf at the bottom to hold chalk and erasers so they don't get lost in the grass. This gives kids a vertical surface for drawing, practicing letters, or playing school. It is an easy way to add a creative zone without taking up any floor space.
- Budget: $30-$50 for paint and plywood
- Apply at least three coats of chalkboard paint for a durable, smooth surface
- Drill small drainage holes in the chalk tray to prevent rainwater from dissolving the chalk
Most people skip this: Use 'seasoning' by rubbing the side of a piece of chalk over the entire surface and erasing it before the first use.
9. Mini Obstacle Course
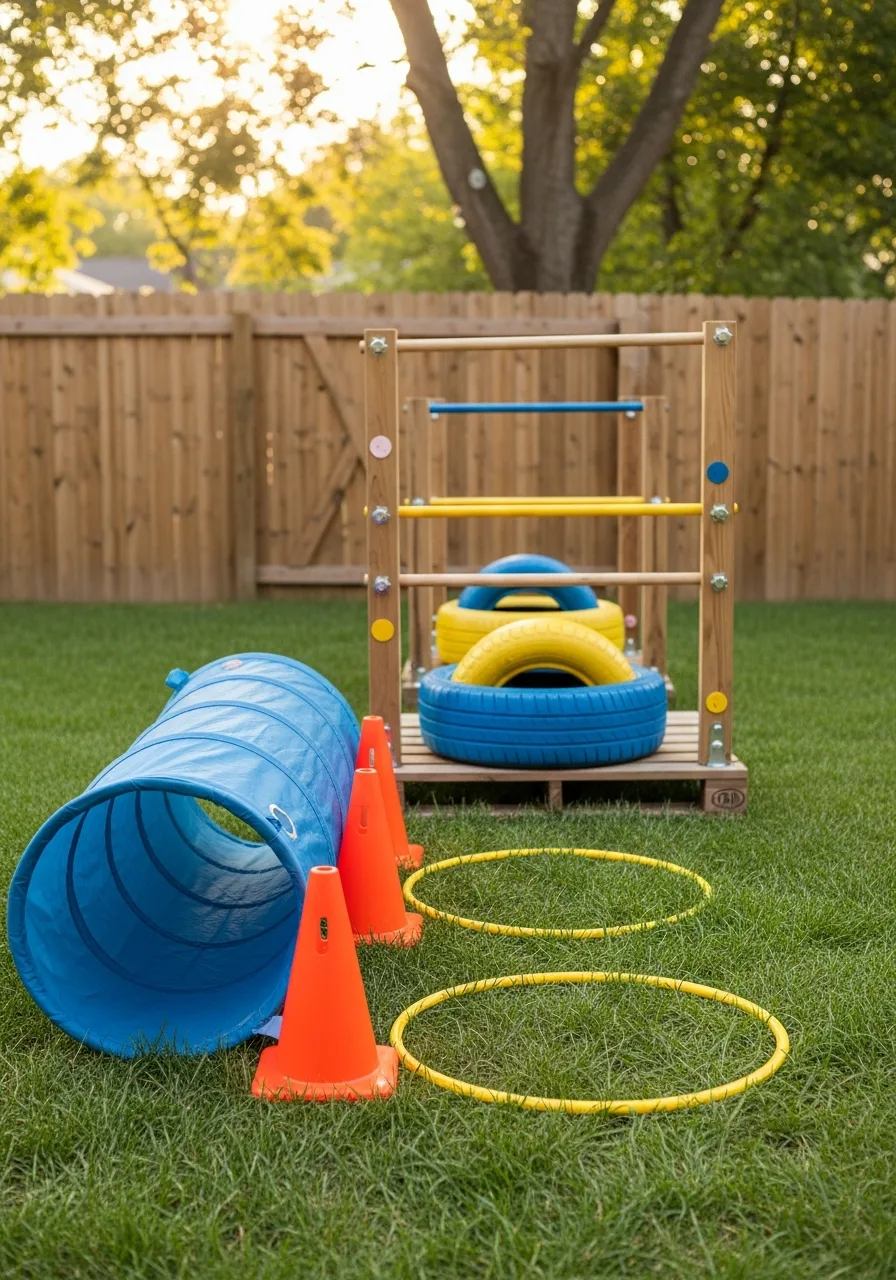
Use cones, hula hoops, and tunnels to create a flexible course that can be rearranged every week. Incorporate a timer or a 'finish line' ribbon to turn the course into a friendly competition. This setup encourages high-energy play and can be packed away in a storage bin when not in use.
It is the most versatile way to use a flat lawn area.
- Sourcing: Many pieces can be found at local dollar stores or sports shops
- Set the course up on grass to provide a soft landing for jumps and crawls
- Use pool noodles as flexible hurdles by arching them and securing the ends with garden stakes
Best shortcut: Use lawn-safe spray paint to mark out 'stations' if you don't want to store bulky equipment.
10. Pallet Playhouse
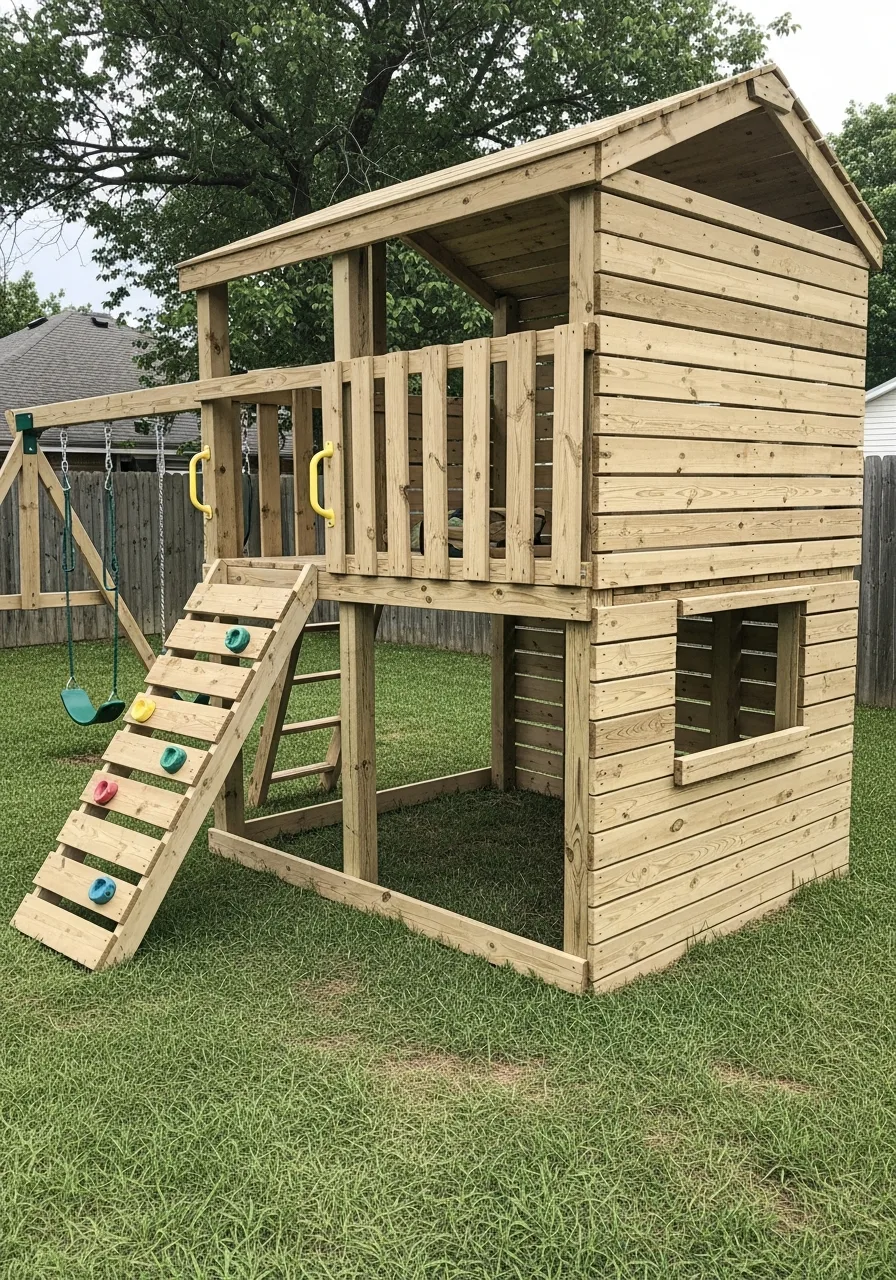
Assemble a simple open-air playhouse using heat-treated pallets for the walls and floor. Paint the structure in bright colors or soft neutrals to make it a stylish addition to the backyard landscape. This creates a dedicated clubhouse for pretend play and reading.
Pallets provide a sturdy frame that is easy to customize with windows or a small roof.
- Timing: One weekend for assembly and painting
- Look for pallets marked with 'HT' to ensure they were heat-treated rather than chemically treated
- Add a piece of outdoor fabric or a tarp as a roof to provide shade inside
Quick win: Sand the edges of every pallet slat to prevent splinters before letting kids inside the playhouse.
11. DIY Swing Set
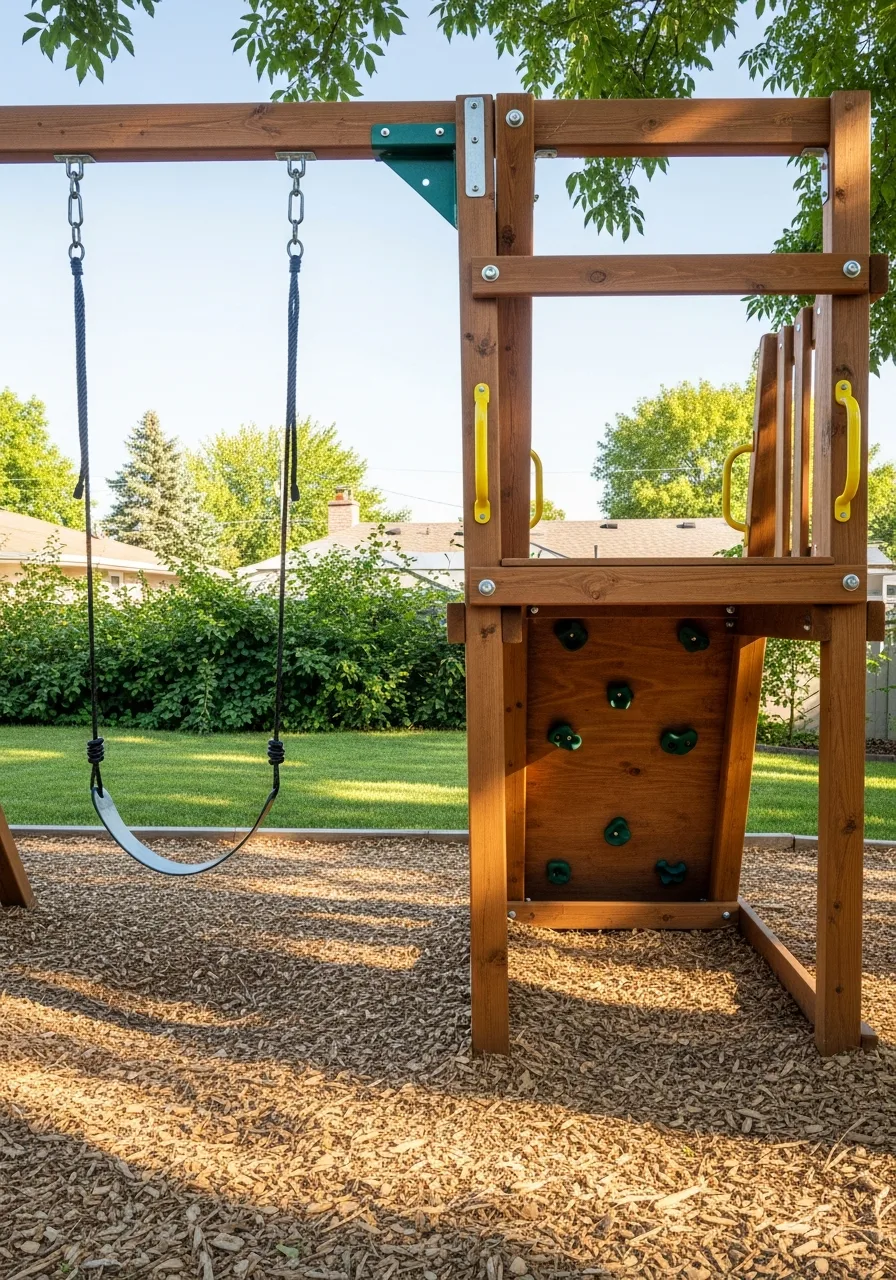
Build a basic A-frame swing set using heavy-duty 4×4 posts and a 4×6 top beam. Ensure the frame is anchored deep into the ground with concrete or heavy-duty anchors to prevent tipping during high swings. A simple two-swing setup provides a classic playground experience without the bulk of a full tower.
Leave at least six feet of clear space in front and behind the swings.
- Budget: $150-$250 for lumber and hardware
- Use heavy-duty swing hangers that bolt through the top beam for maximum safety
- Check all bolts and nuts for tightness every spring and fall
Most people skip this: Use belt-style swings instead of hard plastic seats to reduce the impact if a child is accidentally hit by a moving swing.
12. Climbing Rope Area
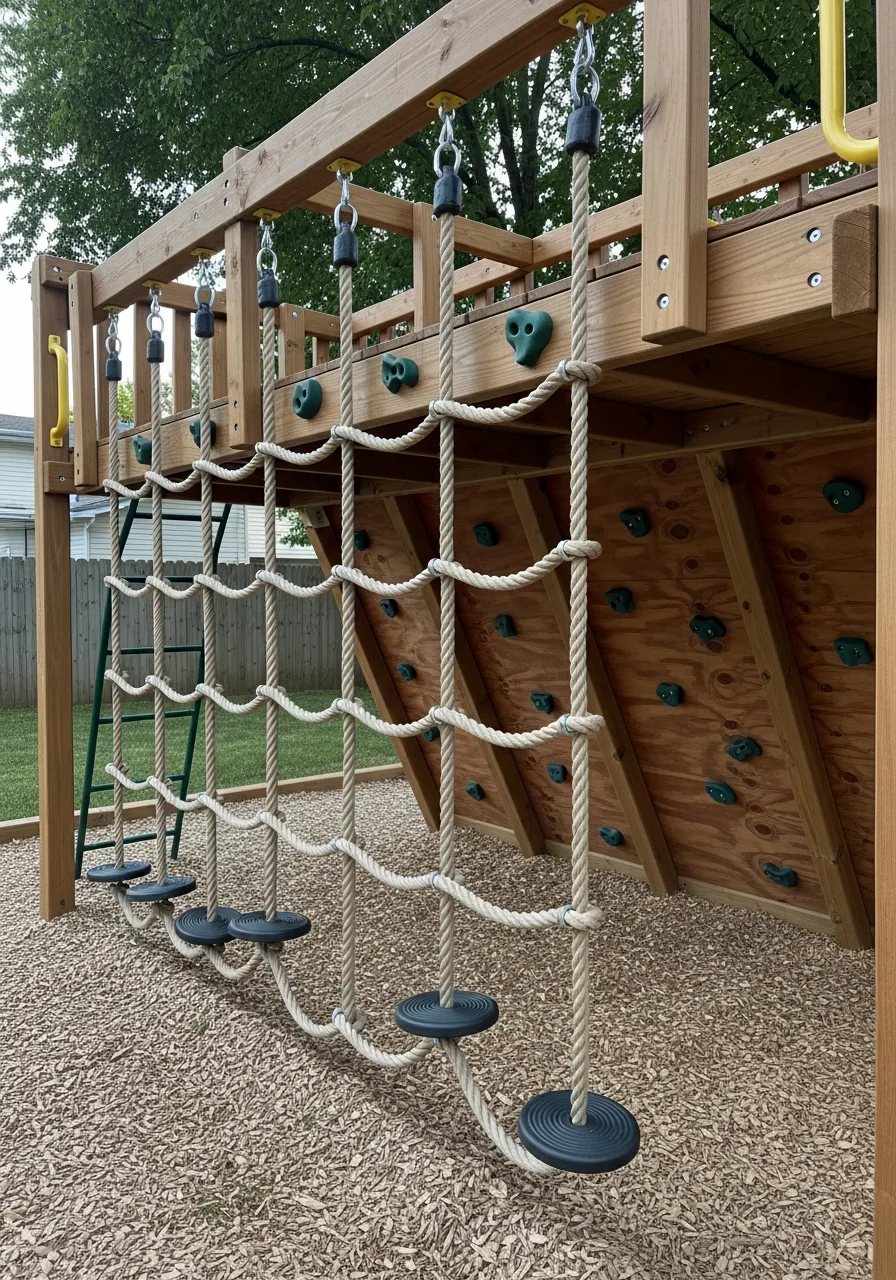
Add a thick climbing rope with integrated knots or foot discs to a sturdy tree or play frame. Place a thick rubber mat or deep mulch at the base to provide a safe landing zone for climbers. This activity builds grip strength and coordination for older children.
Make sure the rope is rated for outdoor use and high weight capacities.
- Budget: $30-$60 for a high-quality rope
- Use a heavy-duty carabiner to make it easy to take the rope down during winter months
- Ensure the rope is long enough to reach within a foot of the ground for easy mounting
Best shortcut: Look for a rope with pre-made knots to help younger kids find their footing as they climb.
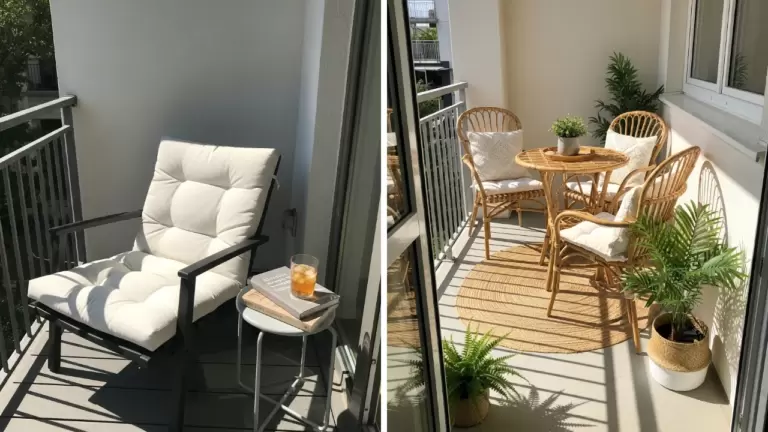
13. Backyard Reading Nook
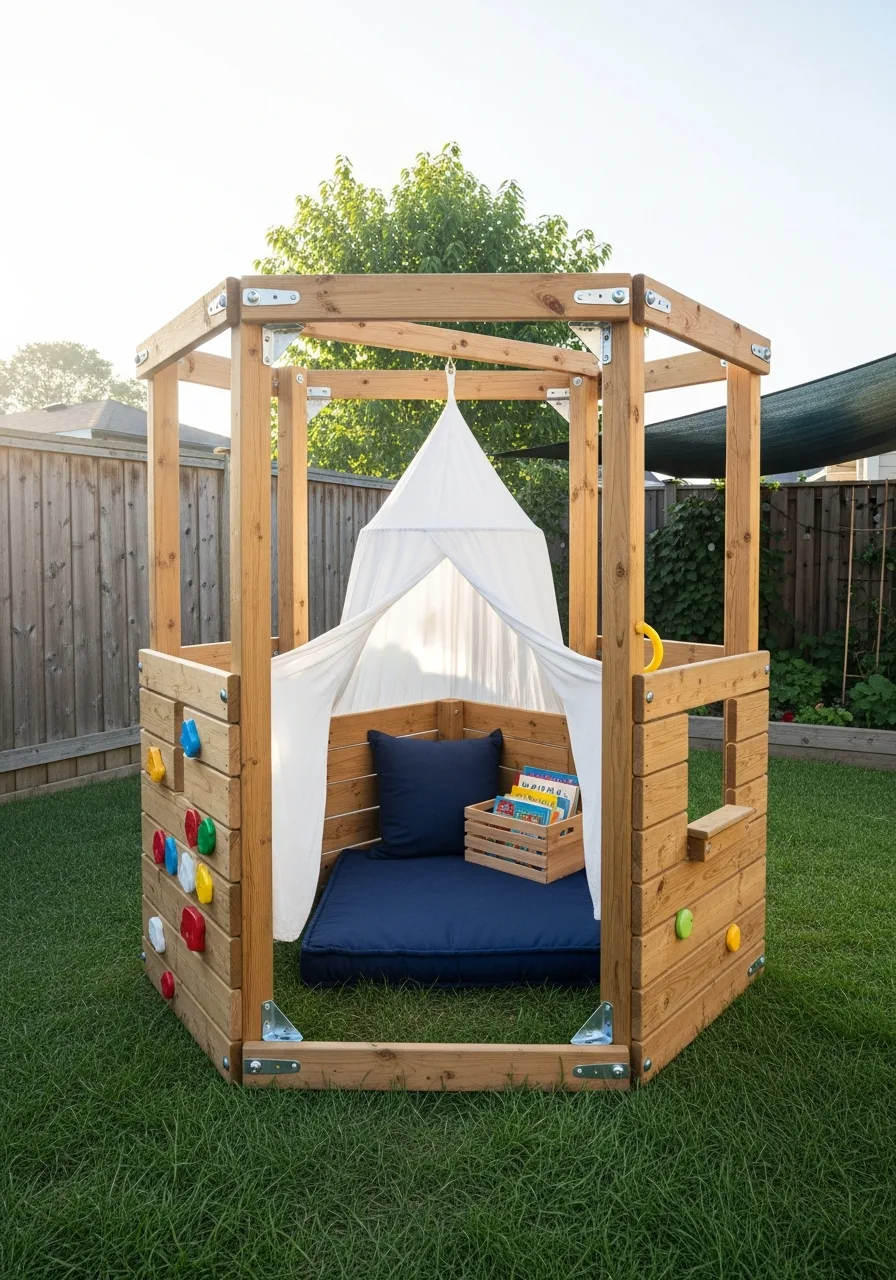
Create a quiet corner with weather-resistant floor cushions and a canopy for shade.
Use a small outdoor bin to store a rotating selection of books so they stay dry and clean. This provides a calm space for children to relax between active play sessions. Place the nook in a low-traffic area of the yard to maintain a peaceful atmosphere.
- Budget: $50-$100 for cushions and a canopy
- Hang a battery-operated lantern inside the canopy for reading during the evening
- Choose cushions with removable, washable covers to handle outdoor dirt
Quick win: Use an old patio umbrella as a quick and sturdy shade structure for the reading area.
14. DIY Music Wall
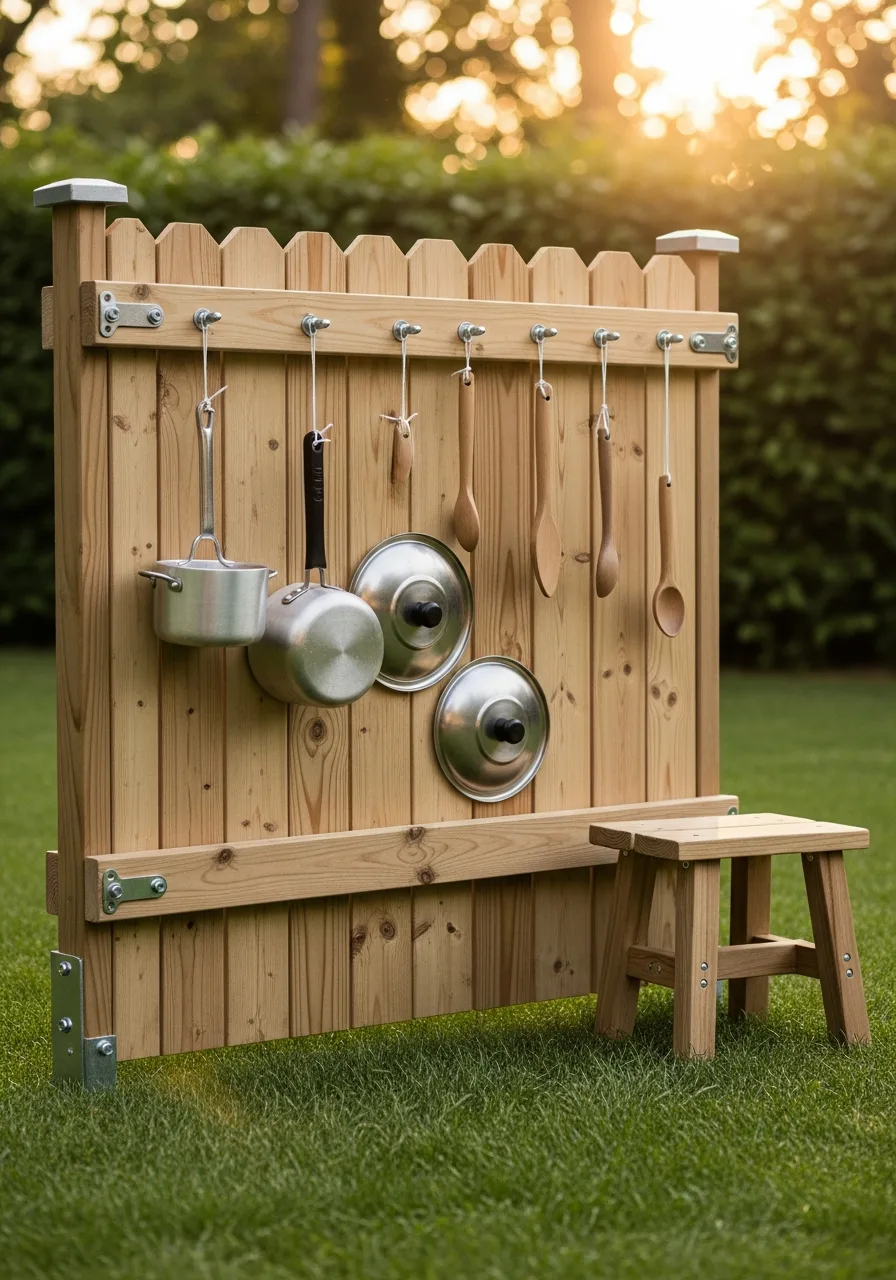
Attach old metal pots, pans, bells, and lids to a wooden fence or a freestanding frame. Provide a variety of wooden spoons and plastic mallets so kids can experiment with different sounds. This sensory station encourages auditory exploration and creative expression.
It is a great way to recycle old kitchenware that is no longer used for cooking.
- Timing: 1 hour to mount and organize
- Use stainless steel items to prevent rust if the wall is exposed to rain
- Space the items far enough apart so kids can hit them individually without overlapping sounds
Most people skip this: Tie the mallets and spoons to the fence with long nylon cords so they never get lost in the yard.
15. Small Slide Zone
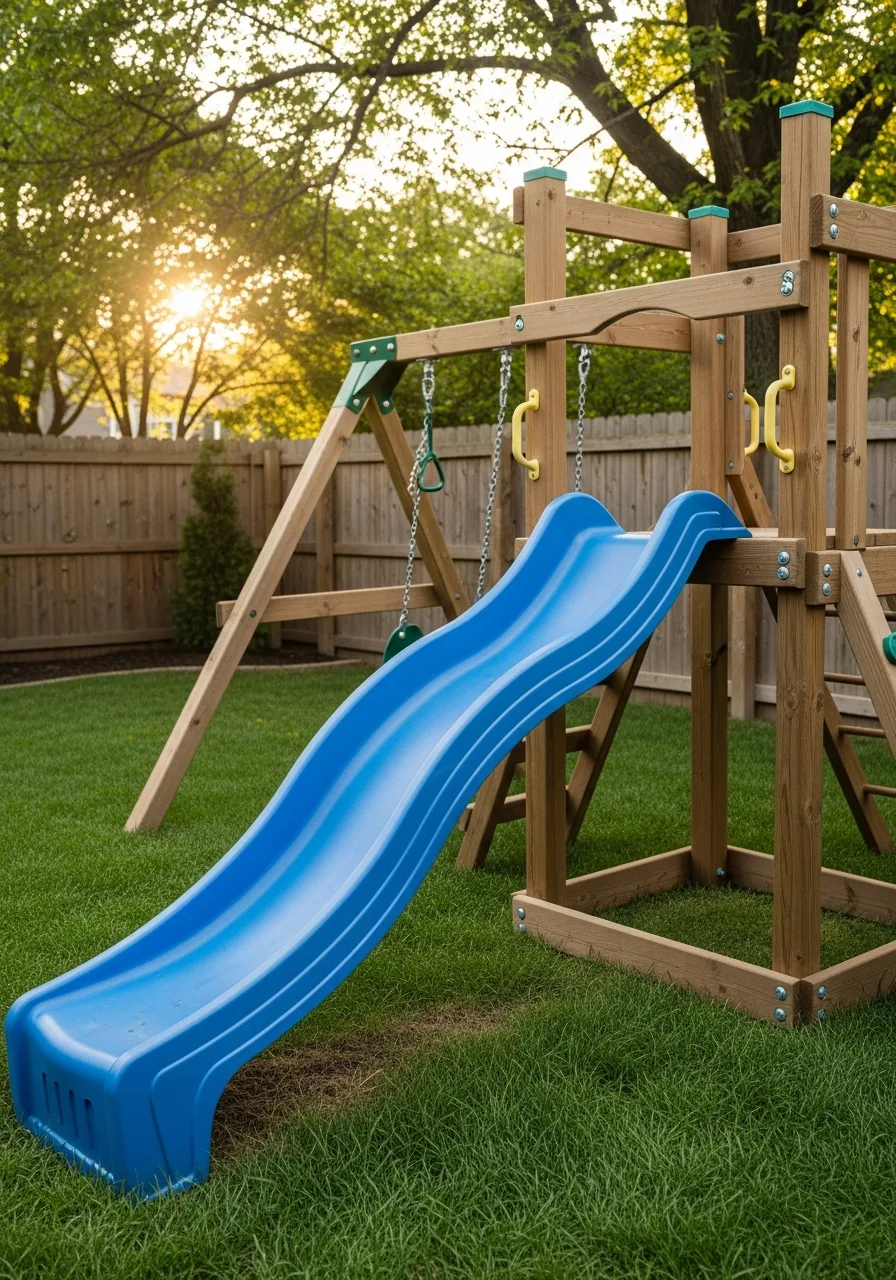
Install a standalone plastic or wooden slide onto a small mound or a low platform. Position the end of the slide over a soft landing spot like grass or a rubber mat to prevent hard landings. A slide is a fundamental playground piece that provides immediate reward and movement.
Ensure the slide is UV-resistant so it doesn't become brittle in the sun.
- Budget: $80-$150 for a standalone slide
- Secure the base of the ladder to the ground with stakes to prevent it from shifting
- Wipe the slide down with a damp cloth regularly to keep it fast and smooth
Best shortcut: Buy a slide-only attachment and build your own wooden steps to save money on a full structure.
16. Natural Log Climber

Use smooth logs placed low to the ground for climbing and crawling. This gives the playground a nature-inspired look that blends into the garden.
Sand the wood thoroughly to prevent splinters while keeping the natural bark for extra grip. Raw wood looks better than plastic and lasts for years if treated properly.
- Check with local arborists for free or low-cost logs.
- Dig shallow trenches to stabilize the logs and prevent rolling.
- Apply a clear outdoor sealant to prevent rot and moisture damage.
Most people skip this: Anchoring logs with rebar prevents them from shifting during heavy play.
17. Backyard Tunnel Course
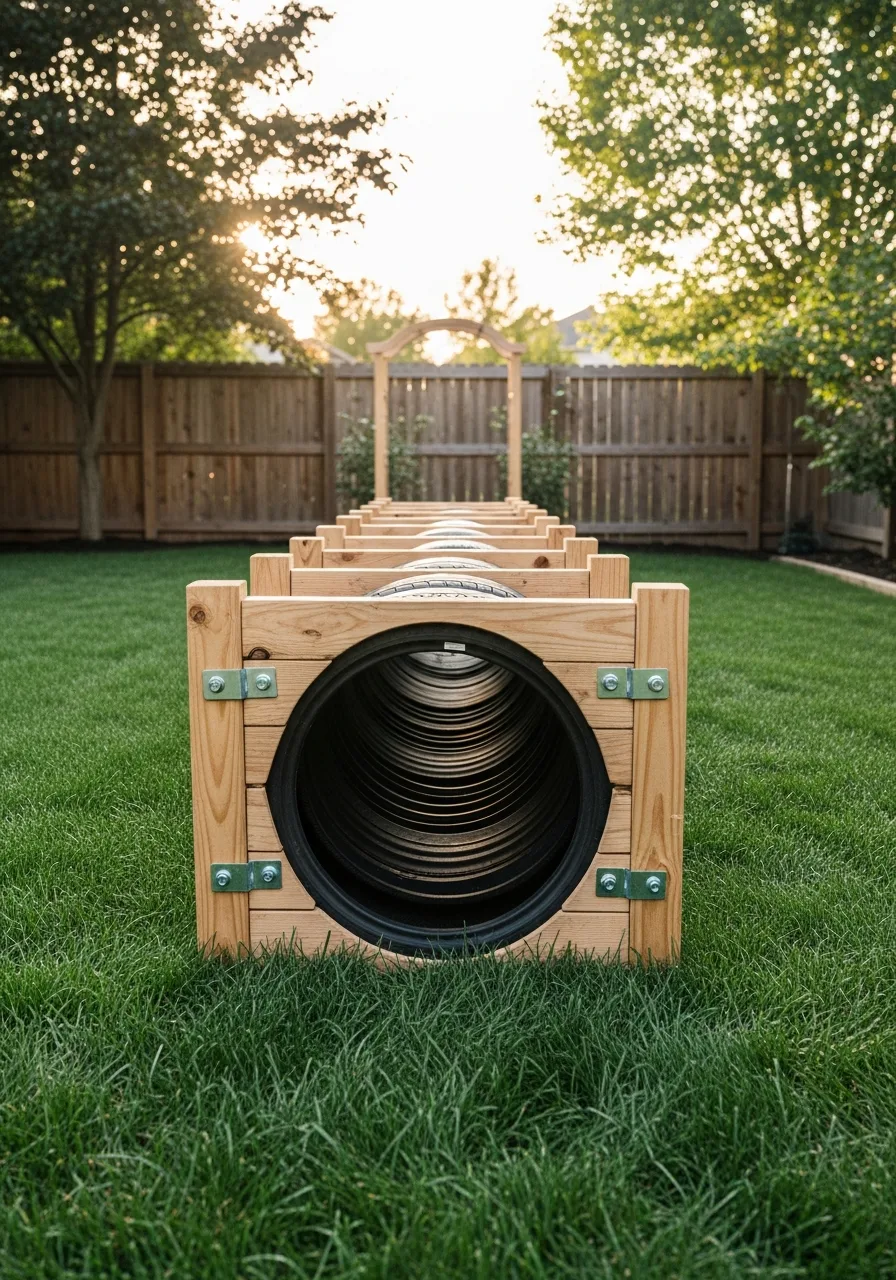
Use play tunnels, garden arches, or DIY fabric tunnels for crawling games.
It is simple to set up and easy to store when not in use. Arrange tunnels in a zigzag pattern to maximize play value in a small yard space. Fabric tunnels stay much cooler than plastic ones during peak summer heat.
- Use lightweight pop-up tunnels for quick assembly and storage.
- Stake the ends into the grass to keep them from sliding.
- Combine with large cardboard boxes for a custom maze experience.
Best shortcut: Use landscape staples to keep lightweight tunnels from blowing away in the wind.
18. DIY Hopscotch Path

Paint or place hopscotch squares on pavers, wood slices, or concrete. This is a low-cost playground idea that works even in the smallest yards.
Use outdoor patio paint to ensure the colors stay vibrant through rain and sun. Wood slices offer a more organic look than traditional concrete chalk drawings.
- Use 12-inch concrete pavers for a permanent and stable path.
- Apply a non-slip grit to the paint for added safety when wet.
- Space the squares based on the child's actual stride length.
Quick win: Use a circular stencil to keep the numbers uniform and professional-looking.
19. Outdoor Building Station

Create a small outdoor building station with blocks, Lego-style pieces, or large foam blocks. It keeps creative play outside and gives kids a hands-on activity.
Glue base plates to a weather-resistant side table for a permanent building surface. Dedicated outdoor bins prevent small pieces from getting lost in the grass.
- Use a plastic potting bench as a standing height building station.
- Drill small drainage holes in the storage bins to prevent water buildup.
- Store small pieces in a mesh bag for easy rinsing and drying.
Most people skip this: UV-resistant base plates won't crack or fade as quickly when left in direct sunlight.
20. Backyard Ball Toss Game
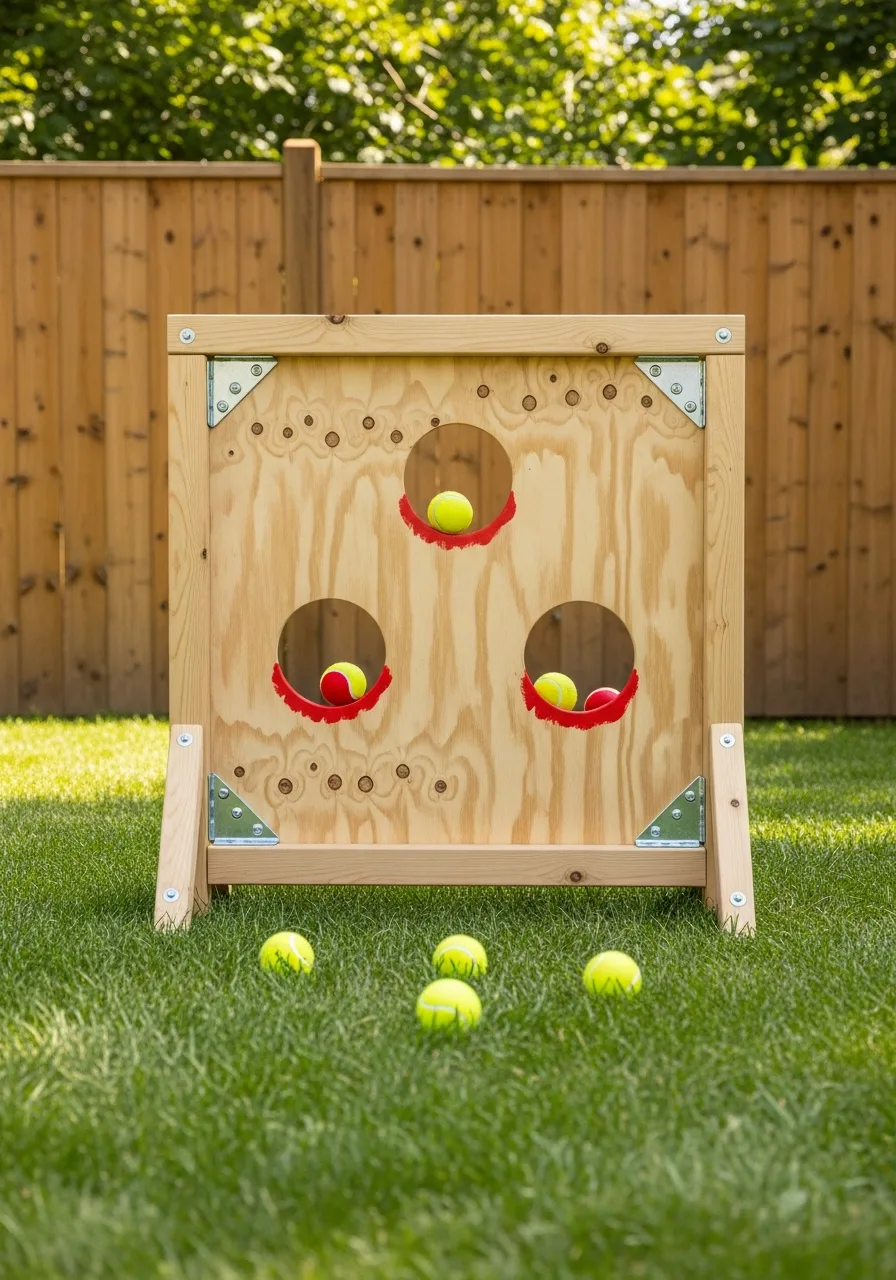
Make a simple ball toss board with cut-out holes or buckets. Kids can practice aiming and play alone or with friends.
Angle the board slightly upward to make it easier for younger children to score. Plywood painted with chalkboard paint allows for easy scorekeeping during games.
- Use varied hole sizes to create different difficulty levels.
- Heavy-duty buckets work as a sturdy alternative to wood boards.
- Sand the edges of the cutouts to protect small hands from splinters.
Quick win: Label each hole with point values to turn the game into a fun math lesson.
21. DIY Rope Bridge
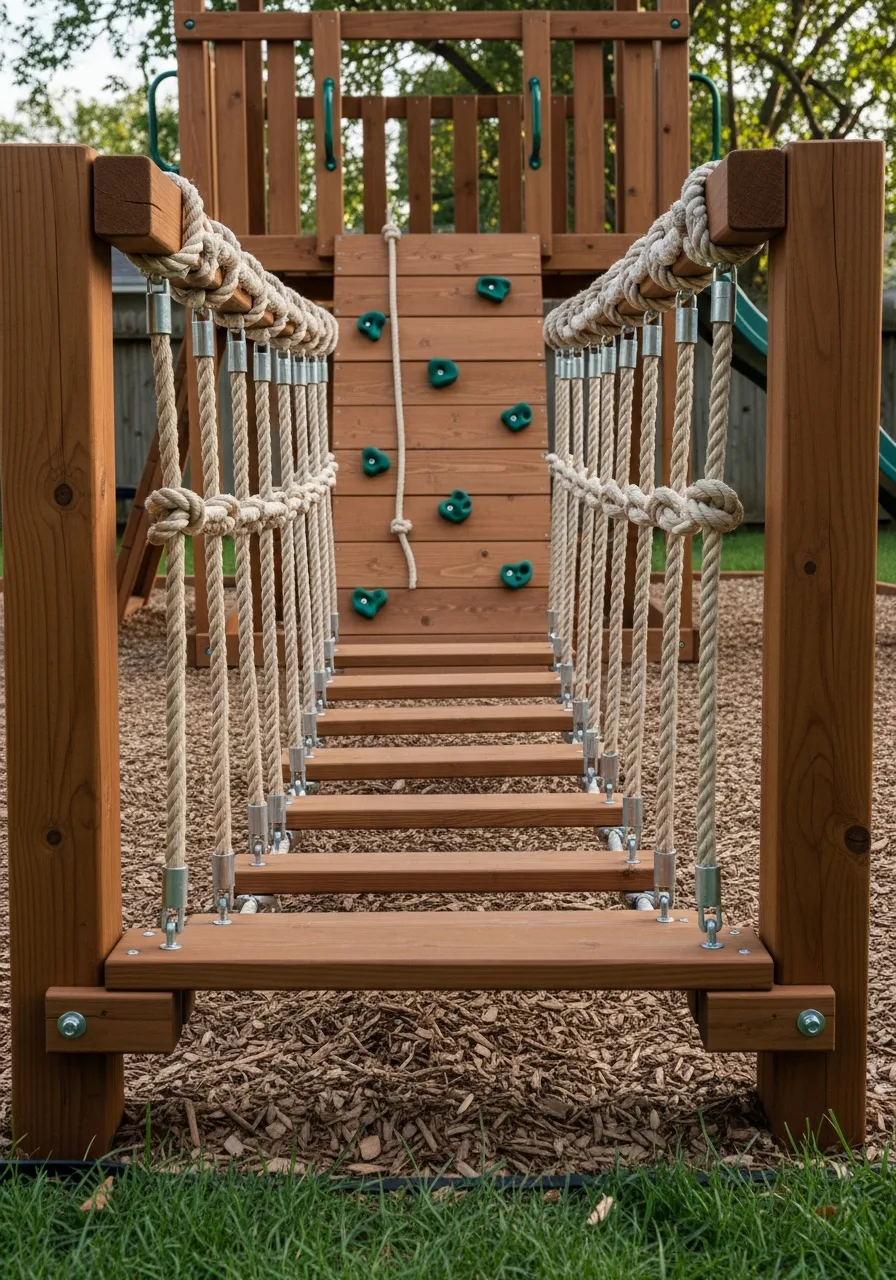
Build a short, low rope bridge between two small platforms. Keep it close to the ground and add soft surfacing underneath.
Use thick manila rope for a classic look and a better grip for small hands. This setup builds confidence without the risk of high-altitude falls.
- Anchor the support posts at least two feet deep for stability.
- Use galvanized hardware to prevent rust and maintain structural integrity.
- Check rope tension monthly to ensure the bridge stays stable.
Most people skip this: Wrapping the rope ends in heavy-duty tape prevents fraying and keeps the bridge looking neat.
22. Garden Play Path
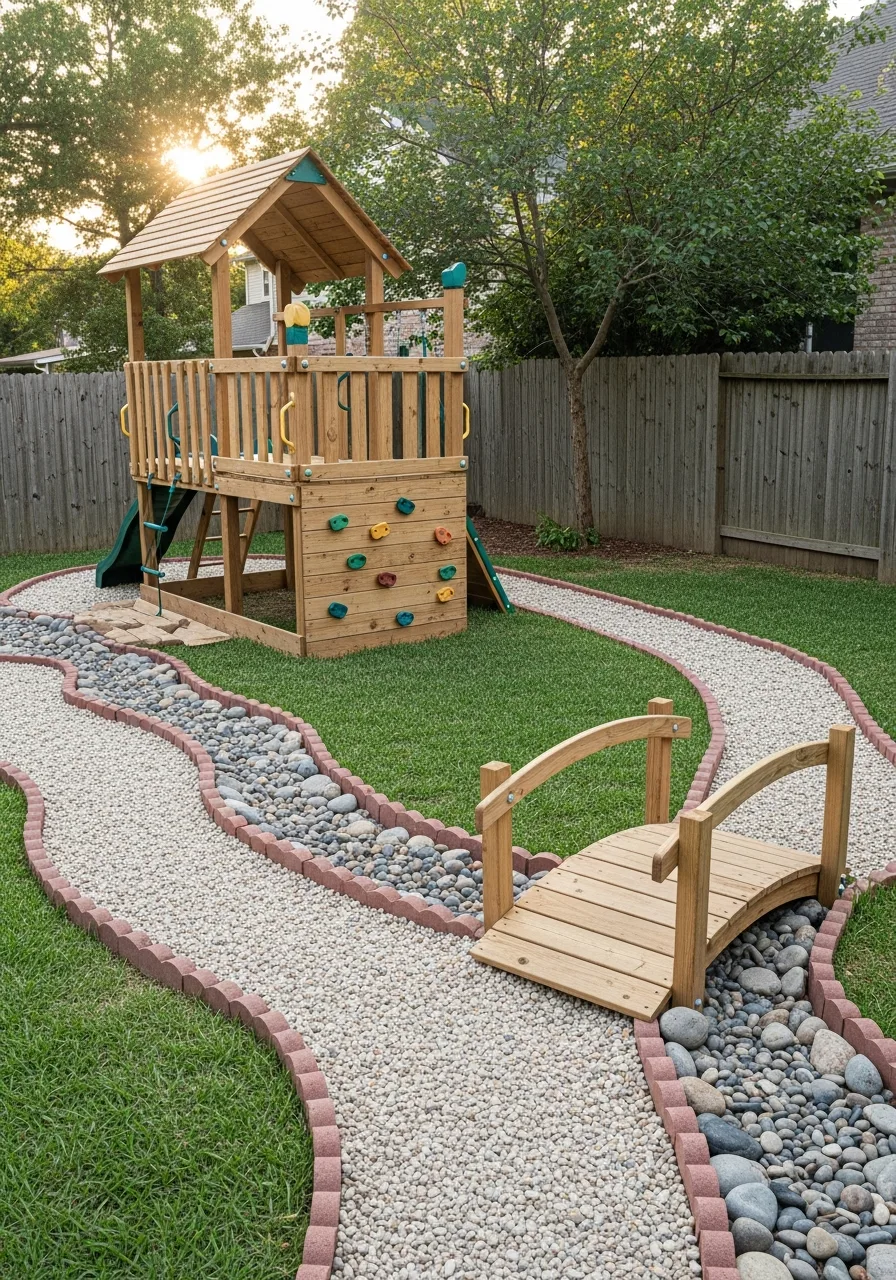
Create a winding path through the yard using stepping stones, mulch, or gravel. Kids can run, follow the path, ride small scooters, or use it for pretend adventures.
Line the edges with smooth river rocks to keep the path materials contained. A defined path keeps foot traffic away from sensitive garden beds.
- Use landscape fabric underneath to prevent weed growth through the path.
- Choose flat stepping stones to prevent tripping hazards during fast play.
- Incorporate solar lights for visibility during evening backyard use.
Best shortcut: Use a garden hose to map out the curves of the path before you start digging.
23. Sensory Garden Corner
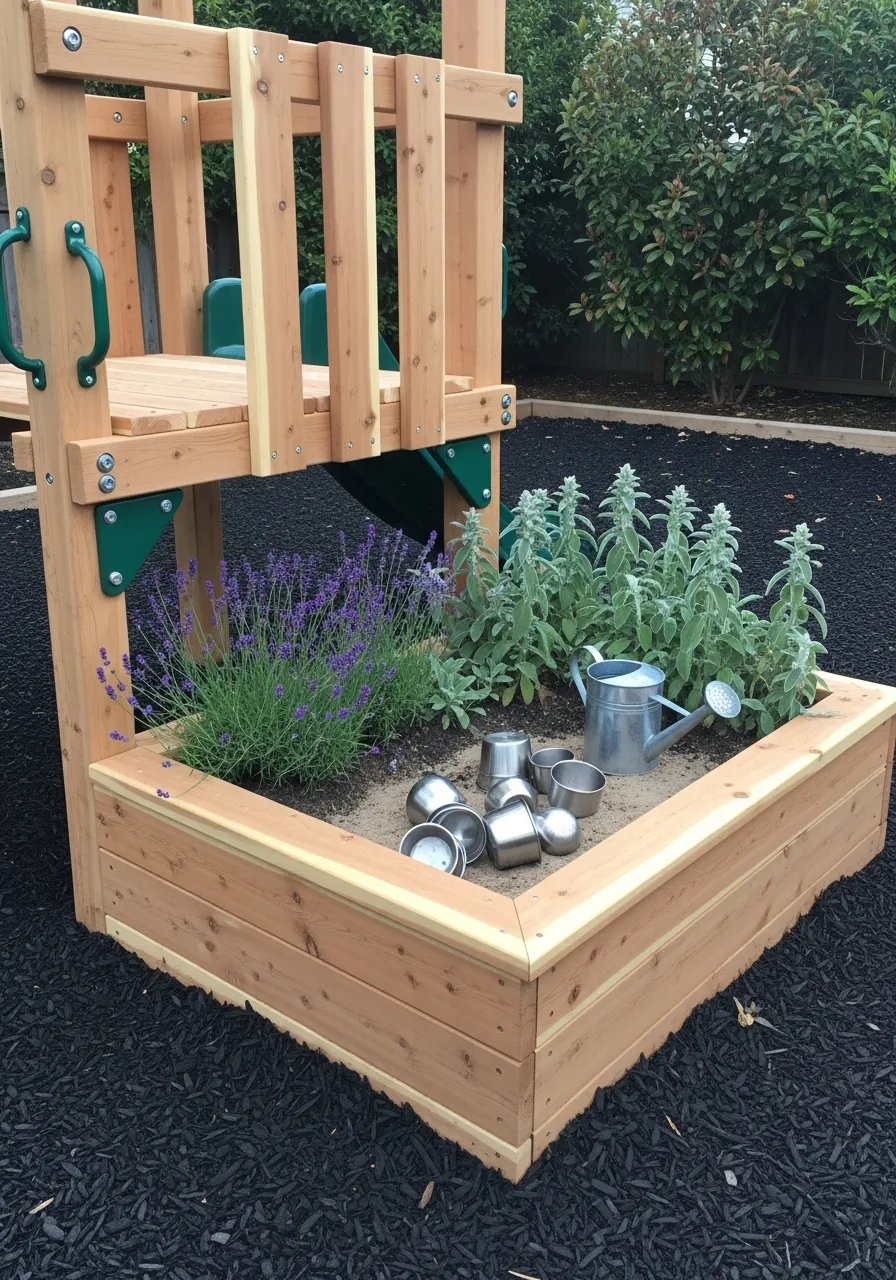
Plant safe herbs, flowers, and textured plants in a kid-friendly corner. This gives children a natural play space where they can smell, touch, and explore.
Choose lamb's ear for its soft texture and mint for its strong, recognizable scent. Raised beds make it easier for children to reach the plants without trampling them.
- Avoid any plants with thorns or toxic berries for maximum safety.
- Use colorful labels so kids can learn the plant names while they play.
- Include a small bench for quiet observation and sensory focus.
Quick win: Add a wind chime or a small bird feeder to engage hearing and sight senses.
24. Outdoor Fabric Fort

Use poles, rope, and weather-friendly fabric to create a simple backyard fort.
It can become a castle, tent, clubhouse, or reading hideout. Select solution-dyed acrylic fabric to prevent fading from the sun. This modular design is easy to take down when the weather turns sour.
- Use heavy-duty spring clamps to hold the fabric in place on the frame.
- Set the fort up on a deck or patio to keep the interior floor dry.
- Add a battery-operated string of lights for a cozy, inviting feel.
Most people skip this: Spraying the fabric with a water-repellent coating helps it dry faster after a light rain.
25. Painted Rock Hunt
Paint smooth rocks and hide them around the play area. Kids can search for colors, numbers, letters, or themed designs.
Seal the rocks with a clear acrylic spray to protect the artwork from moisture. This activity is easy to refresh by simply hiding the rocks in new spots every week.
- Use flat, palm-sized stones for the best painting surface.
- Acrylic pens offer more control than brushes for detailed designs.
- Hide stones in non-obvious places like flower pots or under benches.
Best shortcut: Use a mesh laundry bag to wash several rocks at once before you start painting.
26. Toy Pulley System
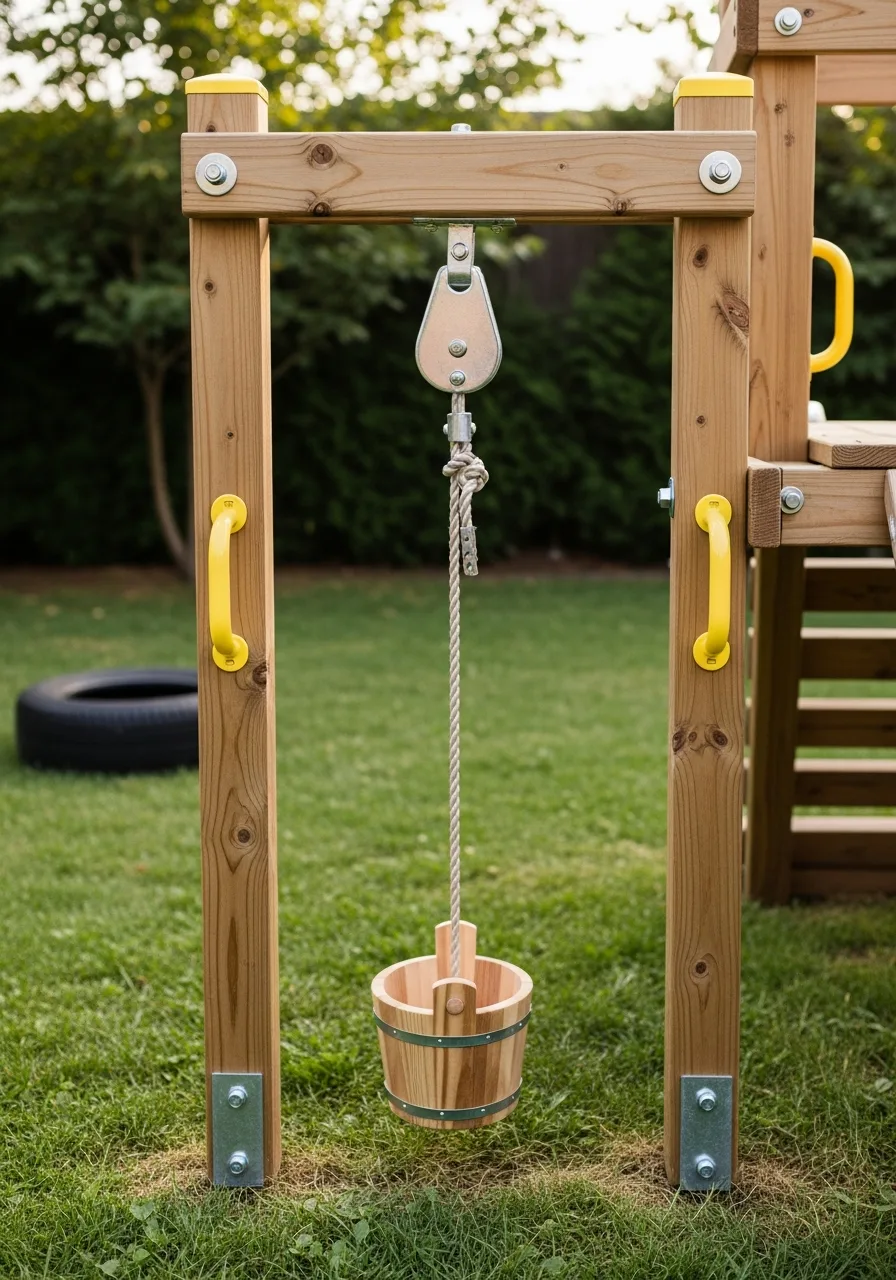
Instead of a high zip line, create a low rope pulley system for toys or buckets.
Kids can move small items across the yard safely while still enjoying the zip-line idea. Mount the rope at a slight decline so the bucket slides smoothly on its own. This setup provides the thrill of motion without any safety concerns.
- Use a clothesline pulley for a budget-friendly hardware option.
- Ensure the anchor points are sturdy enough to handle the rope tension.
- Attach a thick stop knot at the end to prevent the bucket from hitting the tree.
Quick win: Use a colorful bucket so it is easy to spot as it travels across the yard.
27. Picnic Play Corner
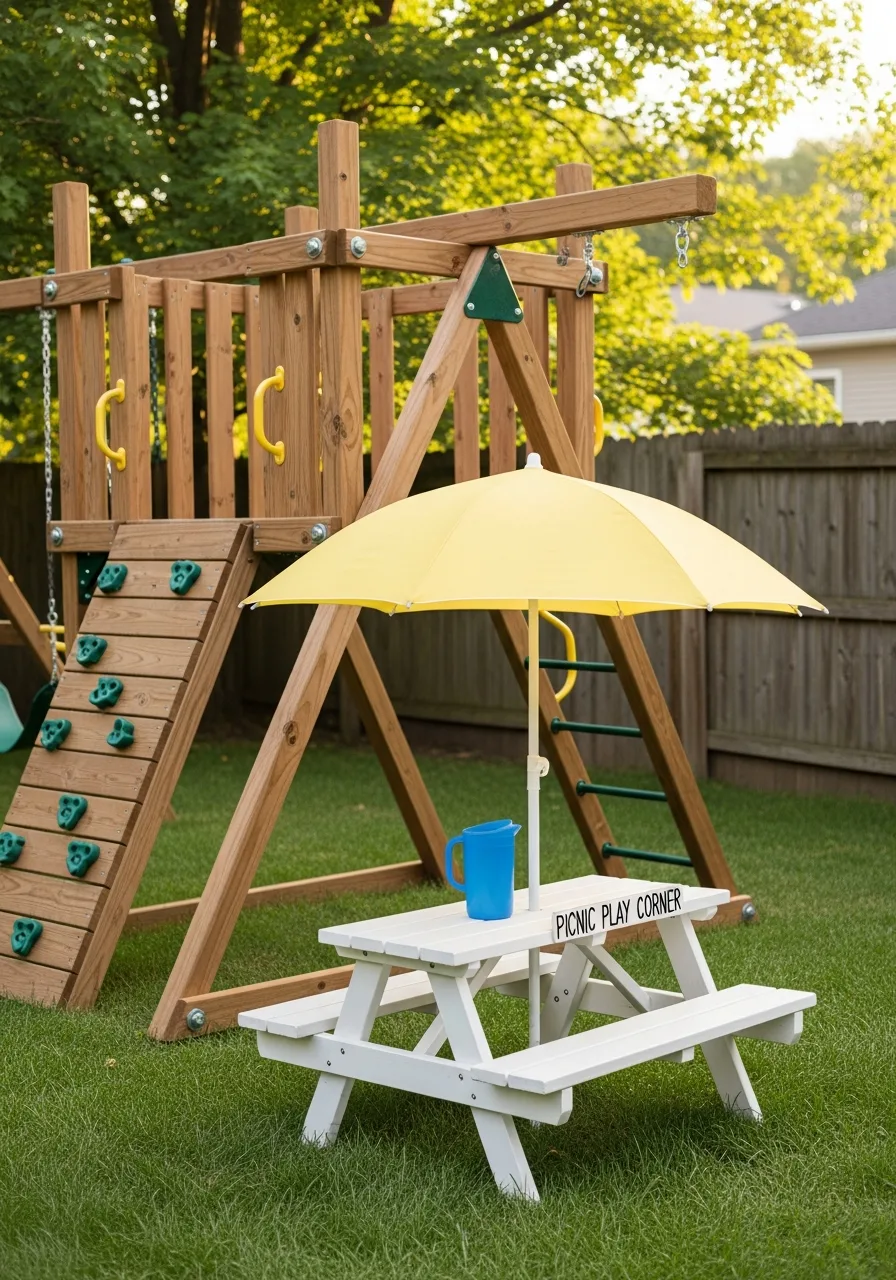
Add a small kids’ picnic table beside the play area. It gives children a place for snacks, crafts, outdoor games, and pretend restaurant play.
Choose a table with an integrated umbrella hole to provide much-needed shade. A dedicated table keeps the mess of crafts and snacks out of the main house.
- Apply a new coat of exterior paint every two years to protect the wood.
- Place the table on a flat surface like a patio or pavers for stability.
- Use outdoor-rated cushions for extra comfort during long play sessions.
Most people skip this: Sanding the corners of the table to a rounded shape prevents bumps and bruises during active play.
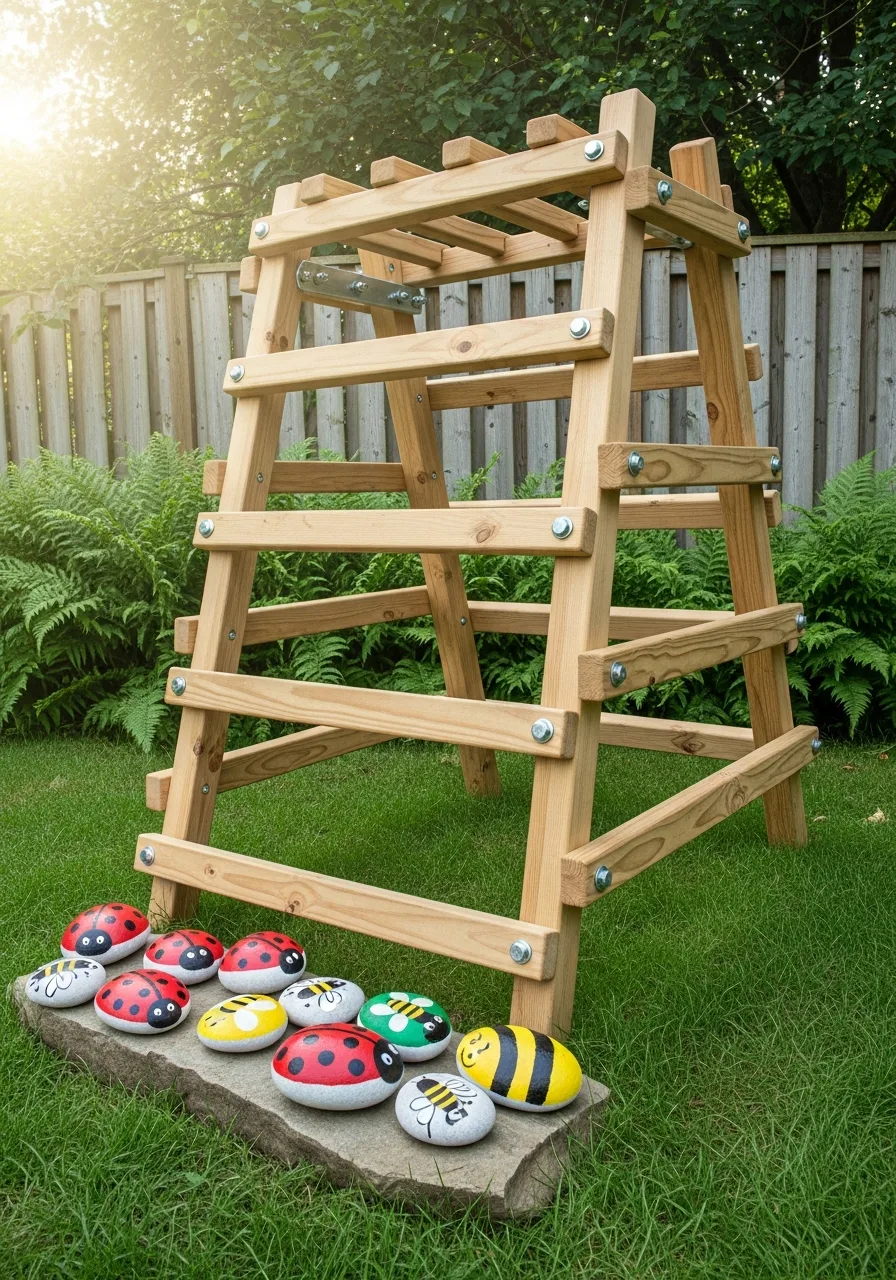
28. Wooden Climbing Triangle
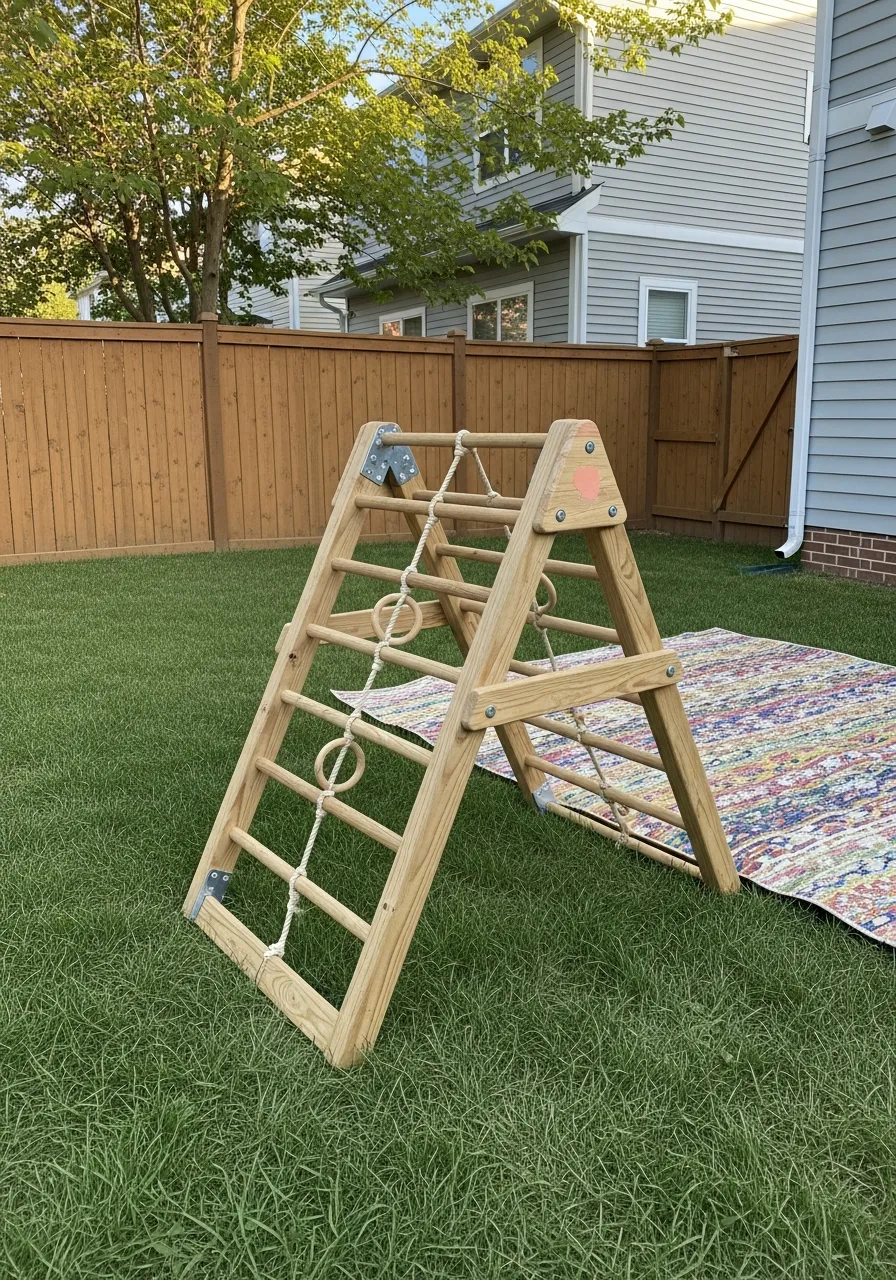
Build or buy a small wooden climbing triangle for toddlers or young kids. It works well for gross motor play and can be used indoors or outdoors.
Finish the wood with a food-safe oil if you plan to use it for very young children. This compact structure offers plenty of exercise in a very small footprint.
- Ensure all screws are countersunk so they do not snag clothing.
- Use a foldable design for easy storage in the garage or shed.
- Place on a soft mat or thick grass to cushion any accidental falls.
Best shortcut: Use pre-cut dowels from the hardware store to save time on sanding and shaping.
29. Nature Scavenger Zone
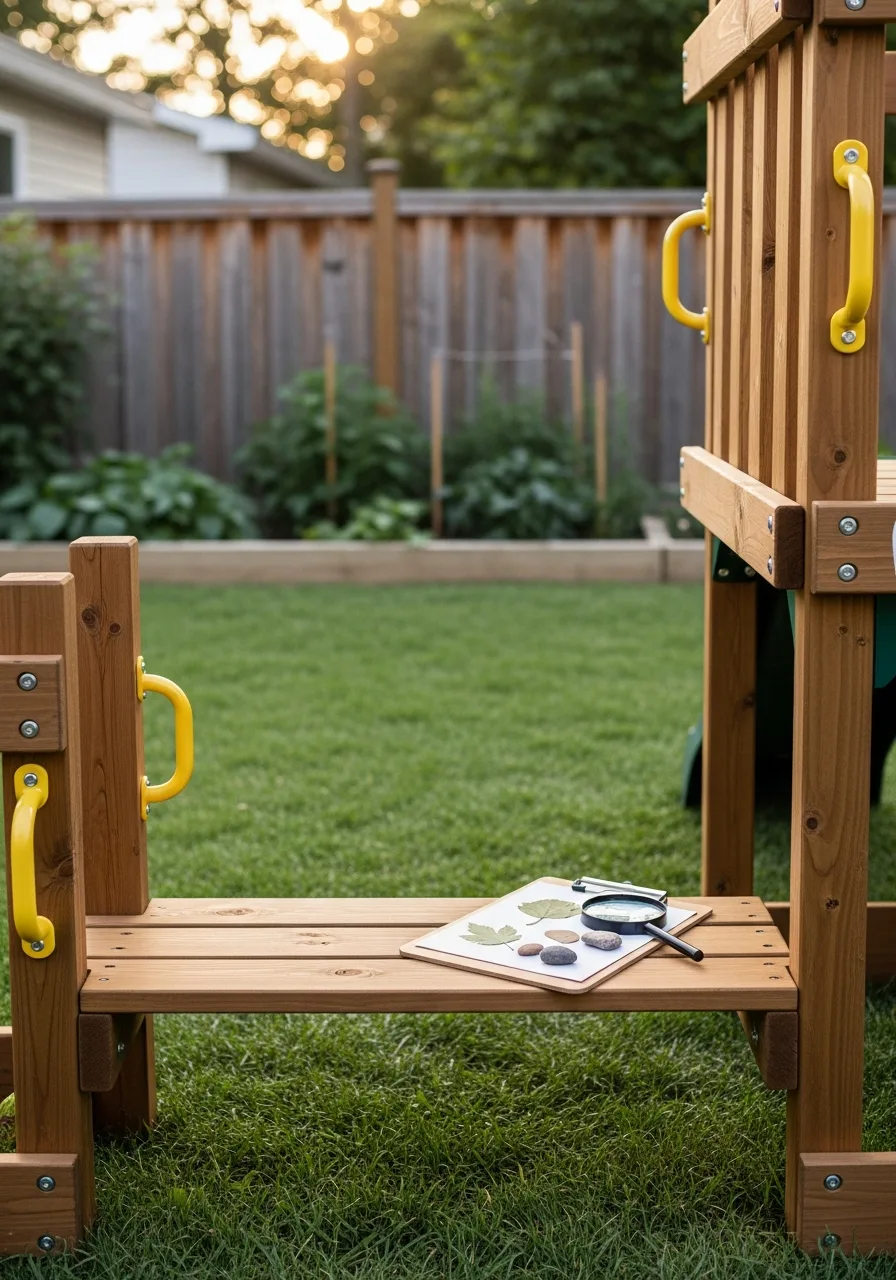
Create a backyard zone where kids can find leaves, rocks, flowers, and small garden items. Add a simple checklist to turn it into a game.
Laminate the checklist so it can be used with dry-erase markers over and over. This turns a simple walk in the yard into an educational exploration.
- Rotate the treasures seasonally to keep the search game interesting.
- Include a small basket for kids to collect their findings as they go.
- Set up a magnifying glass station to inspect found items closely.
Quick win: Include textures on the list, like fuzzy leaves or smooth stones, to engage more senses.
30. Mulched Play Zone
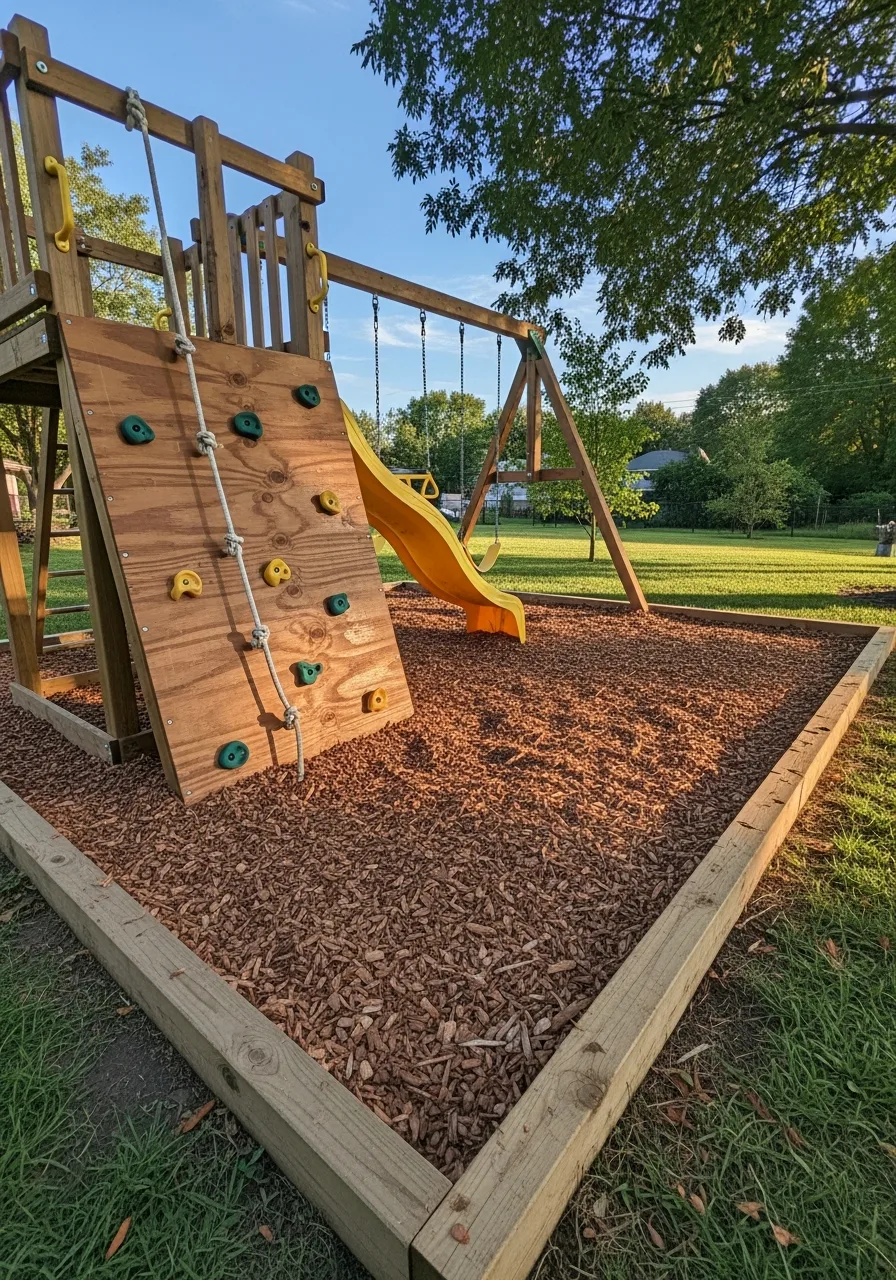
Define a small playground area with wood borders and soft mulch. Add a slide, balance beam, or playhouse to create an easy DIY playground without overcomplicating the yard.
Use rubber mulch for a softer landing and better durability than wood chips. A clear border keeps the mulch from migrating into the grass.
- Dig out the area four inches deep before filling it with mulch.
- Use landscape fabric to keep weeds from poking through the play zone.
- Choose cedar timbers for the border to naturally resist insects and rot.
Most people skip this: Installing a plastic liner inside the border helps prevent the mulch from washing away during heavy rain.
Frequently Asked Questions
What is the cheapest ground cover for a DIY playground?
Wood chips are typically the most budget-friendly option and provide excellent impact absorption compared to grass. While pea gravel is another affordable choice, bulk-delivered wood mulch is often the easiest and most cost-effective way to cover a large play area.
How do I make sure my DIY play structure is safe?
Start by anchoring the structure deep into the ground to prevent tipping and sand every surface thoroughly to eliminate splinters. Always use non-toxic stains and check the manufacturer’s weight limits for all hardware and swings to ensure they can handle active play.
What are the best wood types for outdoor play equipment?
Cedar and redwood are the gold standards because they are naturally resistant to rot, insects, and decay without needing heavy chemicals. If you are on a tighter budget, modern pressure-treated lumber is a durable and safe alternative that holds up well against the elements.
Can I build a playground in a small backyard?
Yes, you can maximize a limited footprint by utilizing vertical space with features like climbing walls or monkey bars attached to a fence. Consider foldable equipment or multi-purpose structures, such as a playhouse with a rooftop deck, to keep the fun contained in a small area.
How do I maintain a wooden DIY playground?
To keep the structure in top shape, apply a fresh coat of waterproof sealant annually and tighten all bolts to keep the frame sturdy. Make it a habit to inspect the wood for splinters or rot and rake the ground cover periodically to maintain its protective depth.