50 Stylish Bathroom Tile Combination Ideas
This post may contain affiliate links: full affiliate disclosure.
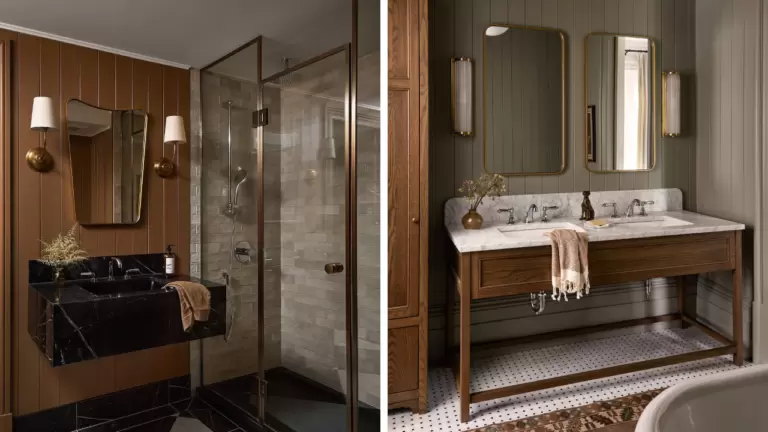
Mixing tile styles creates a high-end look without needing a huge budget. Focus on balancing scale and color to keep the room feeling calm rather than chaotic.
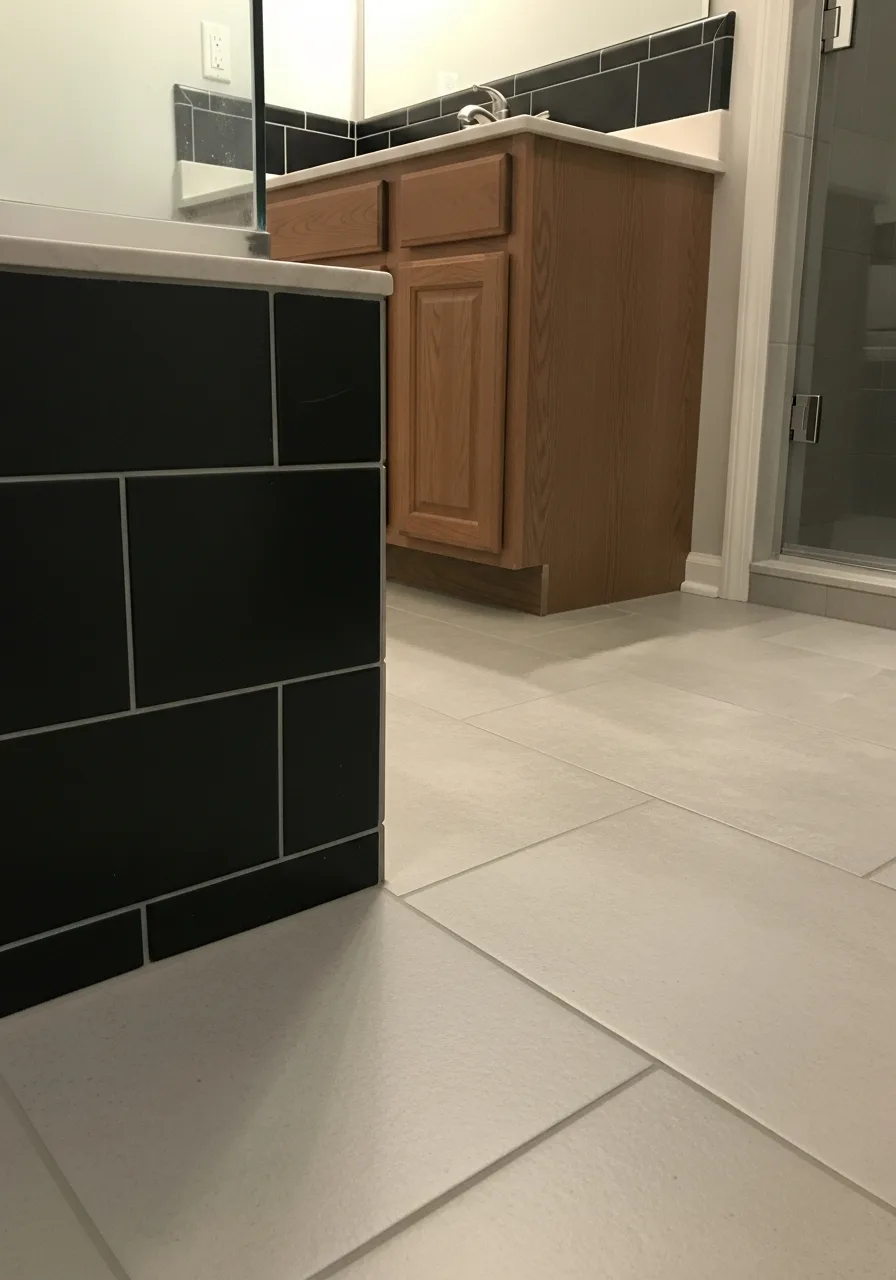
1. Matte and Gloss Mix
Contrast shiny and flat finishes in the same color family to add depth. This prevents a monochromatic bathroom from looking like a flat box.
Install gloss tiles on the shower walls to reflect light and matte tiles on the floor for better grip. Best move: Stick to one color to keep it sophisticated.
- Order gloss tiles for walls and matte for floors from the same manufacturer for a perfect color match.
- Use a laser level to ensure the grout lines from the floor align with the wall tiles.
- Choose a light gray grout to bridge the gap between the two different finishes.
Quick win: Use a high-gloss tile in small bathrooms to bounce light and make the space feel twice as large.
2. Geometric Floor and Subway Walls
Classic subway tiles provide a quiet backdrop for a bold pattern on the ground. This pairing works because the simple wall lines do not compete with the floor's energy.
Choose a grout color for the subway tiles that matches the base color of your patterned floor tiles. What works: Keep the wall tile horizontal to ground the space.
- Select porcelain patterned tiles for the floor to get the look of cement without the high maintenance.
- Center the floor pattern in the middle of the room and work outward for a balanced look.
- Add a simple black pencil liner tile between the subway tile and the floor for a clean transition.
Most people skip this: Always dry-lay your patterned floor tiles first to check for any repeats or misalignments.
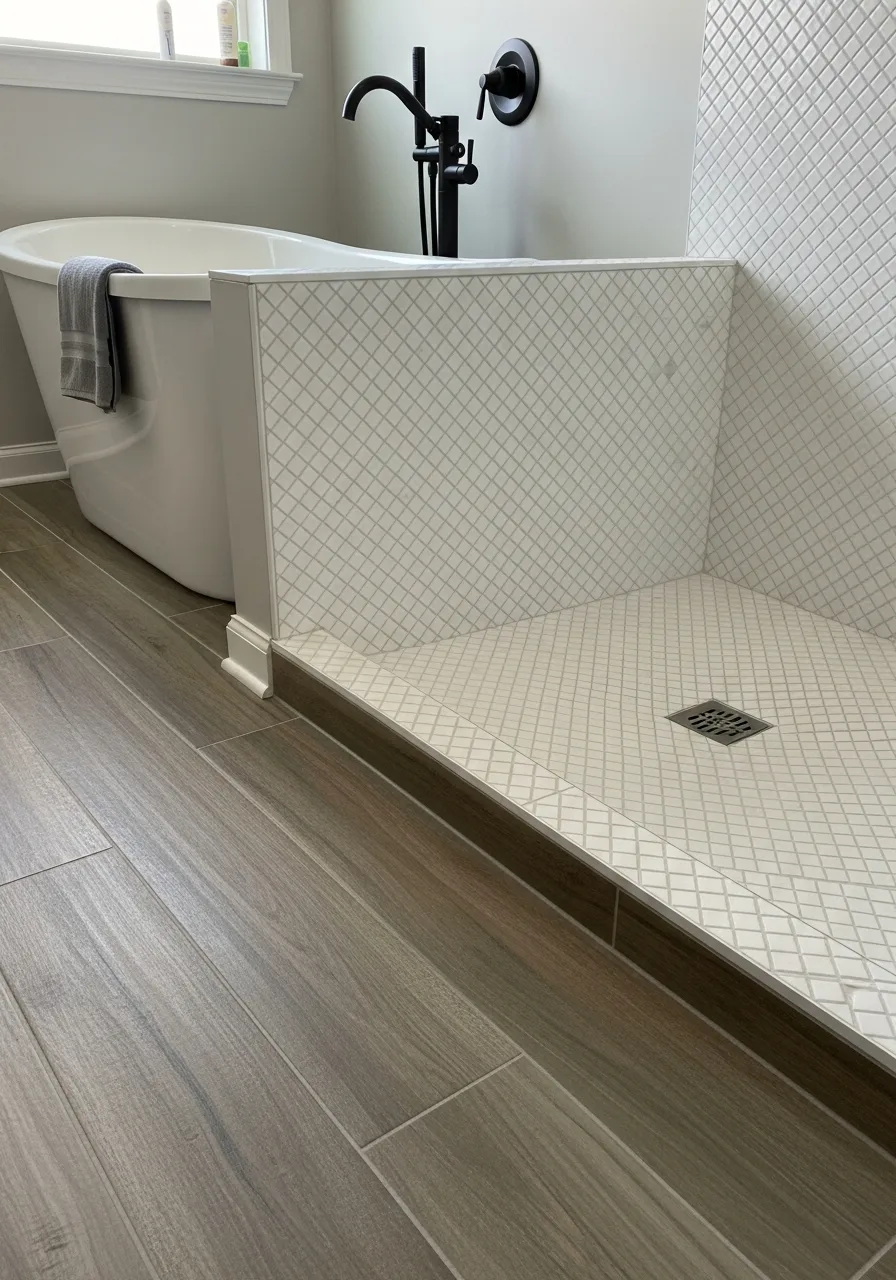
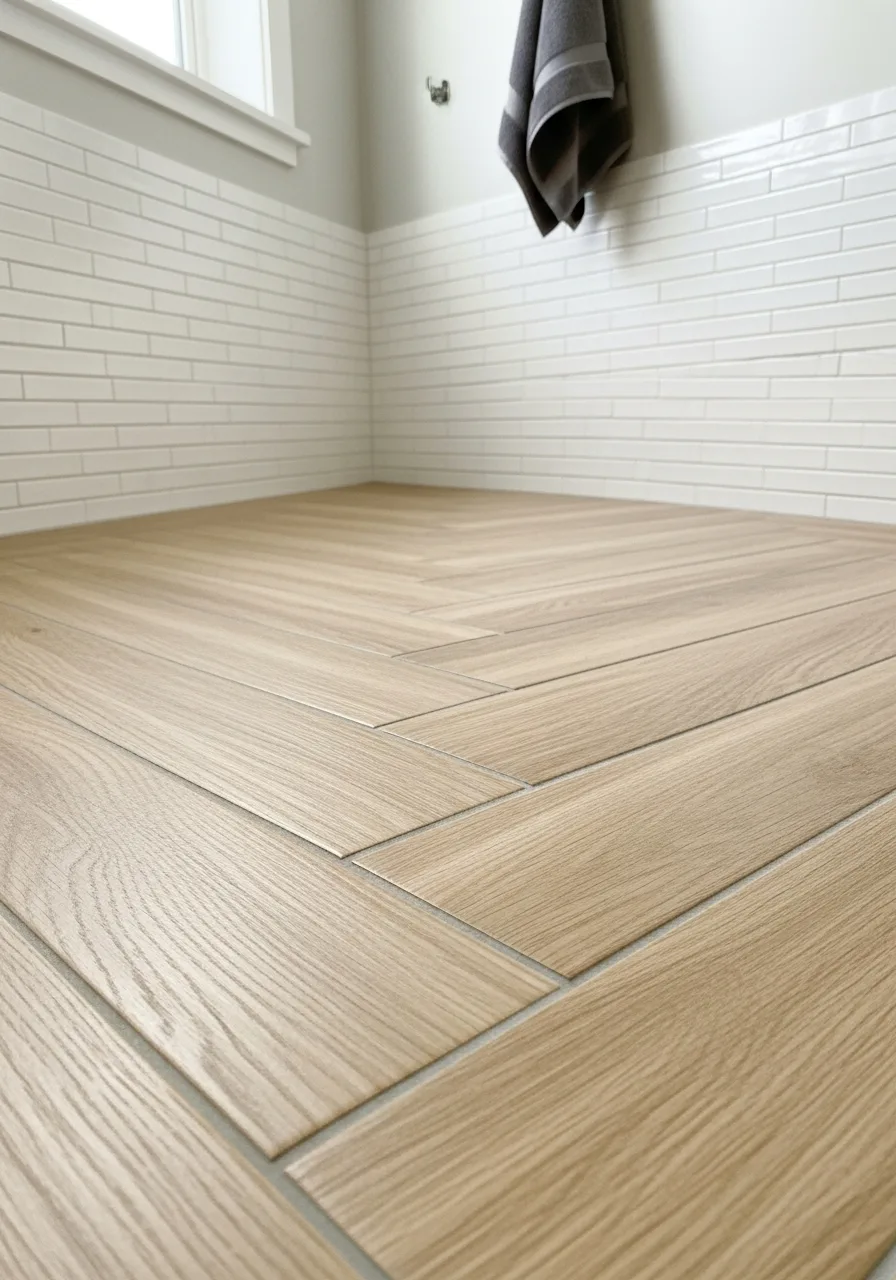
3. Wood Plank and Marble
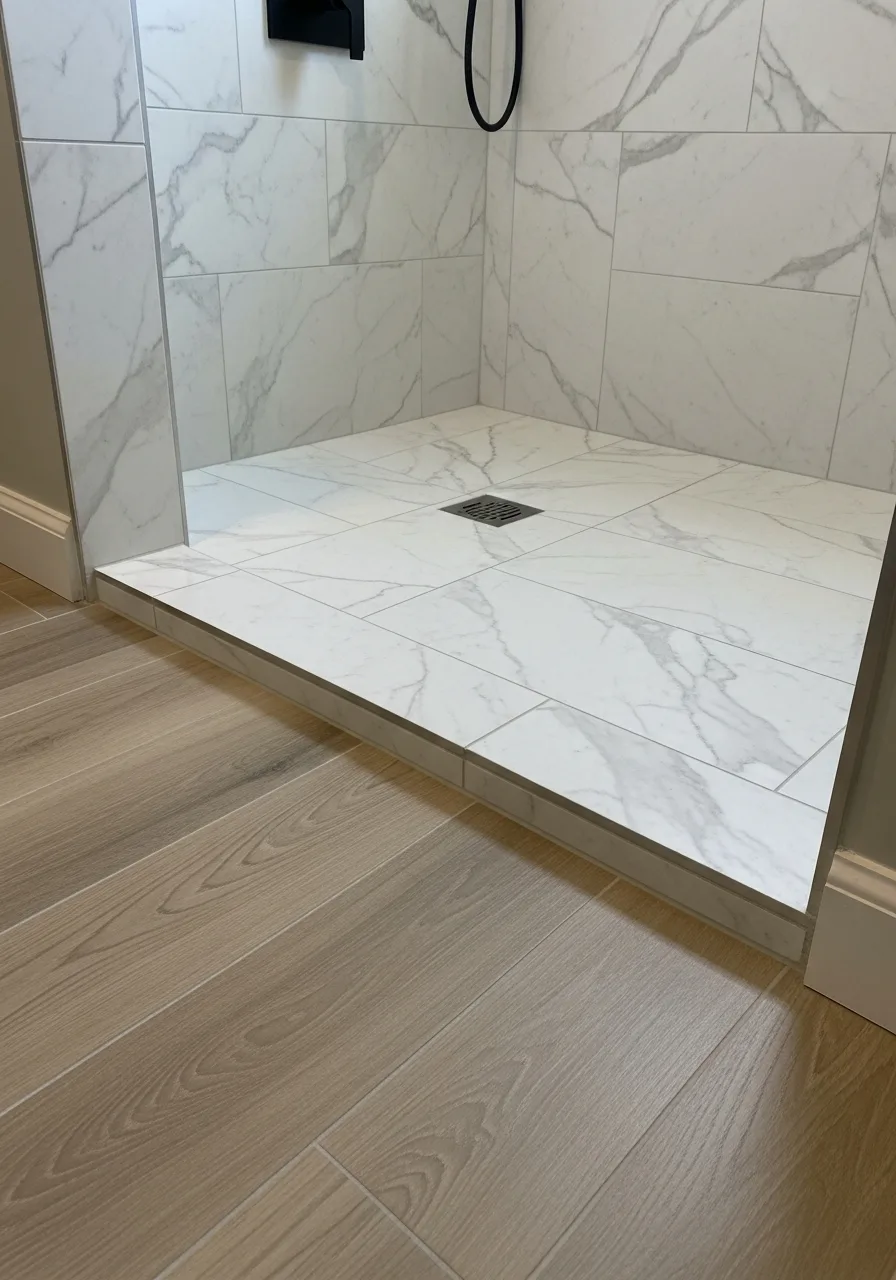
Natural textures like wood-look porcelain bring warmth to cold marble surfaces. This combination makes a modern bathroom feel more organic and spa-like.
Run wood-look tiles through the main floor and use marble-effect tiles inside the shower enclosure. Smart shortcut: Use a light oak finish to hide water spots better than dark walnut.
- Budget for high-definition porcelain wood tiles to avoid a pixelated or fake appearance.
- Lay the wood planks in a staggered pattern to mimic a real hardwood floor installation.
- Use a narrow 1/16-inch grout line for the wood tiles to make the floor look seamless.
Best shortcut: Choose a marble tile with warm gold or tan veins to better connect with the wood tones.
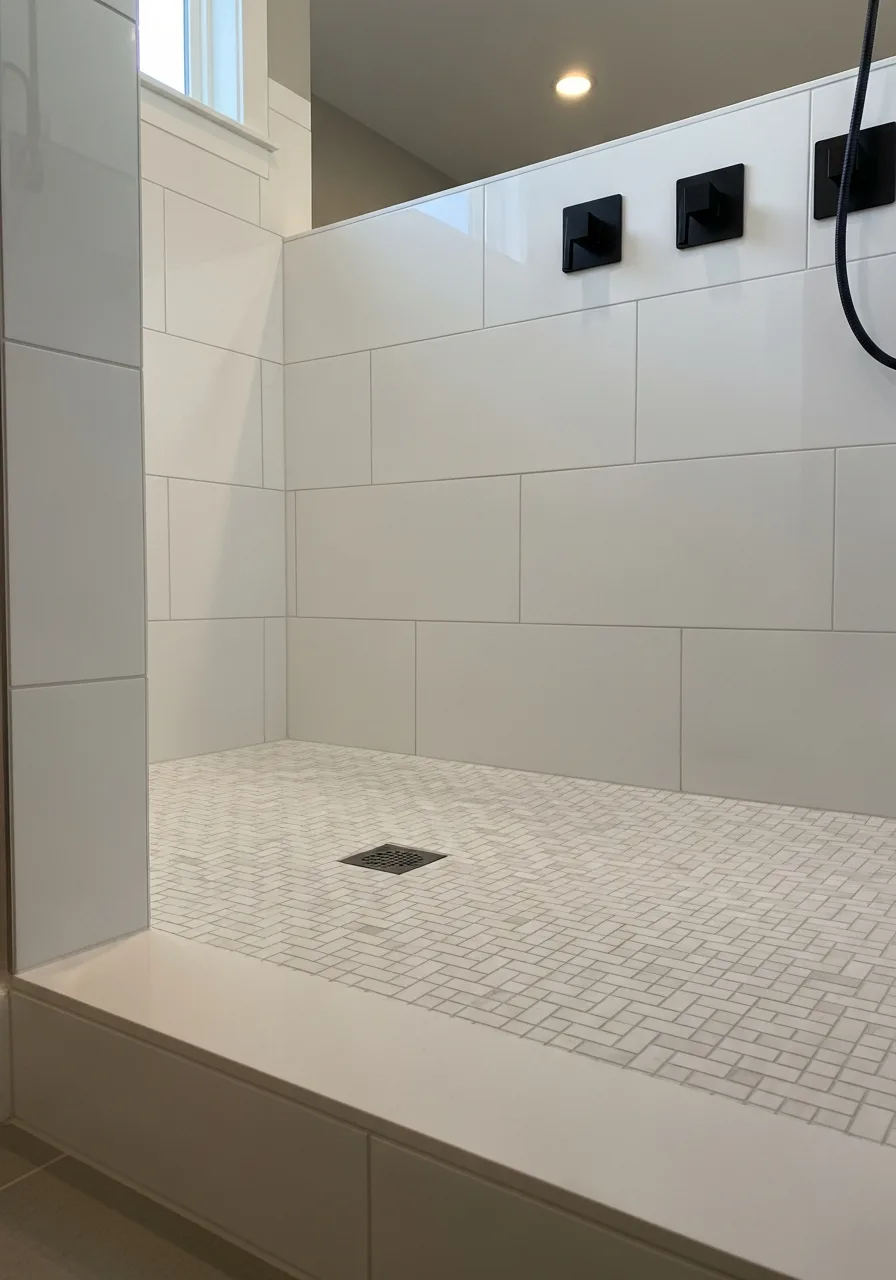
4. Penny Tiles with Large Format
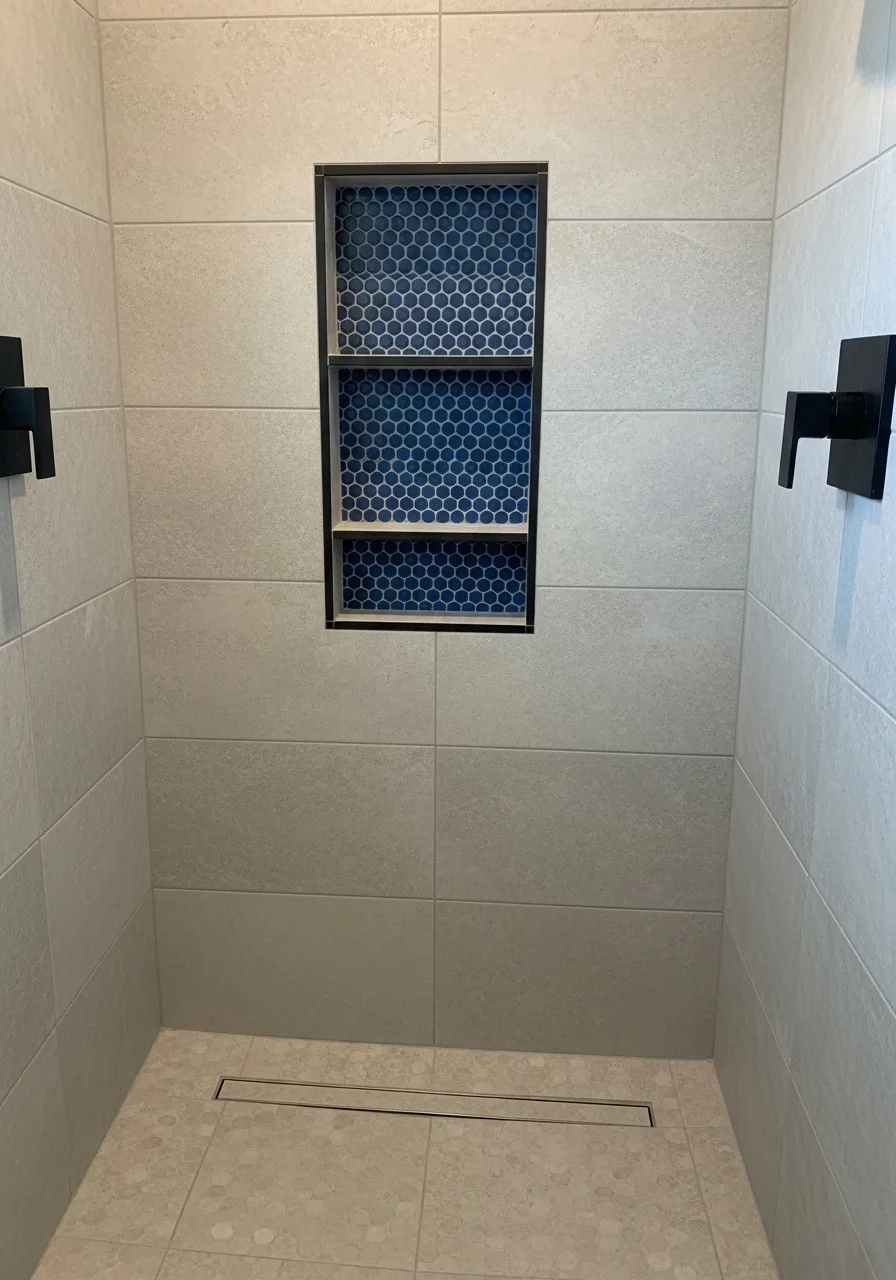
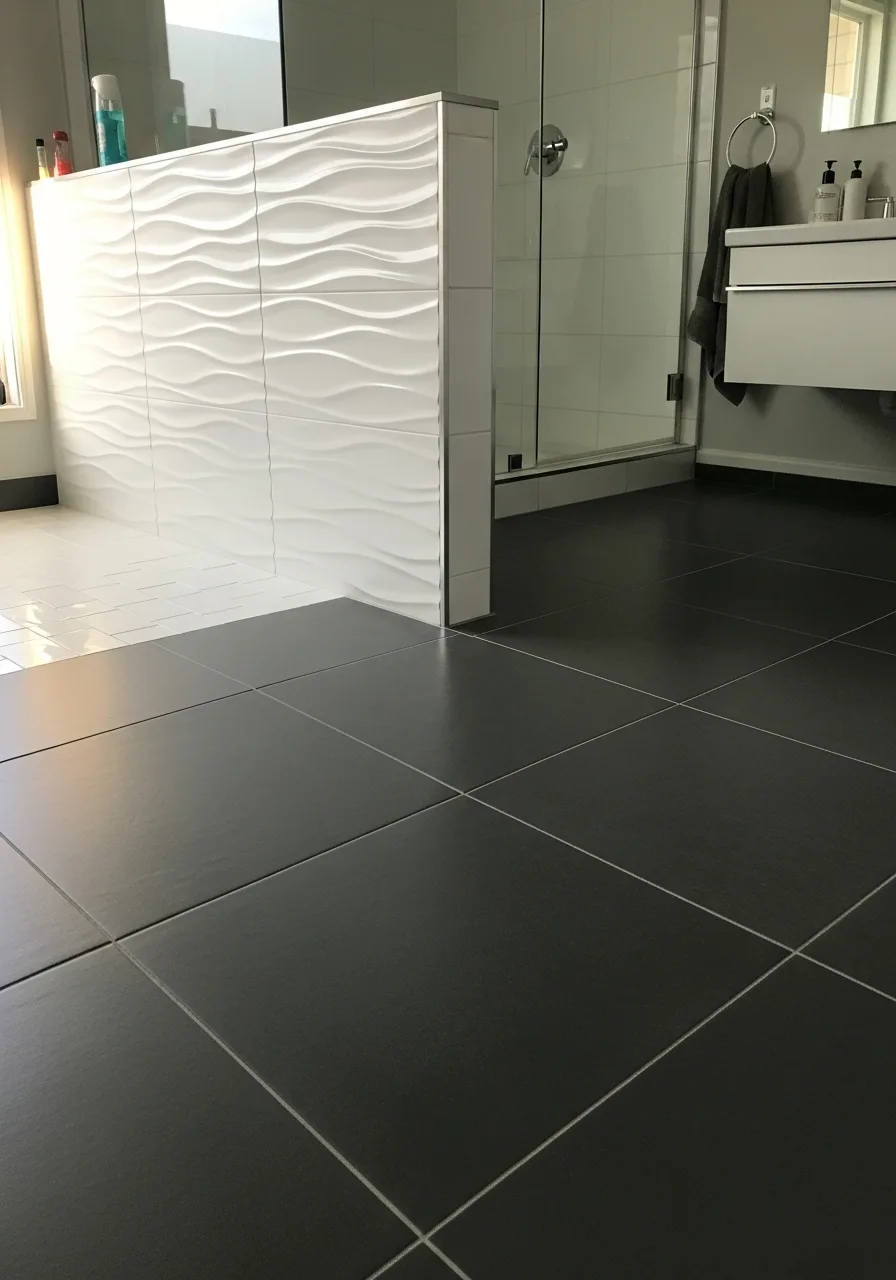
Small penny rounds offer a lot of texture and grout lines, which is perfect for slip resistance. Pairing them with oversized wall tiles creates a clean, modern contrast in scale.
Use the tiny penny tiles on a niche or the floor and keep the walls simple with 12×24 tiles. Worth doing: Match the penny tile color to a vein in the larger tiles.
- Sourcing penny tiles on mesh sheets makes the installation much faster and more accurate.
- Place large format tiles on the walls first to establish a clean grid before adding the small tiles.
- Apply a high-quality sealer to the penny tile grout to prevent staining in high-moisture areas.
Quick win: Use a contrasting grout color on the penny tiles to make the circular shape pop.
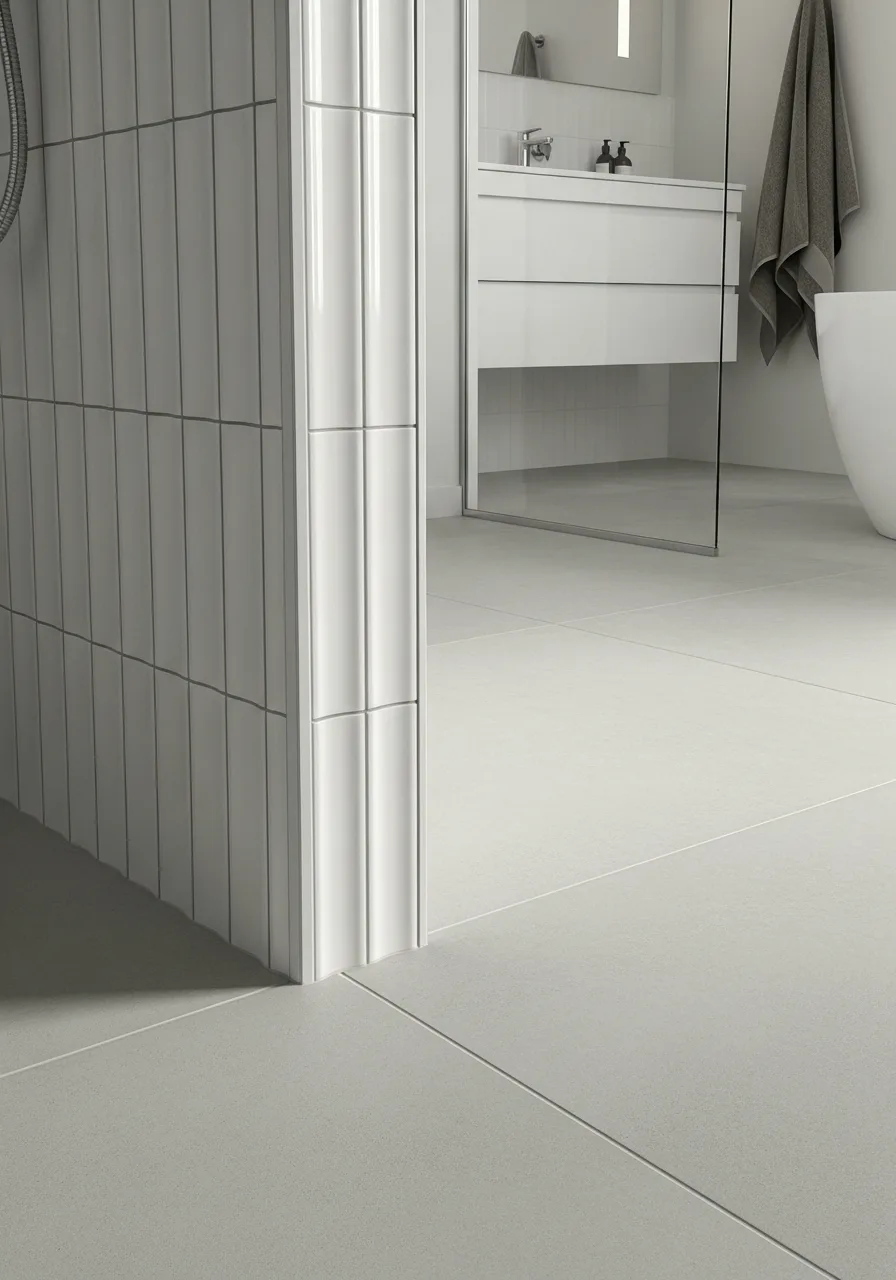
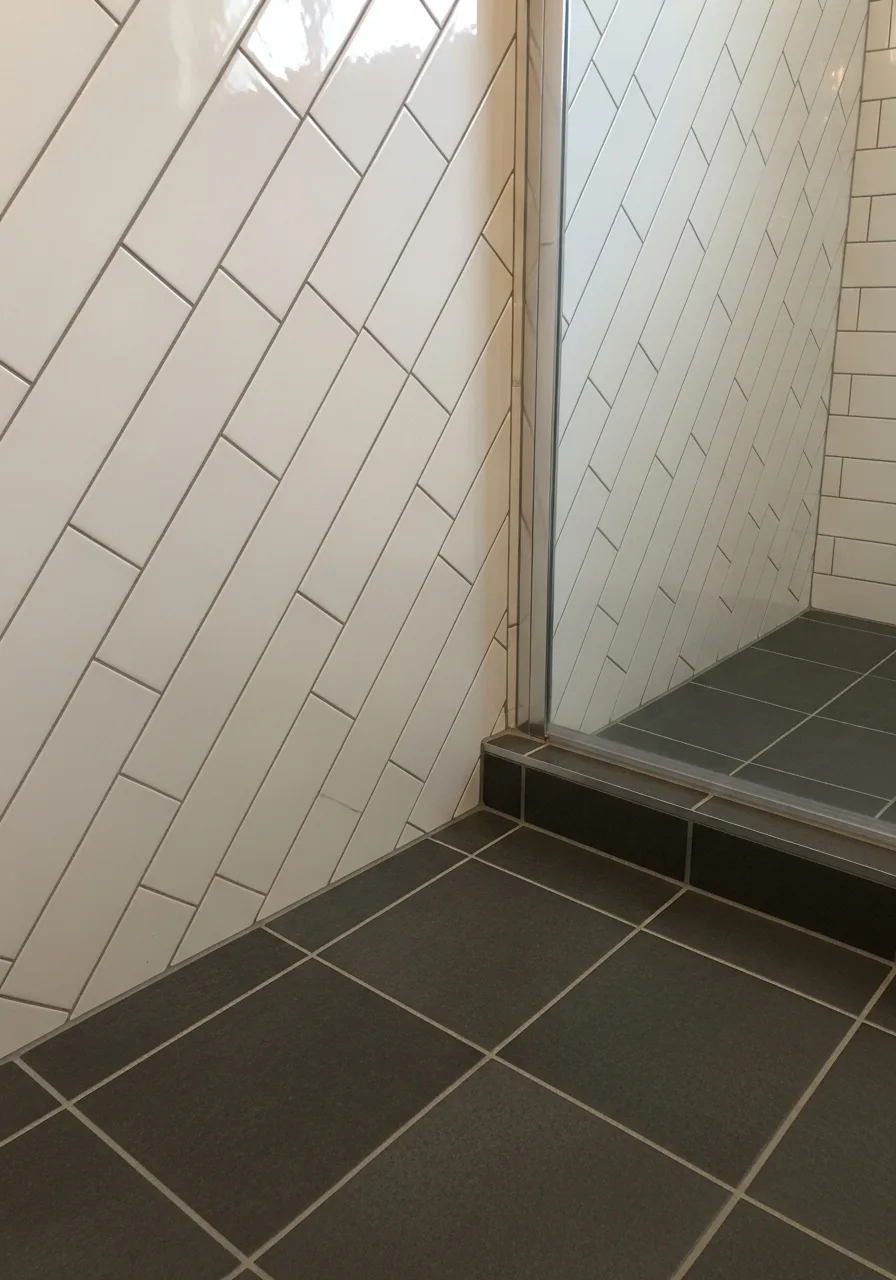
5. Vertical Stacked Subway
Rotating the traditional subway layout makes a standard tile look custom. This vertical orientation draws the eye upward, making low ceilings feel much higher.
Stack the tiles directly on top of each other instead of staggering them for a modern grid look. Best move: Use a contrasting grout to highlight the vertical lines.
- Buy 10 percent extra tile to account for precision cuts at the ceiling and floor lines.
- Start the first row of tiles from the center of the wall to ensure even cuts on both corners.
- Opt for a matte finish tile to give the vertical stack a more contemporary, architectural feel.
Most people skip this: Use spacers on every side to ensure the vertical lines stay perfectly straight over a long wall.
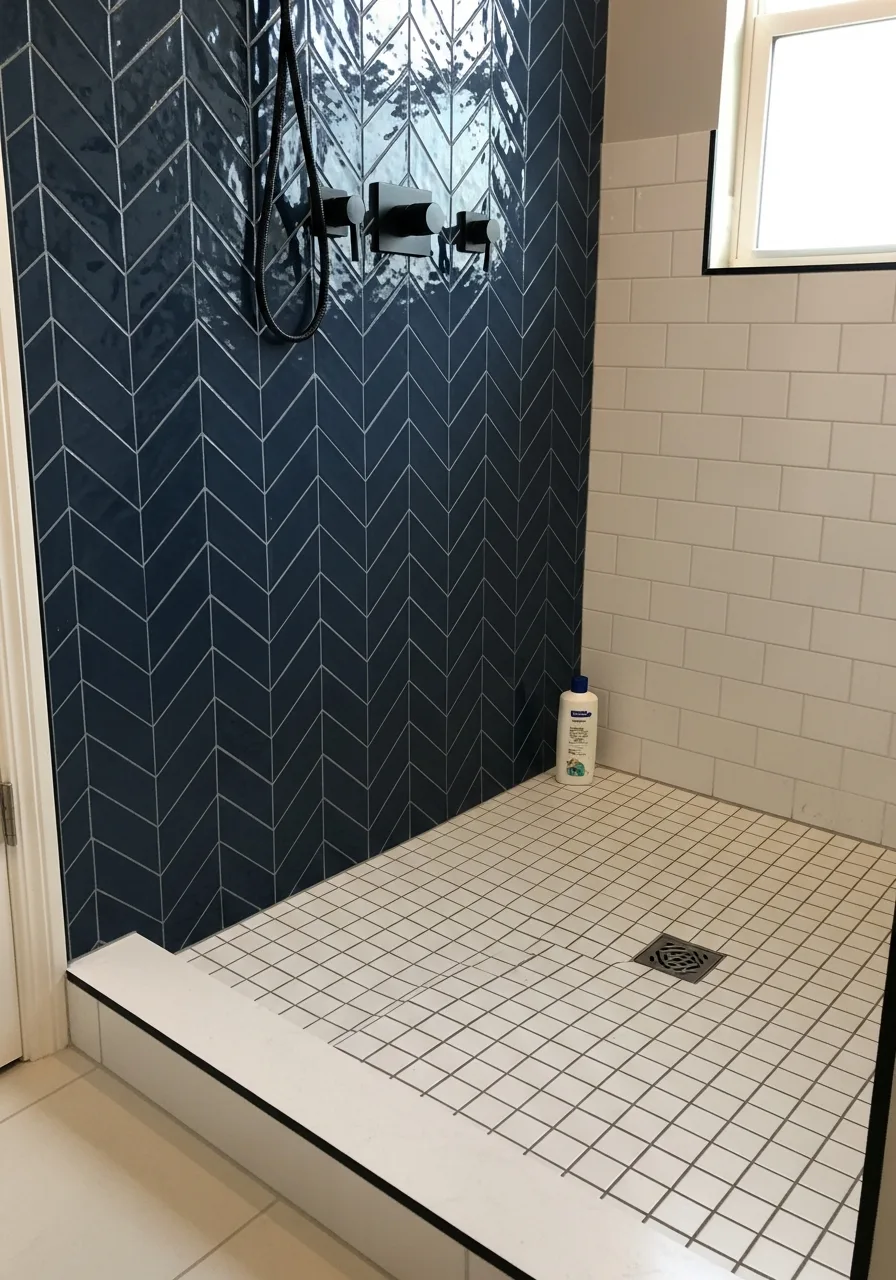
6. Herringbone Focal Wall
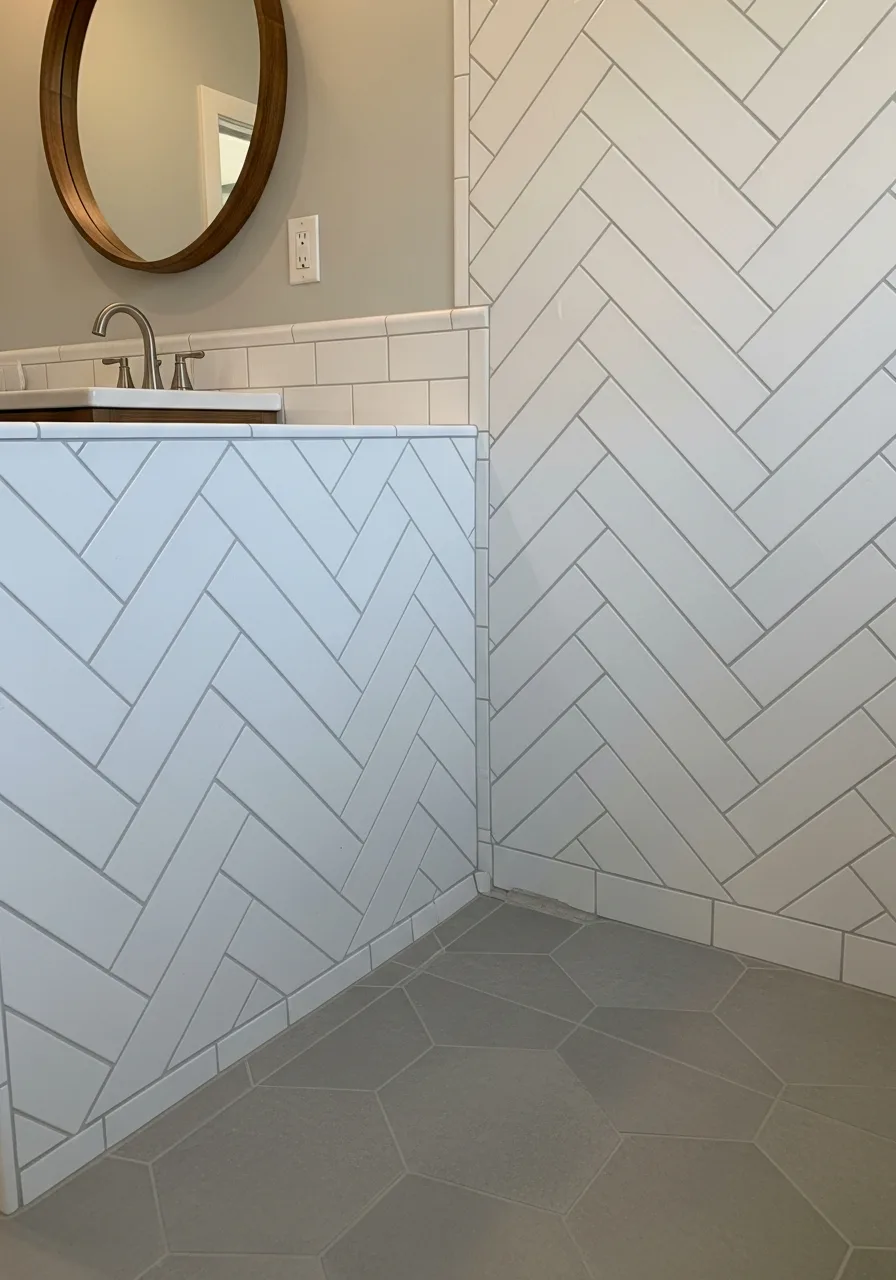
A herringbone pattern adds immediate movement and high-end appeal to a vanity wall. It works best as a feature against simpler, solid-colored tiles on the surrounding walls.
Order ten percent more tile than usual because the herringbone cut creates more waste. What works: Use a matte finish to prevent glare from vanity lights.
- Look for 2×8 or 3×12 tiles to get the best proportions for a herringbone layout.
- Draw a center plumb line on the wall to keep the V-shape of the pattern perfectly centered.
- Apply a darker grout to emphasize the intricate weaving of the herringbone pattern.
Quick win: Use a metal Schluter strip on the edges to give the herringbone pattern a clean, finished border.
7. Terrazzo and Solid Tones
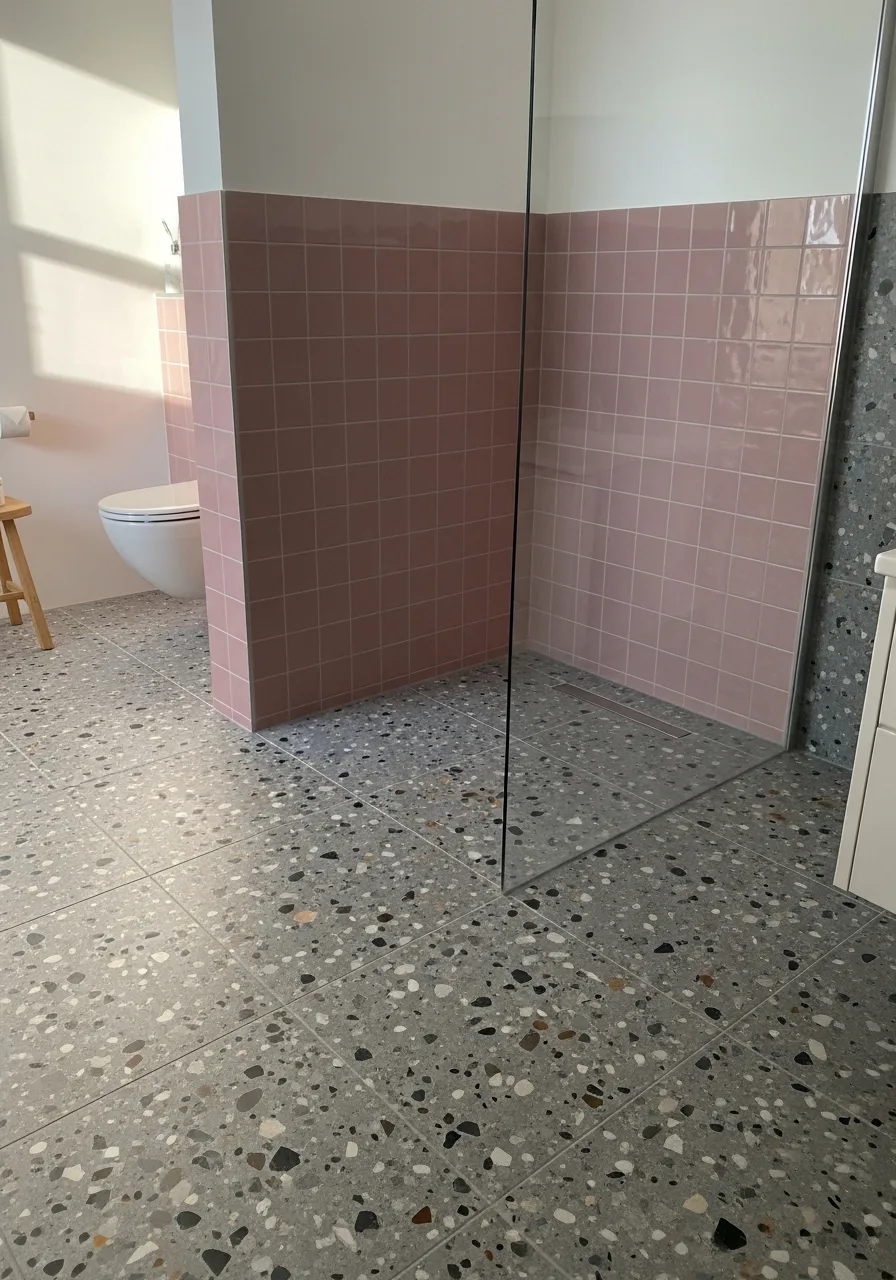
Terrazzo contains multiple flecks of color that you can pull from for the rest of the room. It adds visual interest without the rigidity of a geometric pattern.
Select one color from the terrazzo chips and use that exact shade for the adjacent wall tiles. Smart shortcut: Large terrazzo tiles mean fewer grout lines to clean.
- Search for porcelain terrazzo-look tiles for a more affordable and durable alternative to real stone.
- Coordinate the vanity cabinet color with one of the secondary colors in the terrazzo pattern.
- Use a neutral gray grout for the floor to let the colorful chips remain the focus.
Best shortcut: Pair terrazzo floors with large, plain white wall tiles to keep the room from feeling too busy.
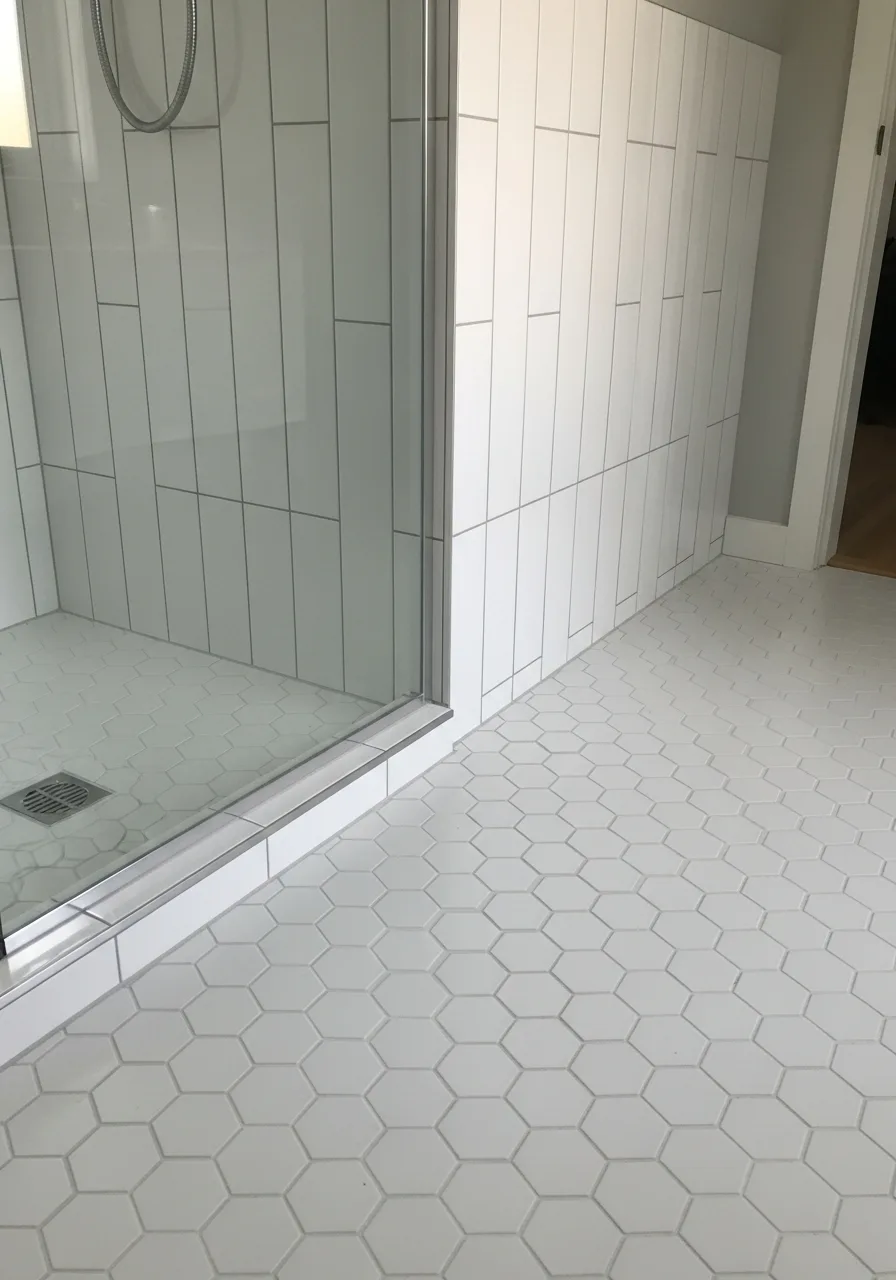
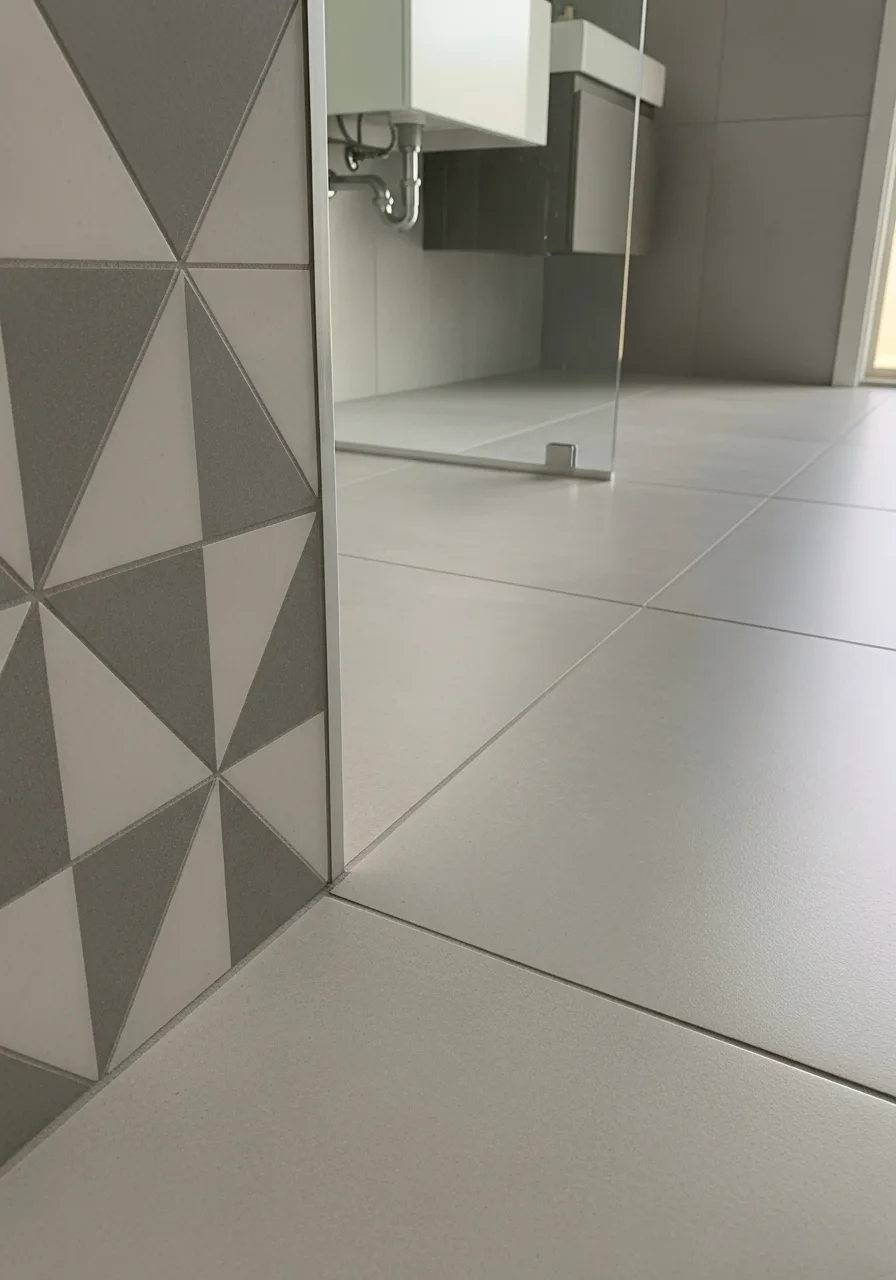
8. Hexagon and Picket Mix
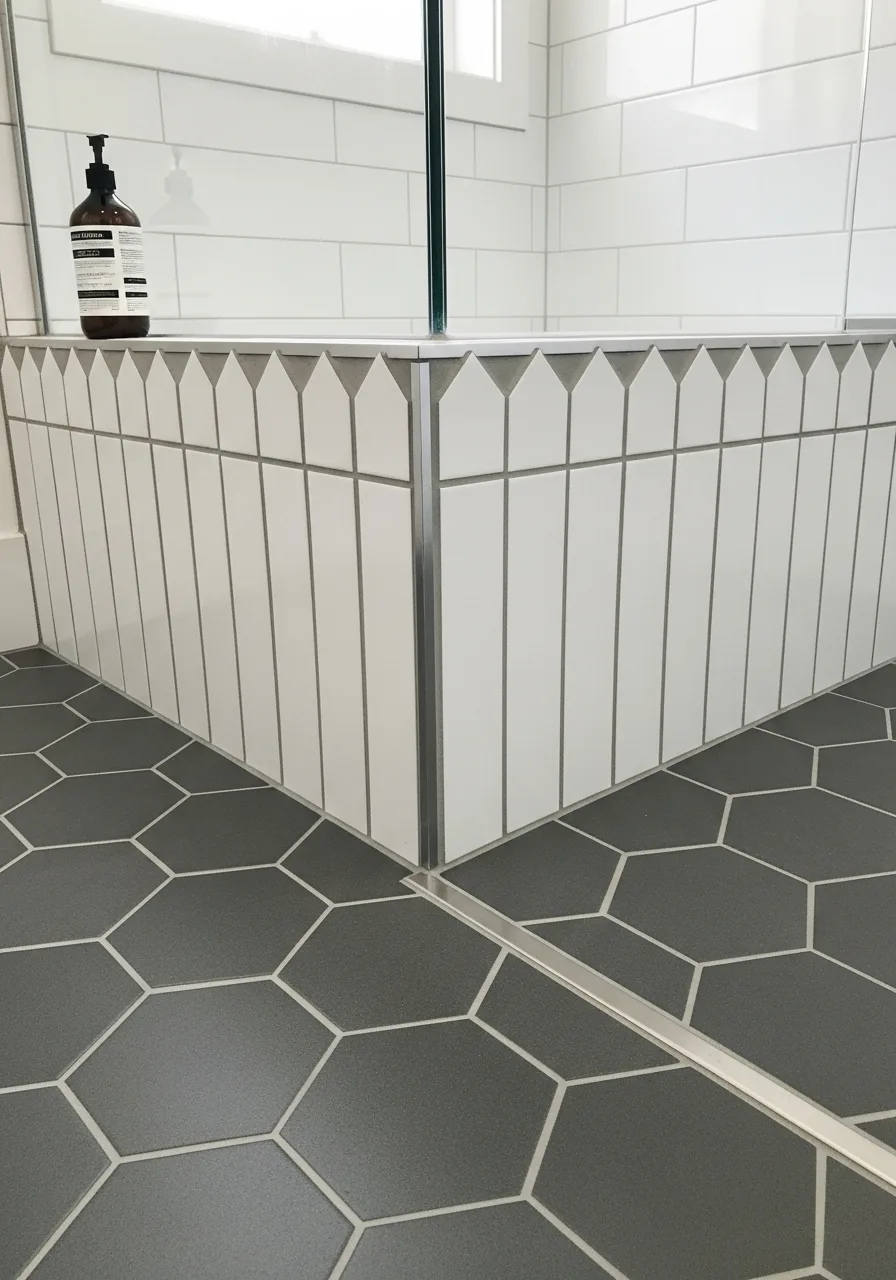
Mixing two different geometric shapes can work if they share a common color palette. This approach creates a playful, architectural feel that suits small powder rooms.
Transition the floor hexagons into a picket-shaped wall tile using a clean metal trim piece. Best move: Stick to neutral tones like charcoal and white to avoid sensory overload.
- Pick tiles with the same thickness to avoid uneven surfaces where the two shapes meet.
- Install the picket tiles vertically to add height to the room while maintaining the geometric theme.
- Use a dark grout for the floor and a light grout for the walls to balance the visual weight.
Most people skip this: Check that the scale of the hexagon isn't too similar to the picket to ensure they look intentional.
9. Zellige and Slate
Zellige tiles have uneven edges and varying shades that provide a handmade, rustic look. Pairing them with flat, dark slate floors grounds the shimmer of the wall tiles.
Focus the Zellige tiles on the backsplash or shower where the light hits the uneven surfaces. Worth doing: Use a very thin grout line to let the tile edges shine.
- Mix tiles from several different boxes before installing to ensure the color variations are spread out.
- Seal the slate floor tiles before grouting to prevent the dark stone from absorbing the grout color.
- Use a wedge spacer to handle the slight size differences common in handmade Zellige tiles.
Best shortcut: Use a warm white grout with Zellige tiles to highlight the unique, hand-crafted texture.
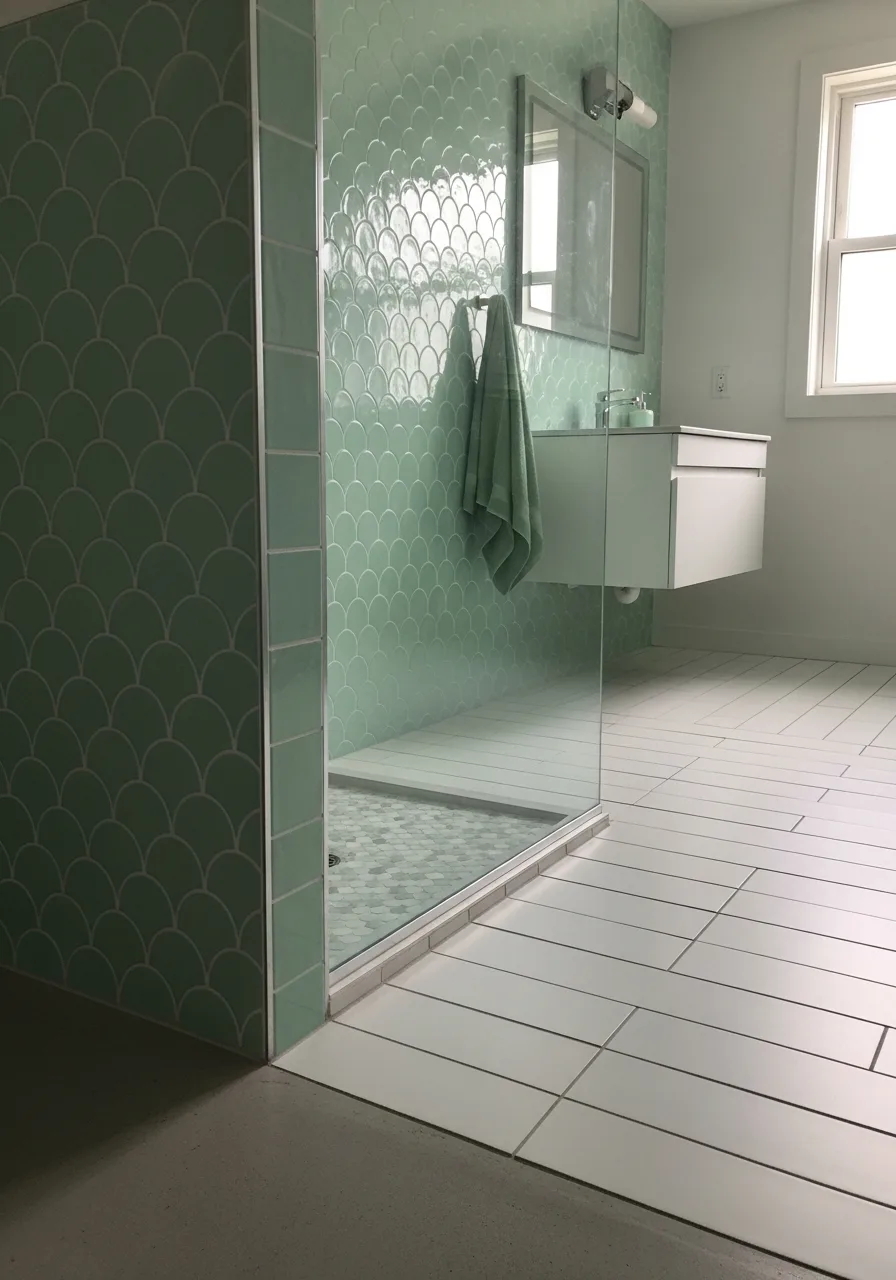
10. Fish Scale and Smooth Stone
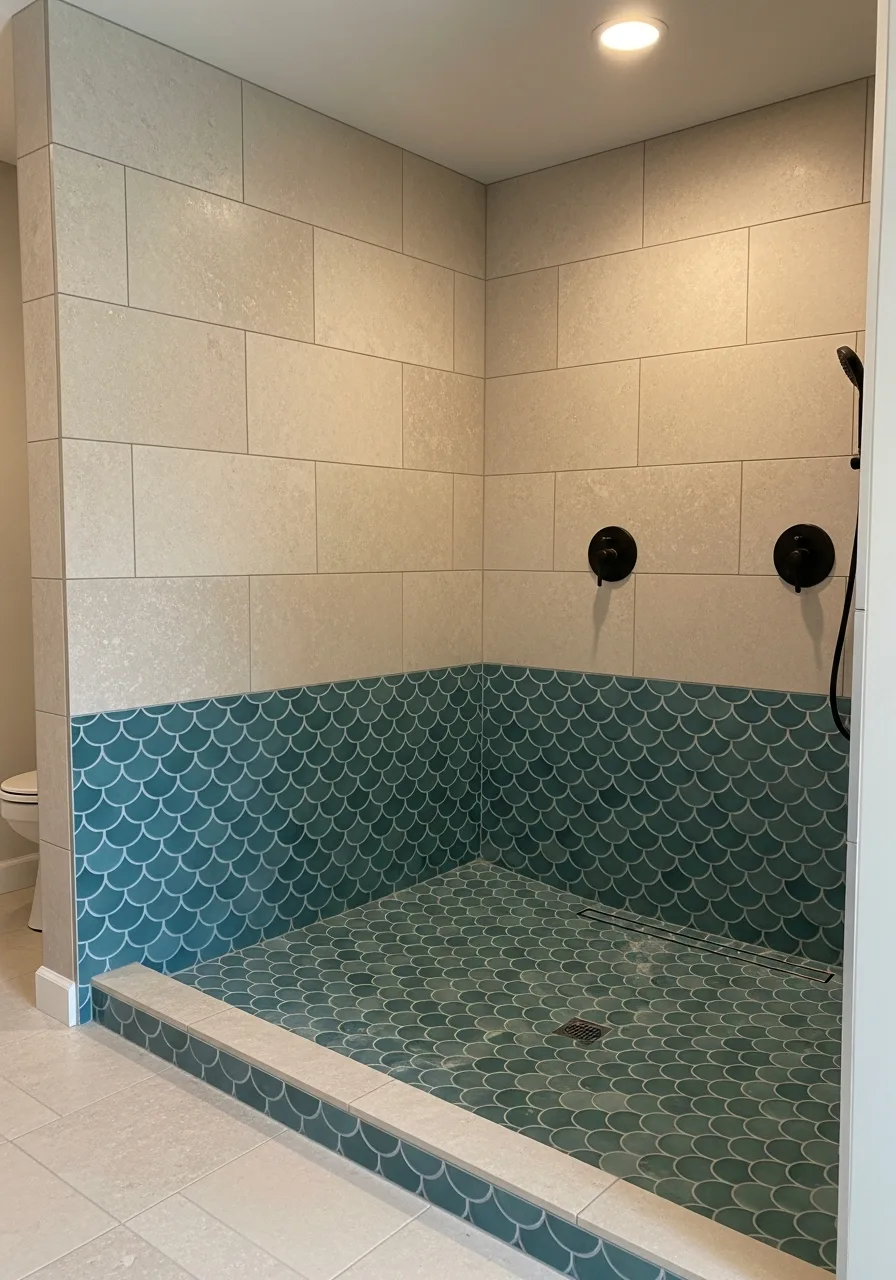
Fish scale tiles, also known as fan tiles, bring a soft, organic curve to a room full of hard angles. They look best when used in a concentrated area like a walk-in shower.
Arrange the fans pointing upward to create a sense of bubbles or water rising. What works: Pair them with large, smooth limestone-look tiles to keep the focus on the pattern.
- Order a sample of the fish scale tile to check the color against your bathroom lighting first.
- Use a flexible adhesive suitable for mosaics to ensure the small fans stay firmly in place.
- Keep the rest of the bathroom hardware simple to avoid competing with the bold tile shape.
Quick win: Place the fish scale tiles only in a recessed niche for a subtle but high-end design detail.
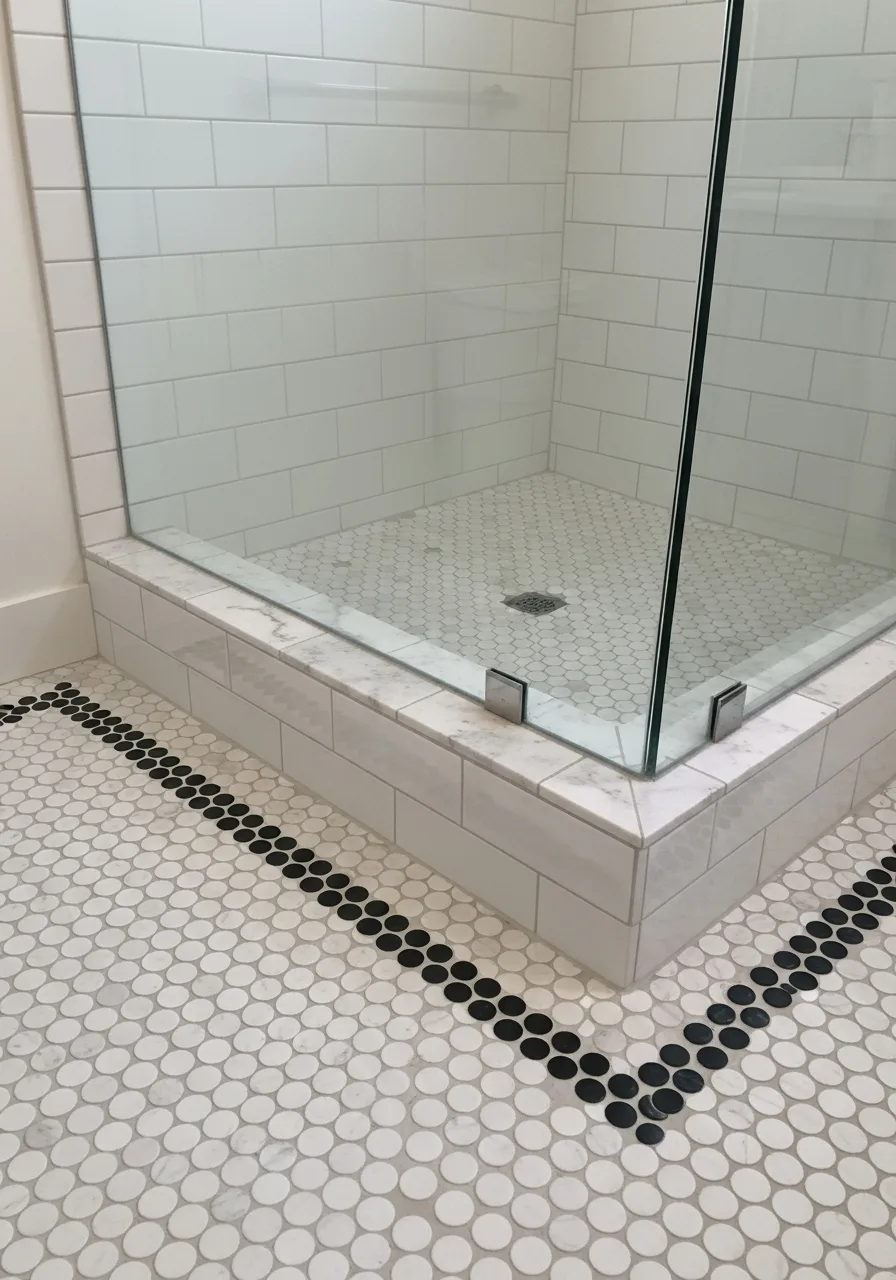
11. Basketweave and Border
A basketweave floor tile is a timeless choice that feels both traditional and upscale. Adding a solid border around the perimeter of the room frames the pattern like a rug.
Use a dark marble border to contrast with a white and gray basketweave center. Smart shortcut: Buy pre-mounted sheets to ensure the pattern stays perfectly aligned during install.
- Plan the border width based on the size of the room to ensure it doesn't look too cramped.
- Use a white thin-set mortar so the dark colors don't bleed through the lighter marble tiles.
- Finish the installation with a high-gloss sealer to enhance the natural stone colors.
Most people skip this: Ensure the subfloor is perfectly level, as small basketweave patterns show every hump or dip.
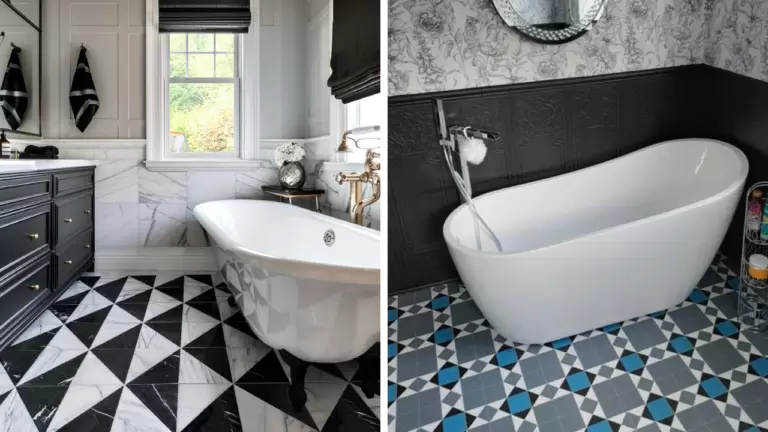
12. Checkerboard with Subway
The classic checkerboard floor is a bold statement that never goes out of style. It pairs perfectly with simple white subway tiles, creating a vintage aesthetic.
Set the checkerboard on a diagonal to make a narrow bathroom feel wider. Best move: Use off-white and charcoal instead of pure black and white for a softer look.
- Measure the room width to choose a tile size that allows for full squares along the main walking path.
- Use a dark gray grout for the entire floor to hide dirt and keep the checkerboard crisp.
- Add a black baseboard tile to tie the floor pattern into the white subway walls.
Quick win: Use 12×12 tiles for the checkerboard to make the pattern feel modern rather than dated.
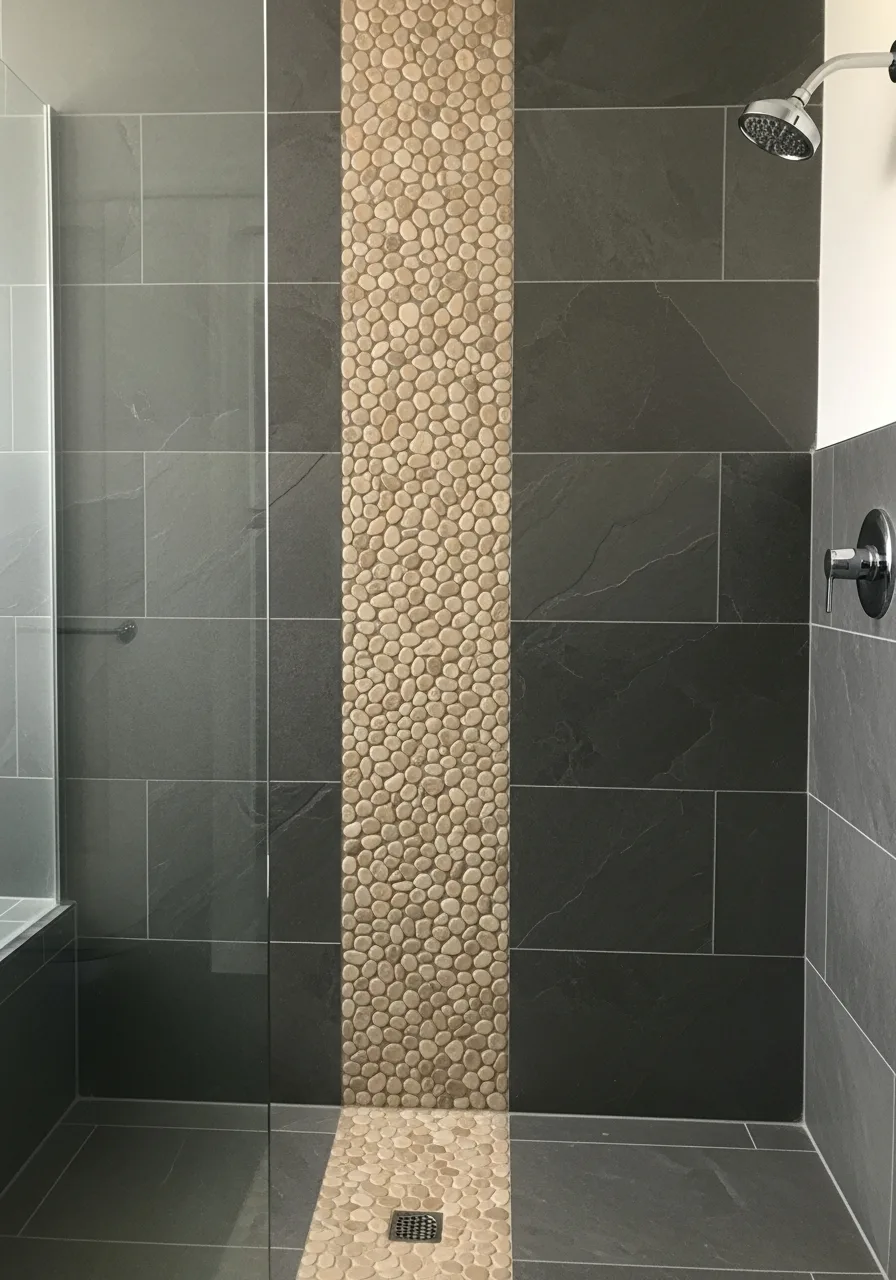
13. Concrete and Pebble
Industrial concrete-look tiles provide a flat, masculine base for the earthy texture of river stones. This combination is ideal for wet room style bathrooms.
Place smooth river pebbles on the shower floor for a natural foot massage and better drainage. Worth doing: Seal the pebbles properly to prevent water from darkening the stone unevenly.
- Sourcing sliced pebbles rather than whole rounds provides a flatter, more comfortable surface to stand on.
- Use a grout color that matches the concrete wall tiles to create a unified color palette.
- Ensure the shower pan is sloped correctly before laying pebbles to avoid standing water.
Best shortcut: Choose a darker pebble mix to hide soap scum and hard water deposits between cleanings.
14. Encaustic Pattern and Glass
Encaustic tiles offer bold, matte patterns that act as the centerpiece of the room. Mixing them with translucent glass tiles on the walls adds a layer of lightness.
Pick a glass tile in a pale blue or green to complement the earthy tones of the floor pattern. What works: Use glass tiles in the shower to make the small space feel more open.
- Use a glass-specific thin-set to prevent the adhesive from showing through the translucent tiles.
- Apply a penetrating sealer to encaustic tiles before grouting to prevent the grout from staining the surface.
- Limit the patterned tile to the floor only to keep the room from feeling visually crowded.
Most people skip this: Use a white grout for glass tiles to maintain their bright, reflective quality.
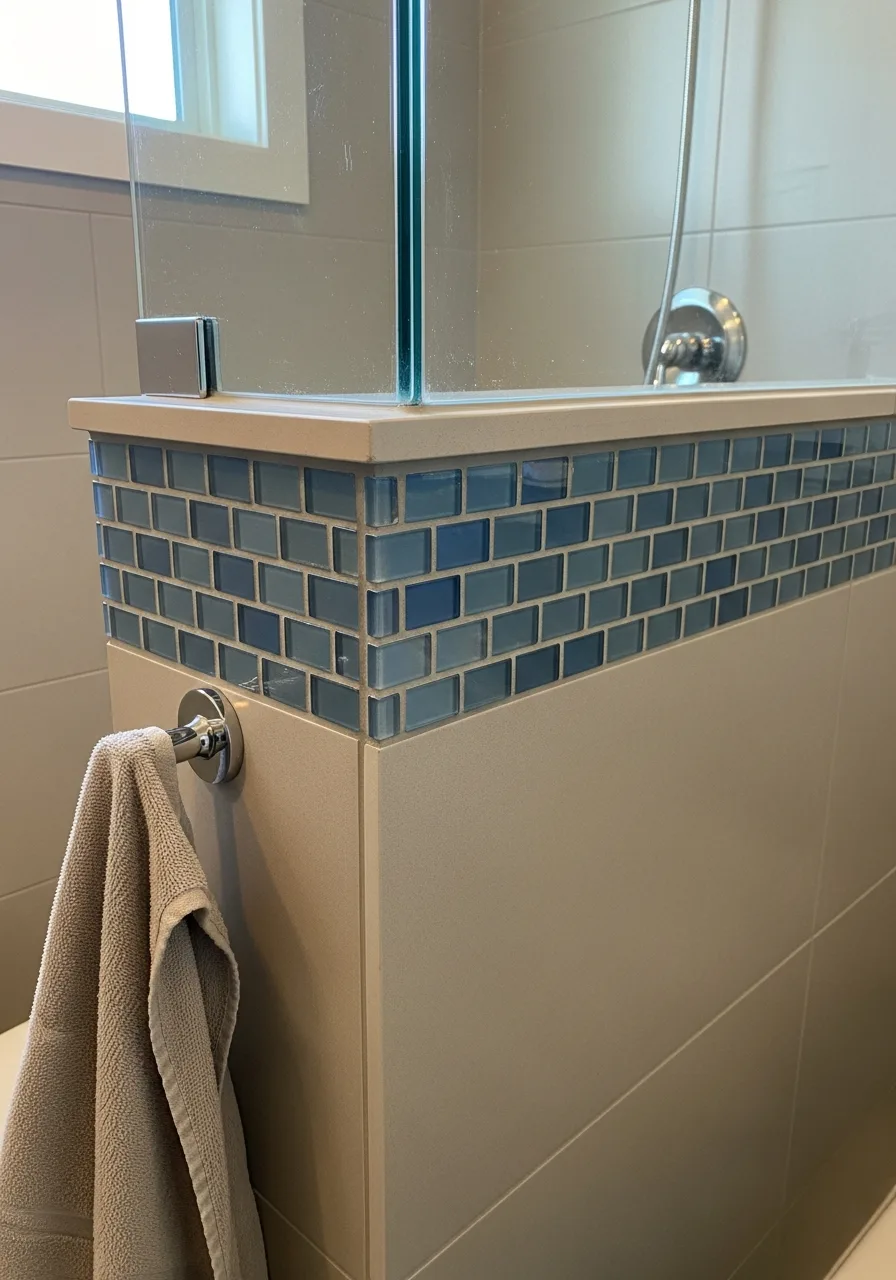
15. Mosaic Strip and Large Squares
A horizontal or vertical strip of mosaic tiles acts as a belt that breaks up large expanses of plain tile. This is a cost-effective way to use expensive materials like mother-of-pearl or metallic glass.
Run the mosaic strip at eye level through the shower to create a high-end focal point. Best move: Match the grout of the large tiles to the mosaic to make the transition seamless.
- Buy mosaic sheets that are the same thickness as your main tiles to avoid a recessed or protruding strip.
- Calculate the height of your shower fixtures before deciding where to place the decorative strip.
- Use a non-sanded grout for the mosaic strip to avoid scratching delicate glass or shell surfaces.
Quick win: Run the mosaic strip vertically behind the shower head for a modern, waterfall-effect design.
16. Diamond Floor and Picket Wall
Mixing two elongated shapes keeps the eye moving without feeling chaotic. Lay the floor tiles on a 45-degree angle to make a narrow bathroom feel wider. What works: Keeping both tiles in the same color family prevents the shapes from competing.
- Order 10 percent extra for cuts on the diamond layout.
- Align the picket points with the center of the sink.
- Use a light gray grout to hide floor dirt while keeping the look airy.
Quick win: Use a metal transition strip between the picket wall and diamond floor for a clean edge.
17. Beaded Inset and Large Format
Adding a small, textured detail like a beaded edge tile breaks up the monotony of massive wall panels. Install a single row of beaded trim at eye level to act as a sophisticated visual divider. Smart shortcut: Use large-format tiles for the majority of the wall to minimize grout lines and cleaning time.
- Check that the trim thickness matches the main tile for a flush finish.
- Place the trim row exactly 60 inches from the floor.
- Swap the beaded trim for a flat pencil liner if the room is ultra-modern.
Most people skip this: Seal the beaded grout twice since the texture catches more dust.
18. Arabesque and Linear

The soft curves of arabesque tiles balance out the sharp, straight lines of standard floor tiles. Use the curved tiles inside a recessed shower niche to create a soft focal point. Best move: Choose a matte finish for the floor to let the glossy wall curves shine.
- Buy pre-mounted mesh sheets for the arabesque tiles to ensure even spacing.
- Center the niche layout so you do not end up with tiny slivers of tile at the edges.
- Use a smaller version of the linear floor tile for the niche shelf to tie it together.
Best shortcut: Use a pre-formed waterproof niche box to save hours of framing.
19. Stacked Square and Hexagon
Small squares and large hexagons create a grid-on-grid look that feels very intentional. Stack the square wall tiles perfectly vertically rather than staggering them for a modern look. What works: Using a dark grout with light tiles to highlight the geometry of both shapes.
- Budget for extra labor as vertical stacking requires a perfectly level starting line.
- Use spacers on all four sides of the square tiles to prevent sagging.
- Scale down the hexagon size for a small powder room to avoid awkward cuts.
Most people skip this: Start the first row of wall tiles one full tile height up to allow for floor leveling.
20. Chevron Wall and Small Grid
Chevron patterns add a sense of direction and energy to a wall. Pair a busy chevron wall with a simple small-scale grid floor to ground the space. Best move: Run the chevron pattern toward the ceiling to make the room feel taller.
- Source chevron tiles that are sold in left and right boxes to complete the V-shape.
- Use a laser level to keep the chevron points perfectly centered on the wall.
- Opt for a dark grout on the floor grid to make it look like a vintage mosaic.
Quick win: Use a white grout for the chevron wall to soften the pattern's intensity.
21. Fluted Wall and Smooth Floor
Textured fluted tiles add a 3D element that plays with light and shadow. Keep the floor tile completely smooth and large-scale to avoid visual clutter. Worth doing: Lighting the fluted wall from above with a sconce to emphasize the texture.
- Expect fluted tiles to cost more per square foot due to the specialized manufacturing.
- Apply grout with a soft sponge to avoid scratching the raised ridges of the tile.
- Use this combo in a dry area like a vanity wall rather than a high-limescale shower.
Best shortcut: Use a color-matched caulk at the corners of the fluted tile for a seamless look.
22. Tonal Mosaic and Large Slab

Using two different sizes of the exact same material creates a high-end custom feel. Install large porcelain slabs on the main walls and use a matching mosaic on the floor for grip. What works: The consistent color palette makes a small bathroom feel much larger.
- Order the wall slabs and floor mosaics from the same dye lot to ensure the colors match.
- Ensure the floor mosaic has a high slip-resistance rating for safety.
- Use the large slabs for the shower bench to minimize uncomfortable grout lines.
Quick win: Use a matching grout color to make the transition between sizes invisible.
23. Scallop Wall and Rectangular Floor
Scallop tiles, also known as fan tiles, offer a soft and organic look. Contrast the curves of the wall with long thin rectangular floor tiles laid in a straight bond. Smart shortcut: Use the scallop tiles on a single accent wall to save on labor costs.
- Plan the scallop layout from the center of the wall outward for symmetry.
- Use a tile nipper or wet saw for the tricky curved cuts at the ceiling.
- Choose a neutral floor color to keep the focus on the decorative wall shape.
Most people skip this: Use a rounded trim piece to finish the exposed side edges of the scallop tiles.
24. Brick Bond and Penny Border
A classic brick layout feels stable and traditional. Add a three-row border of penny tiles around the perimeter of the floor for a vintage hotel vibe. Best move: Use a contrasting color for the penny border to define the room's footprint.
- Measure the border width carefully to ensure it does not get cut off by the vanity or toilet.
- Install the main floor area first, then frame it with the border tiles.
- Use a flexible grout for the penny tiles to prevent cracking in high-traffic areas.
Best shortcut: Buy border sheets of penny tiles to avoid laying individual tiny circles.
25. 3D Texture and Flat Matte
Mixing a 3D wave tile with a flat matte tile creates a tactile experience. Limit the 3D tiles to the shower wall where the water flow can accentuate the pattern. Worth doing: Pairing the textured wall with a large-format matte floor to provide a stable visual base.
- Check the depth of the 3D tile to ensure the shower trim can be installed flush against it.
- Use a grout bag instead of a float to fill the deep recesses of the textured tile.
- Wipe down the 3D tiles regularly to prevent soap scum from settling in the grooves.
Quick win: Place the 3D tiles on the wall opposite the door so they are the first thing guests see.
26. Diamond Mosaic and Wide Plank
A delicate diamond mosaic adds a touch of luxury to a bathroom. Pair it with wide-plank tile that looks like bleached wood for a coastal relaxed atmosphere. What works: The contrast between the intricate mosaic and the broad planks creates a balanced scale.
- Use a 1/16-inch grout line for the wood-look planks to make them look like real timber.
- Ensure the diamond mosaic is rated for wet areas if used in a shower.
- Lay the wood-look planks parallel to the longest wall to elongate the room.
Most people skip this: Use a warm white grout for the diamonds to avoid a sterile cold look.
27. Triangle Pattern and Solid Neutral
Triangle tiles create a bold and modern geometric look. Soften the sharp angles of the triangles by using a large solid neutral tile on the adjacent surfaces. Smart shortcut: Use pre-patterned square tiles that look like triangles to simplify the installation.
- Map out the triangle orientation on the floor before applying thin-set to ensure the pattern is correct.
- Use a very thin grout line to keep the geometric shapes crisp.
- Keep the vanity and hardware simple to let the triangle pattern be the star.
Best shortcut: Use a laser level to ensure the first row of triangles is perfectly horizontal.
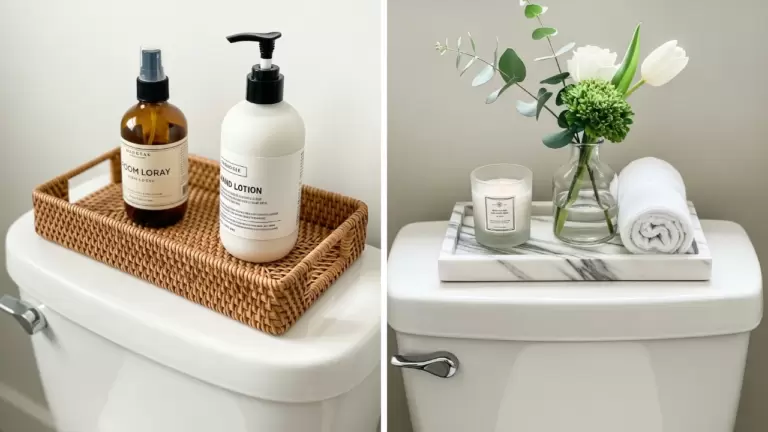
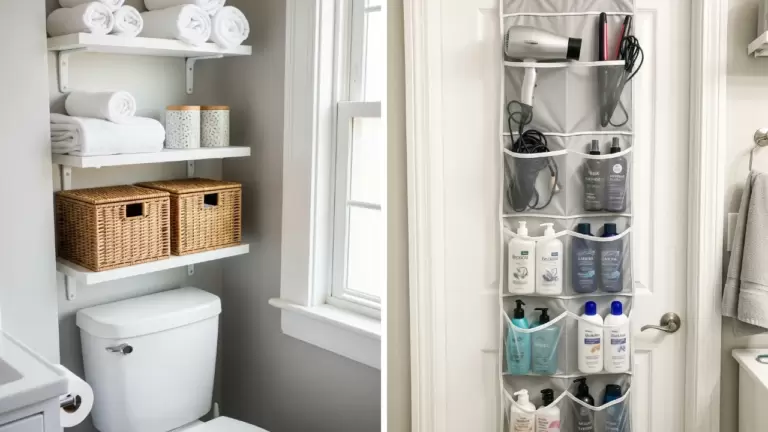
Bathroom Decor
28. Framed Patchwork Tile Floor
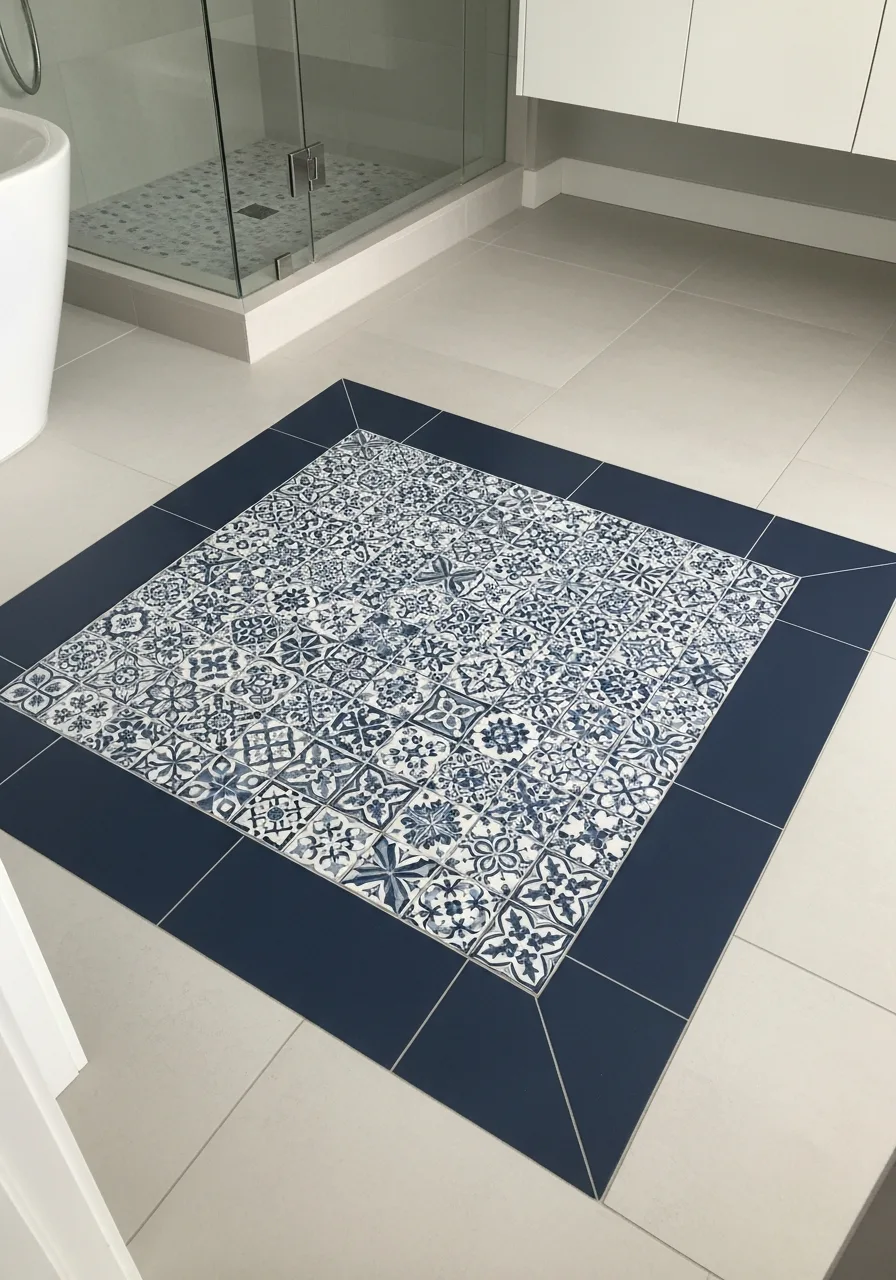
A patchwork floor layout brings character to a small bathroom without overwhelming the space. Lay out the patterned tiles in a loose, non-repeating grid before securing them to ensure the colors feel balanced. Surrounding this mix with a solid 4-inch border provides a clean visual stop that grounds the room.
Best move: Choose patterns within the same color family to keep the eclectic look intentional rather than chaotic.
- Source remnant boxes of patterned tiles from local suppliers to save on costs for the center section.
- Start the layout from the center of the room to ensure the solid border remains an even width around the perimeter.
- Swap patterned tiles for textured white ones to create a subtle, monochromatic version of this look.
Quick win: Use a slightly darker grout for the entire floor to hide wear and seamlessly connect the different tile styles.
29. Vertical Picket and Large Square

Turning picket tiles vertically draws the eye upward and adds height. Combine them with large square floor tiles to provide a sturdy grounded contrast. What works: The vertical lines of the picket tiles mimic a classic pinstripe.
- Start the picket installation at the top of the vanity backsplash for a clean transition.
- Use a 1/8-inch spacer to keep the long vertical lines straight.
- Opt for a matte finish on the large squares to hide water spots in high-use areas.
Most people skip this: Align the center of the vertical picket with the center of the faucet for perfect symmetry.
30. Diagonal Square and Linear Accent
Setting square tiles on a diagonal creates a classic upscale look. Break up the diagonal pattern with a thin horizontal linear accent tile for a custom detail. Worth doing: Using the diagonal layout on the floor to make small bathrooms feel more expansive.
- Calculate for 15 percent waste when doing a diagonal layout due to the many corner cuts.
- Use a contrasting color for the linear accent to define the edges of the room.
- Ensure the linear accent is the same height as the main tile to avoid a trip hazard.
Quick win: Use a dark grout for the diagonal floor to emphasize the diamond shape of the tiles.
31. Oversized Rectangles and Matchstick Mosaics
Large format tiles minimize grout lines and make a small bathroom feel much larger. Stack the oversized rectangles vertically to give the illusion of a much taller ceiling. Pairing these with tiny matchstick mosaics on the floor adds the necessary grip for wet areas.
Best move: Use a matching grout color for the wall tiles to create a seamless, slab-like appearance.
- Order 10% extra for large tiles to cover potential breakage during vertical cuts.
- Start the vertical stack from the center of the wall to ensure even edges on both sides.
- Use a light grey grout for the matchstick floor to hide daily dust and footprints.
Quick win: Align the vertical grout lines of the wall tiles with the center of the floor mosaics for a professional finish.
32. Matte Metallic Inlays and Porcelain
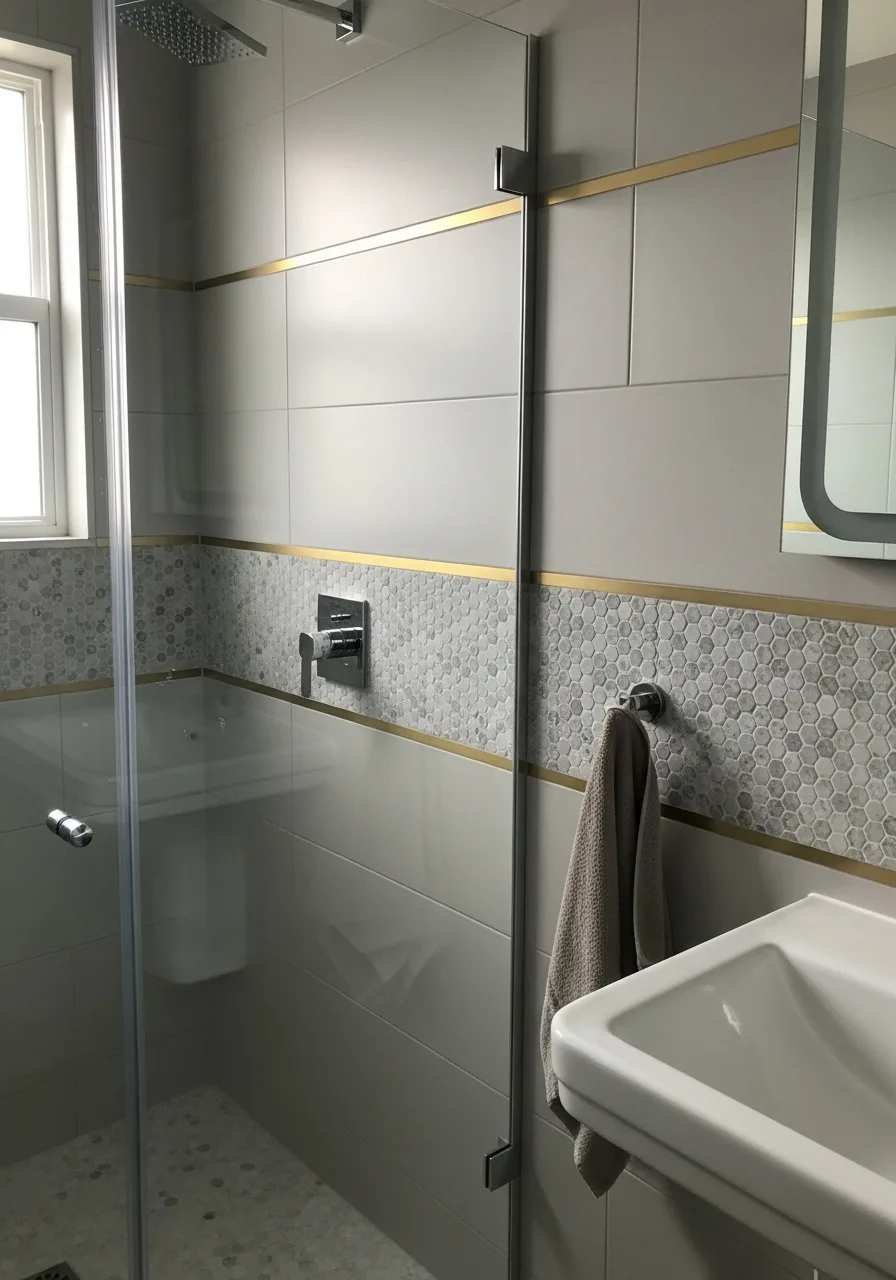
Metallic strips add a touch of luxury without the cost of high-end fixtures. Place the metallic strips at eye level to act as a built-in decorative border. This works best when the metal finish matches your sink faucets and towel bars.
Smart shortcut: Use peel-and-stick metallic trim if you want the look without the difficult tile cutting.
- Select aluminum or stainless steel trims to prevent rusting in high-moisture areas.
- Install the trim pieces at the same time as the tile to ensure they sit perfectly flush.
- Match the trim finish to your shower head and cabinet pulls for a cohesive look.
Most people skip this: Sand the edges of the metal trim after cutting to prevent sharp corners in the shower.
33. Cotto Style Squares and Ceramic
Cotto tiles bring an earthy, Mediterranean feel to a modern bathroom. Use a wider grout line with cotto tiles to lean into the rustic, handmade look. The warm orange tones of the floor balance out the crispness of white ceramic wall tiles.
What works: Choosing a porcelain version of cotto for easier cleaning than traditional clay.
- Expect color variations in cotto tiles and mix several boxes before starting to avoid blotches.
- Seal the grout thoroughly if using authentic clay tiles to prevent moisture absorption.
- Pair this look with a wooden vanity to enhance the natural, warm aesthetic.
Best shortcut: Use a pre-mixed dark grout to mimic the aged look of old-world Mediterranean floors.
34. Rhombus Floor and Rectangular Wall
Rhombus tiles allow for creative patterns like stars or cubes on the floor. Keep the wall tiles a solid color to let the complex floor pattern stand out. This combination adds visual interest without making the room feel cluttered.
Worth doing: Laying out the floor pattern dry before applying any mortar.
- Budget for extra labor costs as rhombus patterns take significantly longer to install.
- Ensure the floor is perfectly level since geometric patterns highlight any dips or bumps.
- Choose a high-contrast grout to make the geometric shapes of the rhombus tiles pop.
Quick win: Use a laser level to keep the first row of stars perfectly straight across the room.
35. Pebble Floor and Marble Slabs
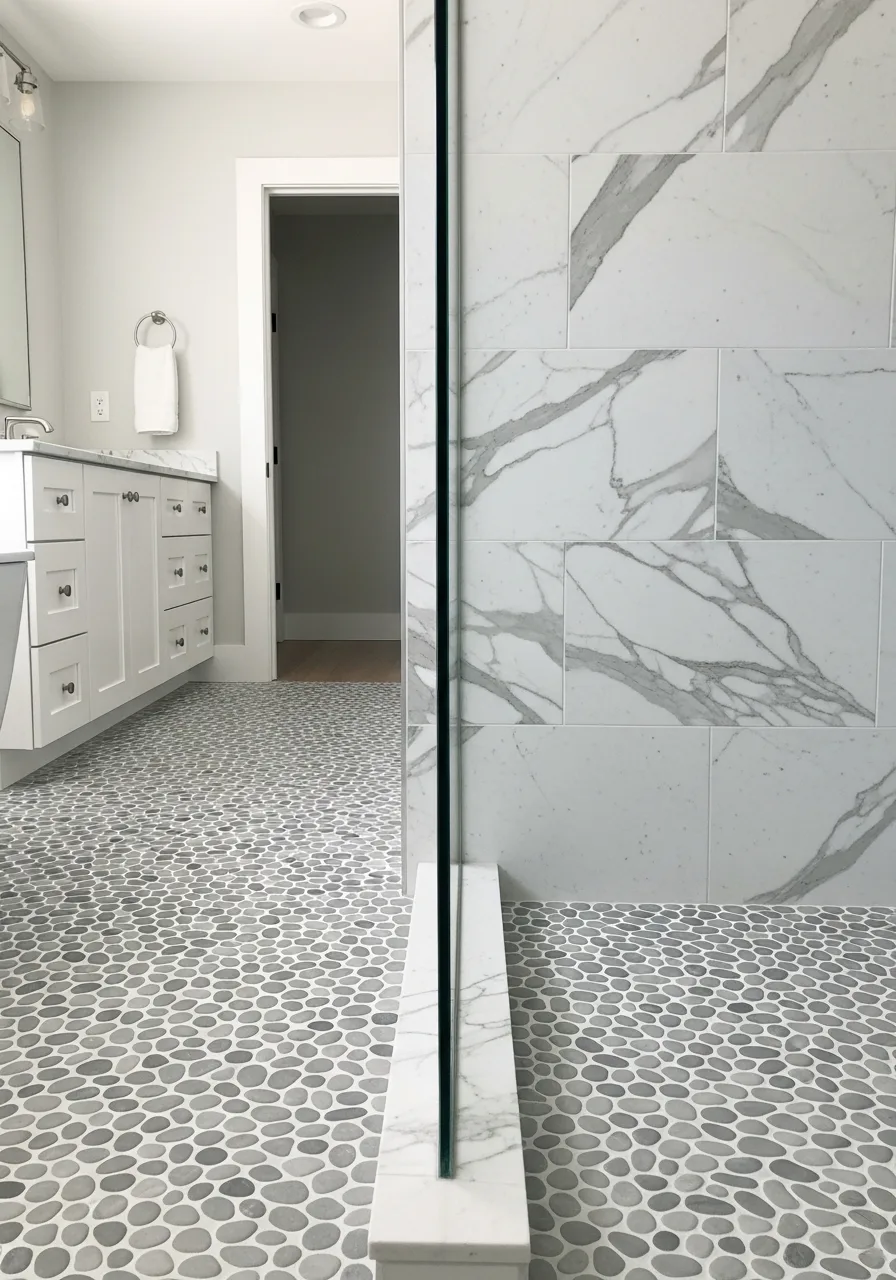
Mixing natural textures creates a spa-like atmosphere in a standard shower. Choose flat-topped pebbles for the floor to ensure the surface is comfortable for bare feet. The organic shapes of the stones contrast beautifully with the straight lines of large marble wall slabs.
Best move: Use a stone sealer once a year to keep the pebbles looking fresh.
- Buy pebble tiles on mesh sheets to make the installation process faster and more even.
- Apply a penetrating sealer to both the stone and the grout to prevent water staining.
- Use a dark grey or tan grout to blend with the natural colors of the river stones.
Most people skip this: Pull a few stones off the mesh edges and hand-place them to hide the square seams between sheets.
36. Diagonal Subway and Square Floor
Subway tiles are a classic choice, but the layout can change the whole vibe.
Angle the subway tiles at 45 degrees to help distract from walls that aren't perfectly straight. This diagonal pattern adds movement and a custom feel to affordable materials. What works: Using a larger square tile on the floor to provide a stable visual base.
- Plan for more waste than usual because diagonal cuts are required at every corner.
- Use a tile spacers to maintain a consistent 1/8-inch gap for a clean, modern look.
- Start the pattern from the center of the most visible wall to ensure symmetry.
Best shortcut: Buy a manual tile snapper for subway tiles to make quick diagonal cuts without a wet saw.
37. Charcoal Slate and Glossy White
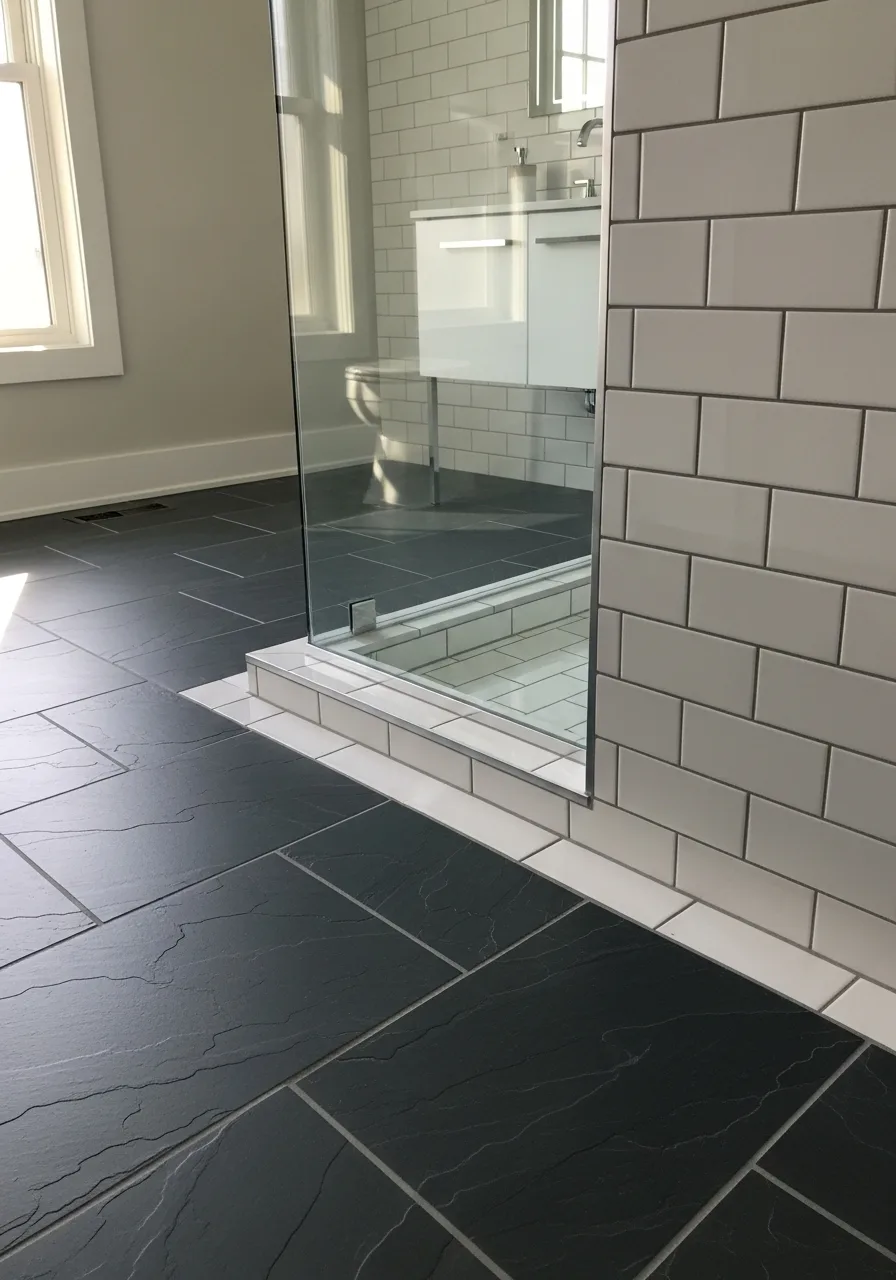
High-contrast colors create a sophisticated and timeless bathroom design. Use a dark grey grout for the slate floor to make the surface look like a solid piece of stone. The matte finish of the slate prevents the floor from being slippery when wet.
Smart shortcut: Use a glossy white tile on the walls to bounce light and prevent the dark floor from feeling heavy.
- Seal slate tiles before grouting to prevent the dark grout from staining the stone's surface.
- Choose a large rectangular slate for the floor to reduce the number of grout lines.
- Pair with black matte hardware to tie the dark floor into the rest of the room.
Quick win: Use a slate enhancer sealer if you want the dark stone to have a 'wet' look permanently.
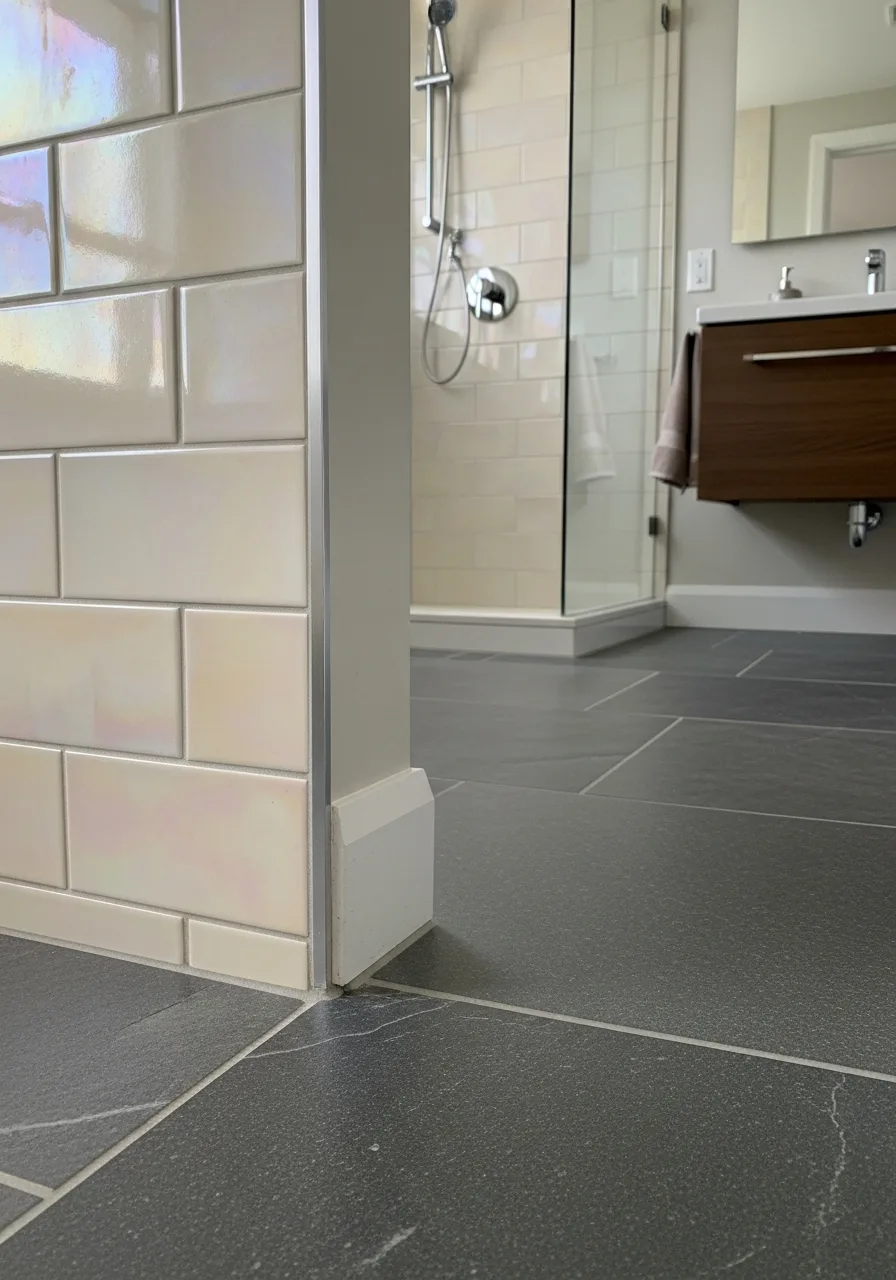
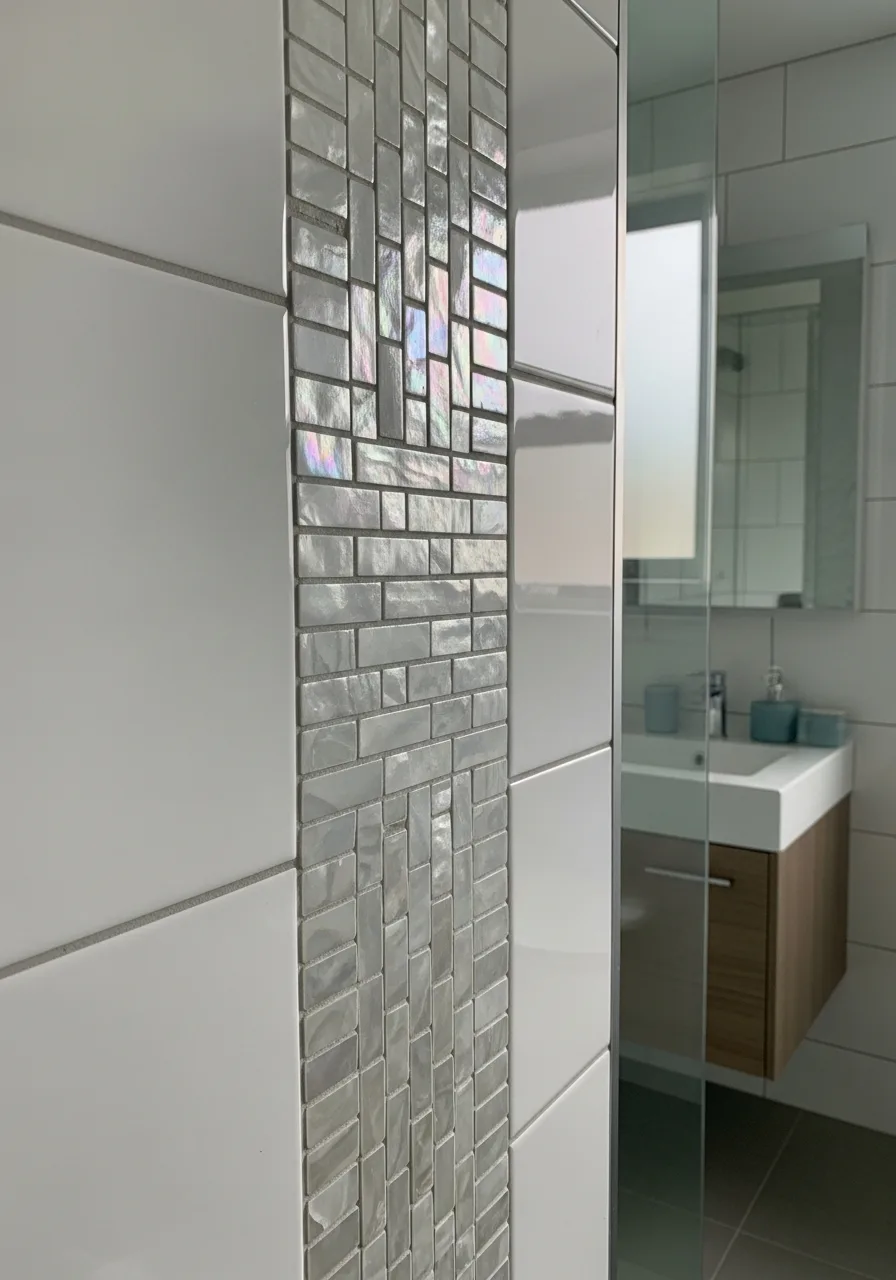
38. Iridescent Glass and Neutral Porcelain
Iridescent tiles change color as you move, adding a dynamic element to the space. Install the glass band only on one wall to keep the shimmer from overwhelming the room. This is an excellent way to introduce color into a neutral bathroom without a full renovation.
Worth doing: Placing the glass tiles where they will catch natural light from a window.
- Use a white thin-set mortar behind glass tiles so the adhesive color doesn't show through.
- Clean glass tiles with a simple vinegar and water solution to maintain their shine.
- Limit the glass to a 4-inch or 6-inch strip to save on material costs while adding impact.
Most people skip this: Use a glass-specific blade on your wet saw to prevent the edges of the tiles from chipping.
39. Terracotta Squares and Cream Subway
Small square terracotta tiles offer a cozy, vintage appearance underfoot. Pair the terracotta with a cream-colored grout to soften the transition between the floor and wall. The cream subway tiles on the wall feel warmer and more inviting than stark white.
Best move: Use this combination in a room with plenty of plants for an indoor-outdoor feel.
- Check that your floor structure can handle the weight of thicker terracotta tiles.
- Apply a high-quality sealer immediately after installation to protect the porous clay.
- Mix tiles from multiple boxes to ensure the natural color variation is spread evenly.
Best shortcut: Use a 'bone' or 'almond' colored grout instead of white to hide dirt on a high-traffic floor.
40. Stacked Pebble Border and Slate
A vertical pebble border breaks up the monotony of large, dark tiles. Run the pebble border from the floor all the way up the wall for a continuous look. This adds a natural, textured element that feels like a custom waterfall feature.
What works: Using different shades of the same color for a subtle, professional design.
- Measure the width of the pebble sheet and cut the slate tiles to fit around it exactly.
- Use a slightly thicker layer of mortar for the pebbles to keep them flush with the slate.
- Apply grout with a soft sponge to ensure it gets into all the gaps between the round stones.
Quick win: Position the pebble border directly behind the shower controls to frame the plumbing fixtures.
41. Beveled Subway and Patterned Cement
Beveled edges add depth and shadow to standard white walls. Select a beveled tile with a high-gloss finish to bounce light into darker corners. This classic wall style pairs perfectly with the busy, intricate patterns of cement floor tiles.
Smart shortcut: Choose porcelain tiles that look like cement for lower maintenance and better water resistance.
- Avoid using beveled tiles in corners where you need to install hardware, as they won't sit flat.
- Use a non-sanded grout for beveled tiles to avoid scratching the glossy finish.
- Keep the floor pattern in a neutral color palette to prevent the room from feeling too busy.
Most people skip this: Use a deeper tile trim or 'bullnose' tile to finish the edges of beveled subway tiles.
42. Matte Black Lanterns and Concrete
Lantern or arabesque shapes offer a softer, more fluid look than standard squares. Contrast the black lantern tiles with a white vanity to make the wall pop. Pairing these with a light grey concrete-look floor keeps the bathroom feeling modern and industrial.
Worth doing: Using a dark grout with black tiles for a seamless, high-end appearance.
- Use a matte sealer on black tiles to maintain the 'flat' look without adding unwanted shine.
- Ensure your wall is perfectly flat, as the lantern shape is unforgiving of uneven surfaces.
- Install the lanterns in a vertical orientation to help the wall feel taller.
Best shortcut: Buy lantern tiles on mesh sheets to ensure the curves are perfectly spaced and aligned.
43. Kite Shaped Tiles and Stone
Kite tiles are a modern alternative to hexagons and offer a sharp, edgy look. Install the kite tiles pointing upward to create a sense of movement on the wall. These work beautifully when paired with large, quiet stone tiles on the floor.
Best move: Use a grout color that matches the tile exactly to emphasize the unique shape.
- Plan the layout carefully at the ceiling and floor to avoid thin, awkward slivers of tile.
- Use a small 1/16-inch grout joint to keep the sharp geometric lines looking crisp.
- Choose a matte finish for the kite tiles to give them a modern, architectural feel.
Quick win: Use kite tiles as a backsplash behind the mirror to create an instant focal point.
44. Herringbone Floor and Stacked Wall
Herringbone patterns add a sense of luxury and traditional craftsmanship to any floor. Use wood-look tiles in the shower area to get the warmth of timber without the water damage. Pairing a busy herringbone floor with a simple, horizontally stacked wall keeps the design balanced.
What works: Using long, thin tiles for the floor to make the herringbone pattern more dramatic.
- Use a leveling system during installation to prevent 'lippage' or uneven edges on the floor.
- Choose a grout color that is one shade darker than the tile to mimic the look of real wood planks.
- Orient the herringbone 'V' shape toward the main entrance of the bathroom.
Most people skip this: Check the 'slip resistance' rating of wood-look tiles before installing them on a shower floor.
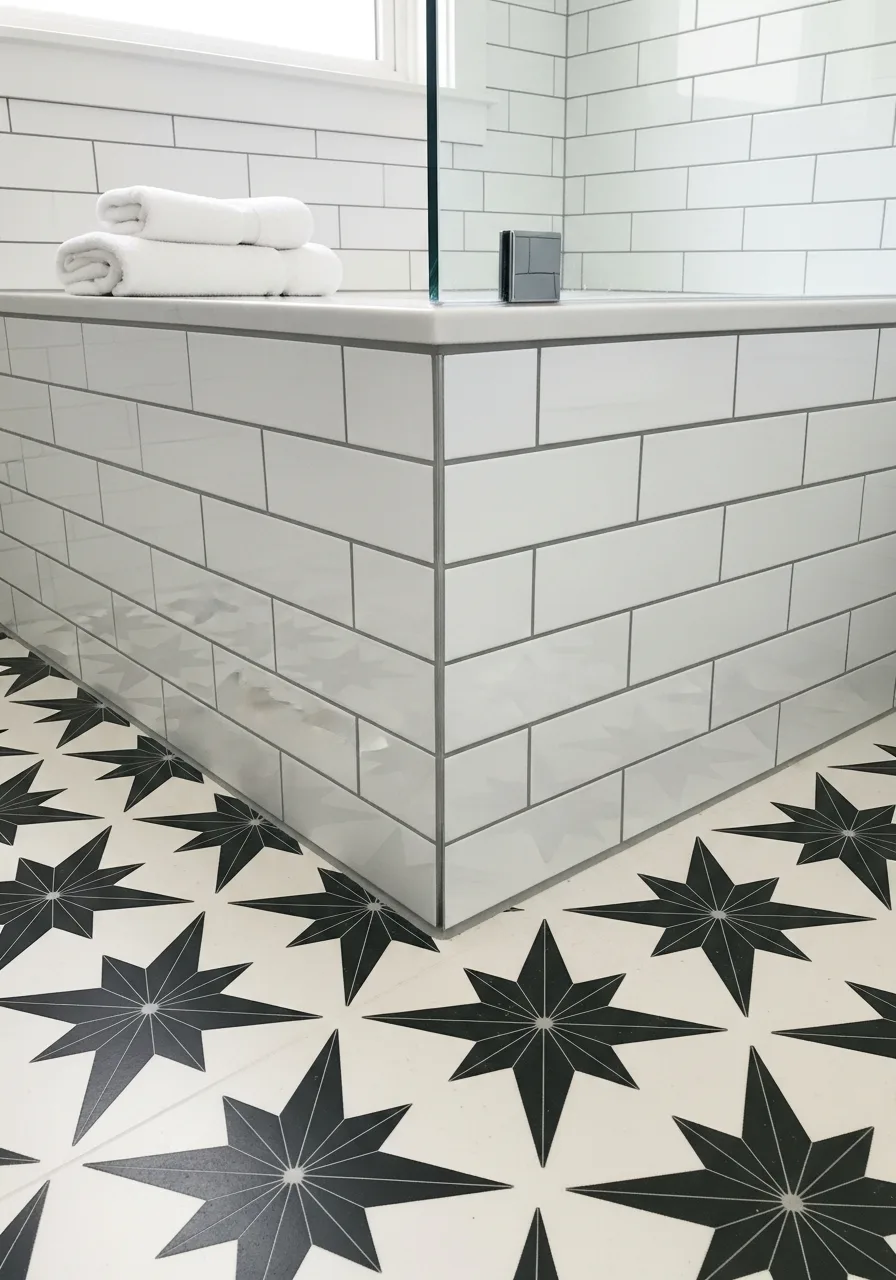
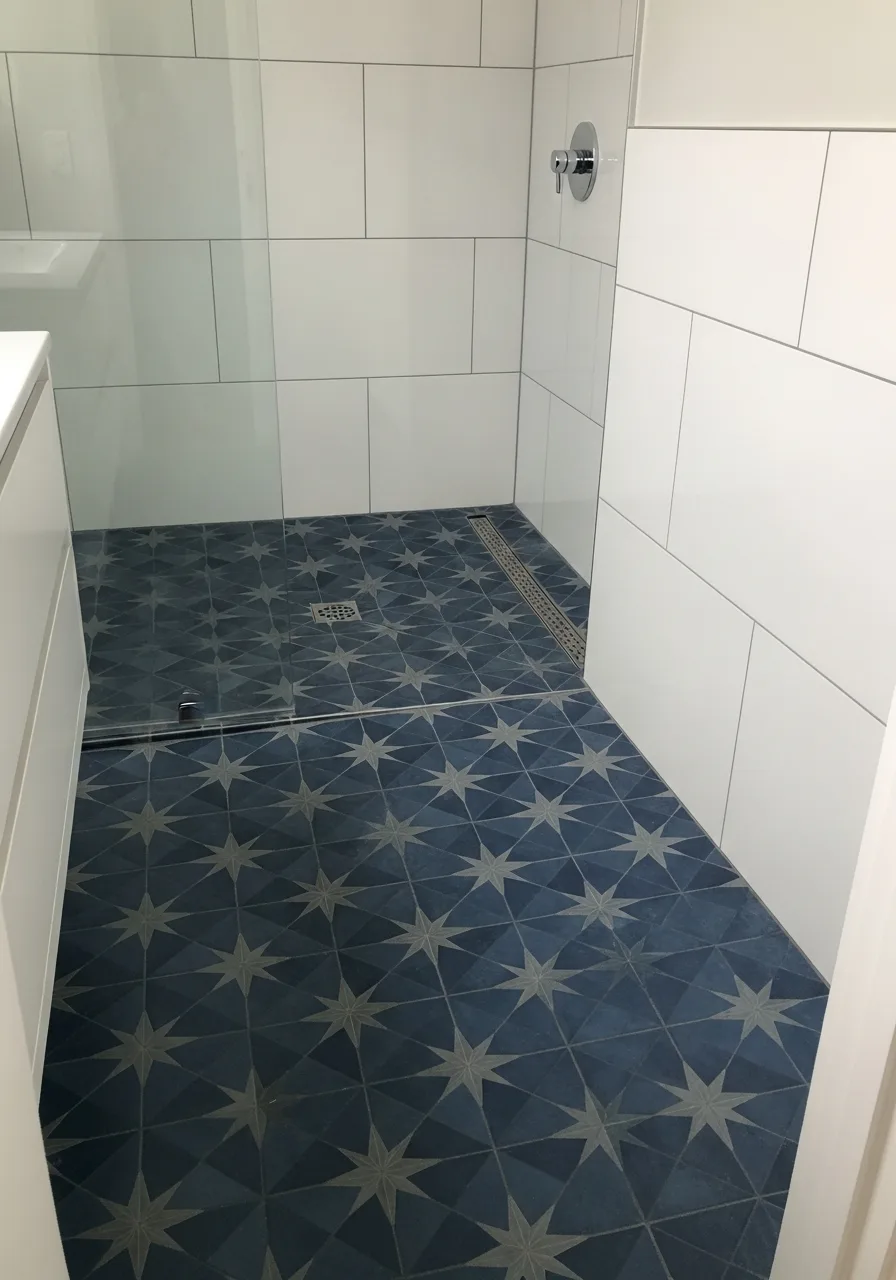
45. Star and Cross and Solid
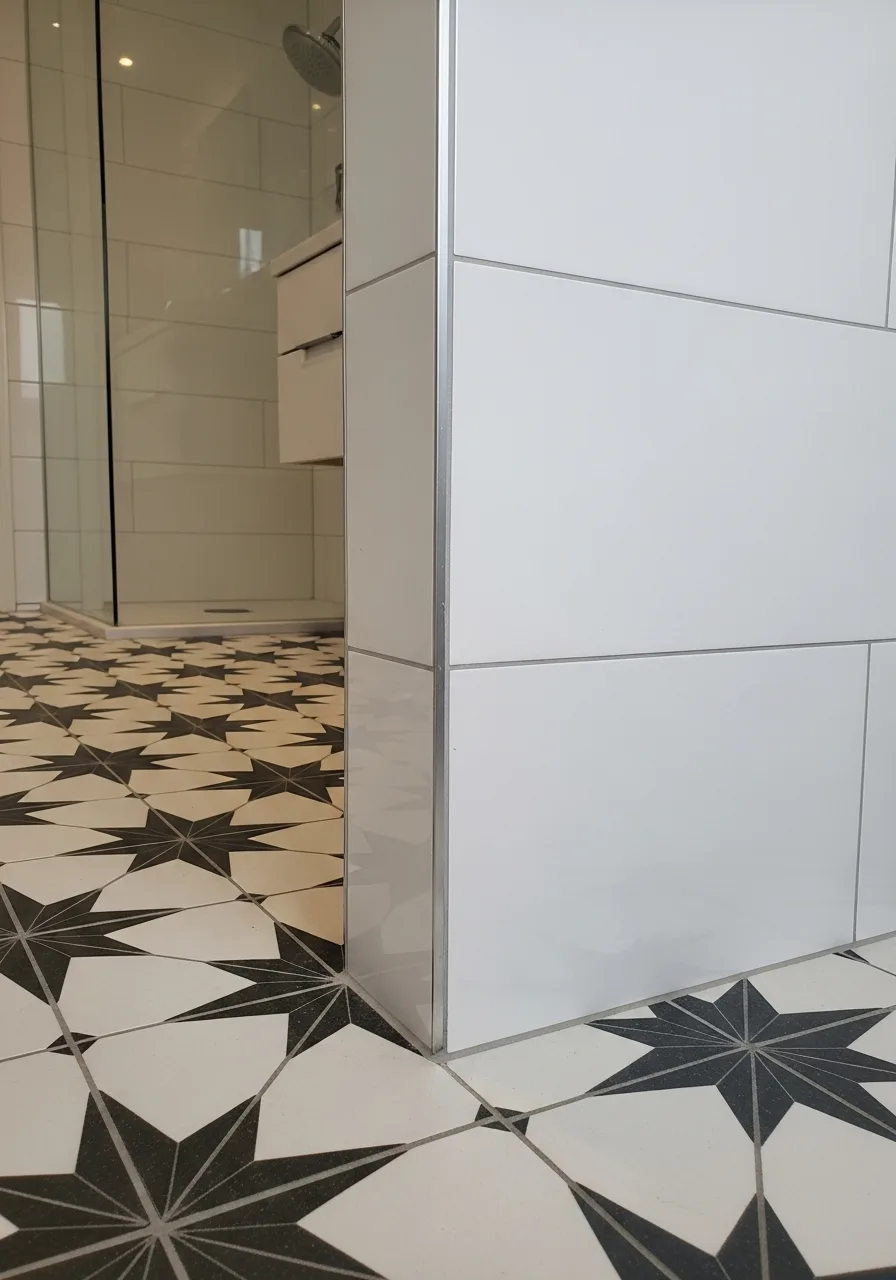
The star and cross pattern is a classic motif that adds instant character to a floor. Center the star pattern in the middle of the room to create a 'rug' effect with the tile. Keeping the walls a solid, large-format tile prevents the pattern from feeling overwhelming.
Smart shortcut: Use a pre-mixed grout to ensure consistent color across the many joints in this pattern.
- Measure the room from the center out to ensure the pattern is perfectly balanced on all sides.
- Budget for extra grout, as this pattern has significantly more joints than standard tiles.
- Use this pattern in a small powder room to make a big design statement in a tiny space.
Best shortcut: Choose a two-color version of the star and cross to make the geometry easier to see from a distance.
46. Linear Mosaic and Large Porcelain
Mix thin glass strips with massive floor tiles to balance the room's scale. The small wall pieces create movement while the floor provides a calm foundation.
Using a matching grout color for both prevents the different sizes from clashing. What works: Keeping colors in the same family makes the size jump feel intentional rather than messy.
- Order 10% extra for the small mosaic tiles to account for intricate cuts around plumbing.
- Start the large floor tiles from the center of the room to ensure even borders at the walls.
- Swap glass for ceramic mosaics if the budget is tight for a similar look.
Most people skip this: Seal the grout lines of small mosaics immediately to prevent water spots in the many crevices.
47. Wave Textured Wall and Granite
Add depth to a small bathroom by using a tile with a raised, wavy surface. Pair this with a smooth, dark granite floor to ground the light-reflecting walls.
Install the textured tiles on the wall facing the door to make an immediate visual impact. Best move: Stick to a single color for textured tiles to avoid overwhelming the eyes.
- Textured tiles often require more grout, so buy one extra bag than the calculator suggests.
- Use a laser level to keep the wave patterns perfectly aligned across the entire wall.
- Choose a smaller wave pattern in tiny bathrooms to keep the scale appropriate for the space.
Quick win: Position overhead lighting close to the wall to cast shadows that highlight the tile's texture.
48. Emerald Picket and Grey Sandstone

Use long, pointed picket tiles in a bold jewel tone to draw the eye upward. Balance the intense color with a neutral, matte sandstone floor that feels soft underfoot.
Run the picket tiles vertically to make a low ceiling feel significantly taller. Worth doing: Matte floors are safer in wet areas because they offer better natural grip than glossy ones.
- Check the lead time on specialty picket shapes as they are often special-order items.
- Apply a high-quality sealer to the sandstone floor to prevent water stains and discoloration.
- Use a light grey grout for the emerald tiles if you want the shape to stand out.
Best shortcut: Use a matching emerald caulk at the corners for a seamless, professional finish.
49. Miniature Square and Large Slab
Combine tiny one-inch squares with massive four-foot slabs for a high-end look. This pairing works best when the small tiles are used in a defined area like a shower floor or niche.
Choose a slab with subtle veining that mimics the colors found in the smaller mosaic tiles. Smart shortcut: Using large slabs on the walls means fewer grout lines to scrub later.
- Hire a pro for large-format slabs because they require special suction tools for placement.
- Ensure the subfloor is perfectly level to prevent the large slabs from cracking over time.
- Use peel-and-stick mosaic sheets for the small squares to save time on a weekend project.
Most people skip this: Match the floor drain cover to the metal finish of your faucets for a cohesive look.
50. Vertical Kit Kat and Concrete
Slim finger tiles offer a modern twist on the classic subway look. Pair these delicate lines with the rugged, industrial feel of large-format concrete tiles.
Offset the vertical wall lines with a staggered floor pattern to add architectural interest. What works: The contrast between thin wall tiles and wide floor tiles makes a standard bathroom feel custom.
- Budget for a diamond-blade wet saw to get clean edges on the thin finger tiles.
- Place the vertical tiles starting from the top of the vanity to ensure a full tile at eye level.
- Use dark grout with concrete tiles to hide dirt in high-traffic family bathrooms.
Quick win: Use a white grout with light blue finger tiles to make the vertical lines pop.
Frequently Asked Questions
How many different tiles can I use in one bathroom?
Most designers recommend sticking to a maximum of three different tiles to prevent the space from feeling disjointed or cluttered. Typically, you would choose one for the floor, one for the walls, and a third as a decorative accent for a niche or backsplash.
Should the floor tile be darker than the wall tile?
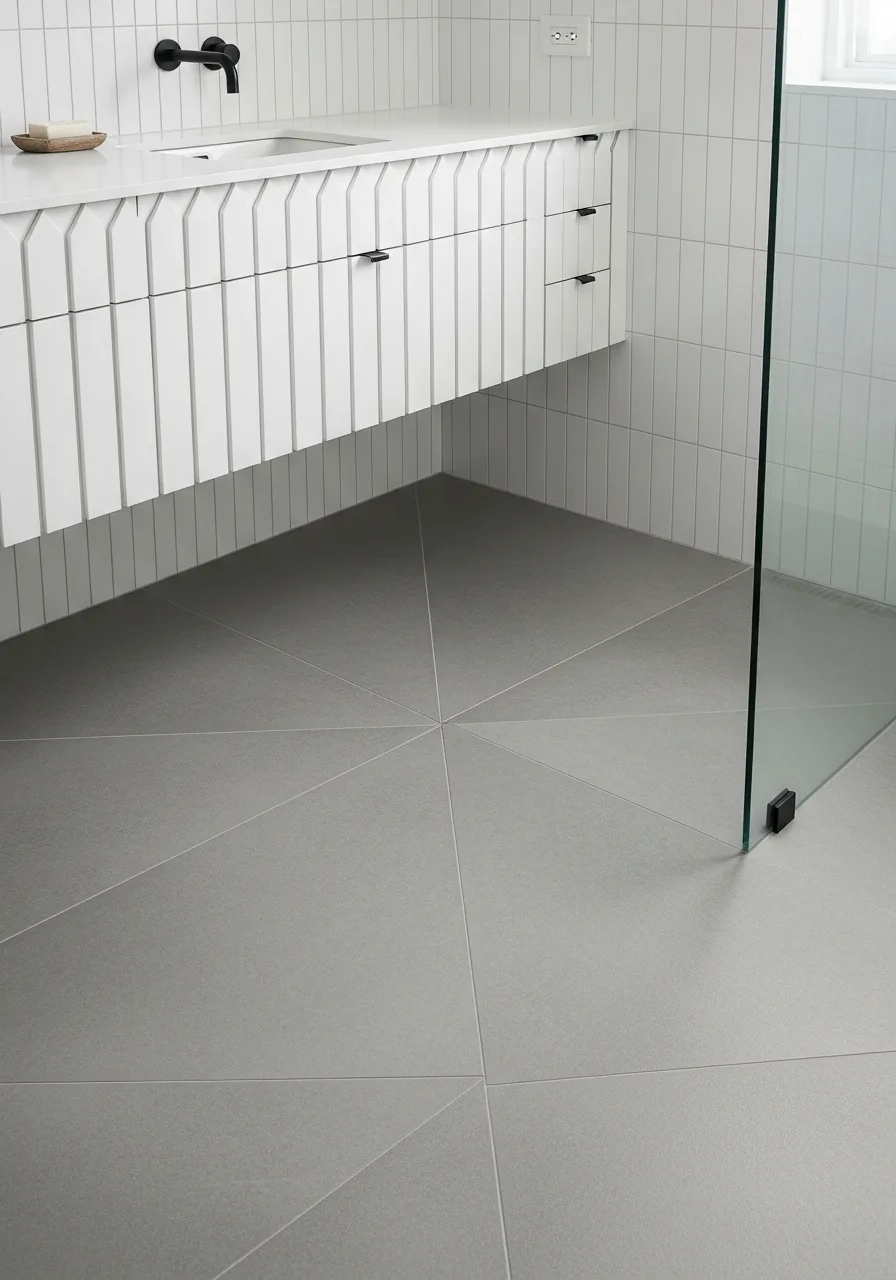
Choosing a darker floor tile is a practical way to ground the space and provide visual weight to the room's foundation. This contrast helps the bathroom feel more balanced and allows lighter wall tiles to make the upper half of the room feel airy and bright.
How do I choose a grout color for two different tiles?
You can either match the grout color to each specific tile for a seamless look or select a single neutral shade that works for both. A mid-tone gray or warm beige is often the best choice for bridging the gap between different tile styles and colors.
Can I mix matte and glossy tiles in the same room?
Mixing matte and glossy finishes is a fantastic way to add texture and manipulate light reflection within the space. Using glossy tiles on the walls can help bounce light around a small room, while matte tiles on the floor provide a slip-resistant and tactile contrast.
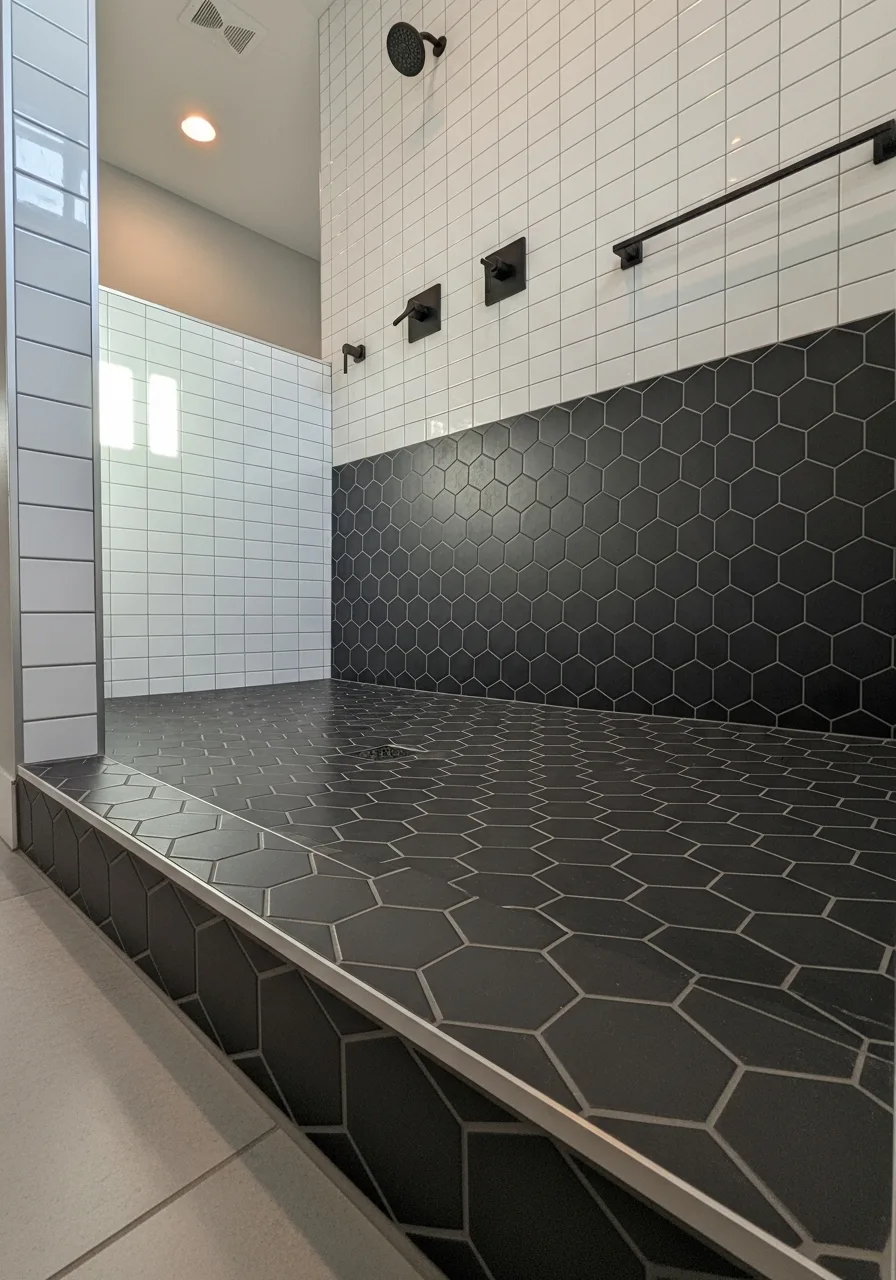
What tile shapes work best together?
Classic pairings like subway wall tiles with hexagonal floor tiles create a timeless and balanced aesthetic. You can also combine elongated picket tiles for an accent wall with large-format square tiles to keep the design clean and contemporary.