35 Clever Cheap Outdoor Kitchen Ideas
This post may contain affiliate links: full affiliate disclosure.
Building a functional cooking space outside doesn’t have to break your bank account. You don’t need a massive budget or a professional crew to get results. I’ve found that focusing on simple materials and smart layouts makes all the difference.
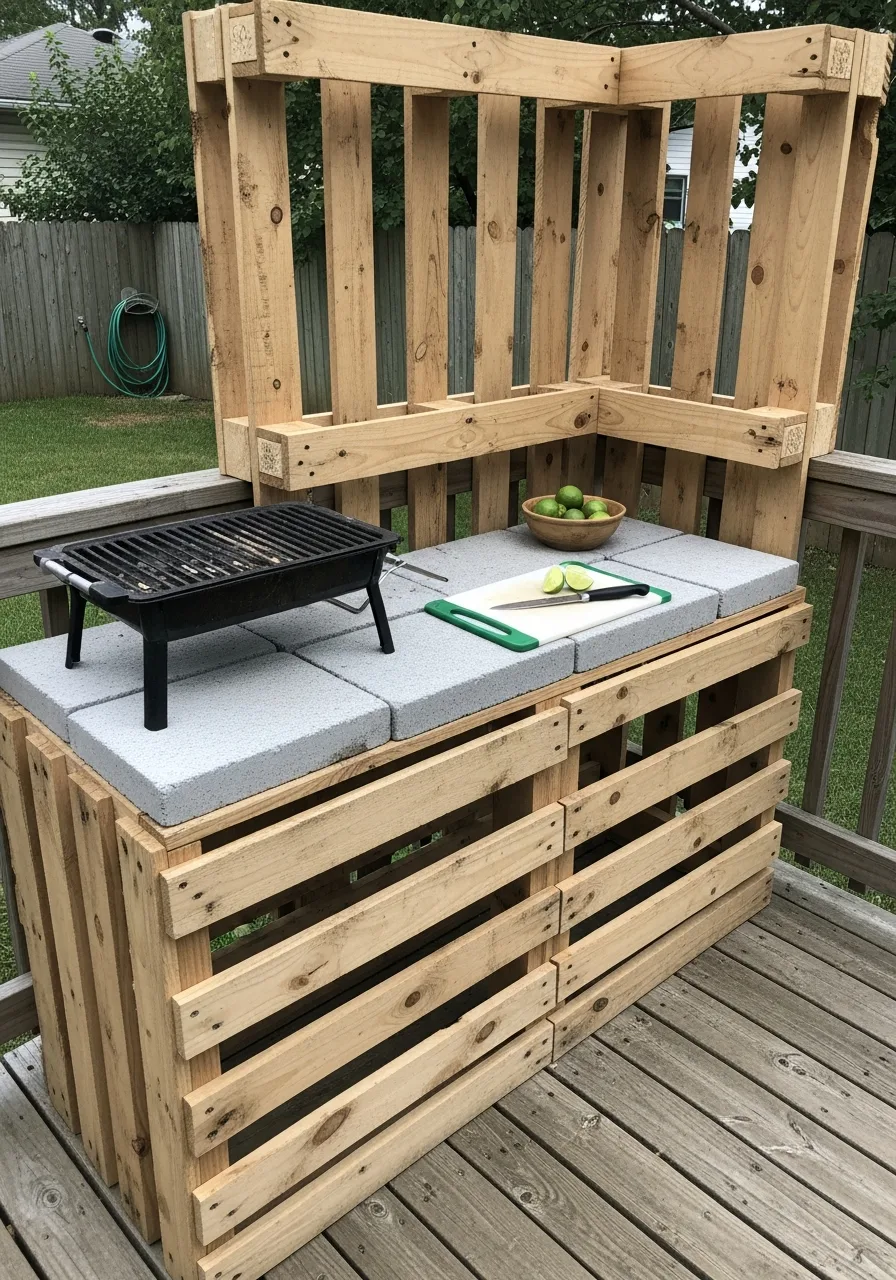
1. Pallet Kitchen Base
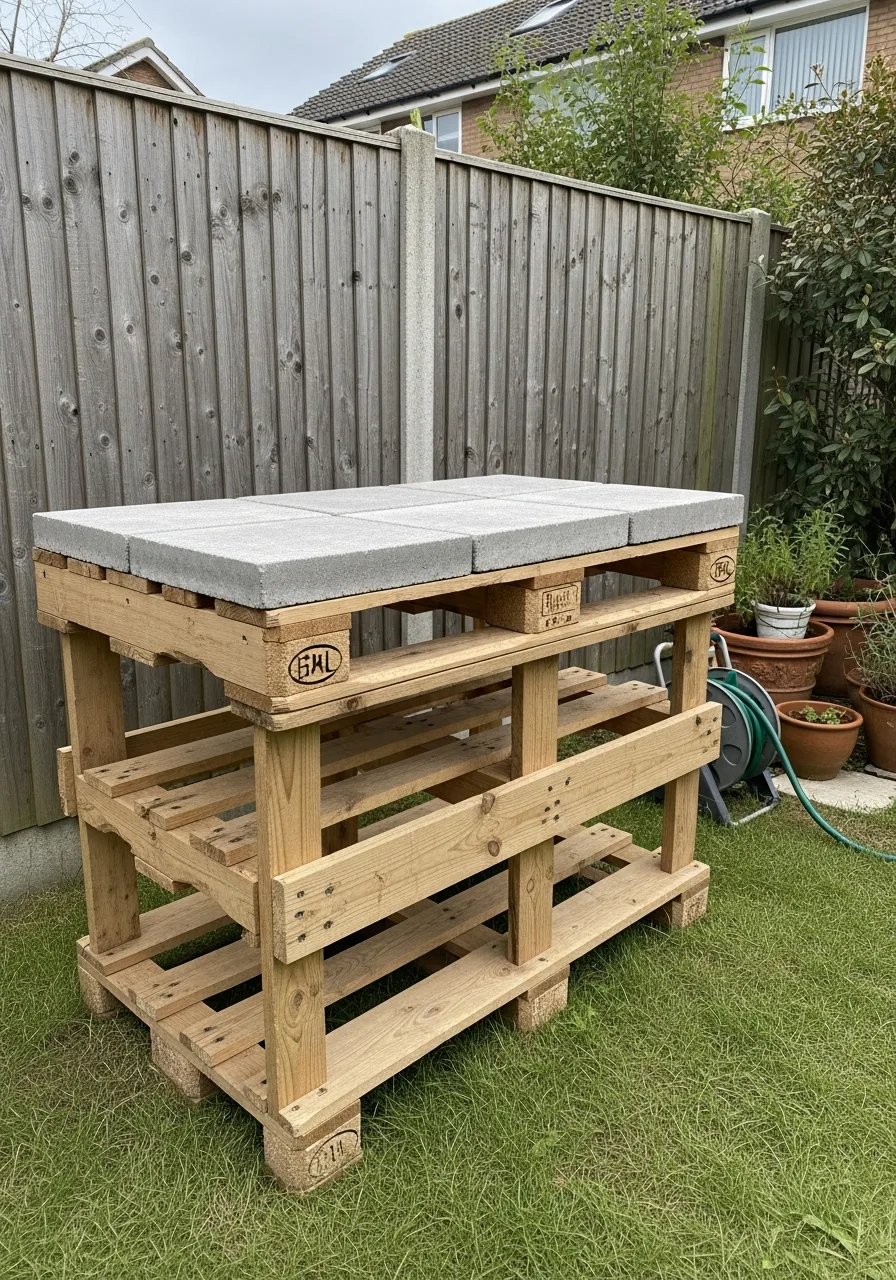
Build your outdoor kitchen frame using reclaimed pallets to create a low-cost structure. This method uses materials that are often available for free behind local stores. I always look for the HT stamp to stay safe.
- Find pallets locally
- Sand every surface
- Apply outdoor sealant
Pro Tip: Most people skip this: check for the heat-treated stamp for safety.
2. Repurposed Furniture Station
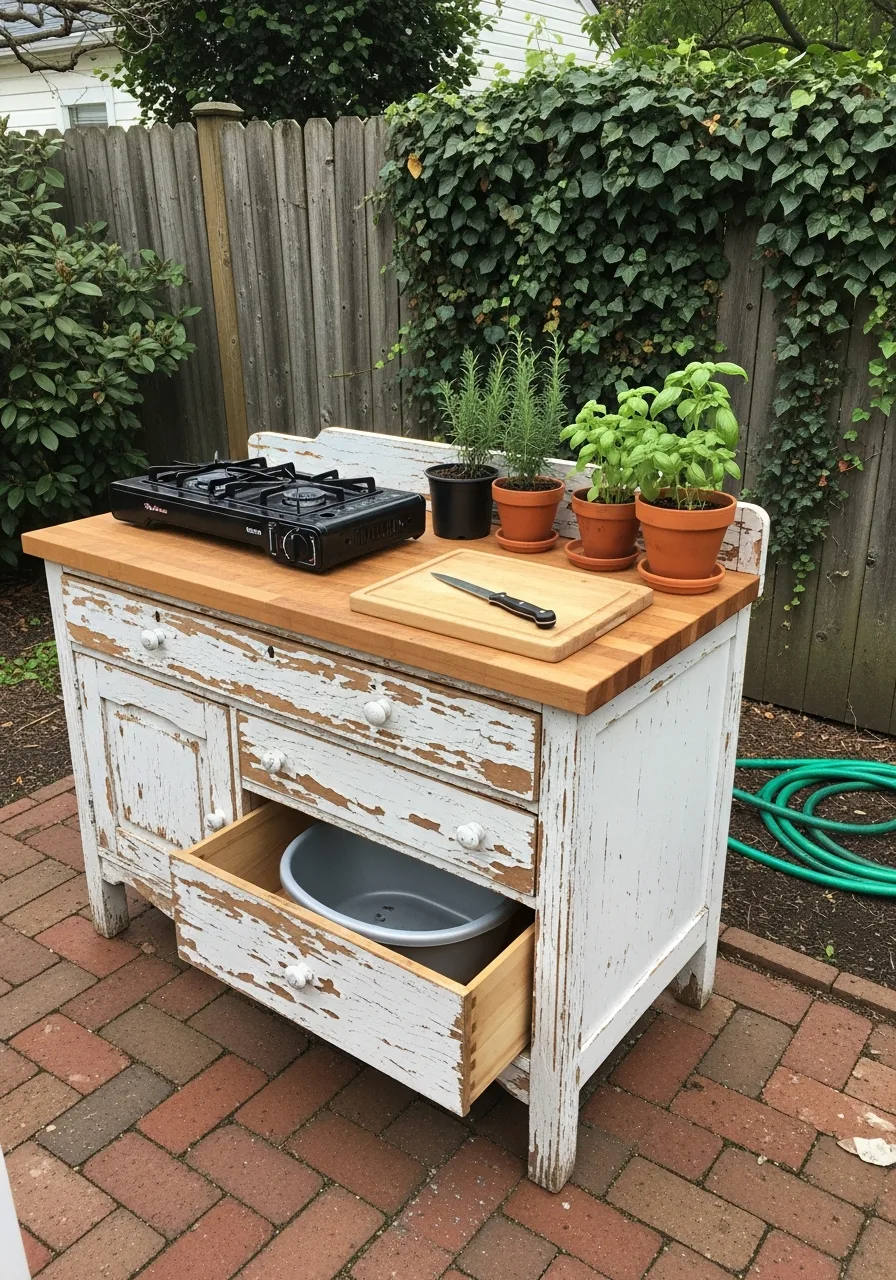
Turn an old dresser or table into a prep station by sealing it. This saves you from building a frame from scratch. My take: metal or stone tops work better than wood.
- Remove old paint
- Use waterproof glue
- Add heavy-duty casters
Pro Tip: Quick win: replace old knobs with stainless steel hardware.
3. DIY Concrete Countertop
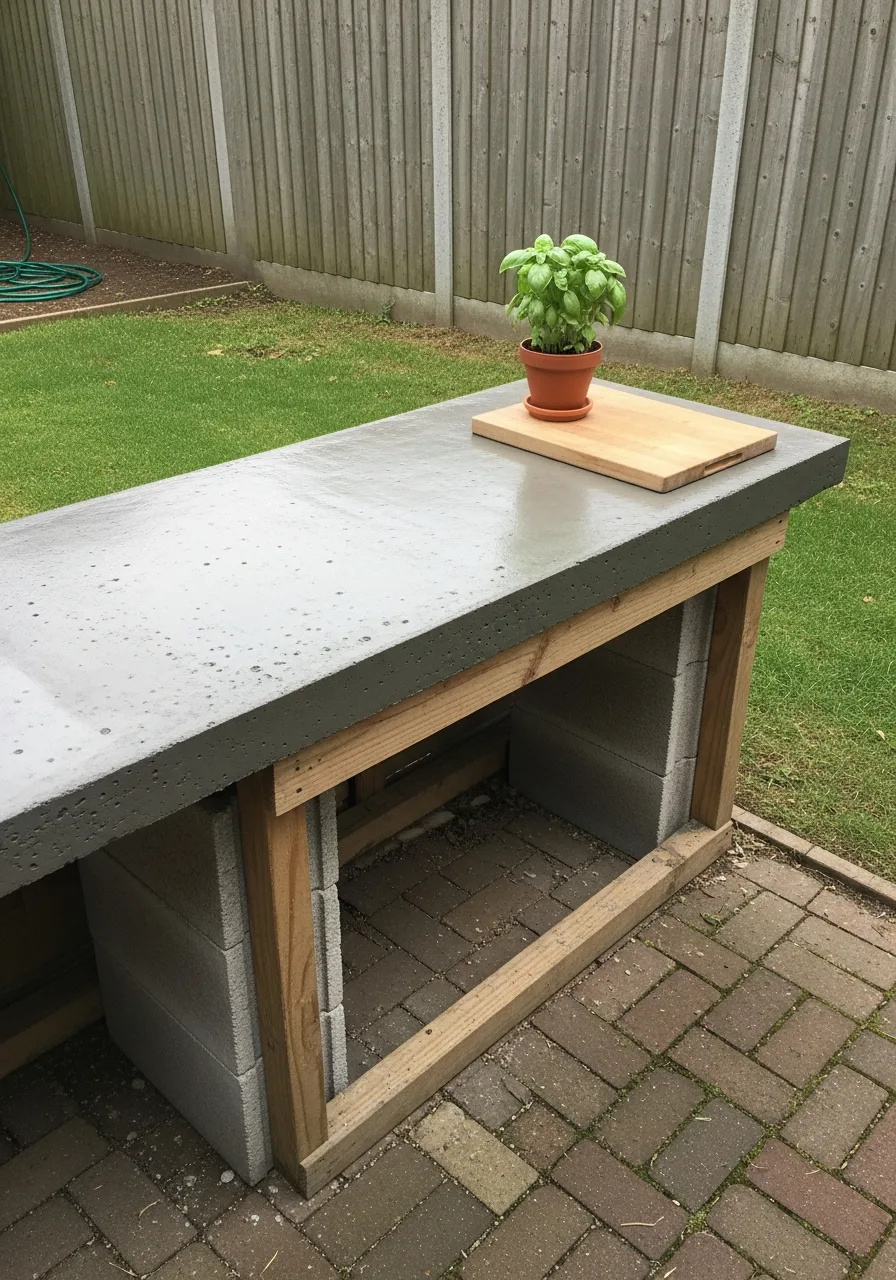
Pour a concrete slab over a wood or block base for a modern look. It provides a massive, heat-resistant surface that lasts for years. Honestly, I prefer a slightly rough finish for grip.
- Build a sturdy mold
- Mix concrete thoroughly
- Vibrate to remove bubbles
Pro Tip: Here’s what I do: use a concrete sealer to prevent oil stains.
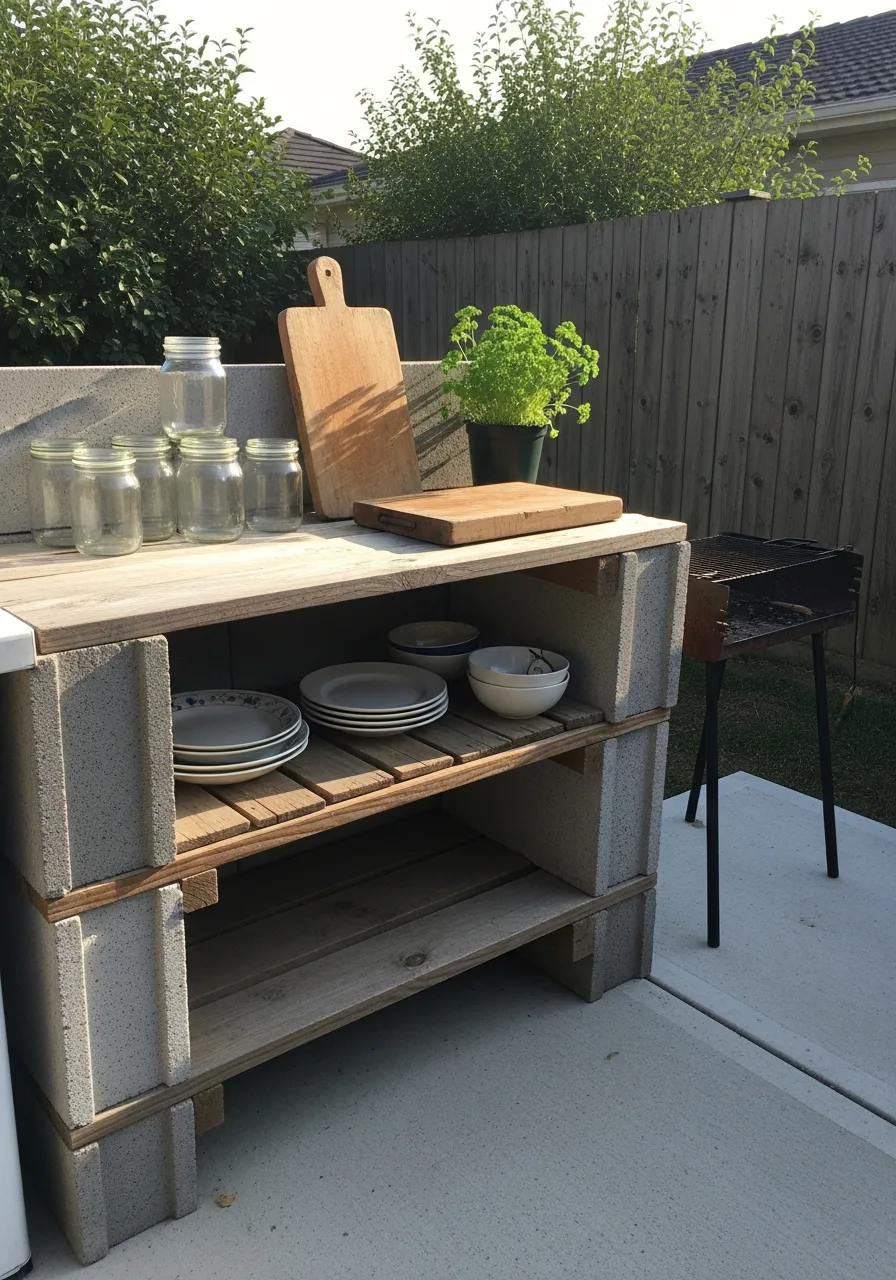
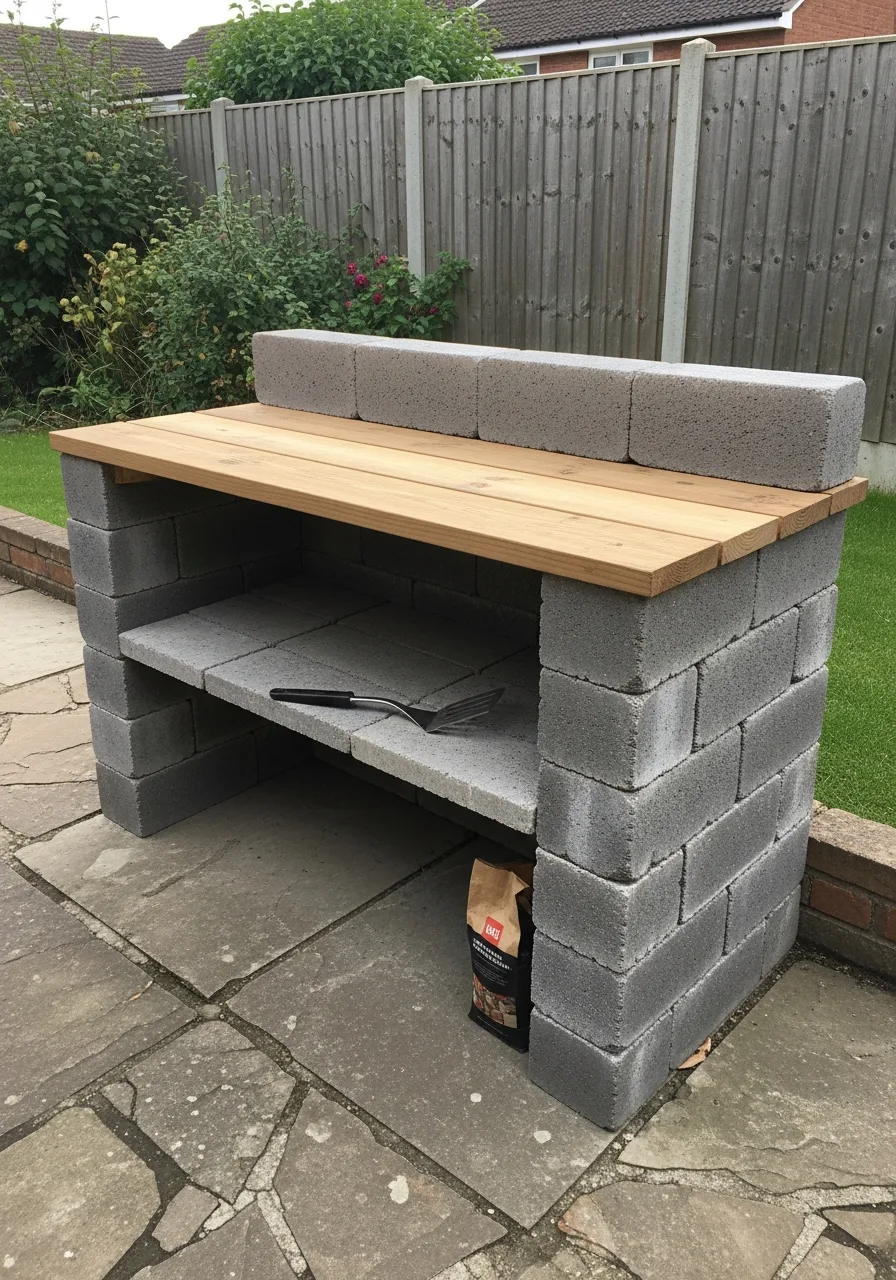
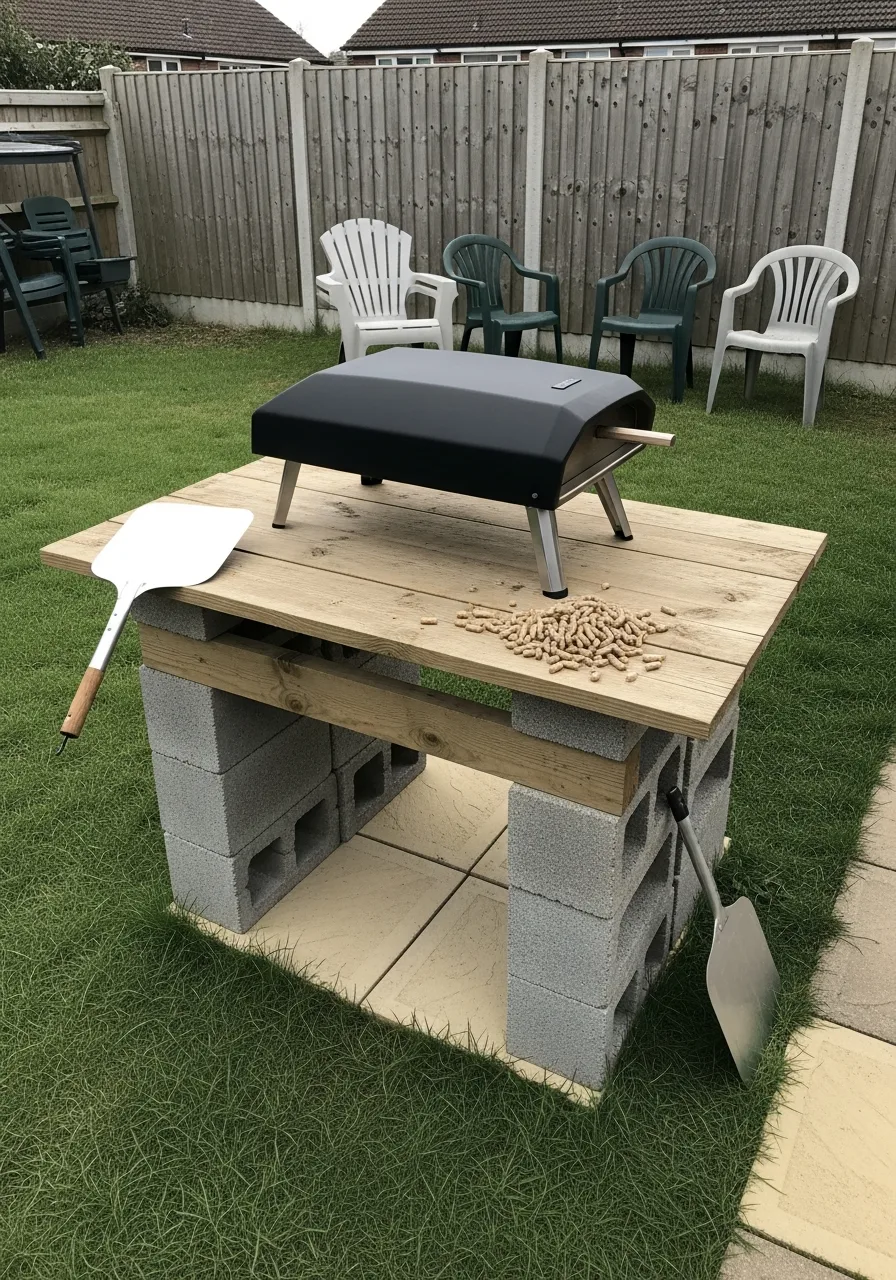
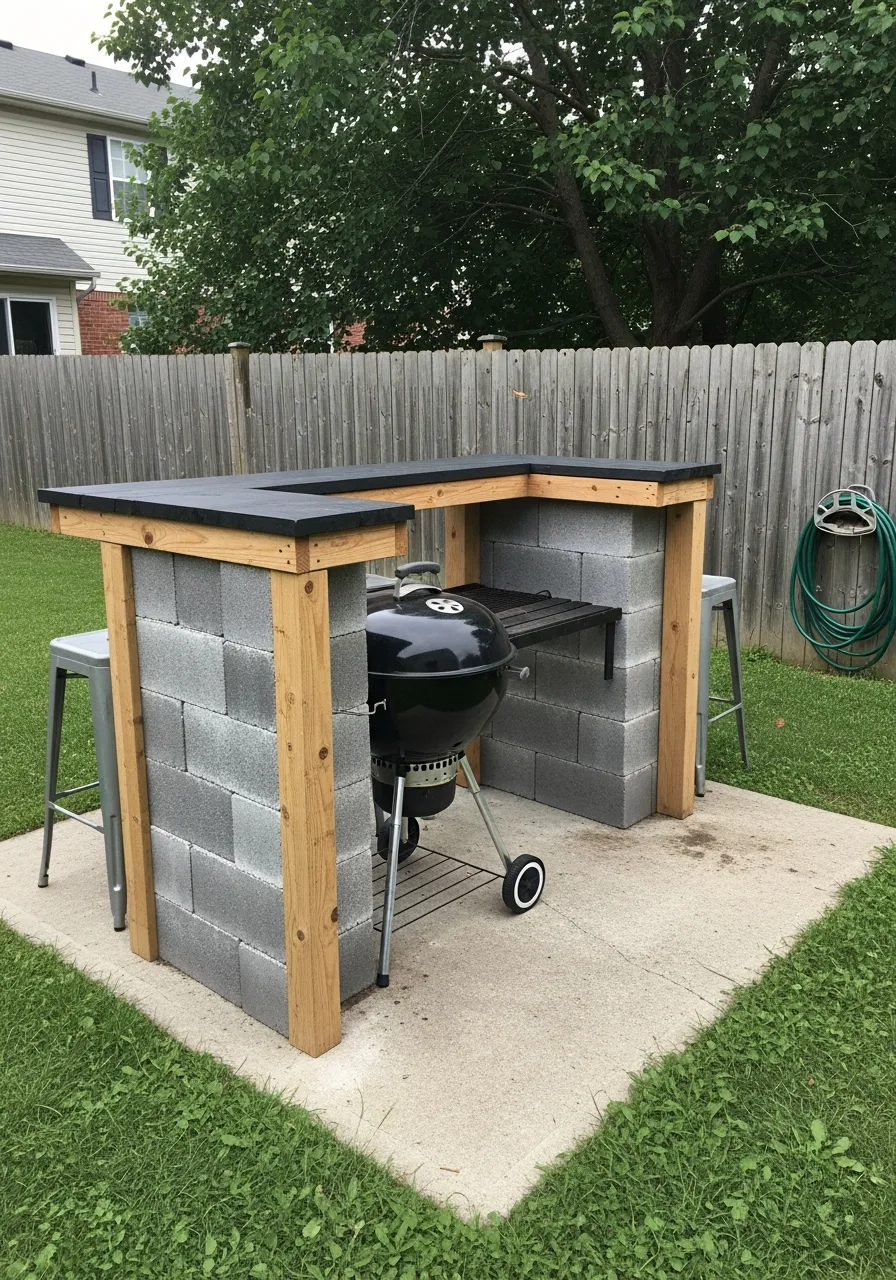
4. Cinder Block Kitchen
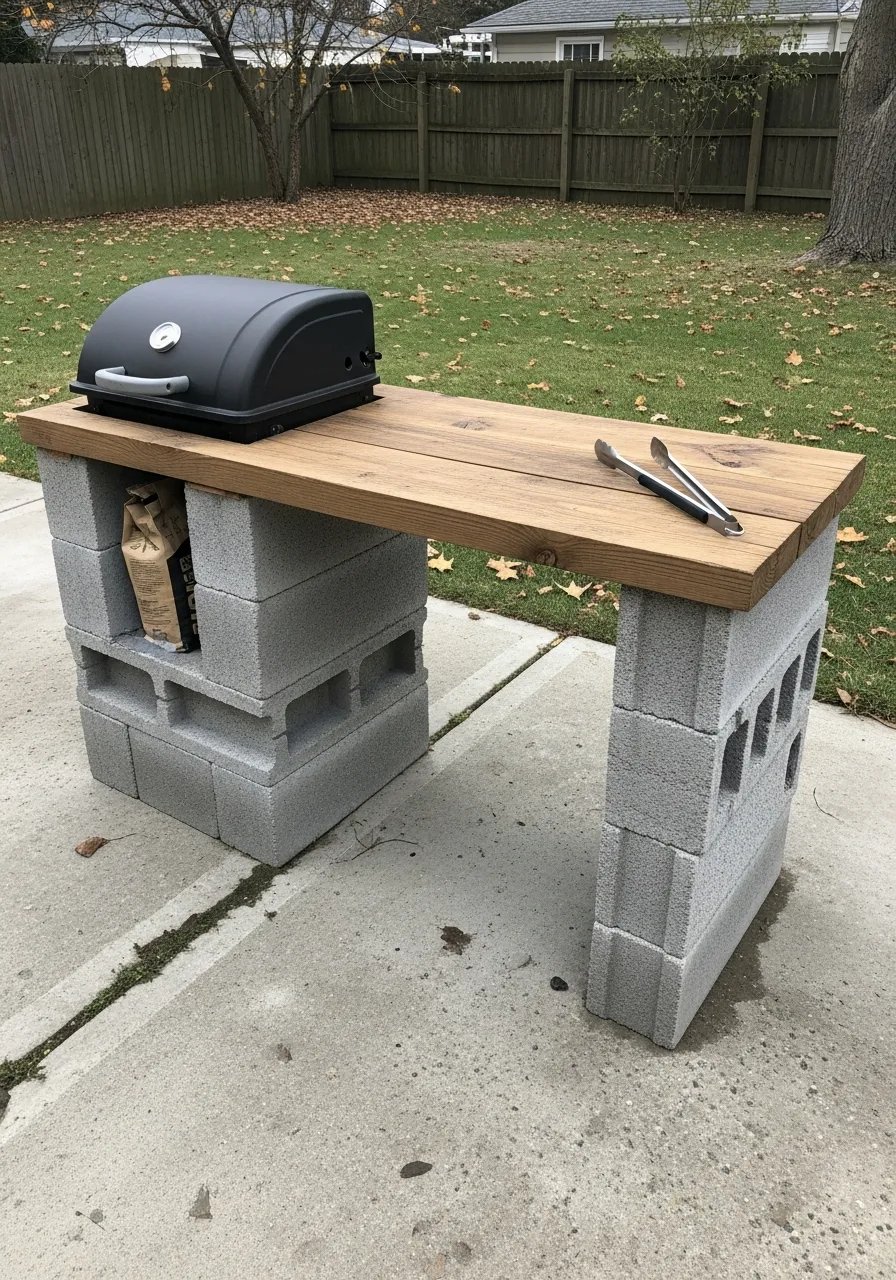
Stack cinder blocks to form a strong, heat-resistant base. This is the fastest way to get a permanent structure without hiring a pro. My take: painting the blocks makes them look like expensive masonry.
- Level the ground first
- Use construction adhesive
- Paint with masonry paint
Pro Tip: Quick win: cap the top with pavers for a finished look.
5. Grill Cart Setup
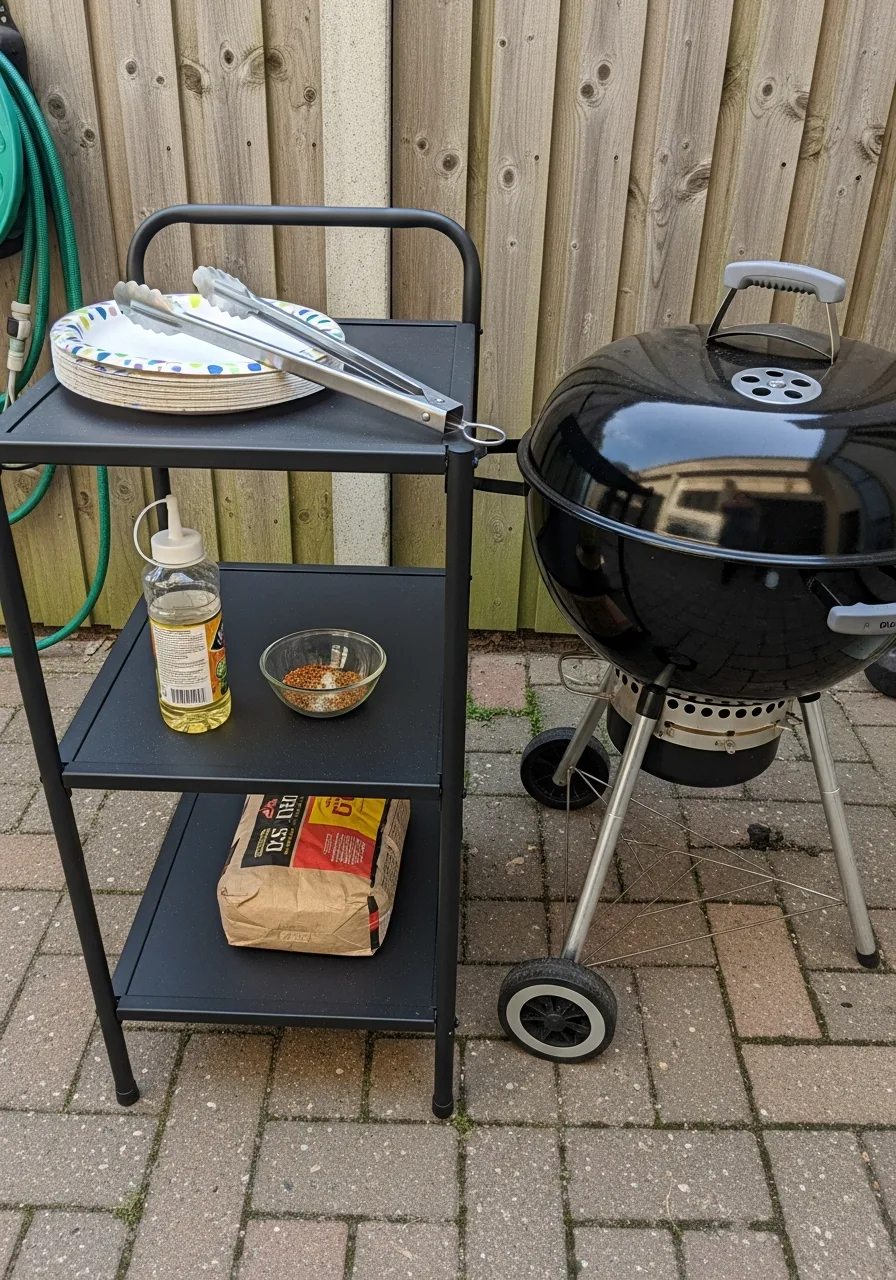
Use a portable grill with a rolling cart for a flexible cooking station. It keeps your patio open when you aren’t hosting a crowd. I always look for carts with built-in tool hooks.
- Choose locking wheels
- Pick a heat-proof top
- Add a side handle
Pro Tip: Most people skip this: check the weight capacity before buying.
6. Pallet Bar Kitchen
Transform pallets into a bar-style setup for prep and entertaining. This design creates a high-top surface that feels like a real backyard pub. My take: vertical pallets make excellent wine rack storage.
- Secure pallets together
- Add a foot rail
- Stain with dark colors
Pro Tip: Here’s what I do: line the interior with weed barrier to hide clutter.
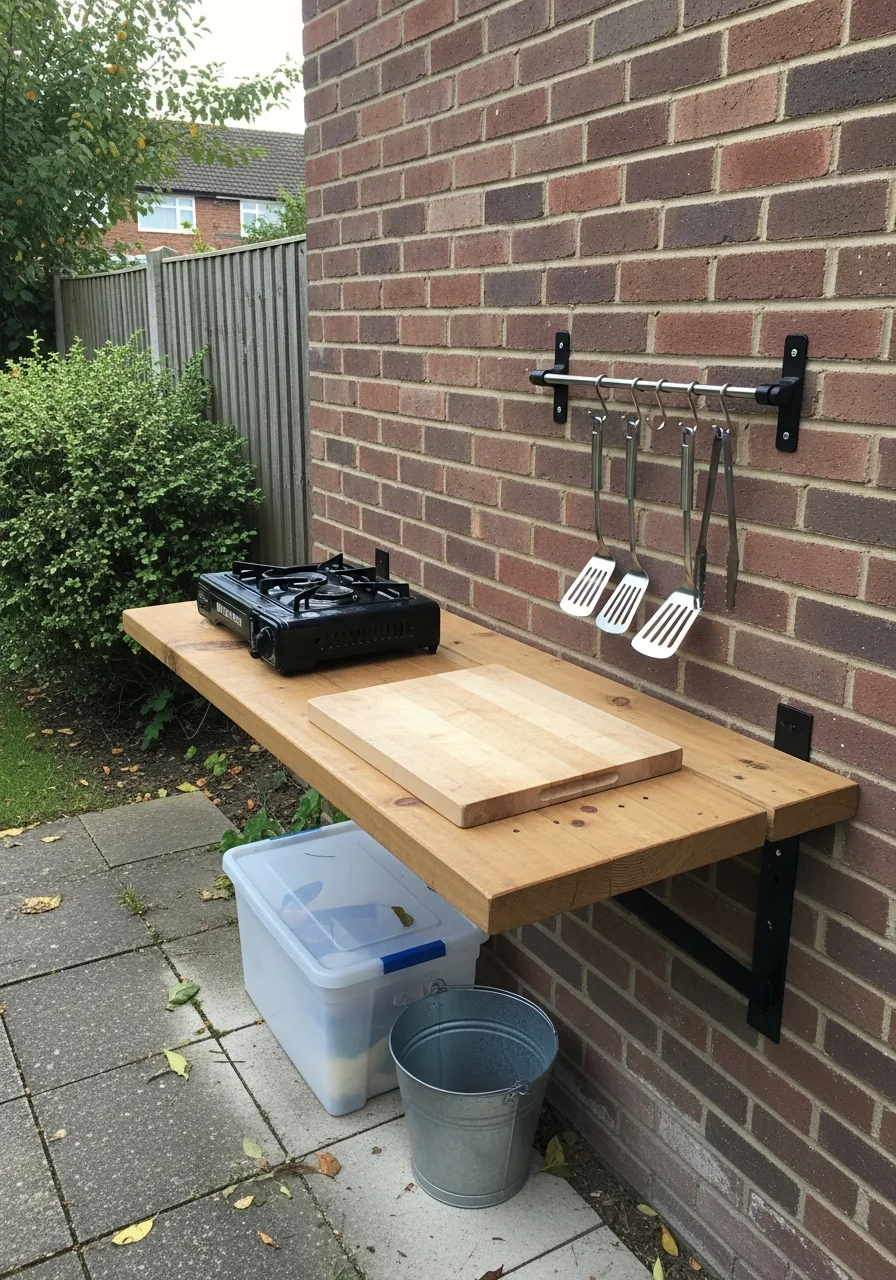
7. Fold-Down Prep Table
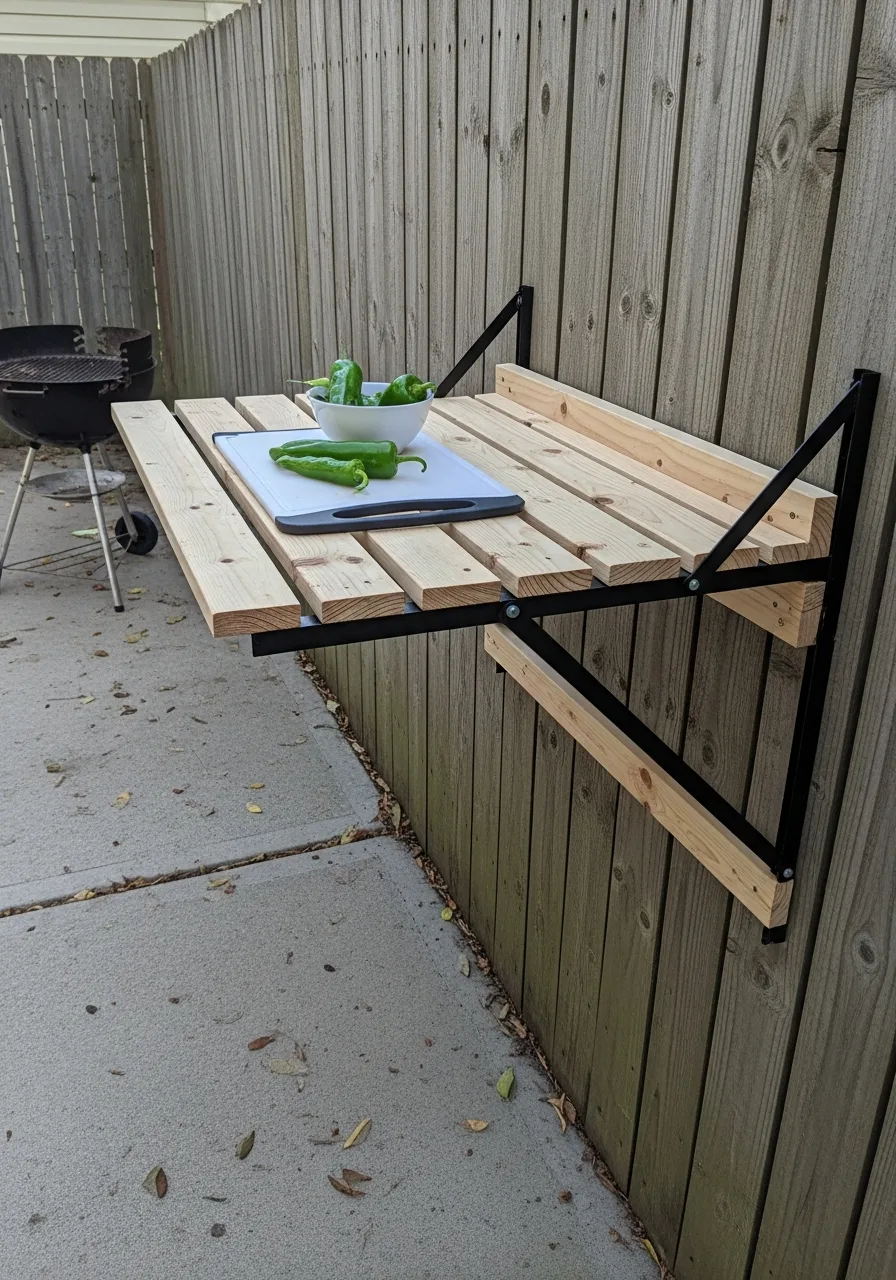
Install a wall-mounted folding table to save space and reduce costs. It stays out of the way until you’re ready to start chopping. Honestly, I love how these keep small patios feeling open.
- Use sturdy brackets
- Mount to wall studs
- Choose weather-resistant wood
Pro Tip: Quick win: use a stainless steel top for easy cleaning.
8. Modular Cabinet Setup
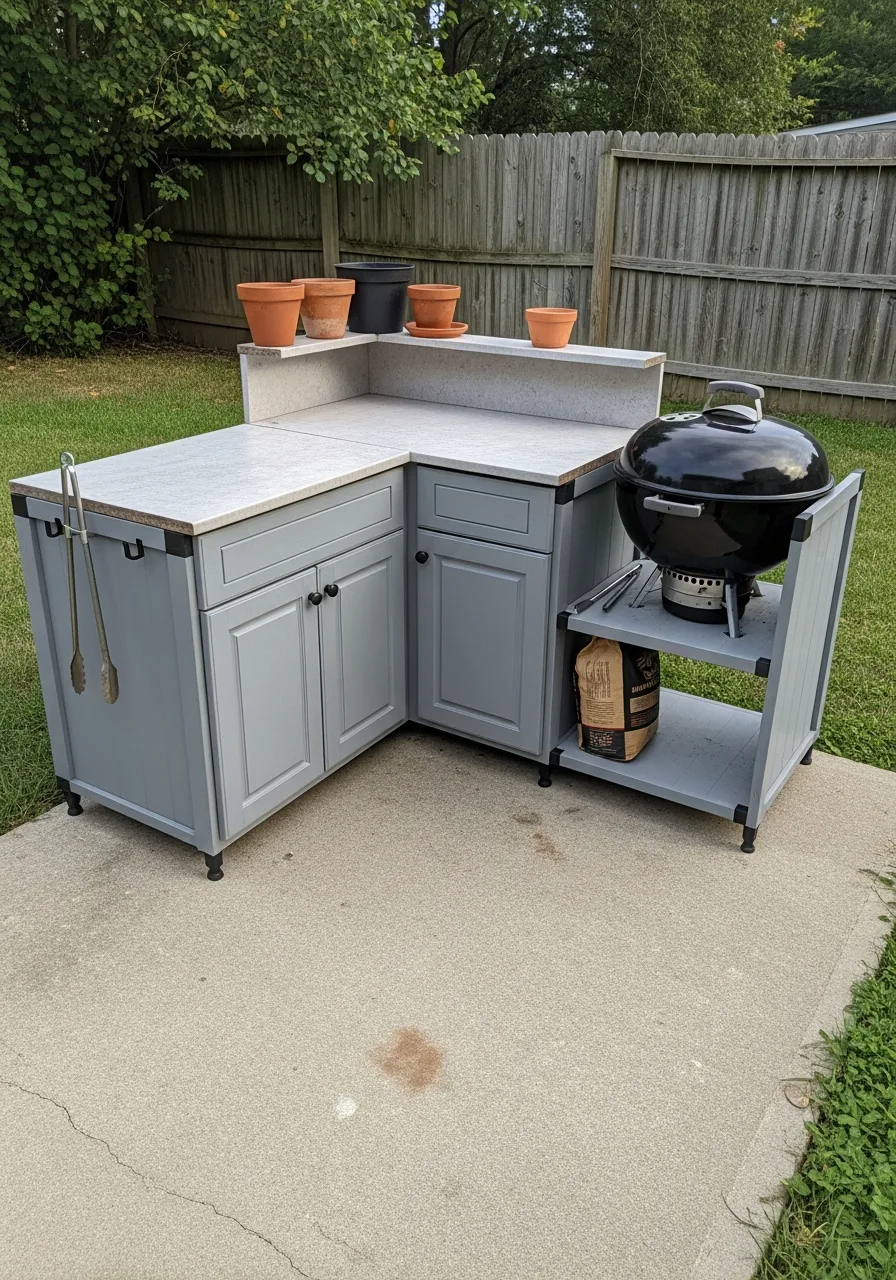
Use ready-made modular units instead of custom cabinets to simplify the build. These pieces fit together like blocks to create a custom look for less. I always recommend stainless steel for durability.
- Measure your space twice
- Pick weather-rated units
- Level each piece individually
Pro Tip: Most people skip this: check if the feet are adjustable for uneven patios.
9. Rolling Kitchen Island
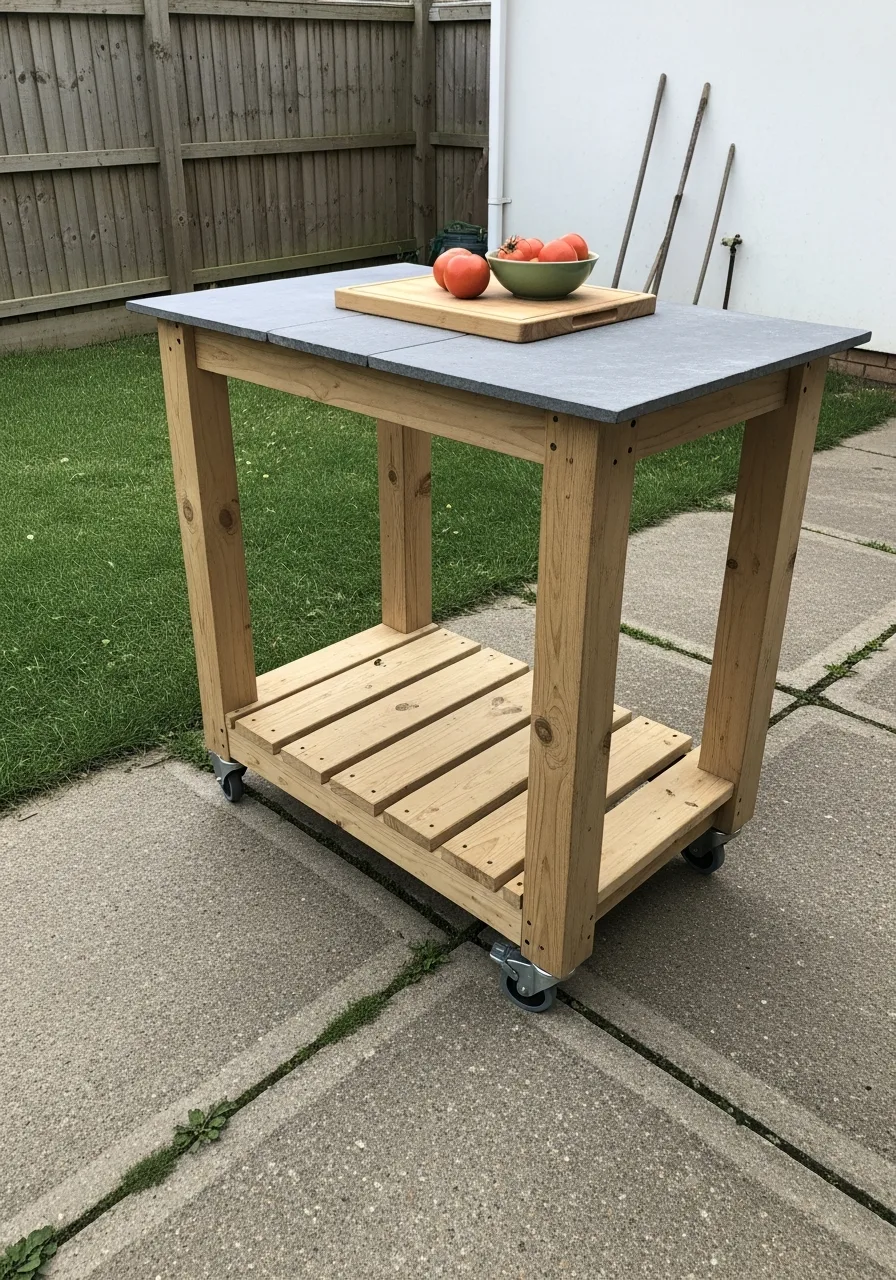
Create a movable island with wheels for prep and storage. You can move it into the shade or closer to the grill as needed. My take: wheels make cleaning the patio much easier.
- Install locking casters
- Add a towel bar
- Use a thick top
Pro Tip: Quick win: add a magnetic strip for your knife set.
10. Open Shelf Kitchen
Skip expensive cabinets and use open shelves to keep costs low. This layout makes it easy to grab your tongs or plates while cooking. Honestly, it prevents that musty smell cabinets get outside.
- Use thick wood planks
- Install heavy-duty brackets
- Organize with plastic bins
Pro Tip: Here’s what I do: tilt shelves slightly forward to prevent water pooling.
11. Salvaged Sink Station
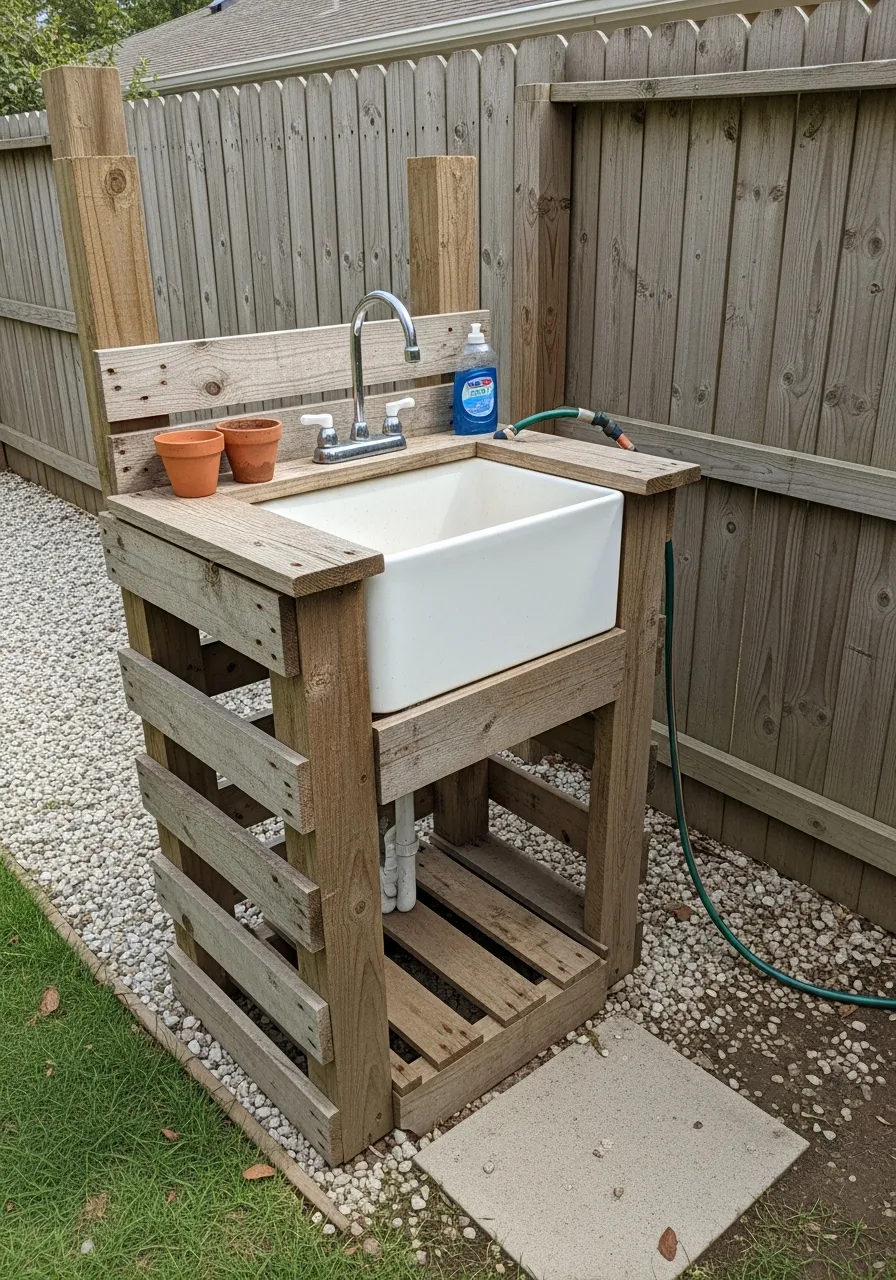
Install a secondhand sink connected to a garden hose for easy cleanup. It makes washing veggies or hands much faster without running inside. My take: a deep laundry sink works better than shallow ones.
- Find a stainless sink
- Hook up hose adapters
- Drain into a bucket
Pro Tip: Most people skip this: use a mesh strainer to catch food scraps.
12. Tile Countertop Design
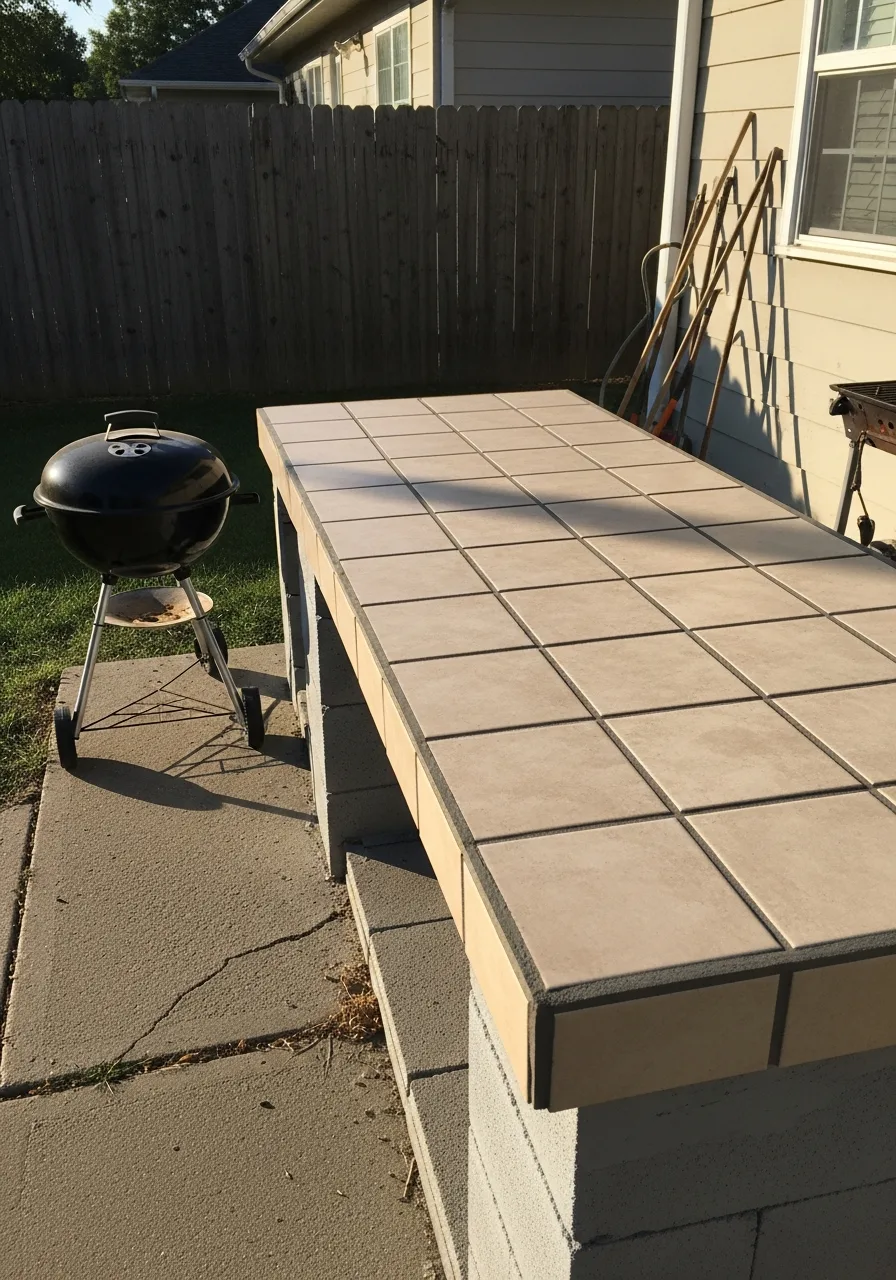
Use affordable tiles over a wood base to create a stylish countertop. Tiles are easy to clean and come in endless colors to match your home. I always use dark grout to hide outdoor dirt.
- Use exterior grade thinset
- Choose porcelain for strength
- Seal grout lines well
Pro Tip: Quick win: use large tiles to minimize the number of grout lines.
13. Metal Counter Surface
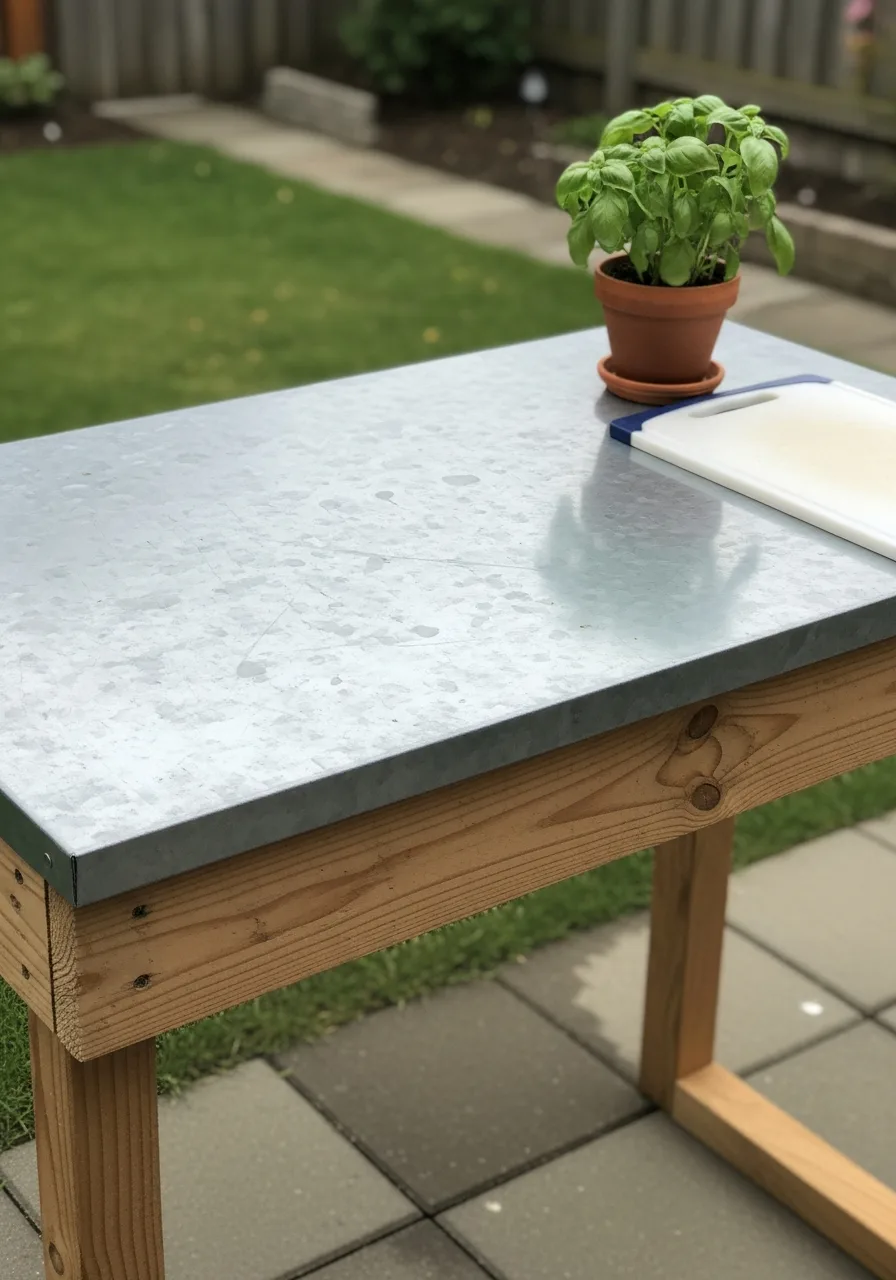
Add a sheet metal top for a durable and weather-resistant prep area. It gives your kitchen a professional look without the high price of stone. My take: stainless steel reflects heat and stays cooler.
- Wrap metal over plywood
- Glue with construction adhesive
- Sand the sharp edges
Pro Tip: Here’s what I do: use a rubber mallet to fold edges perfectly.
14. Simple Pergola Cover
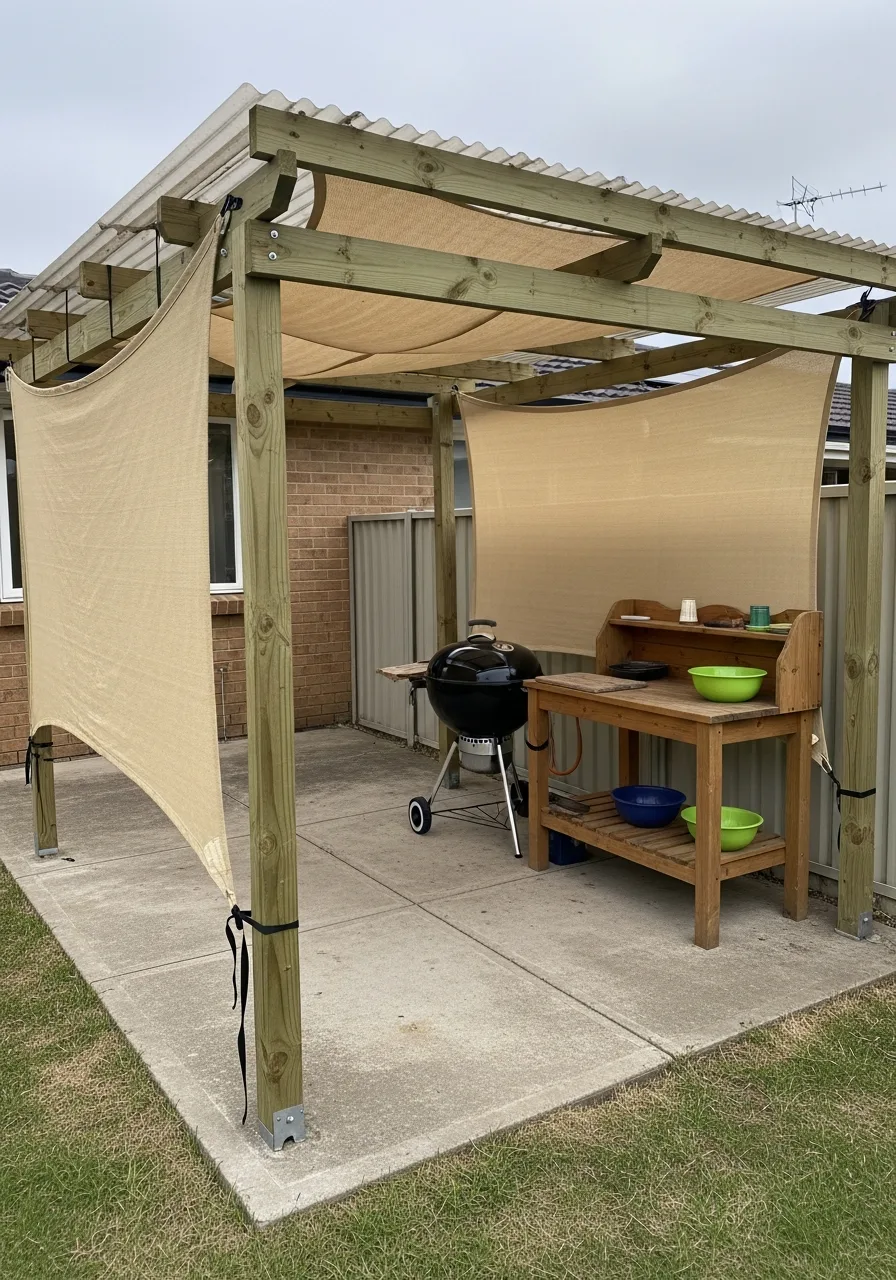
Build a basic pergola with wood to provide shade for your cooking area. It defines the kitchen space and keeps you out of the direct sun. I always grow climbing plants for natural shade.
- Set posts in concrete
- Use pressure-treated lumber
- Space the rafters evenly
Pro Tip: Quick win: hang battery-powered lanterns from the crossbeams.
15. Tarp Roof Kitchen
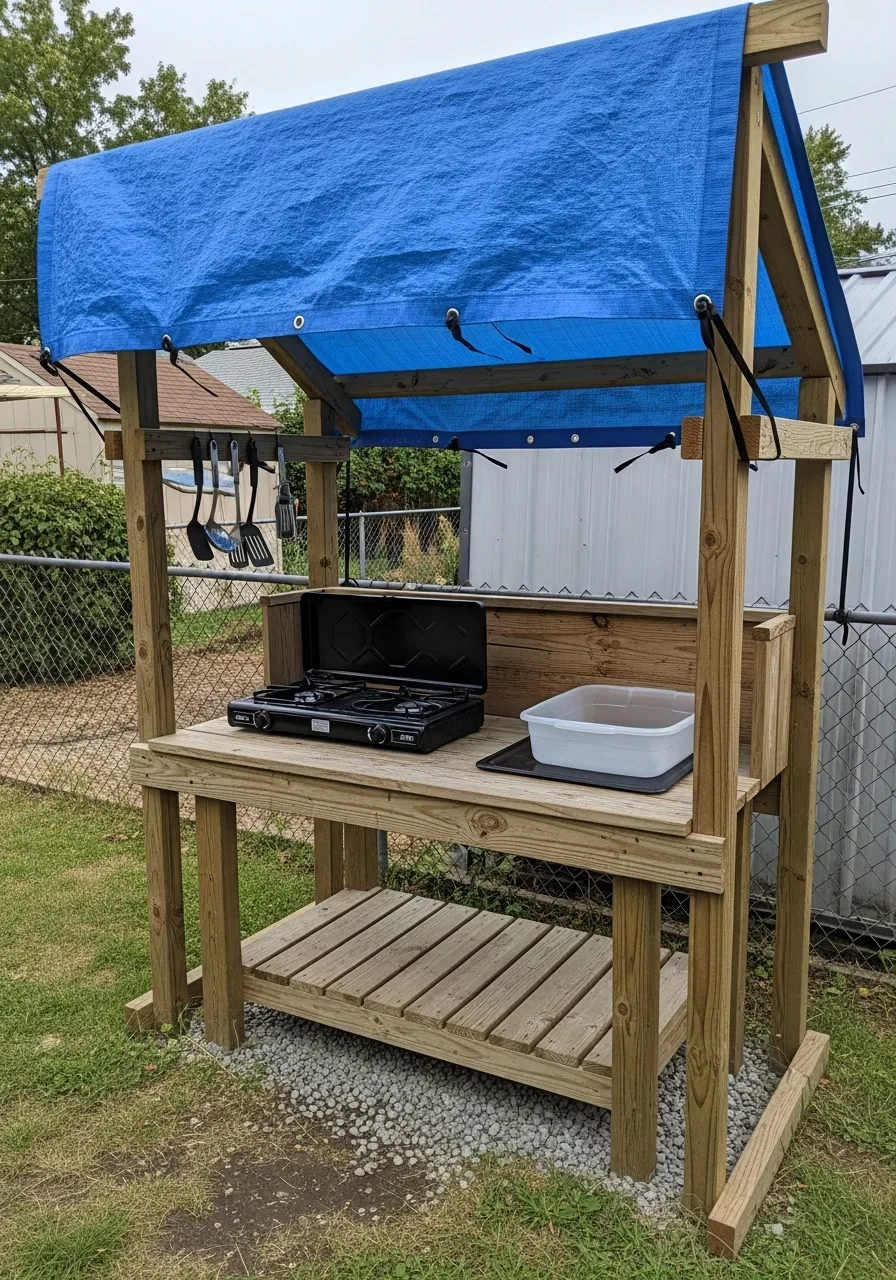
Stretch a weatherproof tarp over a frame to protect your kitchen from rain. This is a very fast way to deal with sun and unexpected showers. My take: get a heavy-duty tarp with reinforced grommets.
- Use bungee cord fasteners
- Angle the roof properly
- Reinforce the corner posts
Pro Tip: Most people skip this: tighten the tarp after the first rain storm.
16. Gravel Floor Base
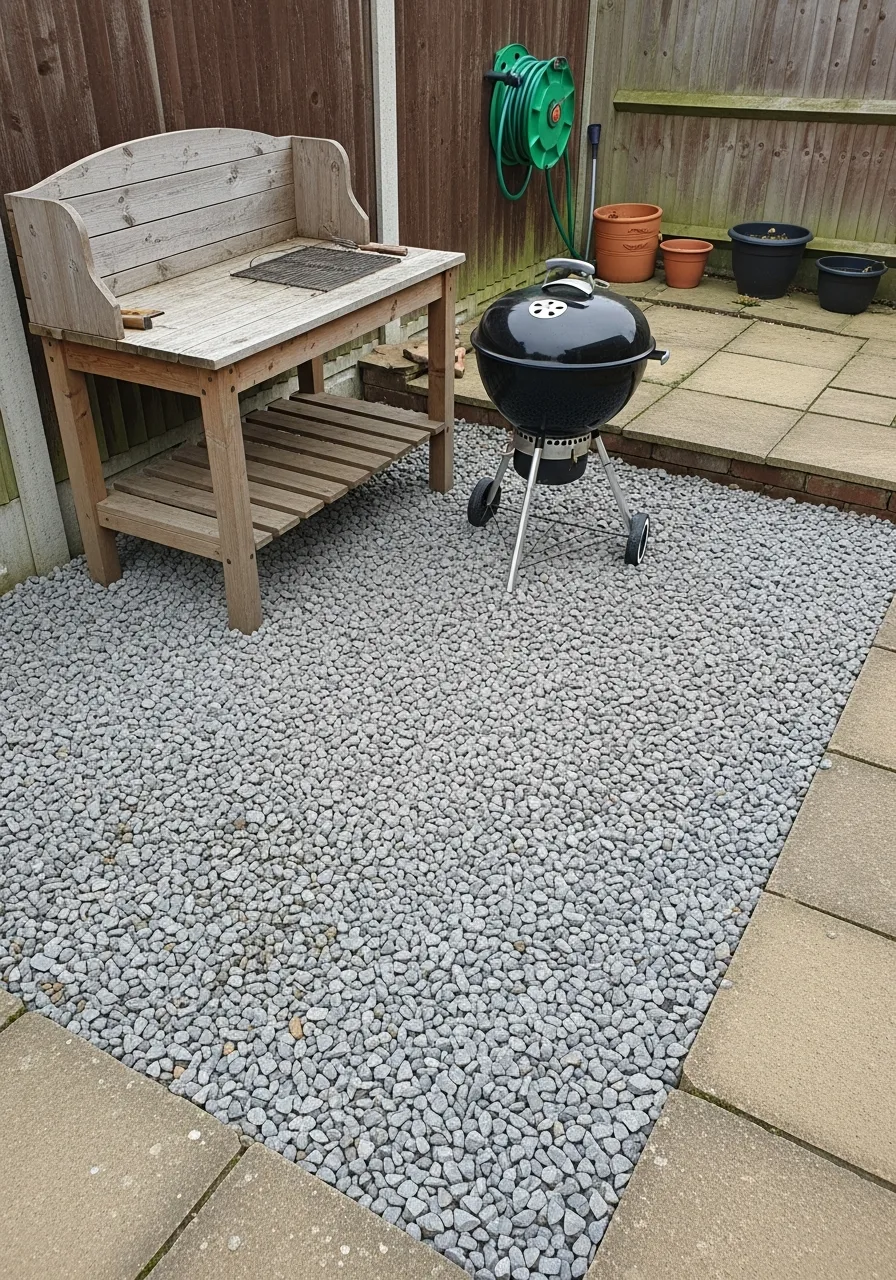
Use gravel instead of concrete for flooring to improve drainage and cut costs. It is much easier to install yourself than pouring a heavy slab. Honestly, I like the crunching sound under my feet.
- Dig down four inches
- Lay landscape fabric first
- Tamp the gravel down
Pro Tip: Quick win: use pea gravel for a softer walking surface.
17. Brick Paver Counter
Combine bricks and pavers to form a sturdy and affordable countertop surface. This material handles high heat from hot pots without any issues. My take: mismatched bricks look great for a rustic vibe.
- Stack bricks for height
- Use pavers for tops
- Glue layers with adhesive
Pro Tip: Here’s what I do: leave a small gap for a drop-in grill.
18. Built-In Cooler Space
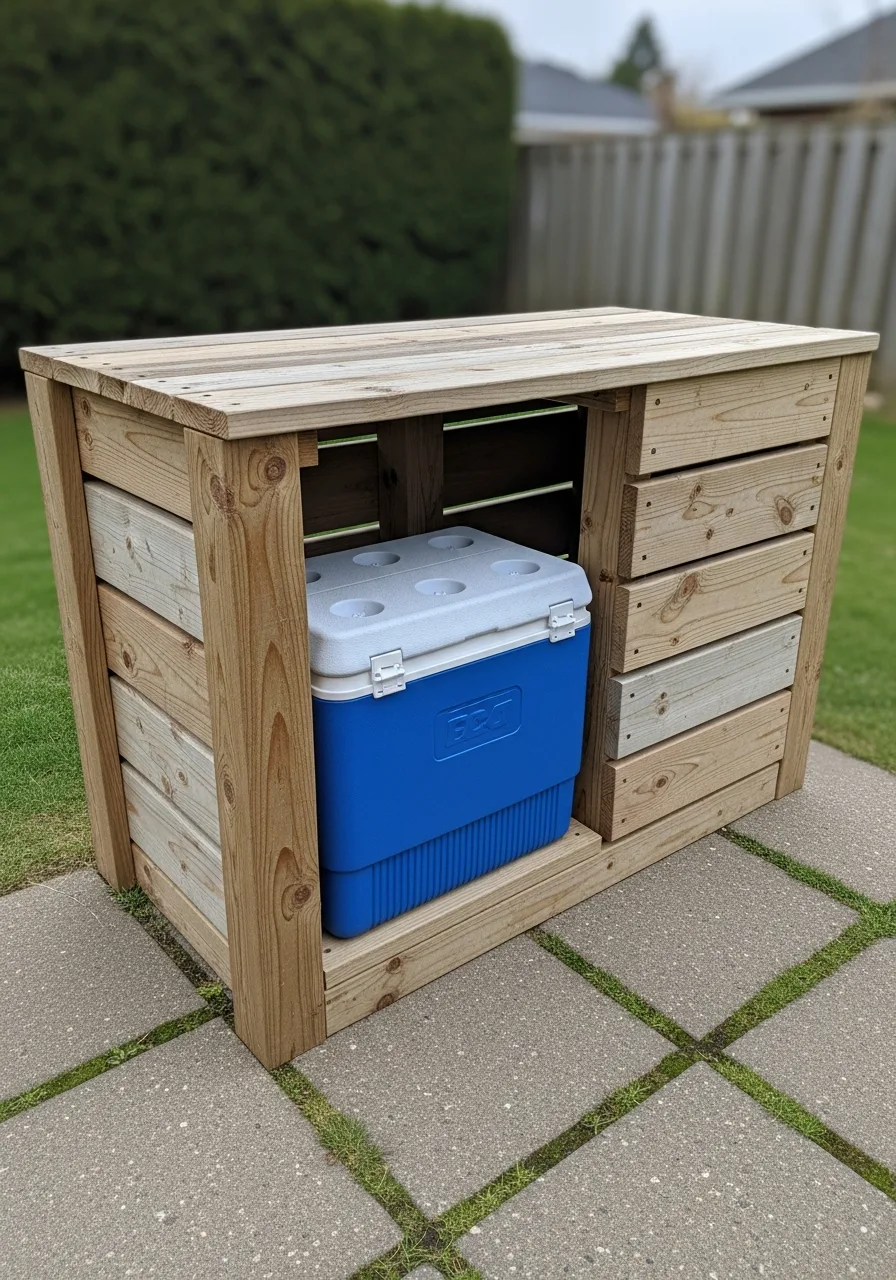
Embed a cooler into your counter for drinks instead of buying a fridge. This saves a ton on electricity and initial appliance costs. Honestly, I prefer this because you don’t have to winterize it.
- Measure the cooler first
- Build a snug frame
- Add a drain hose
Pro Tip: Most people skip this: install the cooler near the seating area.
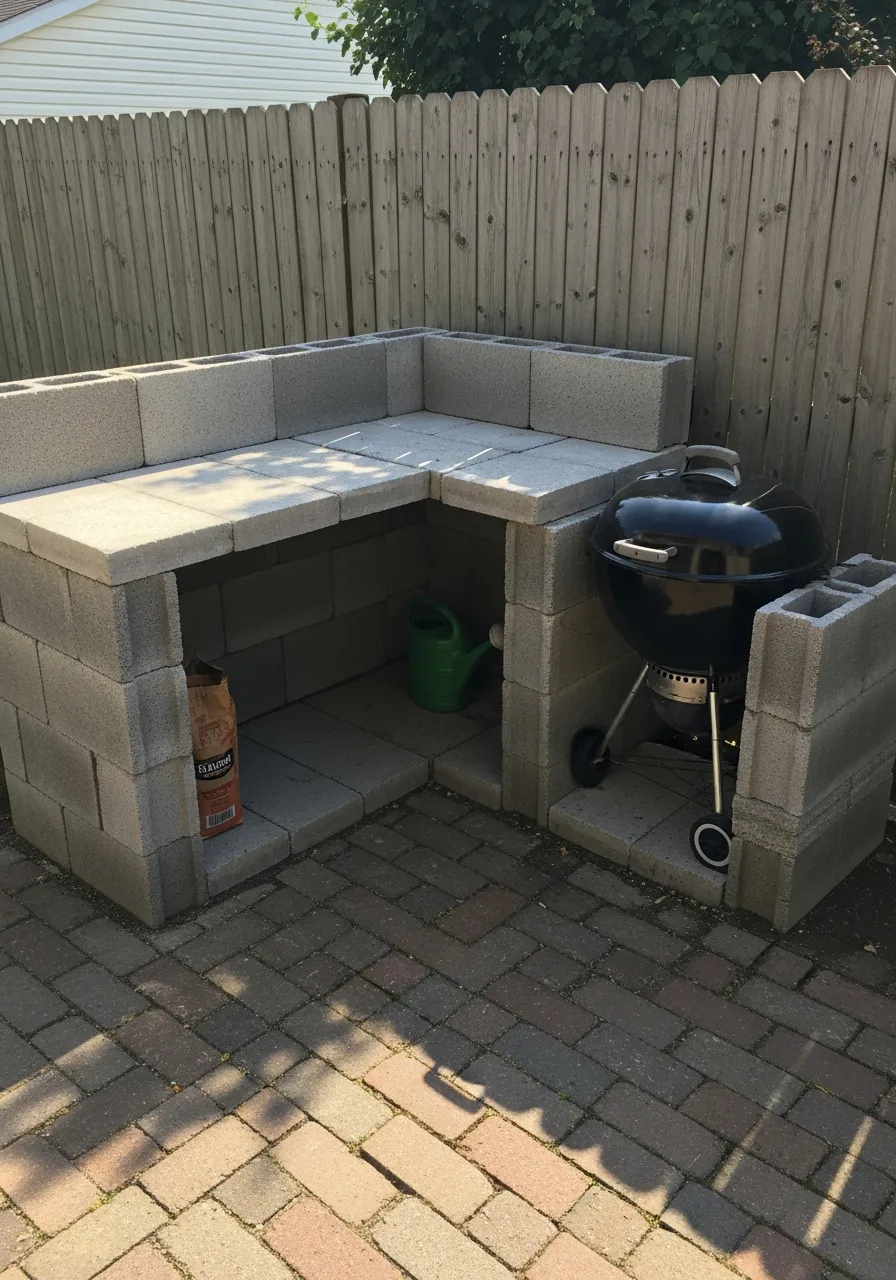
19. Compact Corner Layout
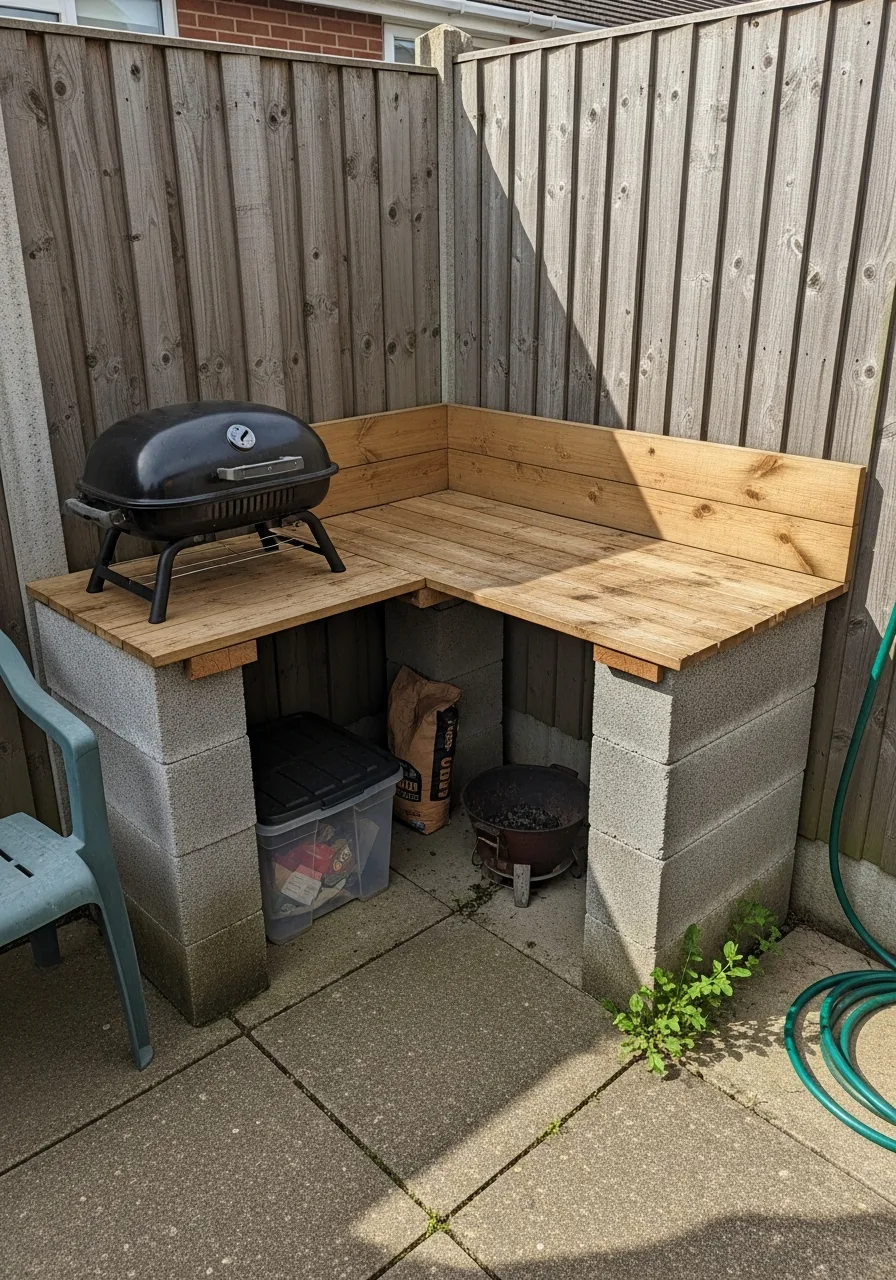
Design your kitchen in a corner to minimize materials while keeping it functional. Using two existing walls reduces the amount of structure you need to build. My take: corners are the most efficient workspaces.
- Place grill in center
- Add counters on sides
- Keep utilities close together
Pro Tip: Quick win: use corner shelving for bulky cooking pots.
20. Fence-Backed Kitchen
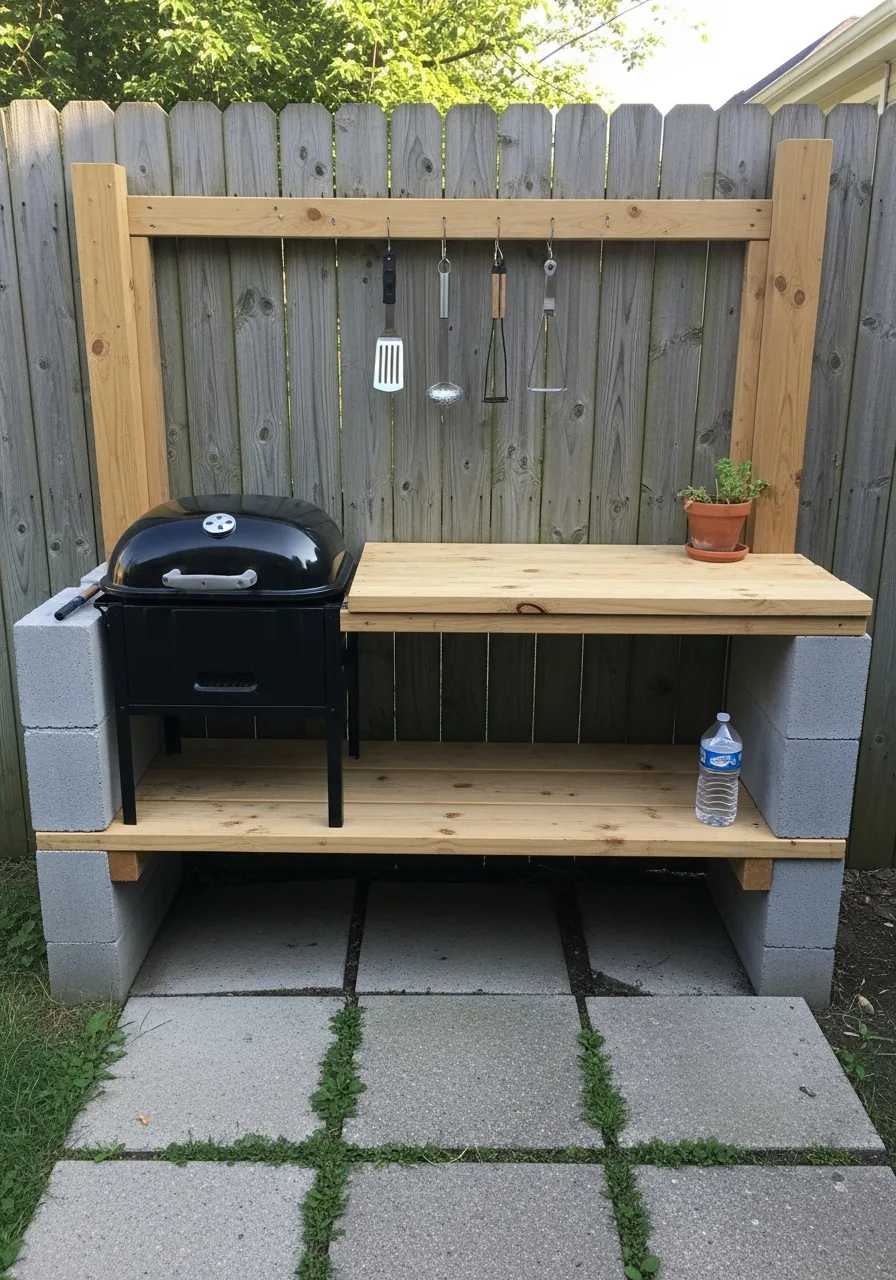
Use an existing fence as the back wall to reduce construction work. It provides immediate privacy and a place to hang your cooking tools. I always check that the fence is sturdy enough first.
- Add a heat shield
- Attach shelves to posts
- Seal the wood back
Pro Tip: Most people skip this: leave a gap for airflow behind the grill.
21. DIY Pizza Oven Area
Create a small pizza oven using bricks for a budget-friendly cooking feature. It adds a high-end feel to your backyard for very little money. My take: keep it small so it heats up quickly.
- Use fire-rated bricks
- Build a solid base
- Create a simple arch
Pro Tip: Here’s what I do: use a pizza stone for the best crust.
22. Utility Shelf Kitchen
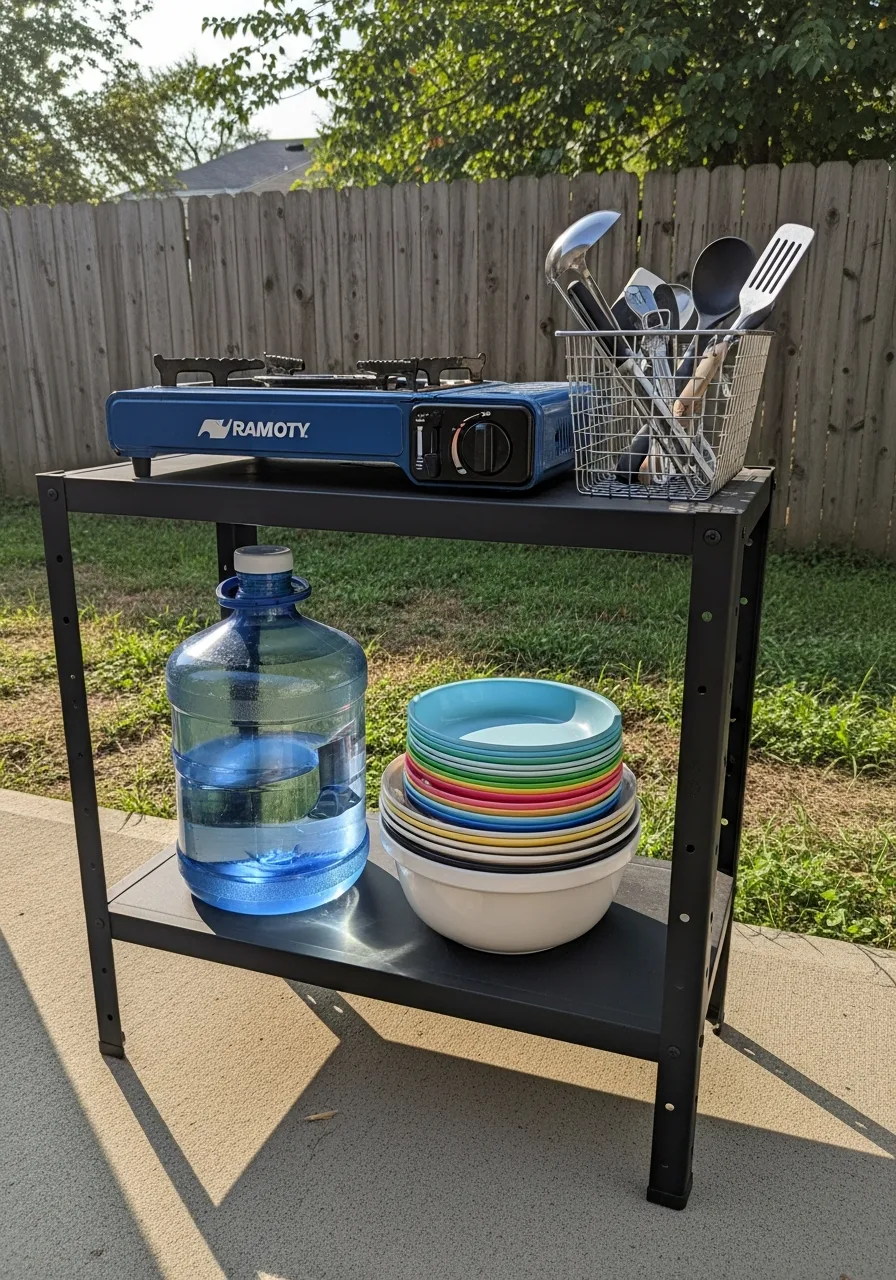
Use basic shelving units as storage and prep space instead of installing cabinets. These metal units are waterproof and hold hundreds of pounds of gear. Honestly, I love how easy they are to clean.
- Buy rust-resistant metal
- Add a wood top
- Use bins for organization
Pro Tip: Quick win: zip-tie the shelves to a wall for stability.
23. Recycled Tile Backsplash
Apply leftover or discounted tiles to create a decorative and protective backsplash. This protects your exterior walls from grease and food splatters. My take: peel and stick tiles work great for this.
- Clean the wall surface
- Apply outdoor-rated adhesive
- Grout for a finish
Pro Tip: Most people skip this: use a level to keep rows straight.
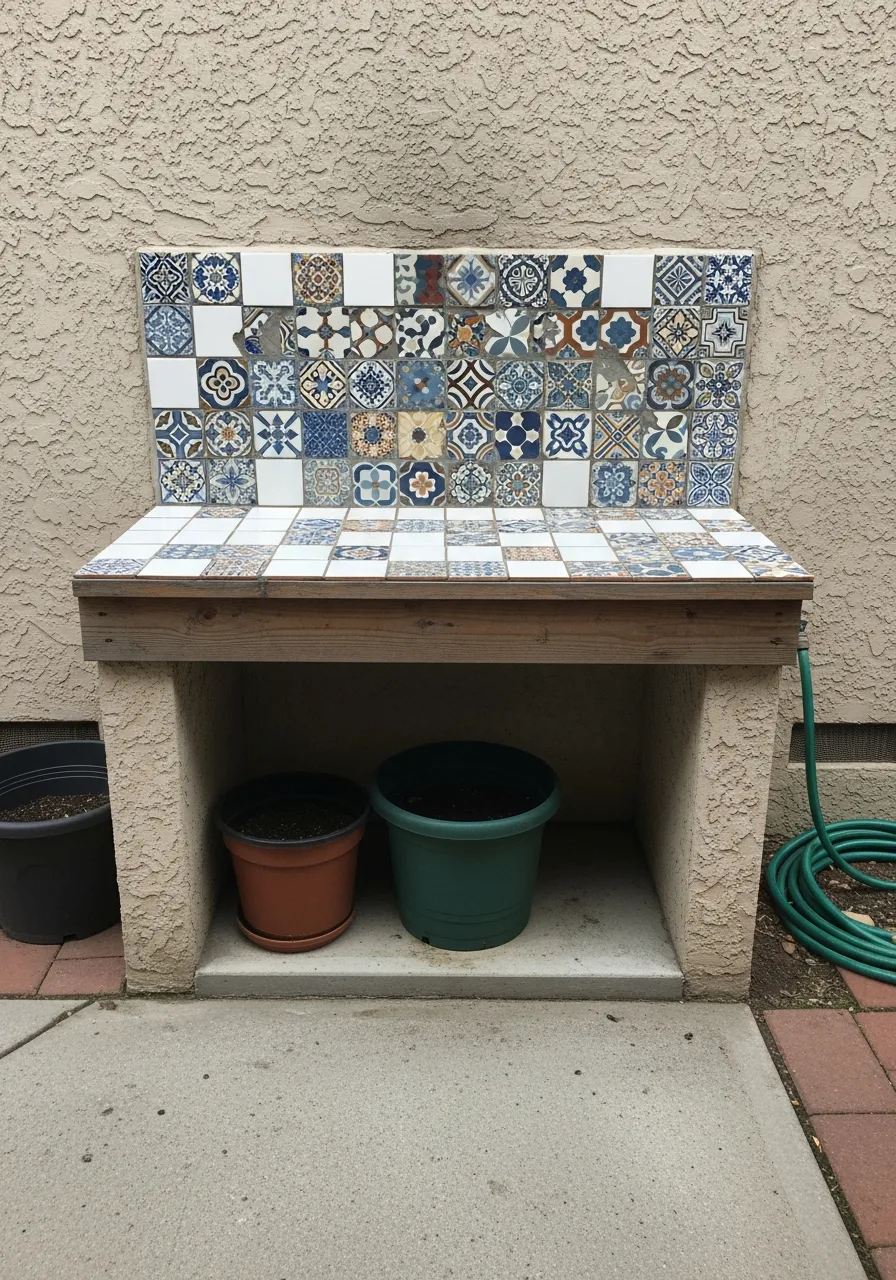
24. Potting Bench Kitchen
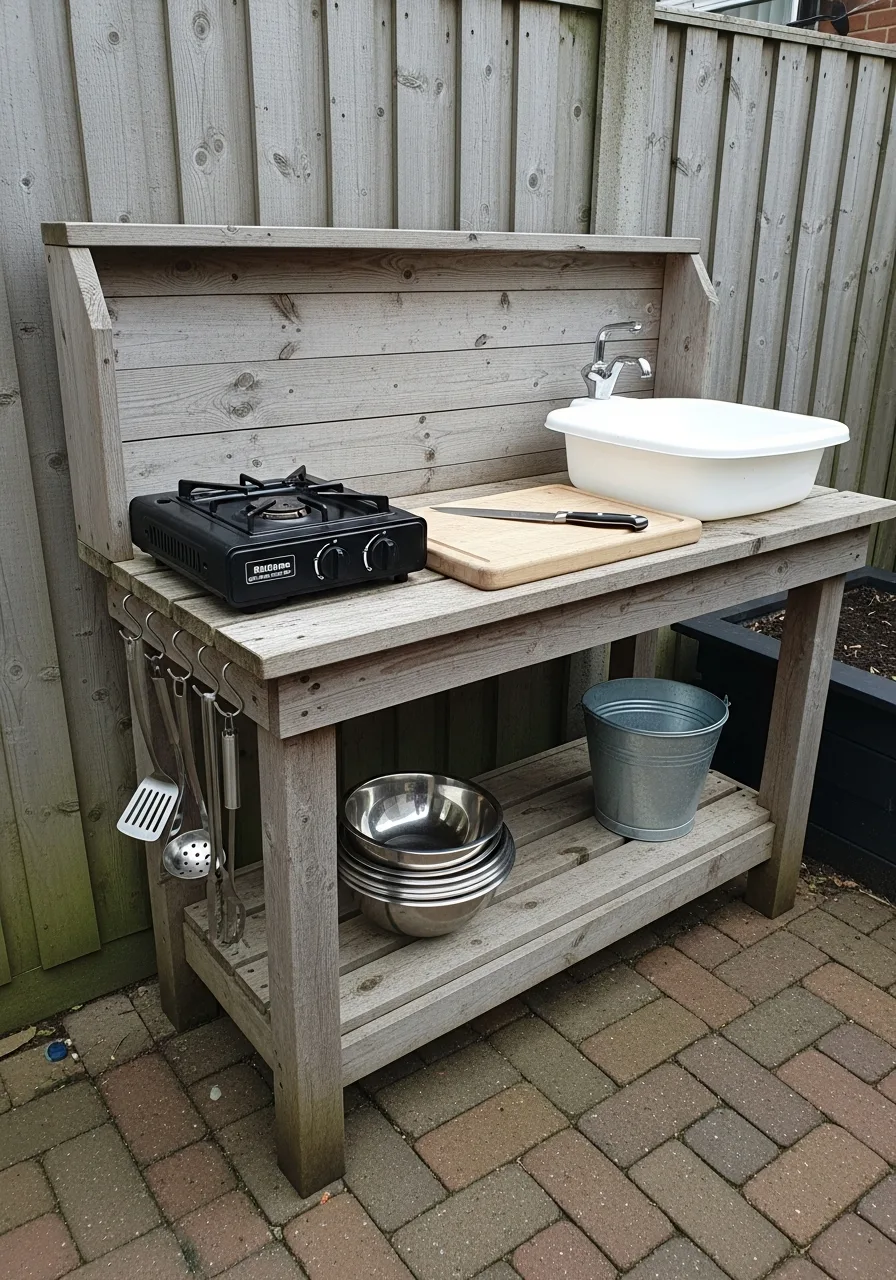
Convert a garden potting bench into a dual-purpose prep and cooking station. These benches usually come with great storage and a perfect height for cooking. Honestly, I always add sealant to the top.
- Add hooks for tools
- Reinforce the bottom shelf
- Mount a bottle opener
Pro Tip: Quick win: use the sink area for an ice bucket.
25. Two-Cart Kitchen System
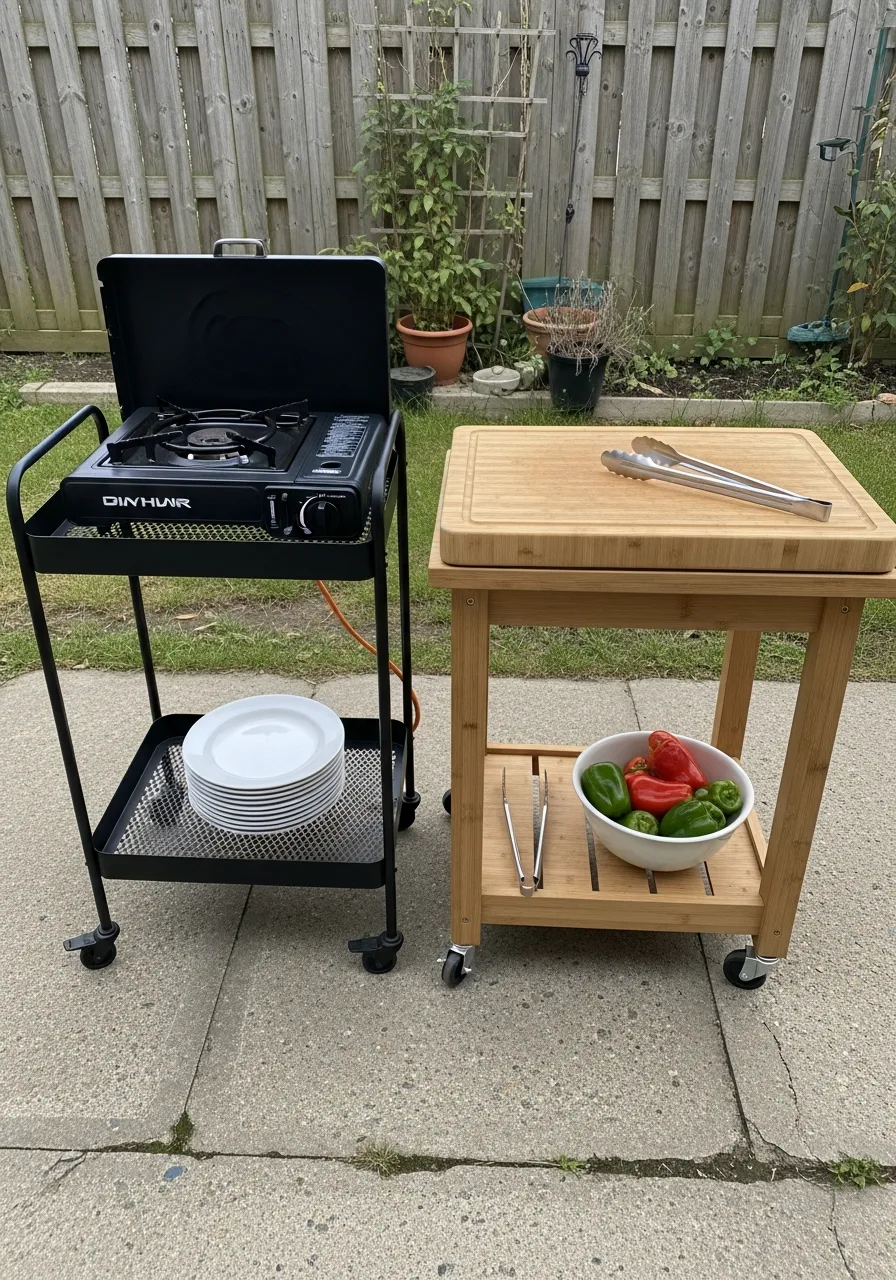
Combine two rolling carts to create a flexible and expandable outdoor kitchen setup. You can separate them for serving or push them together for a long counter. My take: this is the best for renters.
- Match the cart heights
- Use one for prep
- Use one for serving
Pro Tip: Here’s what I do: connect them with a small latch.
26. Hanging Storage System
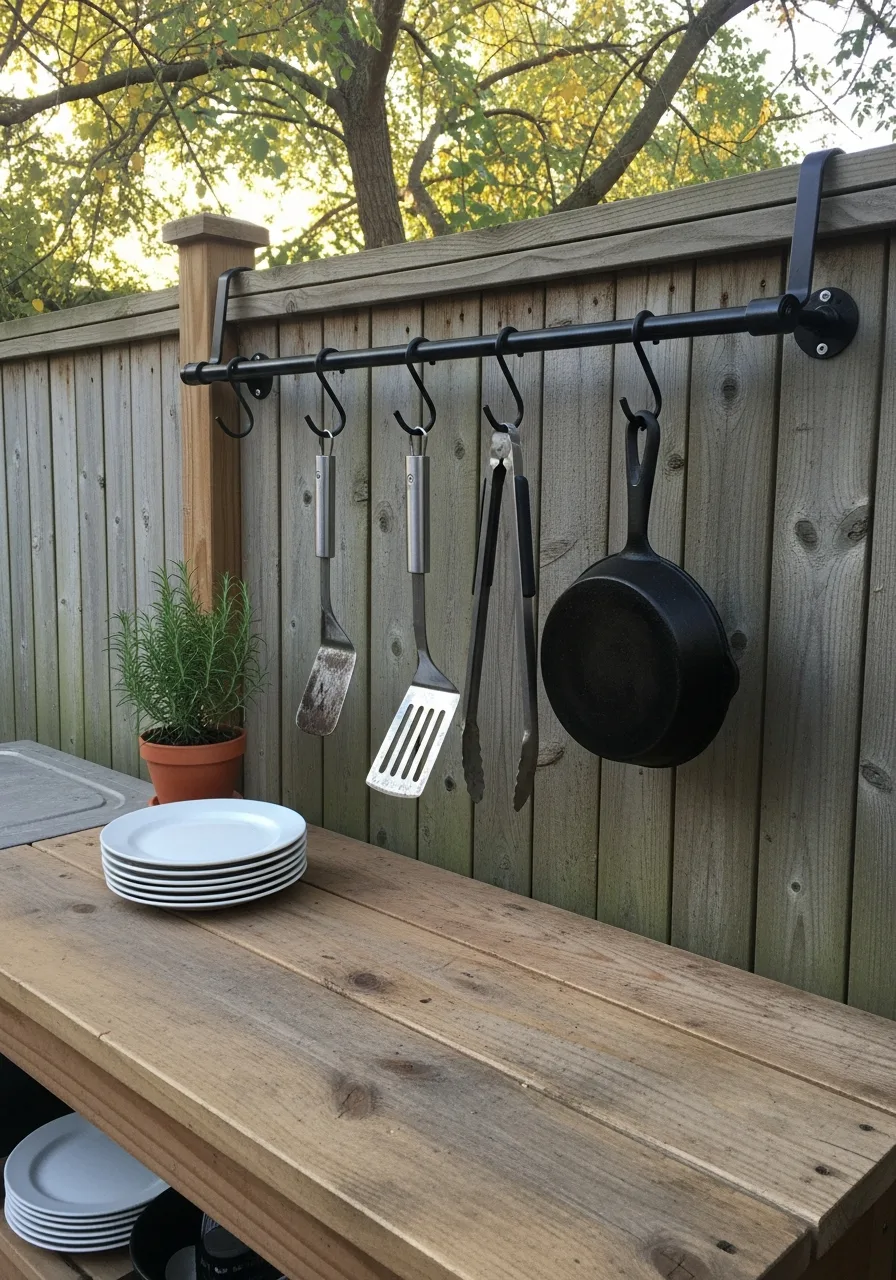
Install hooks, rails, or pegboards to organize tools without expensive cabinetry. This keeps your spatulas and brushes within reach while you are over the grill. I always use magnetic strips for knives.
- Mount to the wall
- Use stainless steel hooks
- Space items for airflow
Pro Tip: Quick win: use a magnetic bar for metal spice tins.
27. Solar Light Kitchen
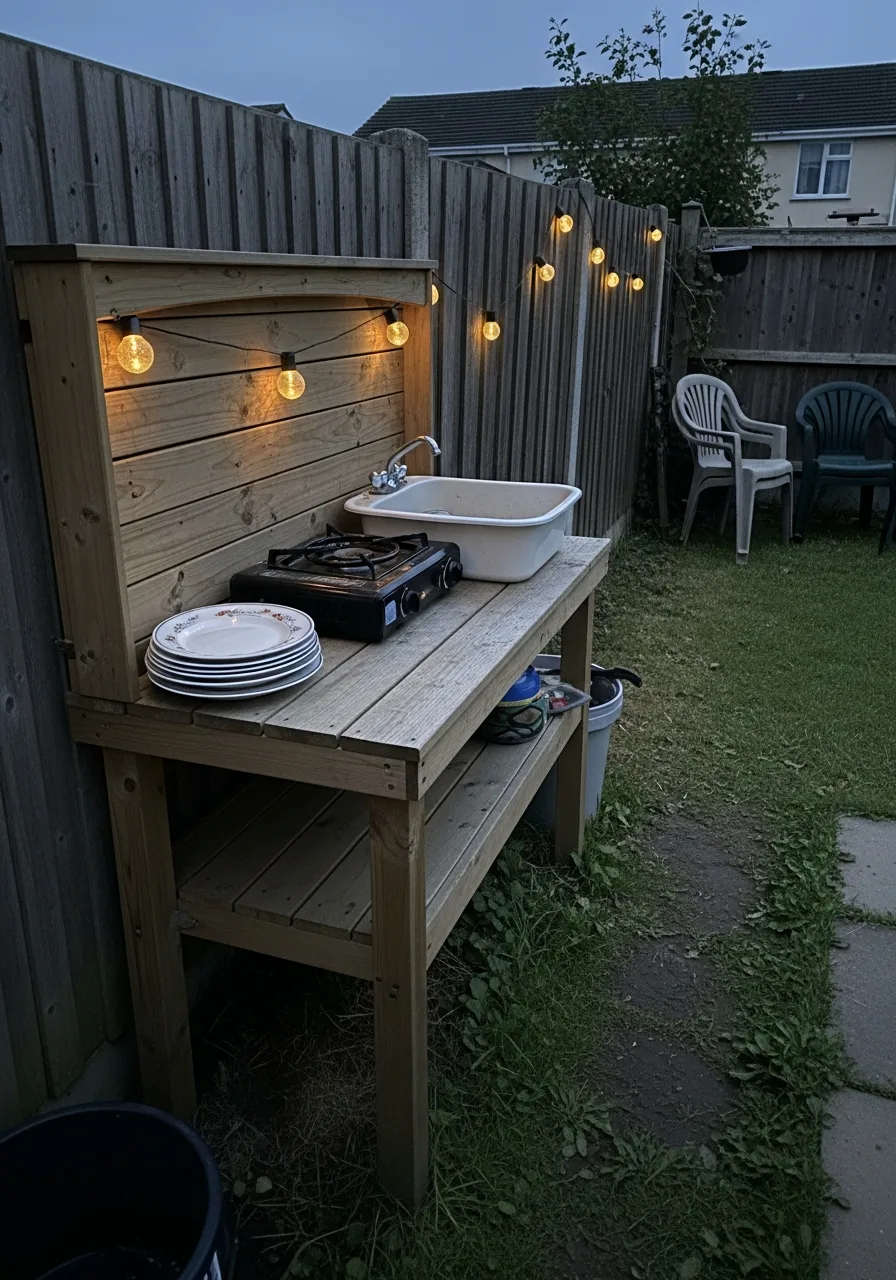
Add solar or LED lights to make the space usable at night without wiring costs. You get great visibility without the cost of an electrician. Honestly, I always use warm-toned bulbs for a cozy vibe.
- Place panels in sun
- String lights over counters
- Use motion-sensor lights
Pro Tip: Most people skip this: clean the solar panels every month.
28. Minimal BBQ Station
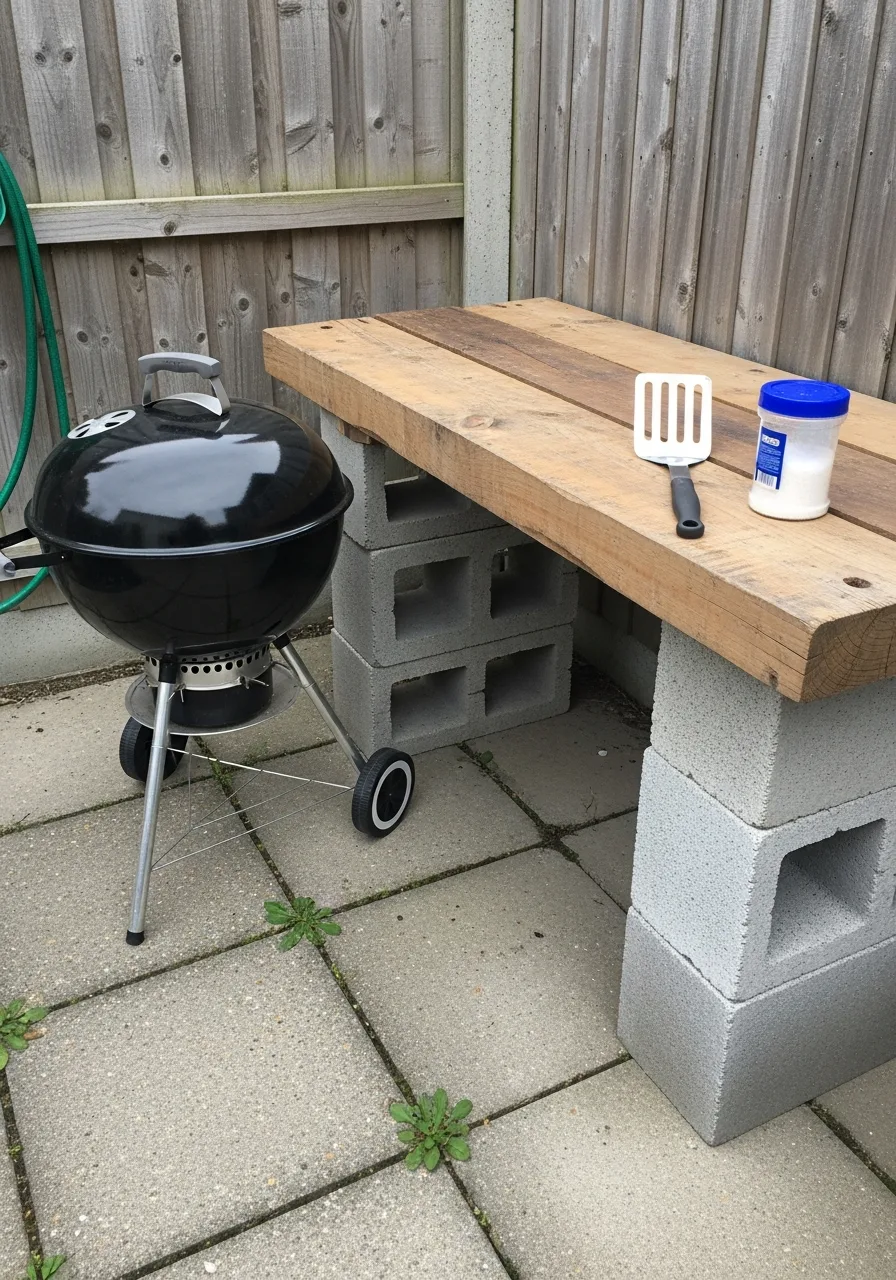
Focus on a grill and a small prep area for a clean and simple design. It keeps the footprint small and the costs even lower. My take: a clean setup is much easier to maintain over time.
- Buy a compact grill
- Add a side table
- Keep tools nearby
Pro Tip: Quick win: use a heavy-duty cover when not in use.
29. Wooden Counter Build
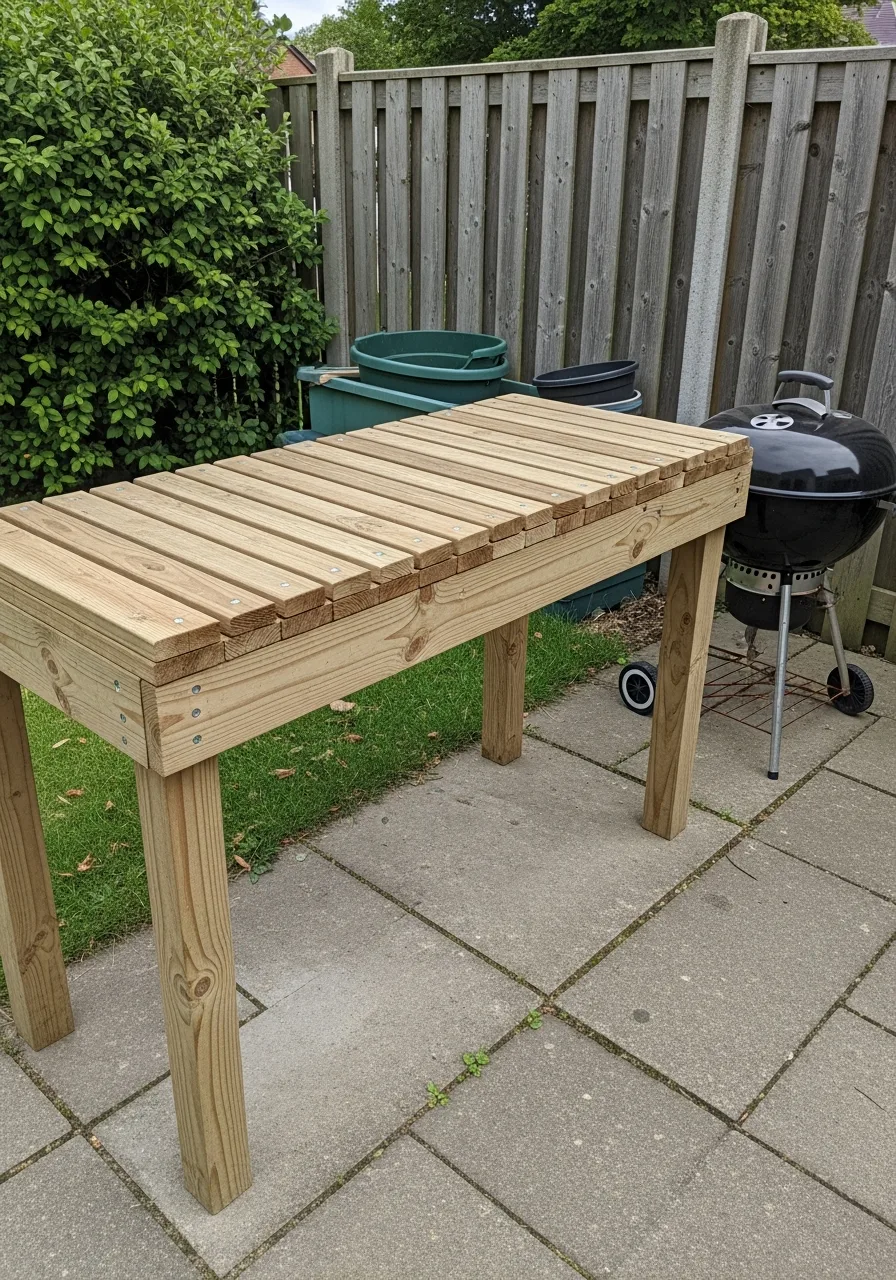
Construct a basic counter using treated lumber for a warm and natural look. Wood is easy to work with and looks great against garden greenery. I always use butcher block oil for food safety.
- Pick pressure-treated wood
- Sand the edges smooth
- Seal all six sides
Pro Tip: Here’s what I do: use 2x4s for a thick, chunky look.
30. Bar and Grill Combo
Combine a bar counter with a grill to create a social cooking and serving area. This allows guests to sit and chat with you while you prepare the meal. My take: high stools make it feel like a vacation.
- Build a tiered counter
- Space for two stools
- Add an overhang
Pro Tip: Quick win: install a foot rail for guest comfort.
31. Under Deck Kitchen
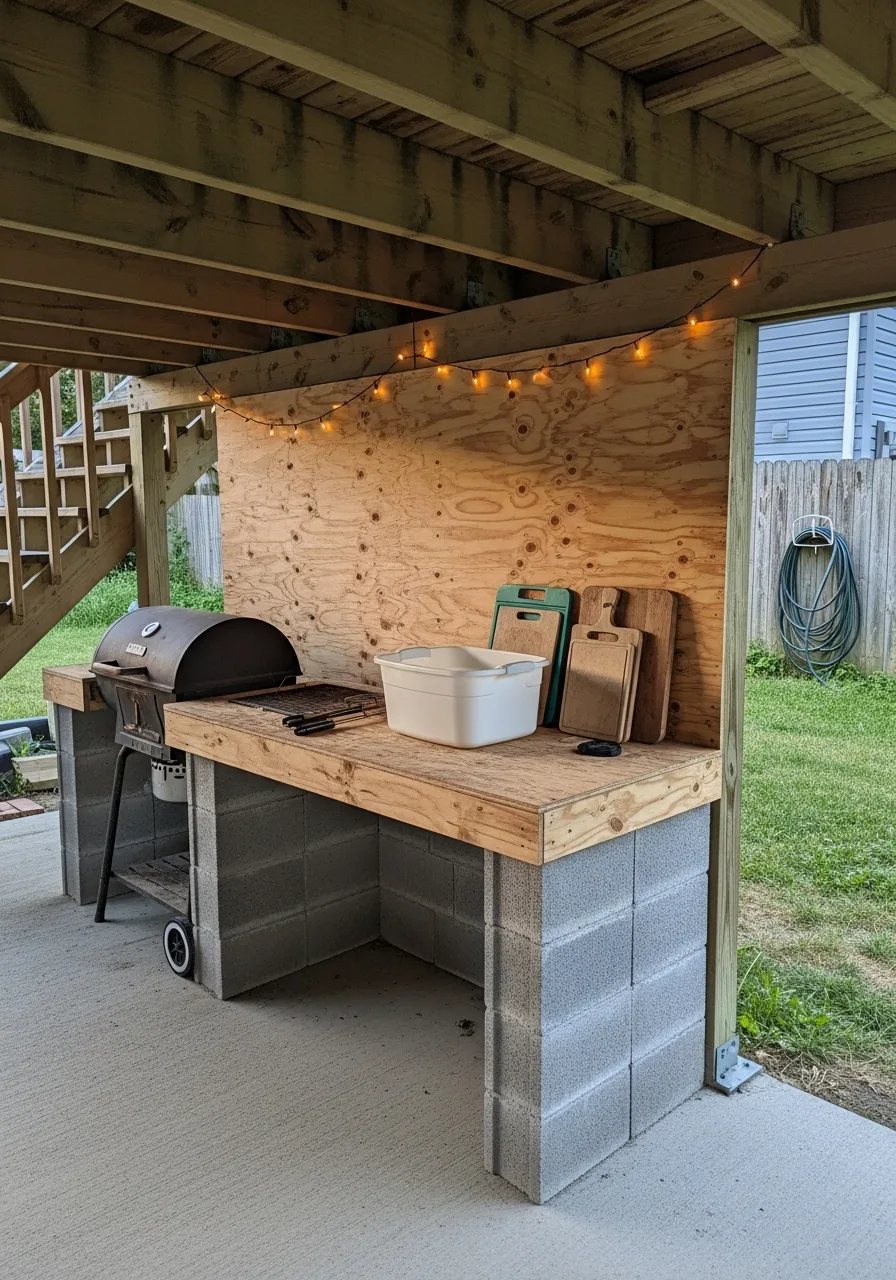
Use the shaded space beneath a deck to save on roofing and structure expenses. It provides a natural ceiling that protects your gear from the elements. My take: make sure your deck is watertight first.
- Check for overhead leaks
- Install a ceiling fan
- Use moisture-proof materials
Pro Tip: Most people skip this: install a drainage system under the deck.
32. Wall-Mounted Kitchen Layout
Build along an exterior wall to simplify installation of utilities and reduce materials. This layout uses the house as a support, making the structure very stable. I always place it near the back door.
- Locate existing water lines
- Mount frames to studs
- Use the house siding
Pro Tip: Quick win: use a ledger board for extra support.
33. Reclaimed Wood Design

Use salvaged wood for the entire structure to create a cohesive and low-cost build. It gives the kitchen a weathered look that blends into the outdoors perfectly. My take: a dark stain makes old wood look new.
- Remove all old nails
- Check for wood rot
- Stain for weather protection
Pro Tip: Here’s what I do: mix different wood types for character.
34. Simple L-Shaped Layout
Design an L-shaped kitchen to improve workflow without increasing complexity. This shape gives you separate zones for prepping, cooking, and serving. Honestly, it makes you feel like a pro chef.
- Keep the grill central
- Add long prep counters
- Create a corner sink
Pro Tip: Quick win: put the cooler at one end for easy access.
35. Mixed Material Kitchen

Combine wood, concrete, and brick to create a unique kitchen using leftovers. Using different textures makes a budget project look like a high-end designer choice. My take: gray concrete and warm wood look amazing together.
- Use wood for frames
- Use concrete for tops
- Use brick for accents
Pro Tip: Most people skip this: keep colors in the same family.
You don’t need to spend a fortune to enjoy cooking outside. Start with one of these ideas and build your dream space slowly. Honestly, the best kitchen is the one you actually use.