30 Garden Border Edging Ideas
This post may contain affiliate links: full affiliate disclosure.
Garden borders are the secret to a yard that actually looks finished. Most people just throw some mulch down and hope for the best, but that usually looks messy. I’ve found that a little structure goes a long way in keeping your outdoor space organized and easy to manage.
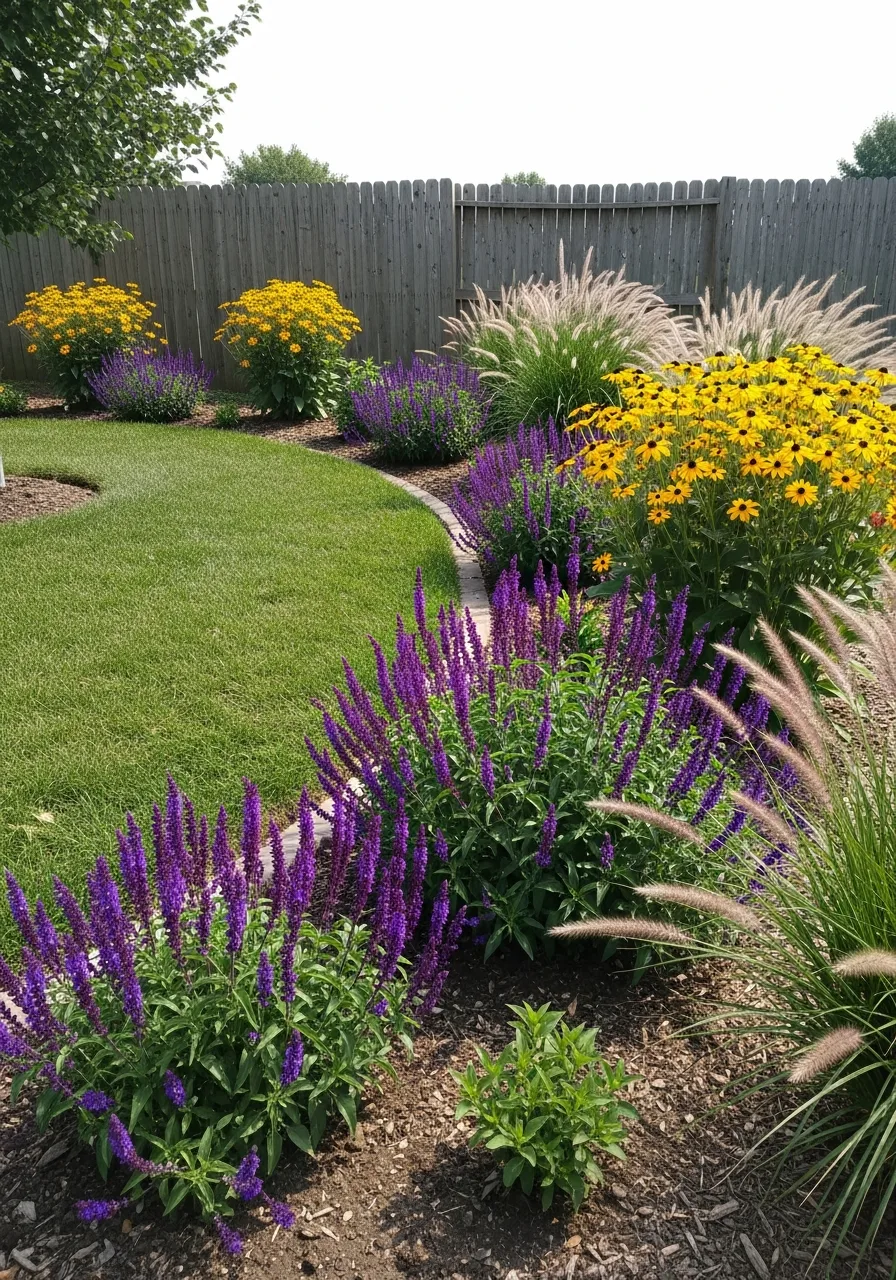
1. Maximalist Layering
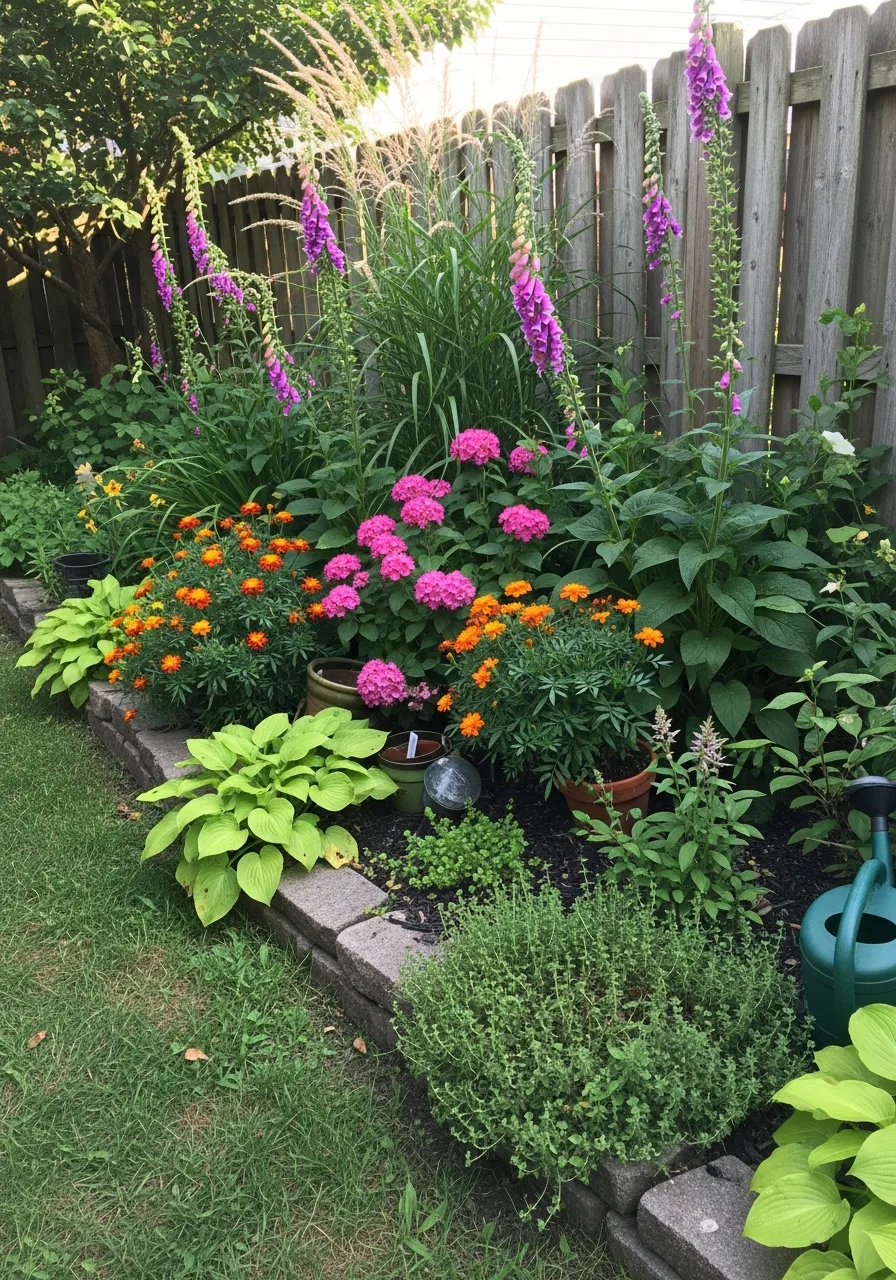
This strategy fills every inch of your garden bed with plants at three different heights. It stops weeds from growing because there is no light left for them to reach the soil. Honestly, I prefer this over plain mulch any day.
- Plant low groundcovers first
- Add mid-height flowering perennials
- Place tall shrubs in back
Pro Tip: Quick win: use evergreen plants so the border stays full all winter.
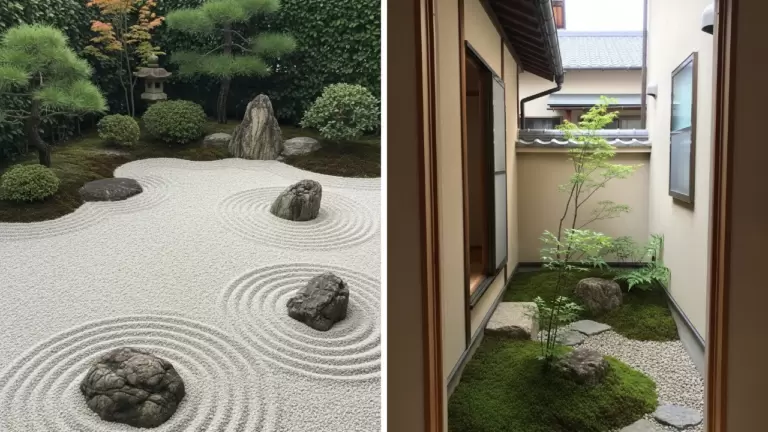
2. Living Botanical Rooms
You use tall grasses or hedges to divide your yard into specific sections. This creates private spots for eating or working outside without building walls. My take: it is the best way to make a big yard feel cozy.
- Select tall ornamental grasses
- Space plants for privacy
- Define clear entry points
Pro Tip: Most people skip this: check the mature height of hedges before planting.
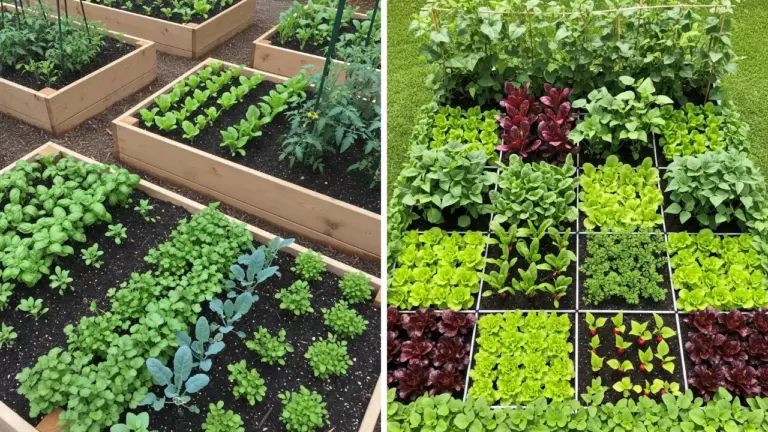
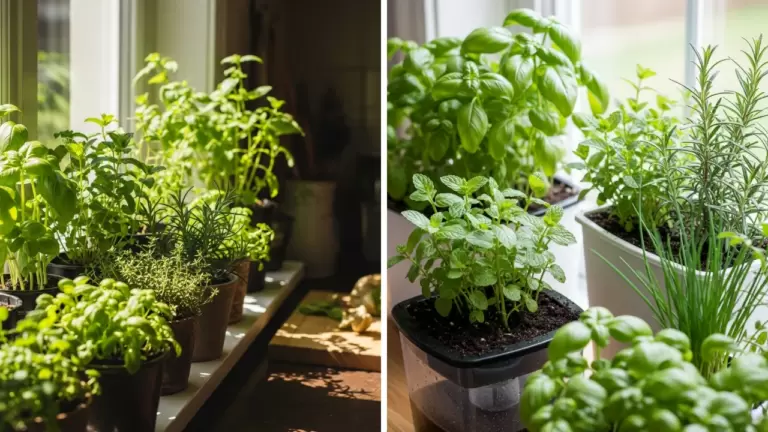
3. Productive Foodscaping Borders
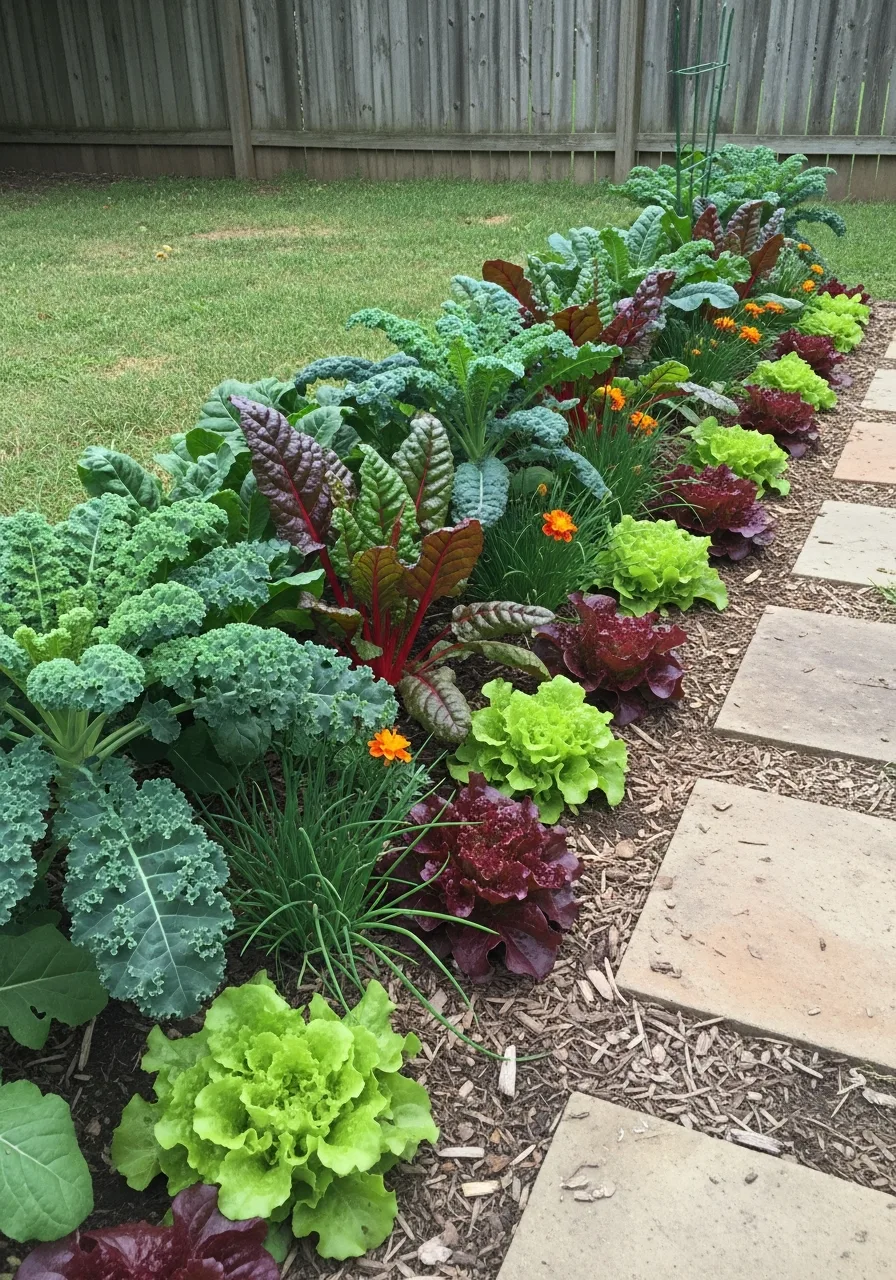
This idea mixes vegetables like kale and chard right in with your flowers. You get a beautiful border and fresh food at the same time. I always recommend this for small suburban yards.
- Mix kale with perennials
- Plant blueberry bushes nearby
- Use colorful rainbow chard
Pro Tip: Here’s what I do: plant herbs at the very edge for easy picking.
4. Climate Resilient Planting
These borders use tough plants that can handle weird weather like floods or heat. Native plants have deep roots that keep the soil in place during heavy rain. What works here is choosing species that belong in your specific area.
- Research local native plants
- Group drought-tolerant species together
- Check soil drainage first
Pro Tip: Quick win: add a layer of compost to help roots grow deeper.
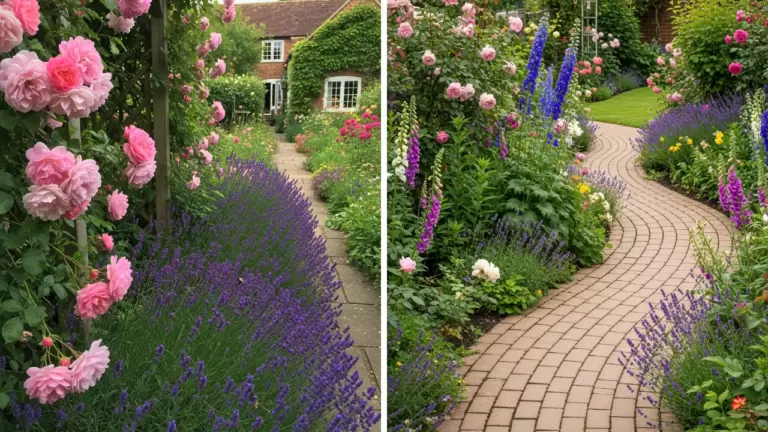
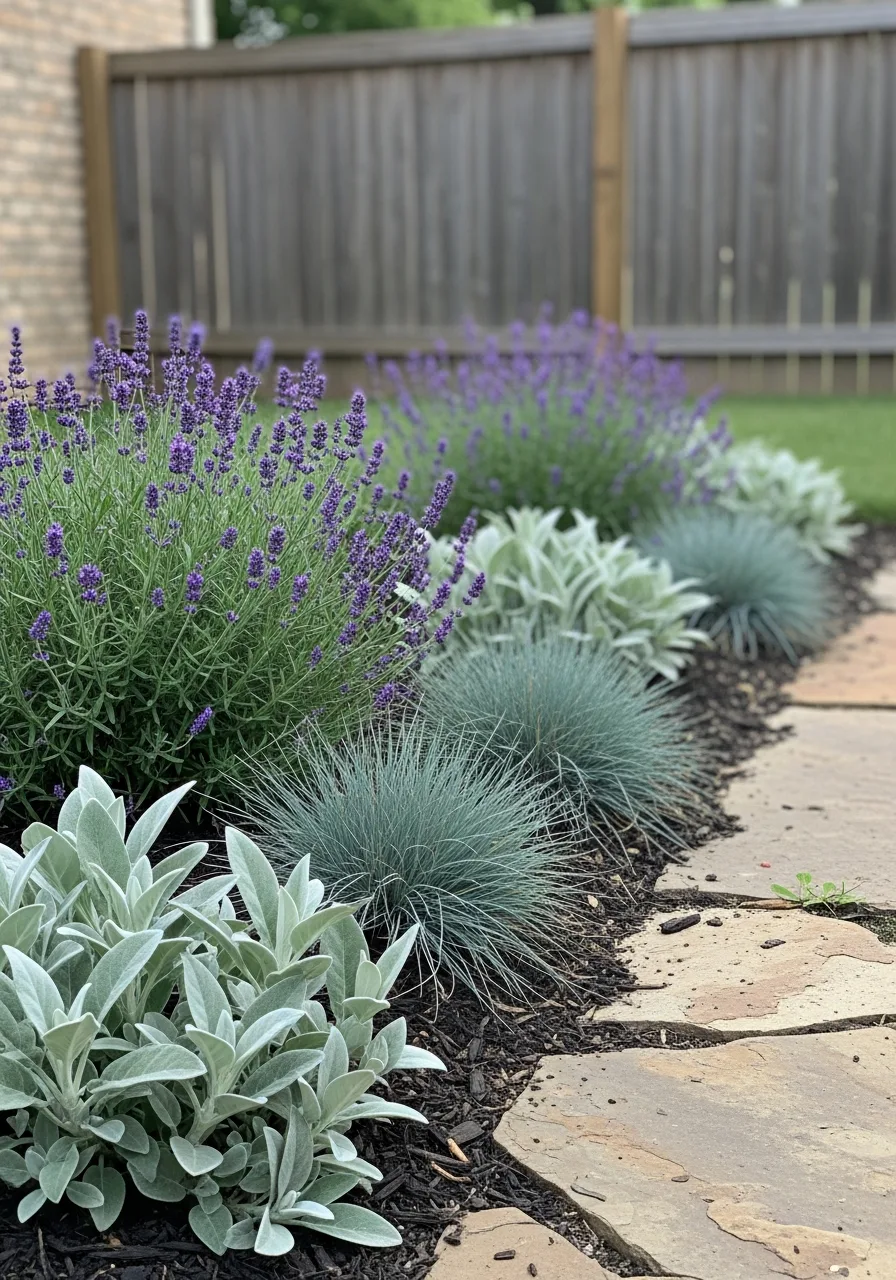
5. Faded Petal Palette
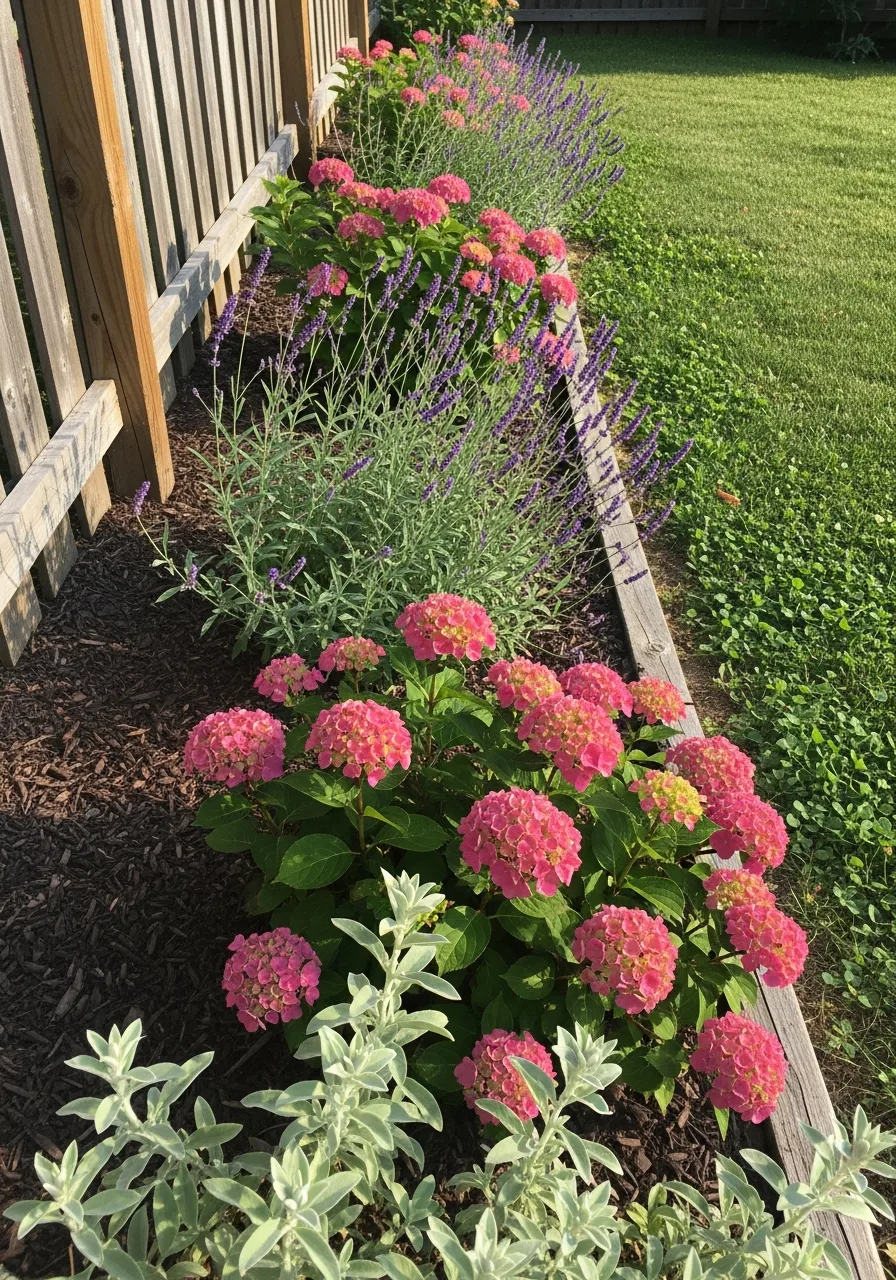
This look uses dusty pinks and soft purples for a vintage aesthetic. It looks very high-end when you pair it with silver-colored leaves. Honestly, this is the most relaxing color scheme you can pick.
- Buy dusty pink roses
- Add silver lambs ear
- Stick to muted tones
Pro Tip: Most people skip this: use black mulch to make soft colors pop.
6. Jewel Tone Accents
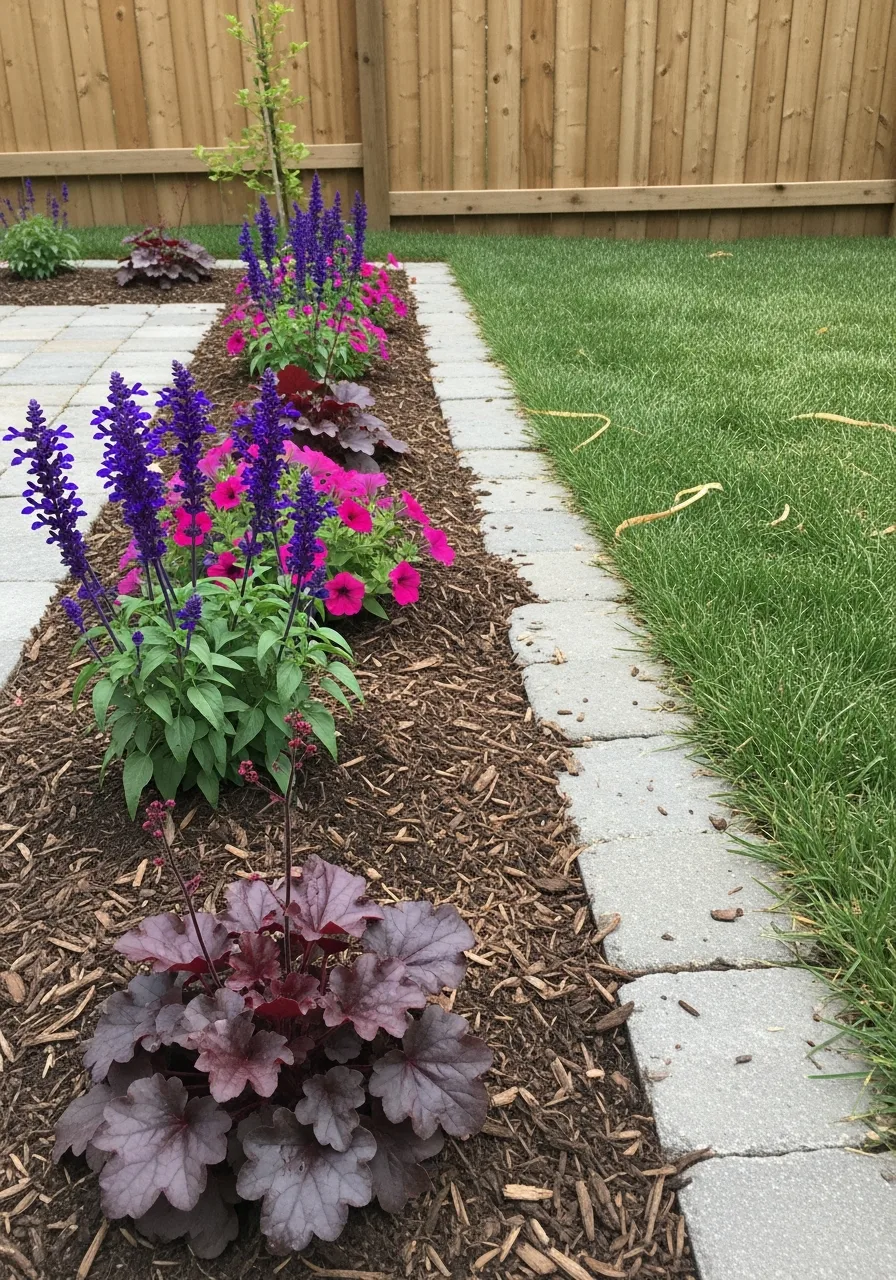
You use bright colors like emerald green and ruby red to create high contrast. These saturated colors stop the garden from looking flat or boring. My take: a few bright spots make the whole yard look professional.
- Pick deep red flowers
- Use dark purple foliage
- Contrast with bright green
Pro Tip: Here’s what I do: place jewel tones near the front door.
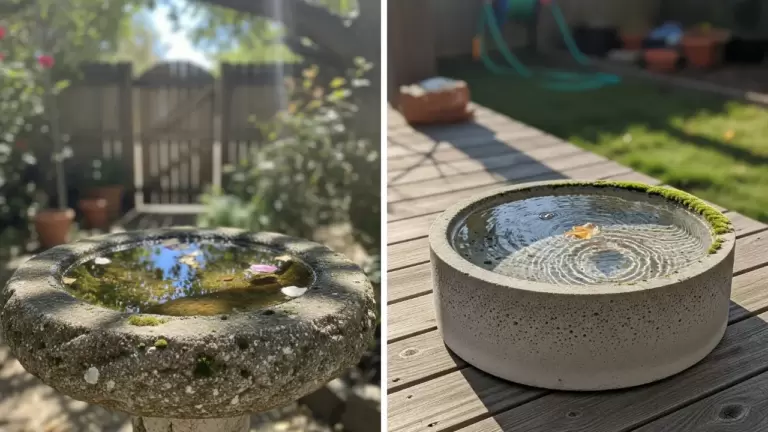
7. Wildlife Friendly Corridors
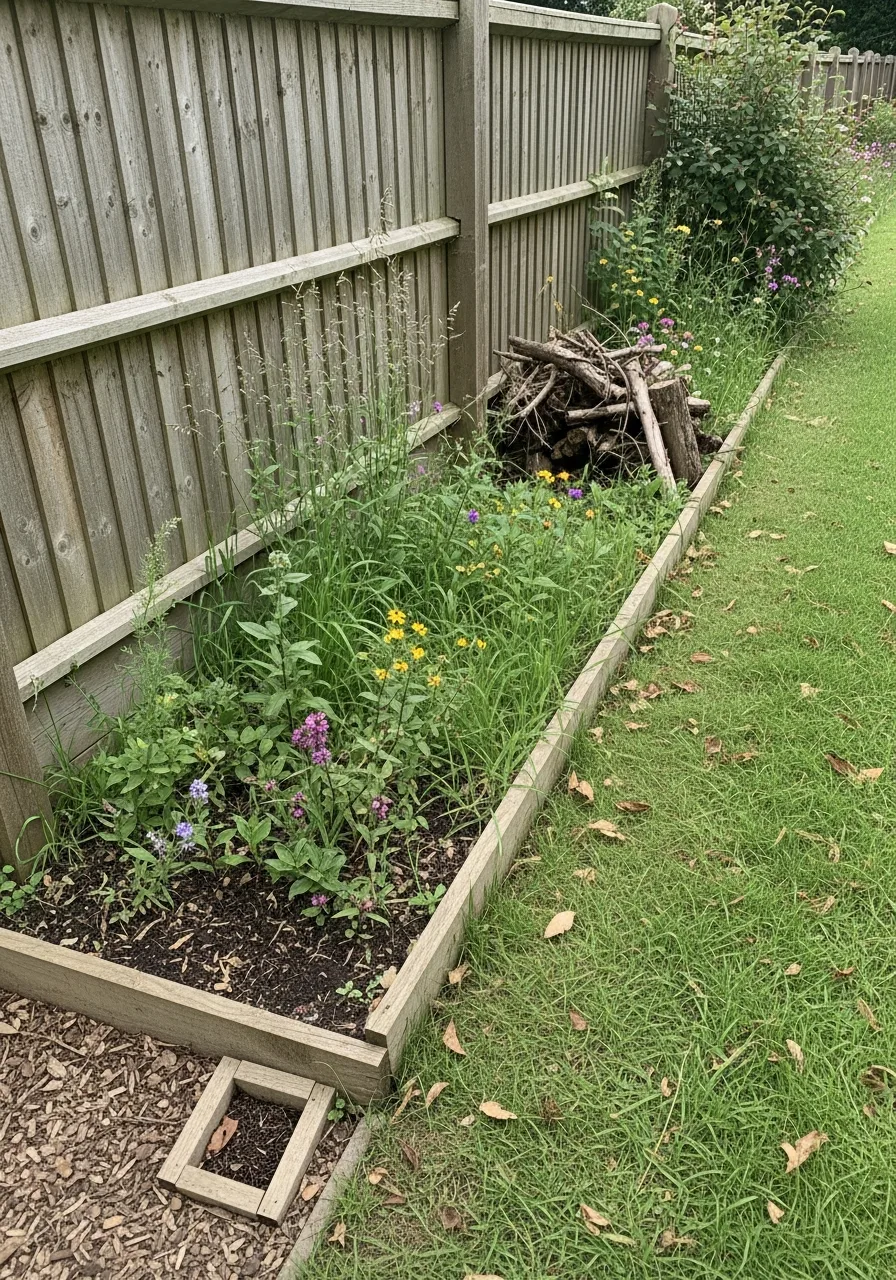
These borders focus on helping bees and birds rather than looking perfectly neat. You use flowers that provide nectar and leave the dried seeds for birds to eat. Honestly, watching the birds is more fun than weeding.
- Plant nectar-rich wildflowers
- Leave seed heads over winter
- Avoid using chemical sprays
Pro Tip: Quick win: add a small stone birdbath inside the border.
8. Vertical Boundary Upgrades
This idea uses fences or walls to grow plants upward. It is perfect for small yards where you do not have much ground space. My take: vertical gardens make a tiny patio feel like a jungle.
- Attach trellises to fences
- Install wall-mounted planters
- Grow climbing flowering vines
Pro Tip: Most people skip this: check if your fence can hold the weight.
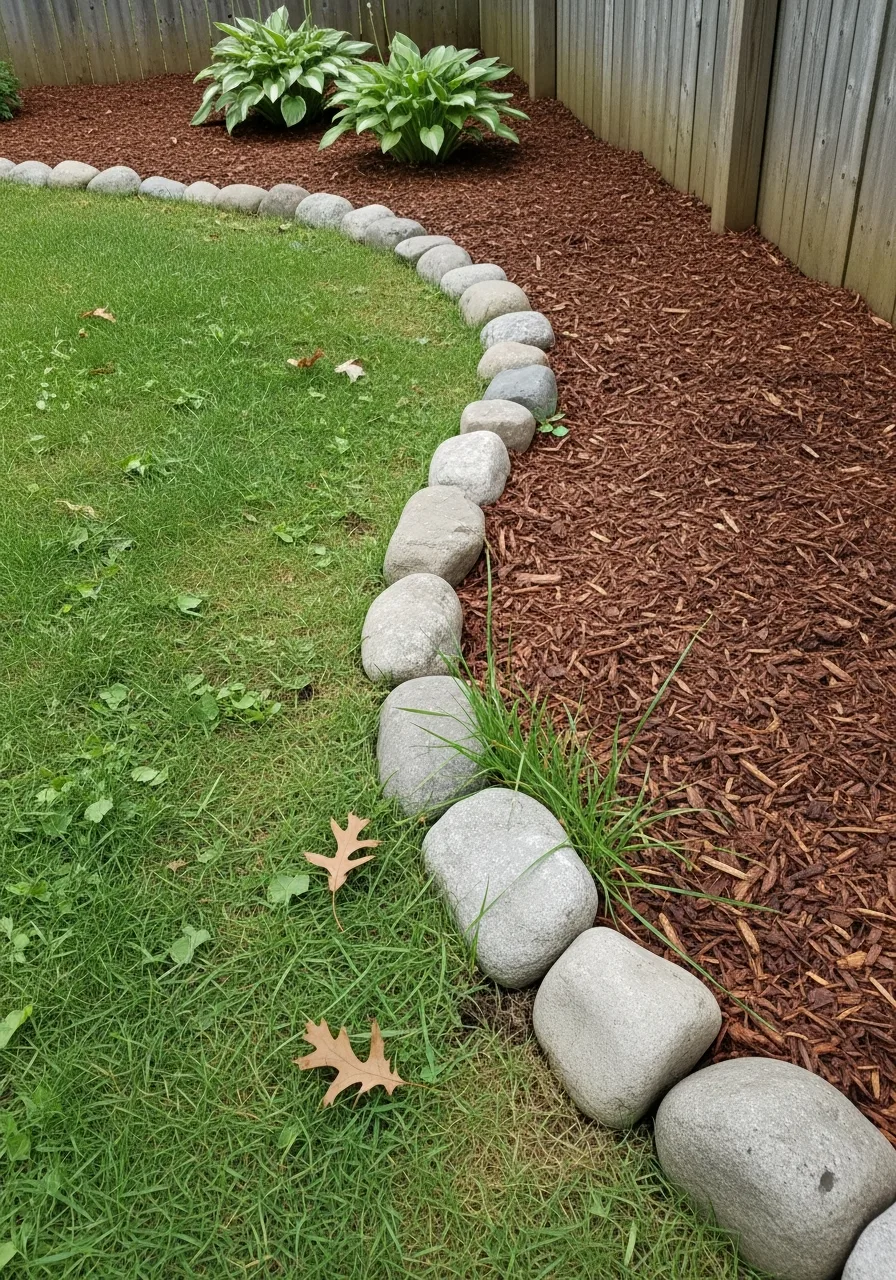
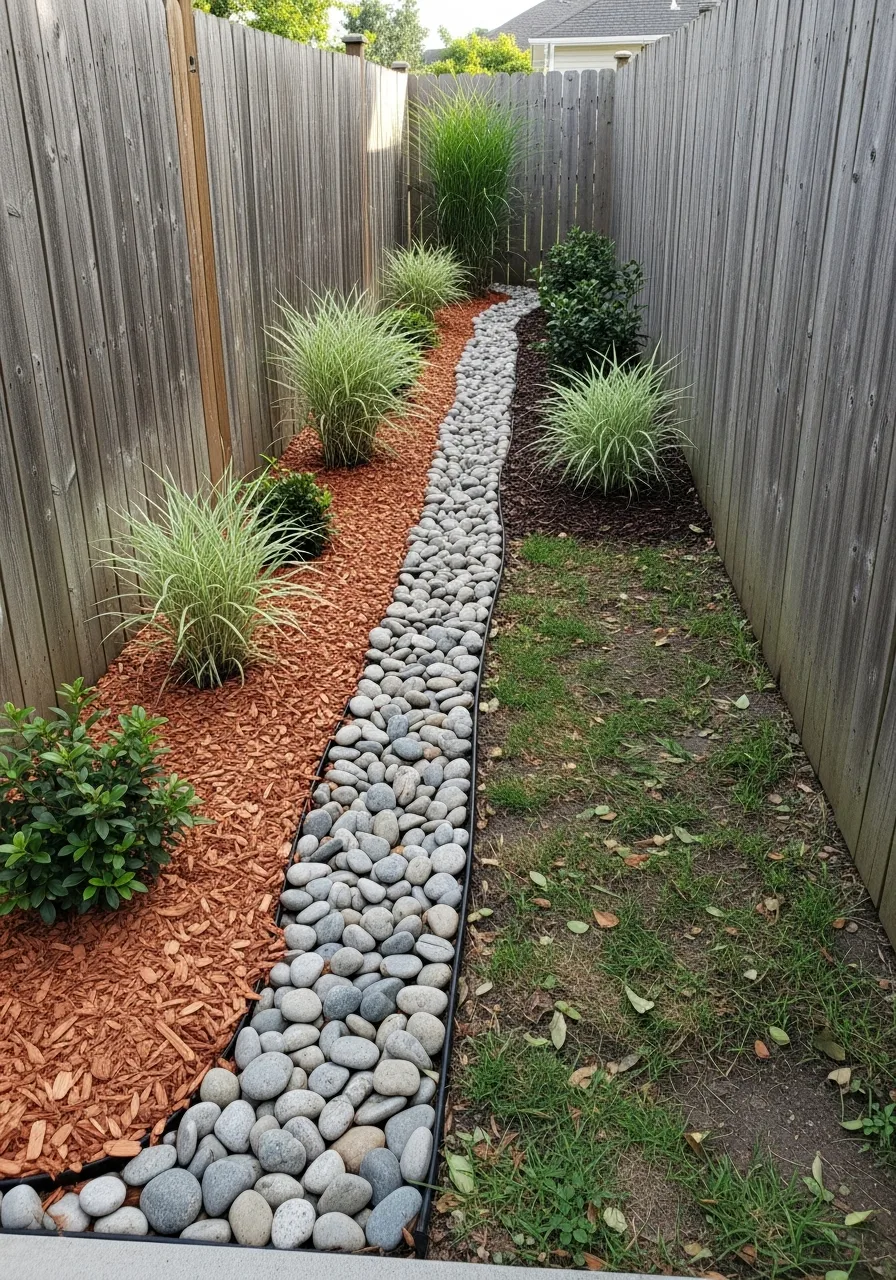
9. Asymmetrical Natural Edges
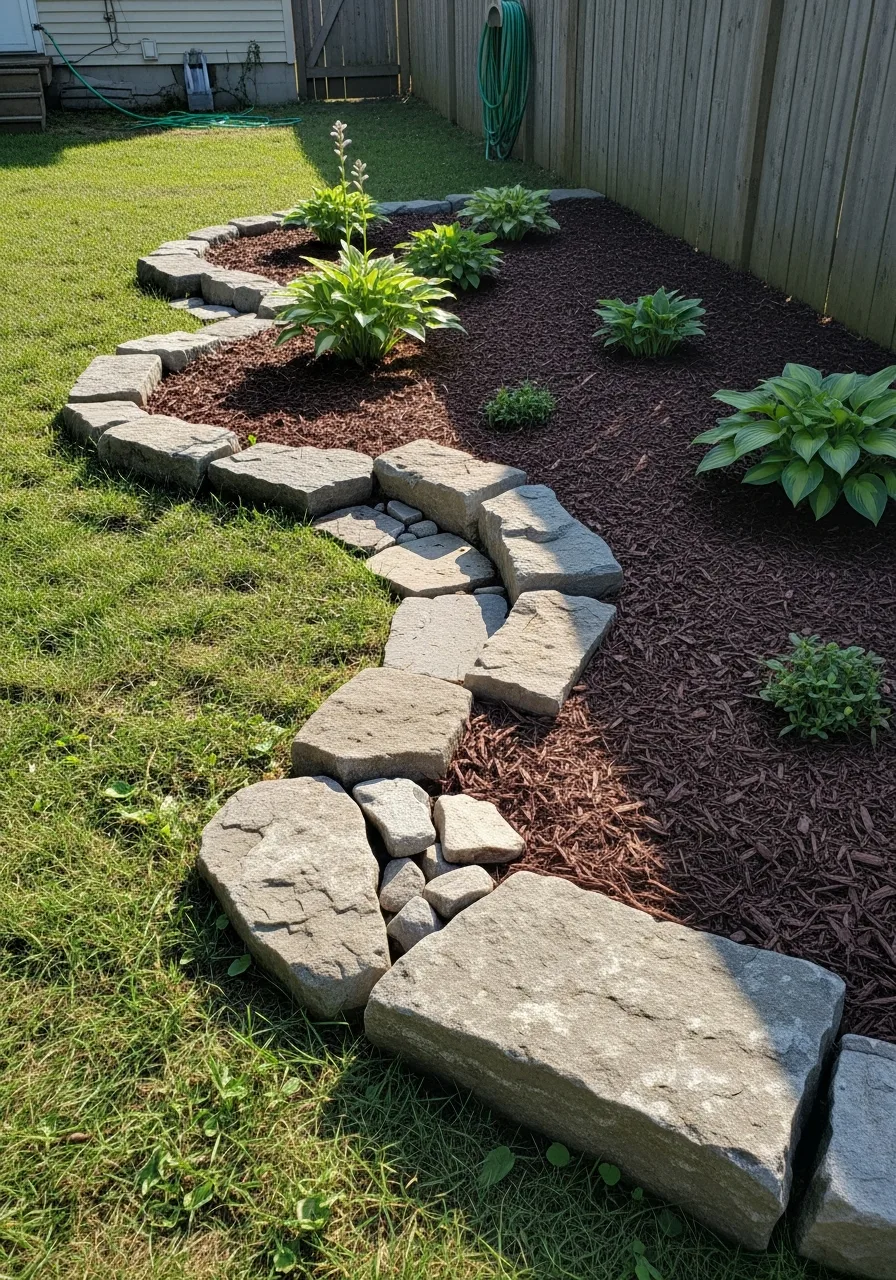
This style uses staggered stones and different plant heights for a messy-on-purpose look. It makes the garden look like a natural forest floor rather than a stiff park. I always prefer this for a relaxed cottage feel.
- Stagger stone heights
- Vary plant spacing
- Avoid straight lines
Pro Tip: Here’s what I do: use different sizes of the same stone.
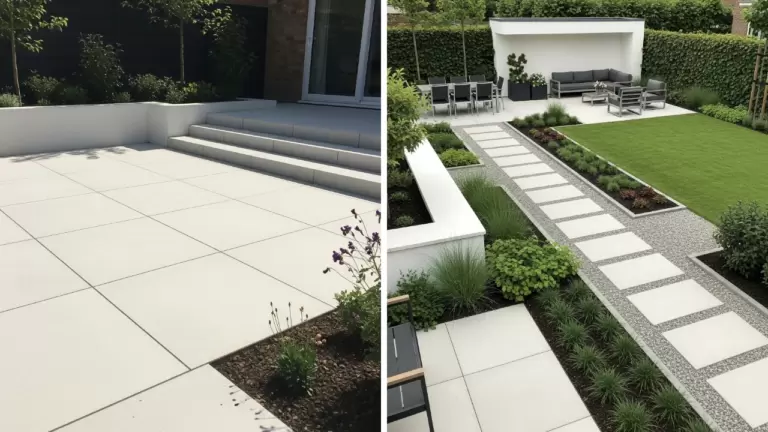
10. Indoor Outdoor Continuity
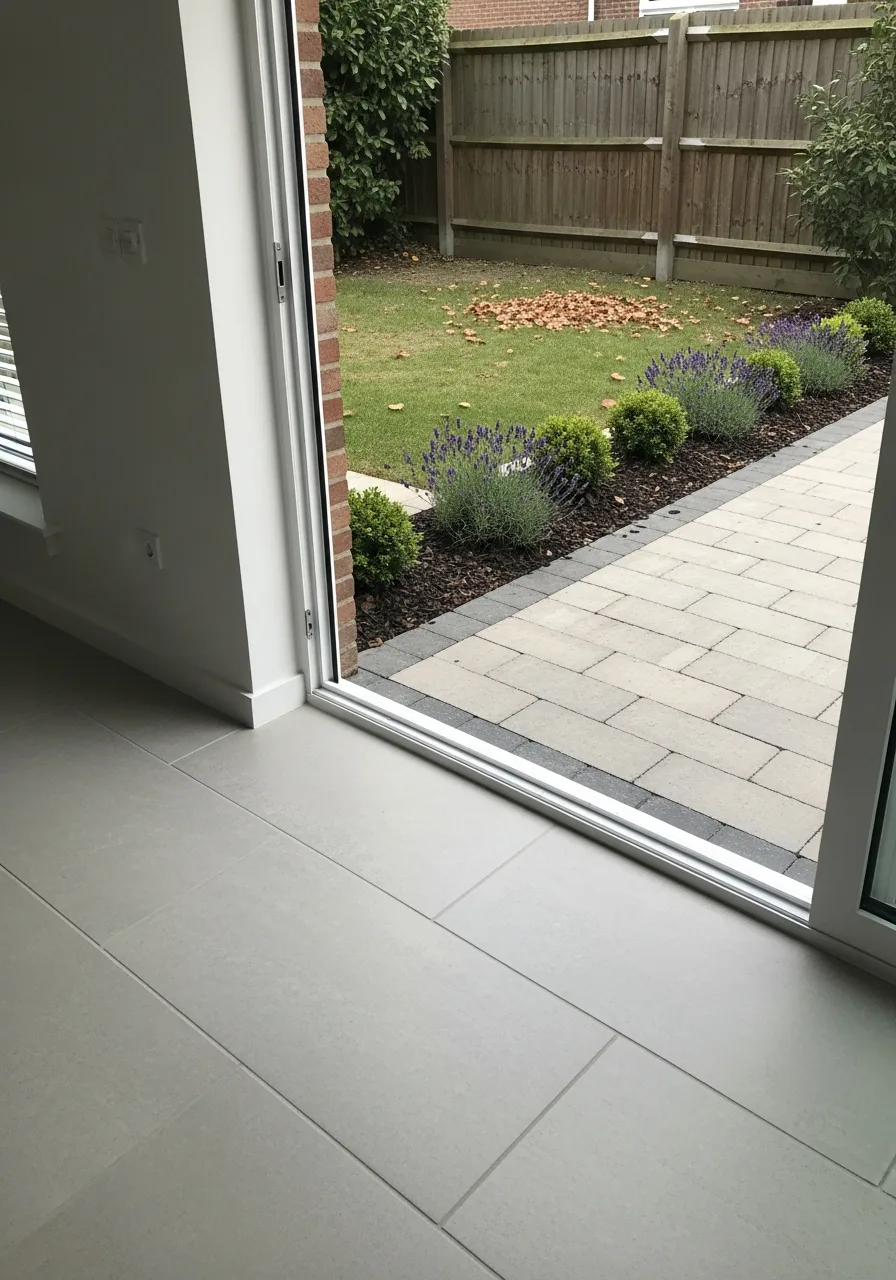
You use the same stone for your garden edge that you have on your indoor floors. This makes the transition from the kitchen to the patio look completely seamless. Honestly, it makes your whole house feel much bigger.
- Match stone materials
- Align border lines
- Keep colors consistent
Pro Tip: Quick win: use large pavers to match indoor tile sizes.
11. Modern Corten Steel Edging
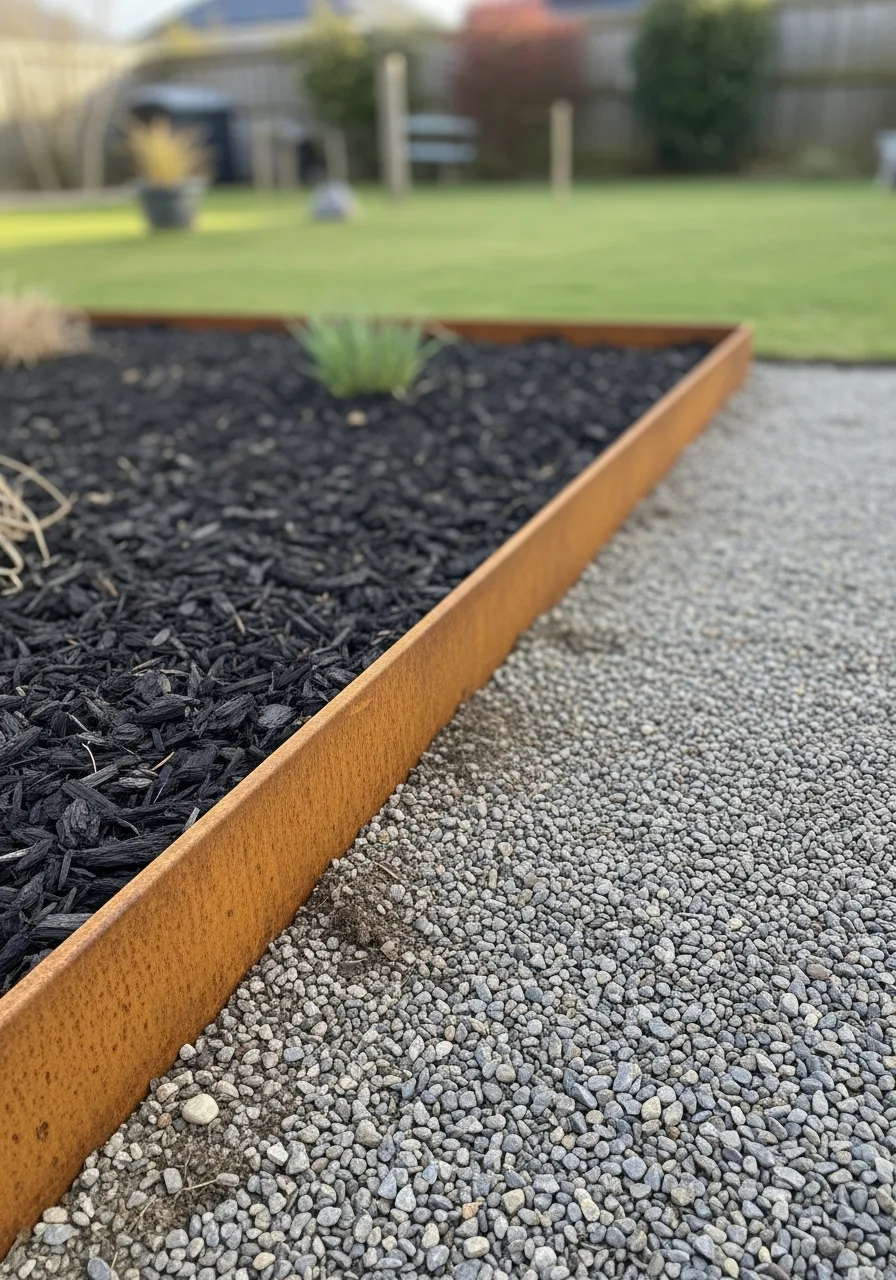
This metal edging develops a cool rusty orange look over time. It creates a very thin and sharp line between your grass and garden beds. My take: it is the cleanest looking edge you can buy.
- Install metal stakes firmly
- Overlap pieces for strength
- Wear gloves during setup
Pro Tip: Most people skip this: use a string line to keep it straight.
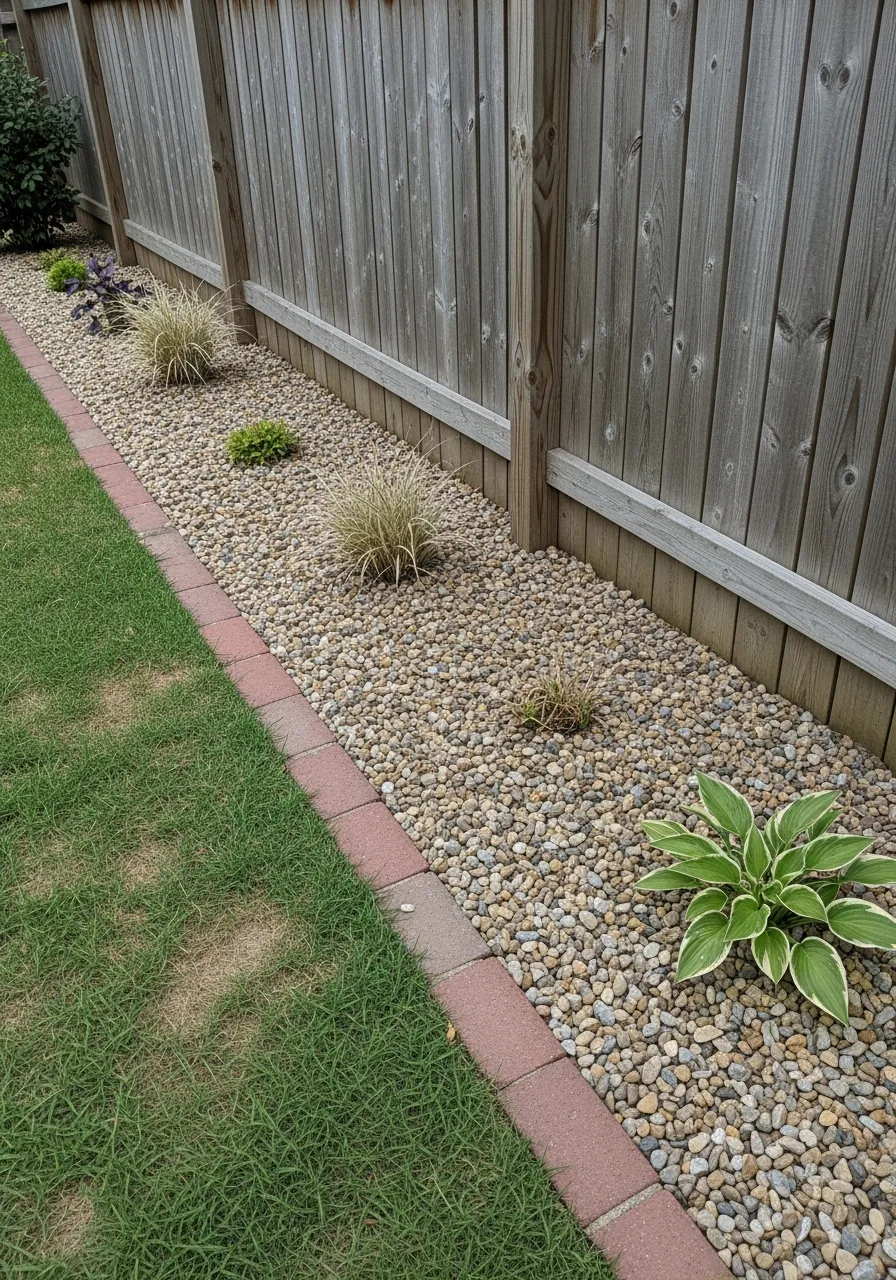
12. Reclaimed Brick Patterns
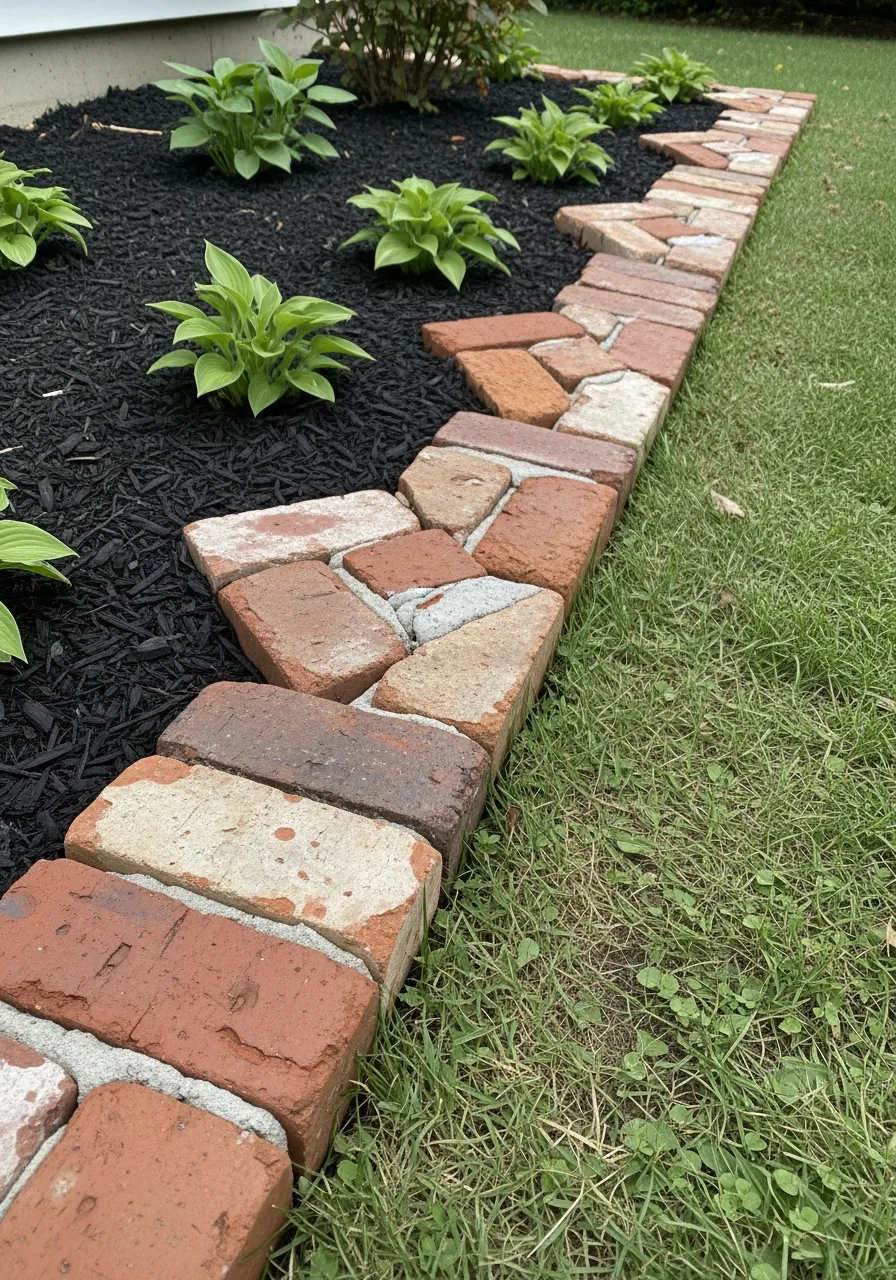
You use old bricks to create patterns like herringbone along the edge. This adds a sense of history and warmth to your landscape. I always suggest this for older homes or cottage gardens.
- Source salvaged bricks
- Lay bricks on sand
- Try a herringbone pattern
Pro Tip: Here’s what I do: set bricks at an angle for texture.
13. Textured Stone Kerbs
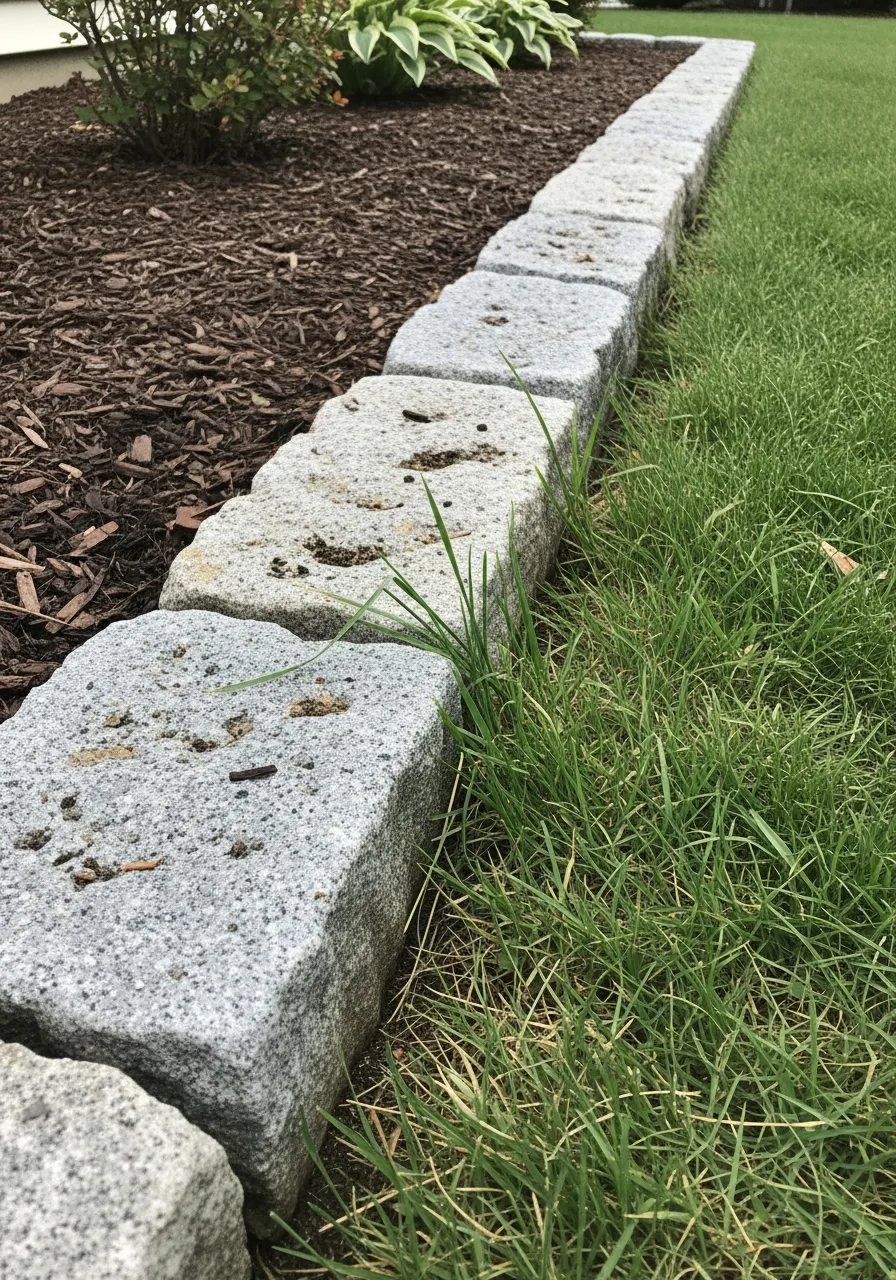
Instead of smooth pavers, this uses rough granite or tumbled stone blocks. The heavy texture makes the border feel permanent and very grounded. Honestly, these stones are heavy but they never move.
- Use rough-hewn granite
- Level each stone carefully
- Fill gaps with sand
Pro Tip: Quick win: use a rubber mallet to set stones without breaking.
14. Integrated LED Border Lighting

You tuck small lights or strips right into the edge of the garden bed. It makes your paths safer to walk on and looks amazing at night. My take: lighting is the fastest way to look expensive.
- Choose waterproof outdoor LEDs
- Hide wires under mulch
- Use a solar timer
Pro Tip: Most people skip this: use warm white lights for a cozy feel.
15. Woven Branch Hurdles

This is a DIY-friendly option using willow or hazel branches woven into low fences. It provides a rustic look that fits perfectly in a woodland garden. I always love how these look as they age.
- Use flexible willow branches
- Space vertical stakes evenly
- Weave branches tightly
Pro Tip: Here’s what I do: soak branches in water before weaving.
16. Functional Permeable Pavers
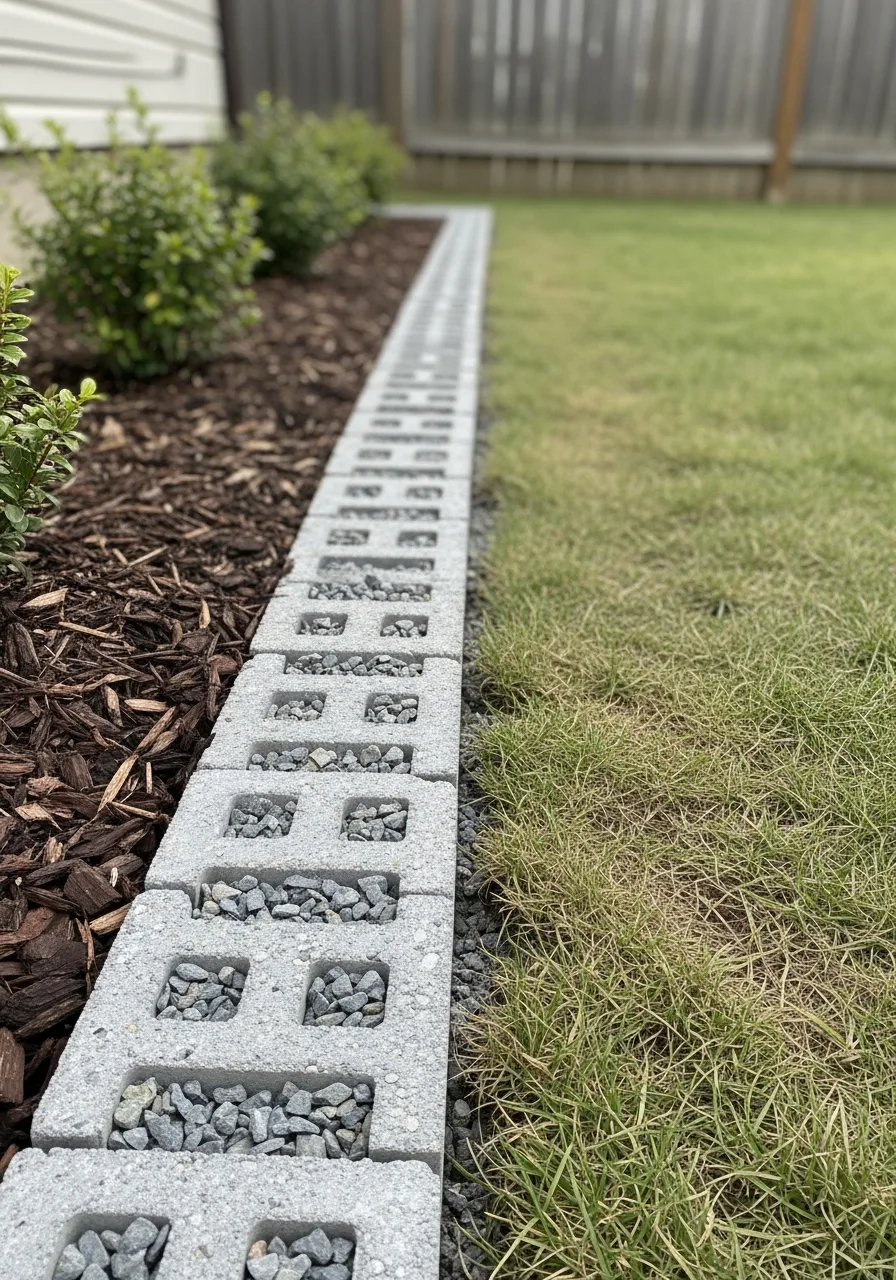
These pavers allow water to soak through the gaps and back into the ground. They prevent puddles from forming on your paths during storms. Honestly, your plants will be much happier with the extra water.
- Select permeable stone types
- Use gravel between joints
- Ensure the base is level
Pro Tip: Quick win: use a coarse sand for the final joint fill.
17. Natural Boulder Accents
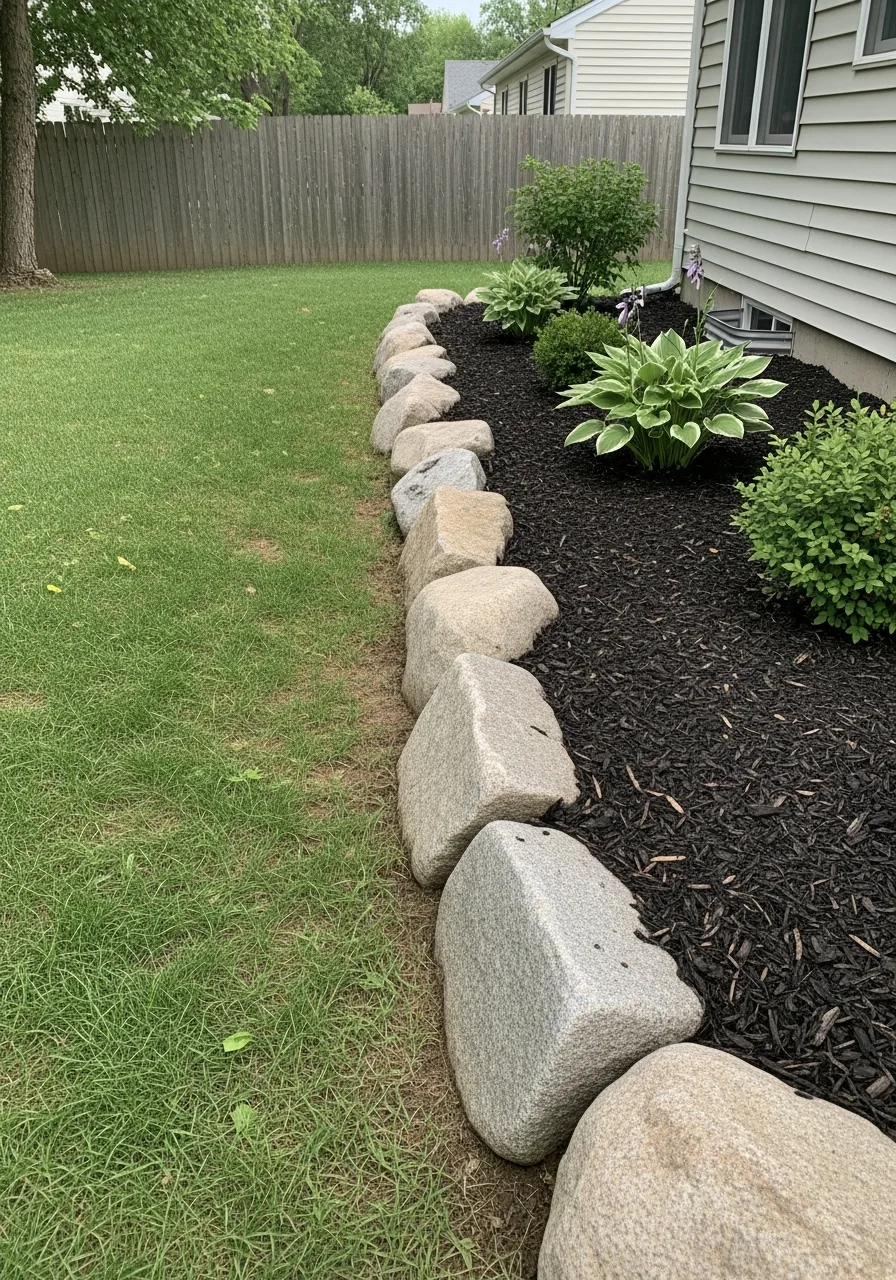
Instead of a continuous line, you place large singular boulders at the corners. These act as anchors for the whole design and look very natural. My take: boulders make a new garden look like it has been there forever.
- Choose rocks of one type
- Bury the bottom third
- Place at bed corners
Pro Tip: Most people skip this: bury the rock slightly so it looks natural.
18. Gabion Wall Borders
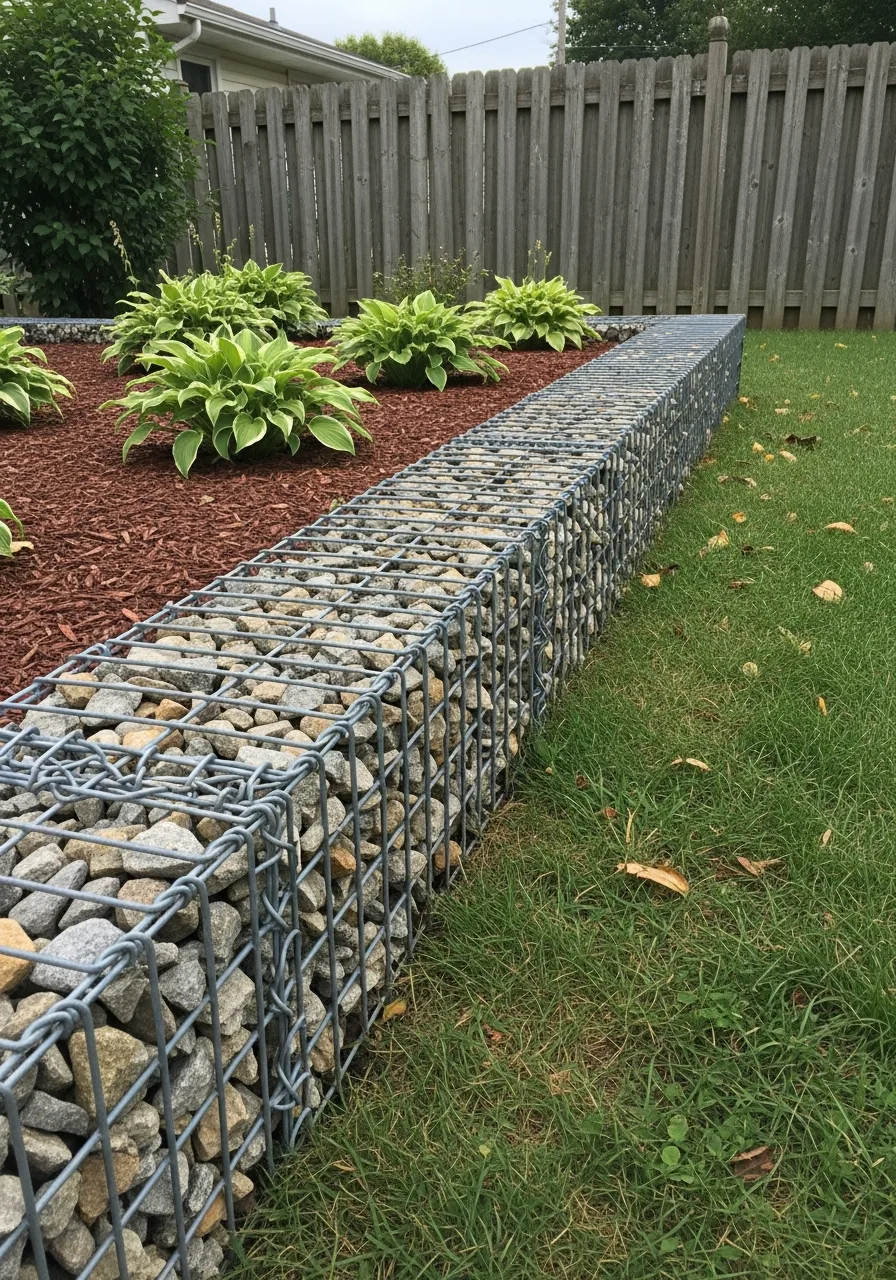
These are wire cages filled with rocks or even recycled glass. They are heavy-duty and provide great drainage for sloped garden beds. I always recommend these for a modern or industrial look.
- Buy sturdy wire cages
- Fill with uniform rocks
- Stack for higher borders
Pro Tip: Here’s what I do: use colorful stones to match your house.
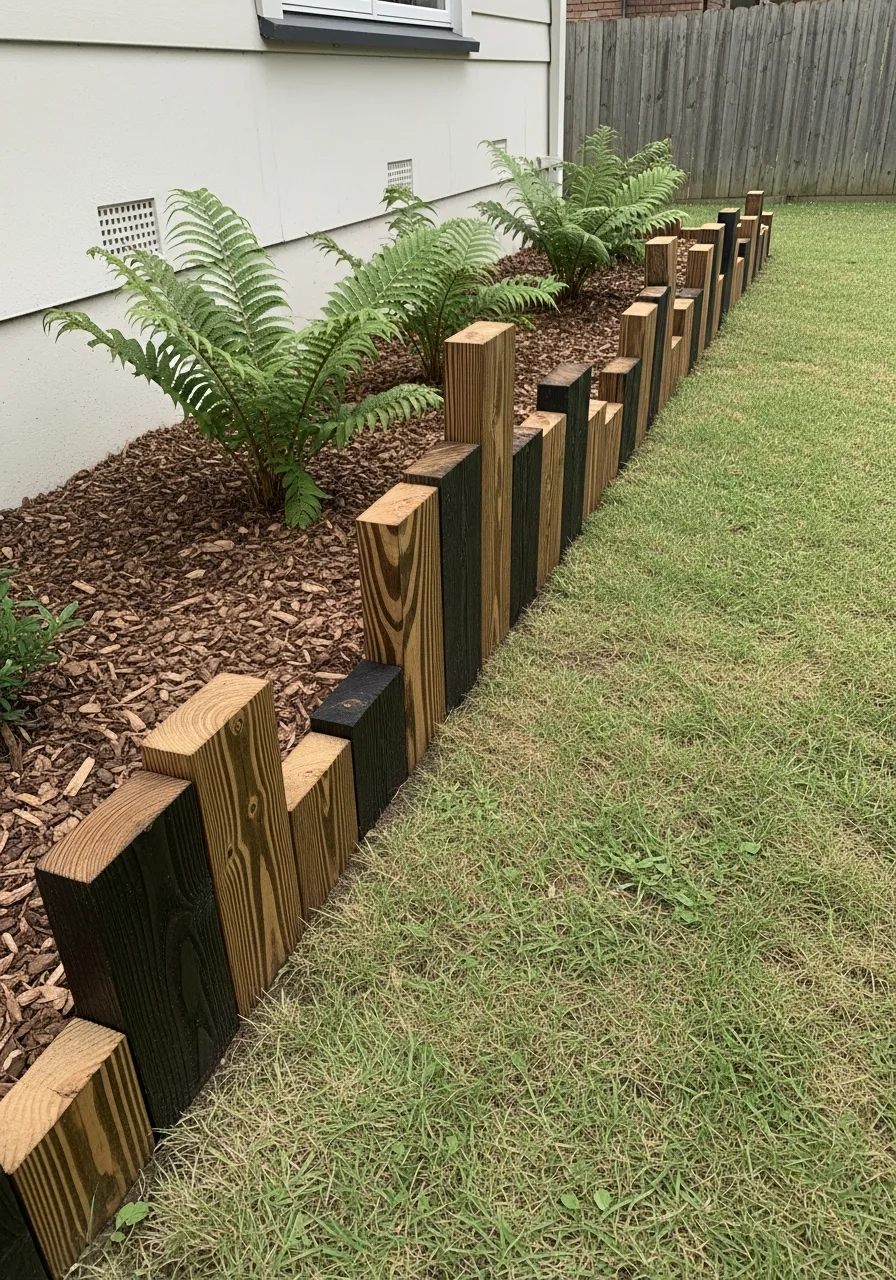
19. Recycled Composite Lumber
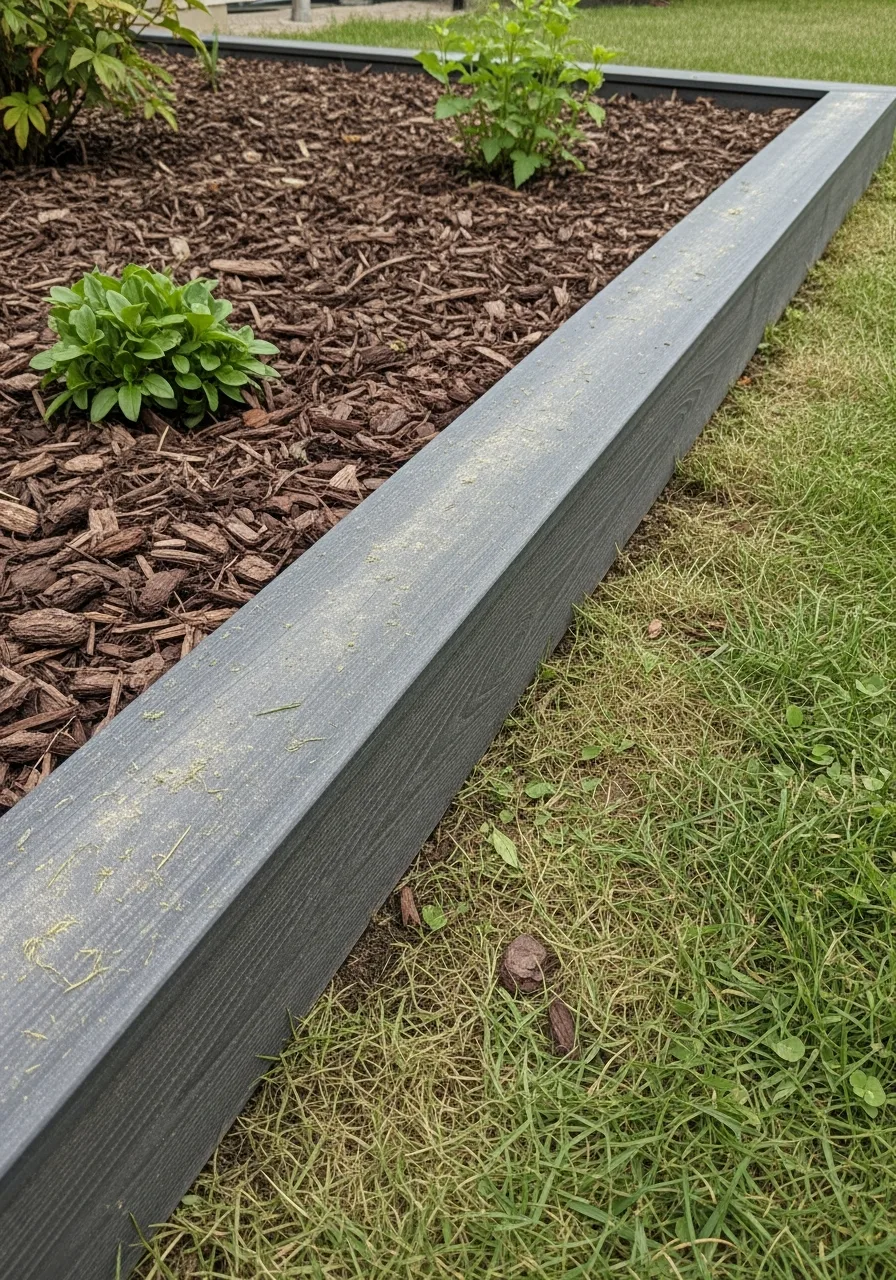
This is a low-maintenance choice made from recycled plastic and wood fibers. It looks like real wood but it will never rot or need staining. Honestly, it is the best choice if you hate painting fences.
- Pick a natural wood color
- Use stainless steel screws
- Cut to custom lengths
Pro Tip: Quick win: buy UV-resistant boards so the color does not fade.
20. Natural No Dig Edge
This is a professional trick where you cut a deep V-shape into the dirt. It keeps grass from creeping into your flowers without using any plastic or stone. I always use a sharp spade for this job.
- Cut a deep trench
- Maintain every few months
- Keep edges very straight
Pro Tip: Most people skip this: keep the grass side higher than the bed.
21. Barkitecture Pet Zones
These borders are designed specifically for dogs to run past without destroying plants. You use tough plants that can survive being stepped on and safe mulch types. My take: a happy dog means a happy garden.
- Use non-toxic plant varieties
- Avoid cocoa hull mulch
- Create clear dog paths
Pro Tip: Here’s what I do: use cedar mulch because it smells great.
22. Rain Garden Borders
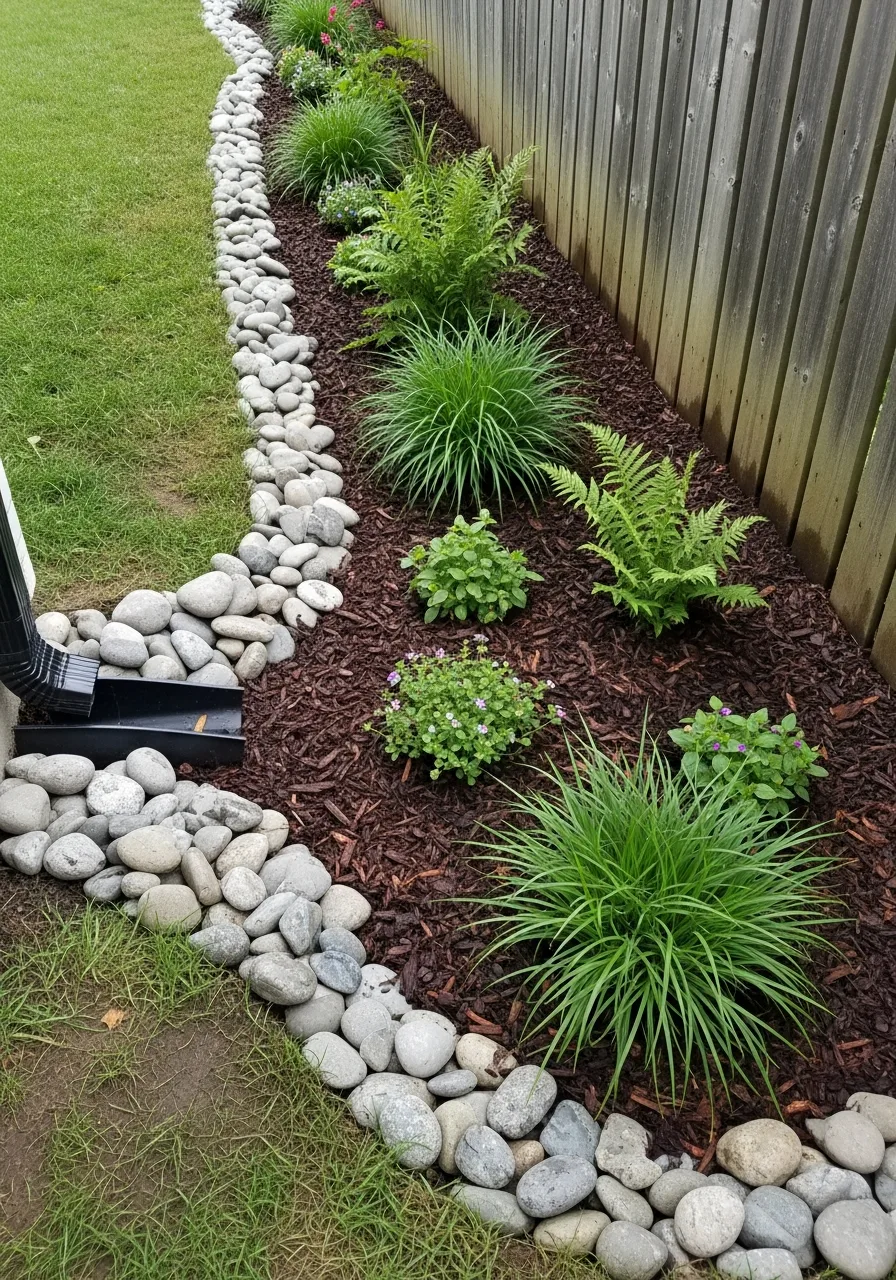
A rain garden is a low spot filled with plants that love extra water. It catches runoff from your roof and filters it naturally into the ground. Honestly, it is the smartest way to handle a soggy yard.
- Pick water-loving native plants
- Dig a shallow depression
- Add river rocks nearby
Pro Tip: Quick win: place it near a downspout for maximum effect.
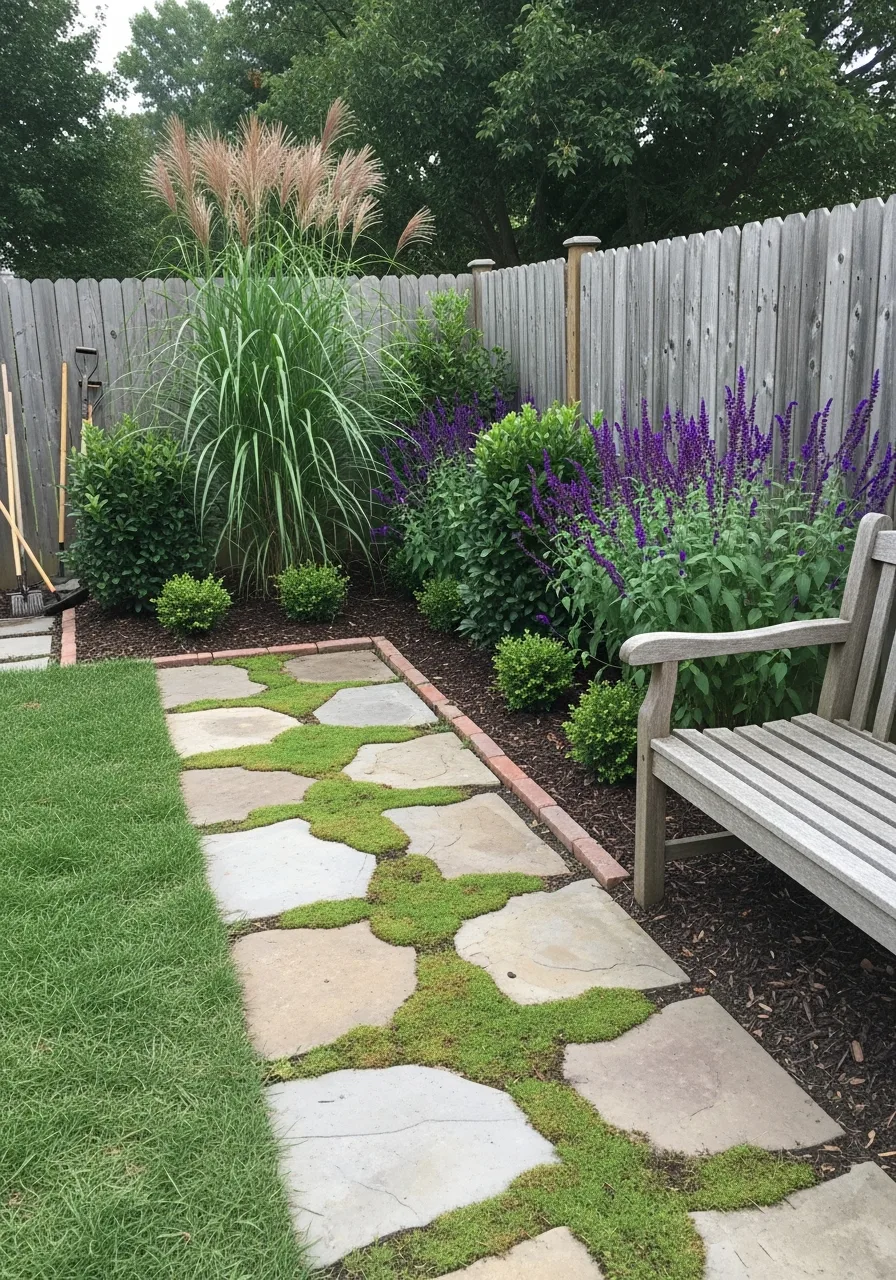
23. Built In Seating Borders
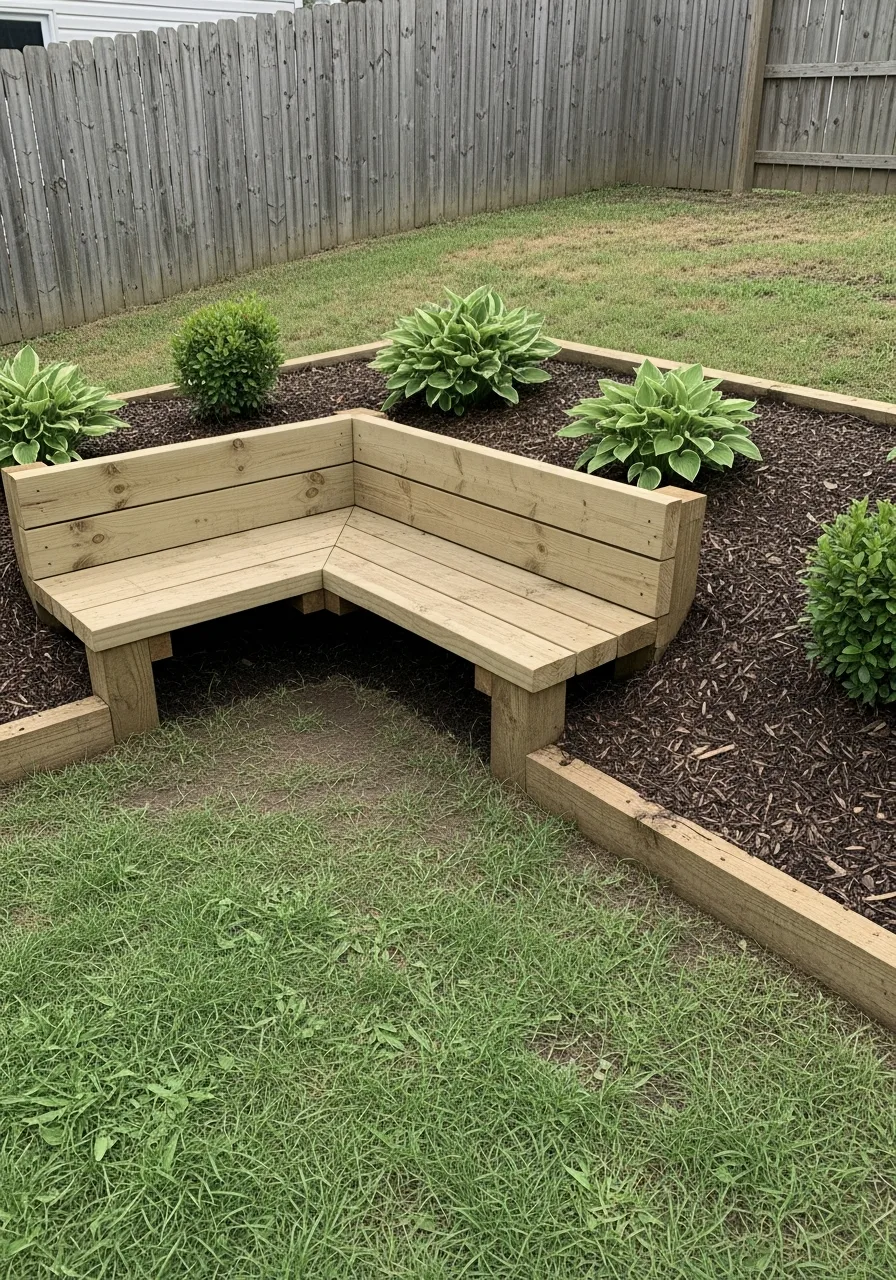
This design turns your garden edge into a long bench or a place to sit. You can use wood or stone to build a wall at the perfect height for resting. My take: it makes your garden feel like a social room.
- Build at chair height
- Use smooth top stones
- Add outdoor throw pillows
Pro Tip: Most people skip this: make sure the seat is at least 15 inches wide.
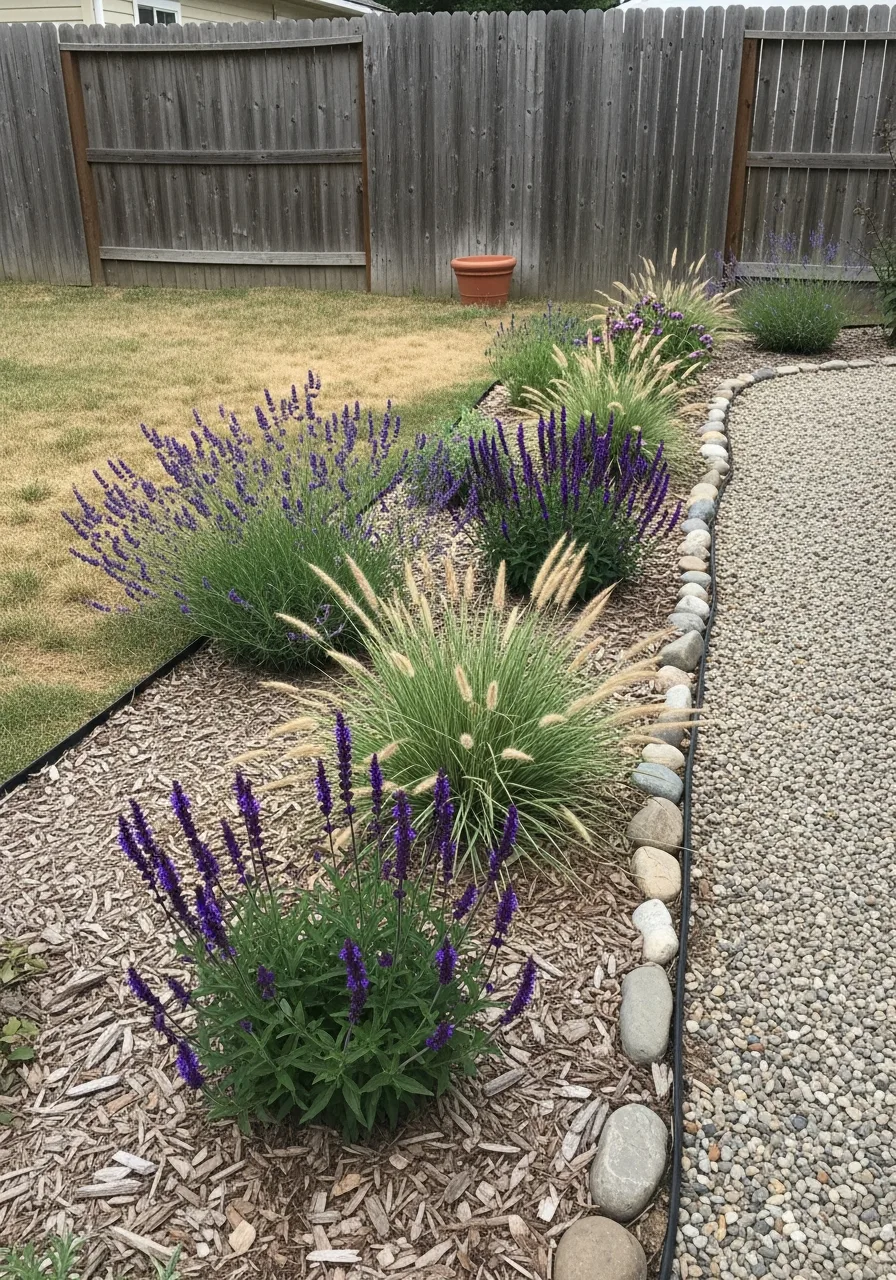
24. Pollinator Fuel Pockets
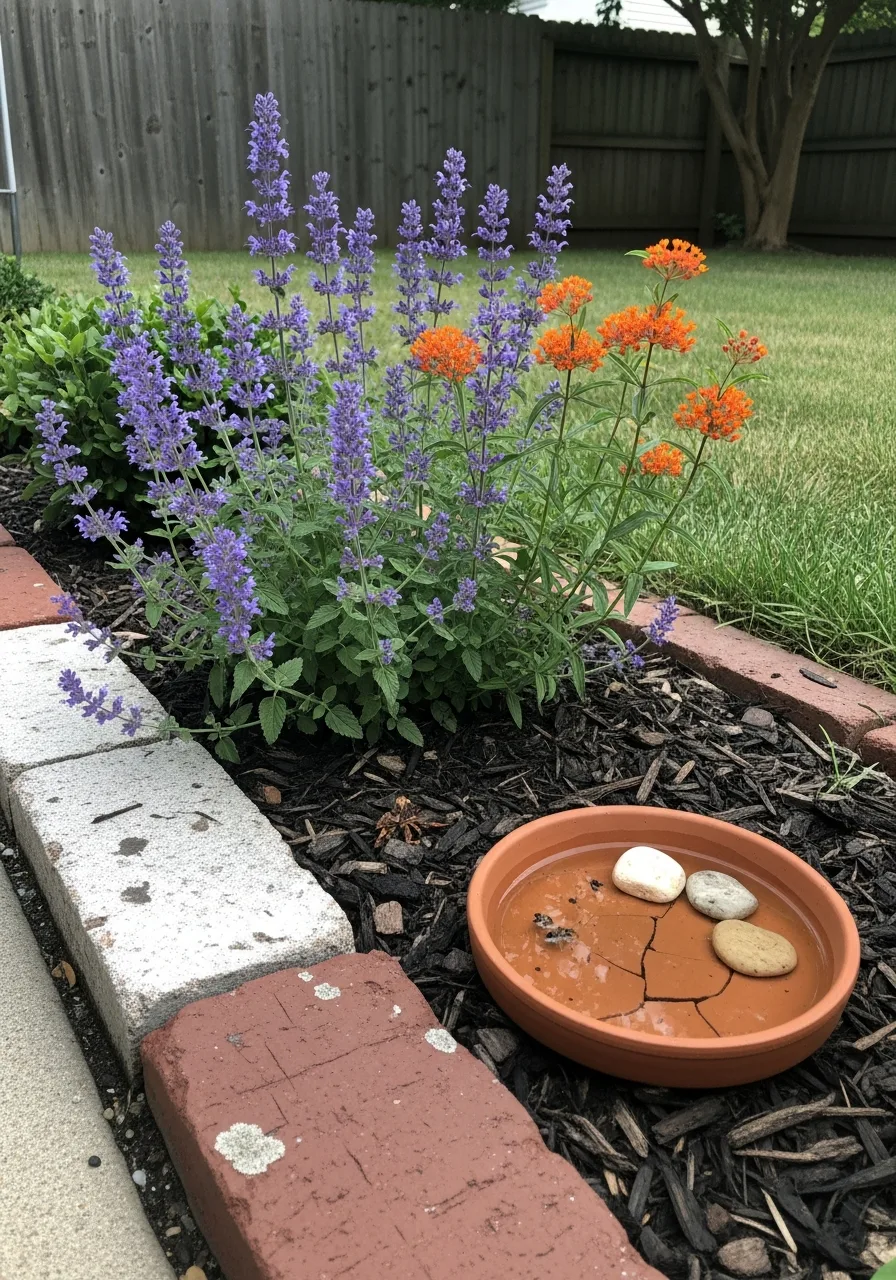
You place small clusters of lavender or other flowers at intervals along the border. This ensures bees and butterflies have plenty of places to land and feed. I always suggest this for fruit tree owners.
- Plant lavender in groups
- Space pockets every 6 feet
- Choose different bloom times
Pro Tip: Here’s what I do: plant purple flowers to attract more bees.
25. Sensory Edging Plants
These borders are planted with soft textures and good smells right at the edge. You want plants like Thyme or Lamb’s Ear where people will brush against them. Honestly, it makes walking down the path much more fun.
- Plant creeping thyme edges
- Add fuzzy lambs ear
- Use fragrant rosemary bushes
Pro Tip: Quick win: plant mint in pots to keep it from spreading.
26. Firescaping Awareness
In dry areas, you use fire-resistant plants with high water content in your borders. This creates a safe zone around your house while still looking beautiful. My take: safety should always come first in landscaping.
- Choose high-moisture succulents
- Avoid resinous pine trees
- Keep plants well watered
Pro Tip: Most people skip this: remove dead leaves and dry brush weekly.
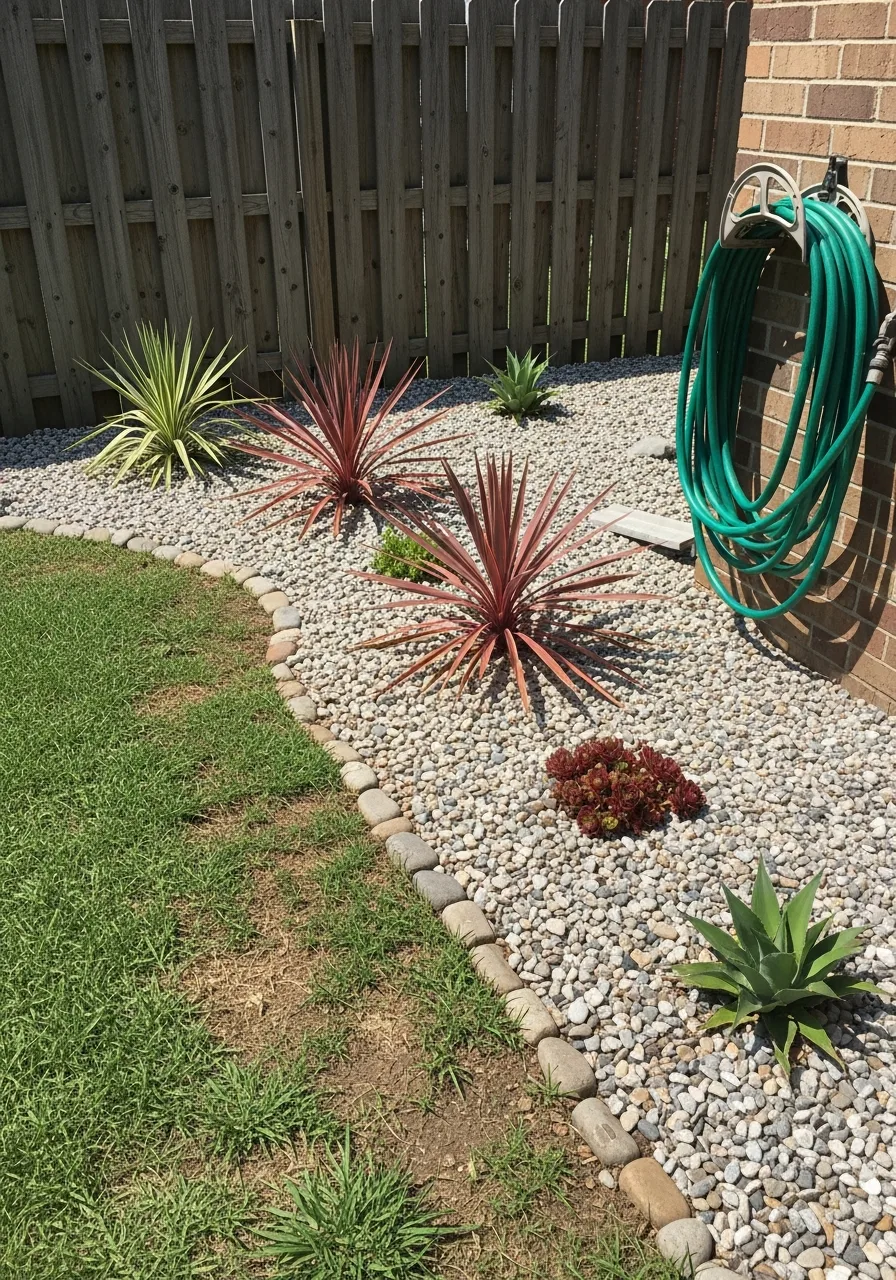
27. Low Maintenance Gravel Borders
You plant your flowers directly into a thick layer of gravel instead of soil. This stops almost all weeds and keeps the ground moist for a long time. Honestly, this is the best choice if you hate yard work.
- Lay heavy landscape fabric
- Choose pea gravel size
- Pick drought-loving plants
Pro Tip: Here’s what I do: use a leaf blower to clean it easily.
28. Multi Level Terracing
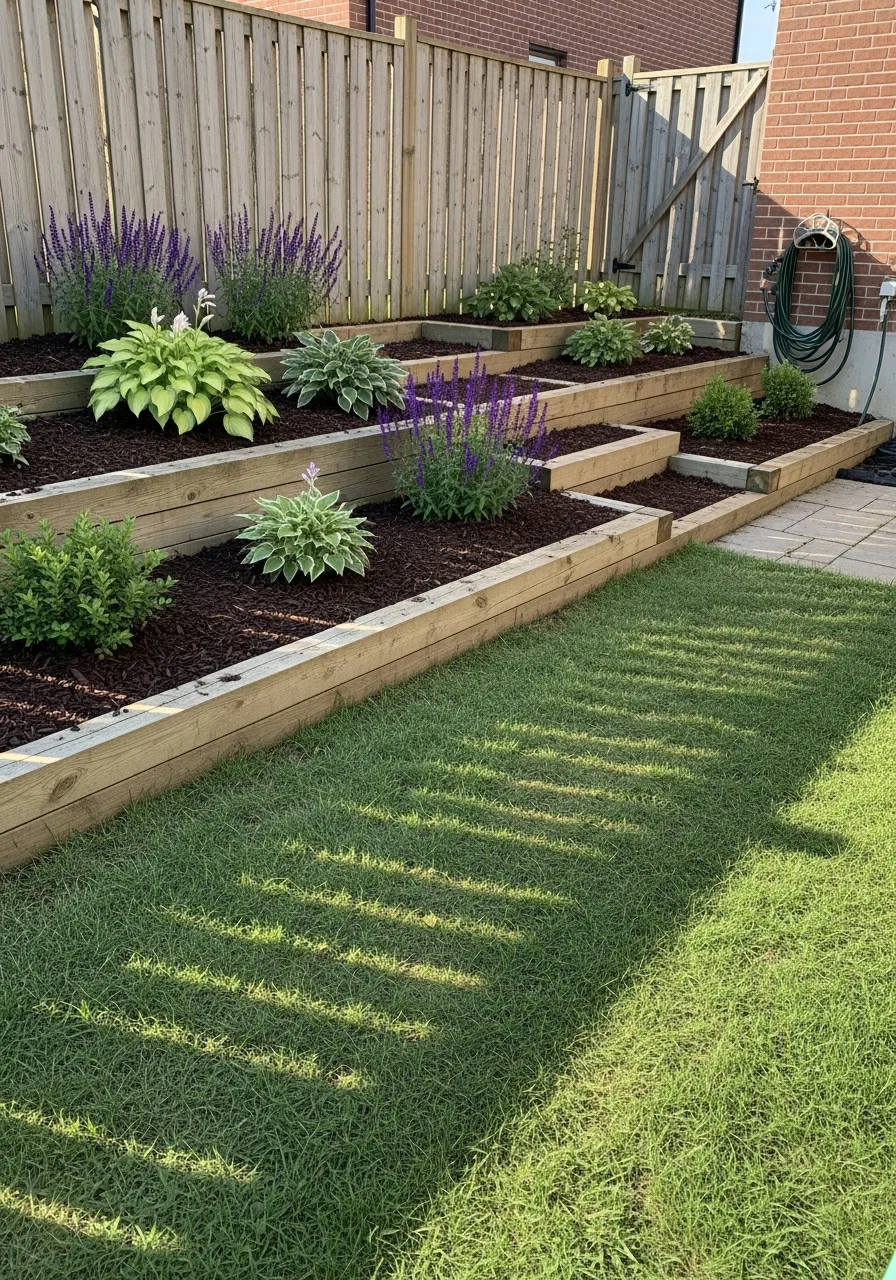
For yards on a hill, you use tiered borders to create flat spots for planting. This stops soil from washing away and lets you see all your plants at once. I always recommend this for steep backyards.
- Build low retaining walls
- Level each planting tier
- Install proper drainage pipes
Pro Tip: Quick win: use different colors for each level of the wall.
29. Sculptural Focal Points
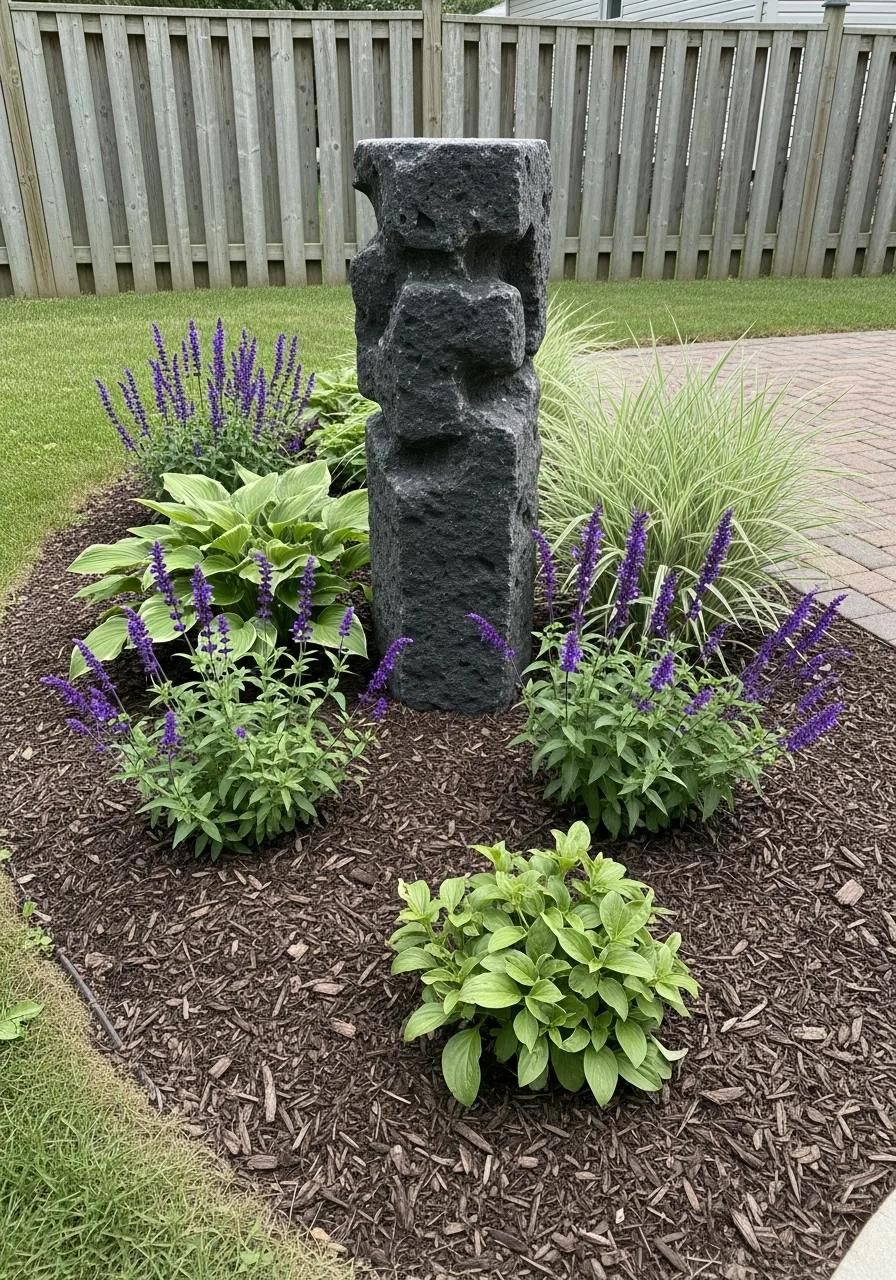
This idea puts one big item like a statue or a large pot in the middle of the border. All the other plants are there just to make that one item look great. My take: every garden needs one big ‘wow’ moment.
- Place a large urn
- Frame it with grasses
- Keep surrounding plants low
Pro Tip: Most people skip this: use a solar spotlight on the focal point.
30. Automated Irrigation Borders
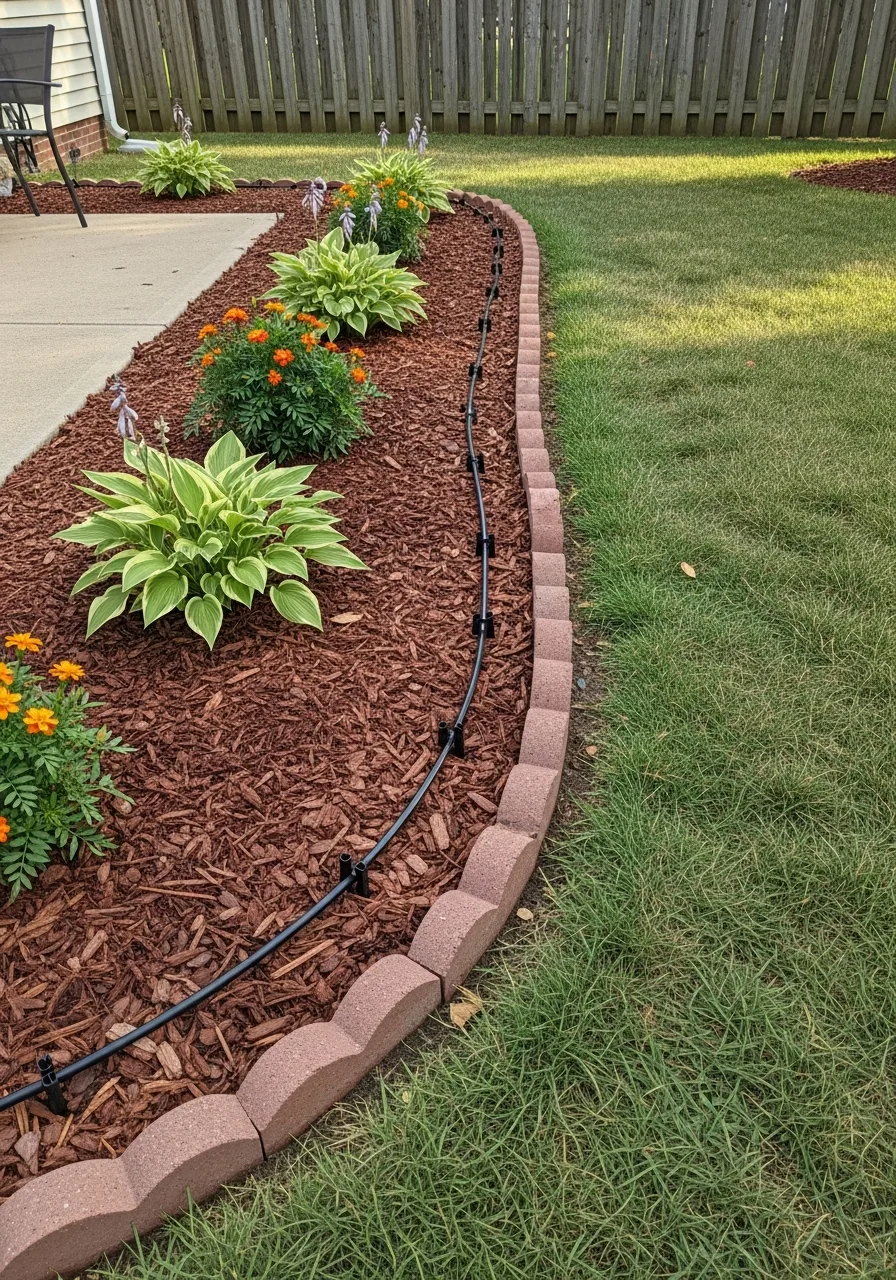
These borders have hidden water lines that run under the mulch to every plant. They use sensors to water only when the dirt is actually dry. I always suggest this to people who travel a lot.
- Hide drip lines well
- Install a smart timer
- Check emitters for clogs
Pro Tip: Here’s what I do: set the timer for very early morning.
31. Layered Green Drenched Gardens
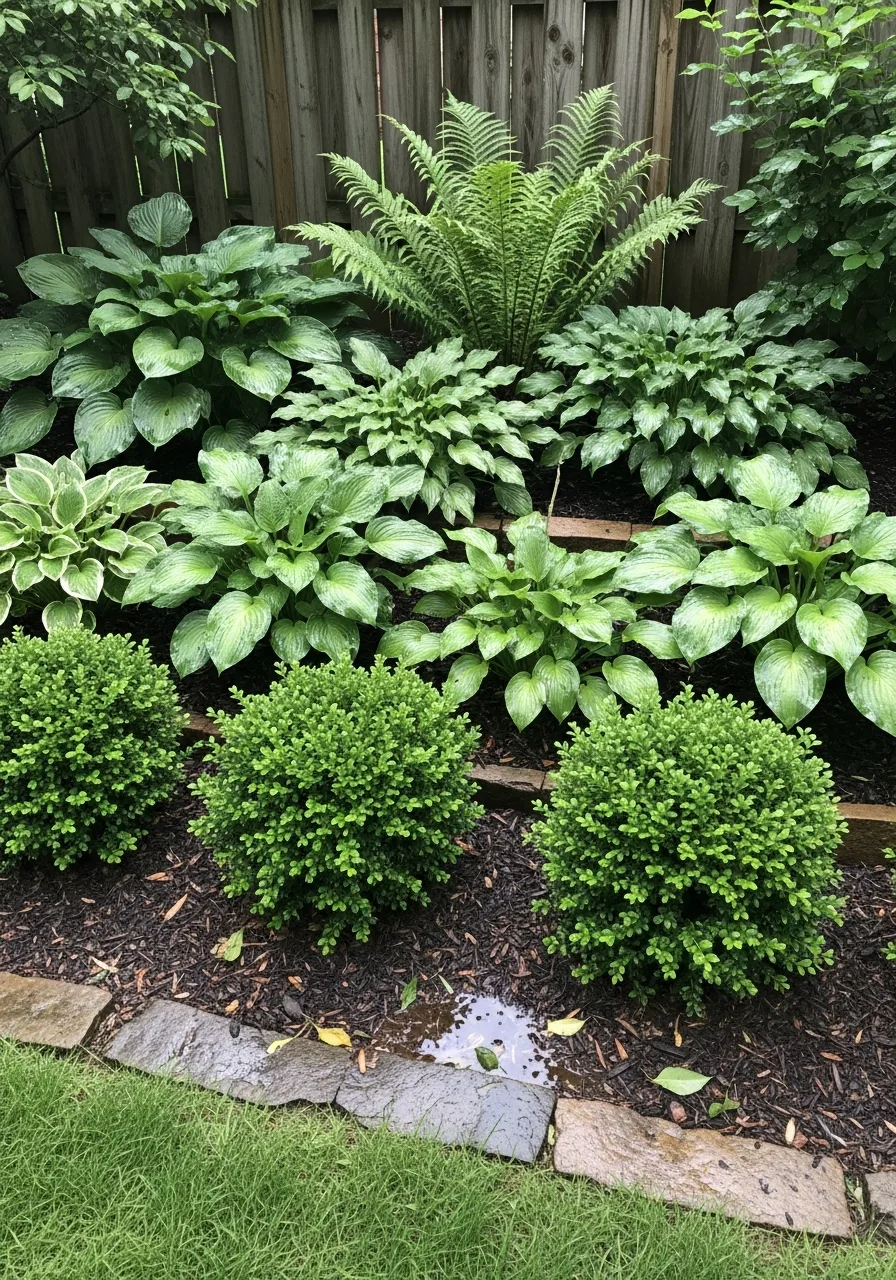
This style uses only green plants with different leaf shapes and textures. By mixing matte and shiny leaves, you create a very calm and sophisticated look. Honestly, it is much easier to manage than bright flowers.
- Mix broad and feathery leaves
- Use different shades of green
- Add glossy evergreen shrubs
Pro Tip: Quick win: use white flowers sparingly for a tiny pop.
32. Winter Interest Structure
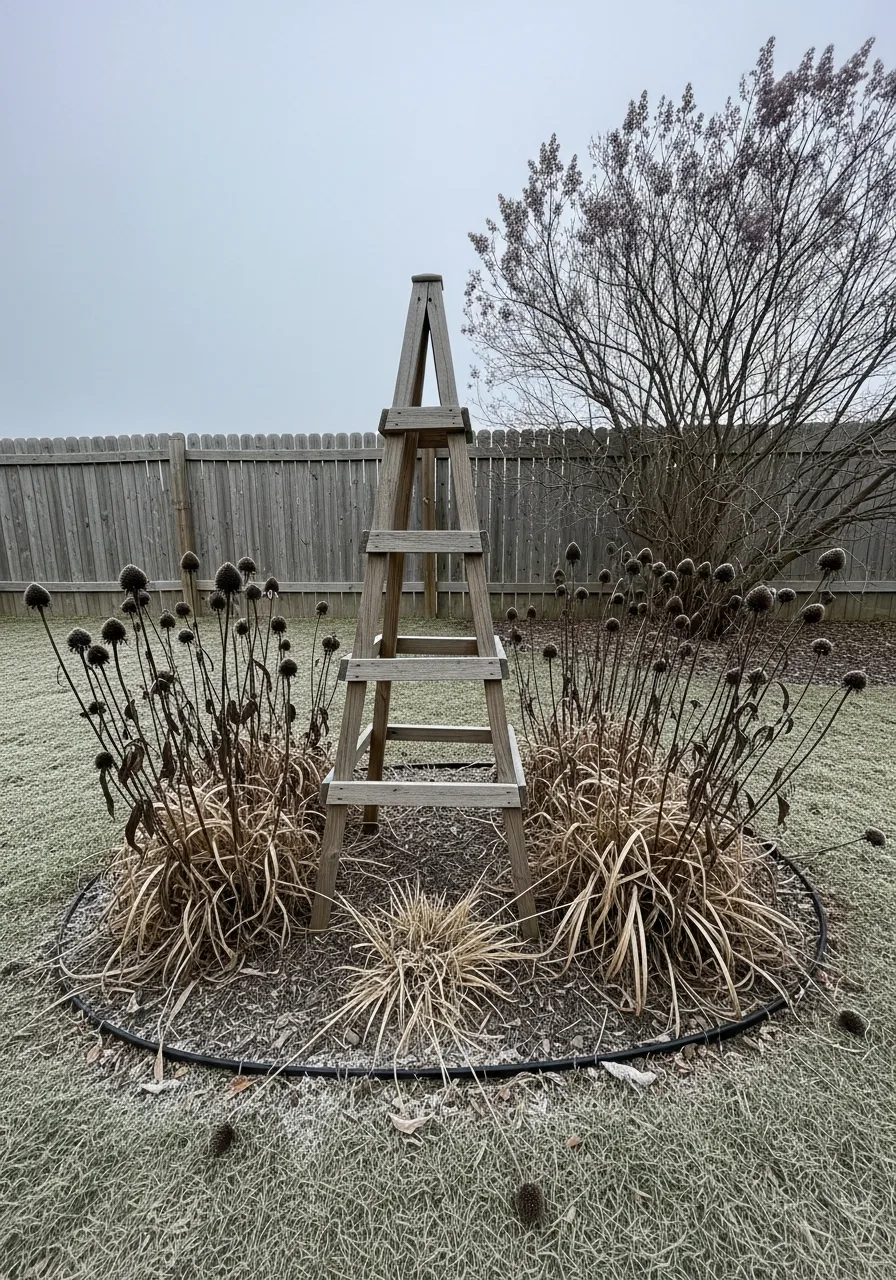
You choose plants that have colorful bark or stay green all year long. This ensures your garden border looks good even when it is covered in snow. My take: don’t let your yard look dead for four months.
- Plant red twig dogwood
- Add tall boxwood hedges
- Leave dried grass standing
Pro Tip: Most people skip this: red bark looks amazing against white snow.
33. Meadow Style Drifts
Instead of planting one of everything, you plant large groups of the same flower. This mimics how plants grow in the wild and creates a sense of movement. I always think this looks more natural and relaxing.
- Plant five of each type
- Repeat groups along border
- Mix in native grasses
Pro Tip: Here’s what I do: stagger the groups so they overlap.
34. Soft Muted Textures
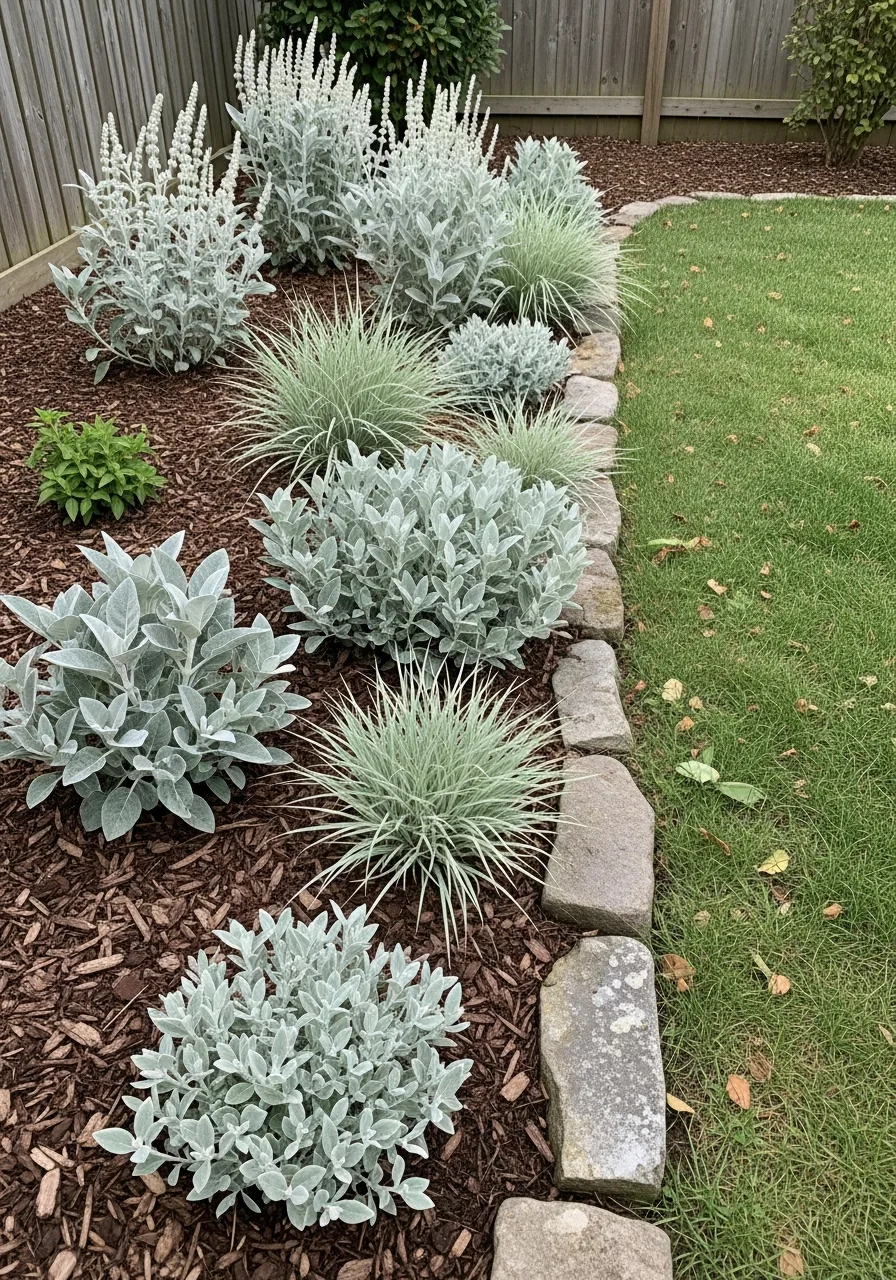
This idea focuses on how the plants feel when you touch them. You pair wispy grasses with velvety leaves to create a soft and hazy look. Honestly, it makes the whole yard feel more expensive and intentional.
- Add soft fountain grasses
- Use velvet leaf perennials
- Keep the colors light
Pro Tip: Quick win: plant these near where you sit to enjoy the feel.
35. Upcycled Mosaic Border Inlays
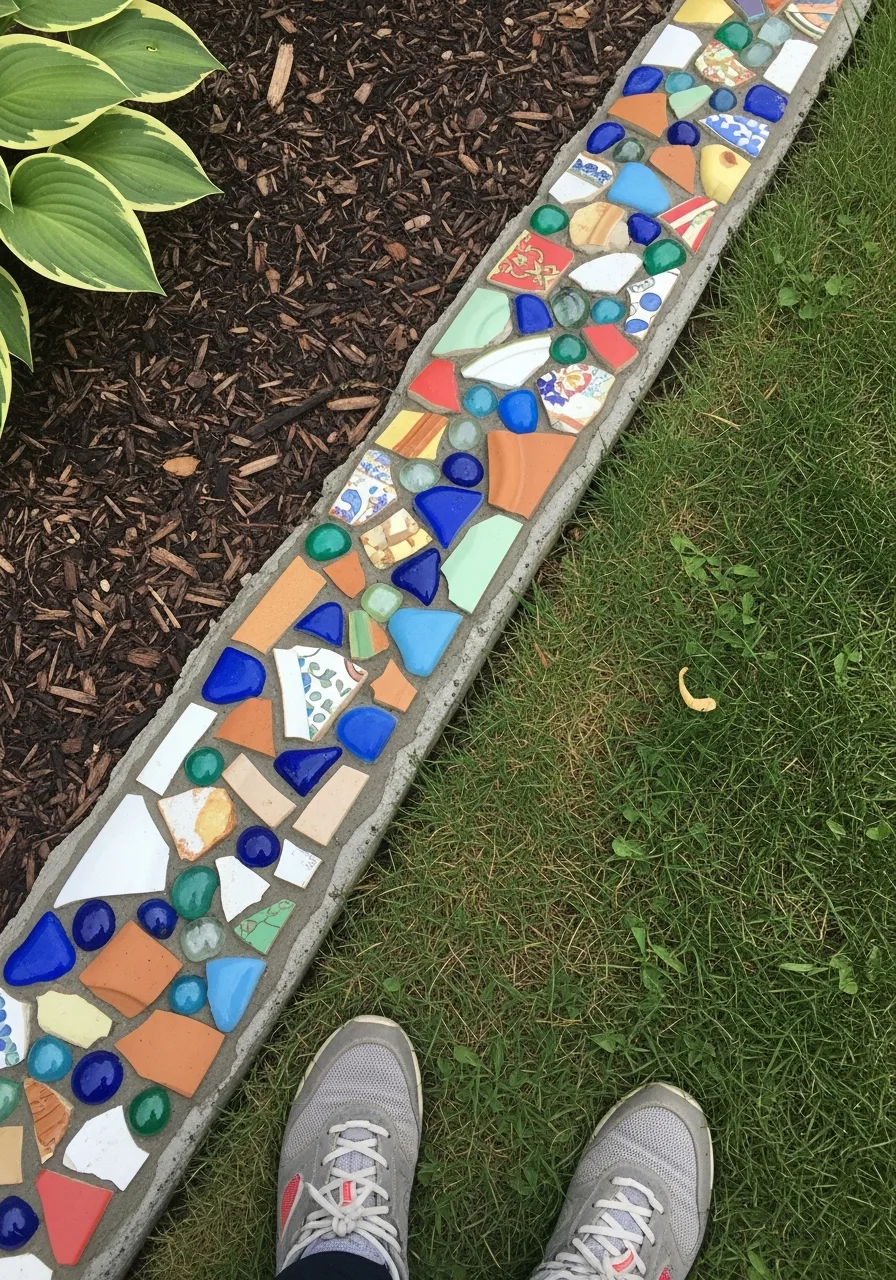
This involves pressing broken tiles or colorful glass into wet concrete edges. It turns a boring border into a piece of custom art that is totally unique. My take: it is a fun way to use up old dishes.
- Collect colorful tile scraps
- Mix small concrete batches
- Seal for weather protection
Pro Tip: Most people skip this: sand the glass edges so they aren’t sharp.
Creating a great garden border doesn’t have to be a massive project. Start with one area and pick a style that matches how much work you actually want to do. I’ve found that a clean edge and healthy plants are all you really need to be proud of your yard.