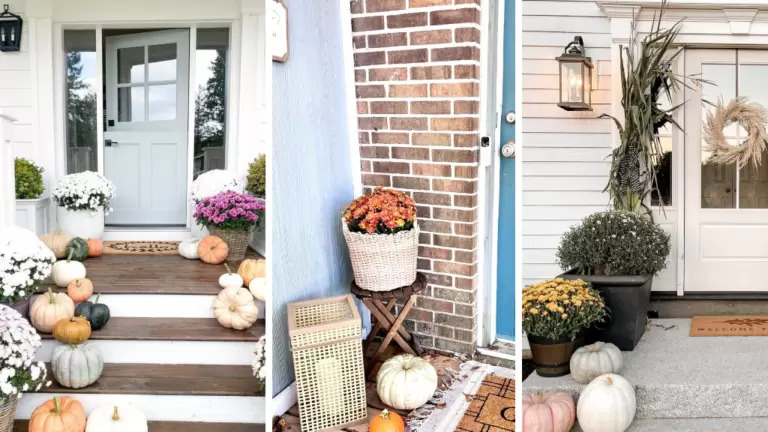
45 Clever Under Deck Skirting Ideas
This post may contain affiliate links: full affiliate disclosure.
Skirting is the best way to hide that ugly mess under your deck. It keeps critters out and makes the whole yard look finished. Honestly, most people ignore this spot, but it is a huge waste of potential style. I have found that a little effort here goes a long way for your home value.
1. Classic Wood Lattice Skirting
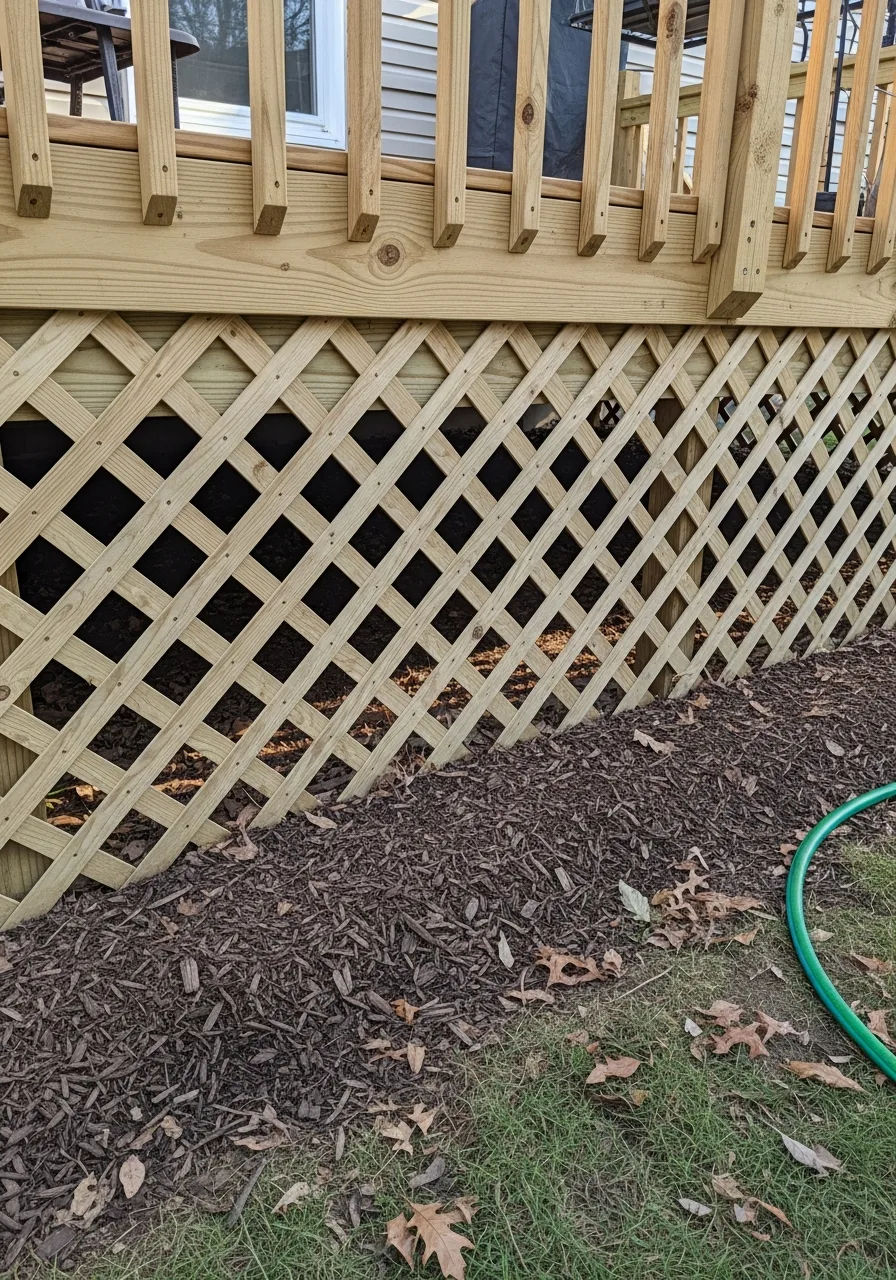
This uses crisscross wood panels to hide the gap under your deck. It keeps the air moving so you do not get rot. Honestly, I think wood lattice is a bit dated but it gets the job done.
- Buy pressure treated wood
- Stain panels before installing
- Use stainless steel screws
Pro Tip: Quick win: Paint it black to make it disappear into the shadows.
2. Vinyl Lattice Skirting
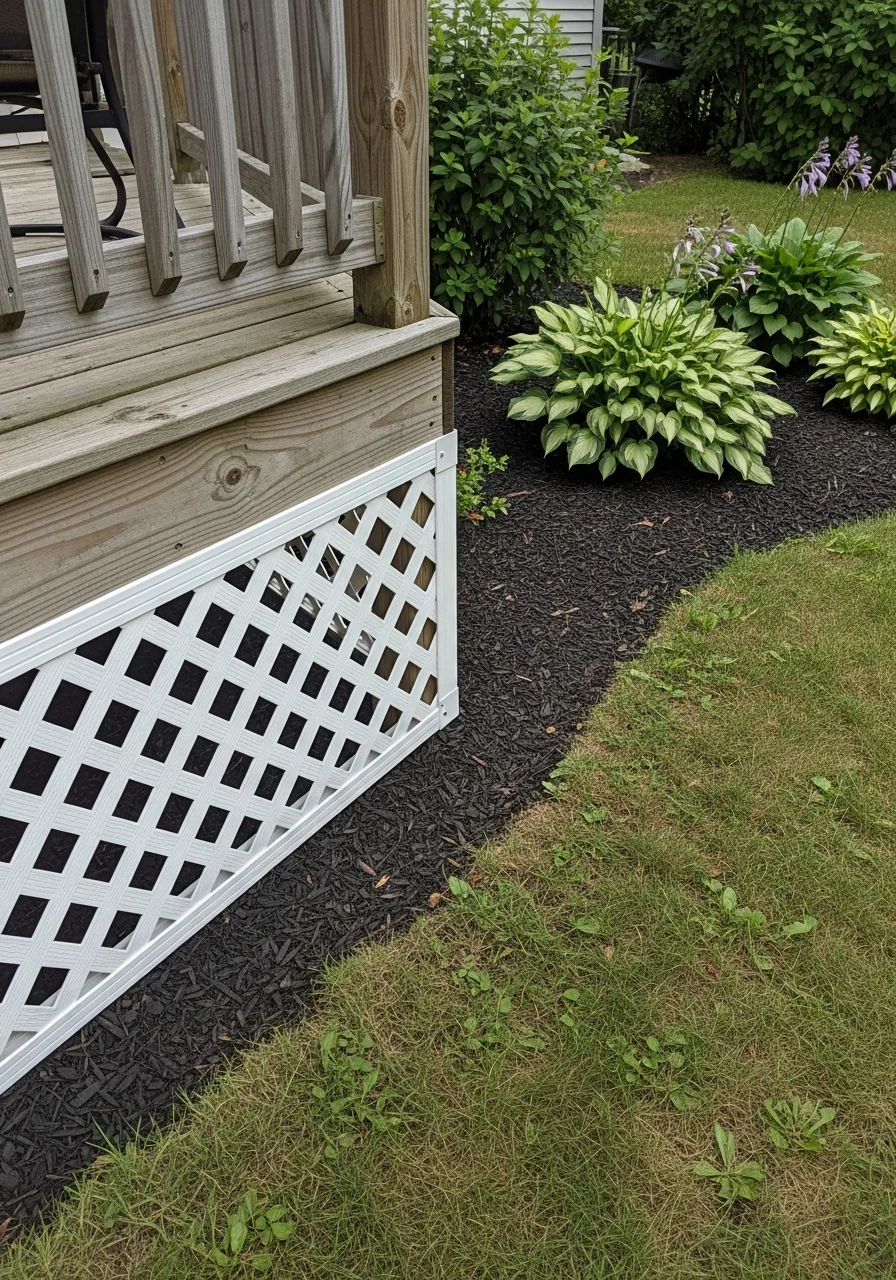
Vinyl panels look like wood but they never rot or peel. They handle rain and mud much better than natural materials. Honestly, I always suggest vinyl if you want to set it and forget it.
- Check for UV protection
- Leave room for expansion
- Hose it down monthly
Pro Tip: Most people skip this: Use matching vinyl trim for a clean edge.
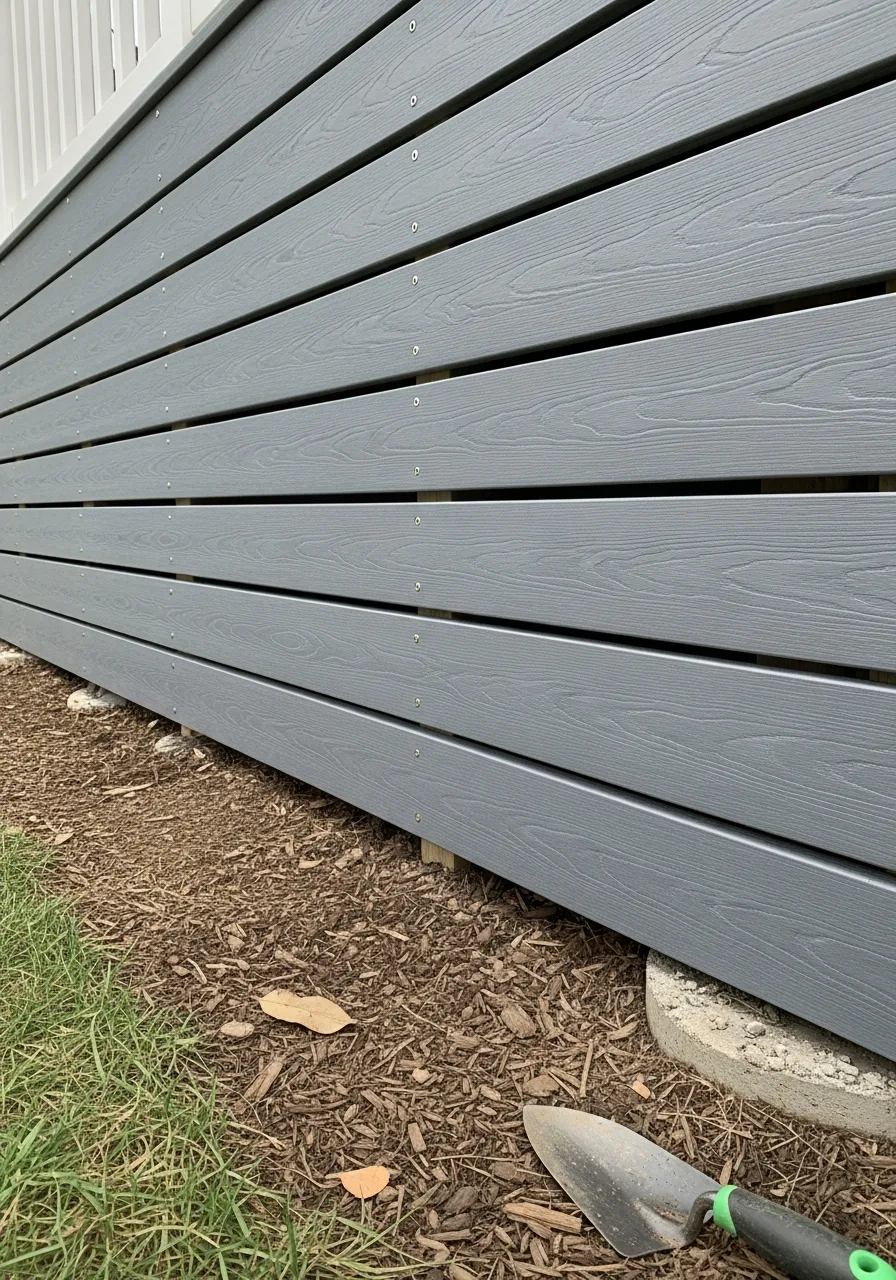
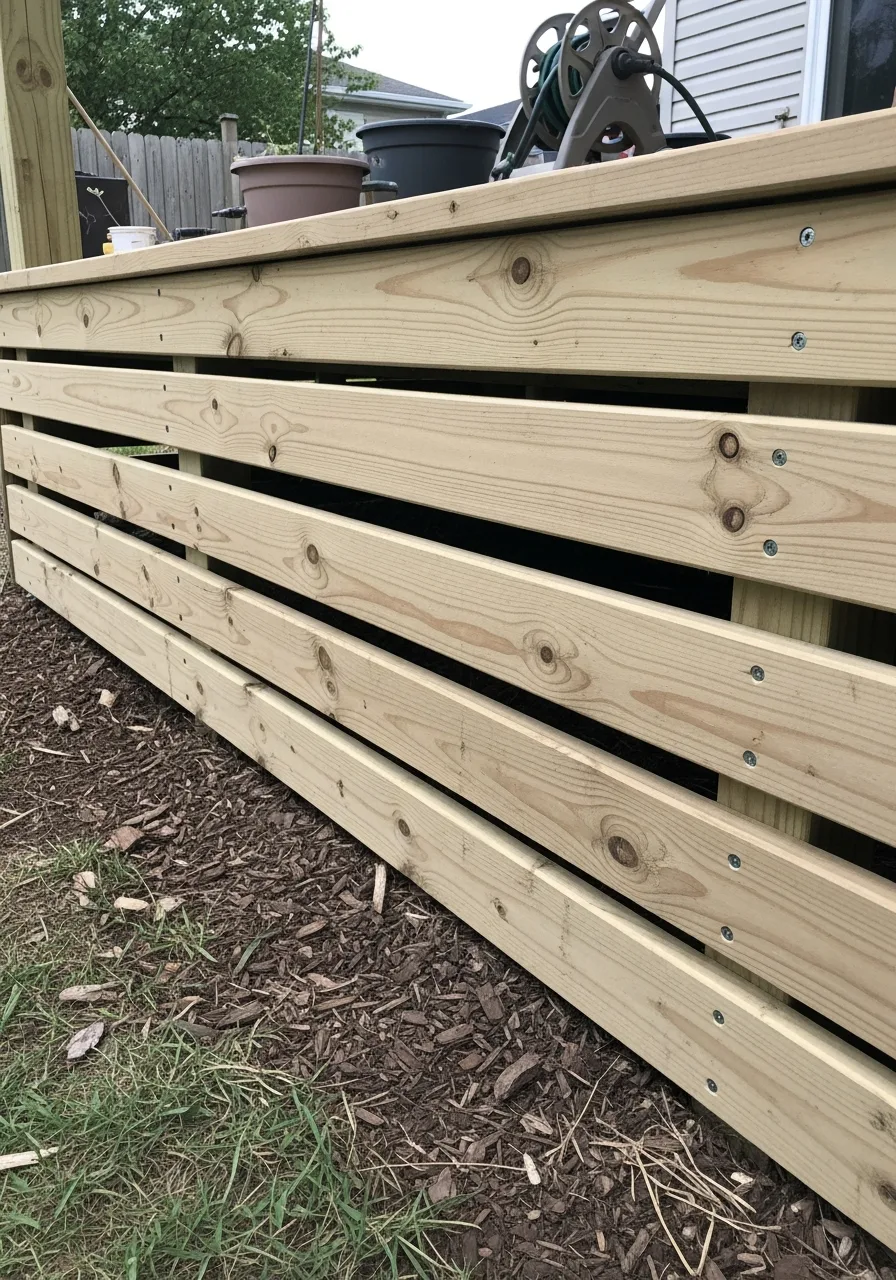
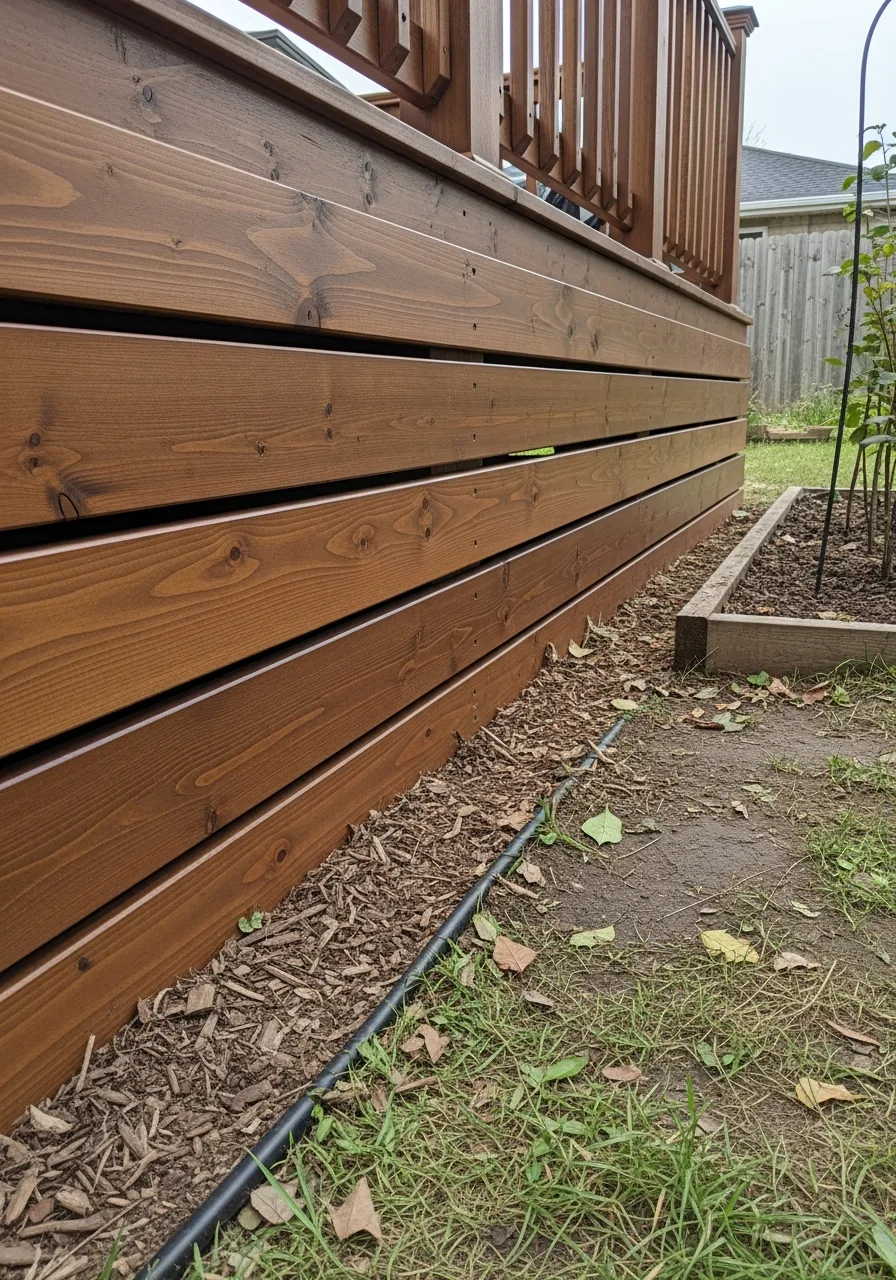
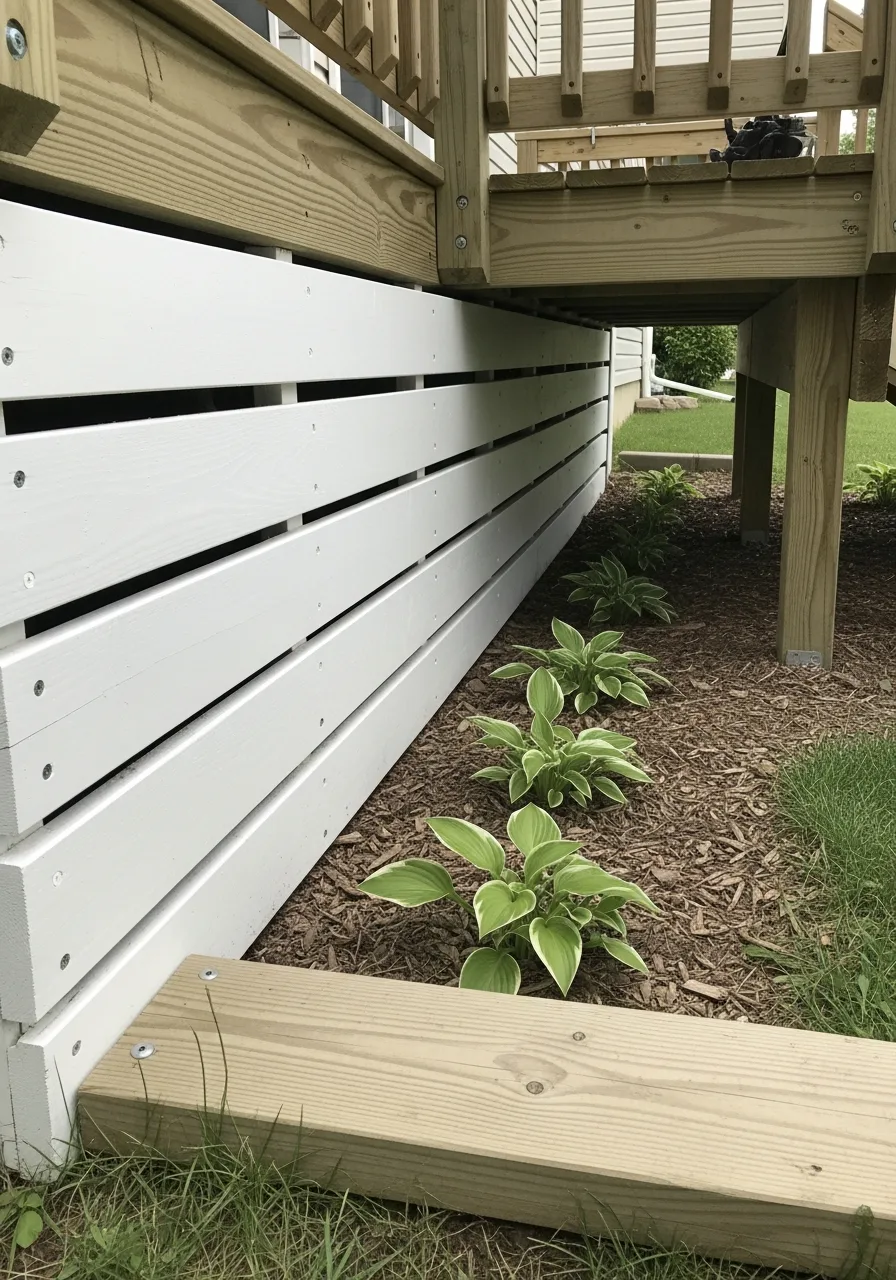
3. Horizontal Wood Slat Skirting
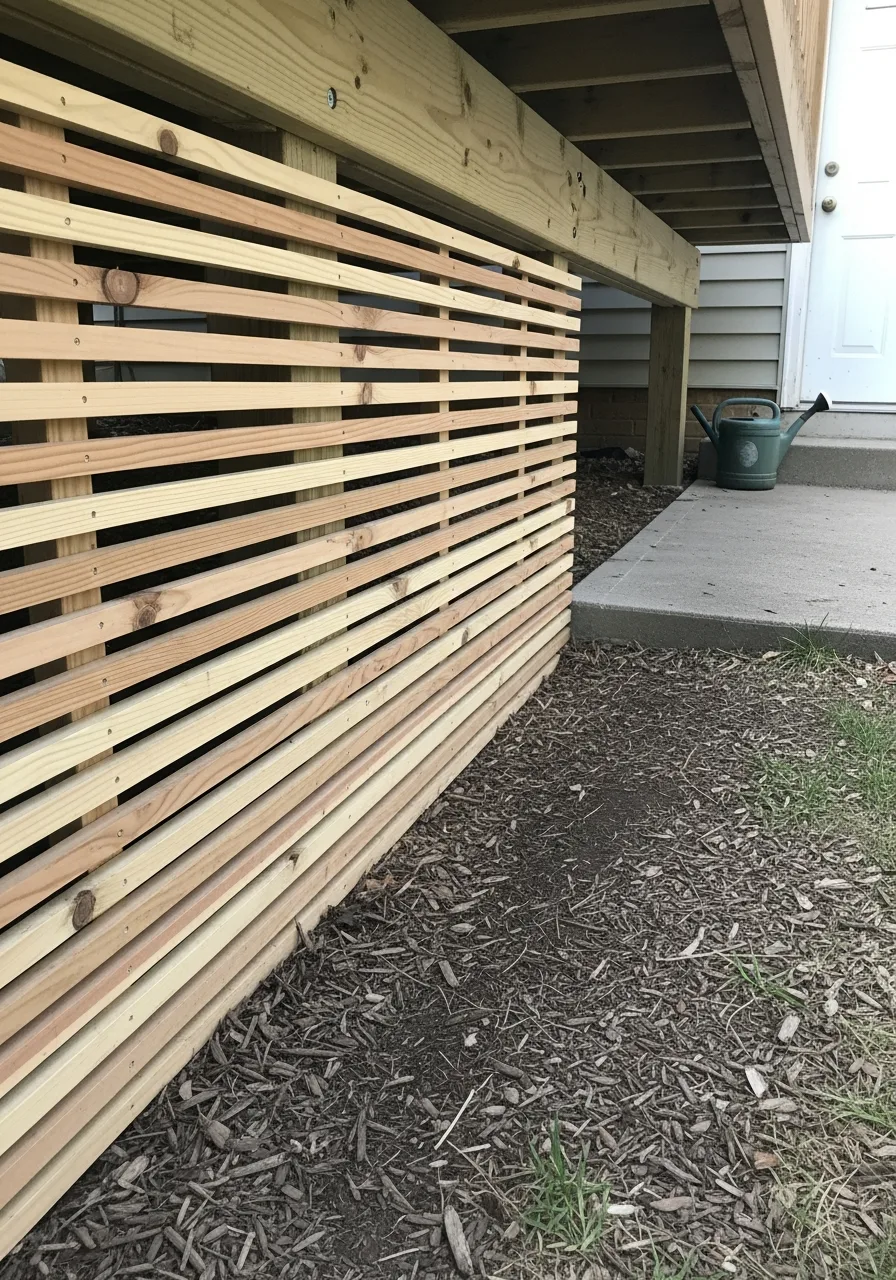
This style uses long boards with small gaps between them. It creates a modern look that makes your deck feel wider. My take: This is the best way to make an old deck look brand new.
- Use a spacer tool
- Pick cedar for durability
- Stagger the board joints
Pro Tip: Here’s what I do: Use dark stain to hide the dirt at the bottom.
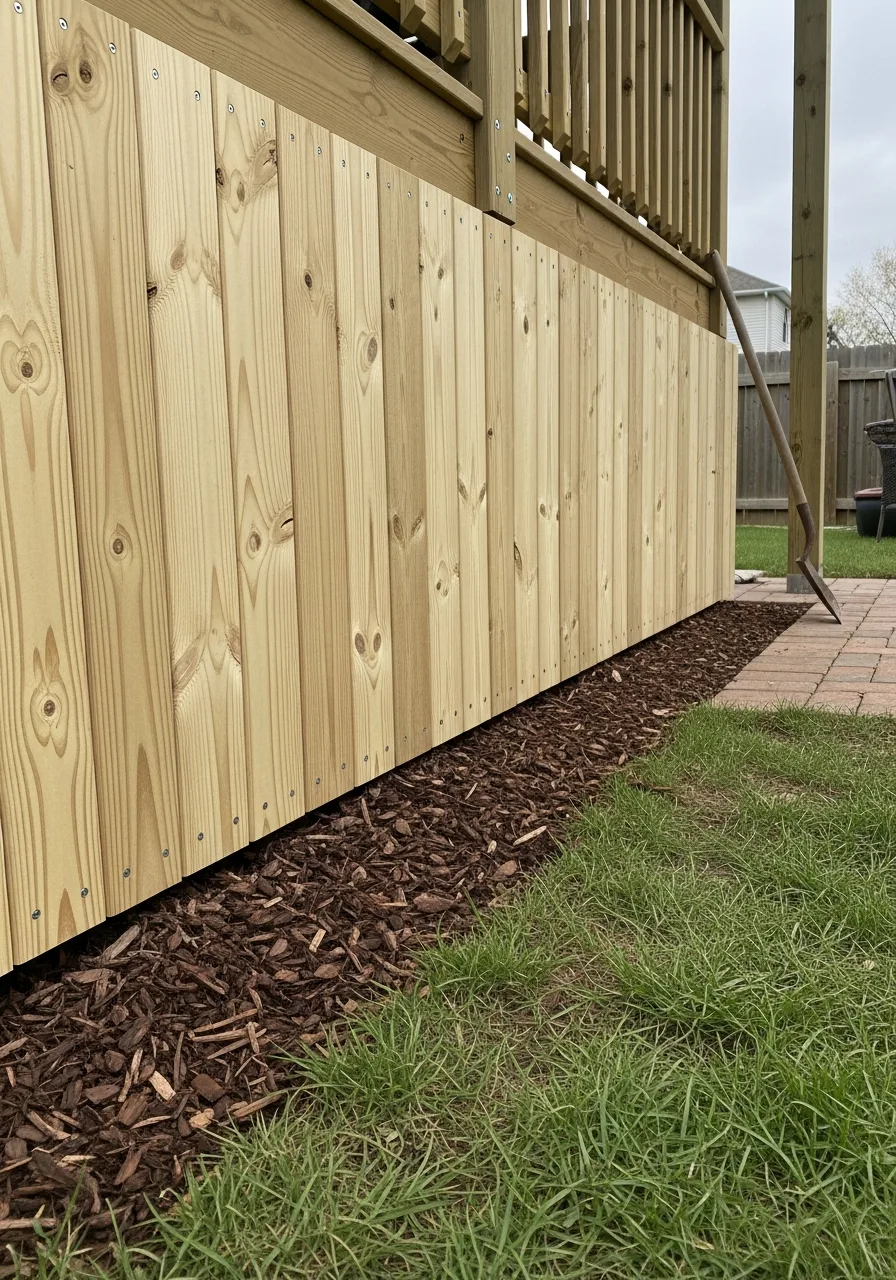
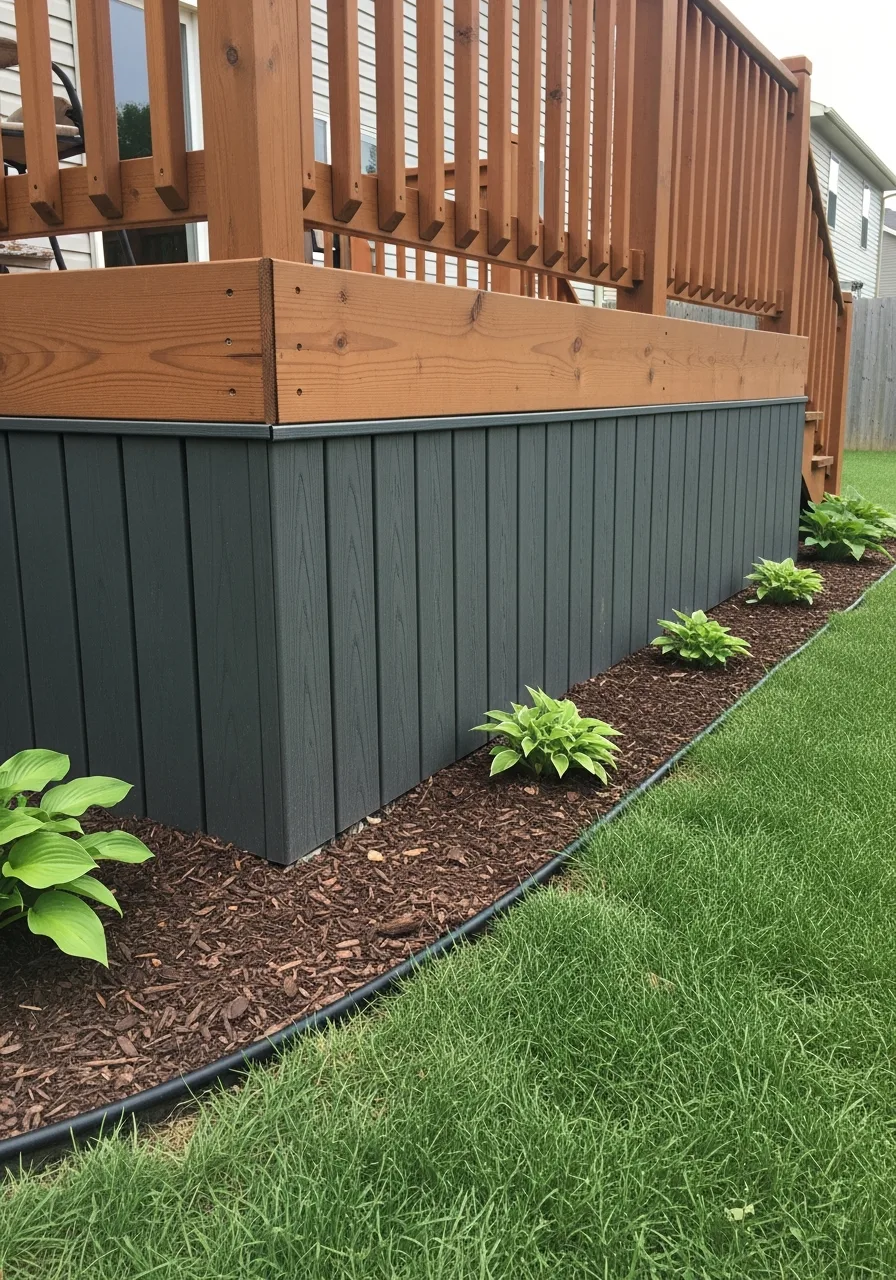
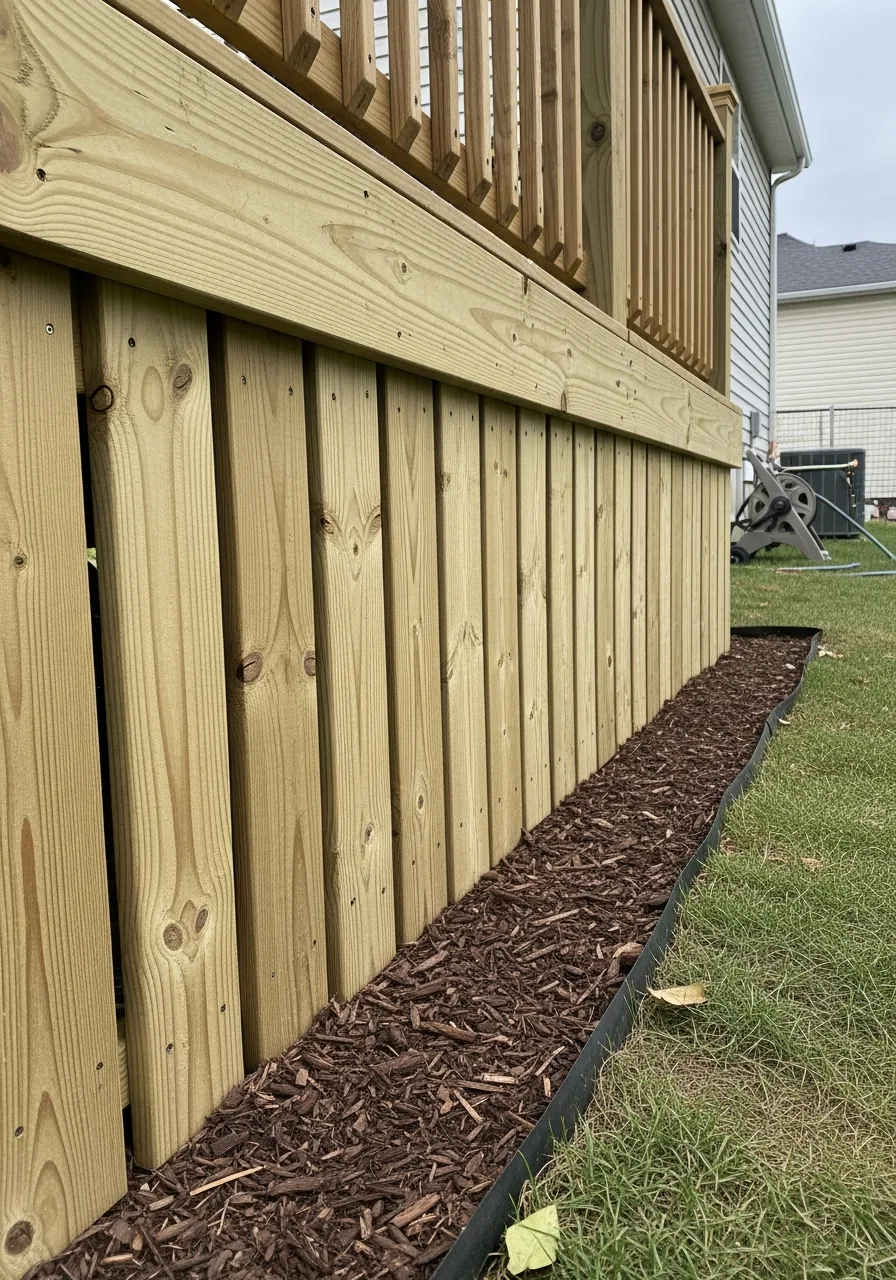
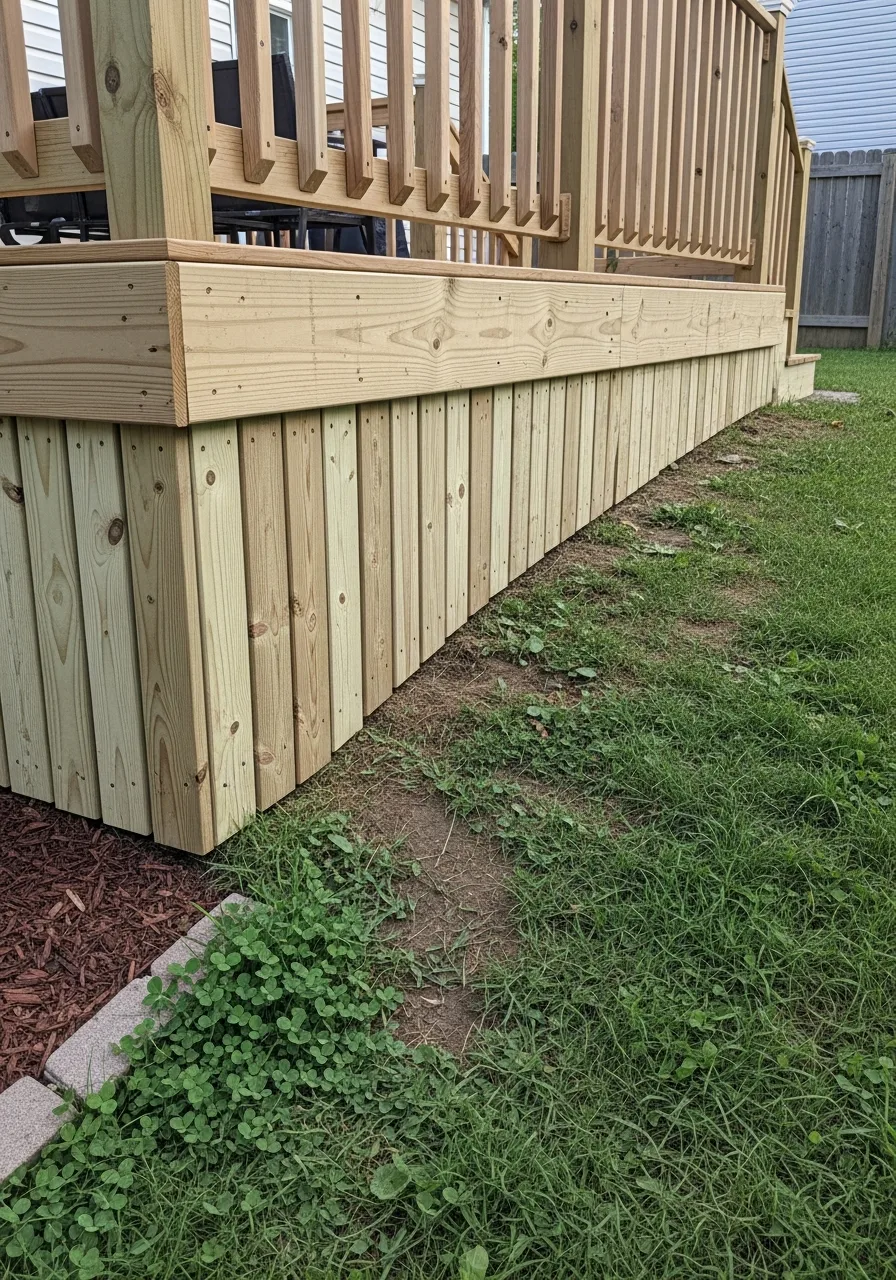
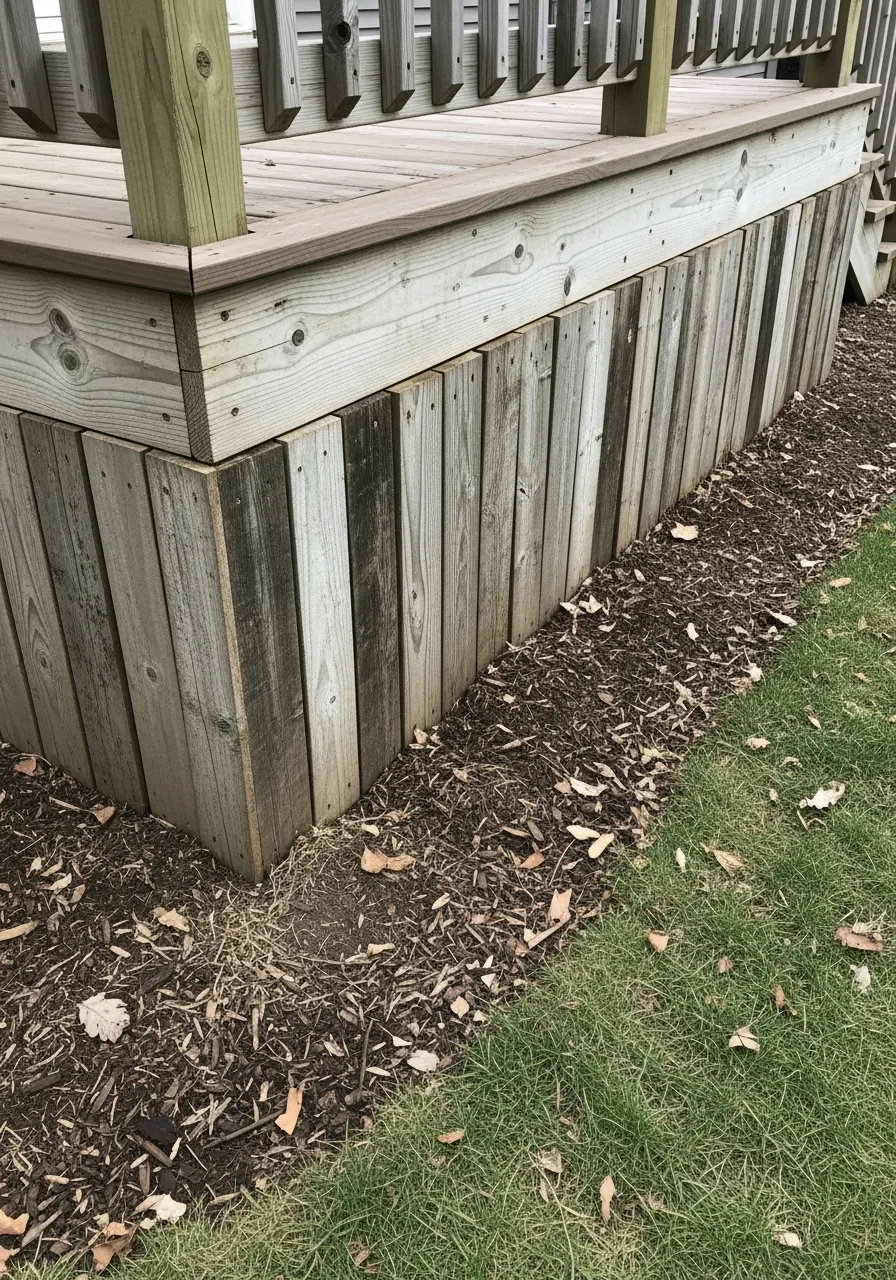
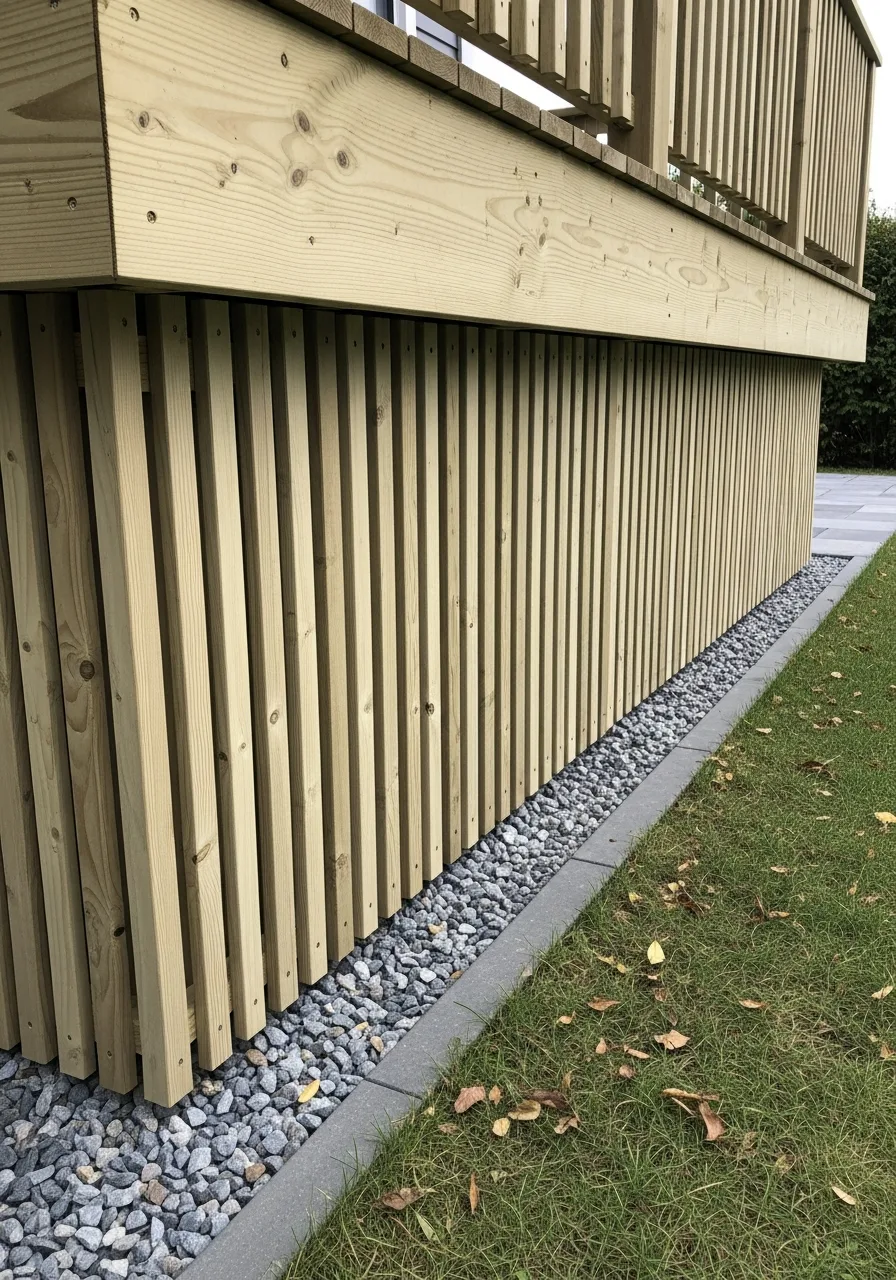
4. Vertical Wood Board Skirting
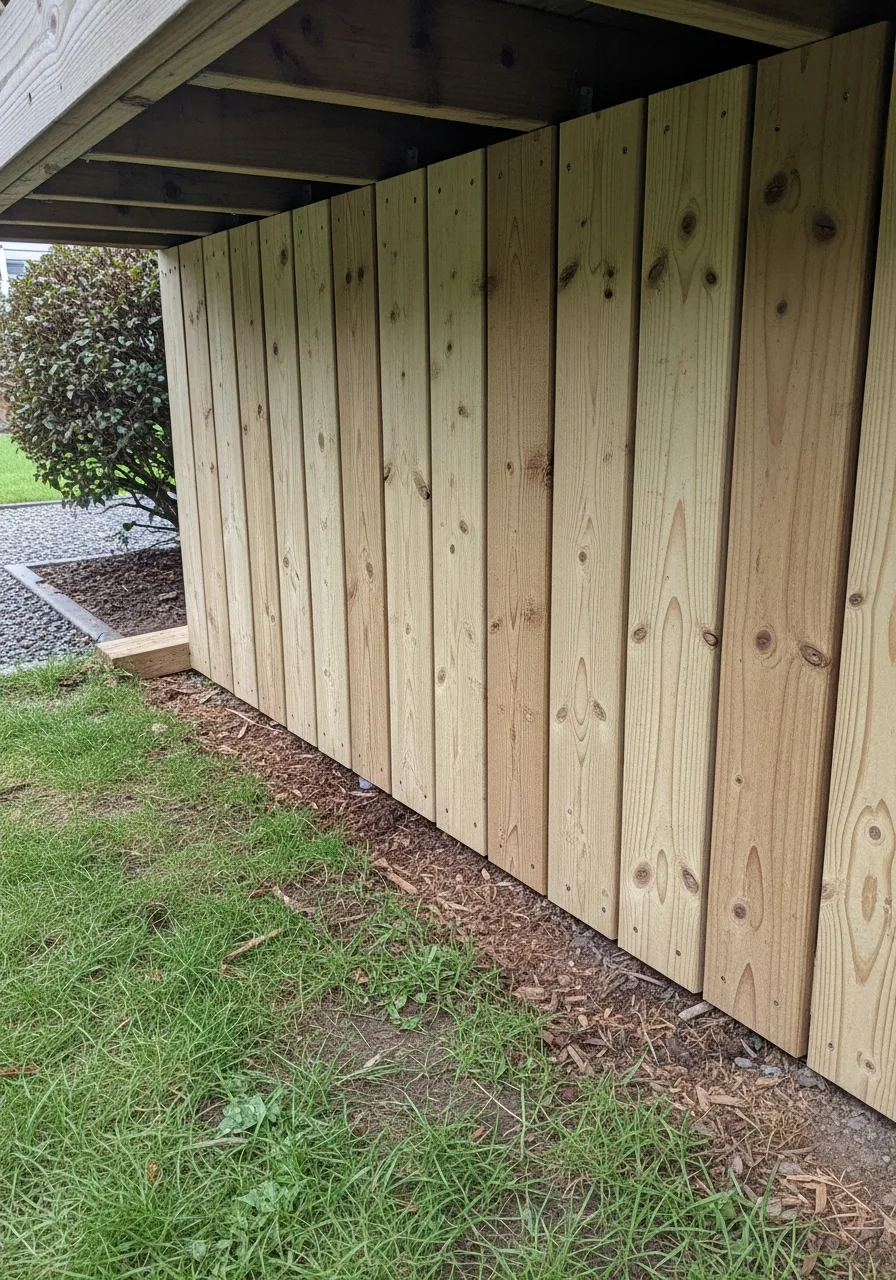
Placing planks up and down makes a short deck look much taller. It provides a solid wall that blocks the view of any storage underneath. Honestly, I prefer this for decks that sit high off the ground.
- Level each board carefully
- Leave a tiny gap
- Secure to a frame
Pro Tip: Quick win: Use boards of different widths for a custom look.
5. Solid Wood Panel Skirting
Solid panels completely close off the area for total privacy. This stops any trash or leaves from blowing under your deck. My take: You must add vents to this style so moisture does not build up.
- Install a frame first
- Seal the bottom edges
- Add a small vent
Pro Tip: Most people skip this: Leave an inch of space above the soil.
6. Composite Deck Board Skirting
Using the same boards as your deck floor creates a seamless look. These materials last for decades without needing any paint or stain. Honestly, I always recommend this if you have the extra budget.
- Match your deck color
- Use hidden fasteners
- Pre-drill your screw holes
Pro Tip: Quick win: Use scraps from your deck build to save money.
7. Decorative Vinyl Panel Skirting

These panels come with pretty patterns like leaves or geometric shapes. They add a designer touch while staying very easy to clean. My take: This is the fastest way to add personality to your backyard.
- Choose a thick panel
- Snap into a frame
- Wipe with soapy water
Pro Tip: Here’s what I do: Put a dark screen behind them for privacy.
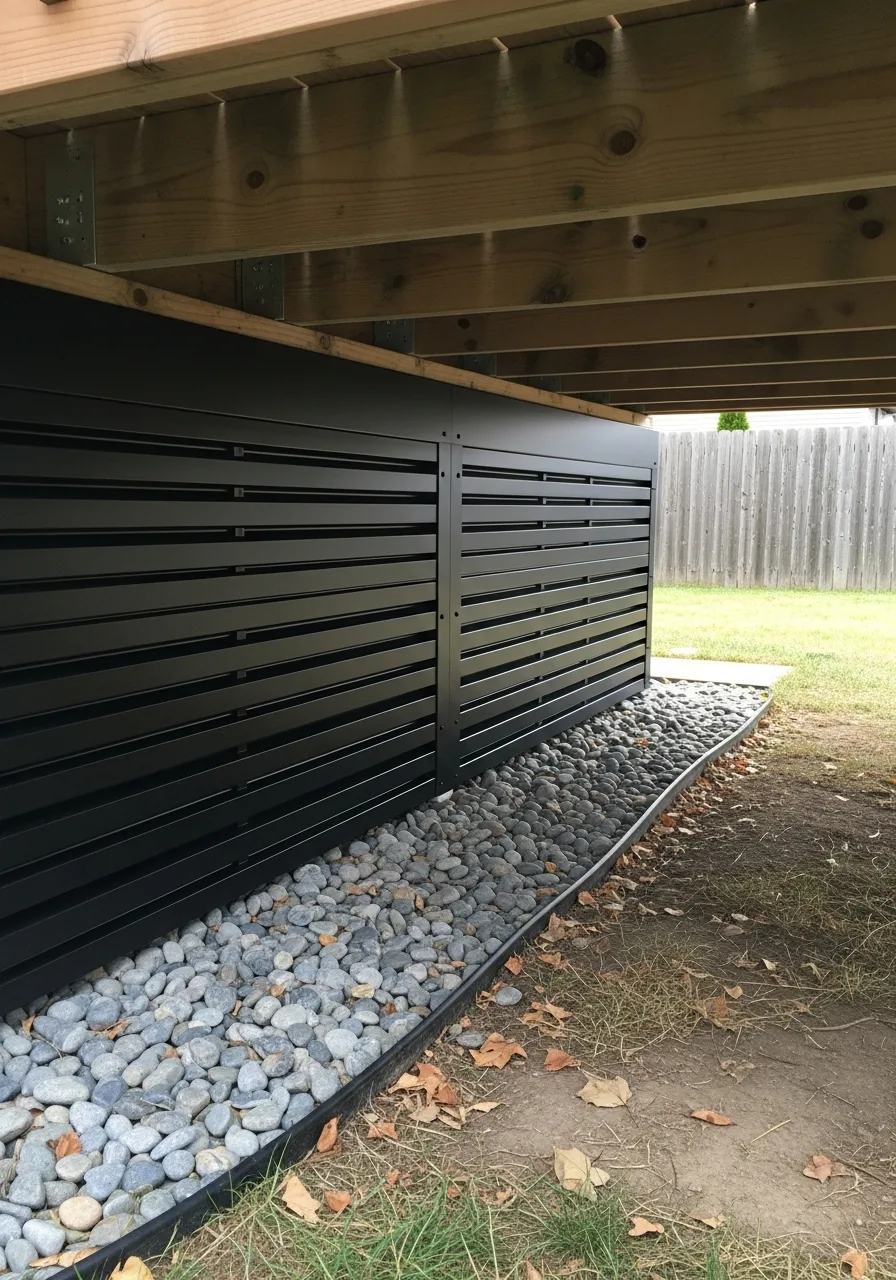
8. Metal Panel Skirting
Flat metal sheets give your deck a very clean and industrial feel. They are tough enough to handle weed whackers and lawn mowers hitting them. Honestly, I love how low-maintenance metal can be.
- Use rust-proof aluminum
- Wear gloves during install
- Fasten with metal screws
Pro Tip: Most people skip this: File down sharp edges for safety.
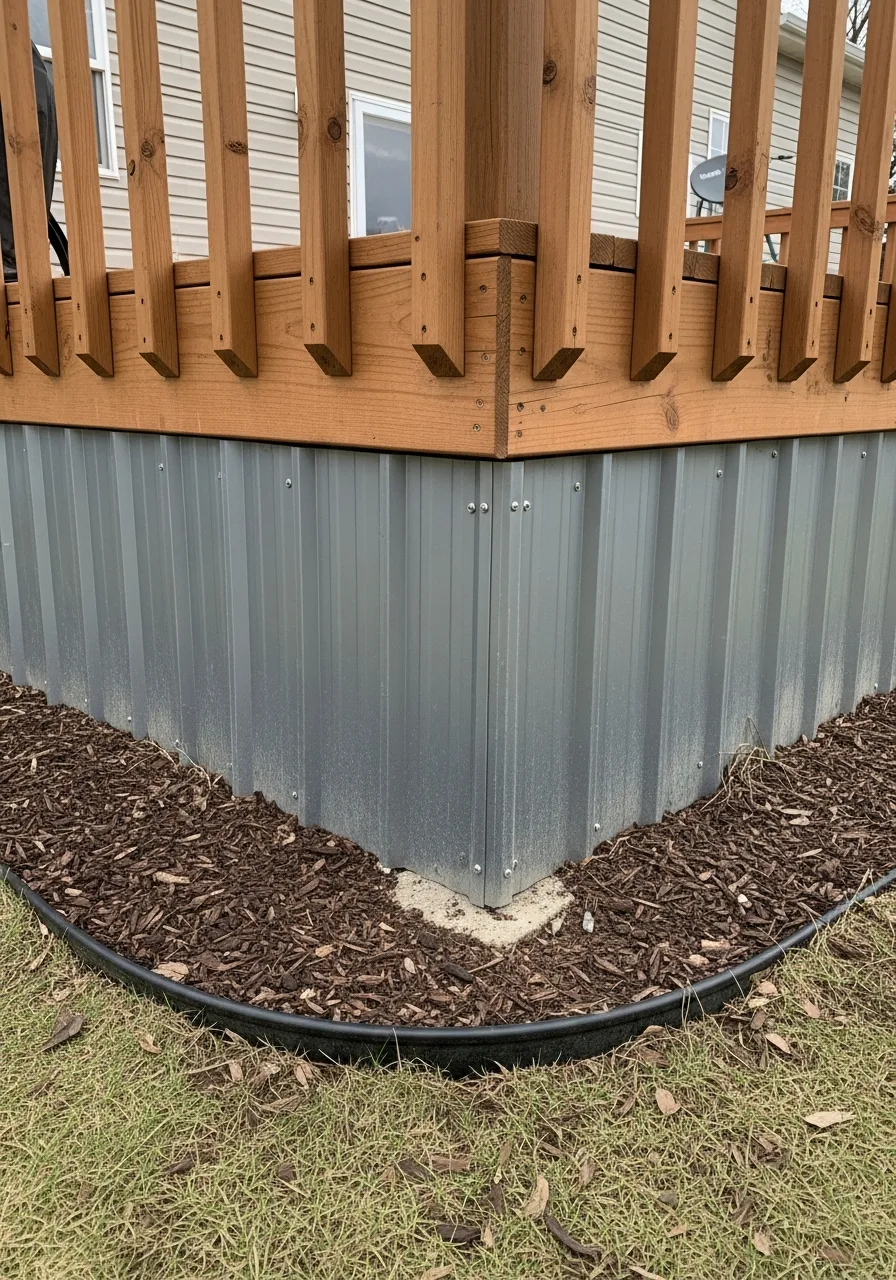
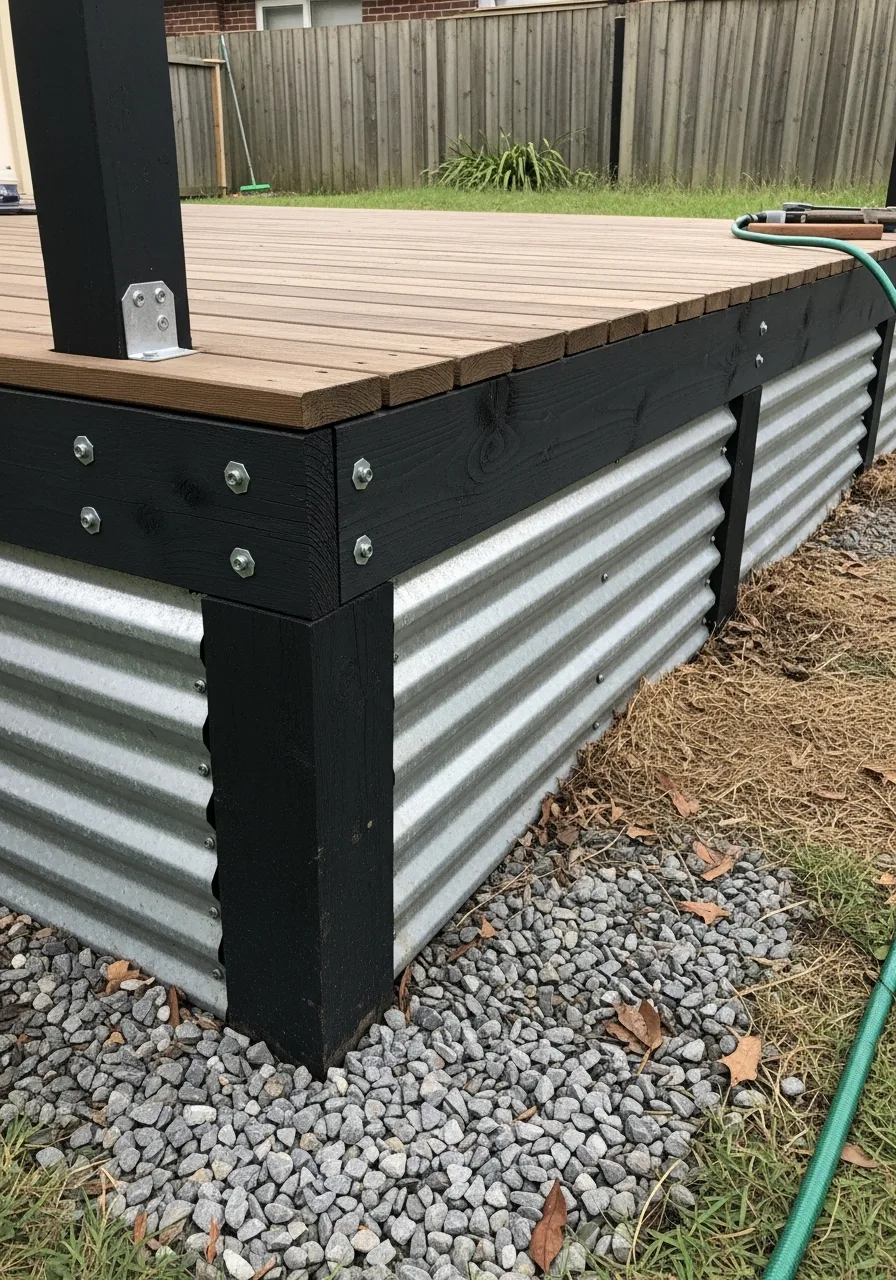
9. Corrugated Metal Skirting
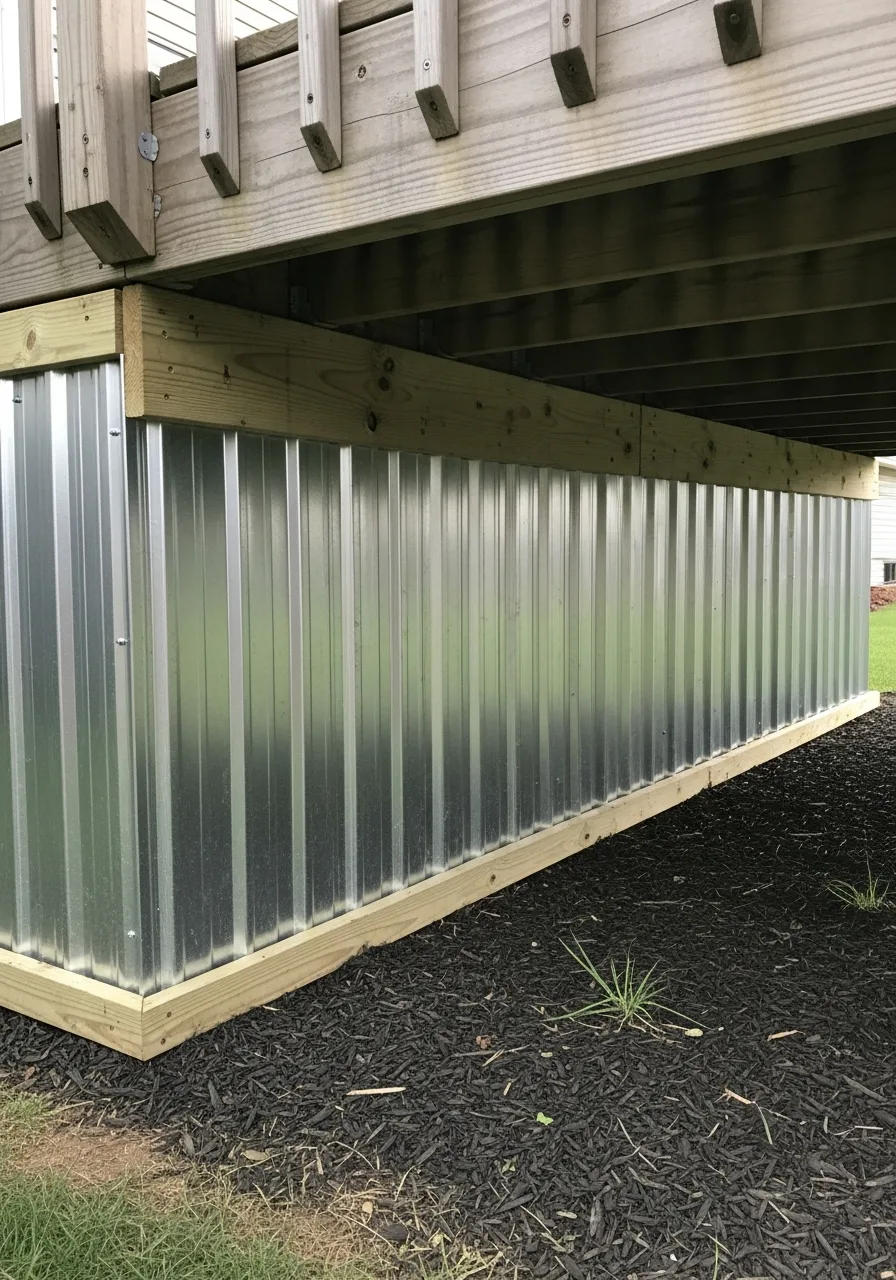
The wavy texture of these panels adds a cool rustic vibe. It works perfectly for farmhouse styles or modern industrial looks. My take: It is very cheap but looks expensive if you do it right.
- Over-lap the edges
- Use rubber-washer screws
- Cut with metal snips
Pro Tip: Quick win: Use galvanized metal to prevent rust spots.
10. Board-Formed Concrete Skirting
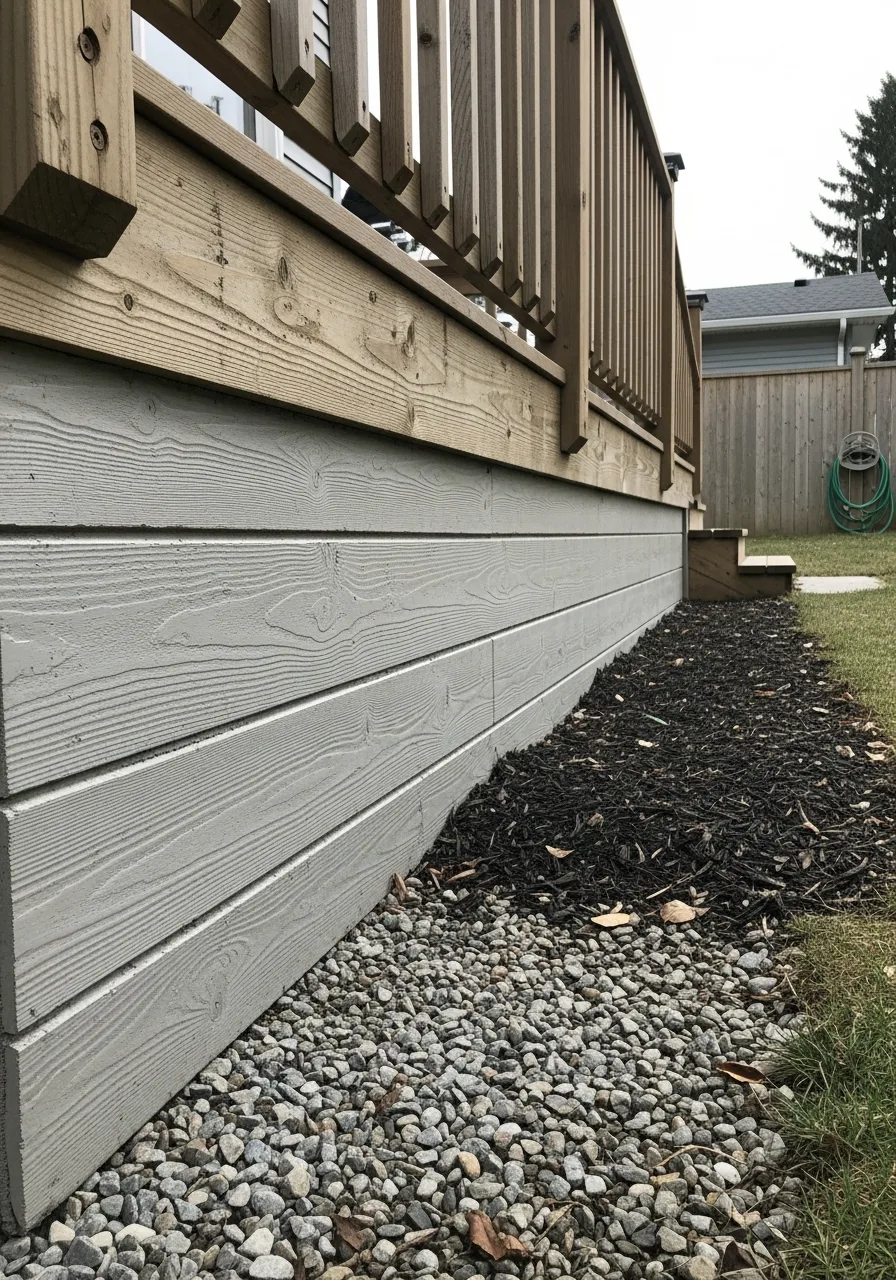
These panels look like wood but are made of solid concrete. They offer a high-end architectural look that lasts a lifetime. Honestly, I find that this is the best choice for modern homes.
- Hire a pro installer
- Seal the concrete well
- Choose a warm tint
Pro Tip: Most people skip this: Check your deck’s weight limits first.
11. Faux Stone Veneer Skirting
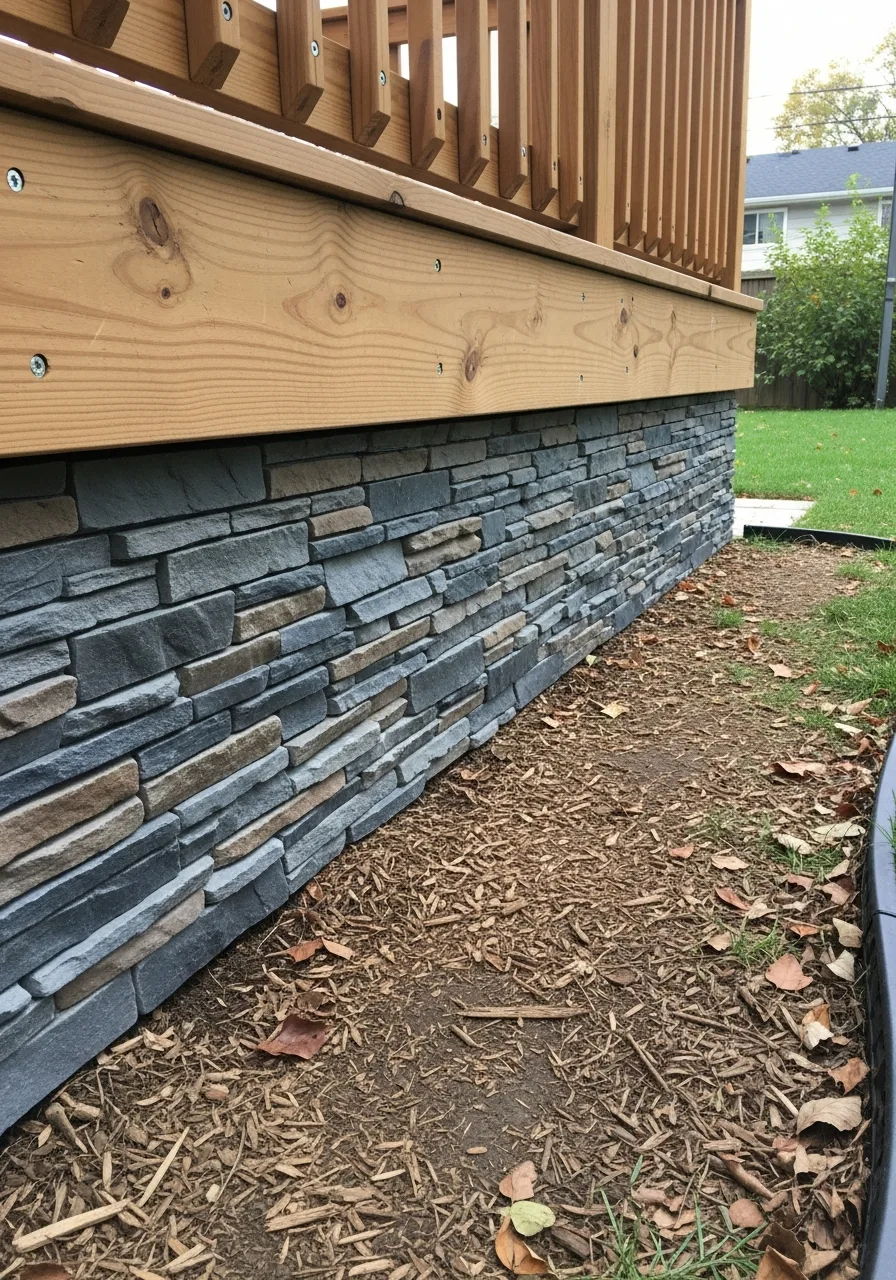
These lightweight panels look exactly like real stone walls. They are easy to screw into a wood frame without needing a mason. My take: This is a great DIY project for a luxury look.
- Stagger the panel seams
- Use exterior adhesive
- Clean with a hose
Pro Tip: Quick win: Buy corner pieces for a realistic finish.
12. Natural Stone Skirting
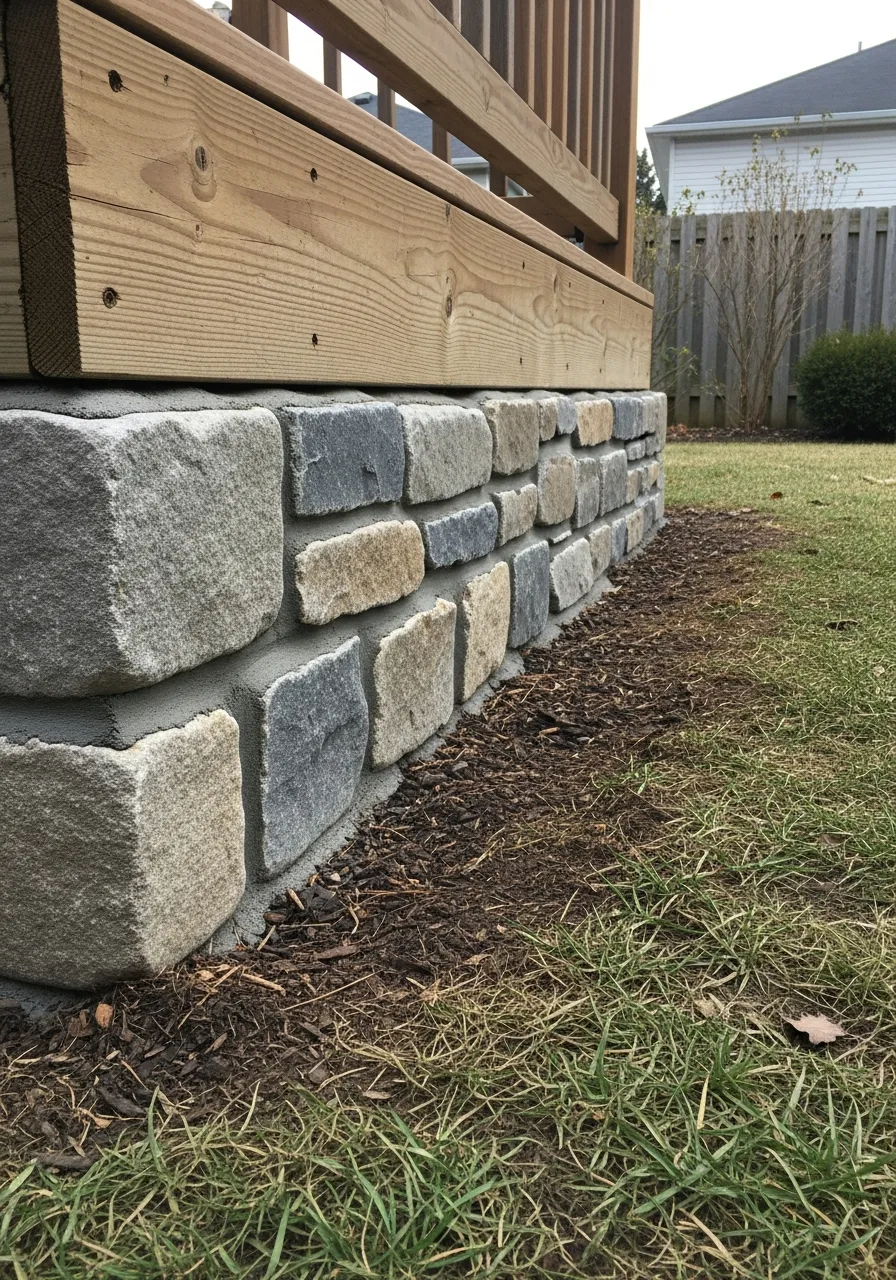
Using real rocks creates a permanent and heavy-duty base. It blends into your landscaping better than any other material. Honestly, I always prefer real stone if you want a forever solution.
- Dig a shallow trench
- Use mortar for stability
- Mix different stone sizes
Pro Tip: Most people skip this: Add a drainage pipe behind the stones.
13. Brick Skirting Design
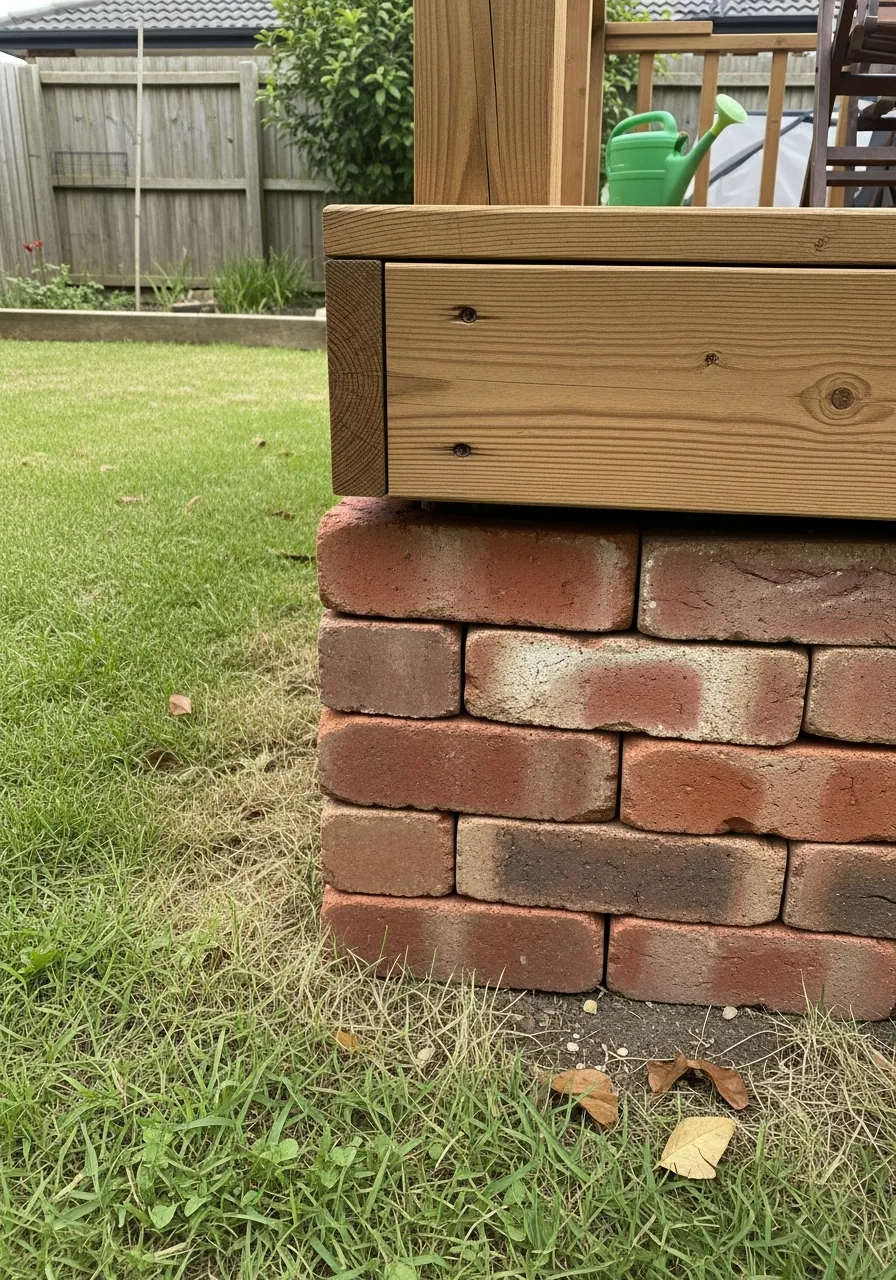
Brick provides a classic look that matches traditional home styles. It is incredibly strong and keeps animals out for good. My take: Use brick if you want your deck to look like part of the house.
- Match the house brick
- Keep grout lines thin
- Add weep holes
Pro Tip: Quick win: Use brick veneer to save time and money.
14. Stacked Stone Skirting
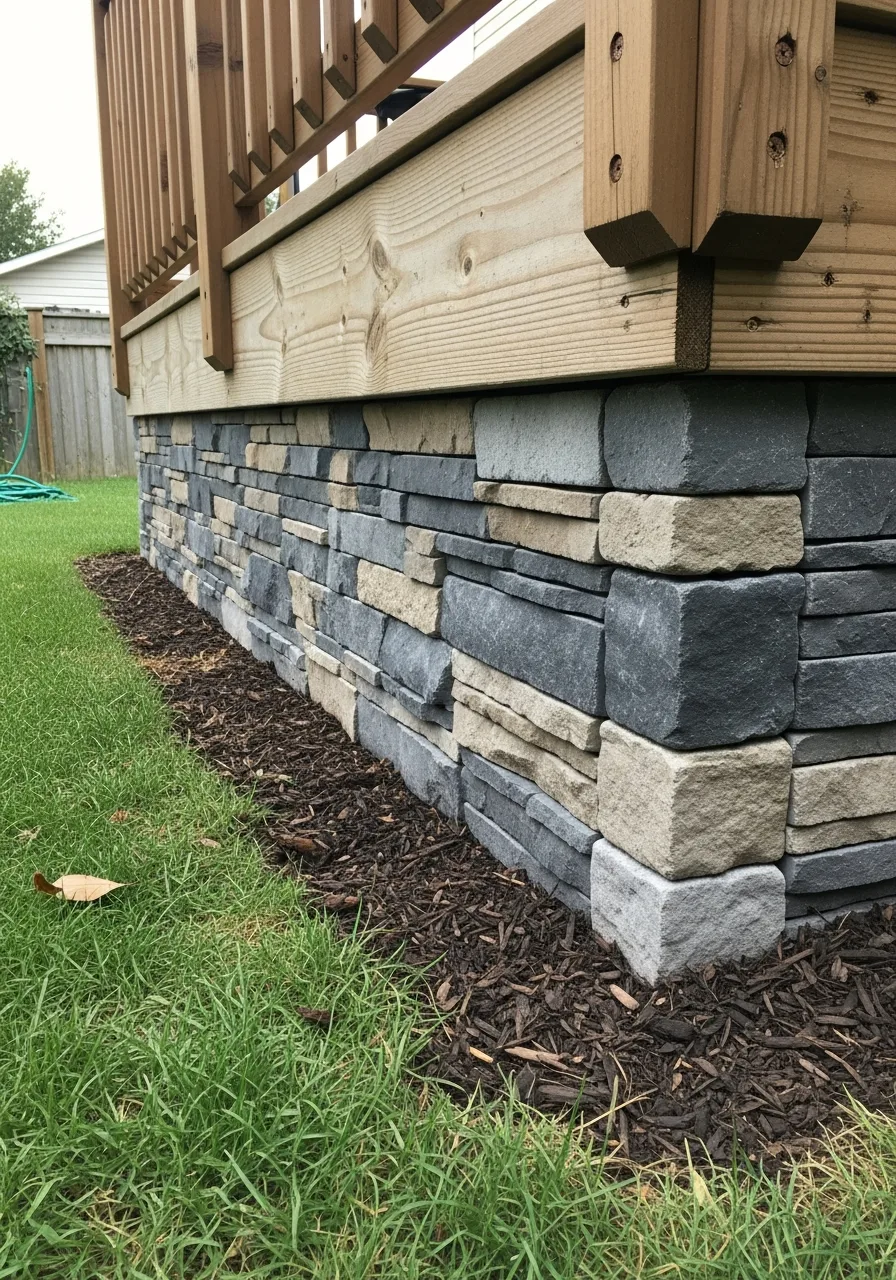
This involves layering thin stones to create a textured wall. It adds a lot of depth and visual interest to the bottom of the deck. Honestly, I think this is the most elegant option available.
- Keep the layers level
- Use a strong adhesive
- Vary the stone colors
Pro Tip: Here’s what I do: Use LED tape light to highlight the texture.
15. Gravel and Stone Base Skirting
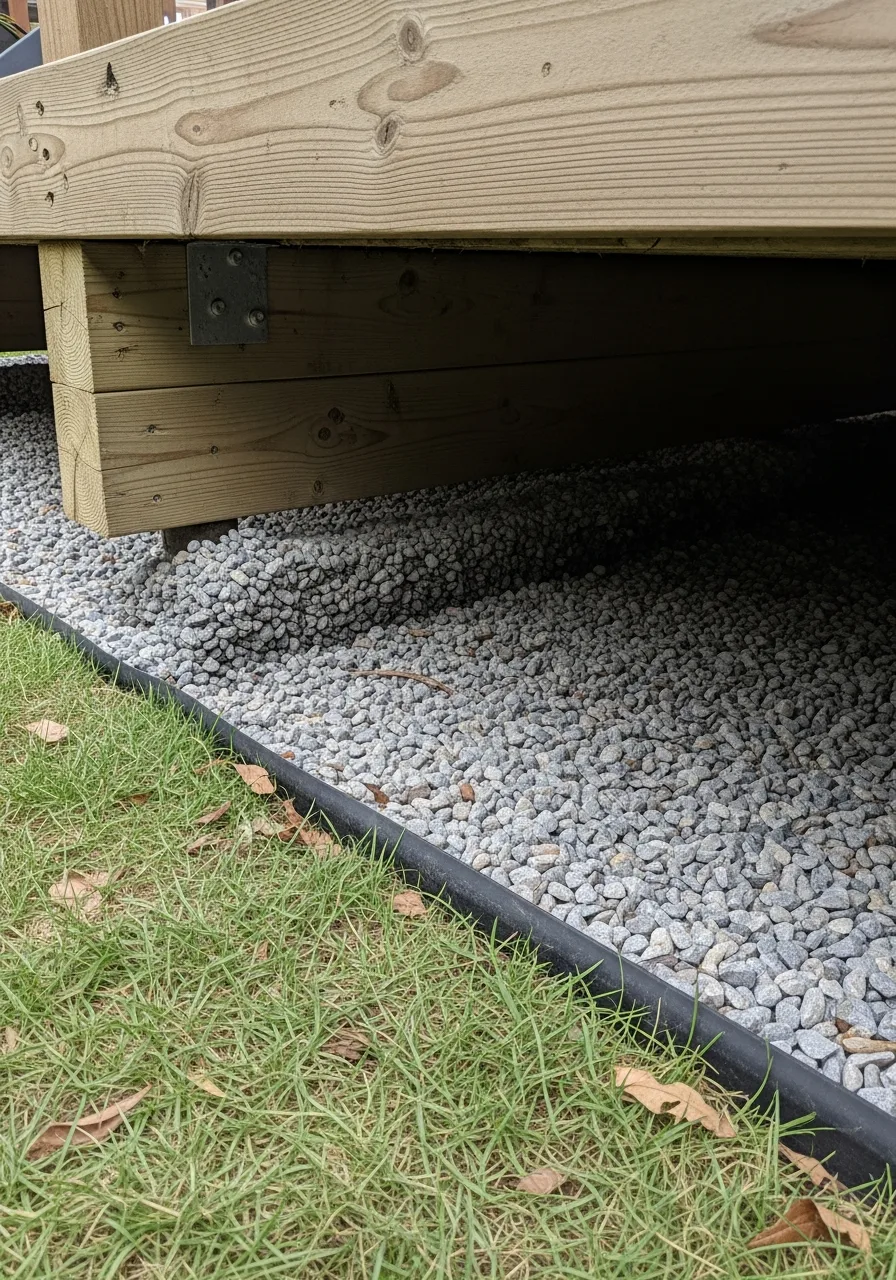
This method uses a layer of stones on the ground under the skirting. It stops weeds from growing and helps water drain away fast. My take: You should never skip the gravel layer if you want a dry deck.
- Lay down landscape fabric
- Use crushed granite stones
- Level the ground first
Pro Tip: Quick win: Use larger river rocks for a high-end look.
16. Living Plant Skirting
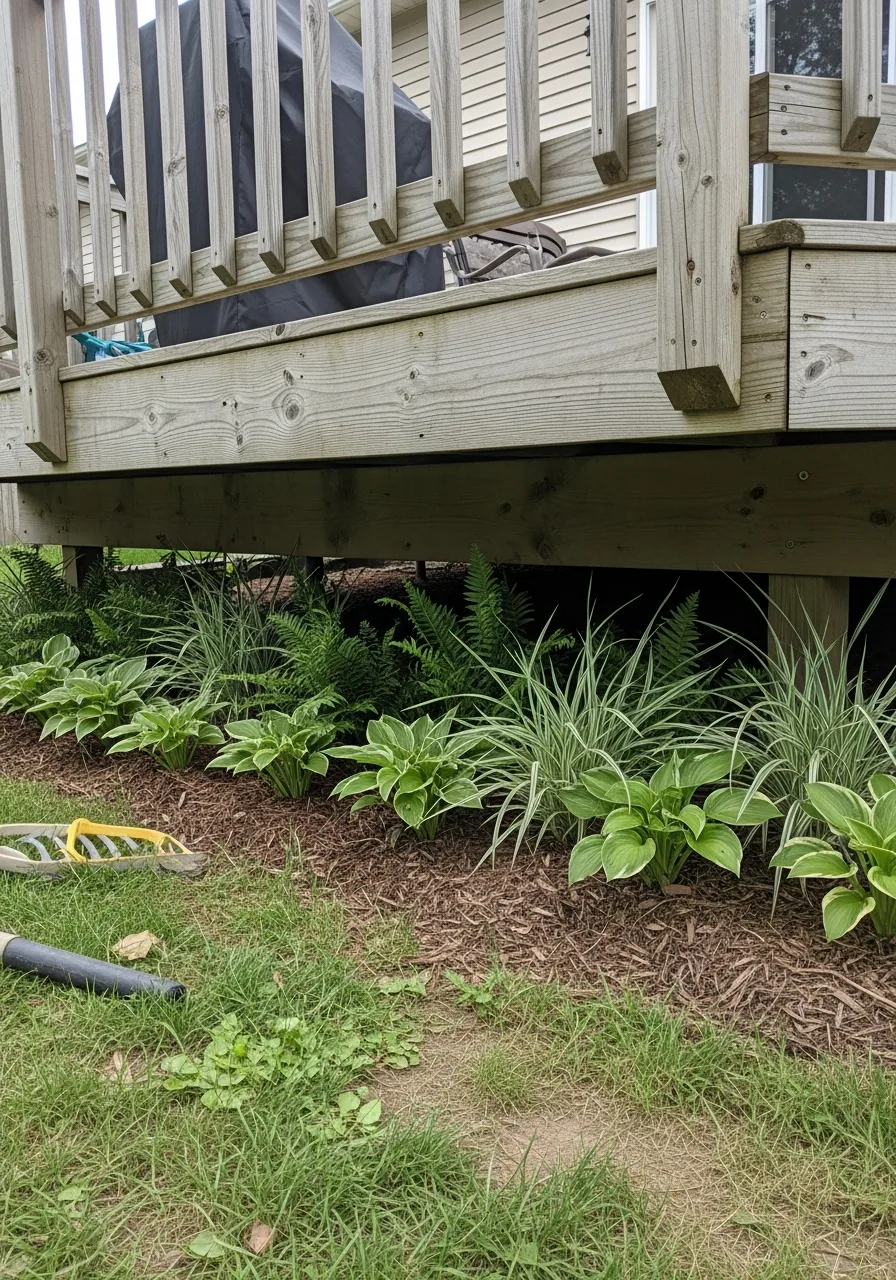
You can use tall plants or shrubs to hide the deck base naturally. This creates a soft border that looks like part of the yard. My take: This looks great but remember you will have to trim it.
- Pick low light plants
- Leave space for growth
- Use mulch for weeds
Pro Tip: Quick win: Use evergreens for year-round coverage.
17. Shrub Border Skirting
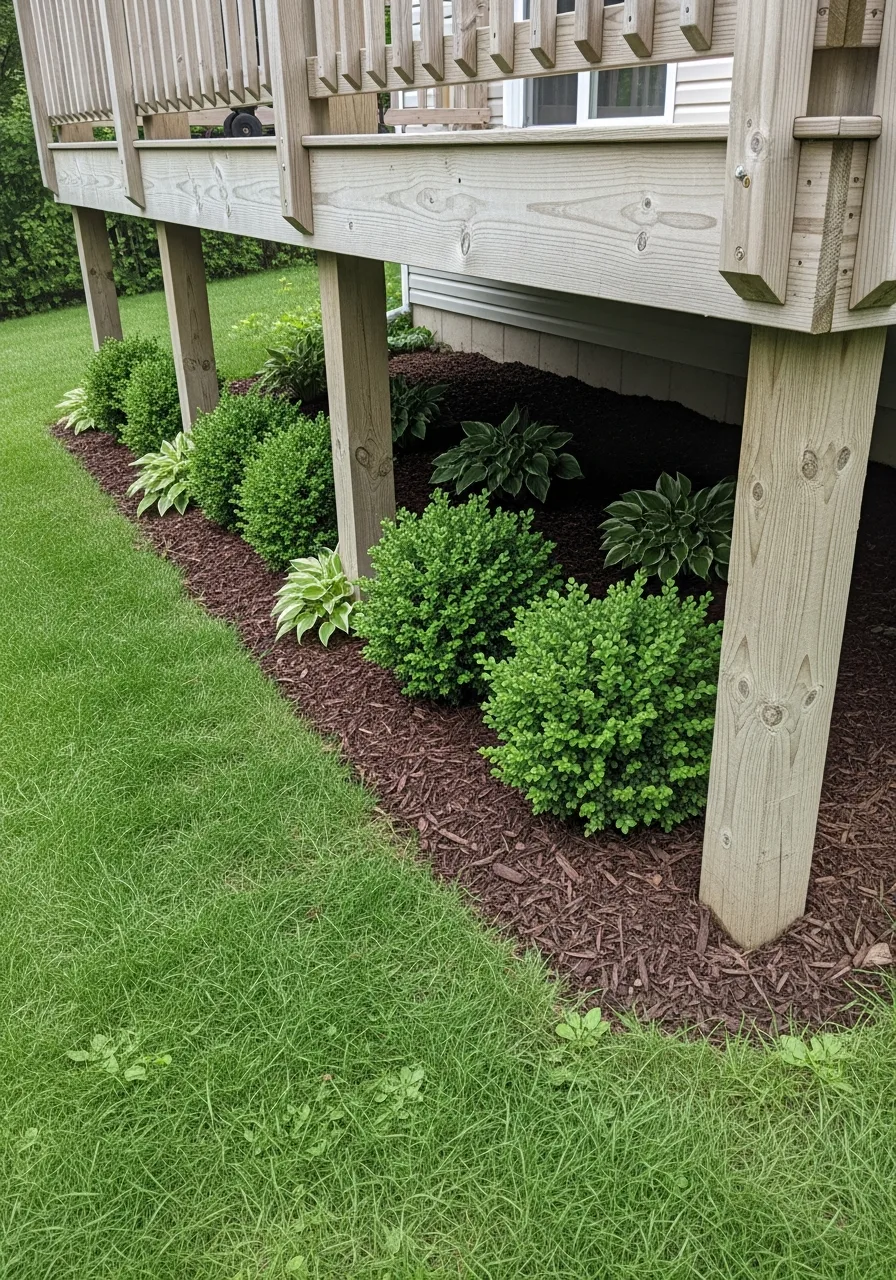
Planting thick bushes along the edge creates a green wall. It hides the underside while still letting air flow through the branches. Honestly, I always suggest boxwoods for a neat and tidy look.
- Space plants for airflow
- Check for sun needs
- Water them regularly
Pro Tip: Most people skip this: Don’t plant them too close to the wood.
18. Climbing Vine Skirting
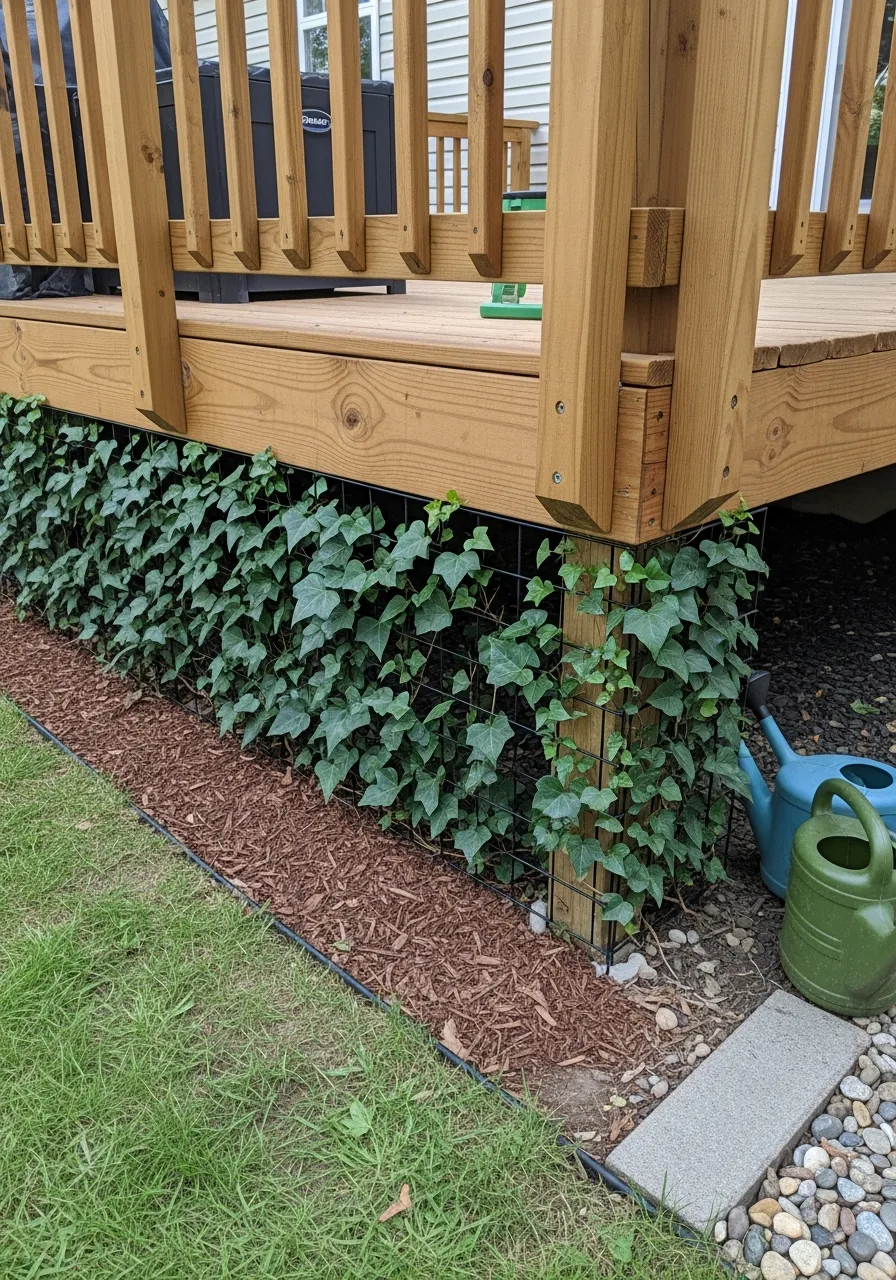
Install a simple wire frame and let vines grow over it. This creates a lush living wall that changes with the seasons. My take: It is beautiful but make sure the vines are not invasive.
- Use a sturdy trellis
- Pick flowering vines
- Prune every spring
Pro Tip: Quick win: Clematis is a great choice for color.
19. Raised Planter Skirting
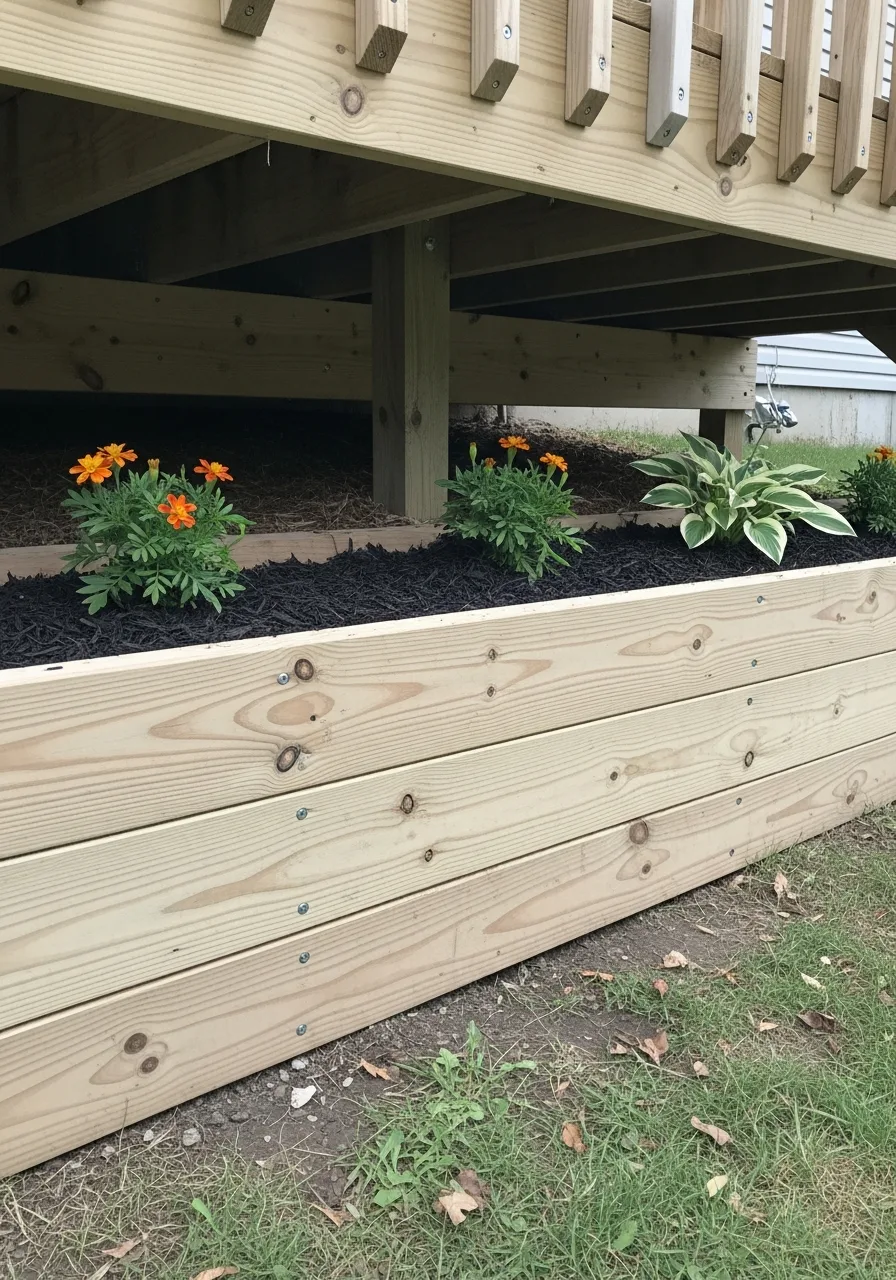
Build boxes right against the deck to hold flowers and herbs. This hides the gap and gives you a place to garden at the same time. Honestly, I love this for small yards where space is tight.
- Use cedar for boxes
- Line them with plastic
- Drill drainage holes
Pro Tip: Here’s what I do: Build them at bench height for extra seating.
20. Cascading Plant Skirting
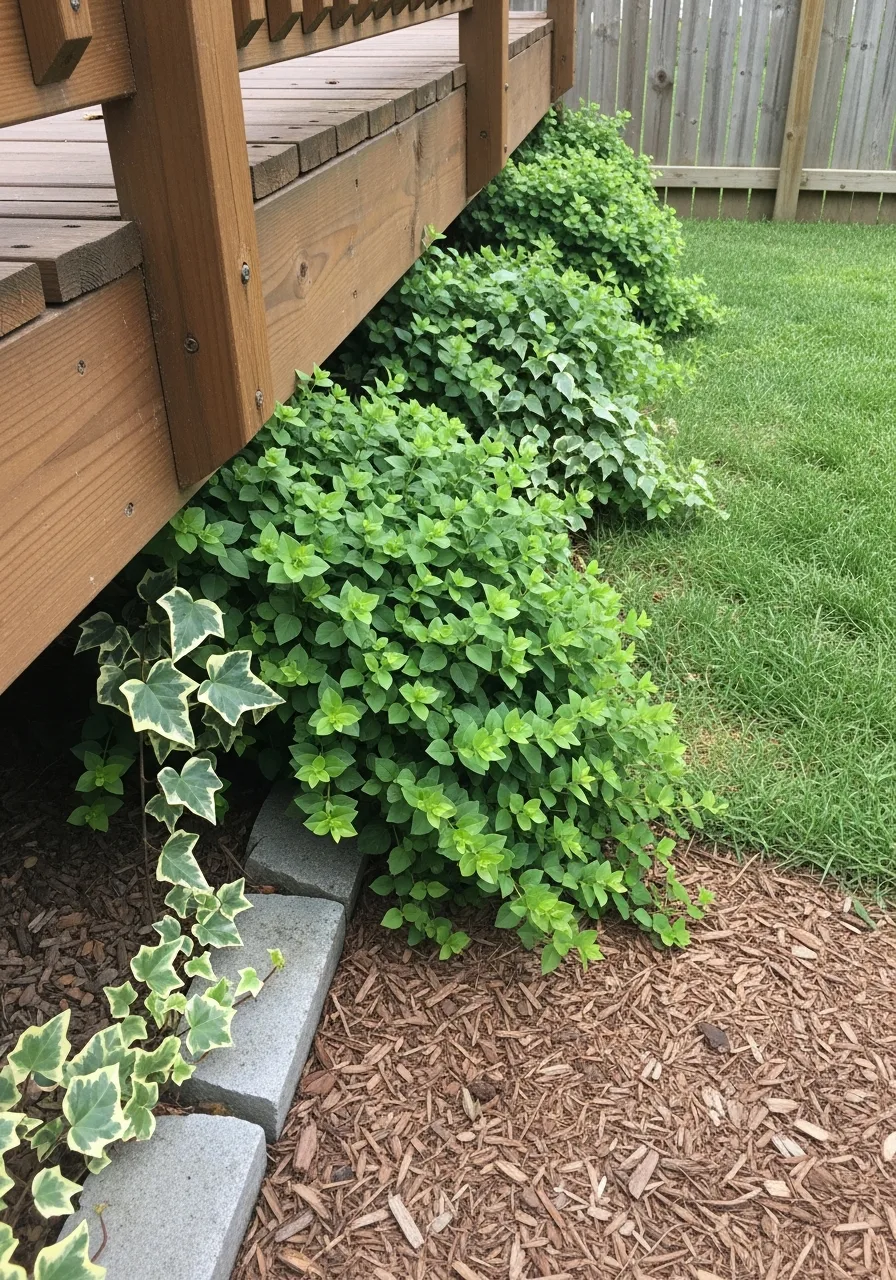
Trailing plants that hang down from the deck edge soften the look. They create a waterfall of greenery that masks the dark space underneath. My take: This works best for low decks that only need a little coverage.
- Use creeping jenny
- Plant in long troughs
- Feed with liquid fertilizer
Pro Tip: Quick win: Use ivy for a classic English garden feel.
21. Under Deck Storage Doors
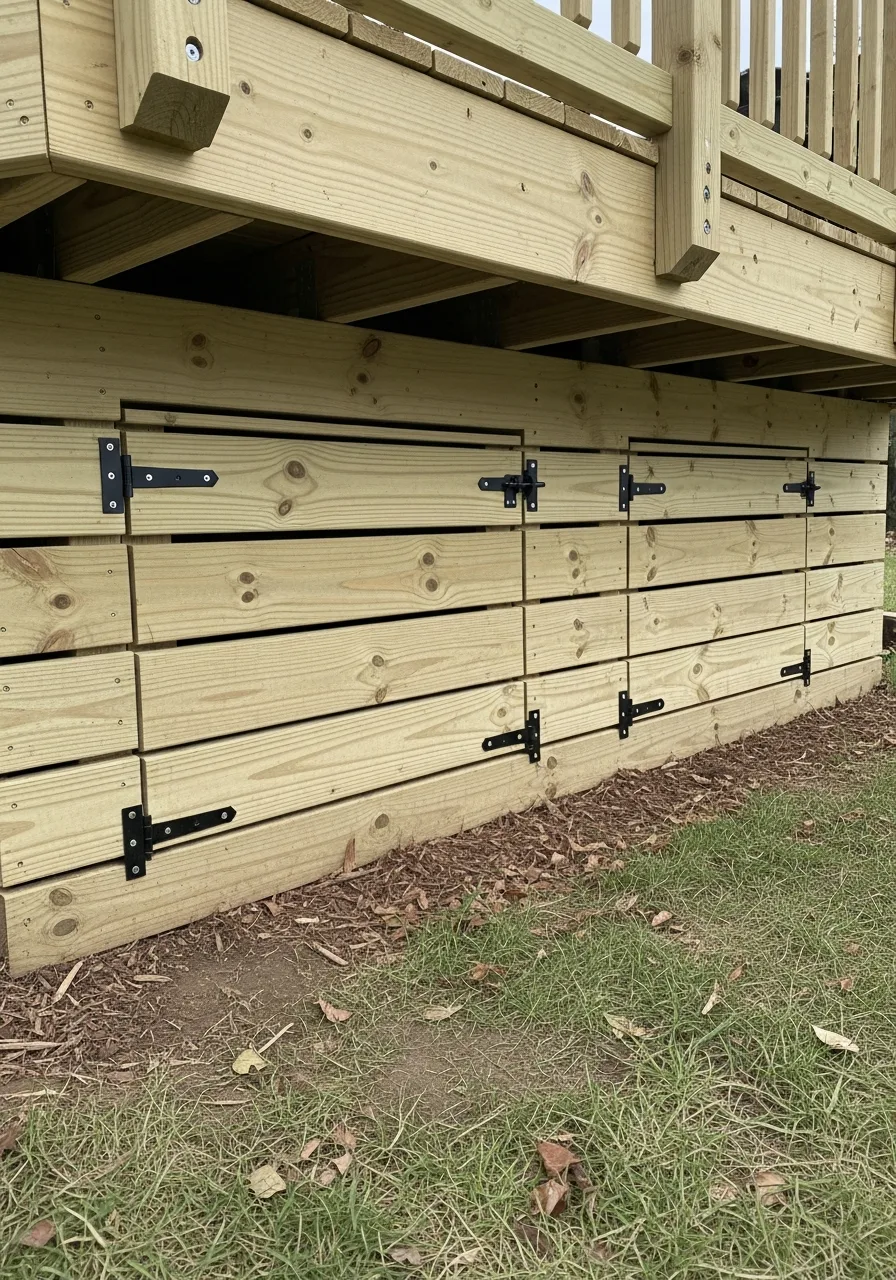
Adding doors into your skirting gives you access to hidden storage. It is the perfect spot for lawn mowers or bulky seasonal gear. Honestly, I always suggest adding doors because you will regret losing that space.
- Install heavy duty hinges
- Add a simple latch
- Make doors wide enough
Pro Tip: Most people skip this: Build a gravel floor inside to keep things dry.
22. Sliding Panel Skirting System
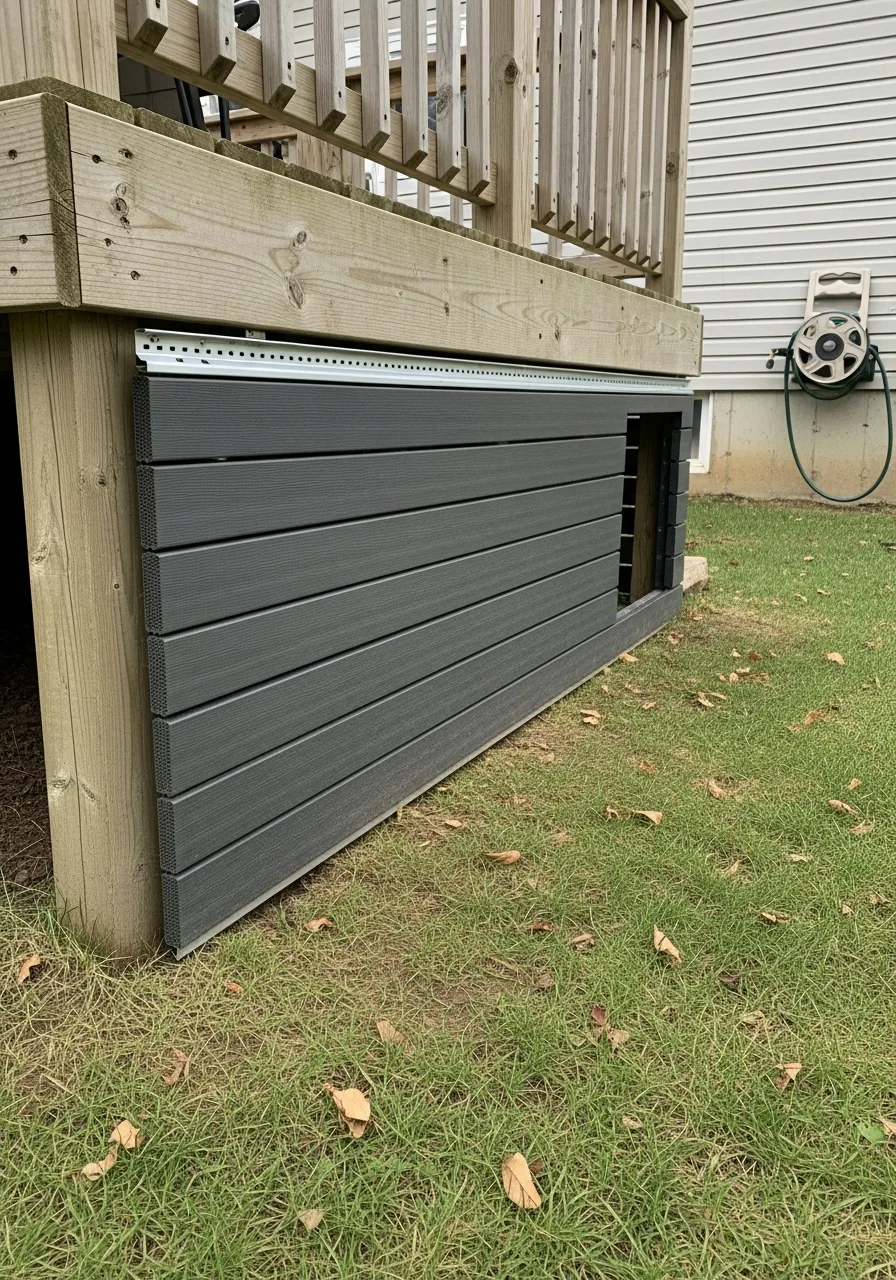
Sliding panels move on a track to reveal the space behind them. They do not need room to swing open like a normal door. My take: This is a genius move for tight spaces where a door would hit a fence.
- Keep the track clean
- Use rust-proof rollers
- Handle for easy grip
Pro Tip: Quick win: Use barn door hardware for a trendy look.
23. Hinged Access Panel Skirting
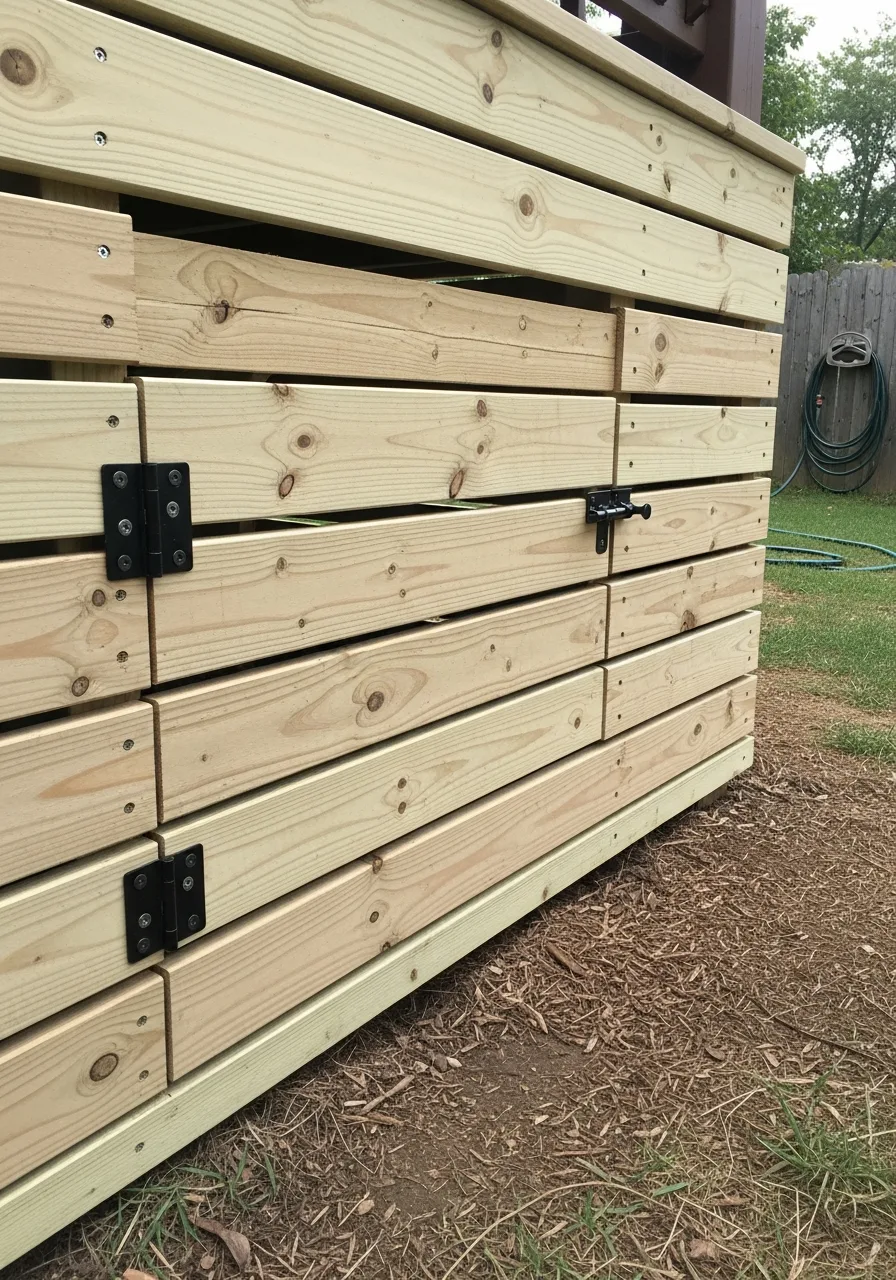
These panels lift up or swing out to let you reach pipes or tools. They look like regular skirting until you need to open them. Honestly, I think every deck needs at least one access point.
- Use gas struts
- Reinforce the frame
- Check for easy clearance
Pro Tip: Most people skip this: Label your access panels so guests don’t pull them.
24. Lockable Storage Skirting
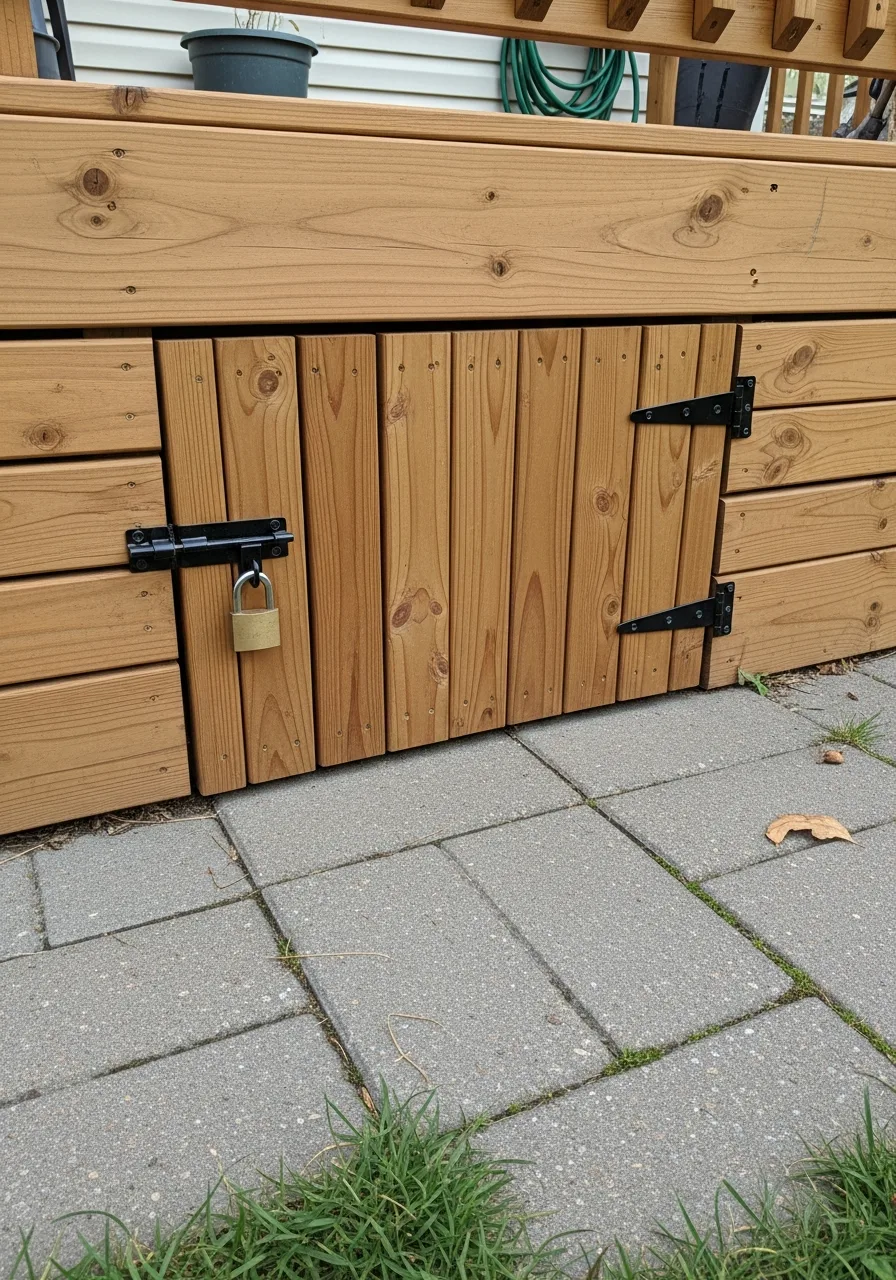
Adding locks to your skirting doors keeps your tools and bikes safe. It turns the area under your deck into a secure outdoor shed. My take: Peace of mind is worth the extra cost of a good lock.
- Use a weather-proof lock
- Pick a sturdy latch
- Hide the lock for looks
Pro Tip: Quick win: Use a combination lock so you don’t lose keys.
25. Multi-Section Panel Skirting
Divide your skirting into smaller pieces that are easy to remove. This makes it simple to fix one part without tearing down the whole thing. Honestly, I always prefer this for long decks with many sections.
- Label each section
- Use easy-out screws
- Keep sections manageable
Pro Tip: Here’s what I do: Use magnets for tool-free removal.
26. Skirting With Built-In Lighting
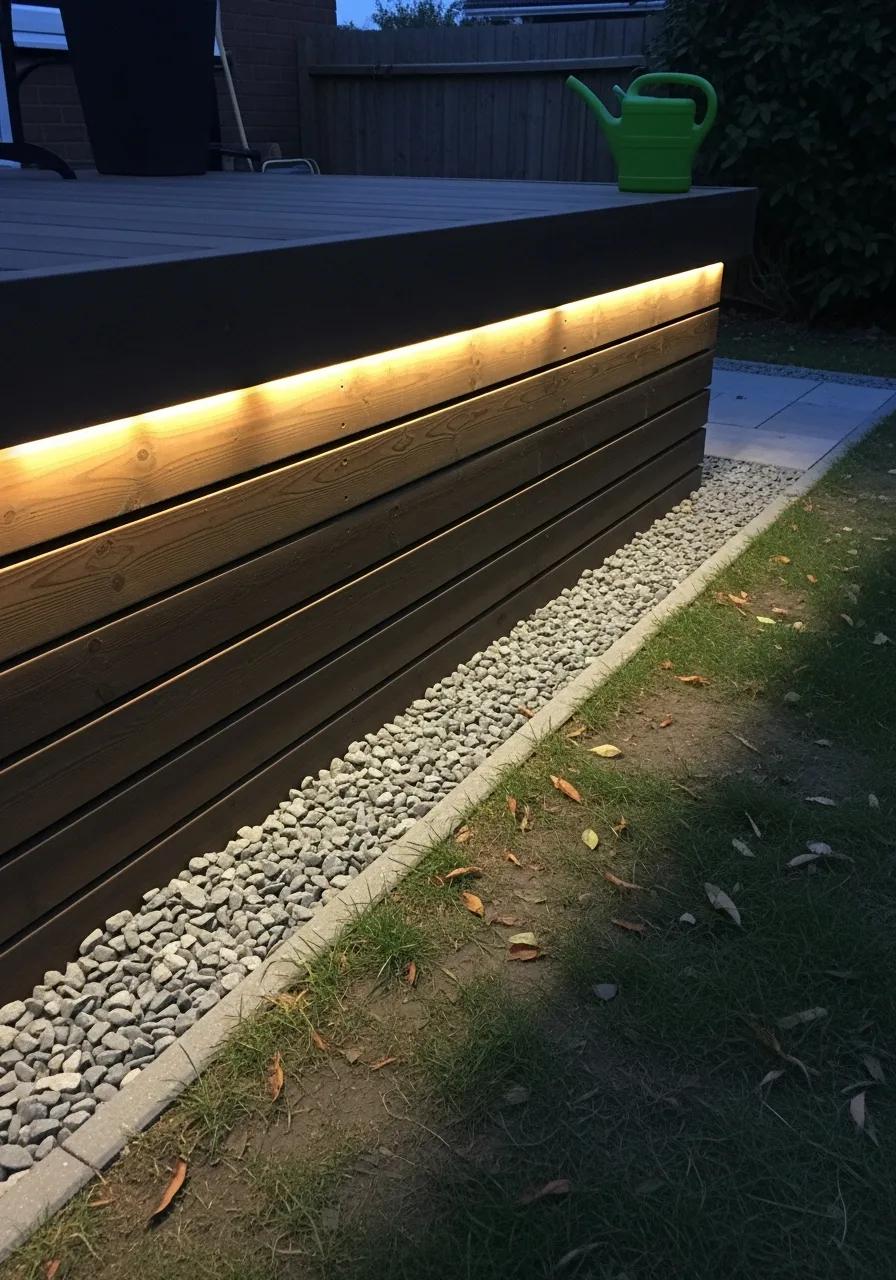
Install LED lights along the bottom of the skirting for safety. It makes the deck glow at night and helps people see where they are walking. My take: This is the best way to add a high-end feel for cheap.
- Use waterproof LEDs
- Hide the wiring behind
- Add a solar sensor
Pro Tip: Quick win: Use warm white lights for a cozy vibe.
27. Skirting With Ventilation Gaps
Small gaps between panels ensure air keeps moving under the deck. This stops mold from growing on your wood structure. Honestly, I never build skirting without checking for proper airflow first.
- Space boards evenly
- Use a spacer tool
- Check local air codes
Pro Tip: Most people skip this: Add mesh behind gaps to stop bees.
28. Privacy Fence-Style Skirting
Use the same style as a privacy fence to enclose the bottom of the deck. This creates a tall, solid wall that looks very organized. My take: This is the best choice if your deck is very high.
- Match your existing fence
- Use thick pickets
- Stain to match
Pro Tip: Quick win: Use dog-ear pickets for a classic style.
29. Mixed Material Skirting Design

Combine wood slats with metal panels for a custom designer look. It breaks up the space and adds a lot of visual interest to the yard. Honestly, I always love mixing textures to make a deck stand out.
- Pick two main materials
- Balance the colors
- Keep the lines clean
Pro Tip: Here’s what I do: Put stone at the bottom for durability.
30. Painted or Stained Skirting
Adding a coat of paint or stain protects the wood from the weather. You can match it to your house trim for a cohesive look. My take: A fresh coat of stain is the easiest way to upgrade your deck.
- Sand the wood first
- Apply two thin coats
- Use exterior grade paint
Pro Tip: Quick win: Use a solid stain for more UV protection.
31. Full Enclosure Skirting

For tall decks, you can fully wall off the area to create a room. This space can be used for a workshop or a garden shed. Honestly, I always suggest this for decks over six feet tall.
- Install a full frame
- Add a standard door
- Ensure it is waterproof
Pro Tip: Most people skip this: Check your local permits for extra rooms.
32. Low Deck Minimal Skirting
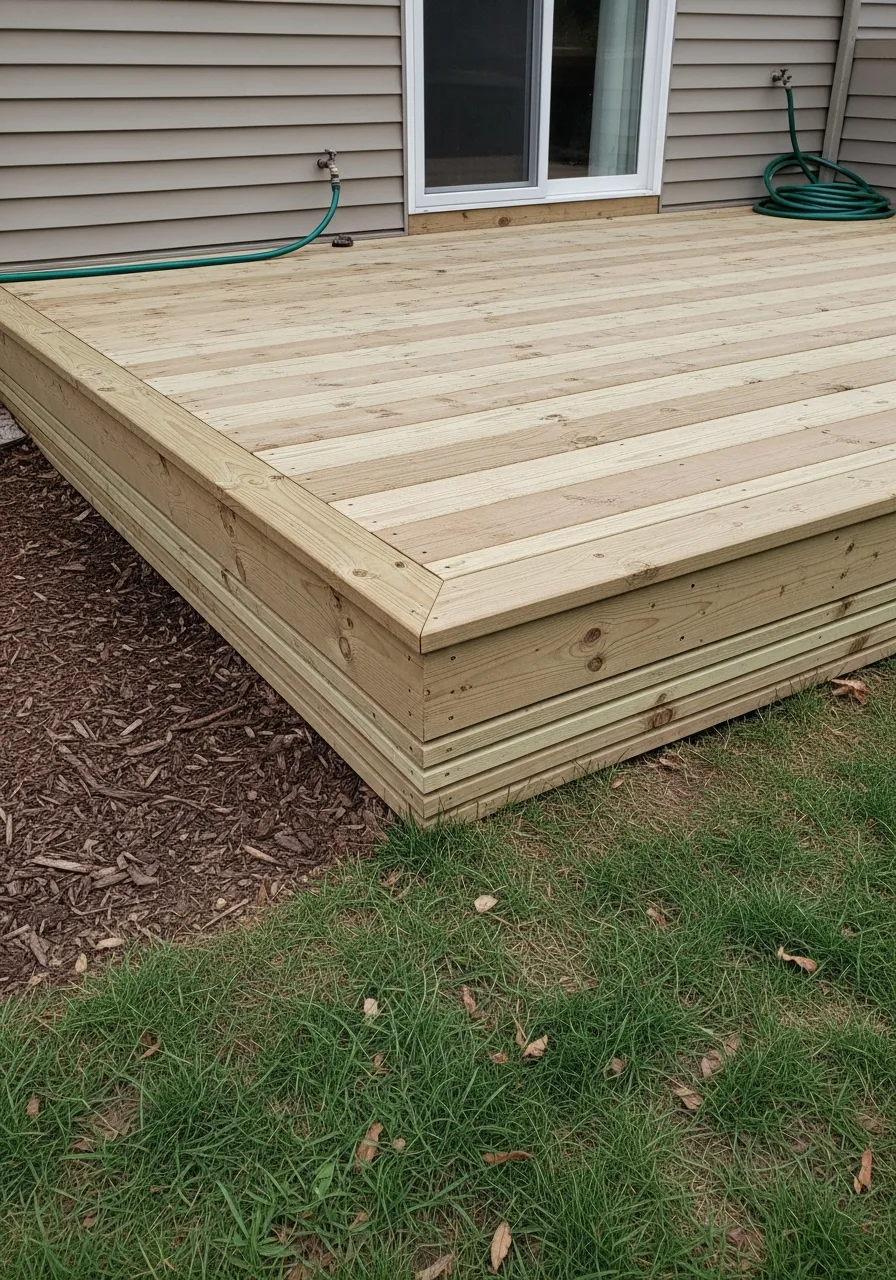
Decks close to the ground only need a tiny bit of skirting. Use simple boards or trim to finish the edge without making it look bulky. My take: Keep it simple so you do not overwhelm the landscape.
- Clear out all debris
- Use narrow trim boards
- Focus on the edges
Pro Tip: Quick win: Use a single wide board for a clean look.
33. Step-Down Skirting for Slopes
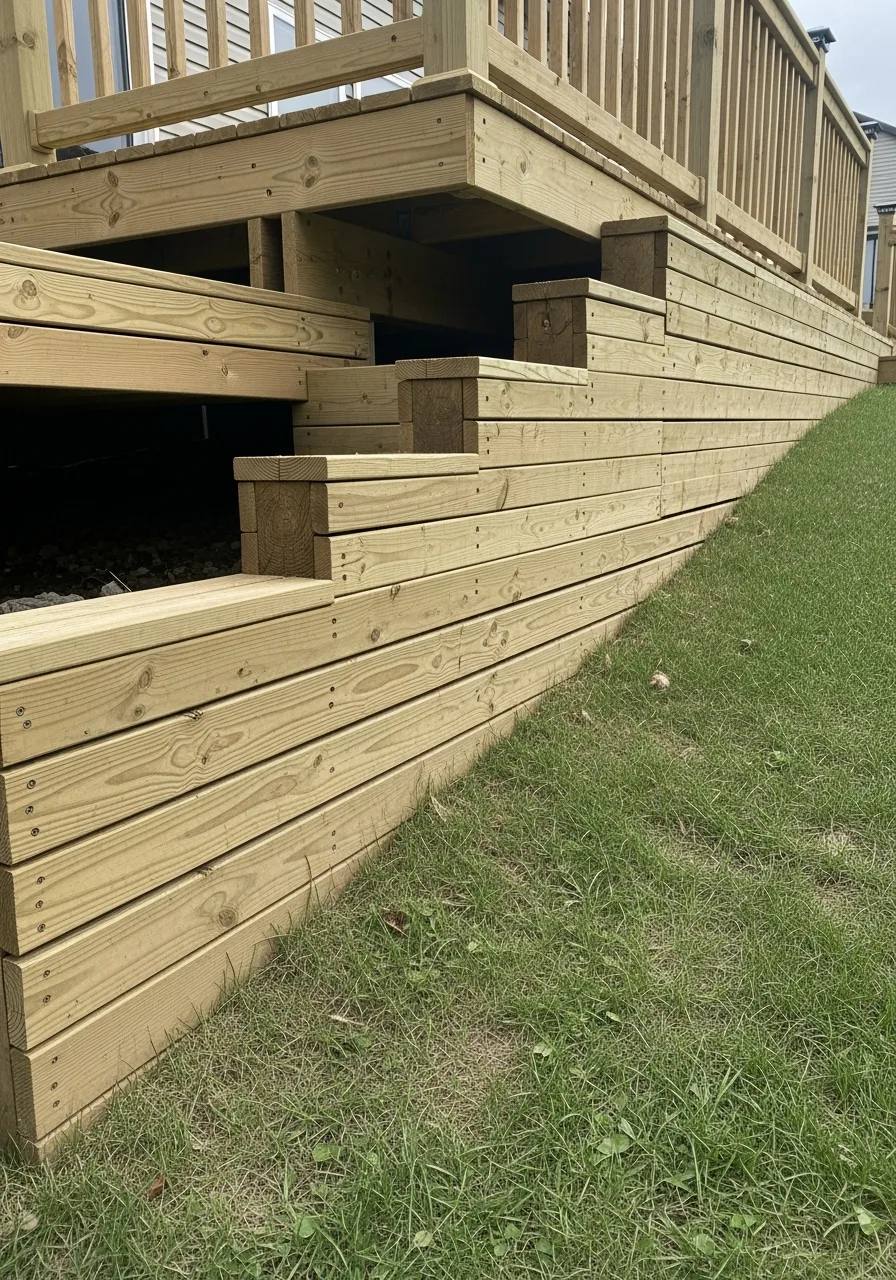
This design uses panels that step down to follow the angle of your yard. It keeps the bottom edge level with the ground for a custom look. My take: This is the only way to handle a sloped lot properly.
- Measure the ground slope
- Cut panels in steps
- Keep horizontal lines level
Pro Tip: Most people skip this: Use a string line to plan the steps.
34. Cut-to-Grade Skirting Design
Trim the bottom of your panels to match the exact shape of the ground. This creates a perfectly tight fit that keeps every critter out. Honestly, I prefer this look for a high-end, custom finish.
- Scribe the ground line
- Use a jigsaw for cuts
- Seal all cut edges
Pro Tip: Quick win: Leave a tiny gap for ground shifting.
35. Skirting With Built-In Stairs
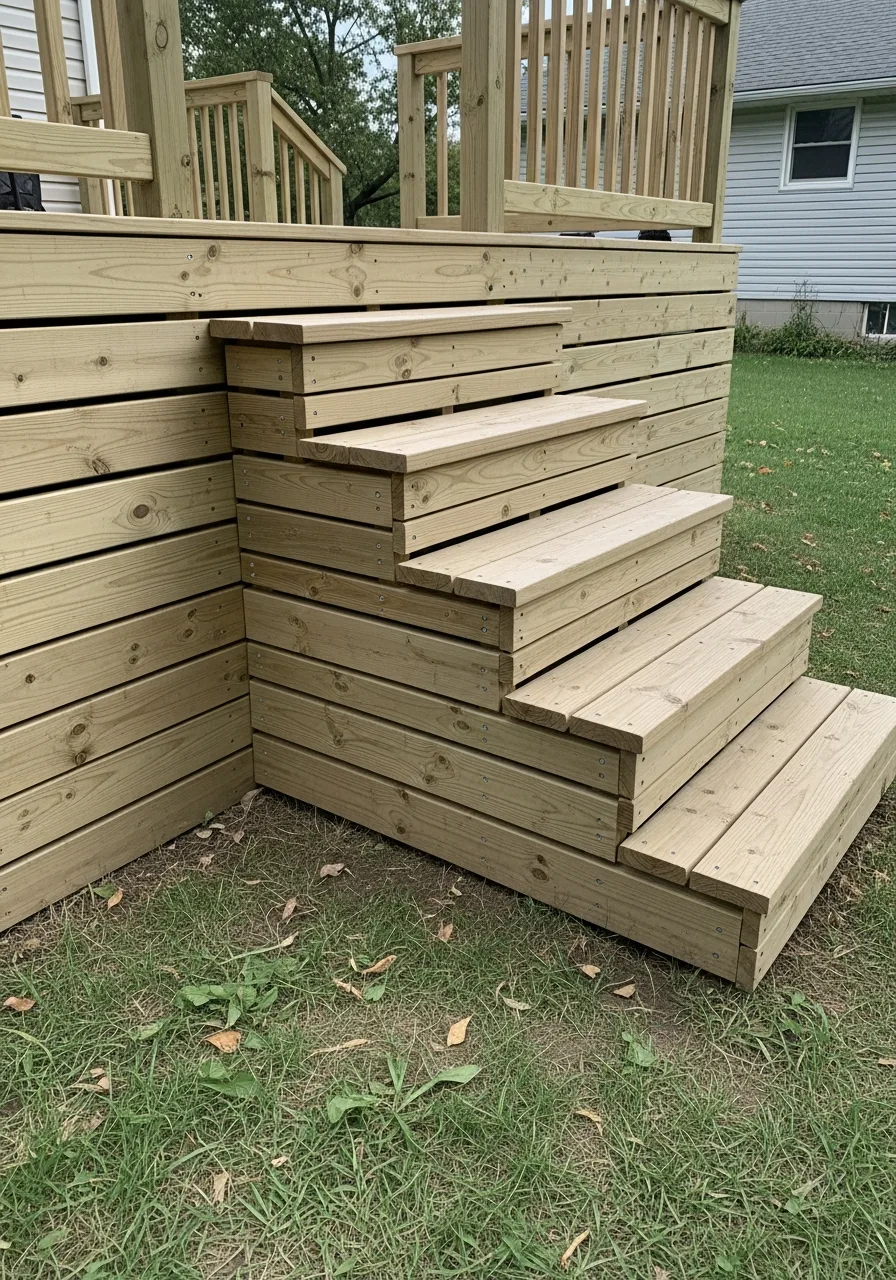
Incorporate your stairs directly into the skirting for a seamless transition. It makes the stairs look like they are part of the deck base. My take: This is a great way to hide the ugly space under the steps.
- Wrap the stair stringers
- Match the skirting boards
- Reinforce the corners
Pro Tip: Here’s what I do: Add step lights for safety at night.
36. Minimalist Modern Skirting
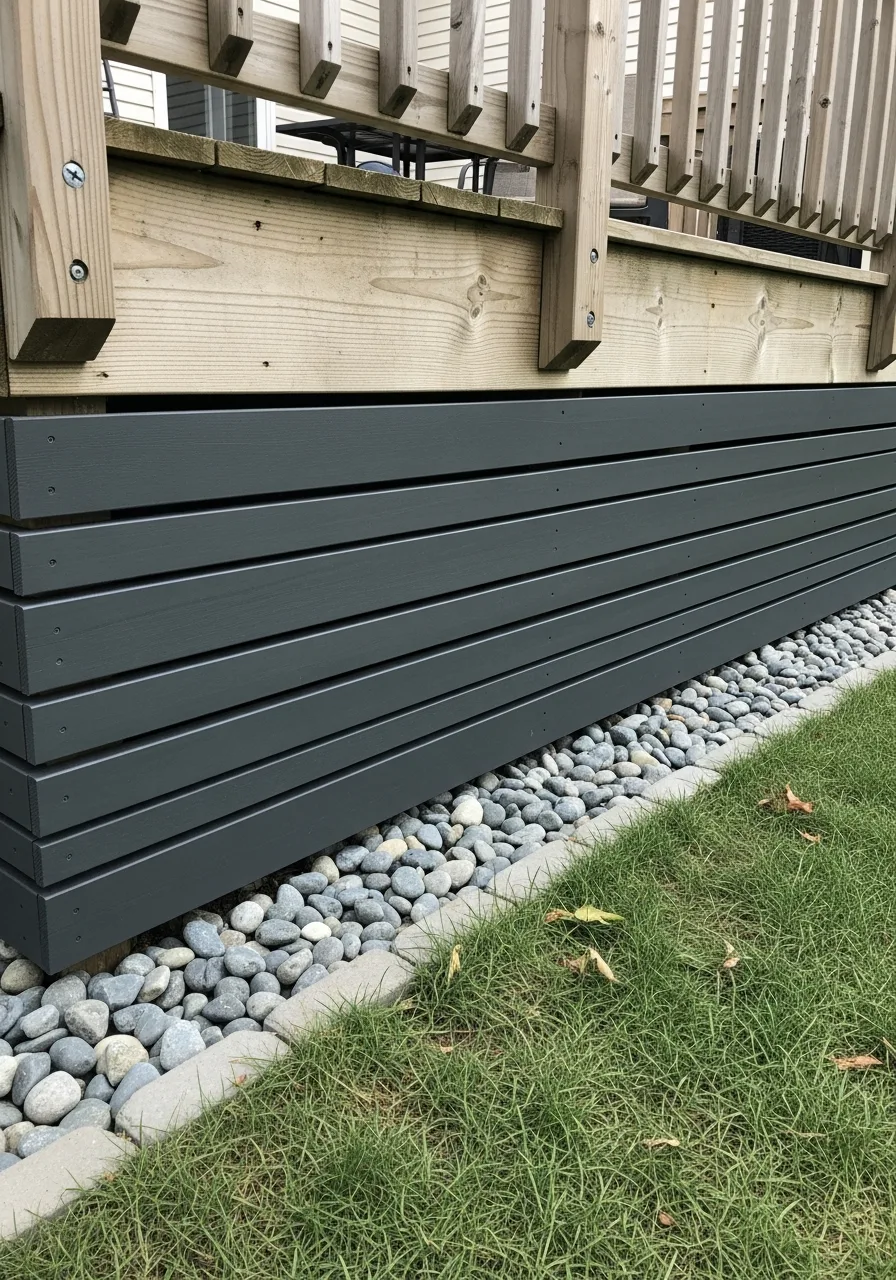
Use thin lines and neutral colors for a very sleek look. This style avoids any extra fuss and keeps your yard looking clean. Honestly, I think this is the best choice for newer homes.
- Use dark gray tones
- Pick smooth materials
- Avoid any visible screws
Pro Tip: Quick win: Use aluminum slats for a crisp finish.
37. Rustic Farmhouse Skirting
Natural wood and simple designs create a cozy farmhouse vibe. It feels warm and inviting without being too formal. My take: This looks best when you let the wood weather naturally.
- Use rough-sawn lumber
- Pick a natural stain
- Keep the design simple
Pro Tip: Most people skip this: Use barn-style hardware for accents.
38. Coastal Style Skirting
Light colors and airy materials give off a beachy feeling. This style works great for decks near the water or in sunny climates. Honestly, I always suggest white lattice for that classic coastal look.
- Use white or light gray
- Pick moisture-proof vinyl
- Keep the design open
Pro Tip: Quick win: Add some rope accents for a nautical touch.
39. Industrial Style Skirting
Dark metal and heavy bolts create a bold urban look. It is very durable and stands up to any weather. My take: This is perfect for a deck that gets a lot of hard use.
- Use black steel panels
- Expose the fasteners
- Keep lines very straight
Pro Tip: Here’s what I do: Use mesh for an edgy, open feel.
40. Scandinavian Style Skirting
This style uses light wood and very clean horizontal lines. It is all about function and simple beauty. Honestly, I love how this makes a small backyard feel much larger.
- Use pale wood stains
- Keep gaps very small
- Hide all the framing
Pro Tip: Quick win: Use pine or cedar for the right color.
41. Reed or Bamboo Screen Skirting

Bamboo rolls are a fast and cheap way to hide the deck base. They add a tropical feel and are very easy to install with zip ties. My take: This is a great temporary fix if you are on a budget.
- Unroll and secure tightly
- Use weather-proof ties
- Replace every few years
Pro Tip: Quick win: Double the layers for more privacy.
42. Fabric Curtain Skirting
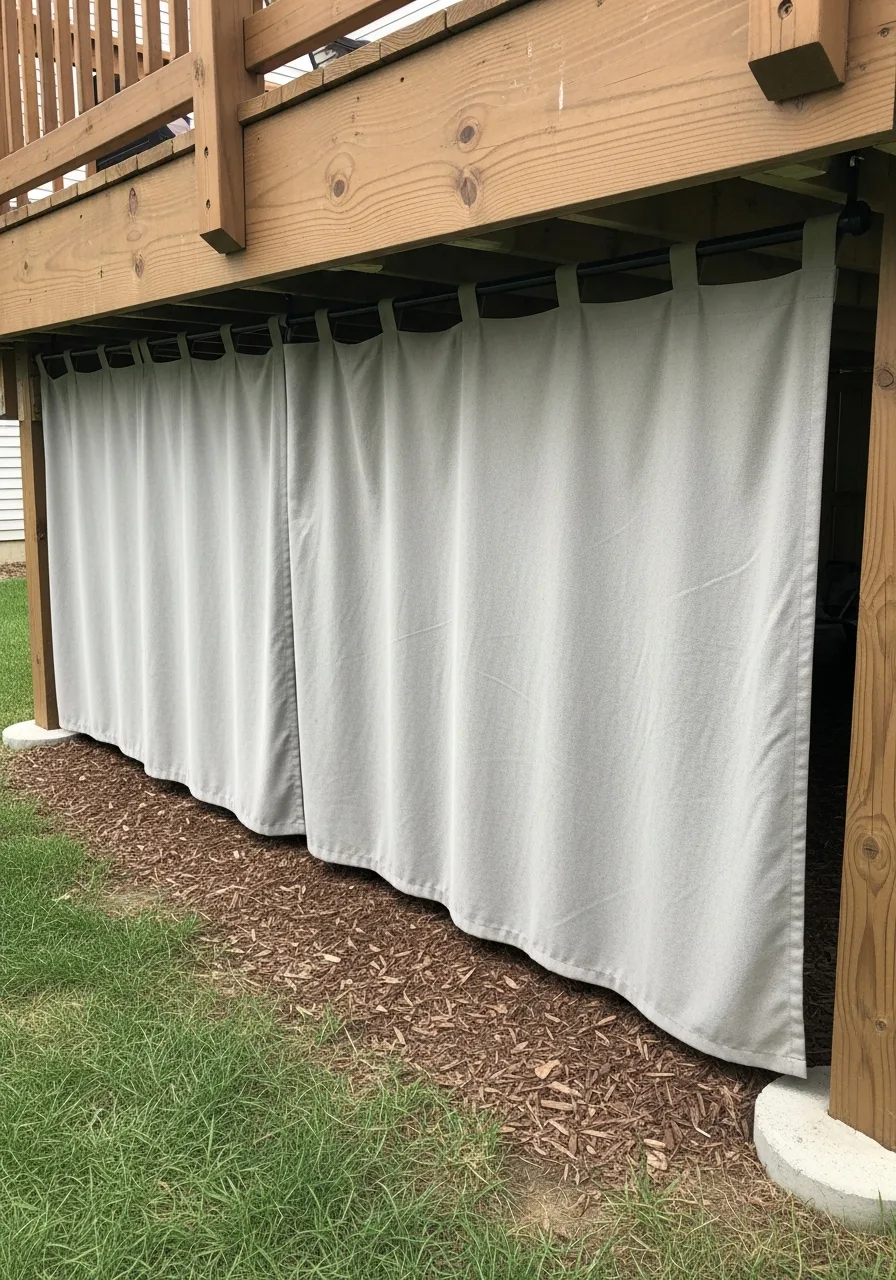
Outdoor curtains can be hung to block the view of the under-deck area. They are easy to slide open when you need to get underneath. Honestly, I prefer this for low-traffic areas where you want a soft look.
- Use weather resistant fabric
- Install a sturdy rod
- Add weights to bottoms
Pro Tip: Quick win: Use clip rings for easy washing.
43. Reclaimed Material Skirting
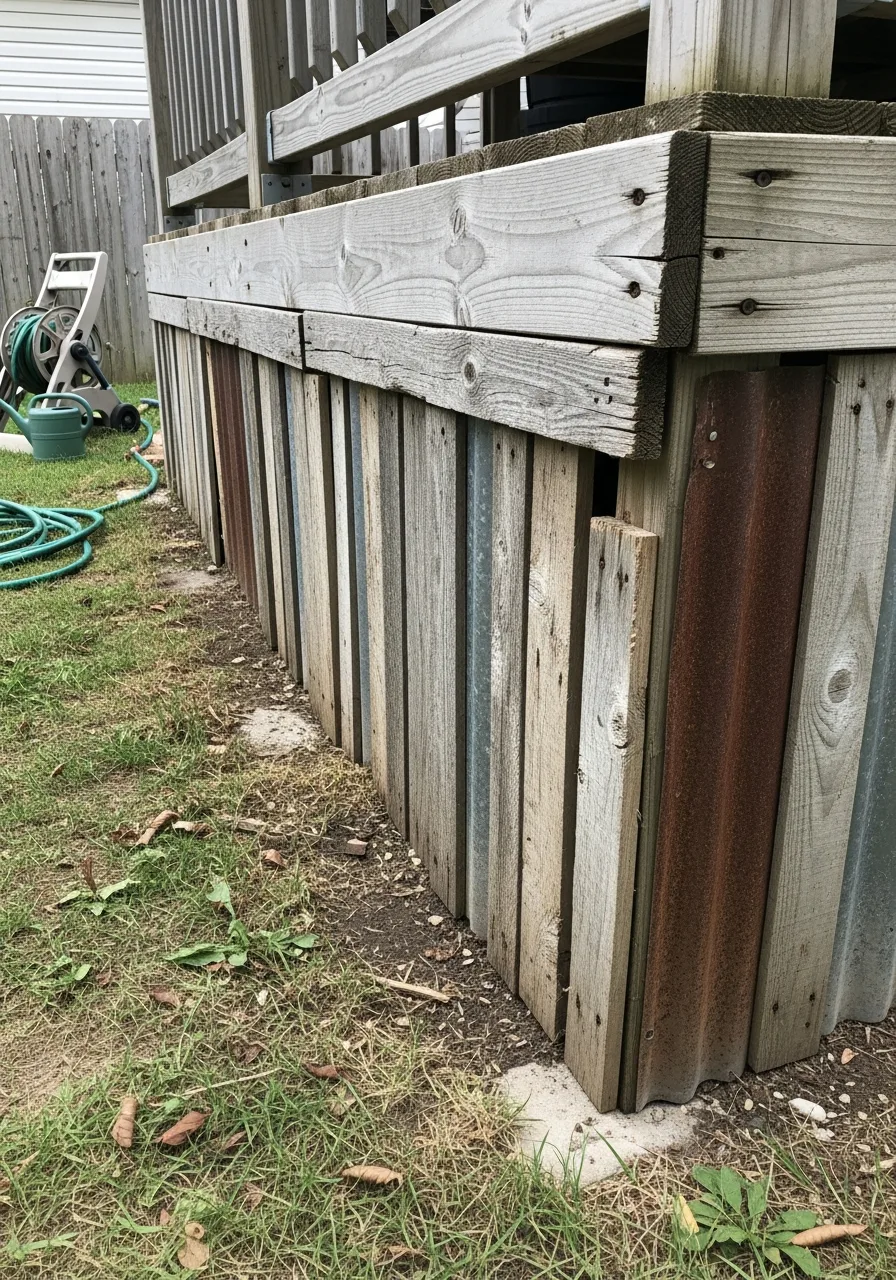
Using old wood or recycled metal gives your deck a unique story. It is eco-friendly and adds a lot of character to your outdoor space. Honestly, I always love a project that saves materials from the landfill.
- Remove old rusty nails
- Check for wood rot
- Seal it for protection
Pro Tip: Most people skip this: Mix different wood types for a patchwork look.
44. Decorative Cut-Out Panel Skirting
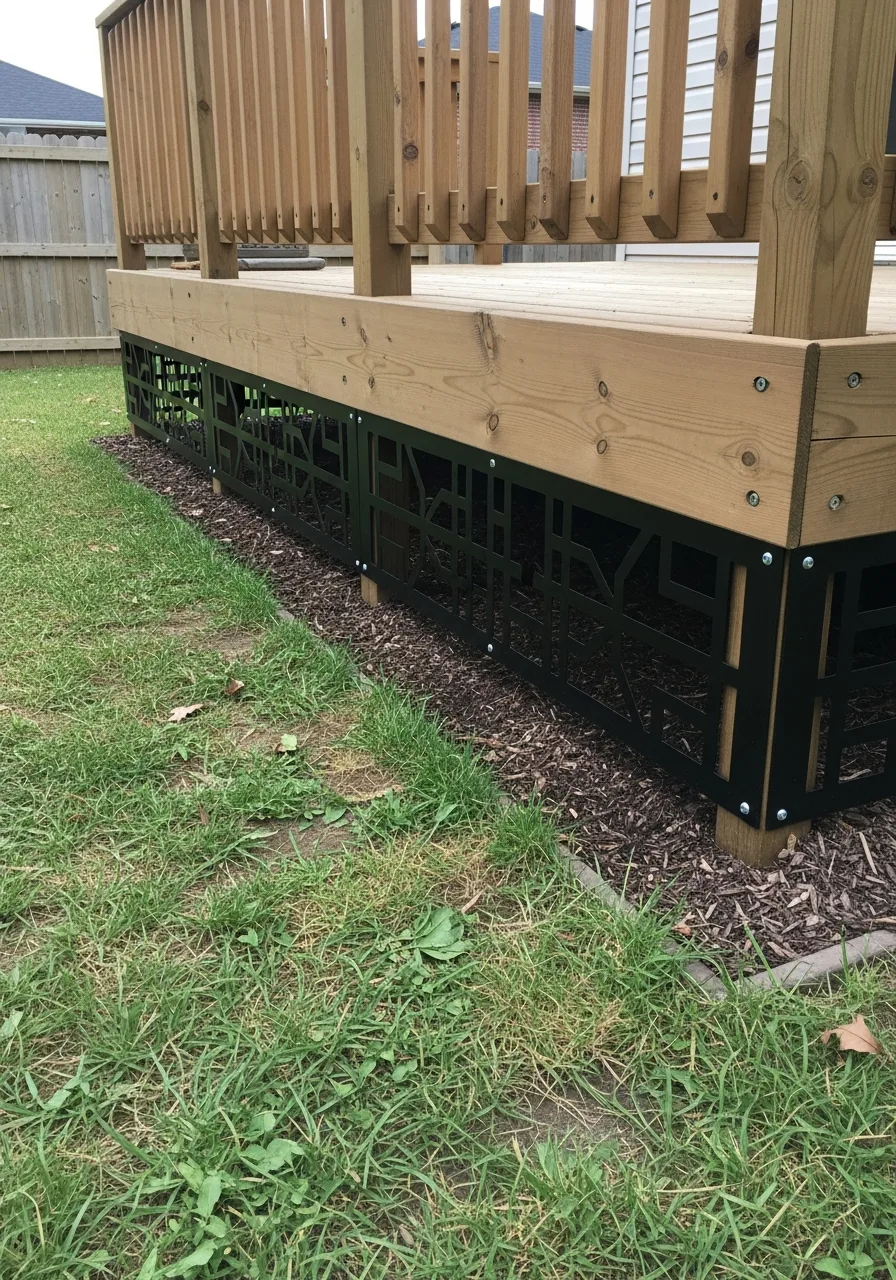
These panels feature artistic designs cut right into the material. They let light and air through while looking like a piece of art. My take: This is the best way to make a statement in a modern yard.
- Pick a bold pattern
- Mount with stand-offs
- Choose a durable metal
Pro Tip: Quick win: Paint the wall behind it a bright color.
45. Statement Skirting Feature Design
This approach uses bold colors or unique textures to make the skirting a focal point. It turns a boring utility feature into a piece of art. Honestly, I always love a bold choice if the rest of the yard is simple.
- Pick a contrasting color
- Use high quality materials
- Keep the design clean
Pro Tip: Quick win: Add a spotlight to show it off.
Fixing up the space under your deck is one of the smartest weekend projects you can do. It keeps your yard organized and hides all the stuff you don’t want guests to see. Honestly, I think you will be surprised at how much better your whole house looks once that gap is finally closed.